How to change git version control automation settings

Oscar de la Hera Gomez
A flower that represents Android Studio with the text “Version Control Confirmation Settings” beneath it.

A step by step guide on changing git version control confirmation settings, such as automatically adding a file when created or removing files on deletion.

Step One: Open Settings
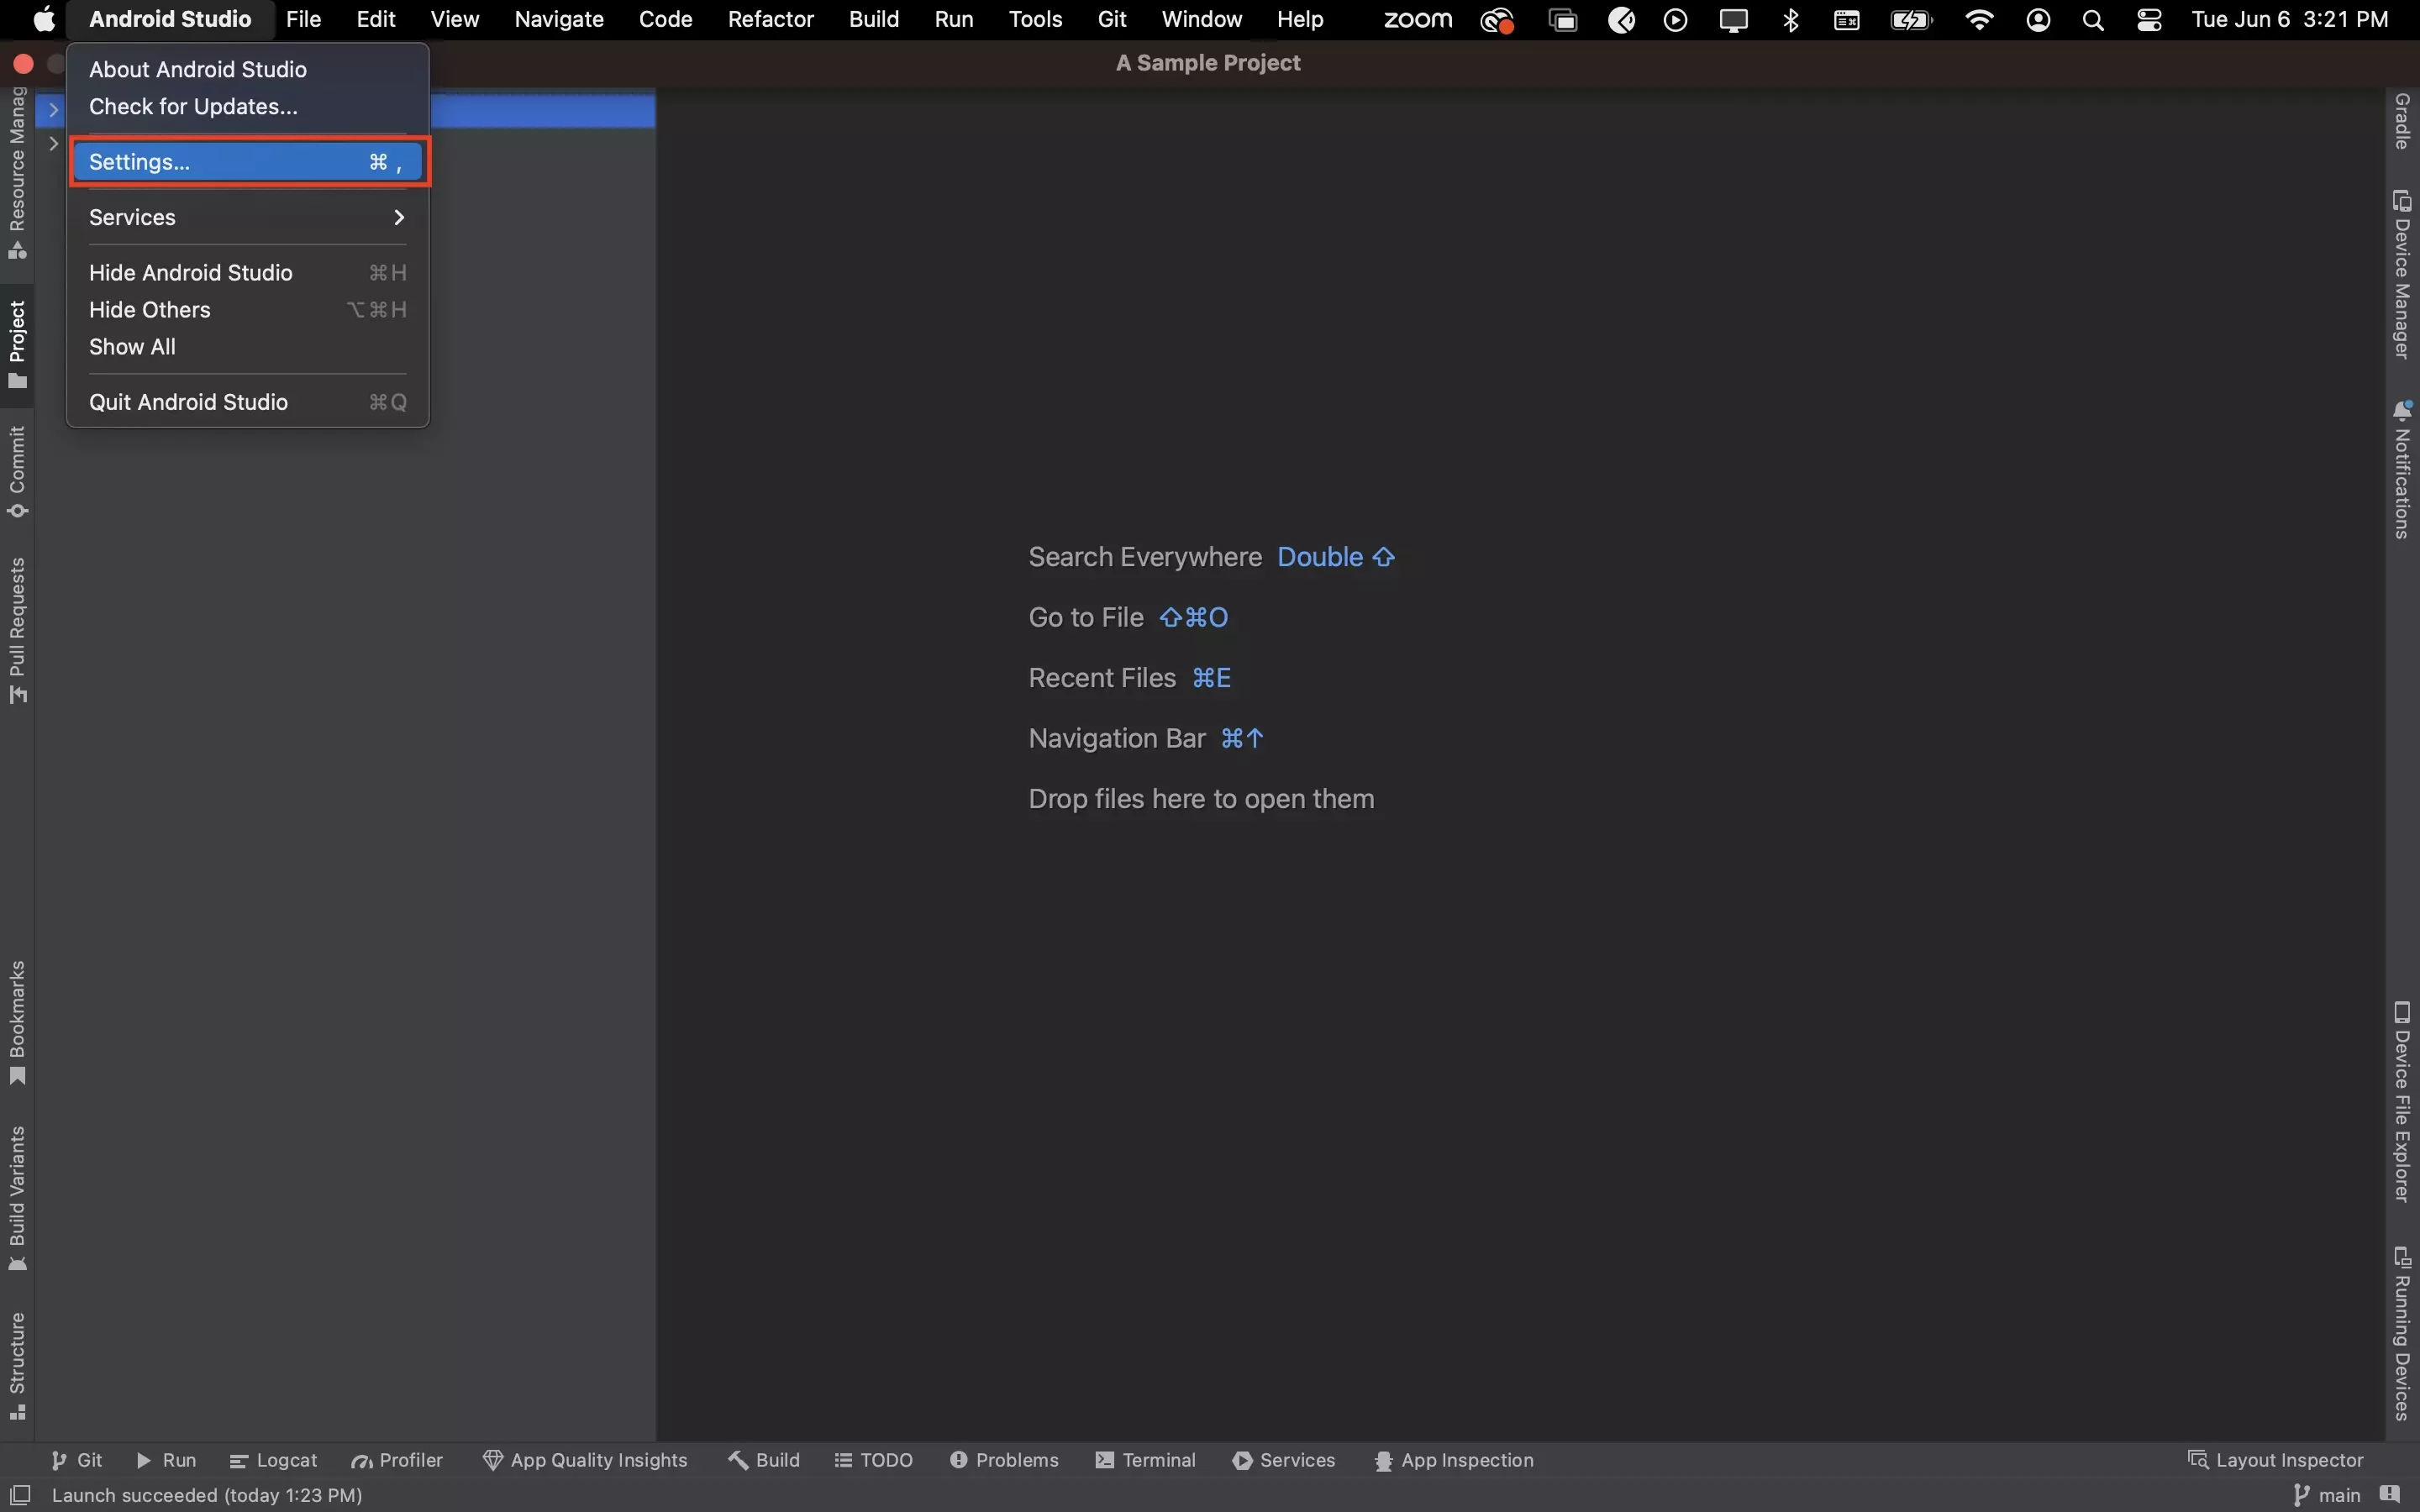
A screenshot of Android Studio showing you how to open settings using the menu bar.

In Android Studio, open settings.

Step Two: Change Version Control Confirmation Settings
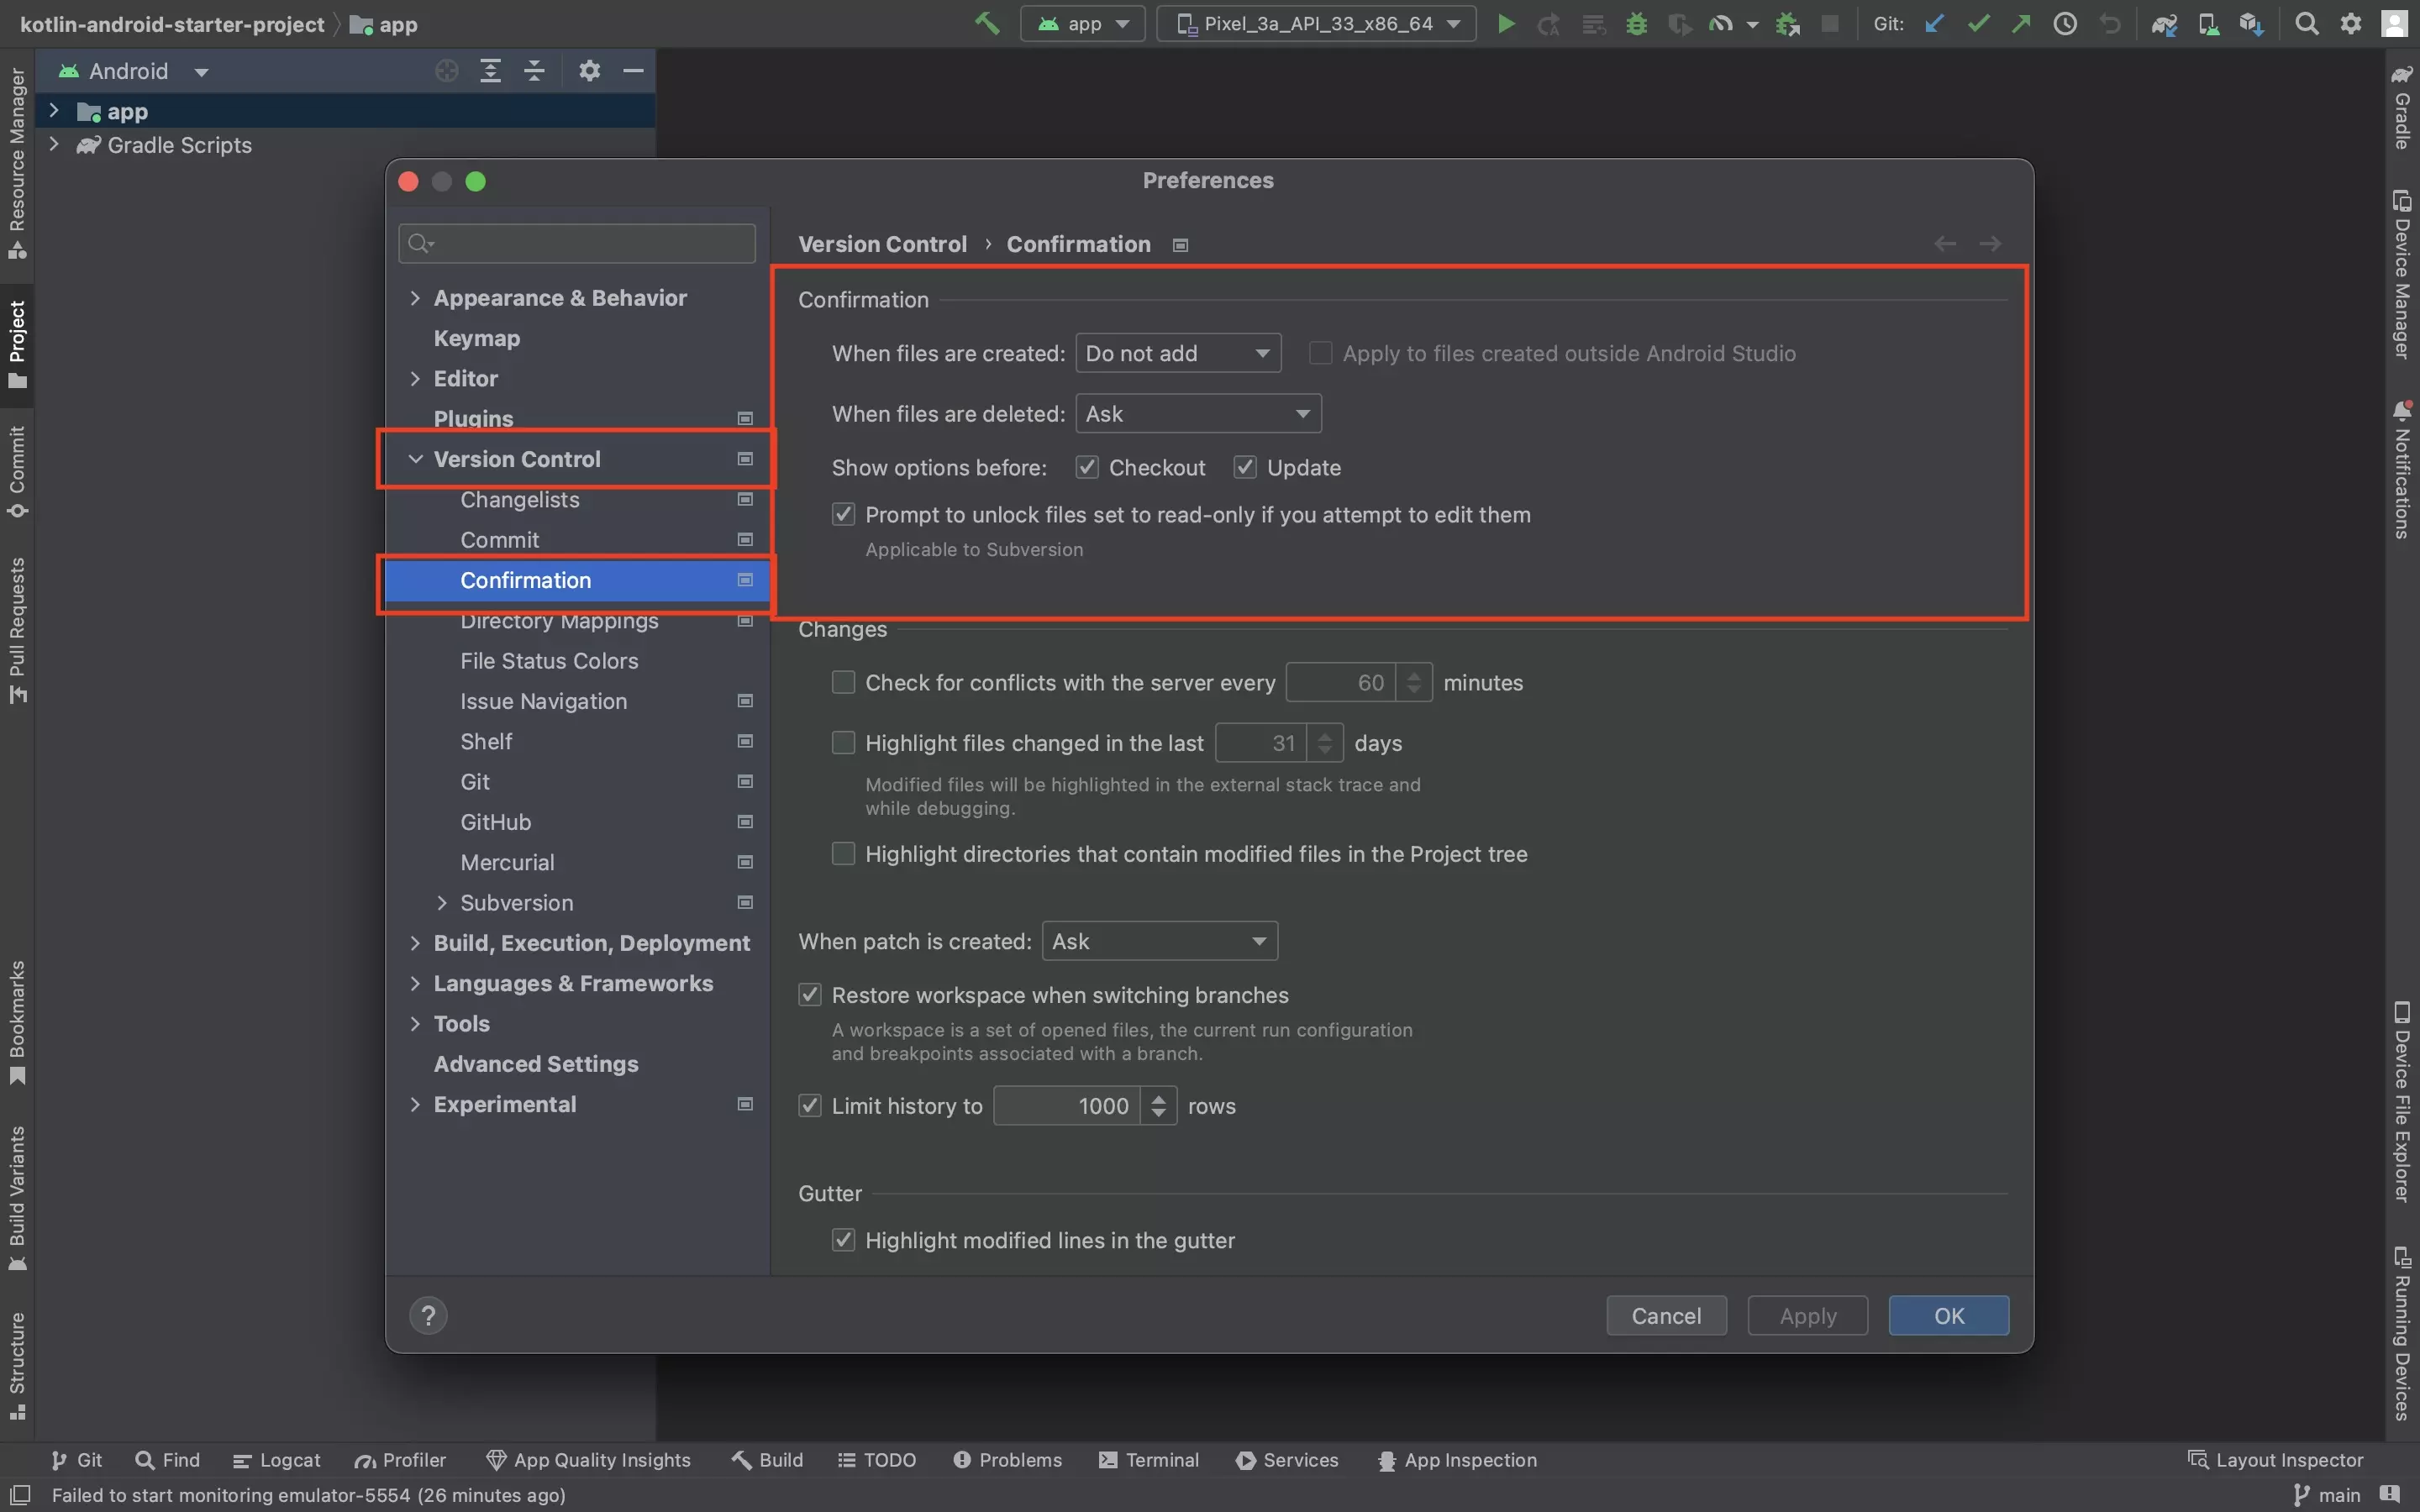
A screenshot of Android Studio showing the preferences window that appears when you open Settings. Highlighted is the "Version Control" tab on the left side bar as well as "Confirmation" tab beneath it. In the central area of the window, we have highlighted the confirmation settings that allow you to automatically add or remove files from git depending on if you've created them or deleted them, as well as other settings.

In the Preferences window that appears, under Version Control > Confirmation make your changes.

Step Three: Save Changes
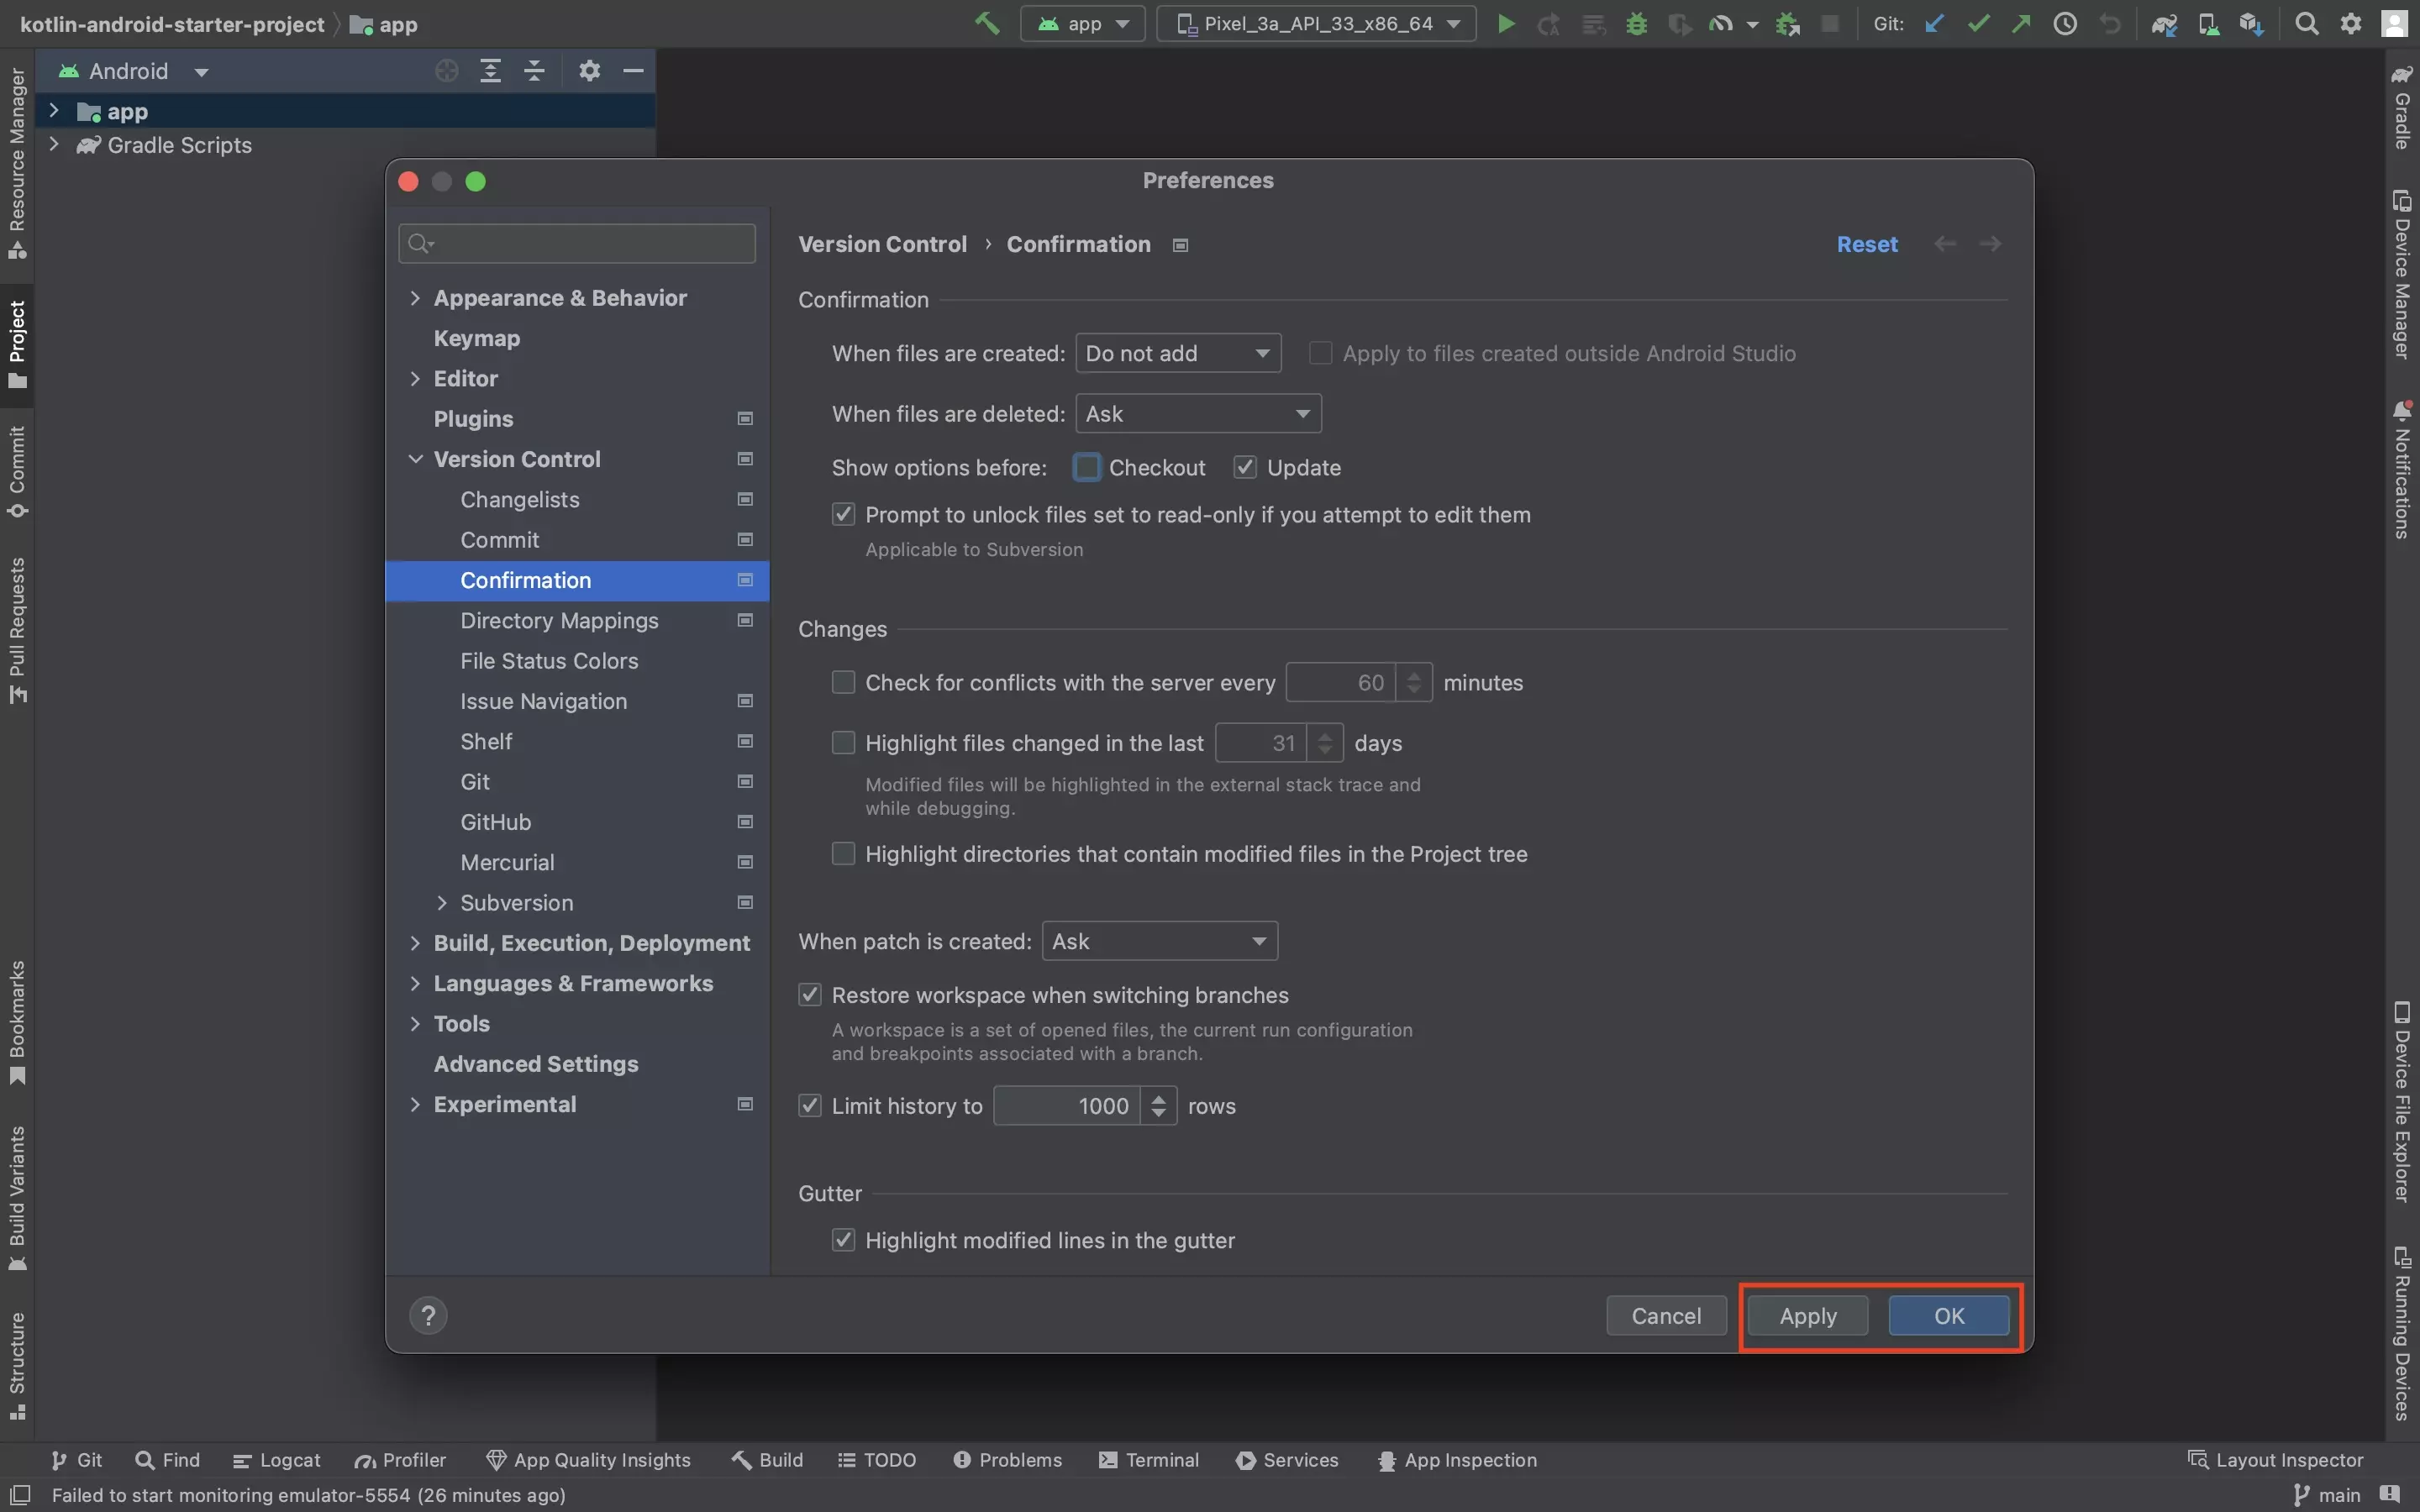
A screenshot of Android Studio showing the preferences window. Highlighted on the bottom right are the "Apply" and "OK" buttons that appear after you make changes to the Android Studio settings. Press either of these to save your changes.

Once everything looks good, press Apply or OK to save your changes.

Any Questions?

We are actively looking for feedback on how to improve this resource. Please send us a note to inquiries@delasign.com with any thoughts or feedback you may have.
delasign logo

Book a Free Consultation.

An icon of an email.

Click here to email us.

Fill in the details below to book a free consultation or to let us know about something else. Whatever it is, we are here to help.

How can we help you ?

Contact Details