How to create an auto-renewable subscription in App Store Connect

Oscar de la Hera Gomez
A flower that represents App Store Connect with the text "Renewable Subscription" beneath it.

A step by step guide on creating a renewable subscription for iOS, iPadOS, MacOS, WatchOS or TVOS using Apple's App Store Connect.

Step One: Access the Apps Subscriptions

A screenshot of an Empty Subscriptions page on App Store Connect.

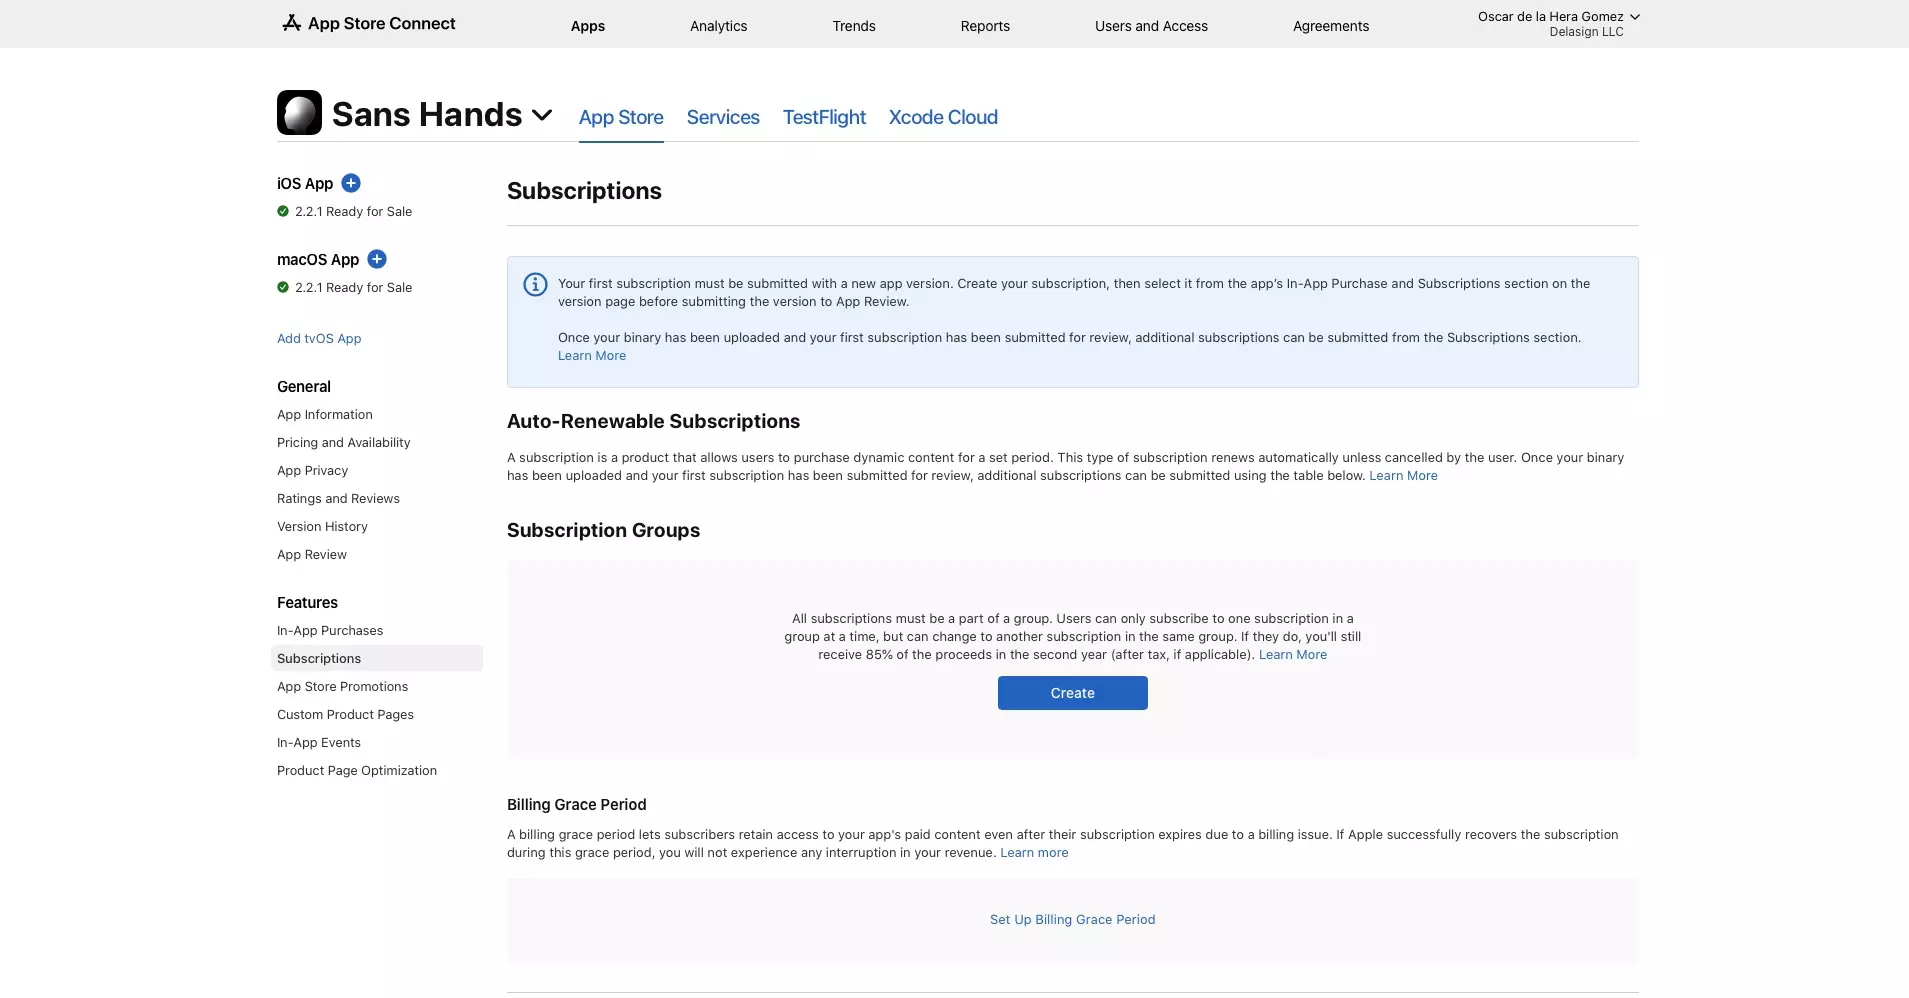
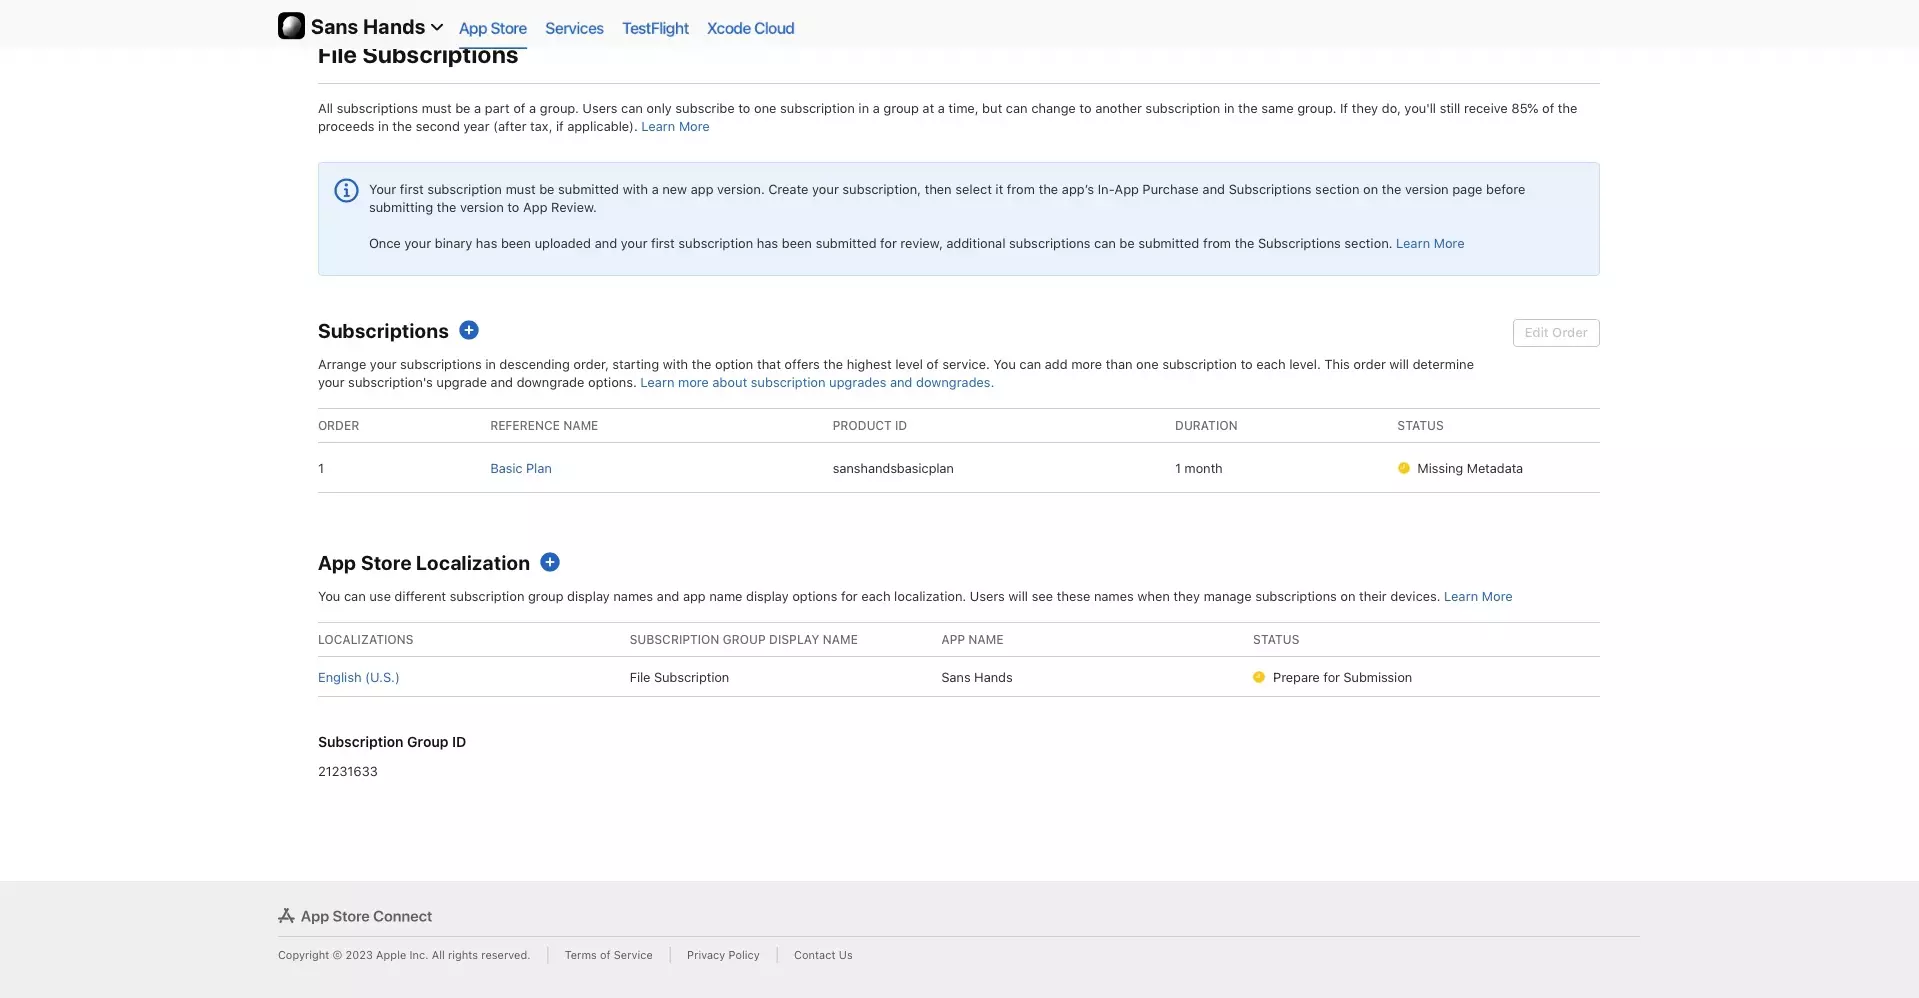
Navigate to the Subscriptions section for the app in App Store Connect.

Step Two: Create a Subscription Group

A screenshot of the App Store Connect Subscriptions page for an App. Highlighted is the "Create" button under Subscription Groups. Click it and move onto the next step.

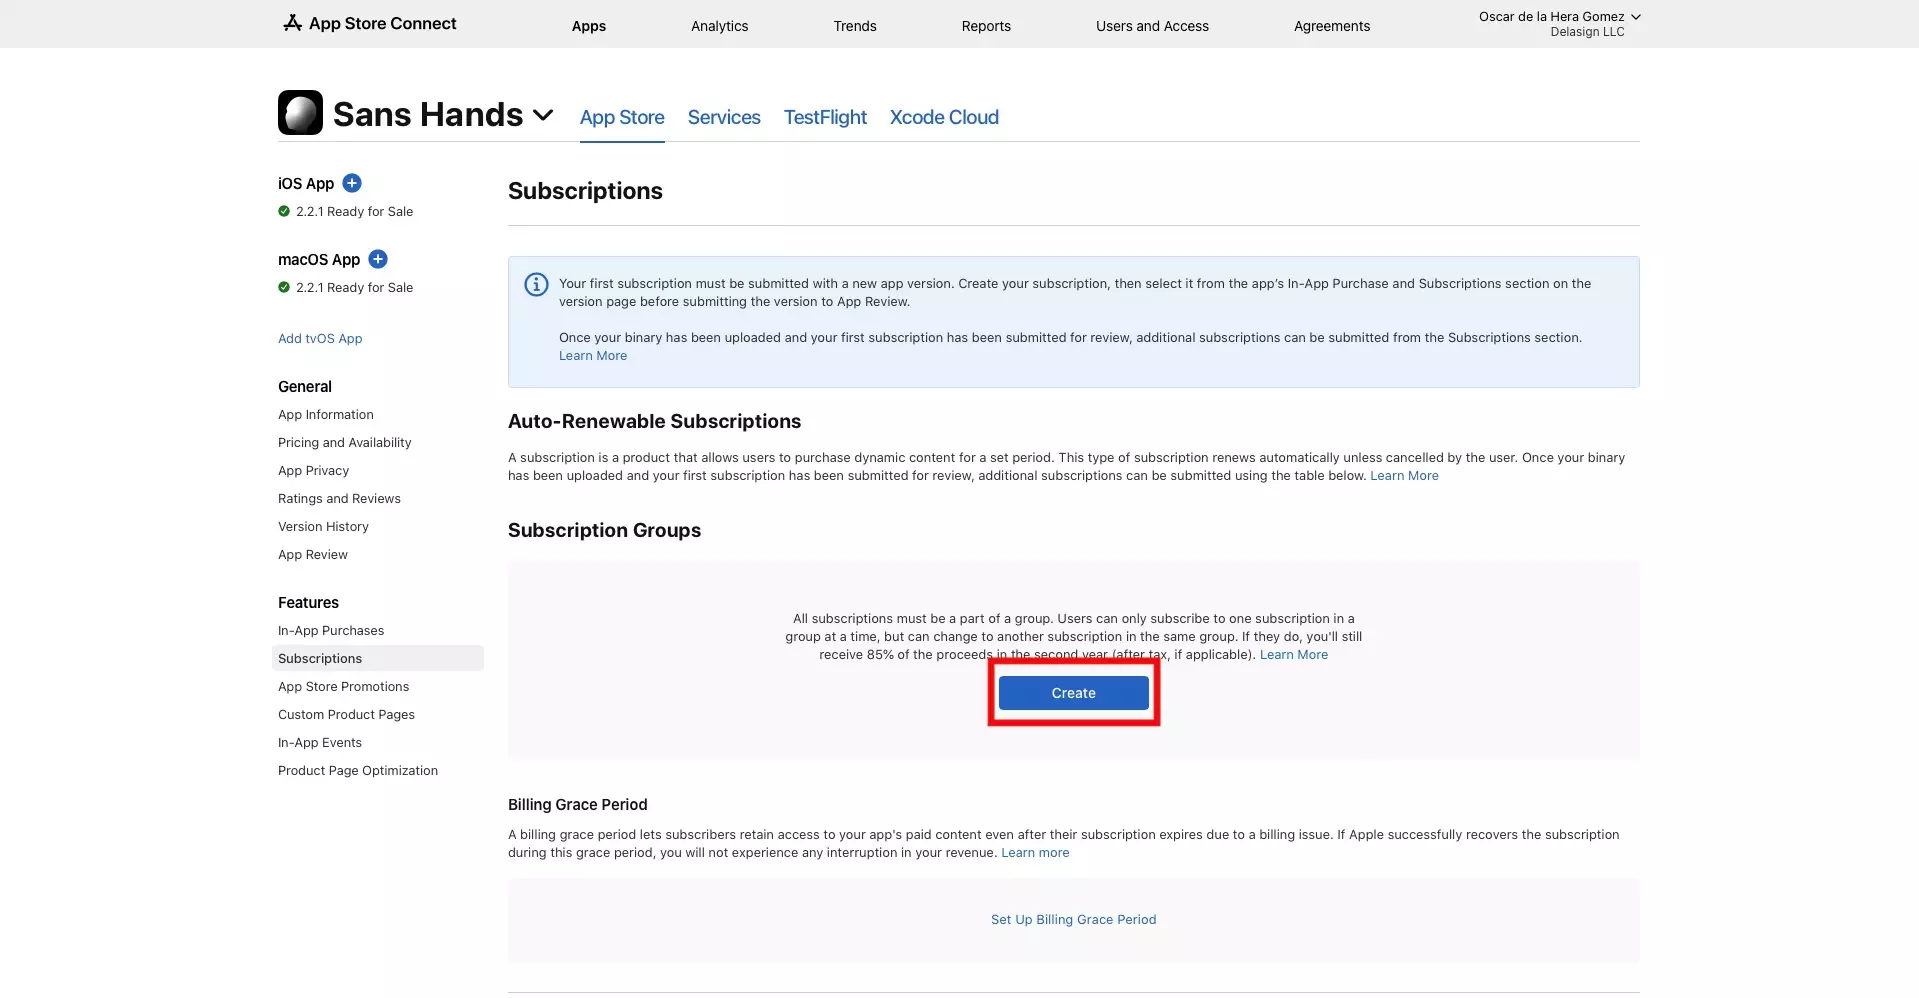
Click Create to create your subscription group.

As mentioned in the screenshot, Apple App Store Subscriptions must form part of a Subscription Group and users are only able to subscribe to a subscription within a group.

See this as a means of creating a group for tiers, where a user can upgrade or downgrade tiers as they like, within the same group.

Step Three: Name and Create the Subscription Group

A screenshot of the Create Subscription Group Modal with a highlight on the details you must fill in and the Create button on the bottom left.

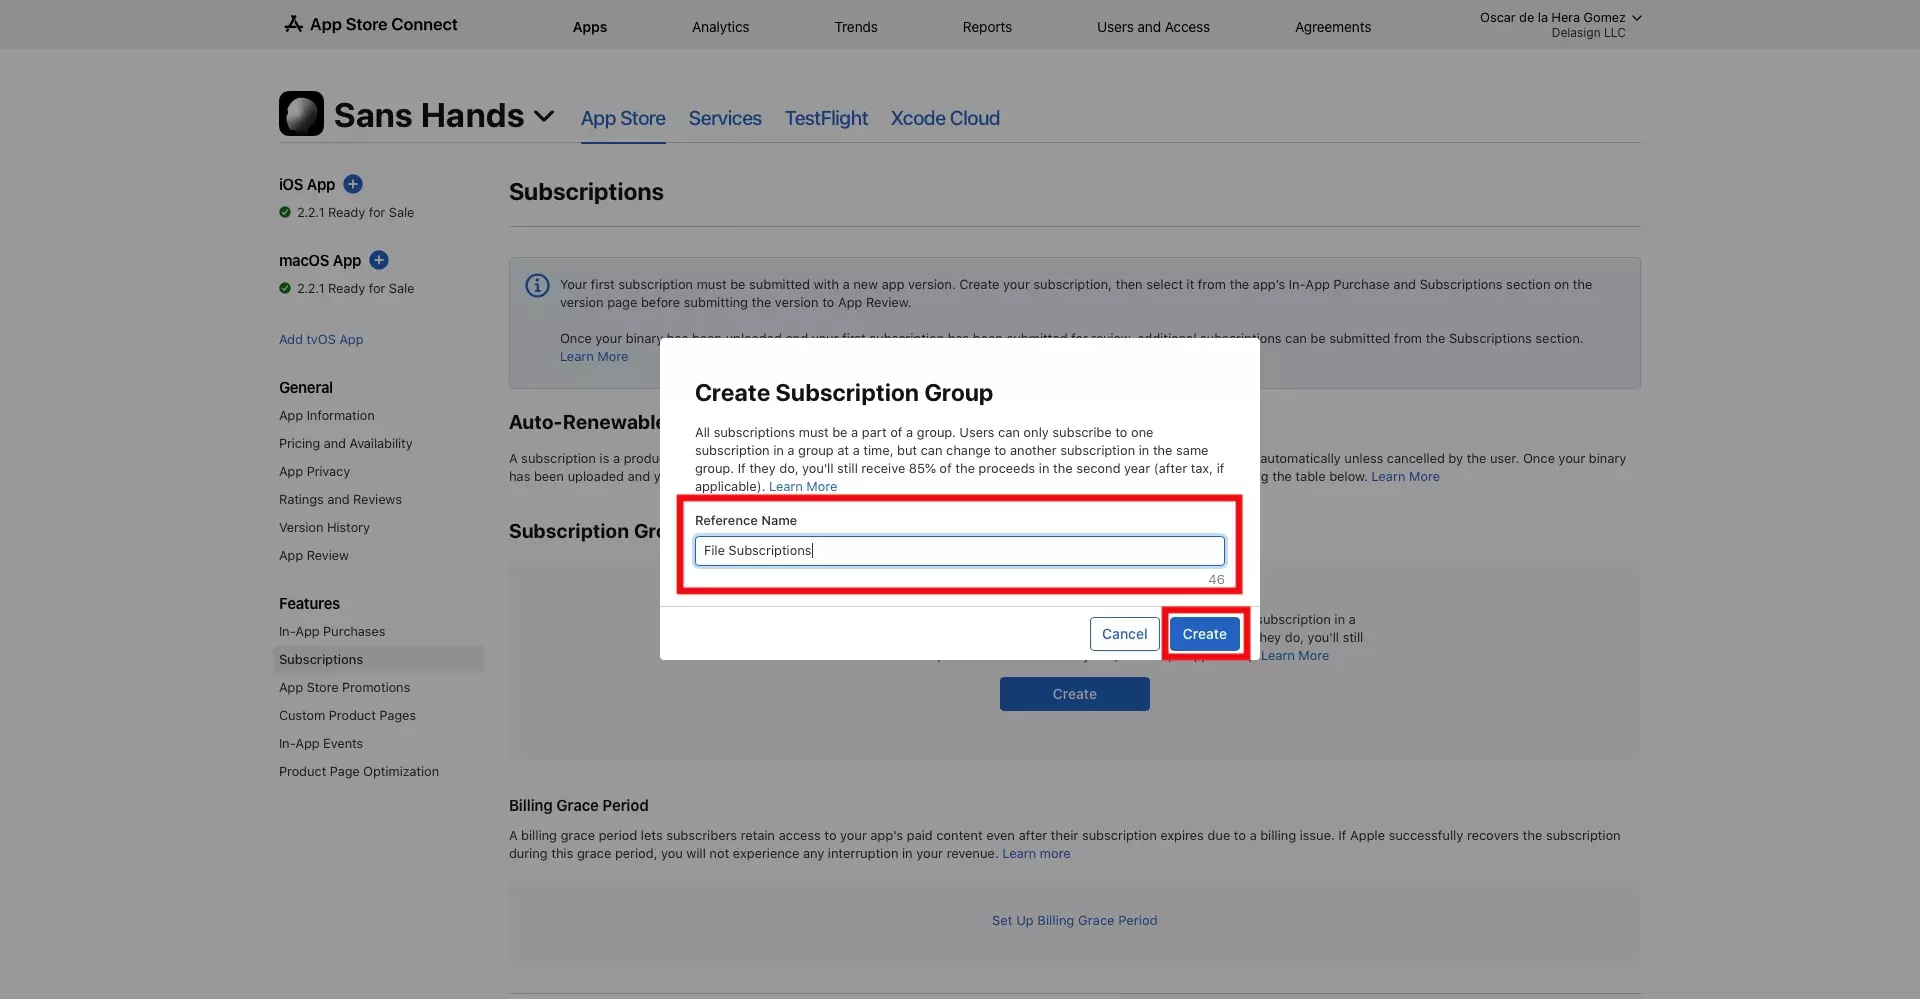
In the modal that appears, give the Subscription Group a Reference Name and click Create.

Please note that the Group Reference Name are for Sales and Trends purposes. The actual information that is displayed to the user is the App Store Localized content which is completed within the product details.

Step Four: Create the Subscription

A screenshot of an App Store Connect Subscription Group with a highlight on the "Create" button under "Subscriptions".

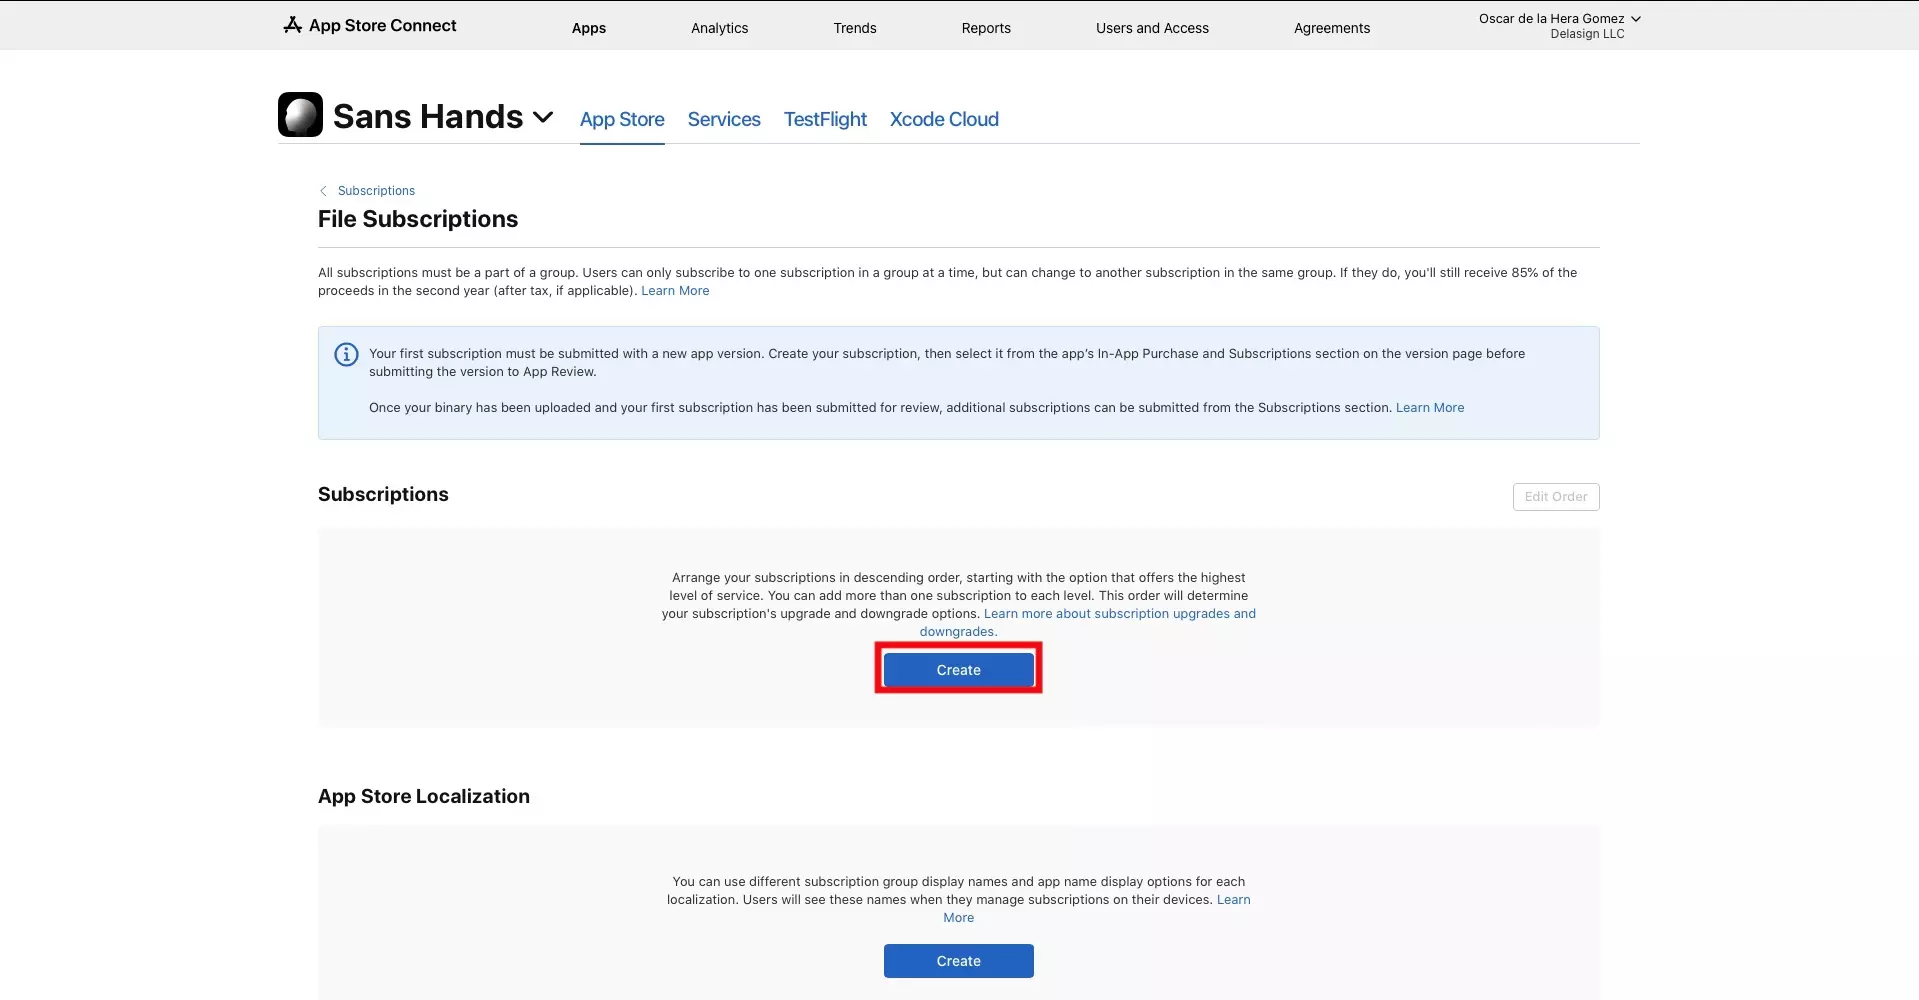
In the page that appears, click Create under Subscriptions.

Step Five: Name and Create the Subscription

A screenshot of the Create Subscription mode with a highlight on the area where you must enter the Reference Name and Product Id. Highlighted on the bottom right is the Create button which becomes active after you fill in the details.

In the modal that appears, give the Subscription a Reference Name and a Product Id, then click Create.

Please note that the Reference Name and Product Id are for Sales and Trends purposes. The actual information that is displayed to the user is the App Store Localized content which is completed within the product details.

Step Six: Set the Subscription Duration

A screenshot of an App Store Connect Subscription page with a highlight on the Subscription Duration dropdown, which is open showing the cases that can be selected. These are 1 week, 1 month, 2 months, 3 months, 6 months and 1 year.

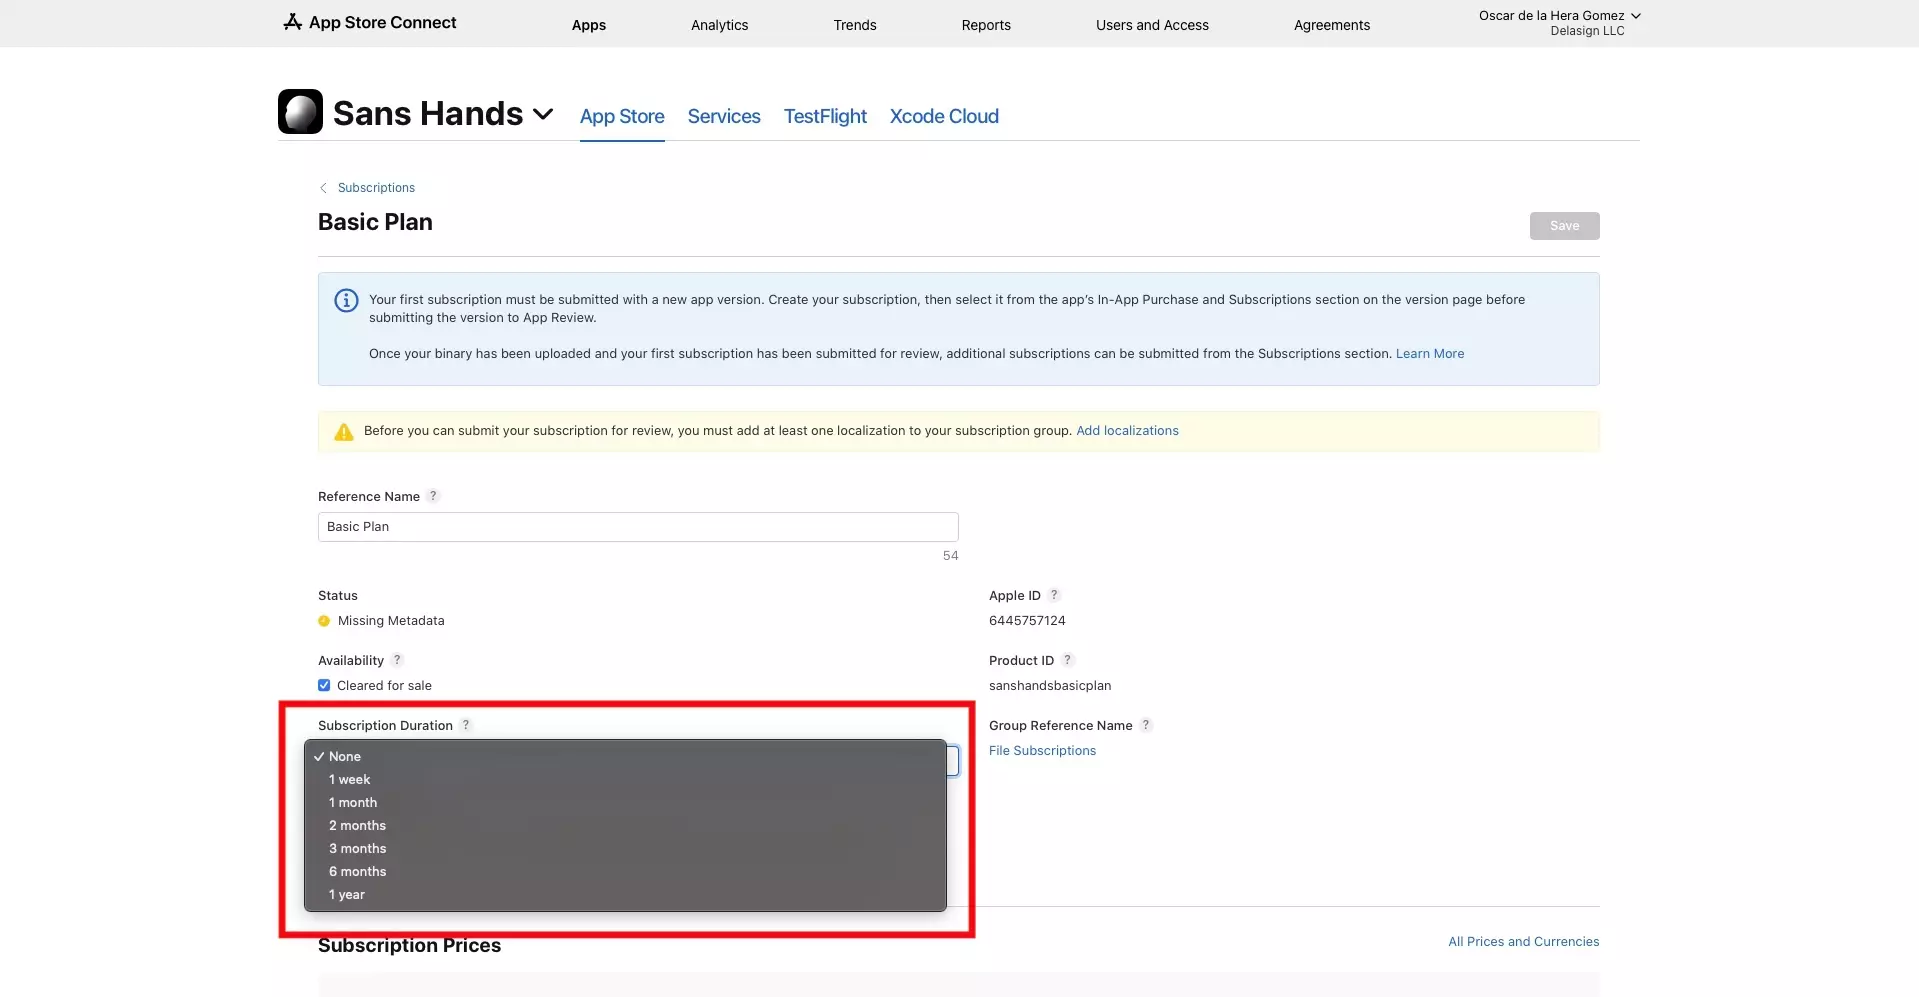
Using the dropdown under Subscription Duration, set how long you want your renewable subscription to last.

Step Seven: Set the Pricing

A screenshot of a App Store Connect Subscription page with the pricing set.

Subscriptions must be priced per region and follow the following process.

A | Add Subscription Price

A screenshot of an App Store Connect Subscription page, with a highlight on the Add Subscription Price button that appears beneath the Subscription Prices section title.

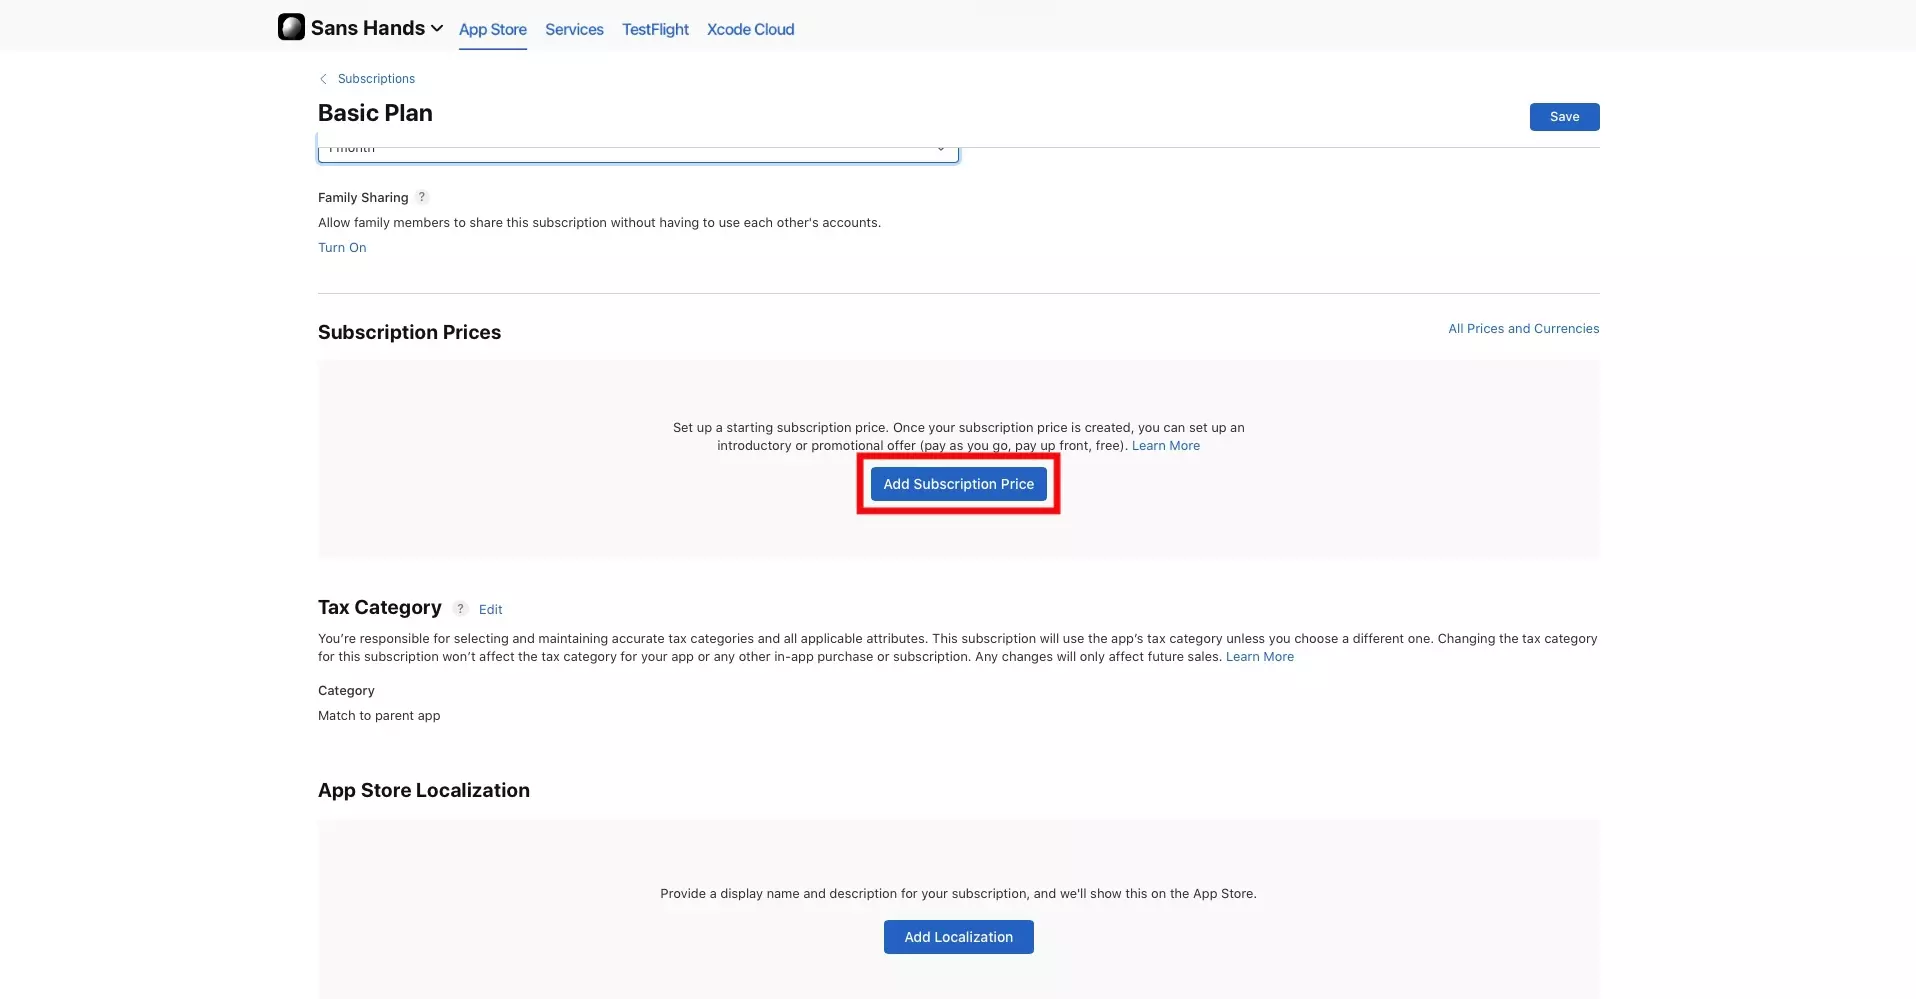
Under Subscription Prices, click the Add Subscription Price button.

B | Set Price

A screenshot of the App Store Connect Subscription Page, Subscription Price modal. Highlighted is the area where you must set the Country or Region as well as the Price. We have also highlighted the Next button on the bottom right of the modal.

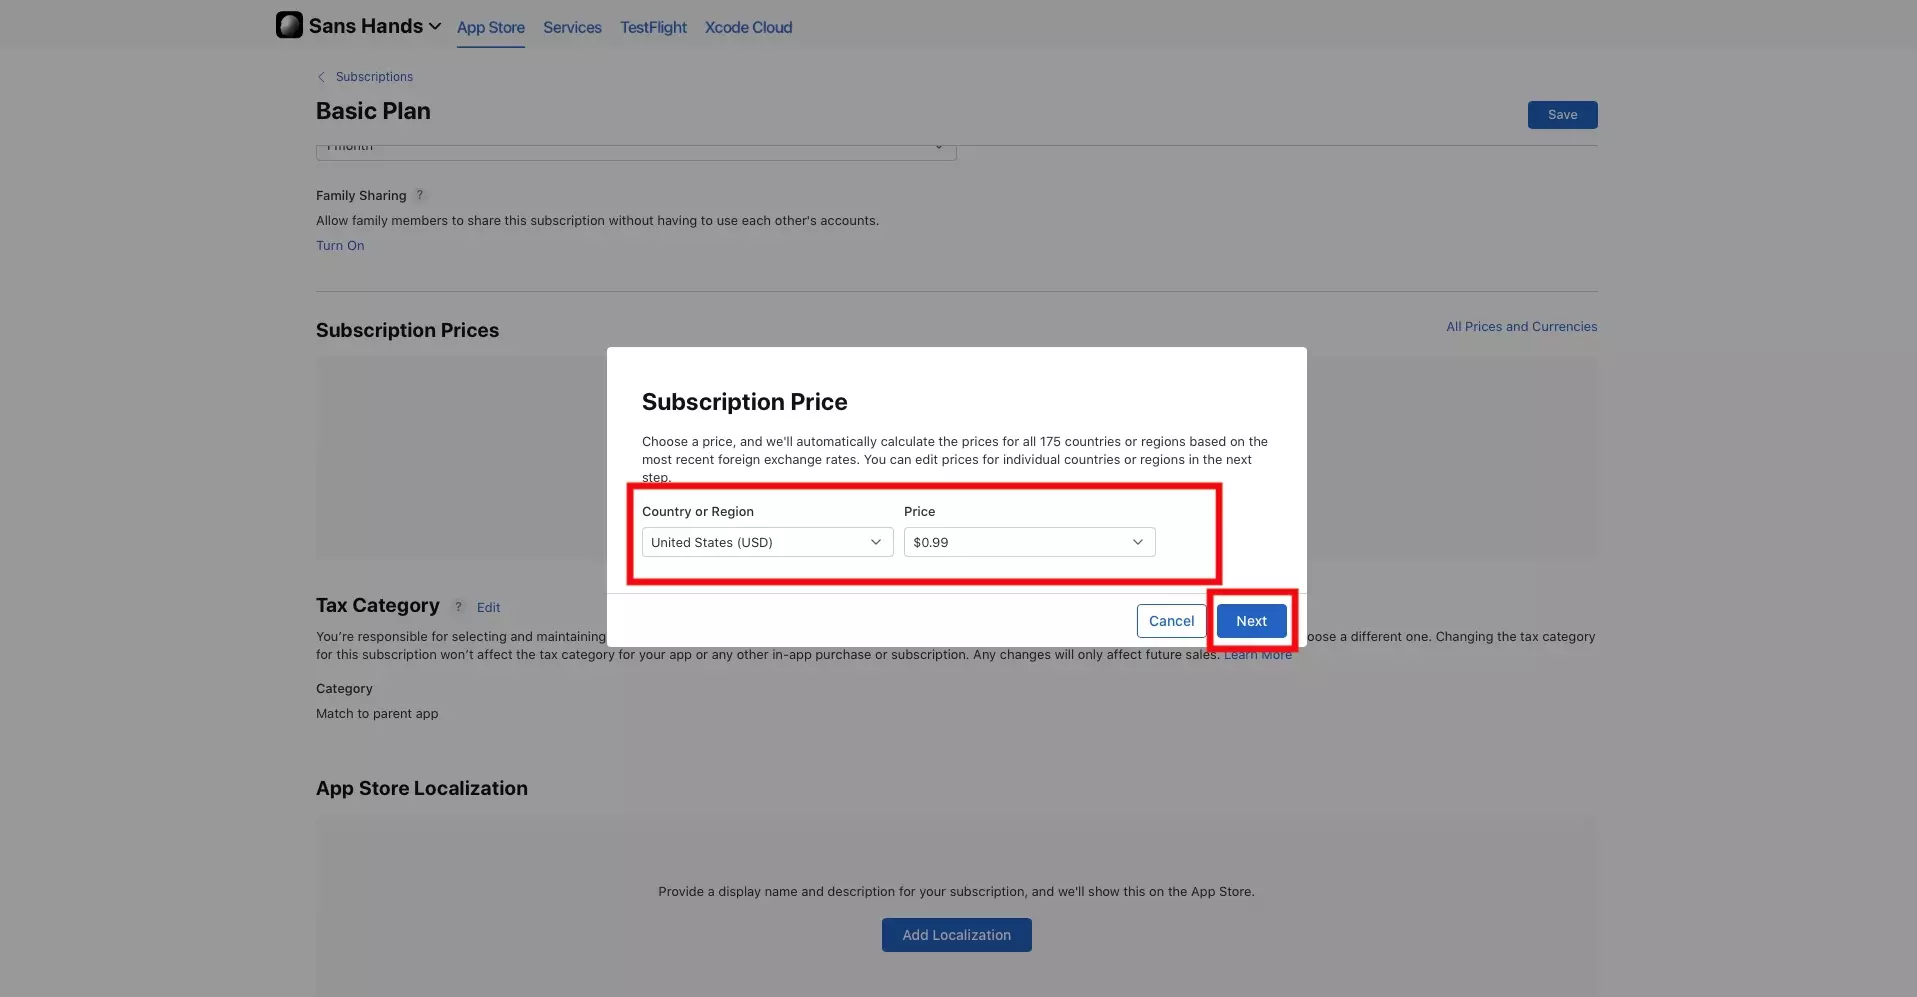
In the Subscription Price modal, set the initial Country or Region and Price. Then click the Next button.

C | Price by Country and Region

A screenshot of the Price by Country or Region modal that appears when you press next. It demonstrates that you can edit the prices of the subscription depending on the local. Once you have made any necessary changes, press the Next button that we have highlighted on the bottom right.

In the Price by Country or Region modal, set the price that you wish per individual region. Then click the Next button.

D | Confirm Subscription Price

A screenshot of the Confirm Subscription Price? Modal that appears when you press next after setting the prices per country or region. It lists all the prices for each country or region. We have highlighted the Confirm button on the bottom right which you must press if everything looks good.

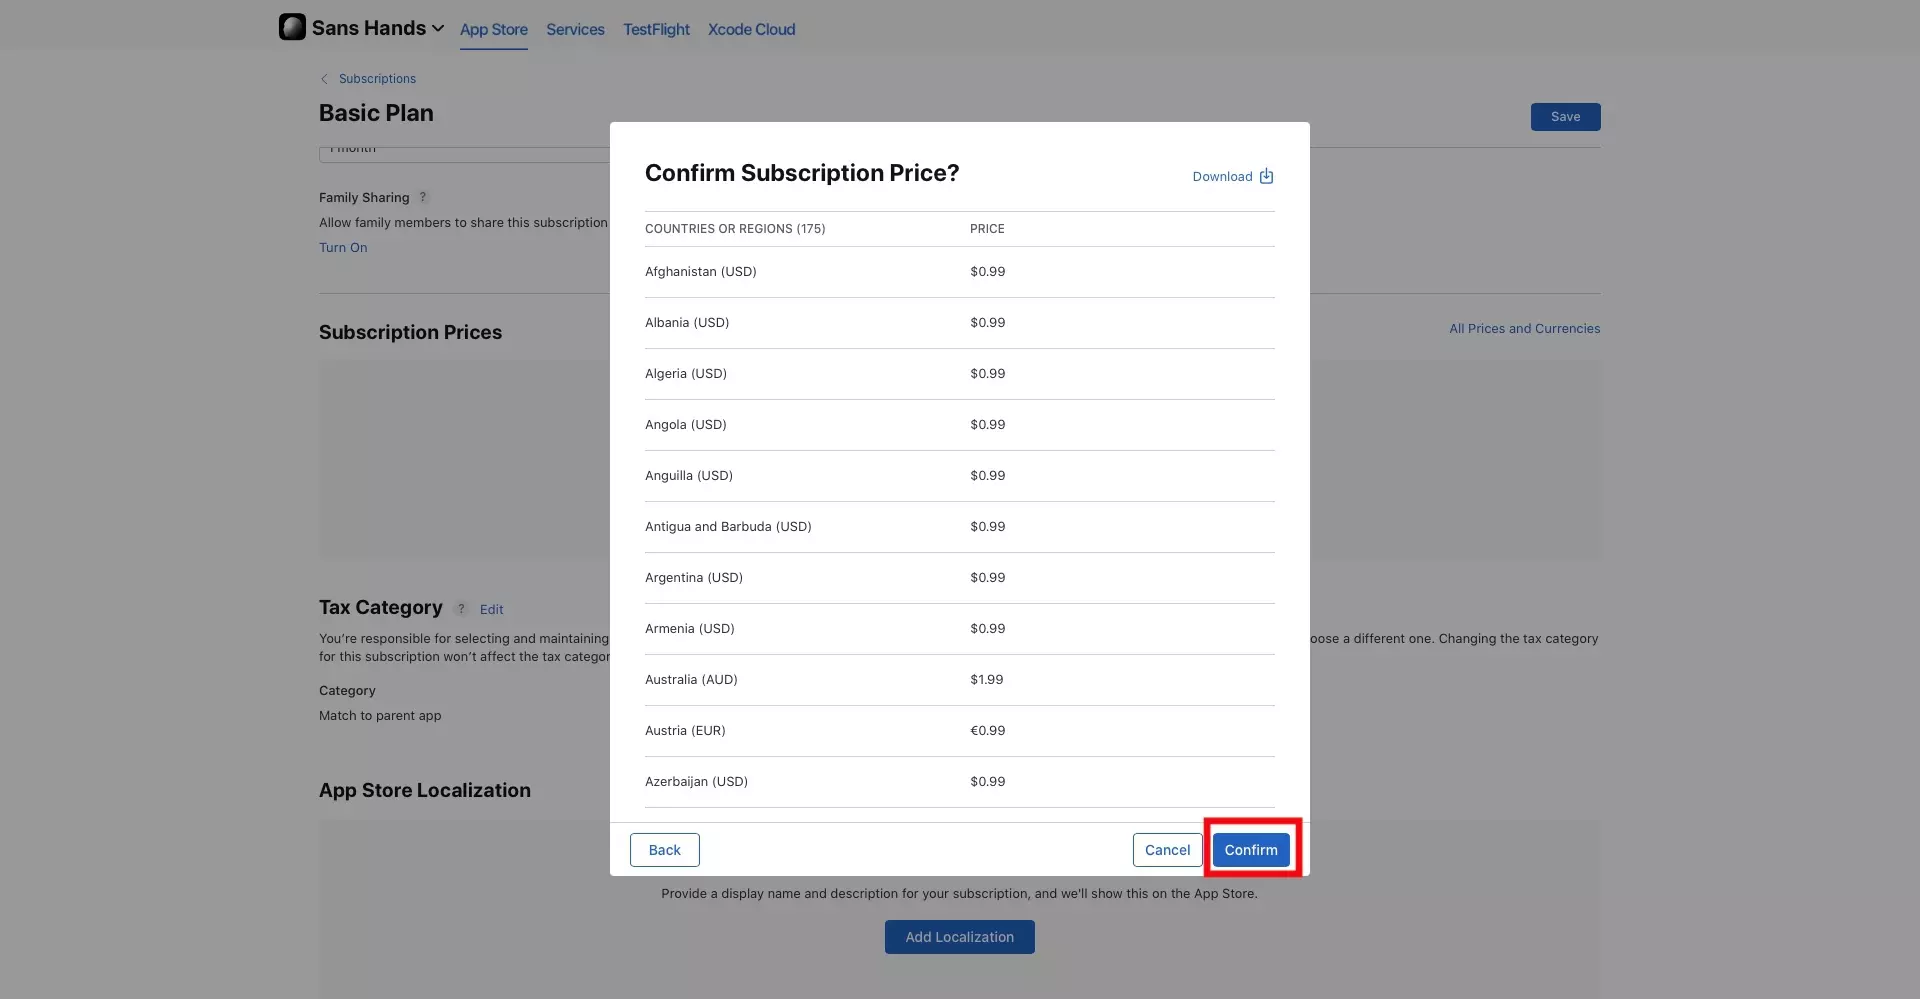
In the Confirm Subscription Price? modal, check that everything looks good. Then click the Confirm button.

Step Eight: Add Subscription Localization

A screenshot of the App Store Connect Subscription page showing a completed localization for English.

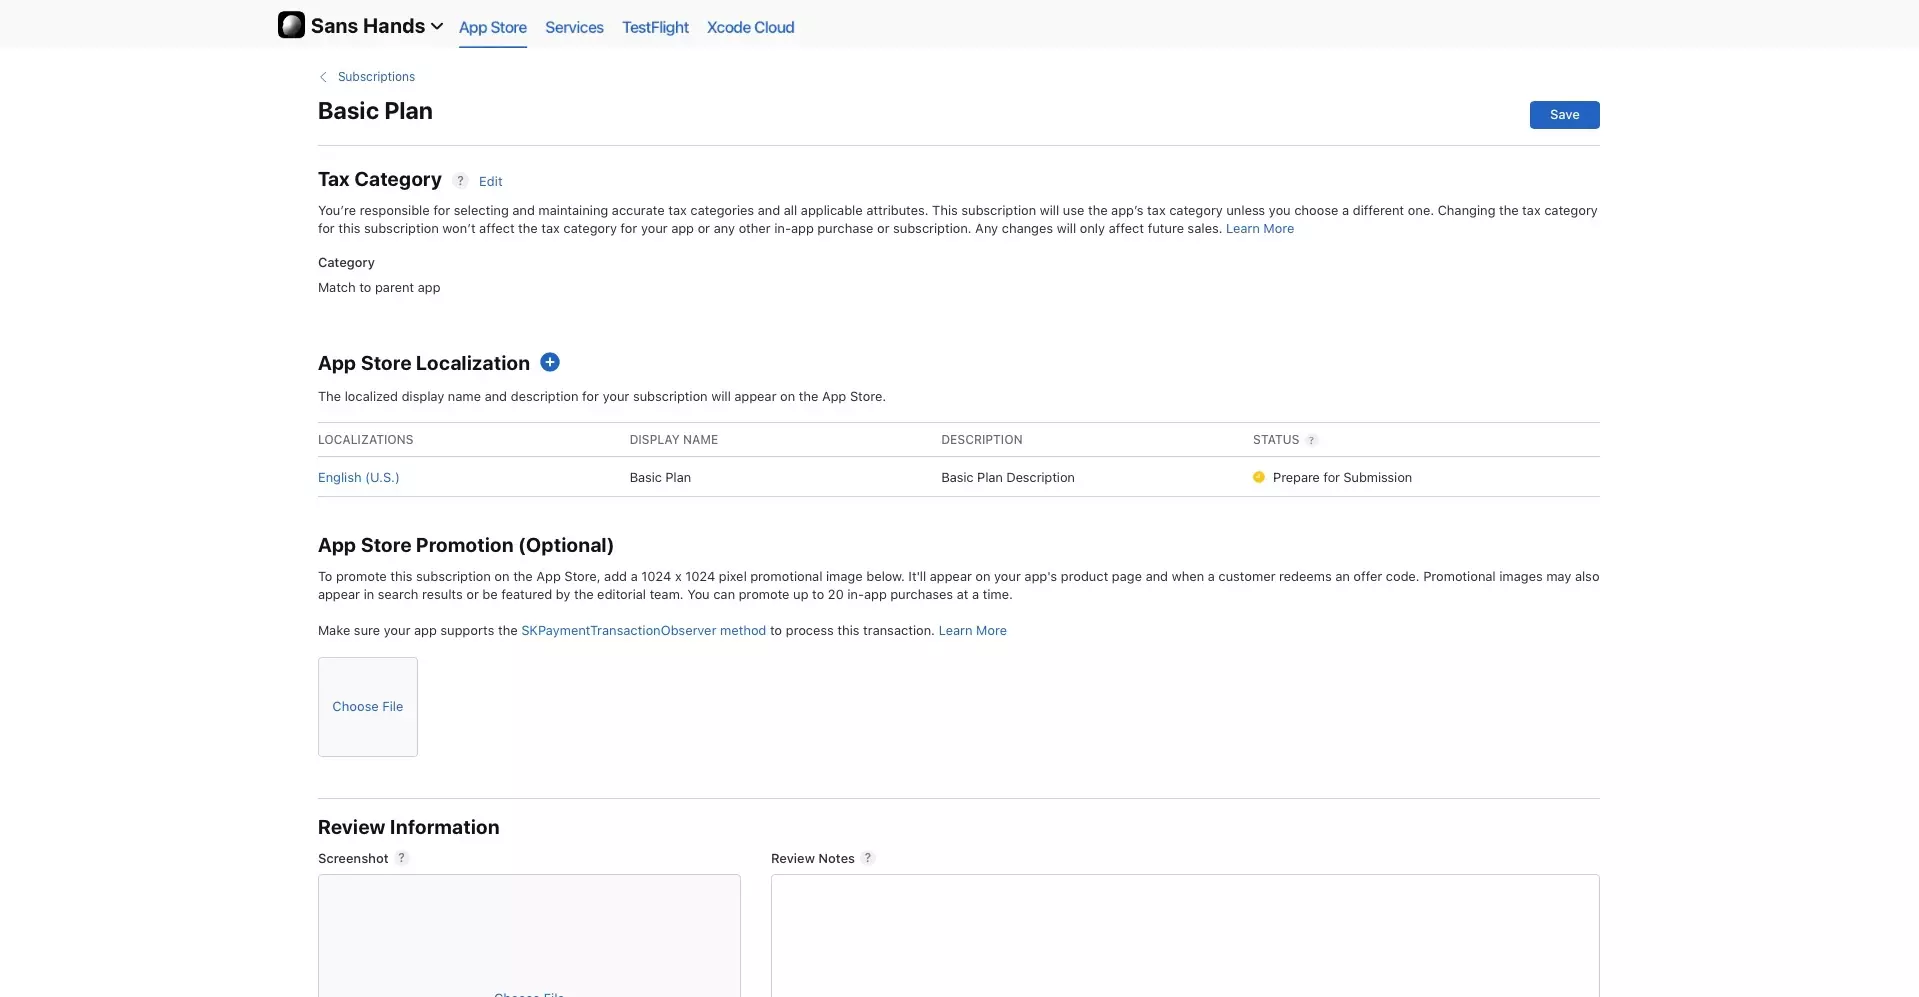
It is recommended that you add localizations to your subscriptions, as this is the information your users will see when managing their subscriptions. This can be added through the following process.

A | Add Localization

A screenshot of the App Store Connect Subscription Page with a highlight on the Add Localization button that appears under the App Store Localization section.

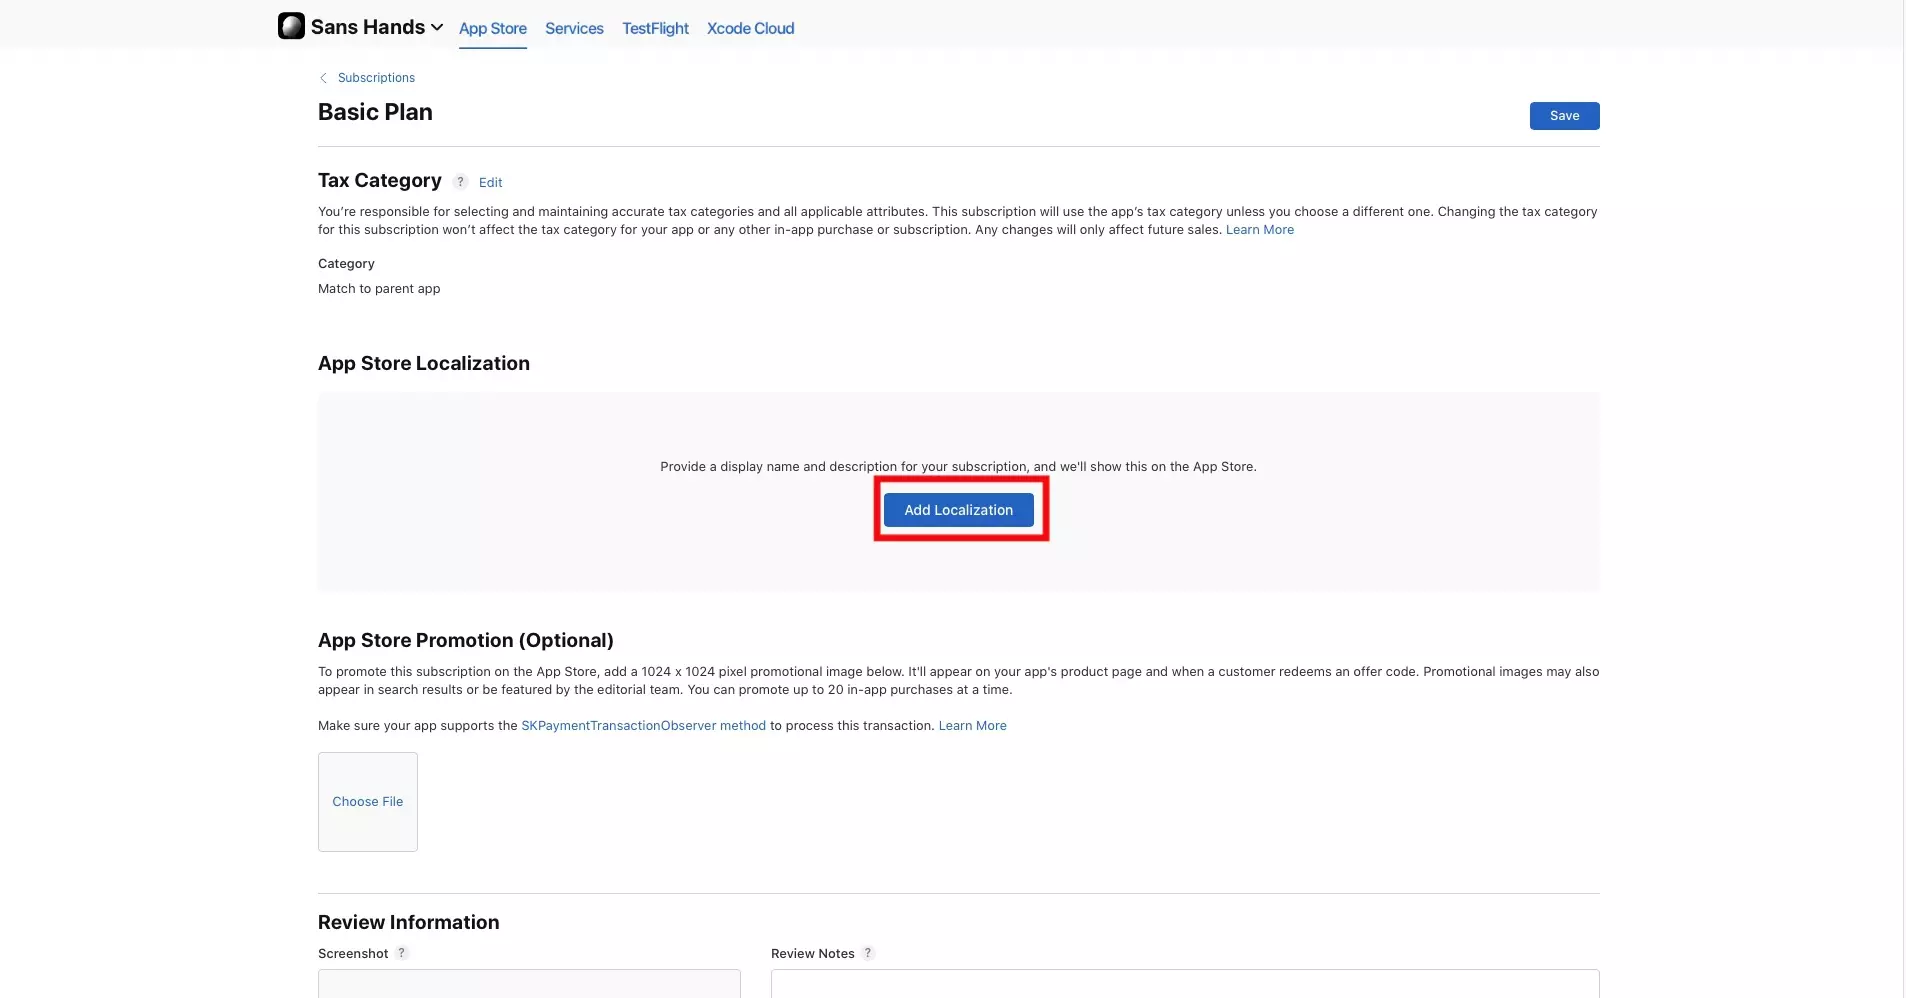
Under App Store Localization, click the Add Localization button.

B | Fill in Details and Add

A screenshot of the Add App Store Localization modal for a subscription. Highlighted is the area where you must fill in the Localization, Display Name and Description. We have also highlighted the Add button on the bottom right which appears after you fill in the required details.

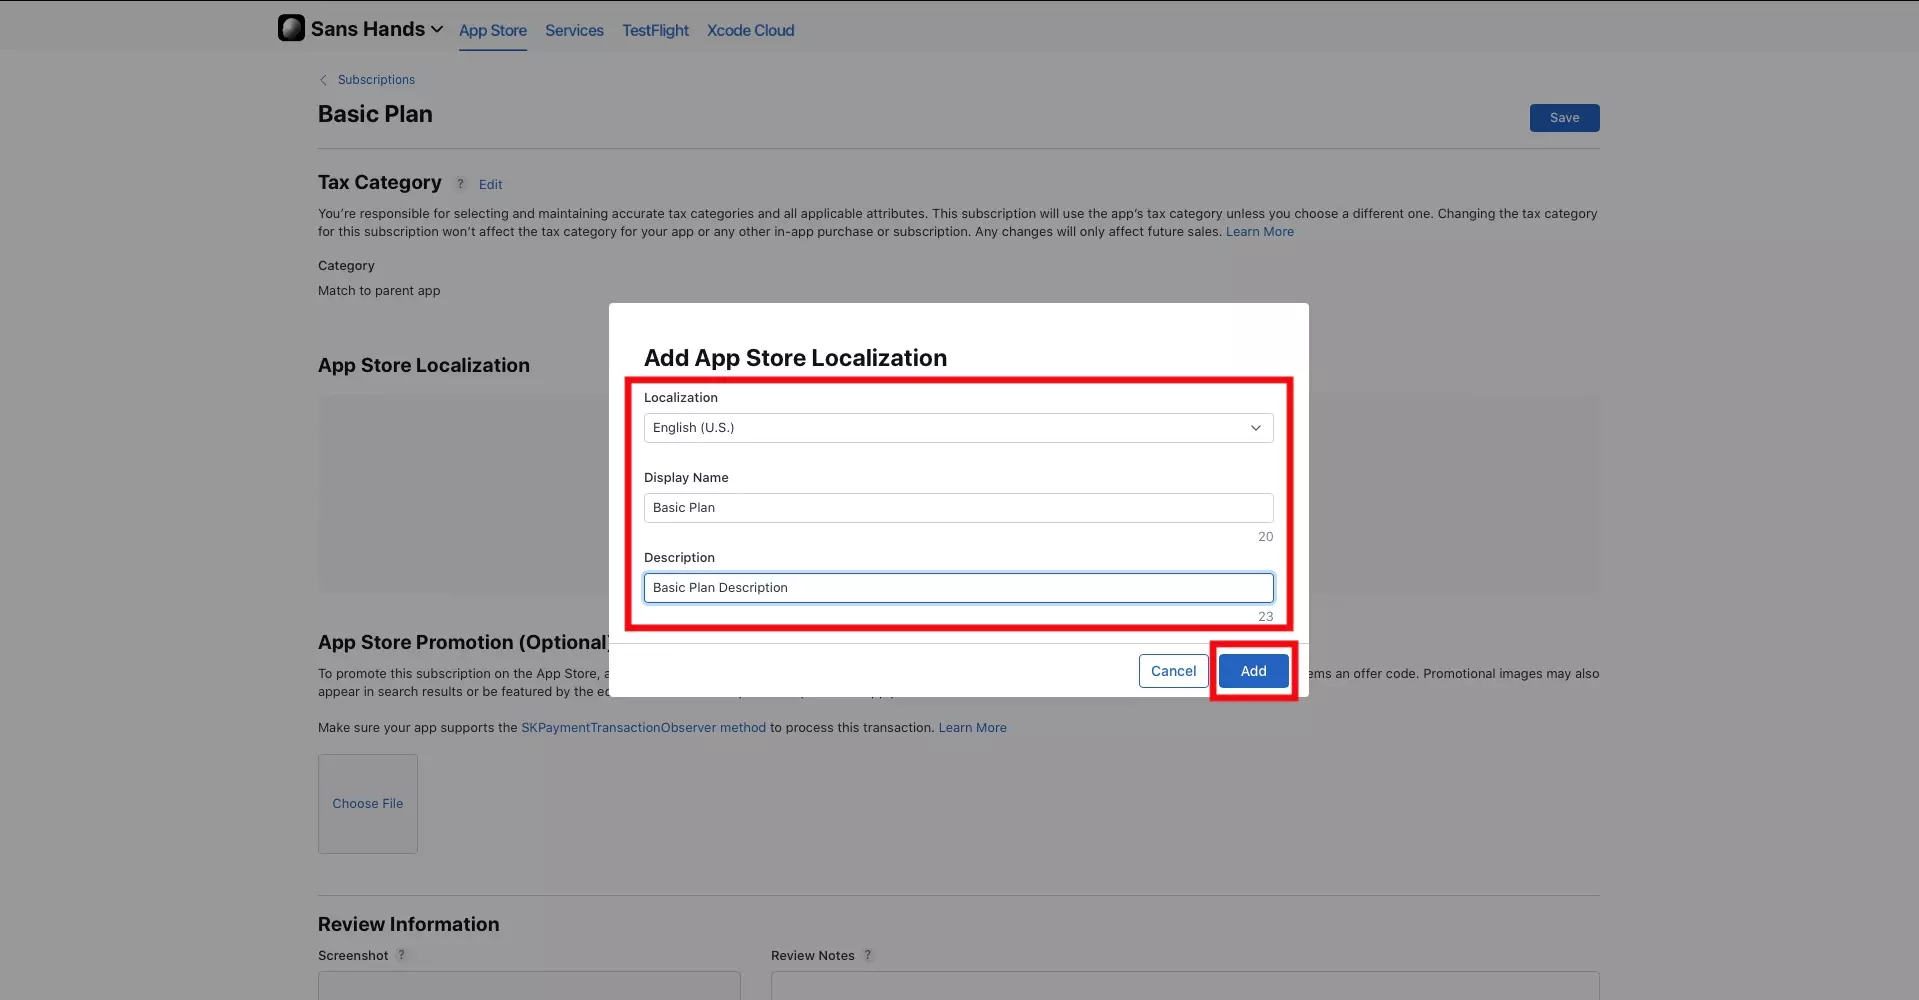
In the Add App Store Localization modal, set the Localization, Display Name and Description. Then click the Add button.

Step Nine: Save

A screenshot of the App Store Connect Subscription that we created in this tutorial with the progress that we detailed up till now on this tutorial. We have highlighted the Save button on the top right. Click this to save the changes.

Once everything looks good, click the Save button.

Step Ten: Add Subscription Group Localization

A screenshot of the Subscription Group localized with the subscription that we created.

Although optional, it is strongly recommended that you add an App Store Localization for the Subscription Group, which will appear when the user manages their subscriptions. This can be done through the following process.

A | Add App Store Localization

A screenshot of an App Store Connect Subscription Group Page with a highlight on the Add Localization button under App Store Connect Localization.

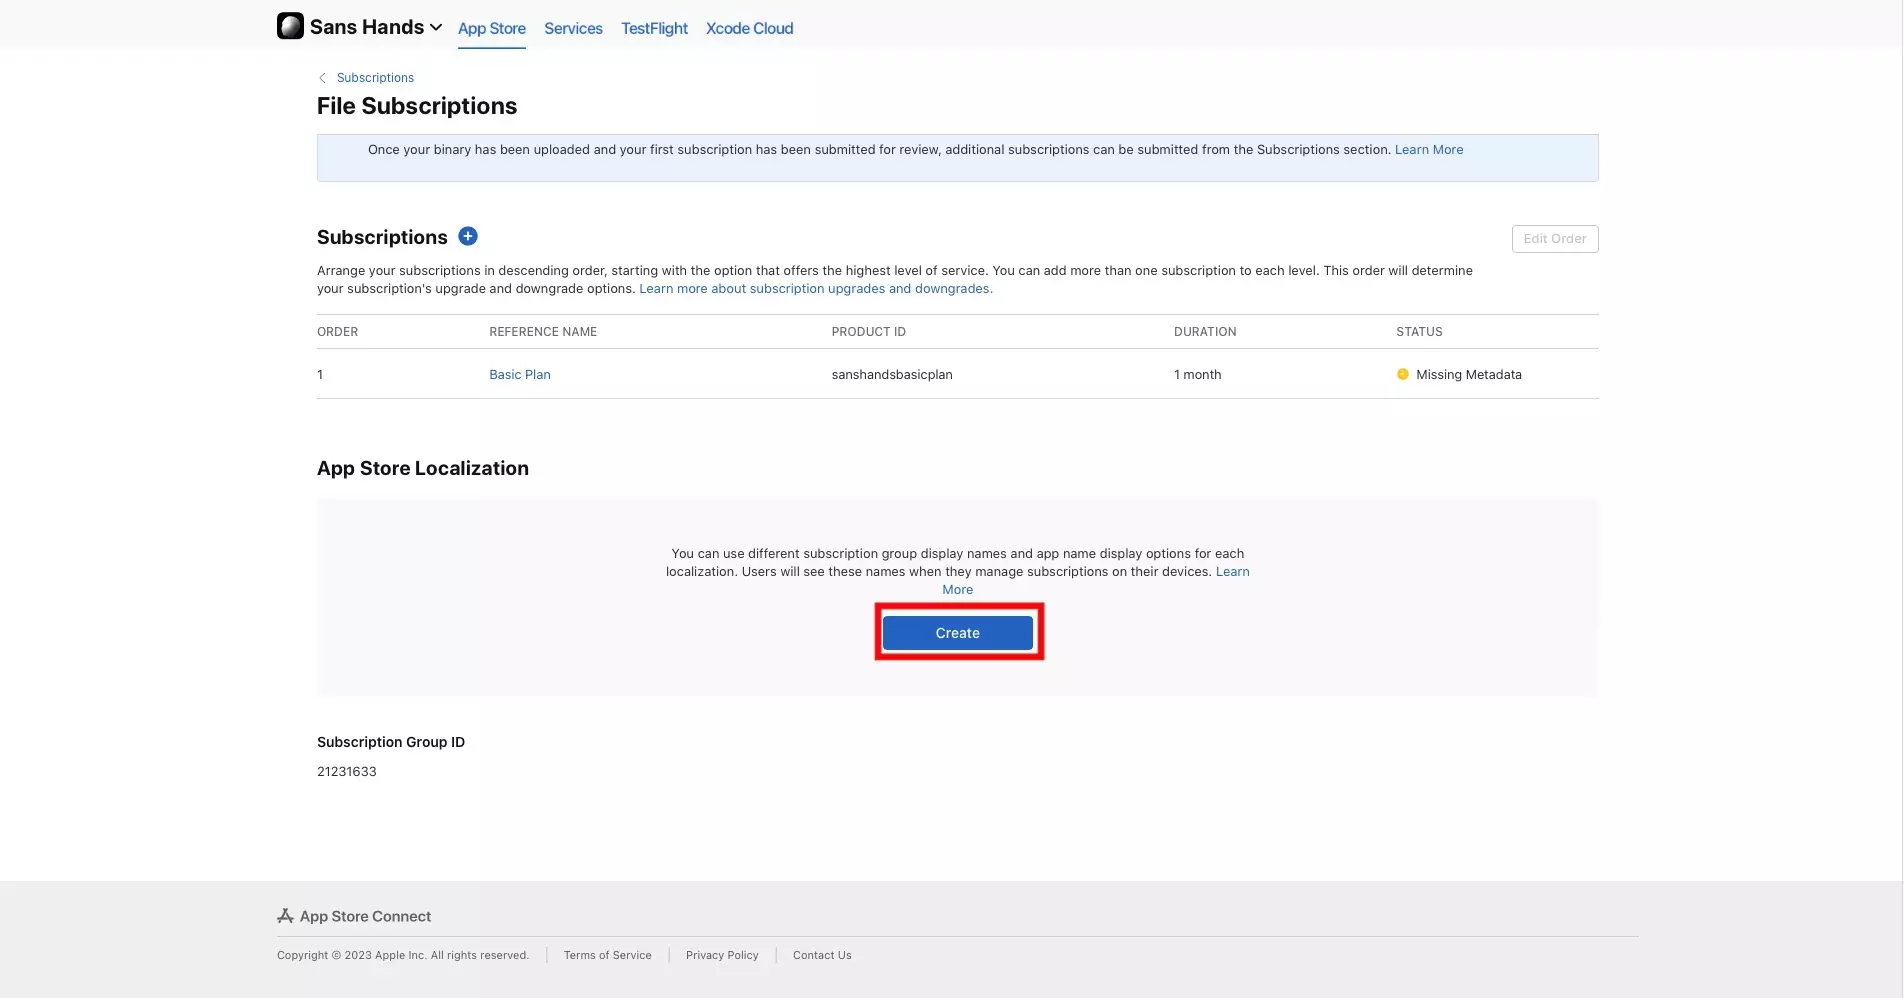
In the Subscriptions Group for the Subscription that you just created, click the Create button under App Store Localization. This is the information that users will see when they manage their subscriptions.

B | Name and Create

A screenshot of the Add App Store Localization Modal for a Subscription Group. Highlighted are the inputs that you must fill in, including the Localization, Subscription Group Display Name and Options - which involve selecting if you want to use the App Name or a custom name.

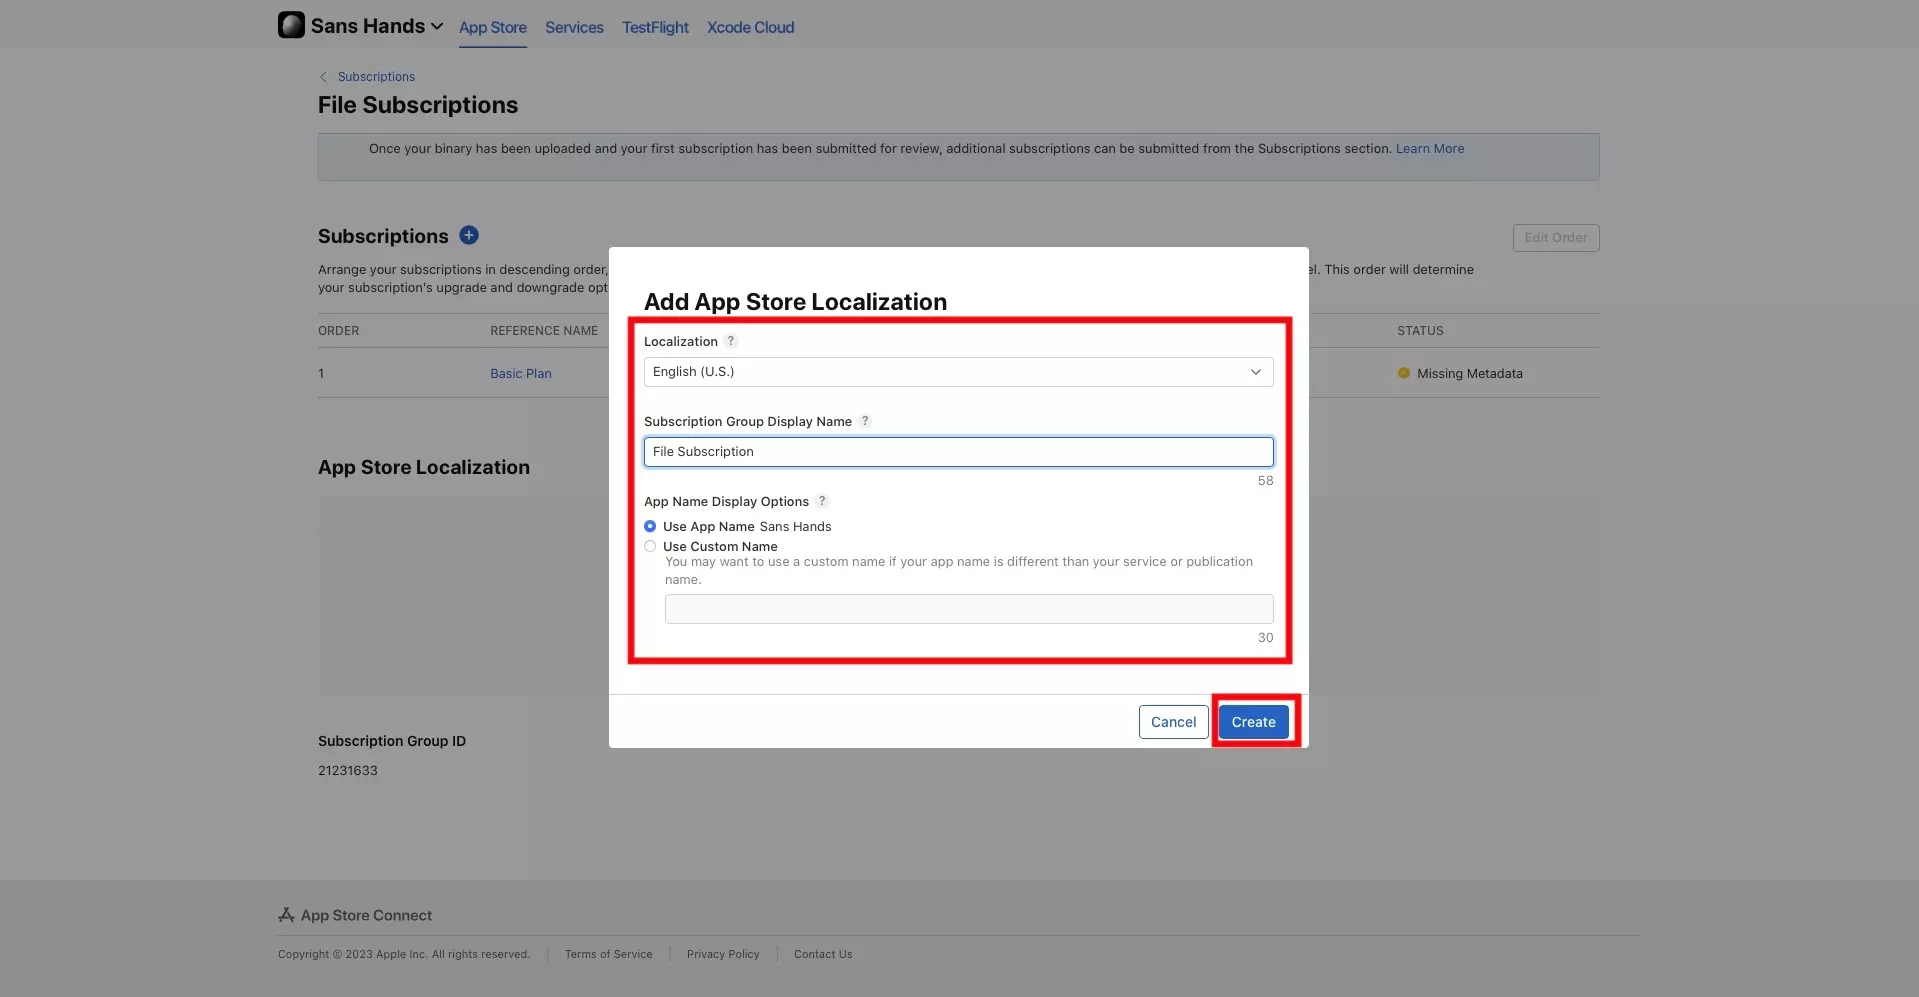
In the Add App Store Localization modal, select the local for the Subscription Group and give it a Display Name. Then click the Create button.

Any Questions?

We are actively looking for feedback on how to improve this resource. Please send us a note to inquiries@delasign.com with any thoughts or feedback you may have.
delasign logo

Book a Free Consultation.

An icon of an email.

Click here to email us.

Fill in the details below to book a free consultation or to let us know about something else. Whatever it is, we are here to help.

How can we help you ?

Contact Details