How to use space between in a Figma auto layout

Oscar de la Hera Gomez
A flower that represents Figma with the text "Space between in Auto Layout" beneath it.

To space items within an auto layout frame select the frame and set the auto-layout gap to Auto.

The following tutorial walks you through how to use Space Between in an auto layout frame or component. For more information on what Auto Layout is and how to use it please use the links below.

Step One: Select an auto layout frame

A screenshot of Figma highlighting a frame that uses Auto Layout.

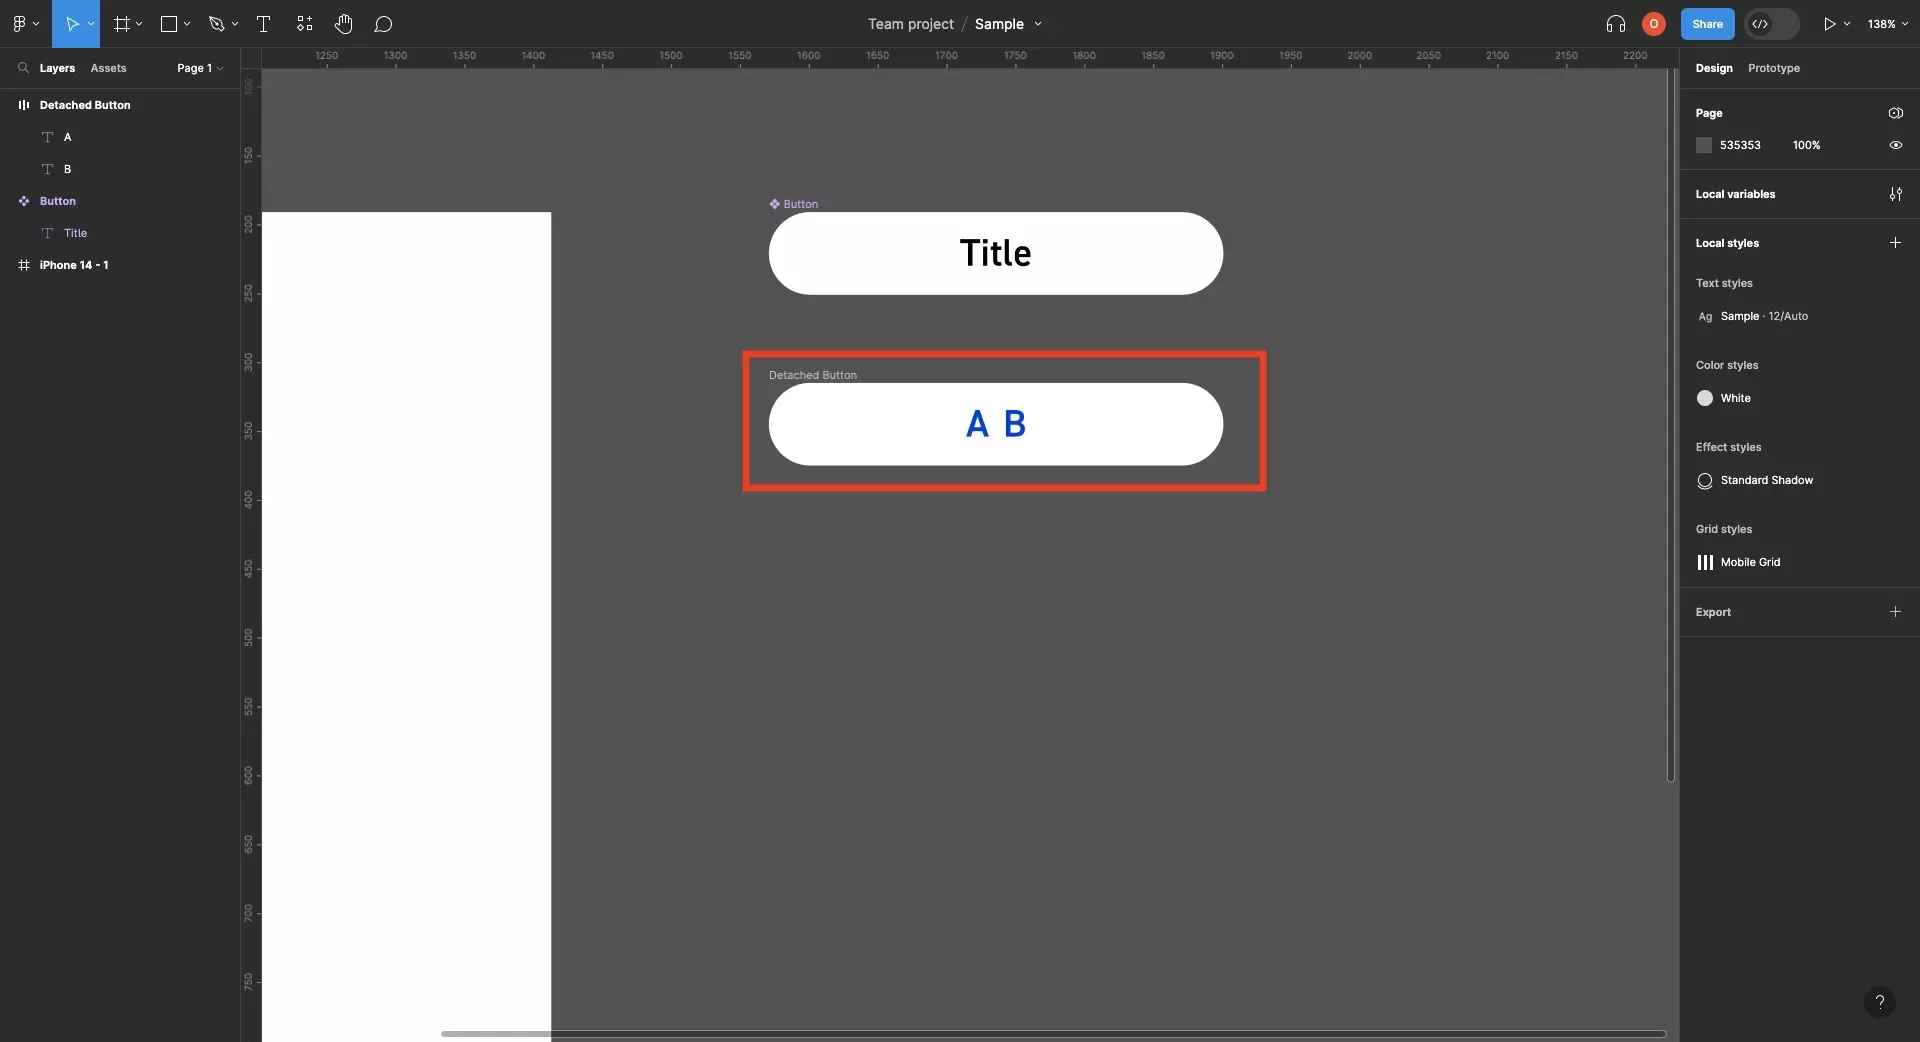
In Figma, open up a project and select a frame that uses auto layout.

Step Two: Click the Gap Dropdown

A screenshot of Figma showing a frame that uses Auto-layout selected. It highlights the dropdown icon that appears when you hover over the gap input under the auto-layout area in the right menu side bar. Click this dropdown icon.

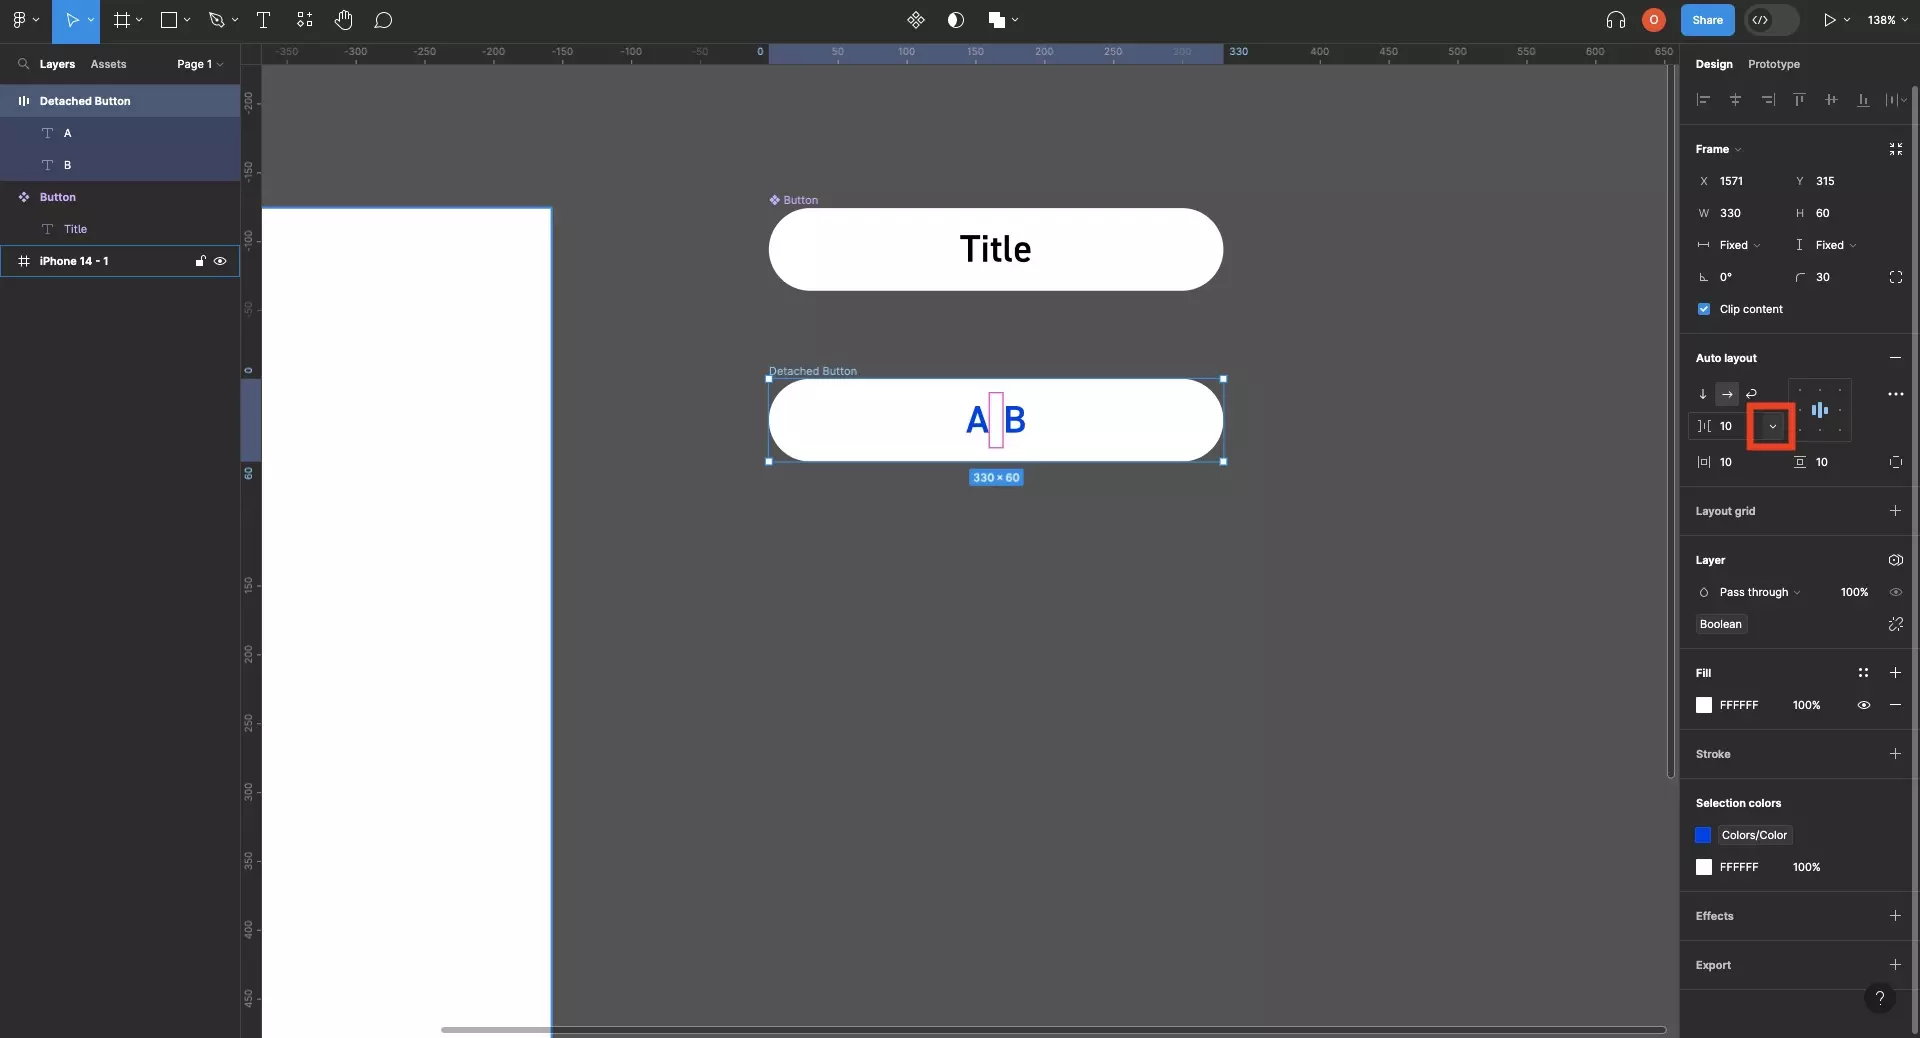
On the inspector on the right, under Auto Layout, hover over the gap input and click the dropdown.

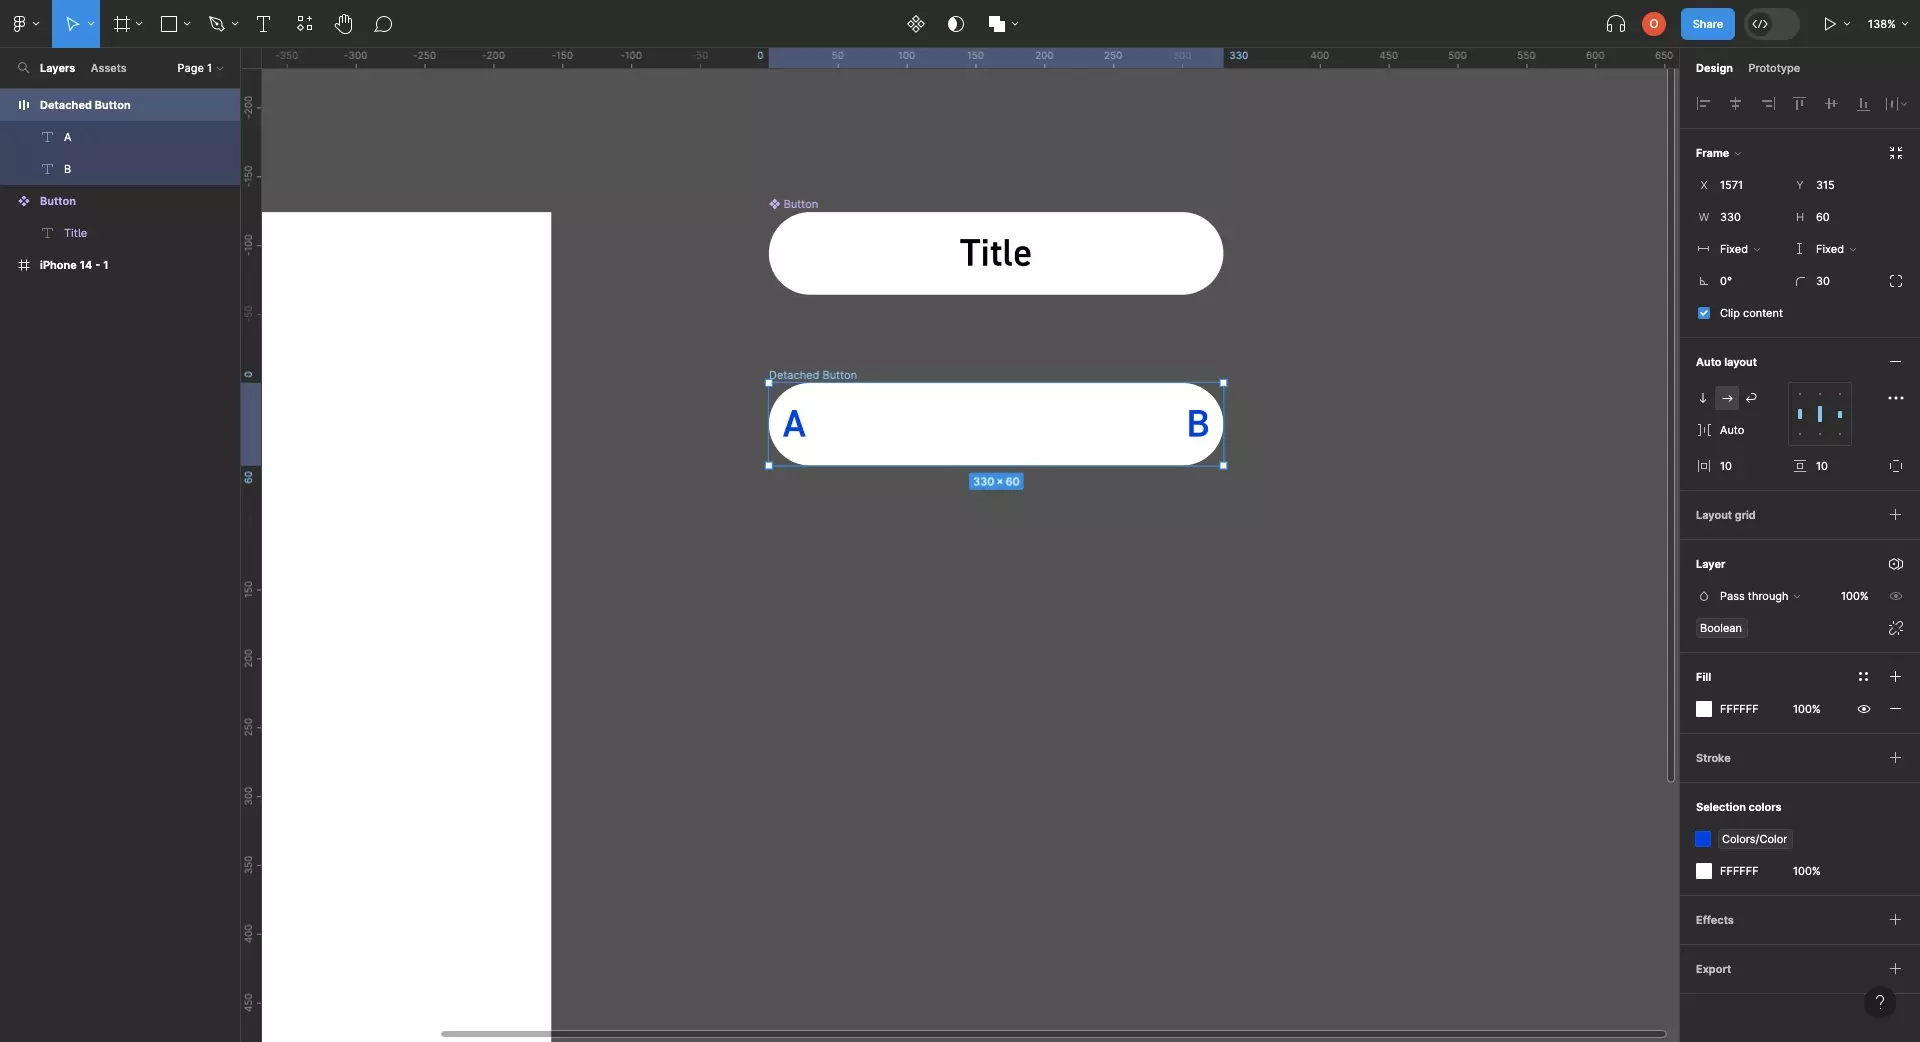
Step Three: Set to Auto

A screenshot of Figma that shows that when you click the dropdown next to the Auto Layout gap input, a menu appears from which you can select "Auto". Click this to make the auto-layout frame use space-between.

In the menu that appears, click Auto.

A screenshot of Figma showing that the frame now uses space-between.

Looking to learn more about things you can do with Figma ?

Search our blog to find educational content on learning how to use Figma.

Any Questions?

We are actively looking for feedback on how to improve this resource. Please send us a note to inquiries@delasign.com with any thoughts or feedback you may have.
delasign logo

Book a Free Consultation.

An icon of an email.

Click here to email us.

Fill in the details below to book a free consultation or to let us know about something else. Whatever it is, we are here to help.

How can we help you ?

Contact Details