How to add Git LFS to a project
A step by step guide on adding git large file storage (lfs) to a project using Terminal.


A step by step guide on adding git large file storage (lfs) to a project using Terminal.
SubscribeDiscover Git LFSRead Github's Setup GuideStep One: Install Git LFS
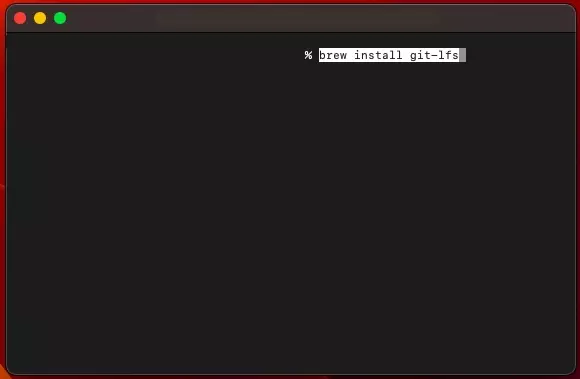
Open Terminal and install Git LFS the following line:
brew install git-lfsIf you do not have homebrew, consult the git lfs install guide or install homebrew using the links below.
Step Two: Set the Current Directory
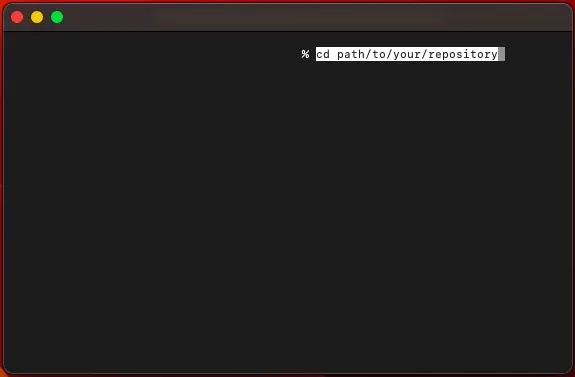
In Terminal, set the current directory to the folder that holds the repository.
cd path/to/your/repositoryStep Three: Track Files
To start using git lfs you must associate it with a file, or type of file in your repository.
Track File Types
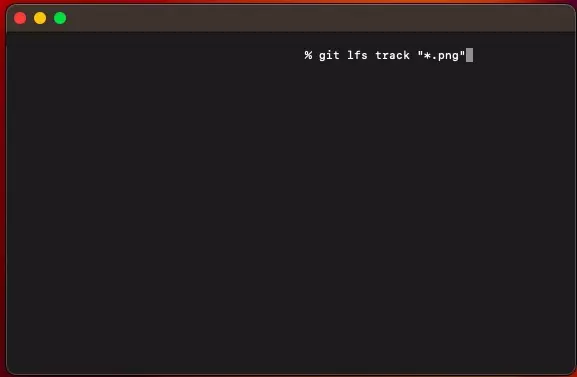
To track all file types (i.e. all pngs) use a line similar to that below.
git lfs track "*.filetype"Track Specific Files
To track specific files, use a line similar to that below. Please note that the path is relative to the project.
git lfs track "path/to/file.filetype"Untrack files
If something went wrong and you want to untrack files or file types, use a line similar to that below.
git lfs untrack "pattern"Make changes outside terminal
To make changes without using Terminal, edit the .gitattributes file.
Step Four: Sync
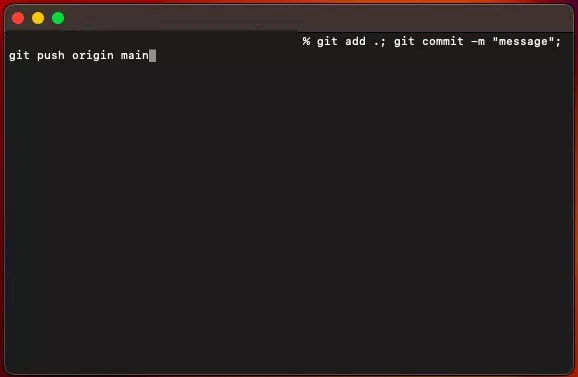
Finally, sync the changes with your repository to complete the changes.
git add .; git commit -m "message"; git push origin mainDid something go wrong ?
Consult our troubleshooting Git LFS guide to resolve your problem.