How to add colored labels to tickets in JIRA

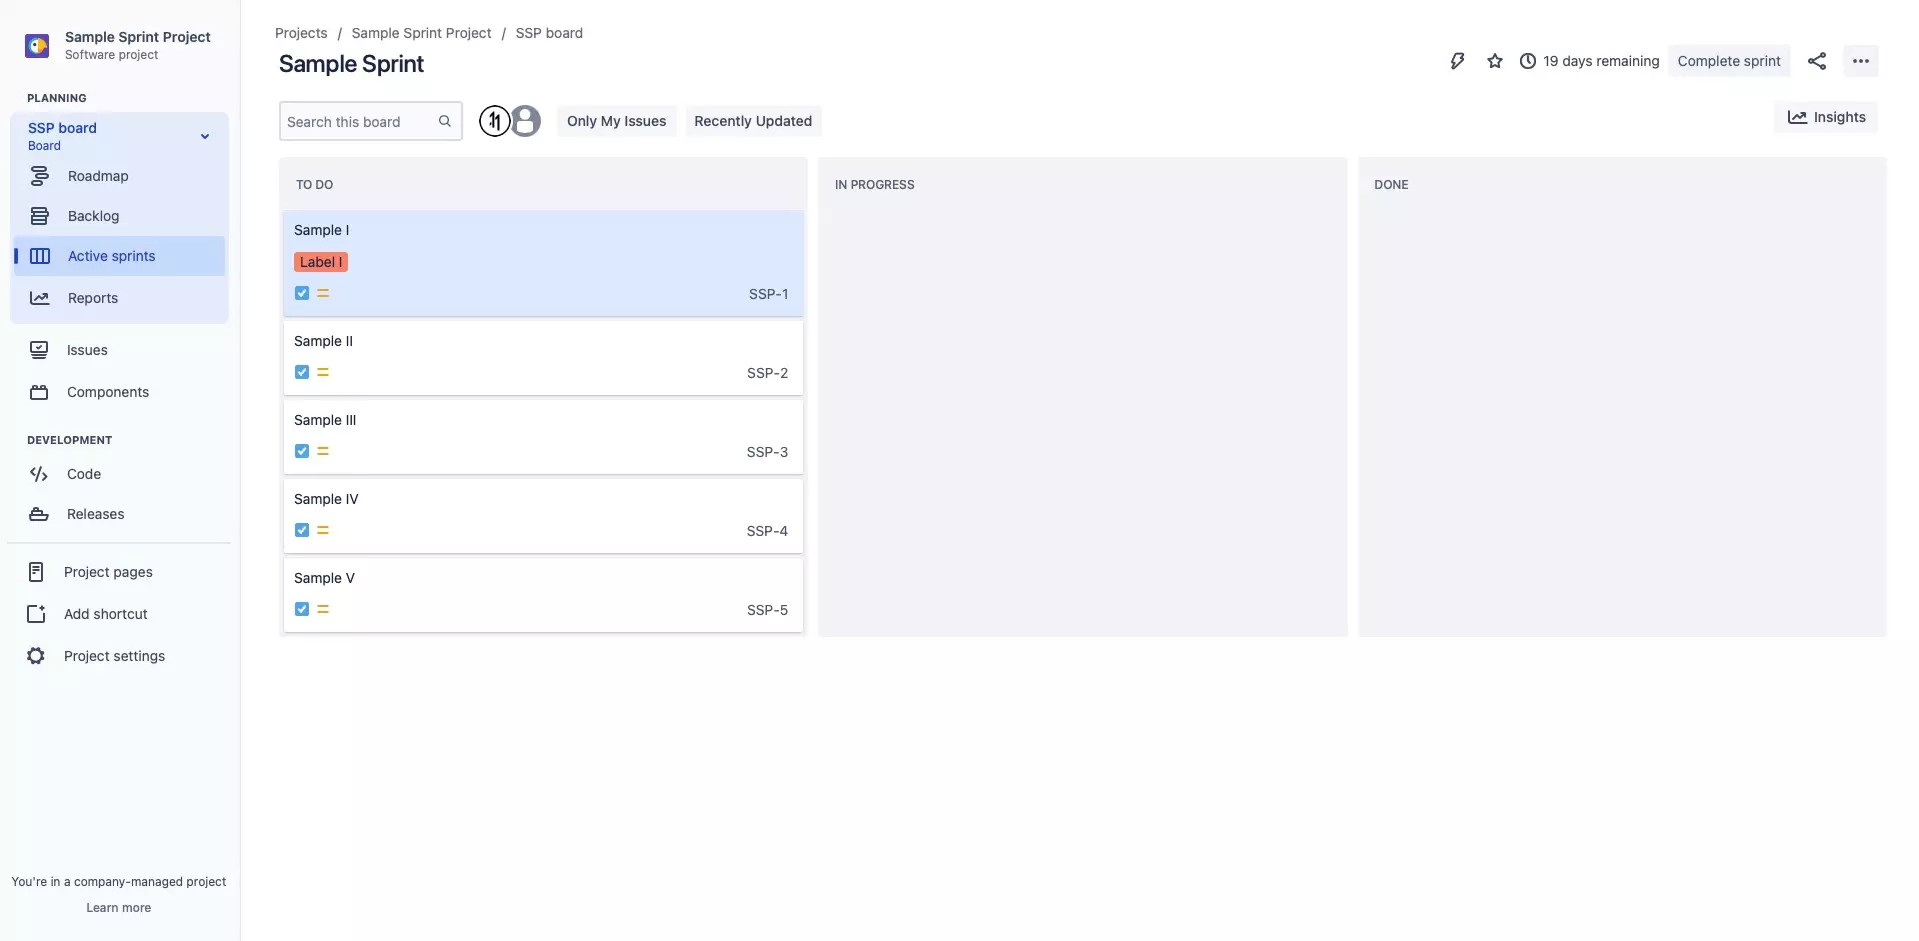
Colored labels can be applied to issues in JIRA through Epics.
Step One: Select Roadmap
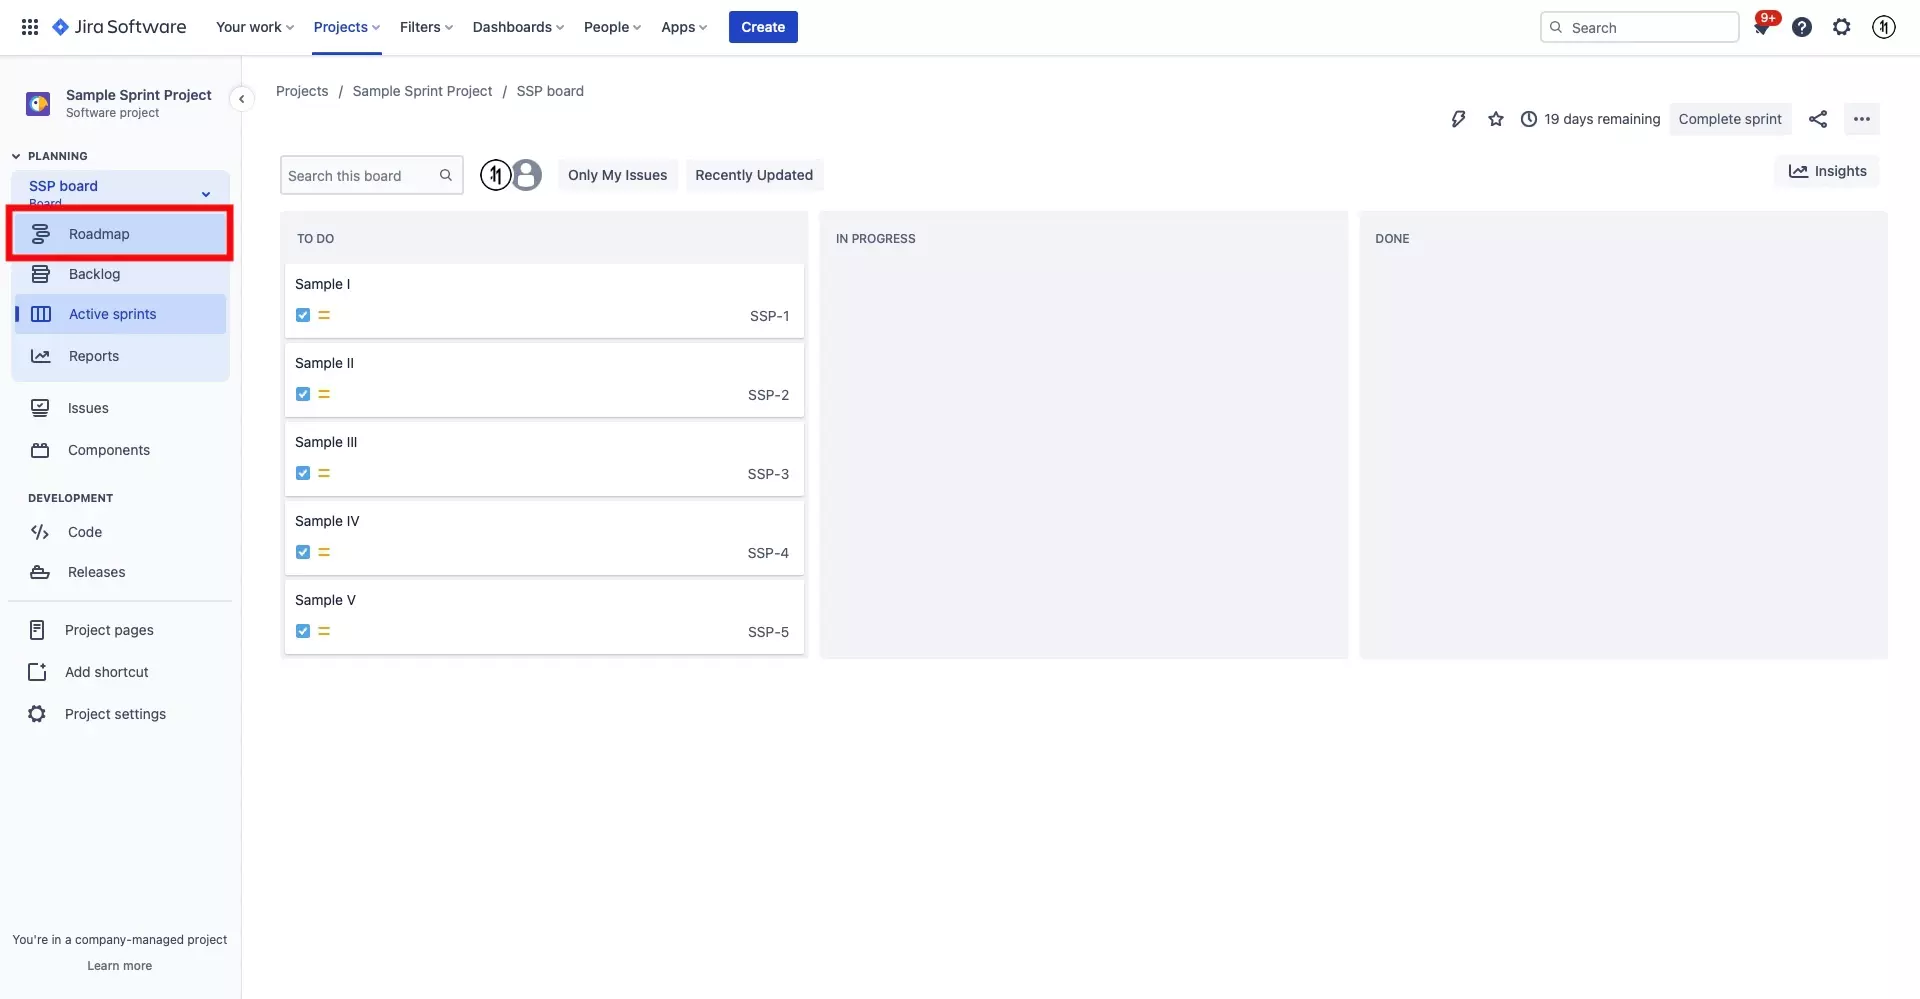
On the Jira project that you wish to apply colored labels to, select Roadmap from the left menu sidebar.
Step Two: Create an Epic
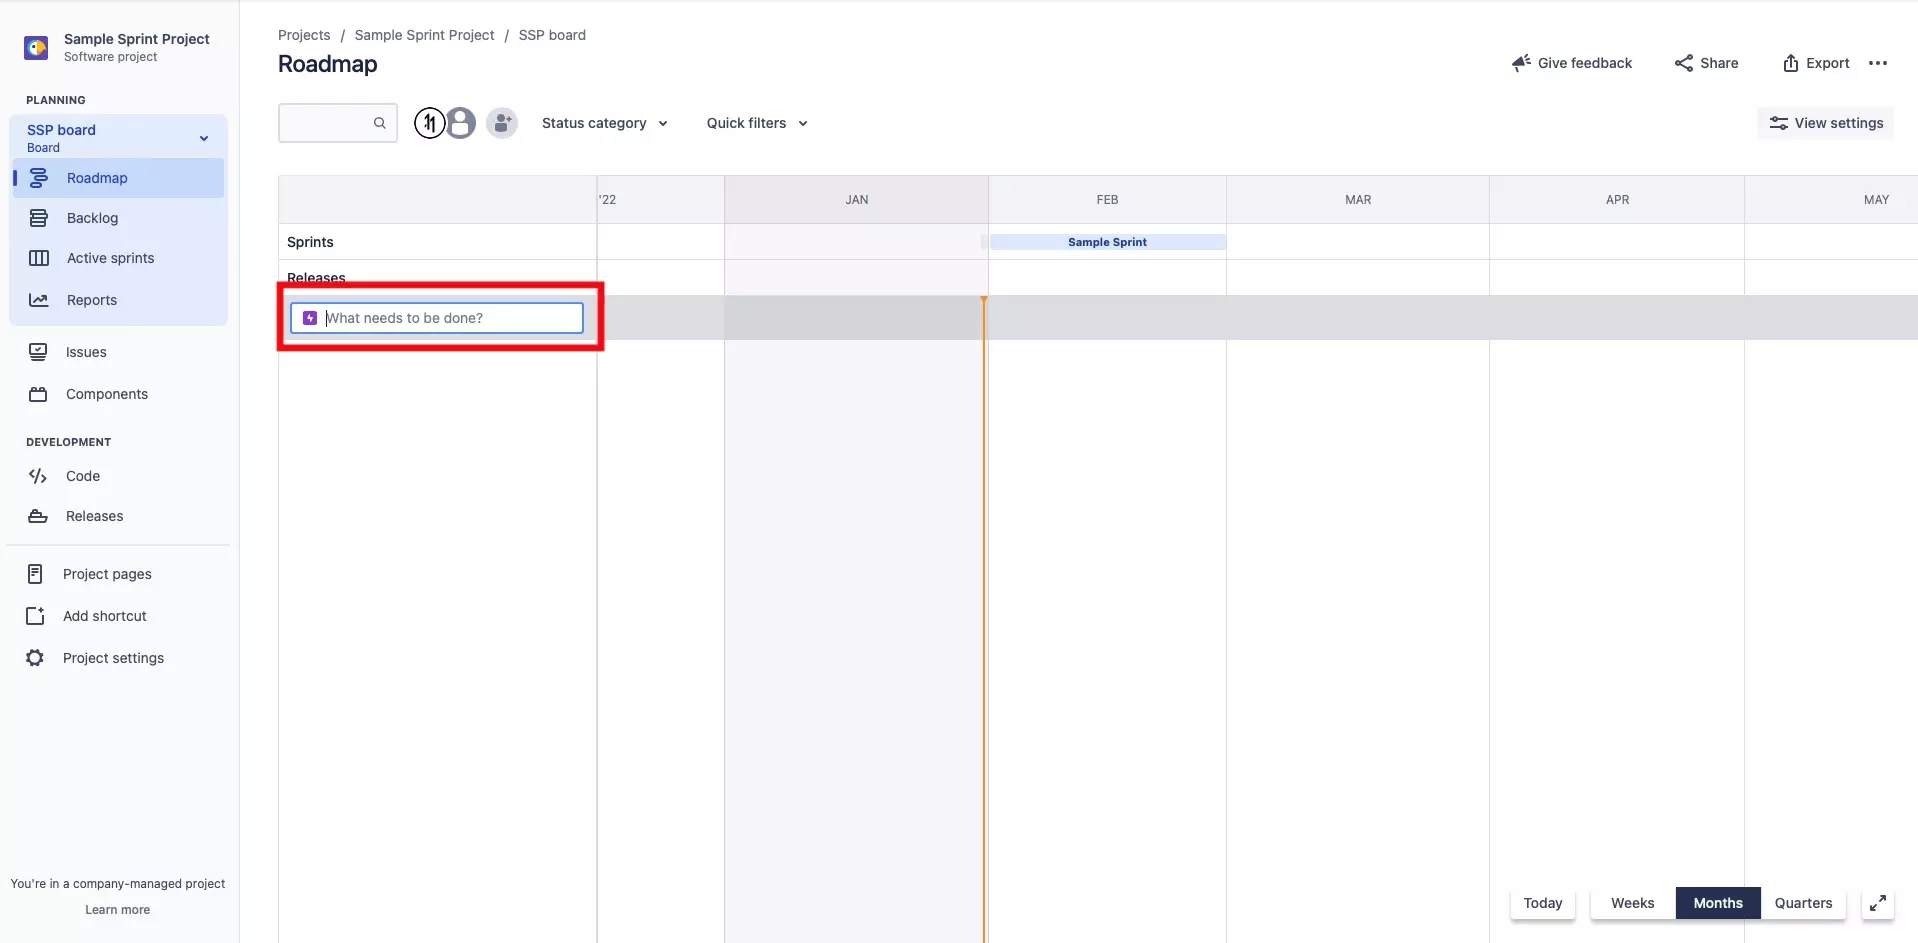
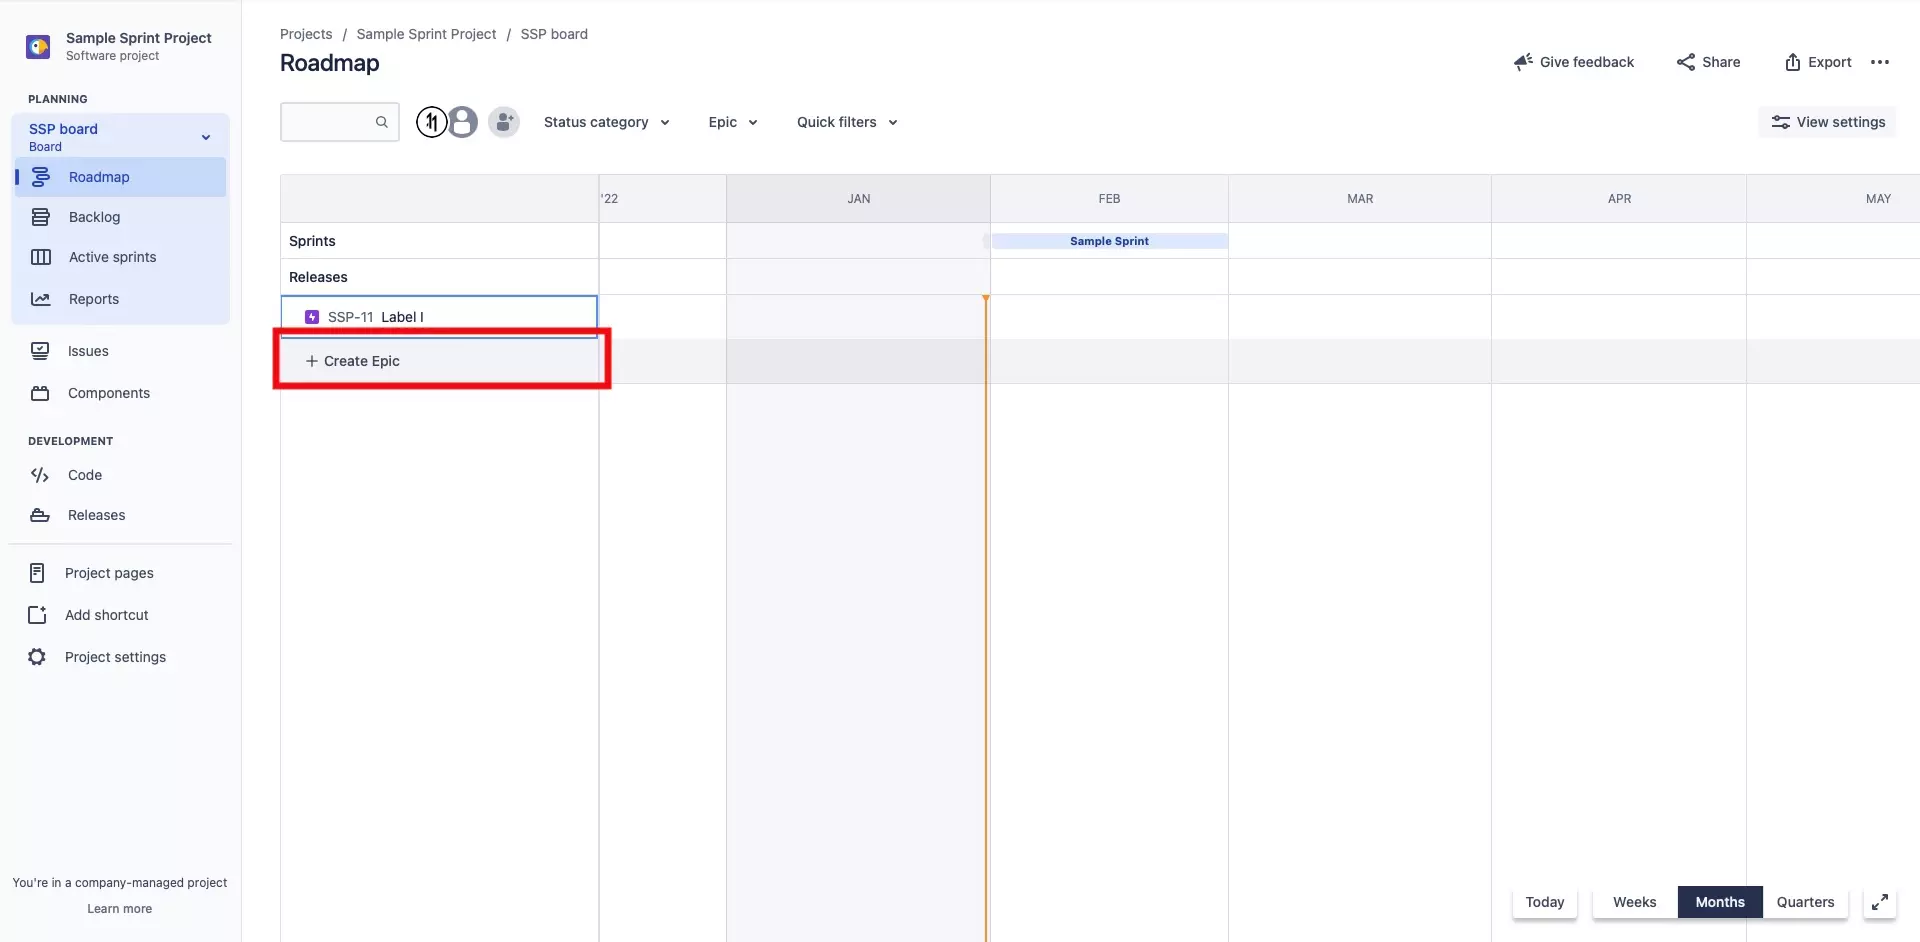
When you navigate to the Roadmap page, depending on whether you have an existing epic or not, it will default to creating an epic or show you the existing epics respectively.
If you do not have an Epic (label), type in your Epic (label) name and press enter.
If you wish to create a new epic, select + Create Epic to create a new epic.
Step Three: Select the Epic
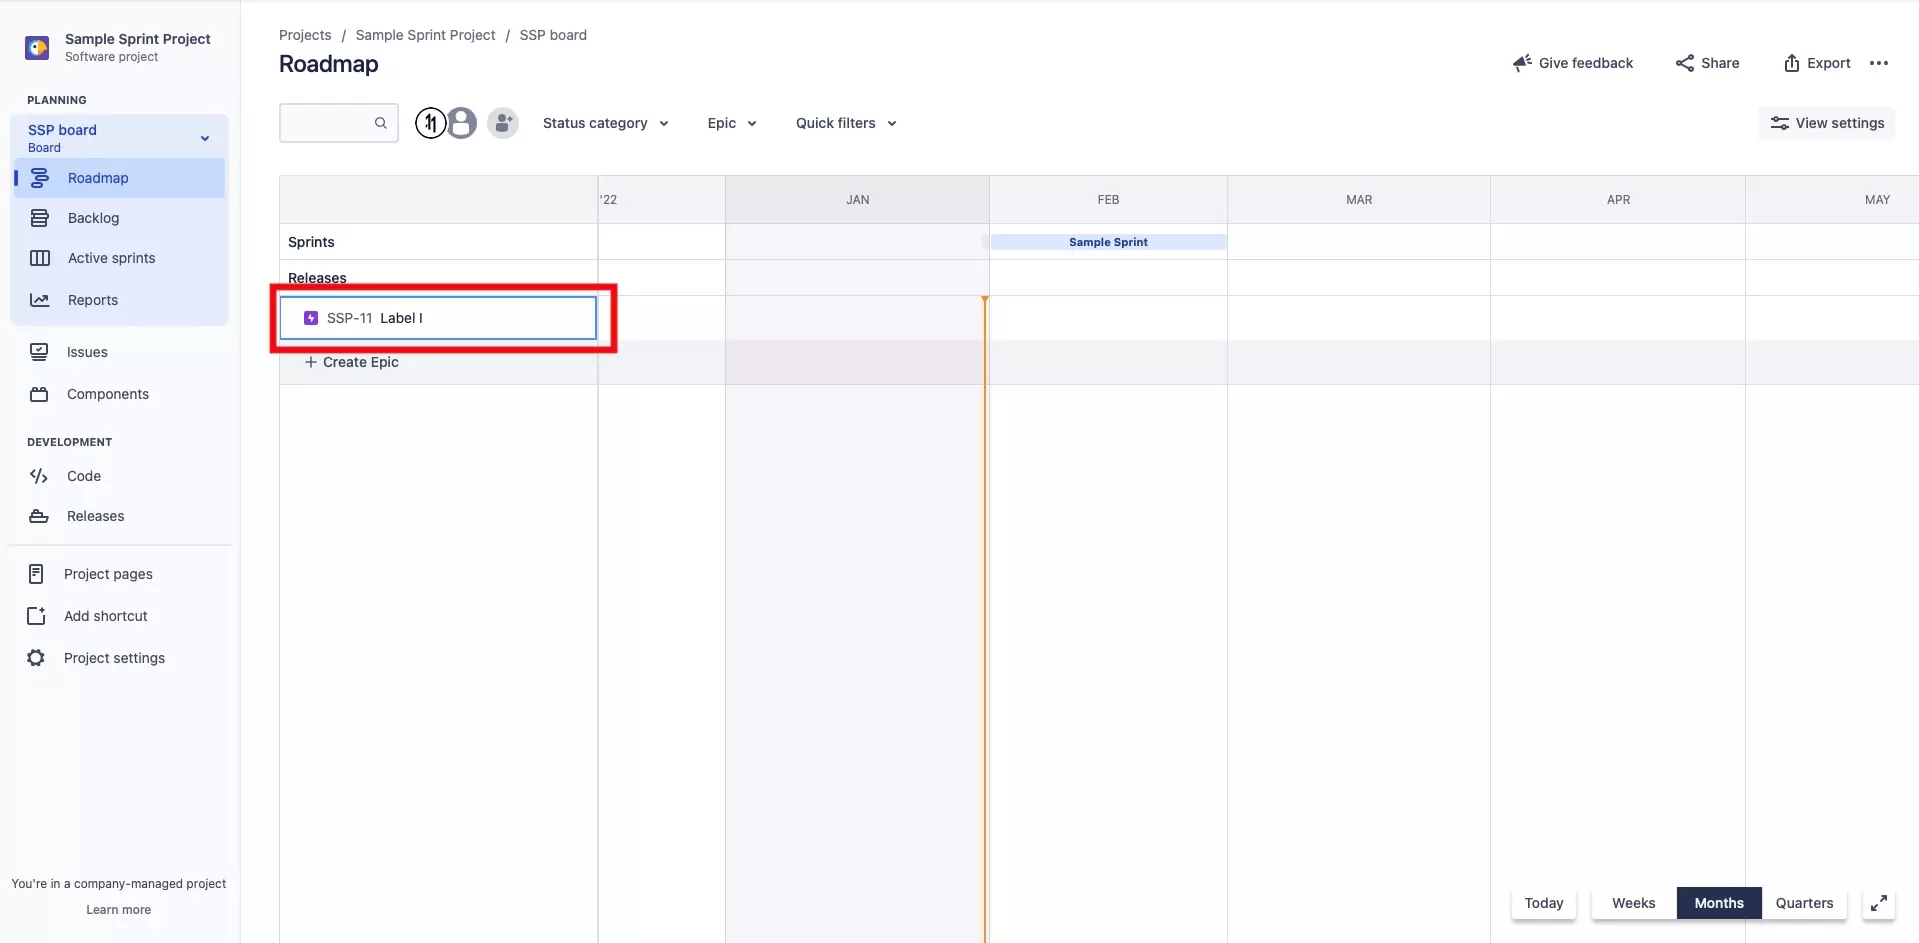
All Epics default to a purple color, to change this color select the Epic.
Step Four: Press the Colored Square
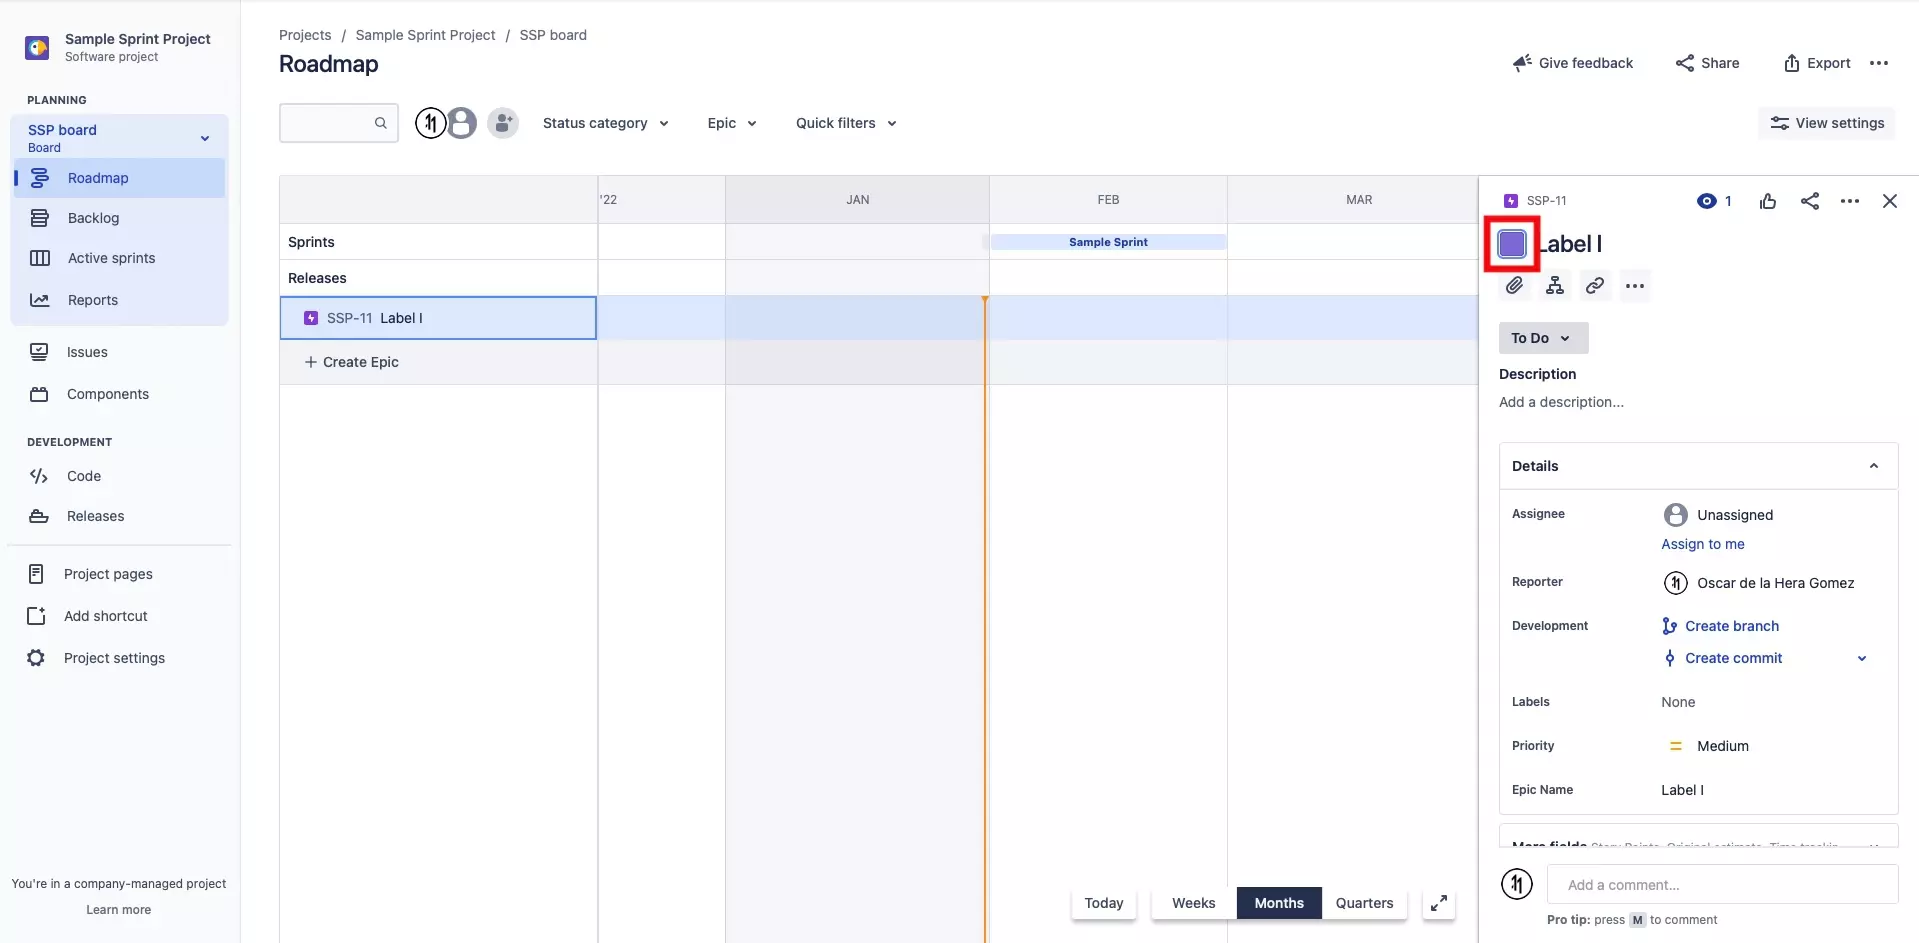
In the modal that appears on the right, select the colored square next to your Epic's name (i.e. Label I).
Step Five: Set the Color
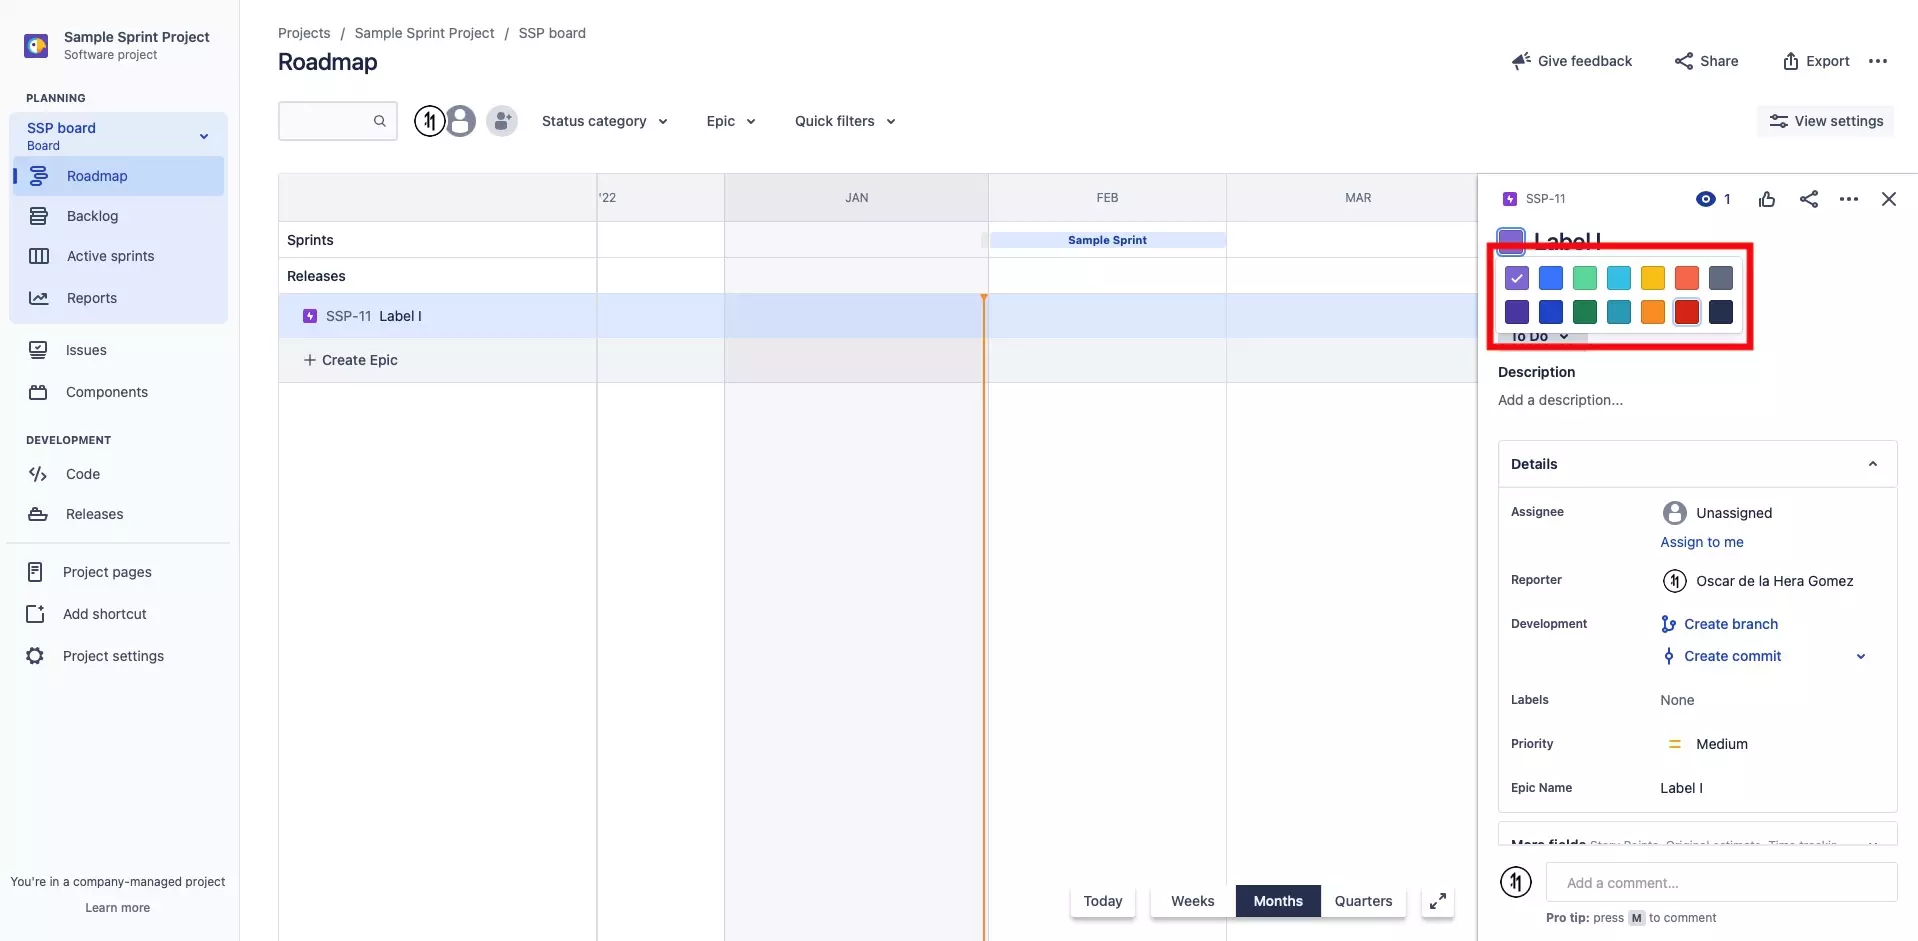
A pop up will appear under the colored square that you pressed in Step Four.
Select the color that you wish to change your Epic (label) to.
If you now navigate to your Active Sprint or Board and set the Epic of a ticket (issue) you will see that the ticket now carries a colored label.
