How to add Priority to tickets in JIRA
A step by step walkthrough on adding priority to tickets of any issue type in JIRA.

A step by step walkthrough on adding priority to tickets of any issue type in JIRA.
Step One: Open up a JIRA Project

Login to JIRA and select the project you wish to add Priority to.
Step Two: Select Project Settings

From the menu on the left, select Project Settings.
Step Three: Select Issue Types
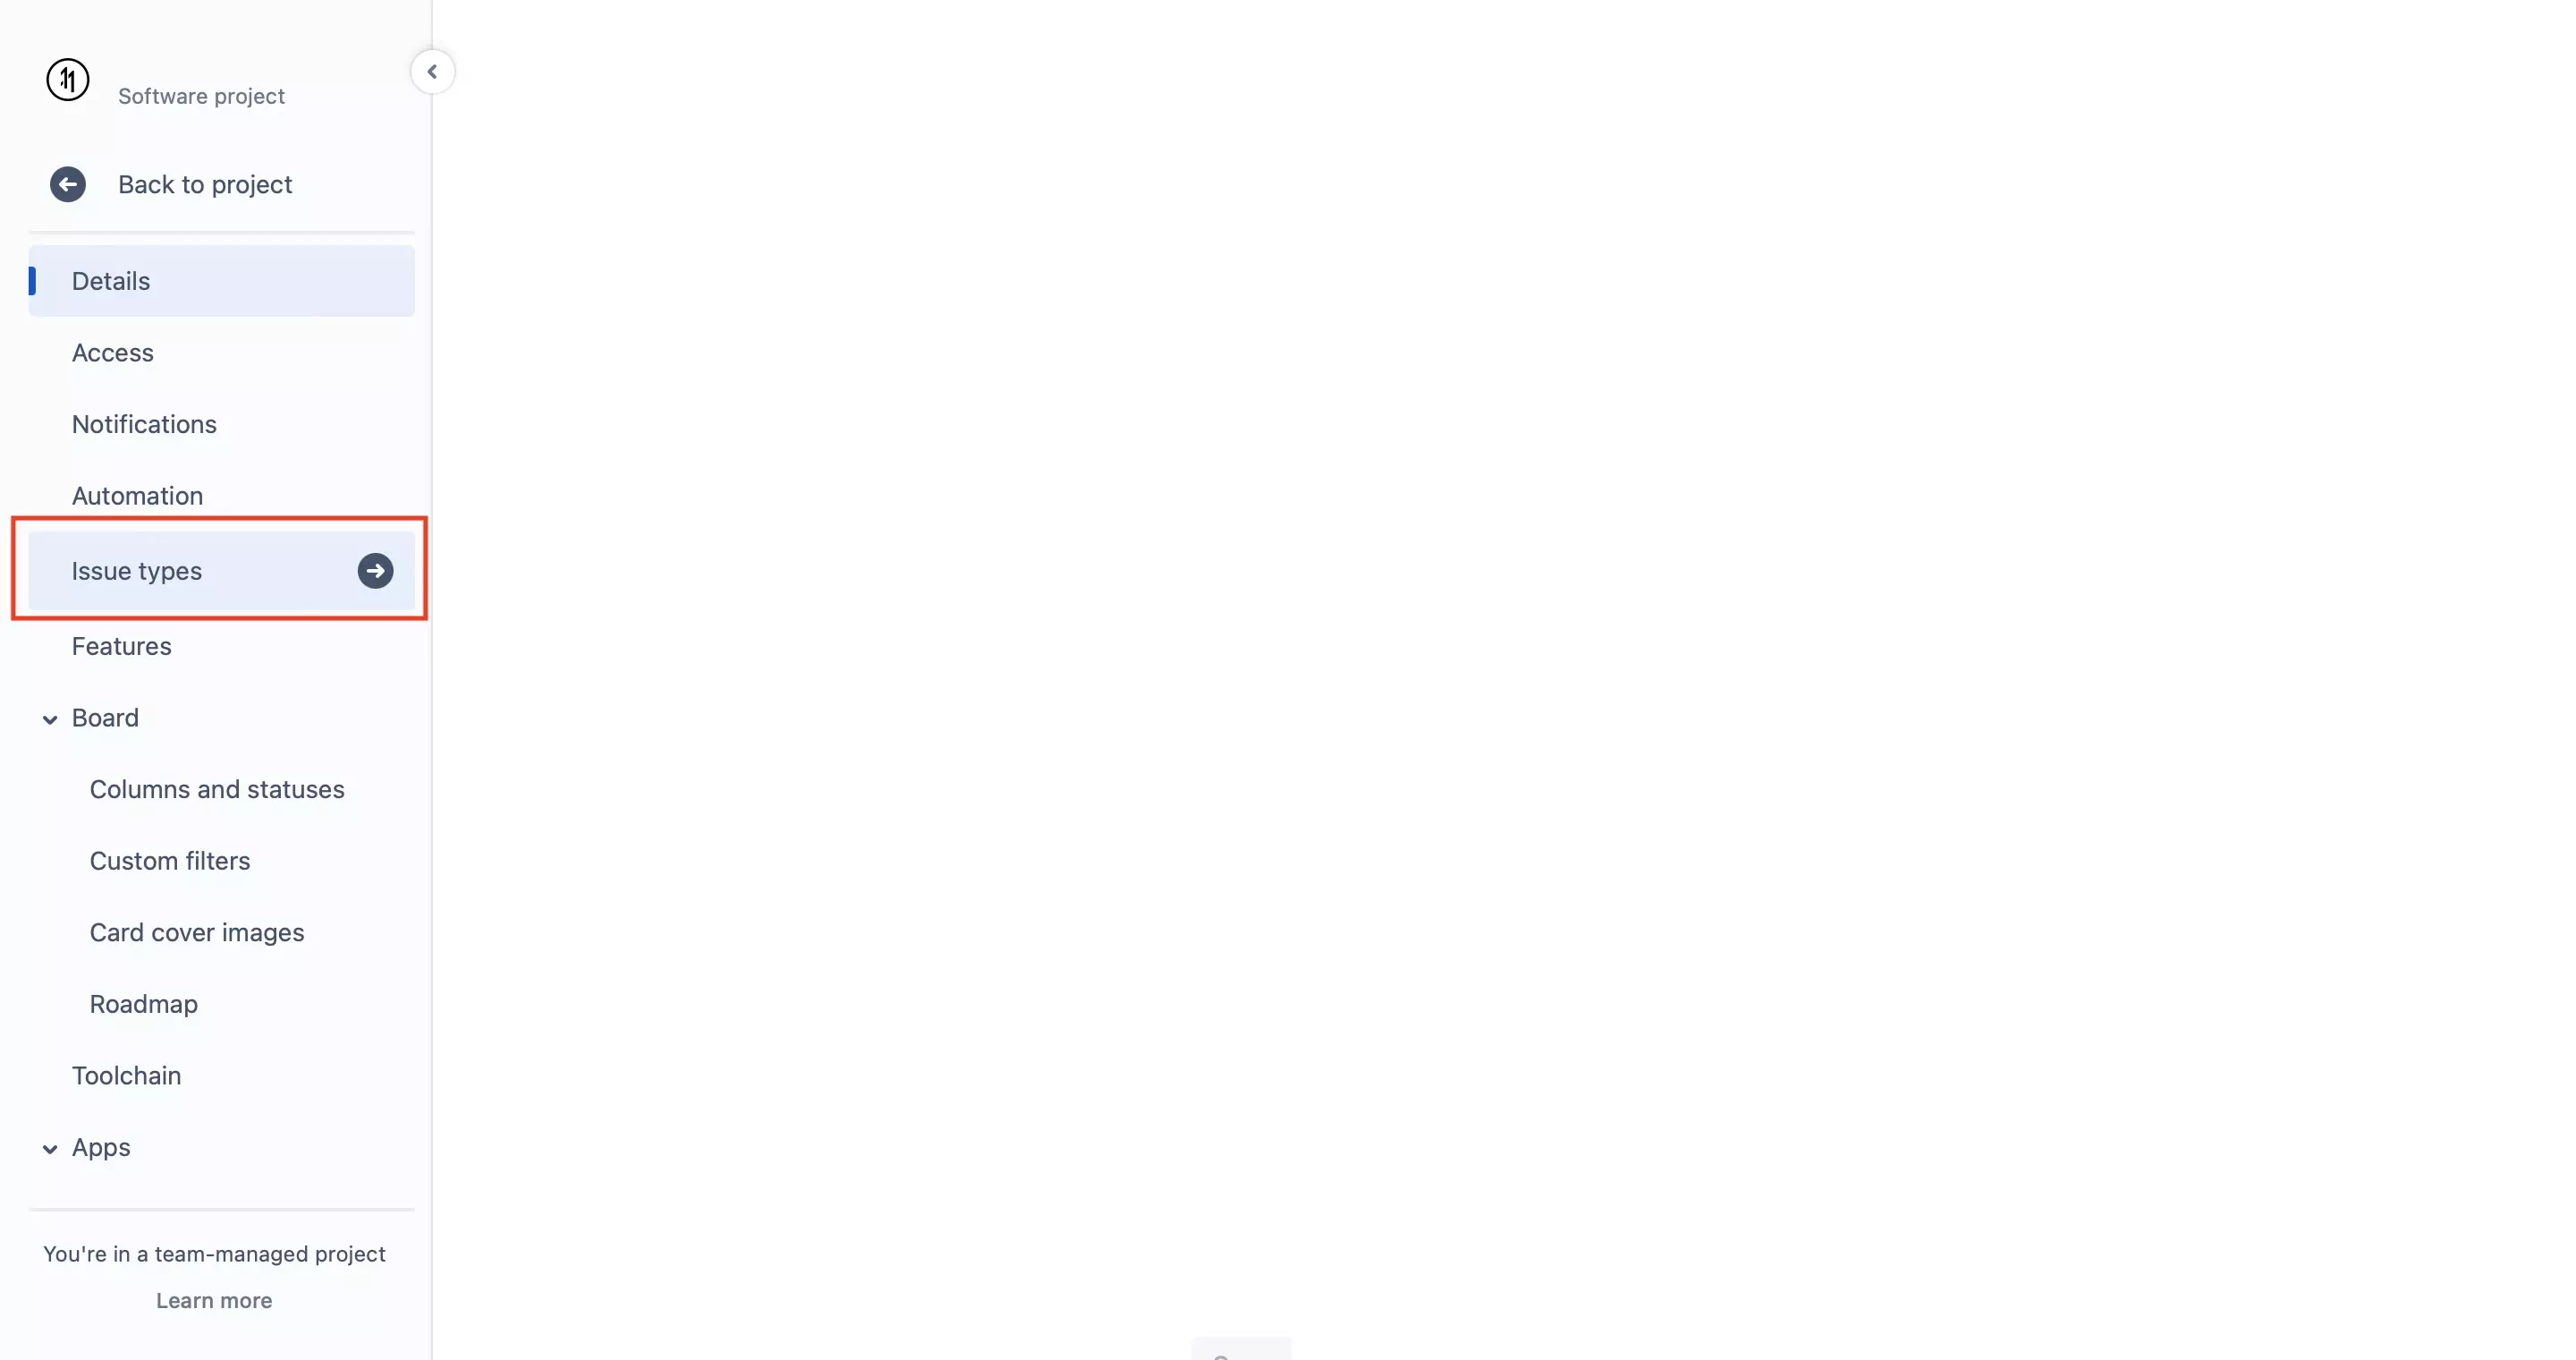
From the menu on the left, select Issue Types.
Step Four: Select the issue type and drag in priority
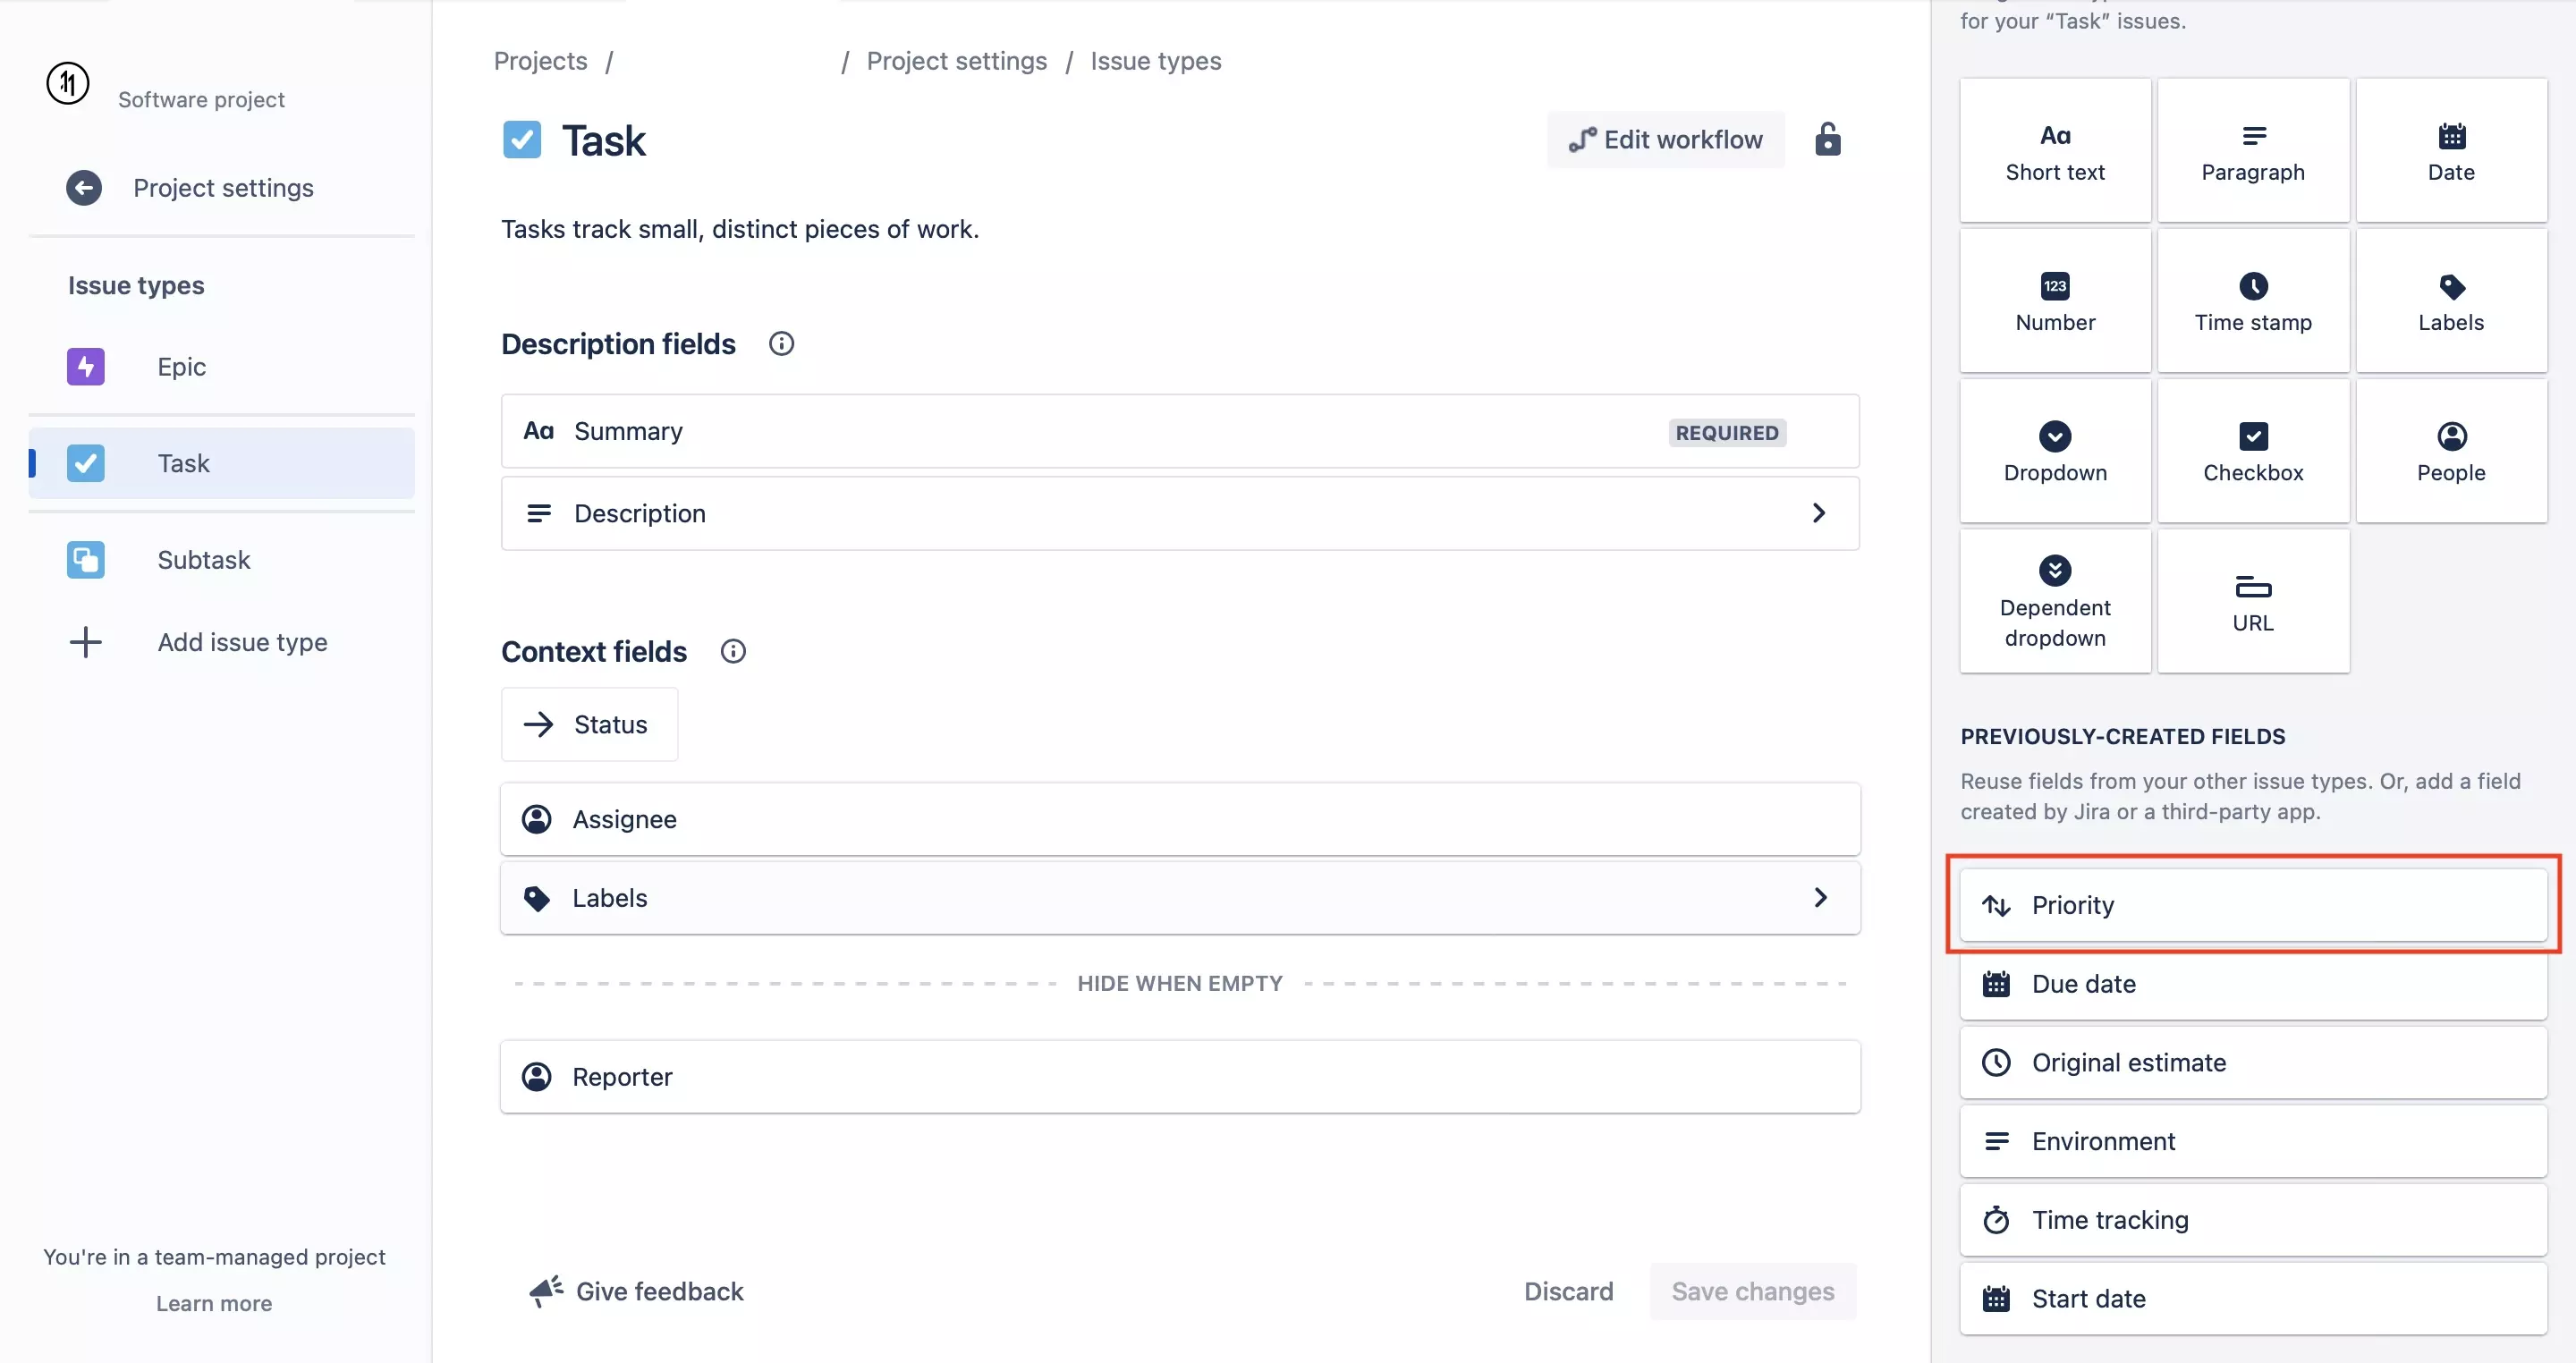
On the page that appears, select the issue type you wish to apply priority to from the menu on the left.
Subsequently, on the menu on the right scroll down to priority and drag it into your issue type. We recommend adding it under Context Fields, below Assignee.
Step Five: Save Changes
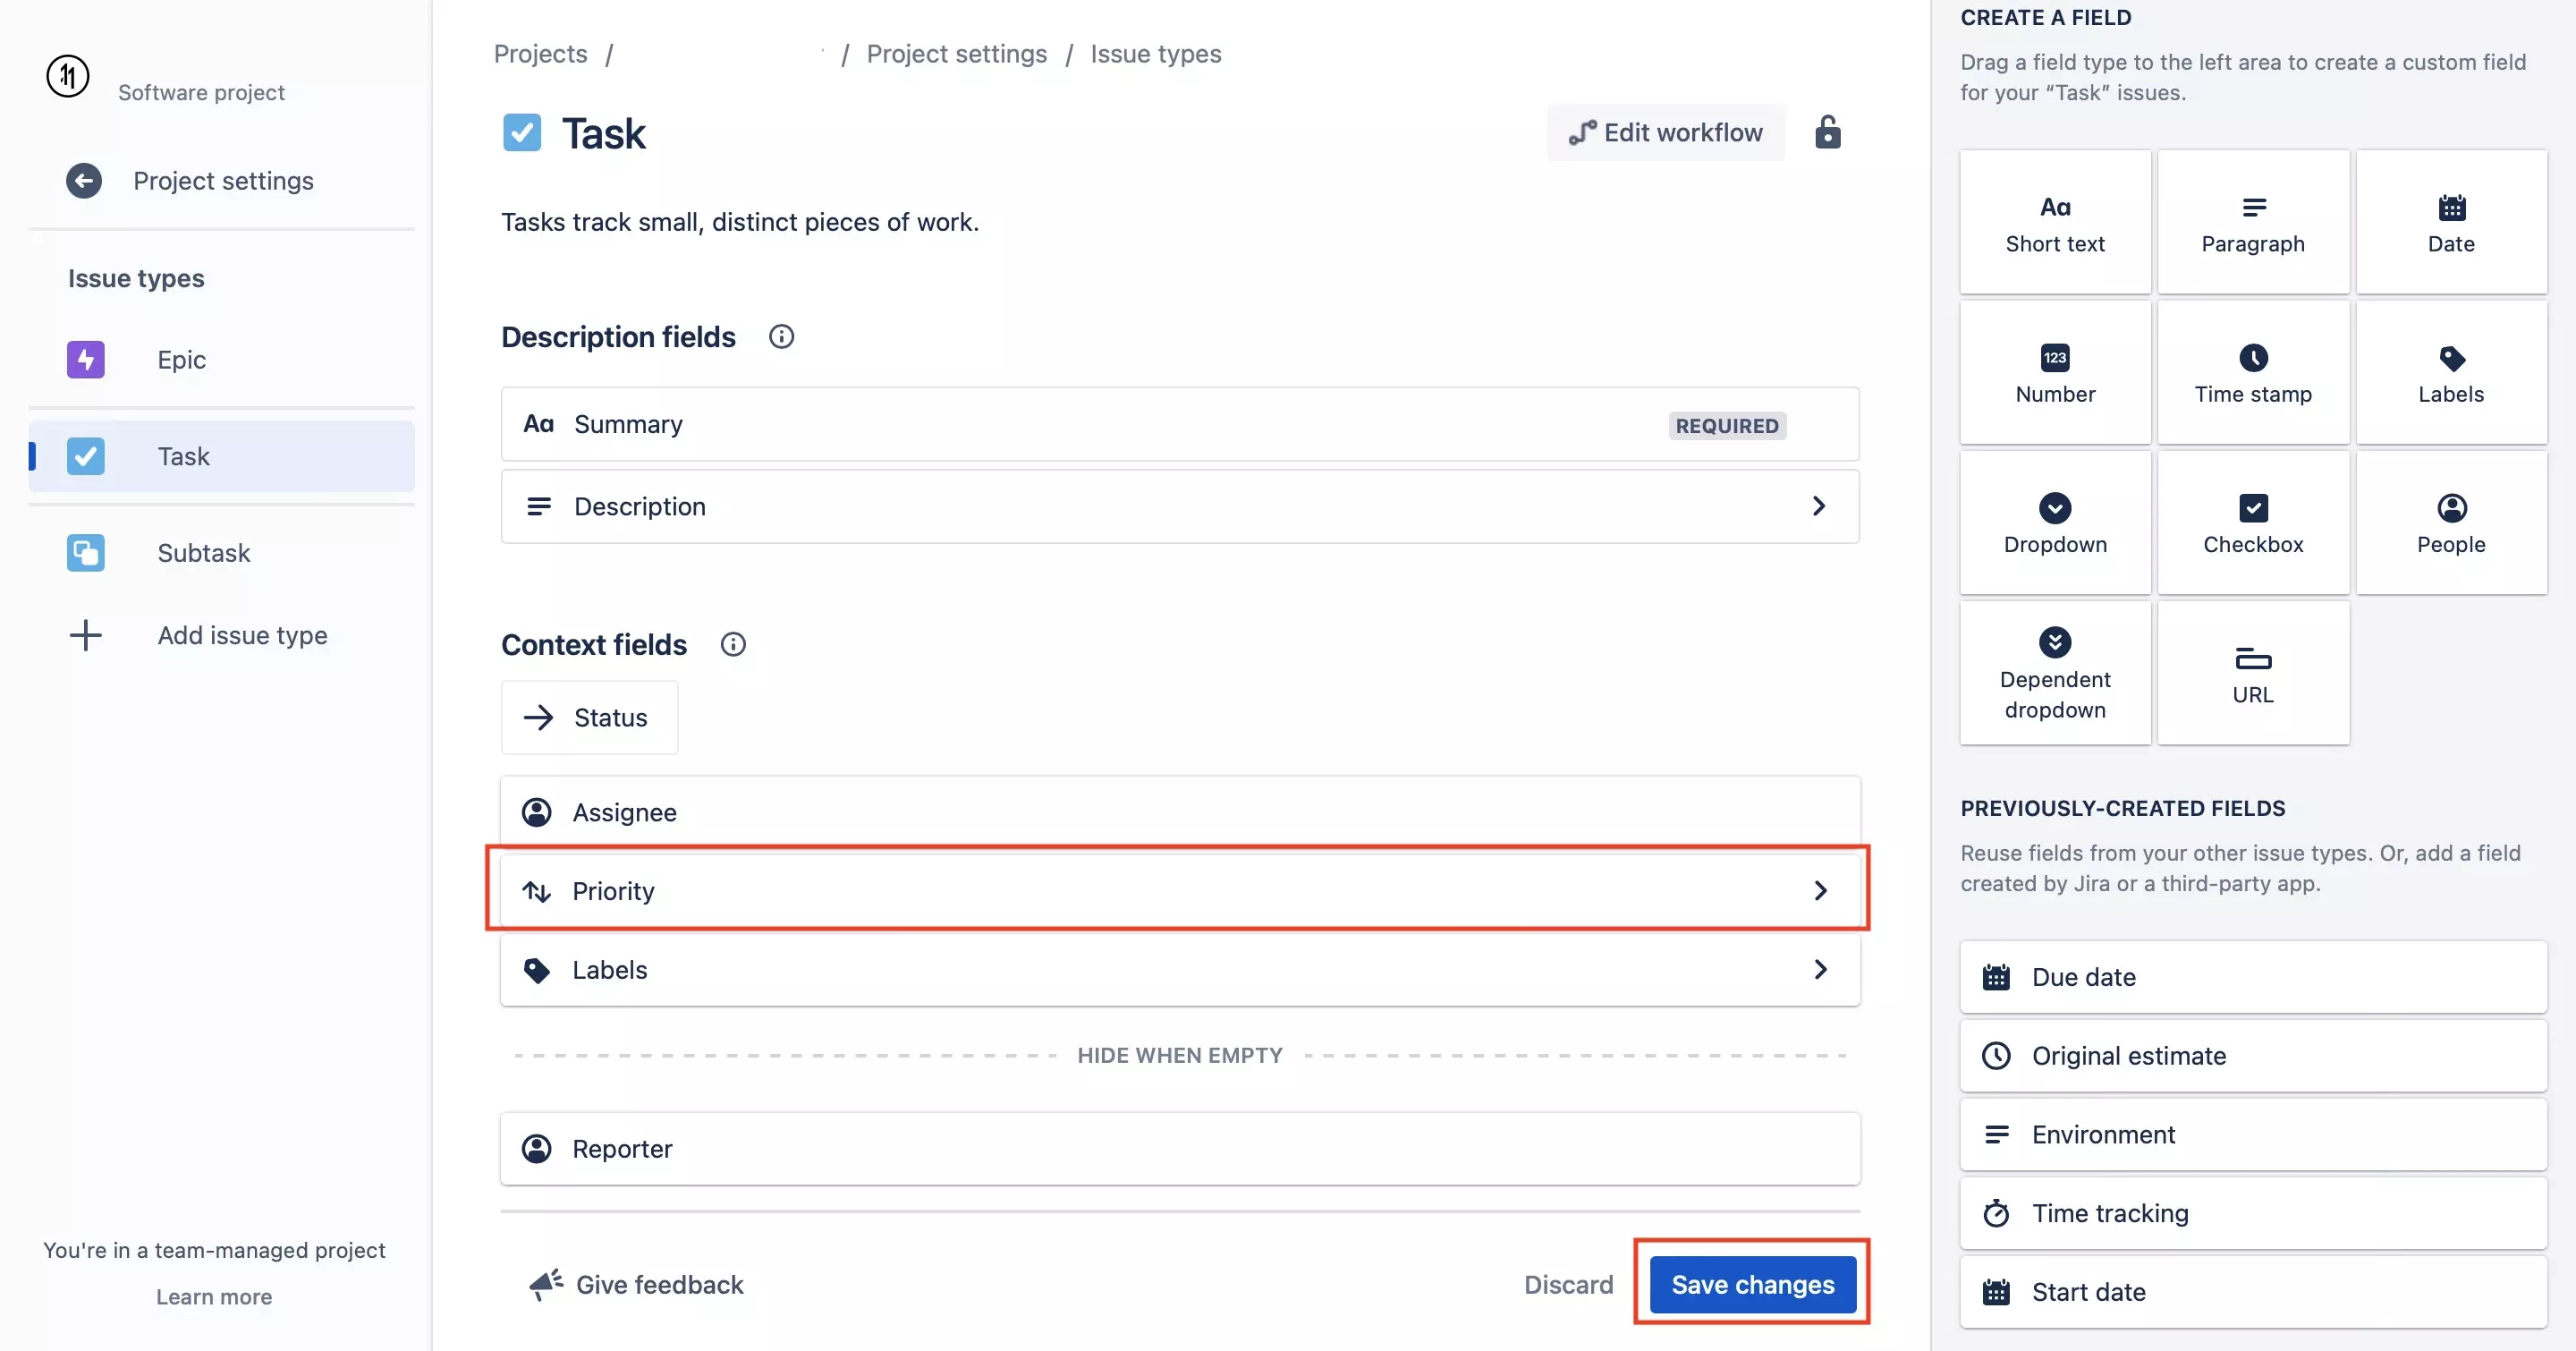
Once you have added priority into the right location, press Save Changes on the bottom right of the page.
Any Questions?
We are actively looking for feedback on how to improve this resource. Please send us a note to inquiries@delasign.com with any thoughts or feedback you may have.