How to add sprints to an existing JIRA project

Oscar de la Hera Gomez
A flower that represents JIRA with the text "Add Sprints" beneath it.

A step by step walkthrough on enabling sprints on a Kanban JIRA project.

Please note that the project must be team managed for this to work.

If the project is company-managed, this tutorial will not work but the principles remain the same.

Step One: Select Project settings

On the menu side bar of your project, there is a button called "Project settings" press it and continue to the next step.

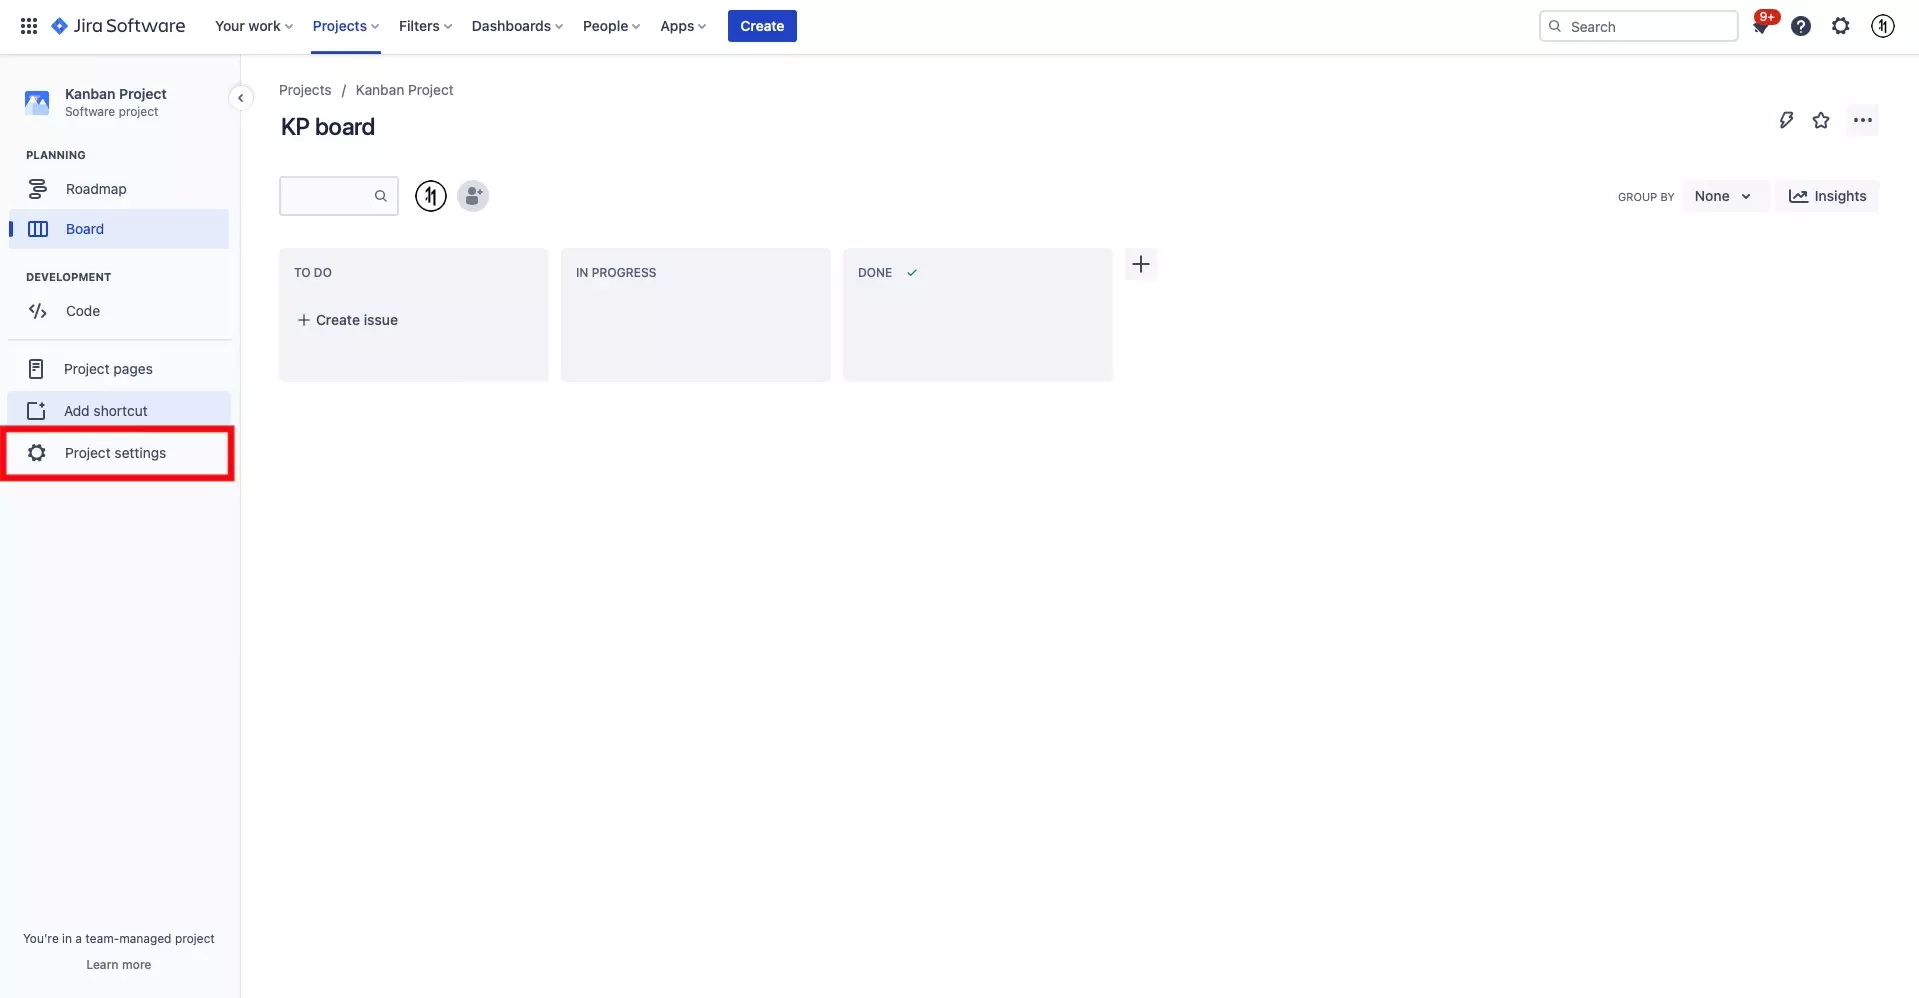
On the JIRA project that you wish to add the sprints feature to, select Project settings.

Step Two: Select Features

On the Project settings page, there is a left side bar menu with a button called "Features." Press it and move to the next step.

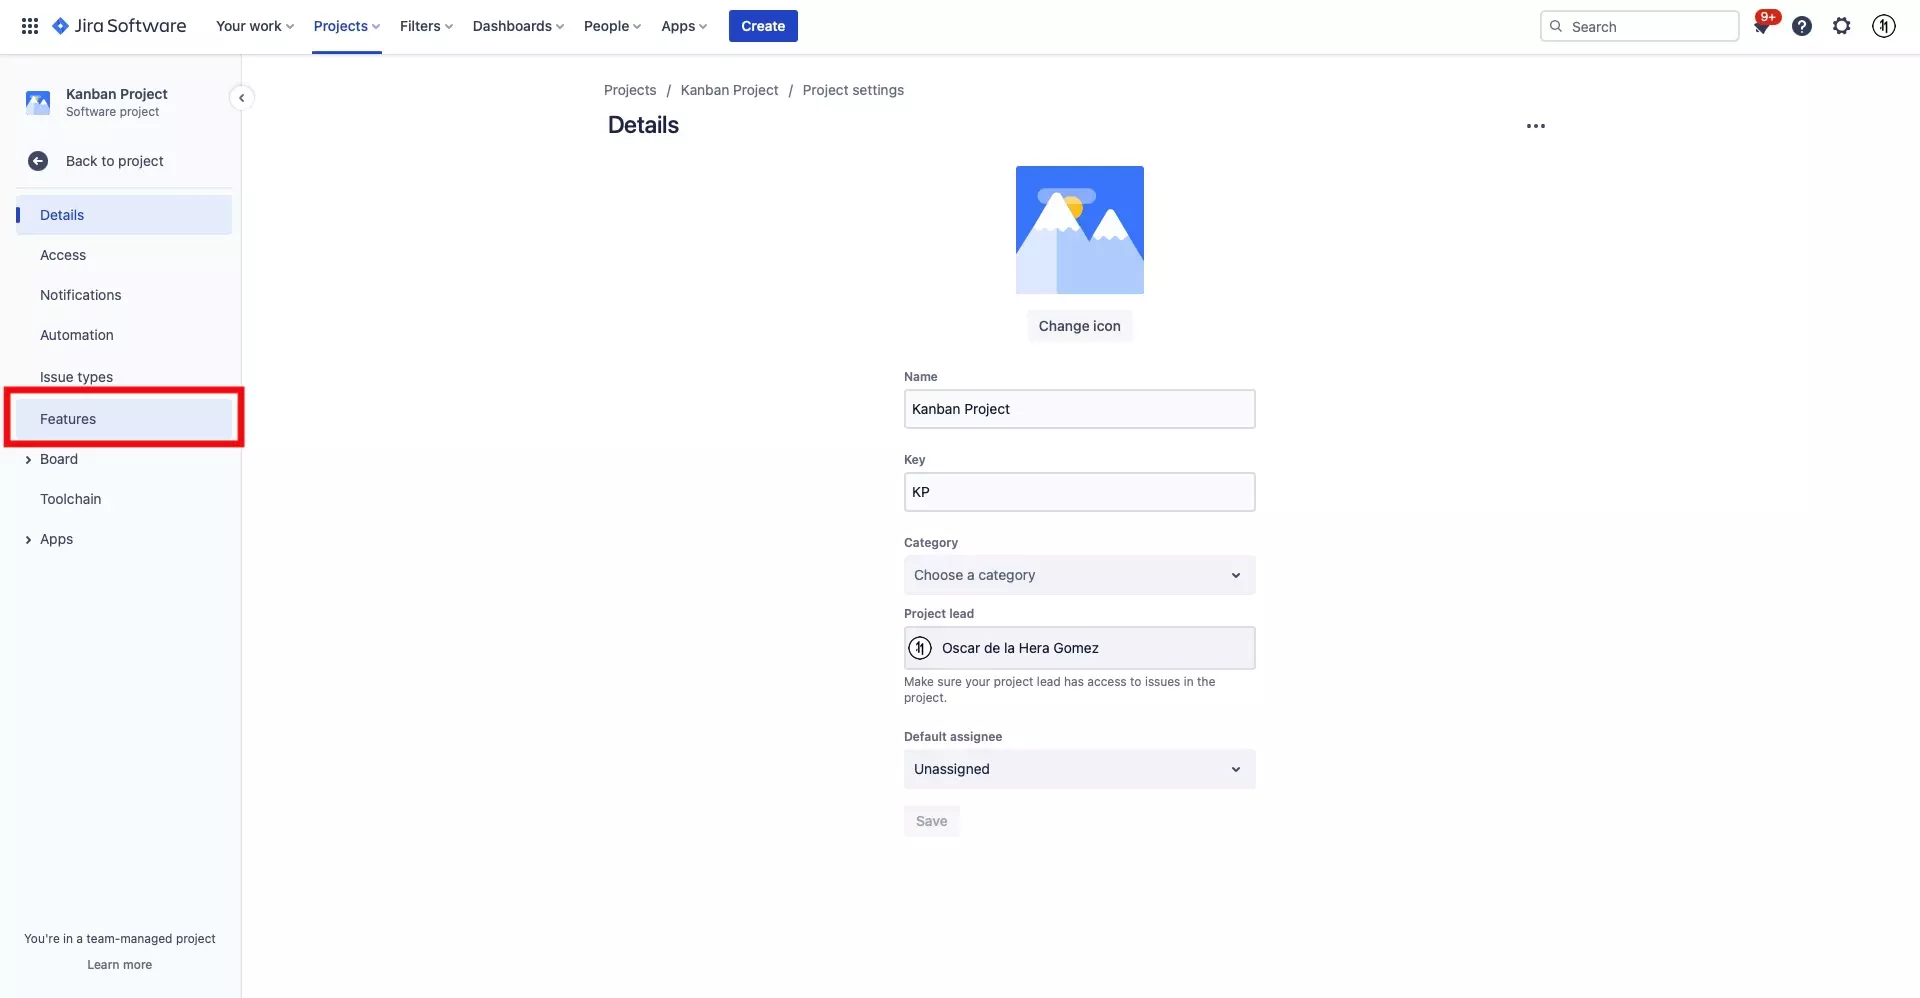
On the left menu bar, select Features.

Step Three: Turn on Backlog

In the Features page there is a column of features offered as blocks. Find the one called "Backlog" and press the switch at the end of the block to activate the backlog feature. This is required to be able to use sprints. Once ready, move to the next step.

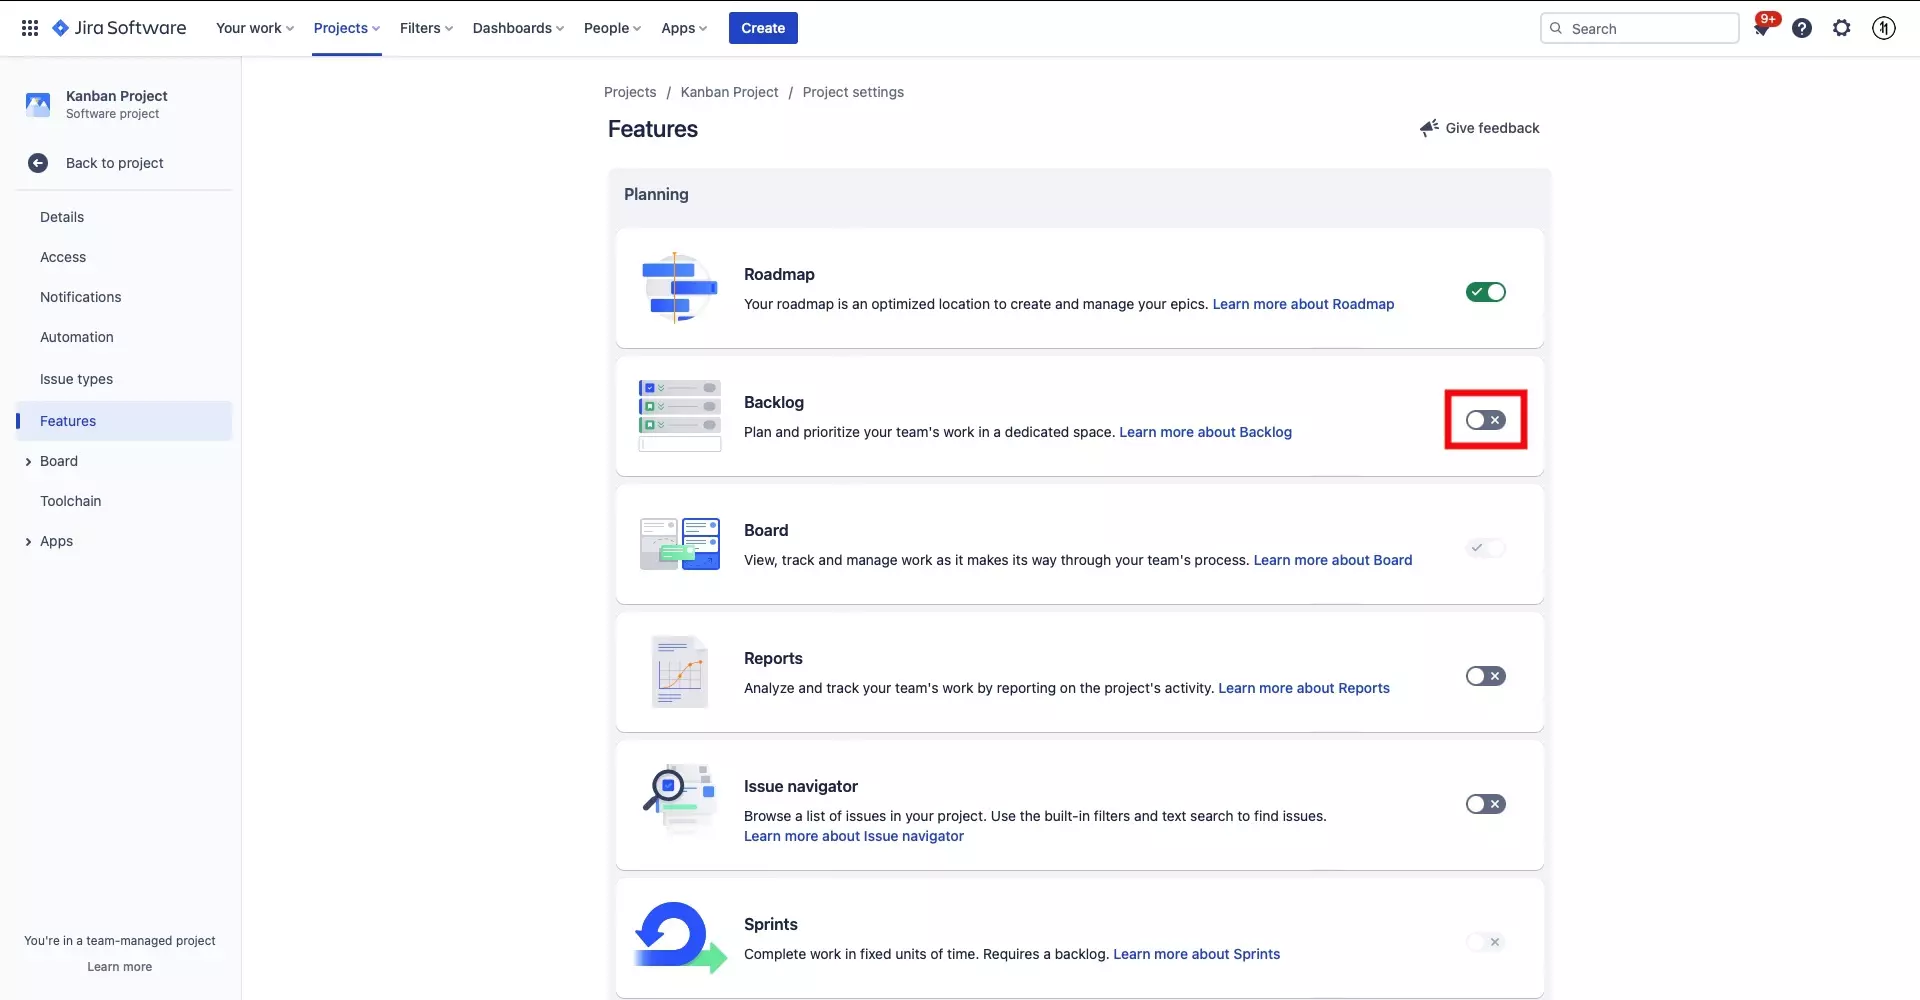
As Sprints requires a Backlog, turn on the Backlog feature by clicking the flip switch at the end of its section.

Step Four: Turn on Sprints

A couple blocks below the Backlog feature block is a "Sprints" feature block. Find it and press the flip switch at the end of the block. This will activate sprints and will be the end of this walkthrough.

Finally, turn on the Sprints feature by clicking the flip switch at the end of its section.

Any Questions?

We are actively looking for feedback on how to improve this resource. Please send us a note to inquiries@delasign.com with any thoughts or feedback you may have.
delasign logo

Book a Free Consultation.

An icon of an email.

Click here to email us.

Fill in the details below to book a free consultation or to let us know about something else. Whatever it is, we are here to help.

How can we help you ?

Contact Details