How to register passkeys
Passkey registration works through a collaborative process between the front-end and backend.


Passkey registration works through a collaborative process between the front-end and backend.
We would like to thank Apple for their WWDC session and their in-person lab as well as Nick Steele for having taken the time to help us understand the process and what is required to make them work securely.
Discover Nick SteeleDiscover Apple's WWDC 2022 Session on PassKey'sRead WebAuthn's guidePasskeys are passwordless passwords, are far more secure than passwords and in the future will replace passwords entirely. For more information on what they are please consult the link below.
There are two parts to passkeys: Registration (account creation) and Authentication (login) and carry the option for Attestation at both parts, which involves validating that a device actually created the passkey.
Attestation is an optional but strongly recommended security measure but is not required to make passkeys work for your website or app. For a proof of concept on how to create passkeys without attestation for a website in React or GatsbyJS, please use the link below (Github repository included).
The following tutorial covers Registration. If you are curious on how authentication works or a step by step proof of concept on registering and authenticating passkeys in ReactJS please use the links below.
Registration (Account Creation)

Registering a passkey is outlined below and involves using the web Navigator to create a credential.
It is important that all the credential creation, registration validation and decoding of data happens on the backend to avoid a security vulnerability.
For sample projects or a proof of concept for logging in, in React or GatsbyJS please use the links below.
This process should work as follows
Step One: User requests to create an account | Front-End
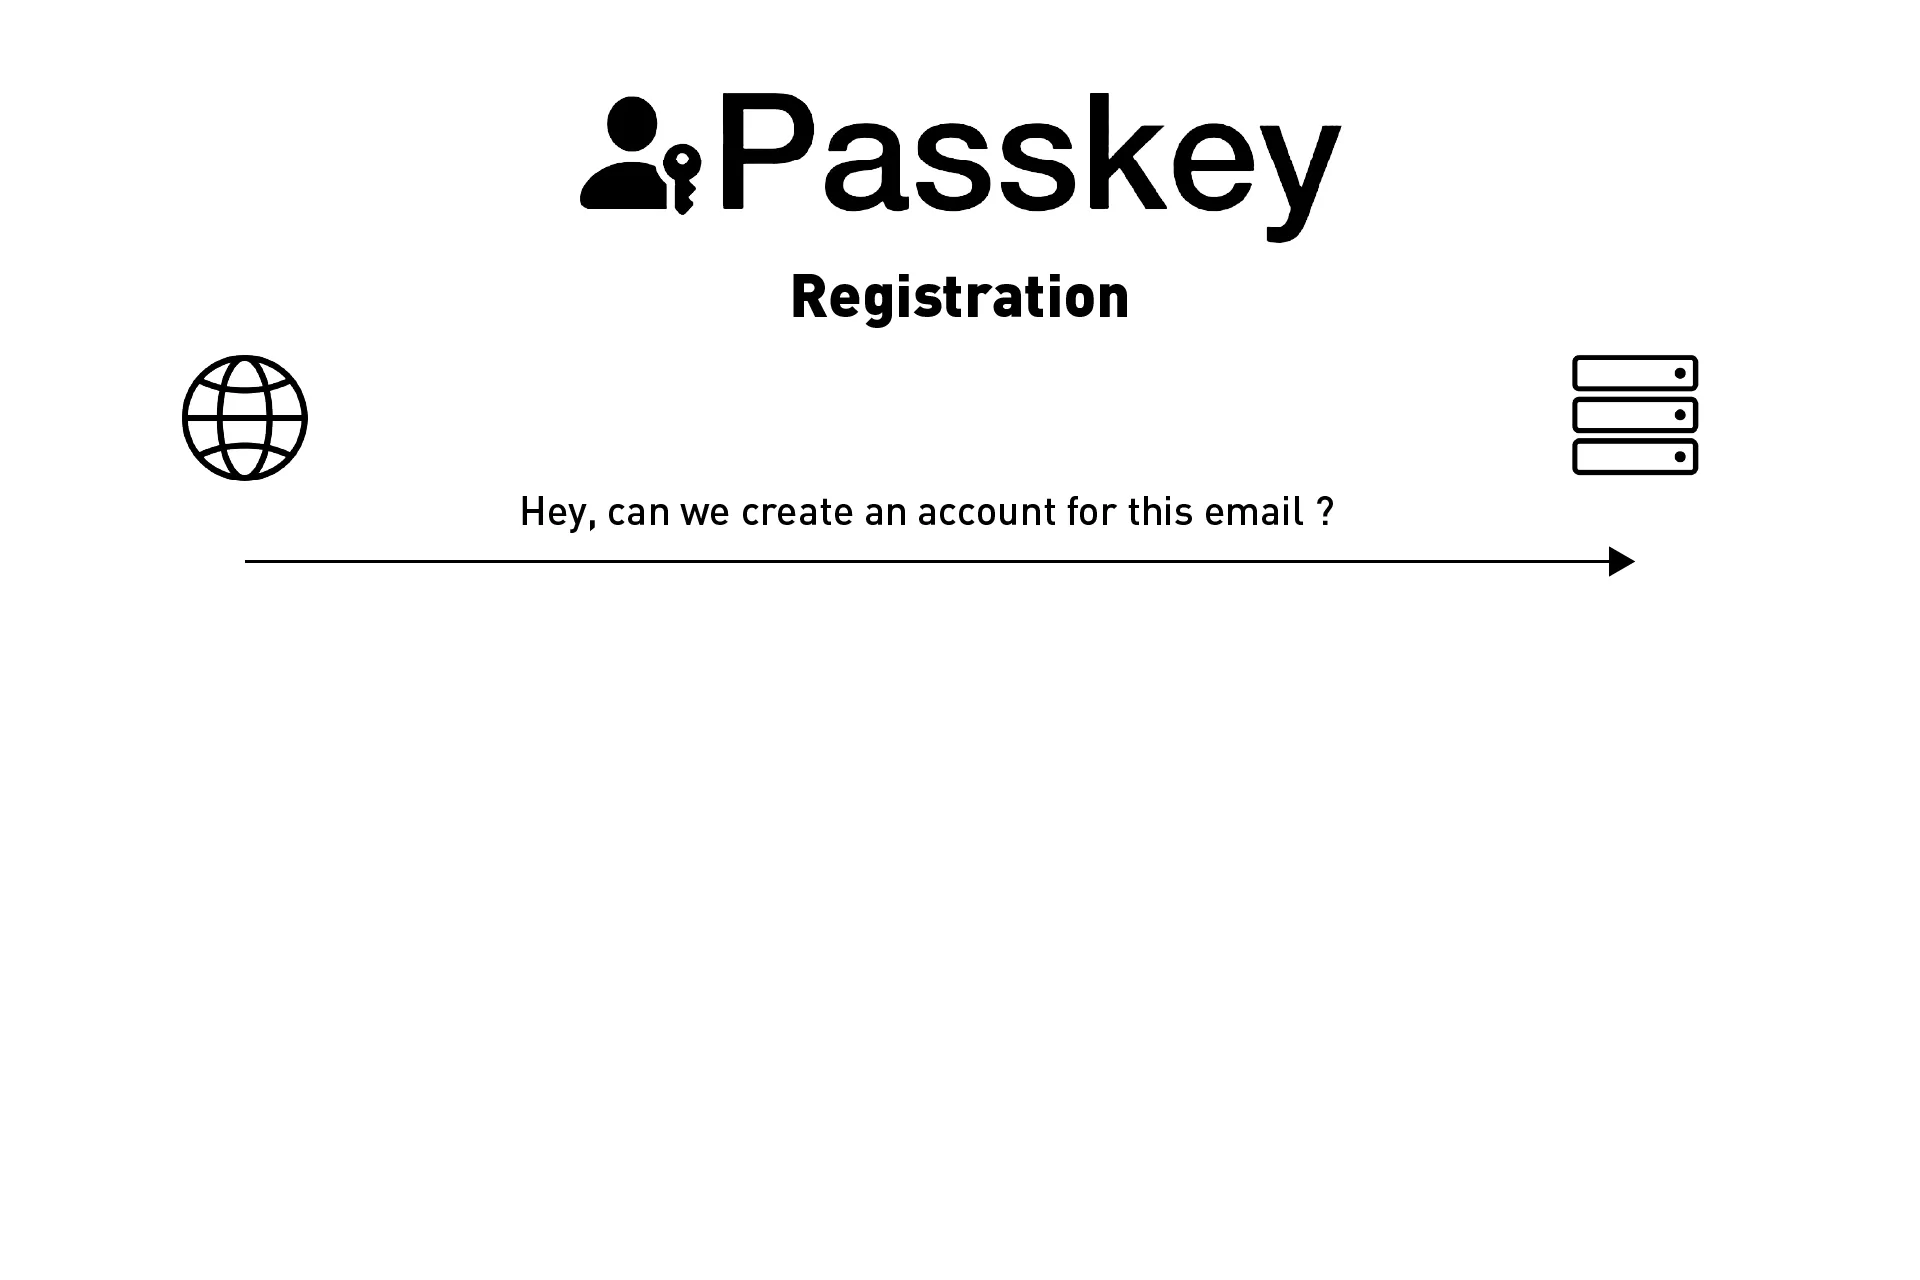
A user goes to your website and wishes to create a new account. They complete the sign up form and request the registration of a new account.
At this point your front-end sends an API request to your backend to request the creation of new account. Within this API request, you are required to include:
- A unique identifier (often an email)
- A display name
Step Two: Validate account has not been created | Backend
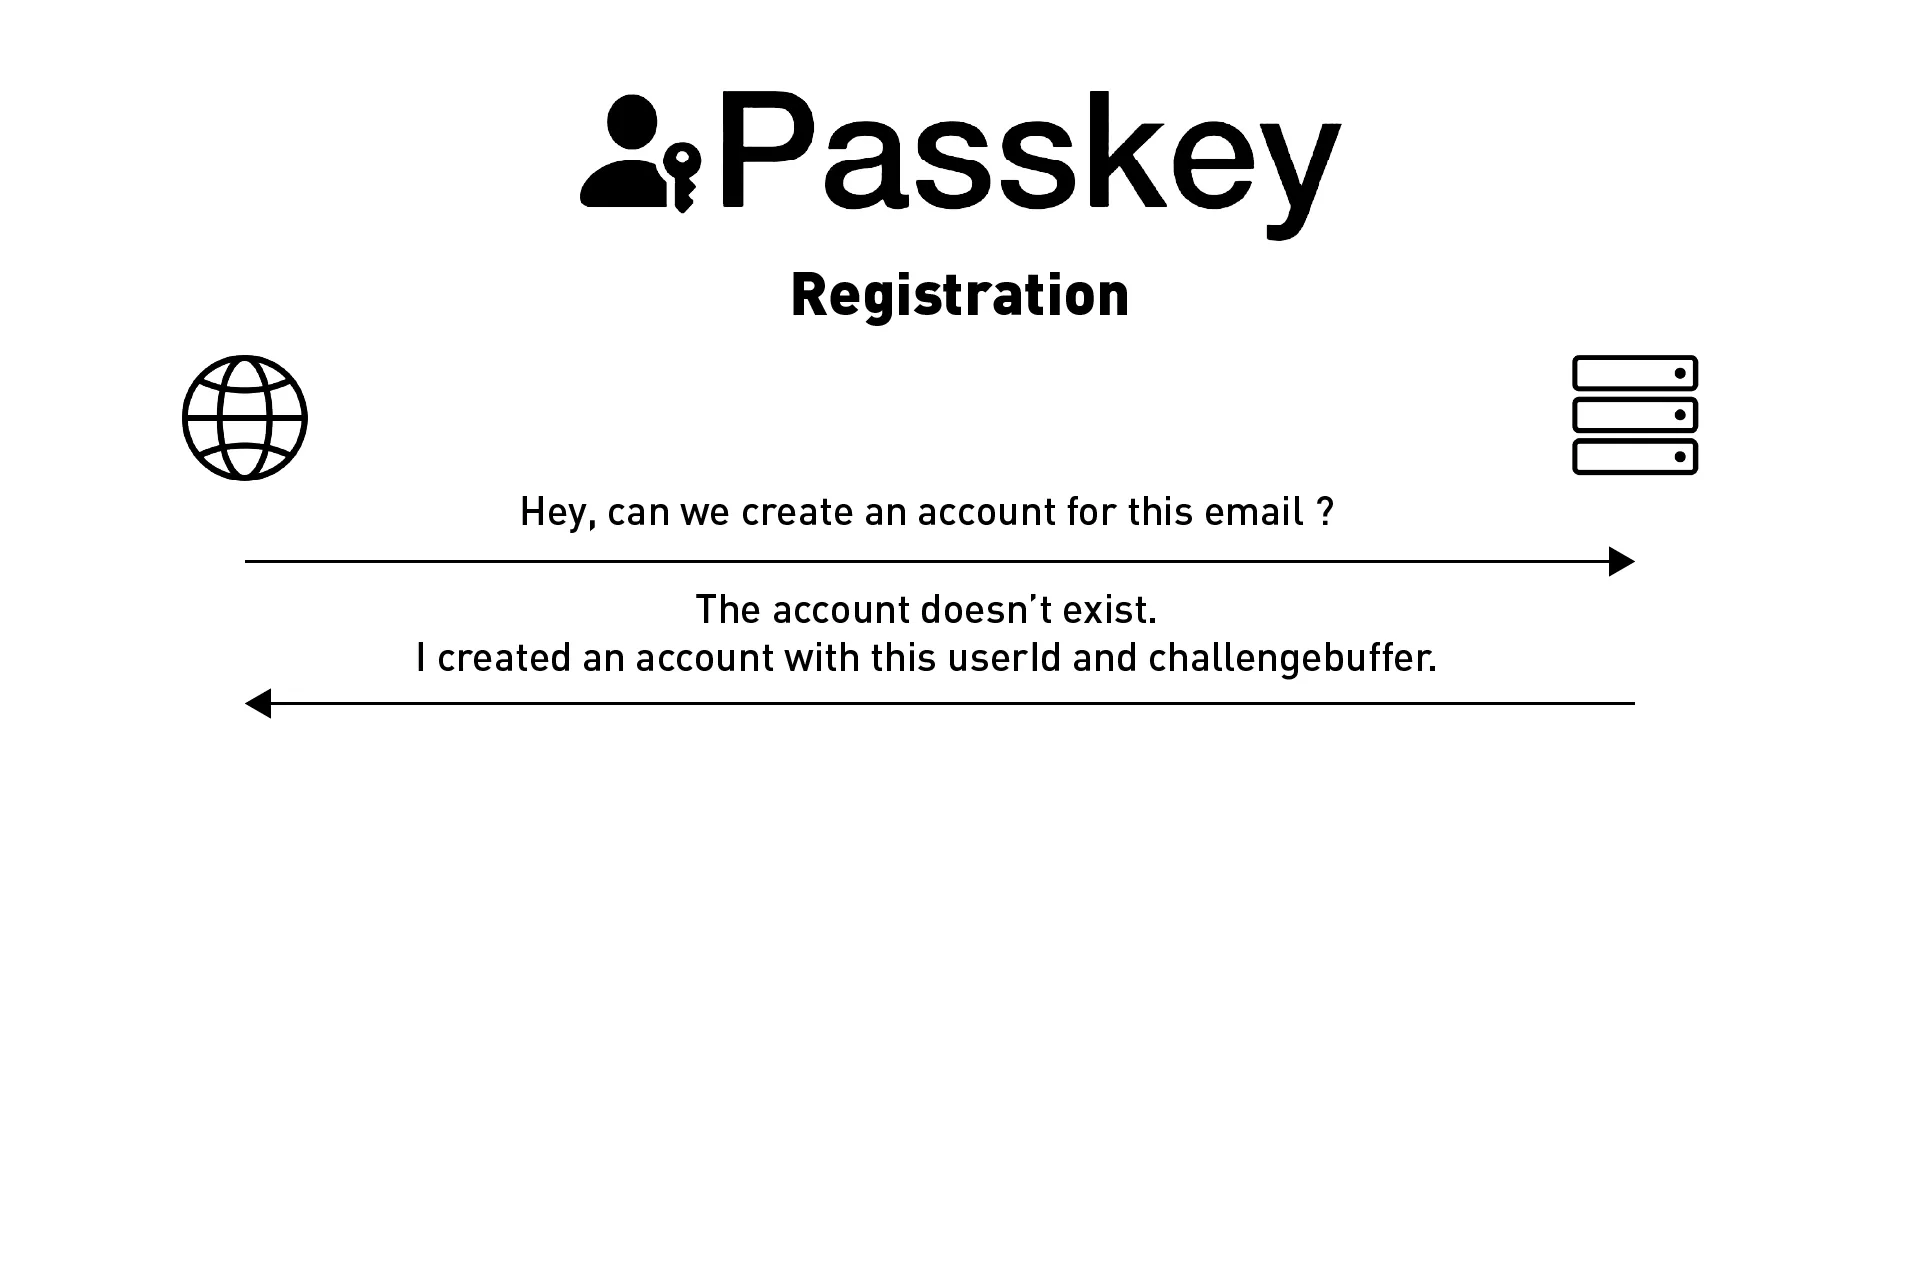
This part involves making sure that the account is new and can be created.
If the unique identifier (i.e. email) has been used in an account on your database, you return that an account already exists and end the registration flow at this step.
If the account does not exist (i.e. that email not been previously been used for an account), you would then generate the following two random 8 character strings:
- A userId
- A challenge buffer
You would then register (i.e. create) an account to your database with the following parameters:
- A unique identifier (i.e. email)
- A display Name
- A userId
- A challenge buffer
- A challenge verification (Empty for now - "")
Please note all the parameters above are strings.
You would then respond to the API request with the userId and challenge buffer as these are required to create the passkey.
Step Three: Create the passkey | Front-End
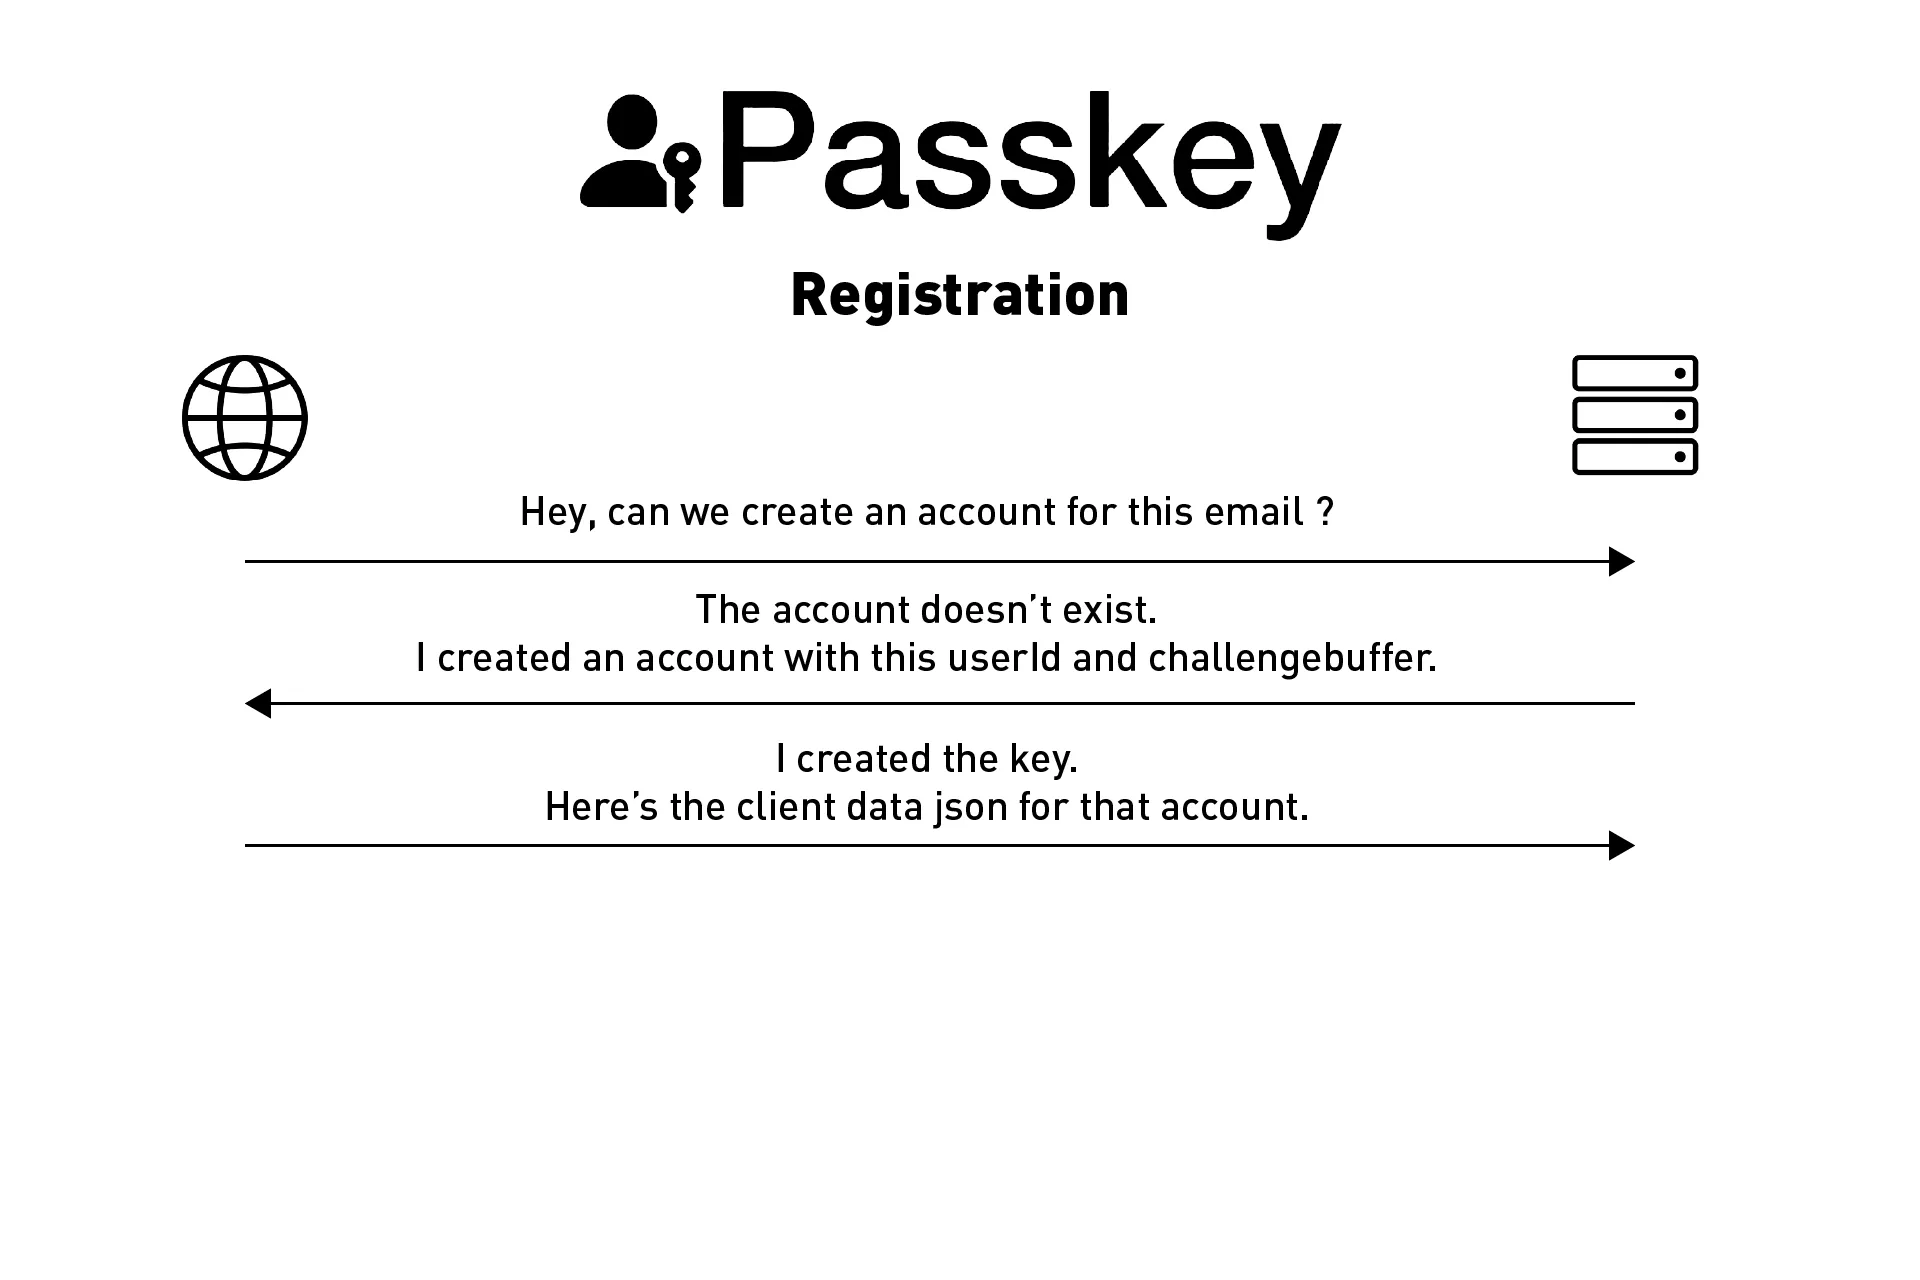
This step assumes that the account was registered (i.e. a new account was created).
You would then use the userId and challenge buffer from the API response to create a passkey. For a proof of concept in ReactJS use the link below.
From the passkey that was created on the device, you would gather the clientDataJSON from the client data and send it in an API call, along with the users email, to the backend for future verification.
Step Four: Verify and save registration challenge to account | Backend
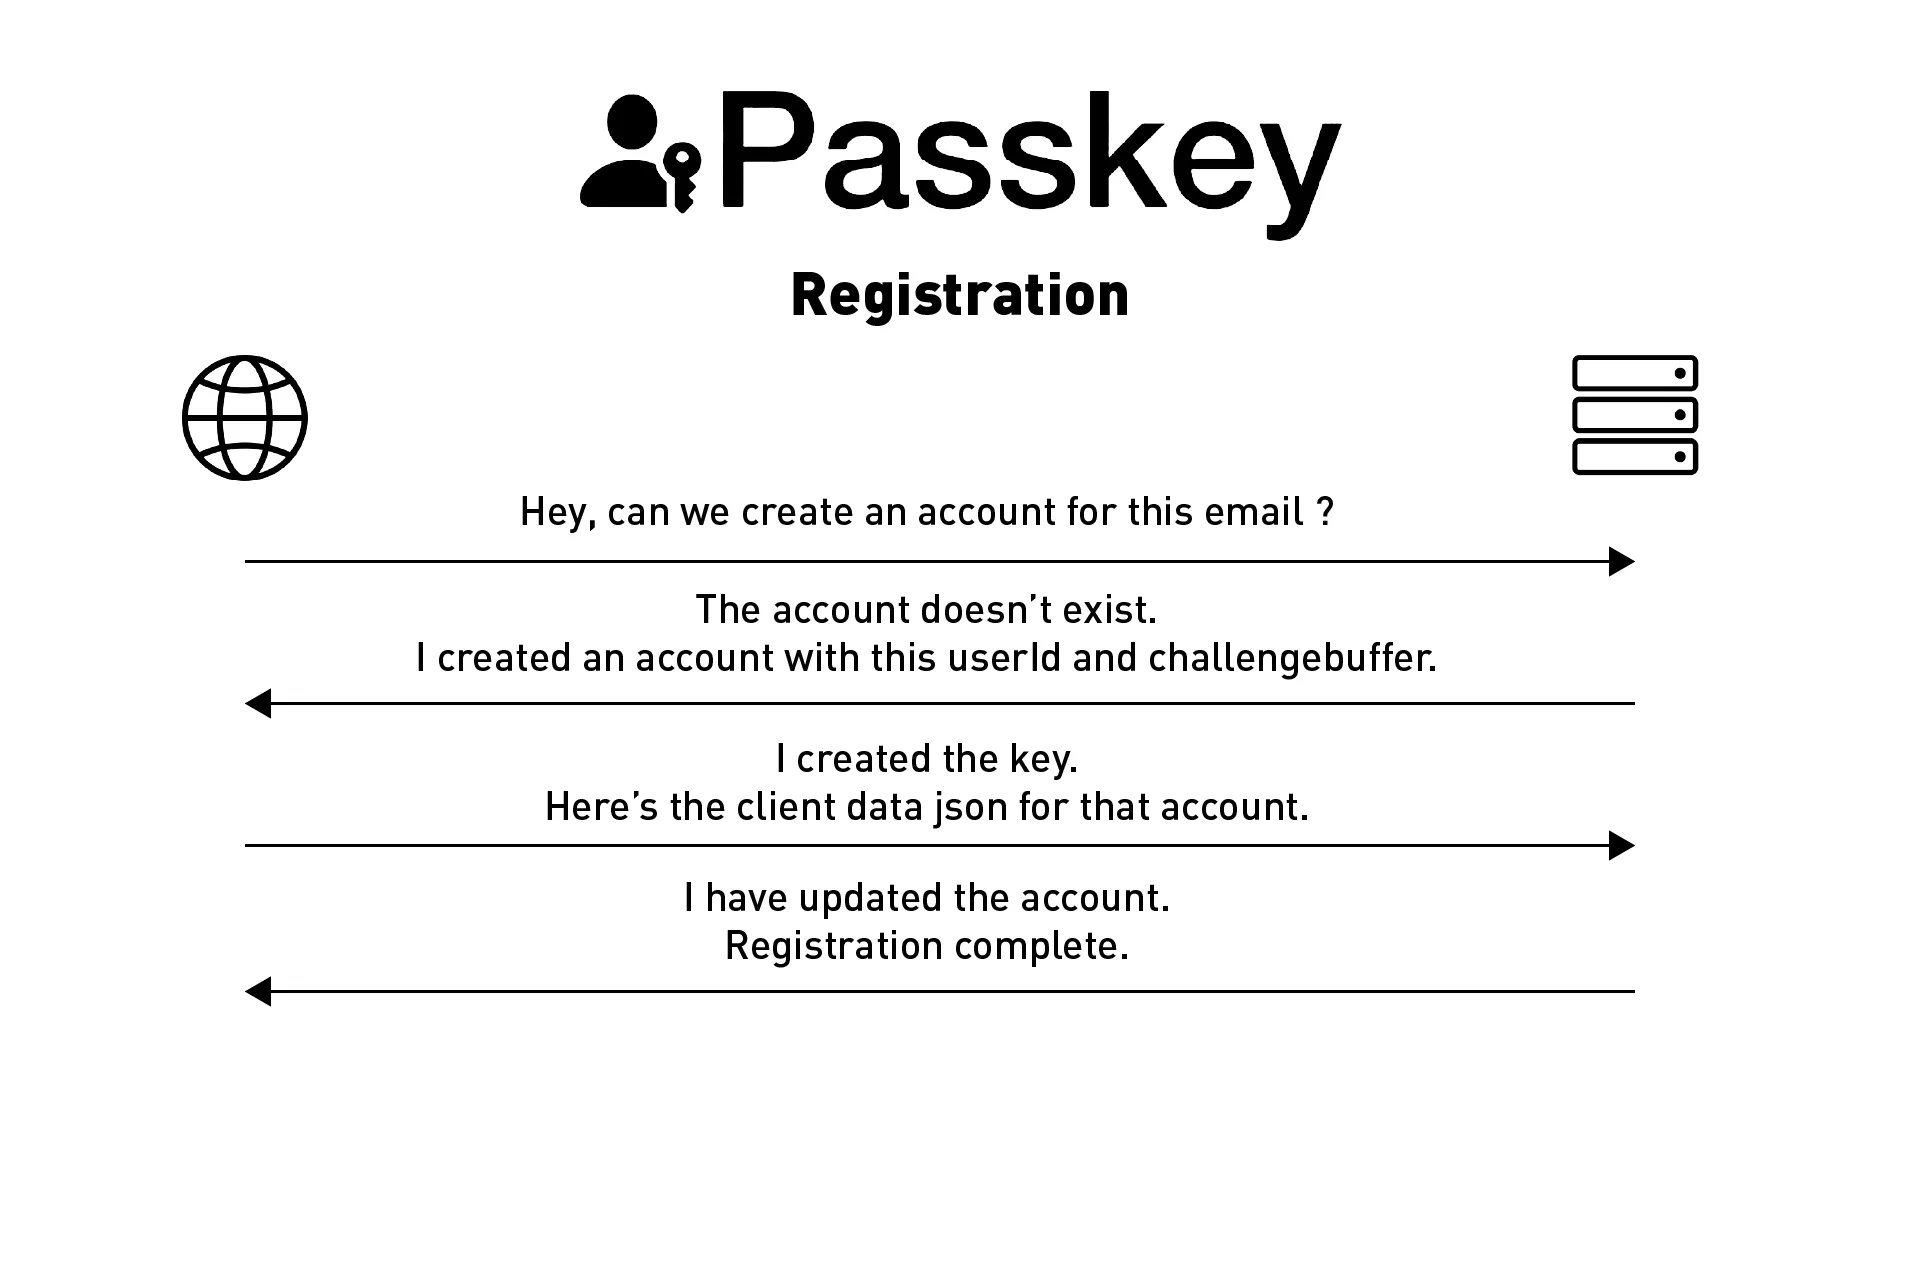
You would then gather the clientDataJSON from the API call and decode it to find the challenge and origin. You would verify that the origin matches your domain and would replace the empty challenge string that we created in step two with the challenge from the clientDataJSON.
This challenge is required for validation when a user tries to authenticate (i.e. login).
Once complete, you would respond to the API call letting your website or app know the registration is complete.
For a proof of concept in ReactJS or the WebAuthn guide use the links below.
Attest the passkey | Backend (OPTIONAL BUT RECOMMENDED)

At step three, once the passkey is created, you would send the client data (which includes the challenge) and the attestation object created from the registration to the backend for attestation and validation.
This process is optional but strongly recommended and is yet to be covered by delasign.
For those seeking to cover this step, Nick Steele recommends that you use the a WebAuthn sample project or a FIDO npm library to complete the attestation as creating your own process without expert supervision is extremely challenging.
Any Questions
We are actively looking for feedback on how to improve this resource. Please send us a note to inquiries@delasign.com with any thoughts or feedback you may have.