How to animate constraints in Swift
A step by step tutorial on animating constraints in Swift (iOS). Github repository included.

A step by step tutorial on animating constraints in Swift (iOS). Github repository included.
The following tutorial builds on our Open Source Swift and makes a label animate when tapping the screen. This tutorial starts on the main branch and the changes are available on the tutorials/animate-constraints branch of the repository below.
Please note this tutorial uses the TinyConstraints Swift package, which we added using the Swift Package Manager.
Animating constraints takes 3 steps
To animate constraints:
- Set the constraints outside of the UIView.animate function
- Call setNeedsLayout() outside the UIView.animate function
- Call layoutIfNeeded() inside the UIView.animate function
Here's a code snippet that describes the phenomenon:
Tutorial
As mentioned above, this tutorial takes our Open Source project and builds on it to produce the results which are available on the tutorials/animate-constraints branch of the repository.
Clone the repo's main branch, before starting the tutorial.
git clone git@github.com:delasign/swift-starter-project.gitStep One: Add the NSLayoutConstraint Variable
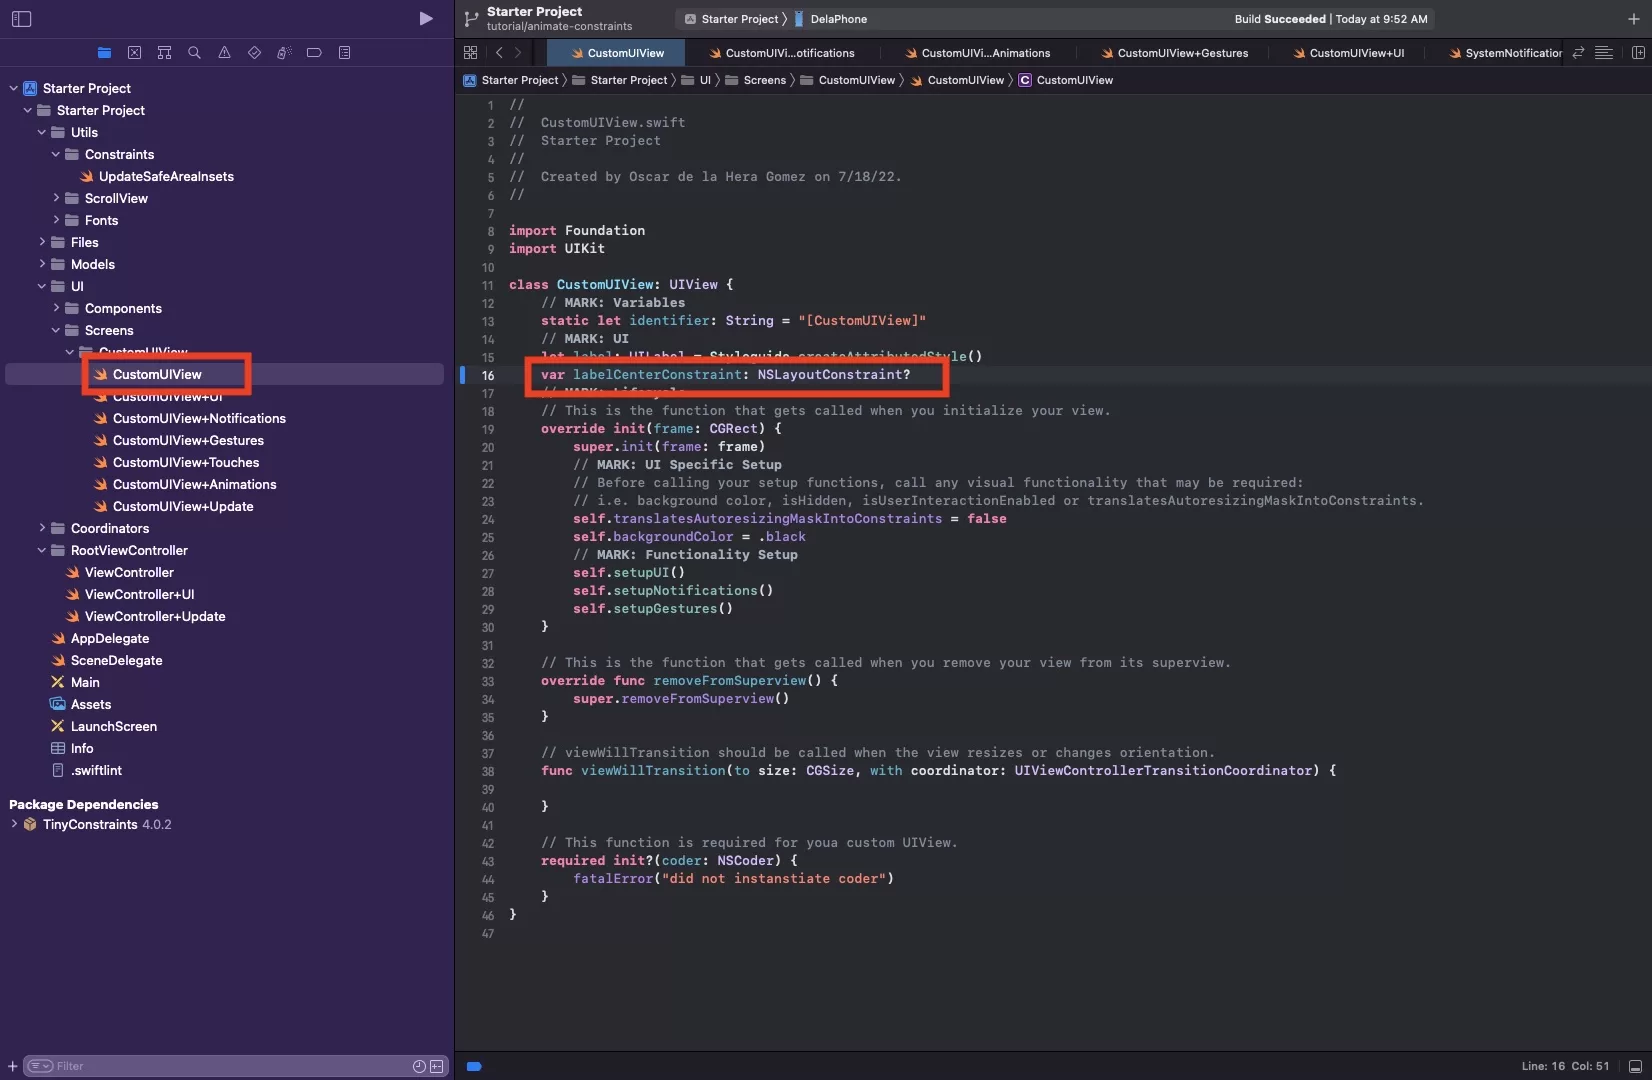
In your CustomUIView.swift add a NSLayoutConstraint optional variable for your label center.
var labelCenterConstraint: NSLayoutConstraint?Step Two: Update your Label Constraint
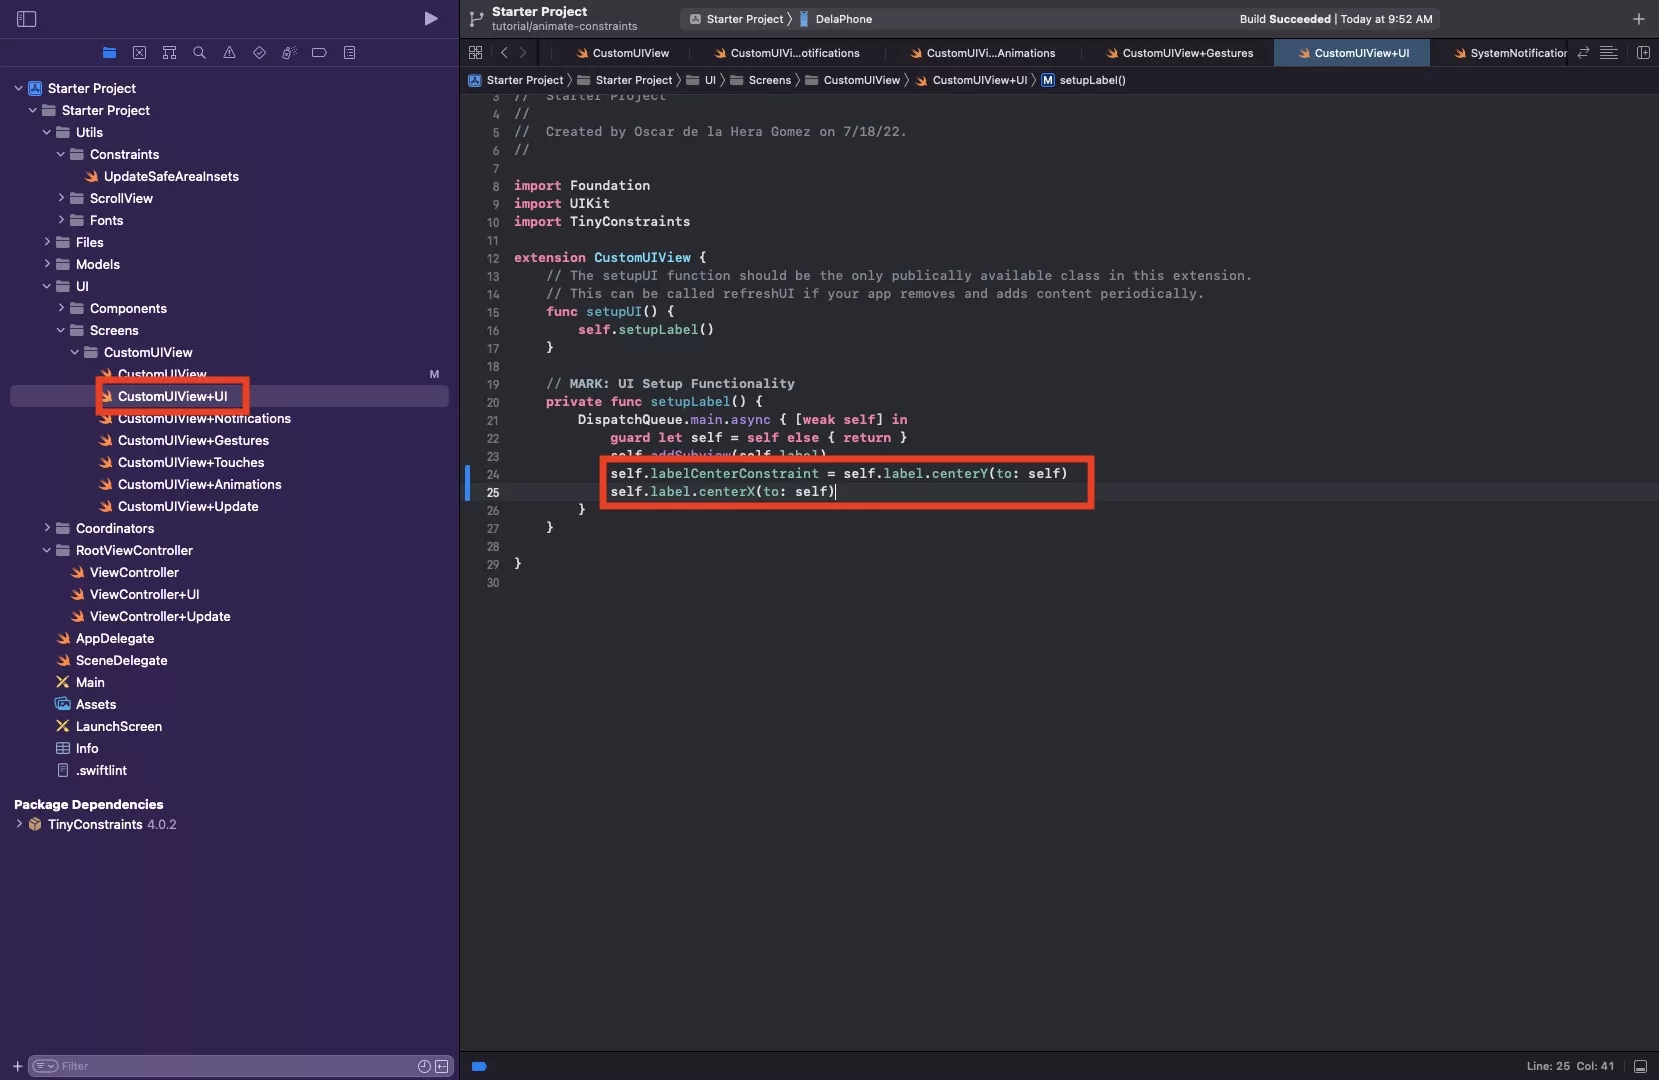
In CustomUIView+UI.swift update your constraint to the following:
self.labelCenterConstraint = self.label.centerY(to: self)
 self.label.centerX(to: self)
Step Three: Add the touch gesture
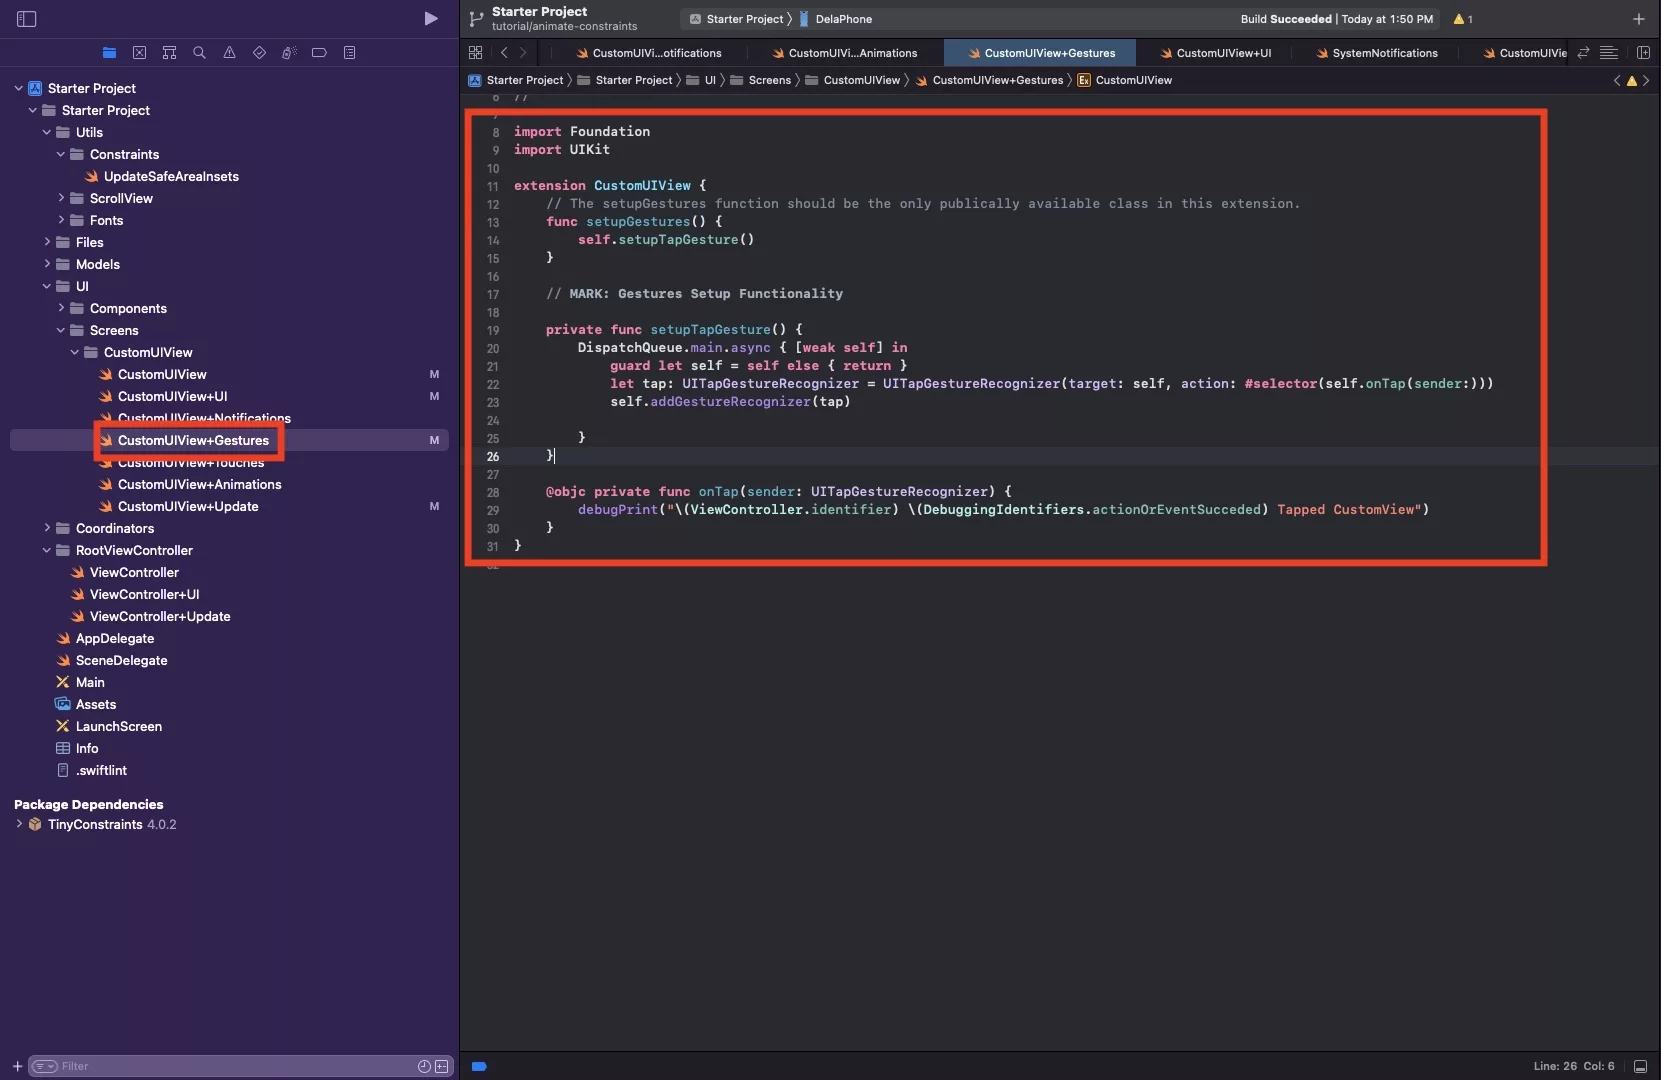
In CustomView+Gestures.swift, update your extension to add a tap gesture. This is done by uncommenting the code and adding setupTapGesture() to your setupGestures function.
The code is available below.
Step Four: Animate on Tap
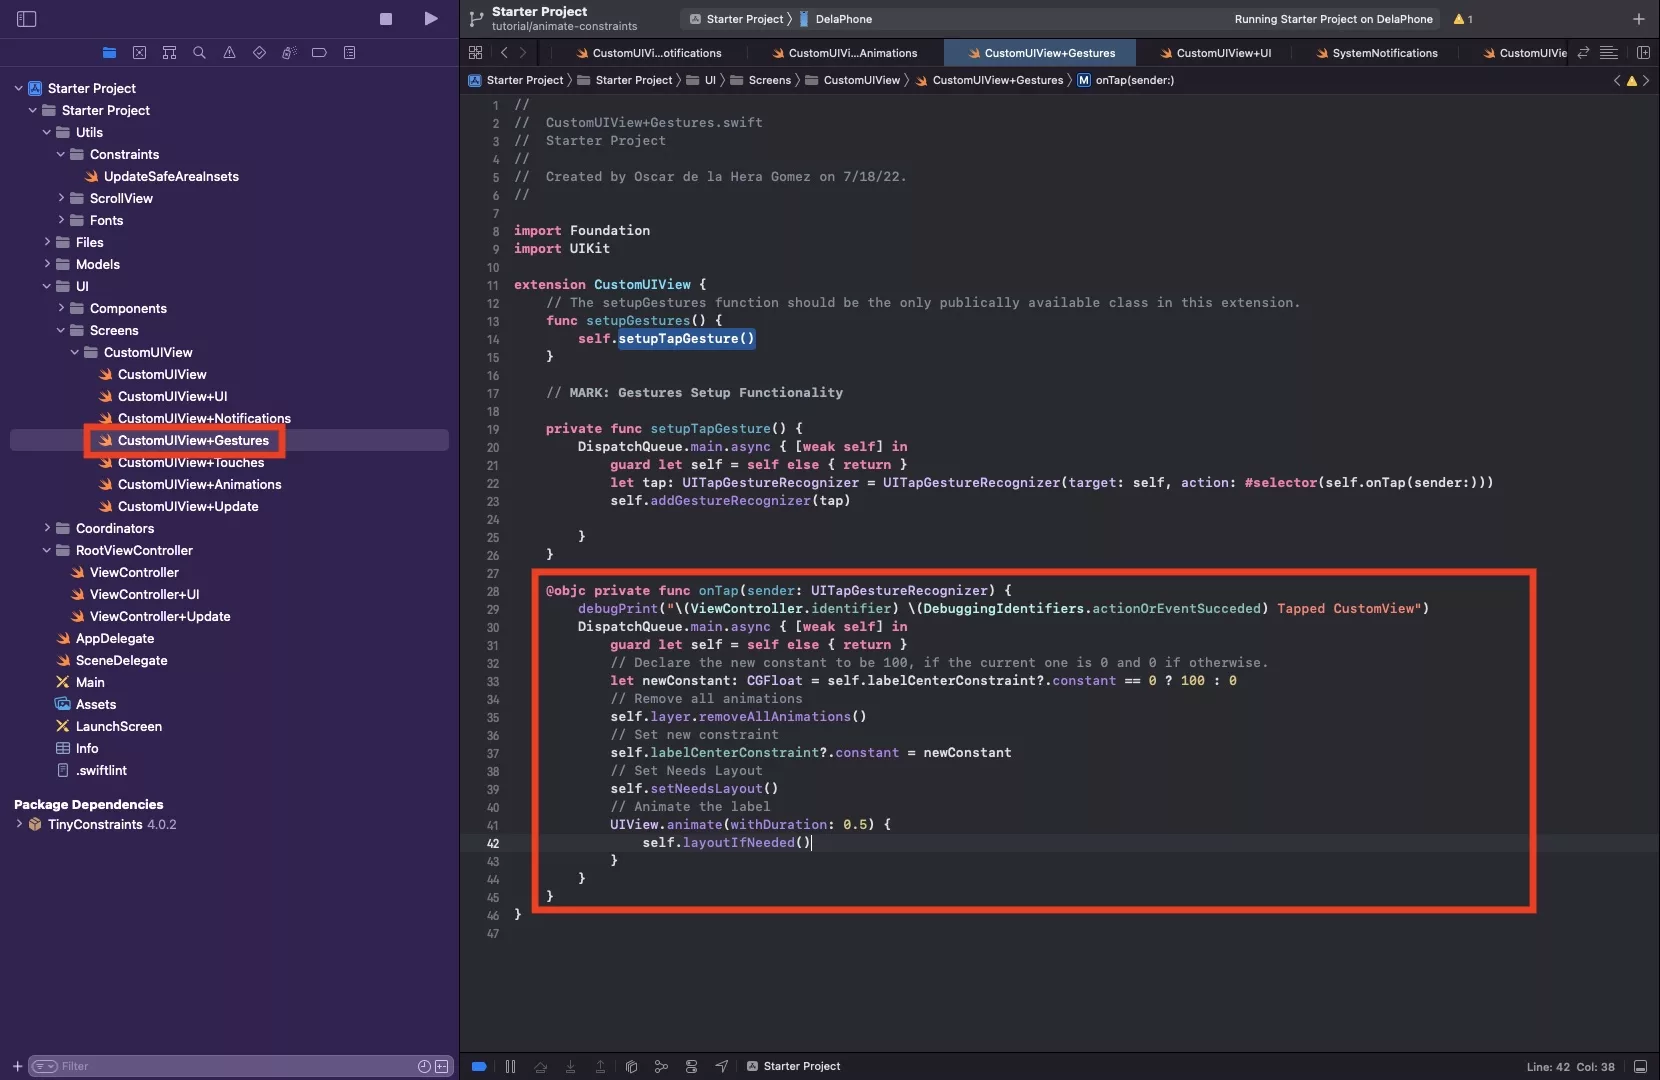
The code below demonstrates how to:
- Determine the current constraint and calculate the new constraint value
- Remove all animations, to make sure the custom view is clear of all animations.
- Set the new constraint to the calculated value
- Tell the view that it needs a new layout.
- Call's the layoutIfNeeded within the animation, telling the app to animate to the new layout over a period of 0.5 seconds.
Step Five: Verify
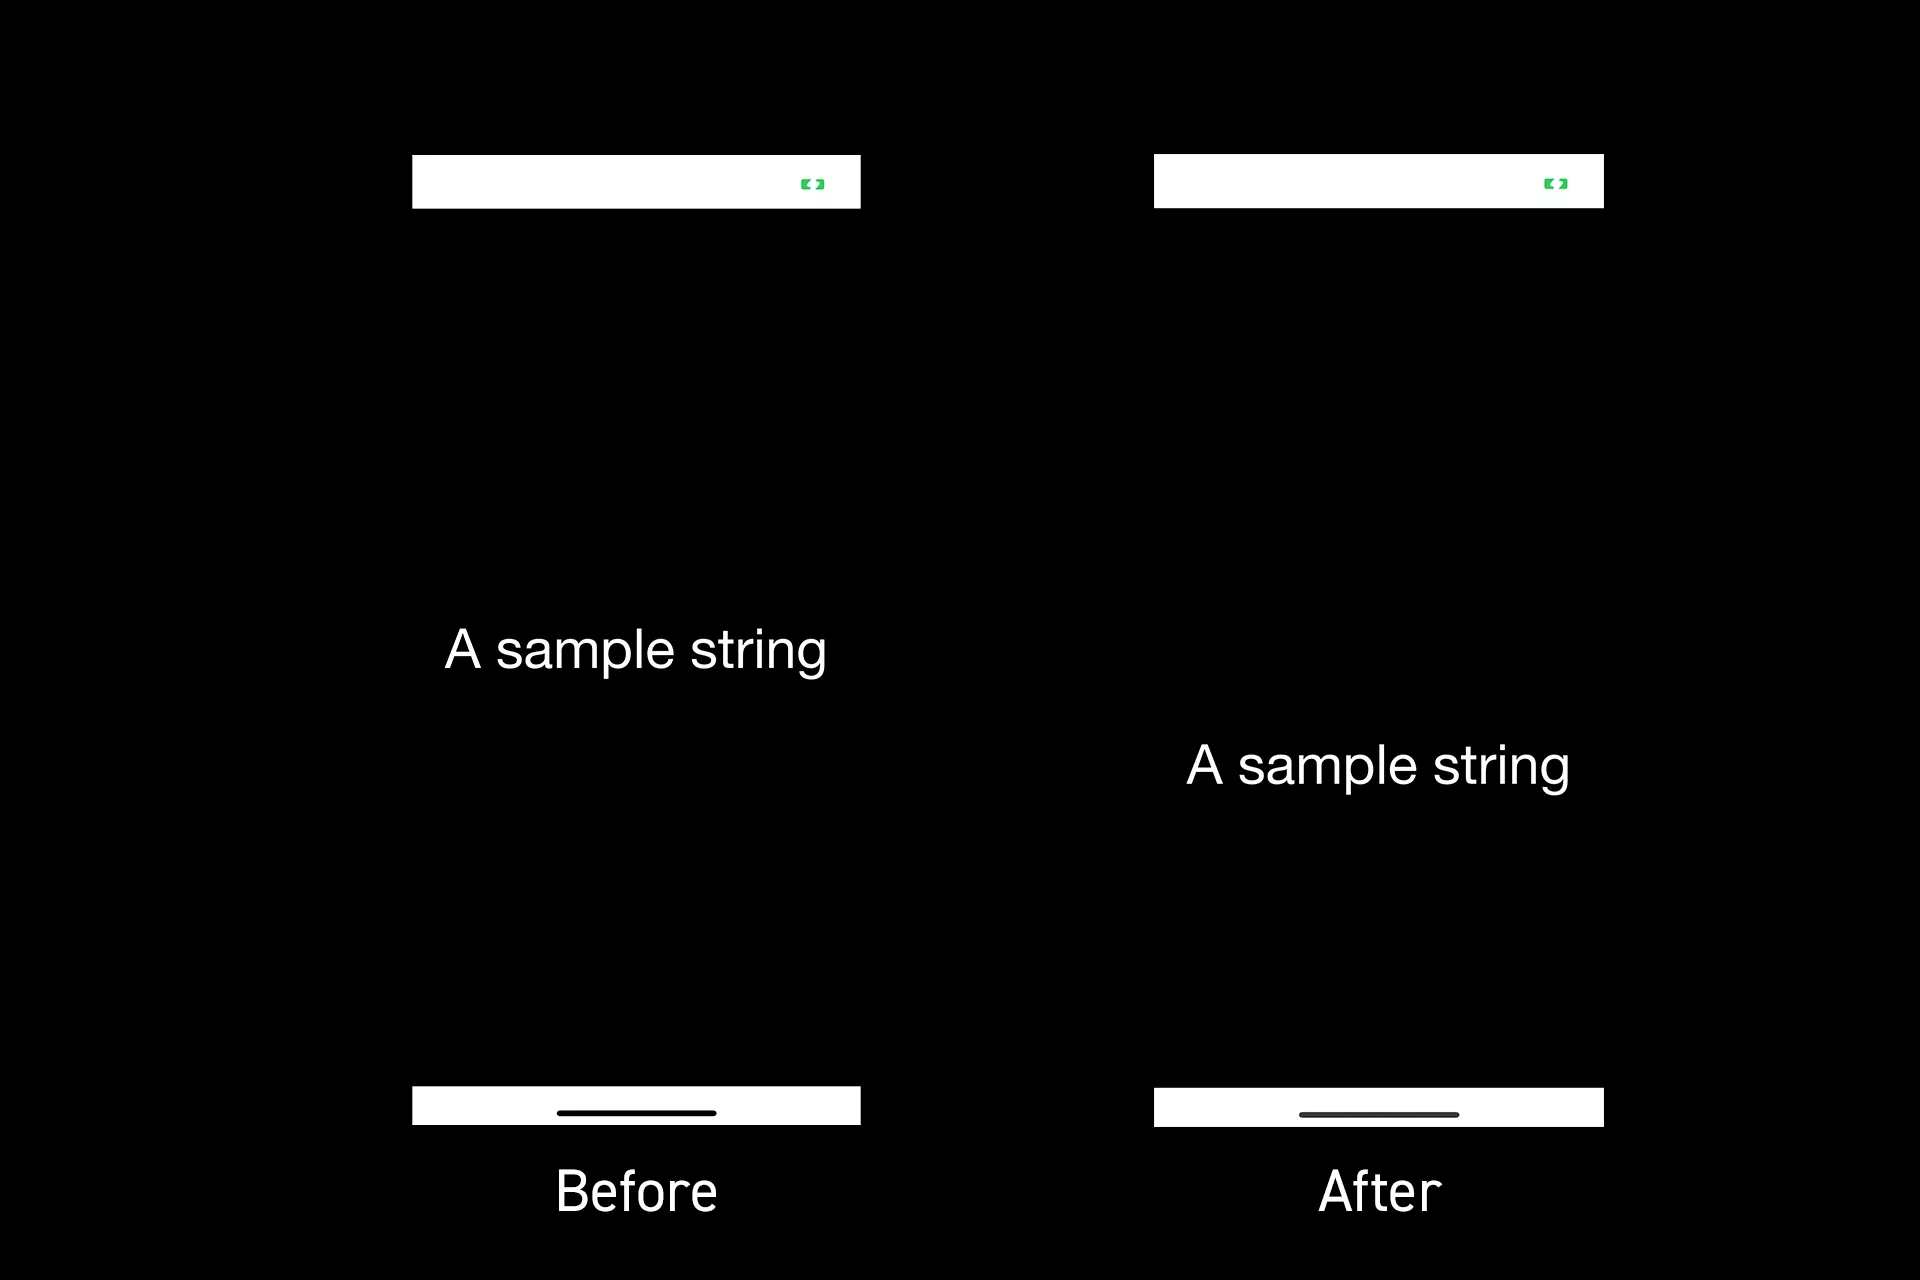
Run your app and tap your screen to see it animate between the center and 100 pixels, vertically off-center.
Any Questions
We are actively looking for feedback on how to improve this resource. Please send us a note to inquiries@delasign.com with any thoughts or feedback you may have.