How to add a hosted image to a view in Swift


A step by step tutorial on adding a hosted image to a UIView in Swift (iOS). Github repository included.
The following tutorial builds on our Open Source Swift and demonstrates how to load a hosted image on a UIImageView. This tutorial starts on the main branch and the changes are available on the tutorials/hosted-image branch of the repository below.
Clone the repo's main branch, before starting the tutorial.
git clone git@github.com:delasign/swift-starter-project.git
Please note this tutorial uses the TinyConstraints Swift package, which we added using the Swift Package Manager.
Step One: Declare your variable
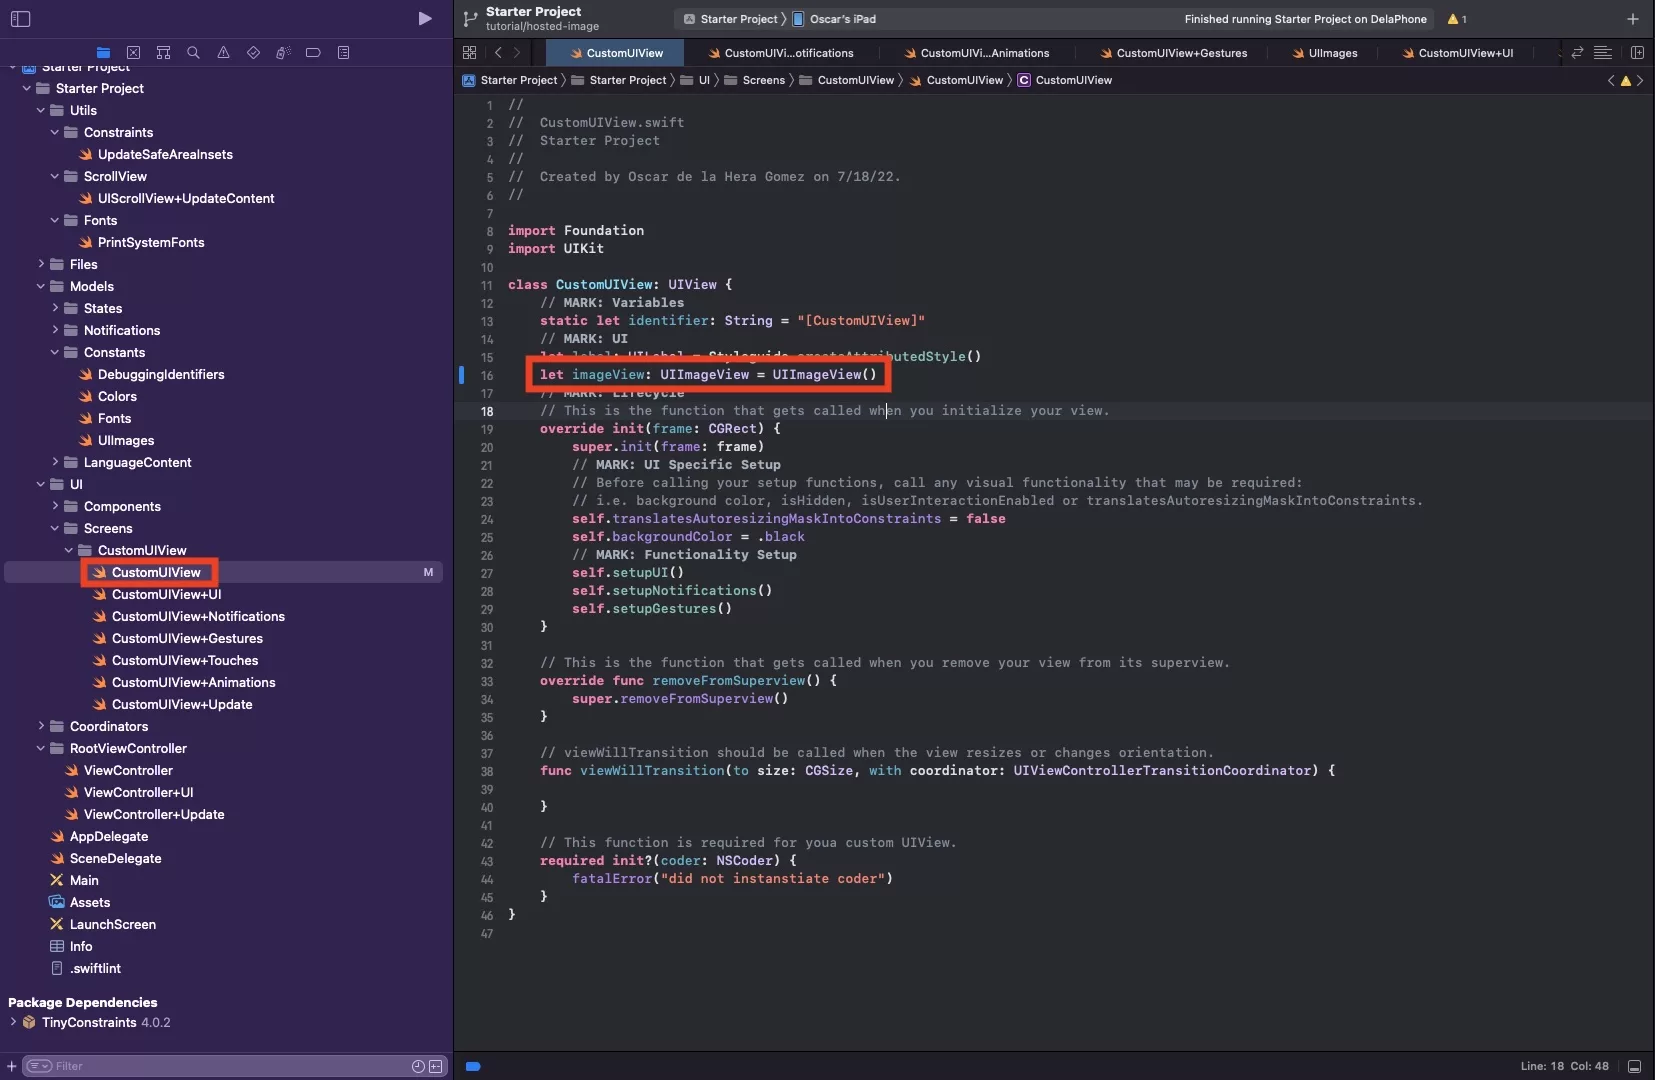
In CustomUIView.swift, declare your UIImageView.
let imageView: UIImageView = UIImageView()
Step Two: Setup your Imageview and add it to the view
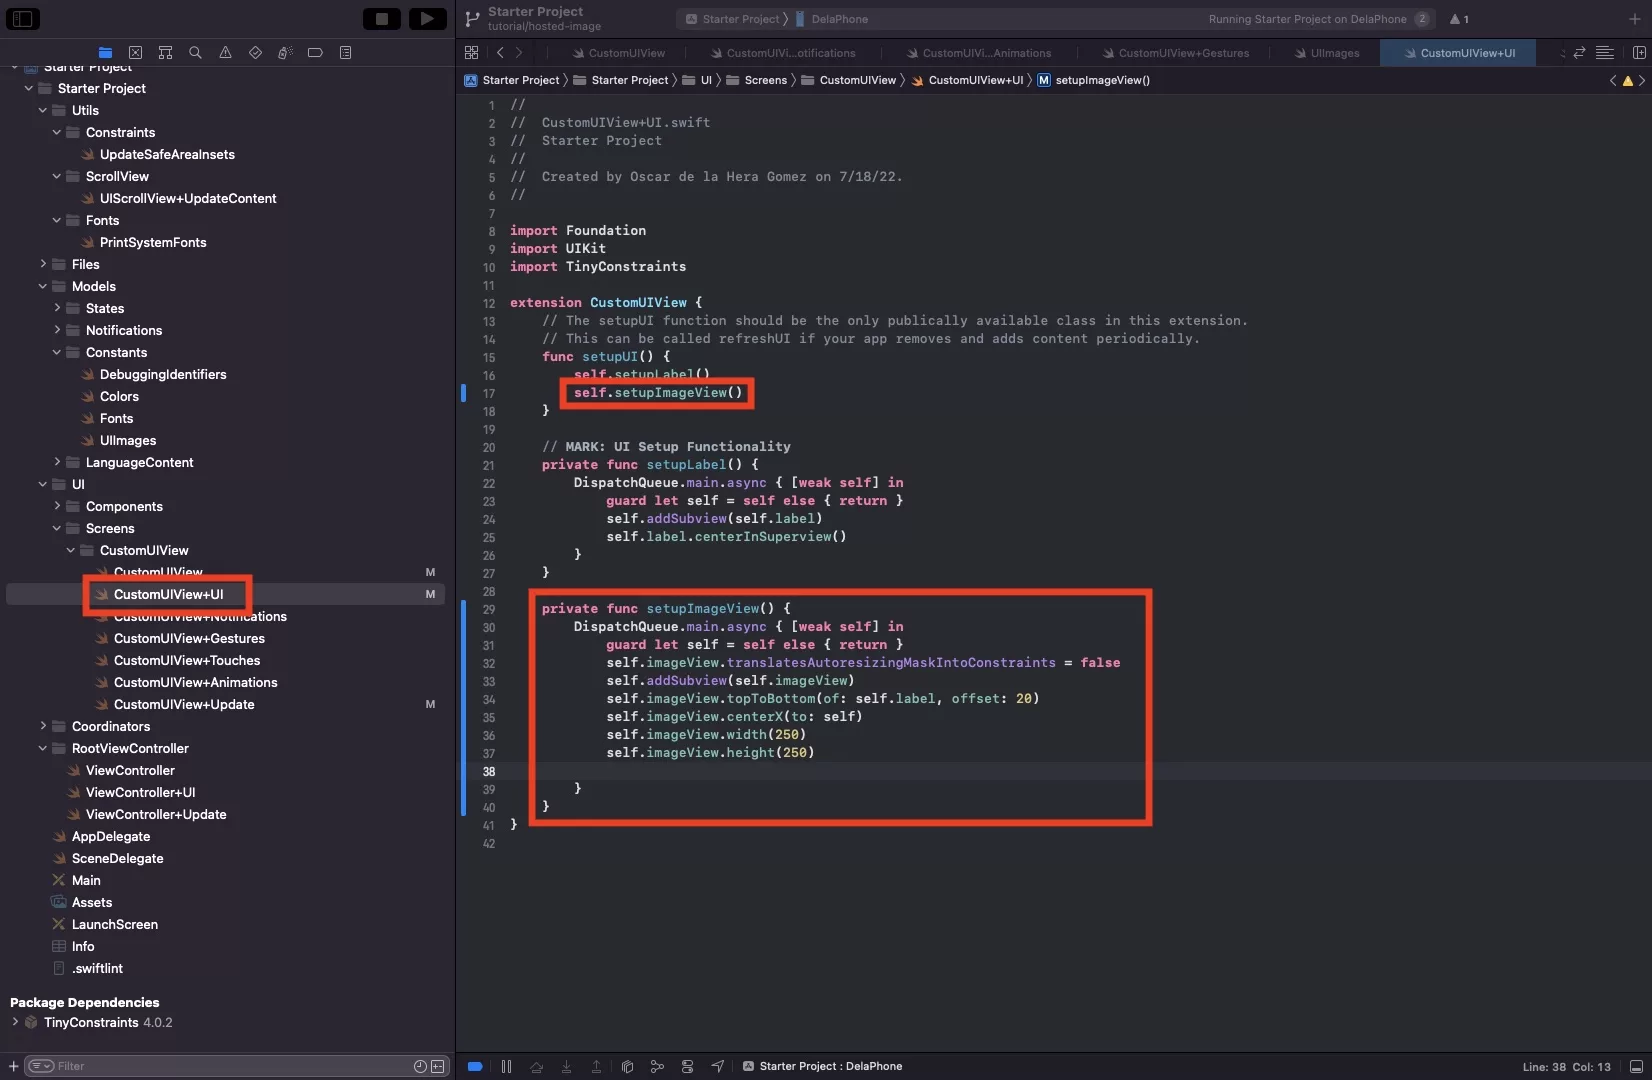
In CustomUIView+UI.swift setup your image view. Sample code below.
Here we have set the imageView to:
- Sit below the label, at an offset of 20 pixels.
- Center itself horizontally on the view
- Have a width and a height of 250 pixels.
Step Three: Add Hosted Image
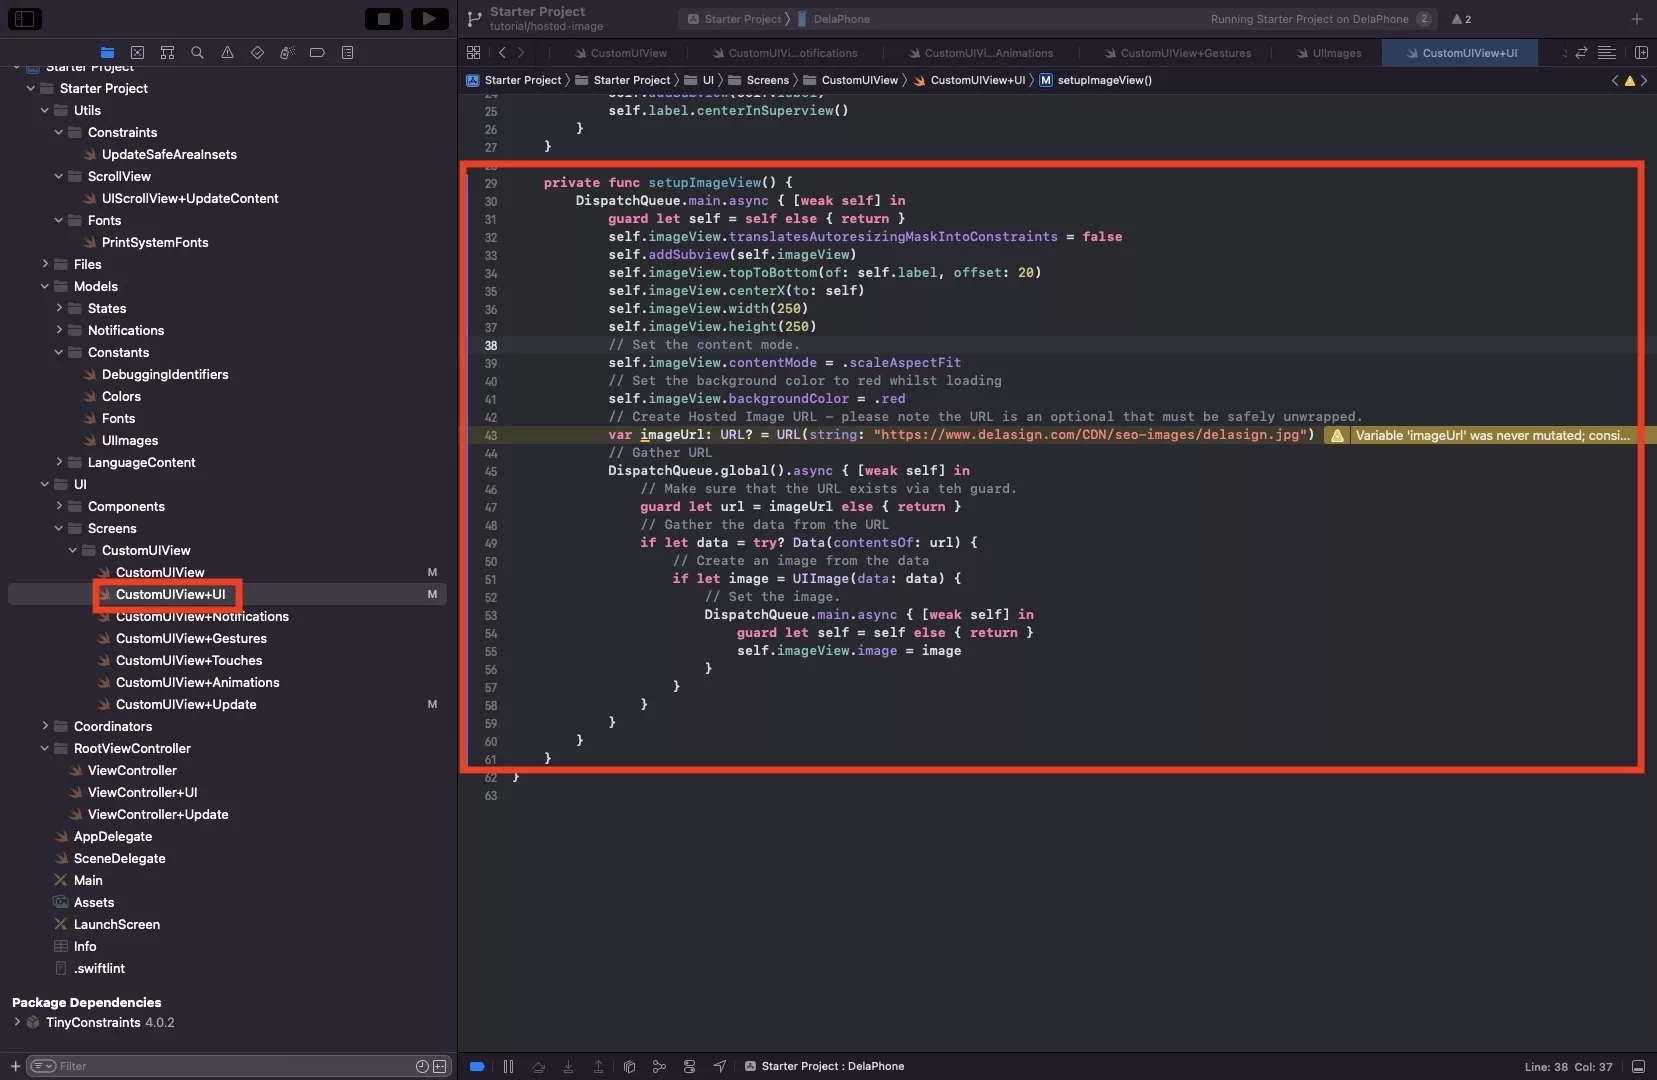
For the example shown, we are using the delasign banner hosted on AWS which uses the following url:
https://www.delasign.com/CDN/seo-images/delasign.jpg
The code example below shows how to gather it and place it as the UIImage, within the UIImageview.
Please note that we have set the backgroundColor to red to confirm that the image loads. We also set the content mode to scaleAspectFit.
Step Four: Verify
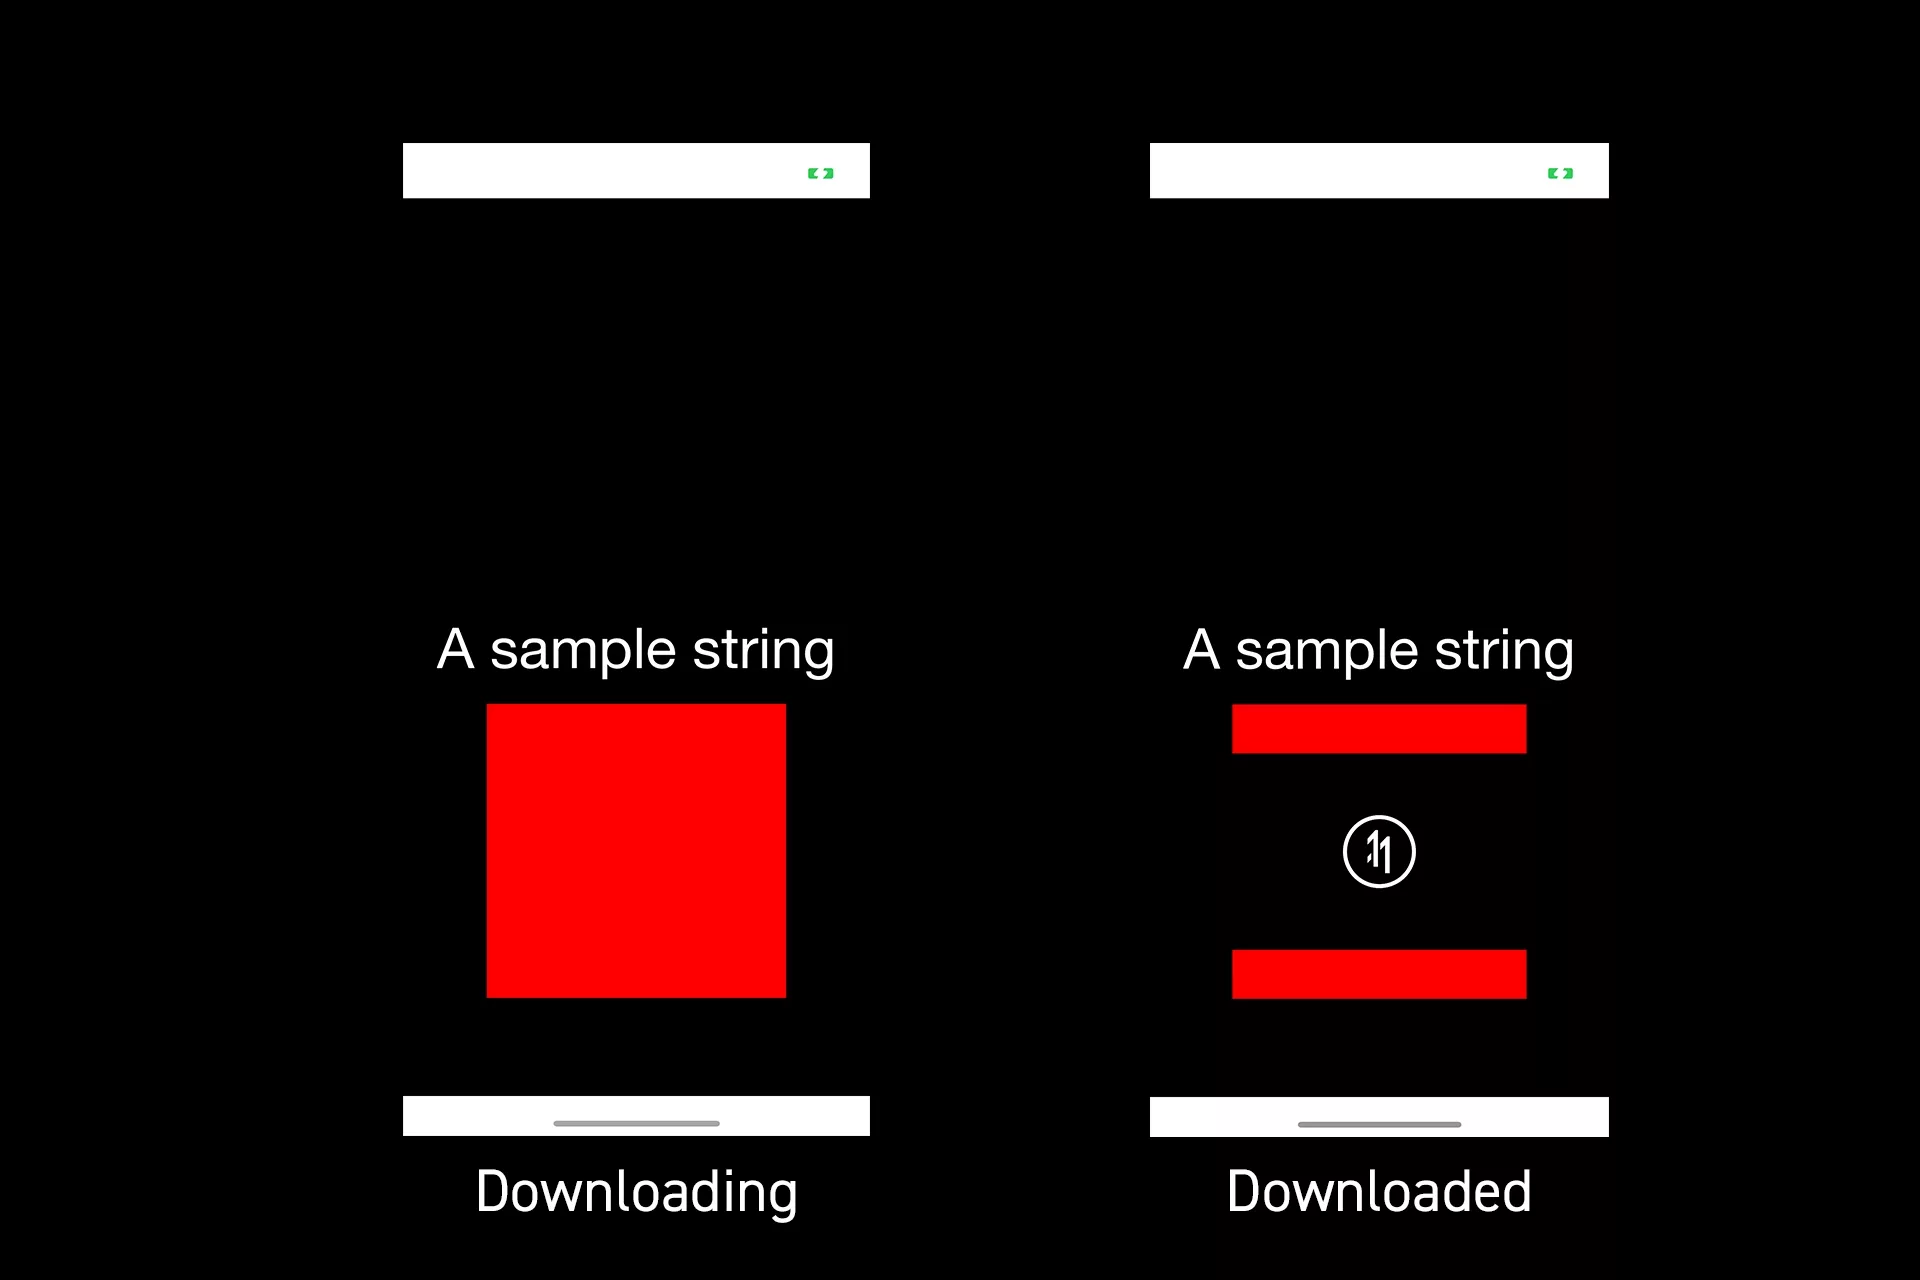
Run your app to verify that the image appears.
Any Questions
We are actively looking for feedback on how to improve this resource. Please send us a note to inquiries@delasign.com with any thoughts or feedback you may have.
