How to setup a Swift project to make API calls.
A step by step tutorial on preparing your Swift (iOS) project to make API calls.

A step by step tutorial on preparing your Swift (iOS) project to make API calls. Github repository available.
The following tutorial builds on our Open Source Swift project which can be downloaded using the link below, and aims to walk you through how to prepare your project for making API calls.
The changes that took place before being merged into the main branch can be found on the tutorial/setup-datacoordinator branch.
git clone git@github.com:delasign/swift-starter-project.gitStep One: Create the DataCoordinator
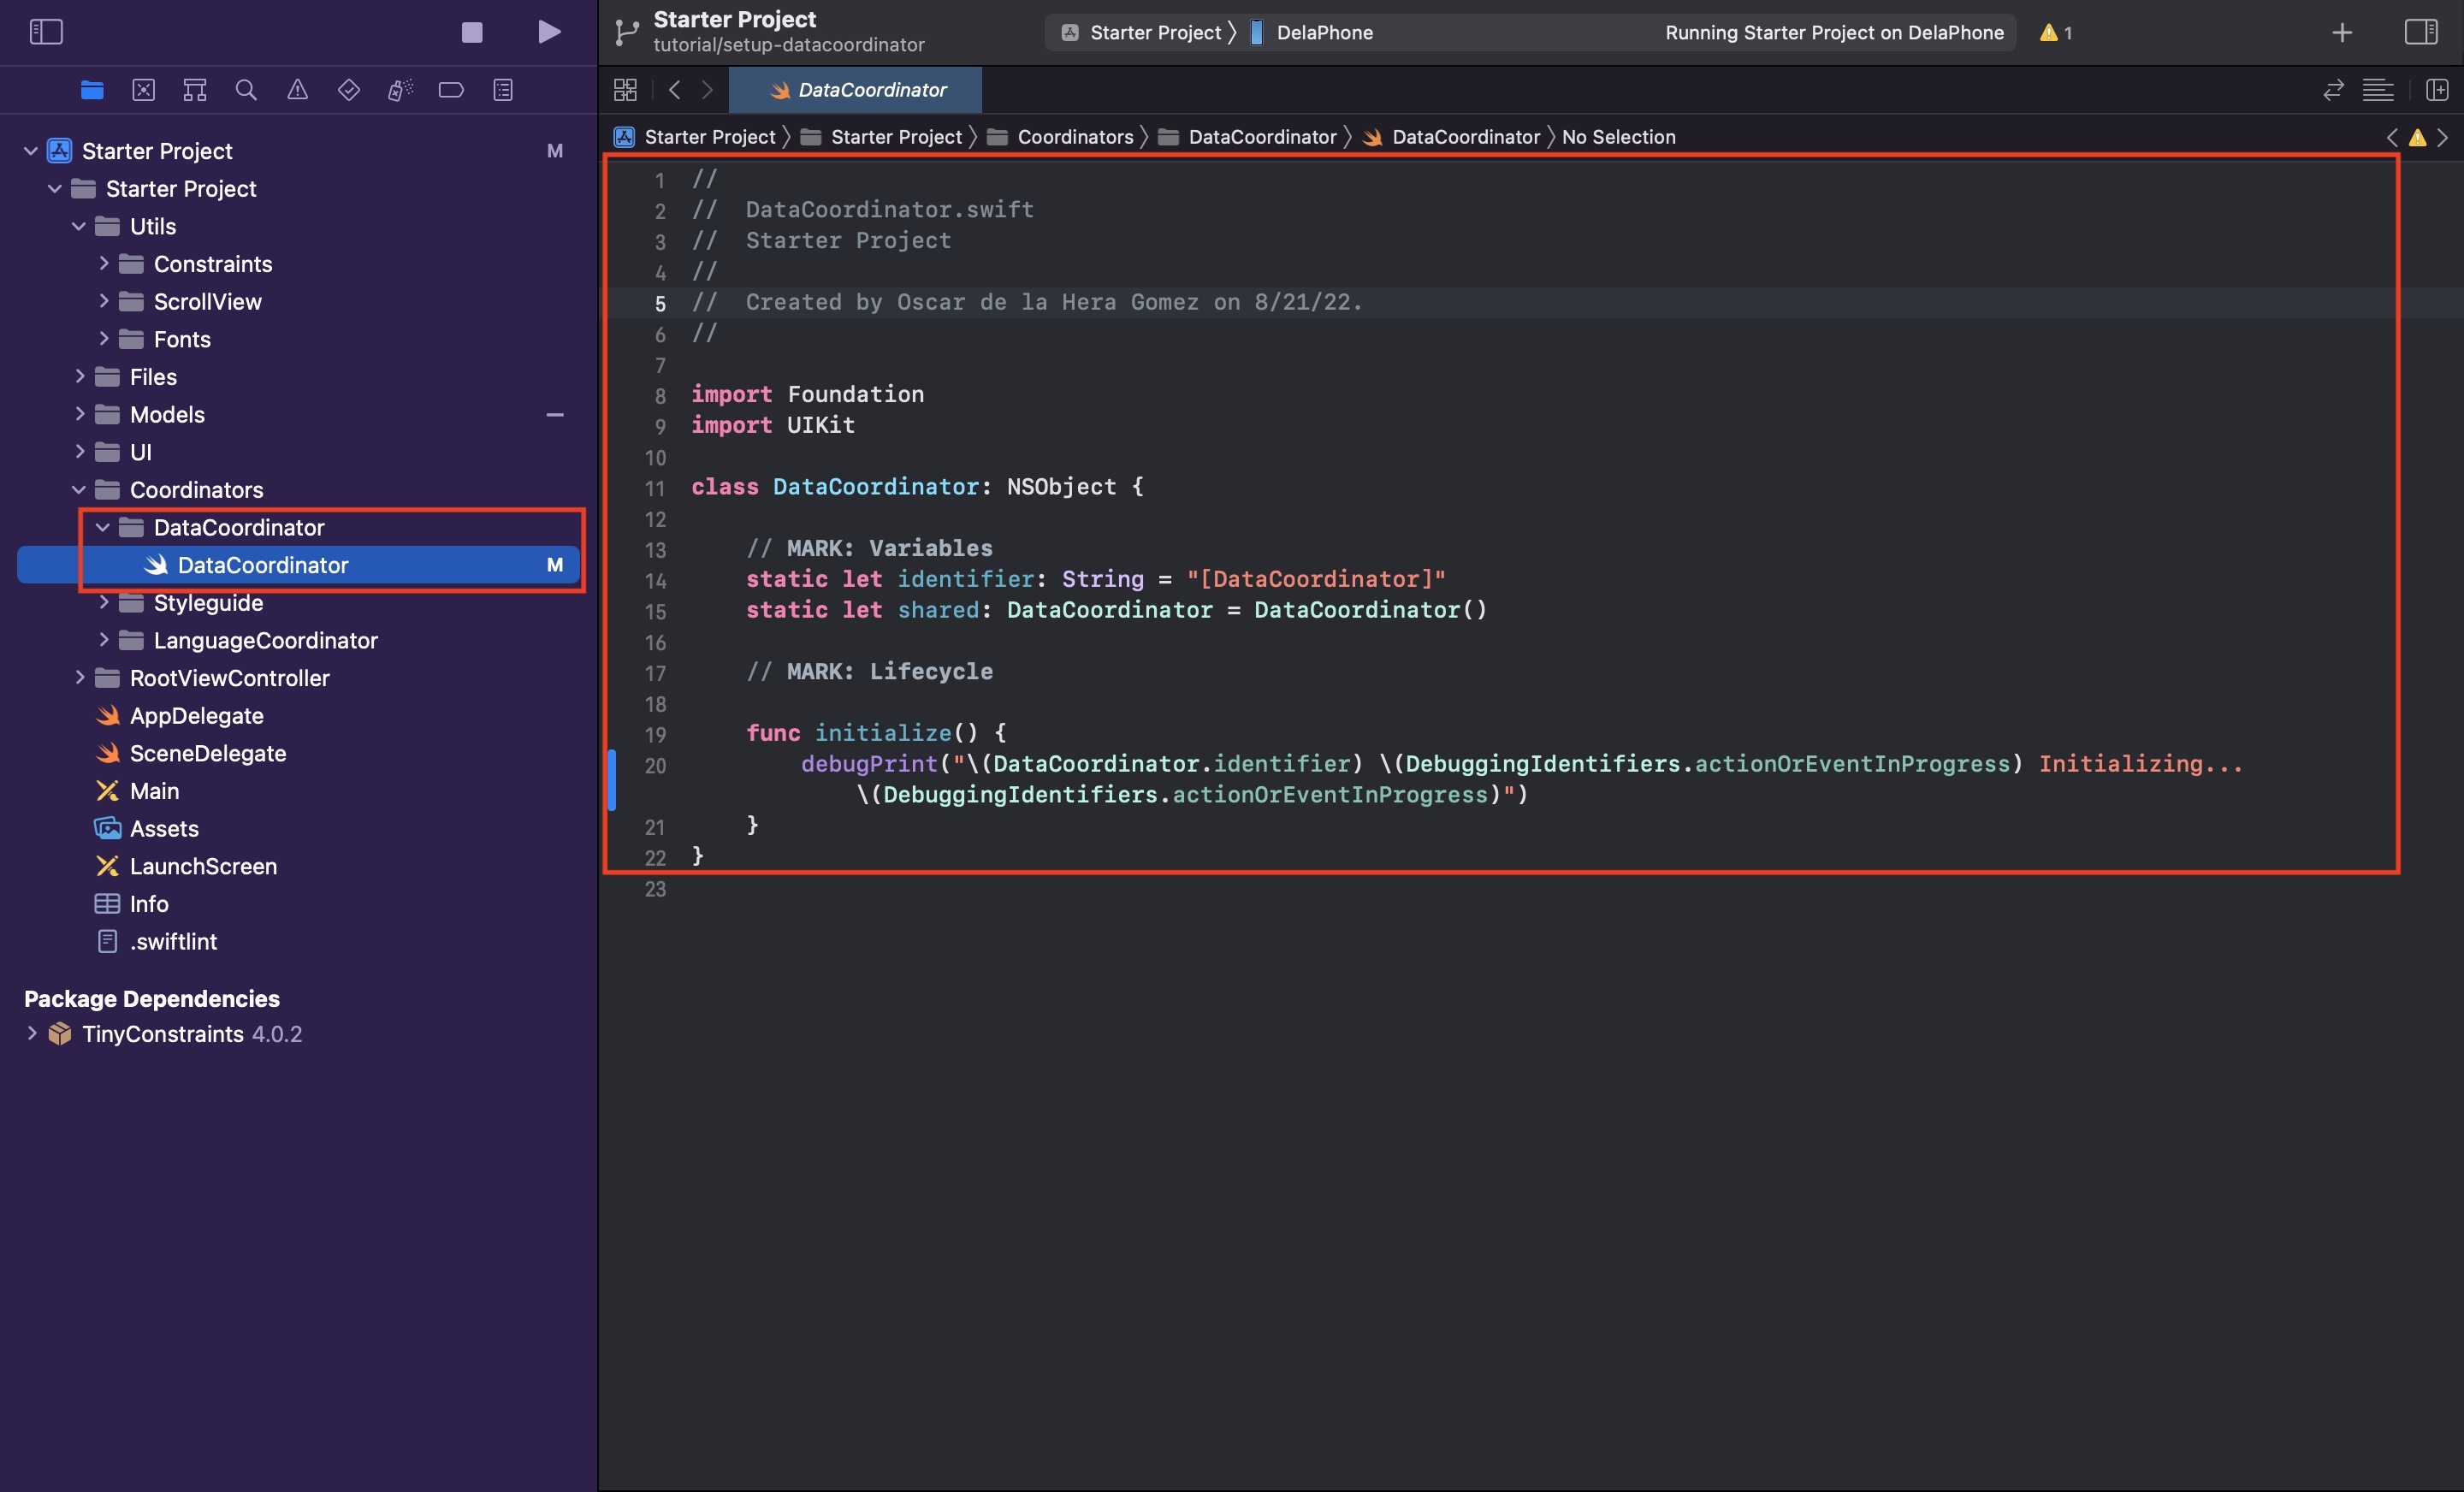
Under the Coordinators folder, create a new folder called DataCoordinator.
Within the DataCoordinator folder, create a new file called DataCoordinator.swift and paste in the code below.
Step Two: Initialize the DataCoordinator
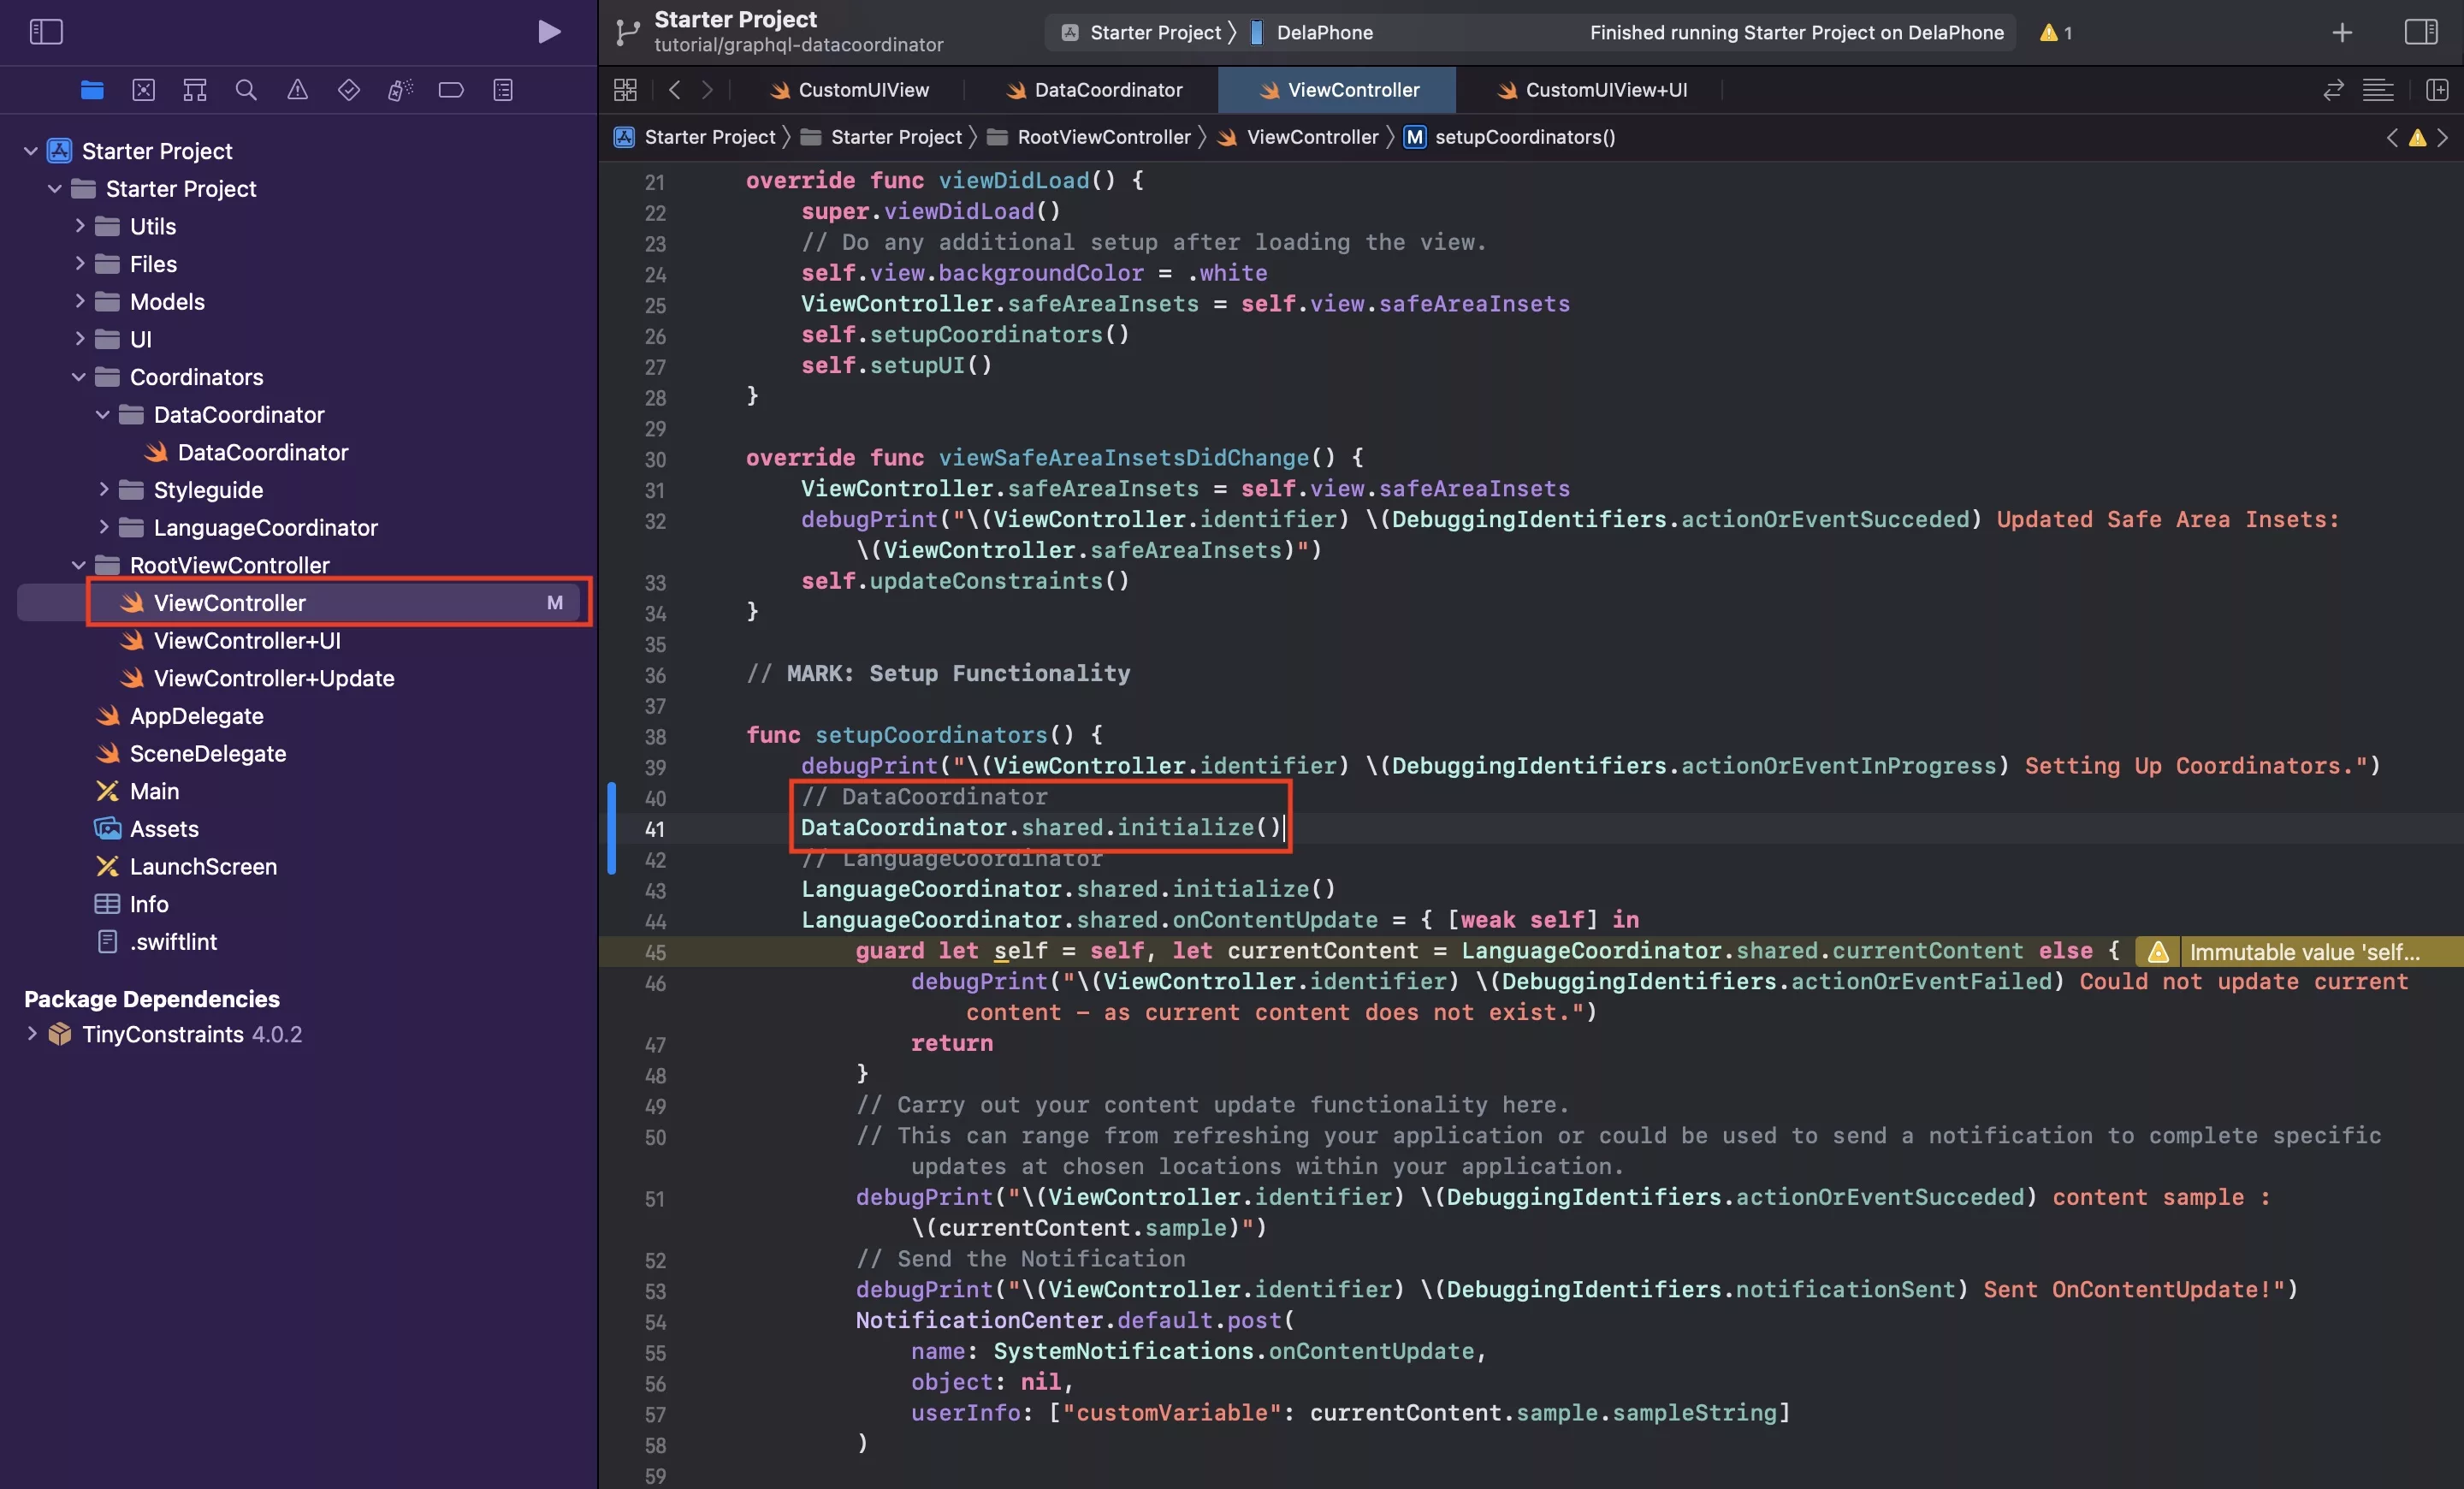
In ViewController.swift, within the setupCoordinators() function, initialize the DataCoordinator.
We recommend that you do this above the LanguageCoordinator.
Step Three: Create the API Configuration model
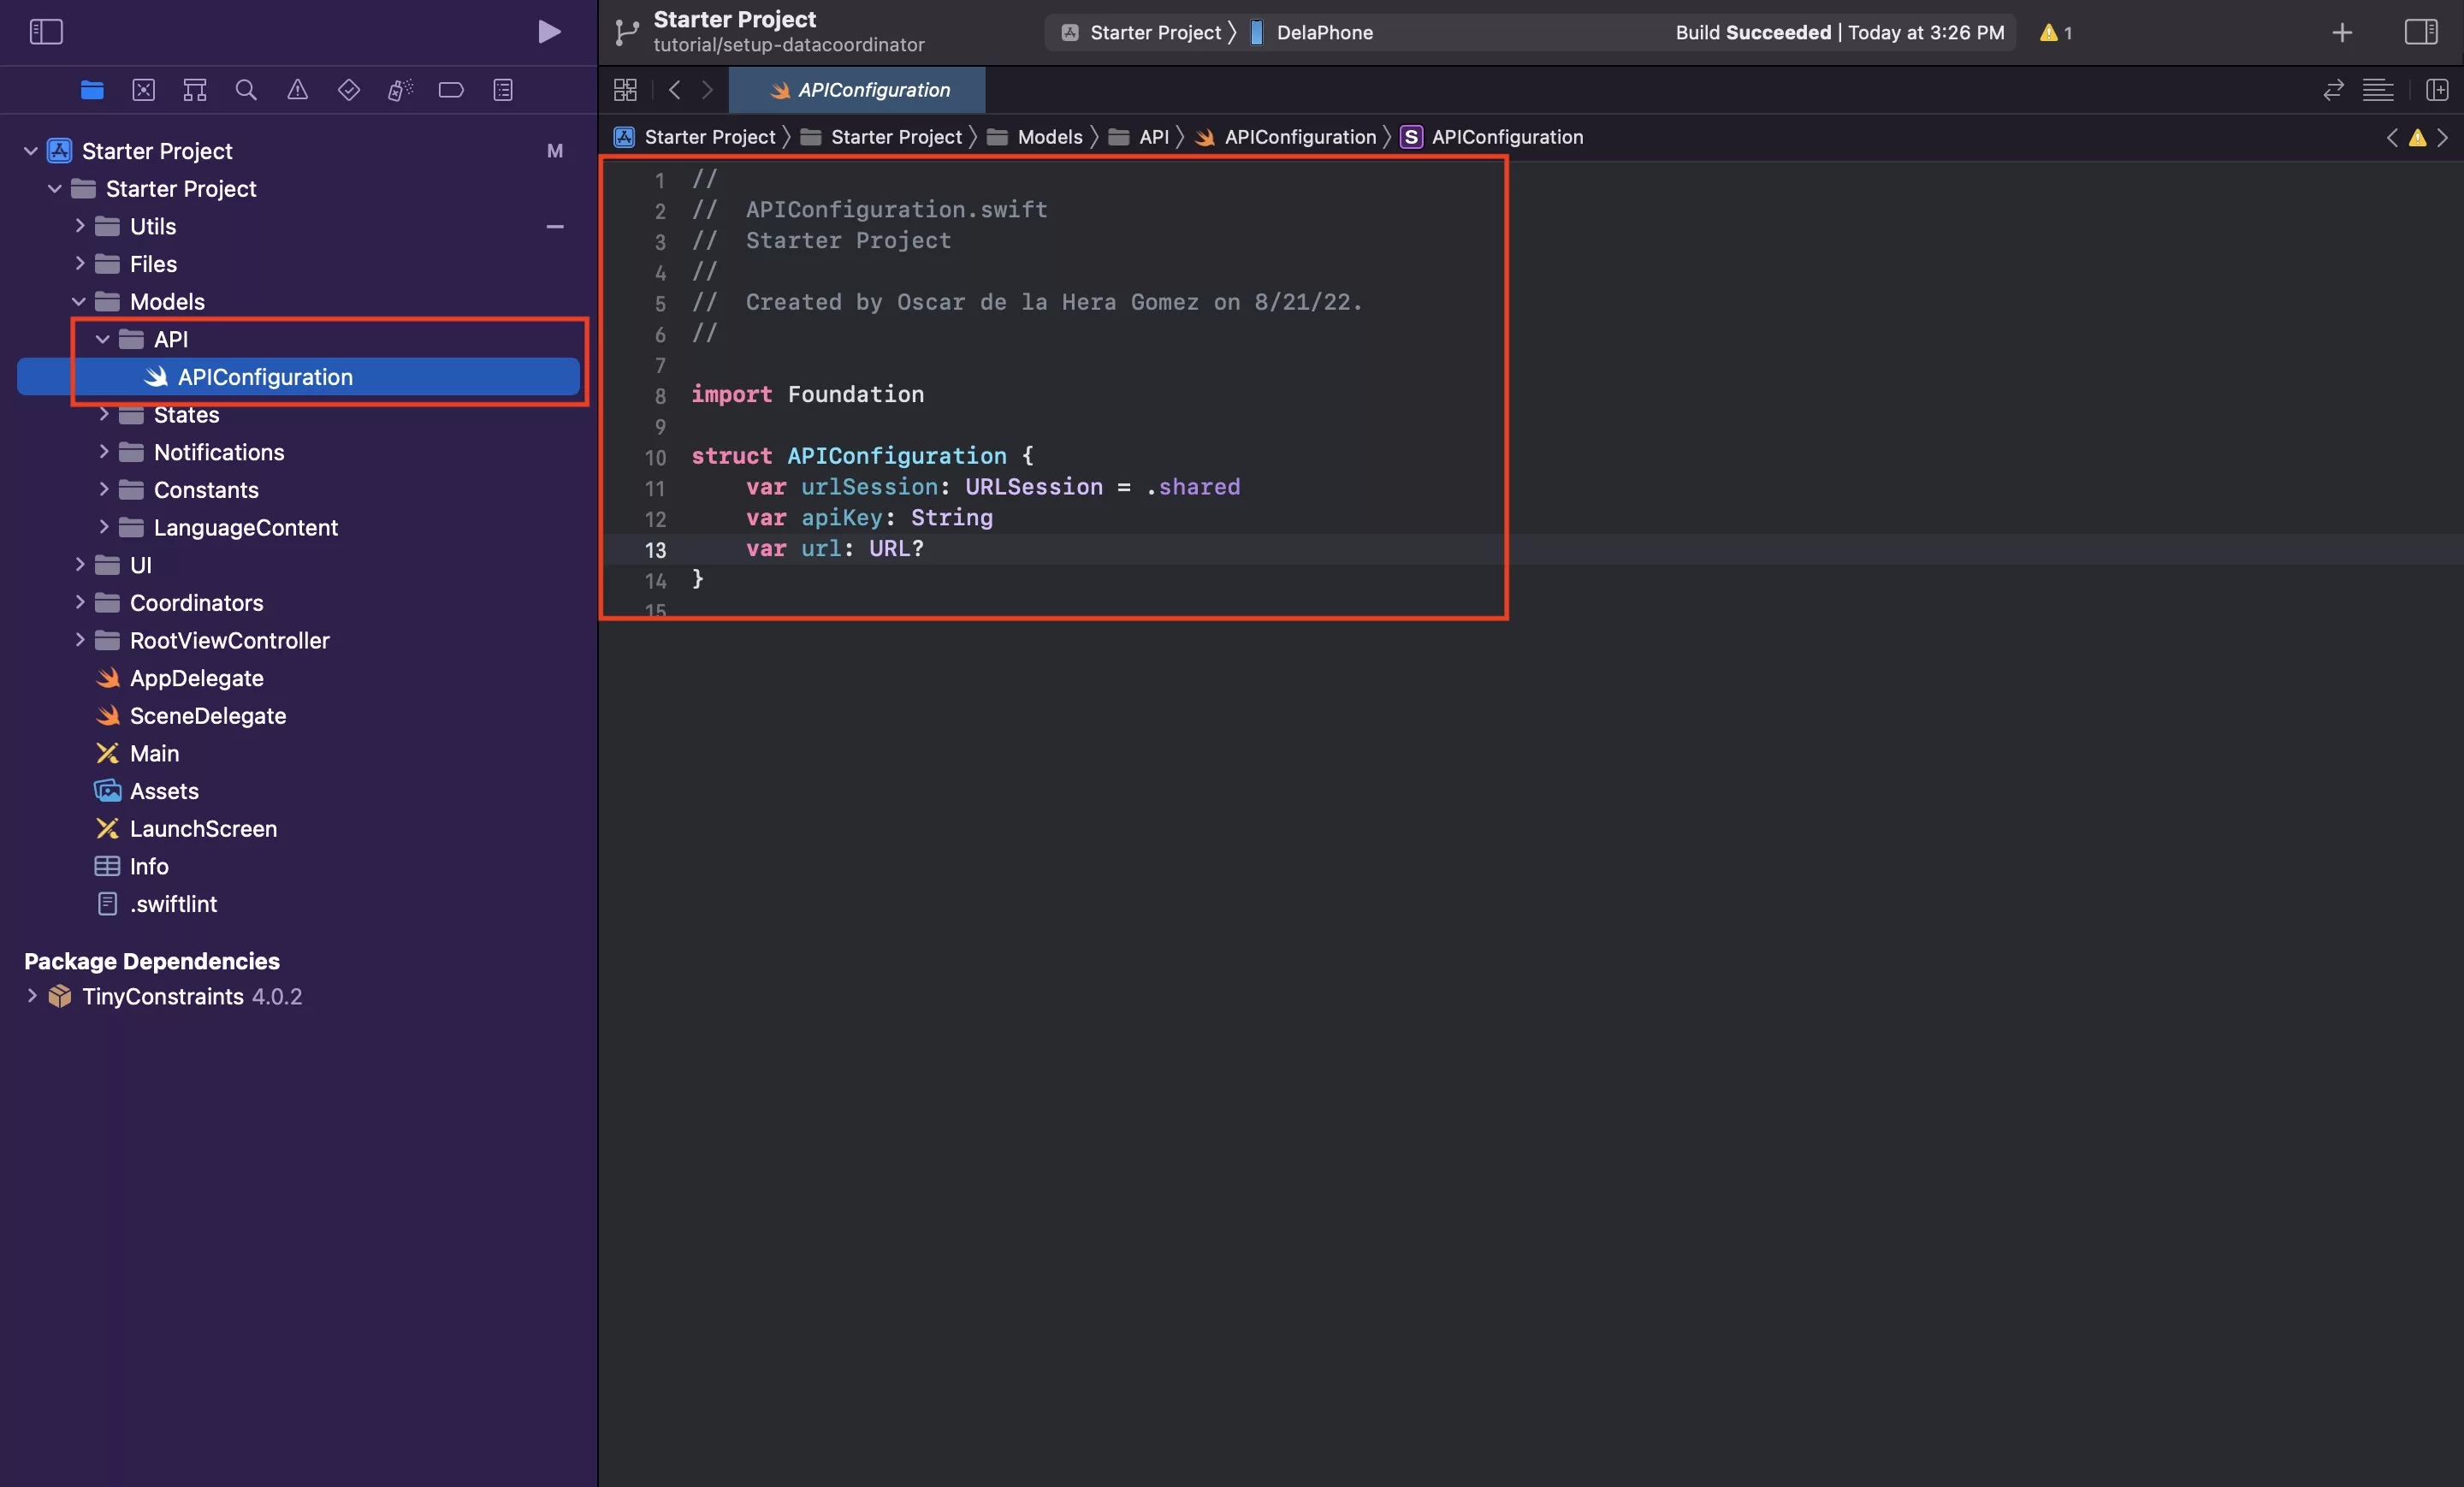
Under the Models folder, create a new folder called API.
Within the API folder, create a new file called APIConfiguration.swift and paste in the code found below.
Step Four: Create the HTTP methods model
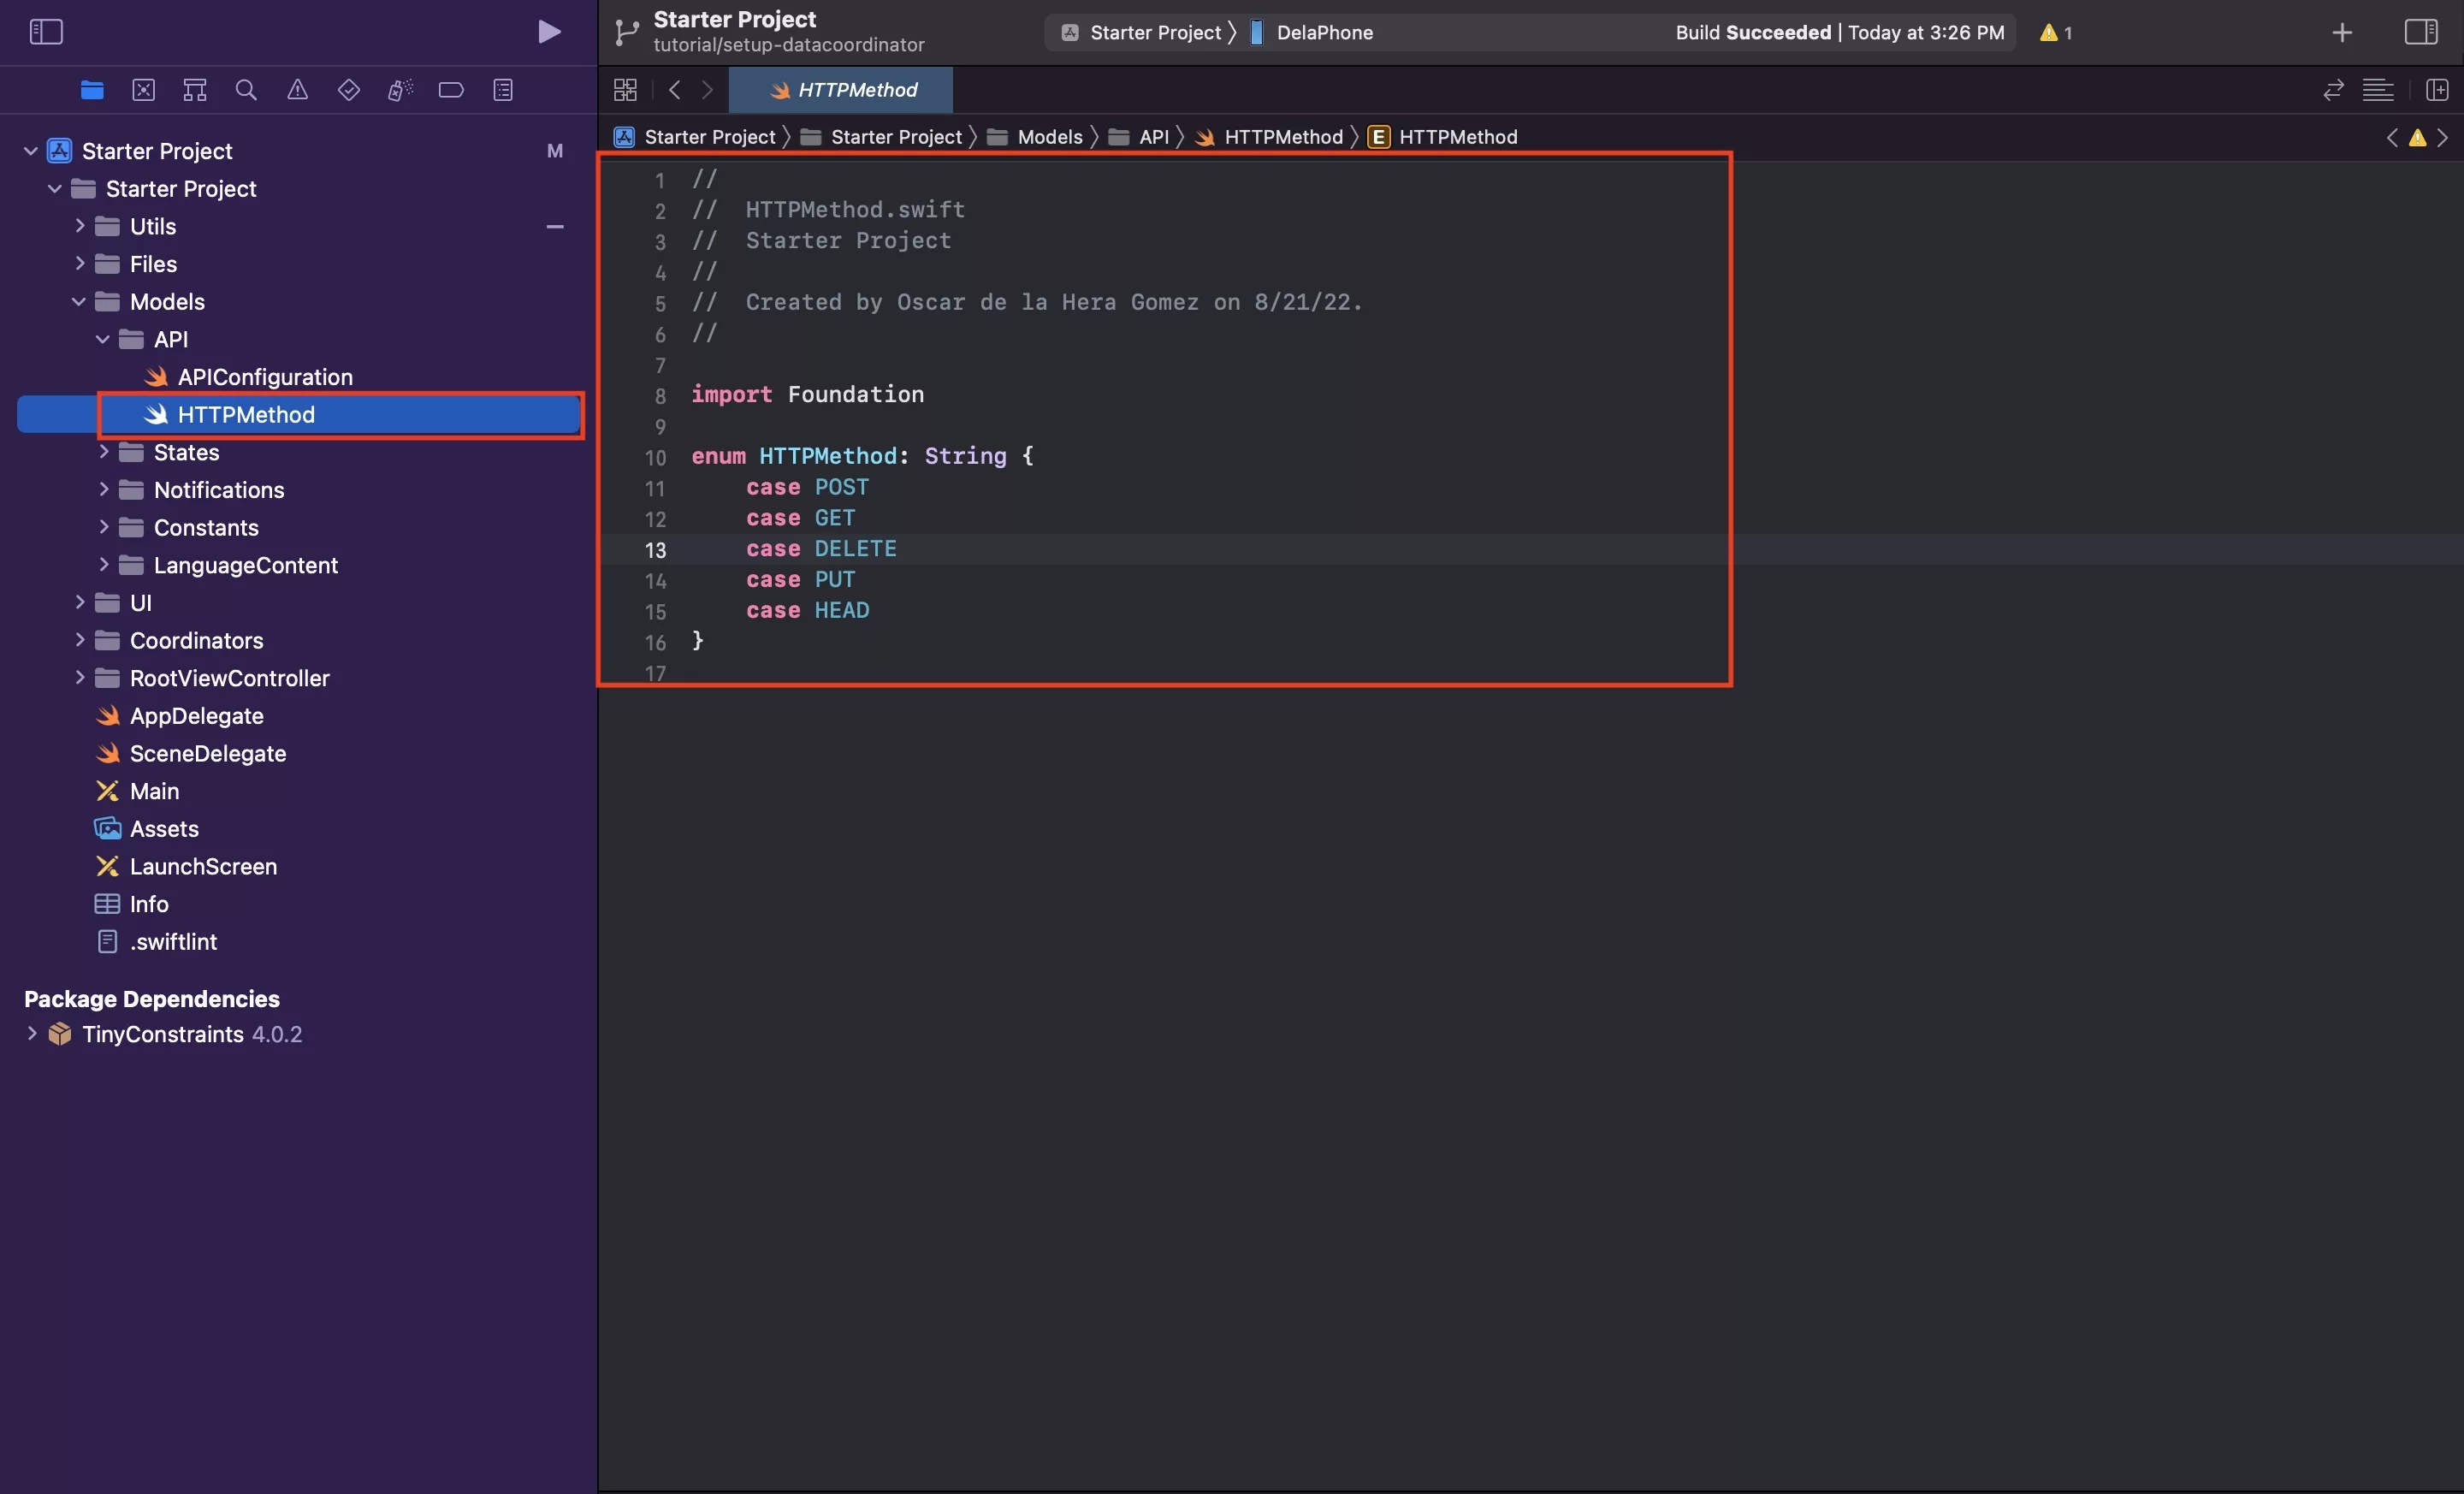
Within the API folder, create a new file called HTTPMethod.swift and paste in the code found below.
Step Five: Create the network errors model
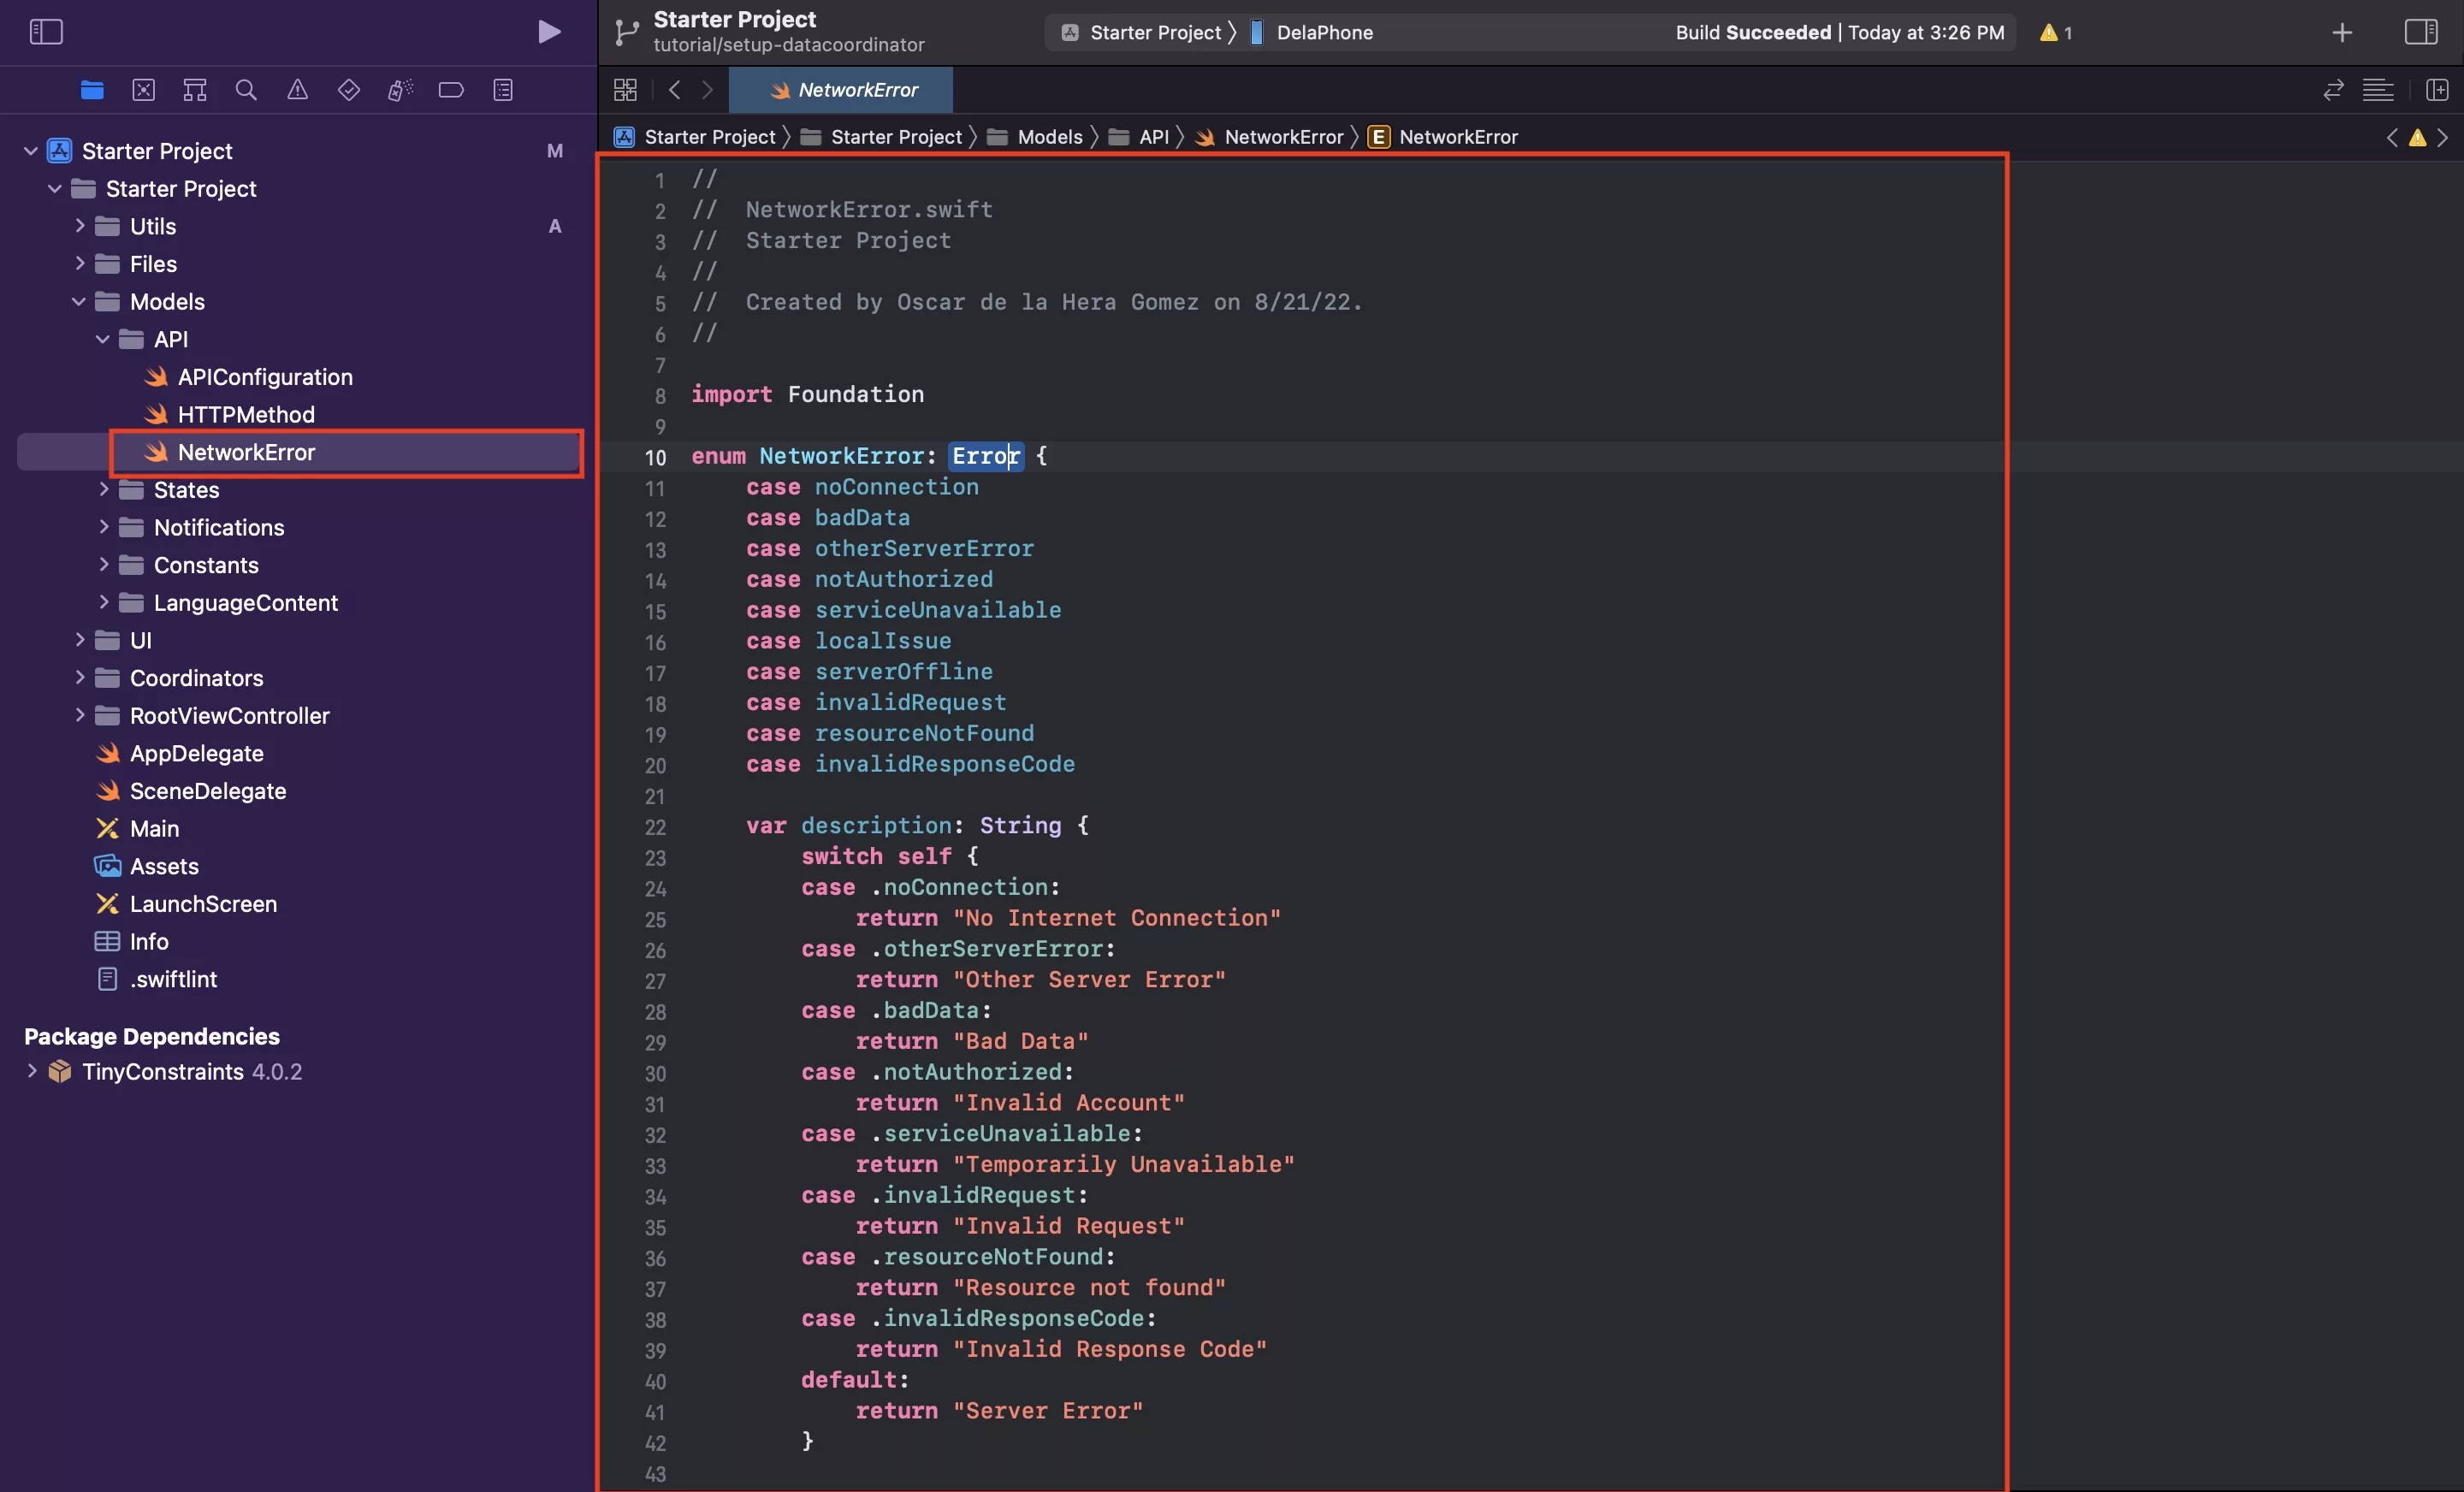
Within the API folder, create a new file called NetworkError.swift and paste in the code found below.
Step Six: Create the Configuration.plist
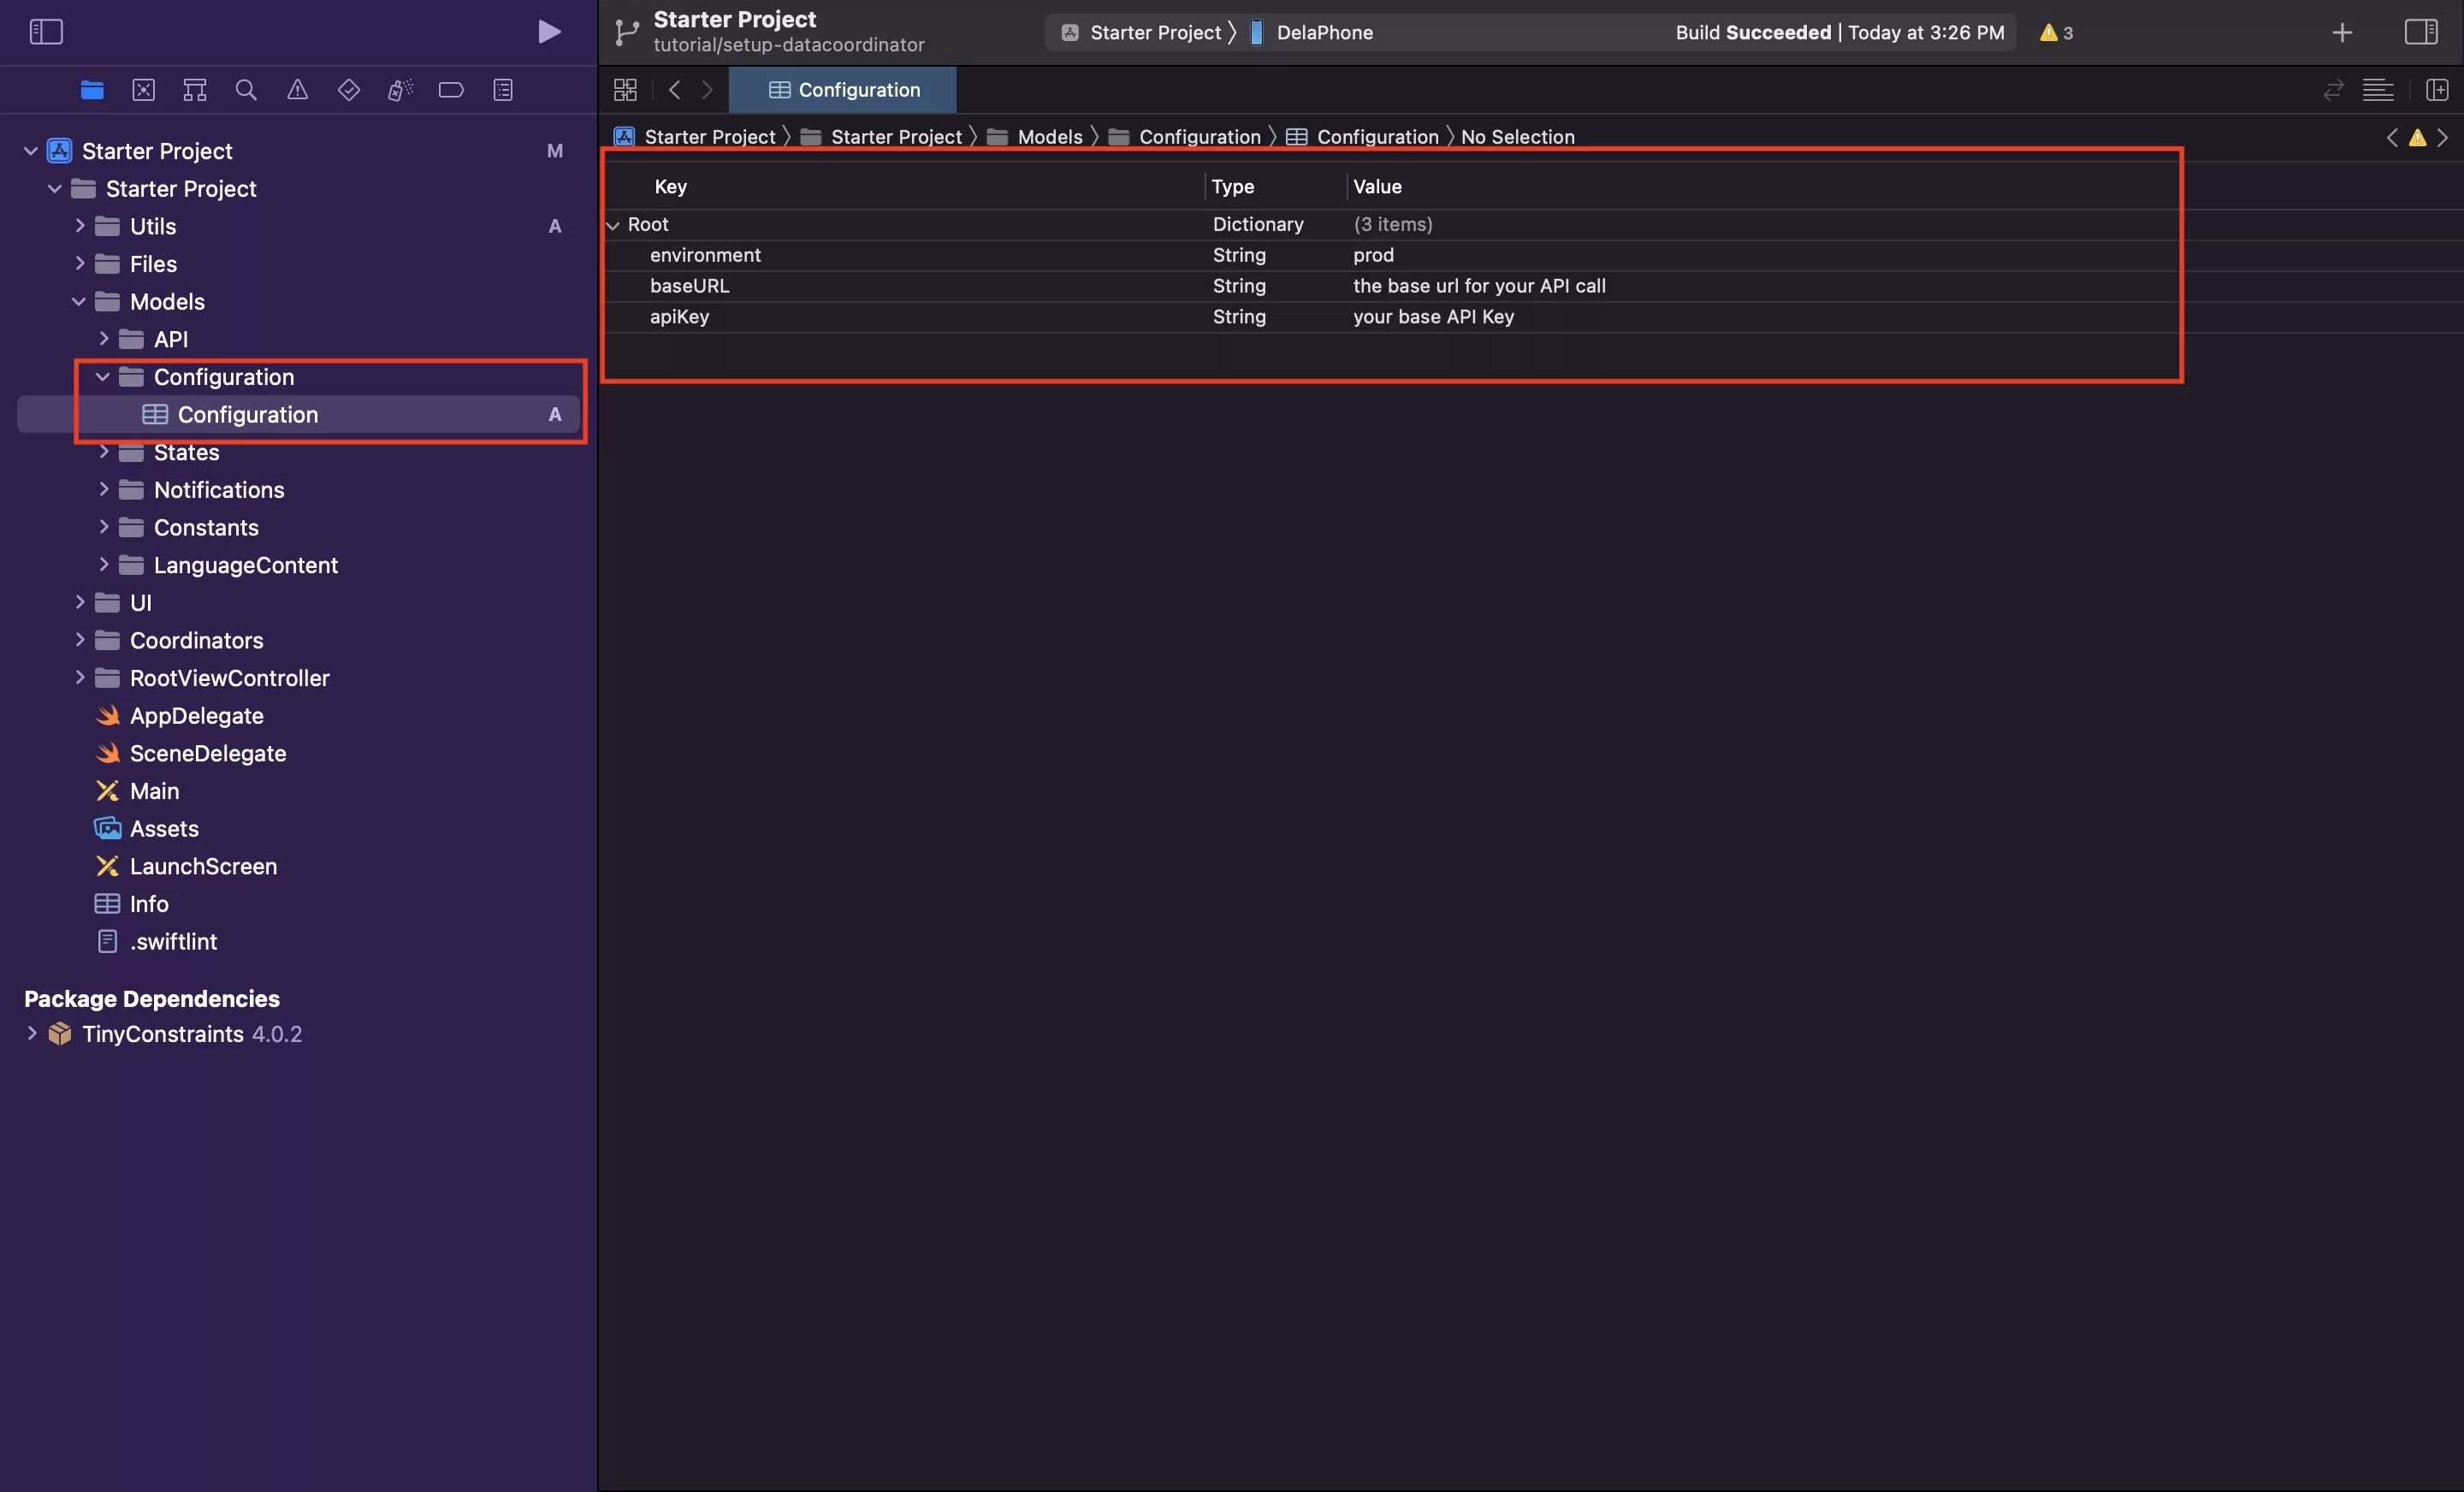
Under the Models folder, create a new folder called Configuration.
Within the Configuration folder, create a new file called Configuration.plist.
We have added a three strings to the Configuration.plist for the purposes of this tutorial:
- environment
- baseURL
- apiKey
We recommend that you use this plist, and the subsequent steps 7 - 10 to make your configuration available to the system in a cohesive way.
Step Seven: Create your Configuration Keys
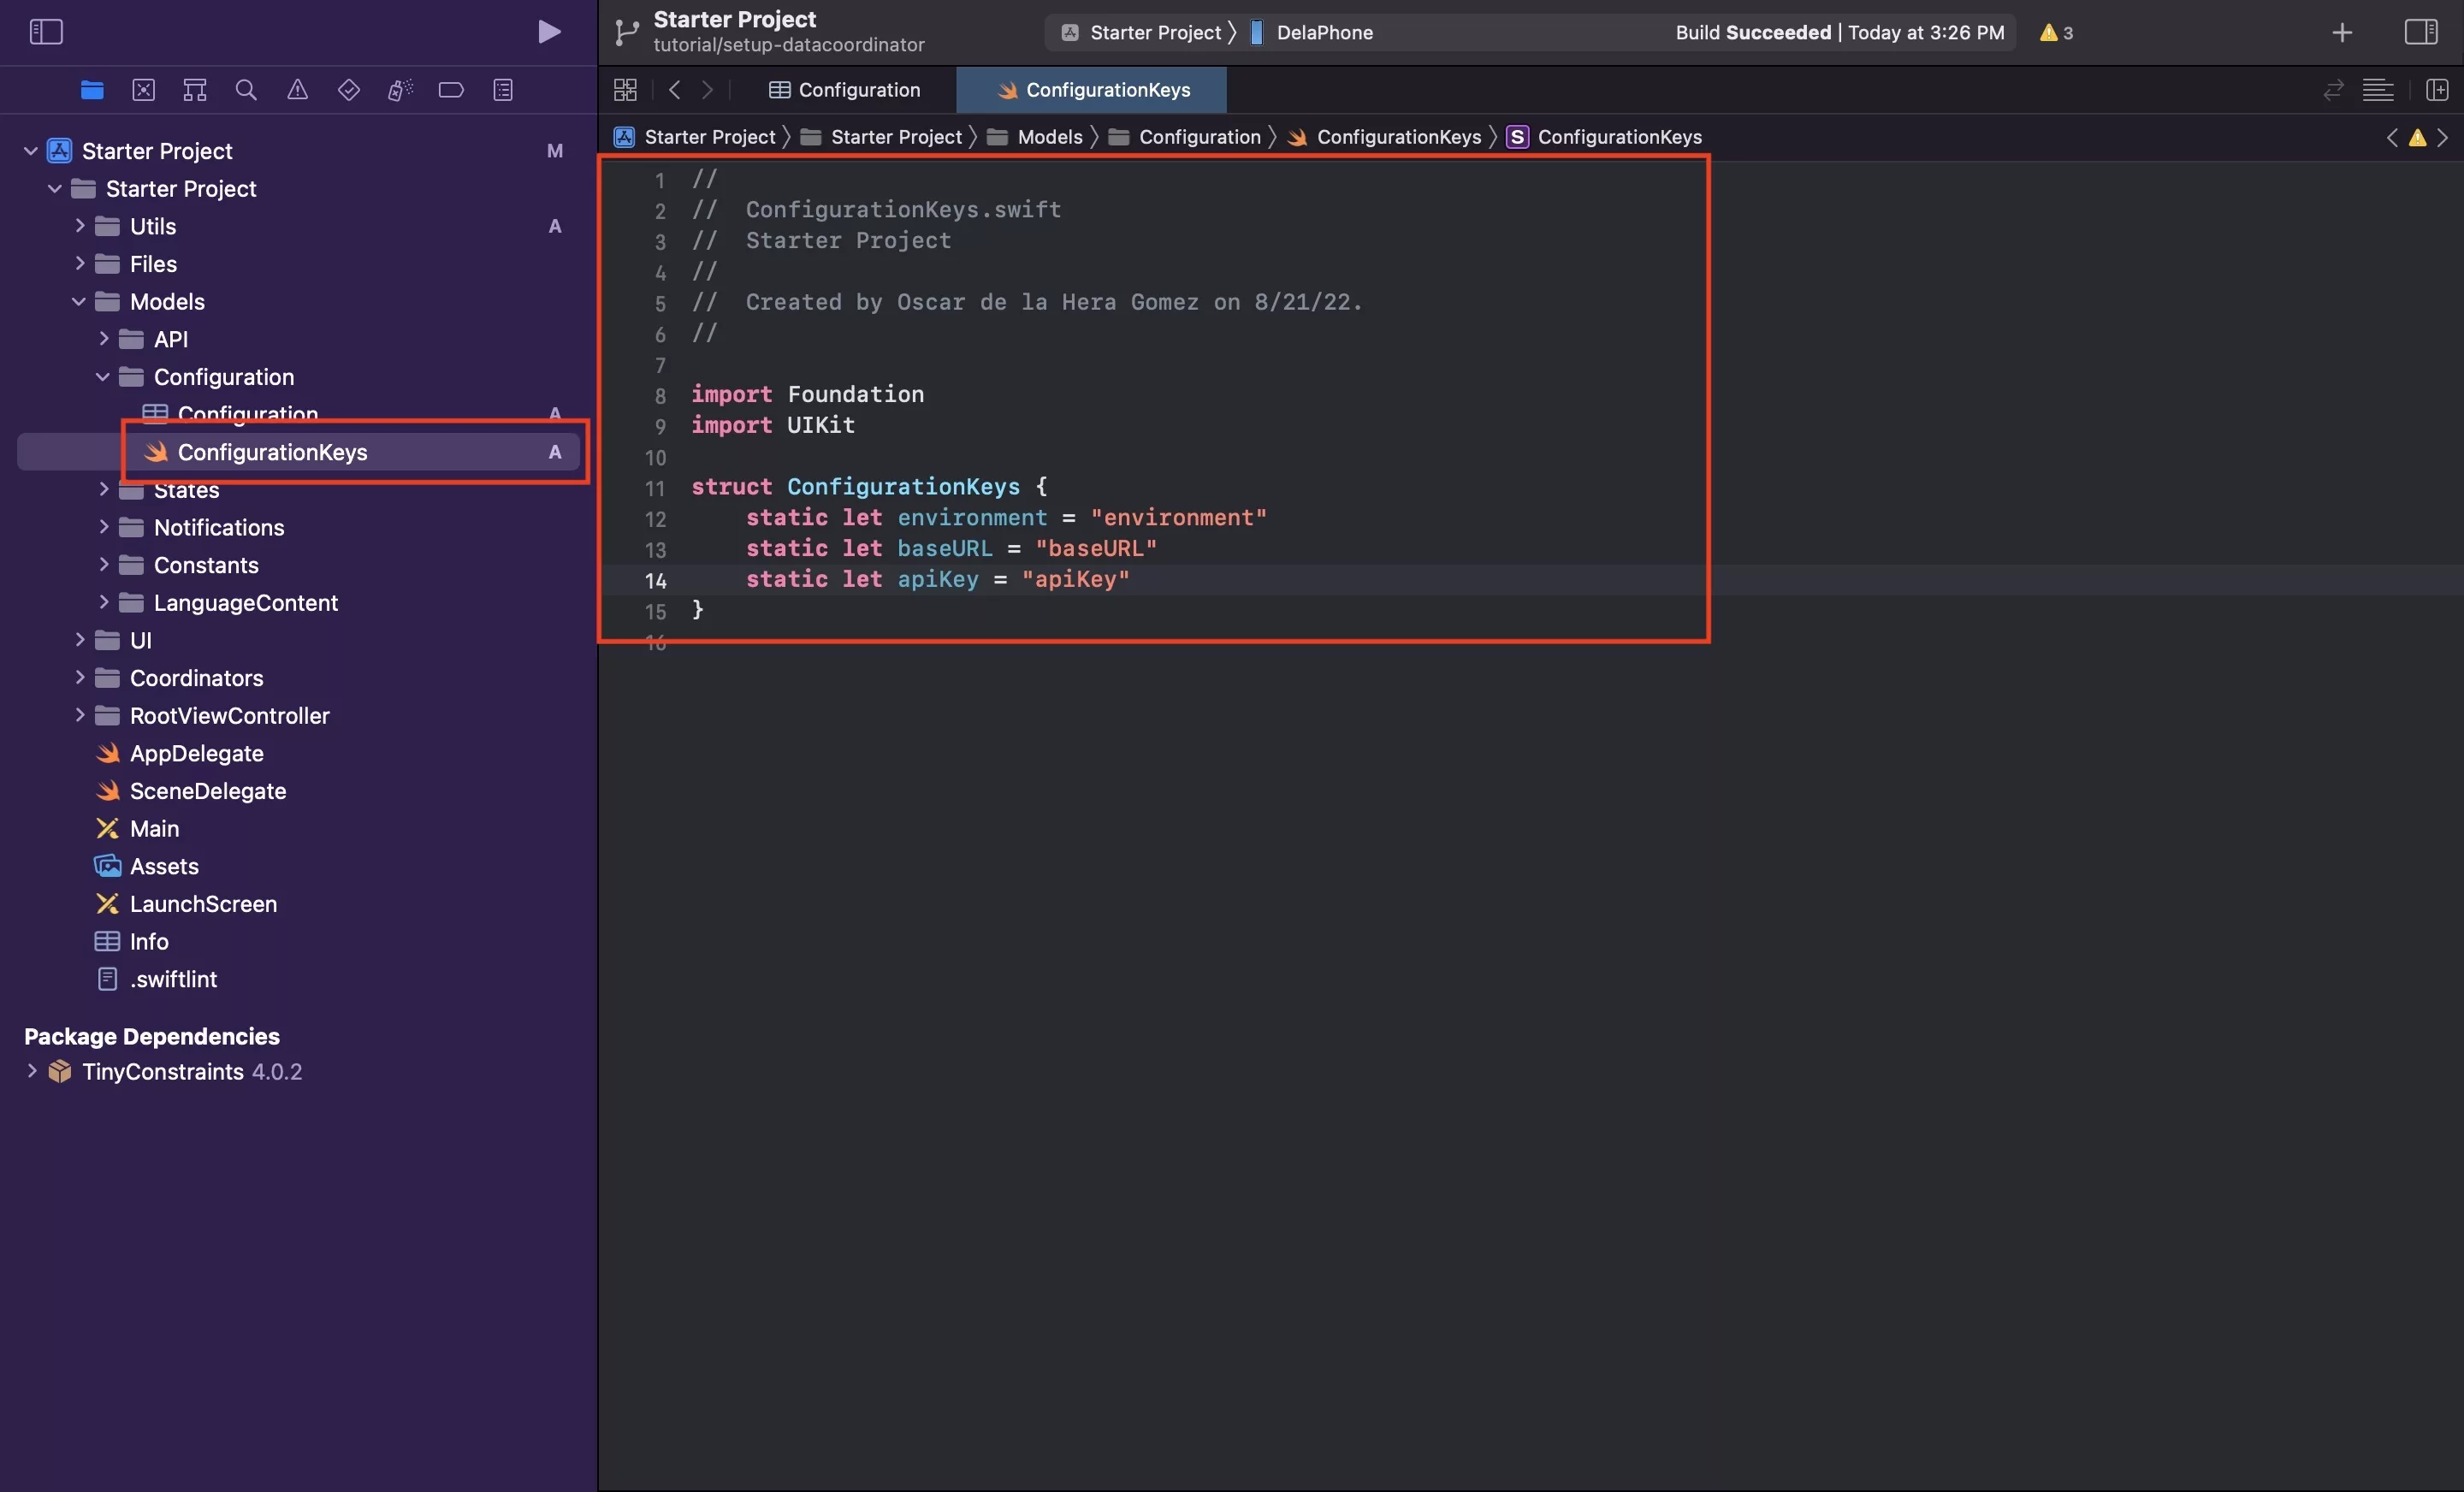
Within the Configuration folder, create a new file called ConfigurationKeys.swift and paste in the code below.
These keys should match the items in your plist and should be updated whenever your plist gets updated.
Step Eight: Create your Configuration
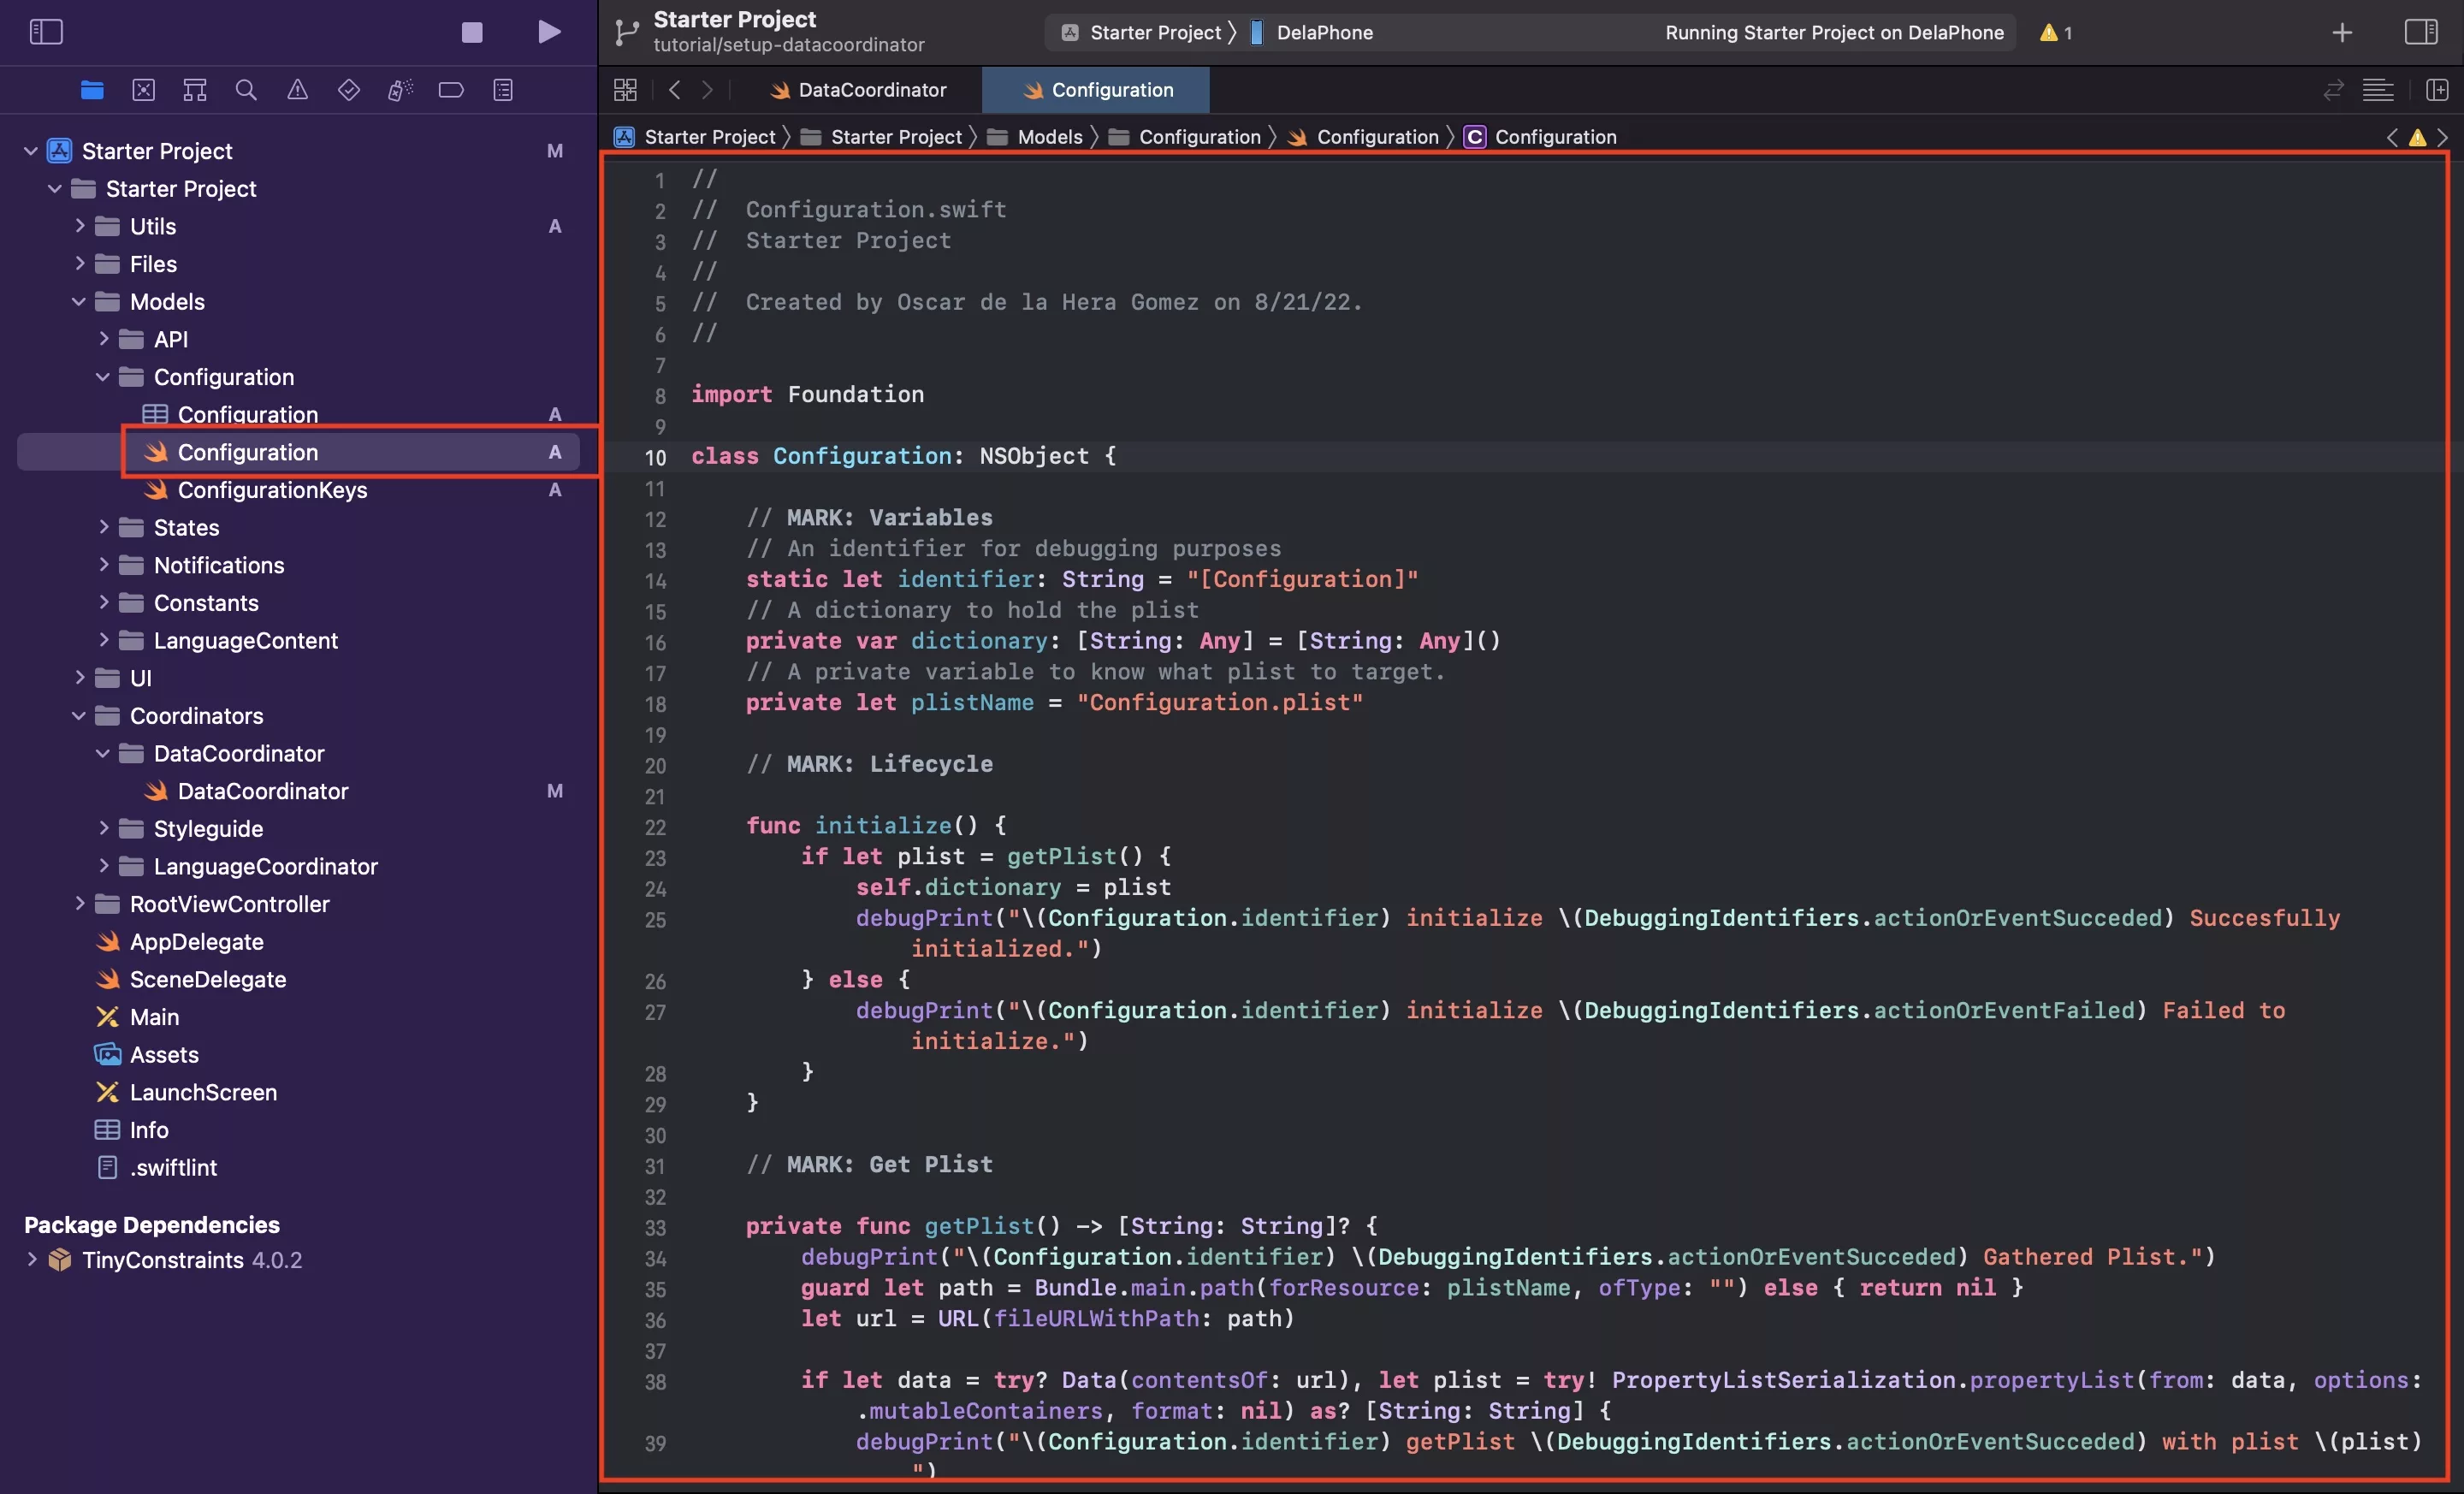
Within the Configuration folder, create a new file called Configuration.swift and paste in the code found below.
We recommend you place this above the ConfigurationKeys.swift.
This code is responsible for gathering the plist on initialization and provides two utility functions that help you gather strings and booleans from your configuration.
Please note that for the purposes of this tutorial, we will only be gathering strings from your configuration as the configuration is composed entirely out of strings.
Step Nine: Create a Configuration+Get extension
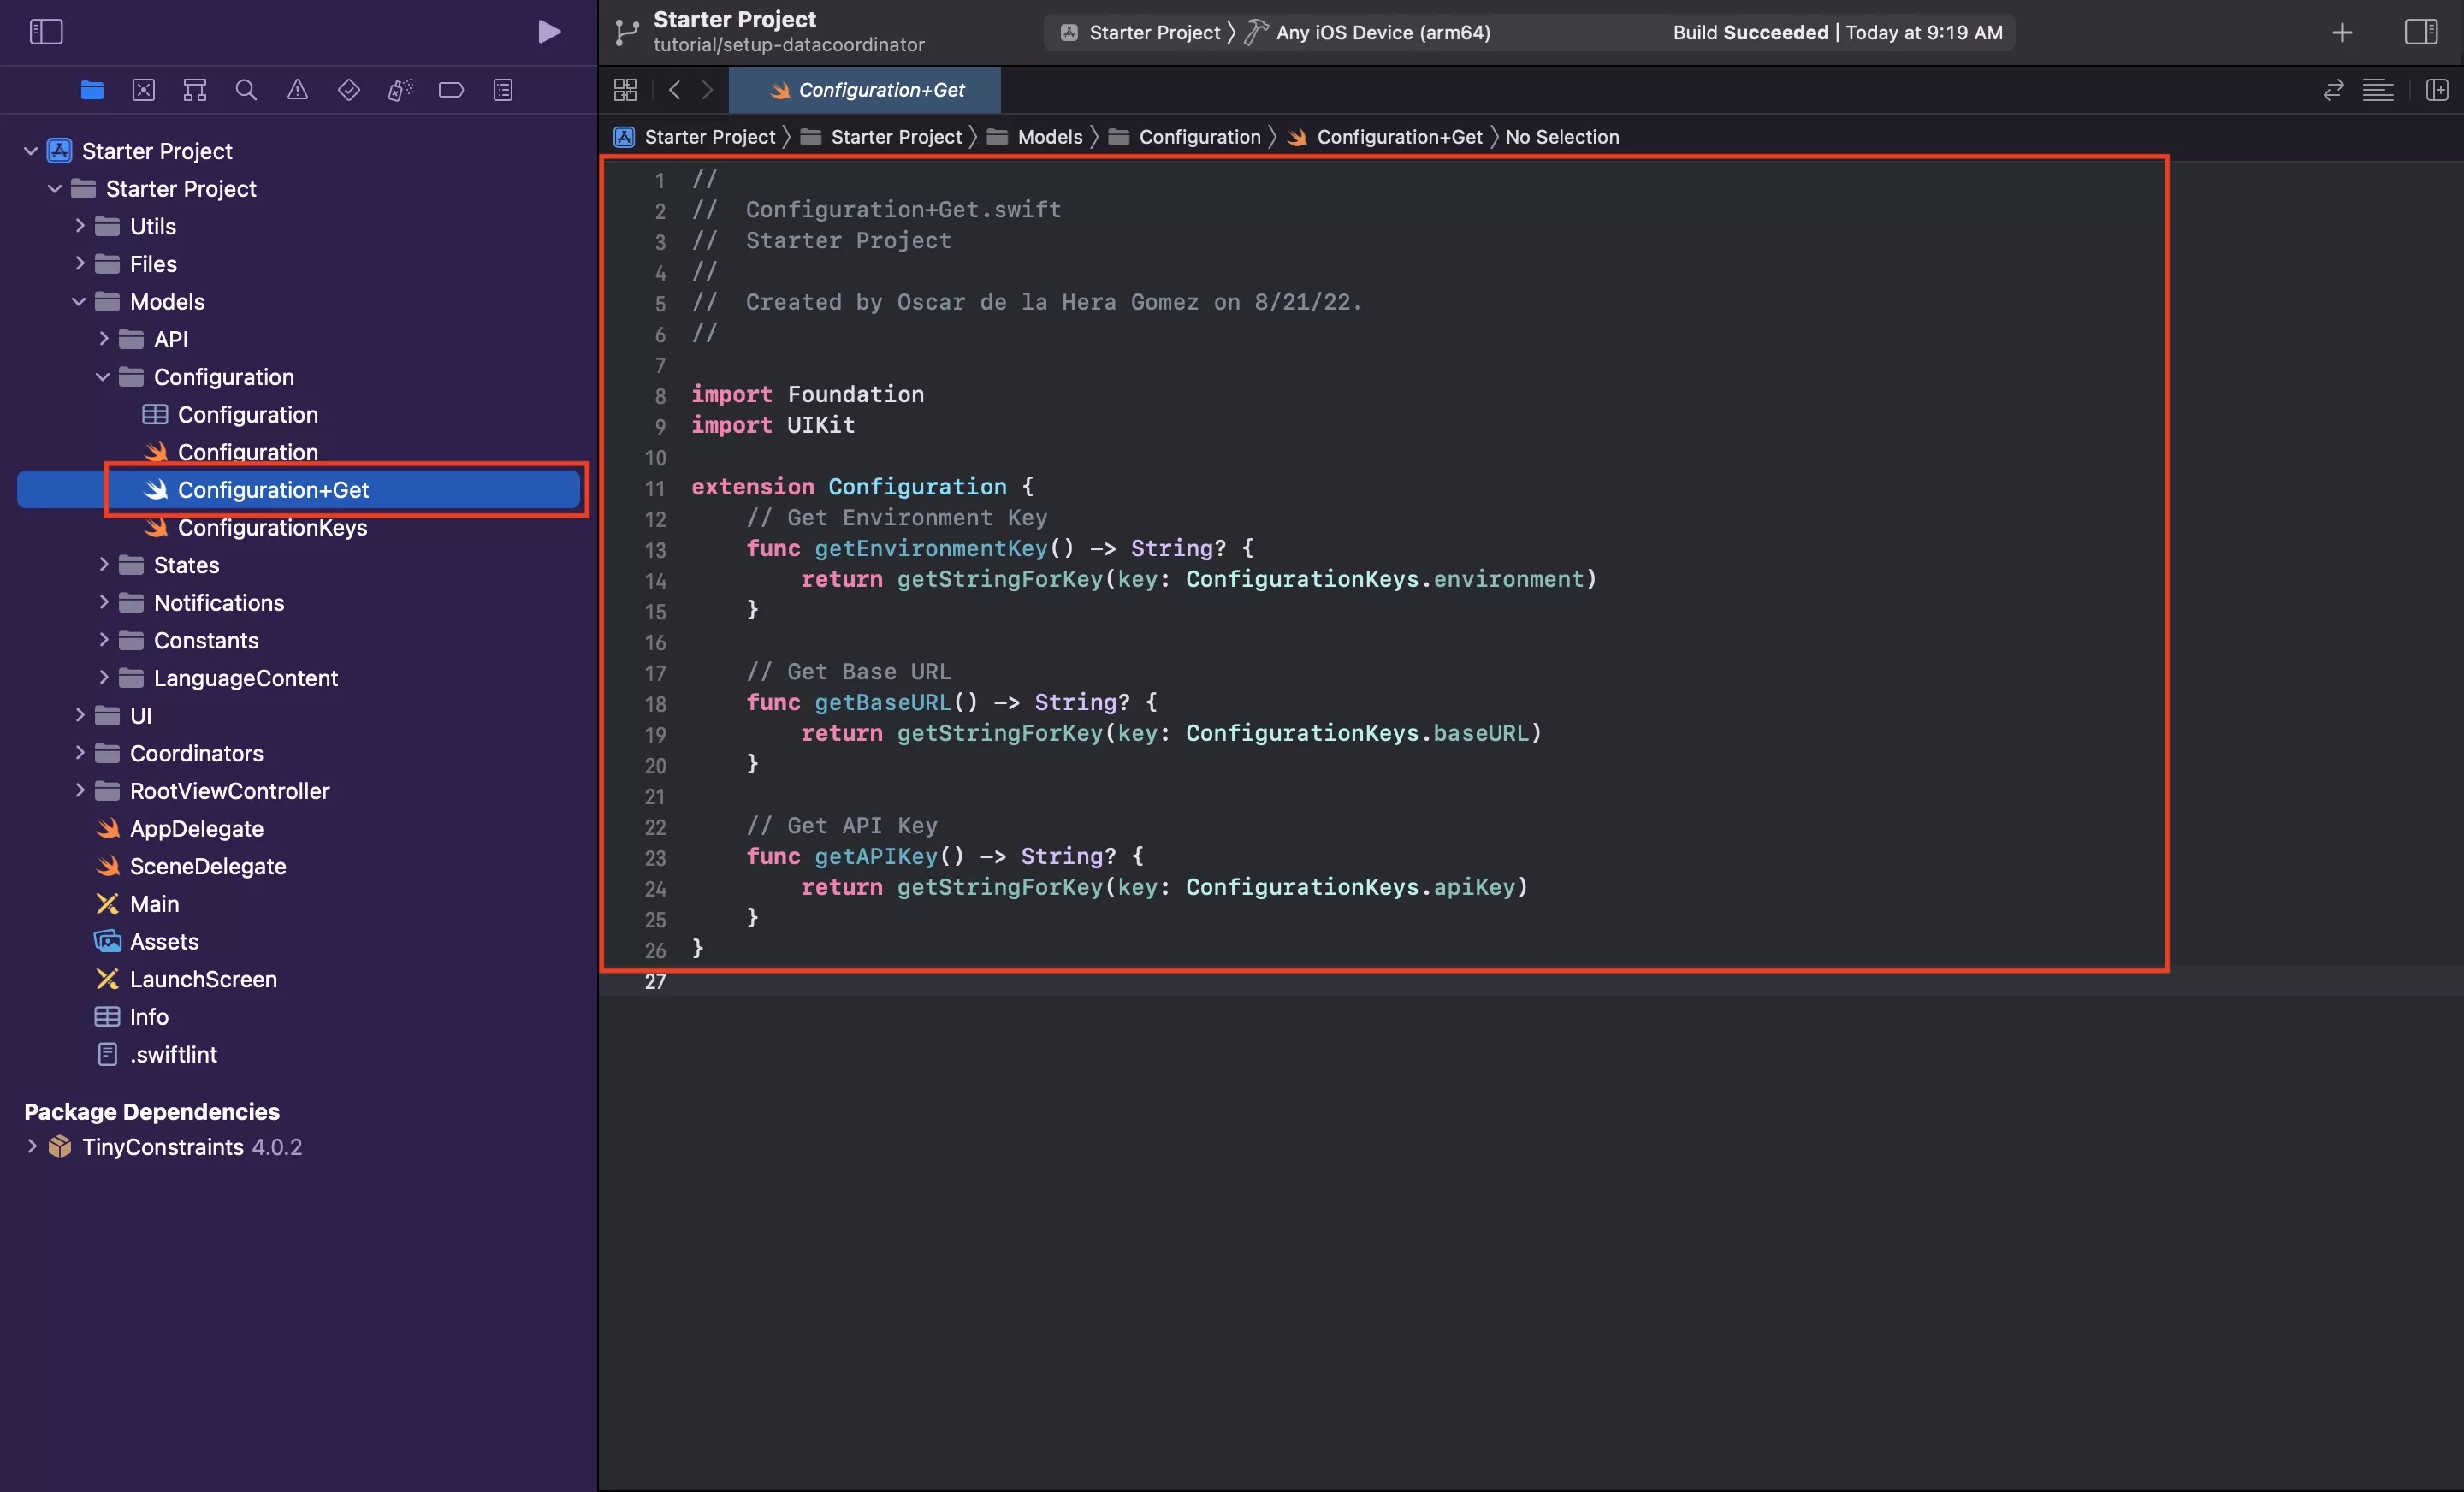
Within the Configuration folder, create a new file called Configuration+Get.swift and paste in the code found below.
We recommend you place this above the ConfigurationKeys.swift.
These get functions should match the items in your plist and should be updated whenever your plist gets updated.
Step Ten: Initialize Configuration
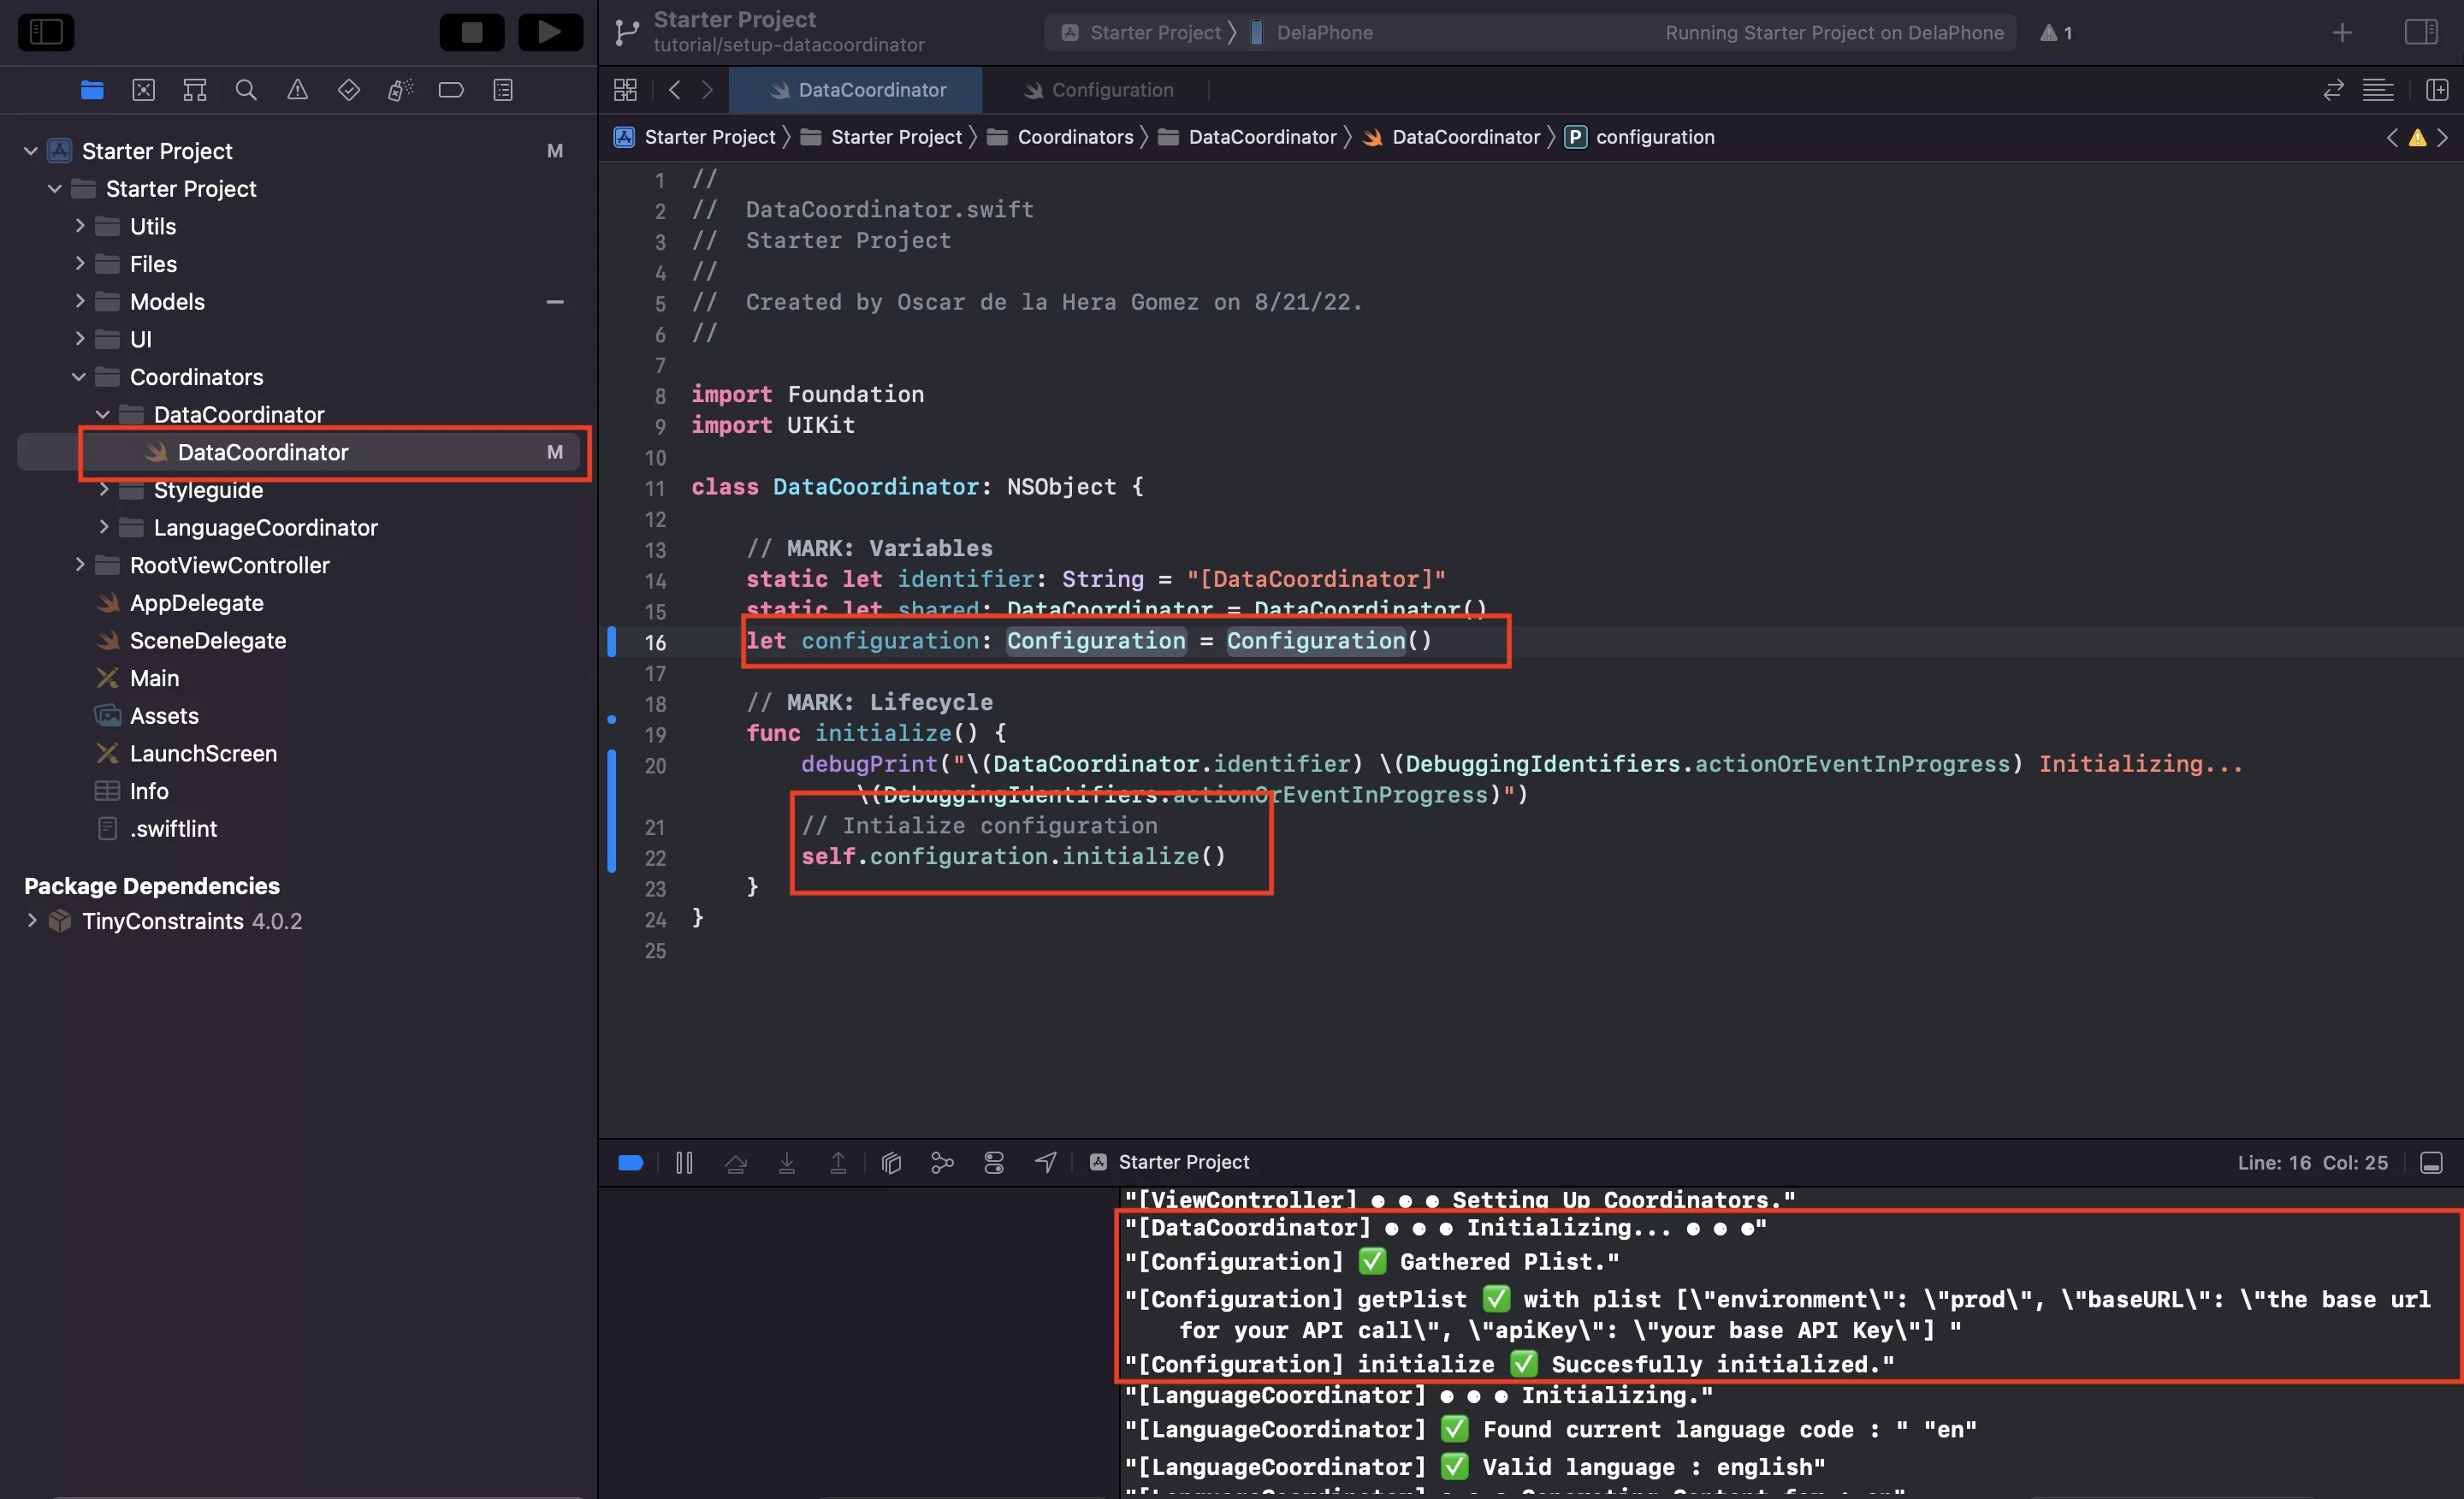
In DataCoordinator.swift, declare the Configuration as a constant and initialize the configuration in the initialize function.
Run your app to confirm that it initializes correctly.
Step Eleven: Create the APIRequestHeader

In the API folder, create a new file called APIRequestHeader.swift and paste in the code found below.
We recommend placing it below the APIConfiguratation.swift file.
Step Twelve: Create the APIClient
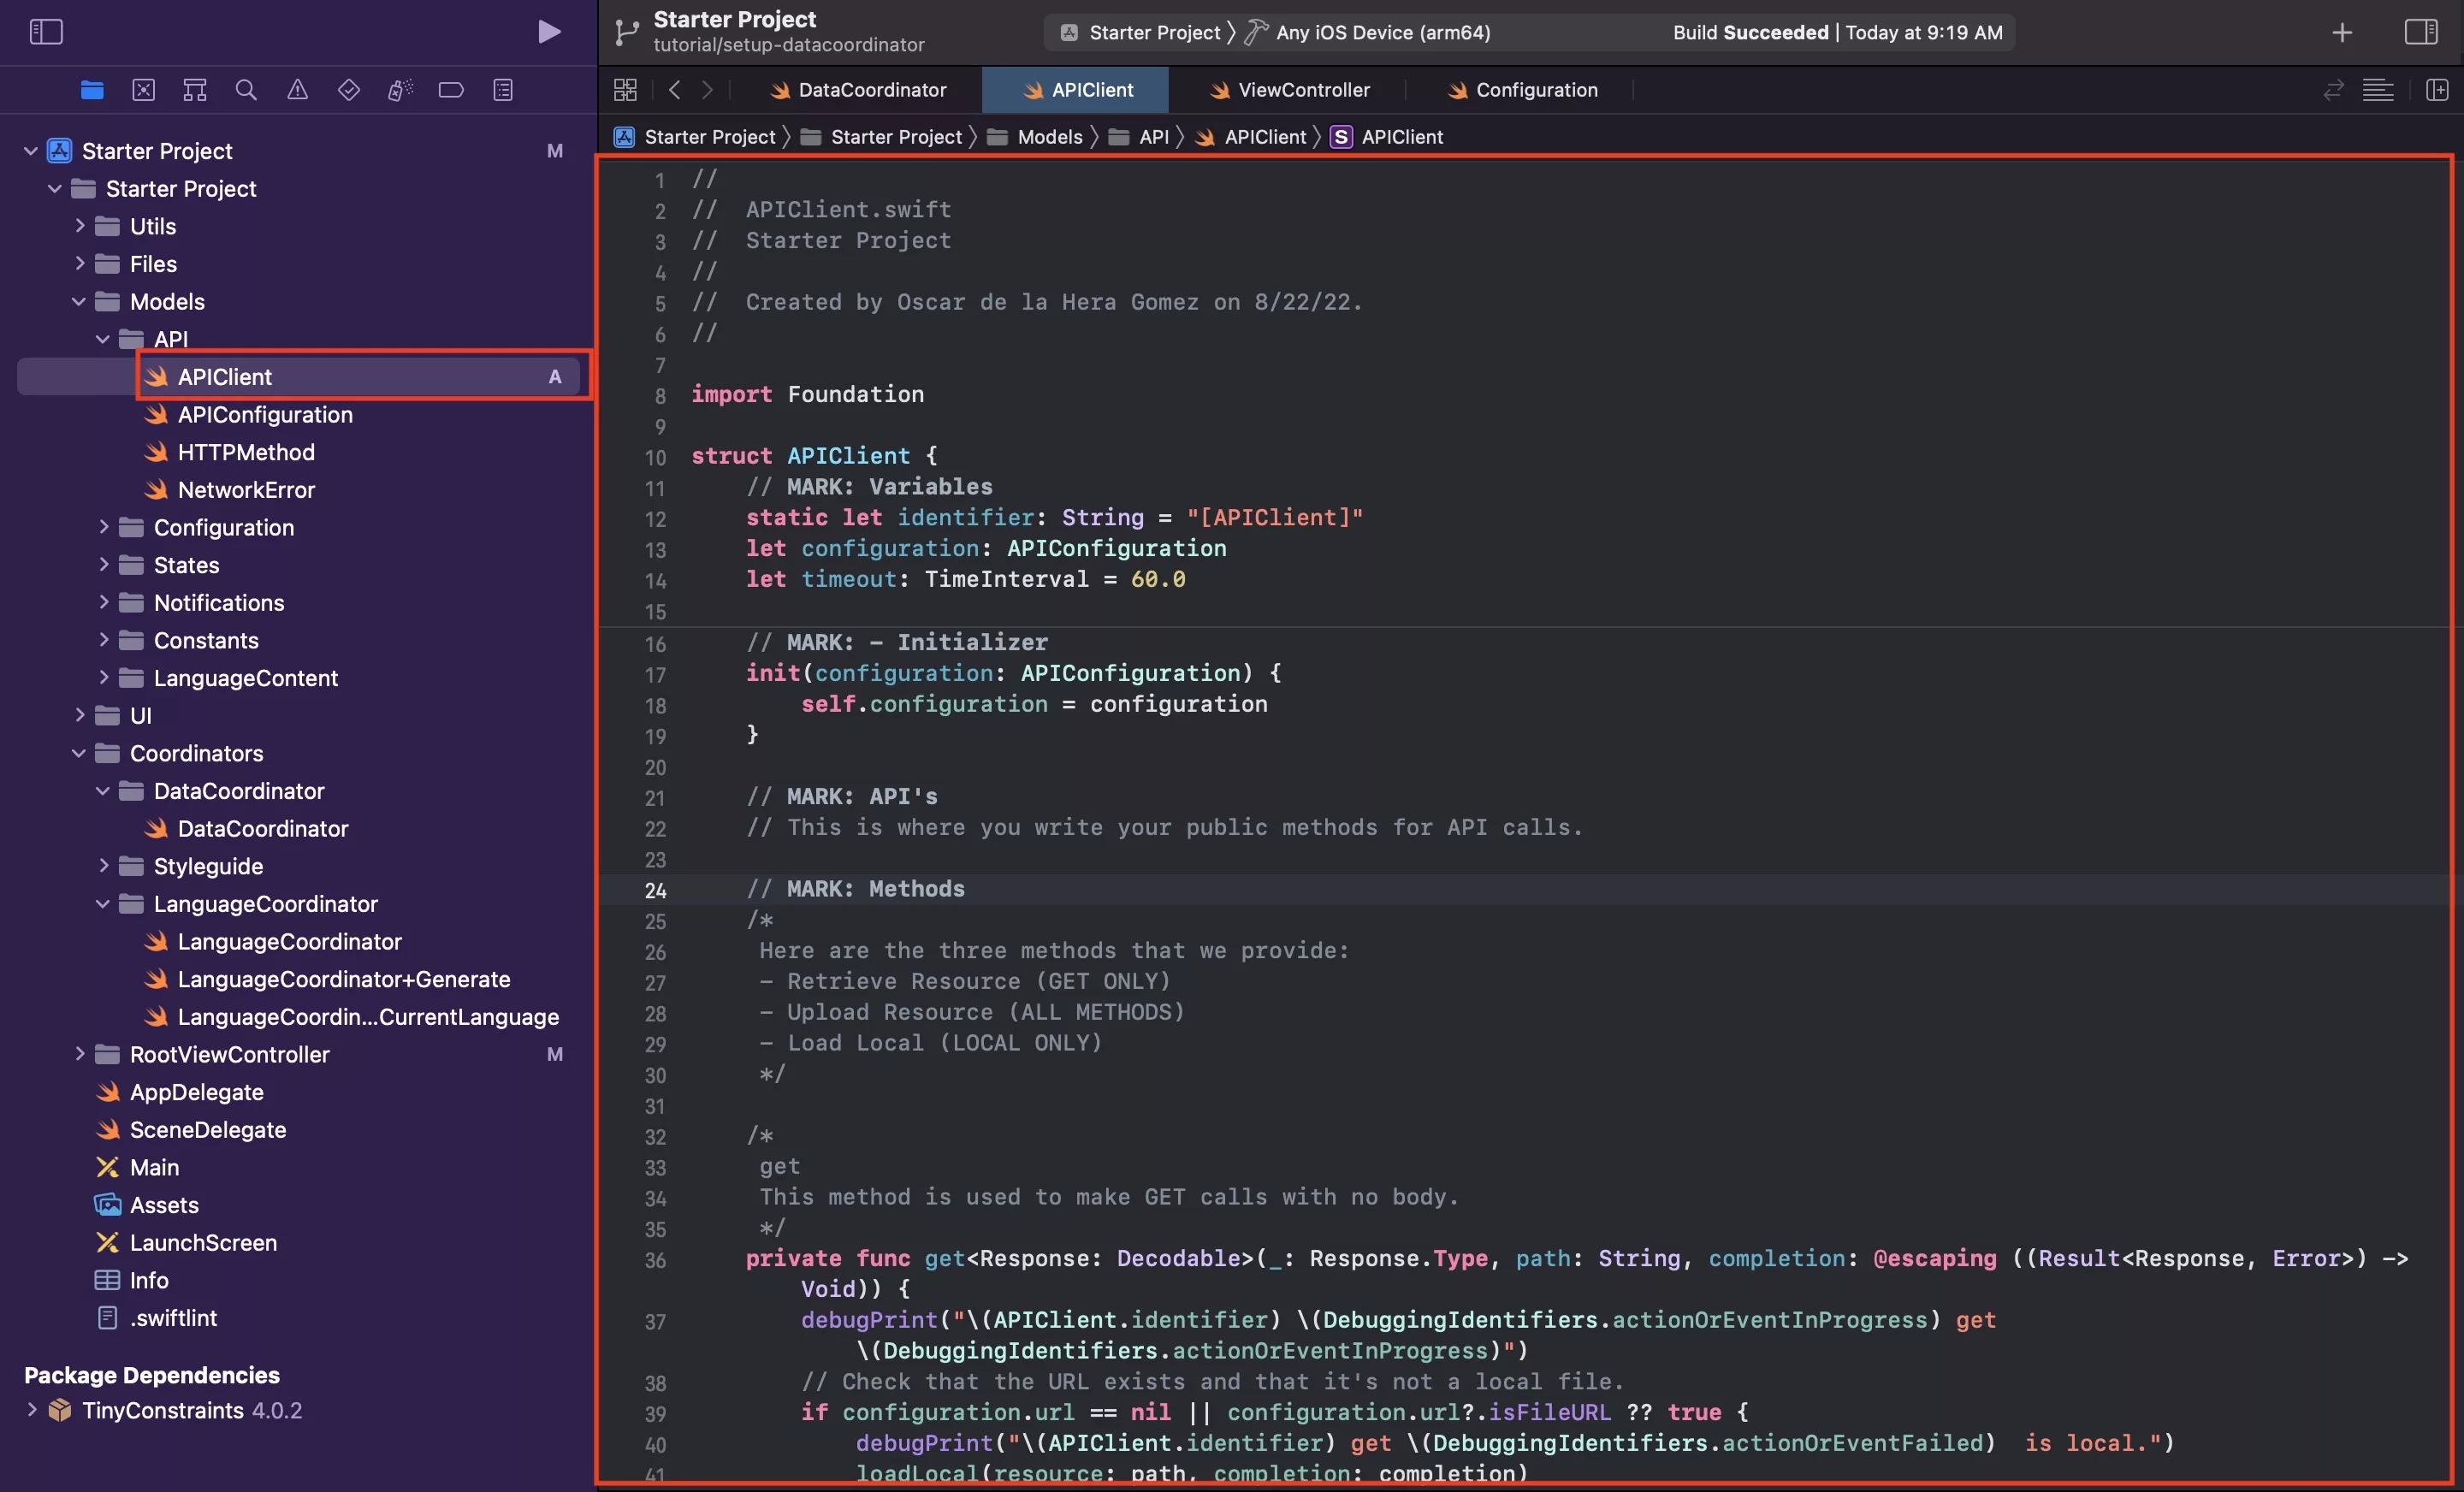
In the API folder, create a new file called APIClient.swift and paste in the code found below.
Please note that our makeAPICall function makes use of Generics, which according to the Swift Programming Language Guide:
Generic code enables you to write flexible, reusable functions and types that can work with any type, subject to requirements that you define. You can write code that avoids duplication and expresses its intent in a clear, abstracted manner.
For more information about generic code please consult the Swift programming guide through the link below.
Step Thirteen: Enable App Transport Security Settings
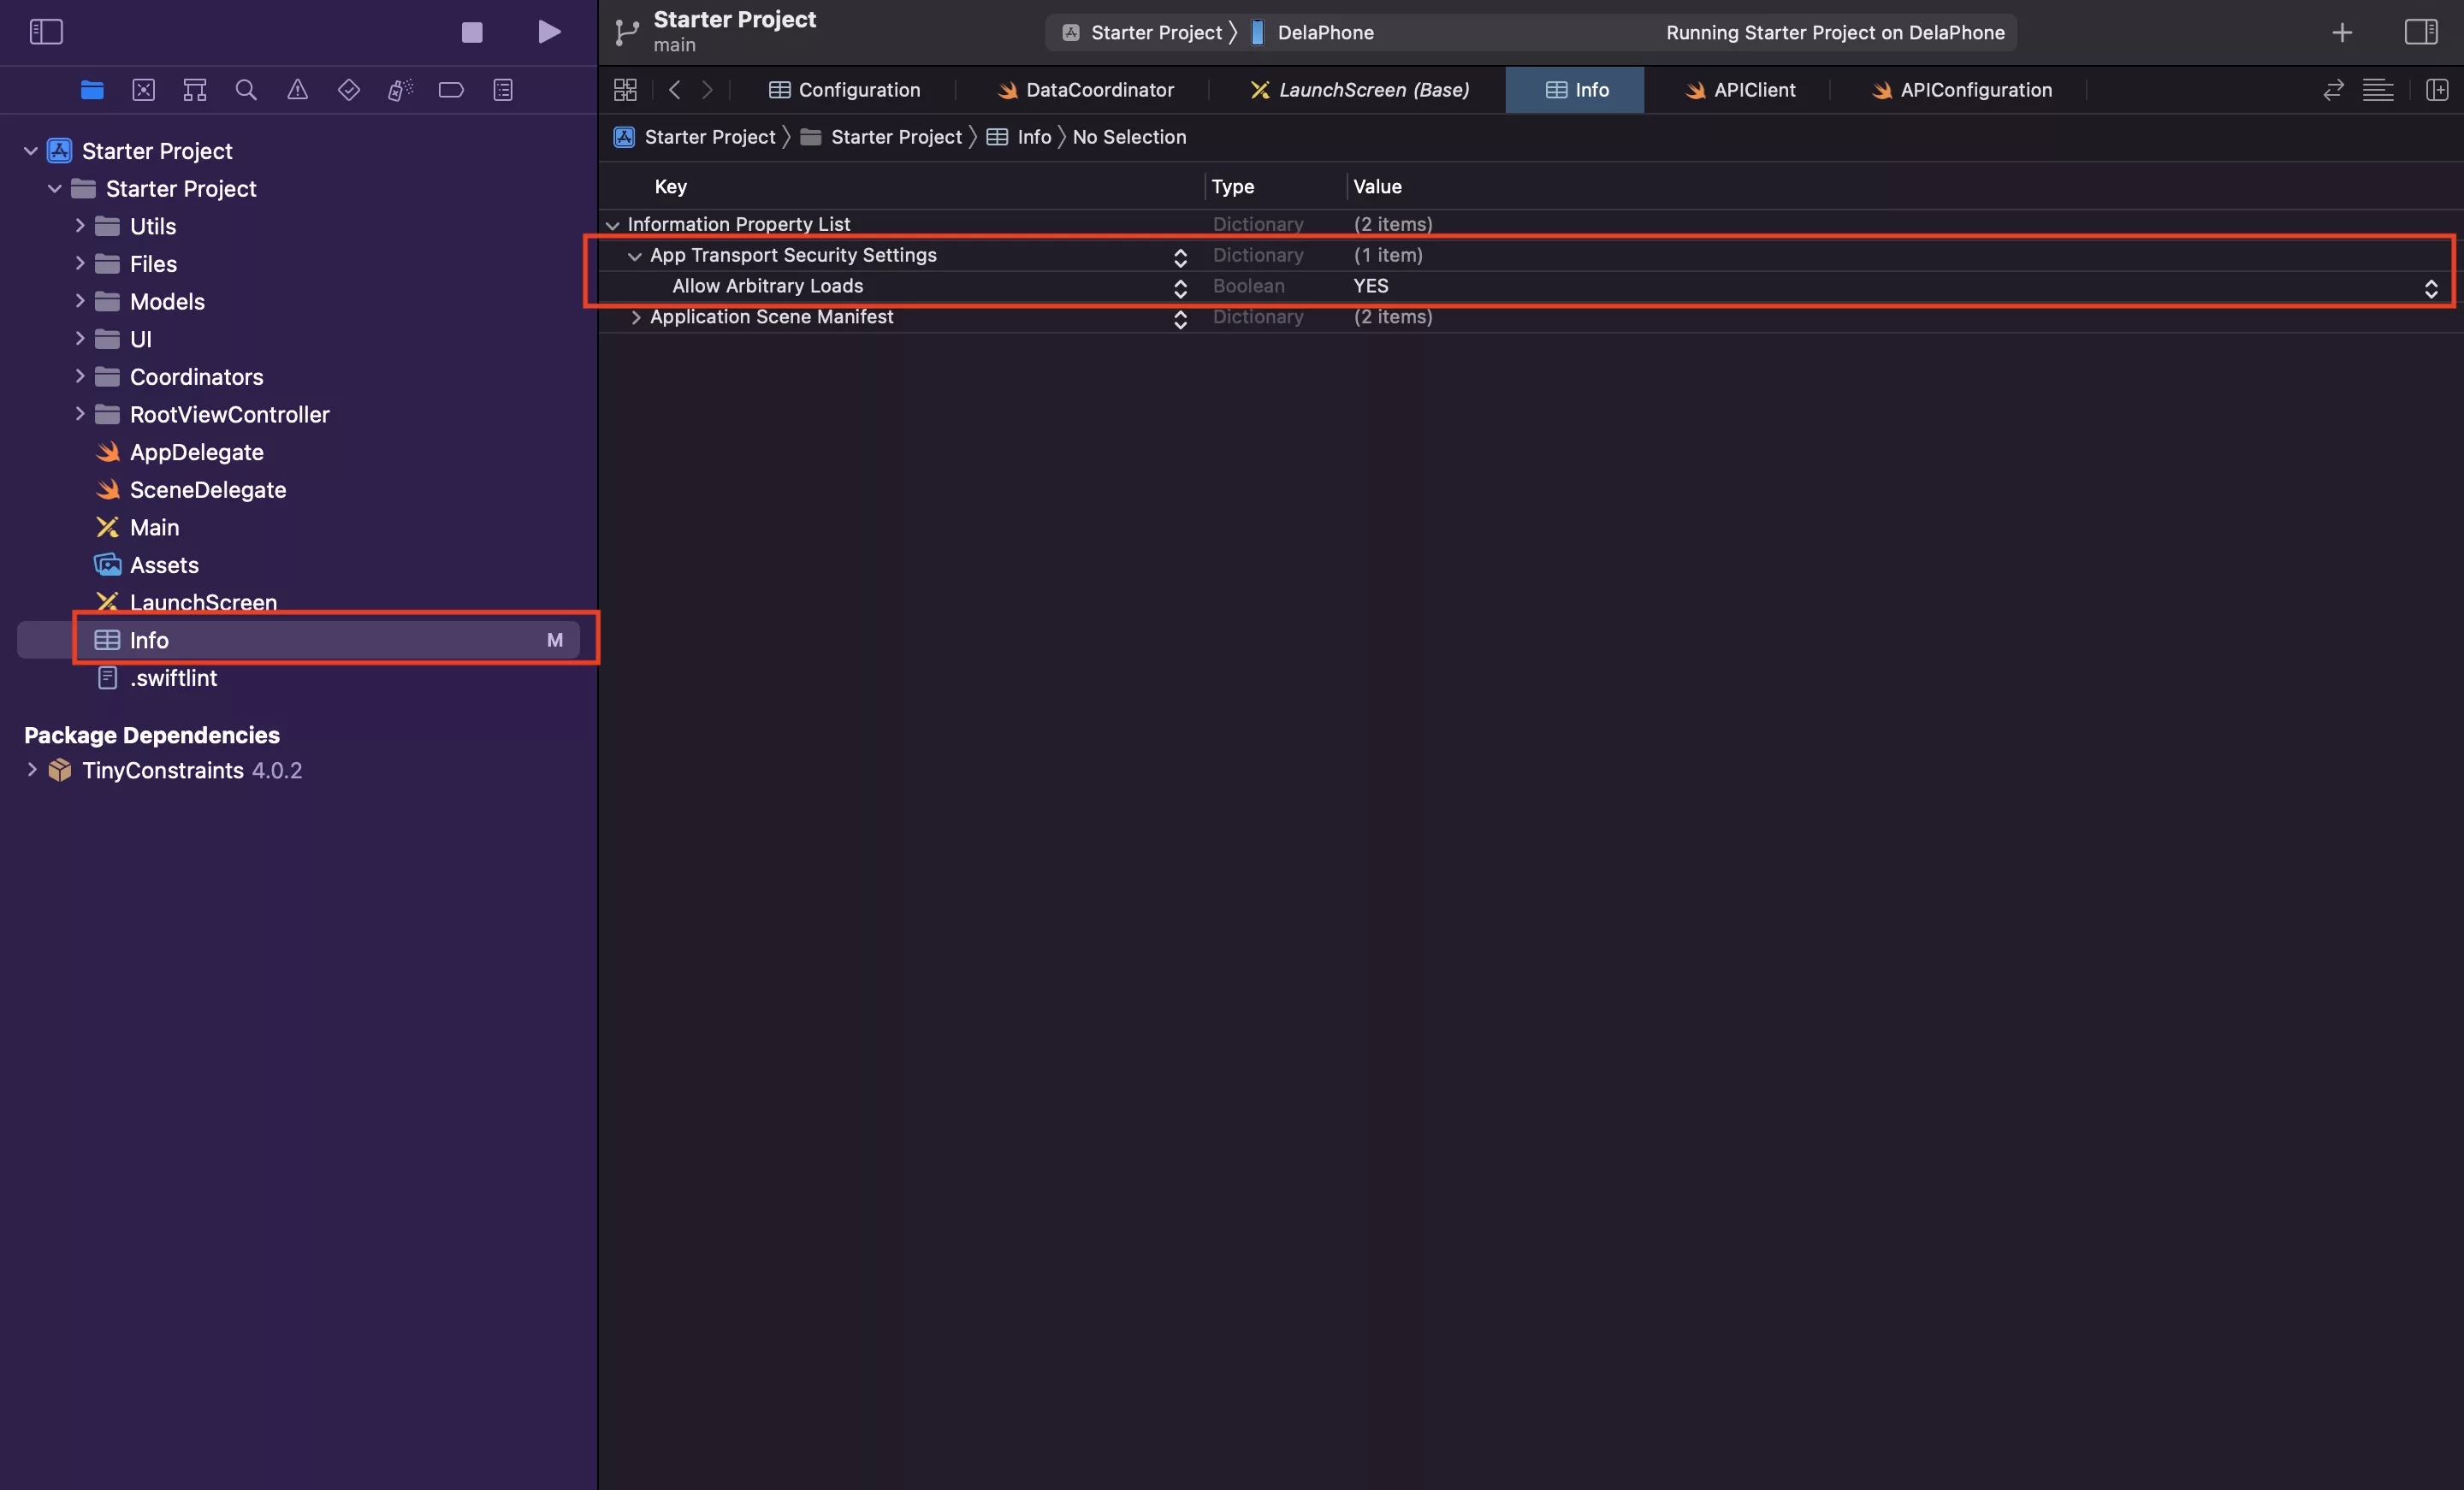
In your info.plist, add a new property called App Transport Security Settings.
Within it add a Boolean called Allow Arbitrary Loads and set to YES.
This is required to be able to make HTTPS calls as discussed by Apple:
On Apple platforms, a networking feature called App Transport Security (ATS) improves privacy and data integrity for all apps and app extensions. ATS requires that all HTTP connections made with the URL Loading System—typically using the
URLSessionclass—use HTTPS. It further imposes extended security checks that supplement the default server trust evaluation prescribed by the Transport Layer Security (TLS) protocol. ATS blocks connections that fail to meet minimum security specifications. For additional details, see Preventing Insecure Network Connections.
Any Questions
We are actively looking for feedback on how to improve this resource. Please send us a note to inquiries@delasign.com with any thoughts or feedback you may have.