How to snap a carousel to position in Swift
A step by step tutorial on snapping a carousel to position in Swift (iOS). Github repository included.

A step by step tutorial on snapping a carousel to position in Swift (iOS). Github repository included.
The following tutorial walks you through how to snap a carousel to position in Swift (iOS) using XCode. The project builds on our Open Source Swift project and a previous tutorial aimed at implementing a carousel in Swift.
This tutorial starts on the tutorial/custom-carousel branch and the changes are available on the tutorial/snap-carousel-to-position branch of the repository found below.
Please note this tutorial uses the TinyConstraints Swift package, which we added using the Swift Package Manager.
What are we creating in this tutorial ?
In this tutorial, we will build on the How to create a custom carousel in Swift tutorial and make the carousel snap to the closest index when your finger stops touching the screen (i.e. at the end of a touch or swipe).
Tutorial
We recommend downloading our open source project and checkout the tutorial/custom-carousel branch and carrying out the steps outlined below.
git clone git@github.com:delasign/swift-starter-project.gitStep One: Declare the current index variable
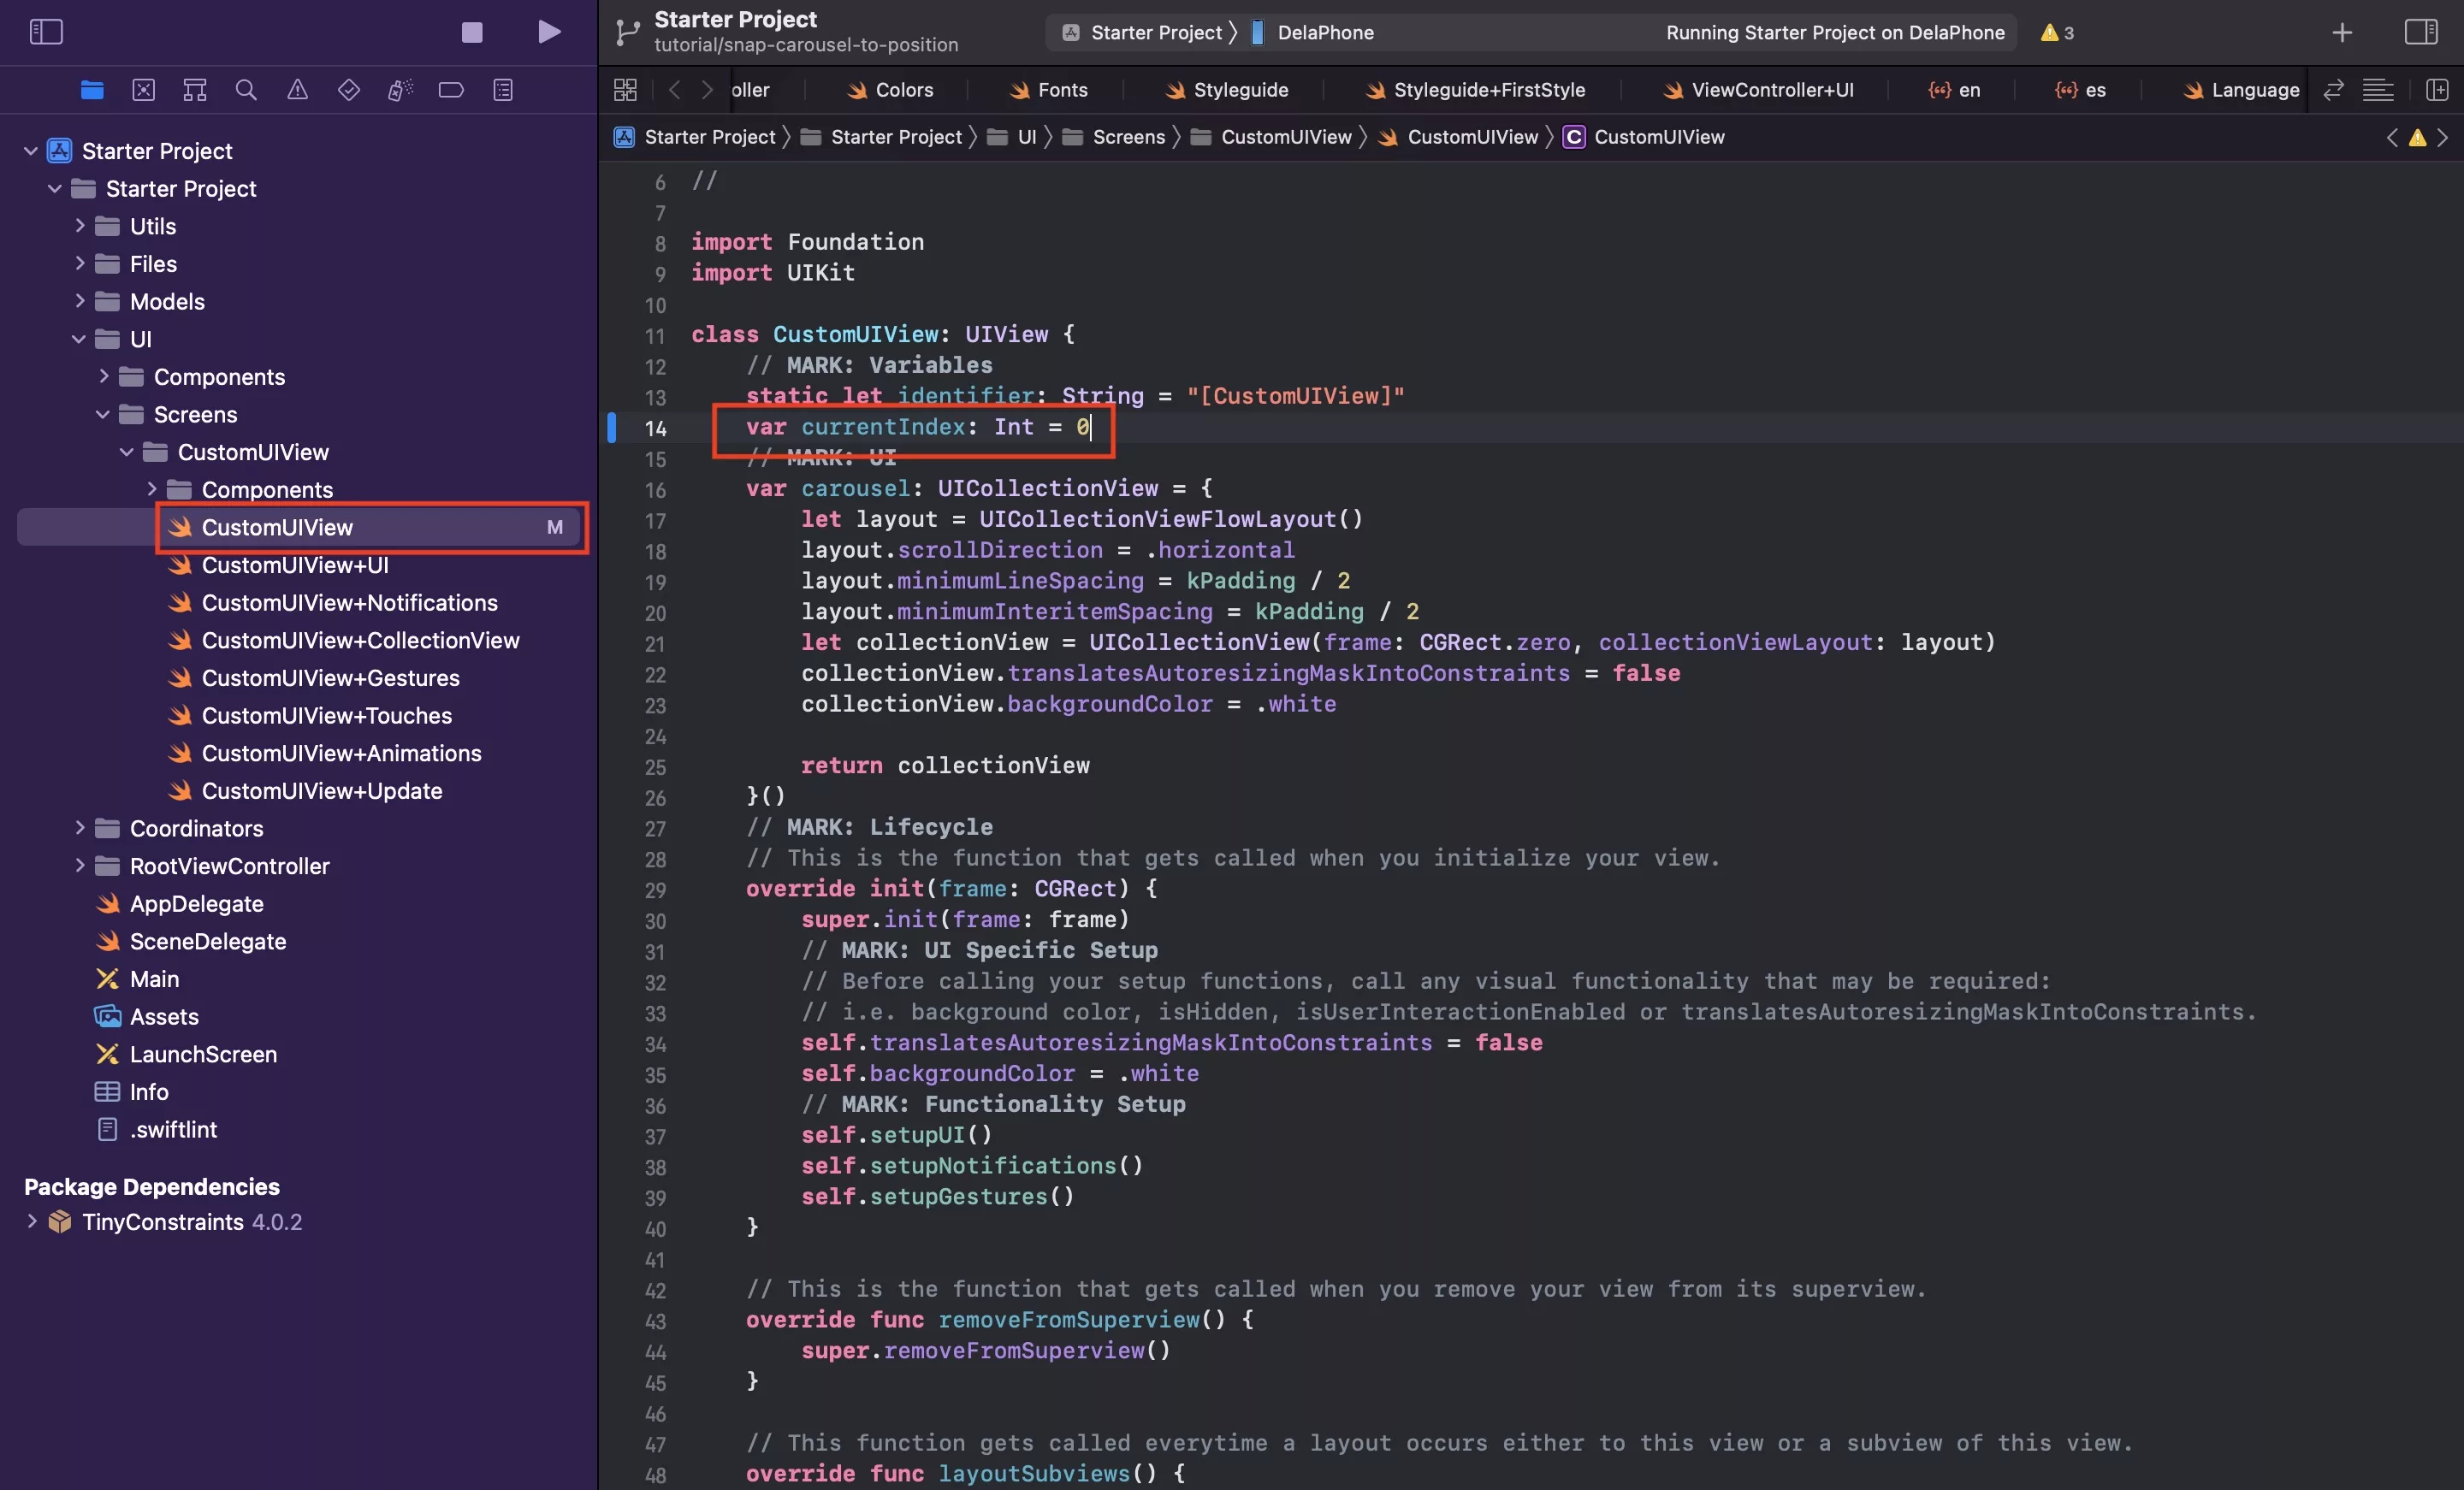
In CustomUIView.swift, declare a variable called currentIndex and set it to 0.
Step Two: Create the ScrollView Extension
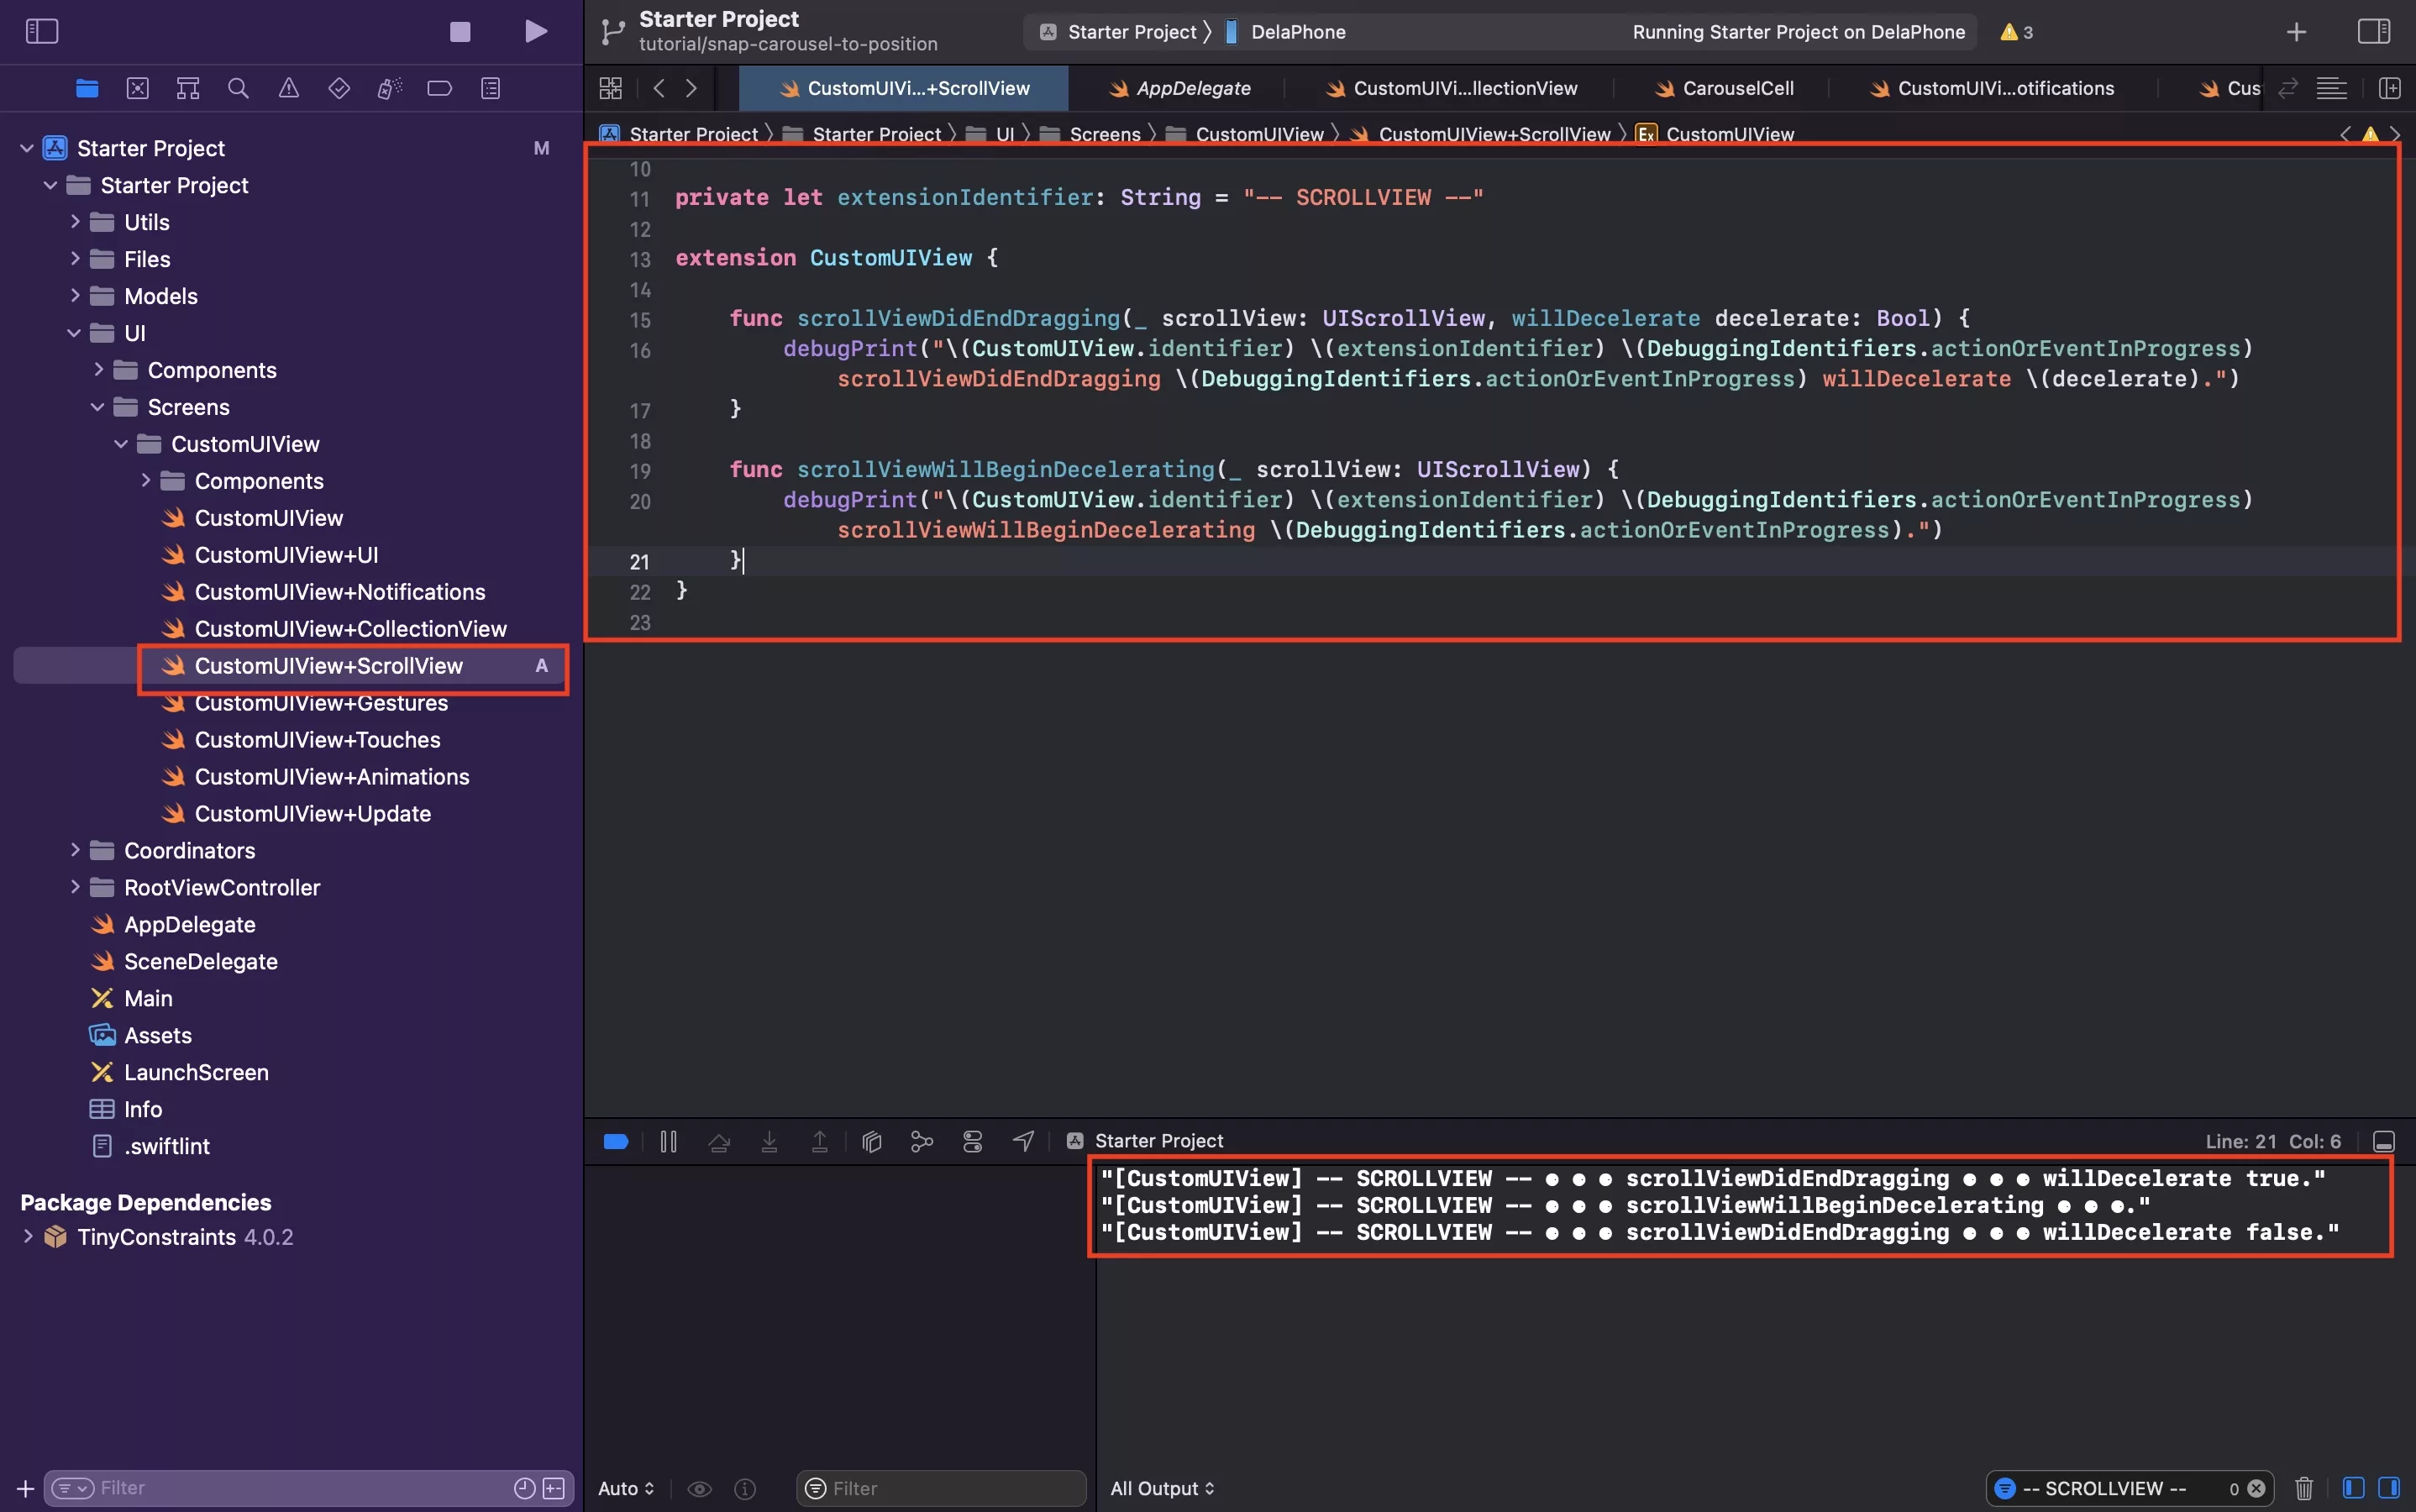
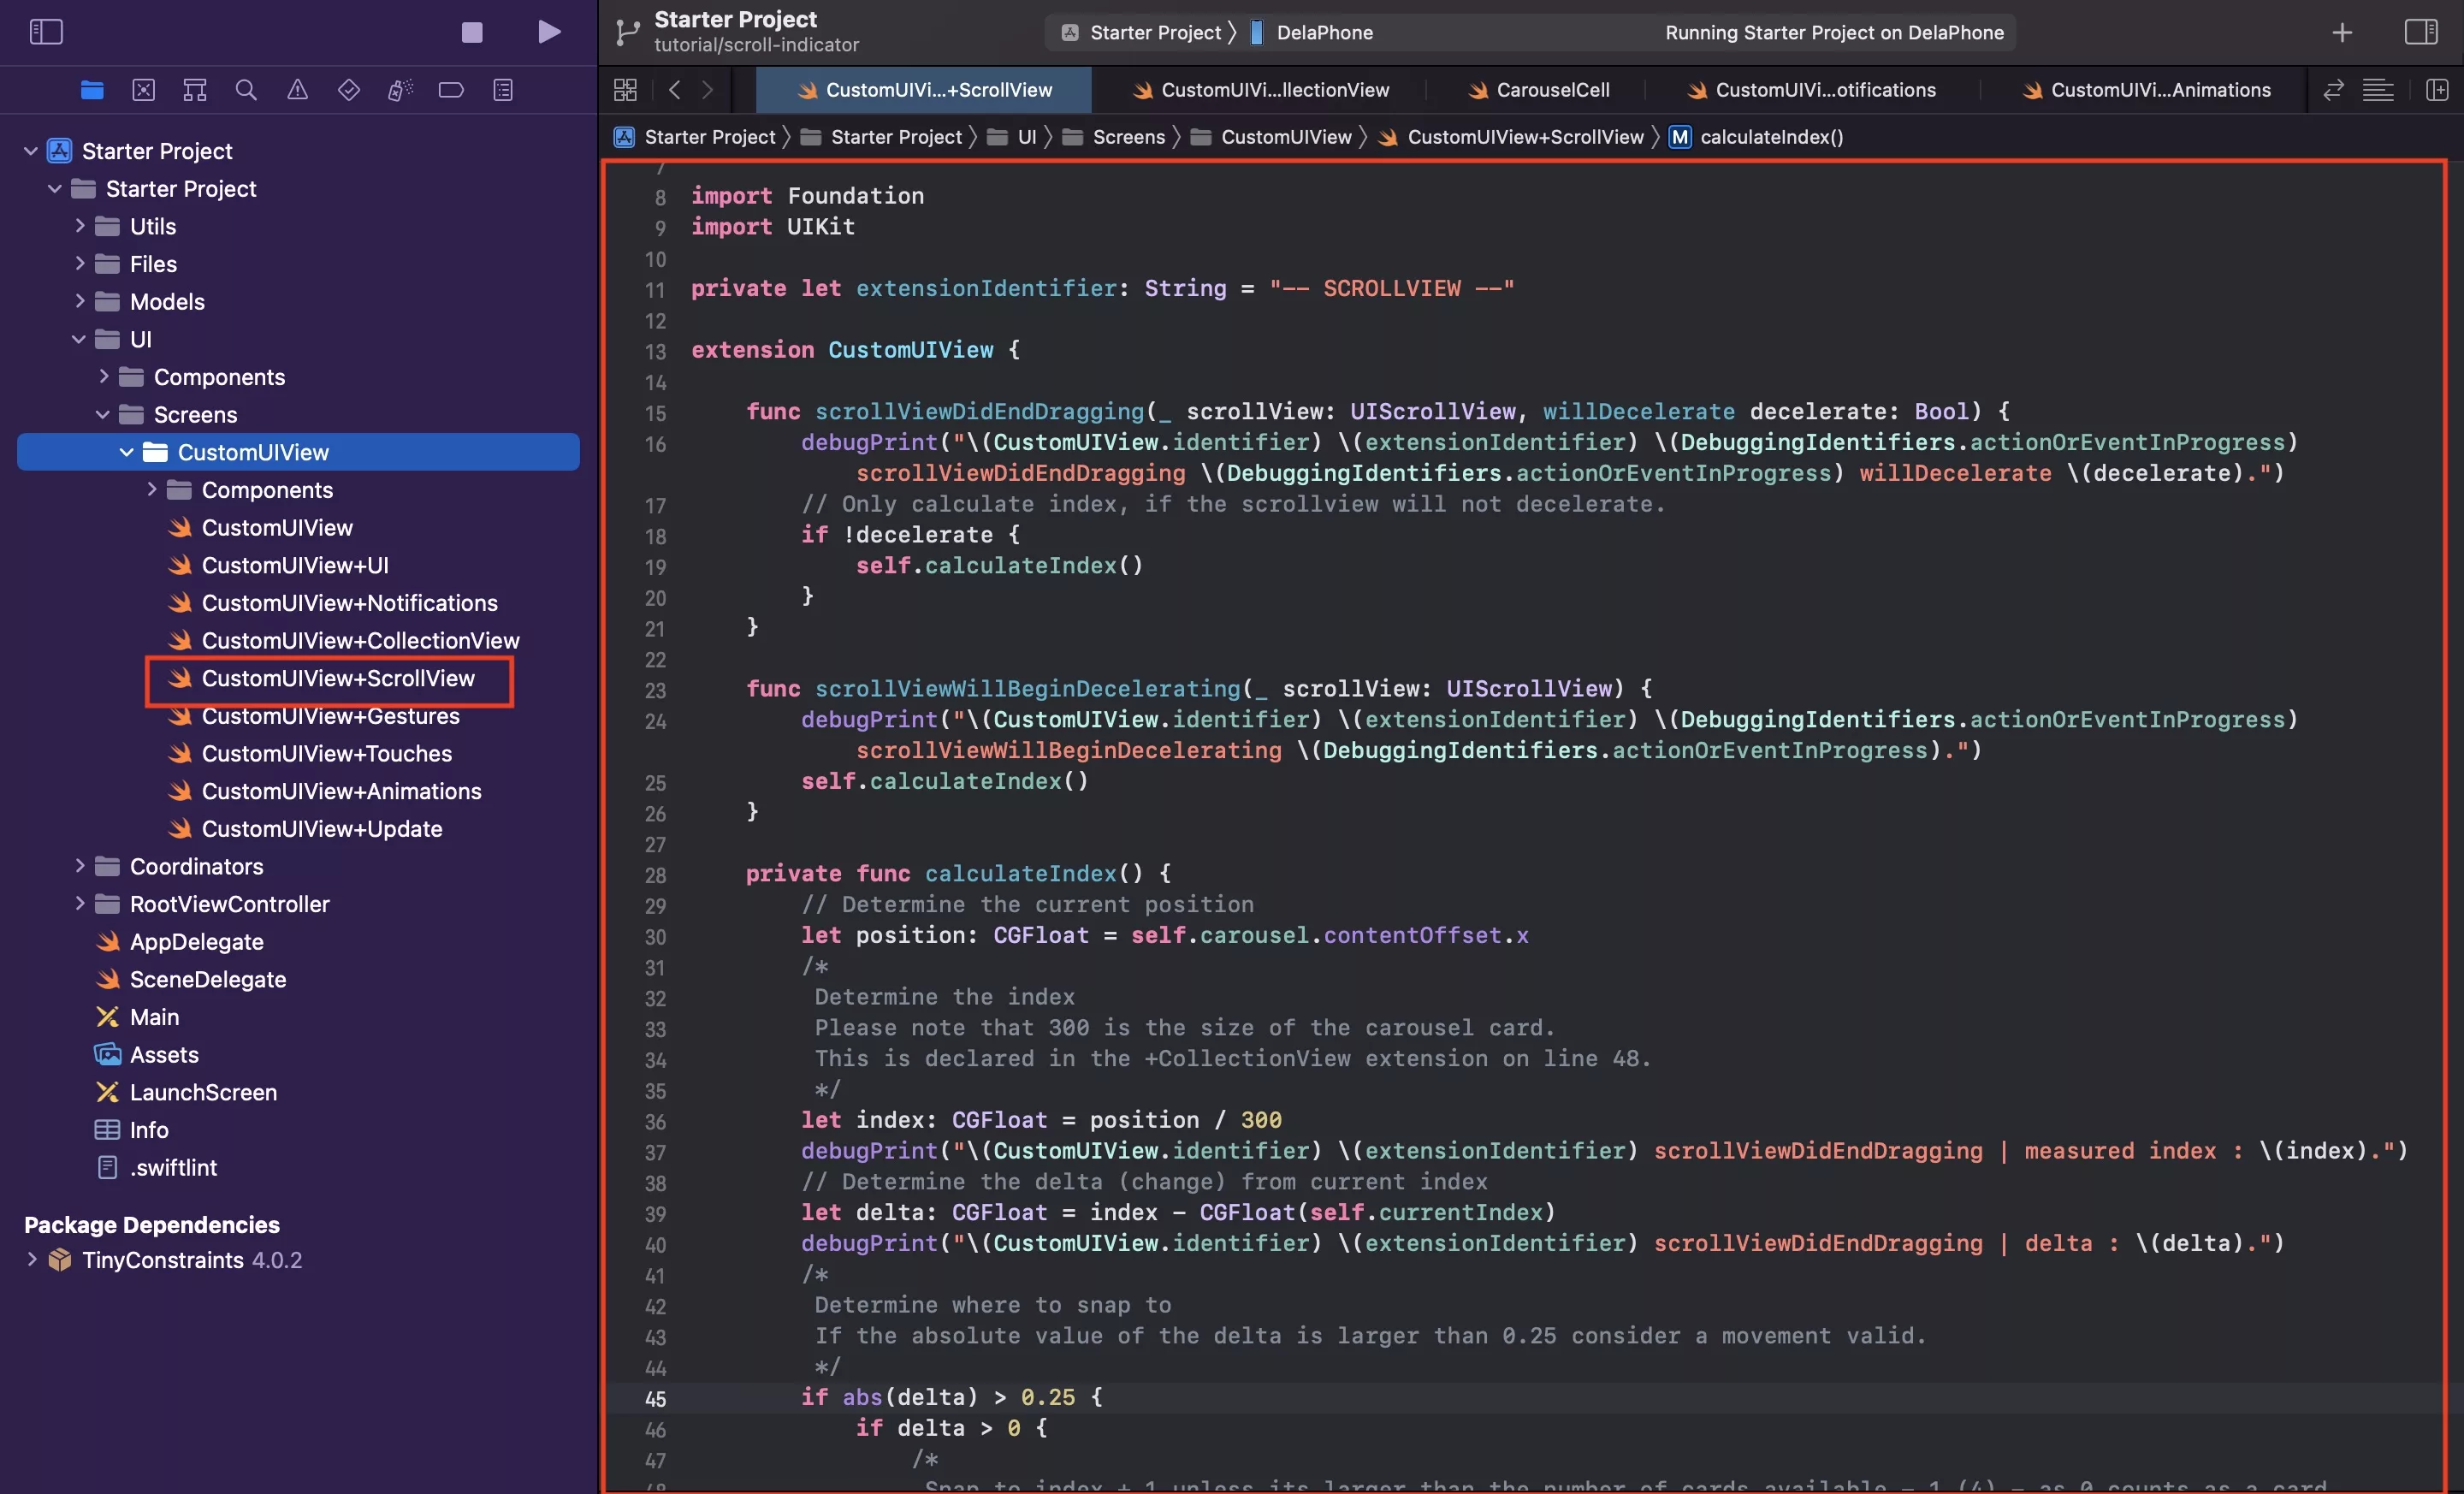
Under the CustomUIView folder, create a new file called CustomUIView+ScrollView and copy the code found below.
We recommend that you place it under the +CollectionView extension.
As you can see from the screenshot above, if you run the code:
- If you finger leaves the scrollview with the carousel still, the console will print
"[CustomUIView] -- SCROLLVIEW -- ⚈ ⚈ ⚈ scrollViewDidEndDragging ⚈ ⚈ ⚈ willDecelerate false."
- If your finger leaves the scrollview with the scrollview moving, the console will print "[CustomUIView] -- SCROLLVIEW -- ⚈ ⚈ ⚈ scrollViewDidEndDragging ⚈ ⚈ ⚈ willDecelerate true." & ustomUIView] -- SCROLLVIEW -- ⚈ ⚈ ⚈ scrollViewWillBeginDecelerating ⚈ ⚈ ⚈."
Step Three: Snap to position
Update your extension to the code found below.
The following code will call calculateIndex when a carousel is stopped being interacted with, if it is still (will not decelerate) or when it begins to stop decelerating after a drag has ended.
Calculate Index
This function determines the delta (i.e. the difference between the current scroll position and the initial position, also known as the current index) of the scroll and if it's larger than 0.25; it determines what index to move to.
If it is not larger than 0.25, it returns to the current index.
All the scenarios end by calling snapToPosition.
Snap to Position
This function updates the current index variable declared on step one, and which is used in calculateIndex and subsequently, tells the carousel to scroll to the item at that index.
As mentioned in the comment, please note that this algorithm only works for a carousel (UICollectionView) with one section.
Verify
Run your code and see your carousel snap to position.
Any Questions
We are actively looking for feedback on how to improve this resource. Please send us a note to inquiries@delasign.com with any thoughts or feedback you may have.