How to setup speech recognition in Swift
A step by step tutorial on setting up an iOS app to listen to and transcribe words in real time.

A step by step tutorial on setting up an iOS app to listen to and transcribe words in real time.
The following tutorial uses Apple's Speech framework and is based on Apple's Recognizing Speech in Live Audio Open Source project, whose link can be found below.
We recommend that you clone our Open Source Swift Starter Project, checking out the main branch and carrying out the steps below. The changes can be found on the tutorial/voice branch.
git clone git@github.com:delasign/swift-starter-project.gitStep One: Create the SpeechCoordinator
The following step walks you through how to create the necessary files and structure for the SpeechCoordinator.
A | Create the SpeechCoordinator folder
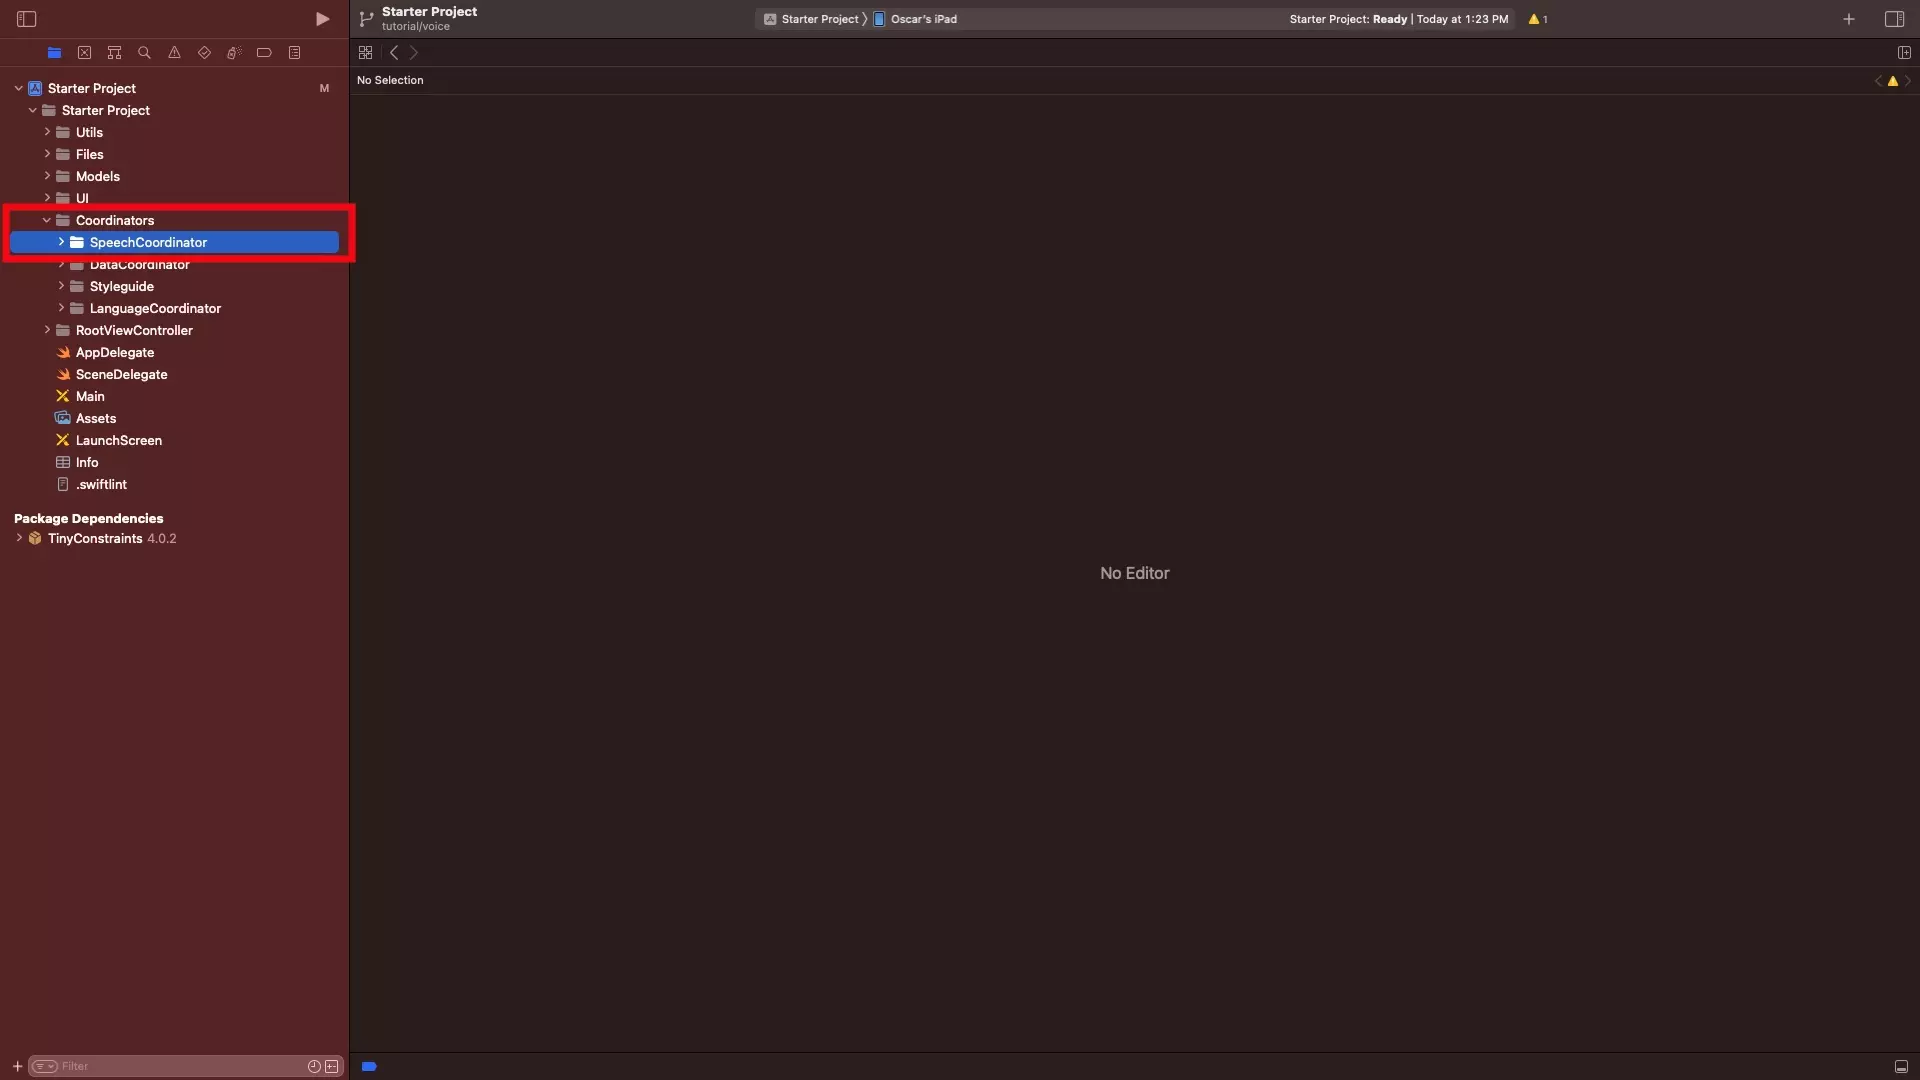
Under the Coordinators folder, create a new group (folder) called SpeechCoordinator by right clicking on the Coordinators folder, and selecting New Group.
B | Create the SpeechCoordinator base file
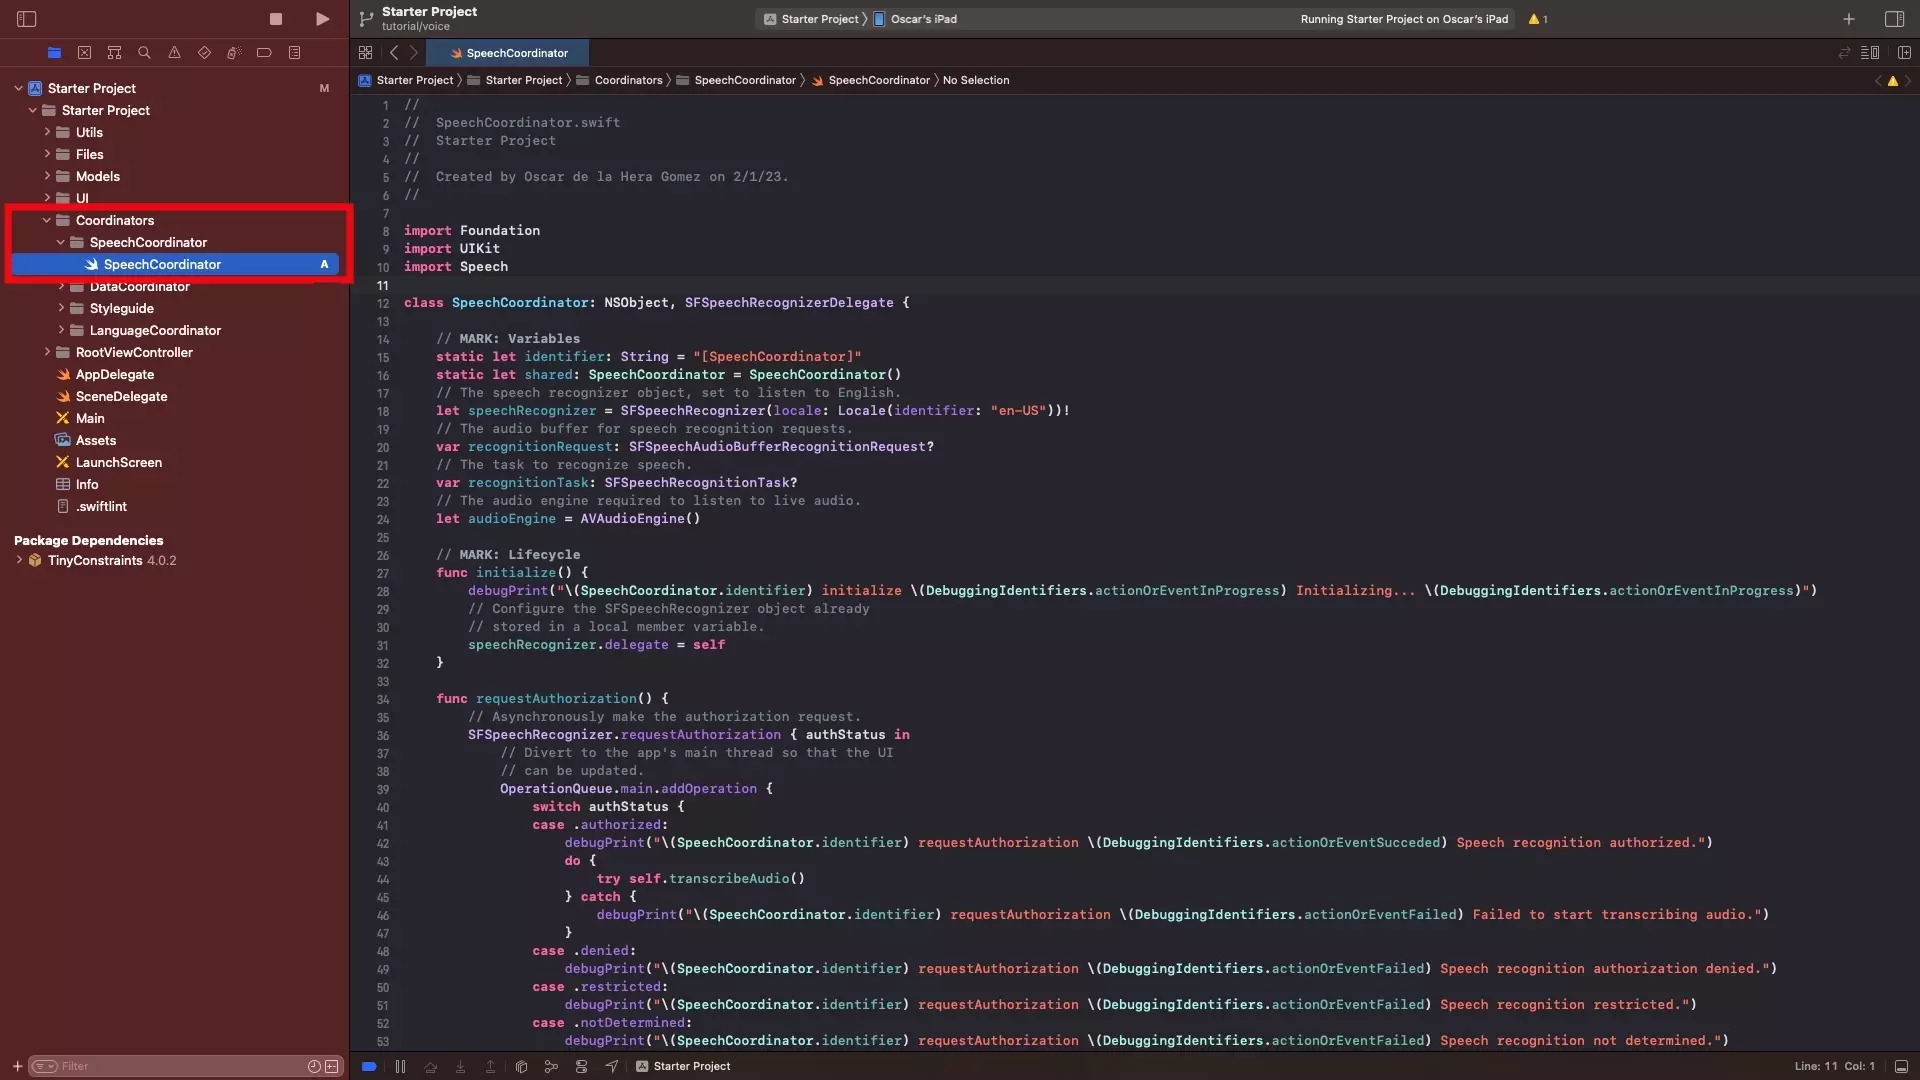
In the newly created SpeechCoordinator folder, create a new file called SpeechCoordinator.swift and paste in the code below.
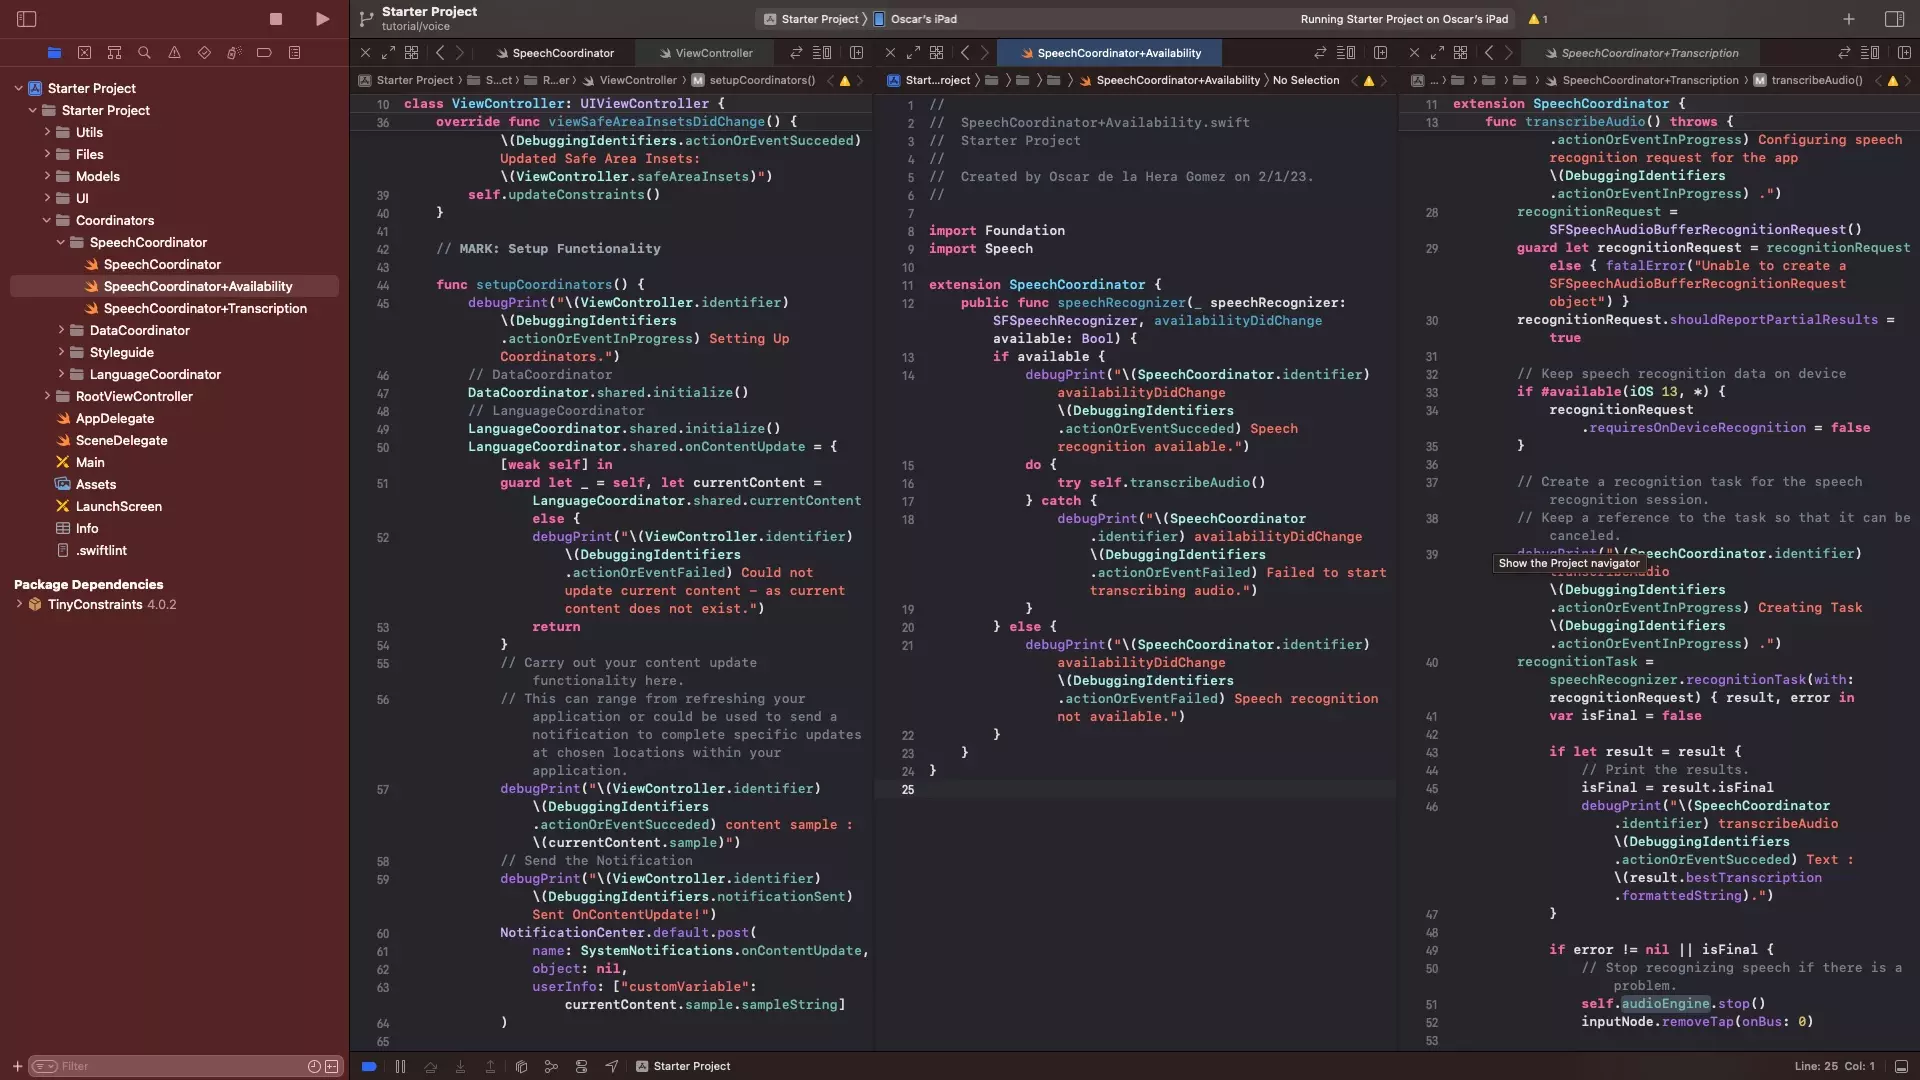
C | Add the Availability extension
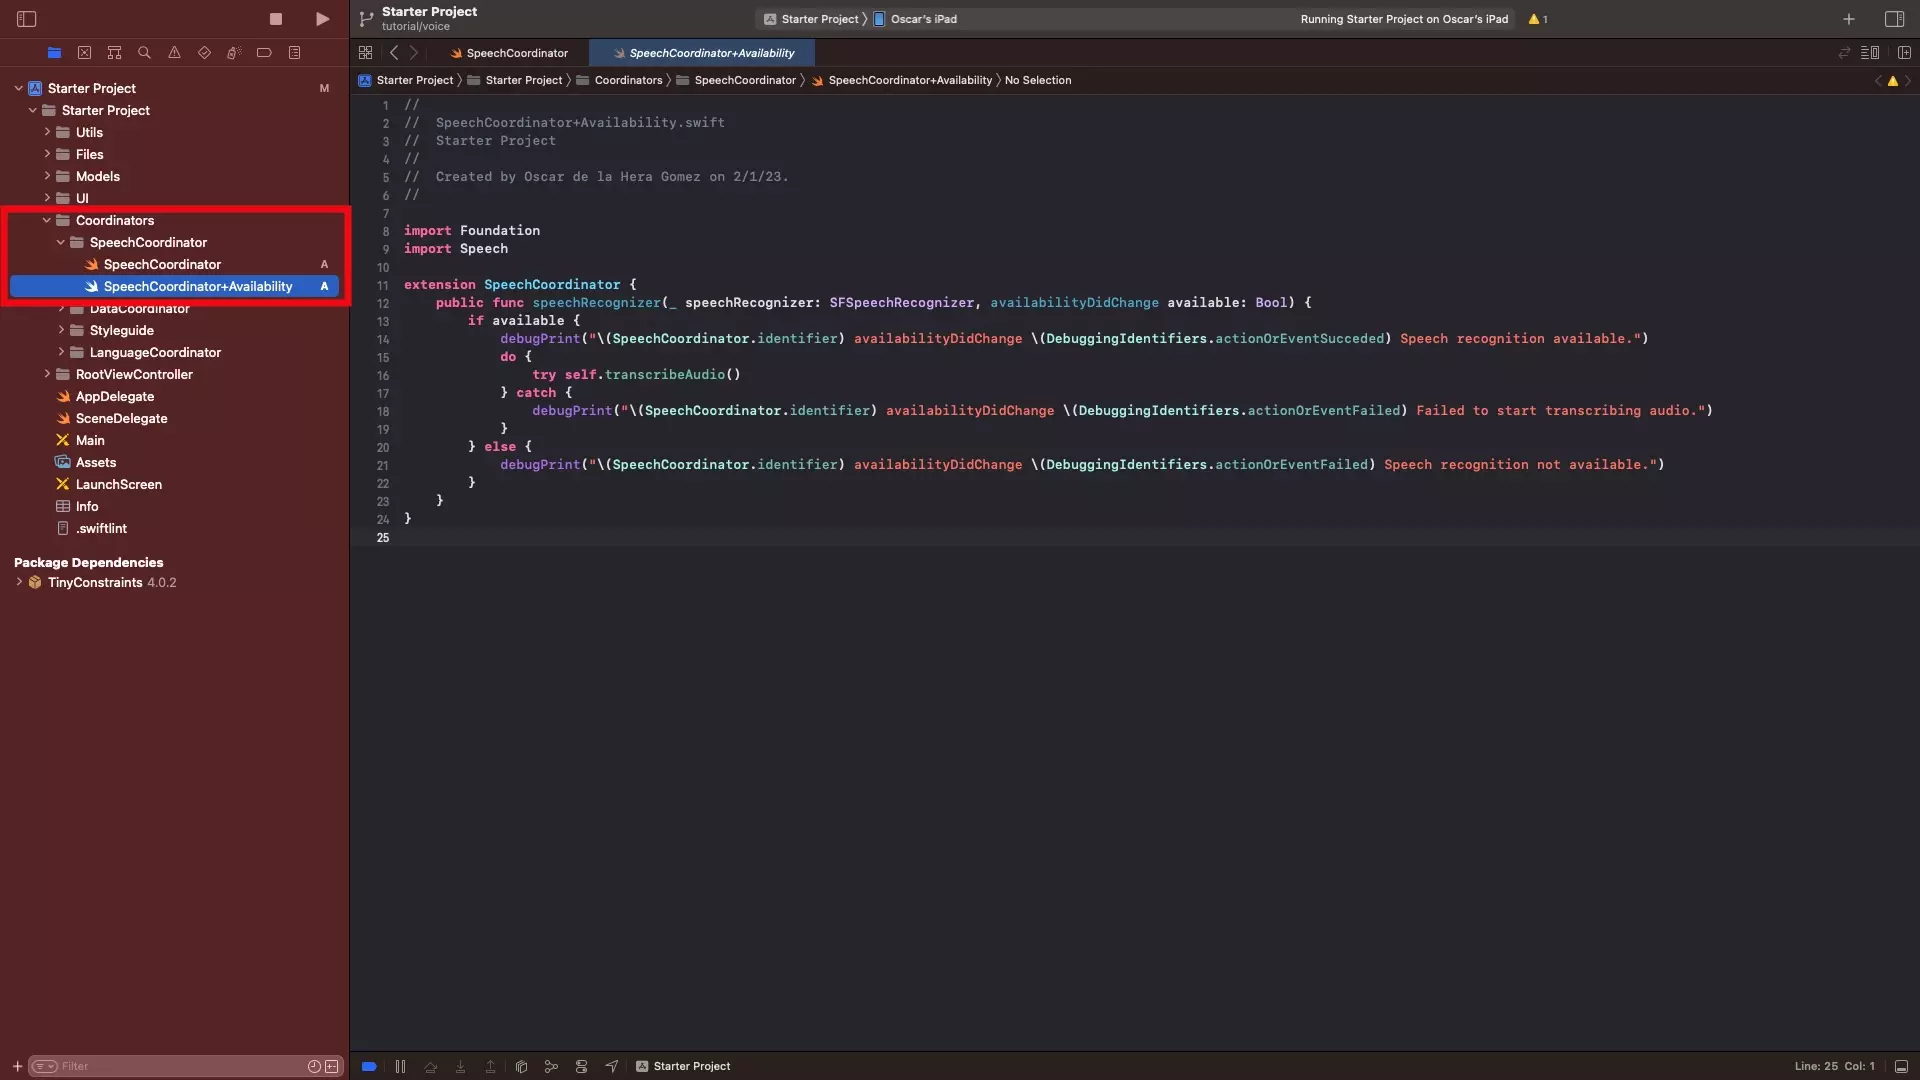
In the SpeechCoordinator folder, create a new file called SpeechCoordinator+Availability.swift and paste in the code below.
D | Add the transcription extension
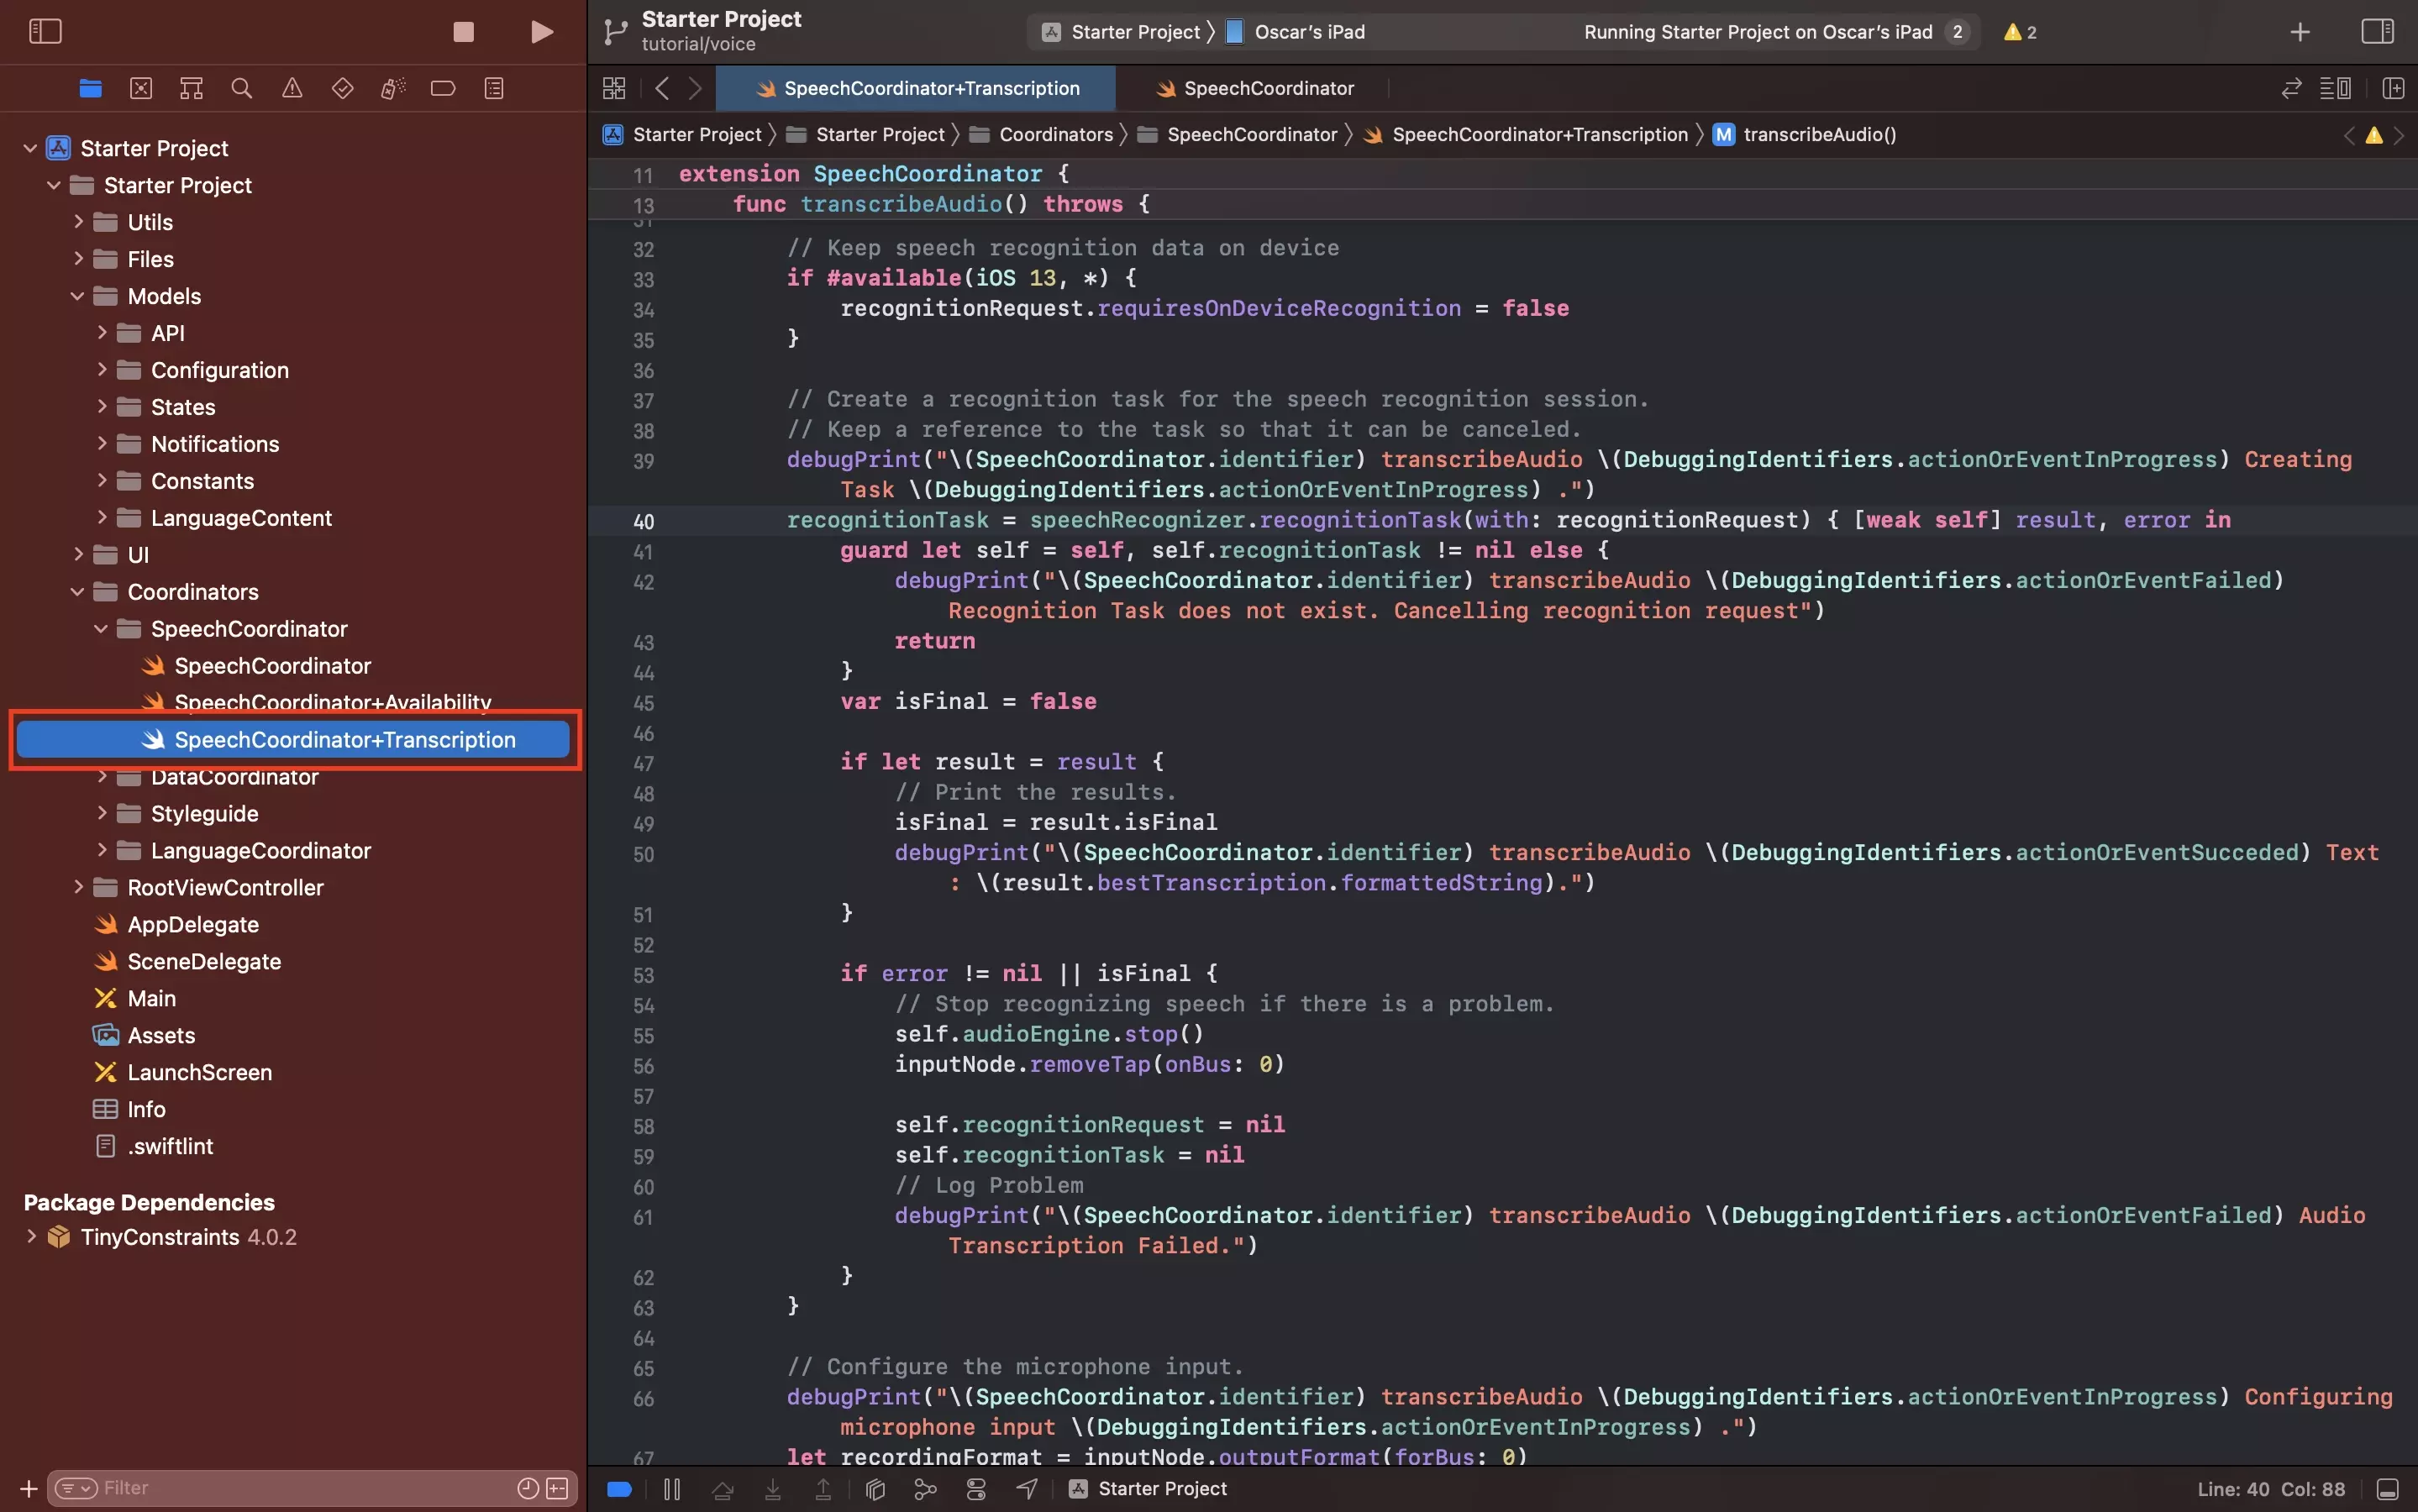
In the SpeechCoordinator folder, create a new file called SpeechCoordinator+Transcription.swift and paste in the code below.
Step Two: Initialize the Coordinator
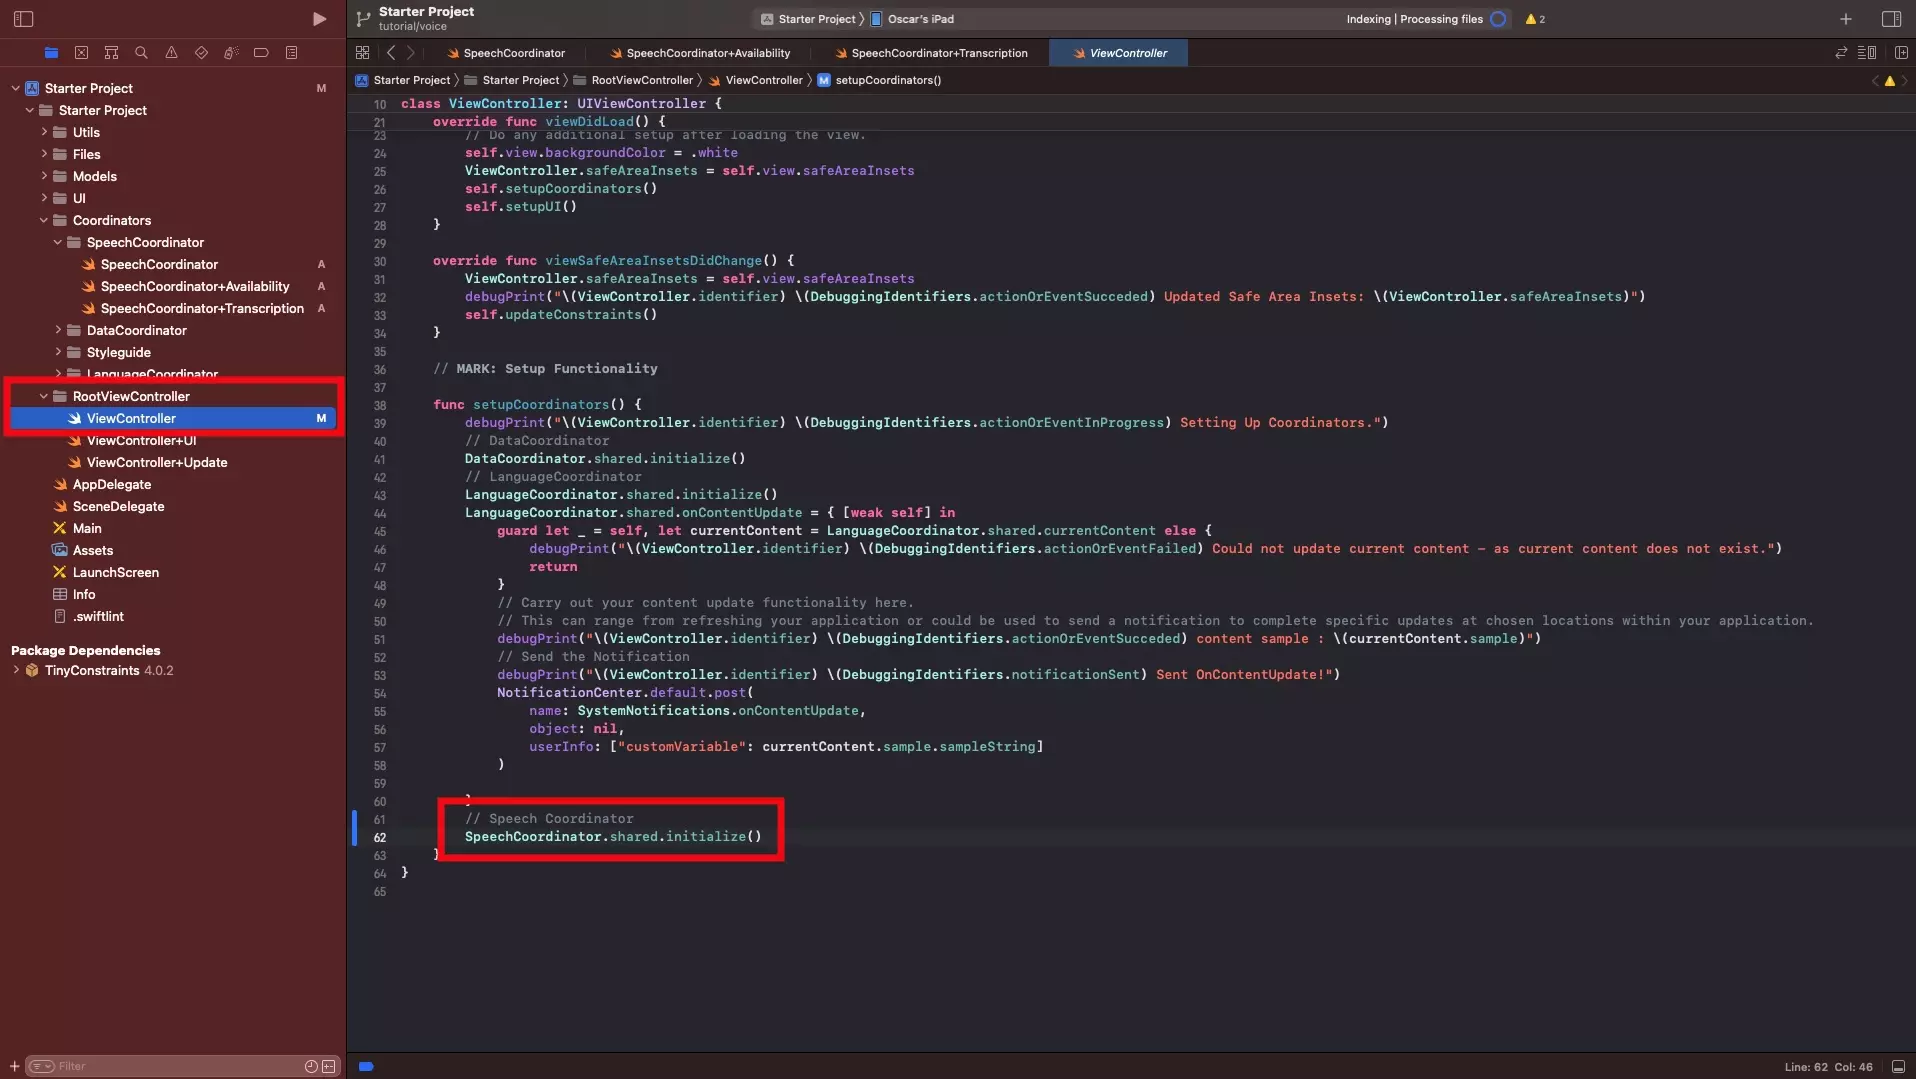
Navigate to the ViewController.swift, found under the RootViewController folder and within the setupCoordinators function initialize the SpeechCoordinator using the line below.
SpeechCoordinator.shared.initialize()Step Three: Request Authorization
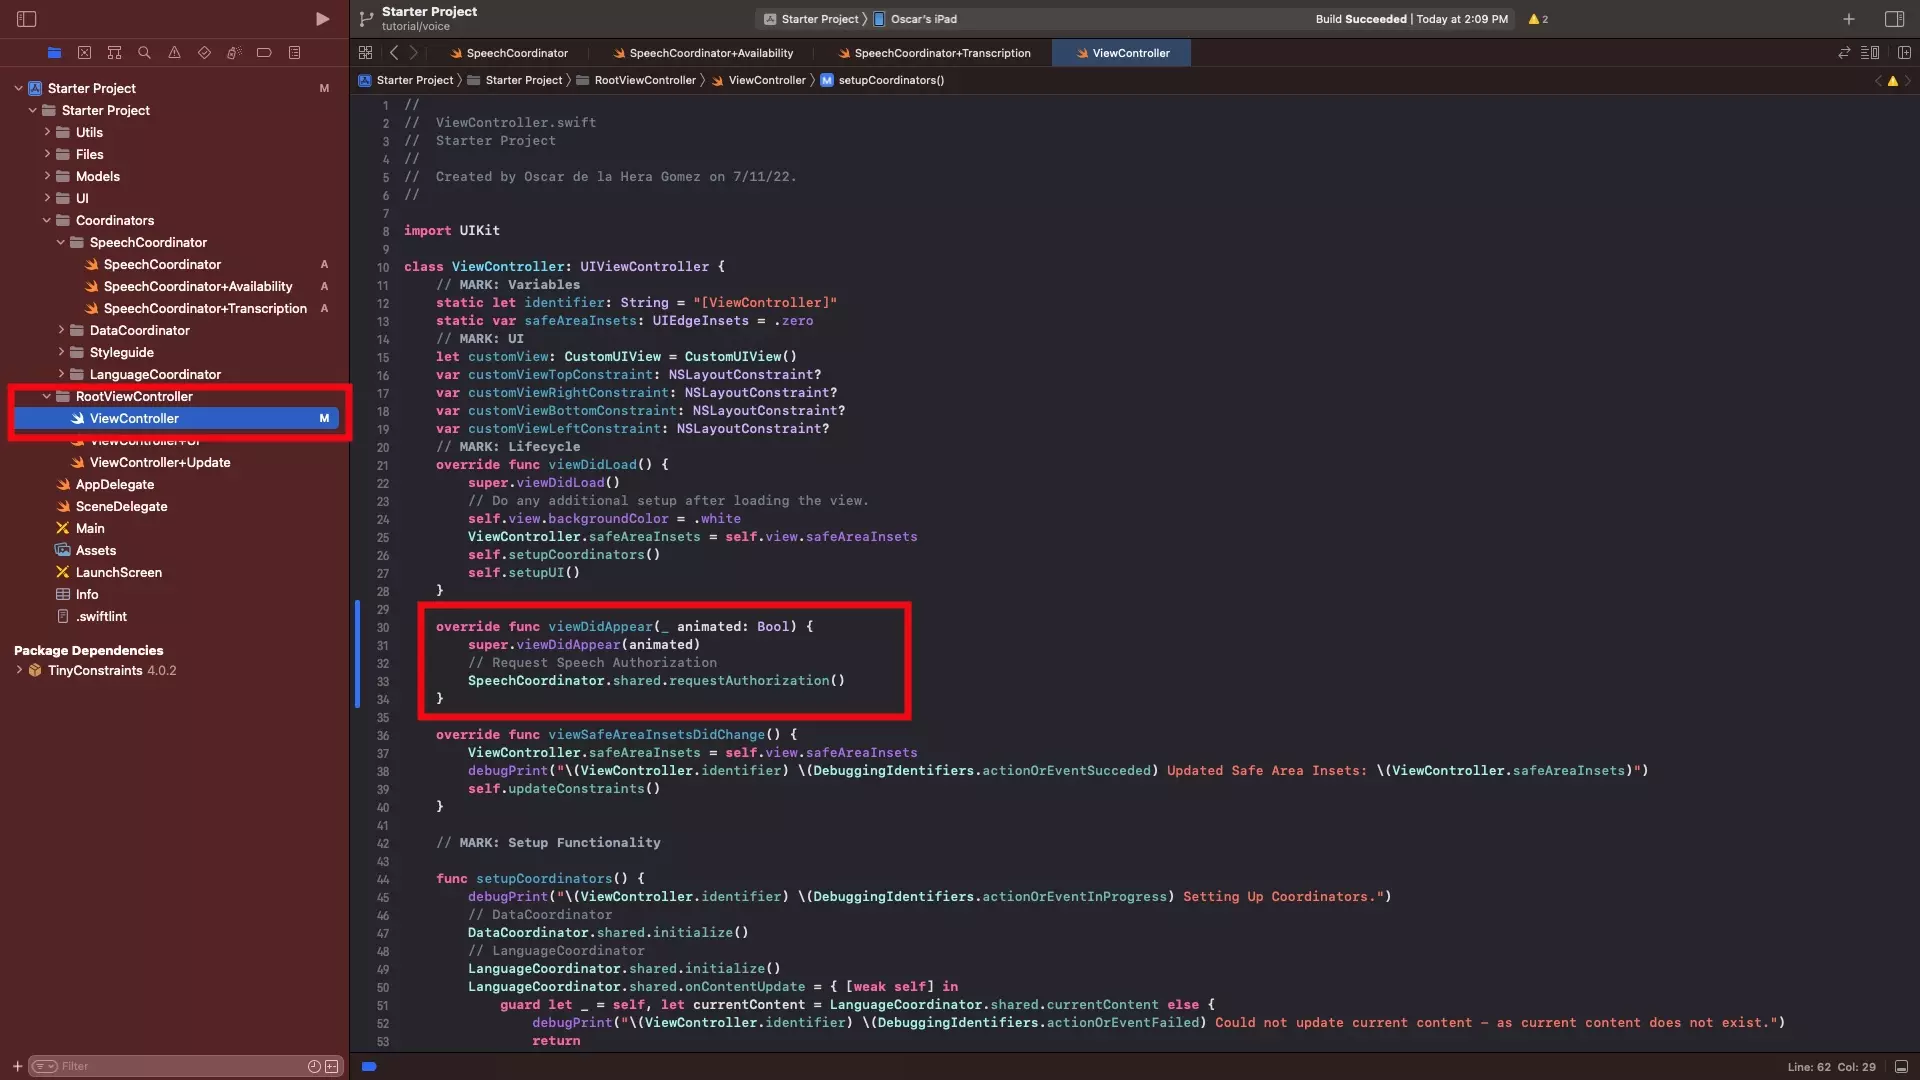
In the Navigate to the ViewController.swift, under the viewDidLoad function, add the code found below.
Step Four: Update Permissions
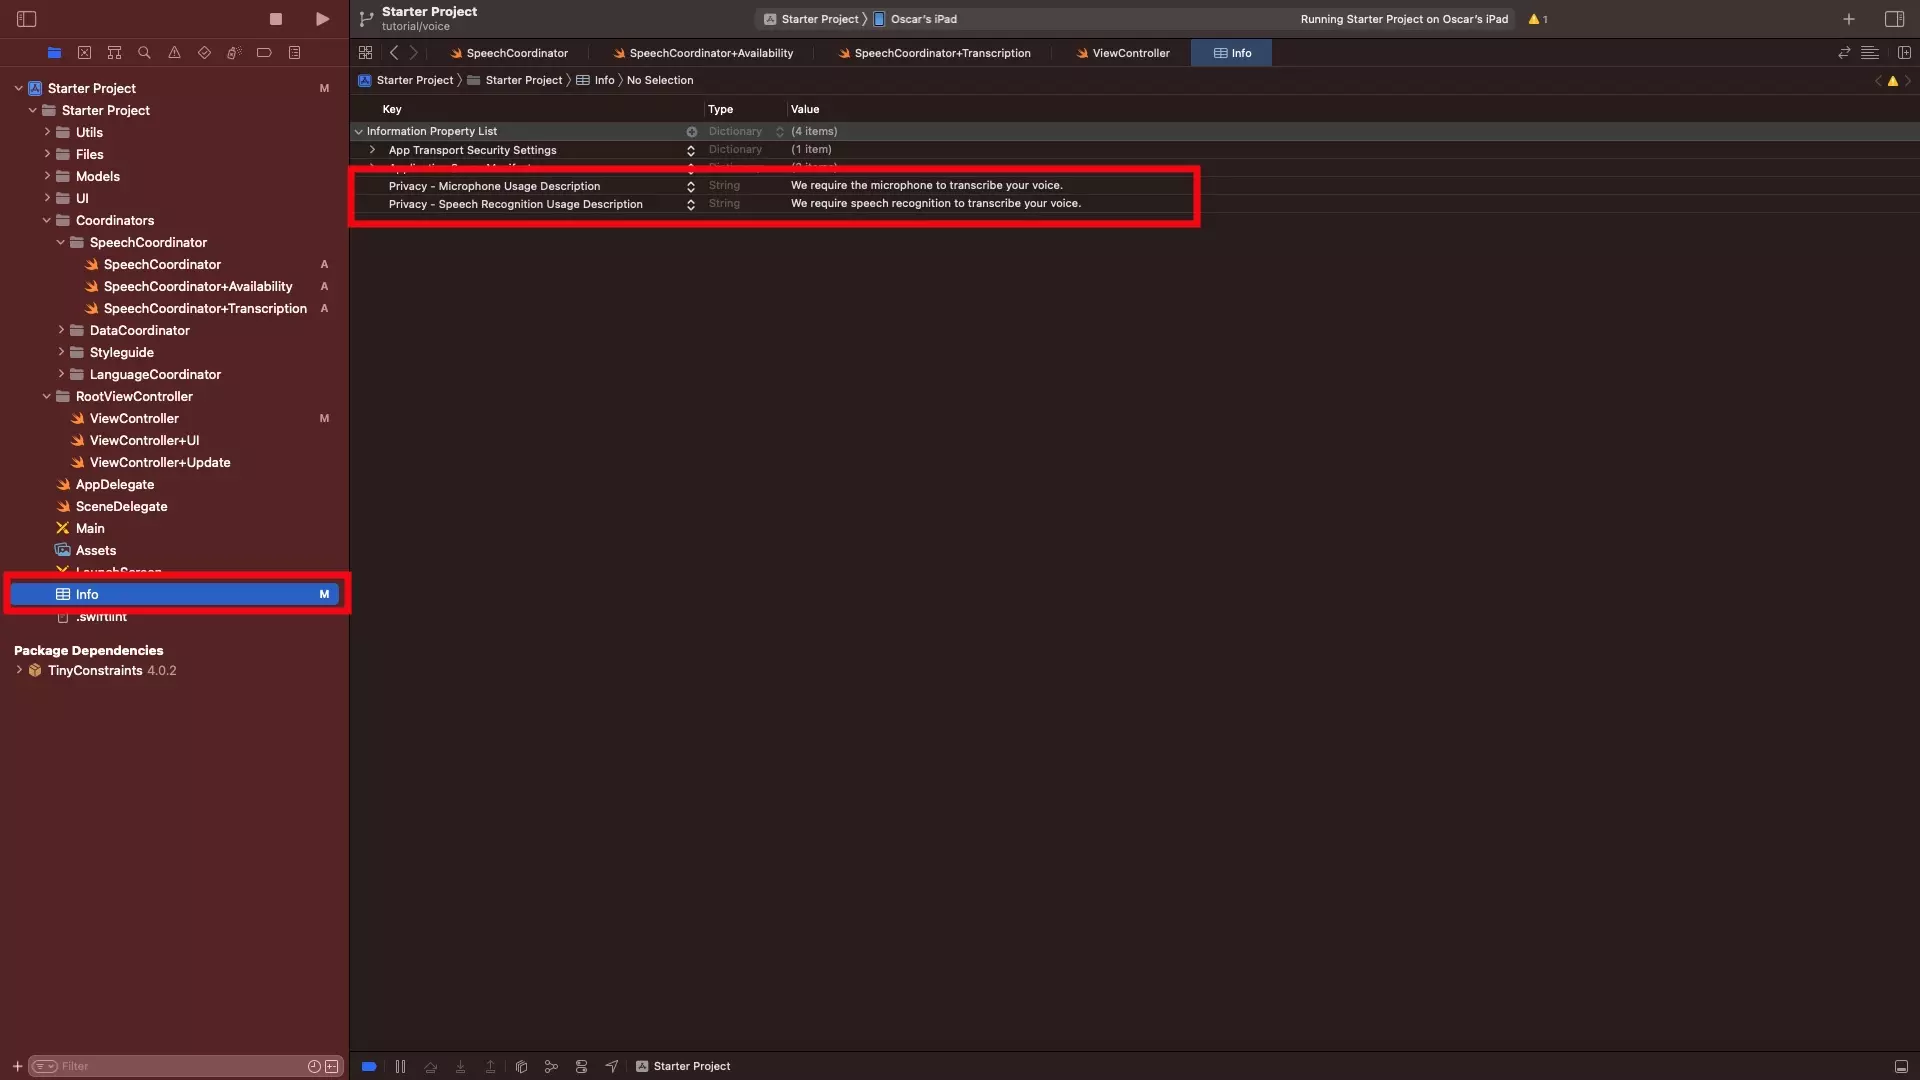
Open the project's info.plist and add two rows, one for the NSMicrophoneUsageDescription key and one for the NSSpeechRecognitionUsageDescription key; along with descriptions as to why you need the microphone and speech recognition. Both of these are required for speech recognition to work.
Optional: Mac Catalyst Entitlement
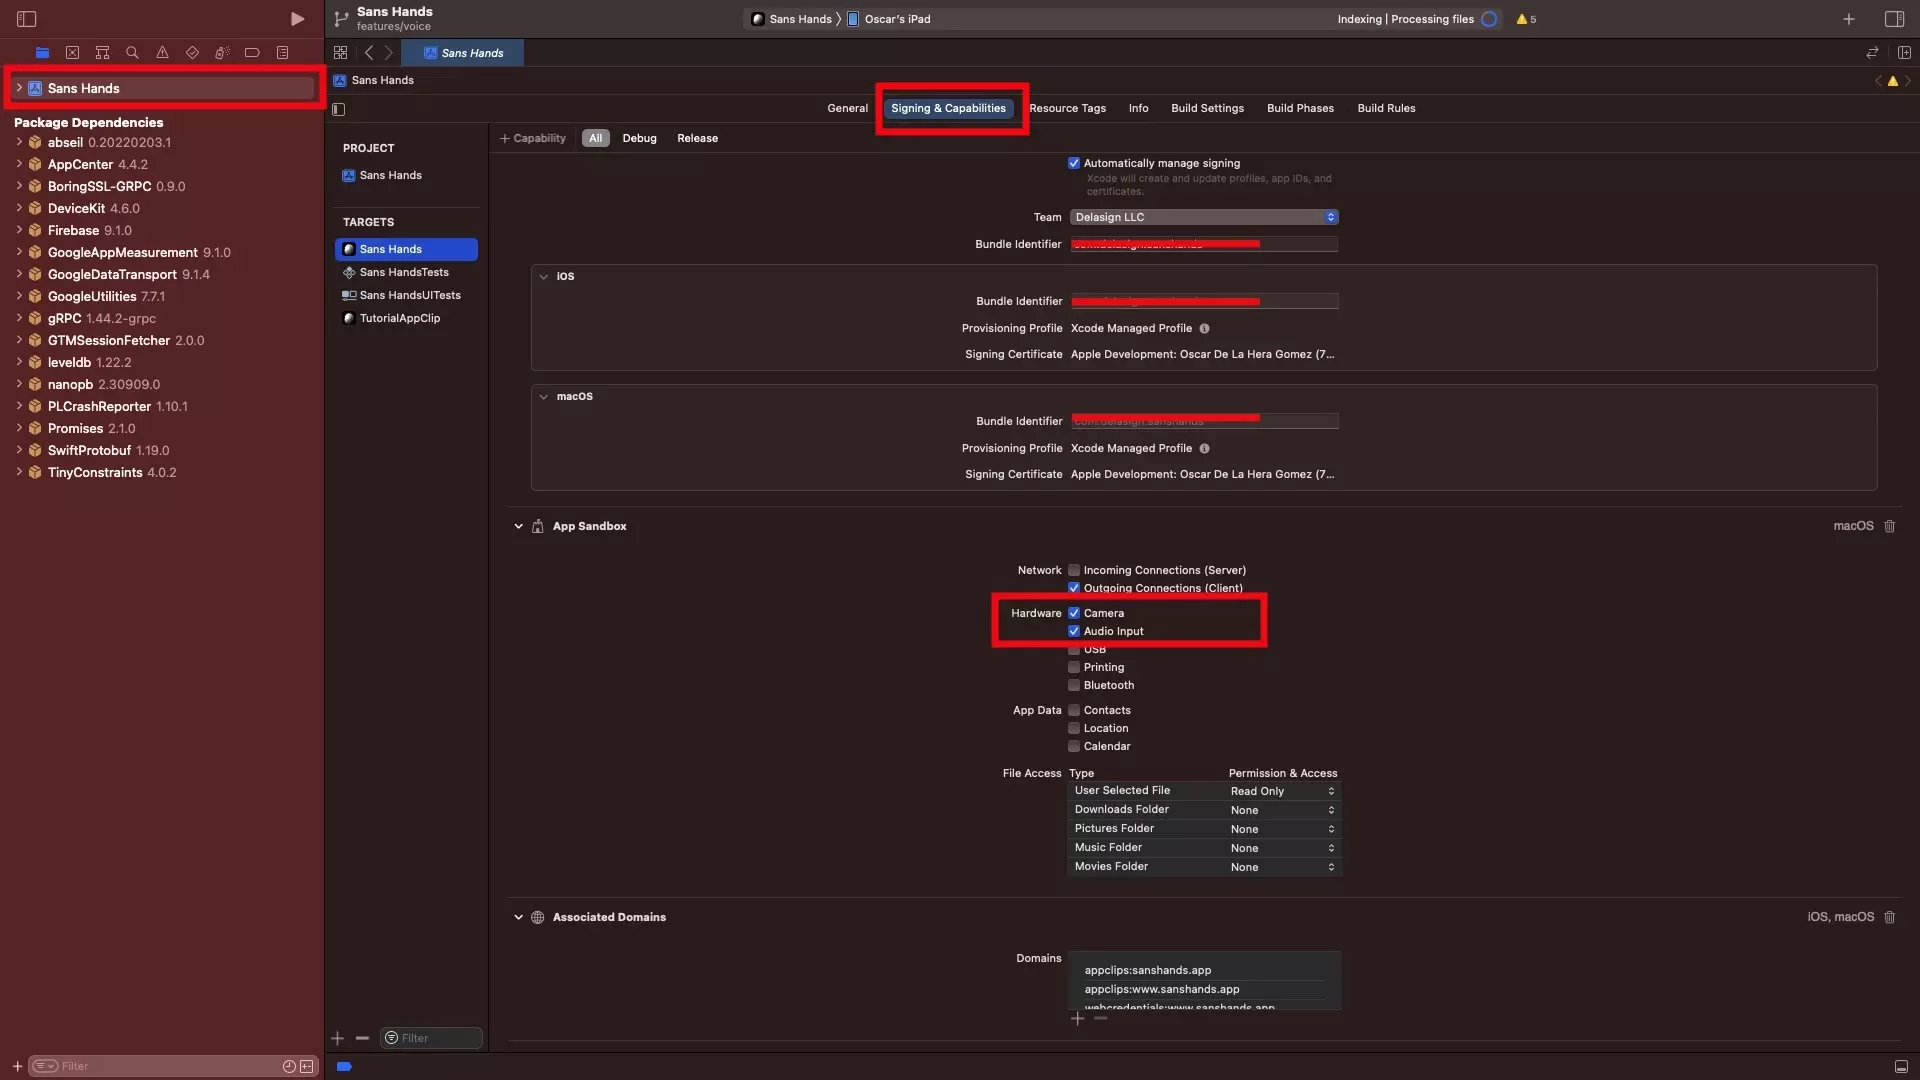
Please note that this screenshot is from our Sans Hands project.
If you are seeking to use the algorithm to do speech recognition on Mac Catalyst, make sure that you check off the Audio Input. This can be found in the Signing and Capabilities tab, in the App Sandbox section under Hardware.
Step Five: Verify
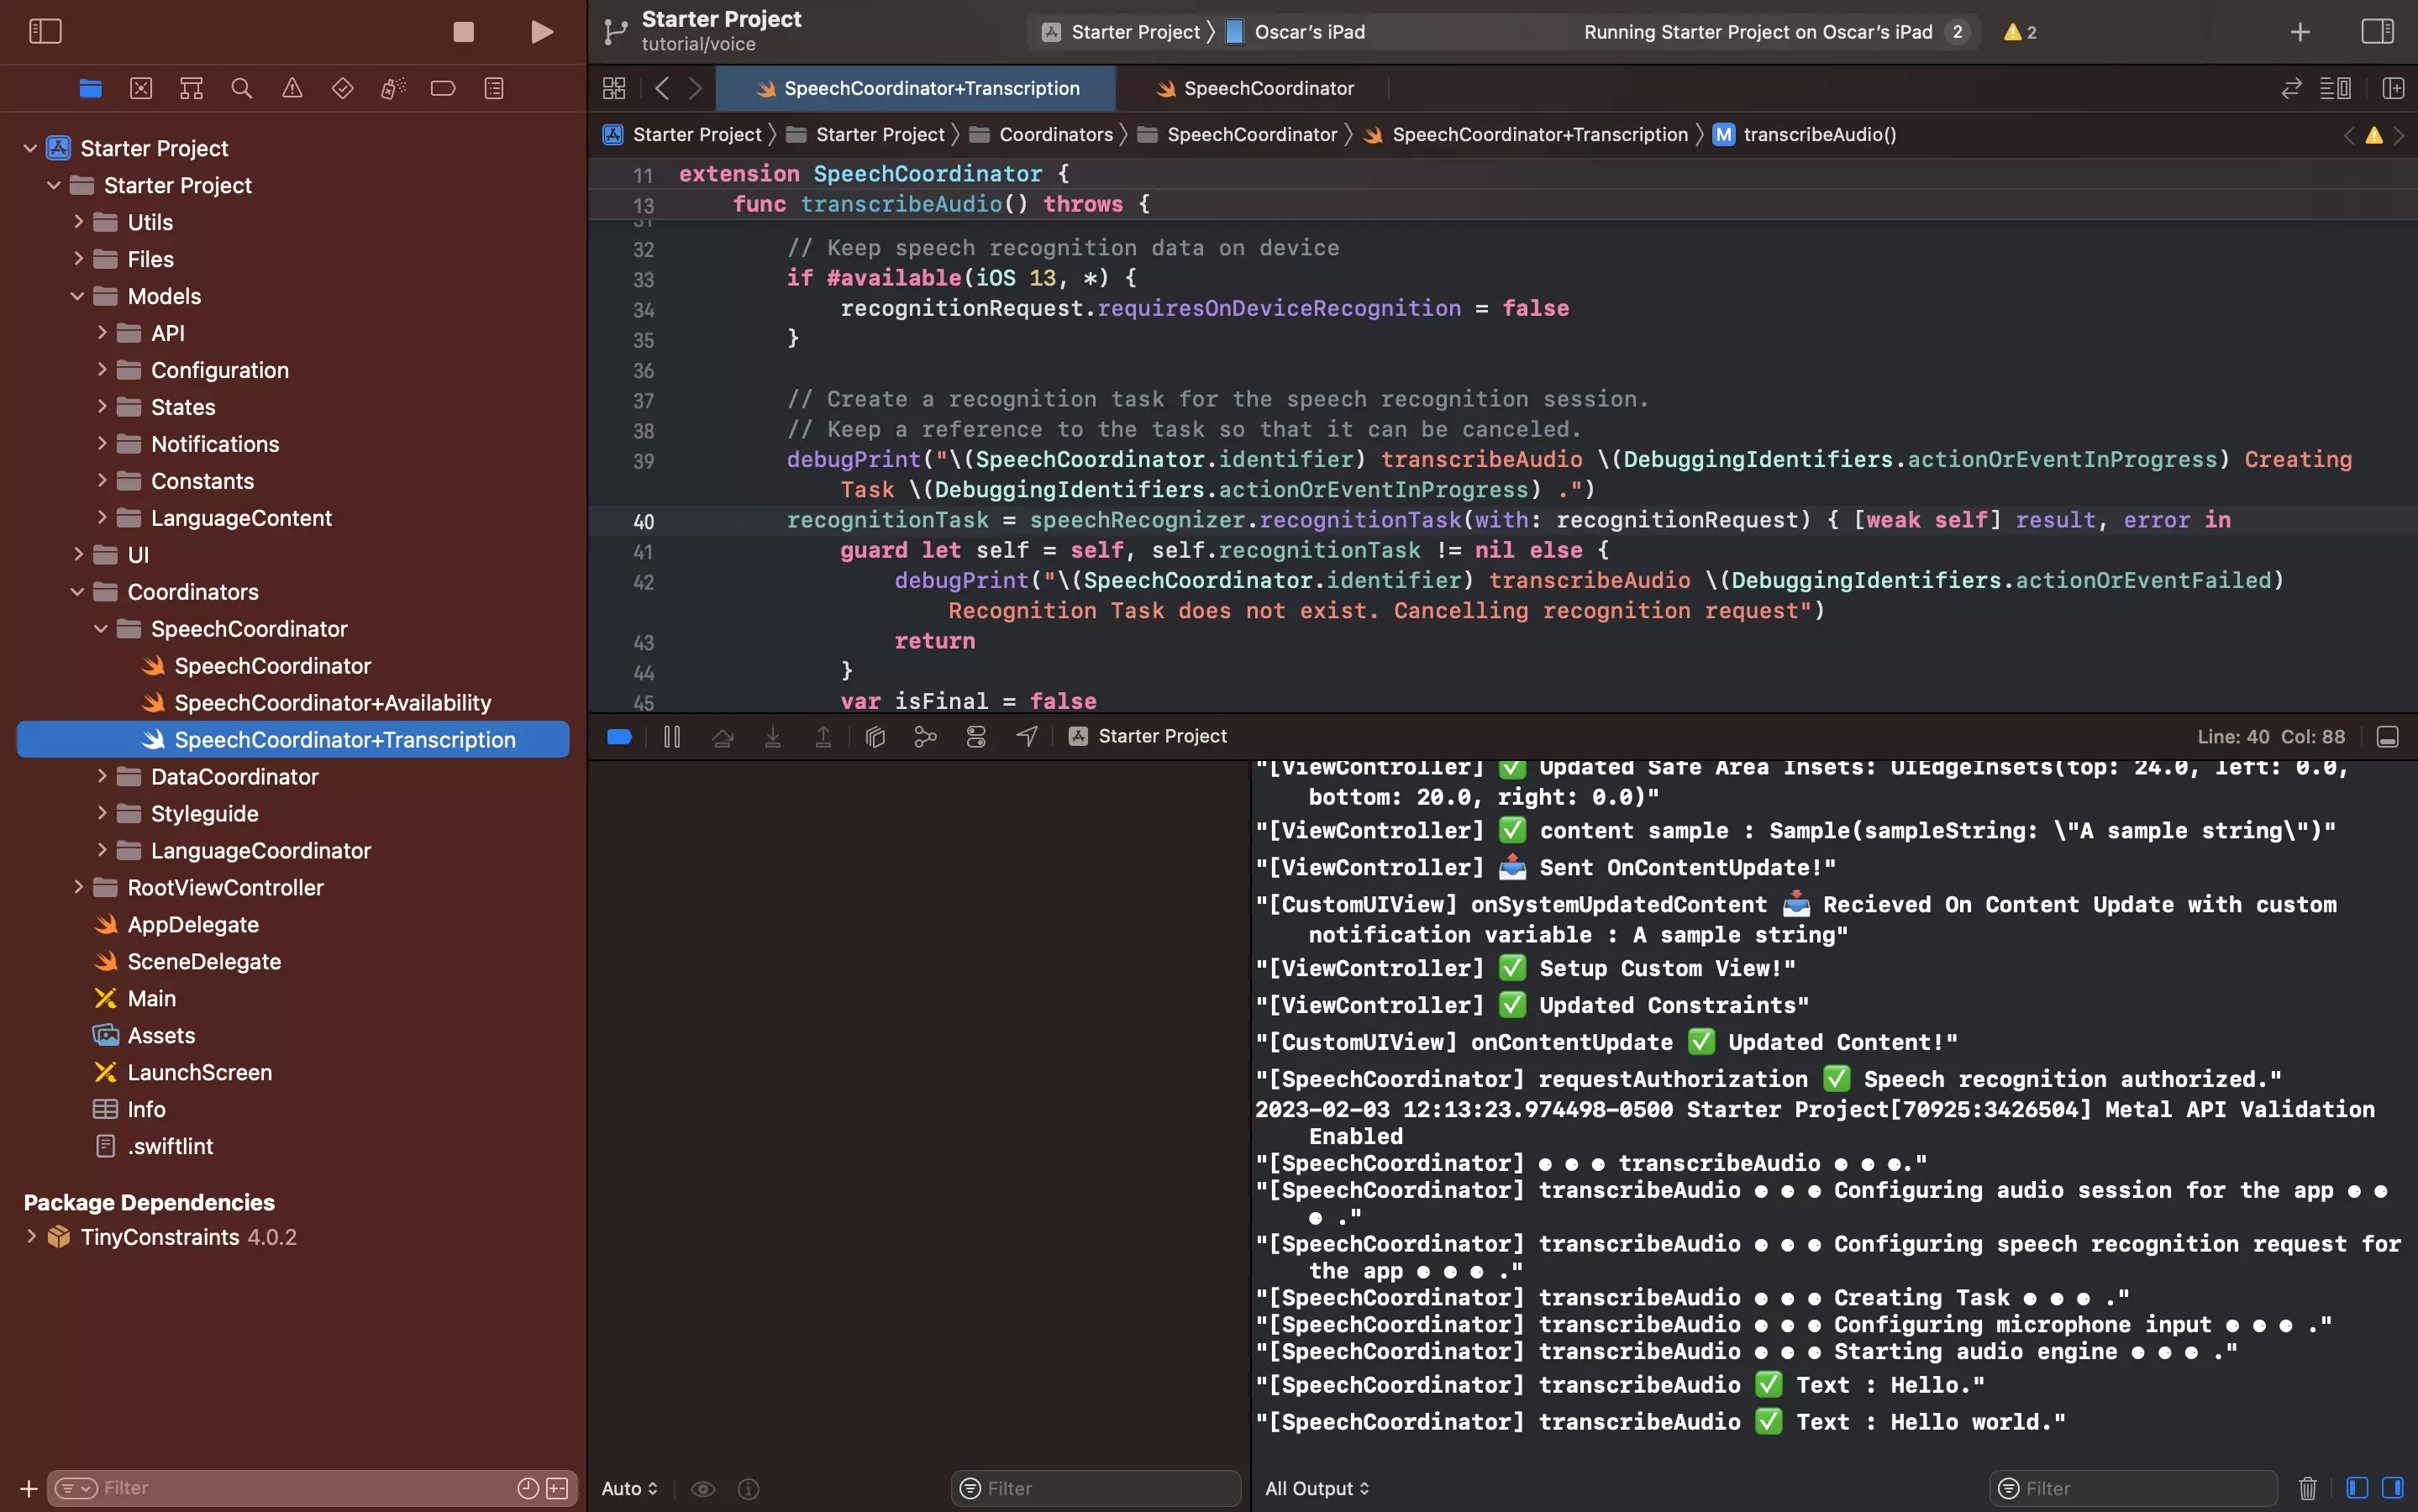
Run the project and you should see that the audio is transcribed in real time in the console.
To ease looking for this, filter the console to include [SpeechCoordinator].