How to rename a project in Xcode
A step by step tutorial on renaming a project in Xcode.


A step by step tutorial on renaming a project in Xcode.
The following step by step tutorial walks you through how to rename our open source Swift starter project using Xcode.
Step One: Download our Open Source project
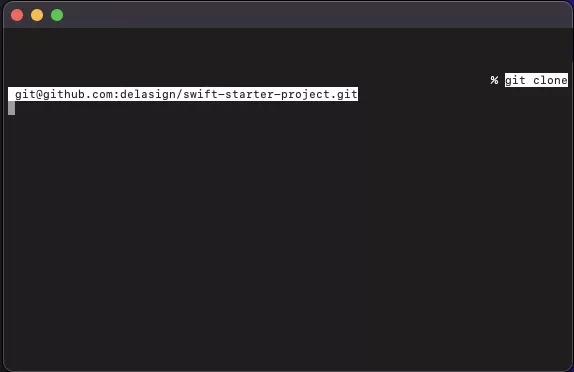
Download the project using the Github link below or run the following line in terminal:
git clone git@github.com:delasign/swift-starter-project.gitStep Two: Open the project
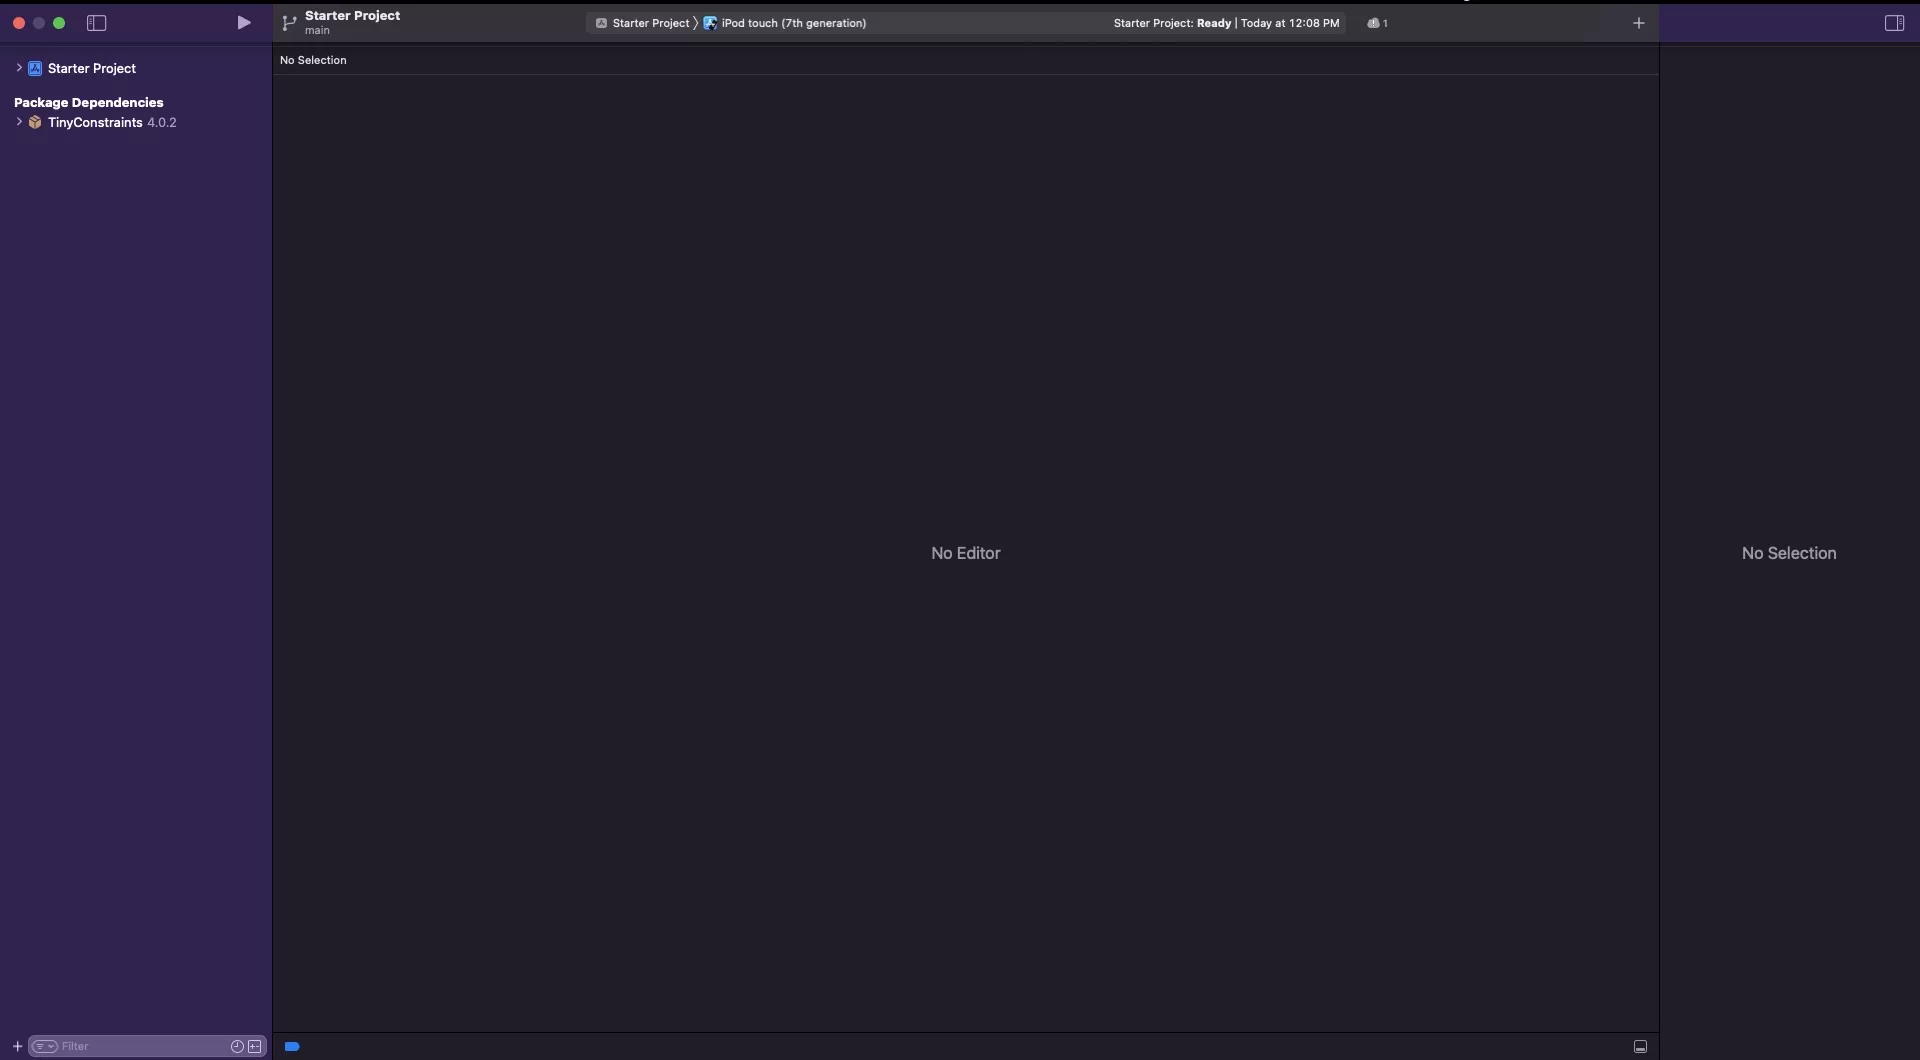
Open XCode and open your project or navigate to your project folder in Finder and double click the project or workspace to open it in XCode.
Step Three: Rename project
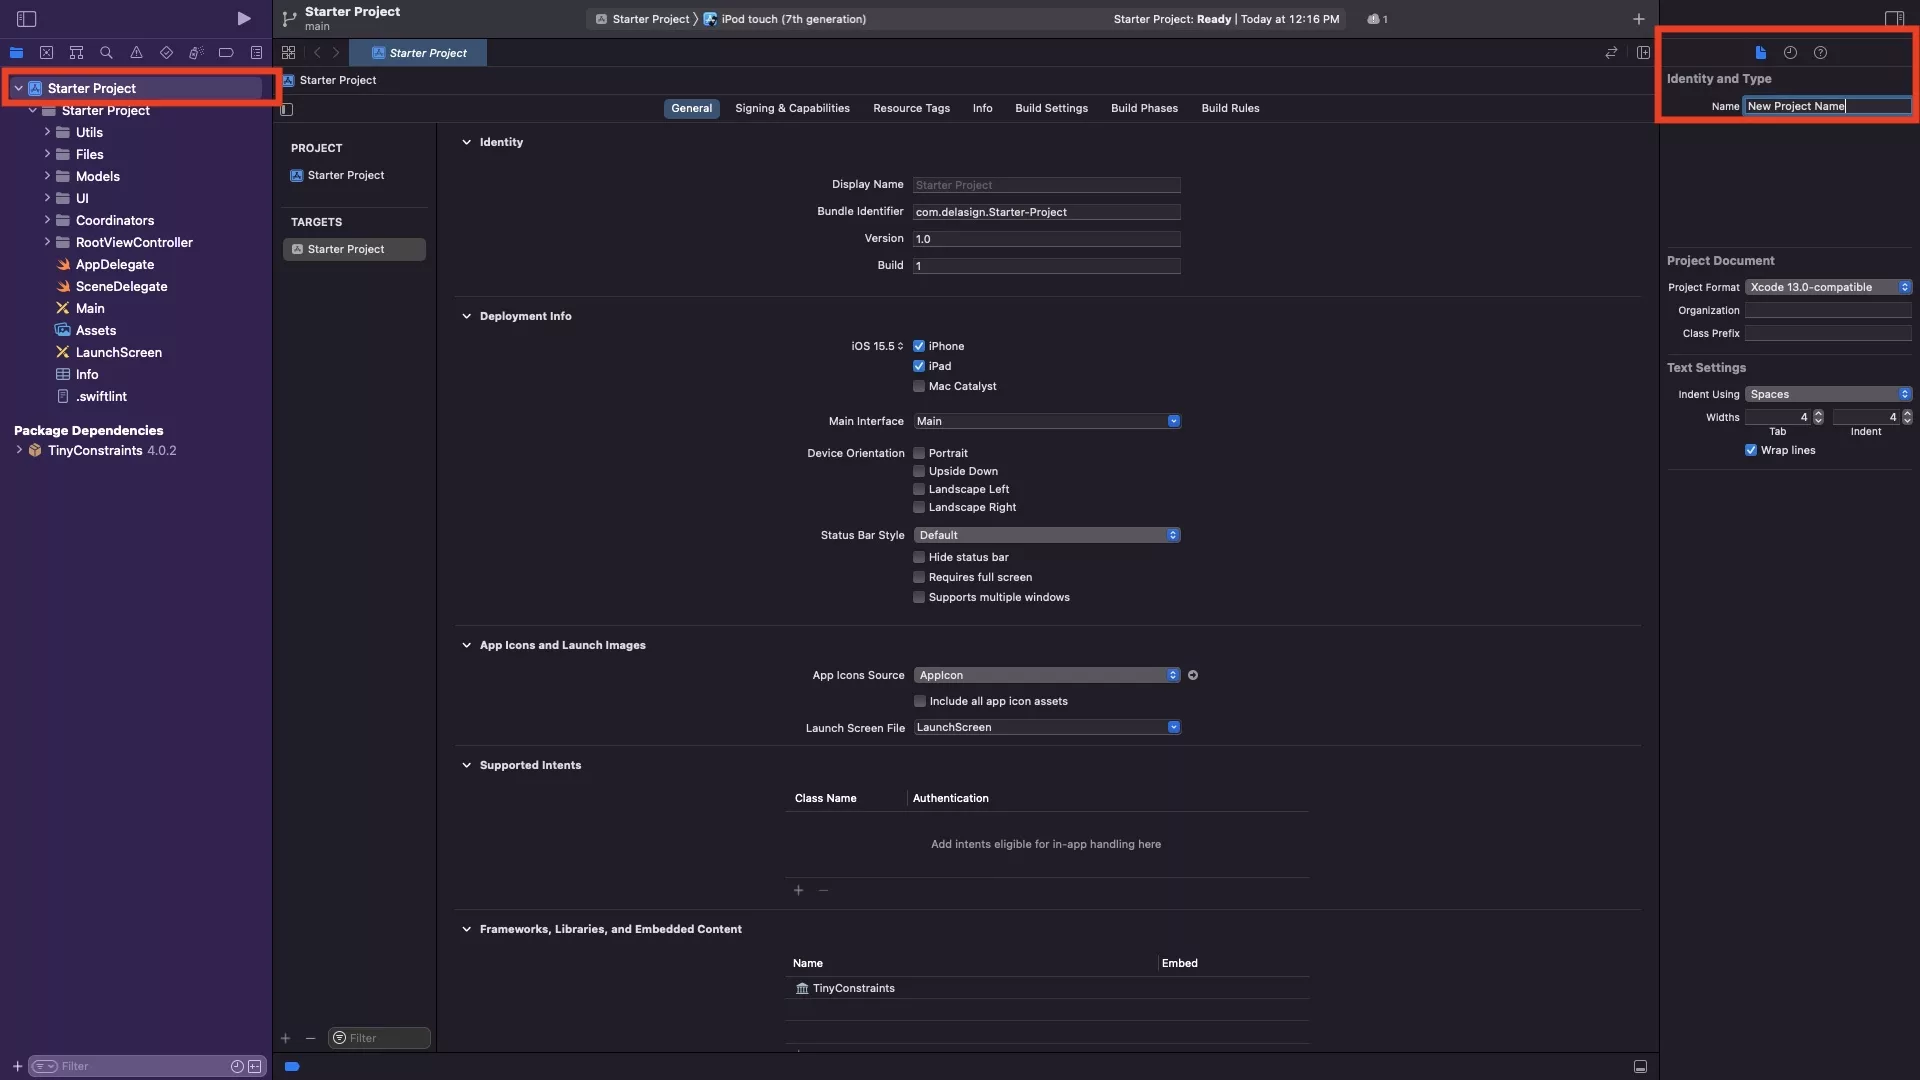
On the Project Navigator (left hand side menu, with the folder icon selected), select the project name which has an Apple app icon to its left. This is found on the top left and in our case is called Starter Project.
Then on the File Inspector (right hand side menu with the document icon selected), under Identity and Type change the name to your new name - in our case New Project Name.
When ready, Press Enter.
Step Four: Confirm rename

A modal will appear asking you what it should rename. Make sure everything is selected and press Rename.
Step Five: Rename project folder
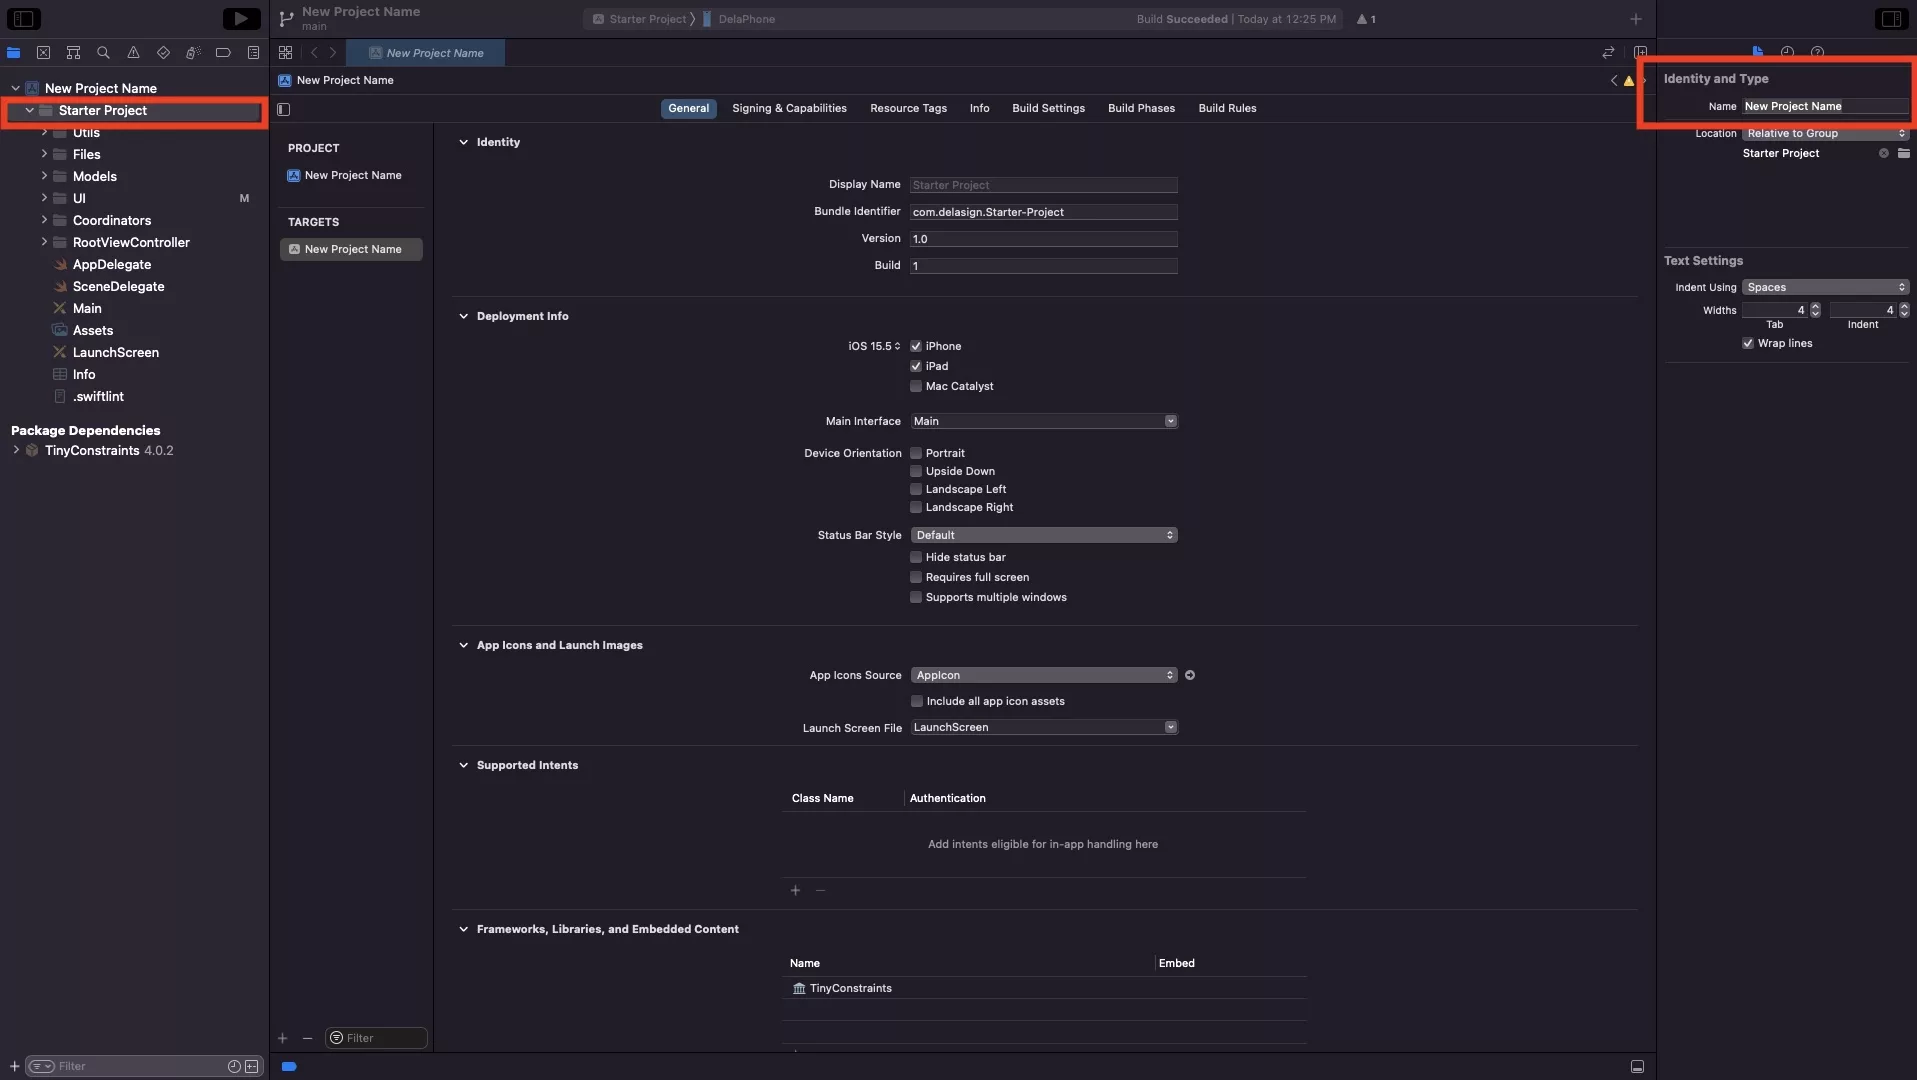
On the Project Navigator, under the newly named project, select the folder that sits beneath it - in our case its called Starter Project.
Then on the File Inspector, under Identity and Type change the name to your new name - in our case New Project Name.
When ready, Press Enter.
Step Six: Correct info.plist path
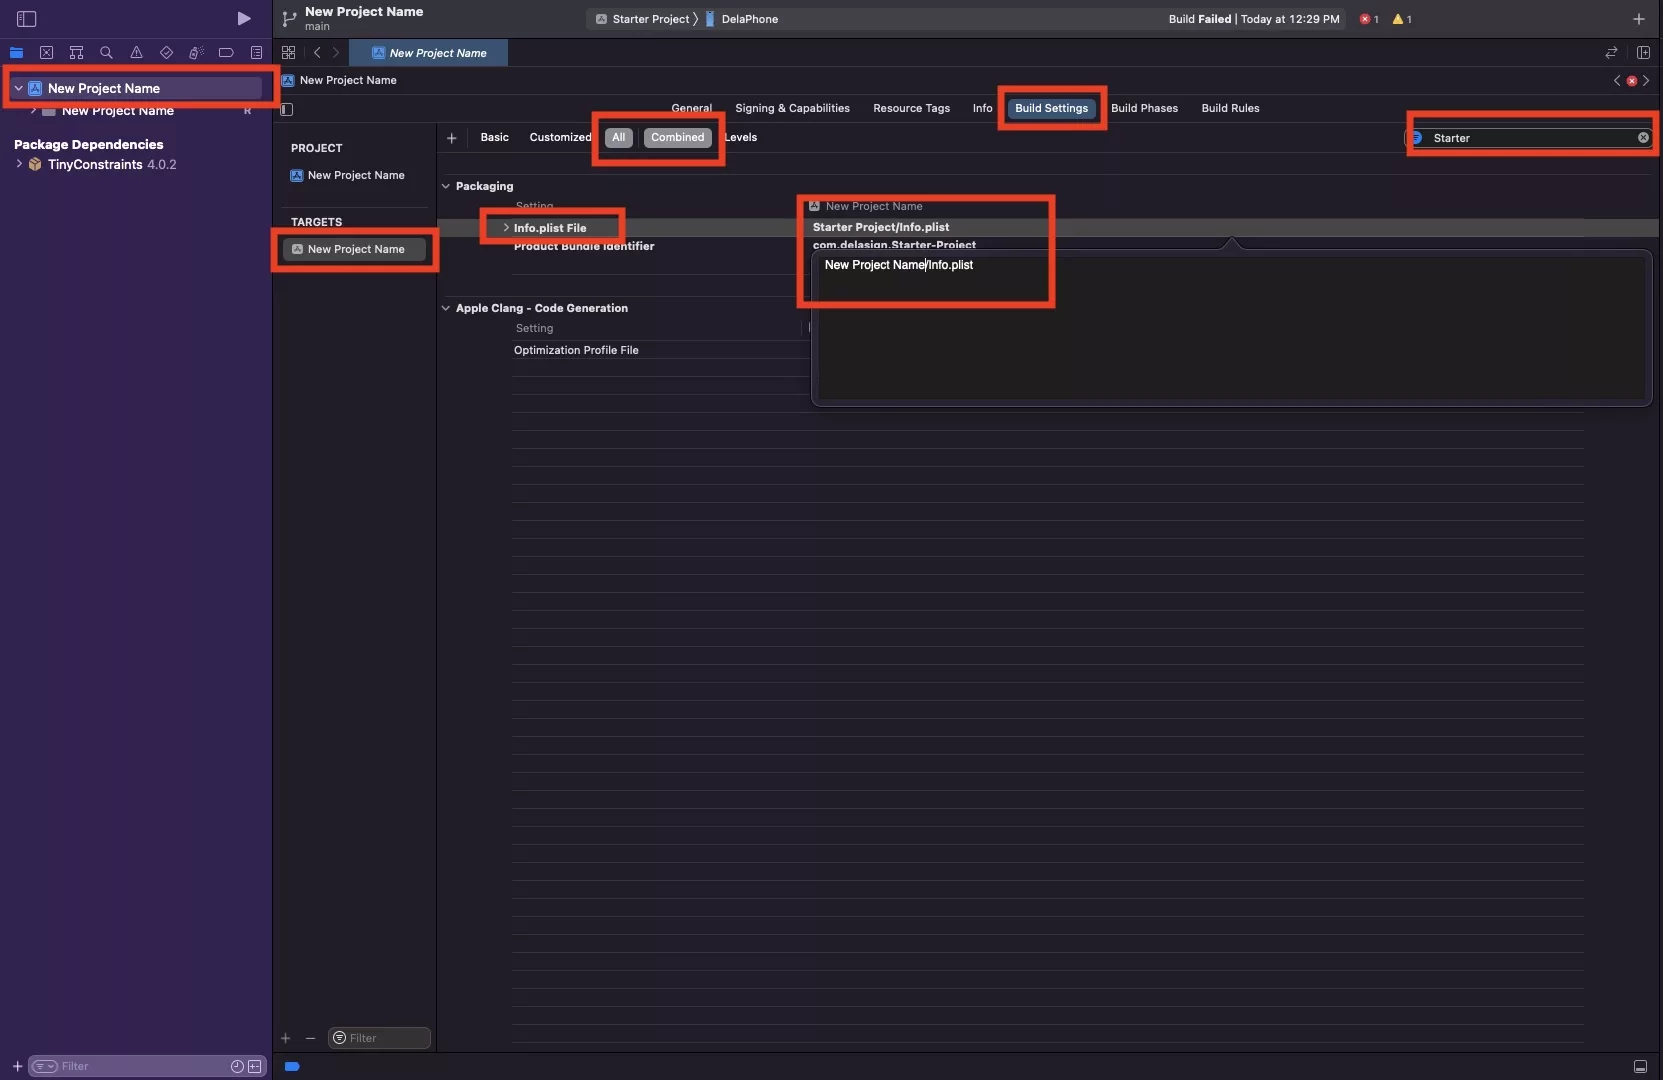
On the Project Navigator, select the project name which has an Apple app icon to its left. This is found on the top left and in our case is now called New Project Name.
In the view that appears, select New Project Name under Targets.
Then within it, select Build Settings, make sure All and Combined are selected and search for the previous project name - in our case Starter.
The under Packaging, double click on the path for your info.plist to rename it. In our case it went from Starter Project/info.plist to New Project Name/info.plist.
Step Seven: Navigate to Manage Schemes
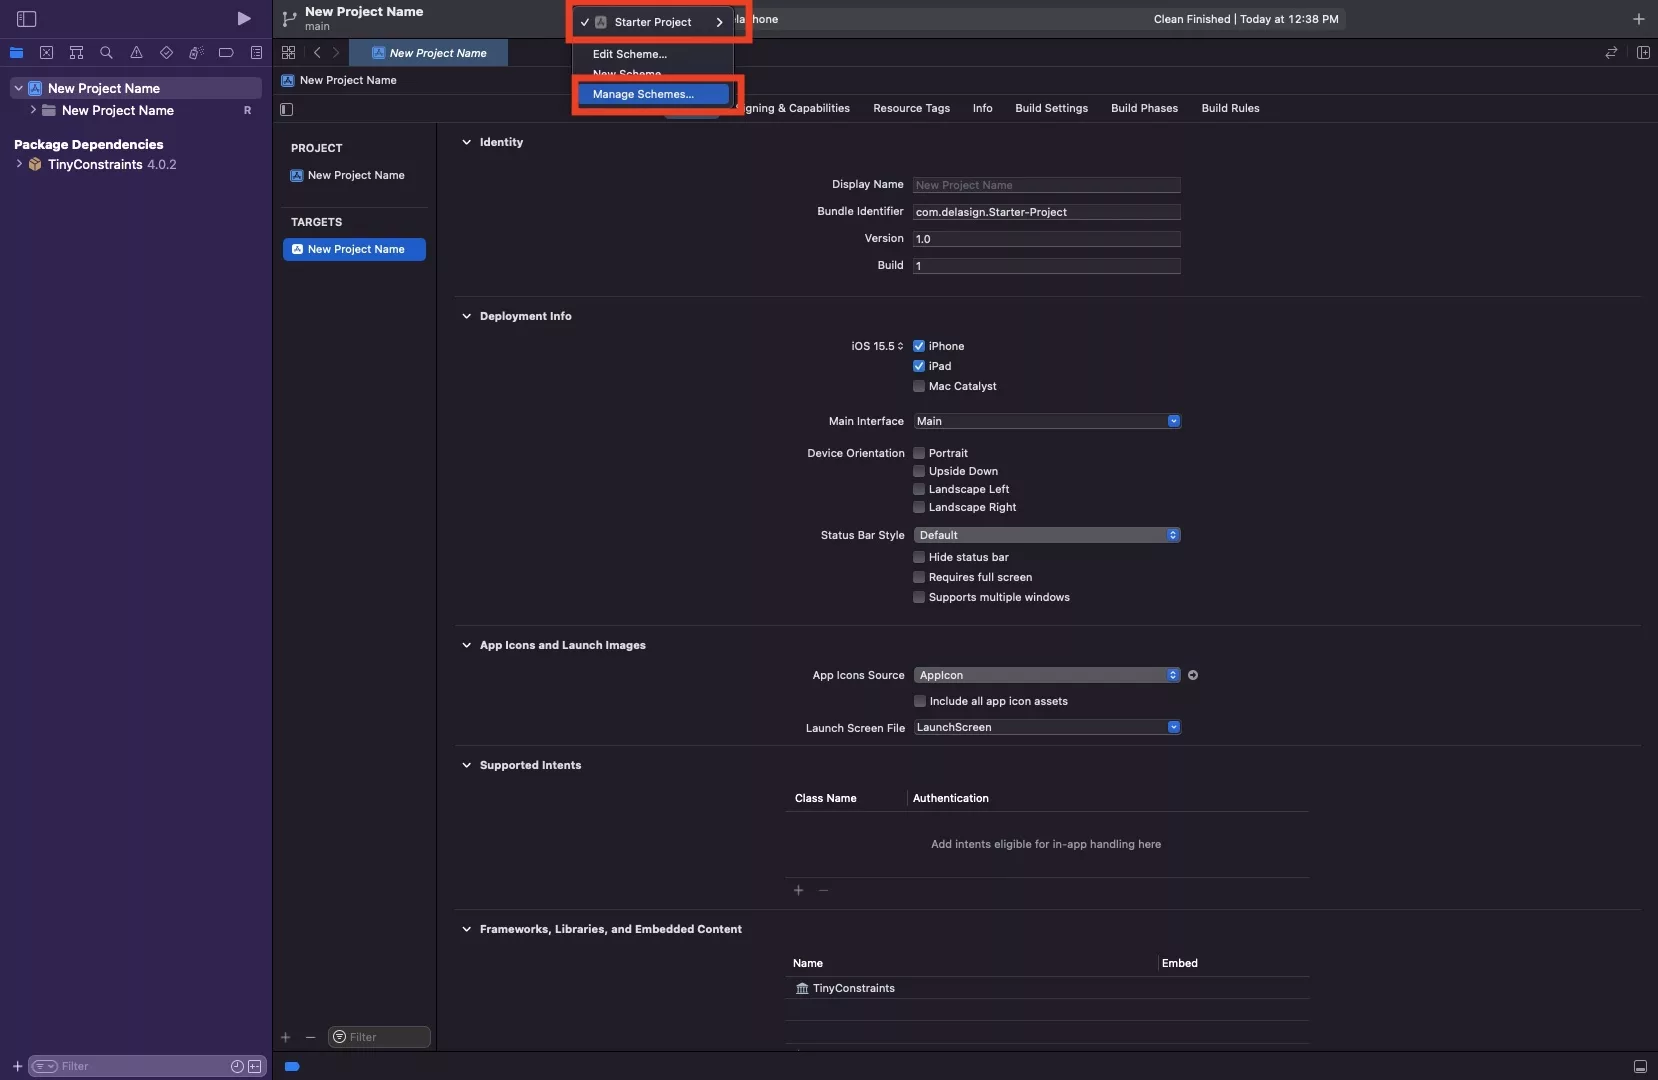
At the top, in the center bar select your project scheme (in our case Starter Project) and in the menu that pops up select Manage Schemes...
Step Eight: Rename your Scheme
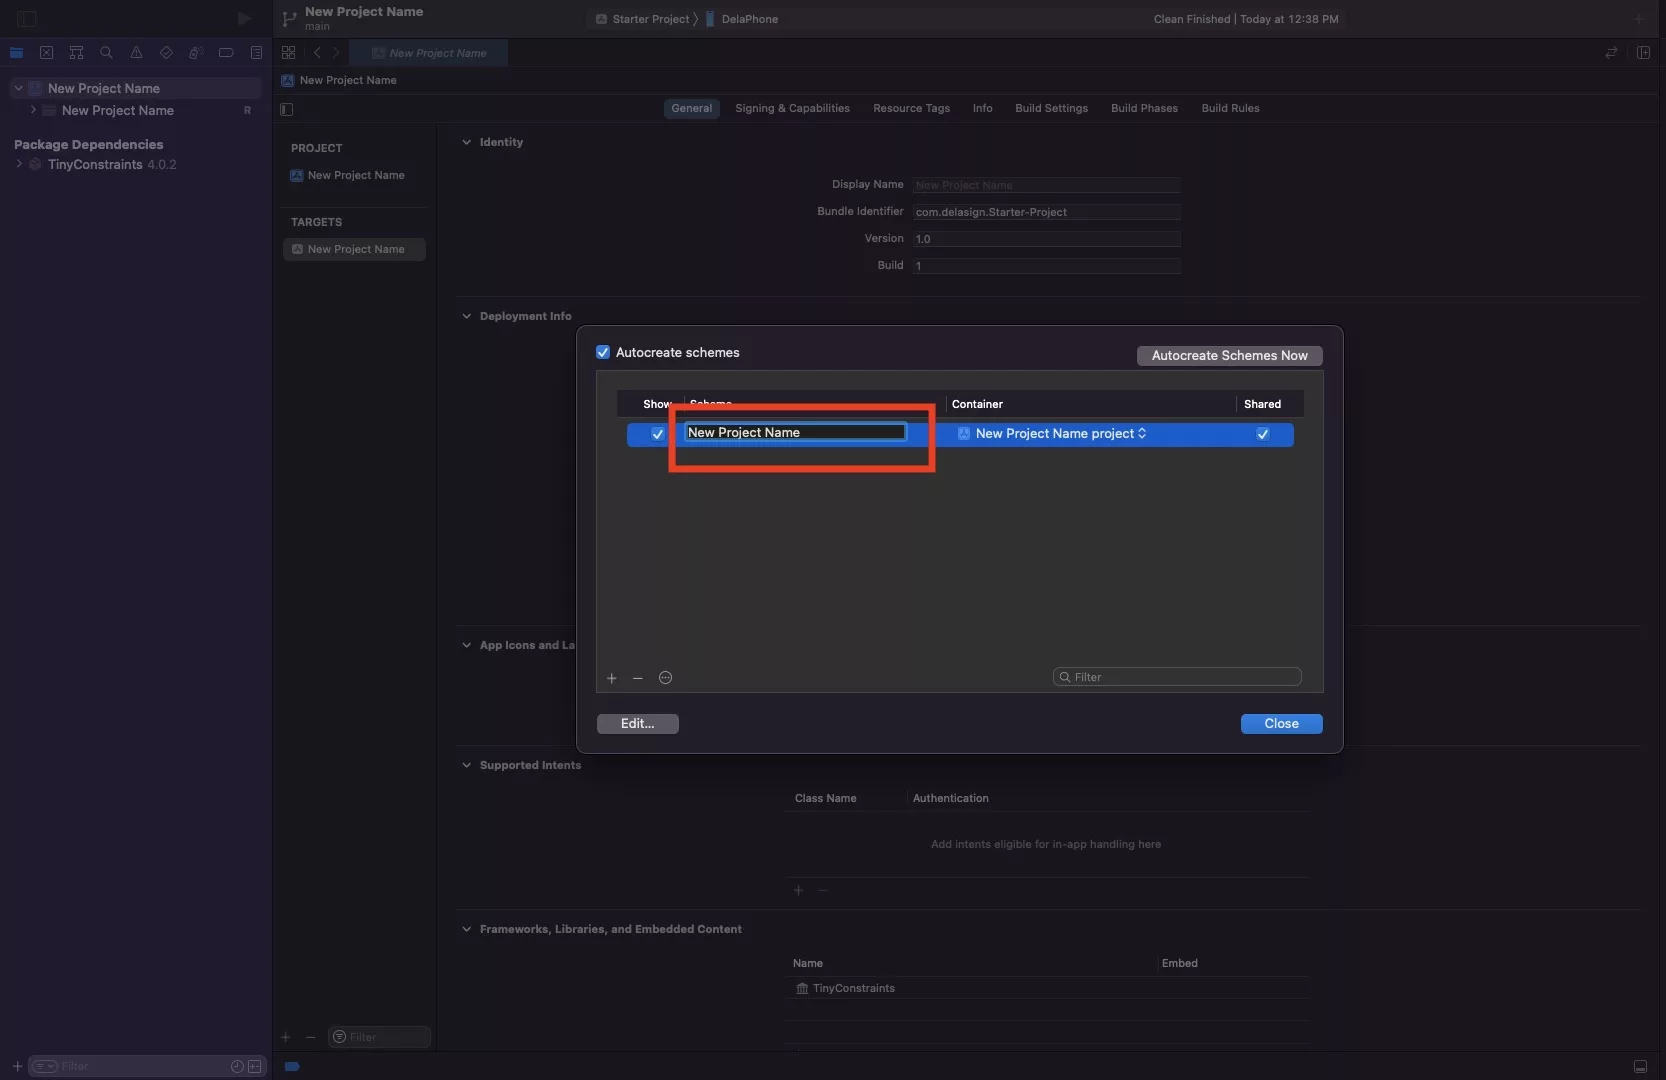
In the modal that appears, select the scheme. Then a second later, click it again to rename it - in our case we renamed it to New Project Name.
Please note that if you double click the scheme name, it will not let you rename it but will take you to the schemes modal.
Any Questions
We are actively looking for feedback on how to improve this resource. Please send us a note to inquiries@delasign.com with any thoughts or feedback you may have.