How to rename an Android Studio Project
A step by step guide on renaming an Android Studio project. Open Source Kotlin Android project included.

A step by step guide on renaming an Android Studio project. Open Source Kotlin Android project included.
SubscribeDownload Open Source Kotlin Starter ProjectWe recommend that you clone our Open Source Kotlin Starter Project, checking out the main branch and carrying out the steps below. The changes can be found on the tutorial/basics/rename-project branch.
git clone git@github.com:delasign/kotlin-android-starter-project.gitPlease note that this tutorial renames the project from "Sample Project / samplestarterproject" to "A Sample Project / asamplestarterproject".
Step One: Rename the App Name
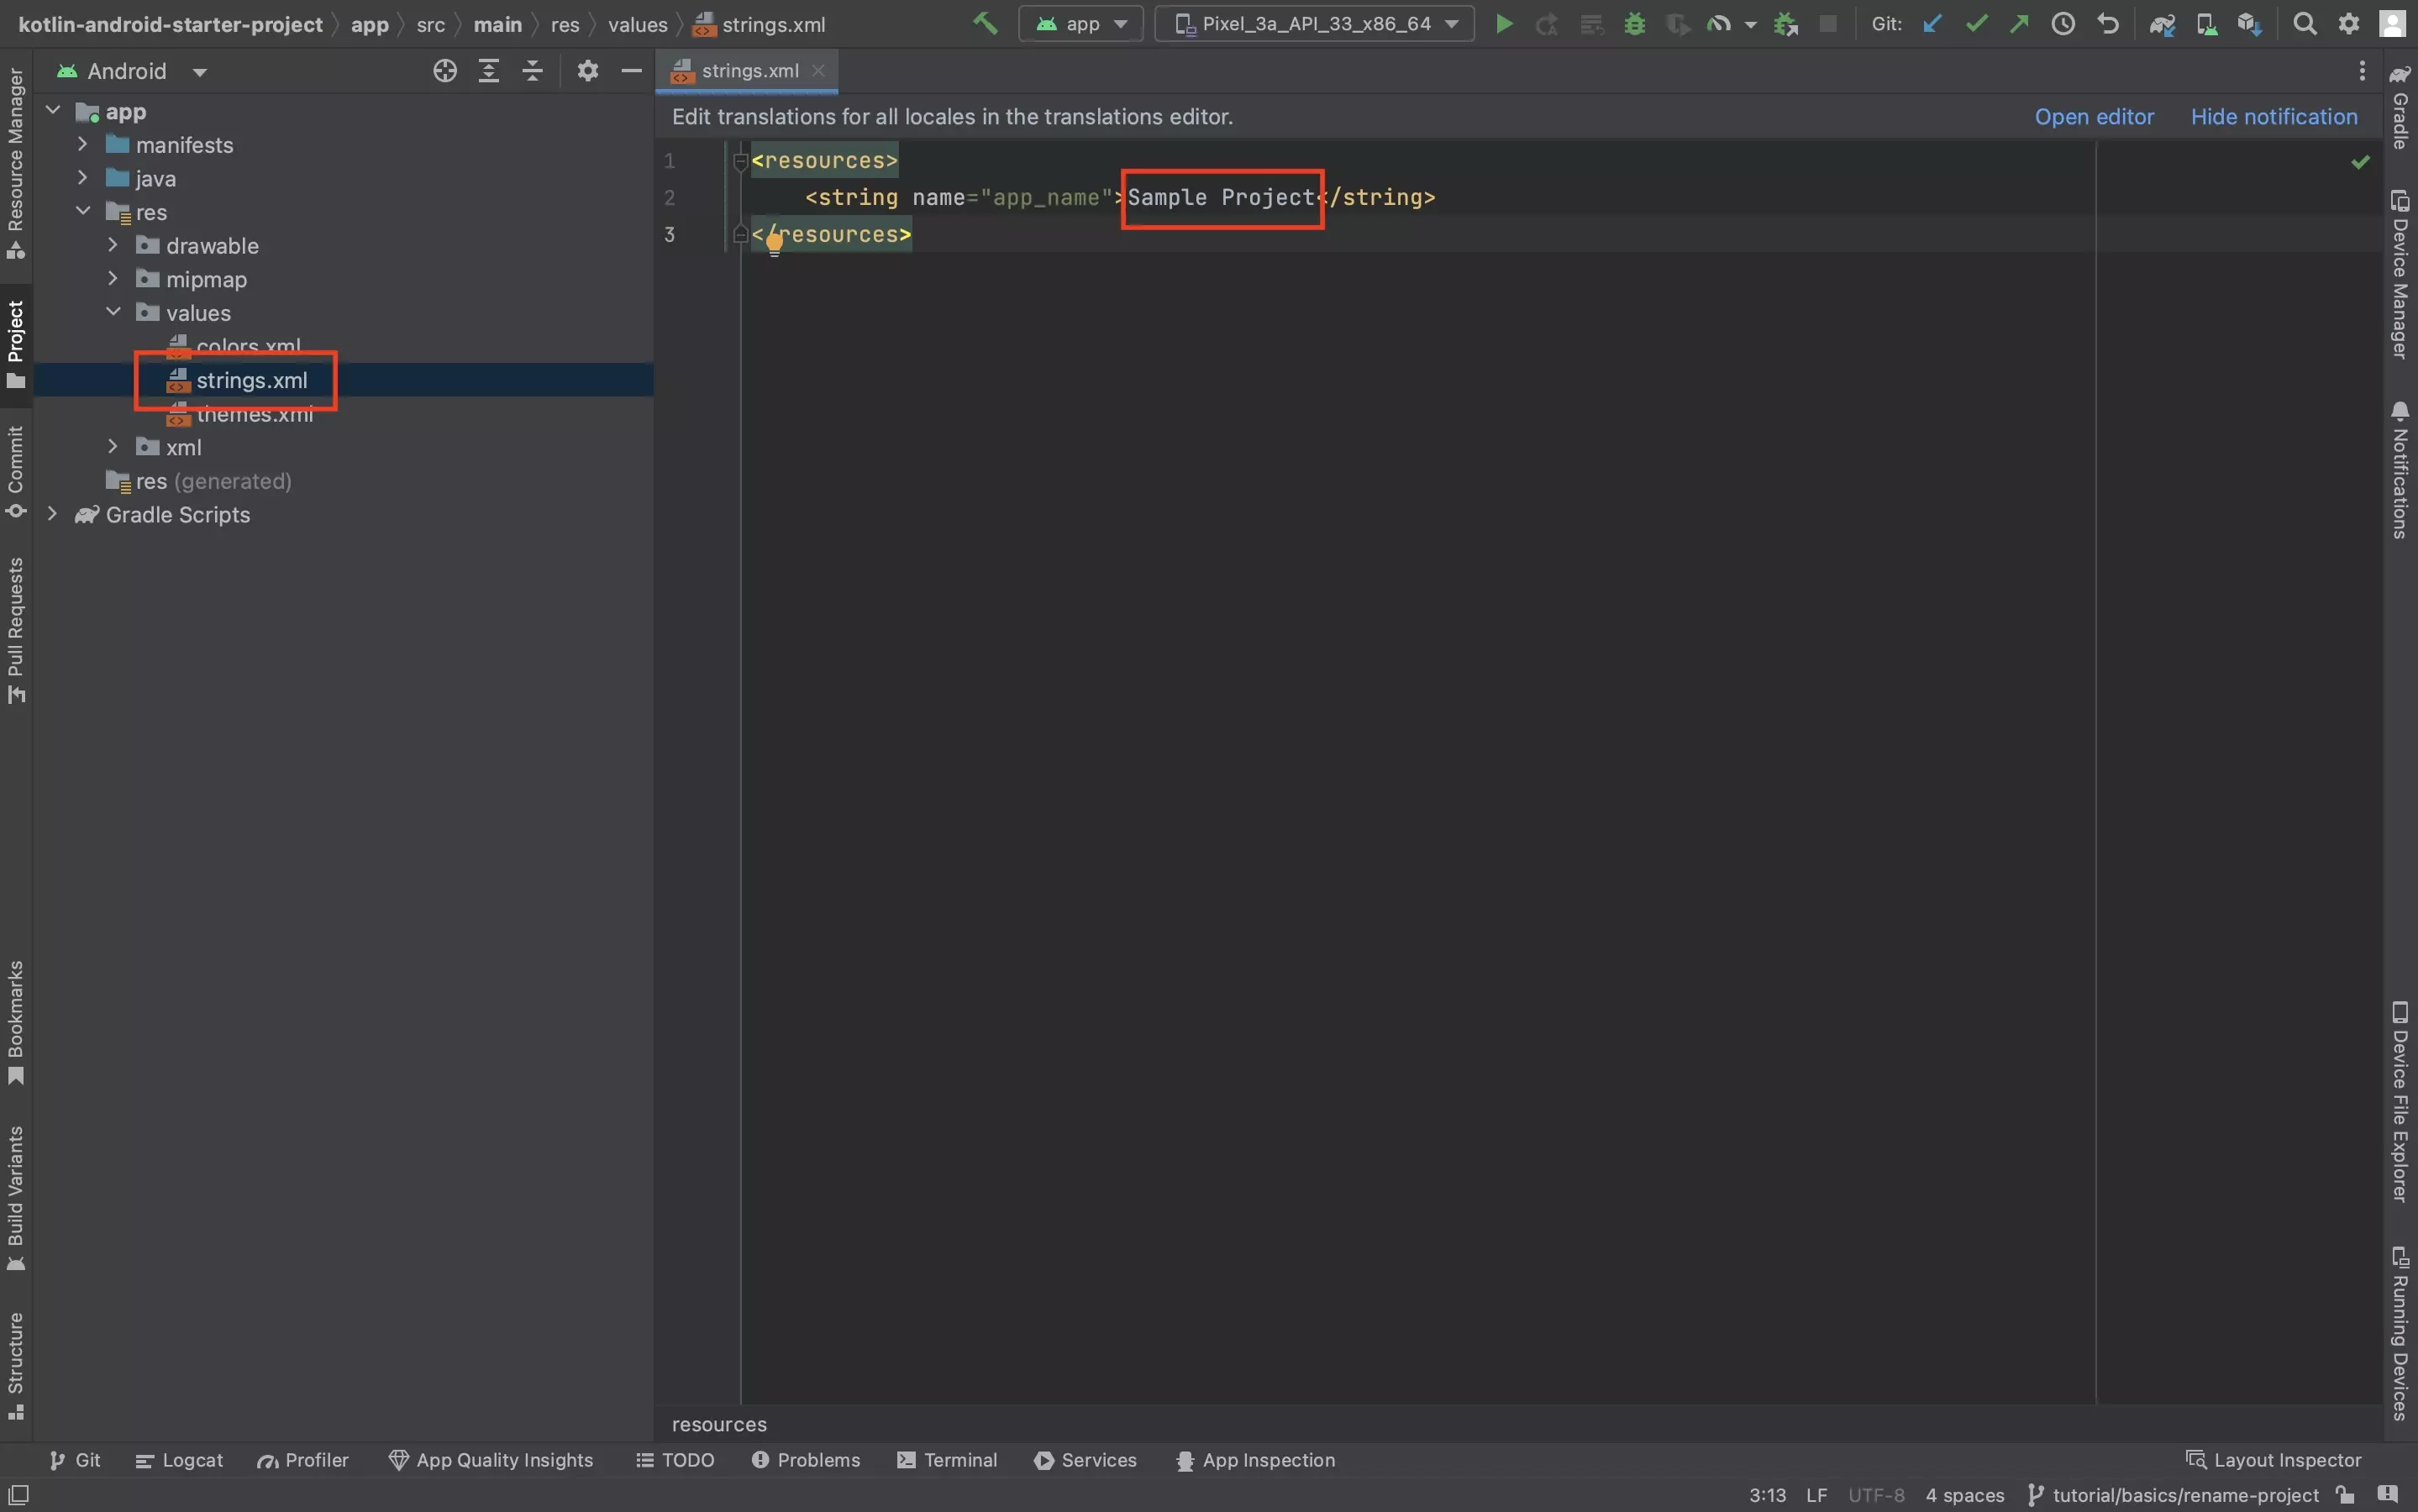
In Android Studio, under res > values > strings.xml change the app_name string to the name that you wish for your app to display on the Android device.
Step Two: Rename the Root Project Name
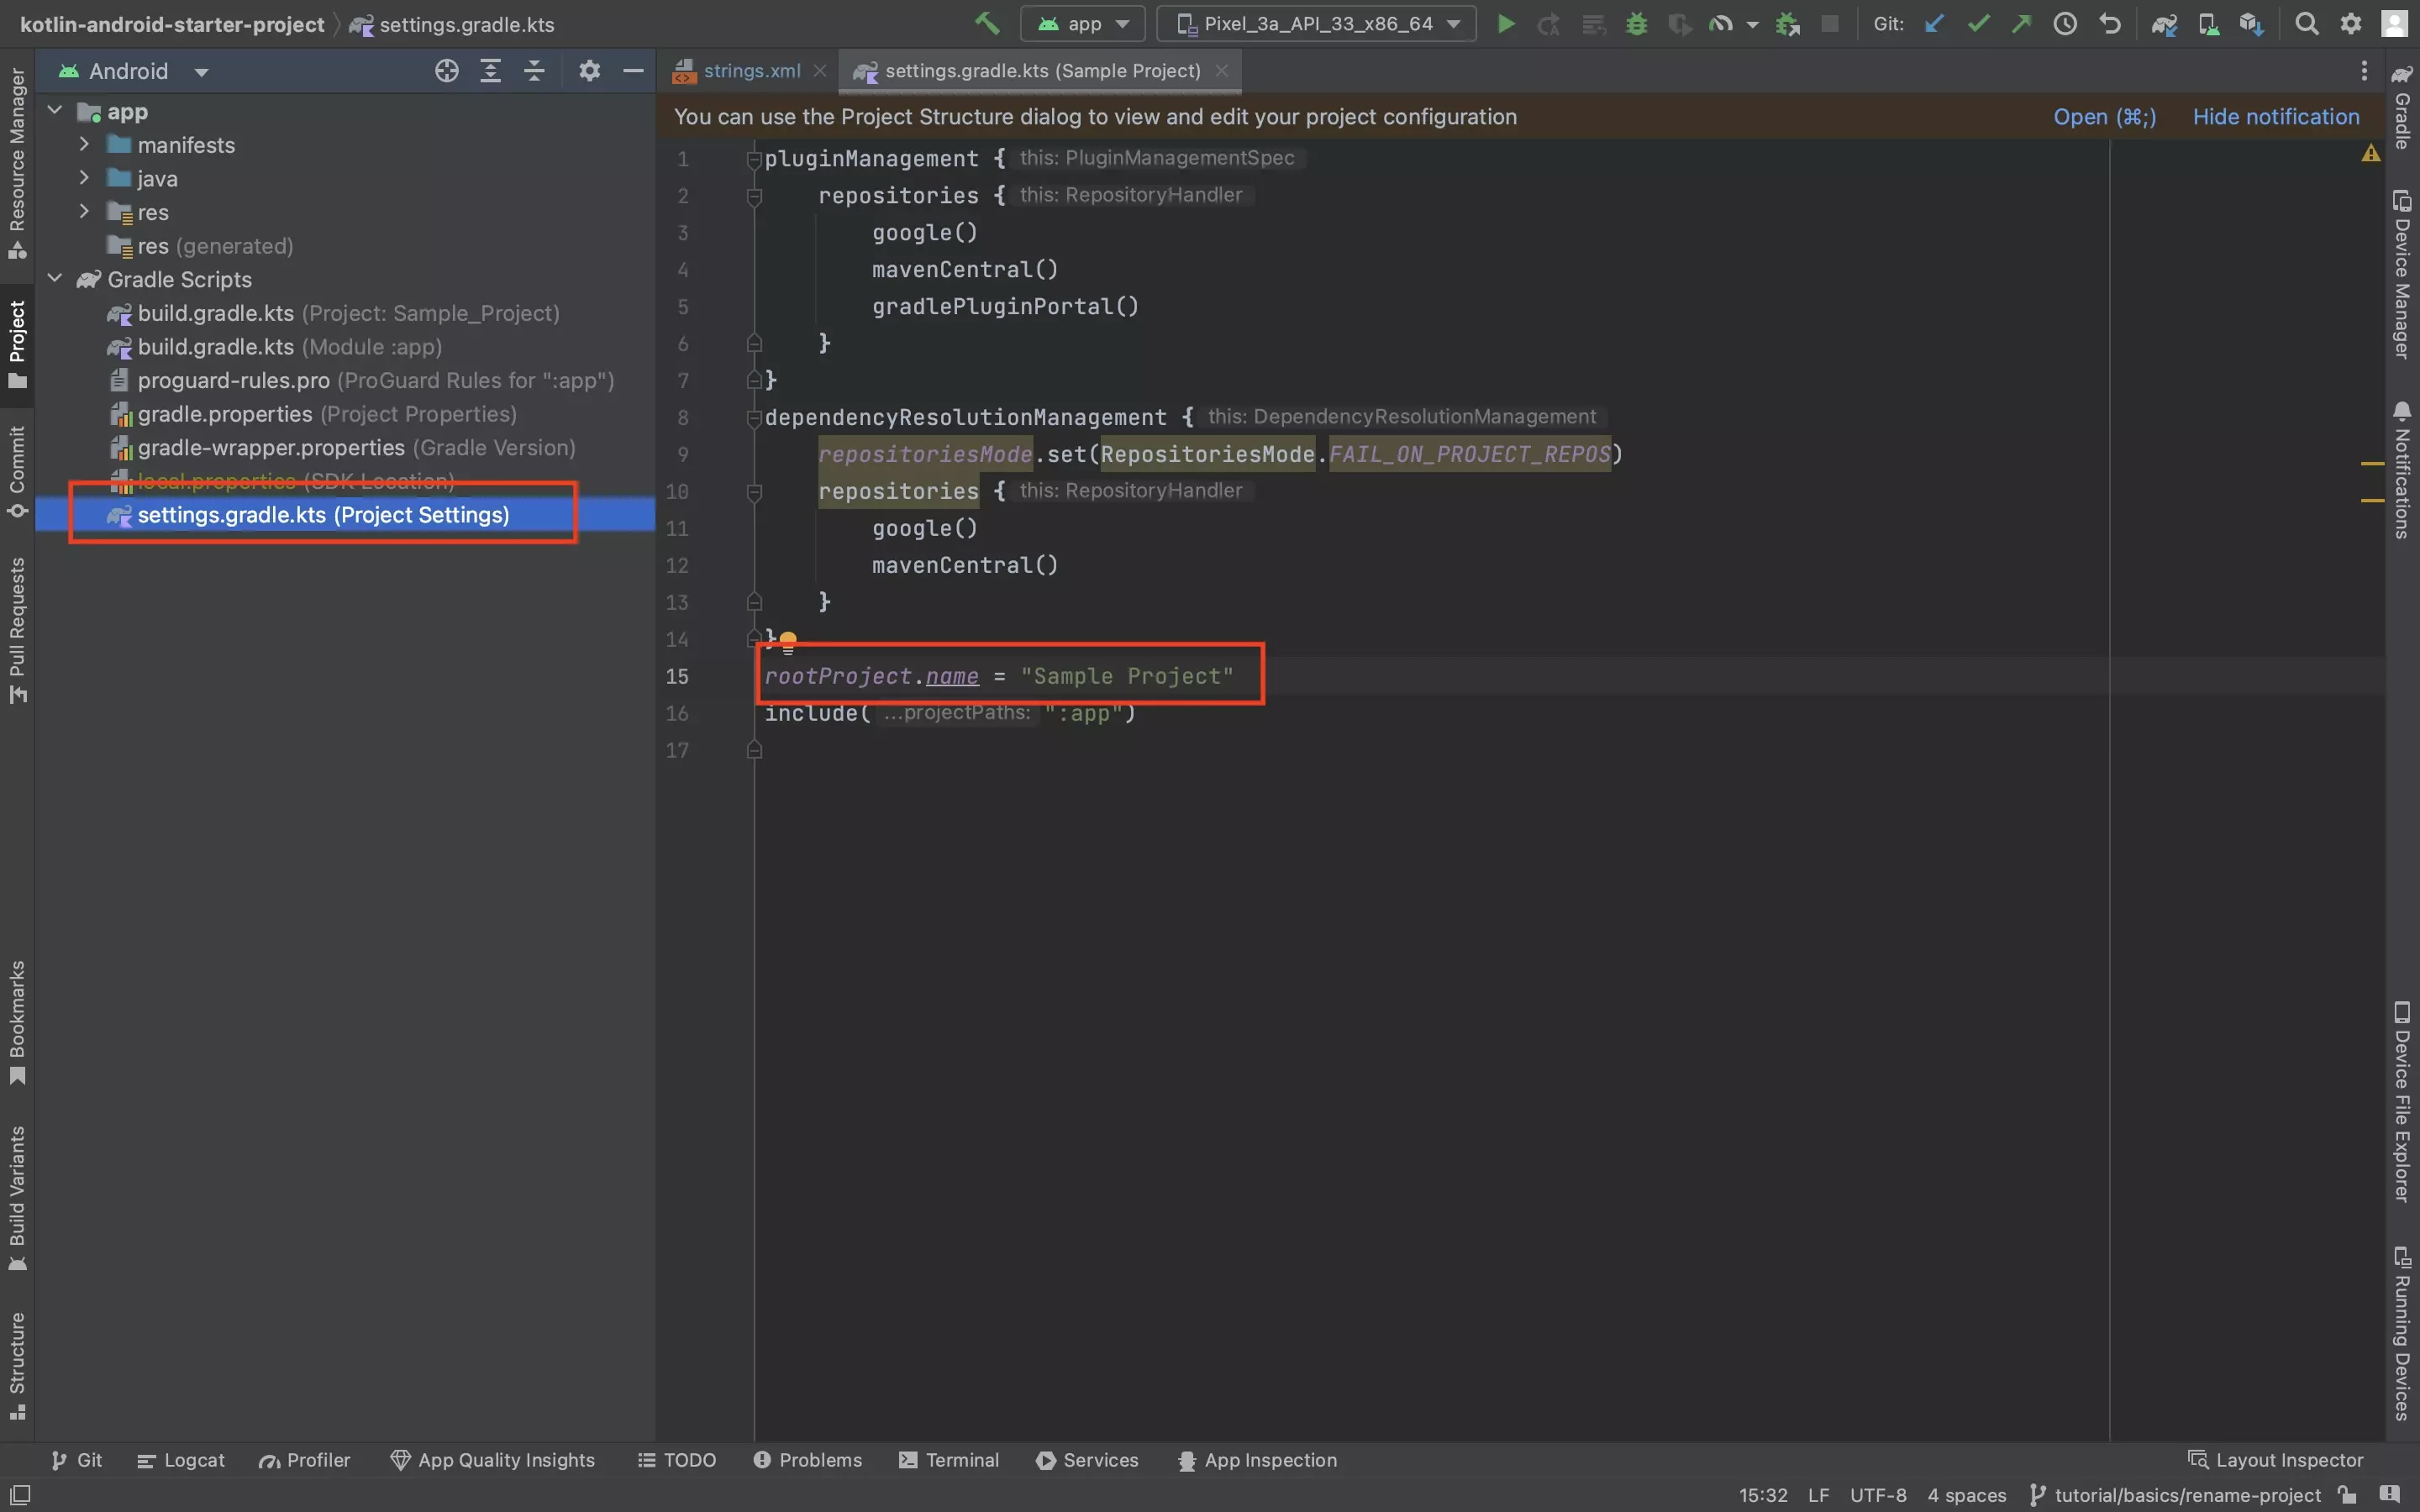
Under Gradle Scripts > settings.gradle.kts rename the rootProject.name to the name of your project.
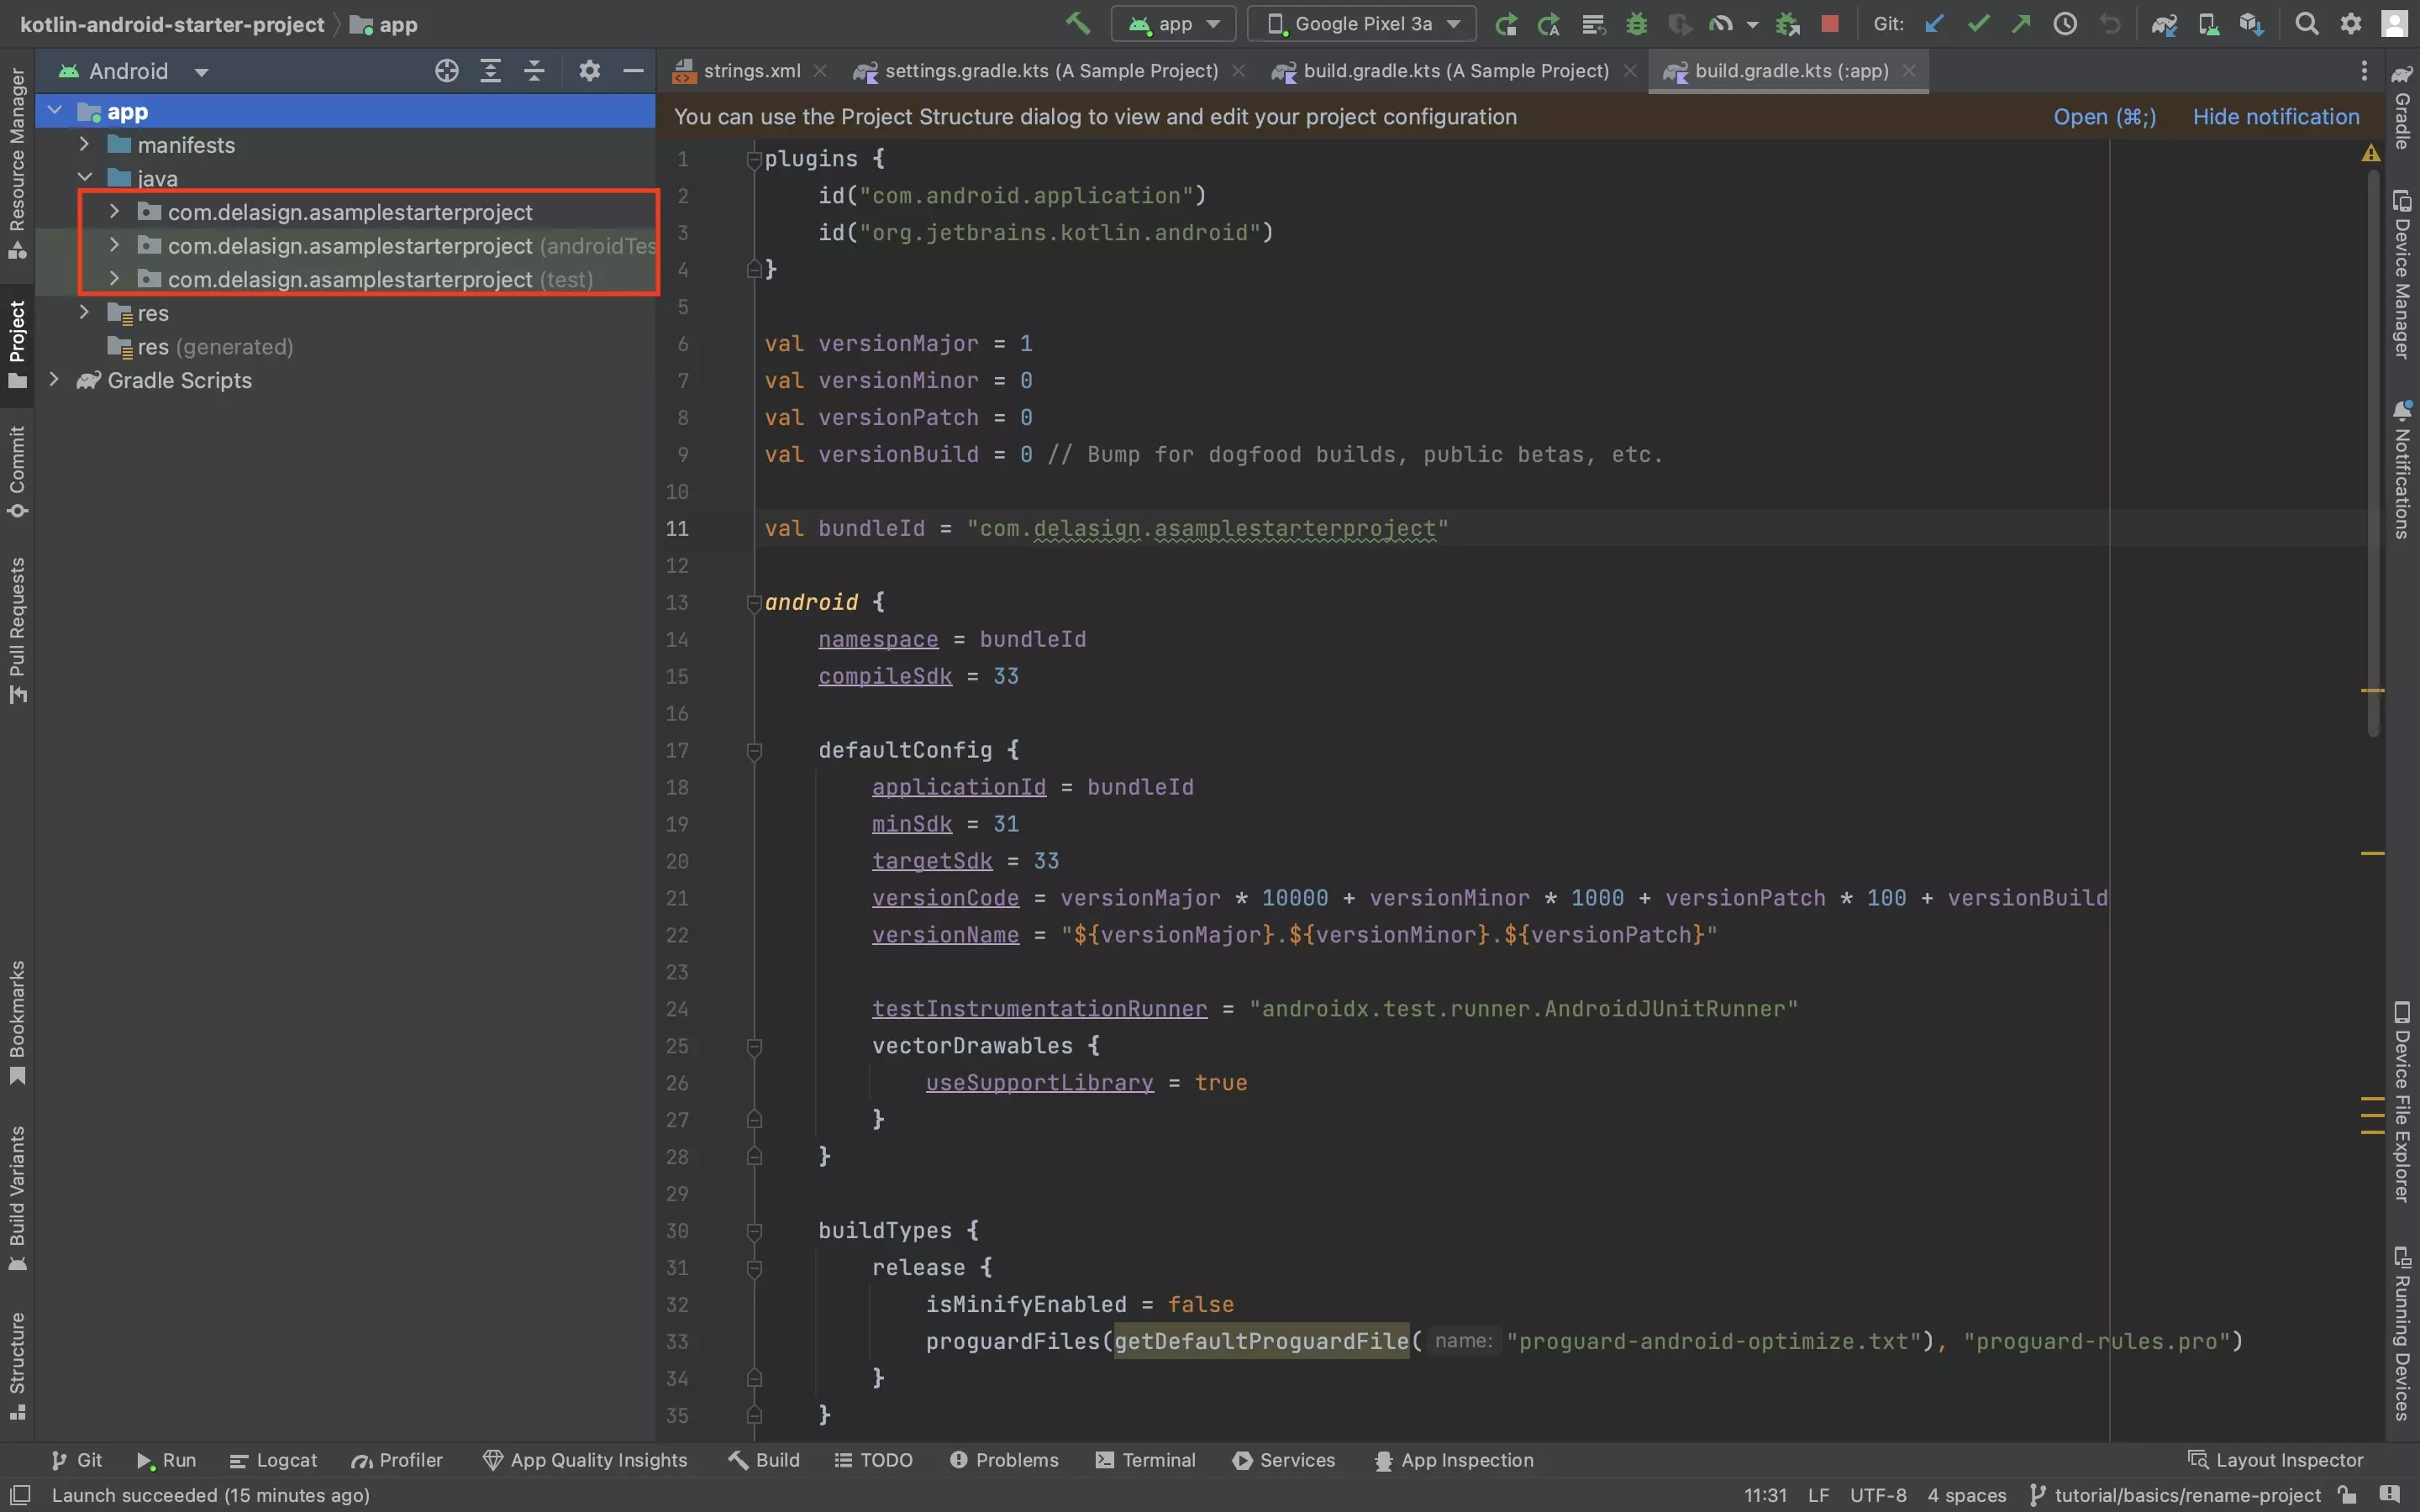
Step Three: Rename the Namespace and AppId
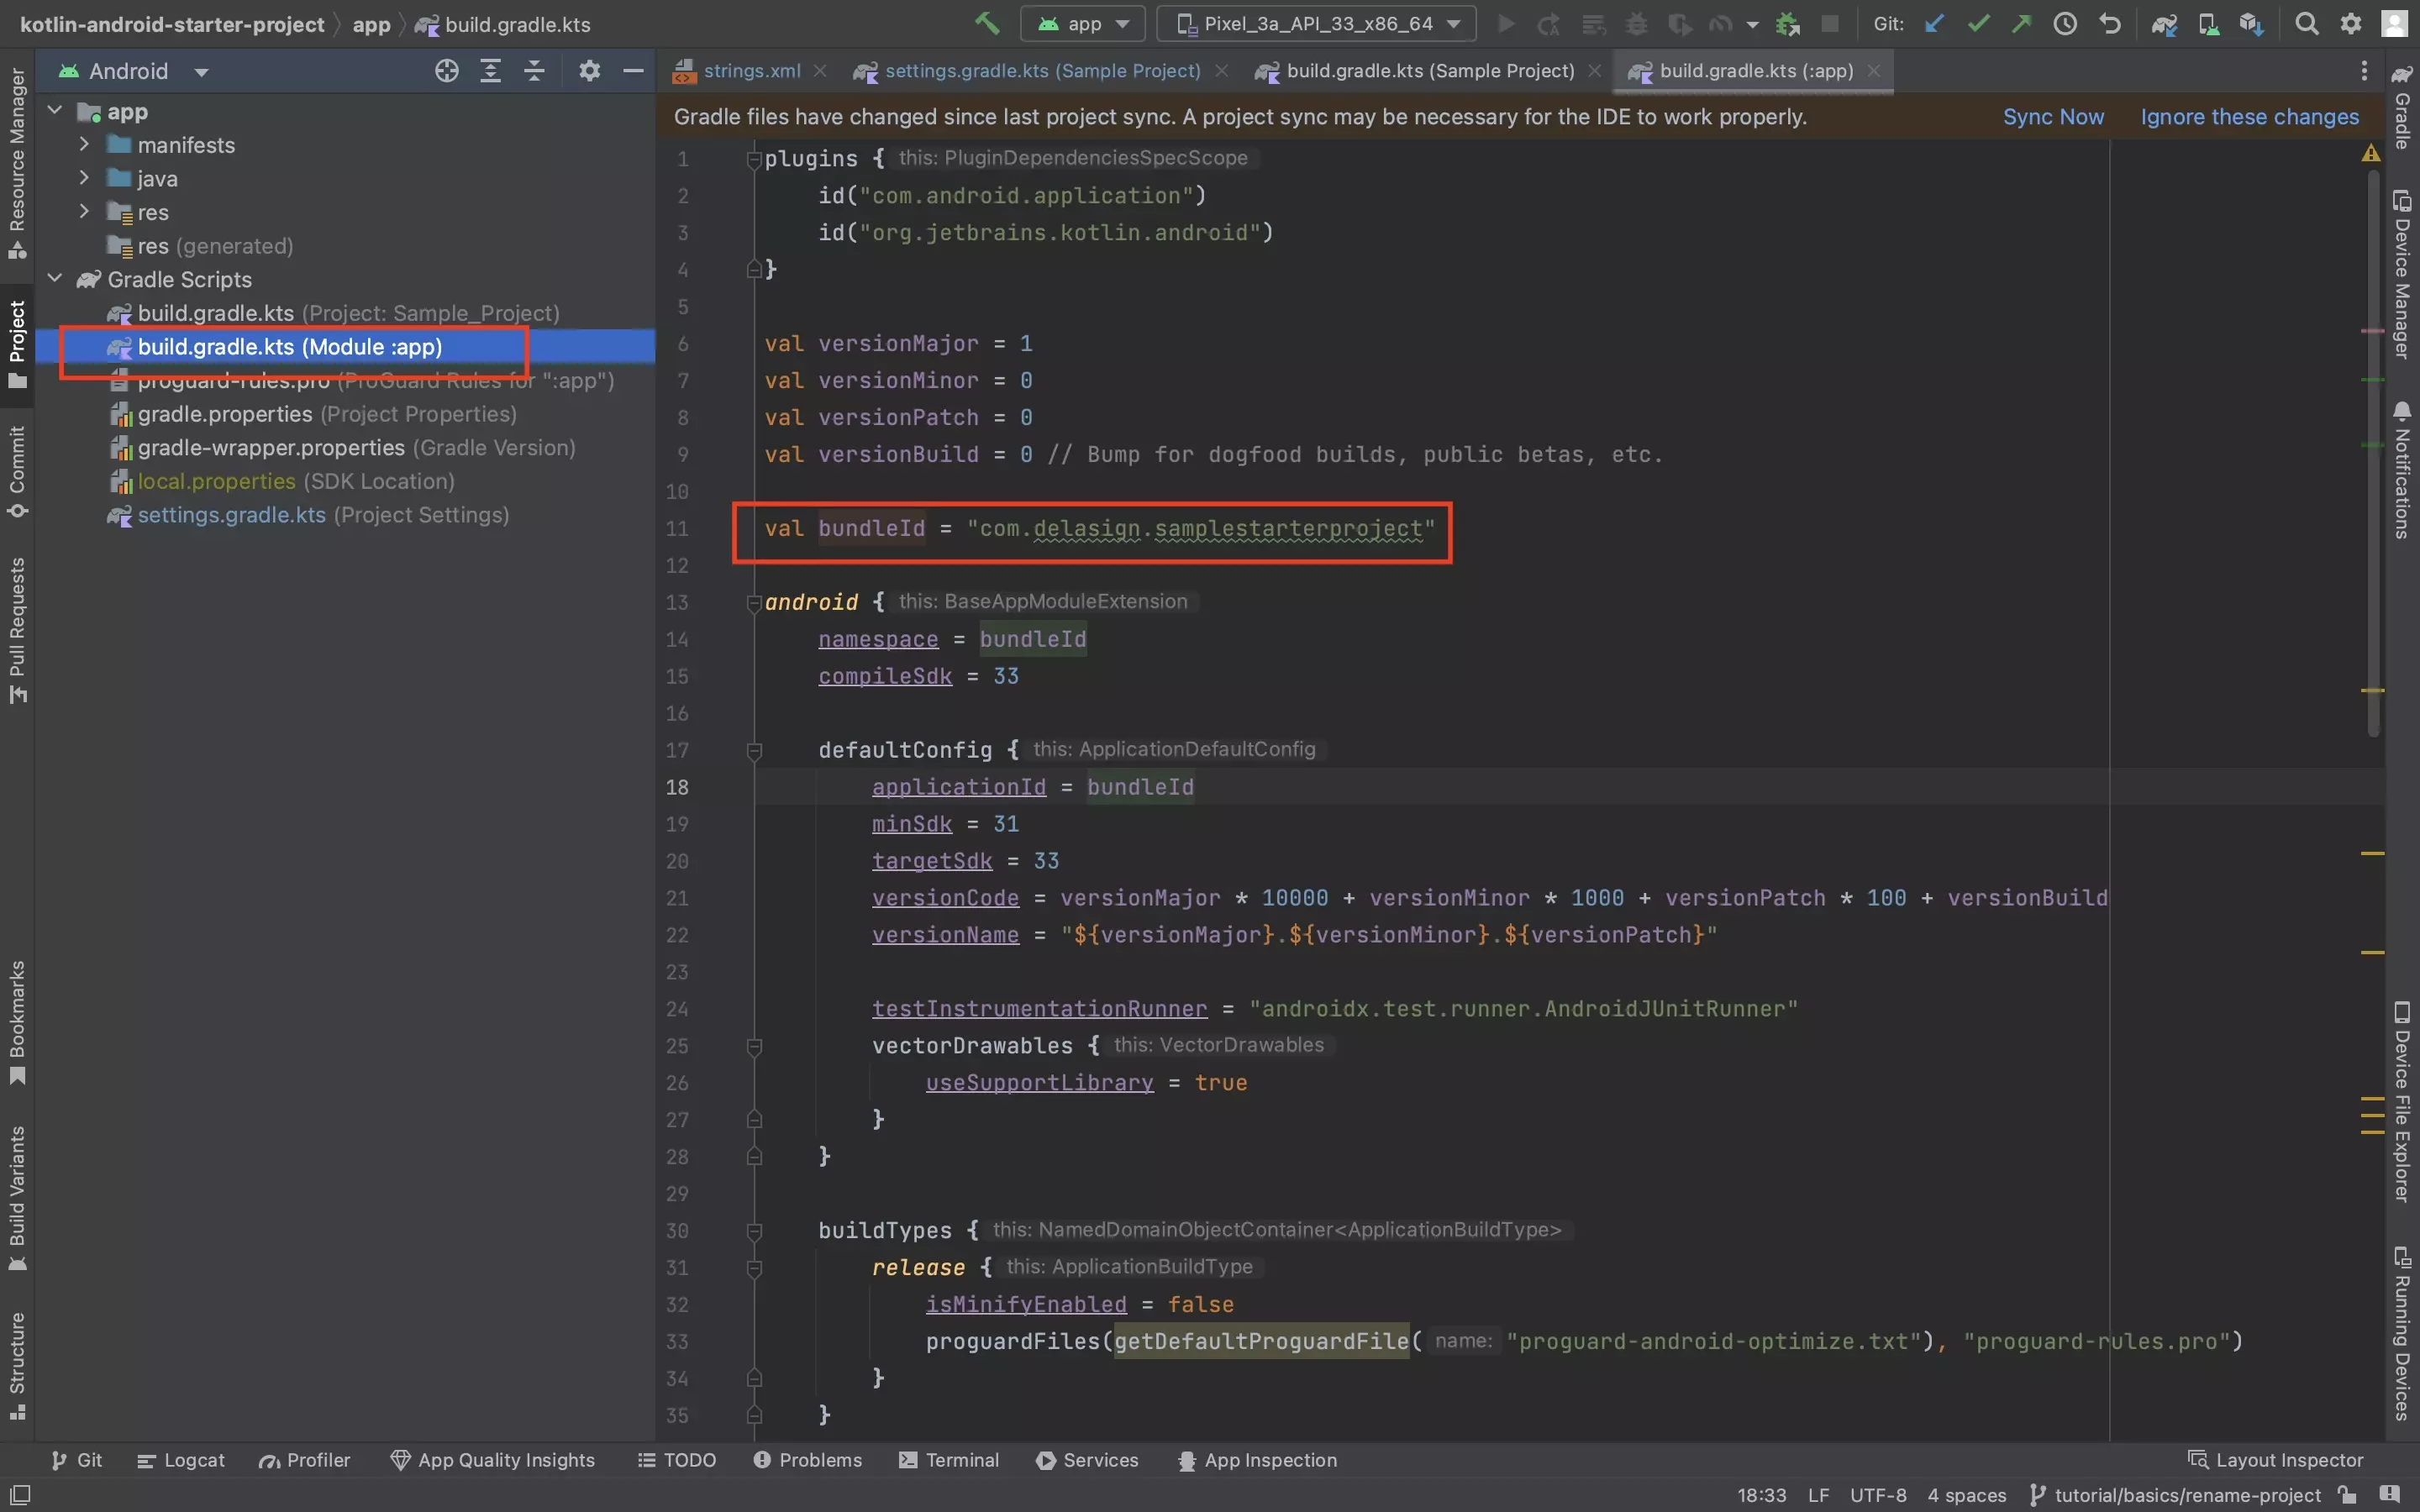
Under Gradle Scripts > build.gradle.kts (Module :app) rename the bundleId to the namespace / applicationId of your project.
Please note that we have created a BundleId value so that it is consistent across the namespace and appId.
Step Four: Refactor Project Folders
Follow the steps below to refactor the project folders to work with the new namespace and appId.
A | Rename Folders
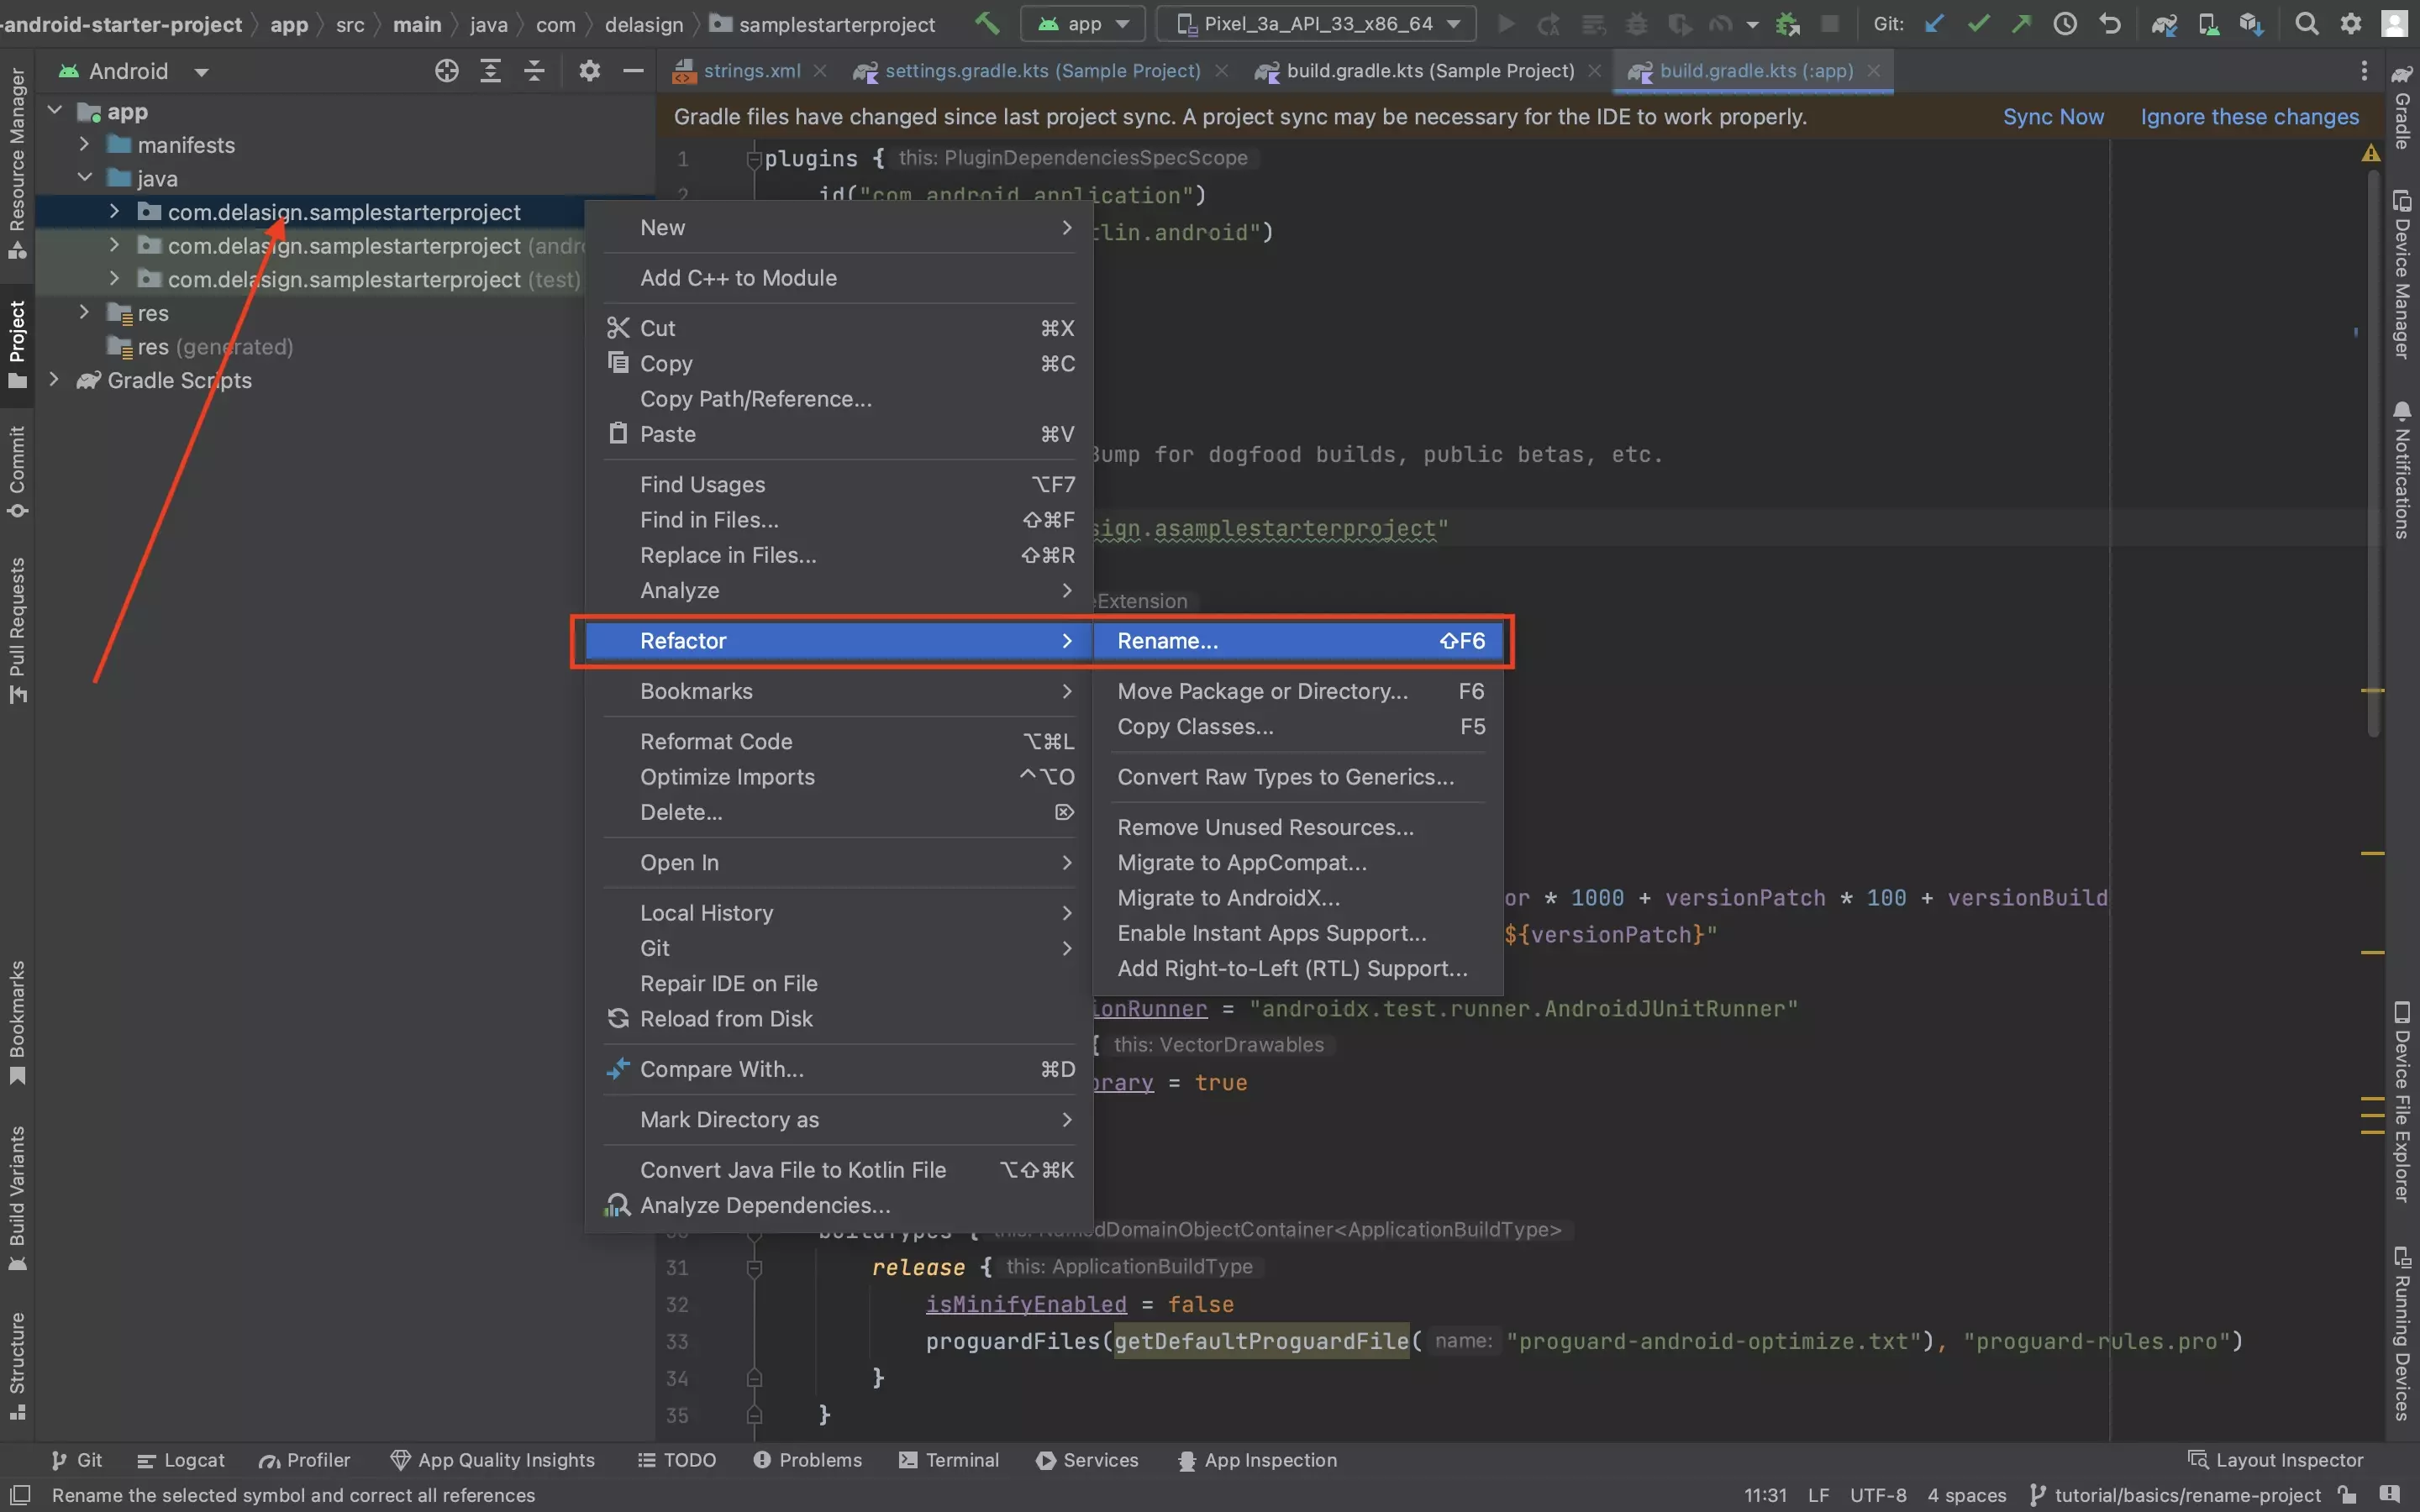
Under app > java right click the first folder (com.delasign.samplestarterproject) and refactor it to the same bundleId that you used in Step Three.
B | Select all directories
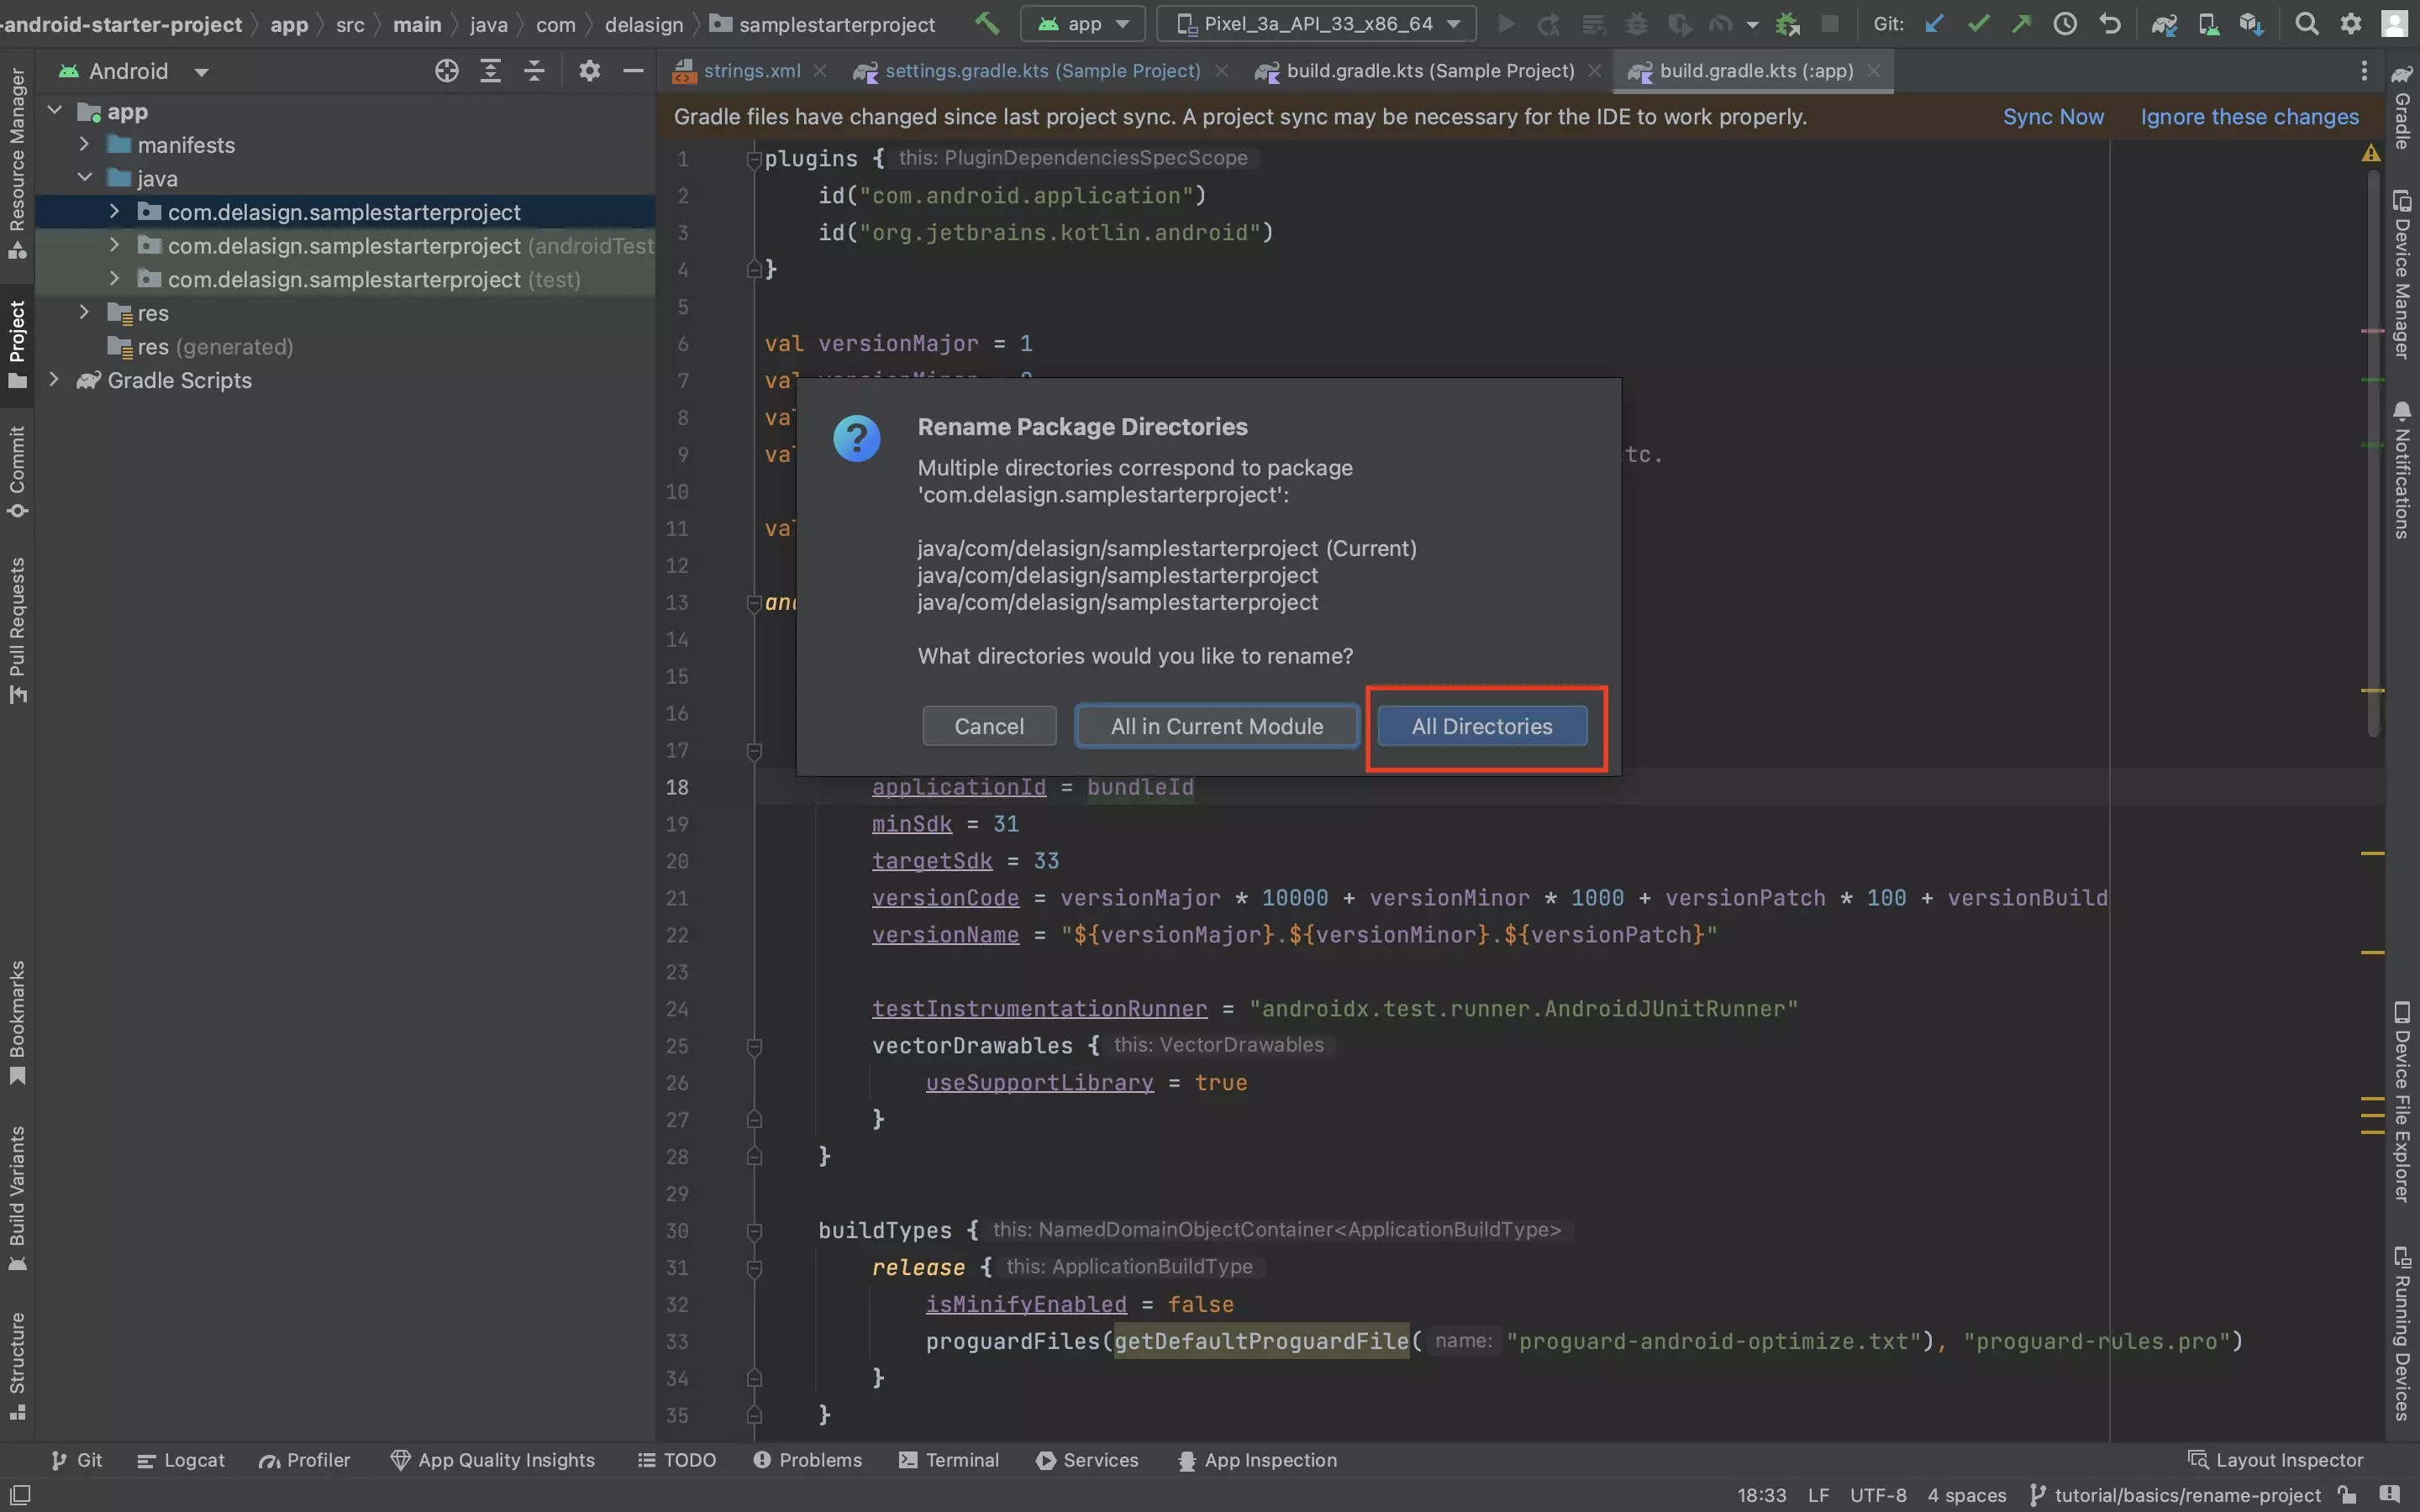
In the pop up that appears, select All Directories.
C | Refactor
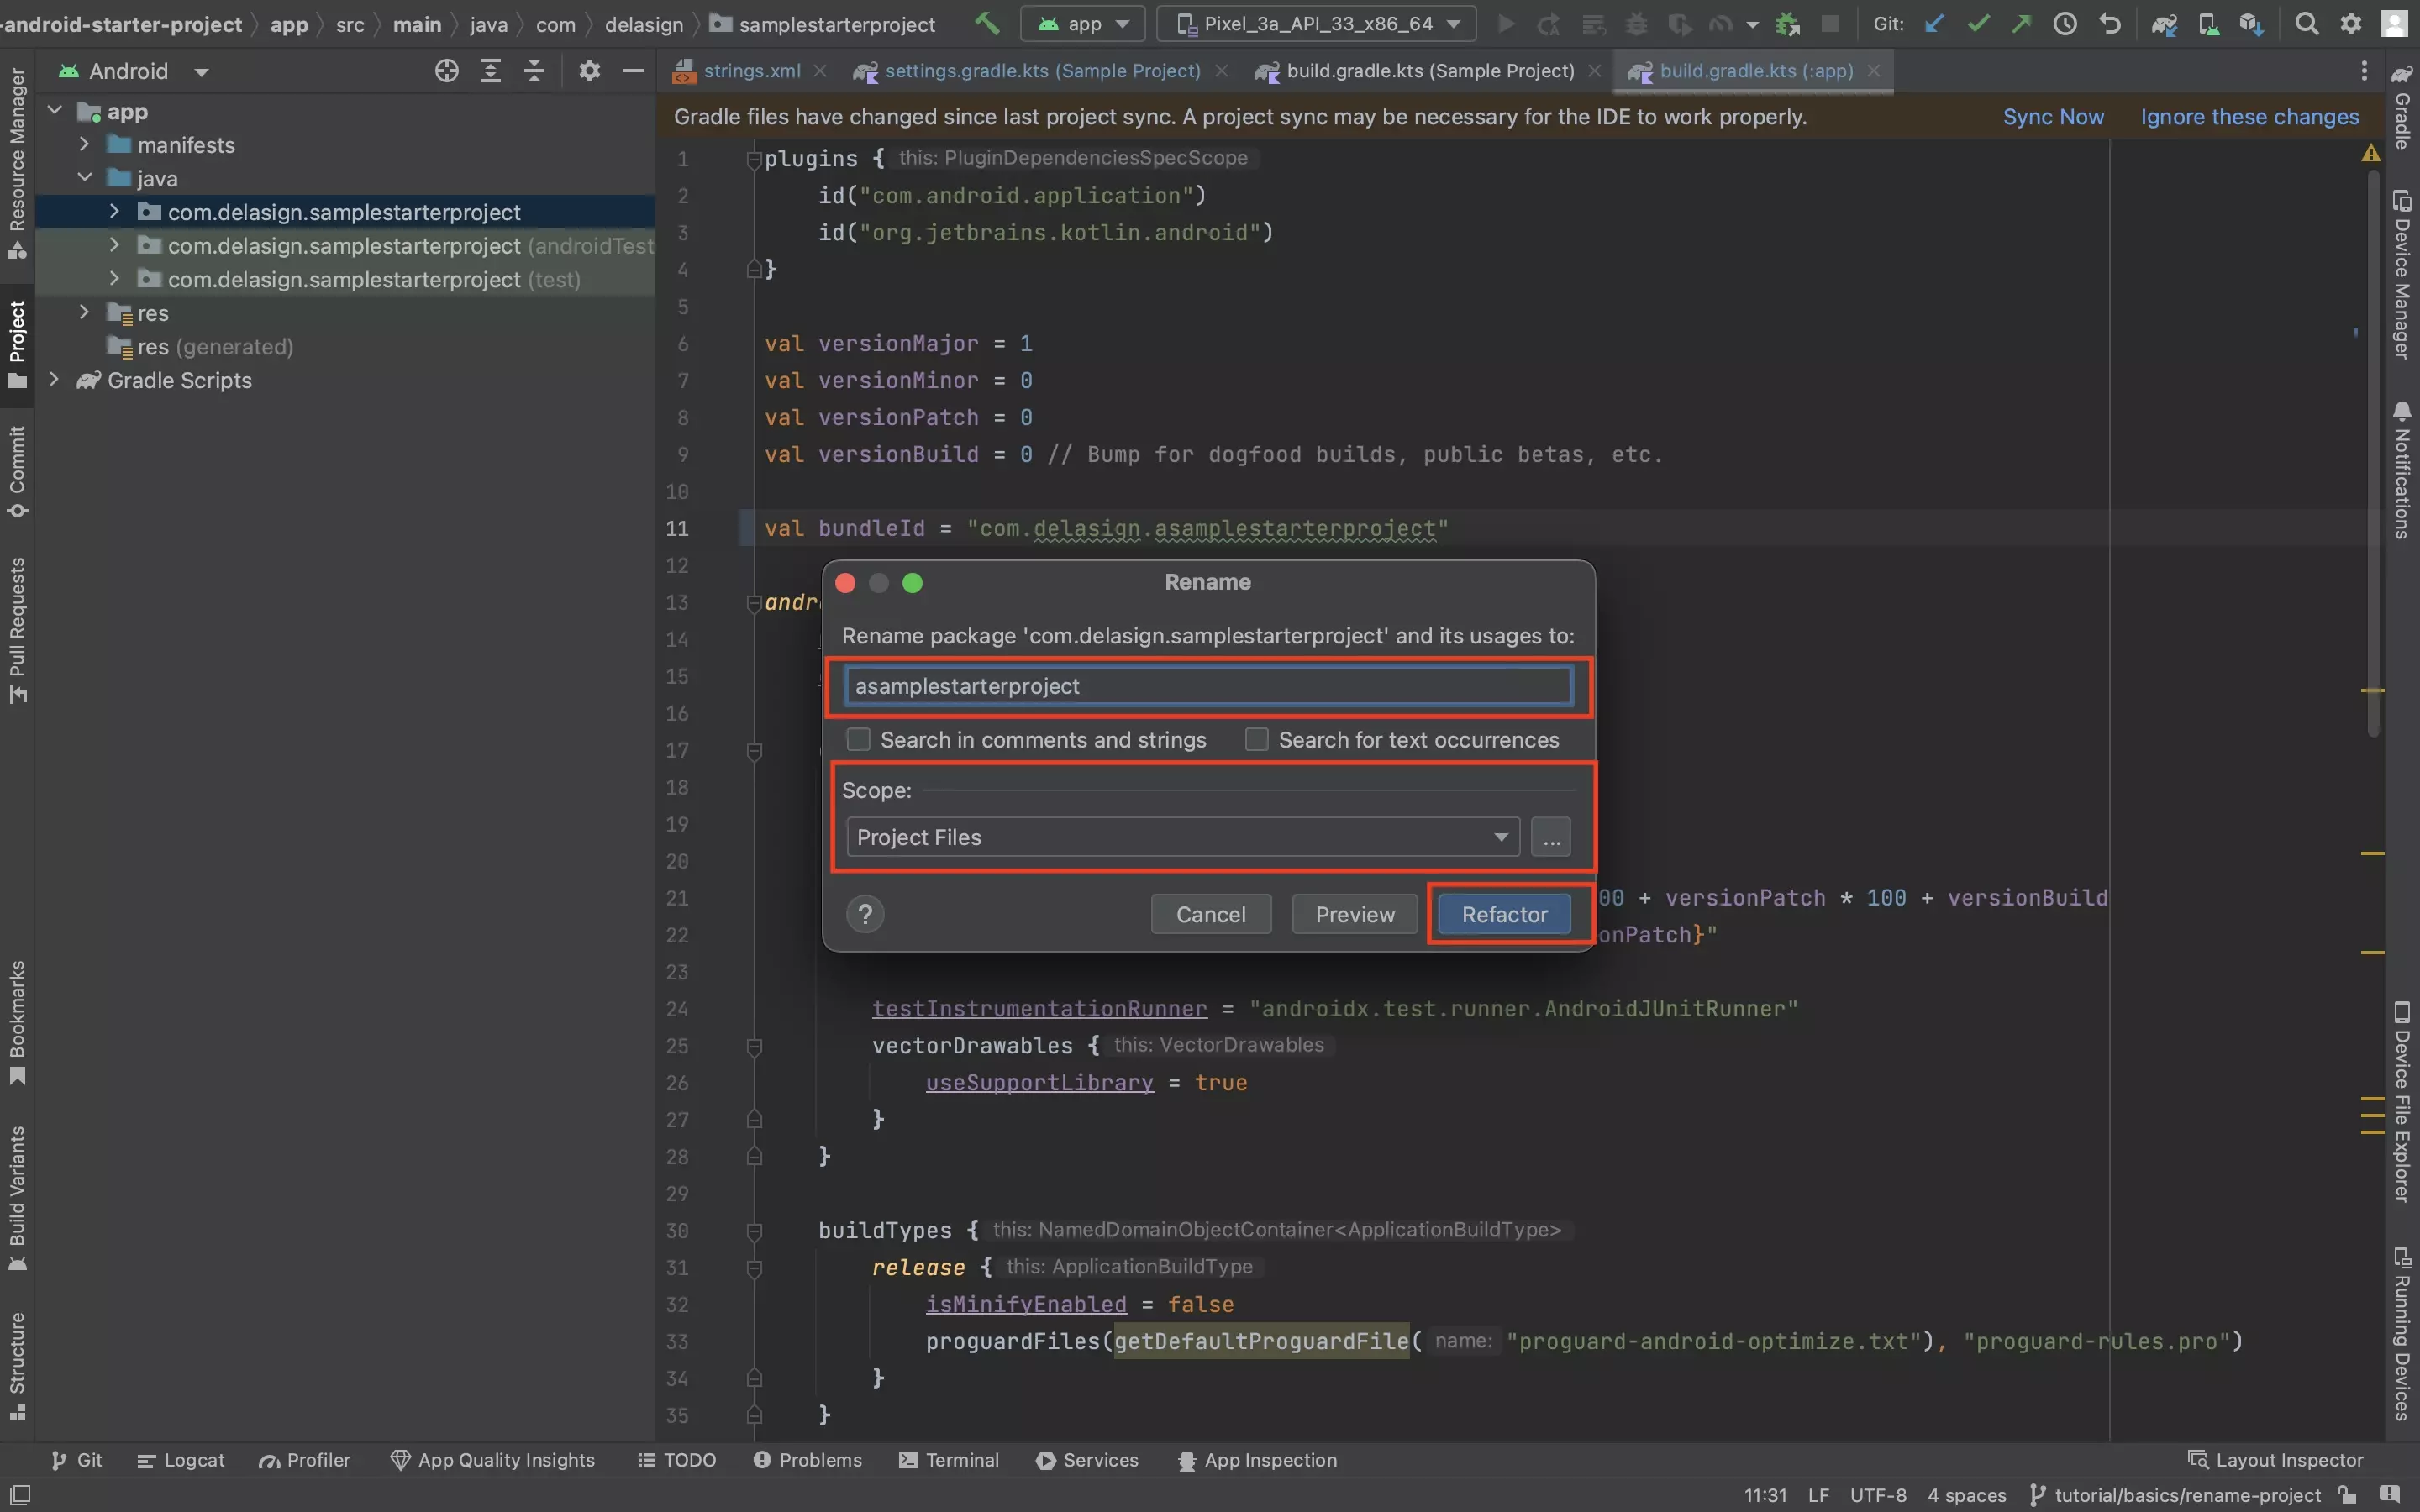
In the pop up that appears, refactor the folders to the BundleId that you used in Step Three.
Step Five: Sync Gradle Scripts
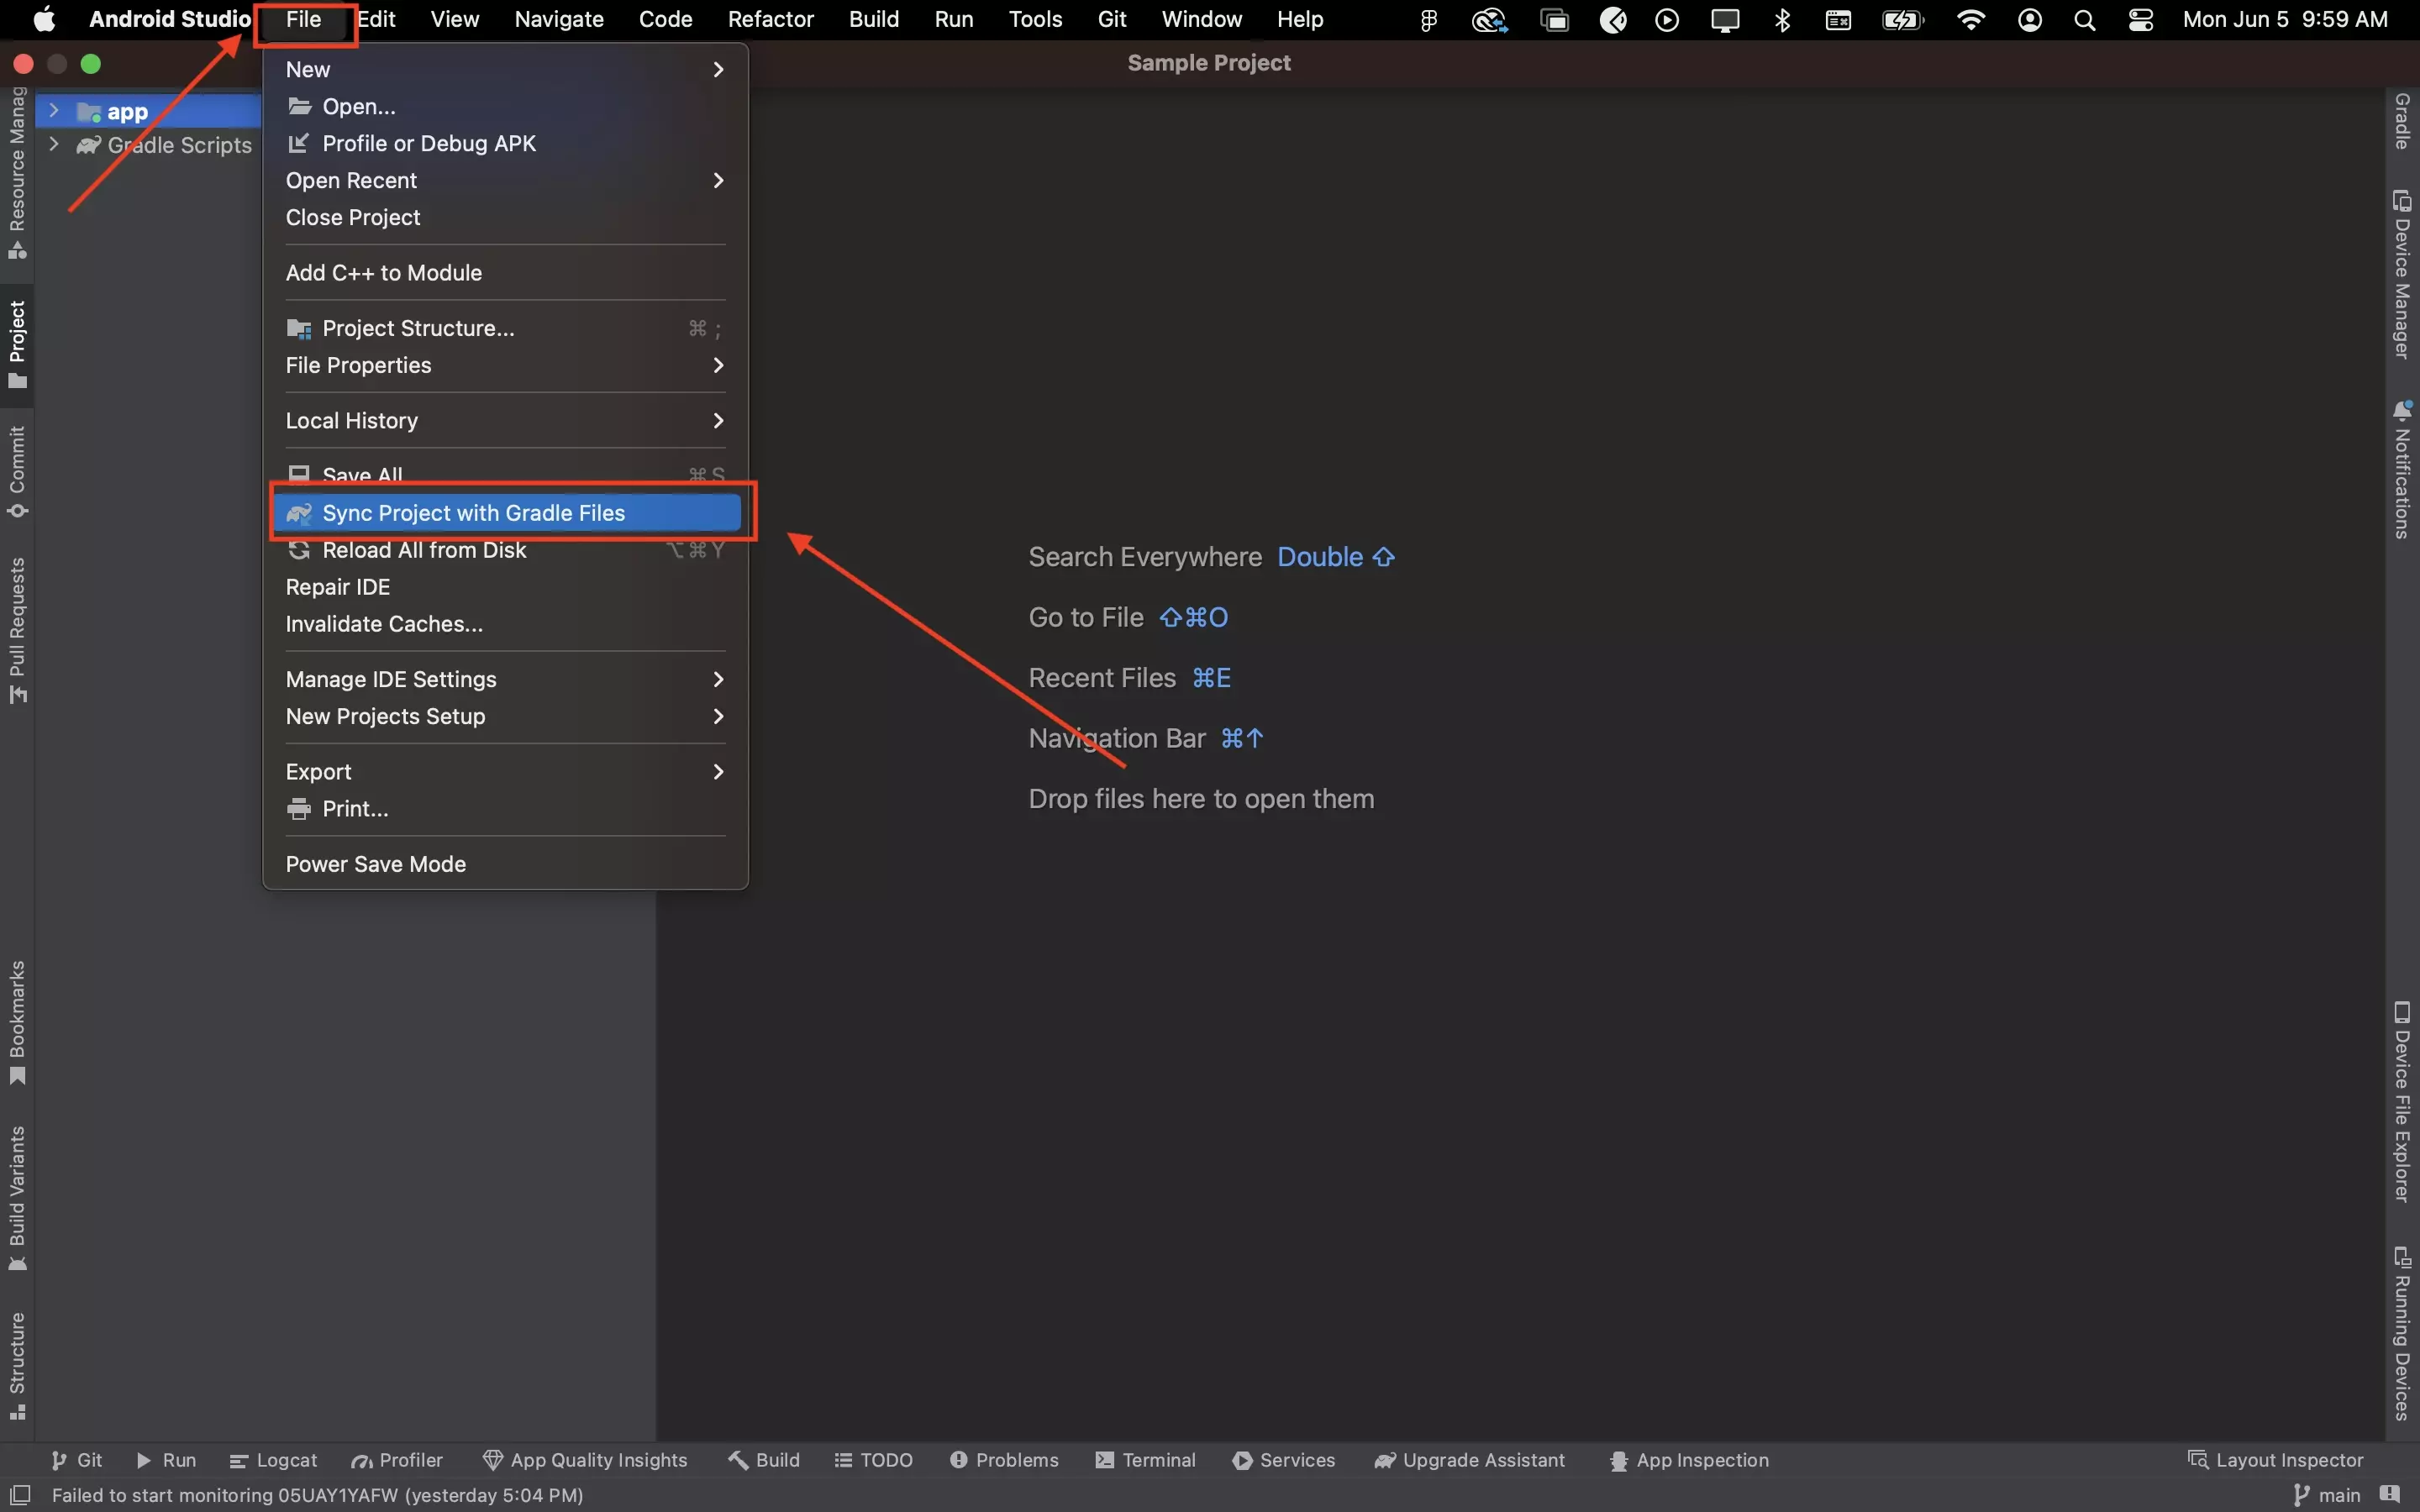
Sync your gradle files.
Step Six: Clean & Rebuild

To make sure that the changes have gone through, clean and rebuild your project.
Step Seven: Run

Run the project on a device or simulator to make sure that everything worked out.
OPTIONAL: Update the Proguard-rules.pro file
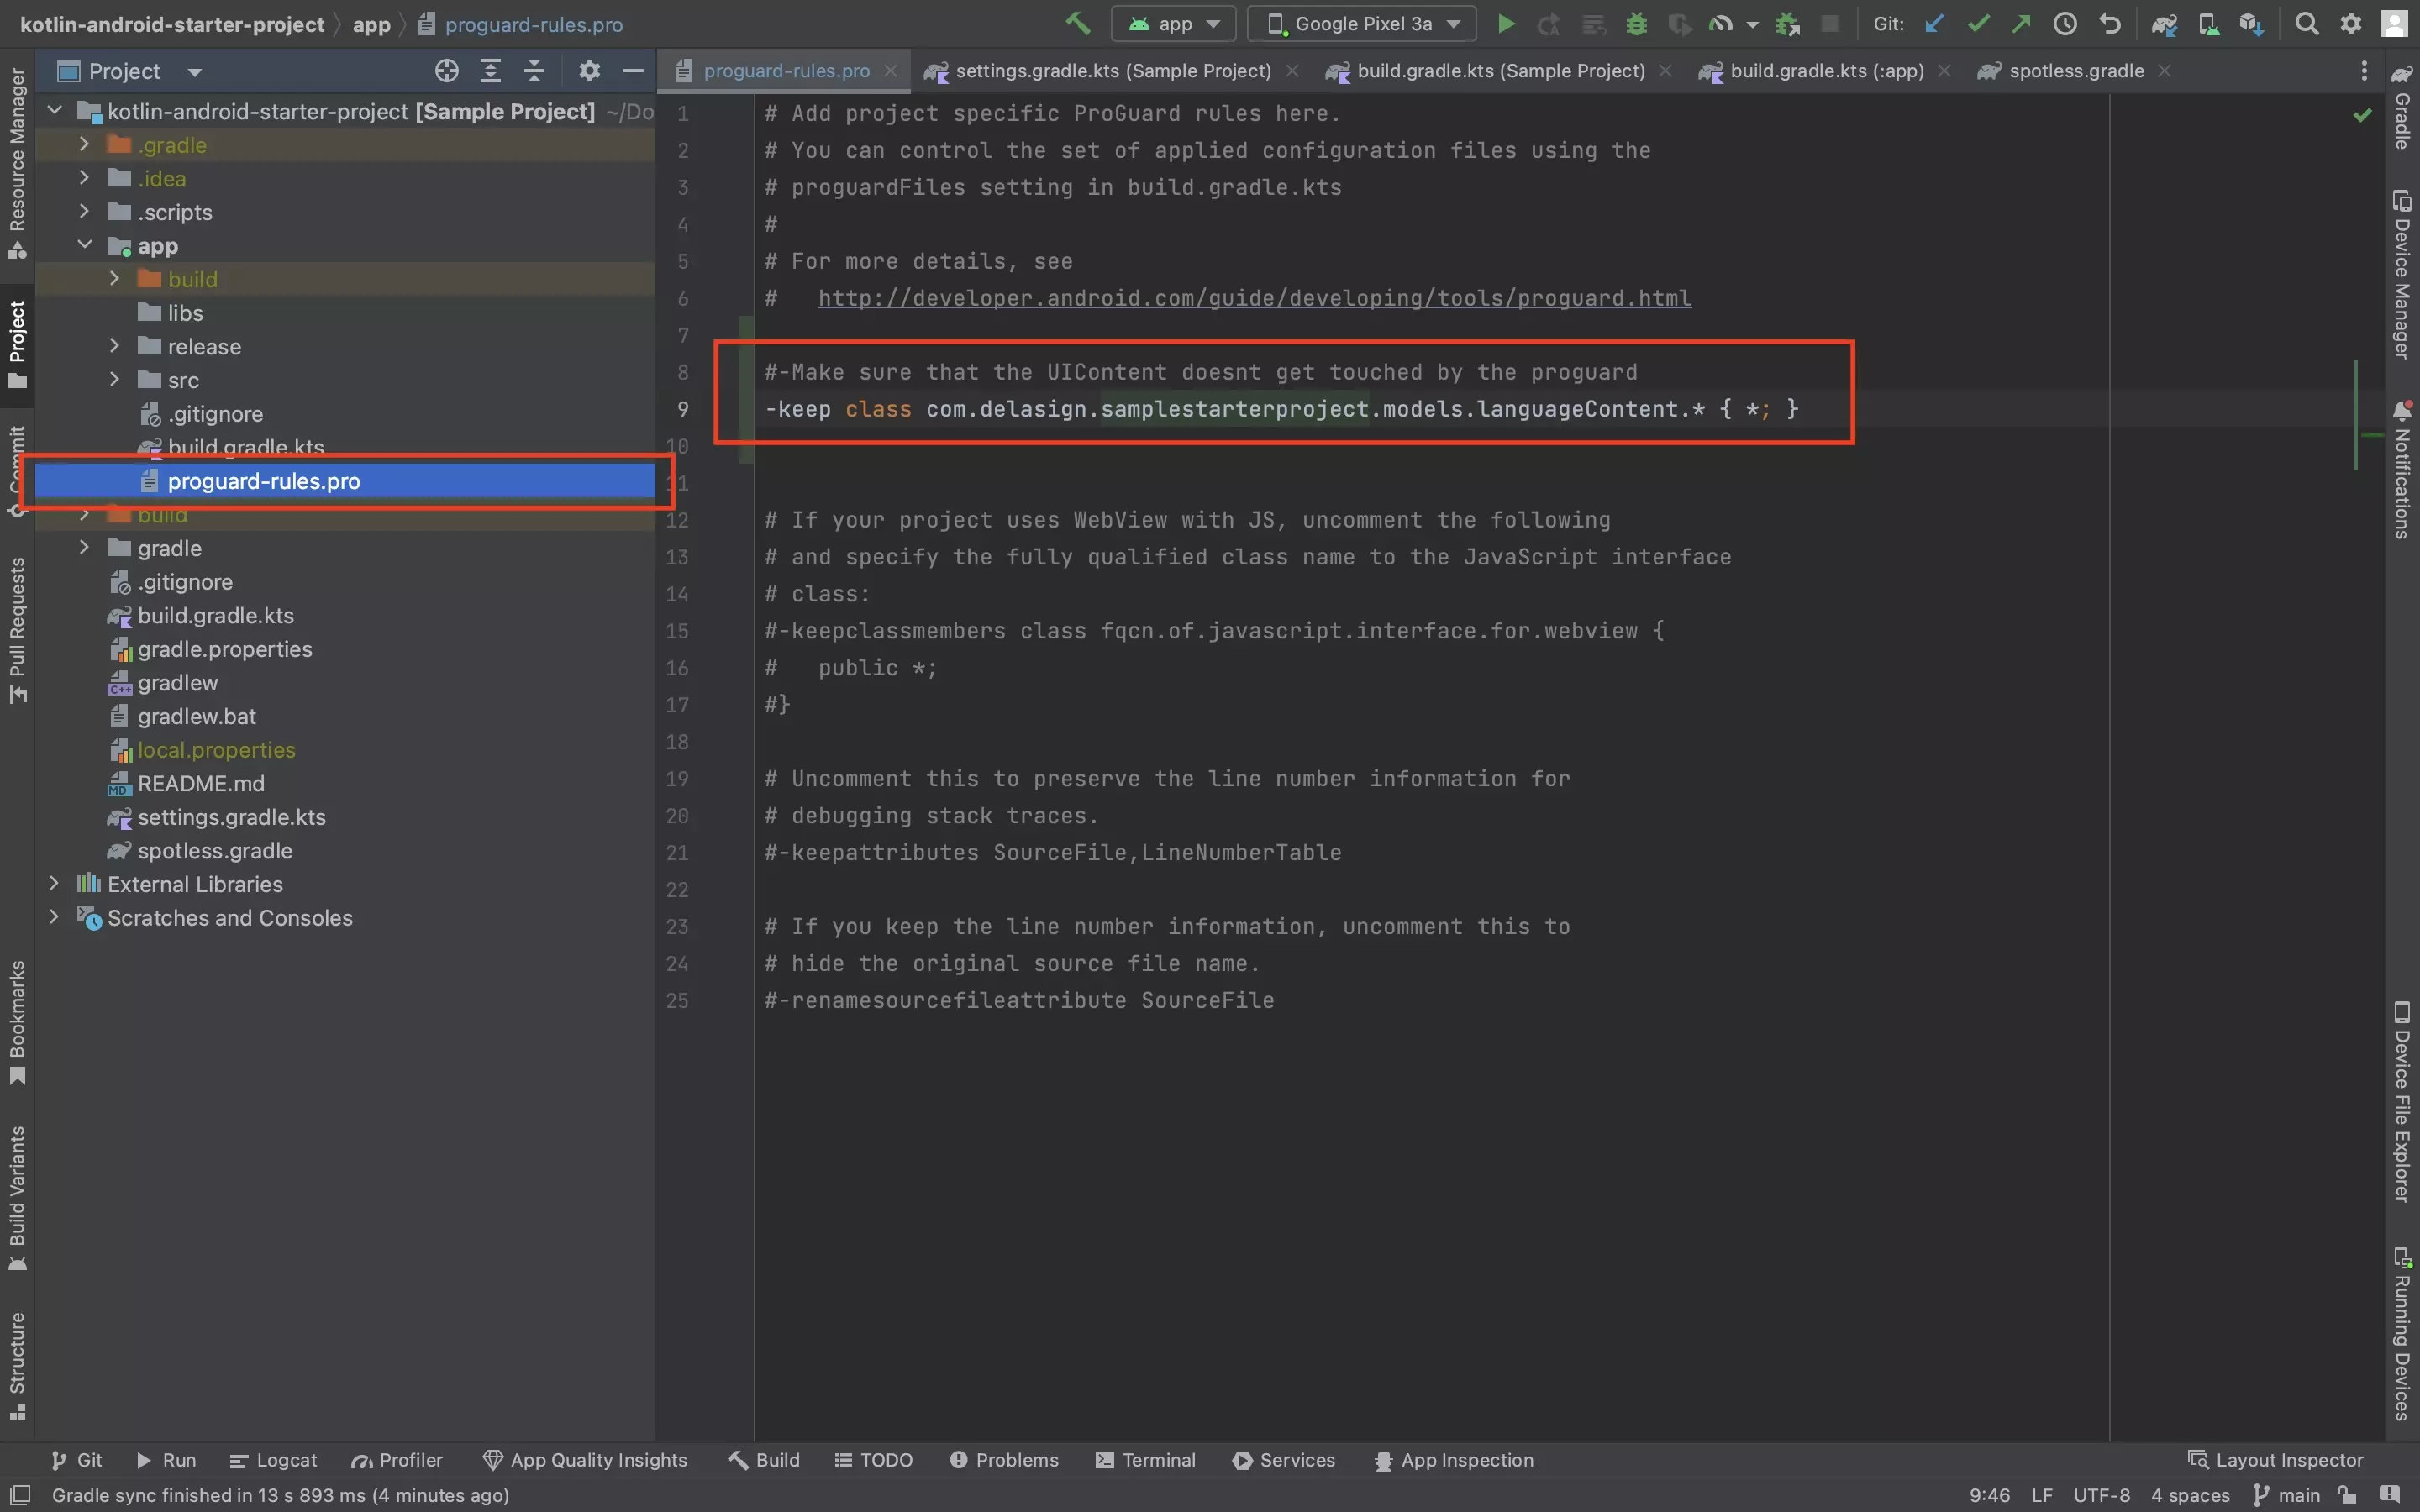
If your project has removed specific files or directories from being obfuscated, you must update the bundleId of any paths within the proguard-rules.pro file.
OPTIONAL: Update the App Bundle Id Constant
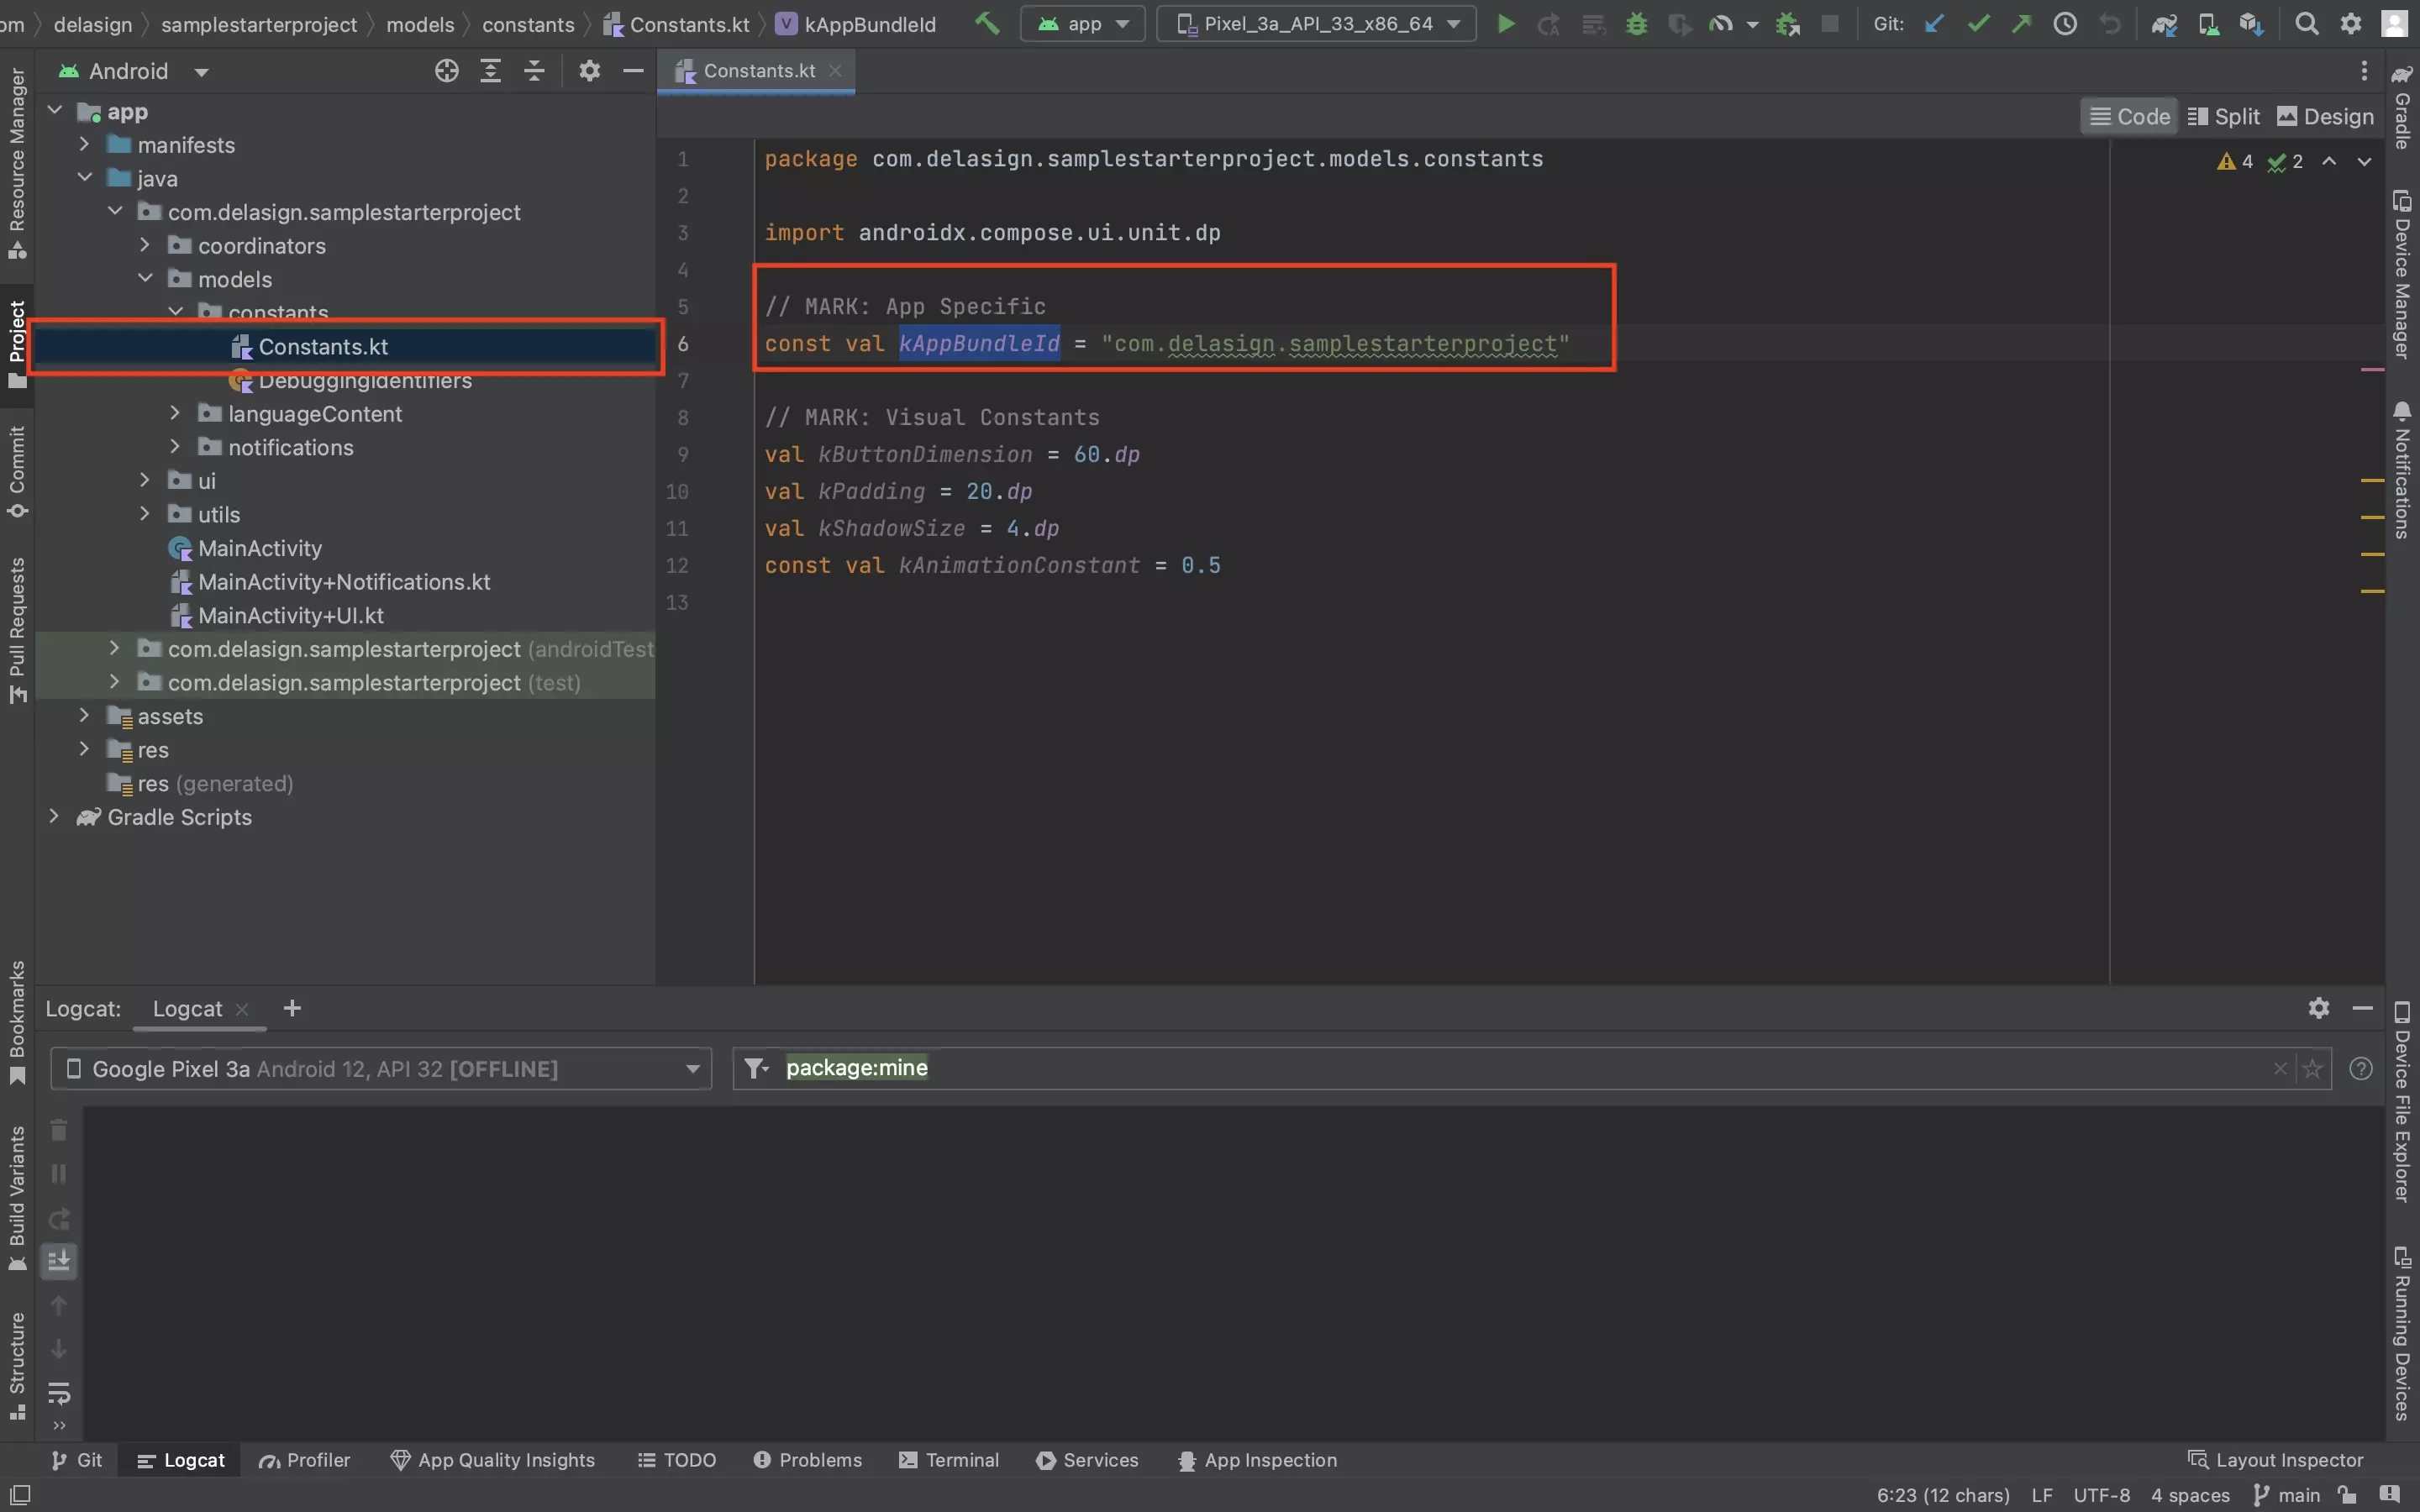
If you are using our Open Source project or methodology, update the kAppBundleId in the Constants.kt file to make sure that the Notifications (Intents) are sent to the right package.