How to create and use color styles in Figma
A step by step tutorial on setting up color styles in Figma.

A step by step tutorial on setting up color styles in Figma.
SubscribeWhat are Styles in Figma?Step One: Create your colors
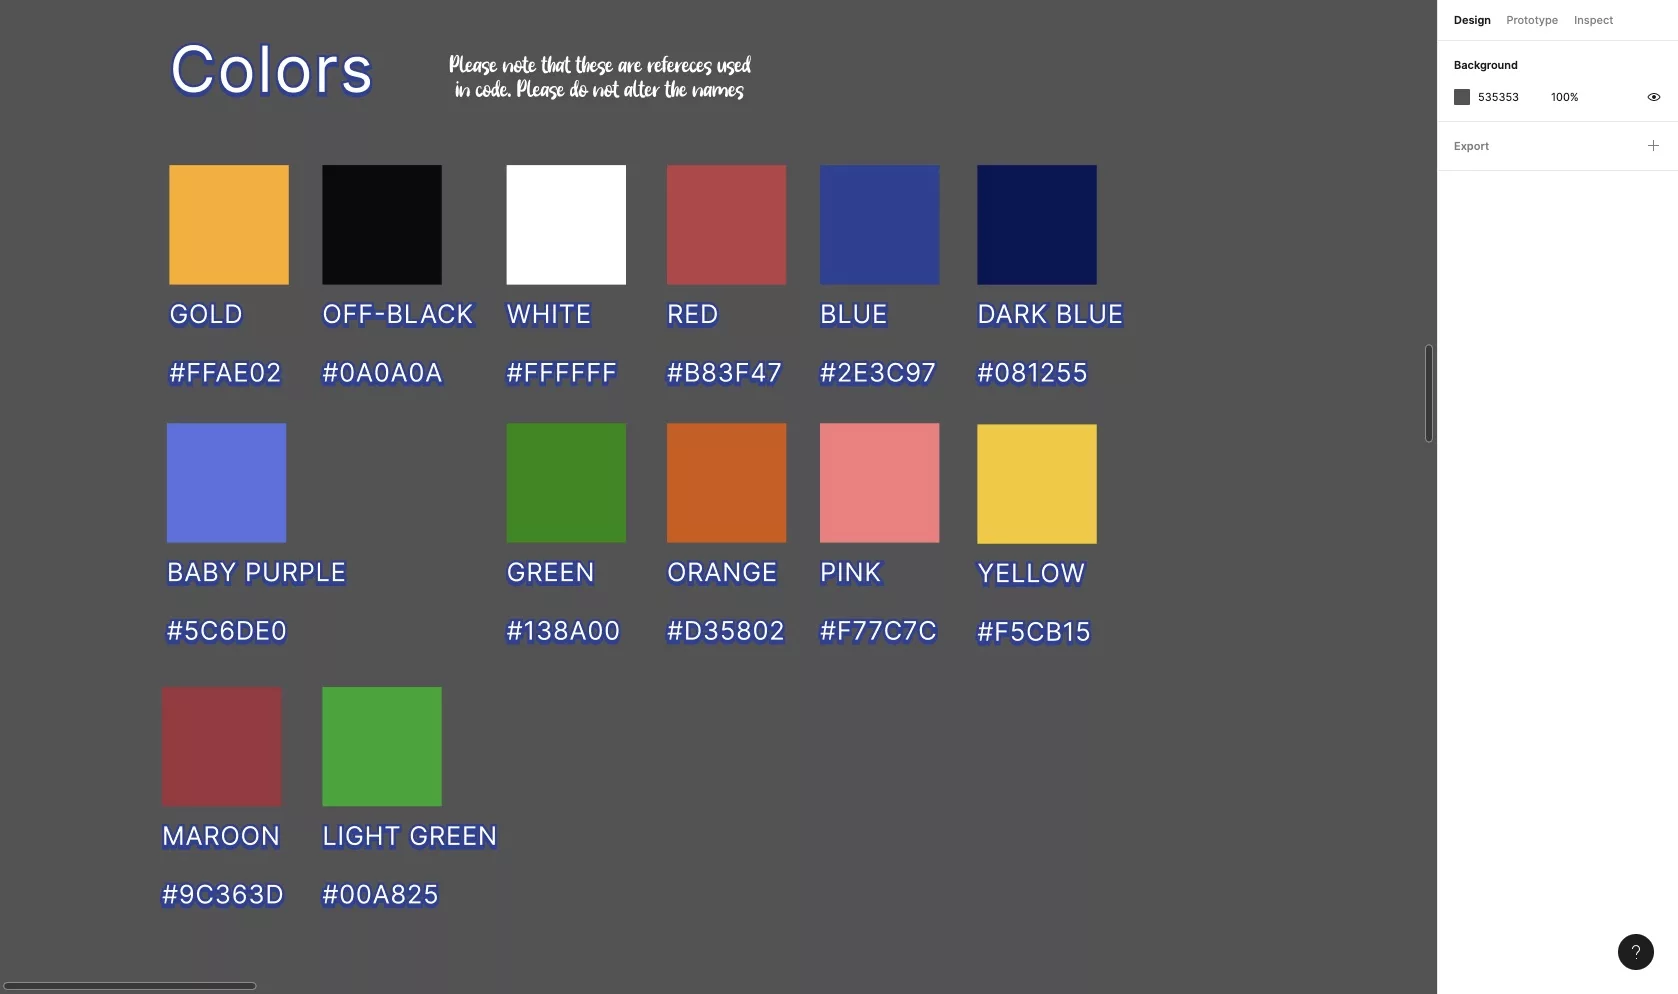
In Figma, create your colors.
Step Two: Select a color & click on Style
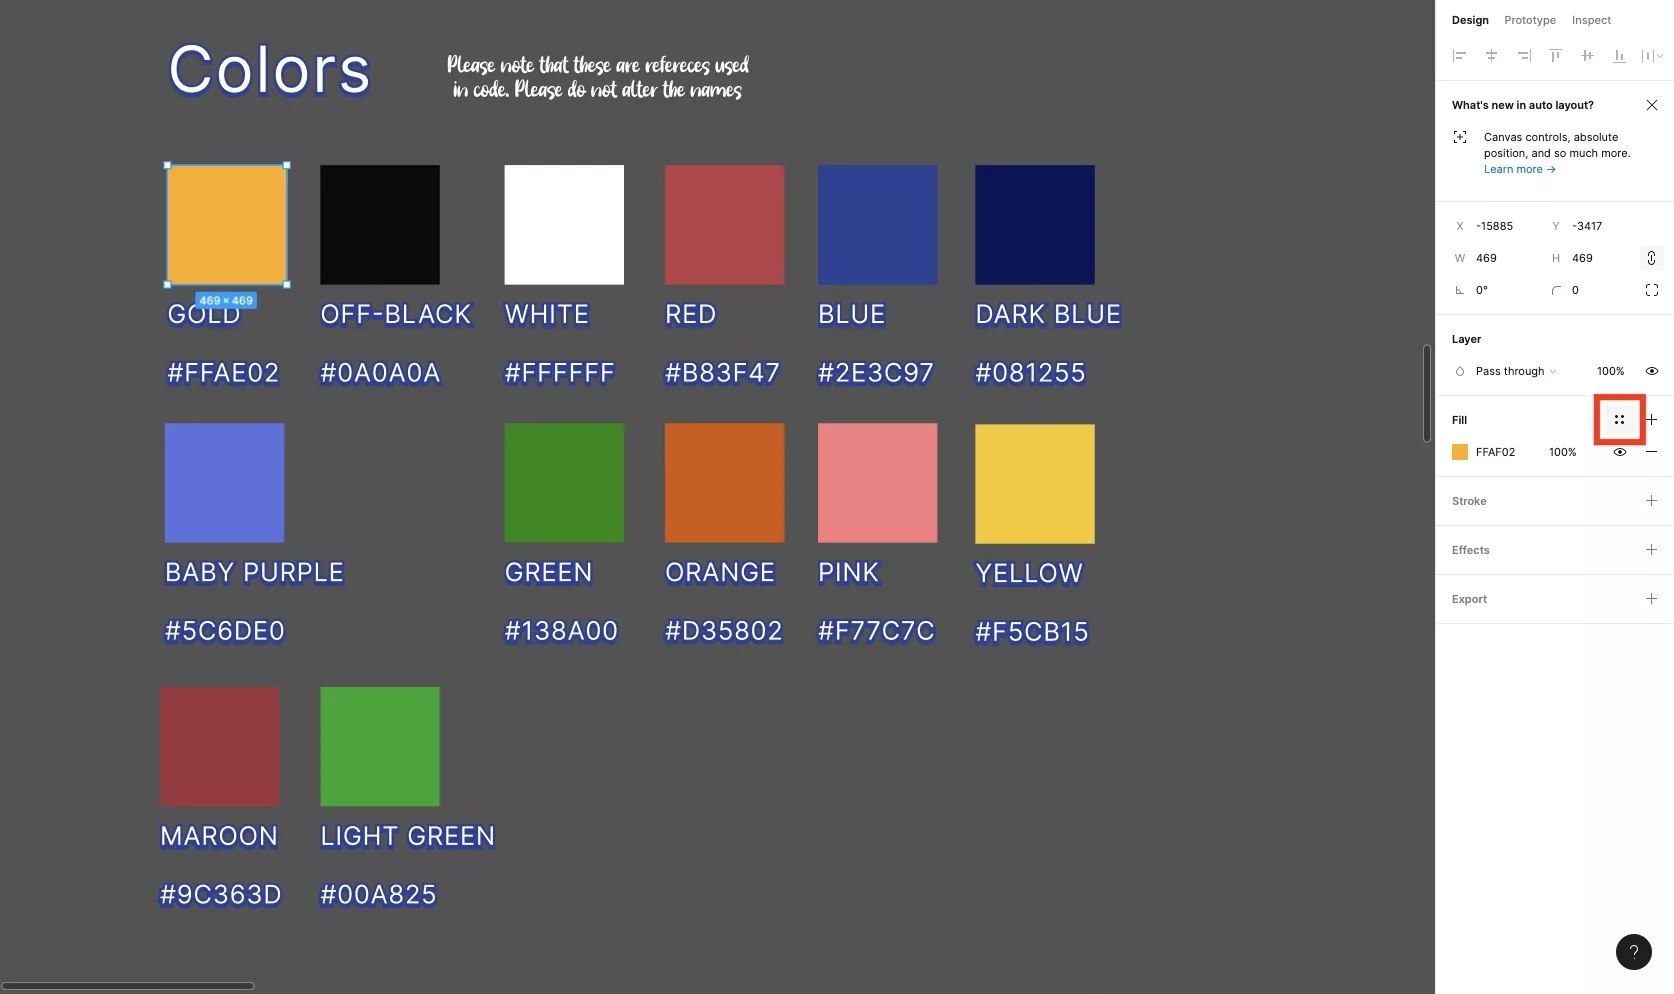
Select a color that you wish to turn into a style and press select style from the fill menu on the right hand side.
Step Three: Create a new style
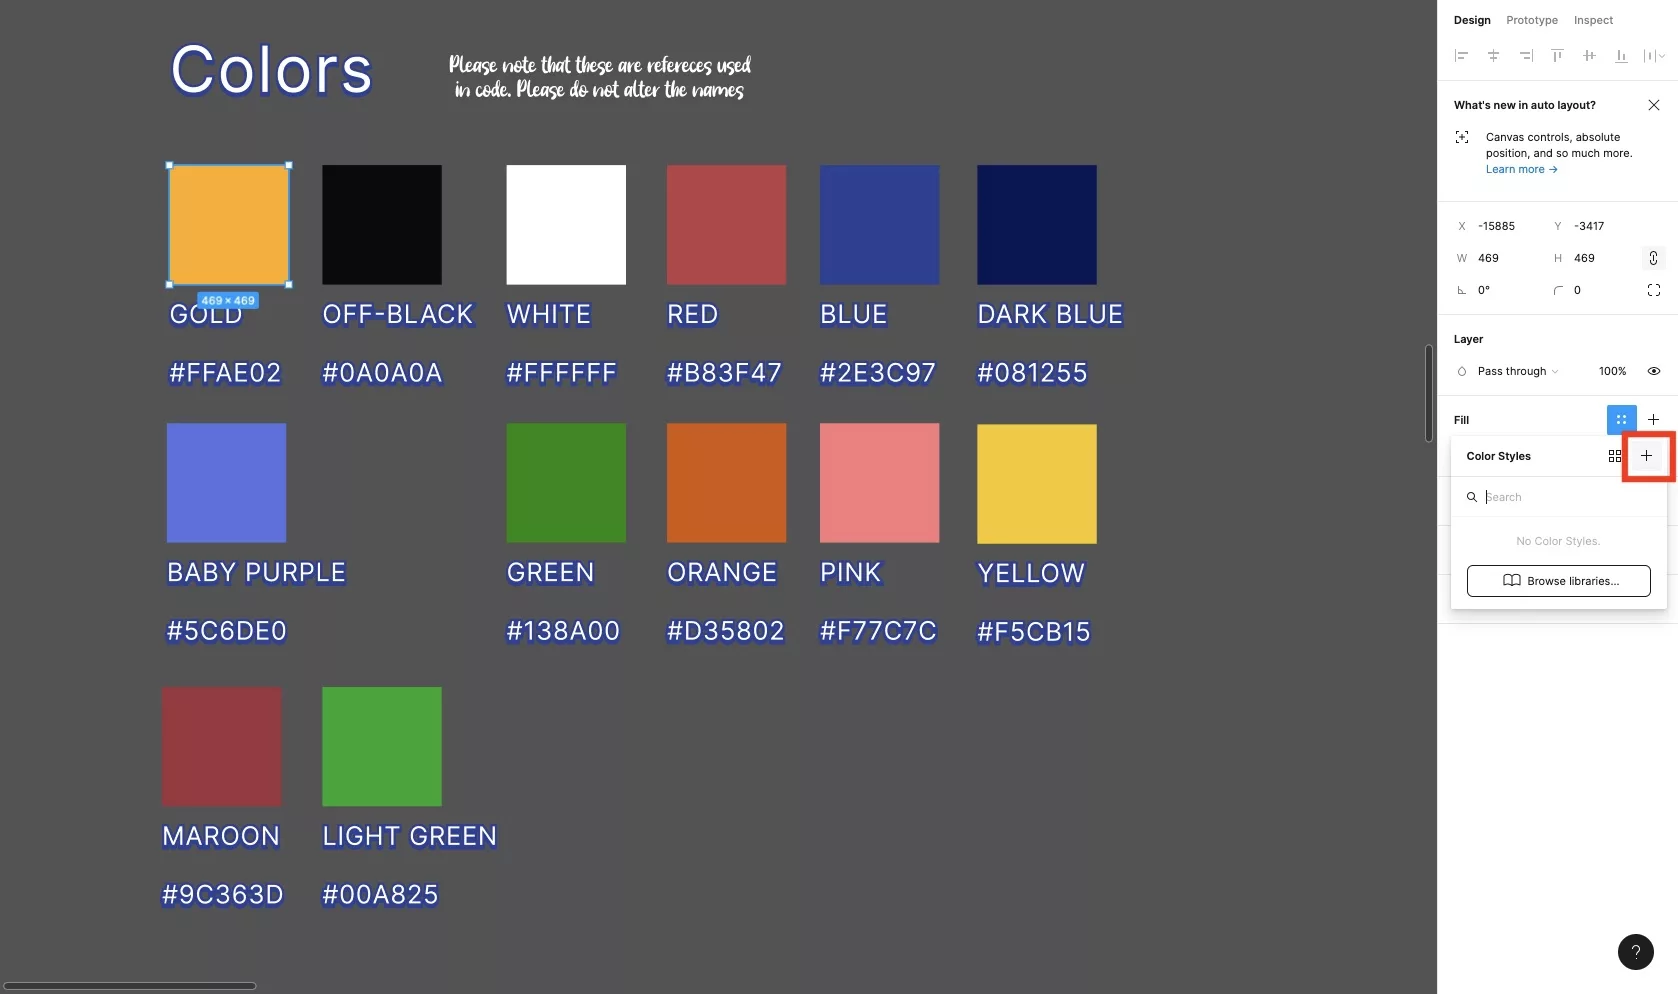
Press the + button in the modal that appears to create a new style.
Step Four: Name & select Create Style
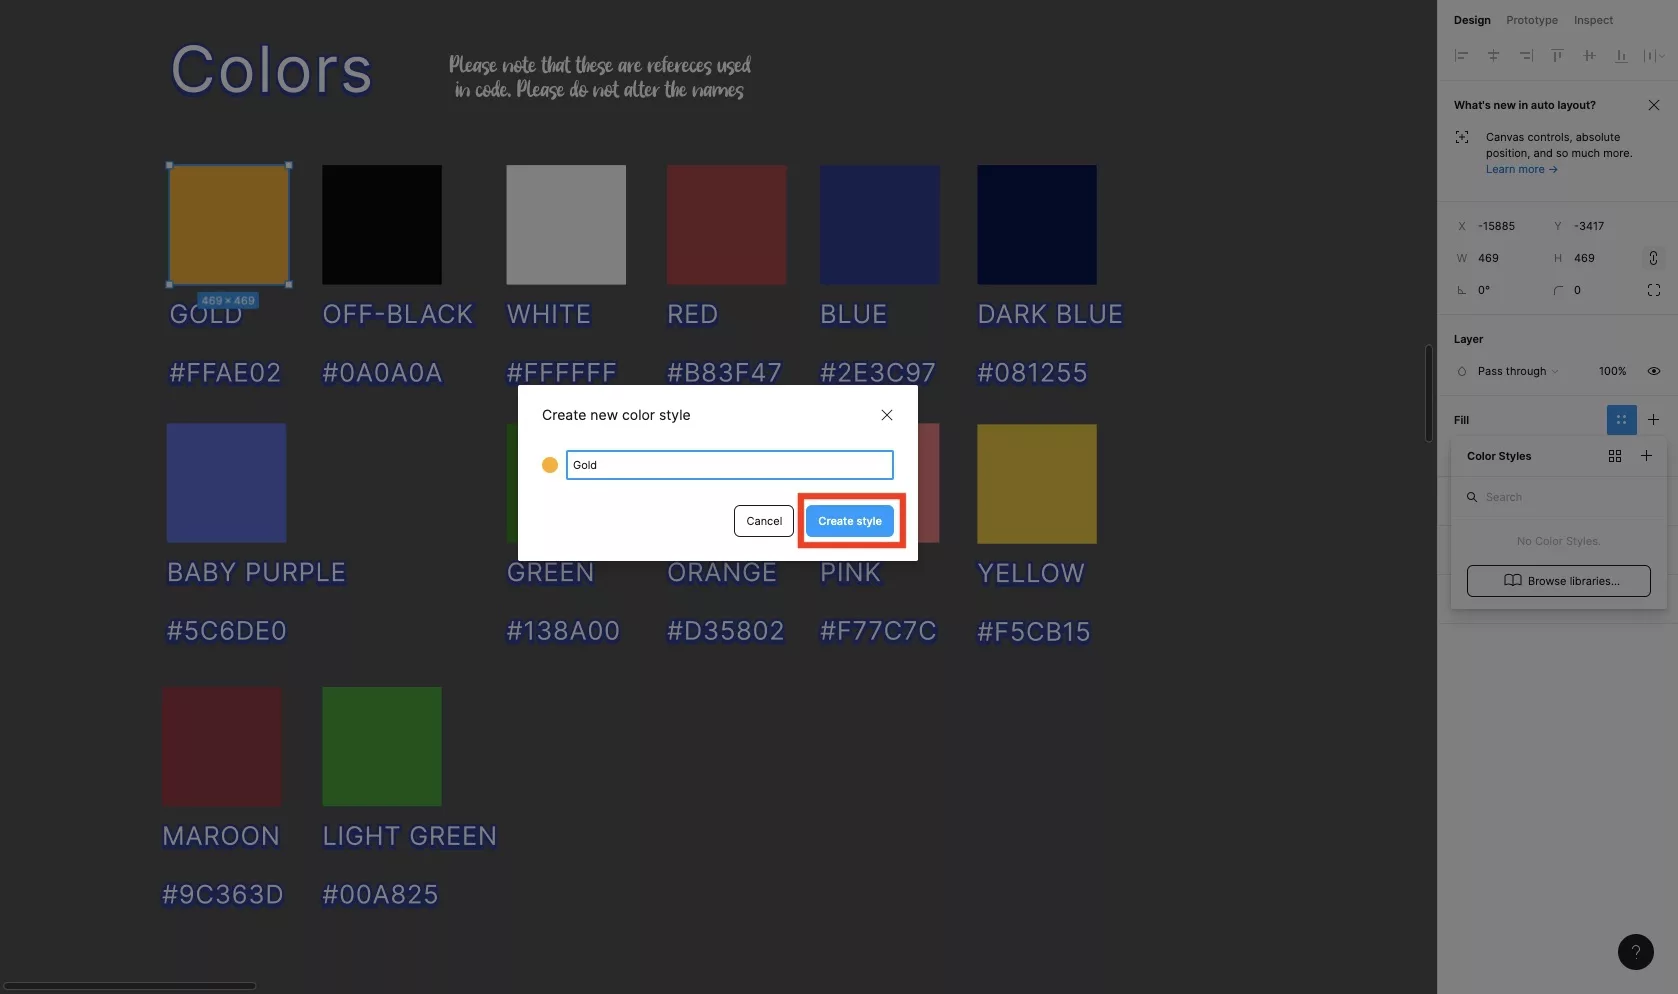
In the modal that appears, type in the name of the color style that you wish to create and subsequently press Create Style.
Step Five: Use the Style
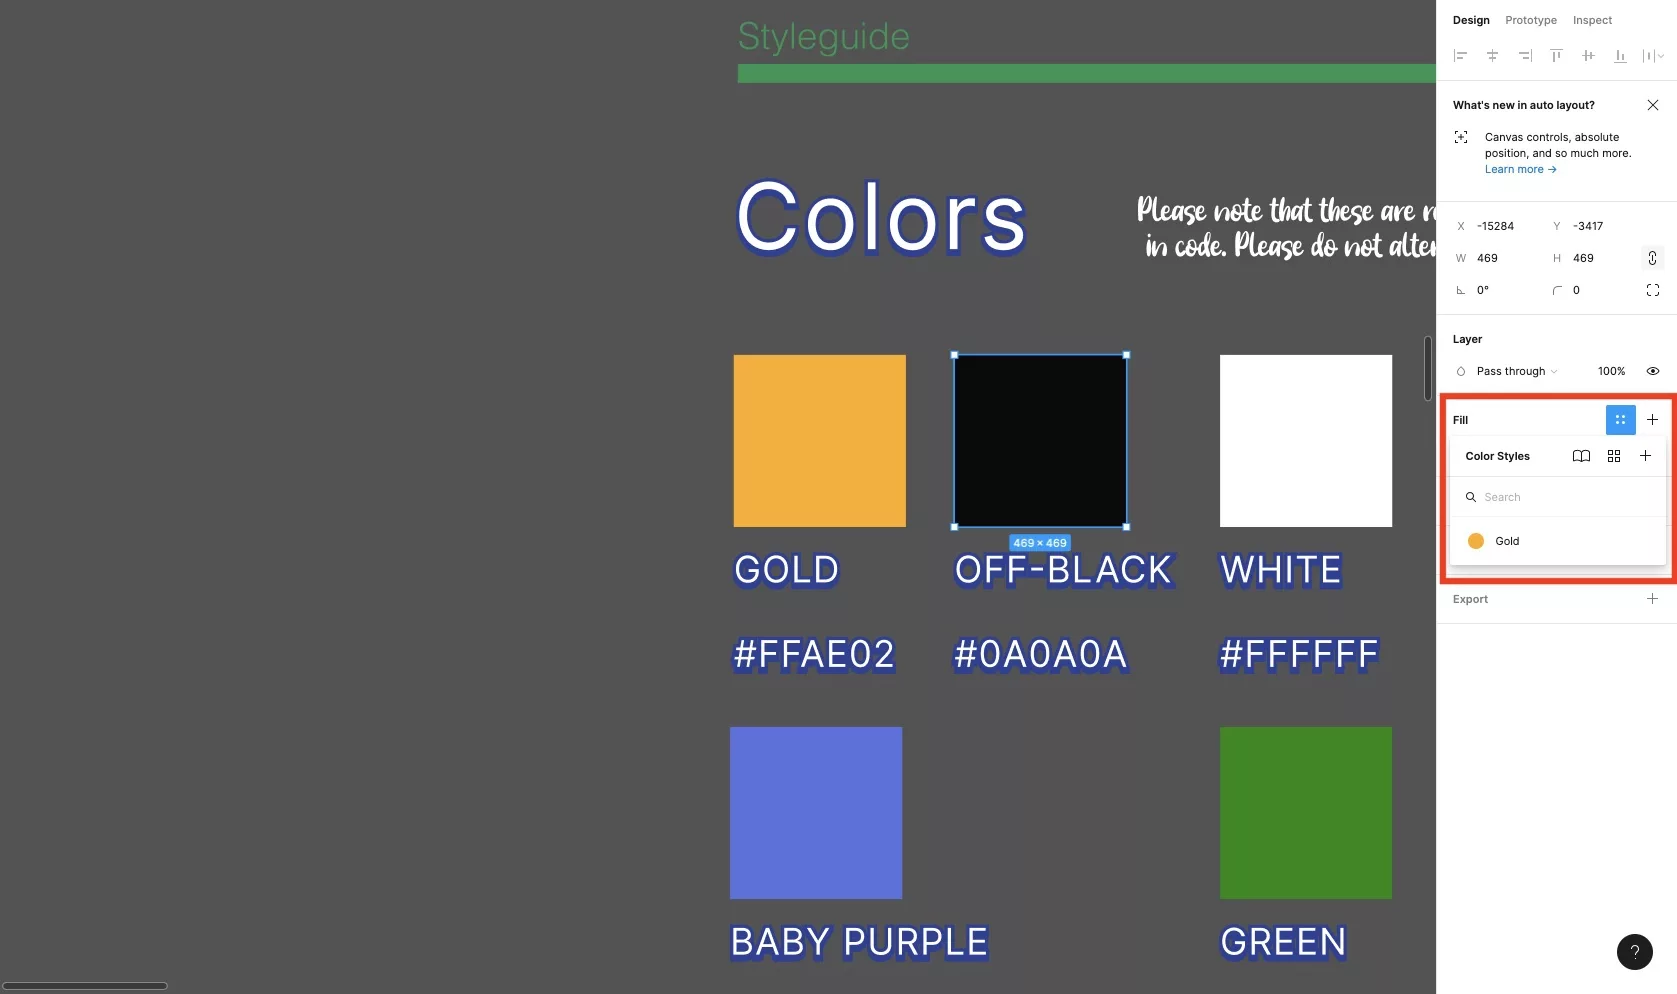
Your color should now appear under the Color Styles.
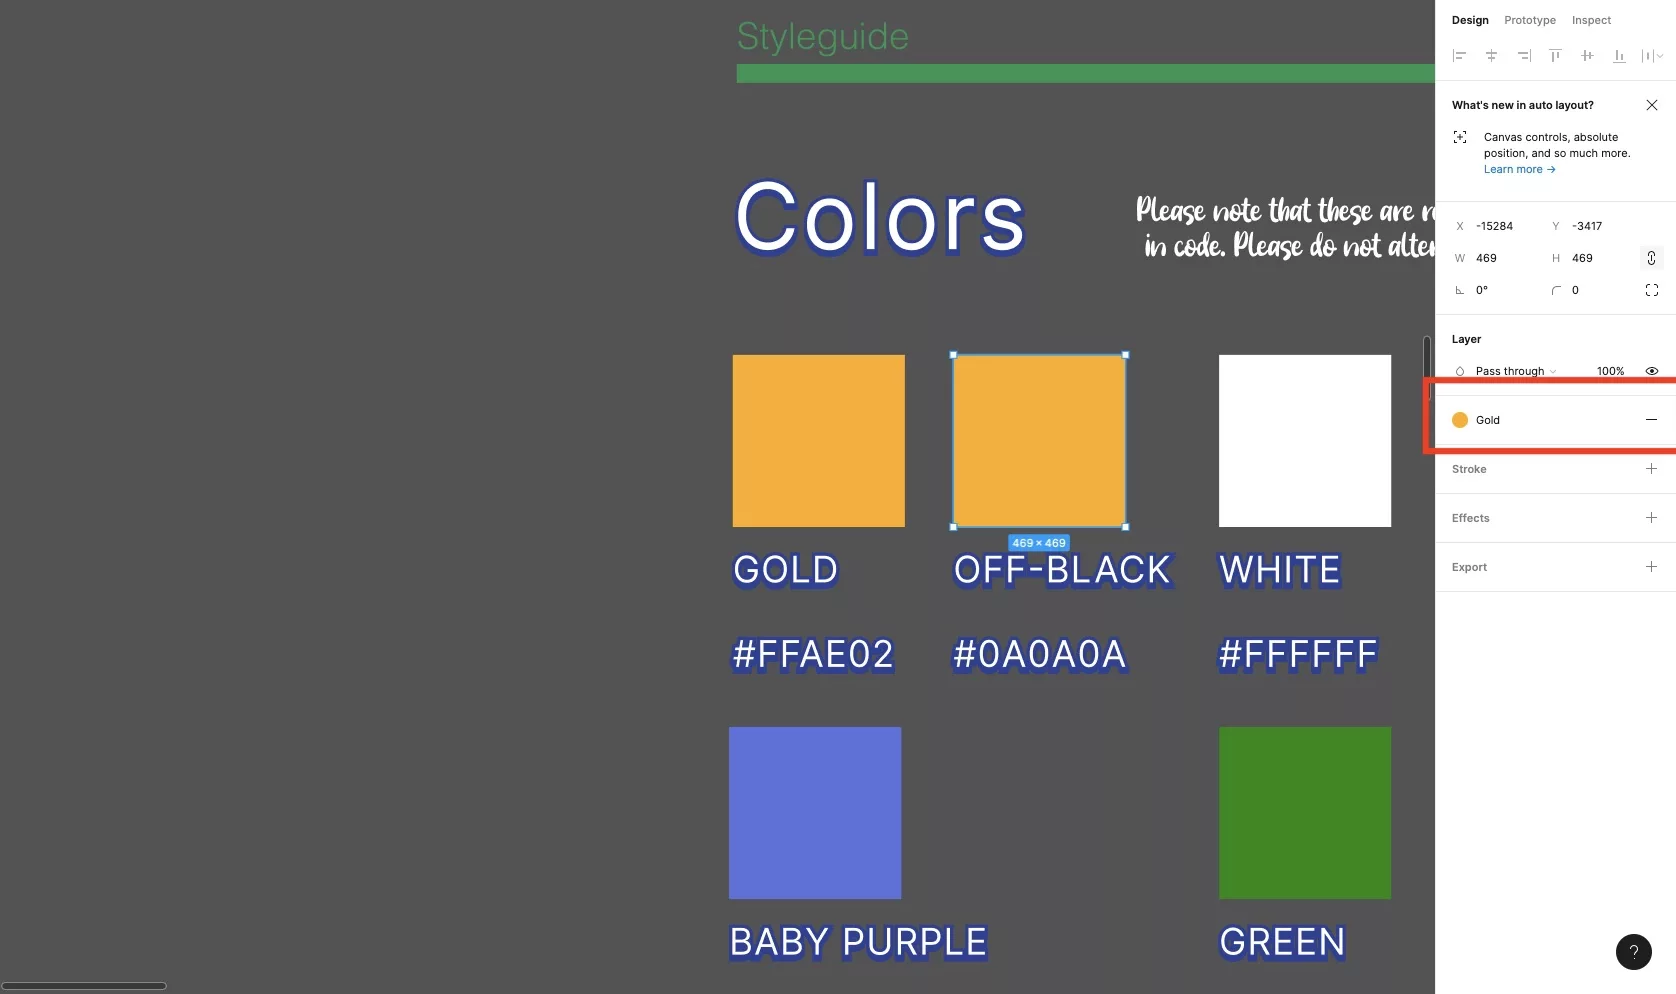
If you select that color it will change the color to the saved color style.
If at any moment you want to edit the style, remove, delete or detach it, follow one of the tutorials linked below.
Looking to learn more about things you can do with Figma ?
Search our blog to find educational content on learning how to use Figma.
Any Questions
We are actively looking for feedback on how to improve this resource. Please send us a note to inquiries@delasign.com with any thoughts or feedback you may have.