How to add custom fields to users in Craft CMS

Oscar de la Hera Gomez
A flower that represents Craft CMS with the text "Custom User Fields" beneath it.

A step by step guide on implementing custom User fields in Craft CMS.

Step One: Create the field

A screenshot of the Create a Field Craft CMS screen. Highlighted is the field type, which allows you to change the field type that you are creating; the column type that allows you to change how much memory the field uses as well as the save button, which is found on the top right of the screen and creates the field once you have completed the form.

Create a field, as if it were for a Craft CMS section.

Step Two: Select Settings

A screenshot of Craft CMS with a highlight on the Settings tab on the left menu side bar. Press it and move on to the next step.

In the left menu sidebar, select Settings.

Step Three: Select Users

A screenshot of the Craft CMS Settings Page. Highlighted is the Users tile under System. Press it and move on to the next step.

In the Settings page, select Users.

Step Four: + New Tab

A screenshot of the User Settings Craft CMS page on the User Fields tab. Highlighted is the + New Tab button. Press it and move onto the next step.

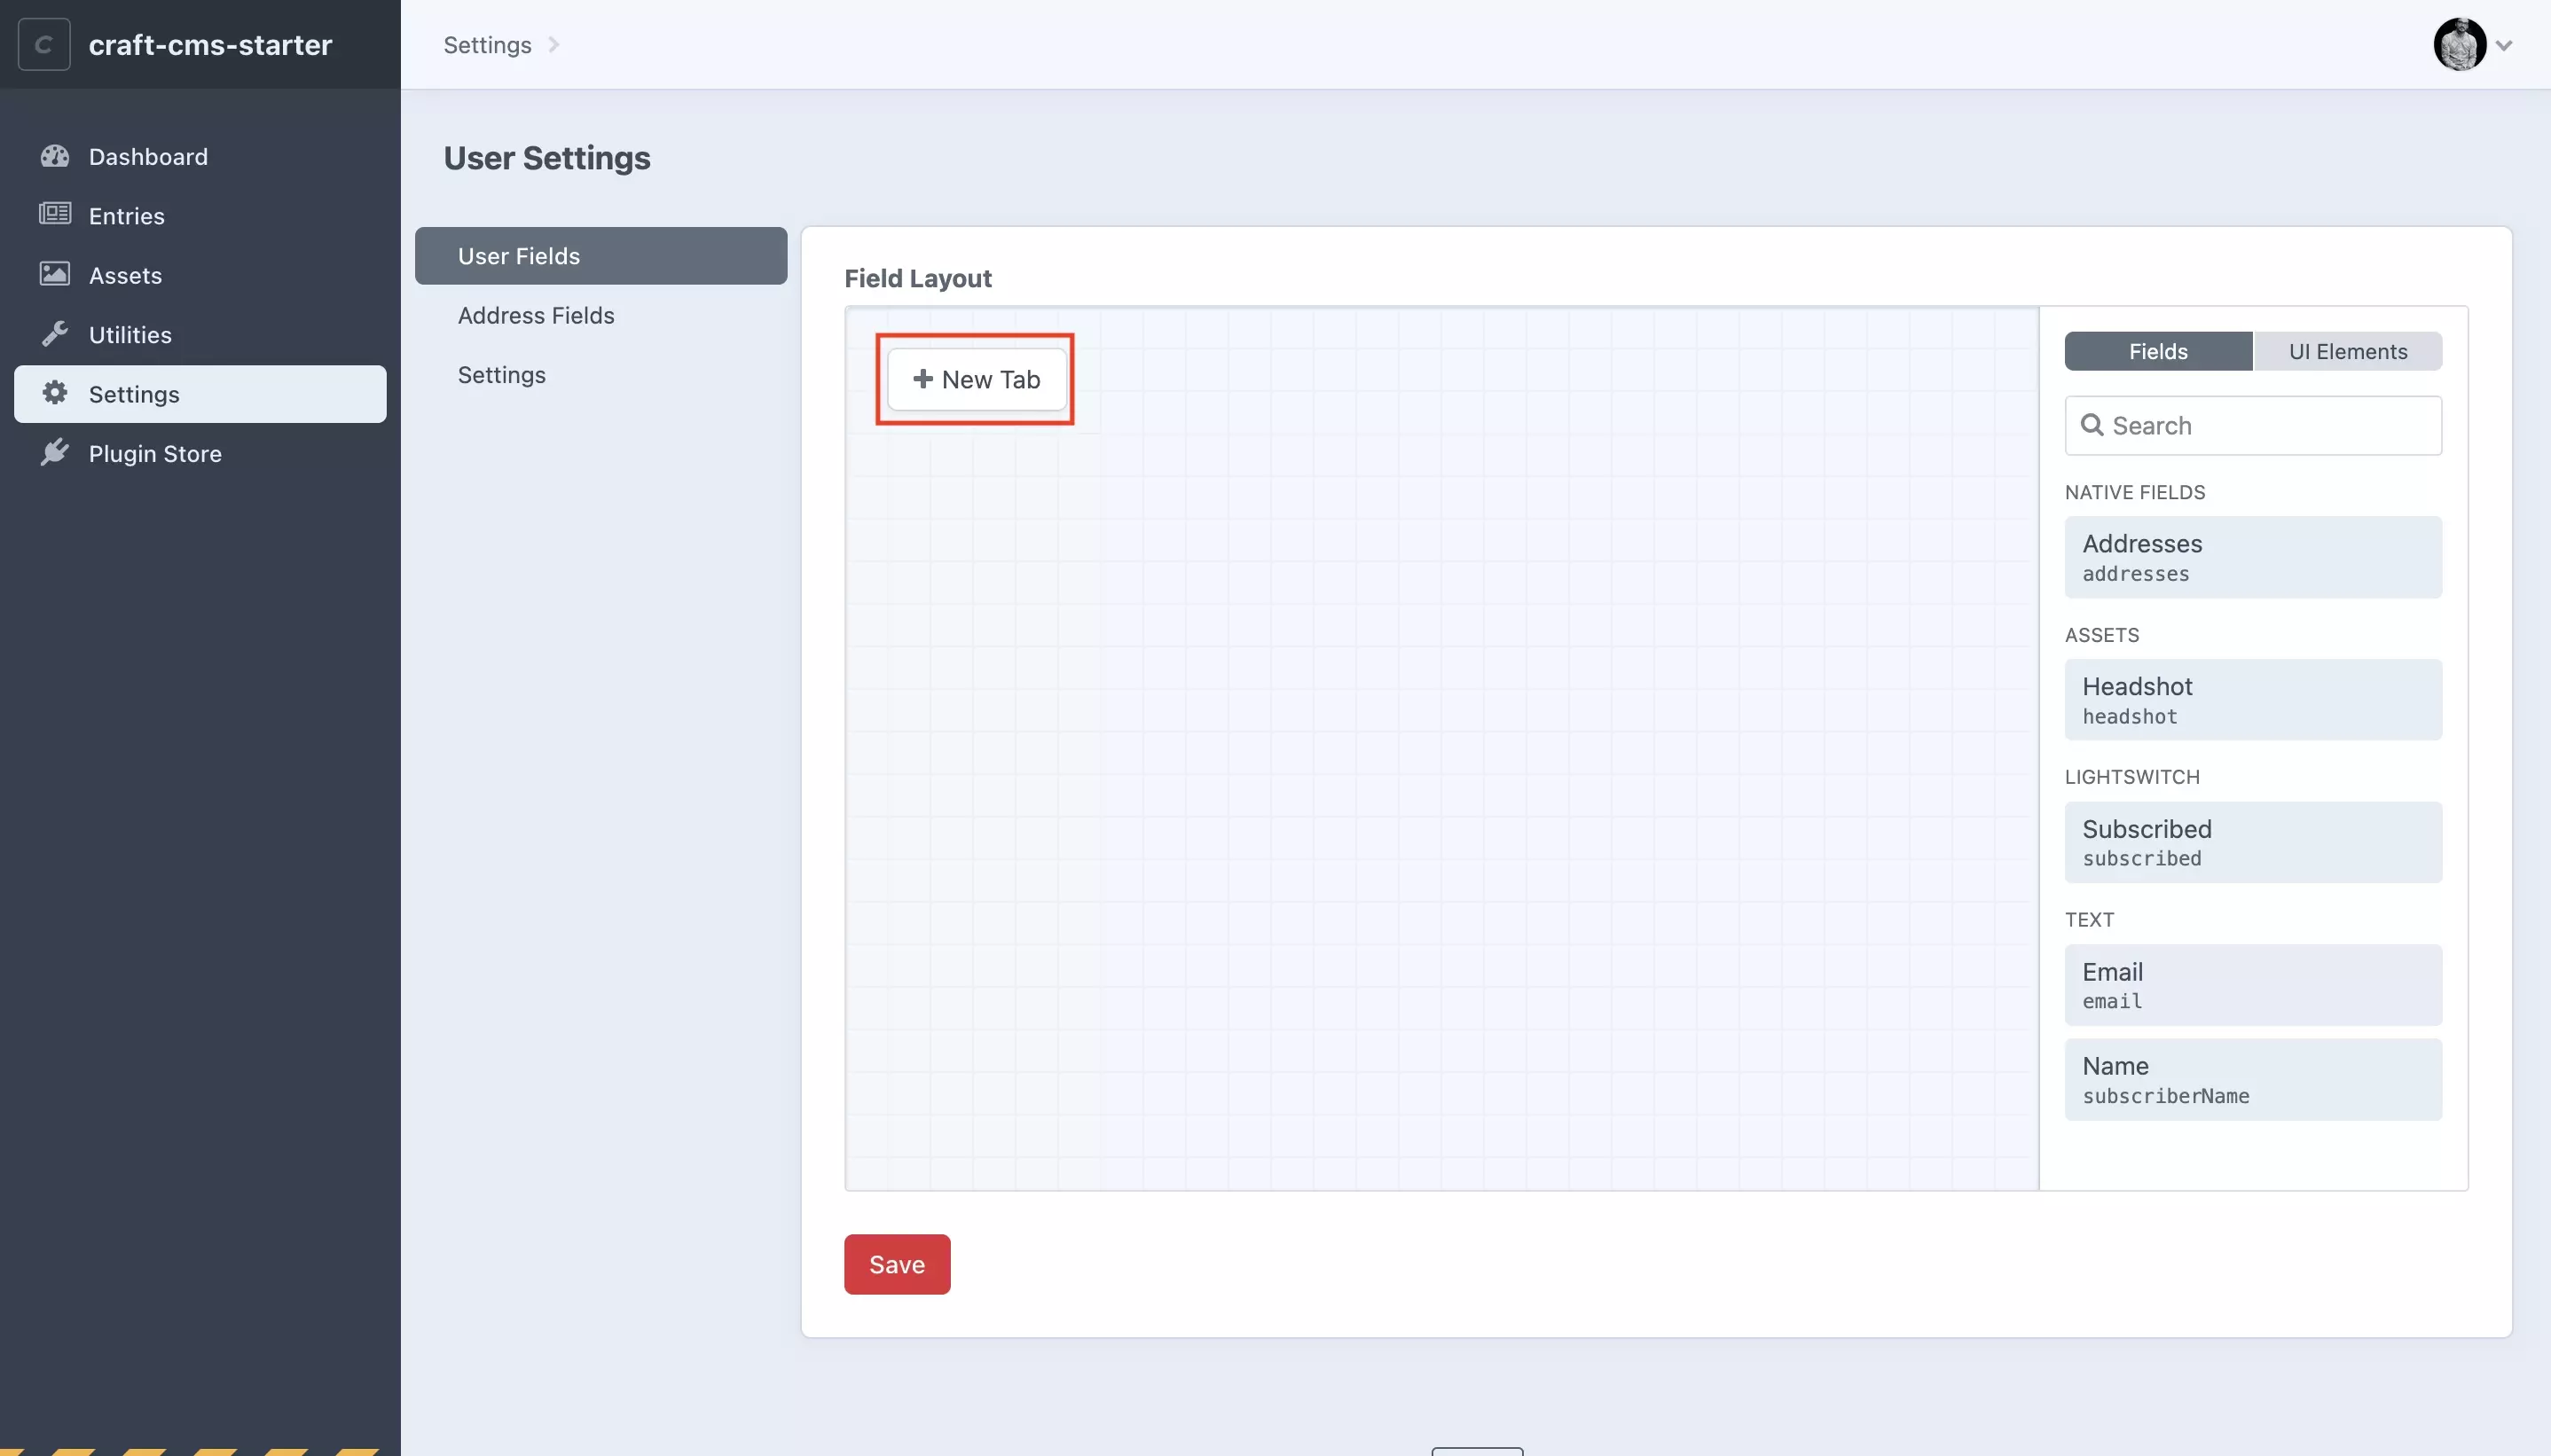
When entering the User Settings page, you be taken to the User Fields section.

Press + New tab within the field layout.

Step Five: Create new tab

A screenshot of Craft CMS showing the alert that appears when you select + New Tab. Give your tab a name and press the OK button on the bottom right of the alert to create a new tab.

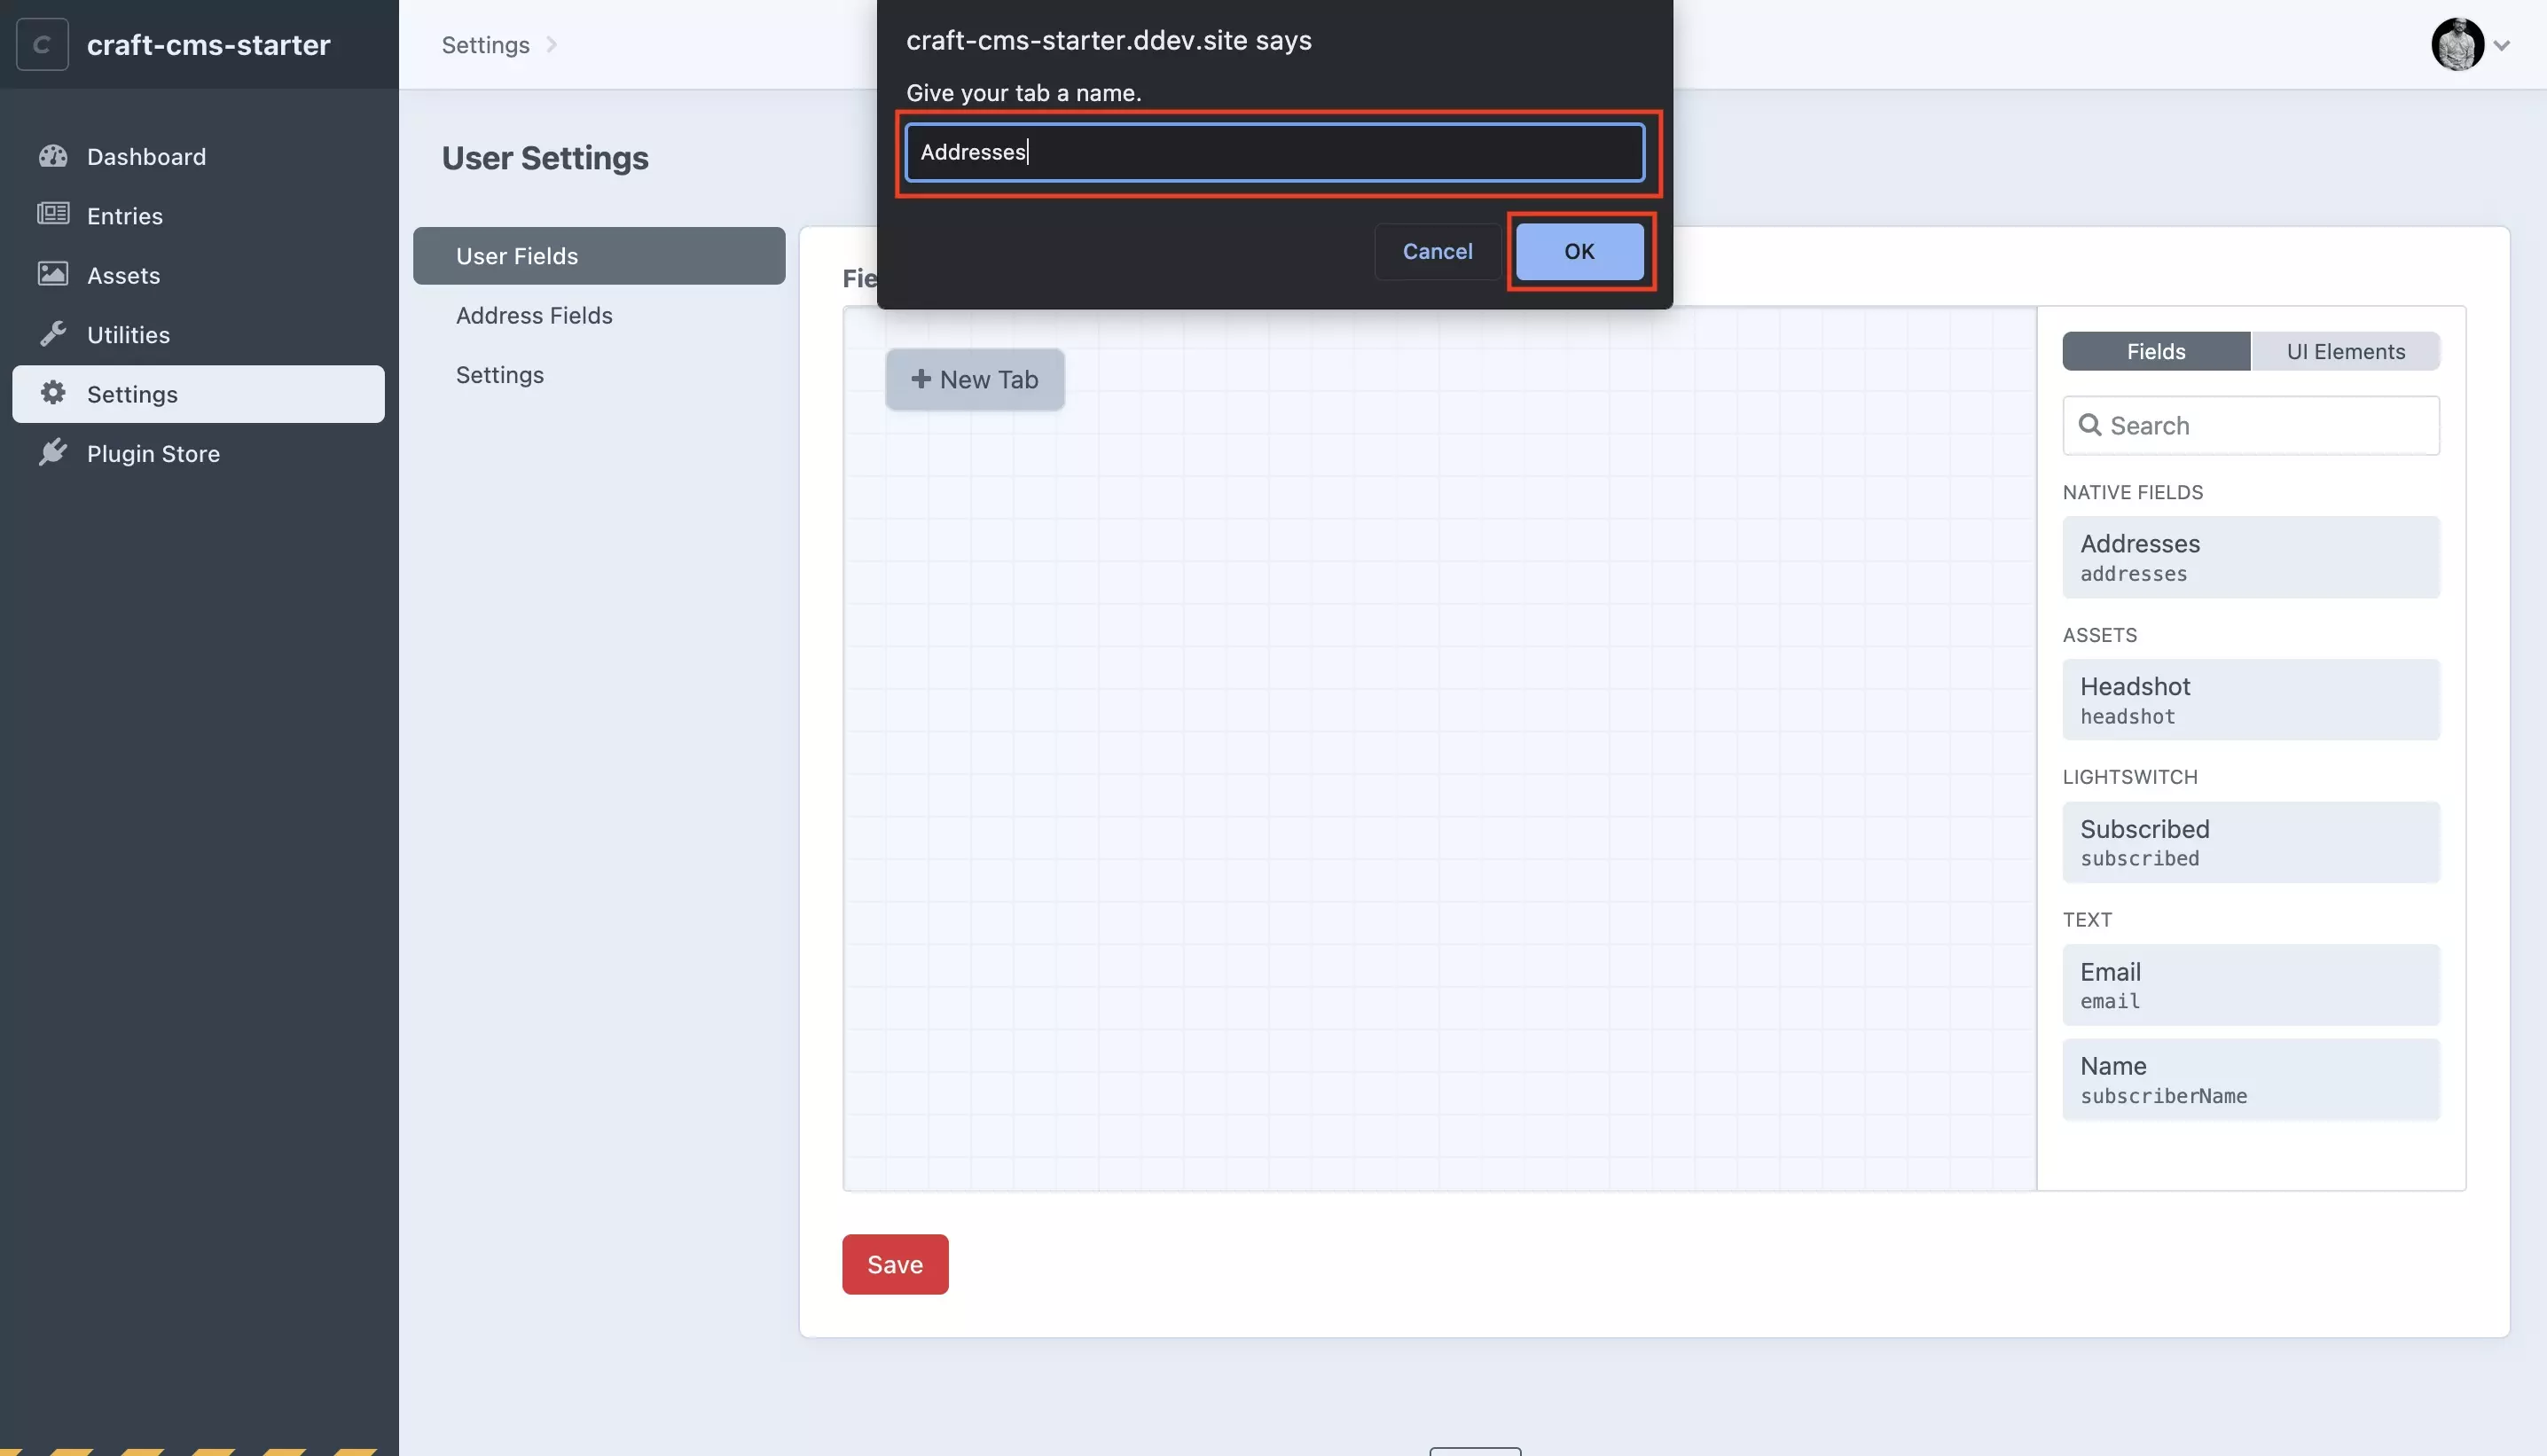
In the alert that appears, give your tab a name and press OK.

Step Six: Drag and Drop

A screenshot of the User Settings Craft CMS page on the User Fields tab, showing how you can drag and drop fields from the Fields area on the right hand side into the tab that you just created.

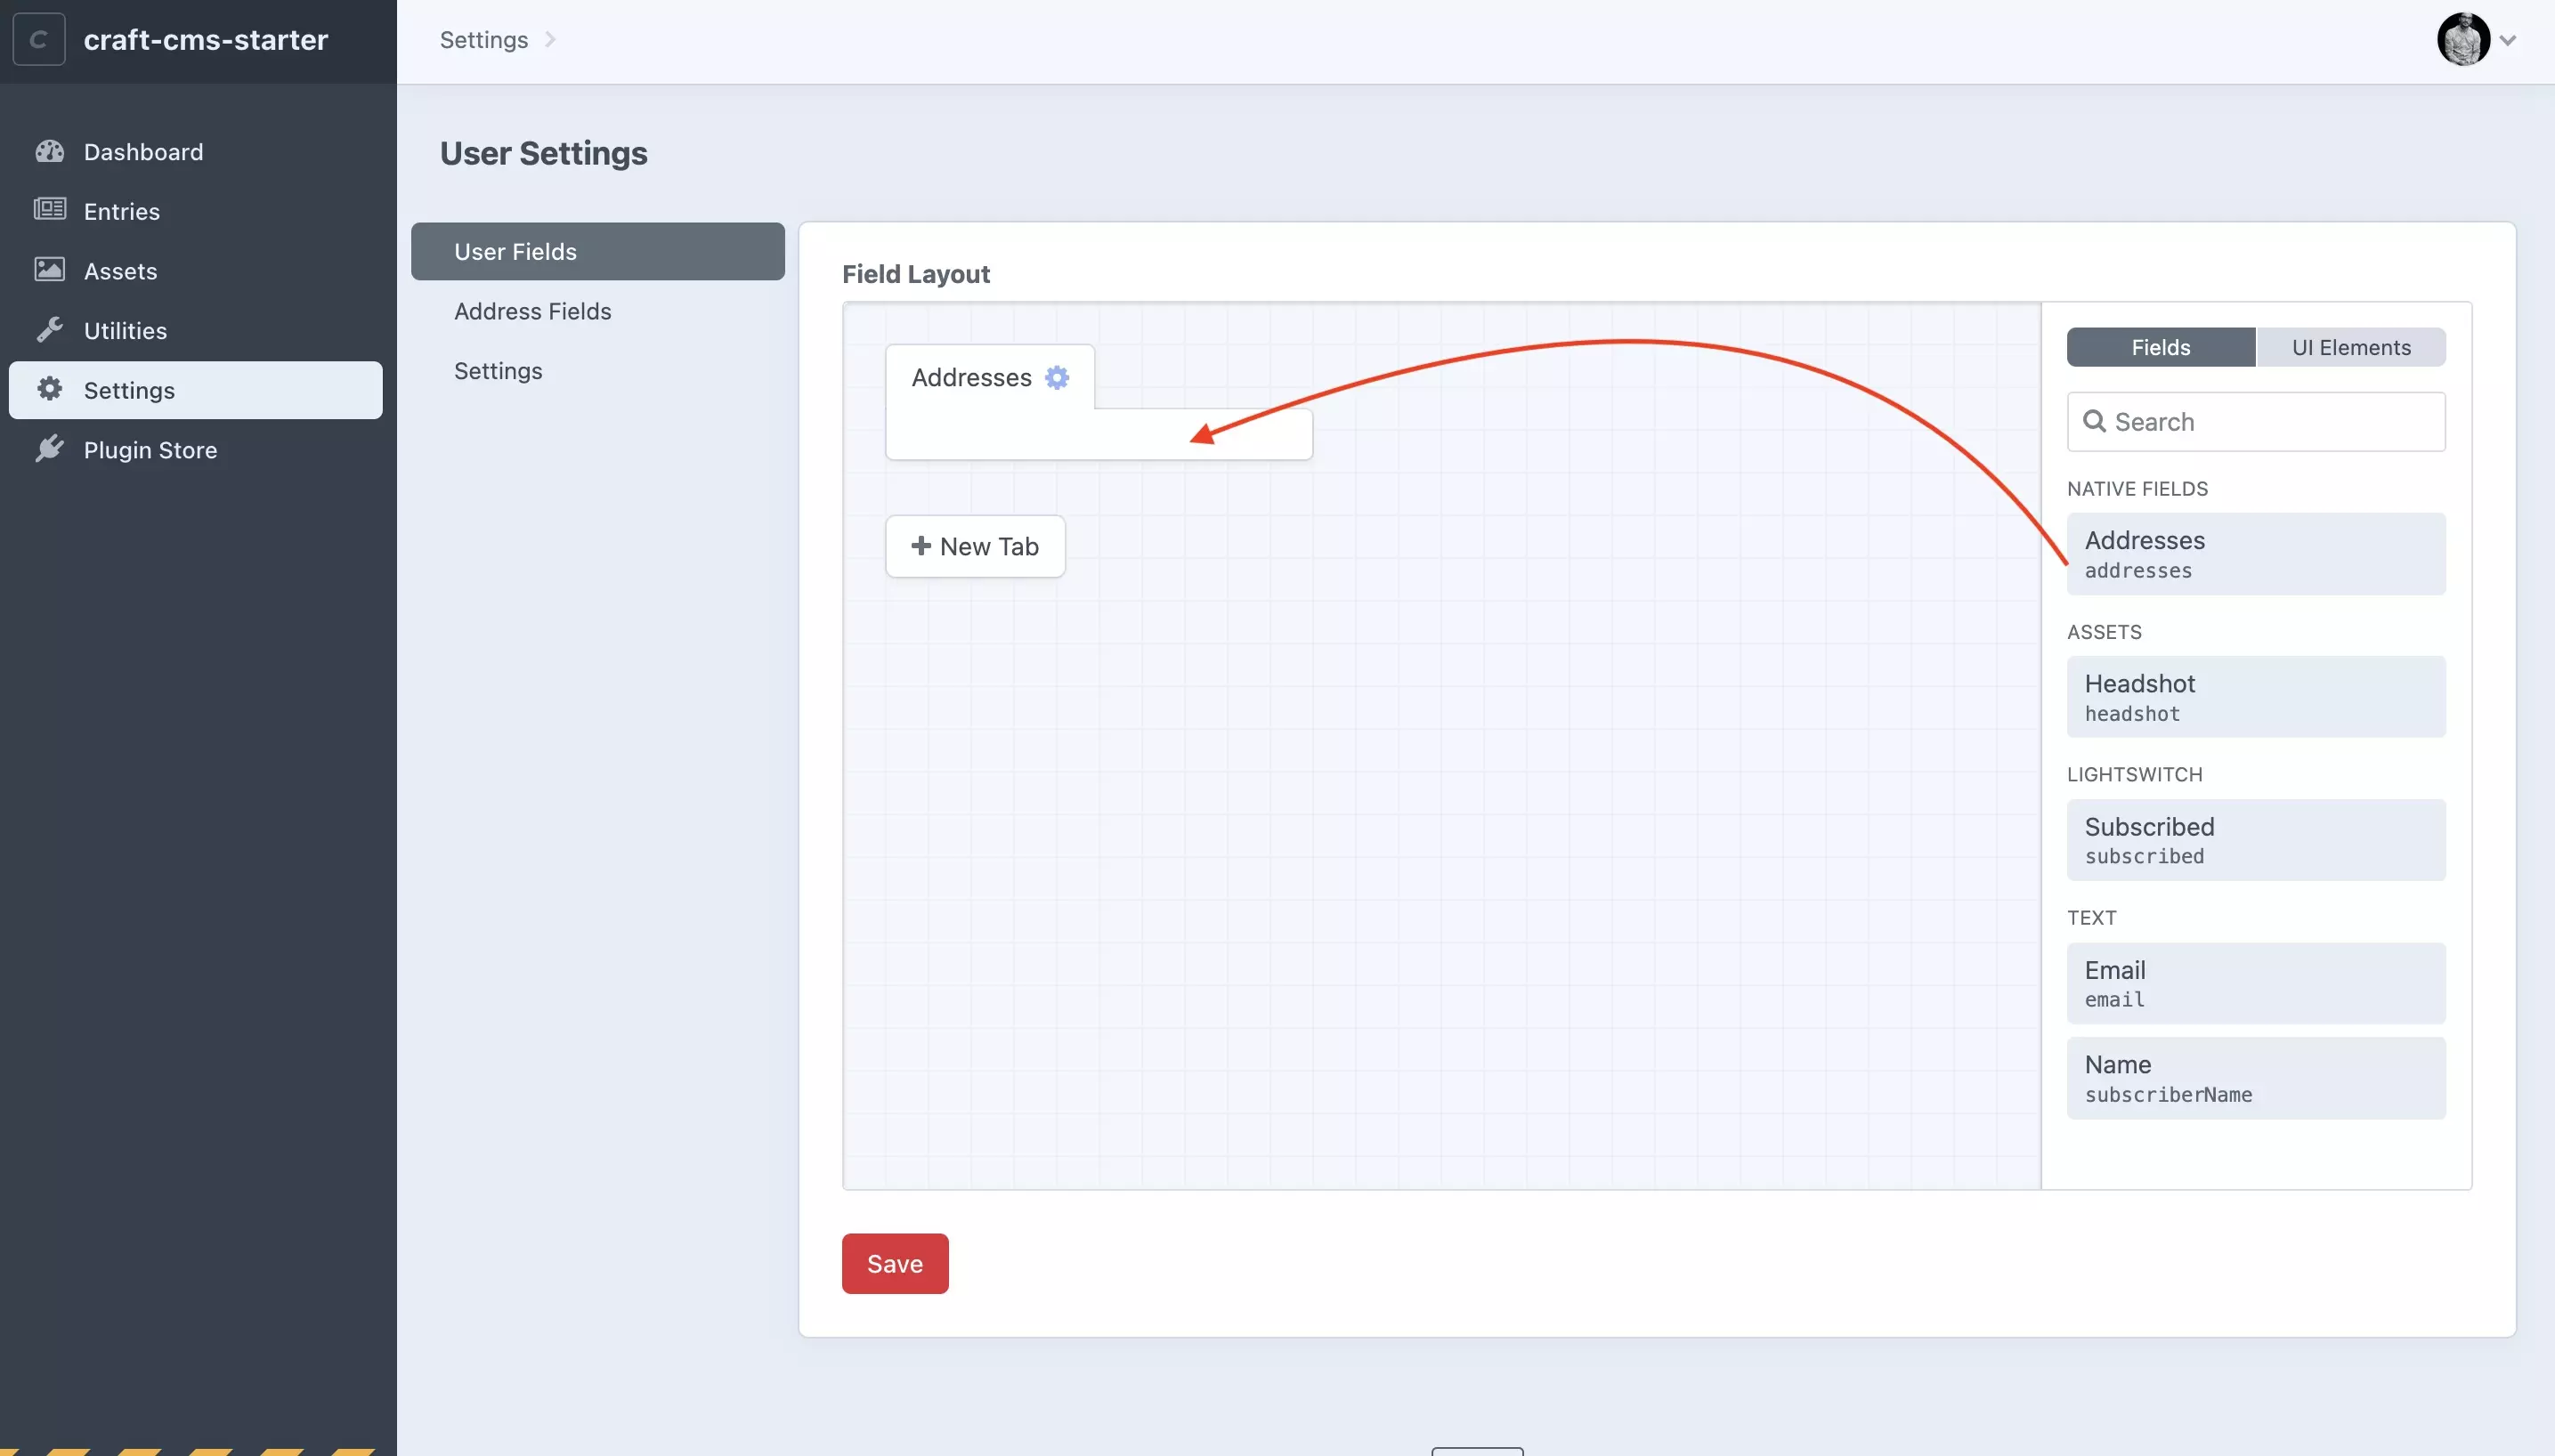
Drag and drop the fields that you wish to add to the tab.

Step Seven: Save

A screenshot of the Craft CMS User Settings page, with the User fields tab selected. Fields have been added to the tab that we created and highlighted is the Save button on the bottom left, which must be pressed to save the changes.

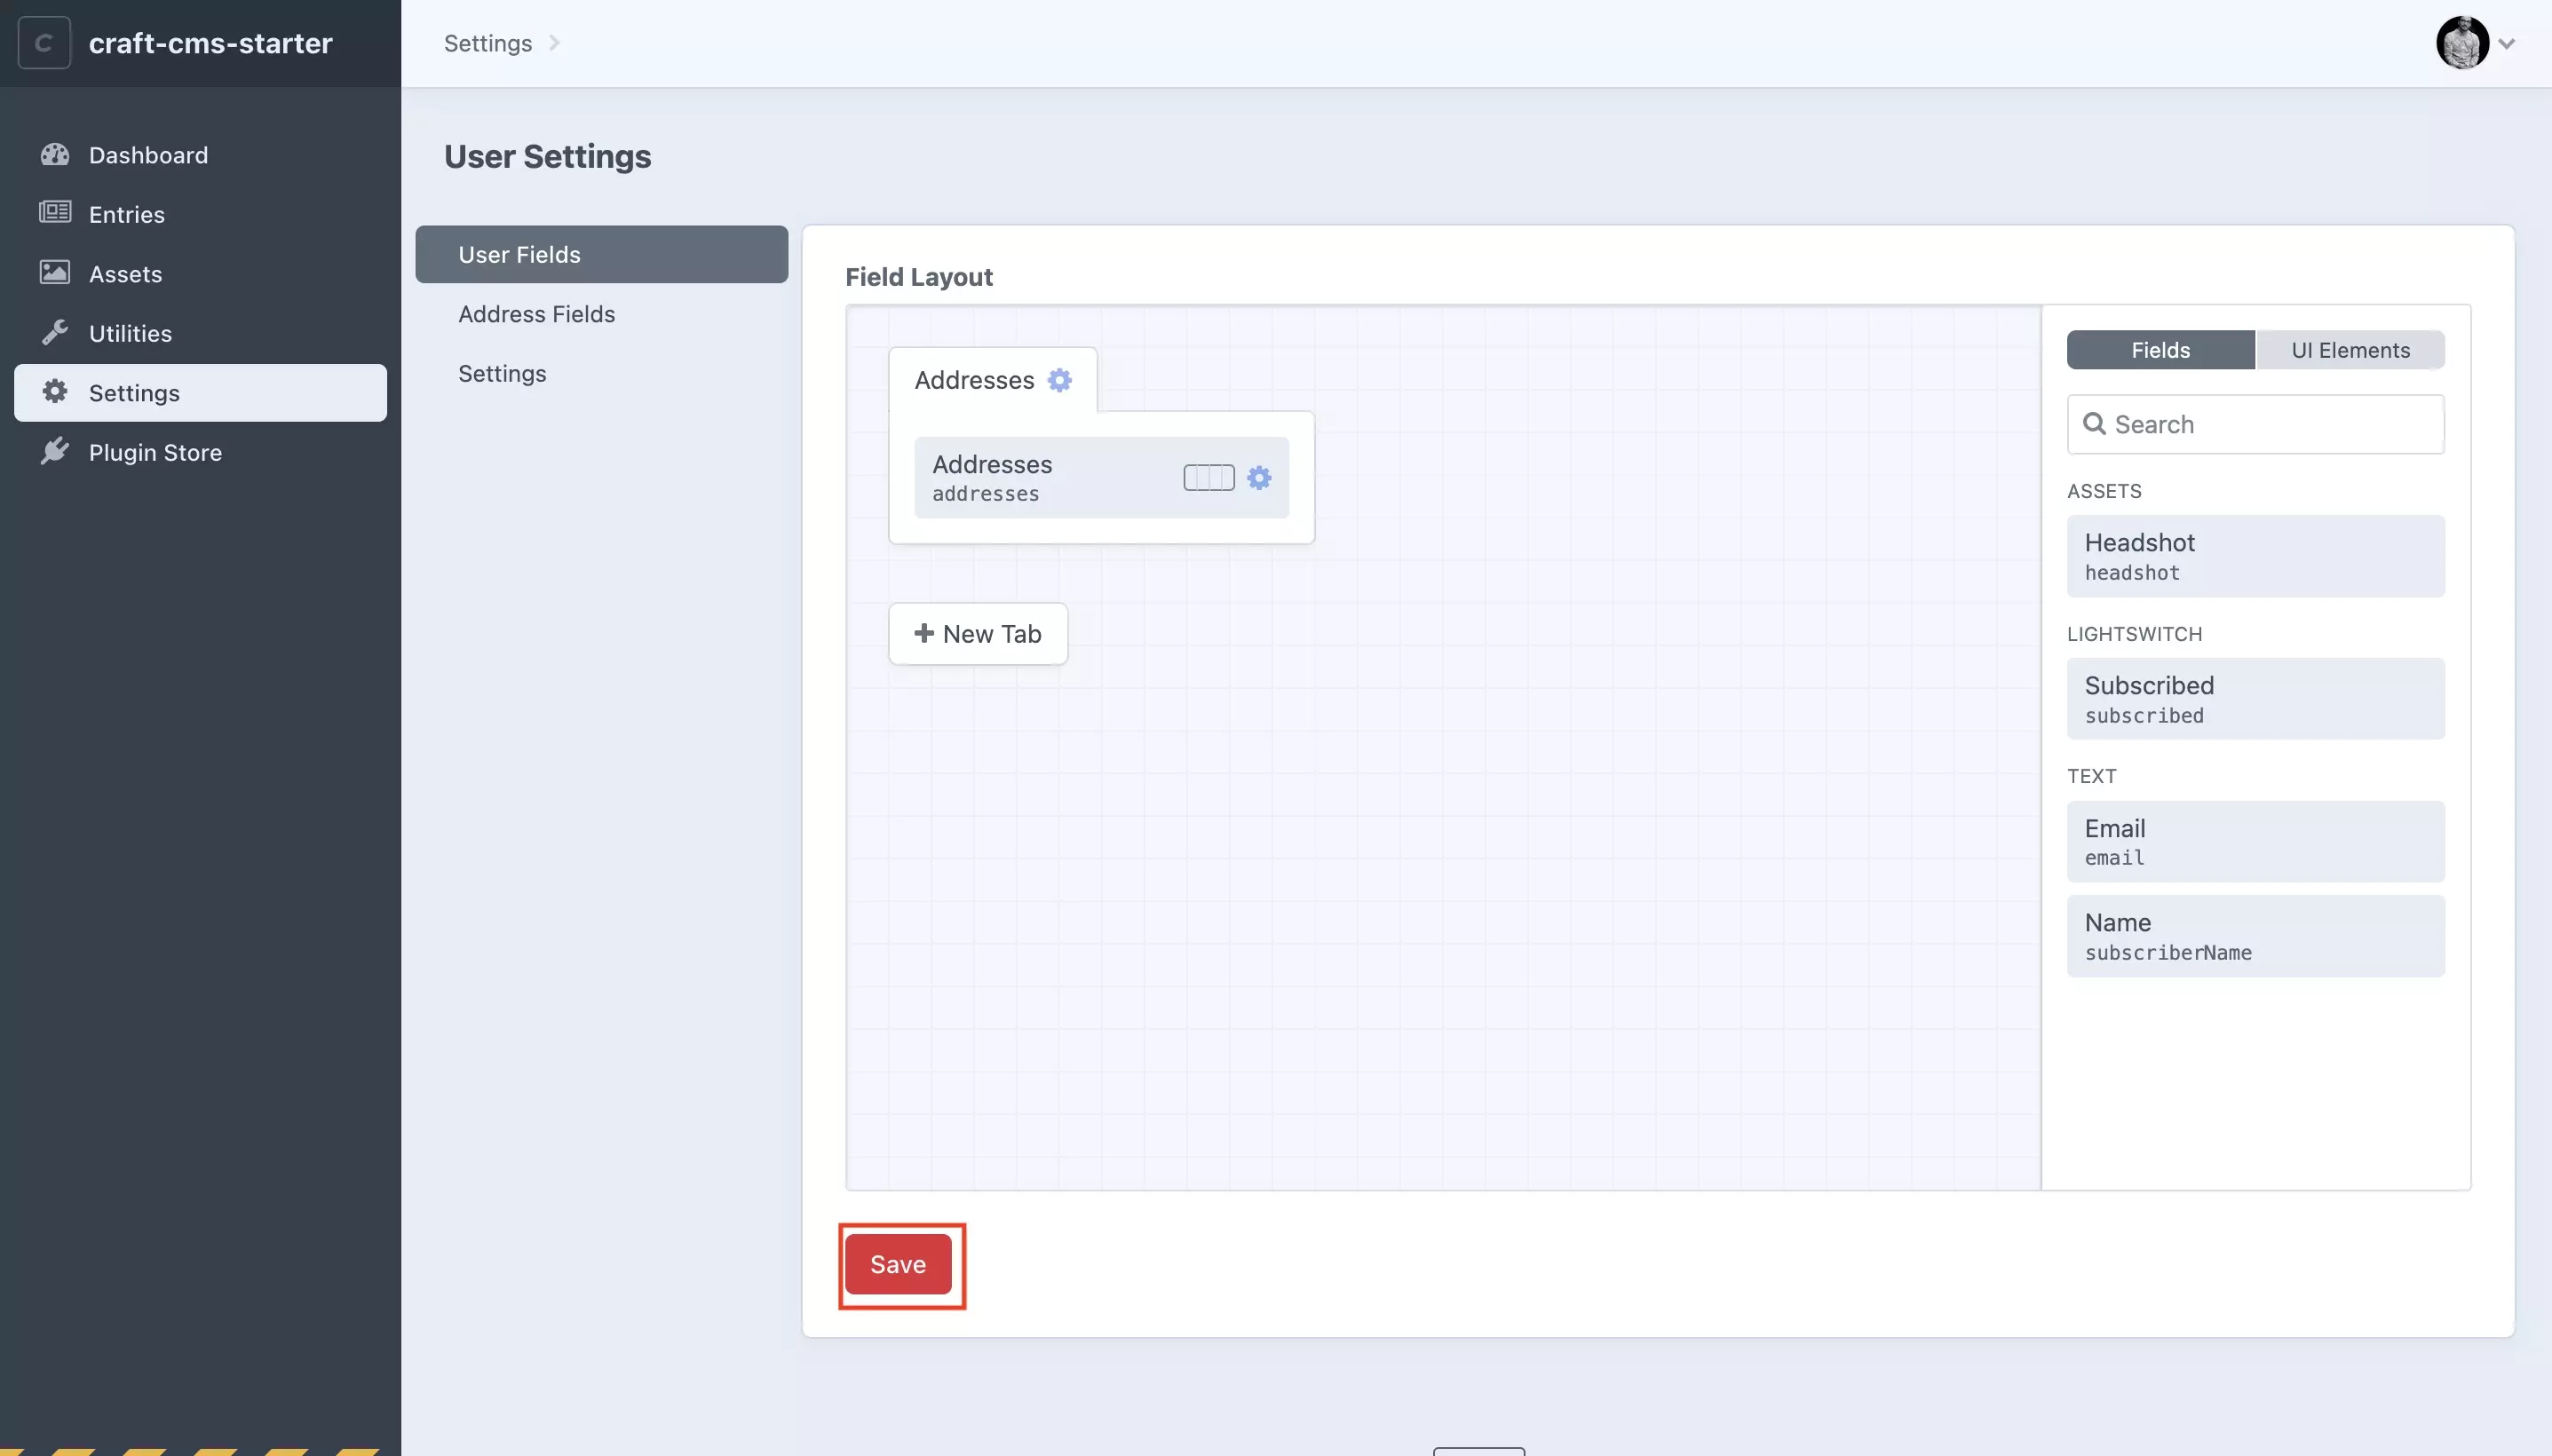
Press Save to register the changes.

Step Eight: Verify

A screenshot of Craft CMS showing the new tab and field in the User account.

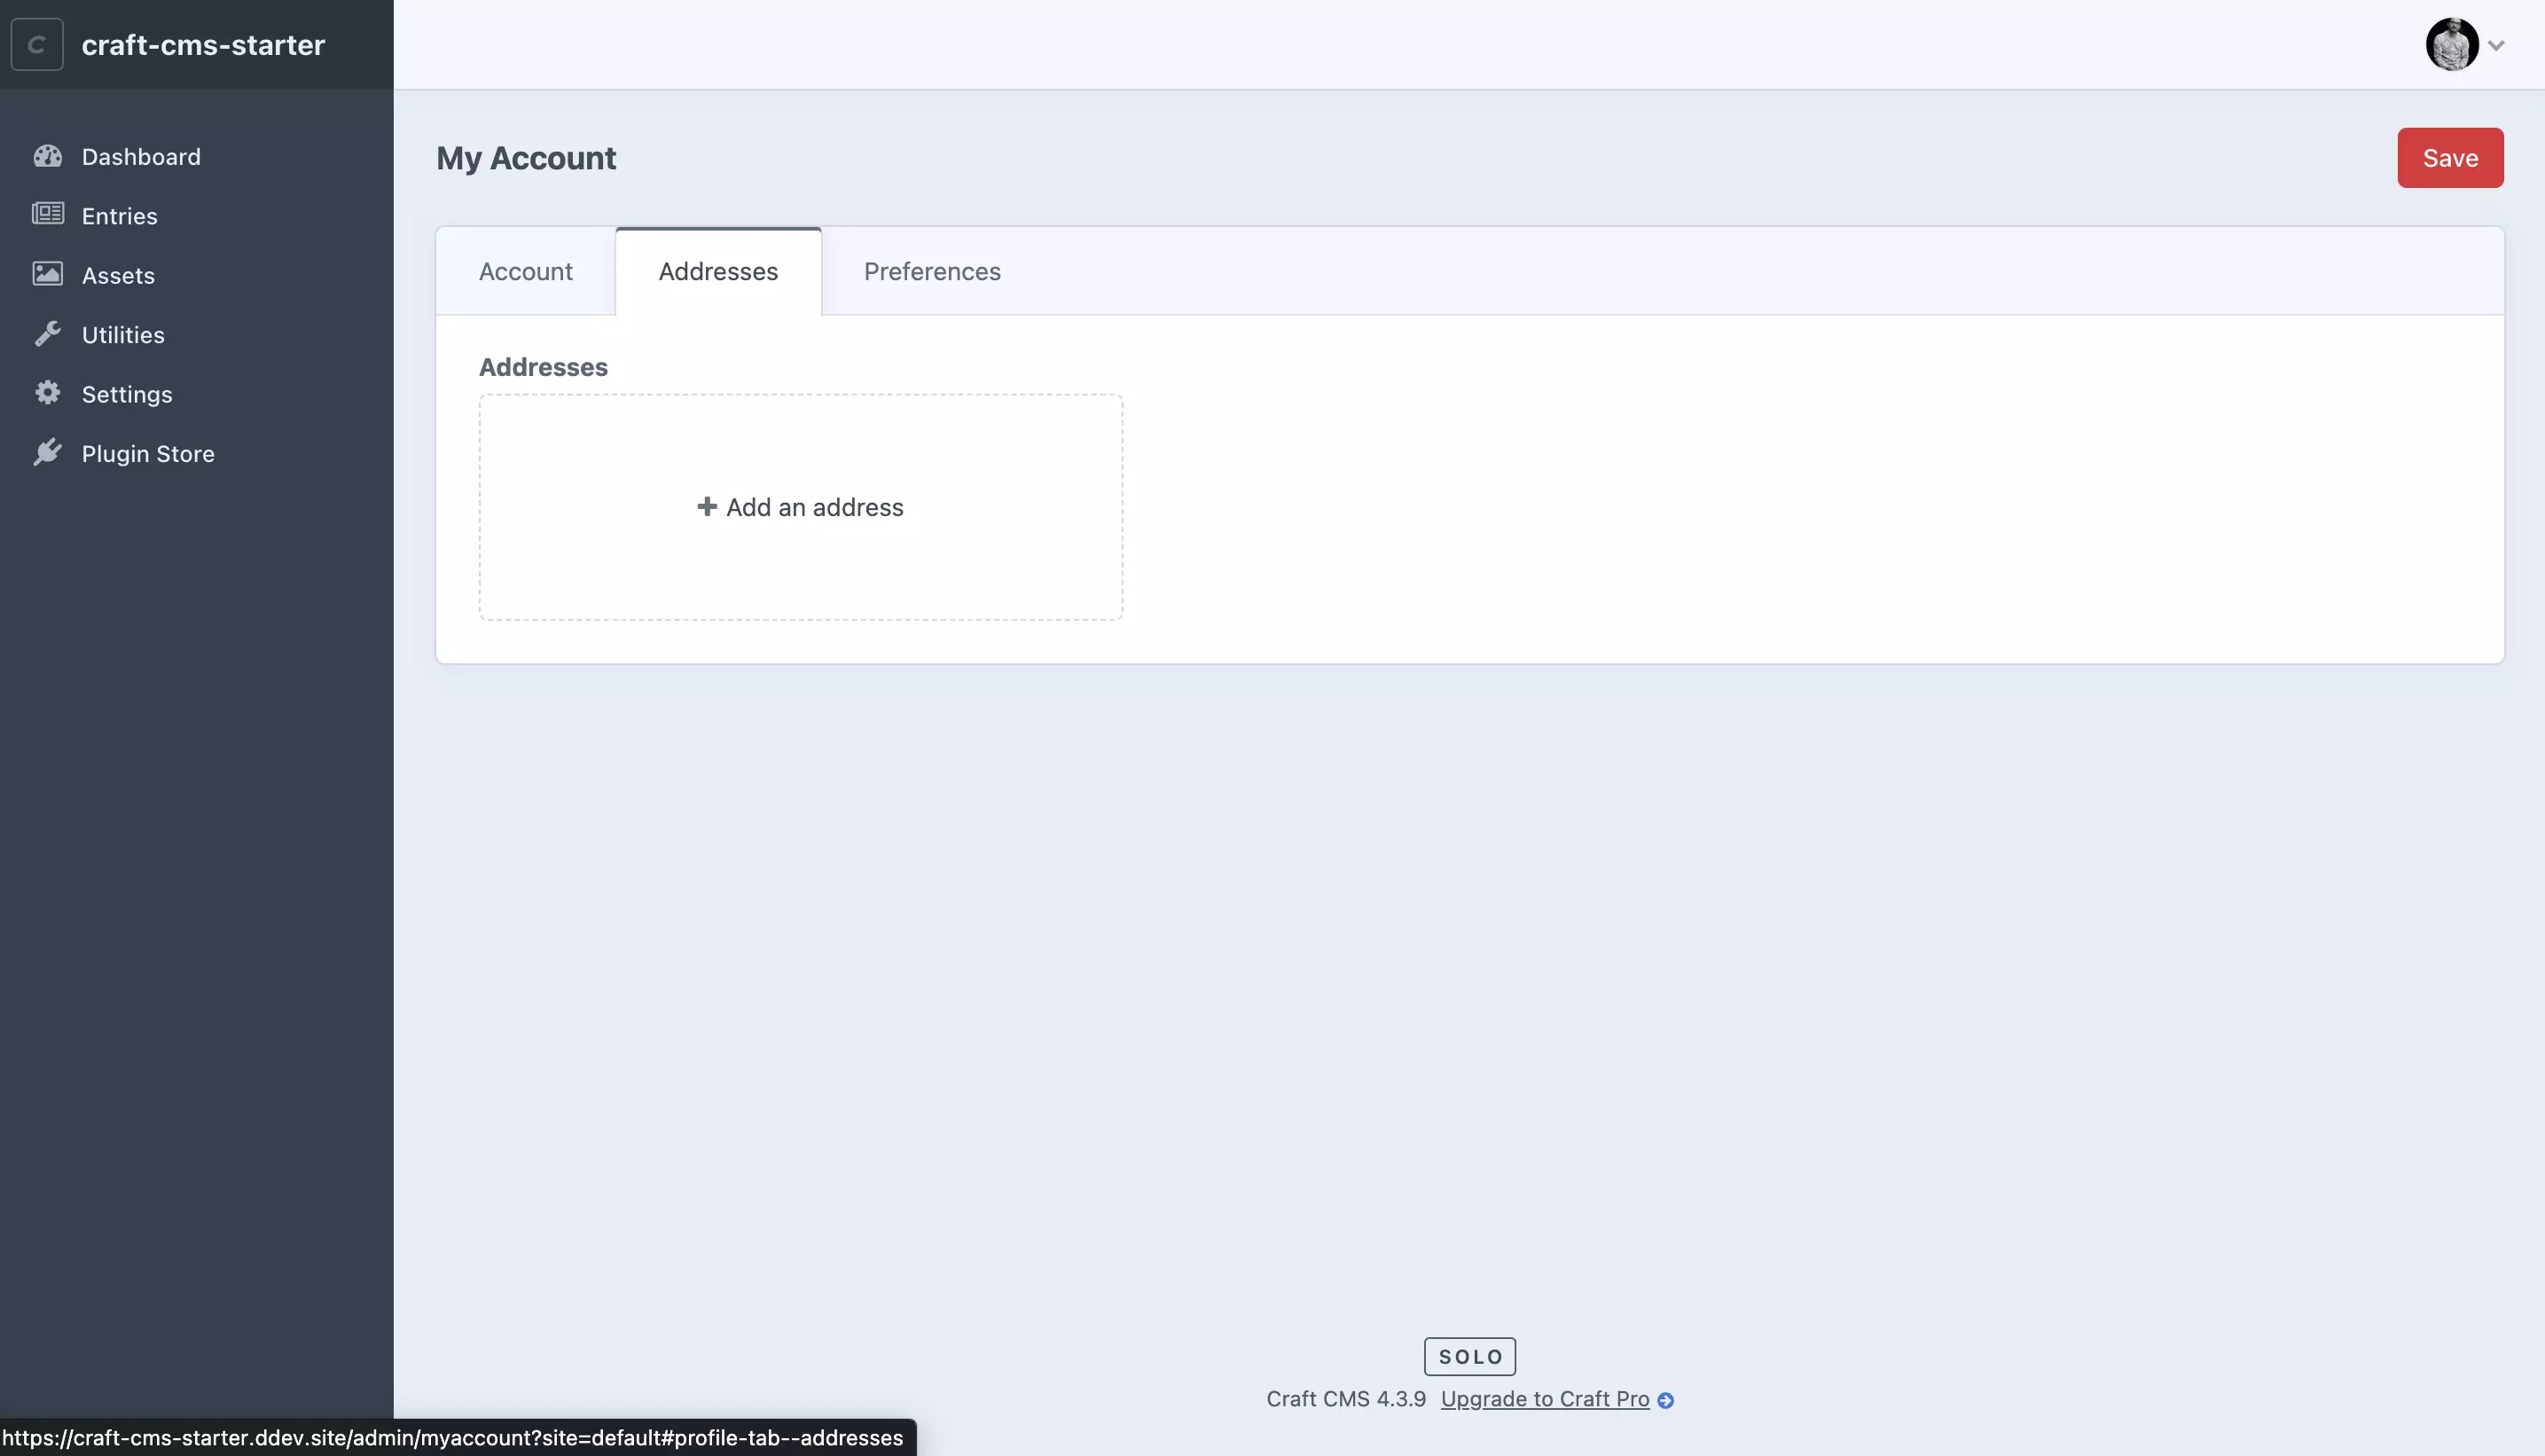
Navigate to the user's account and you will see that the tab and fields have been added.

Any Questions?

We are actively looking for feedback on how to improve this resource. Please send us a note to inquiries@delasign.com with any thoughts or feedback you may have.
delasign logo

Book a Free Consultation.

An icon of an email.

Click here to email us.

Fill in the details below to book a free consultation or to let us know about something else. Whatever it is, we are here to help.

How can we help you ?

Contact Details