How to make required fields for Craft CMS entry types
A step by step guide on making fields required for entries to be saved or created in Craft CMS.

A step by step guide on making fields required for entries to be saved or created in Craft CMS.
SubscribeStep One: Select Settings
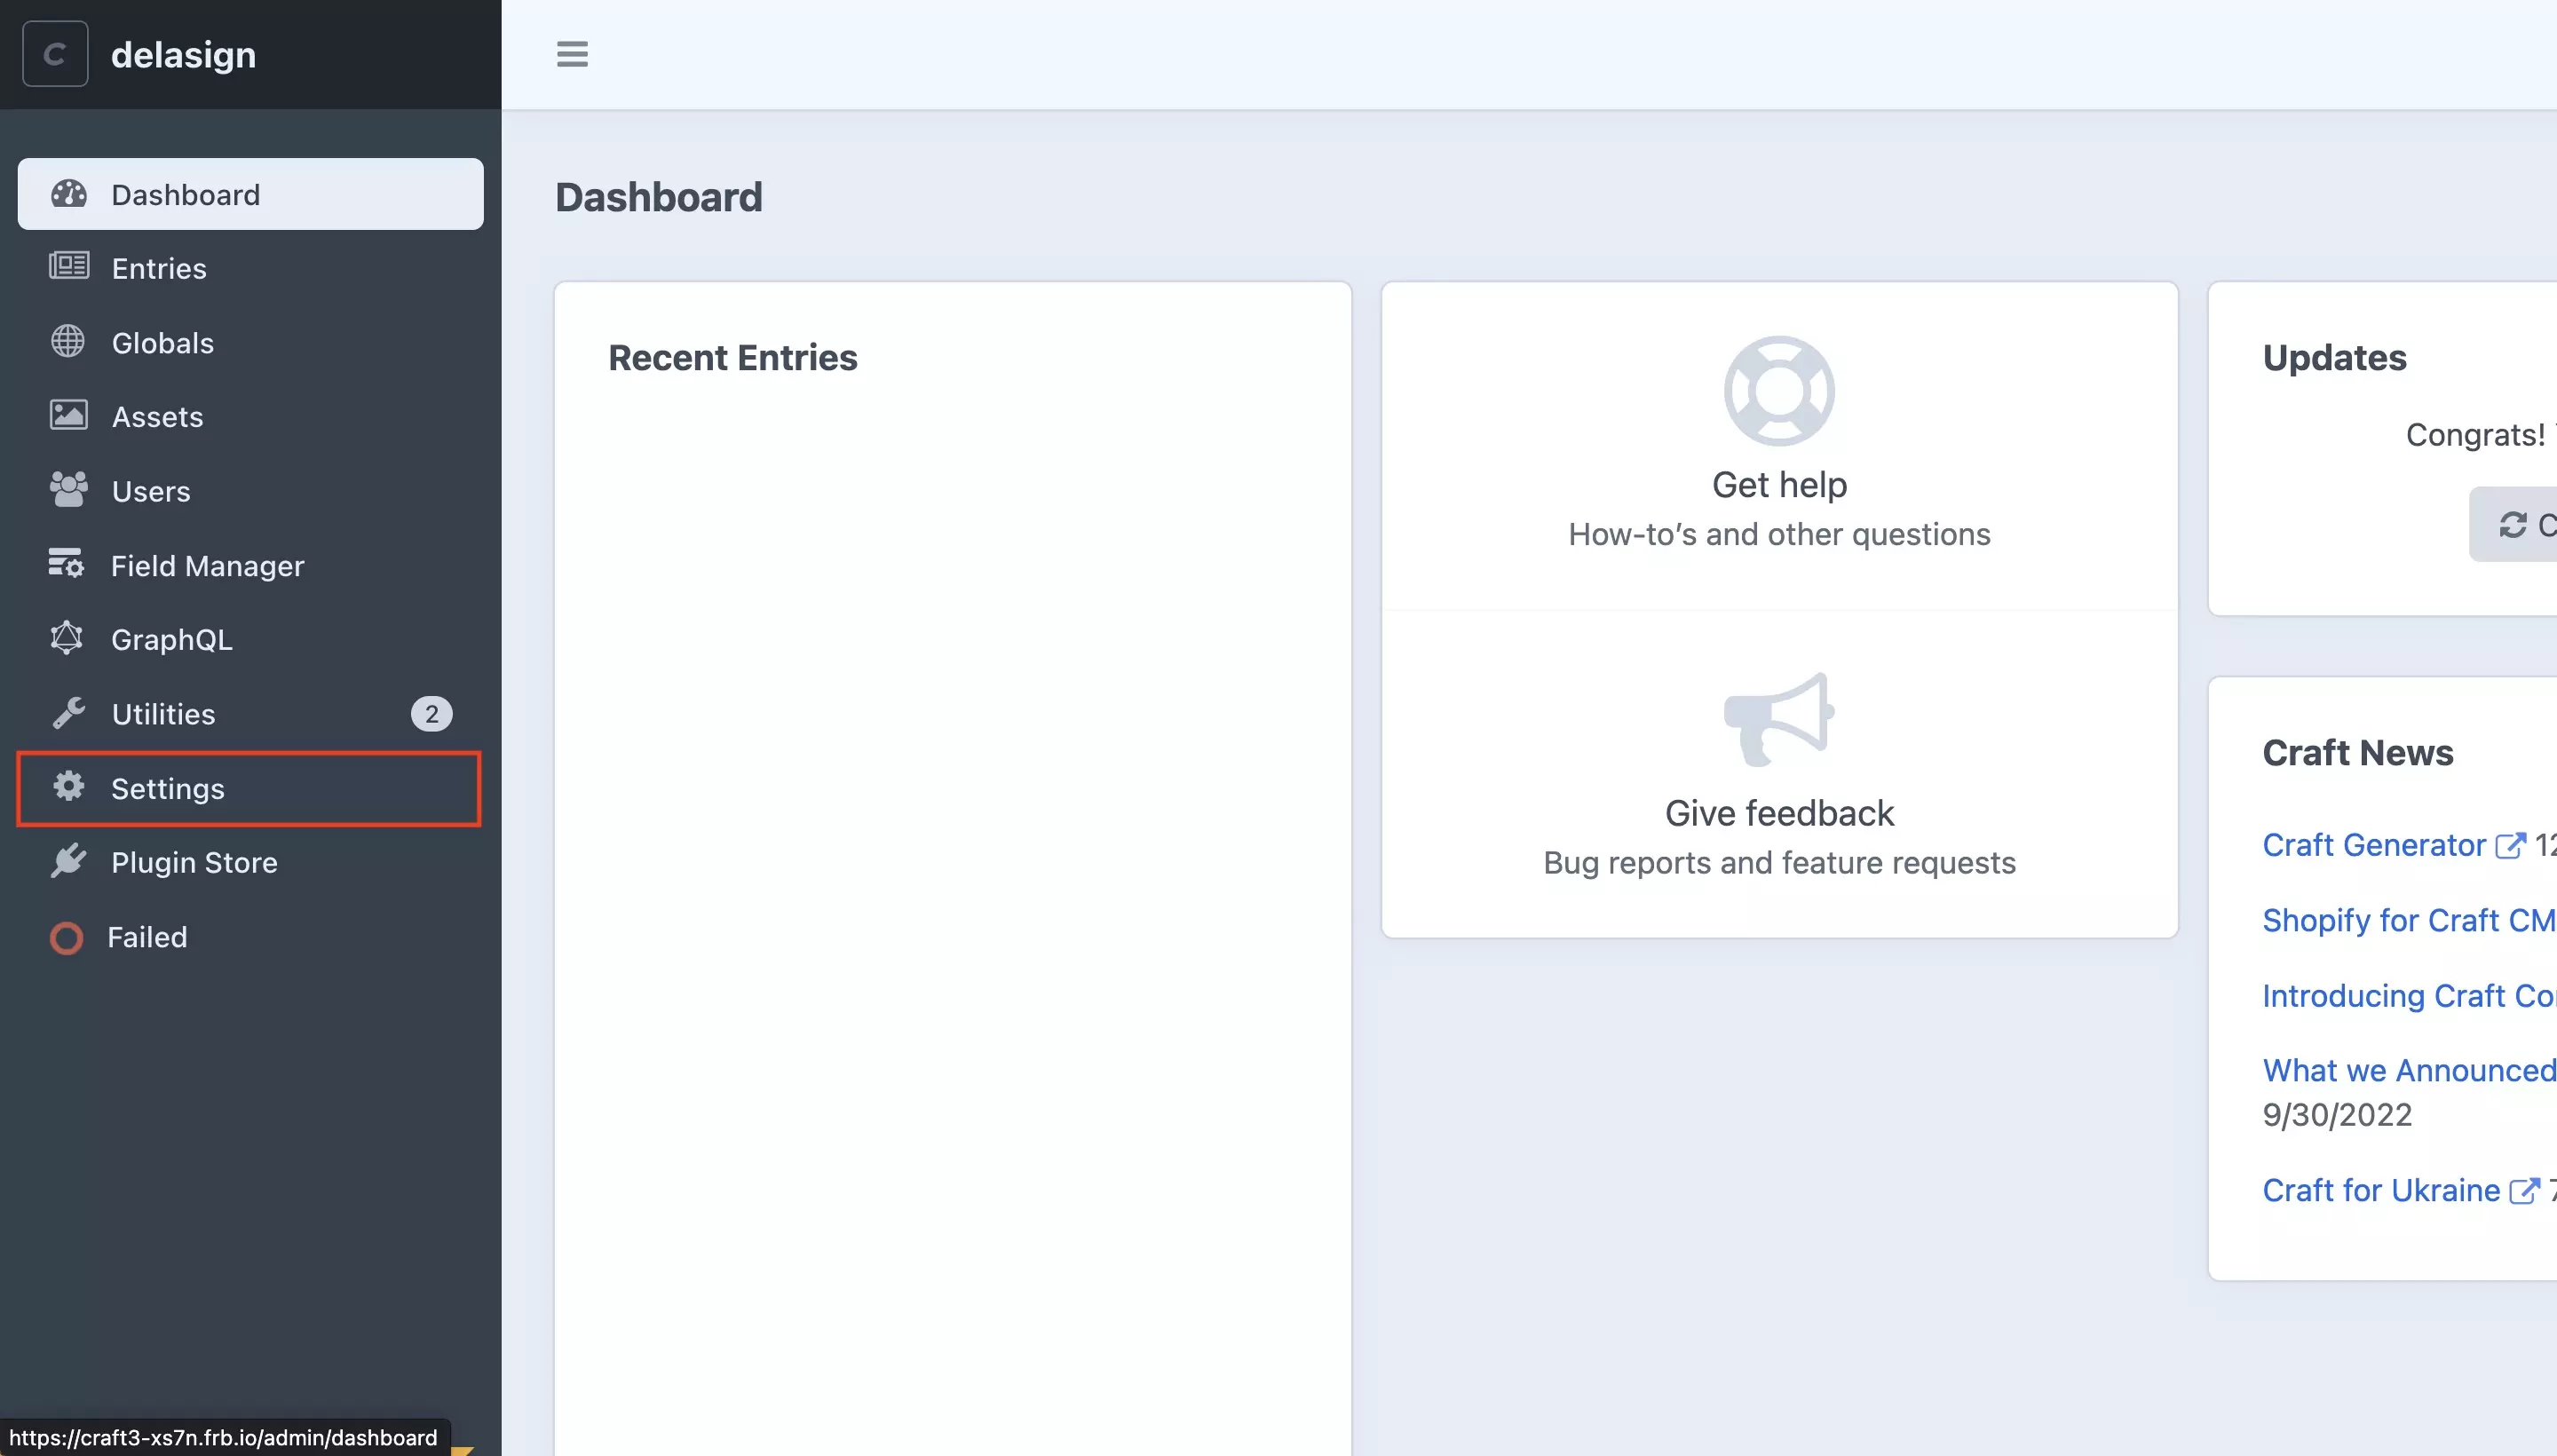
On the left side bar menu, select Settings.
Step Two: Select Sections
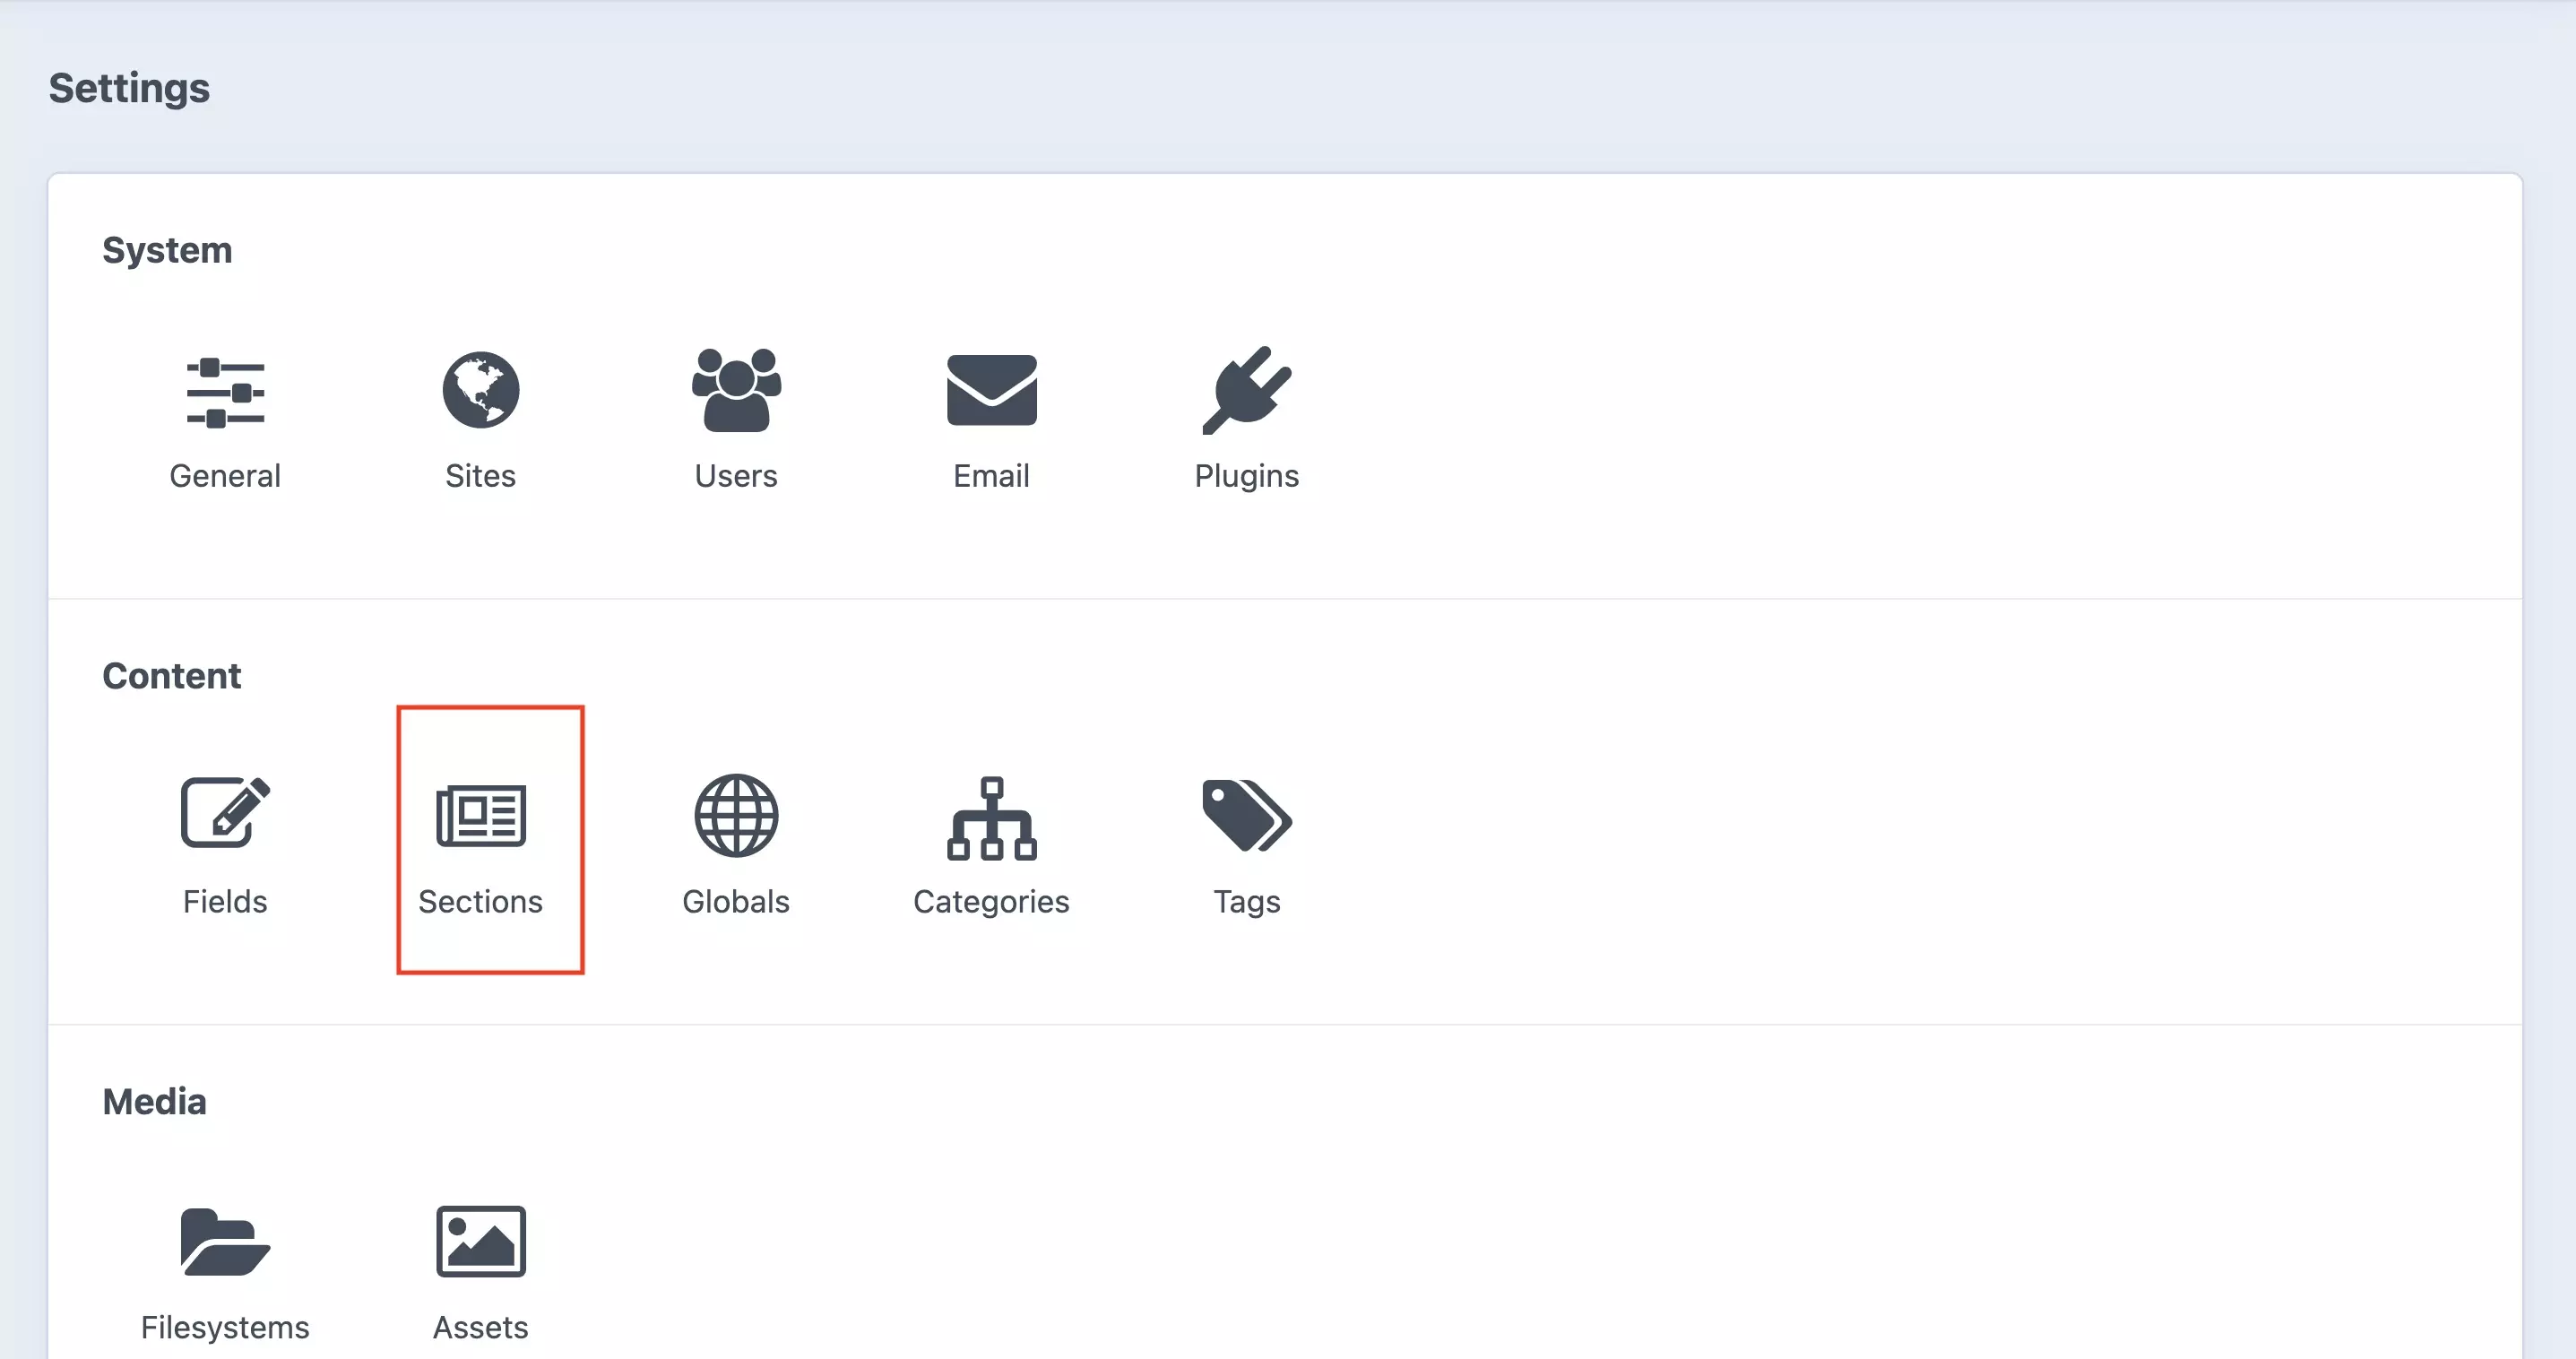
In the Settings screen, select Sections, under Content.
Step Three: Select the section entry
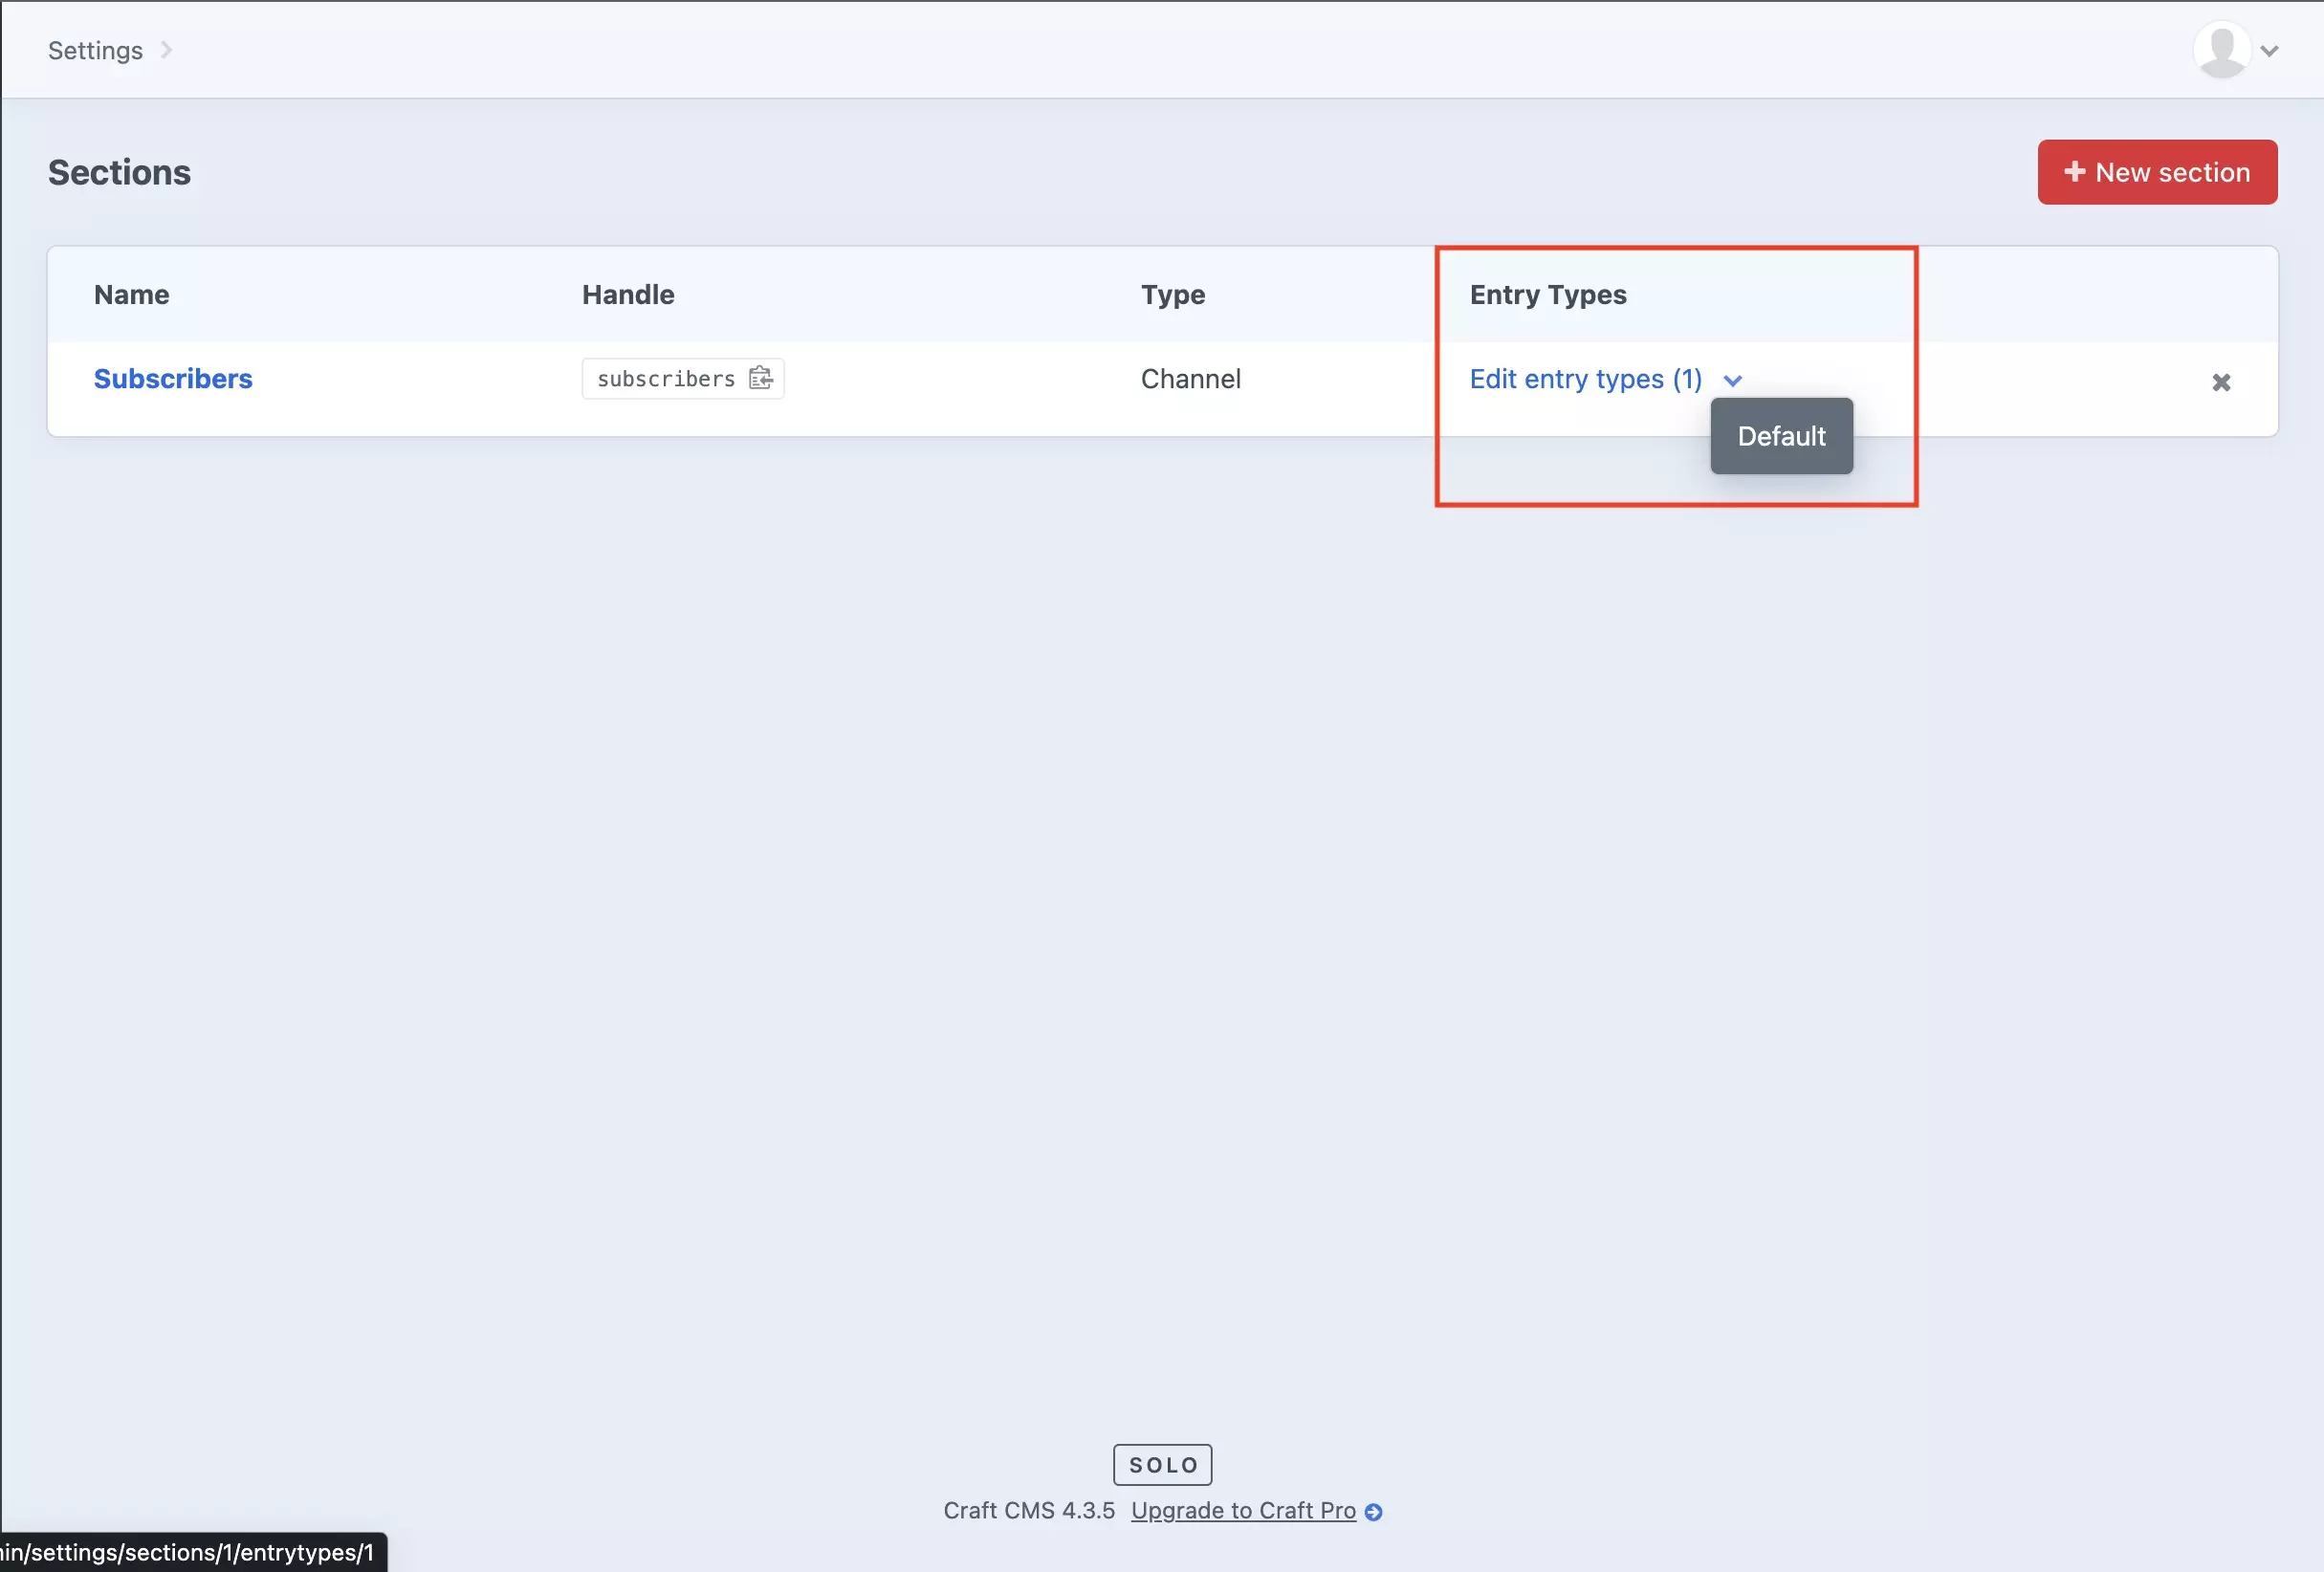
In the Sections screen, find the section that you wish to modify.
Navigate to the Edit entry types (#) v and select the v to open a pop up that allows direct access to modifying the section entry type.
Select the entry type that you wish to add required fields to.
In the case of our tutorial, we are modifying the Default entry type of the Subscribers section. If you are seeking to add required fields to a new entry type, create a new channel or select a channel and create an entry type.
Step Four: Press the gear
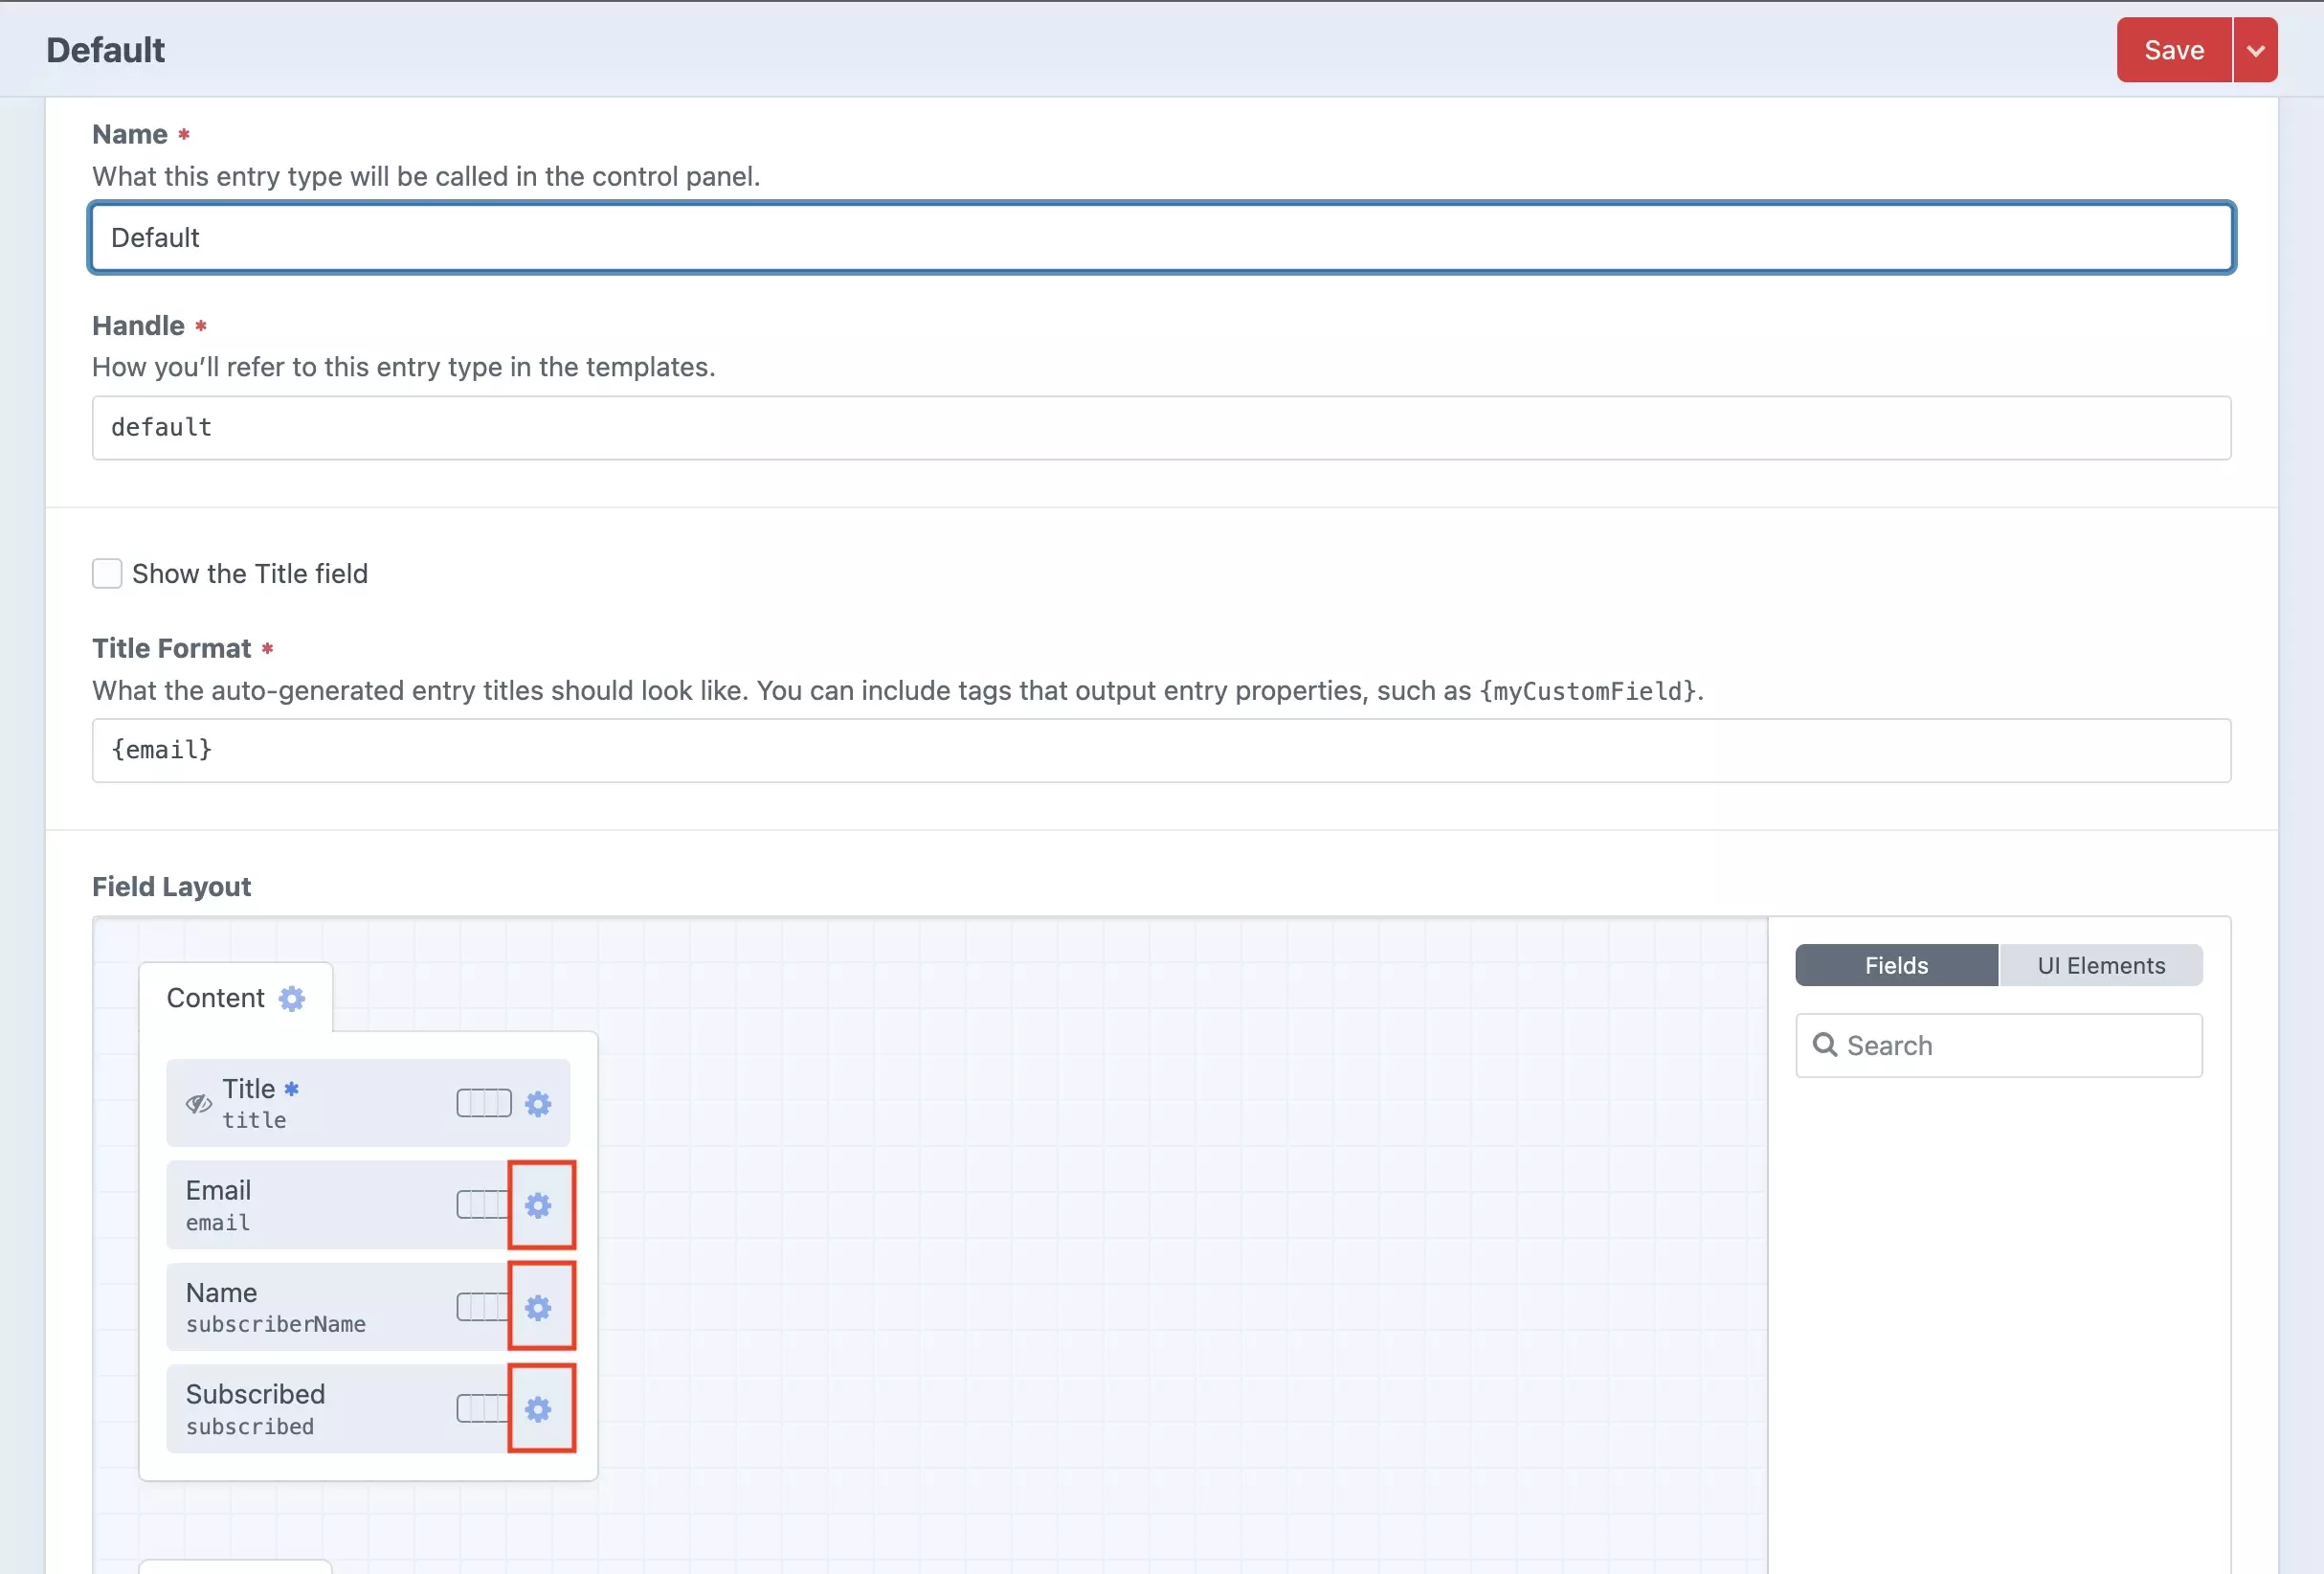
Press the gear icon next to the field that you wish to make a required field. This will prompt a modal to appear on screen.
Step Five: Flip Required Lightswitch
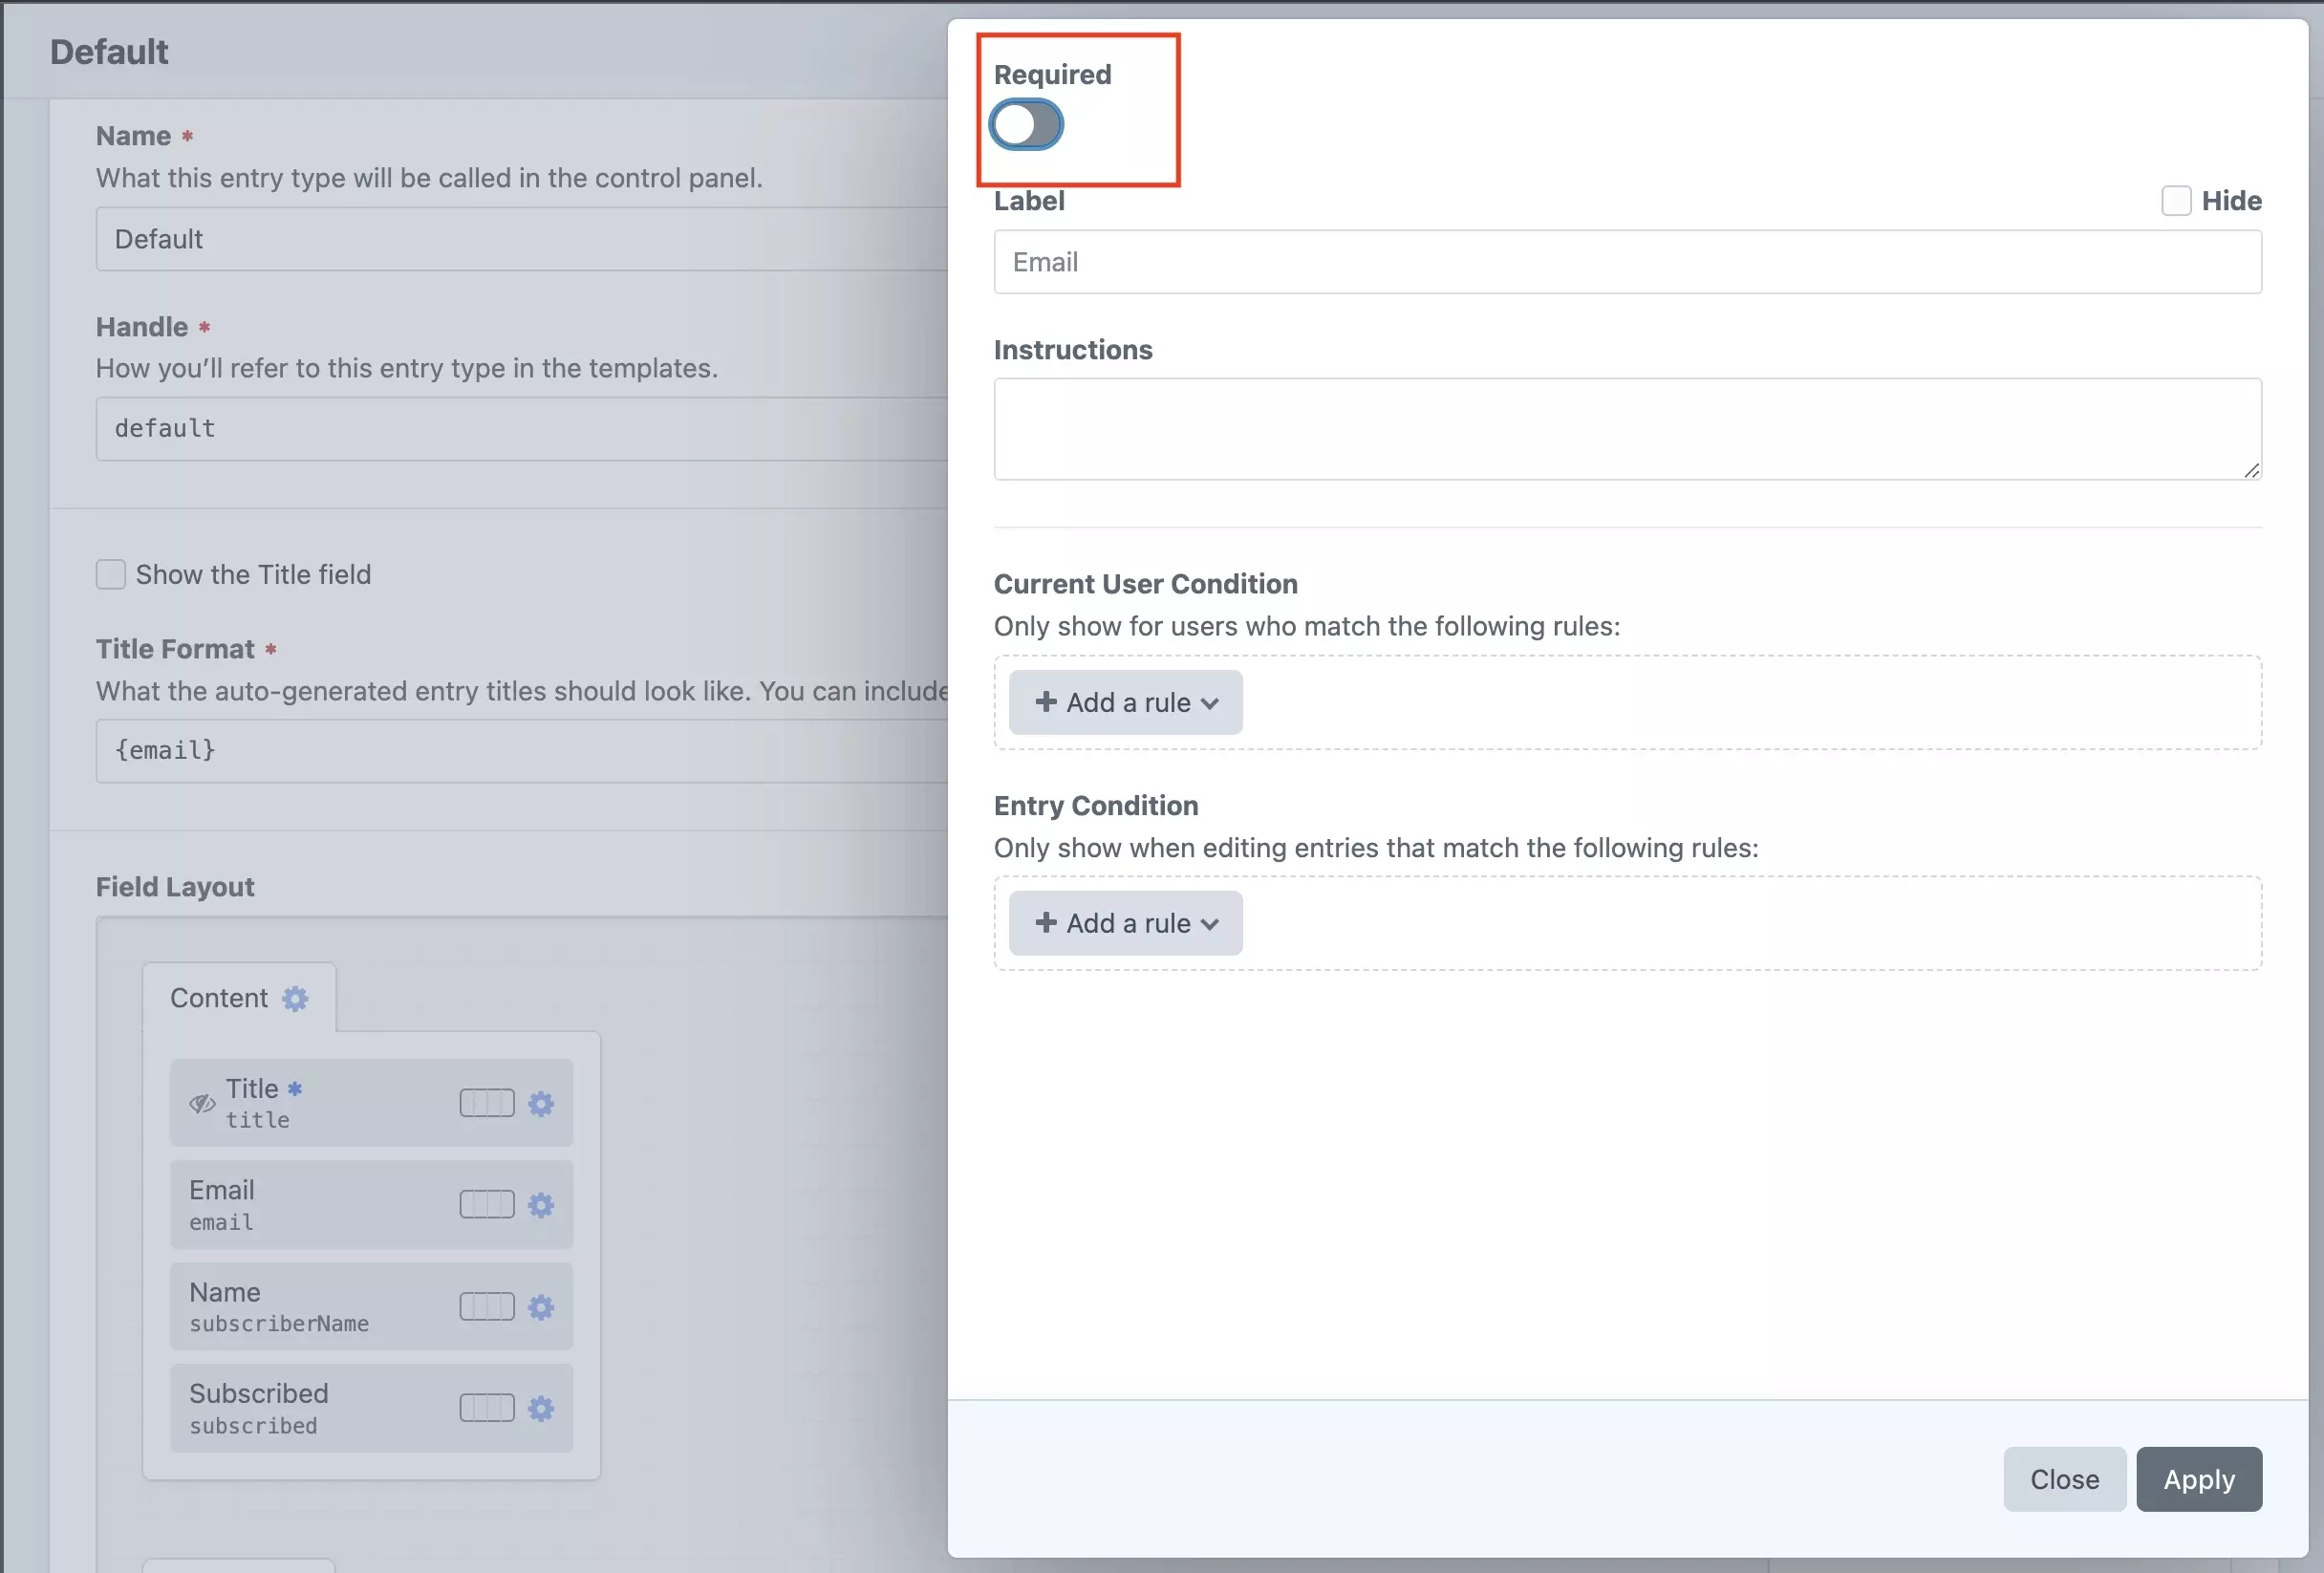
Turn on the Required lightswitch that appears in the modal window to make the field required.
Step Six: Apply changes
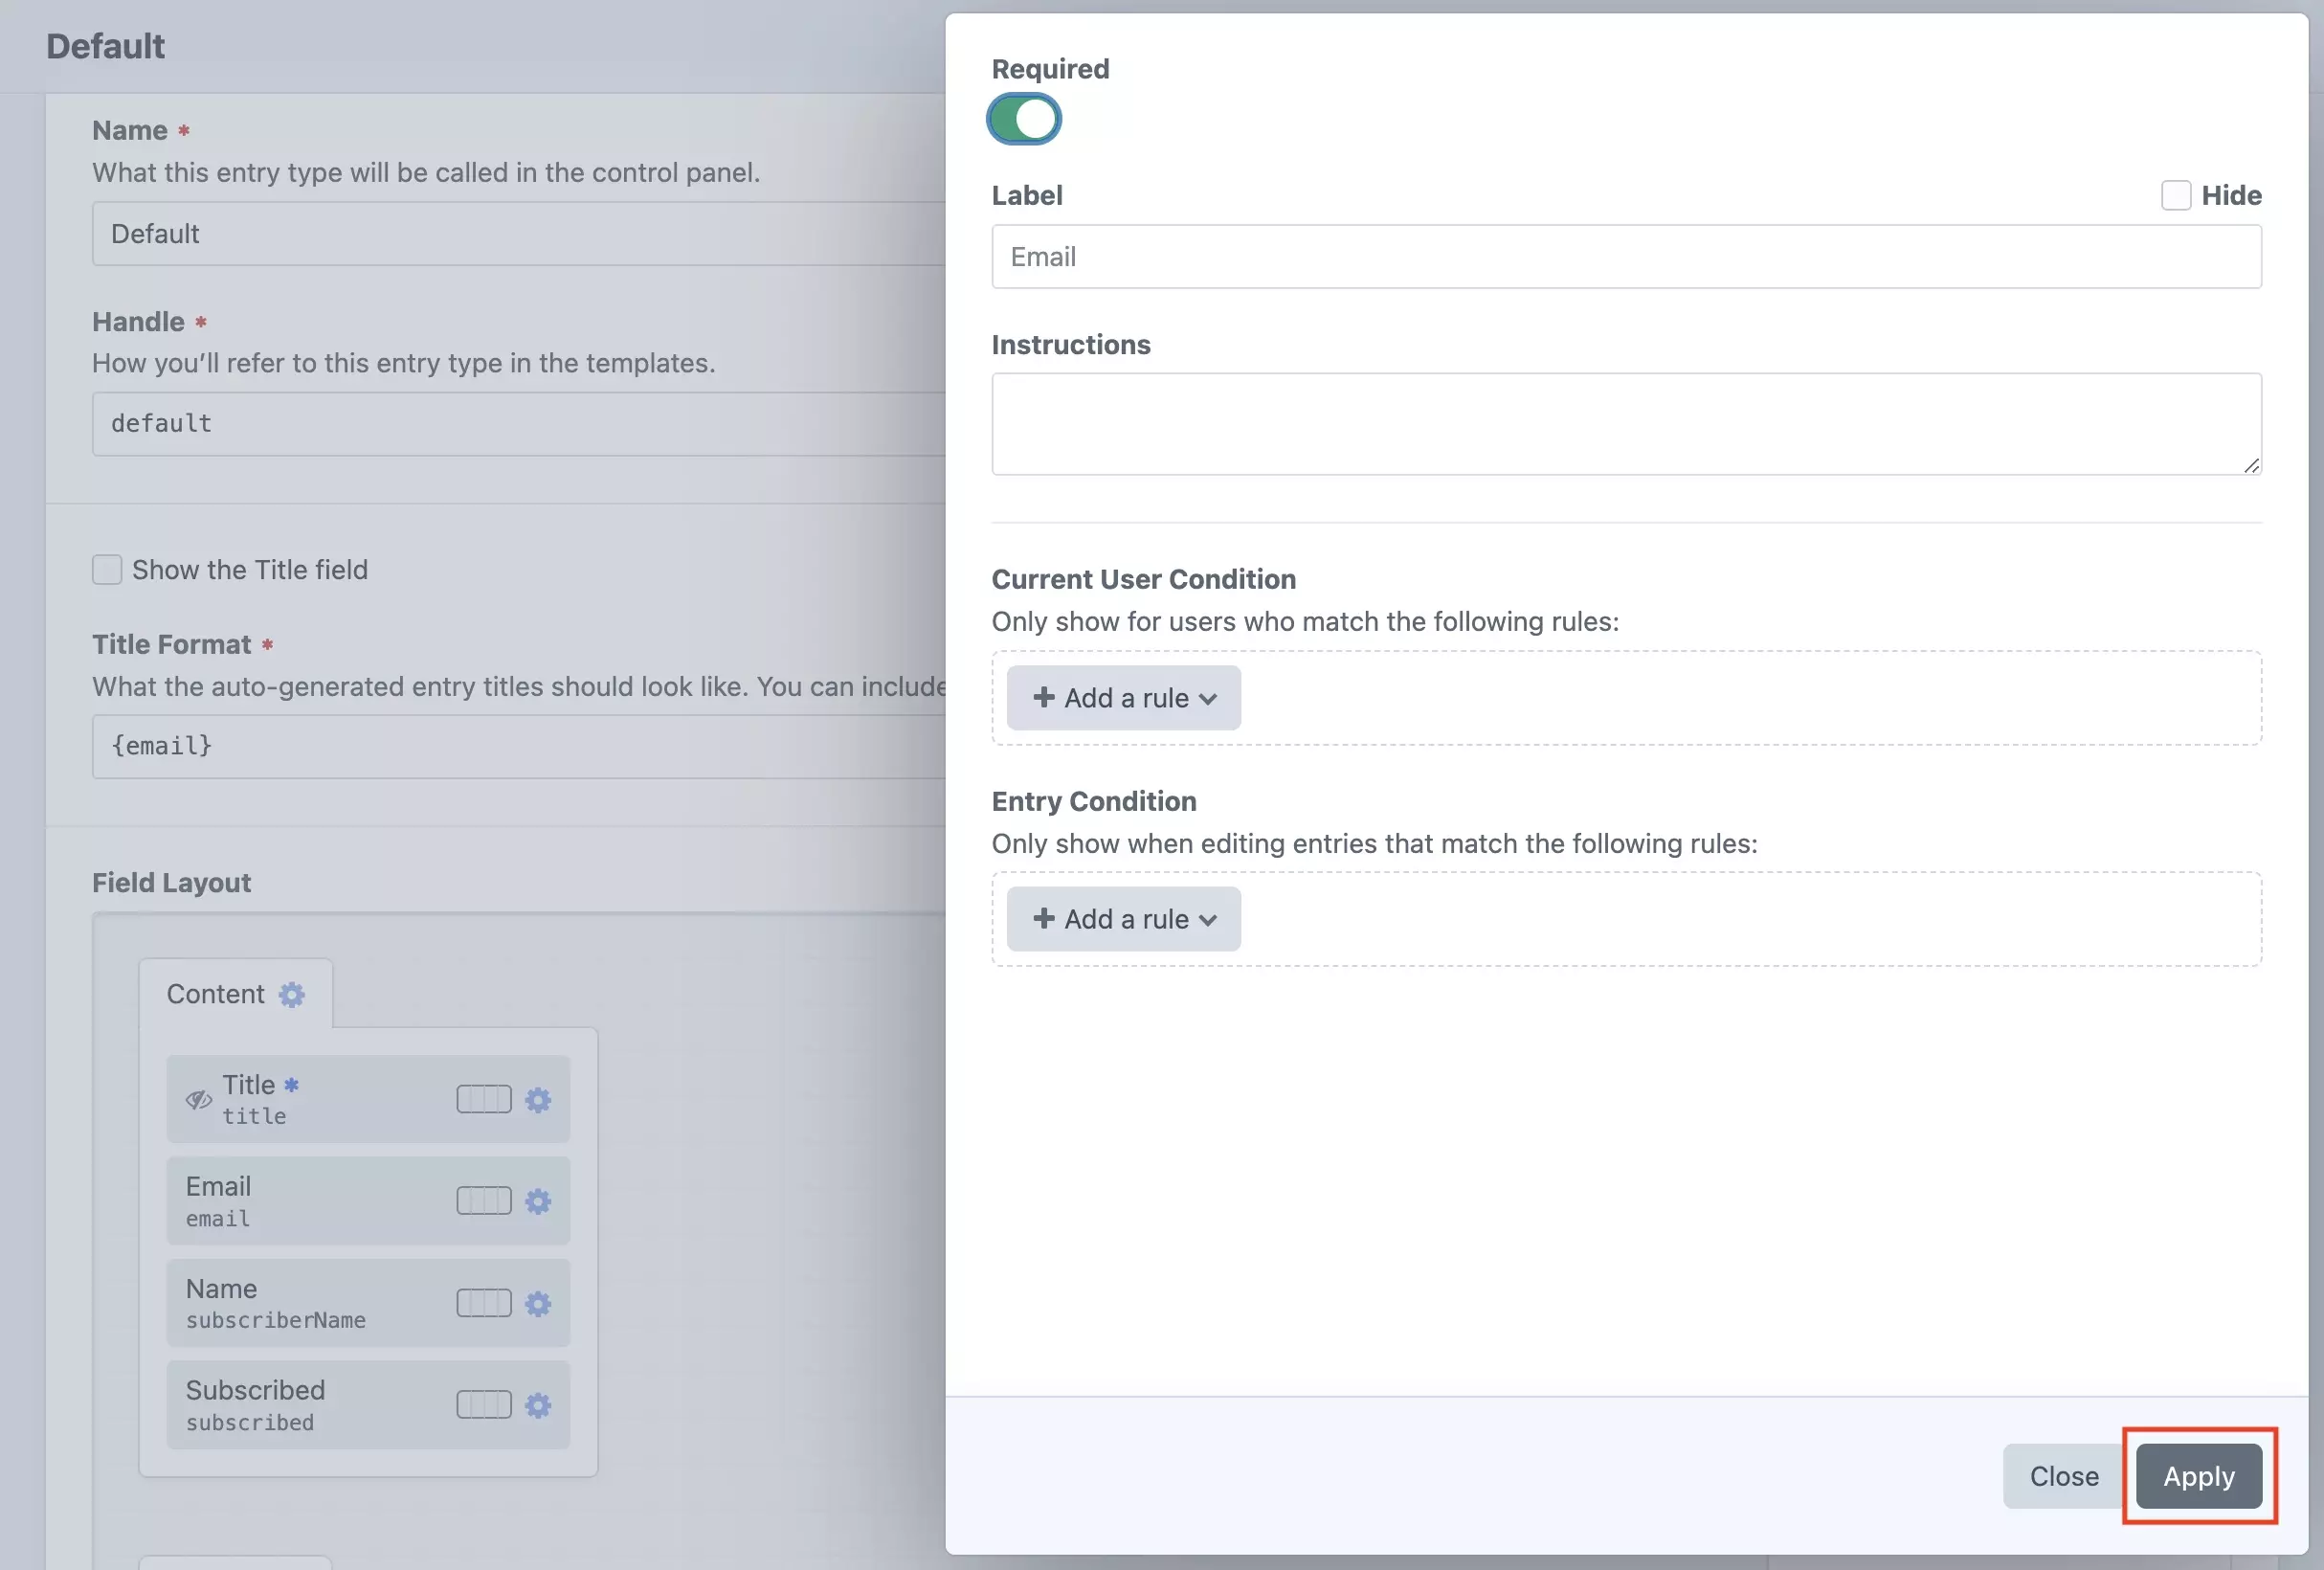
Press the Apply button to save the changes.
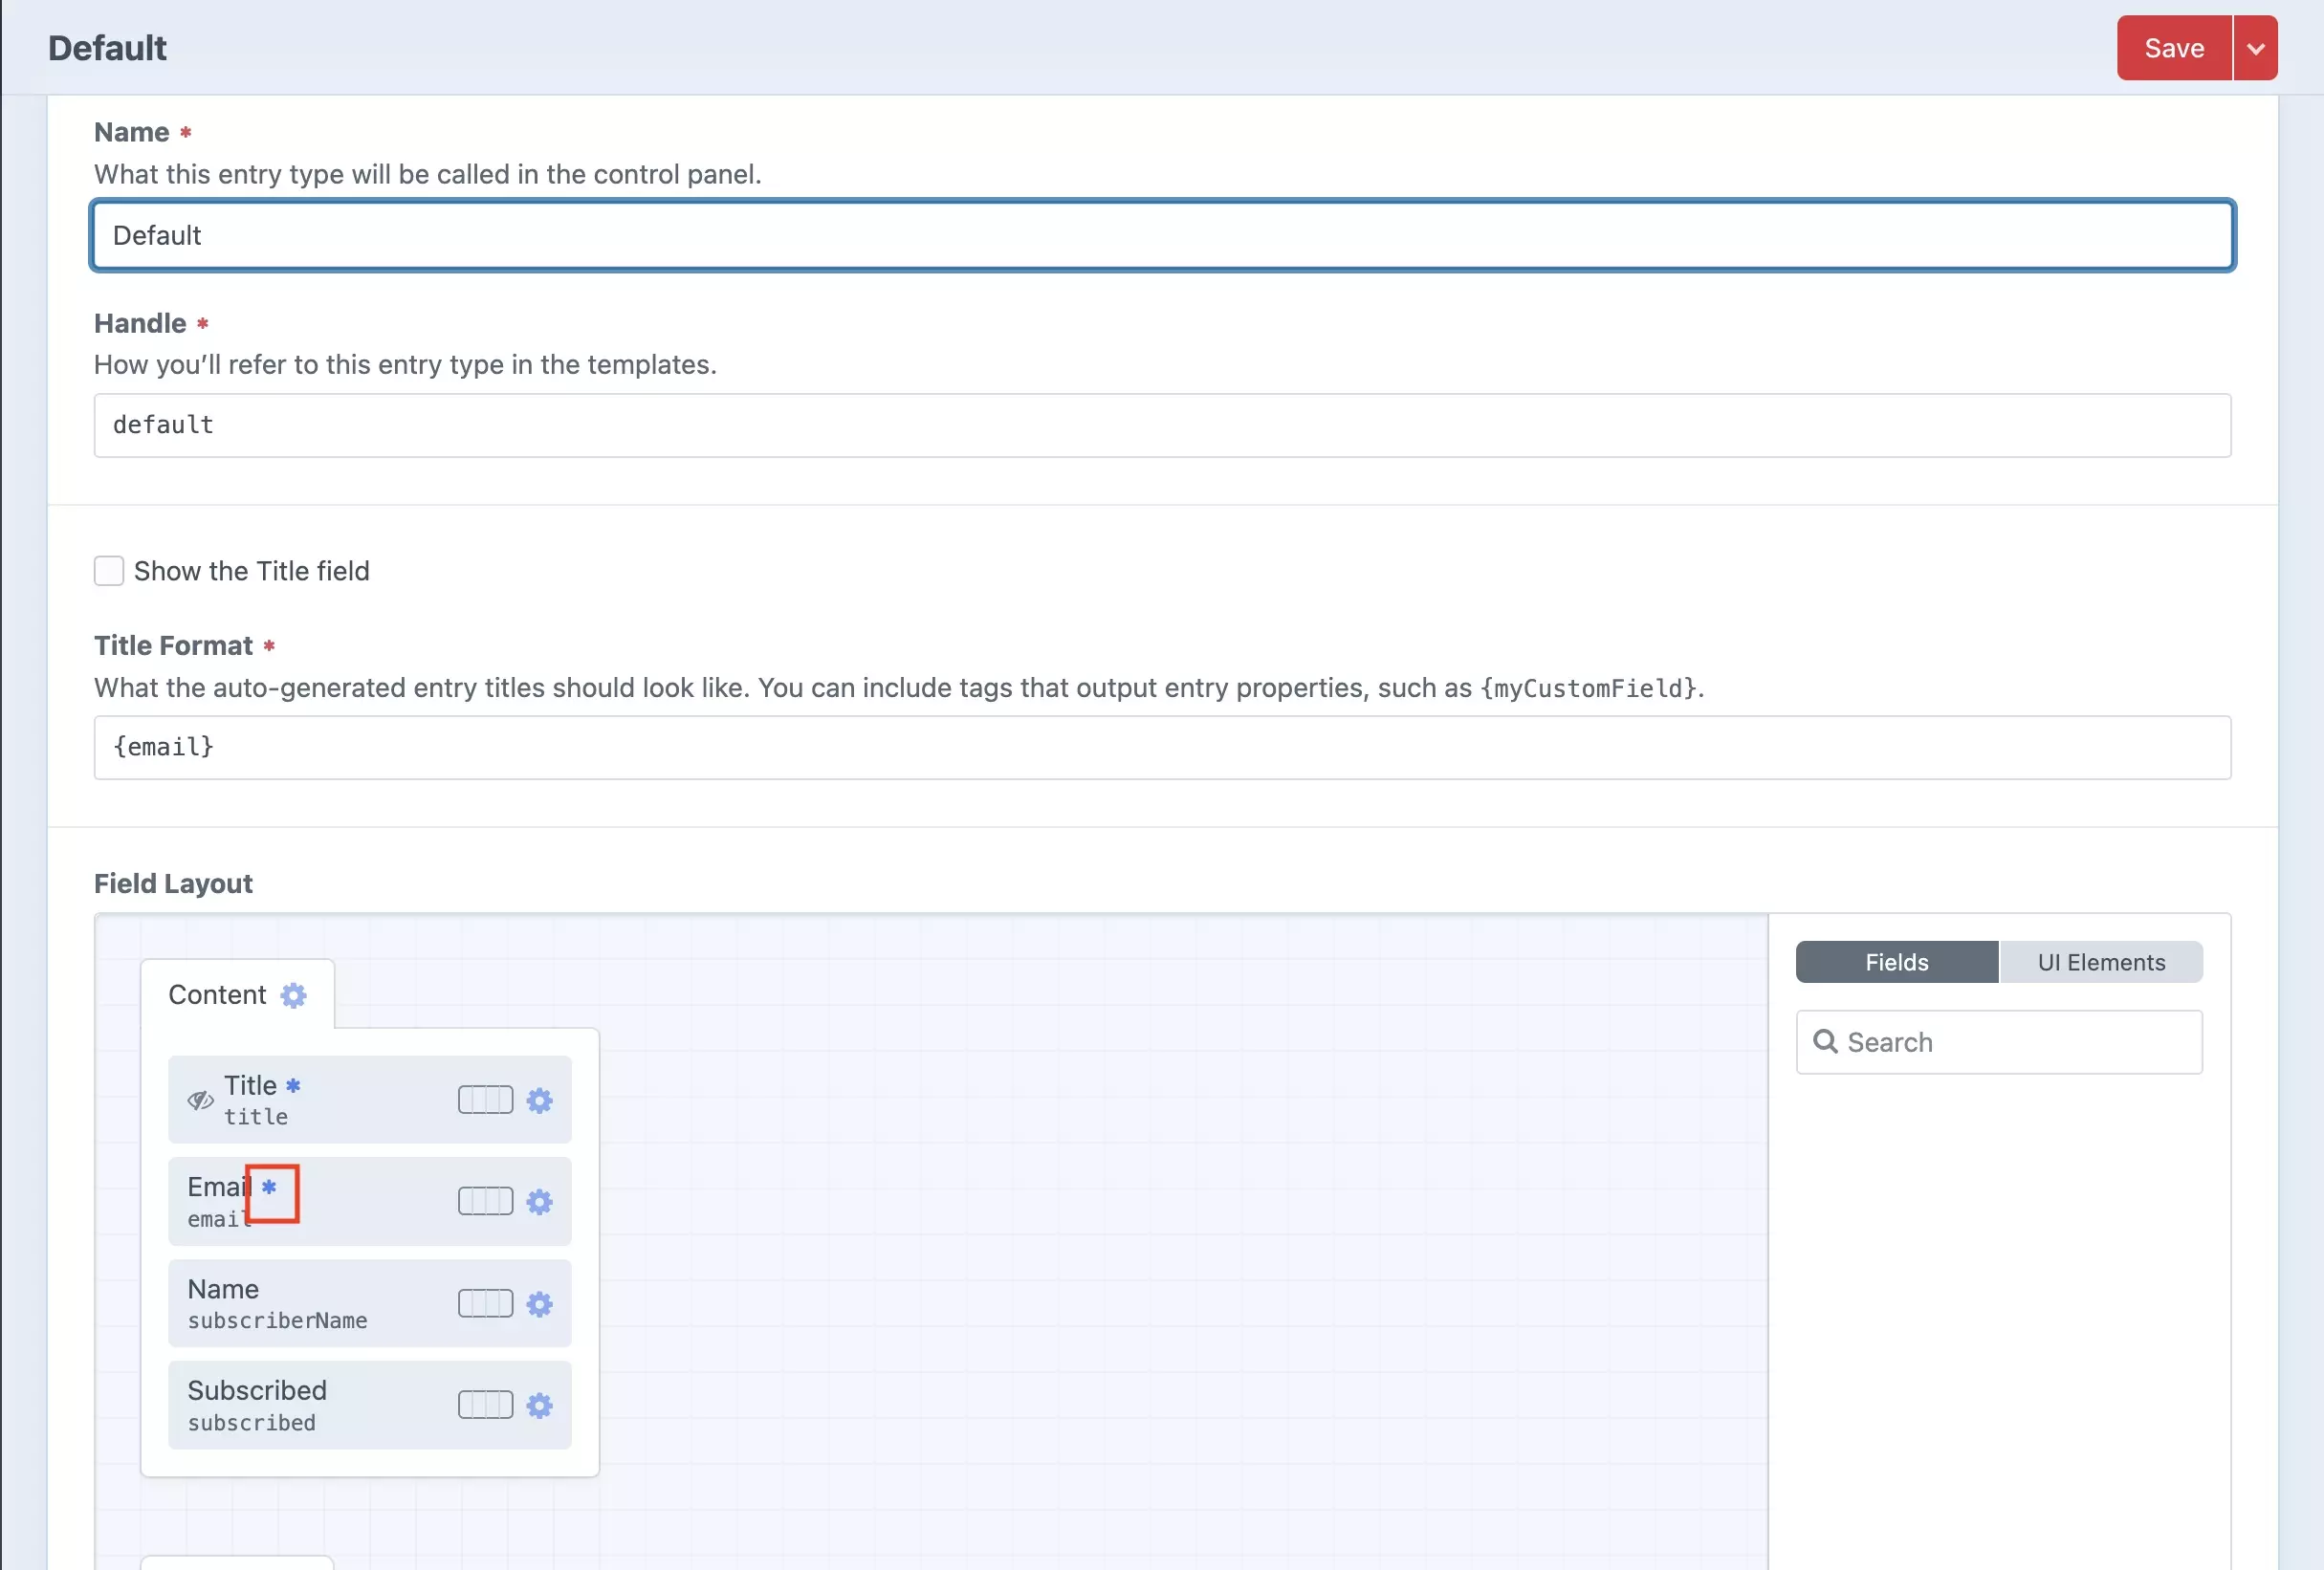
The field which you set to required will now show a * as demonstrated in the image below.
Any Questions?
We are actively looking for feedback on how to improve this resource. Please send us a note to inquiries@delasign.com with any thoughts or feedback you may have.