How to create a channel in Craft CMS
A step by step walkthrough in creating a channel for Subscribers in Craft CMS.

A step by step walkthrough in creating a channel for Subscribers in Craft CMS.
The following tutorial walks you through how to create a channel that holds subscribers in Craft CMS. The tutorial forms part of our Open Source series of creating a series of API endpoint that manage the subscribers to the delasign website.
This tutorial assumes that you have created text fields for the email and name of the subscriber, as well as a lightswitch (flip switch) field to determine whether the user is subscribed or not. If you are not familiar with how you can create lightswitch or plain text fields or how we recommend that you group them, please consult the tutorials listed below.
We recommend downloading and setting up out Open Source Craft CMS starter project and carrying out the steps below.
Step One: Select Settings
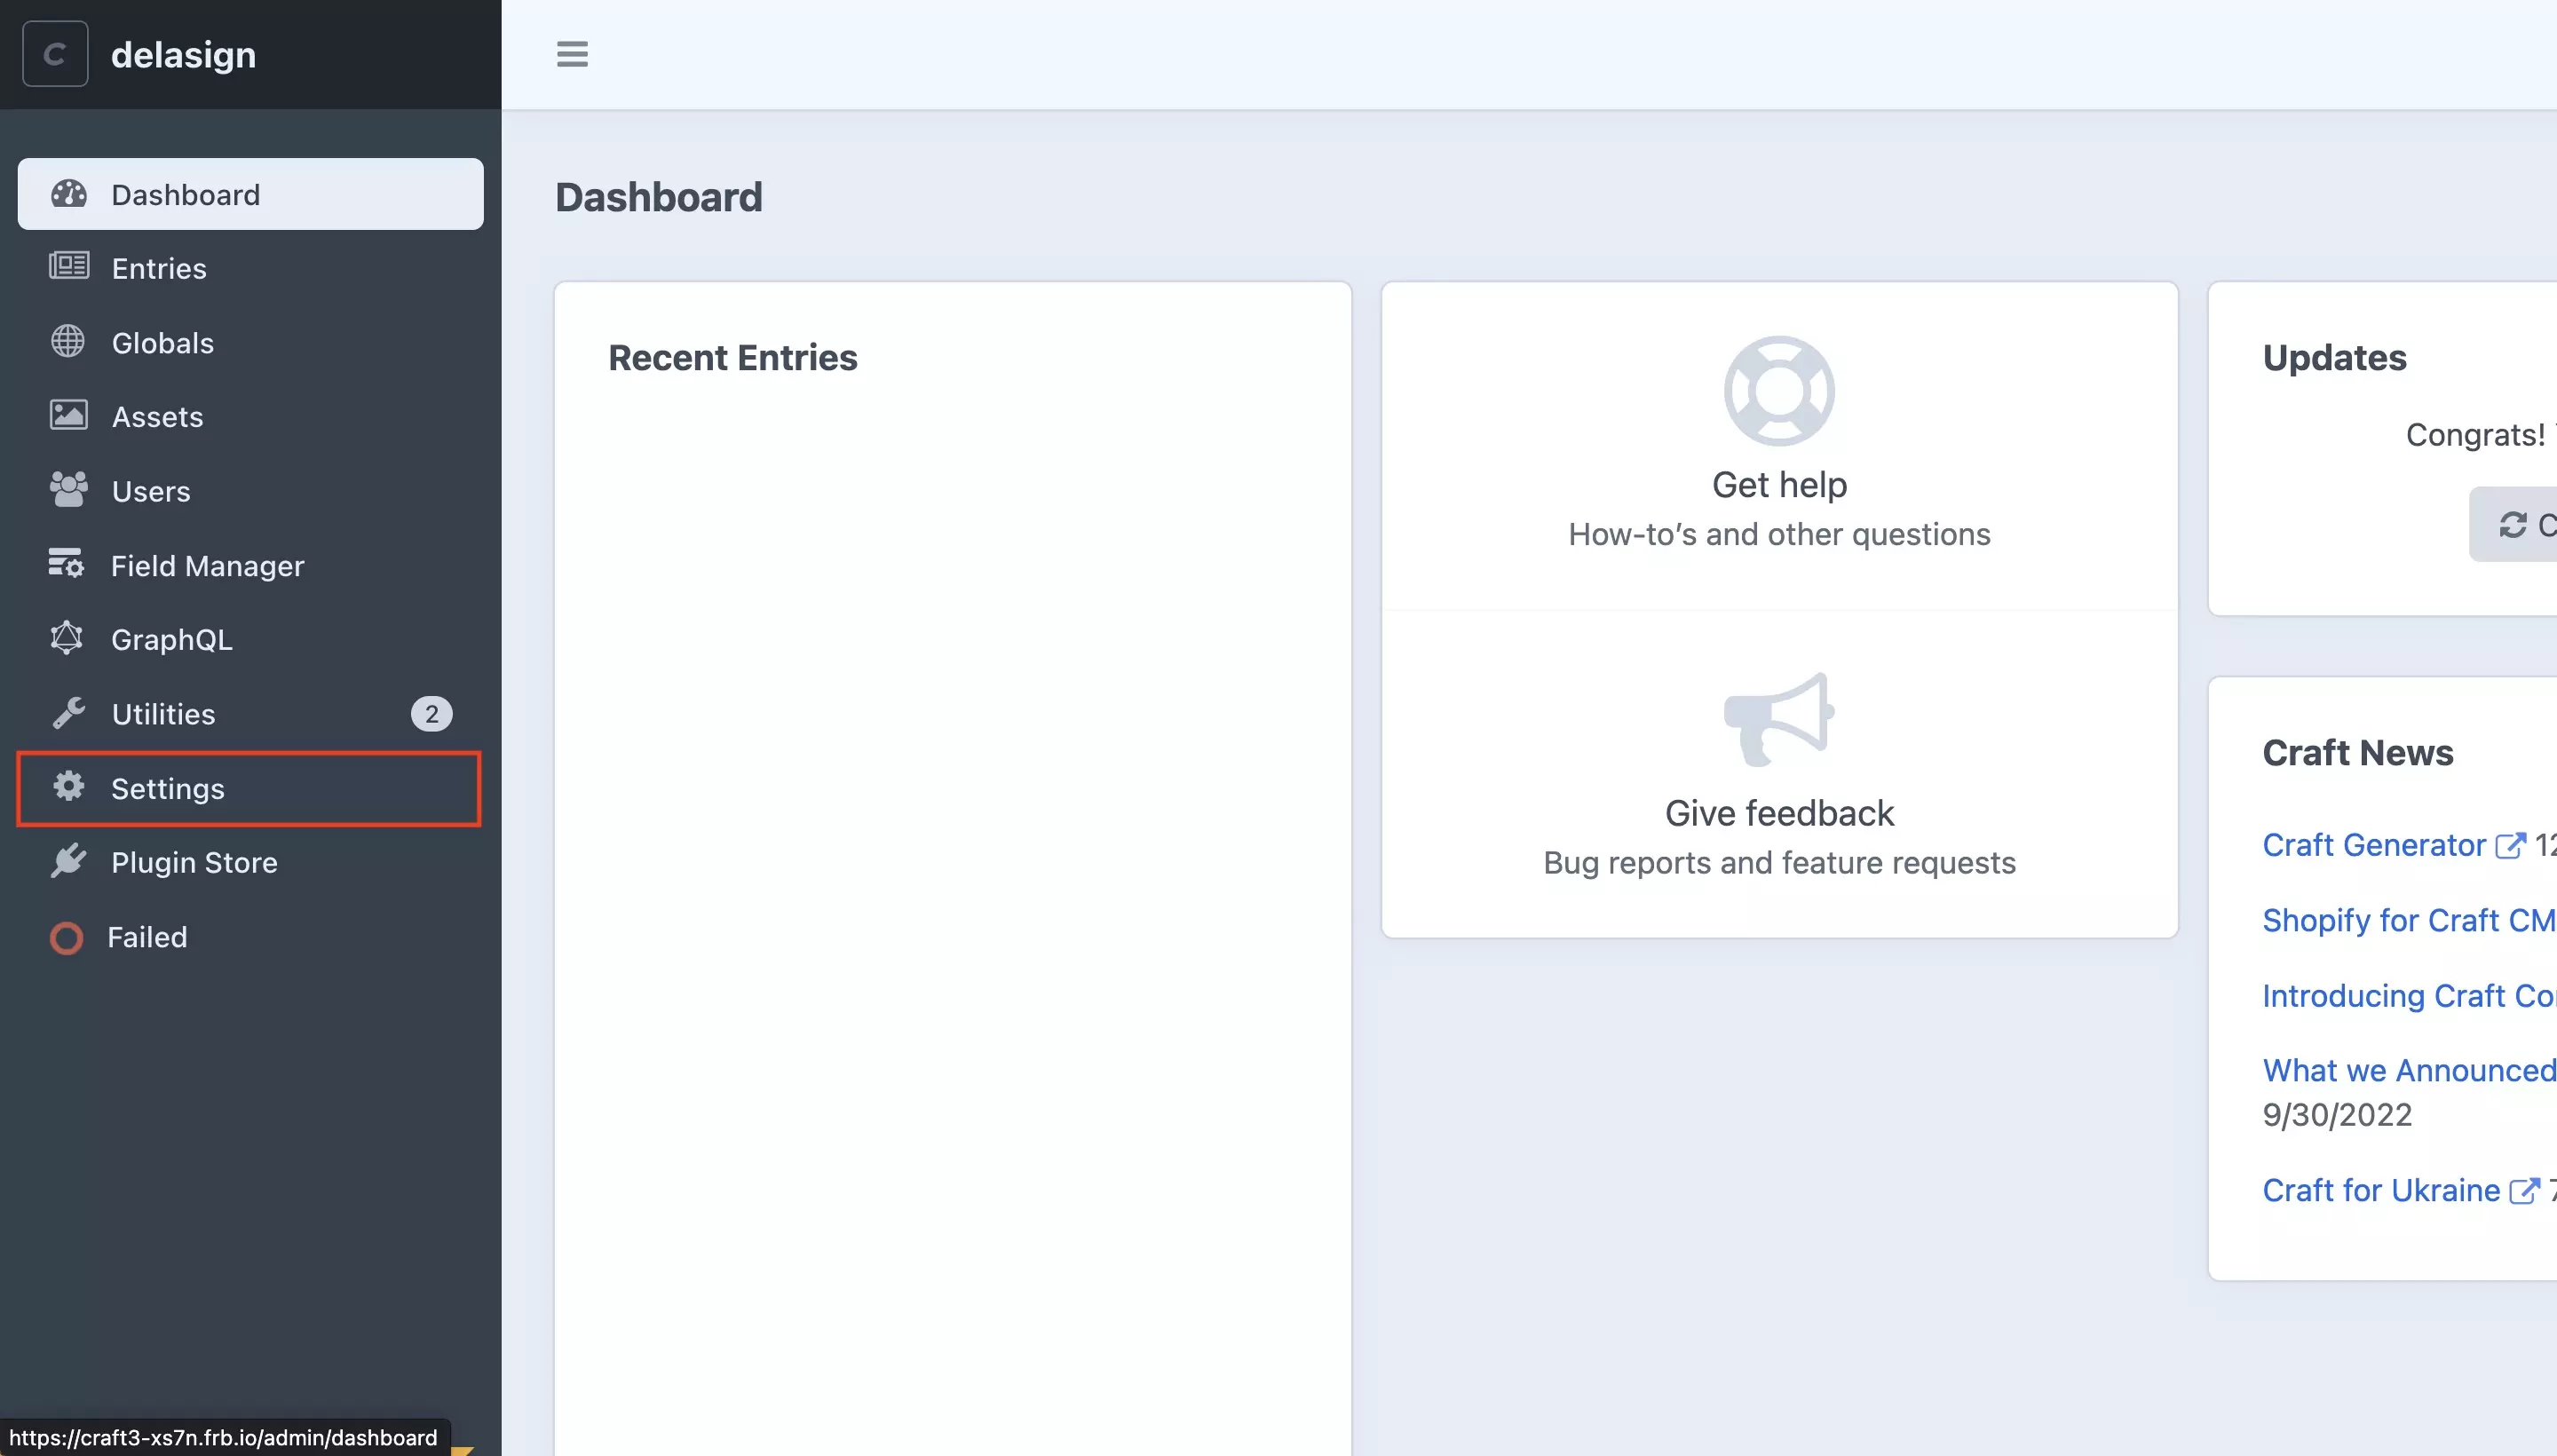
In the side bar on the left side of the screen, select Settings.
Step Two: Select Sections
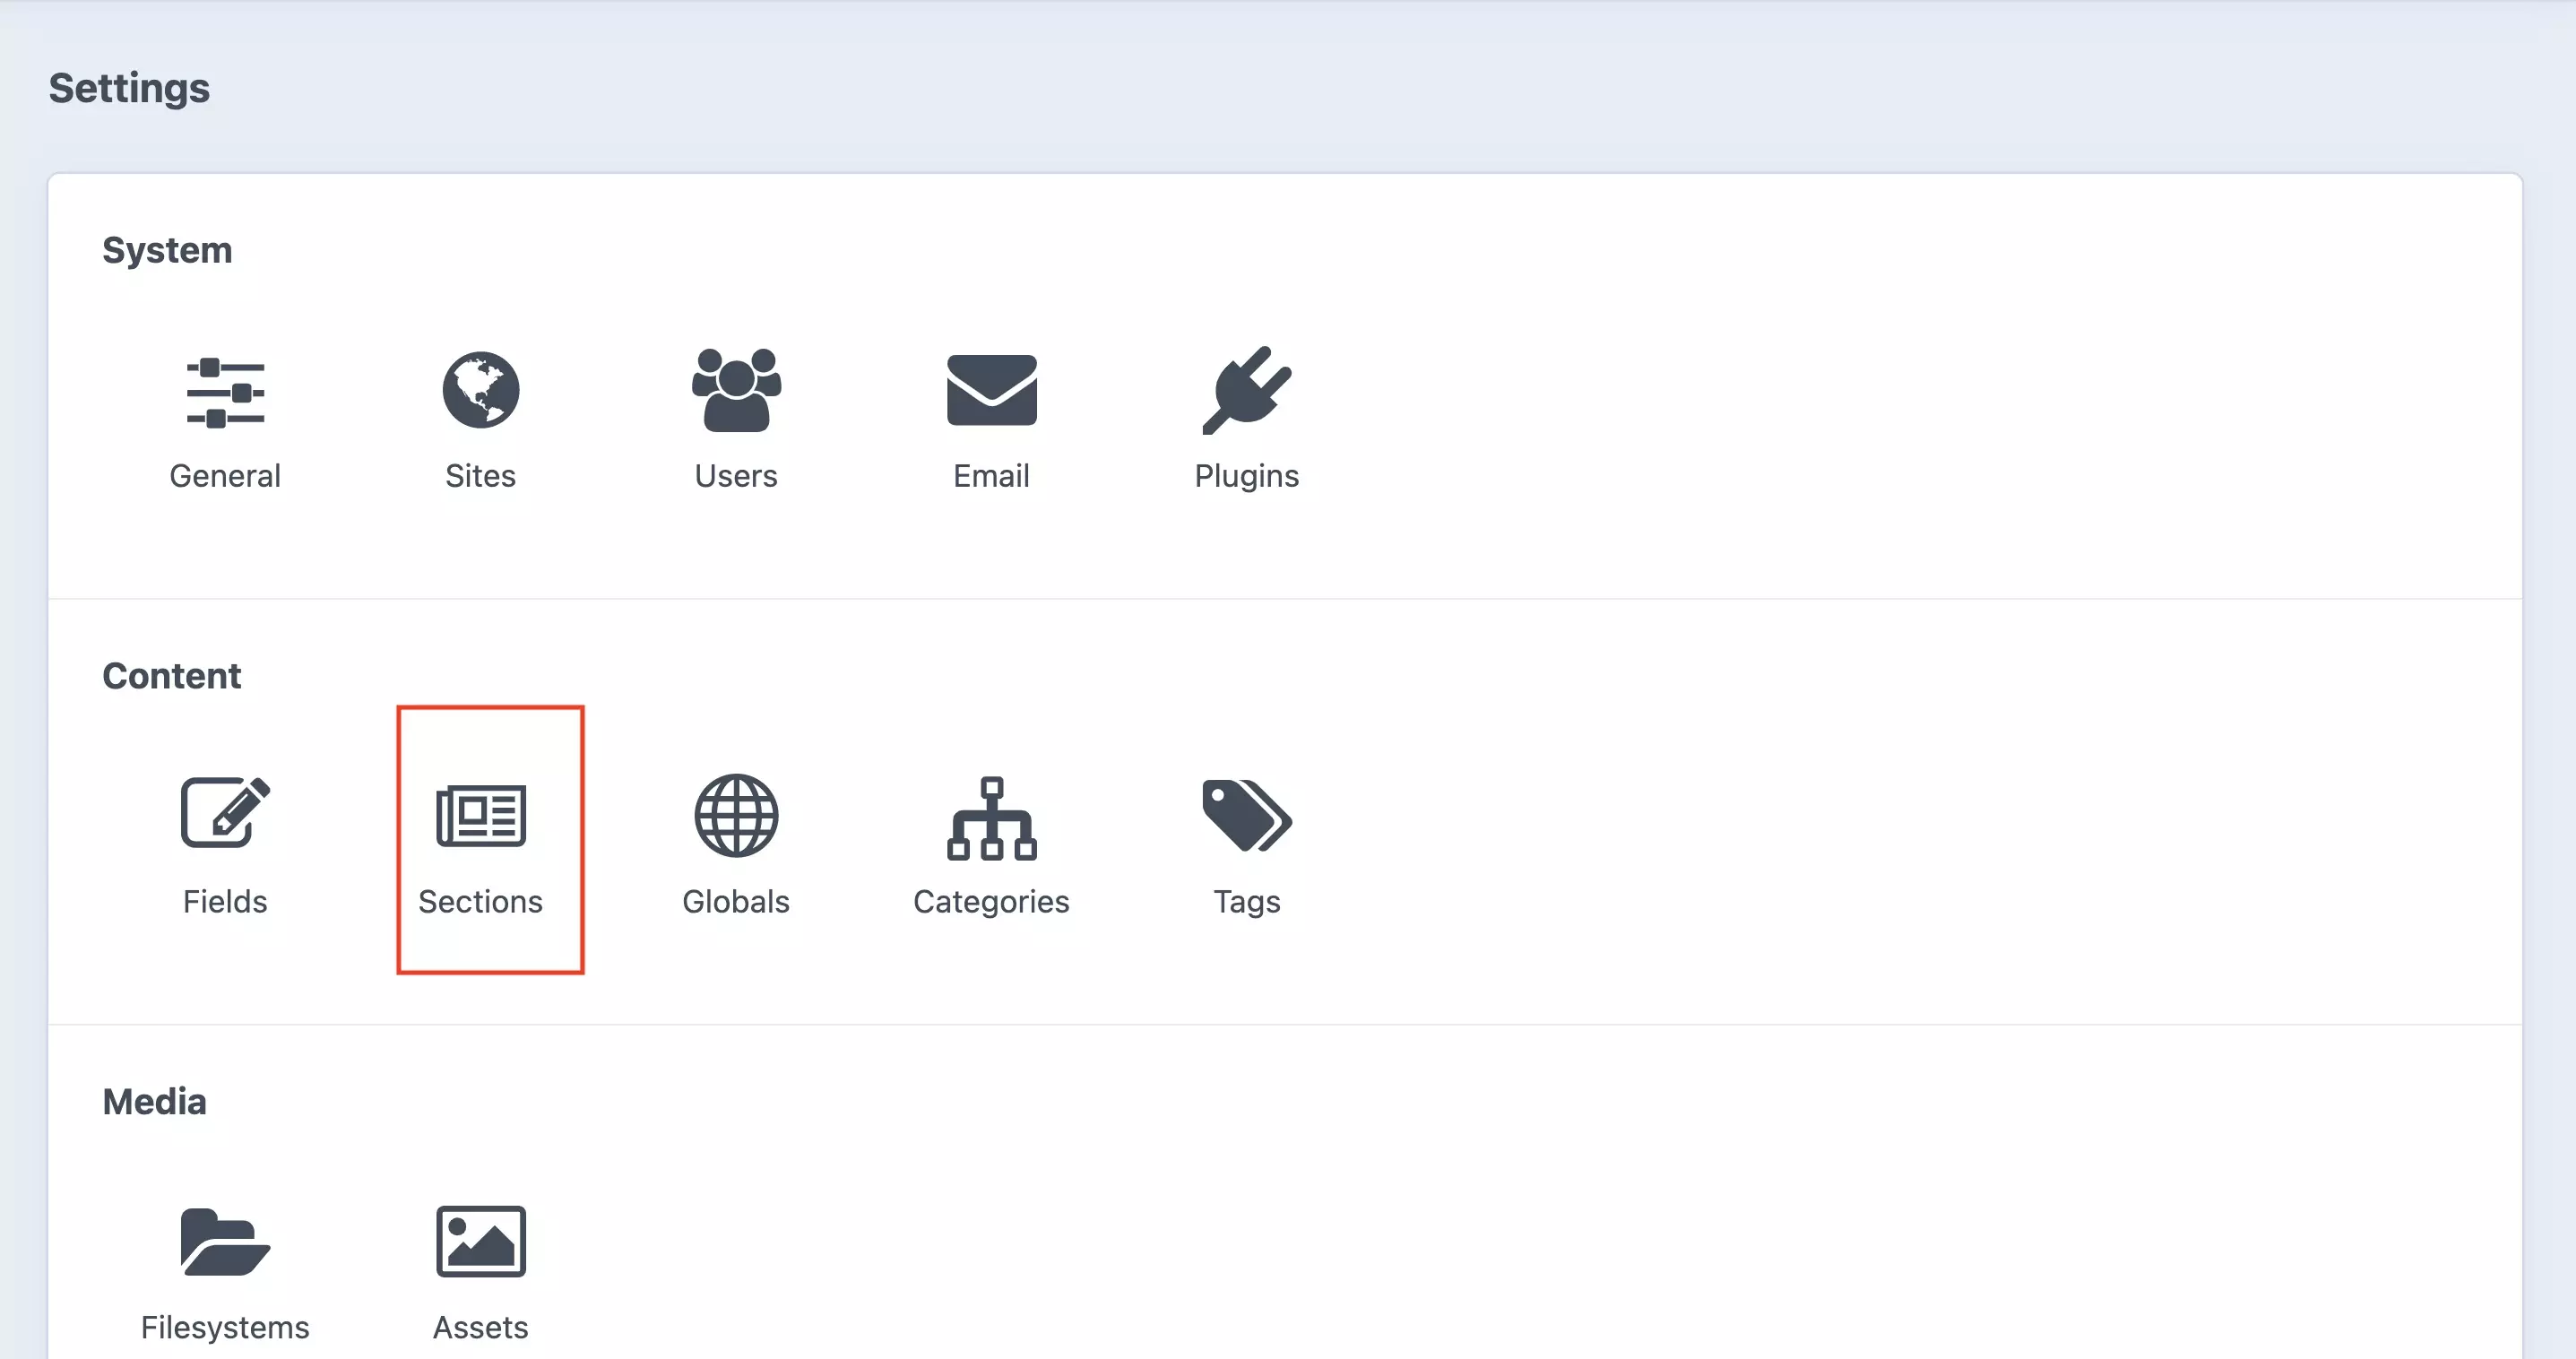
In the Craft CMS Settings screen, select Sections under Content.
Step Three: Select + New Section
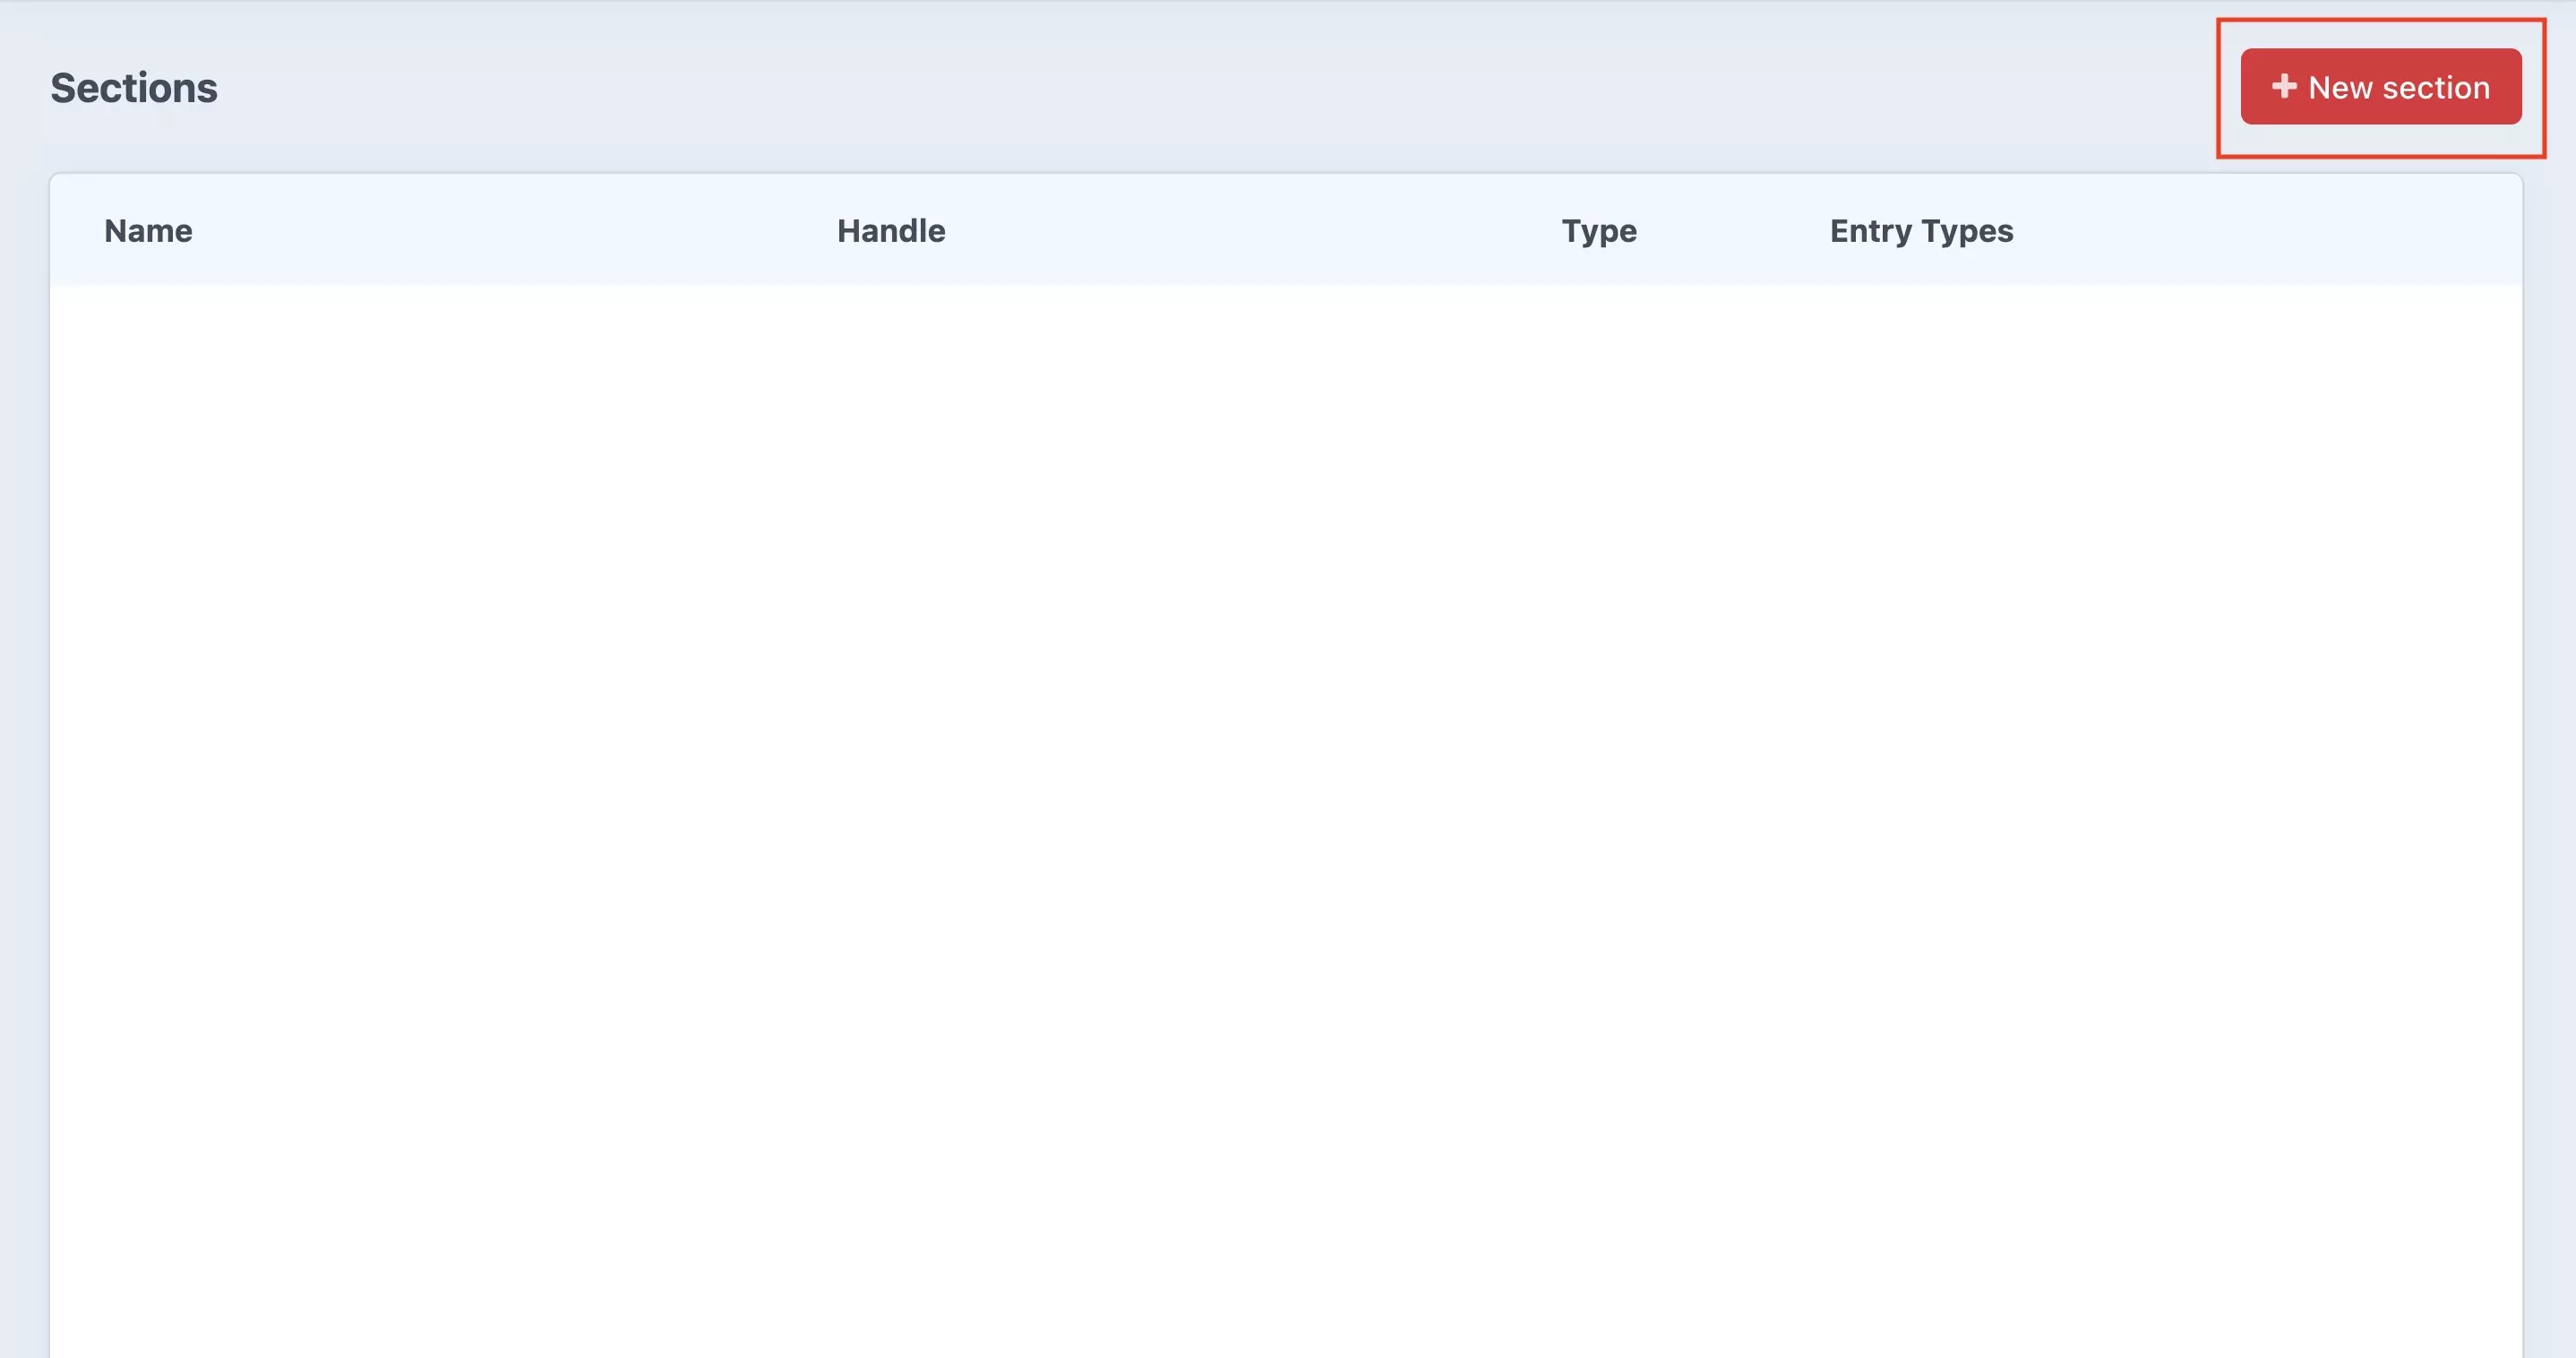
In the Craft CMS Sections screen, select the +New section button on the top right of the screen.
Step Four: Create Channel
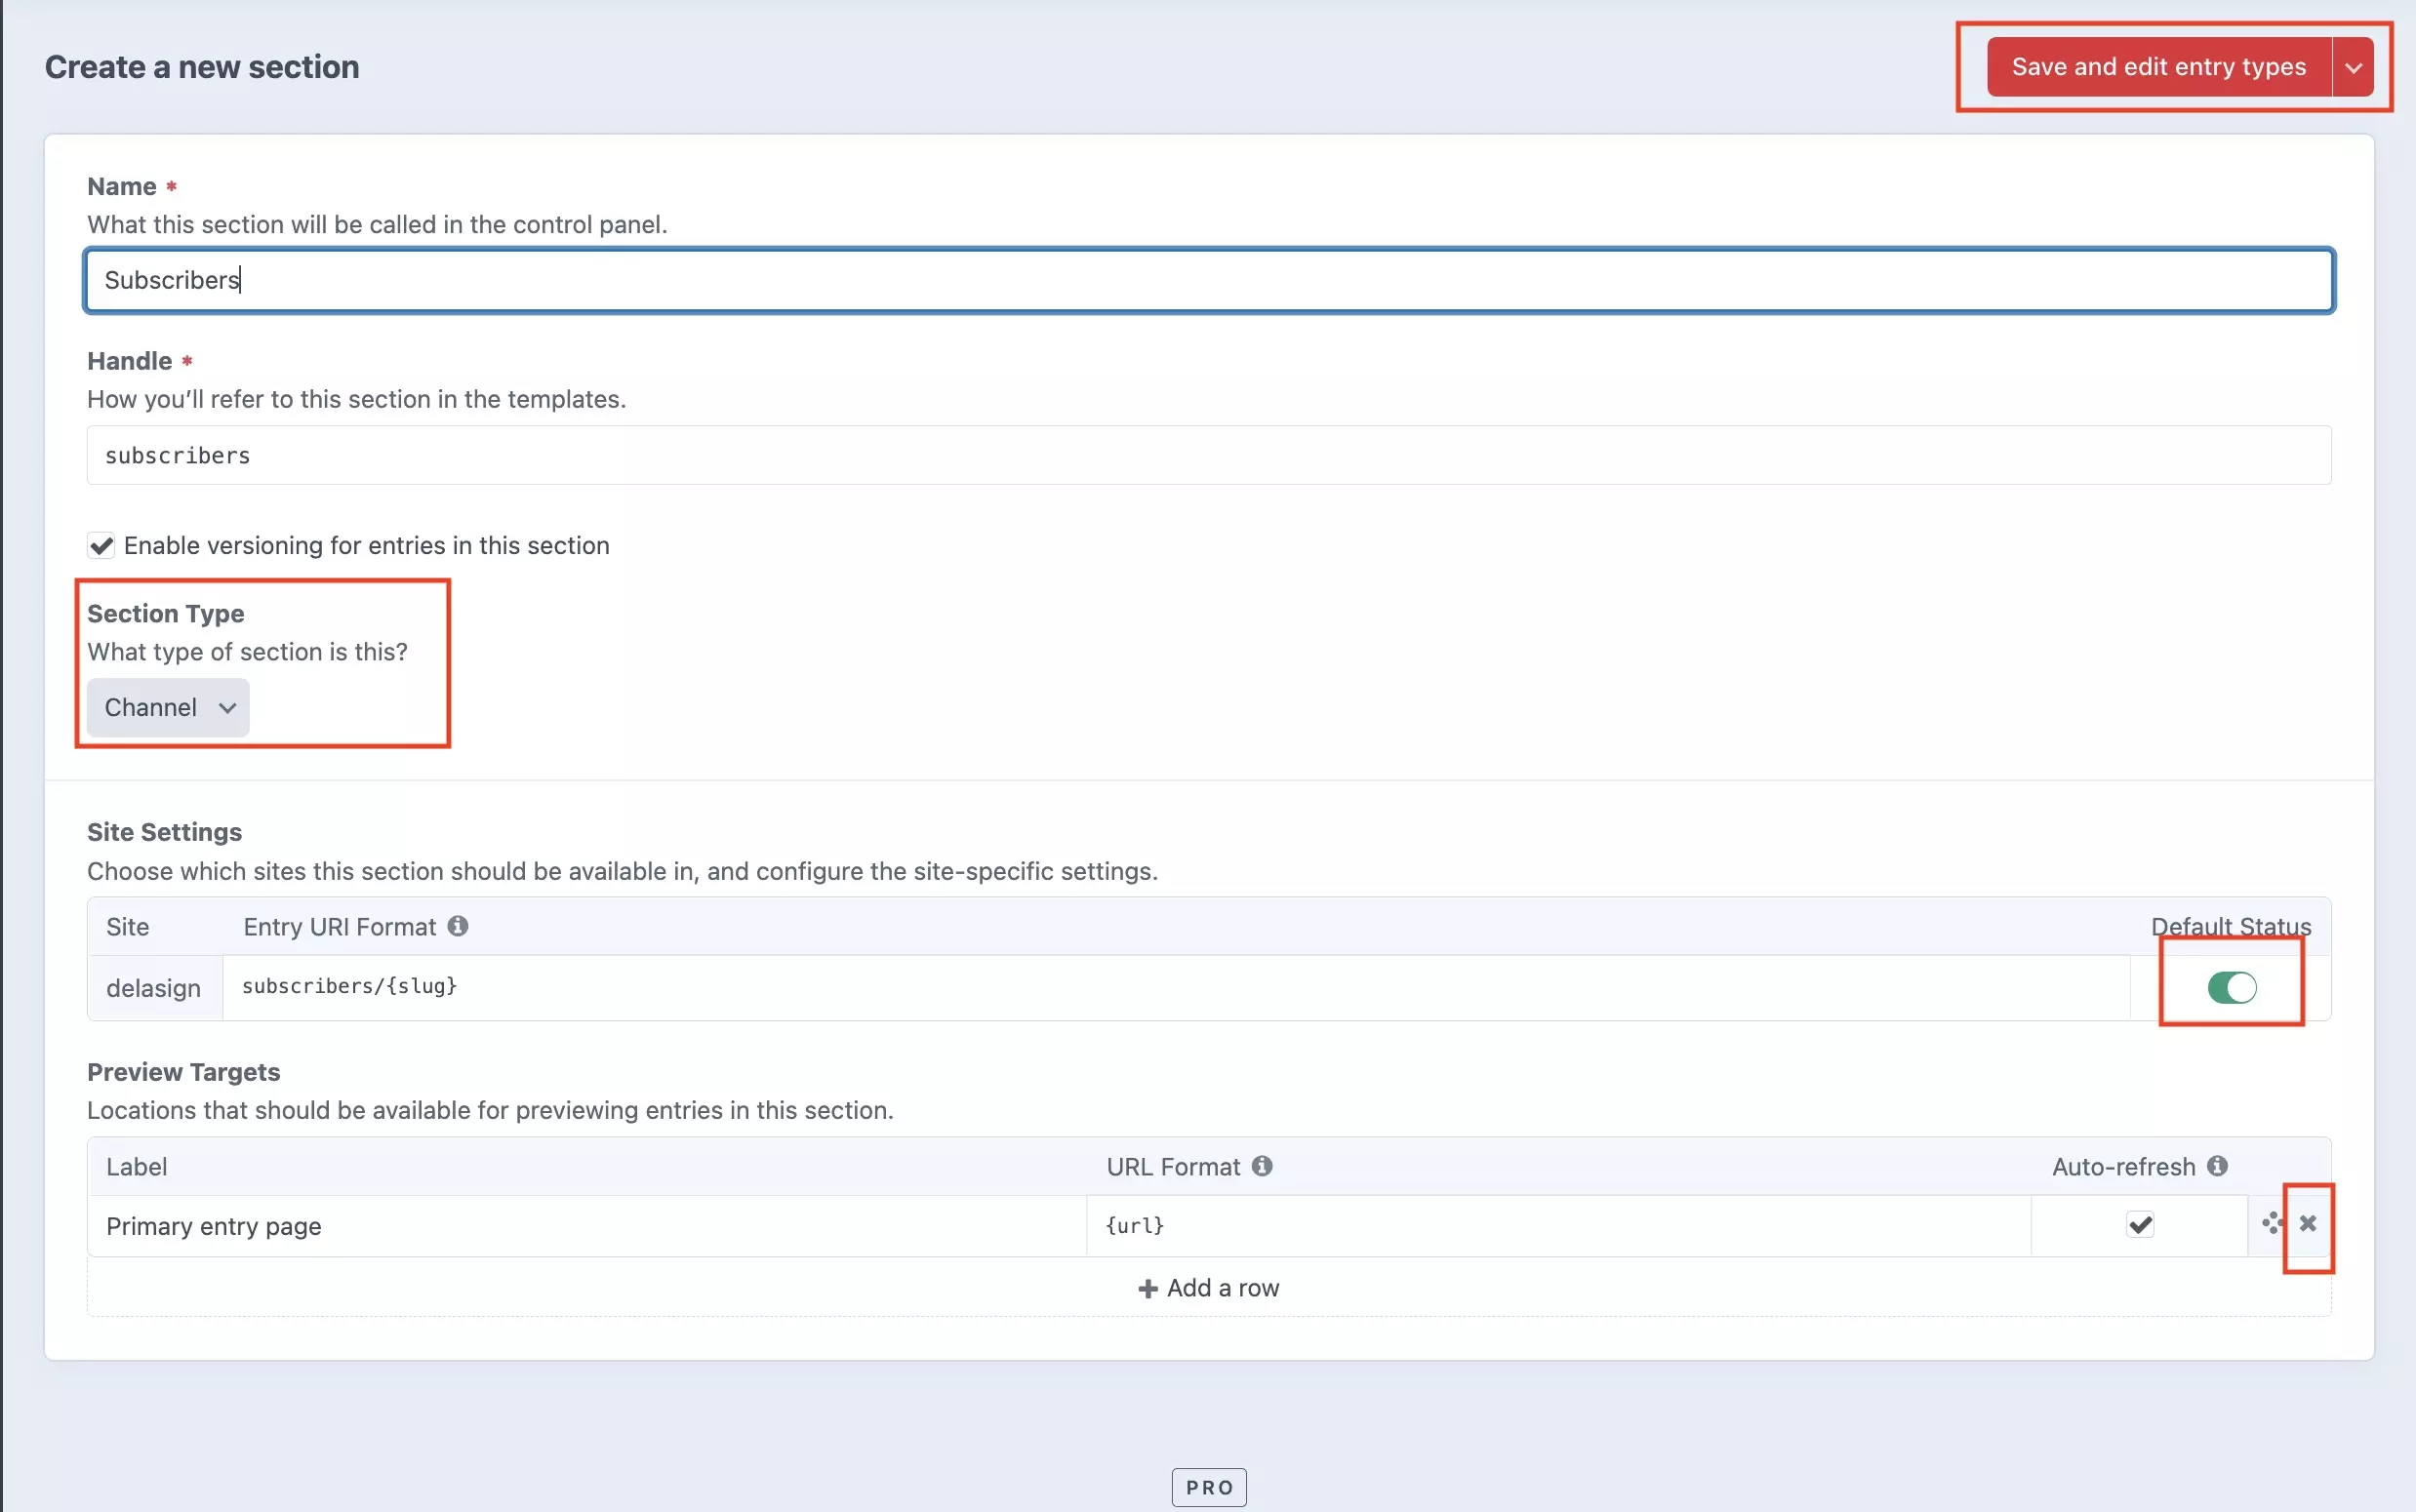
In the Create a new section Craft CMS screen, name your section - this will automatically assign a handle.
After that, navigate to the Section Type and select Channel.
Subsequently, make sure that the default status for the entry is ON and remove the preview target - as this is not a web page but a dataset.
Once everything is good press the Save and edit entry types button.
Step Five: Select Default Entry Type
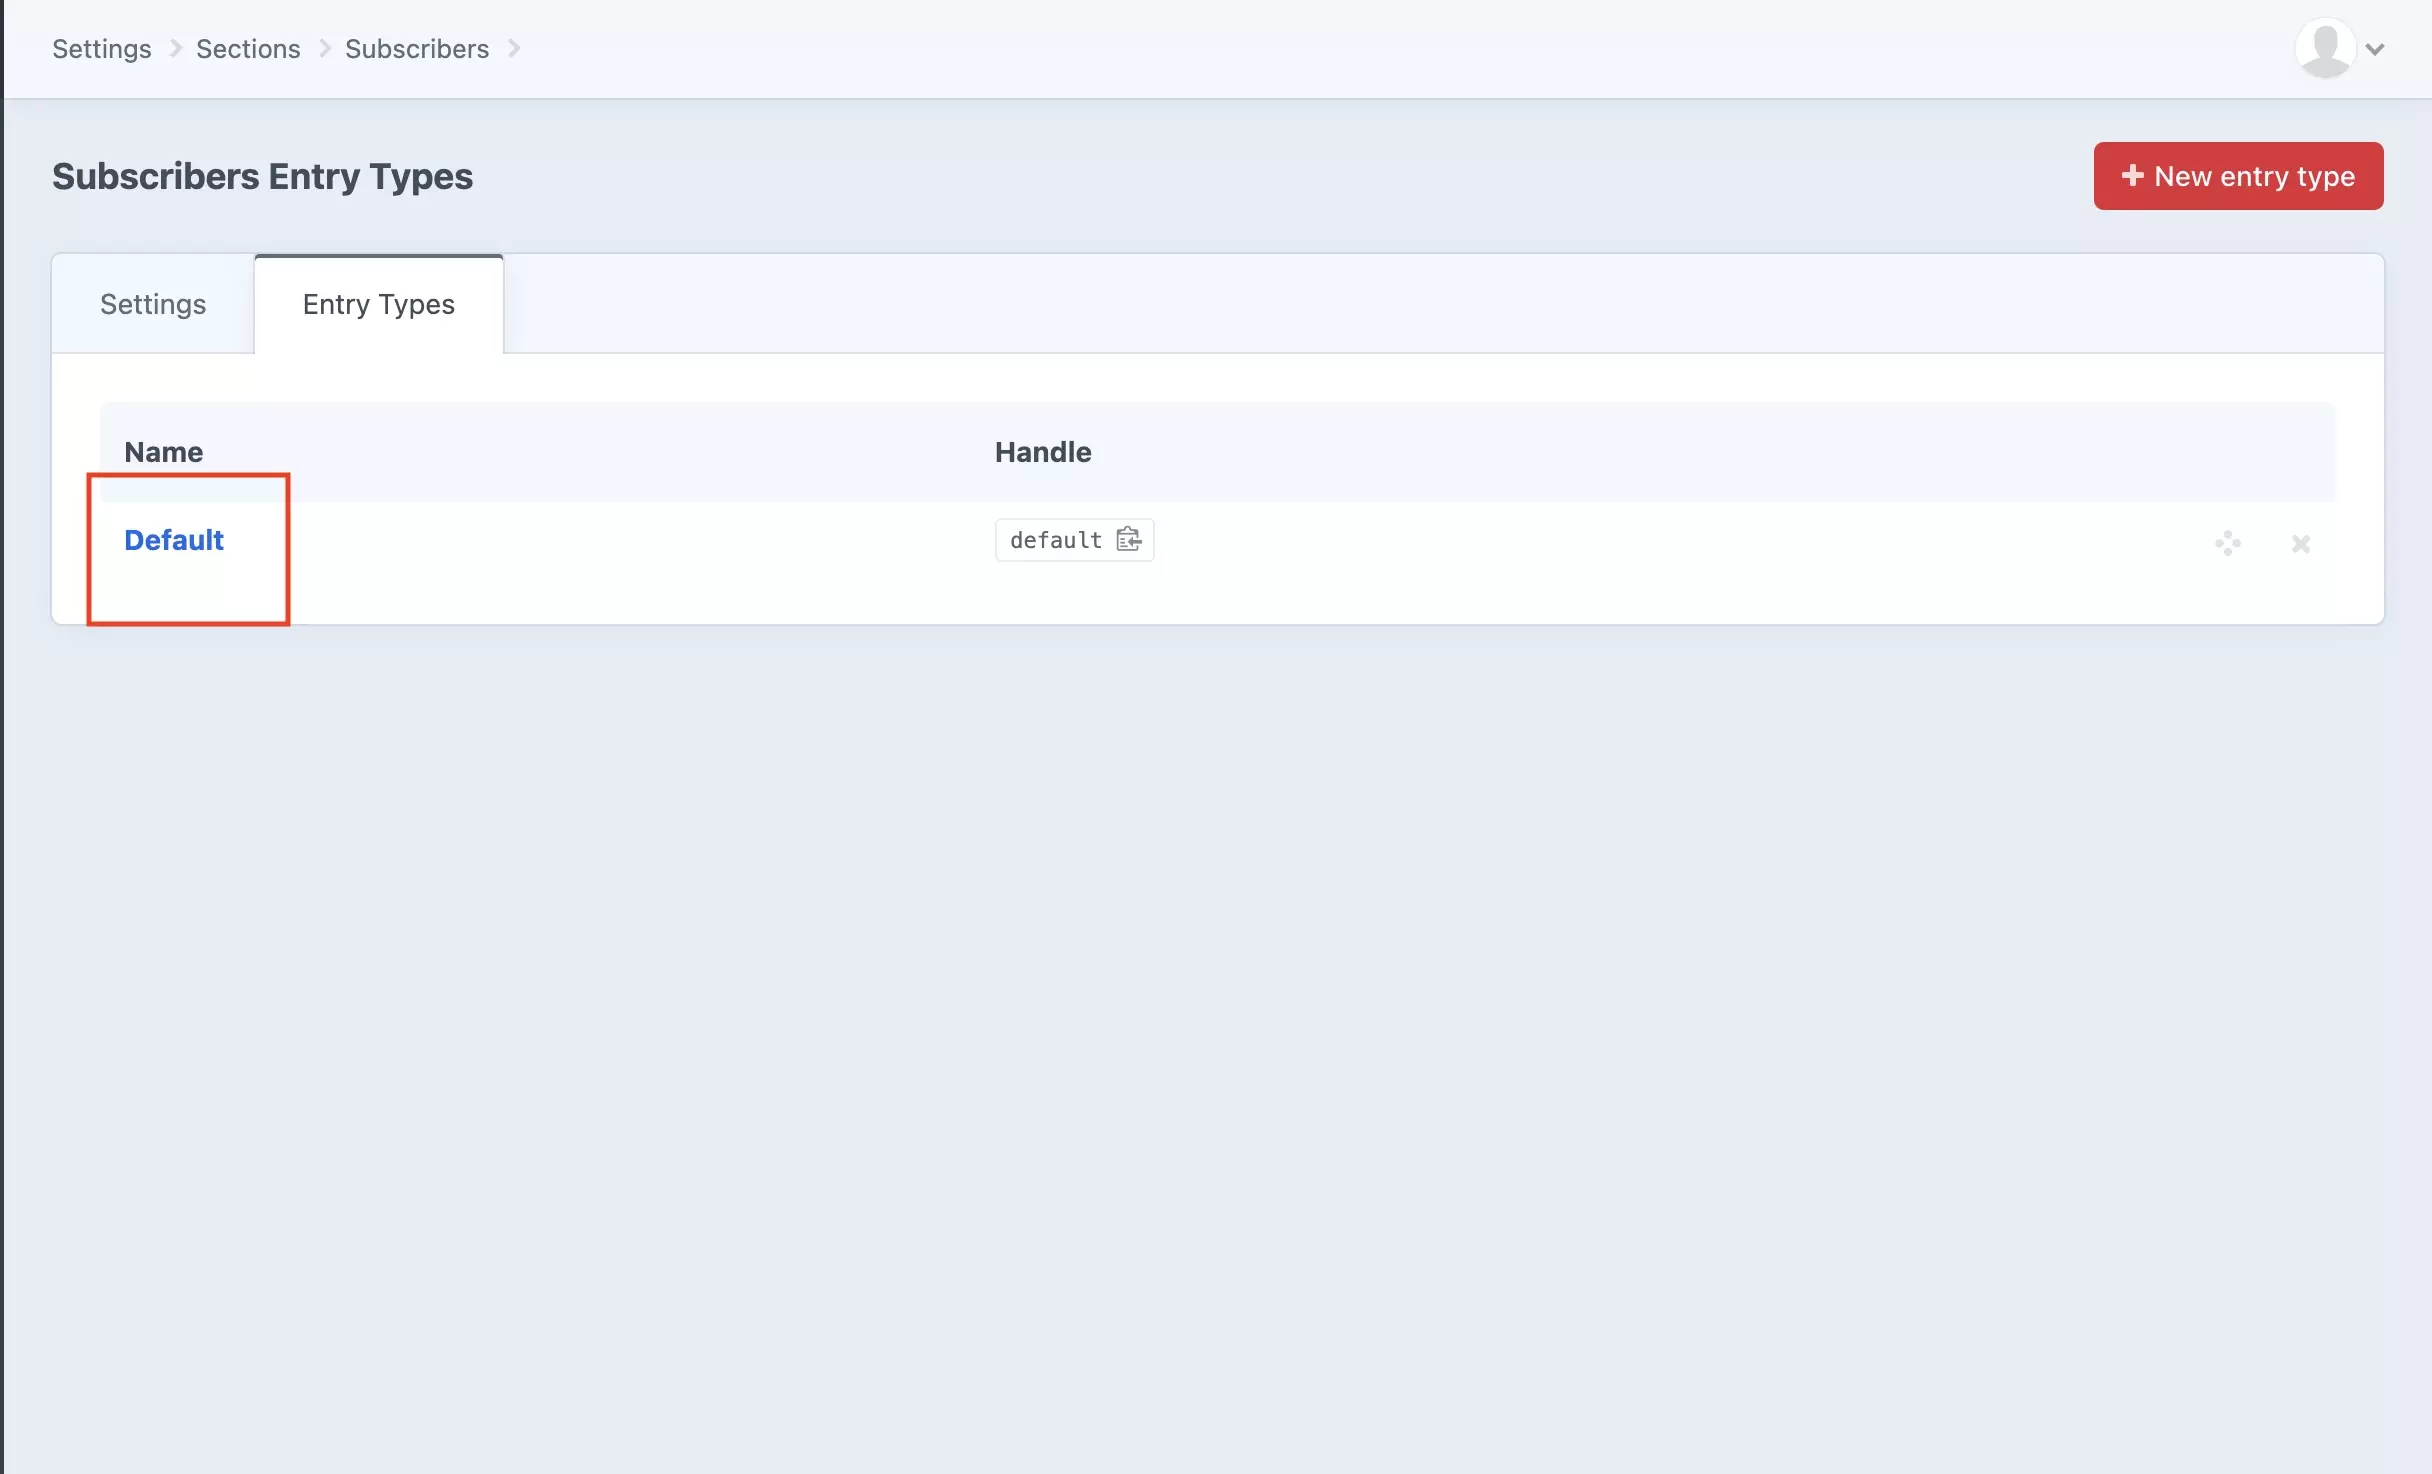
In the screen that appears, select Default under the Entry Types tab.
Step Six: Drag and drop fields
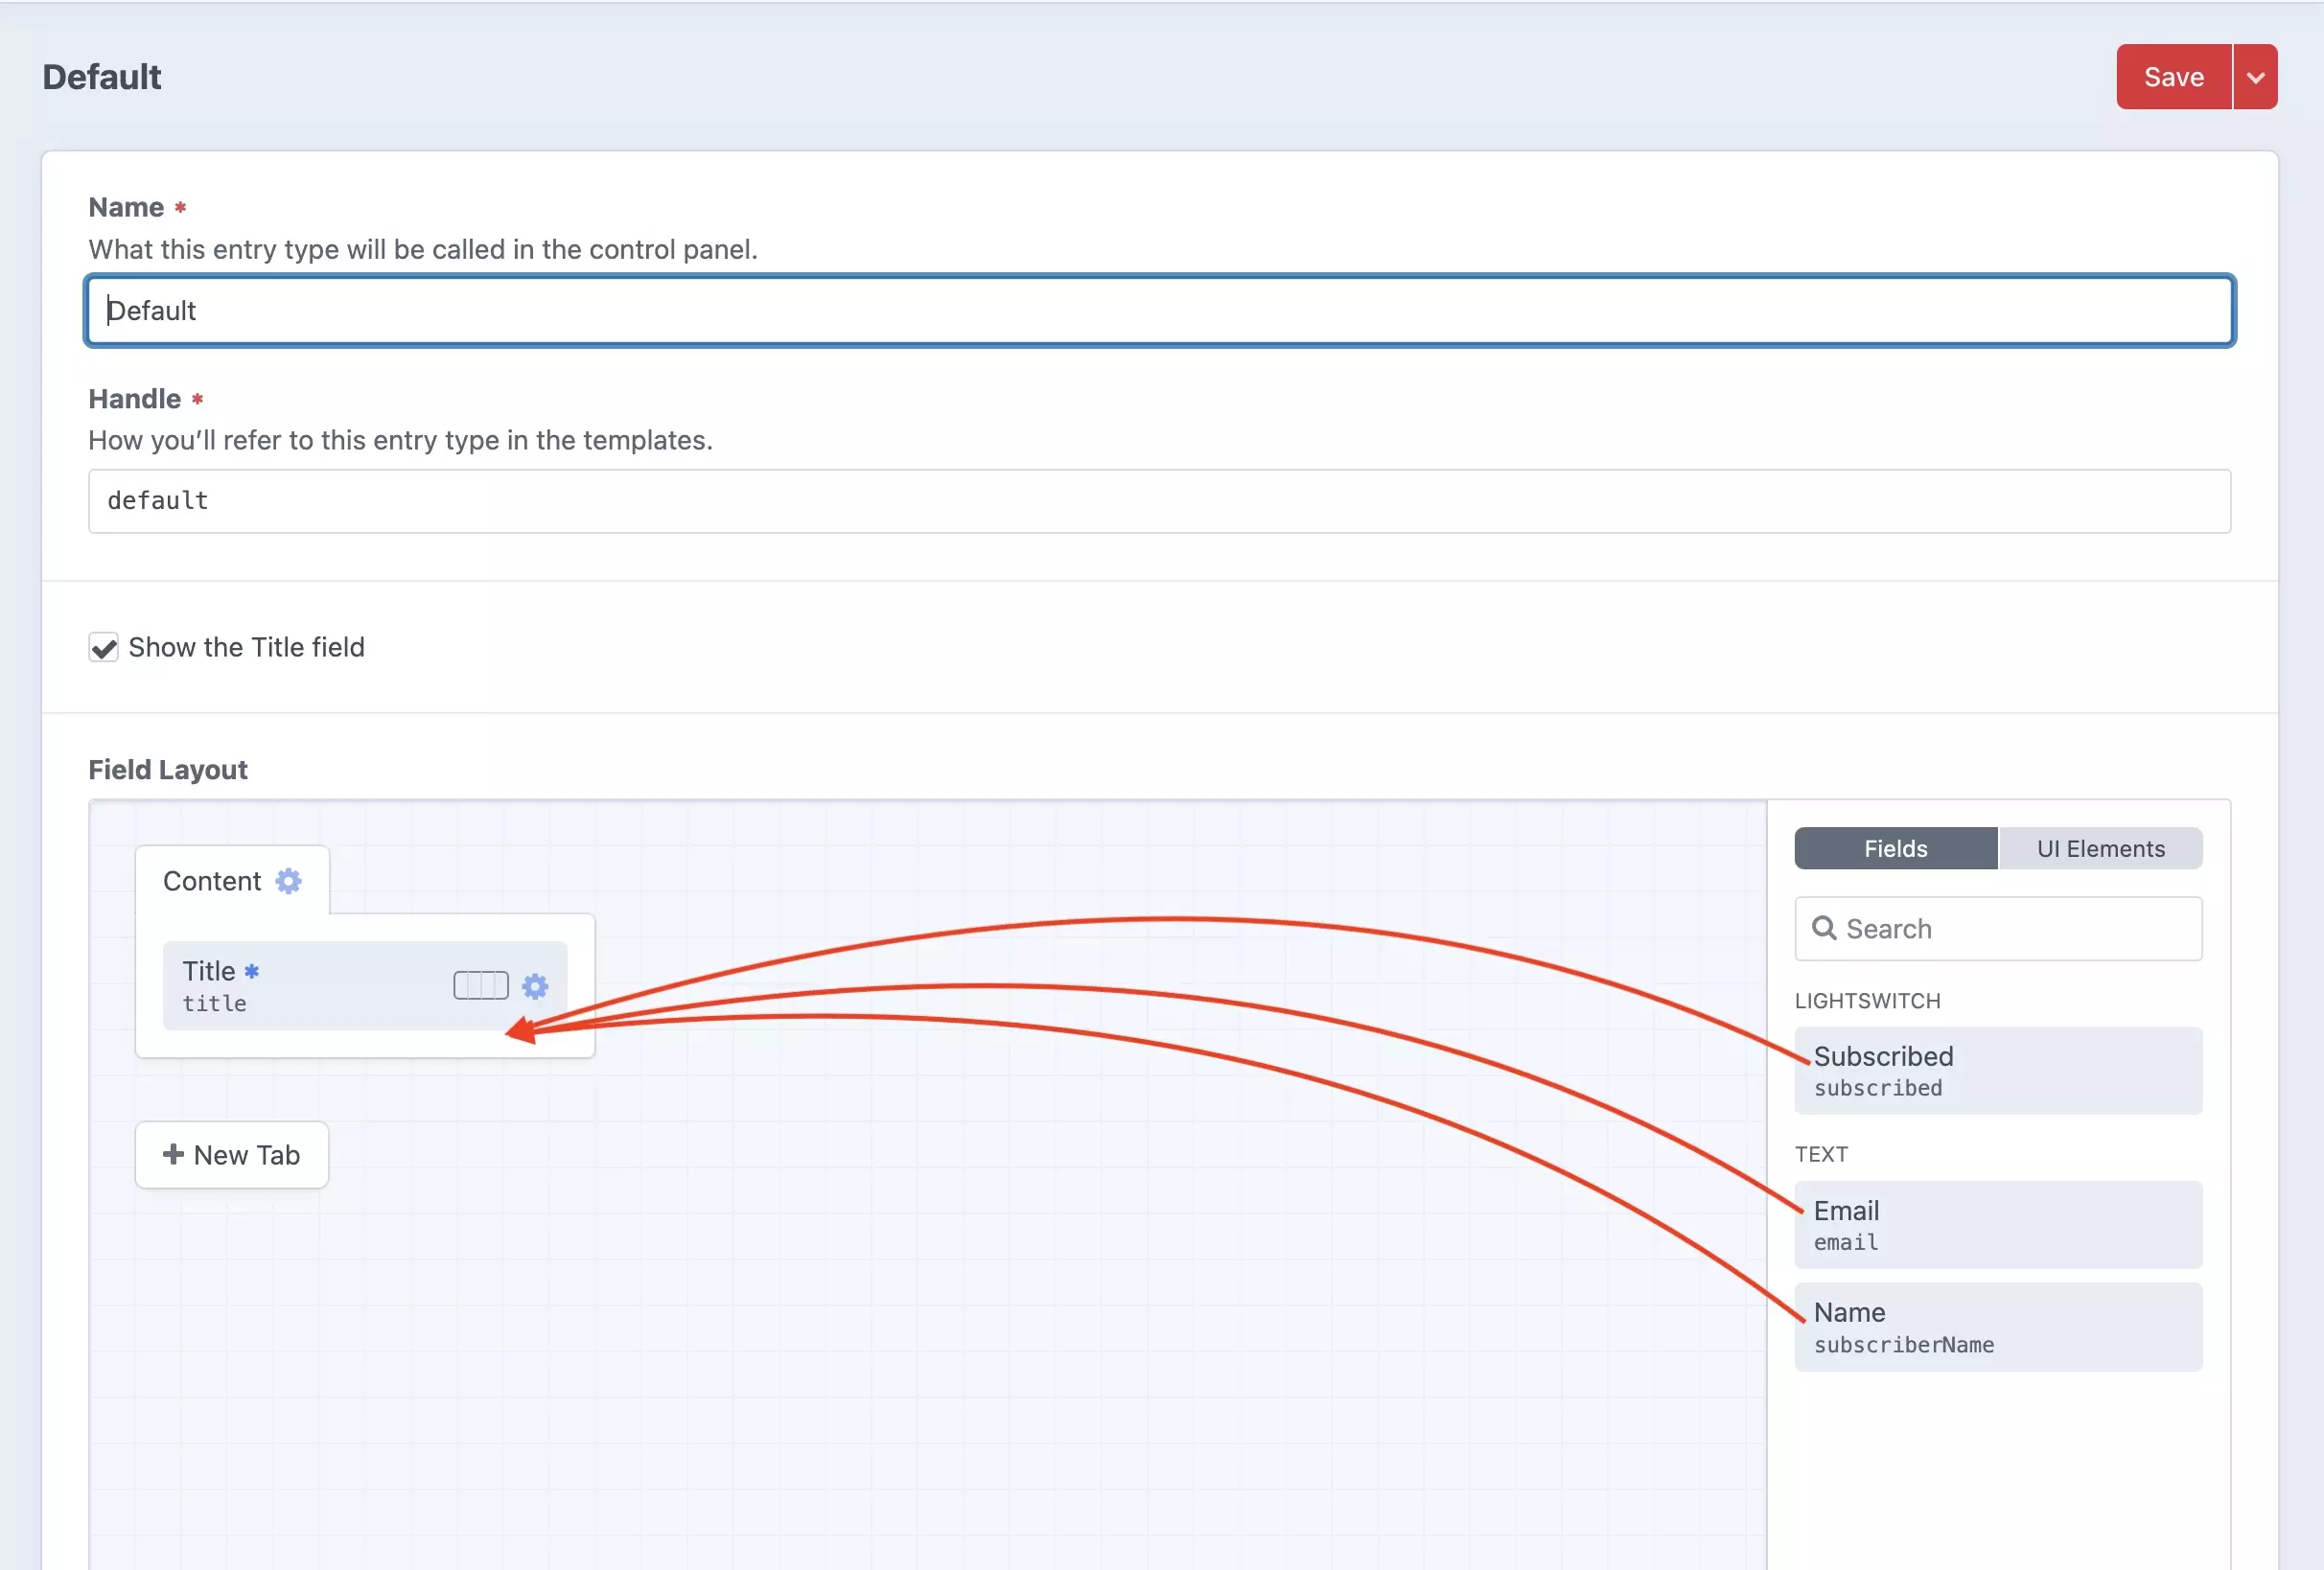
From the fields inspector on the right side of the screen, search for and drag and drop your fields into the Content tab.
If you wish to create a separate tab to structure your fields, press + New Tab, name your tab and drag your fields into the area of the new tab that you created.
Step Seven: Save
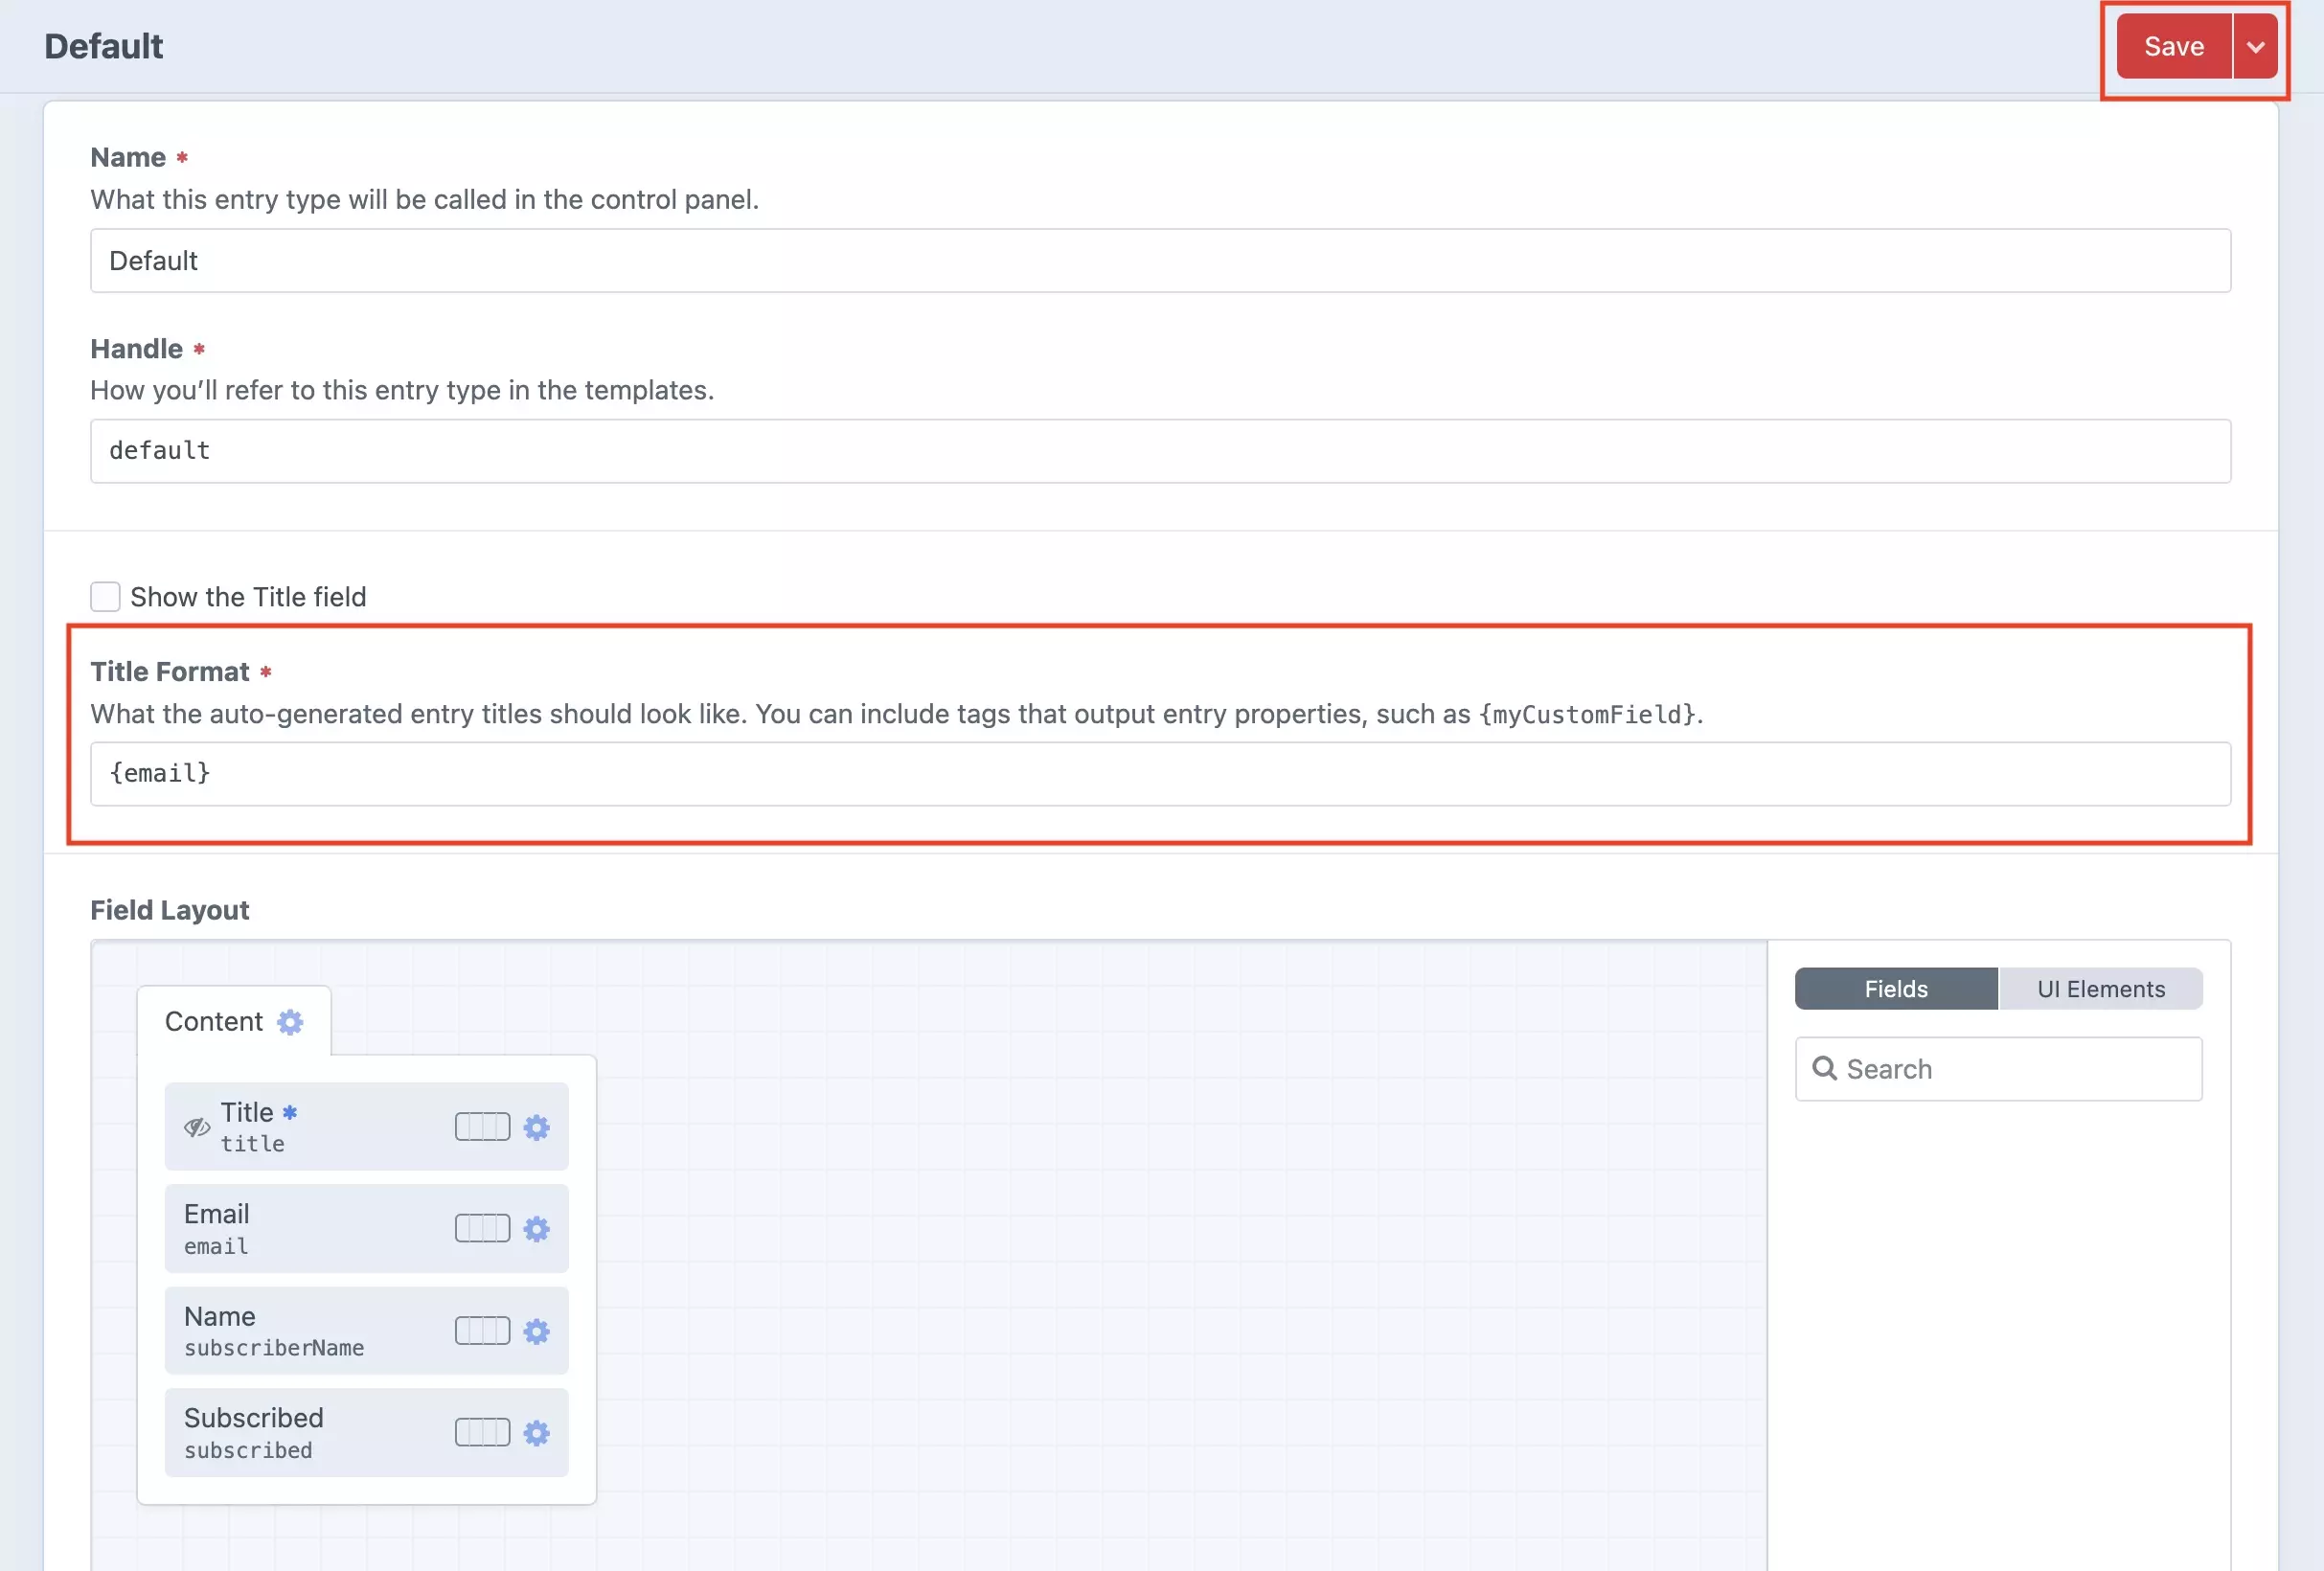
Once complete press Save on the top right side of the screen.
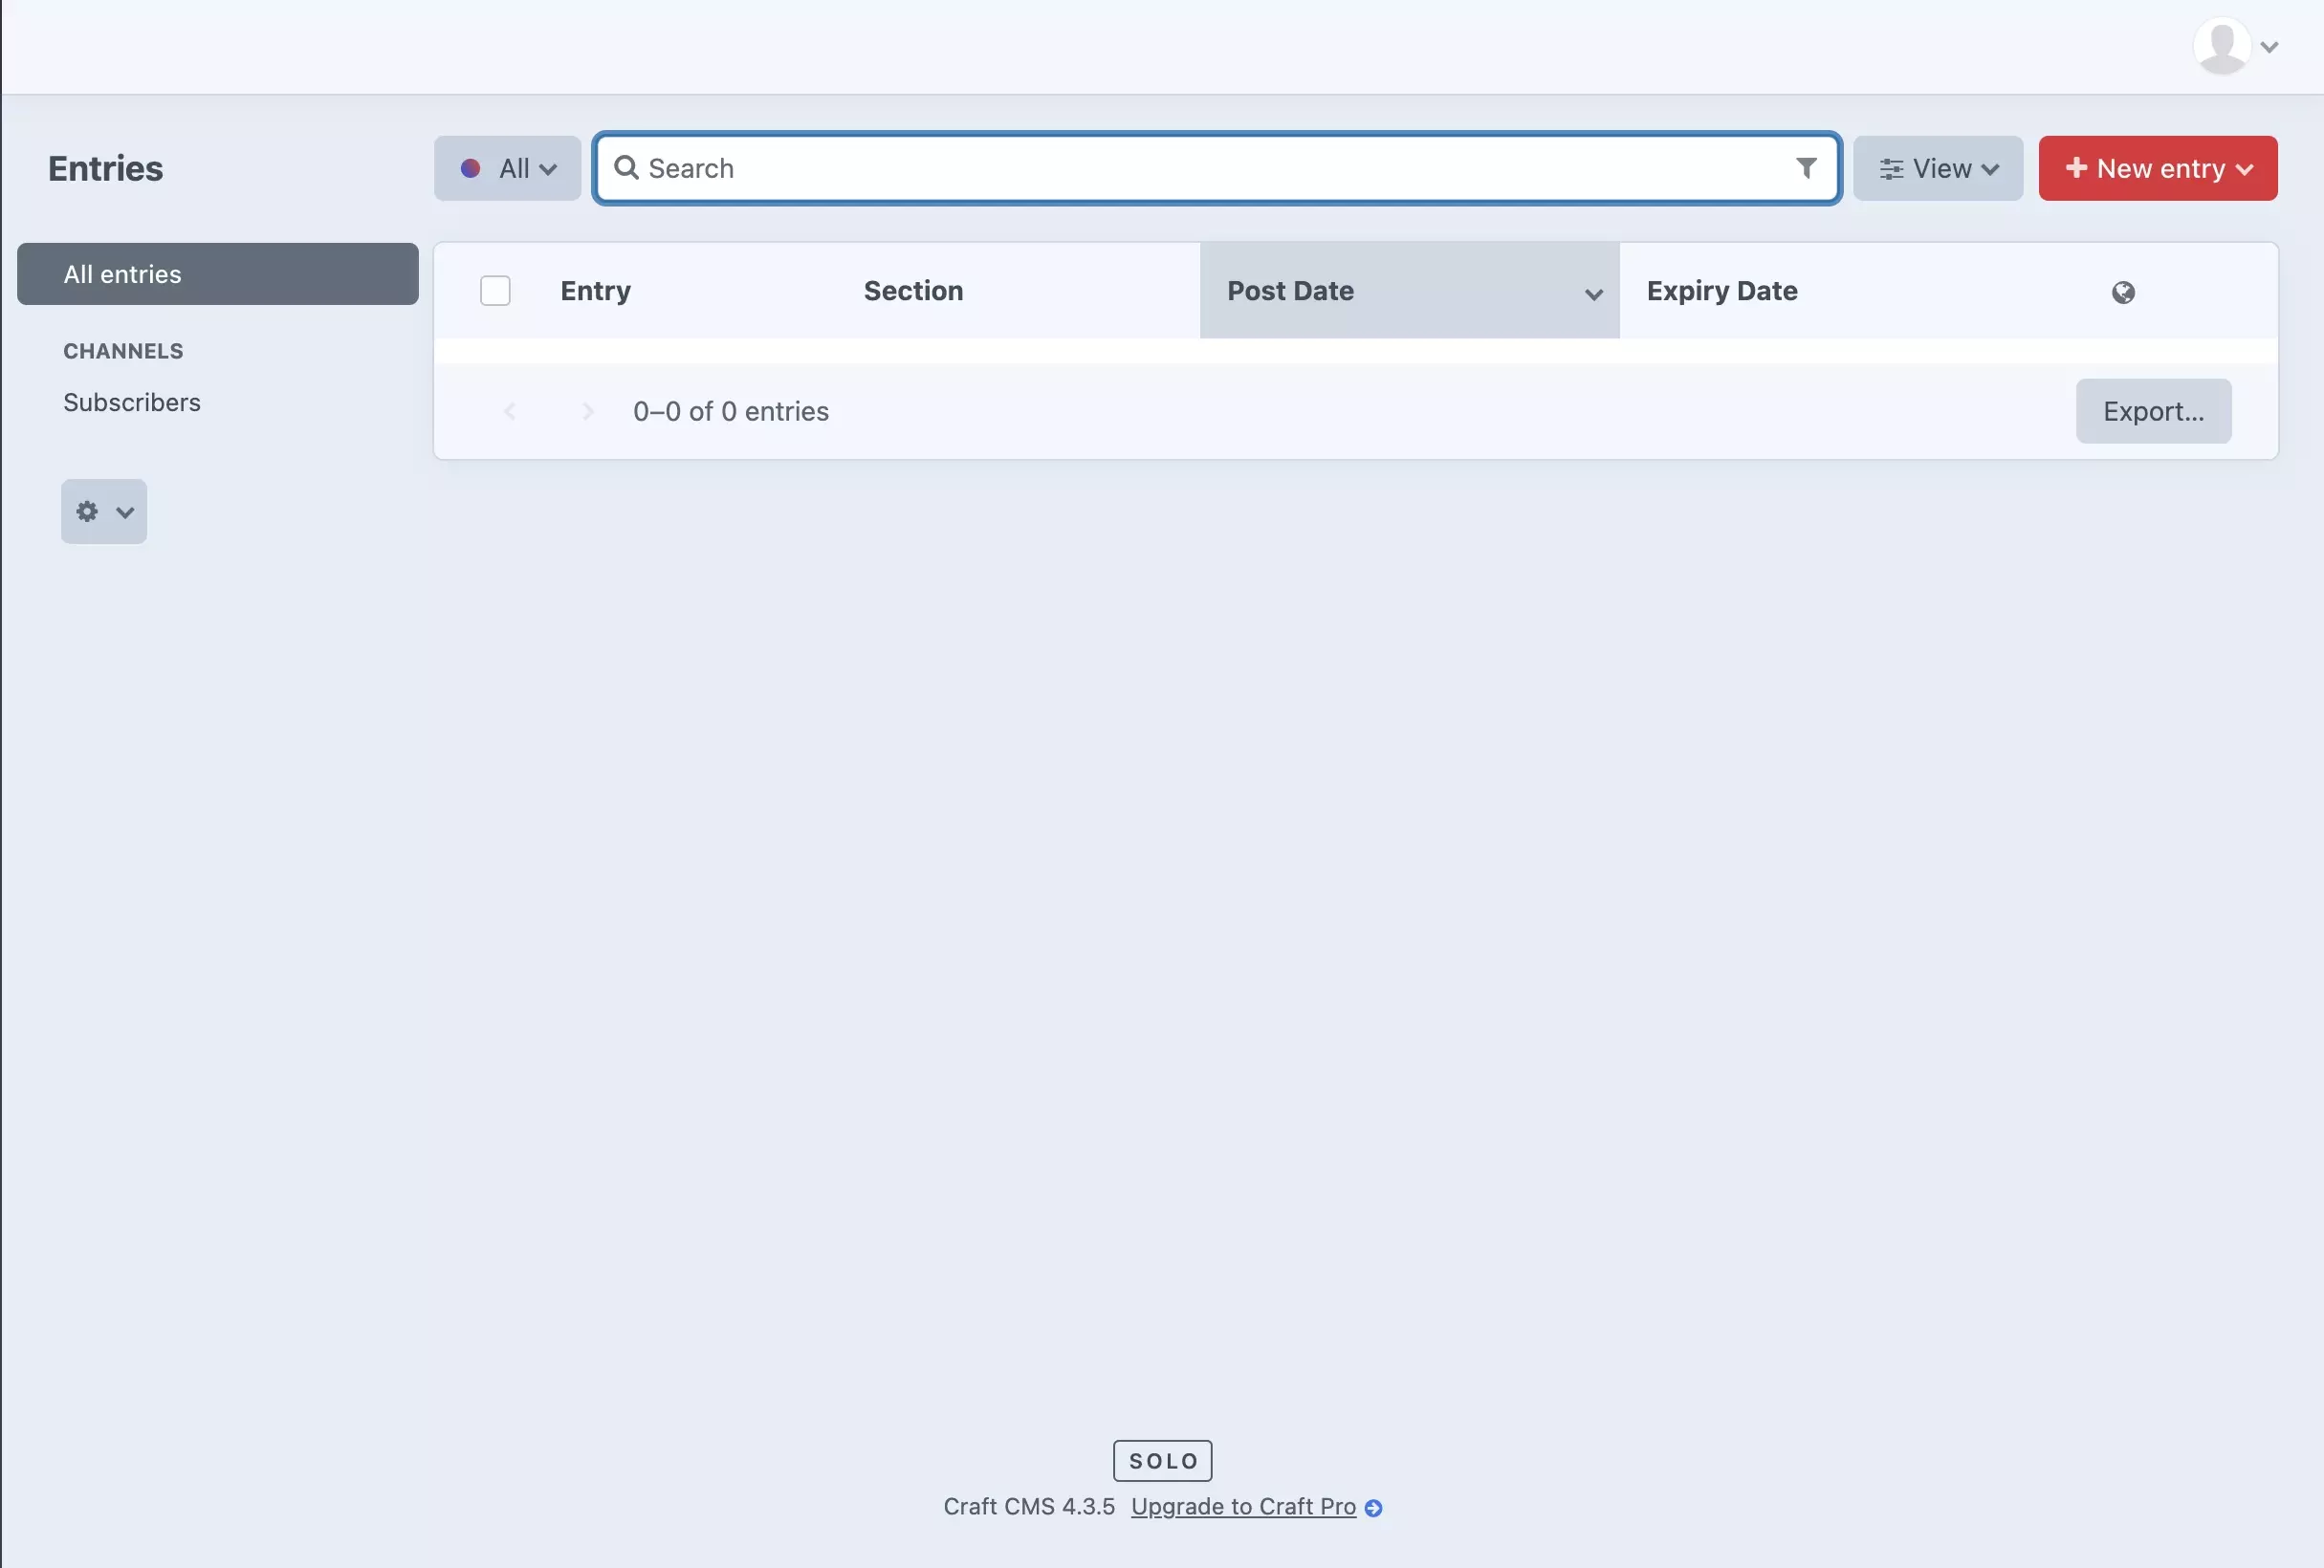
If you navigate to Entries, Subscribers will now appear under Channels.
Please note we programmatically made the title field equal to the email field, by setting the title format to {email} (the handle of the email field).
Any Questions?
We are actively looking for feedback on how to improve this resource. Please send us a note to inquiries@delasign.com with any thoughts or feedback you may have.