How to add or remove a section from a site in Craft CMS

Oscar de la Hera Gomez
A flower that represents Craft CMS with the text "Add or Remove Section in Multiple Sites."

A step by step guide on adding or removing a section from a site in a Craft CMS that's split into multiple websites.

Please note that the following tutorial requires you to have created a section (i.e. a channel, structure or single). If you are looking for a tutorial on how to do this, follow the tutorial in the button below.

Step One: Select Settings

A screenshot of Craft CMS with a highlight on the left menu sidebar on the "Settings" tab. Press it and continue to the next step.

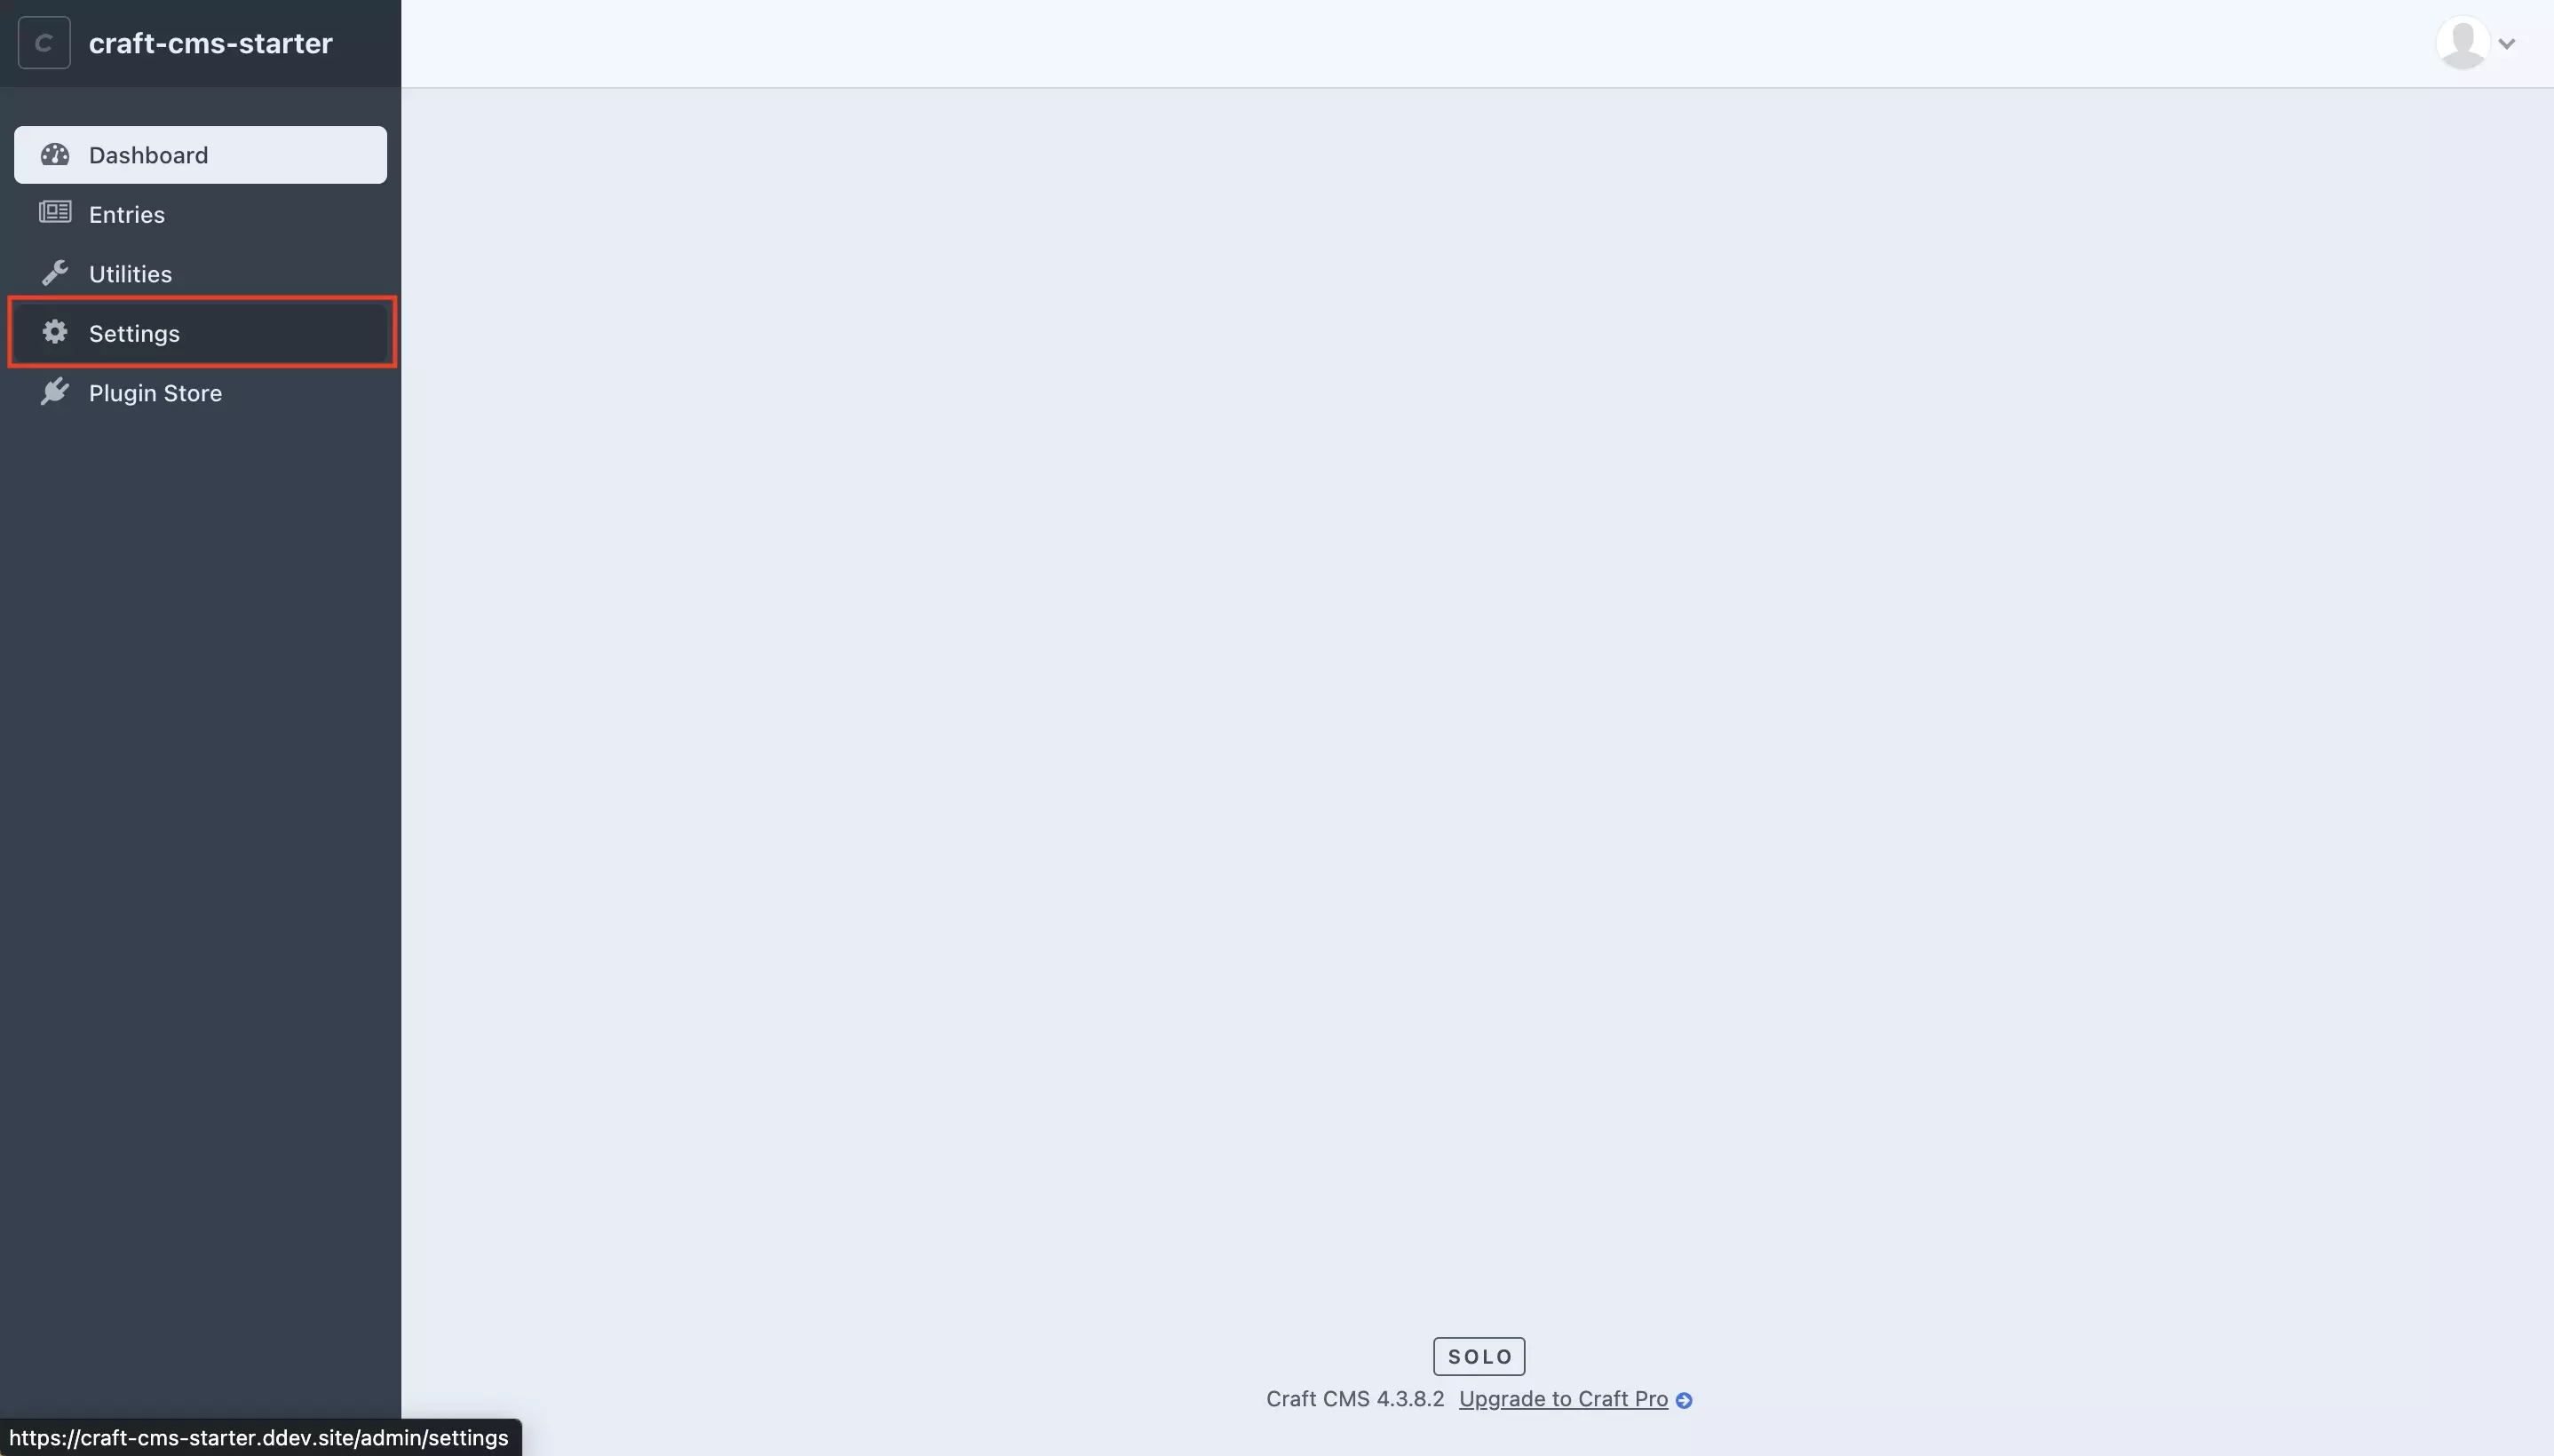
On the left menu side bar, press the Settings tab.

Step Two: Select Sections

A screenshot of the Settings Craft CMS page with a highlight on the "Sections" tile under "Content." Press the "Sections" tile and continue to the next step.

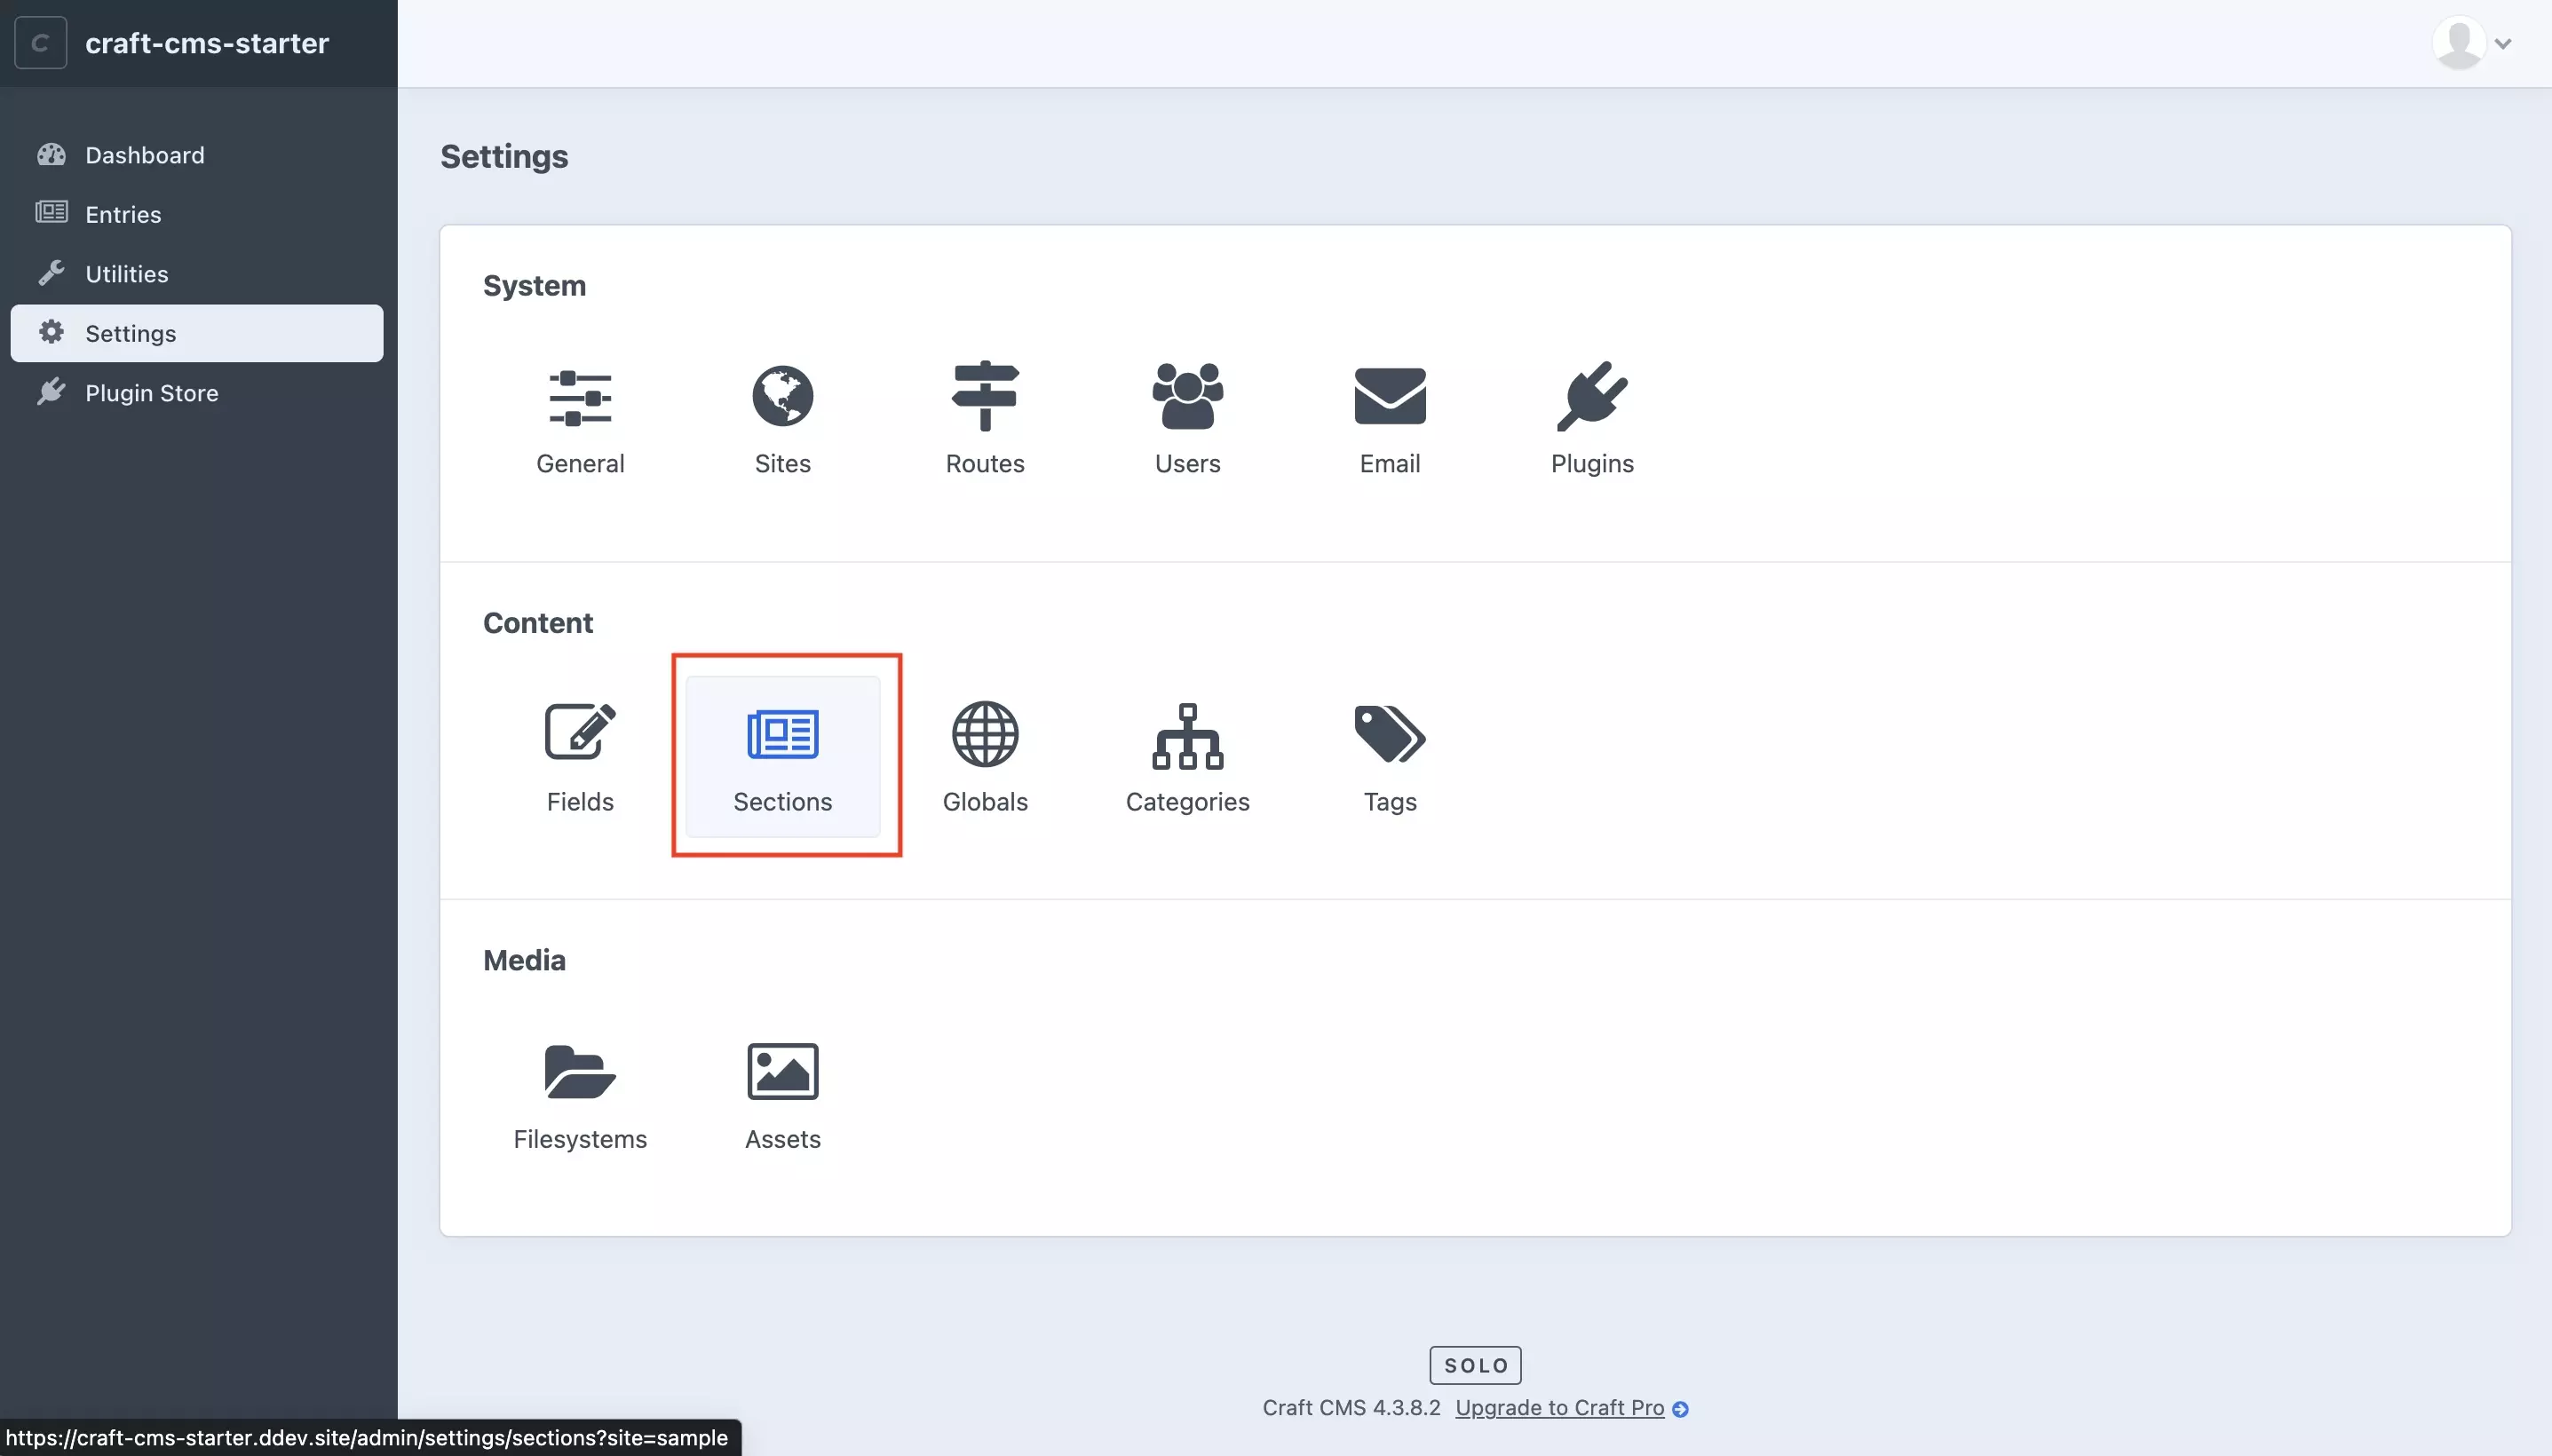
In the Settings page, press the Sections tile under Content.

Step Three: Select the Section

A screenshot of the Craft CMS Sections page with a highlight on the "Subscribers" link under the "Name" column. Press the name of the section that you wish to add or remove from a site and continue to the next step.

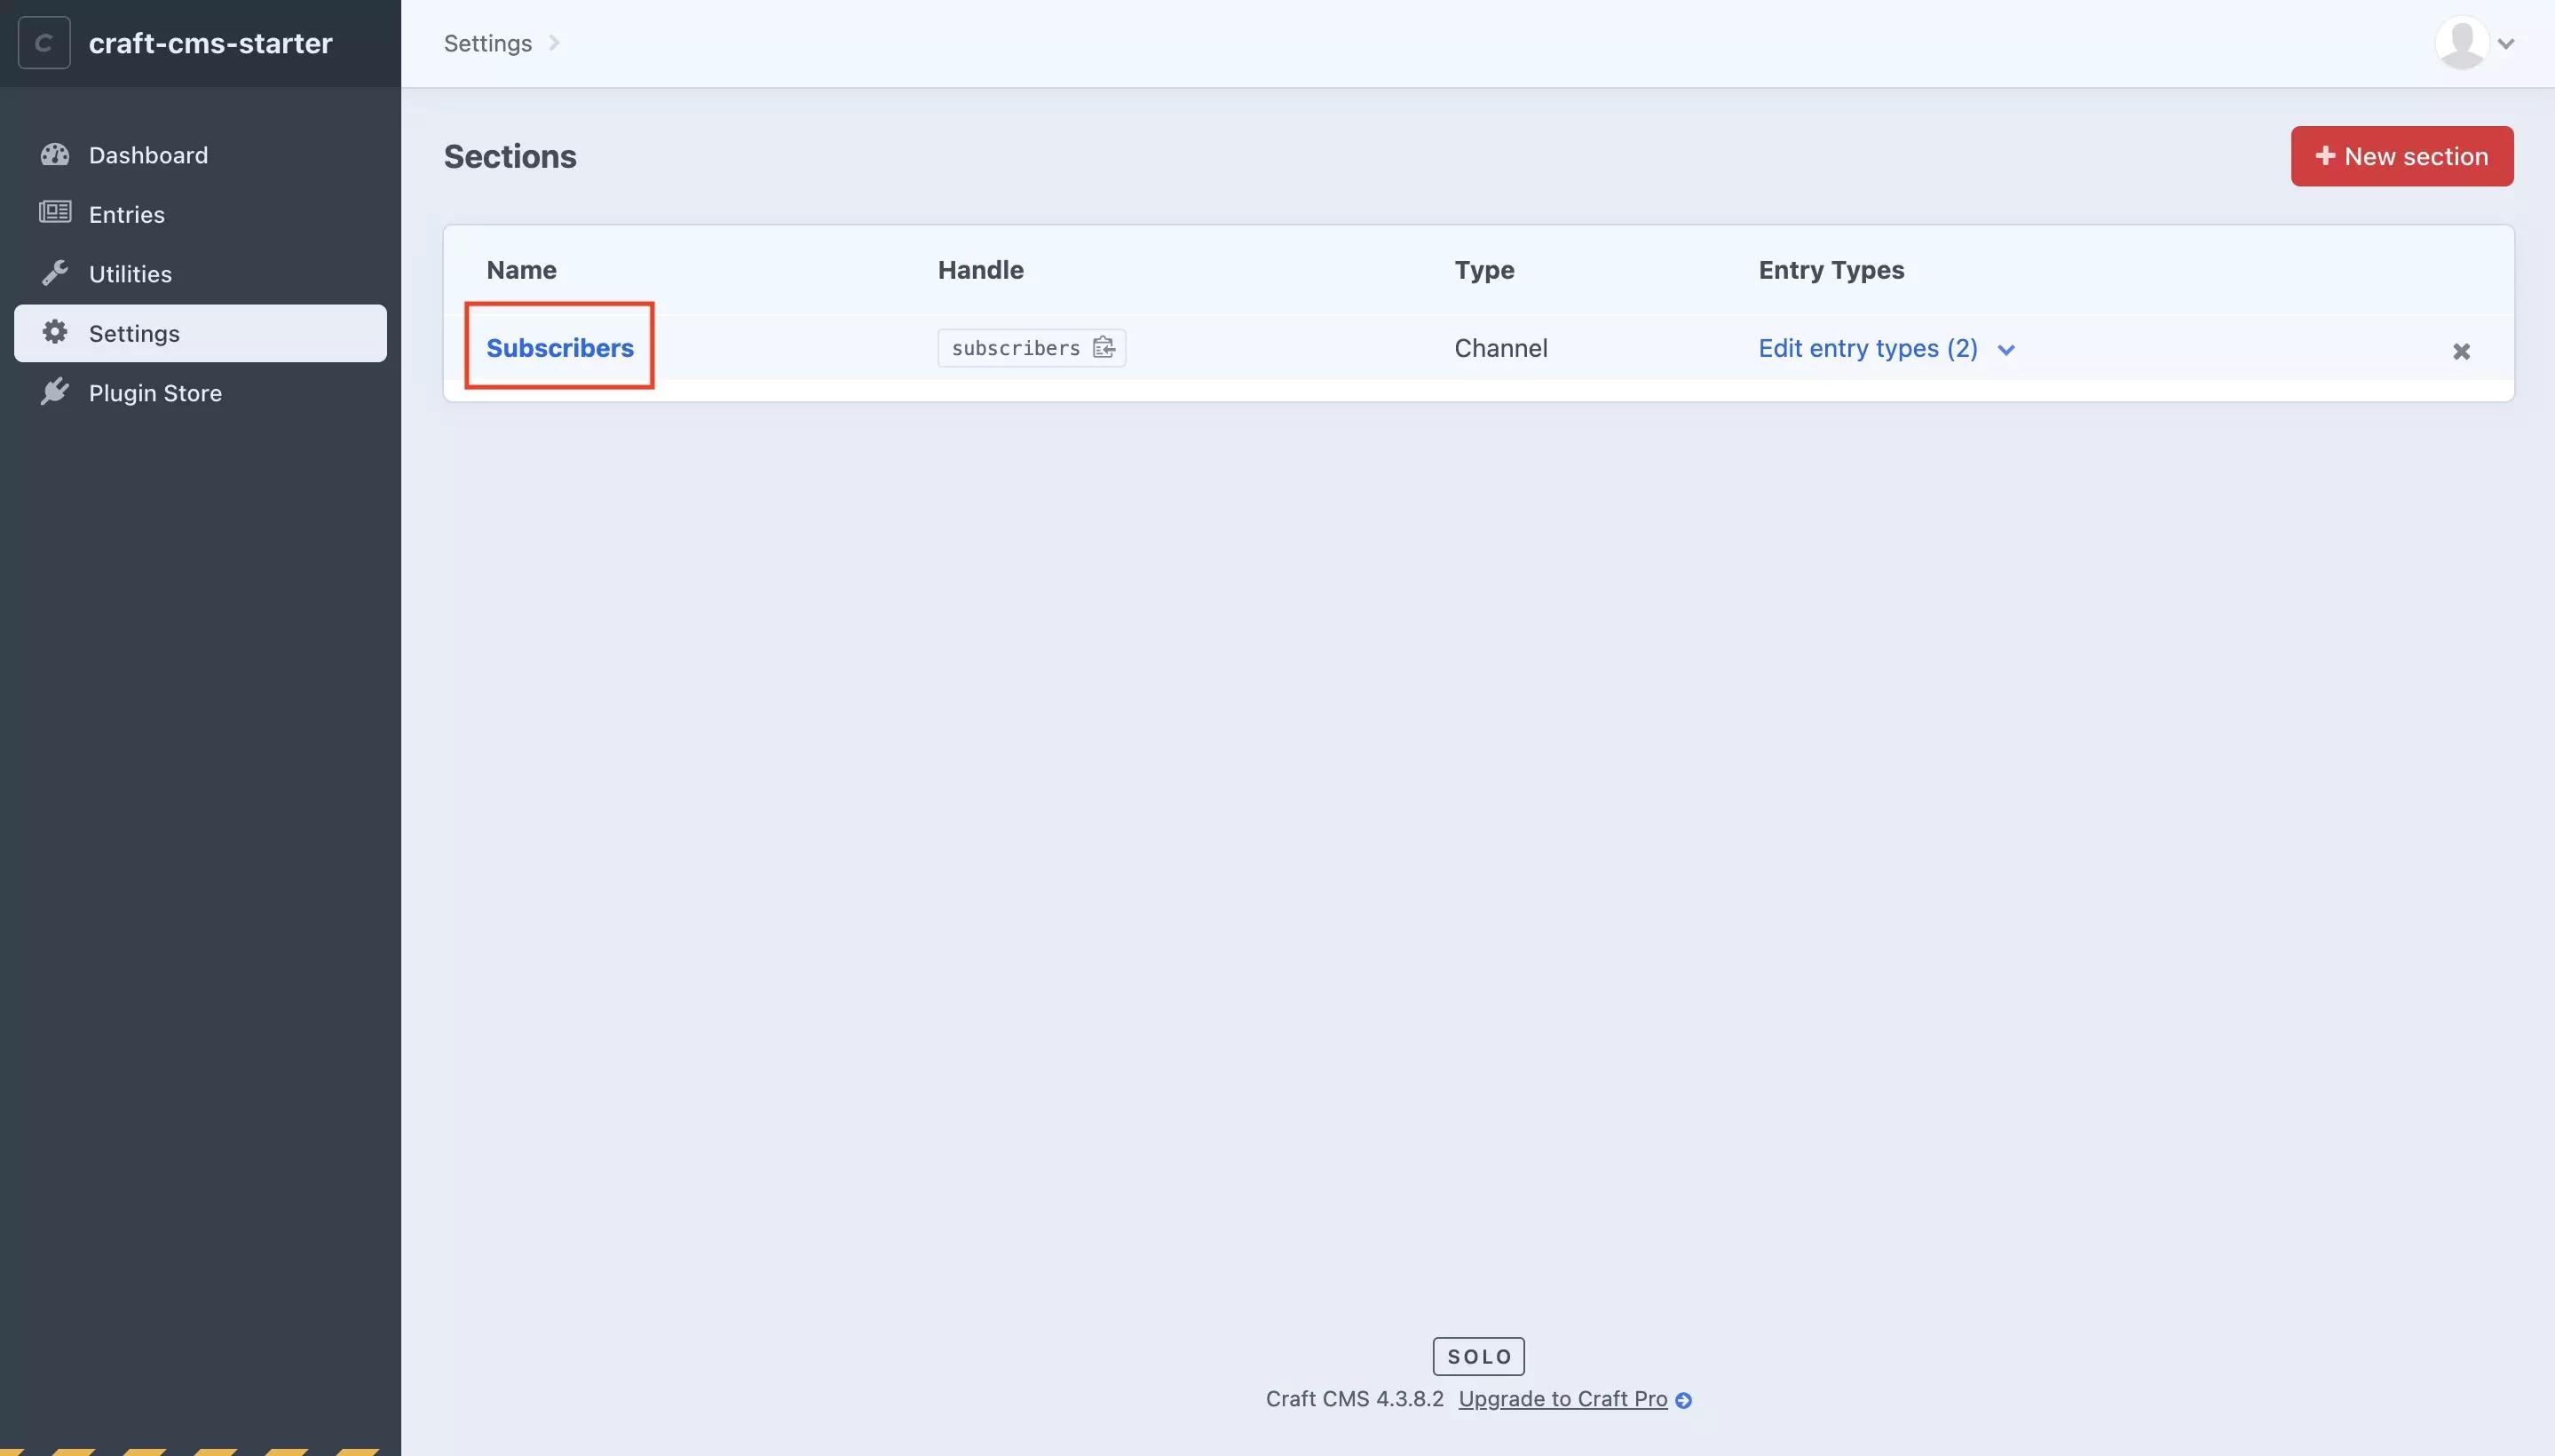
Press the Name of the section that you wish to add or remove from a site.

Step Four: Activate or deactivate the section for each site

A screenshot of the "Subscriber" Craft CMS section that we created in a former tutorial. This is the same as all sections. Highlighted on this page is the light switches under "Site Settings" that allow you to add or remove sections depending on whether they are on or off respectively. Turn on the switches for the sites you wish to add the sections to and turn off the switches on the sites you wish to remove the sections from. Once you're good to go, press the "Save" button which we have highlighted on the top right side.

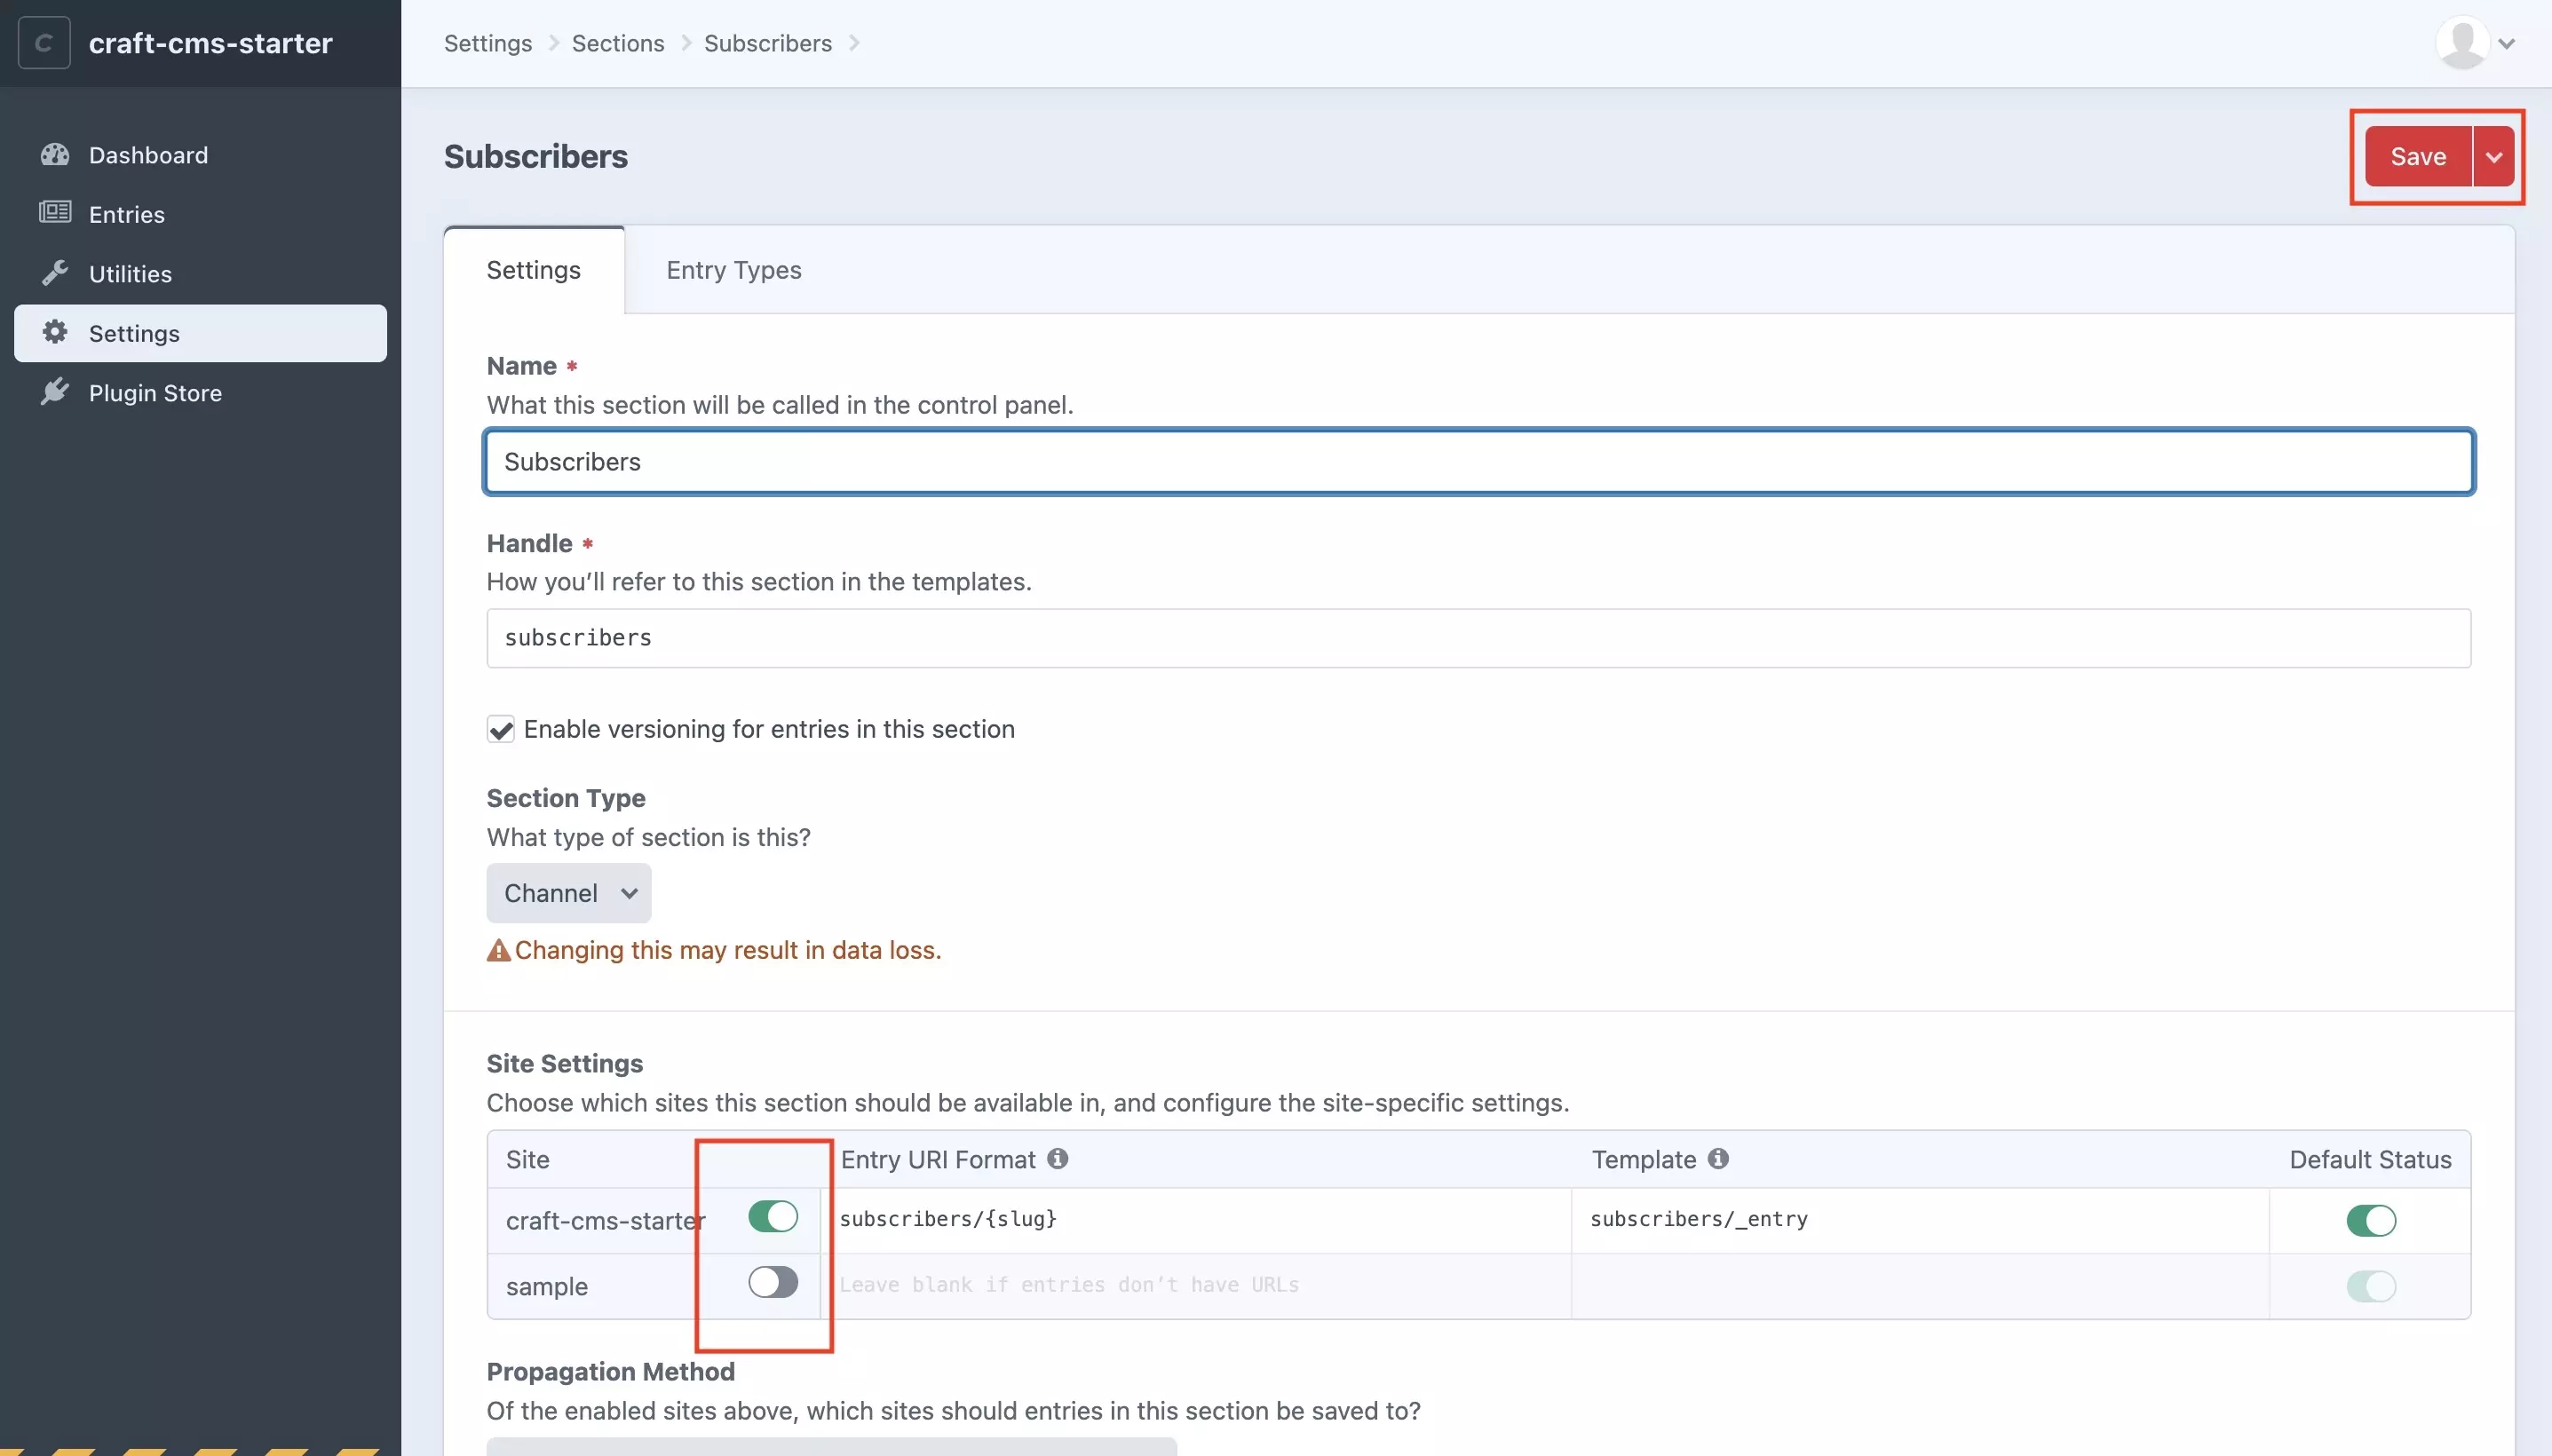
Under Site Settings:

  • Turn on the light switch on the site that you wish to add the section to.
  • Turn of the light switch on the site that you wish to remove the section from.

Once you've made your changes and they look good, press Save.

Any Questions?

We are actively looking for feedback on how to improve this resource. Please send us a note to inquiries@delasign.com with any thoughts or feedback you may have.
delasign logo

Book a Free Consultation.

An icon of an email.

Click here to email us.

Fill in the details below to book a free consultation or to let us know about something else. Whatever it is, we are here to help.

How can we help you ?

Contact Details