How to apply a custom material in Reality Composer Pro
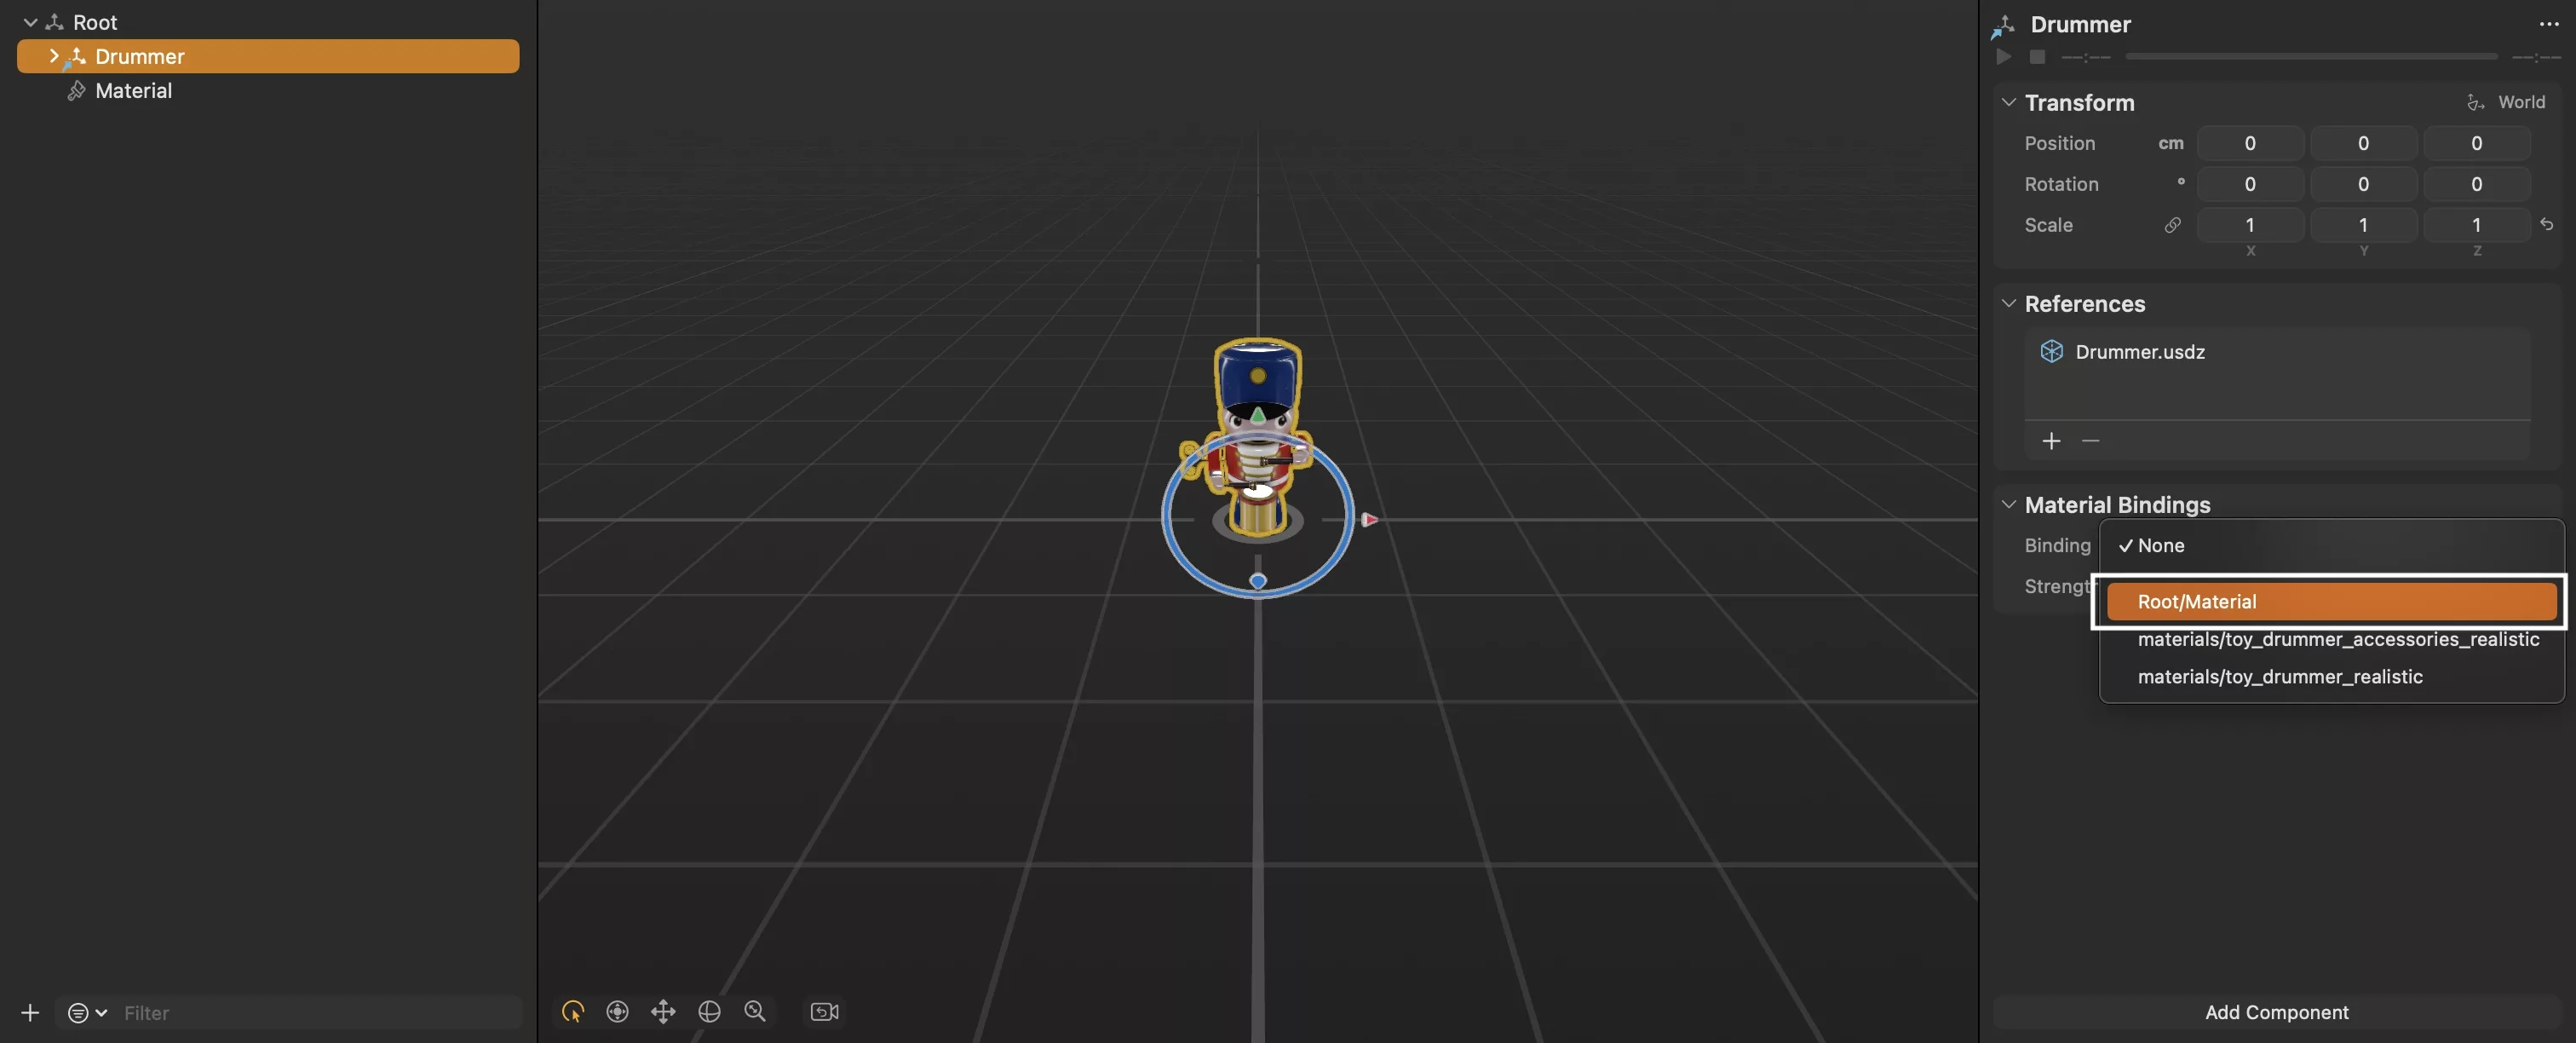
Select the relevant model and bind the material by selecting the custom material from the binding dropdown under Material Bindings.

Select the relevant model and bind the material by selecting the custom material from the binding dropdown under Material Bindings.
SubscribeThis tutorial walks you through how to apply a custom shader material or PBR material to a model using Reality Composer Pro.
To learn how to create and construct a custom shader material or PBR material, consult the tutorials below.
To apply the material, select the relevant model and apply the material using the Material Bindings component found on the inspector on the right.
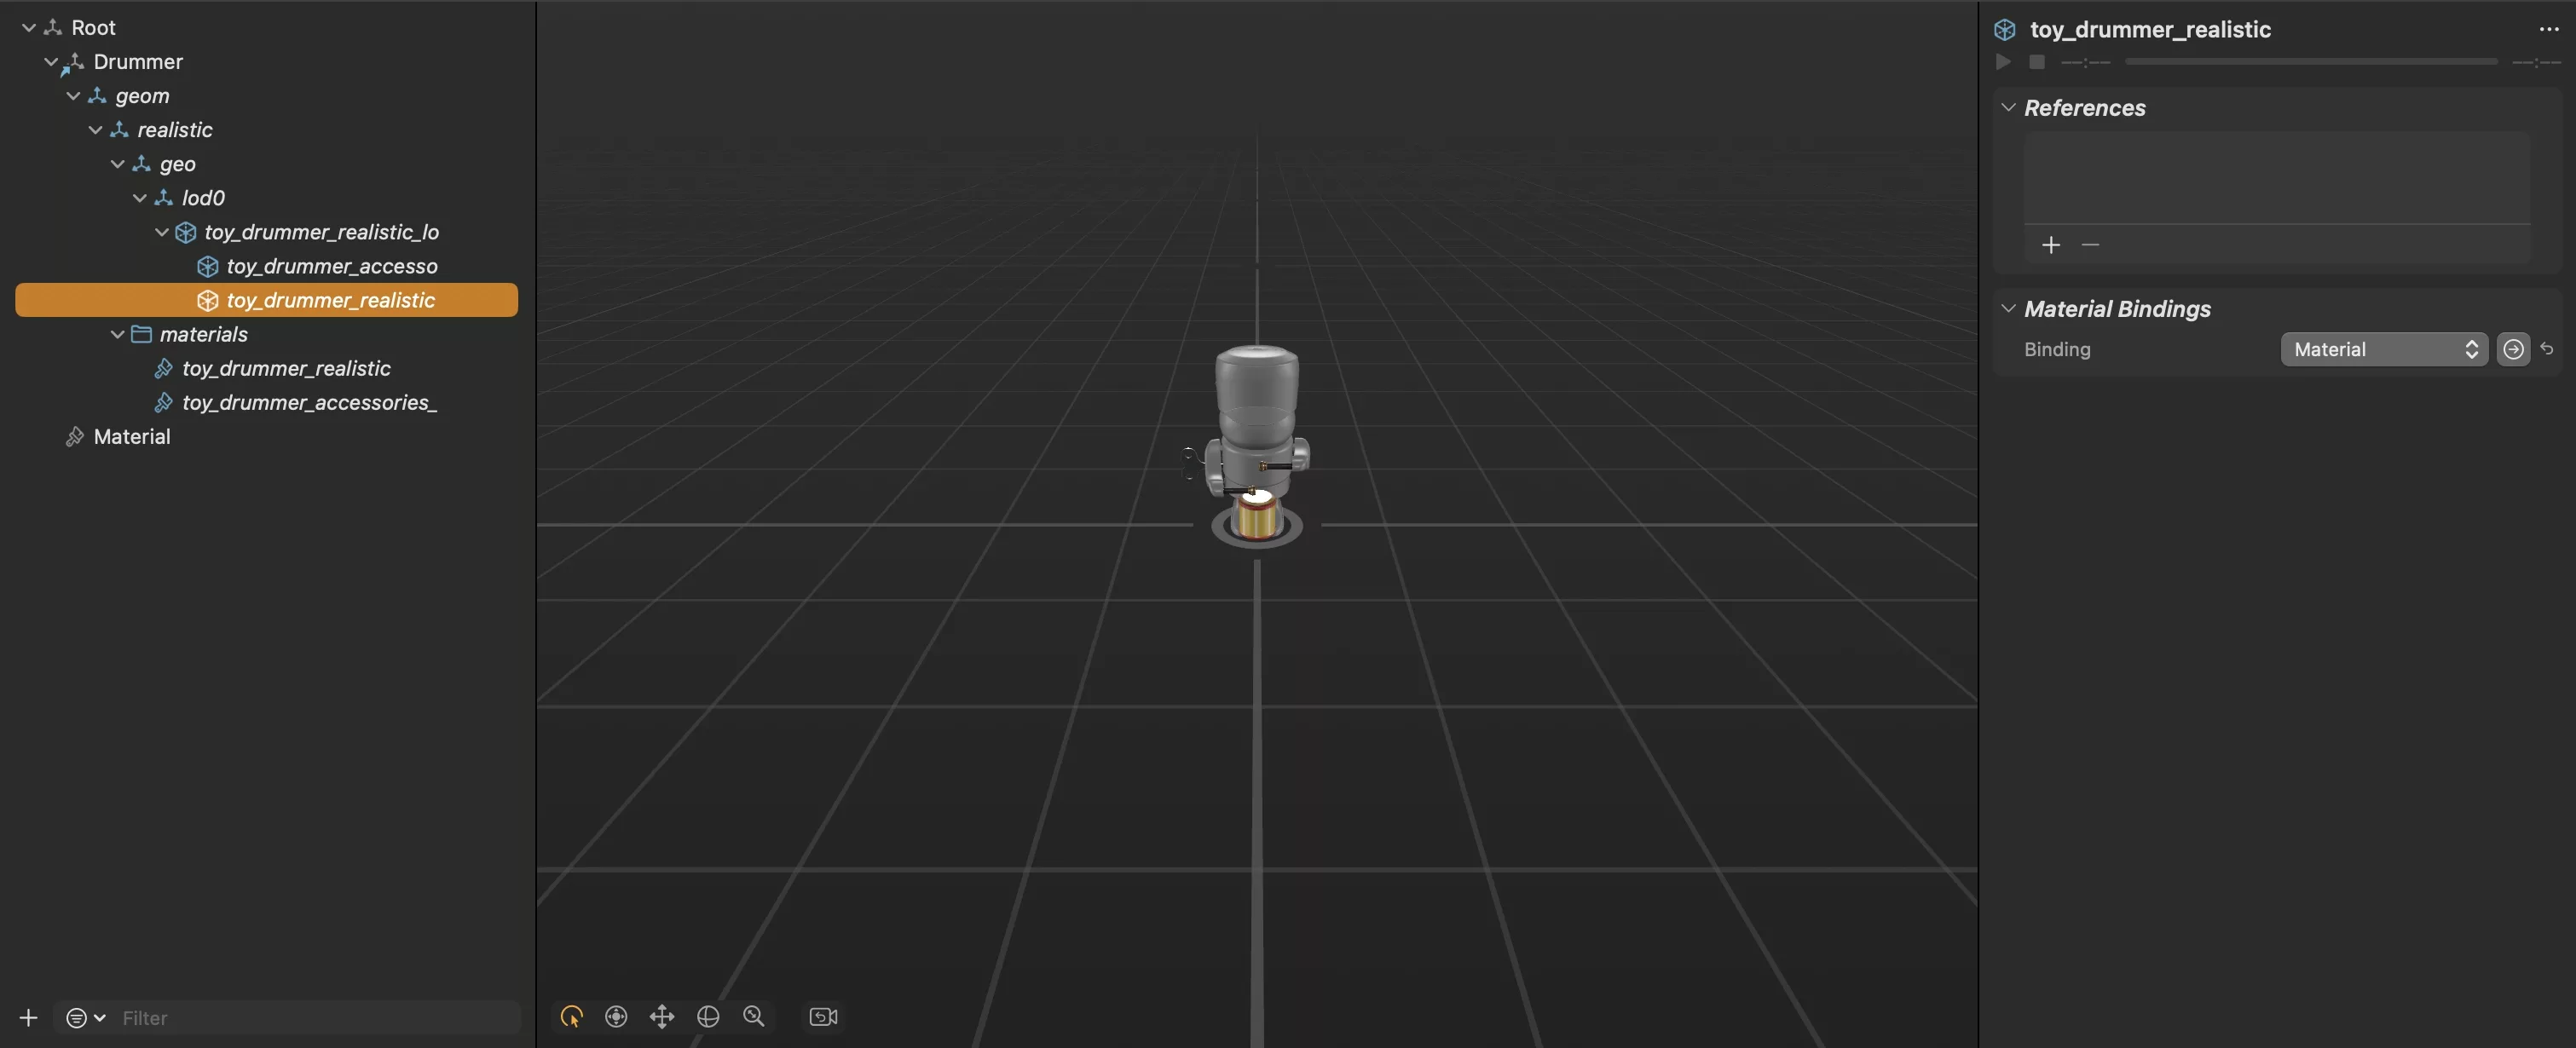
Please note that, as shown below, depending on the model, you may need to apply it to a child of the parent model.
Looking to learn more about Augmented Reality, Design and Technology?
Search our blog to learn more about A/R, design and technology.