How to create custom shaders using Reality Composer Pro
In a Reality Composer Pro scene, select the shader graph and create a new Material.

In a Reality Composer Pro scene, select the shader graph and create a new Material.
SubscribeThis tutorial walks you through how to create a new custom shader material using Reality Composer Pro.
We recommend that you consult the sessions below to learn more about what you can do with the Shader Graph.
Step One: Open the Scene
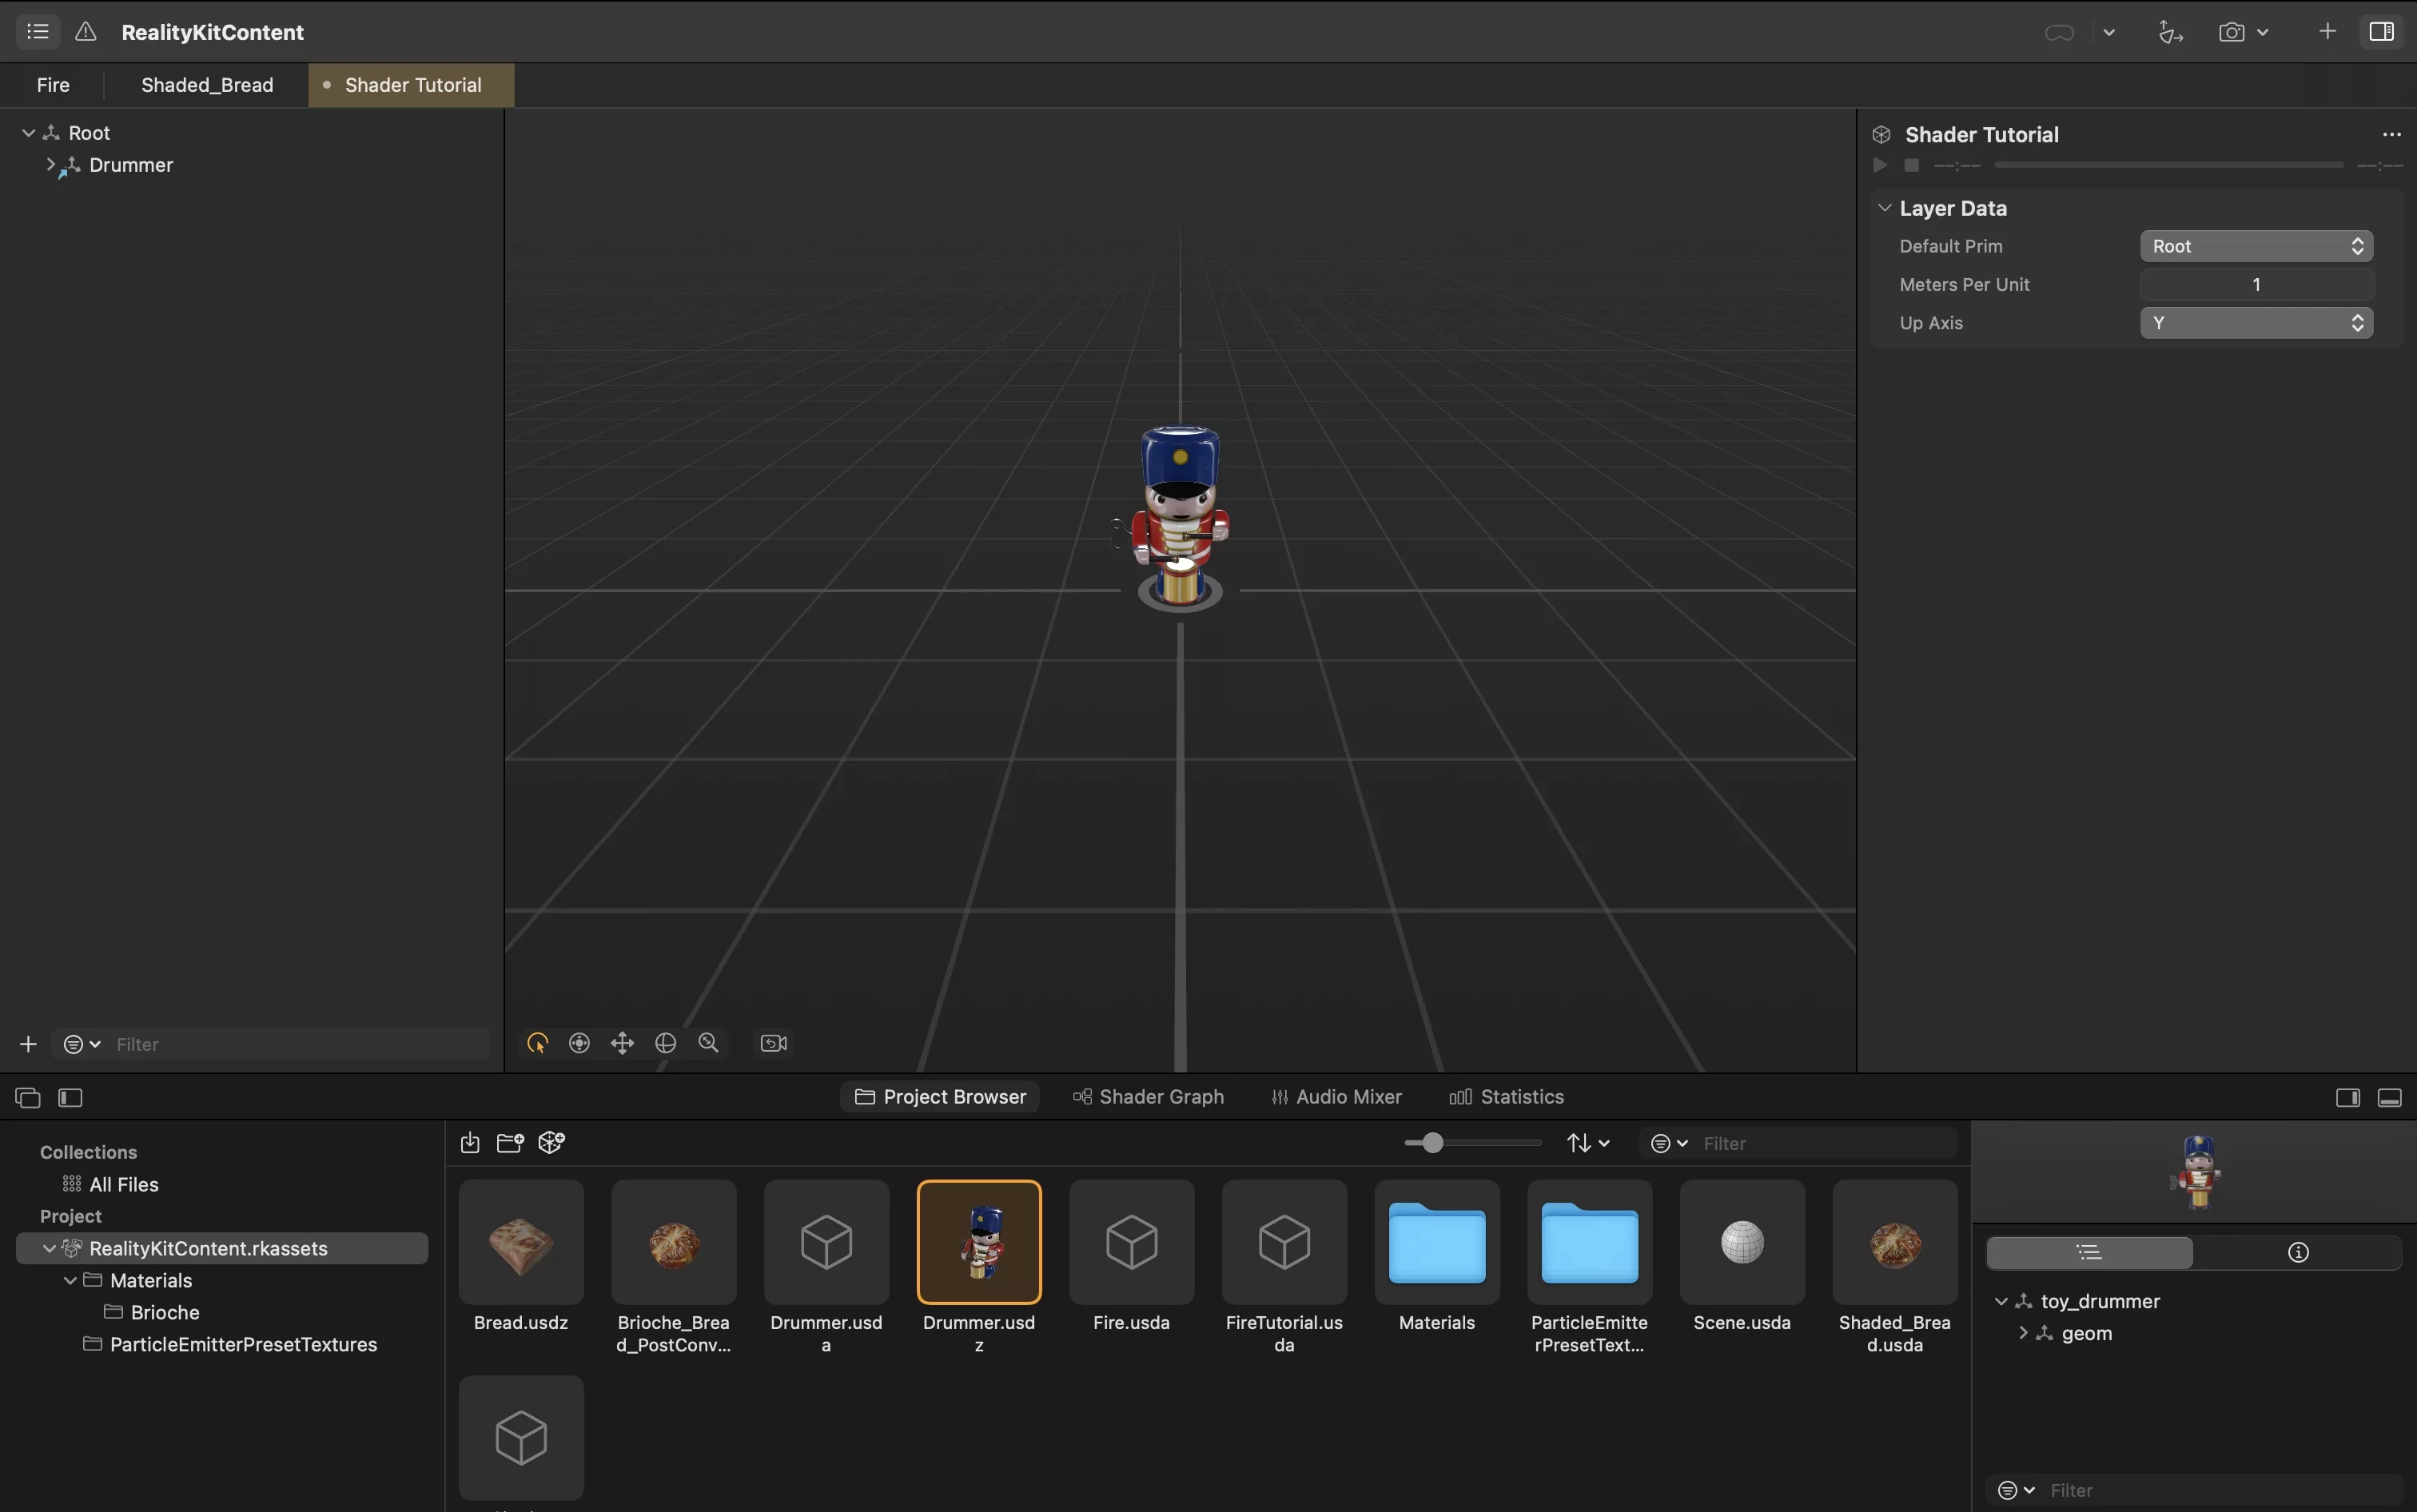
Open the Reality Composer Pro project and select the scene where you would like to create the custom shader material.
Step Two: Create the Material
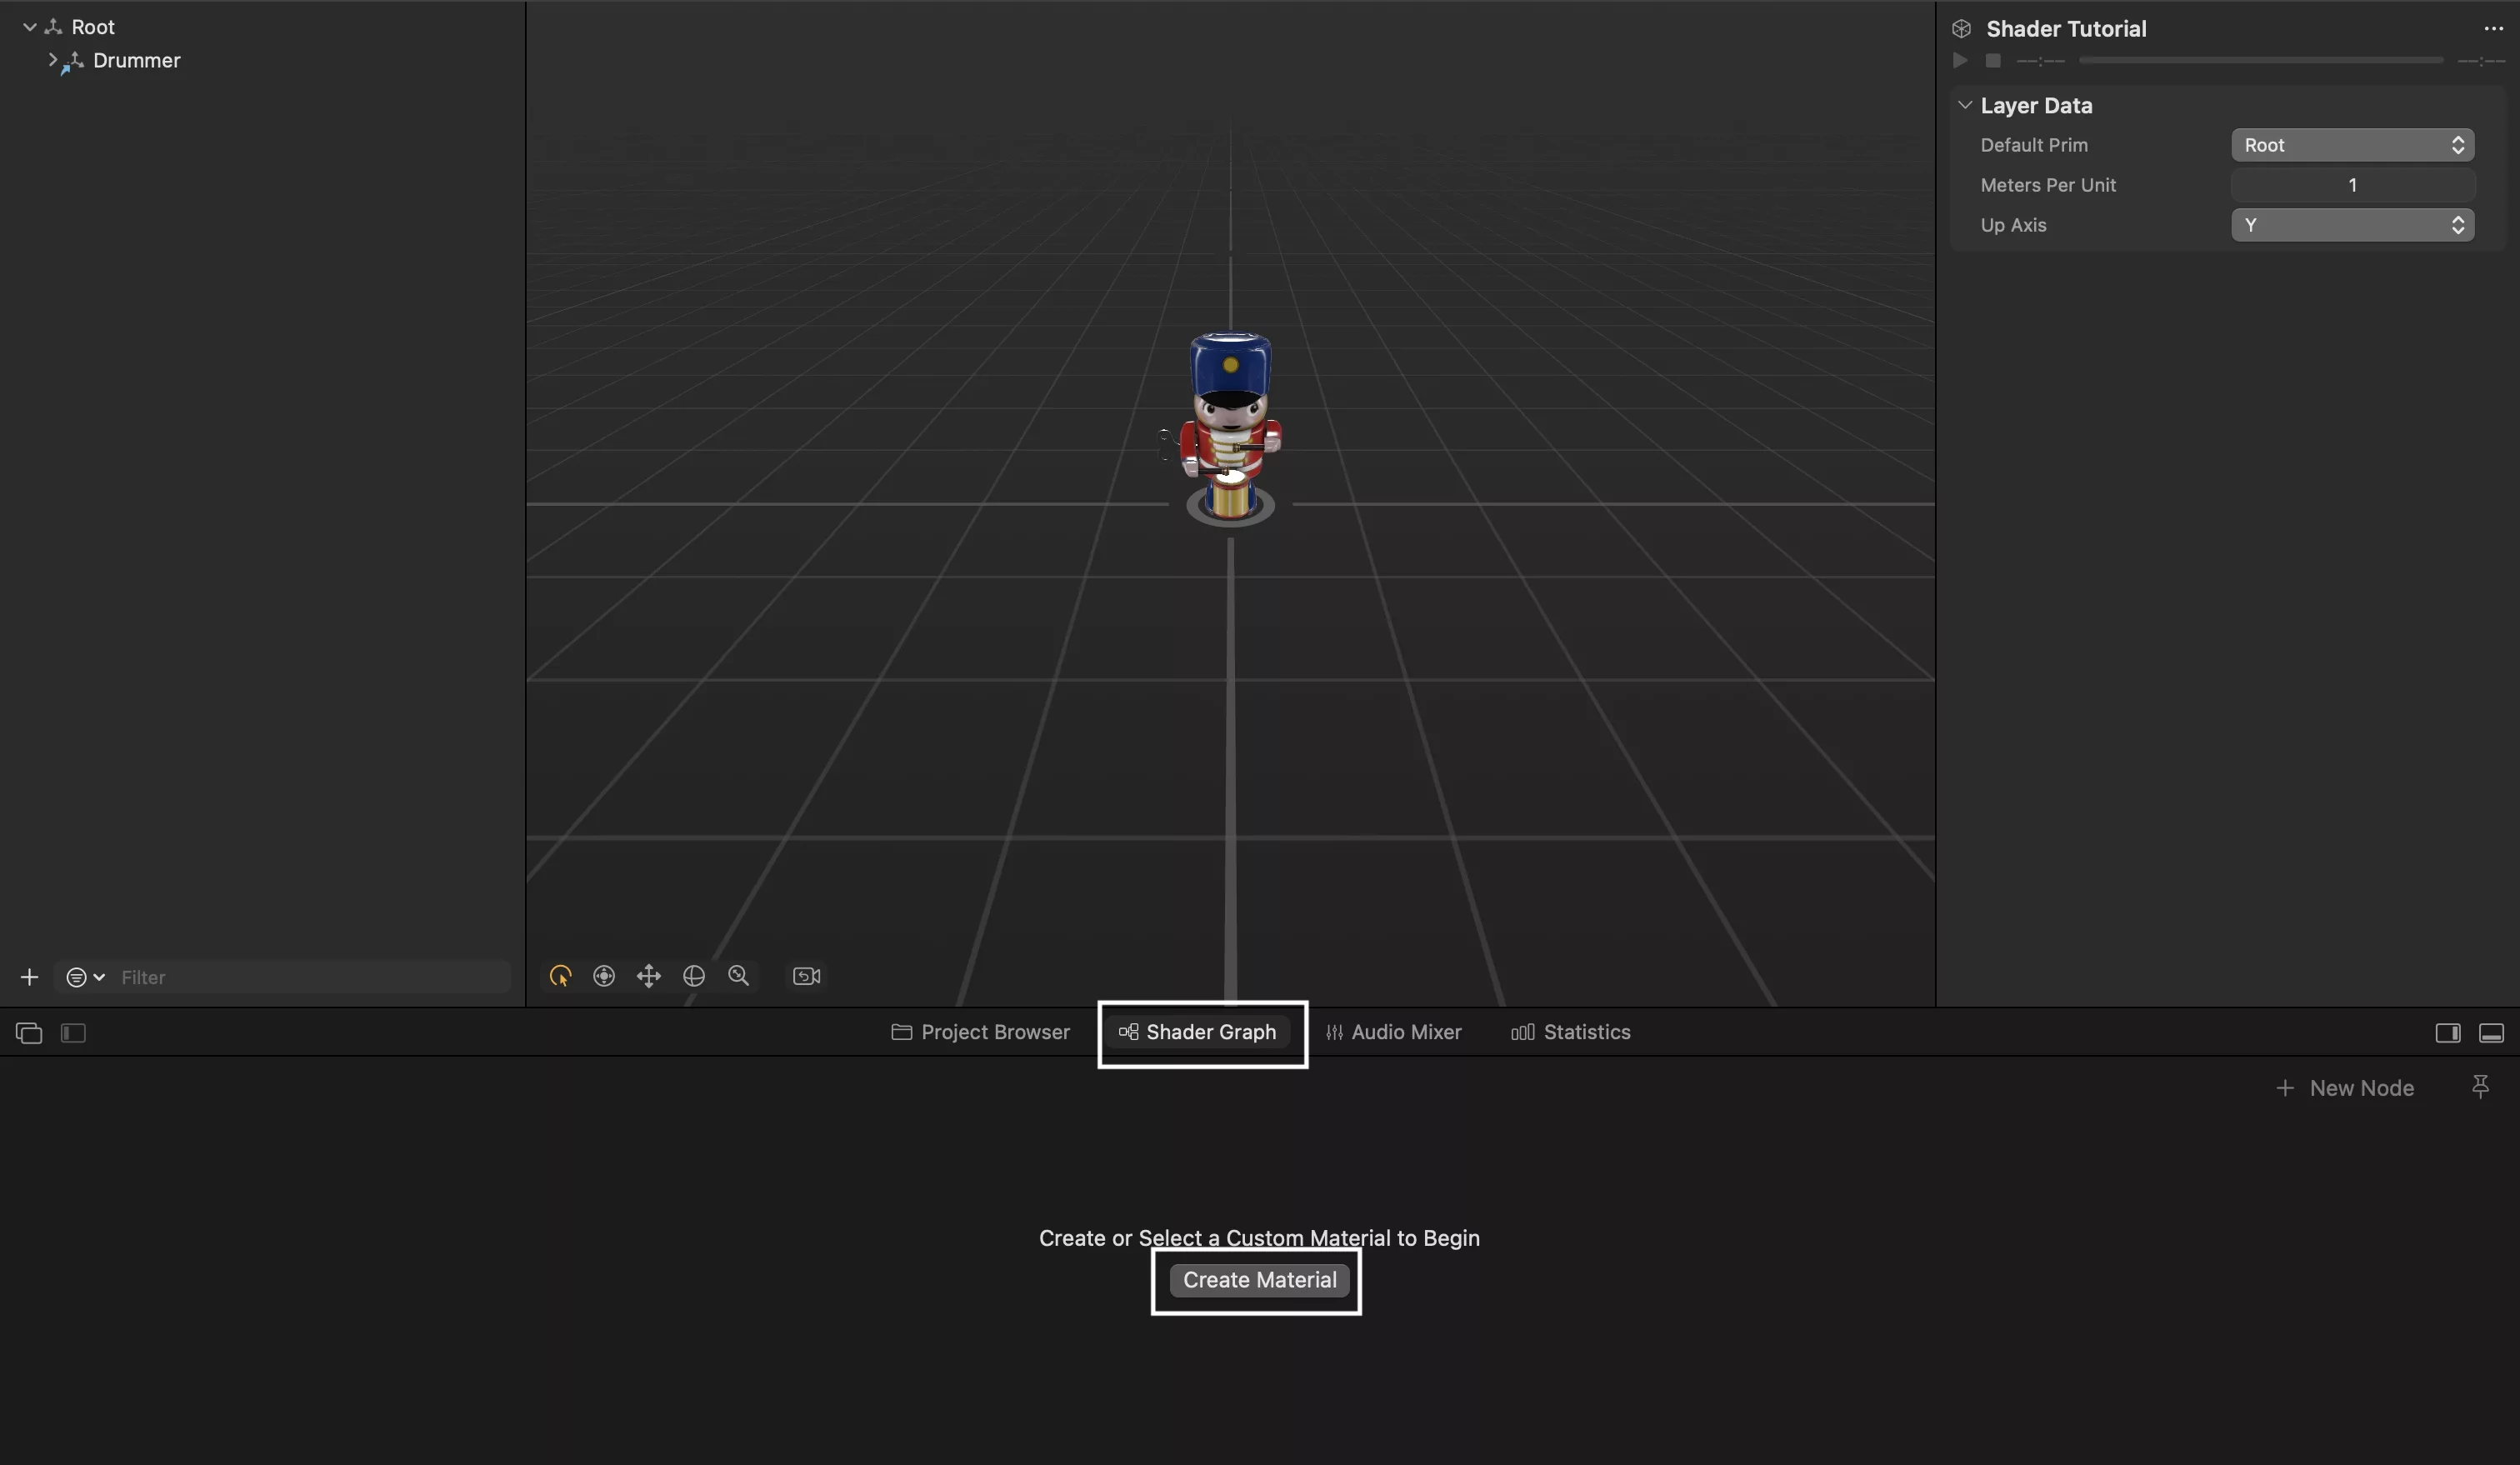
Click the Shader Graph button that sits below the scene editor.
Step Three: Construct the Shader Material
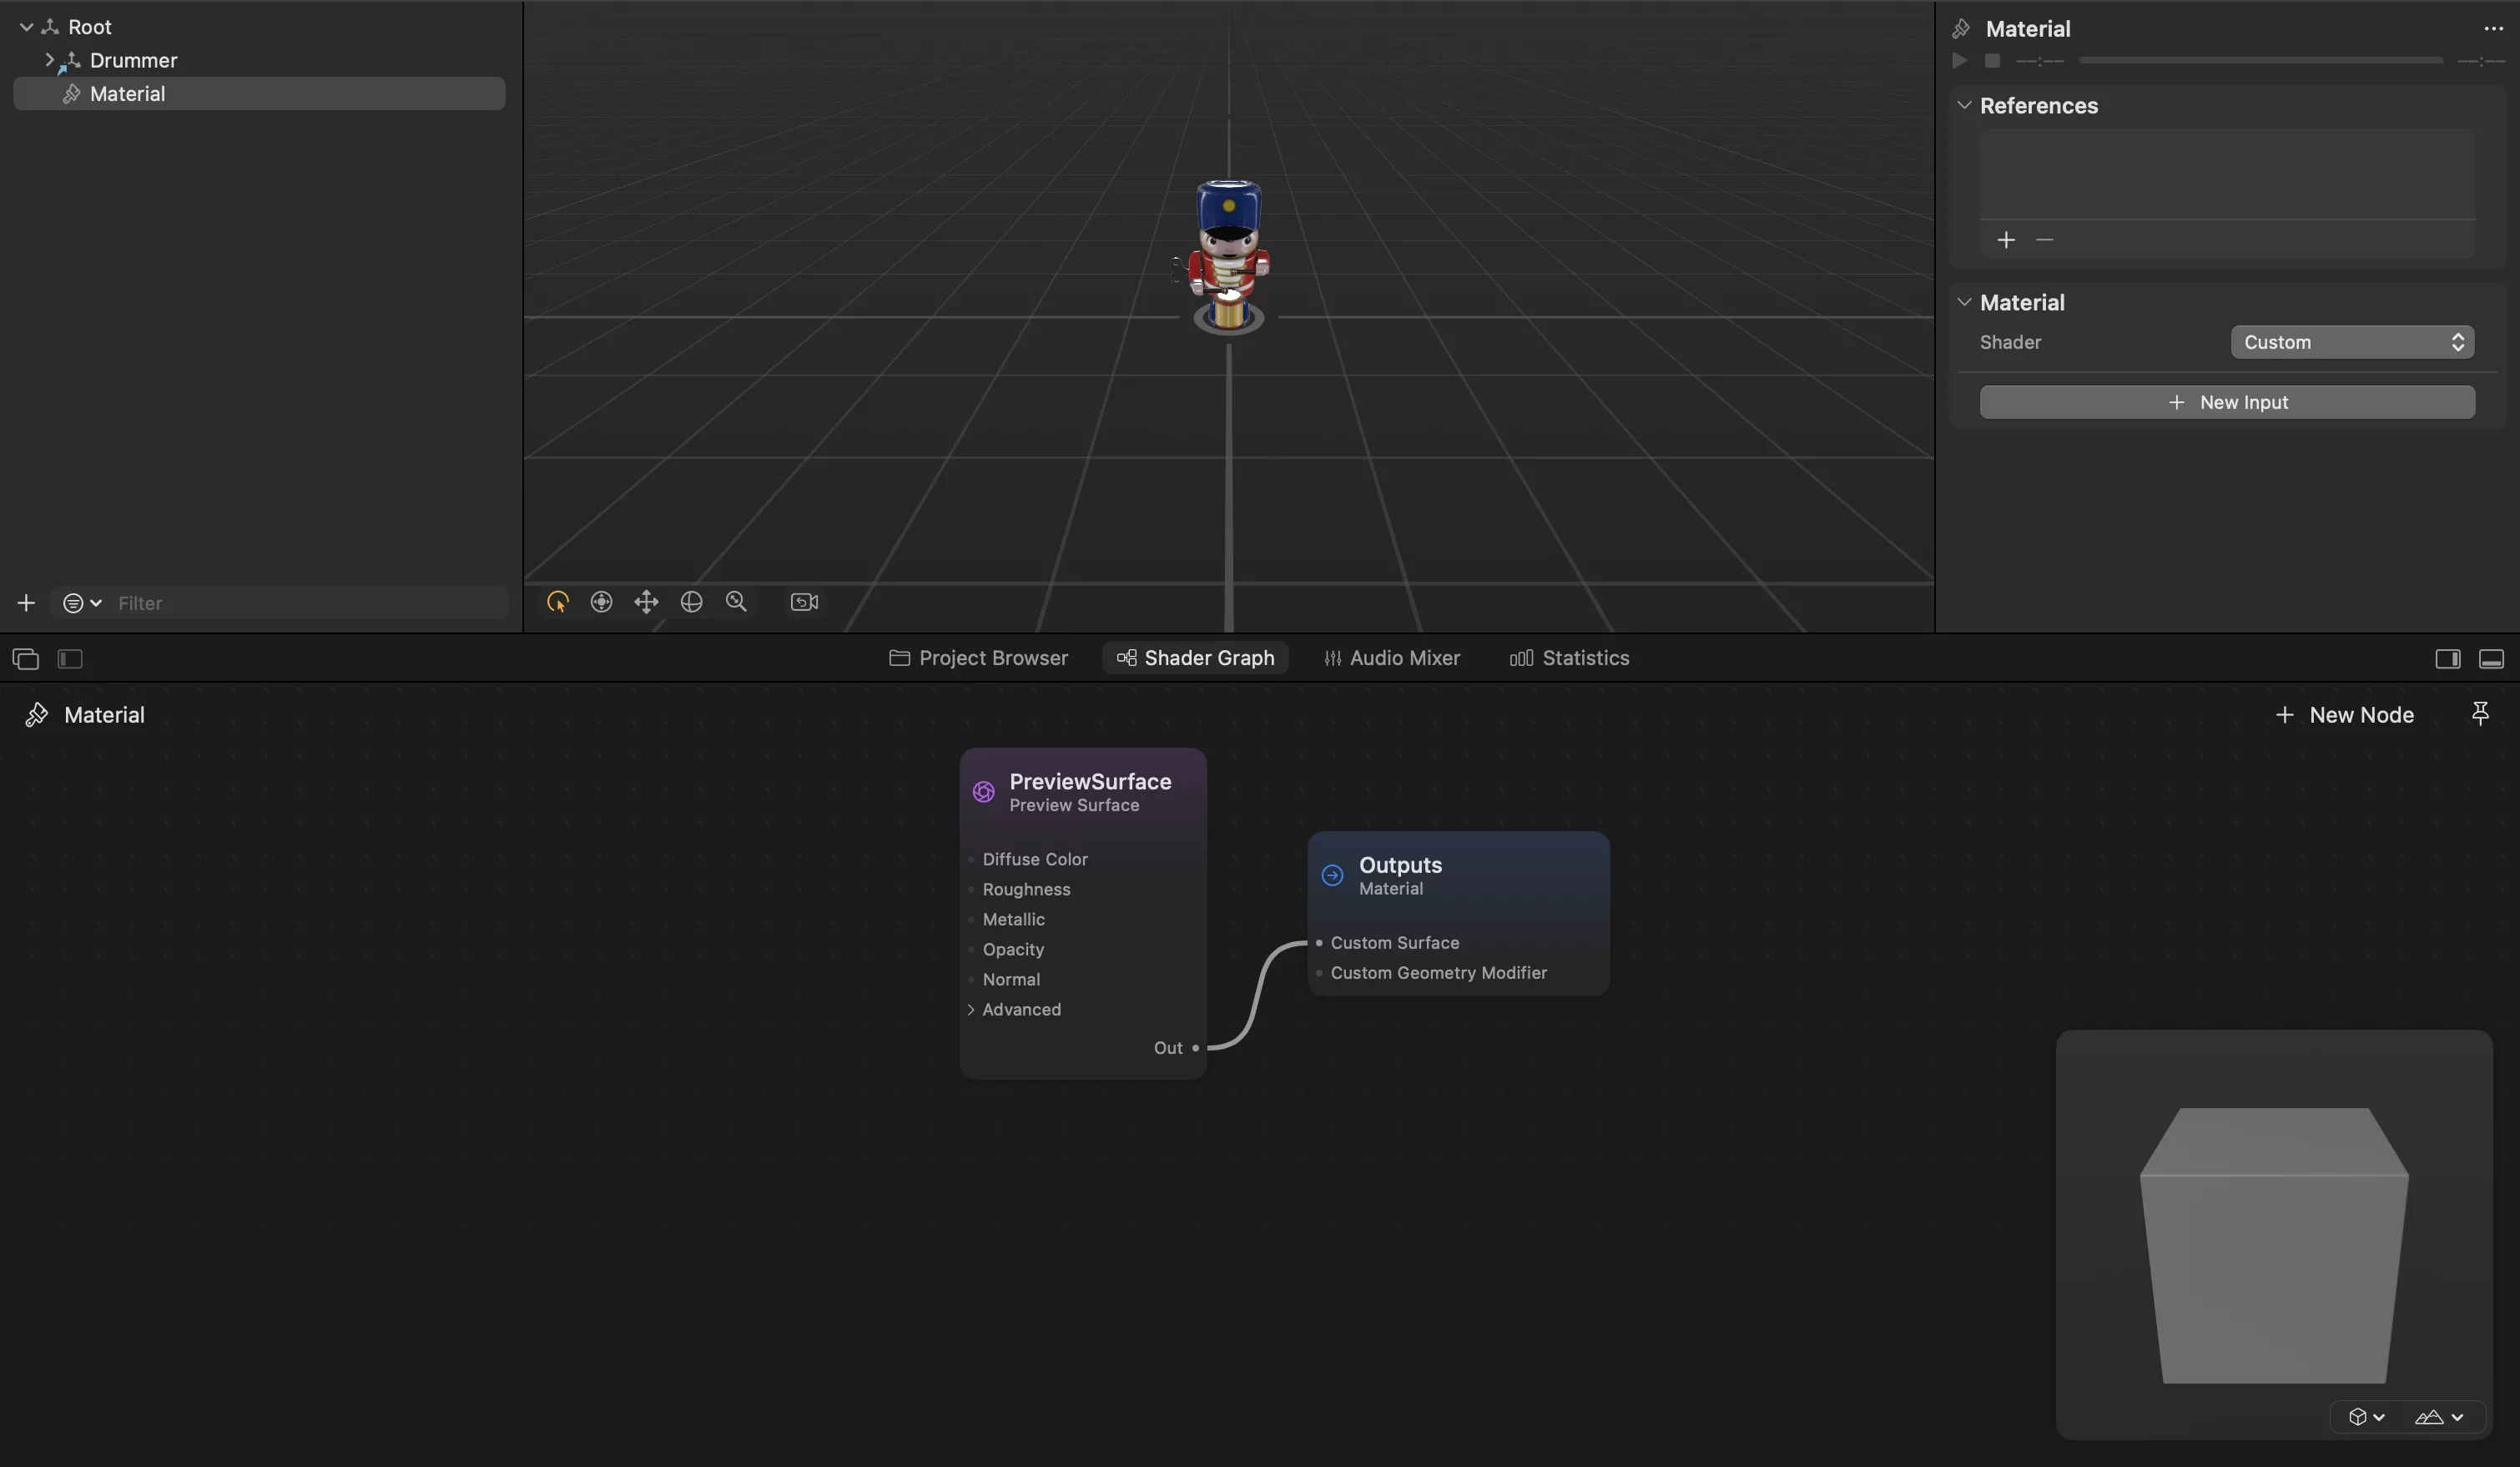
Add and connect nodes to create your custom shader material.
If you are looking to learn how to apply it to a model so you can see how the shader affects a model in real time, consult the tutorial below.
Looking to learn more about Augmented Reality, Design and Technology?
Search our blog to learn more about A/R, design and technology.