How to launch into an immersive space in VisionOS


Update the info.plist to allow for immersive experiences and configure your immersive space in the app.
The code for this tutorial can be found in the repository linked below on the 101/open-in-immersive-style-starter branch.
The fundamentals for this tutorial were taken from Apple's WWDC Go Beyond the Window with SwiftUI.
Step One: Setup the Immersive Space

Follow the tutorial below to learn how to trigger the activation of immersive spaces from a window.
Step Two: Update the plist

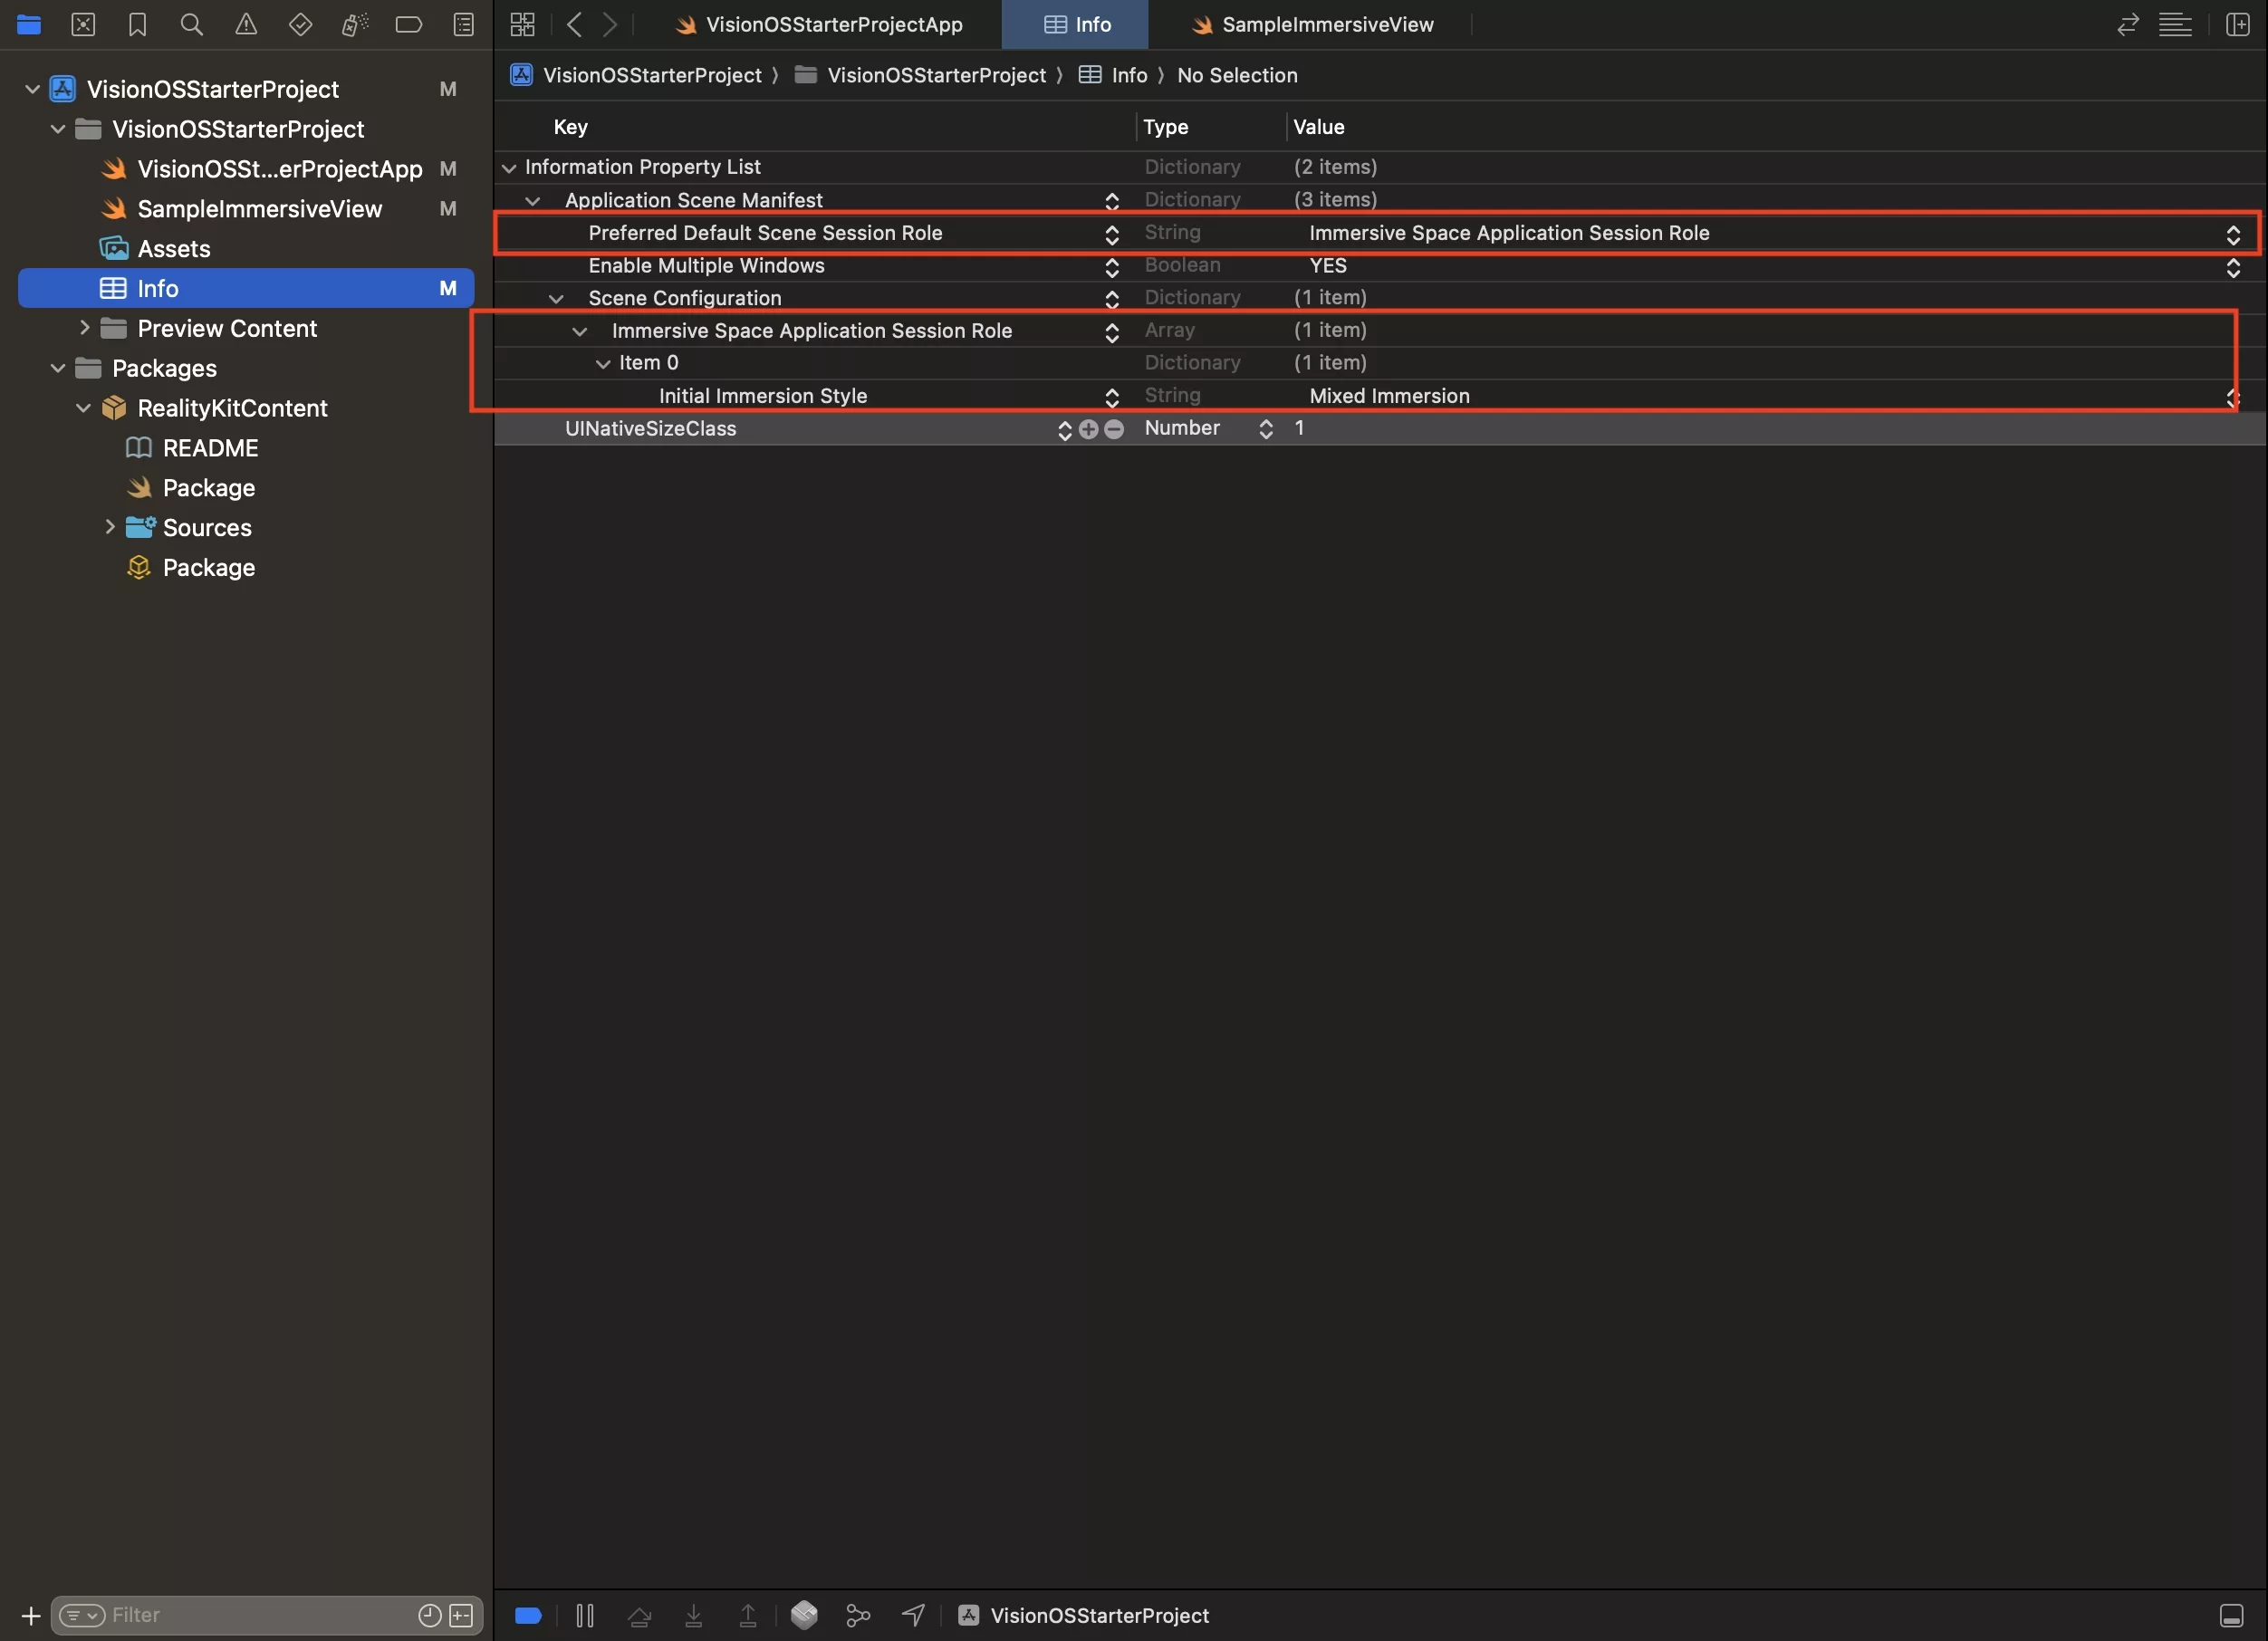
In the info.plist file:
- Set the Preferred Default Scene Session Role to Immersive Space Application Session Role.
- In the Scene Configuration, add a new array called Immersive Space Application Session Role and in its first item set the Initial Immersion Style to Mixed Immersion (or Progressive or Full).
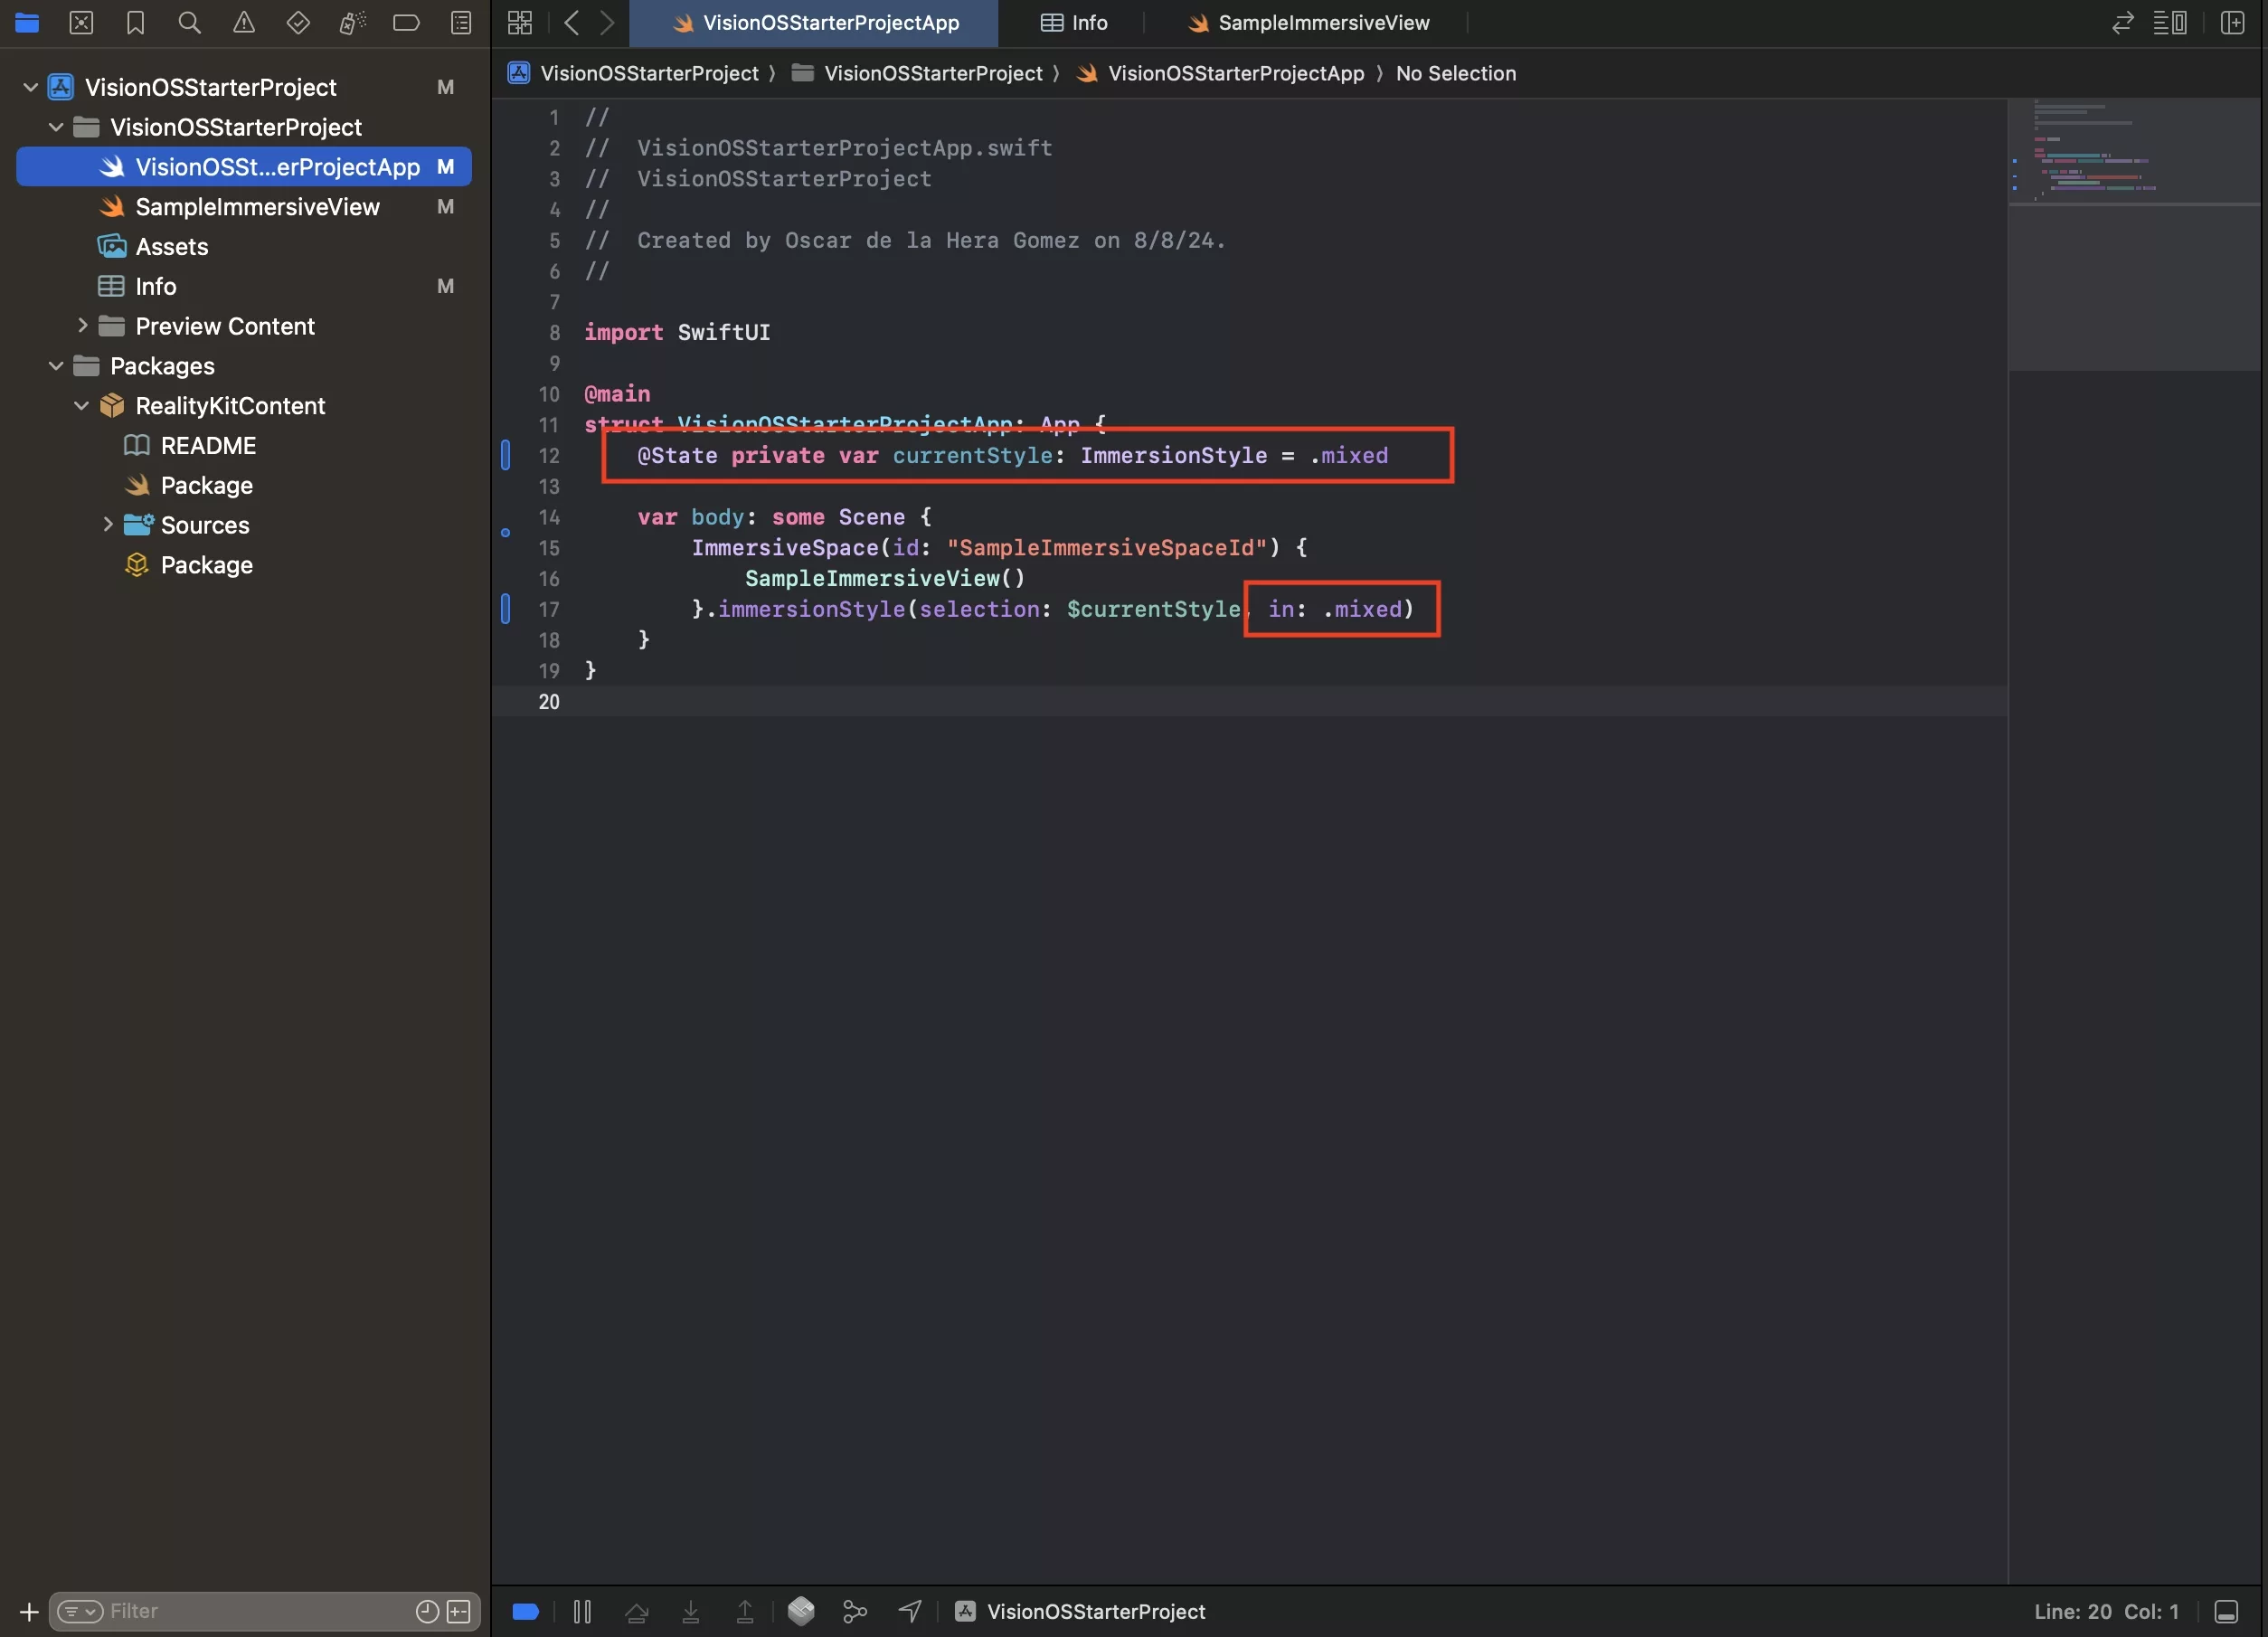
Please note that the style set in "Initial Immersion Style" must match the style set in the app.
Step Three: Update the App

In the App, update the scene to be set to the initial style set in Step Two.
You can also remove the window as it is no longer needed. That said, Apple requires a way for the app to be open and close the app - windows are normally used for this.
To learn how to add multiple immersive styles to an immersive space, consult the link below.
Step Four: Test

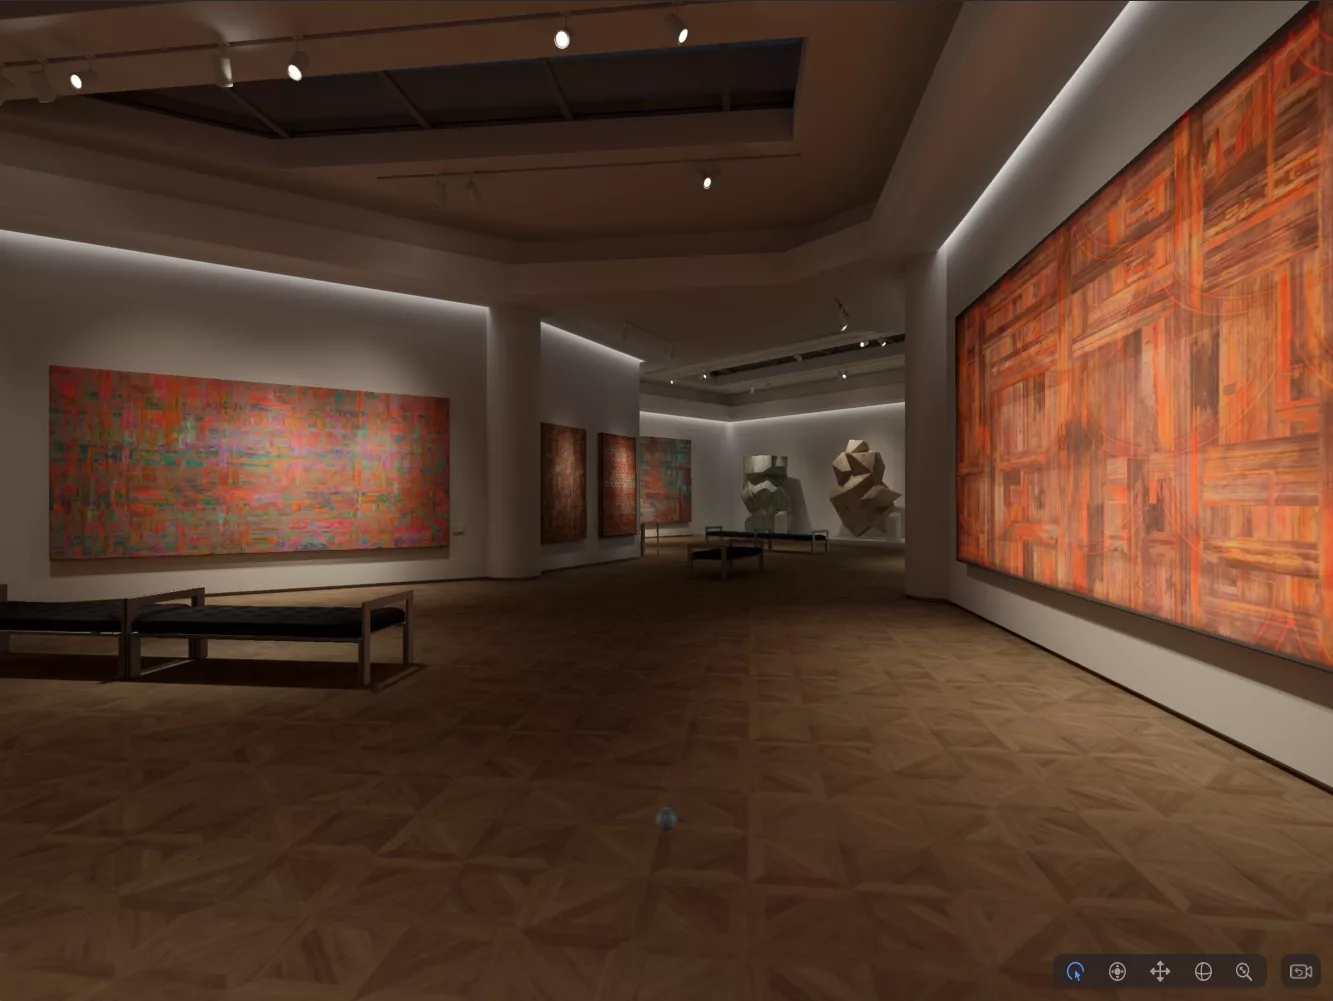
Run the app and confirm it launches into an immersive space.
Looking to learn more about VisionOS, Spatial Computing, Design and Technology?
Search our blog to learn more about visionOS, spatial computing, design and technology.
