How to create a mixed reality try out via Apple AR Quick Look and Google Scene Viewer.
A mixed reality tutorial that transforms a model from Blender to Apple AR Quick Look and Google Scene Viewer using USDPython, USDZ, GLB and ReactJS.

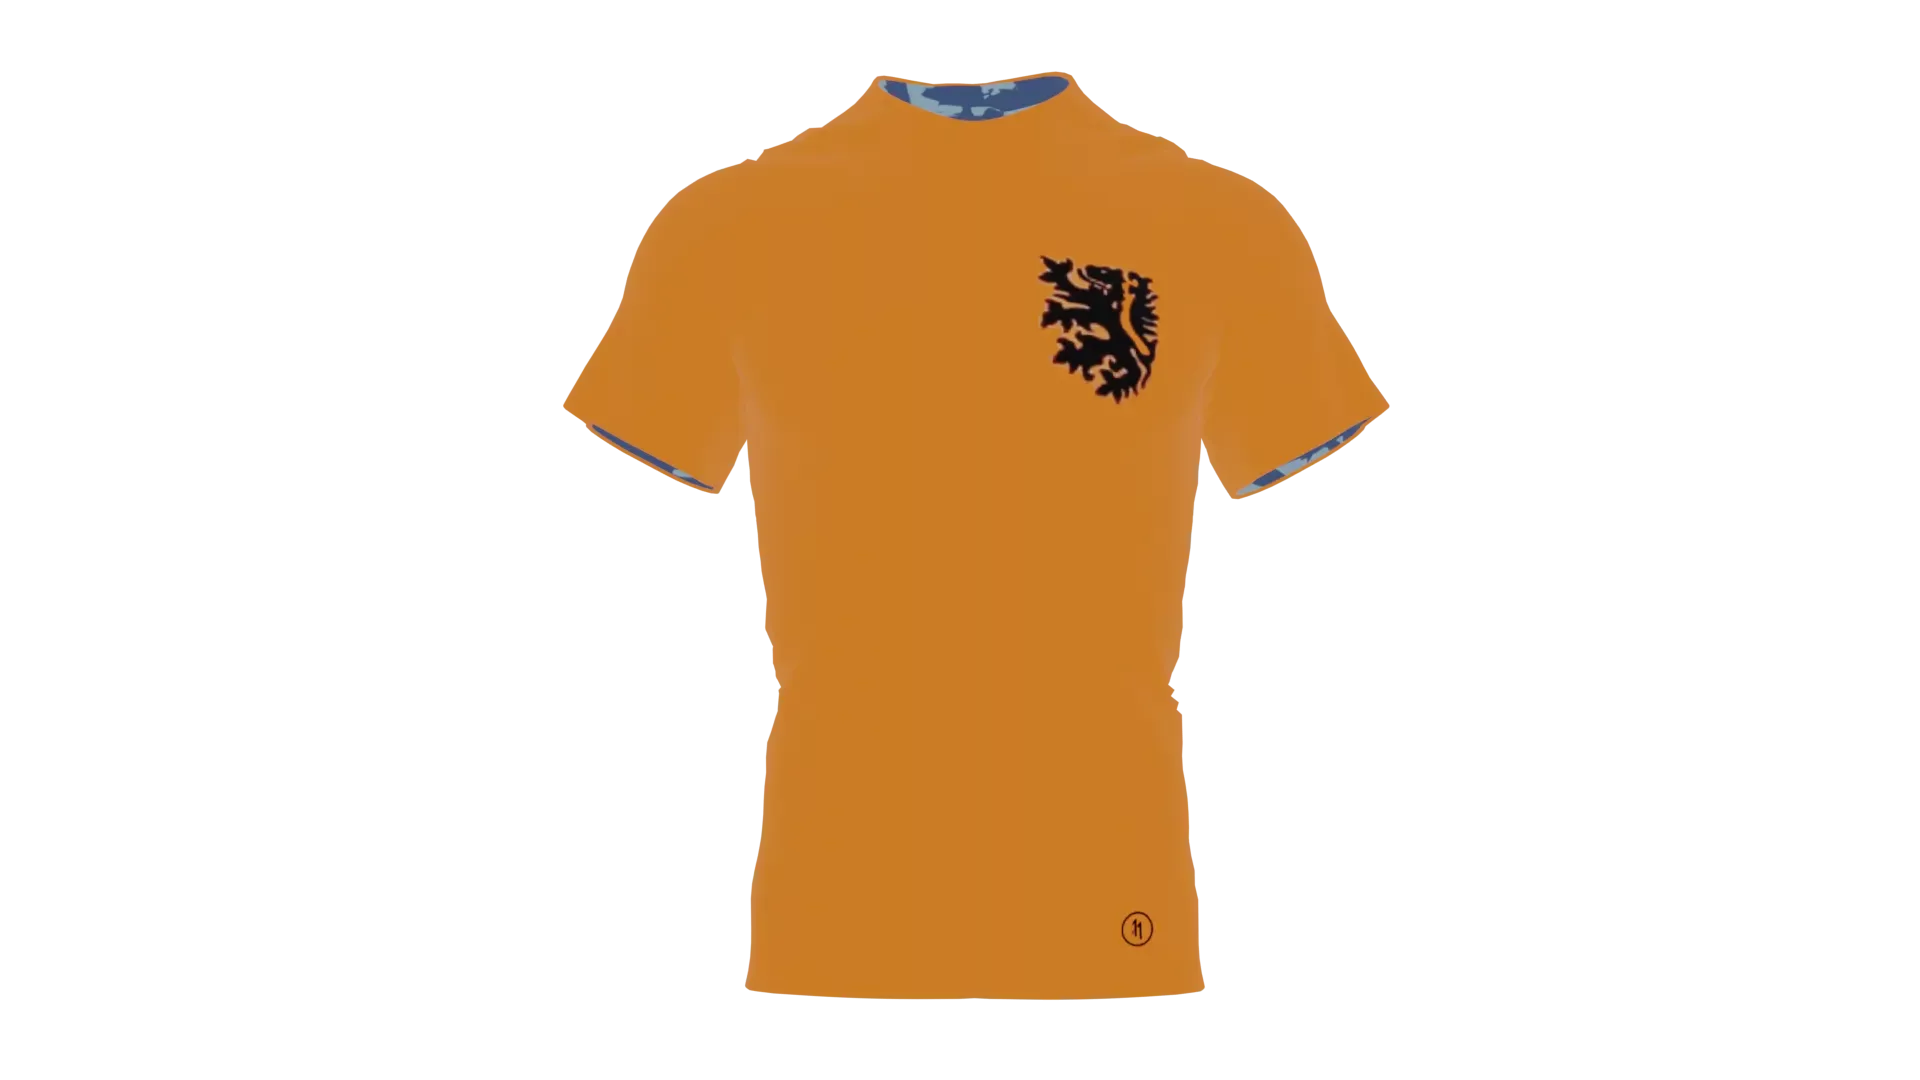
A render of a 1970 Holland Virtual Replica rendered in Blender.
This tutorial aims to walk you through how to create a mixed reality try out from a model in Blender to Apple AR Quick Look and Google Scene Viewer, as shown on Clotho.
Resources
Please find all the resources associated to this page, along with additional guides below:
Step One: Open the model in Blender
Open the file in Blender, we have attached our material and scene properties incase it helps produce a more desireable result.
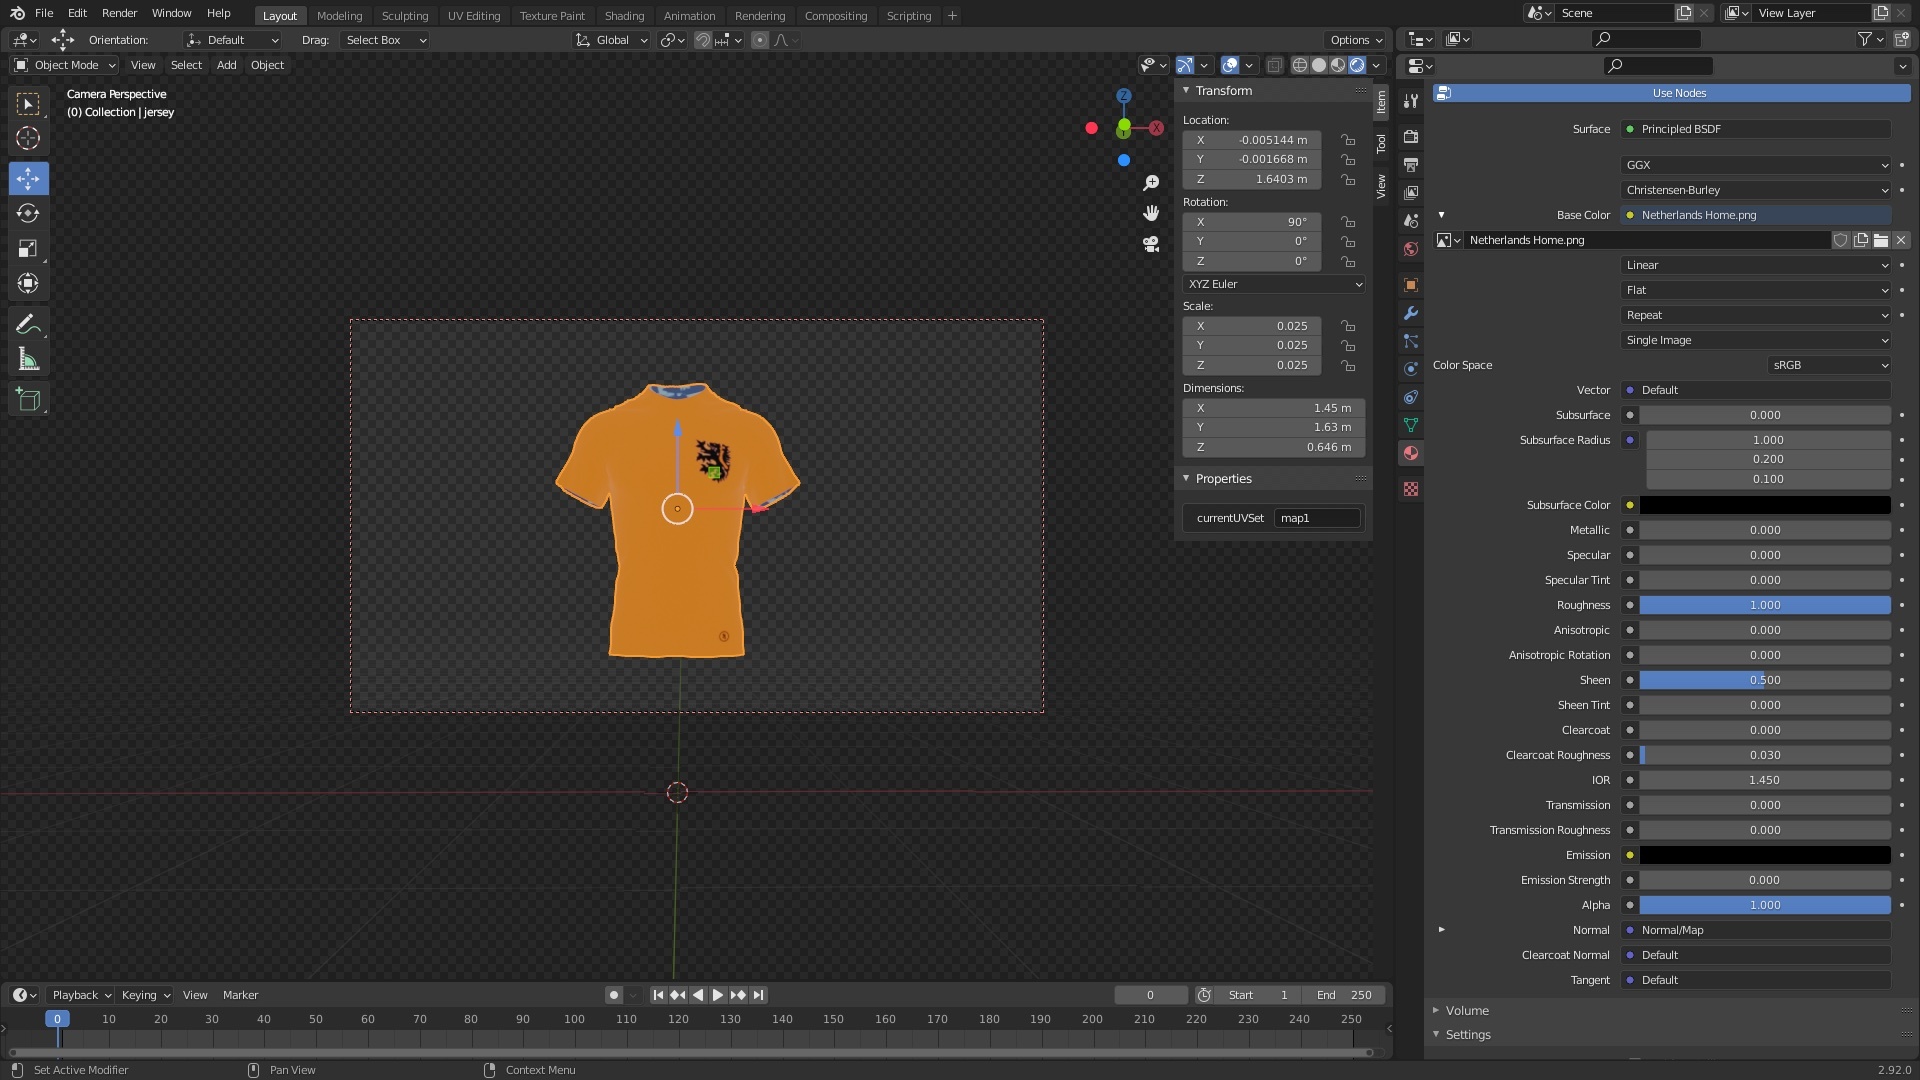
A 1970 Holland Replica in Blender with material settings on the right.
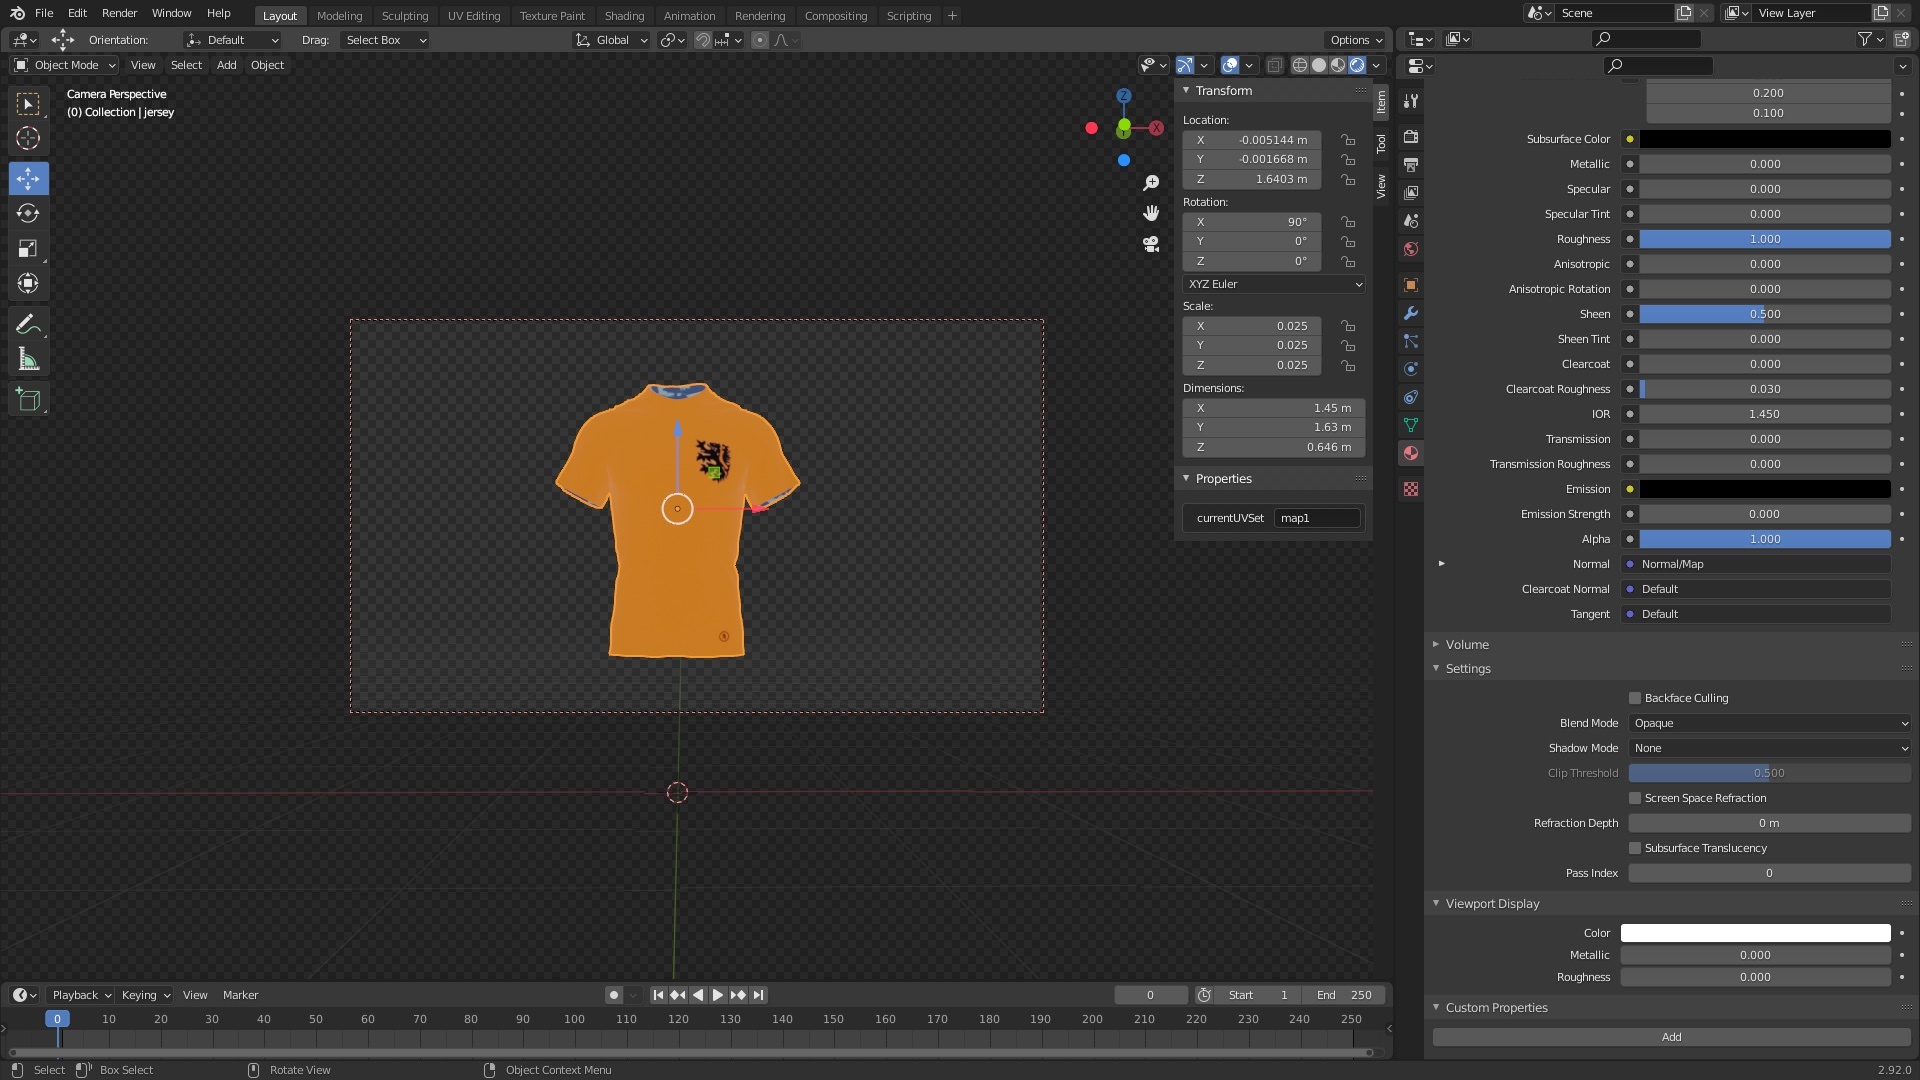
A 1970 Holland Replica in Blender with all other settings on the right.
Step Two: Export and Save the Model as a GLB
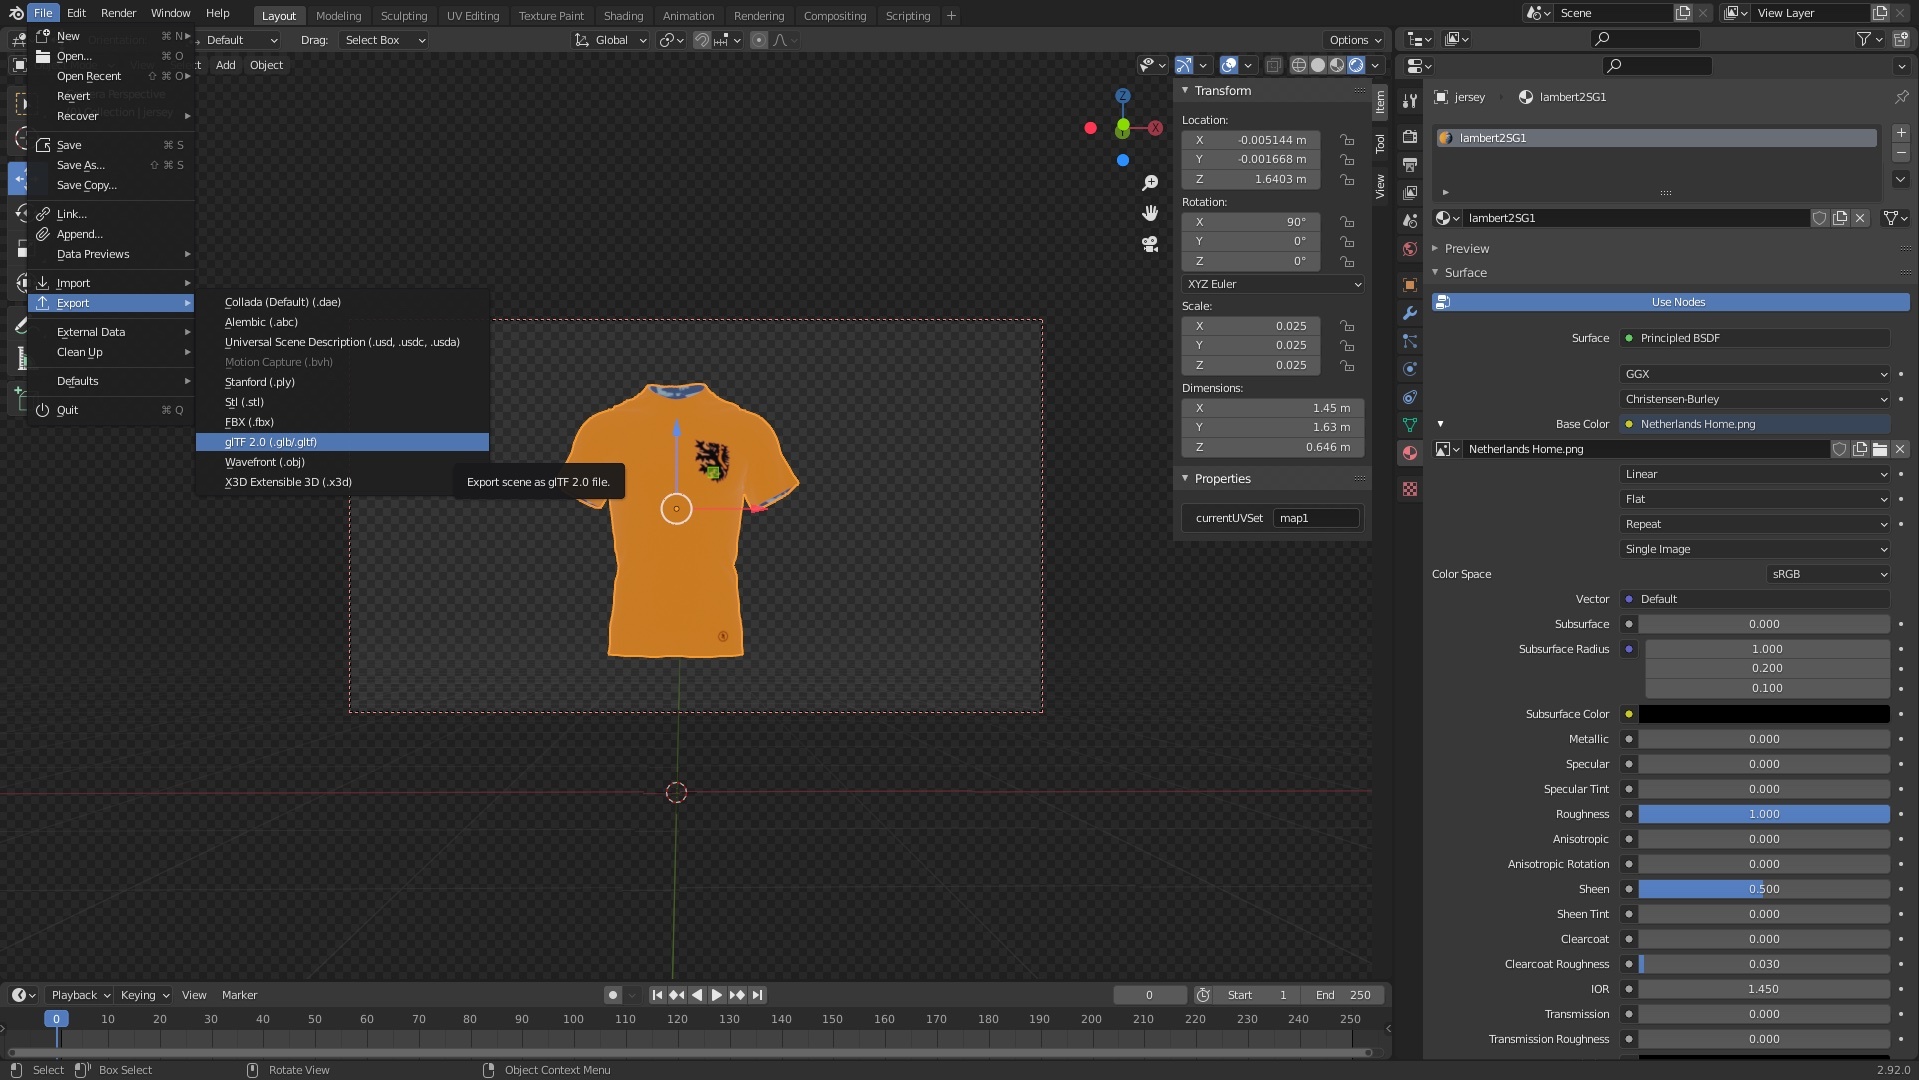
How to export the file as a GLB on Blender.
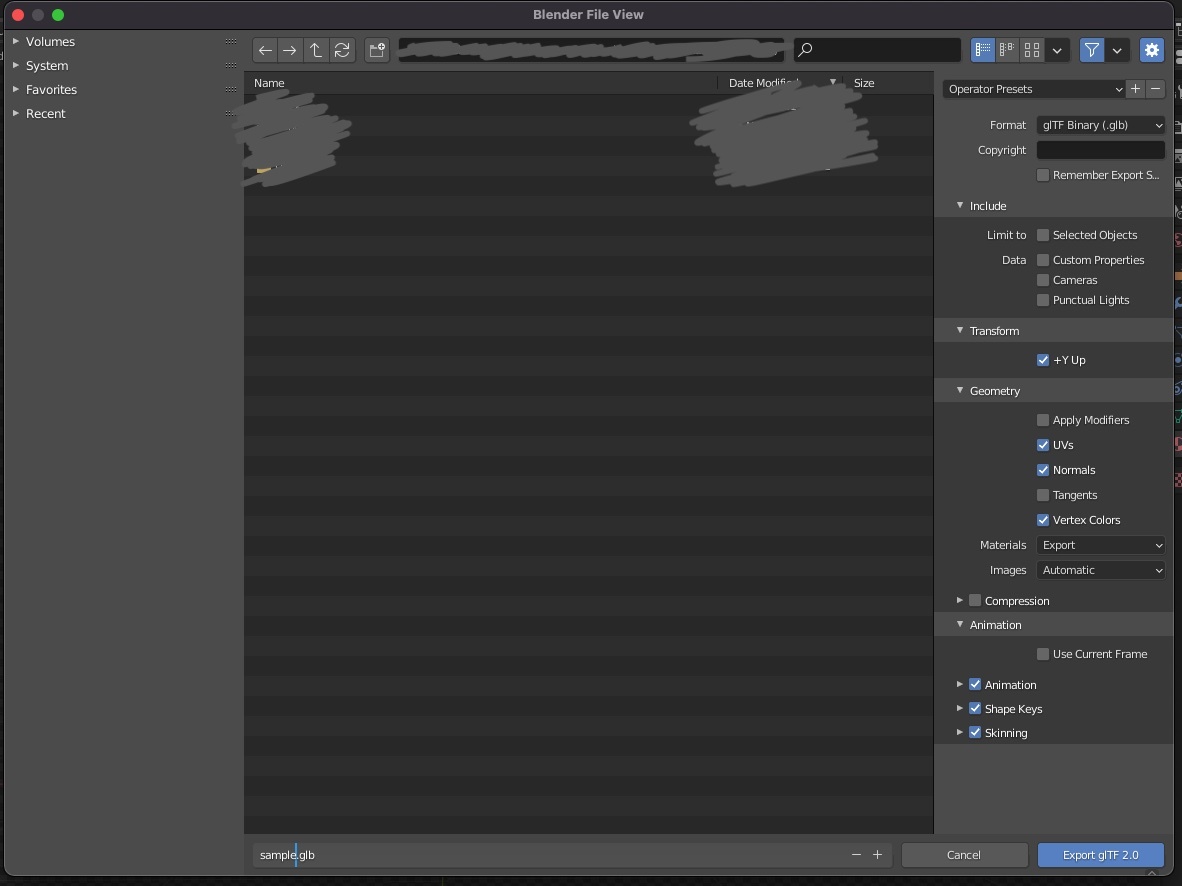
How to save a file as a GLB on Blender.
Step Three: Open USDPython Command
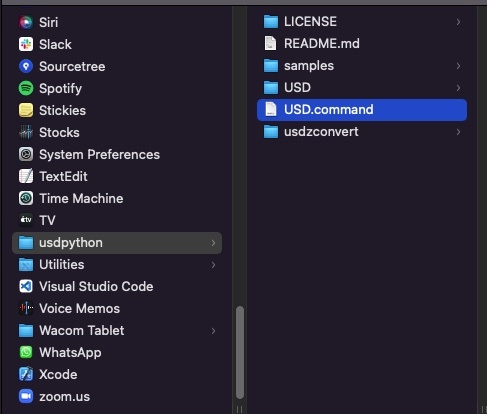
Navigate to USDPython and double click on USD.command.
If you do not have USDPython, download the USDZ Tools using the link below and install the pkg.
Please note that USDPython requires Python 3.7.
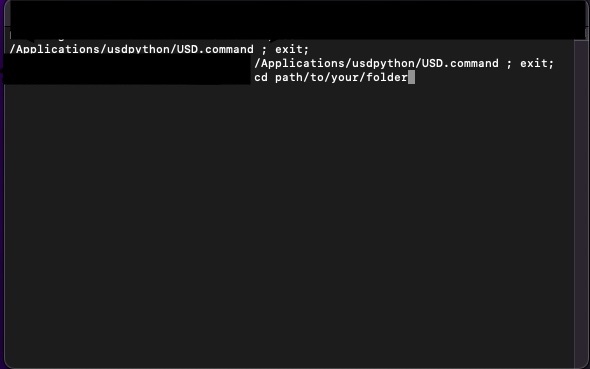
Step Four: Set the folder of the GLB as the current directory
In the terminal that pops up, navigate to your current directory.
Step Five: Convert the GLB to a USDZ
Run the following line in terminal. Update 'sample' to your filename, to ensure it gets converted correctly.
usdzconvert sample.glb sample.usdzStep Six: Verify that it converted correctly in Finder
Open the USDZ in your finder by clicking on it and pressing space bar.

Set the current directory to the place where you saved the GLB.
Step Seven: Complete the logic for the component
Complete the logic for your React Component using a our sample code below
Any Questions?
We are actively looking for feedback on how to improve this resource. Please send us a note to inquiries@delasign.com with any thoughts or feedback you may have.