Notifications in Swift
A step by step tutorial on posting and receiving notifications in Swift (iOS). Github repository included.

A step by step tutorial on posting and receiving notifications in Swift (iOS). Github repository included.
The following tutorial builds on our Swift series that from scratch shows you how to create a SwiftLint enabled project, how to add Swift Package dependencies, create a swift based style manager (known as a styleguide) and localize your app for multiple languages.
If you are looking how to post and receive notifications, jump to Step three.
Step One: Create your Notifications file
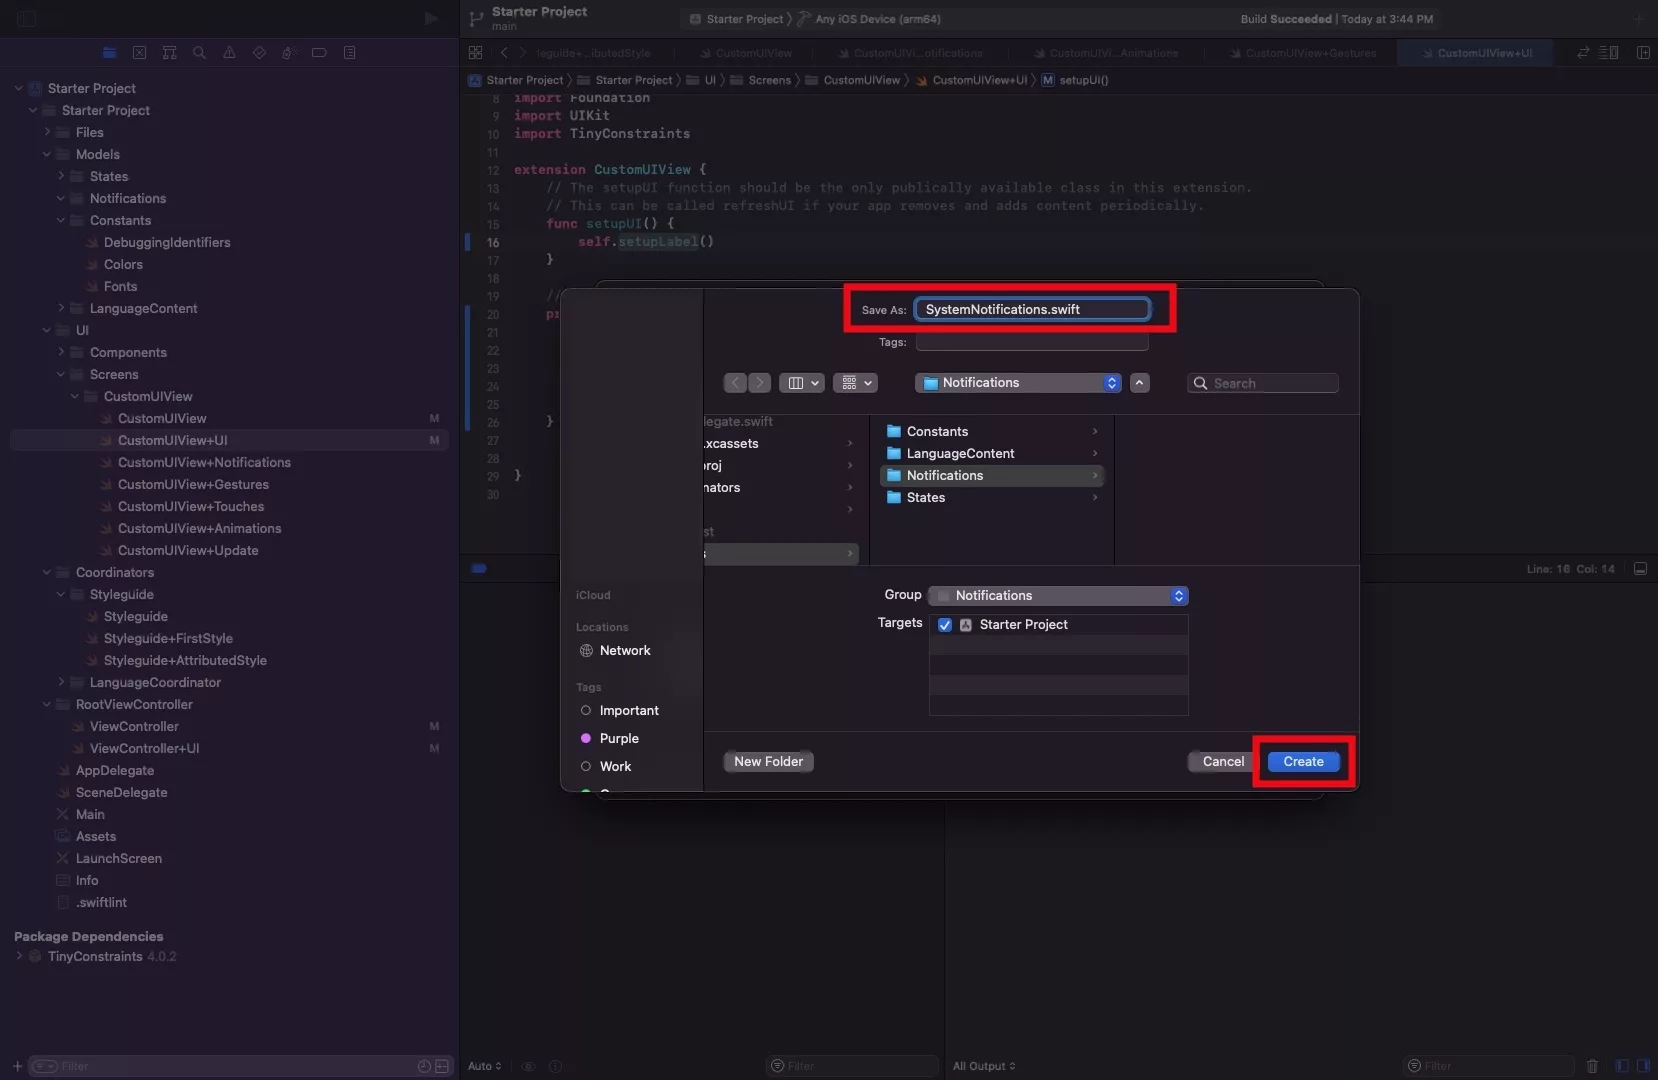
Under the Models folder, select the Notifications folder and press Command + N.
This will select the Swift, iOS file type. Press Next.
After that enter the name of your file - SystemNotifications.swift - and press Create.
Step Two: Code your struct and custom notification
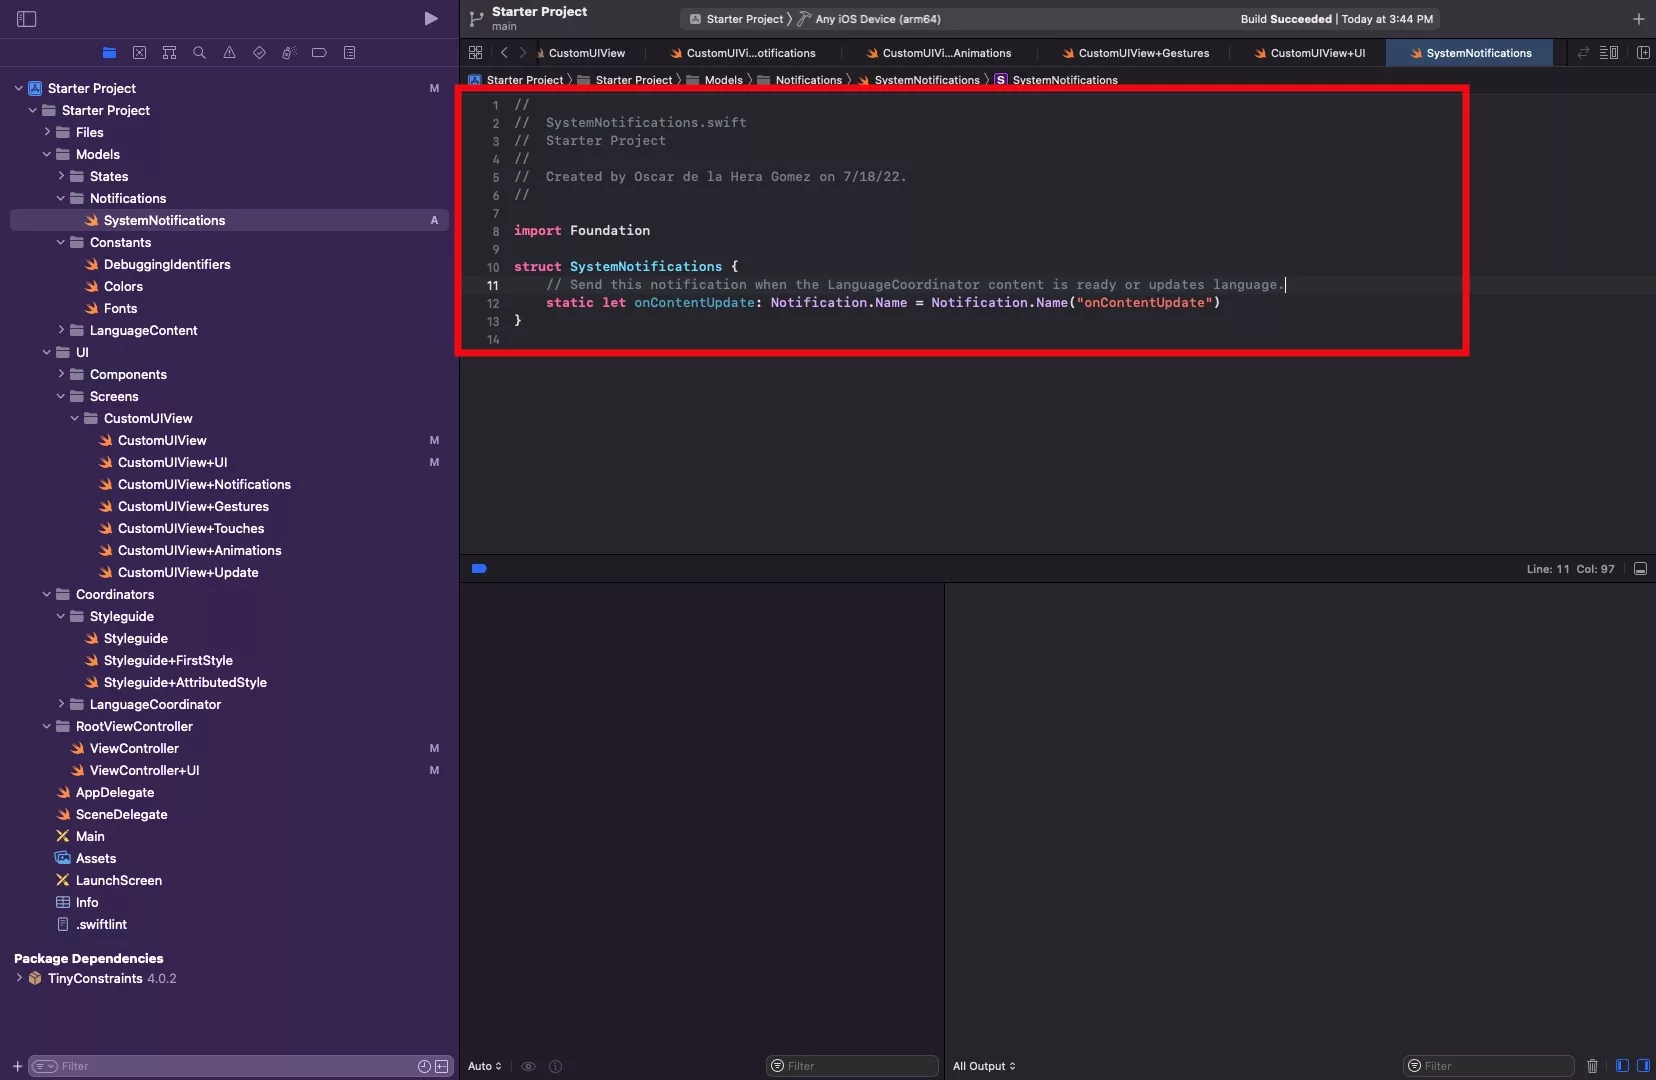
In our case, we have called our struct SystemNotifications and the custom notification onContentUpdate.
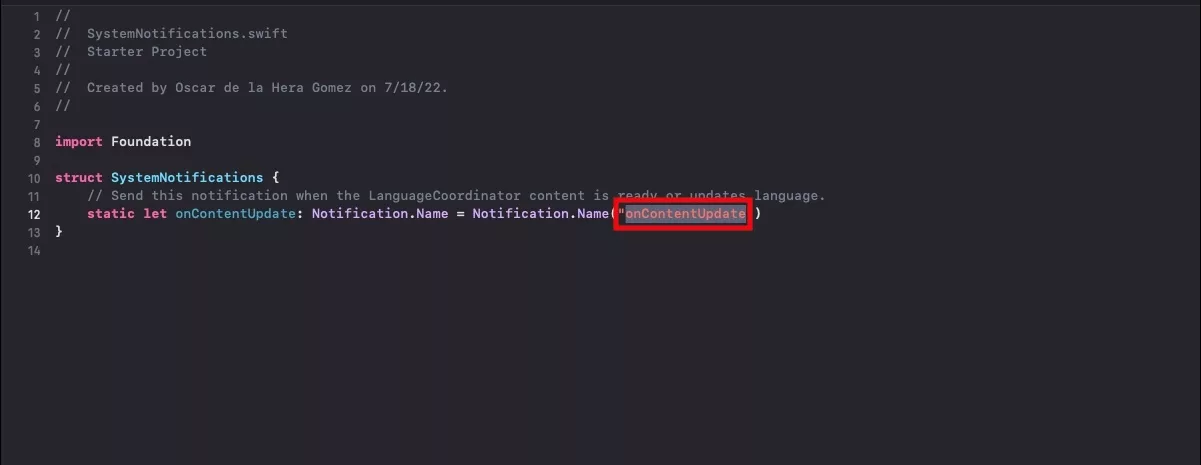
Please note that the string value on the right hand side is what is used by the system - so make sure you change both the constant name and the string value of the notification if copy-pasting, as this has been known as a source of bugs in the past.
Step Three: Post your notification
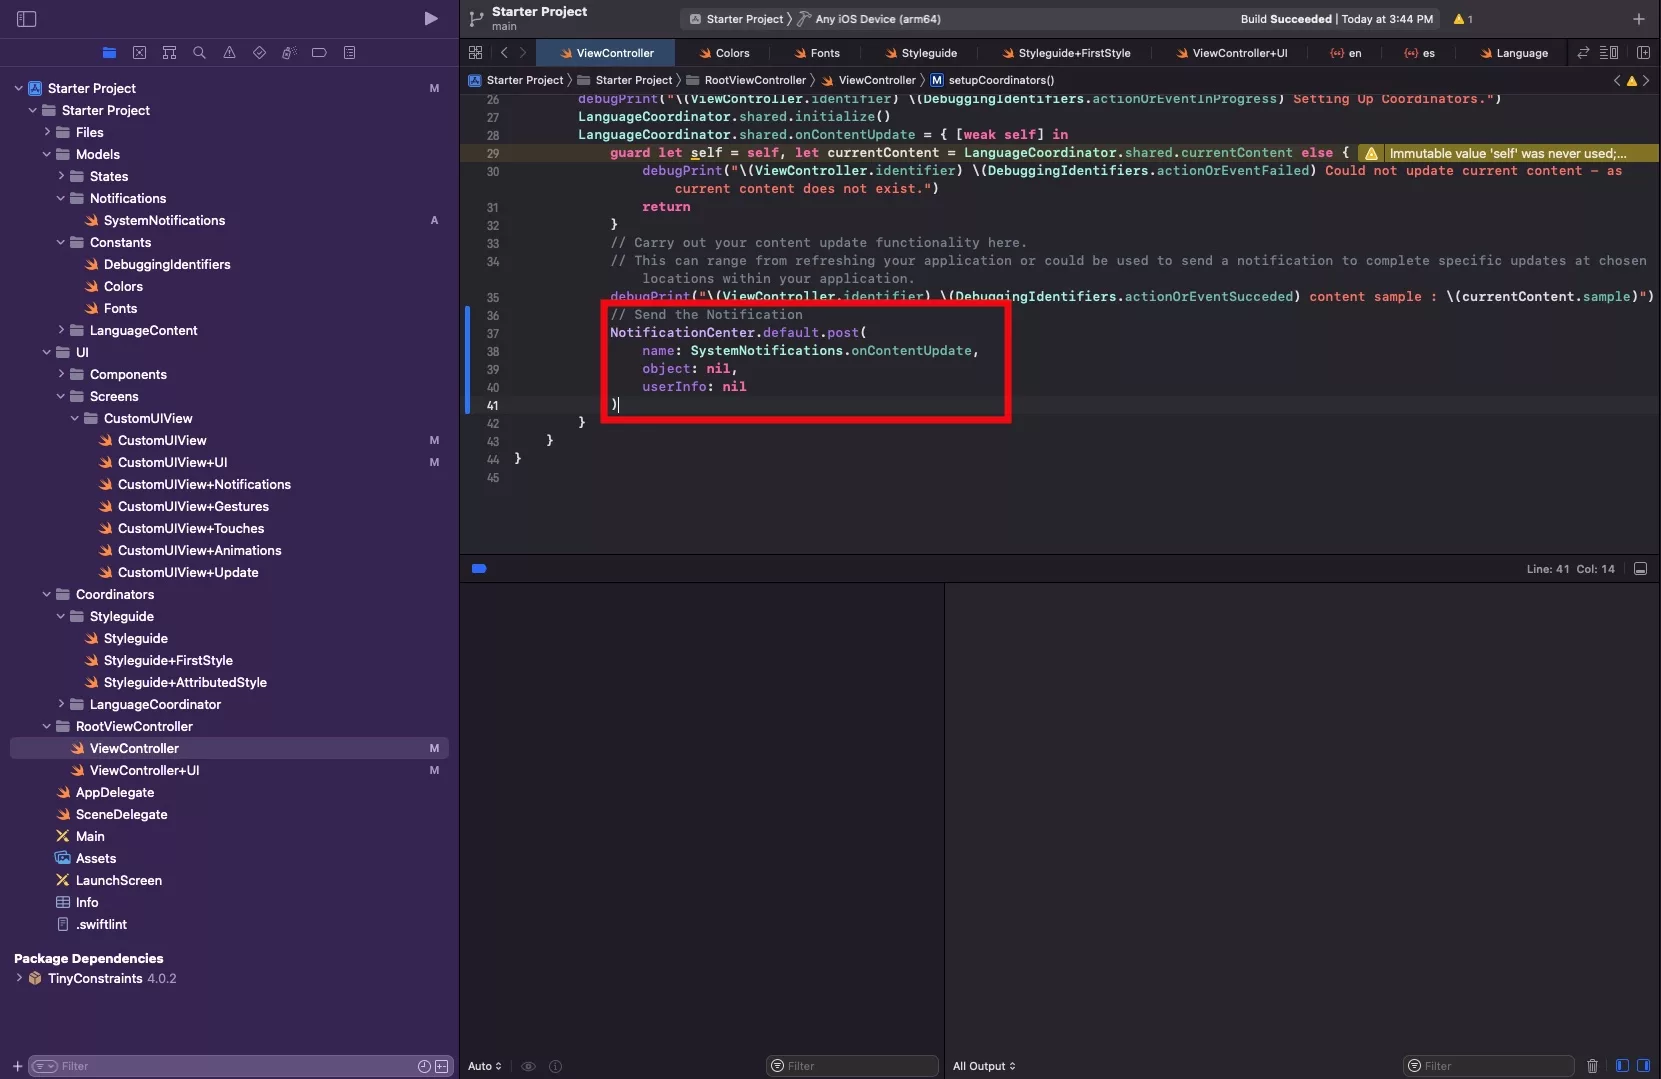
If you are looking to send a standalone notification, without added information such as a variable or object, use the following code:
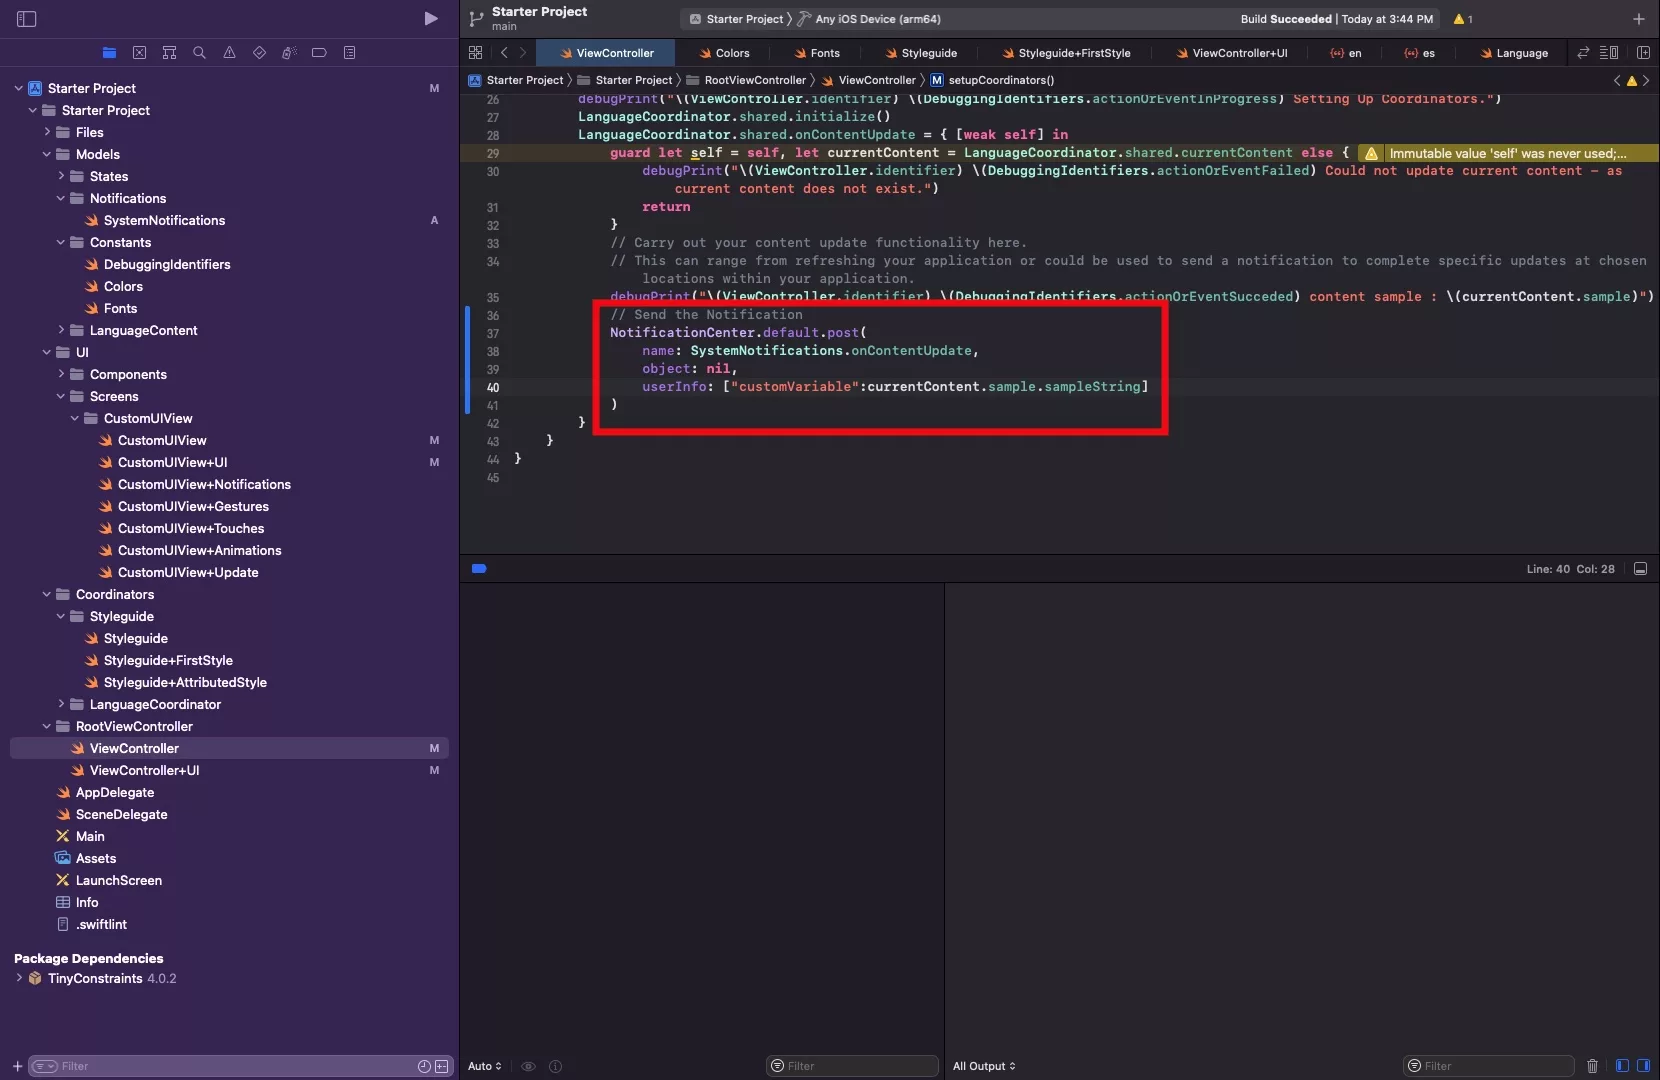
If you are looking to send a notification with added information, like a variable or object, place that variable or object in the userInfo in a dictionary form similar to the code below.
Step Four: Add the notification observer
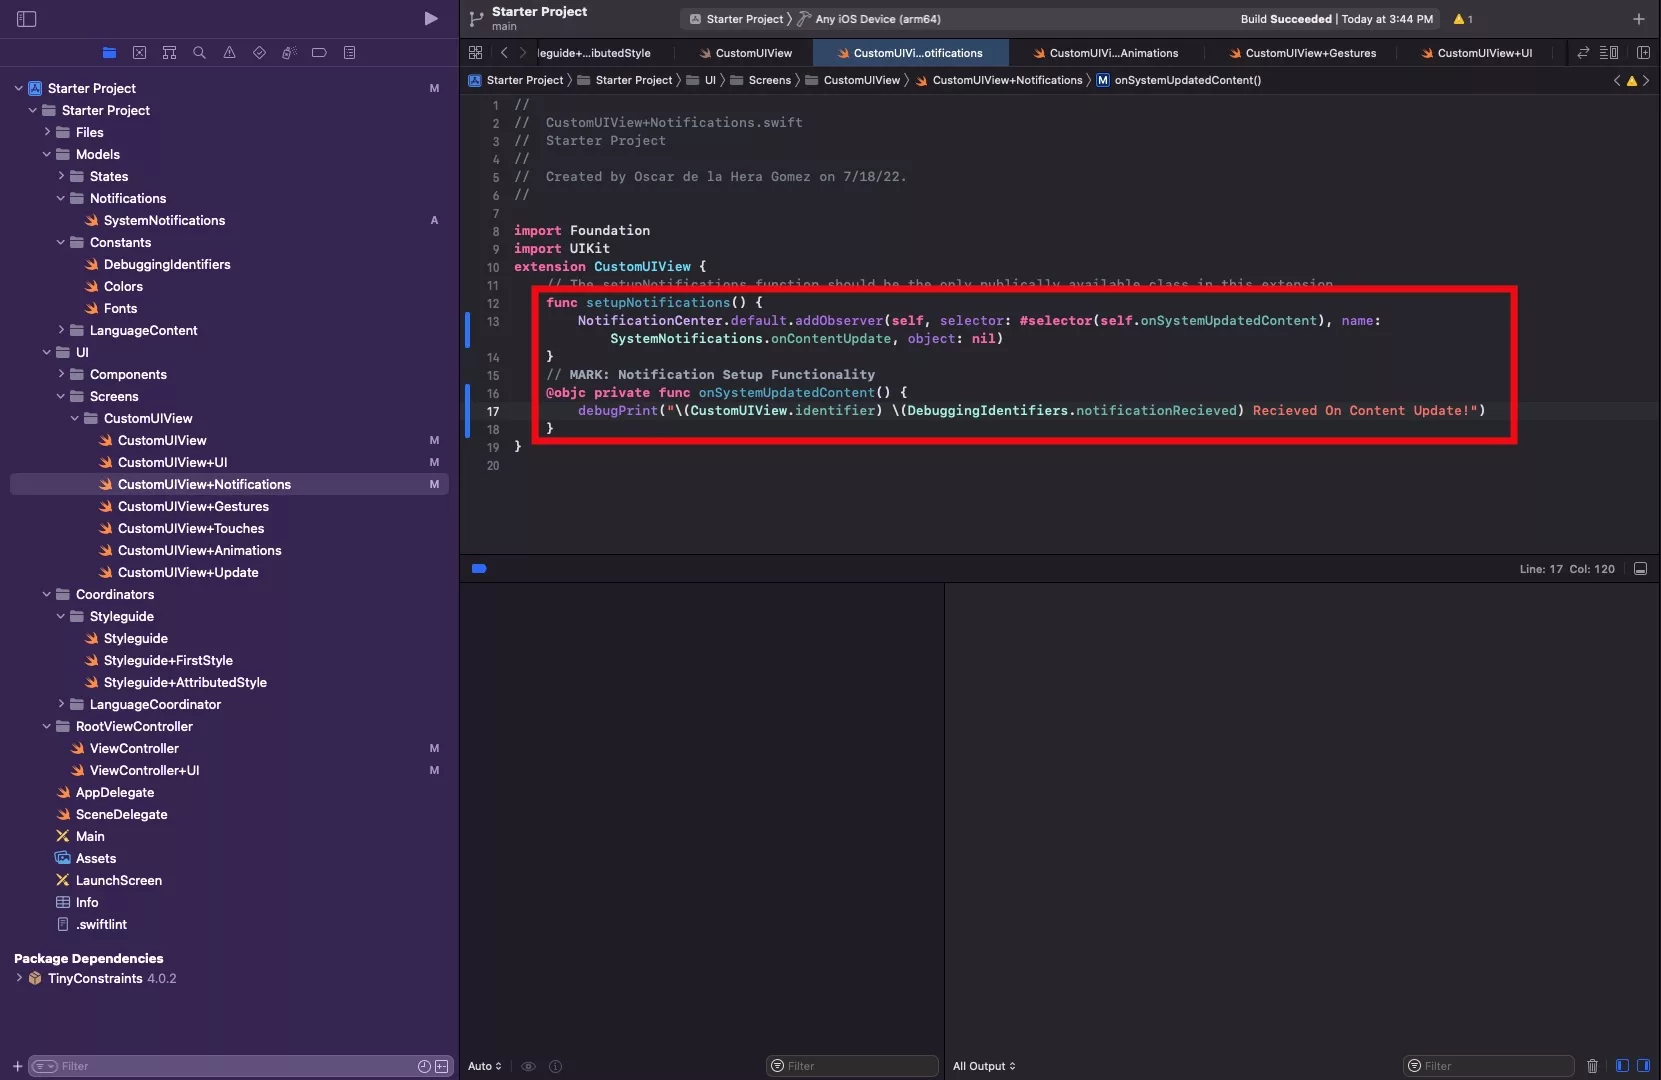
In the view, or object, where you wish to listen for the notification; add an observer similar to the one in the code below.
In our example, we have added it to the CustomView and pointed it to a function onSystemUpdatedContent that we define on Step 5.
Step Five: Process your notification
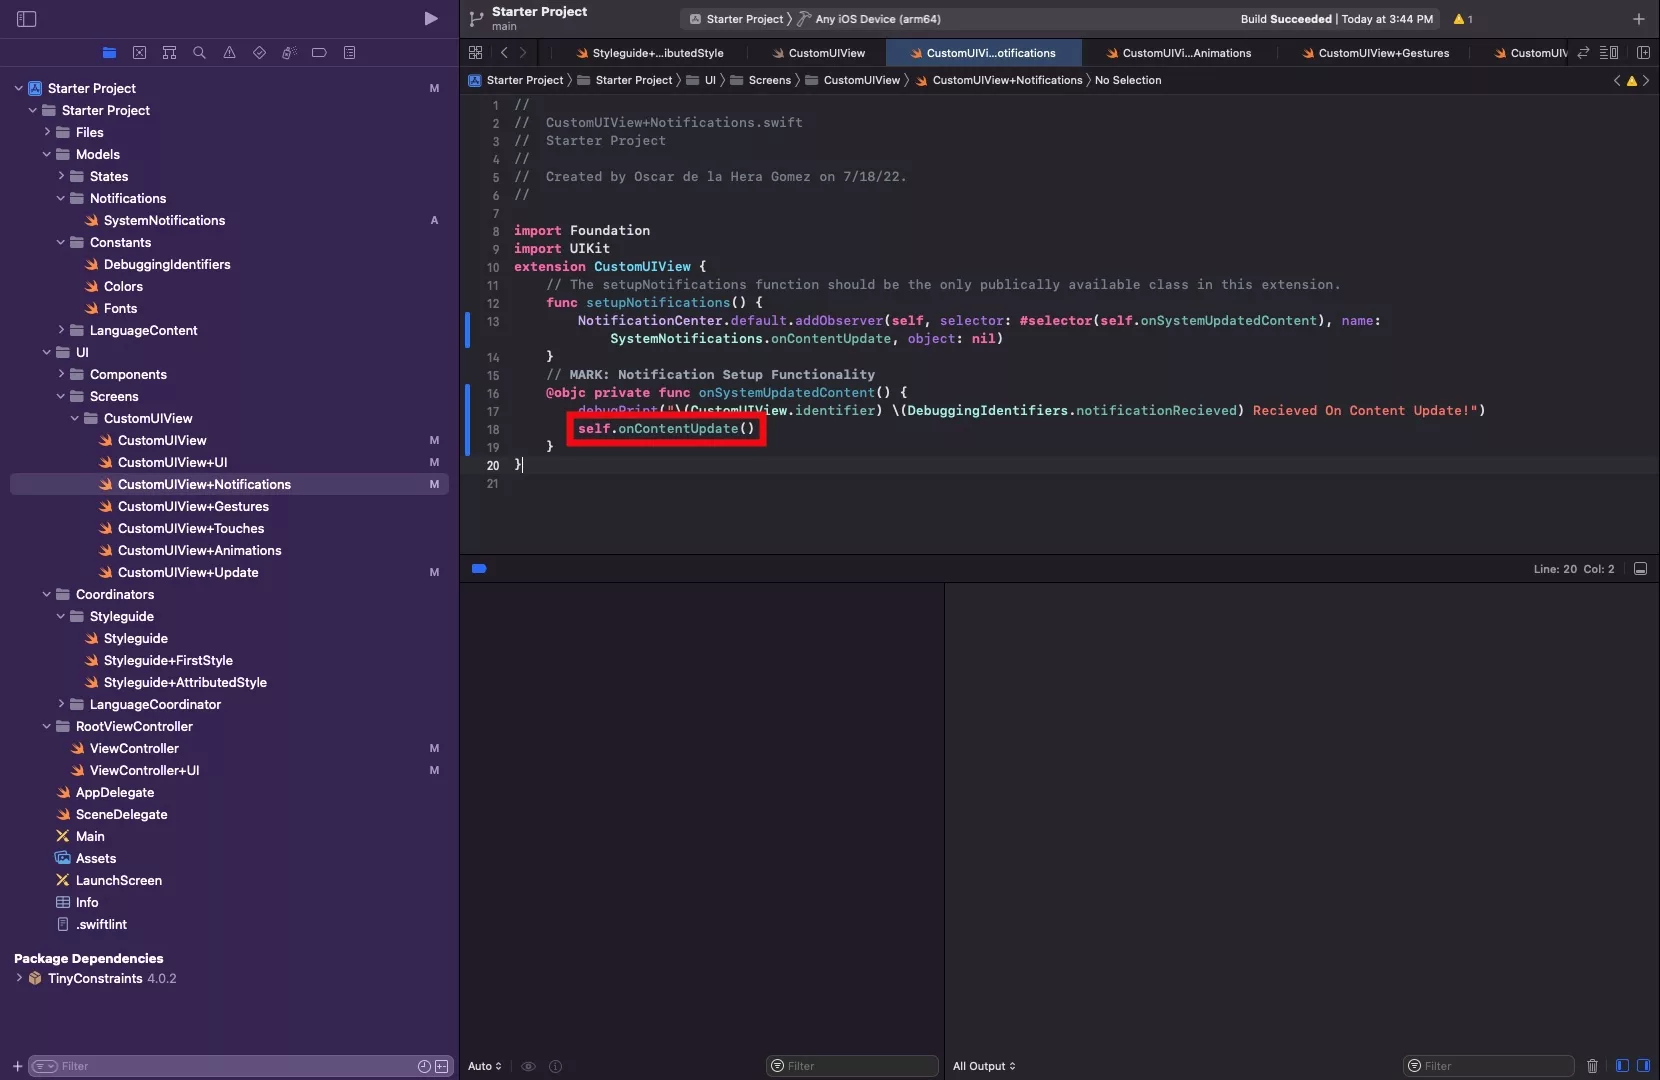
As shown in the image above, if you are looking to send a standalone notification, without added information such as a variable or object, add any code to the @objc selector that you have chosen. In our case, we redirect it to our onContentUpdate function.
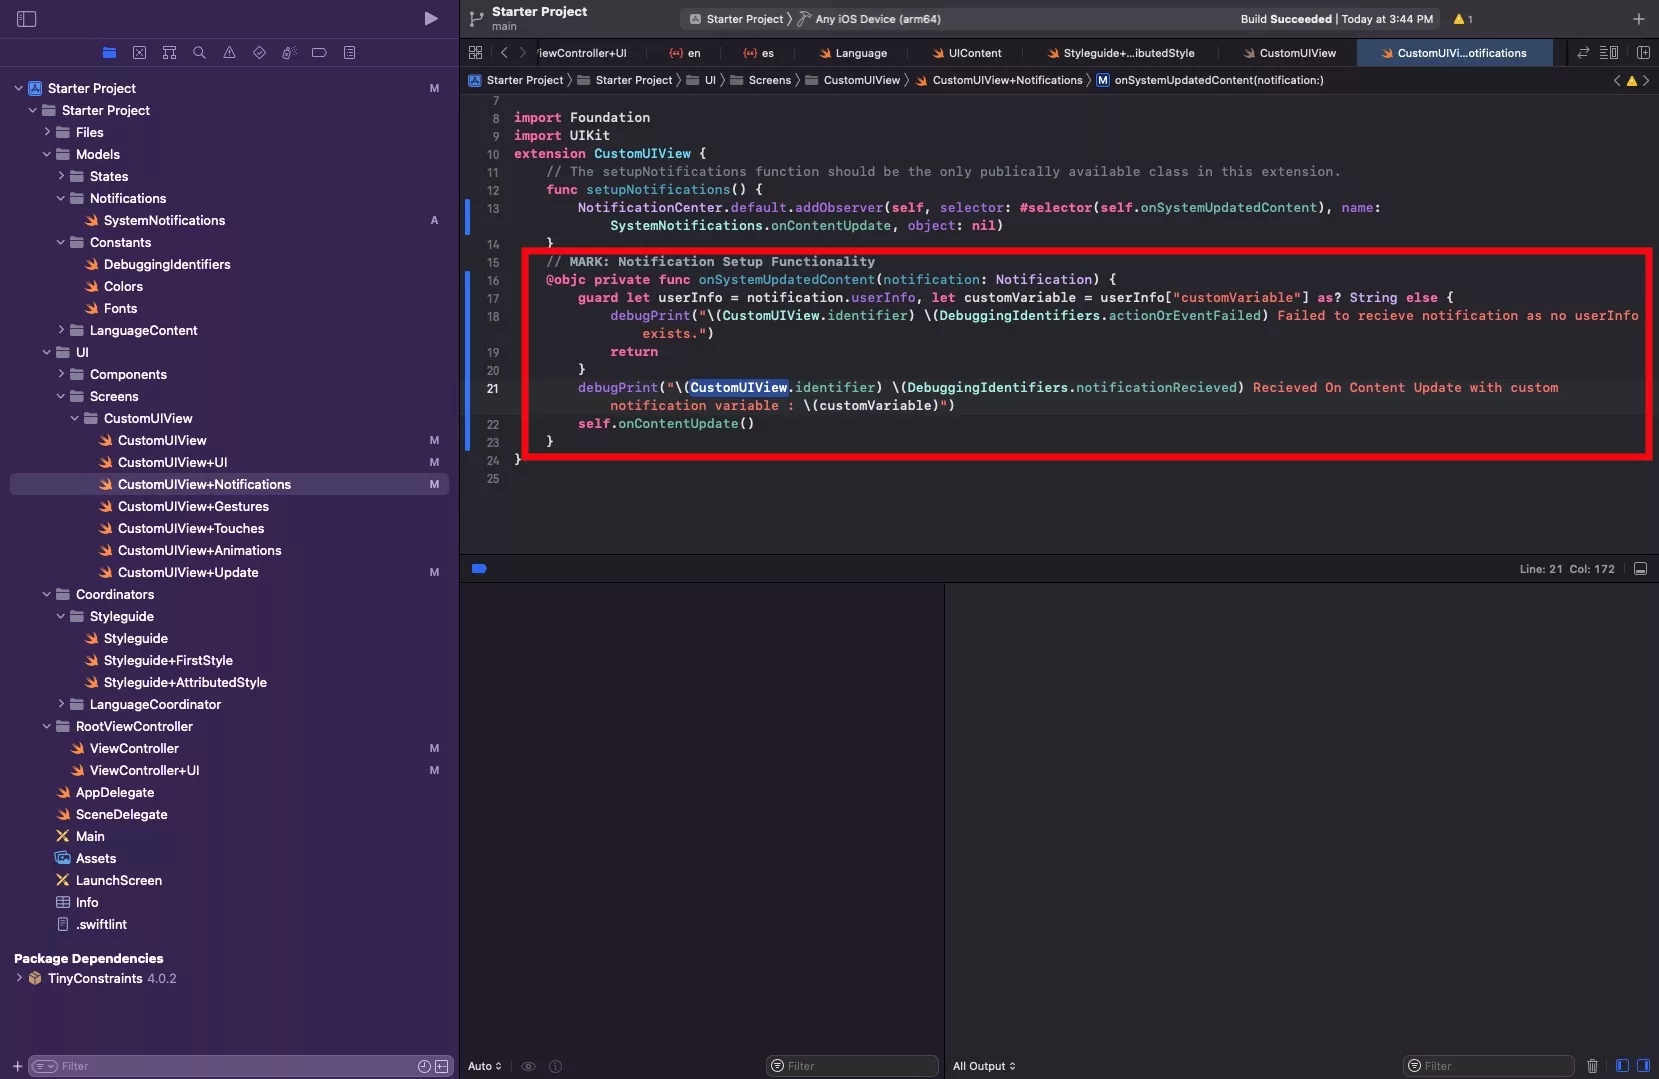
If you are looking to receive a notification with added information, like a variable or object use the code below. Please note that the key information between step four and five is the userInfo dictionary that is passed.
Step Six: Verify
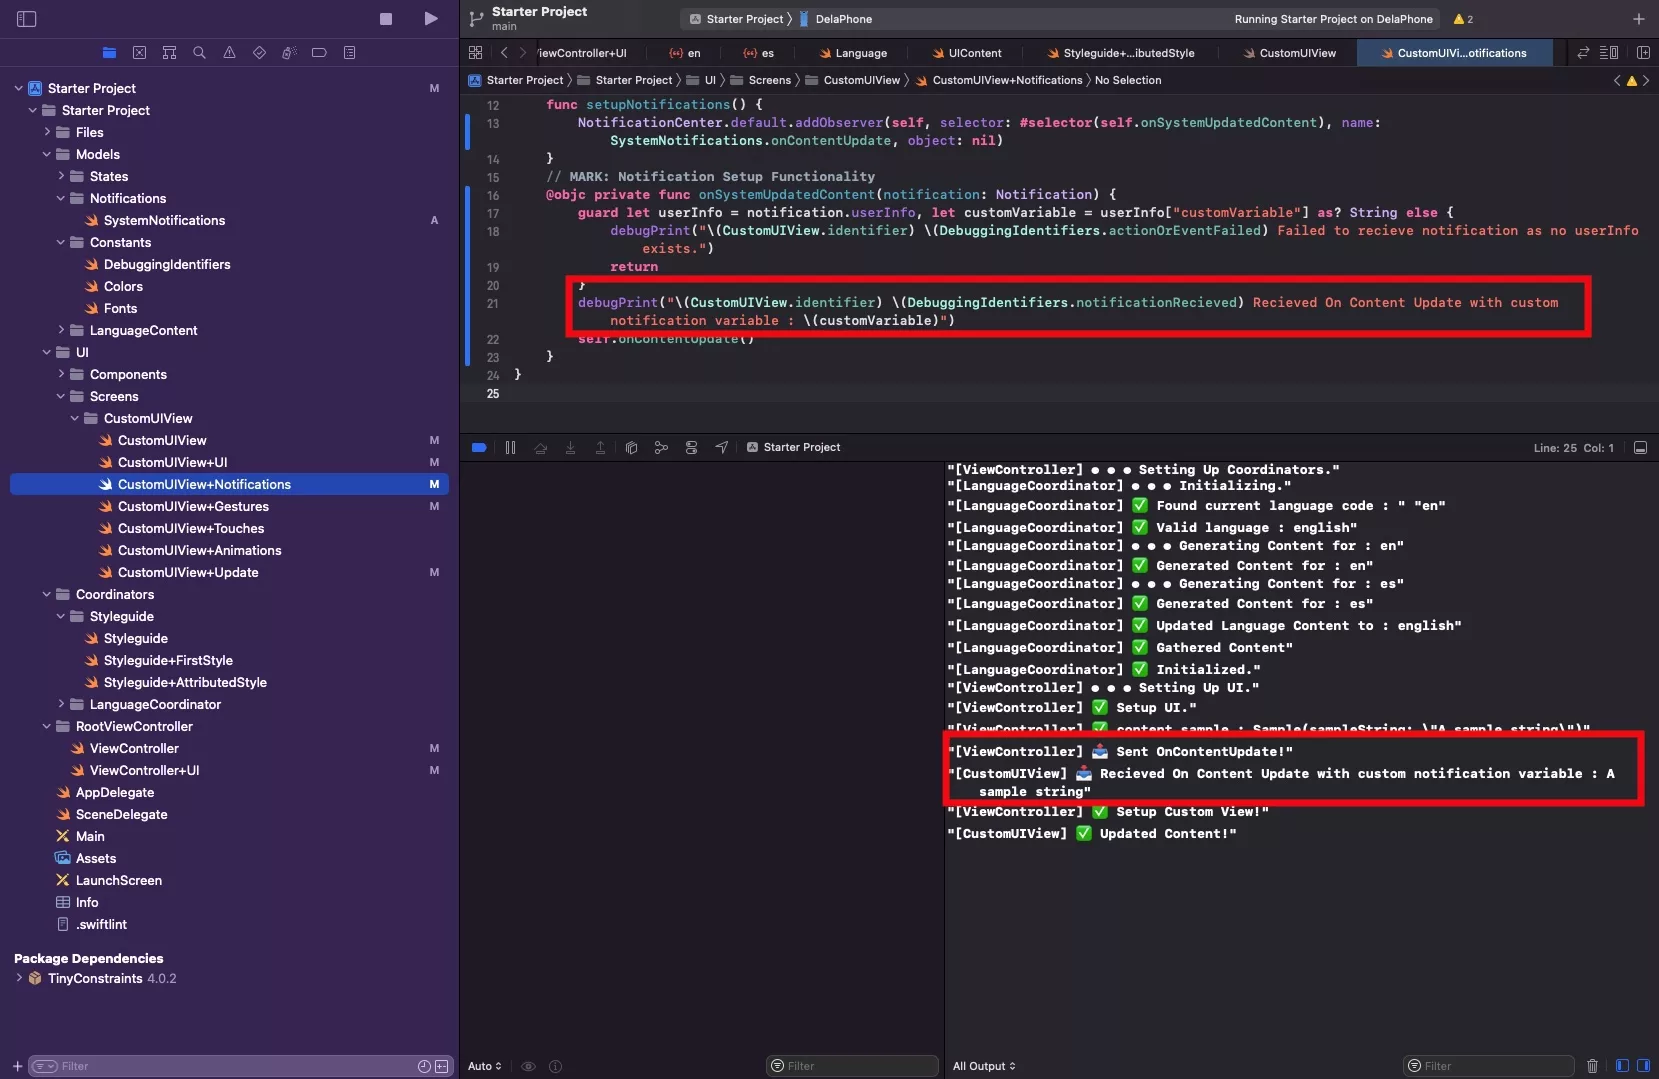
Run your app and witness the notification being sent and received.
As you can see from our logs, the notification is both received includes the custom variable.
Any Questions
We are actively looking for feedback on how to improve this resource. Please send us a note to inquiries@delasign.com with any thoughts or feedback you may have.