How to localize iOS, MacOS, TVOS & WatchOS apps in XCode and Swift
A step by step tutorial on our method for creating multilingual apps in XCode and Swift. Github repository included.

A step by step tutorial on our method for creating multilingual apps in Swift. Github repository included.
The following article walks you through how to create a language coordinator, for Spanish and English, that enables localized (multilingual) Swift applications that displays different strings depending on the iPhone's system language.
Step One: Create the folder structure
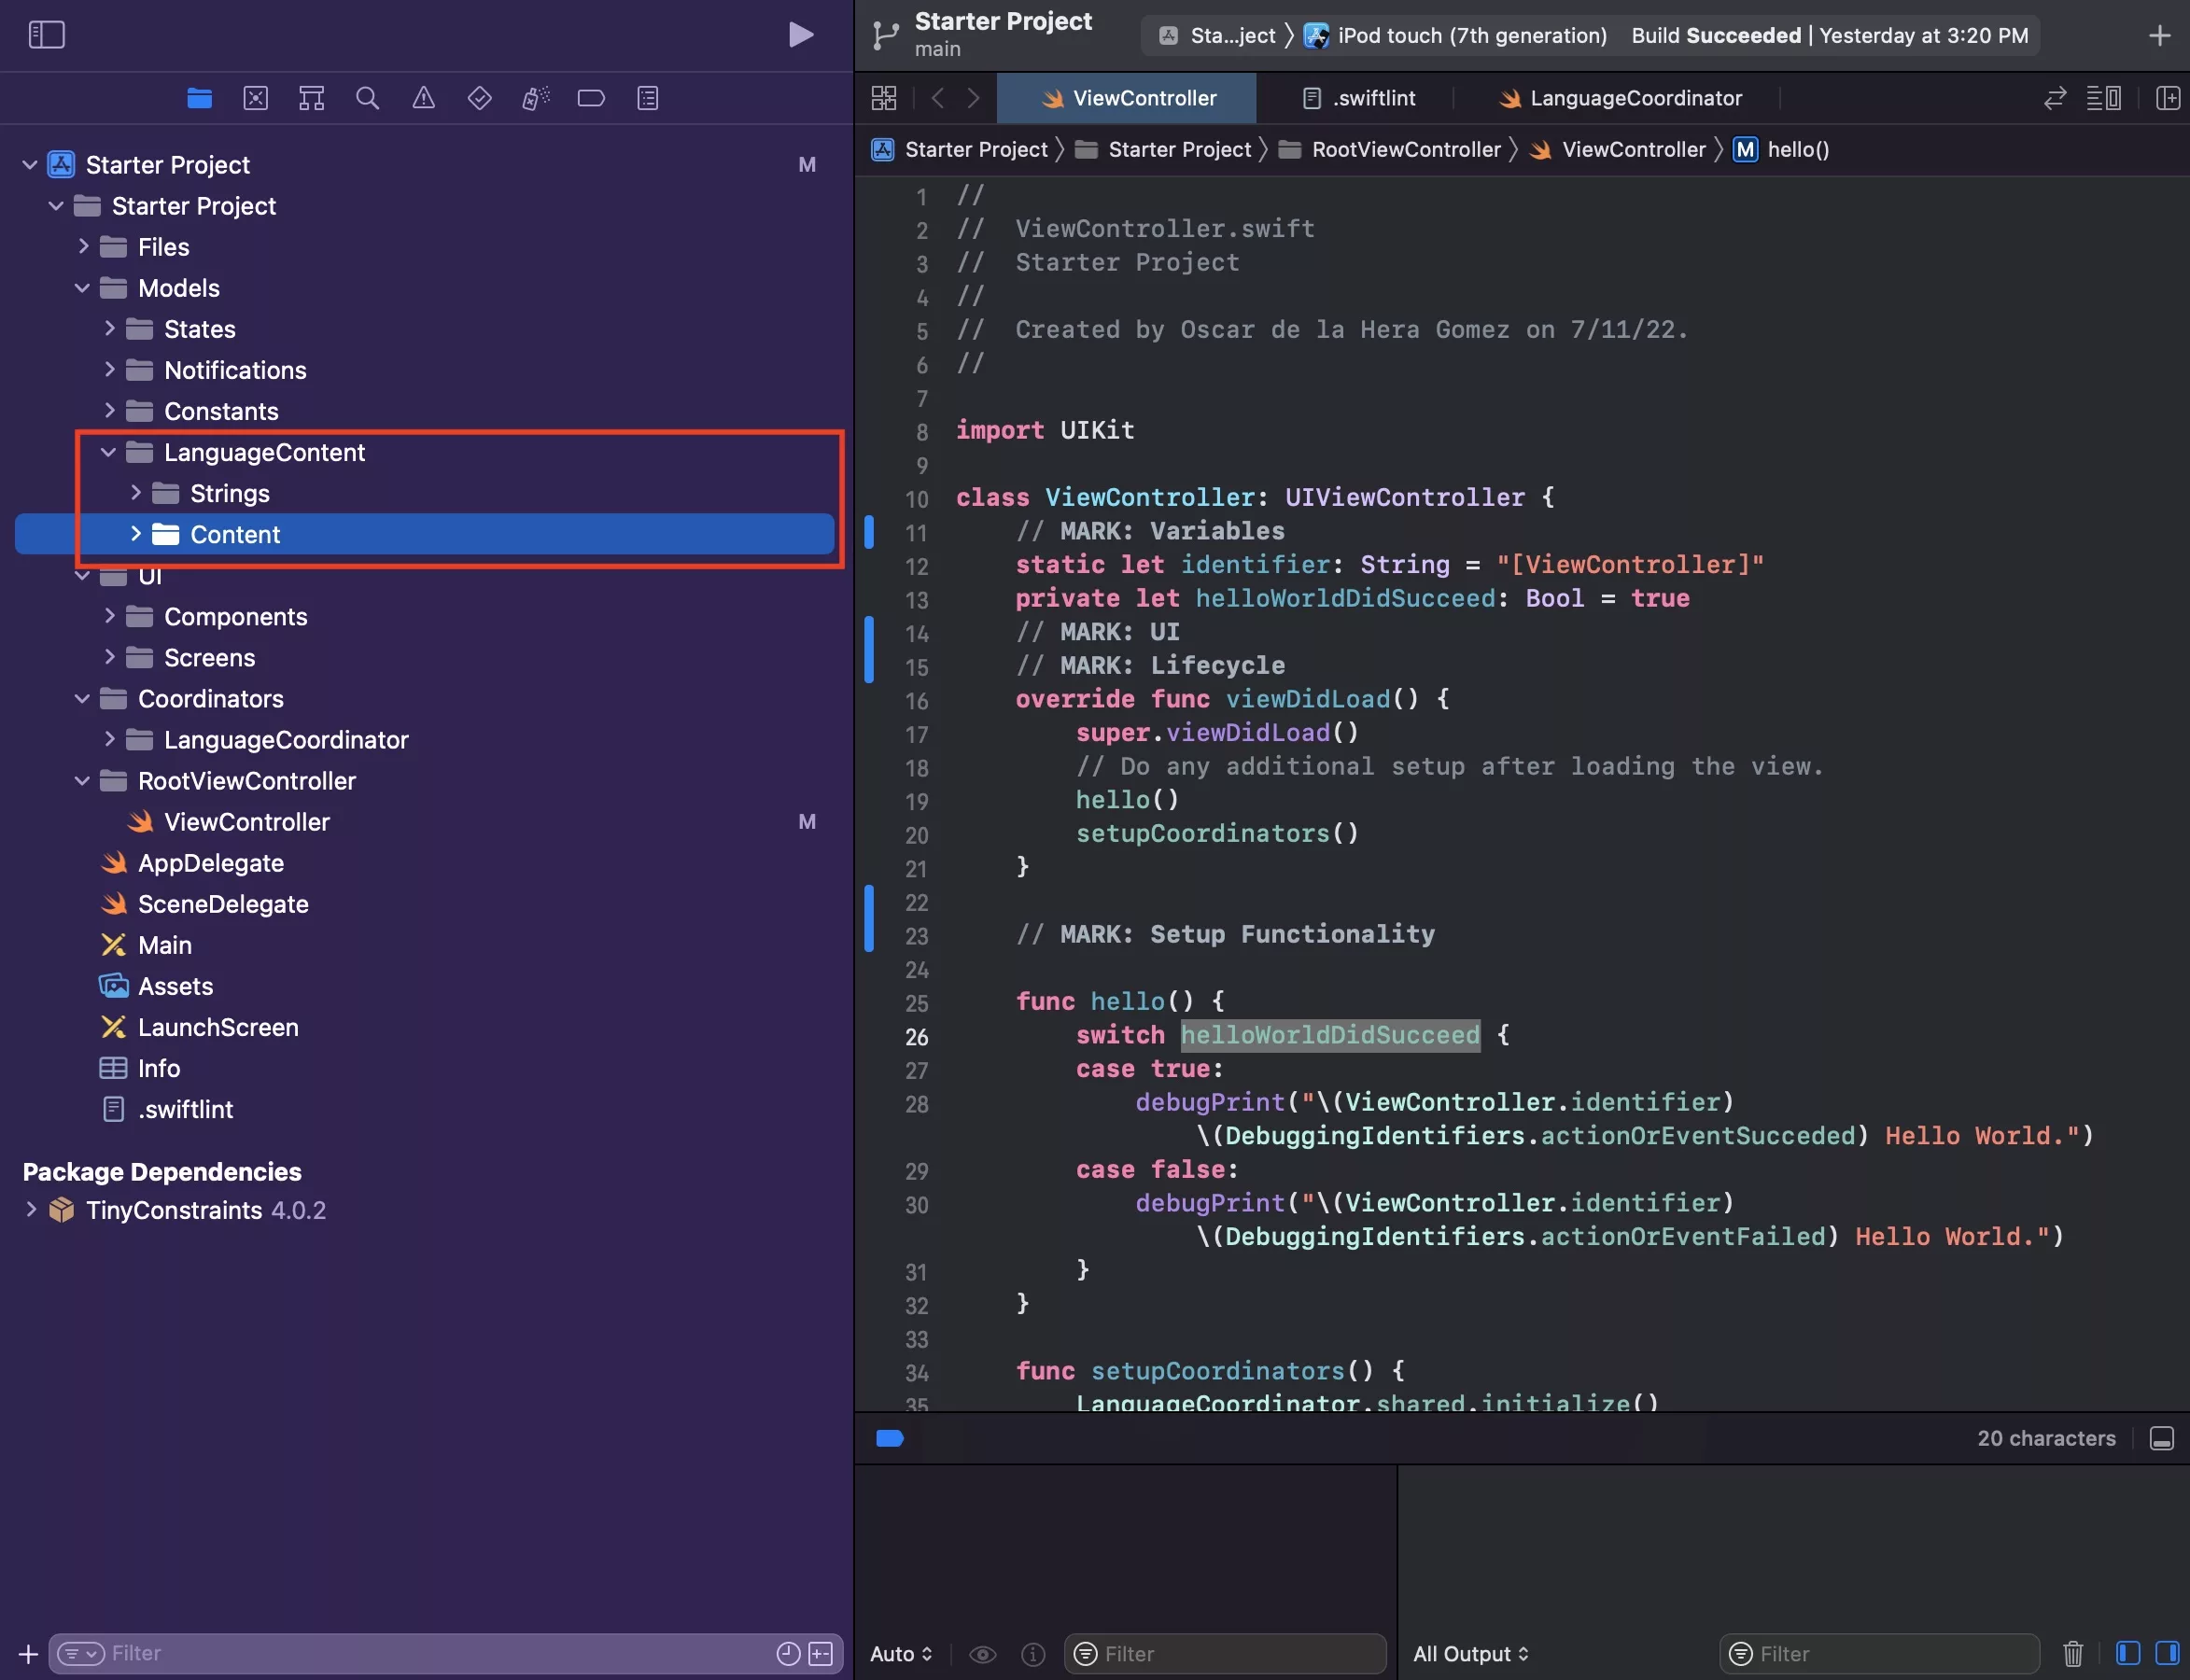
Under the Models folder, create a LanguageContent folder. Within this folder, create two folders Strings & Content.
Step Two: Create language json files
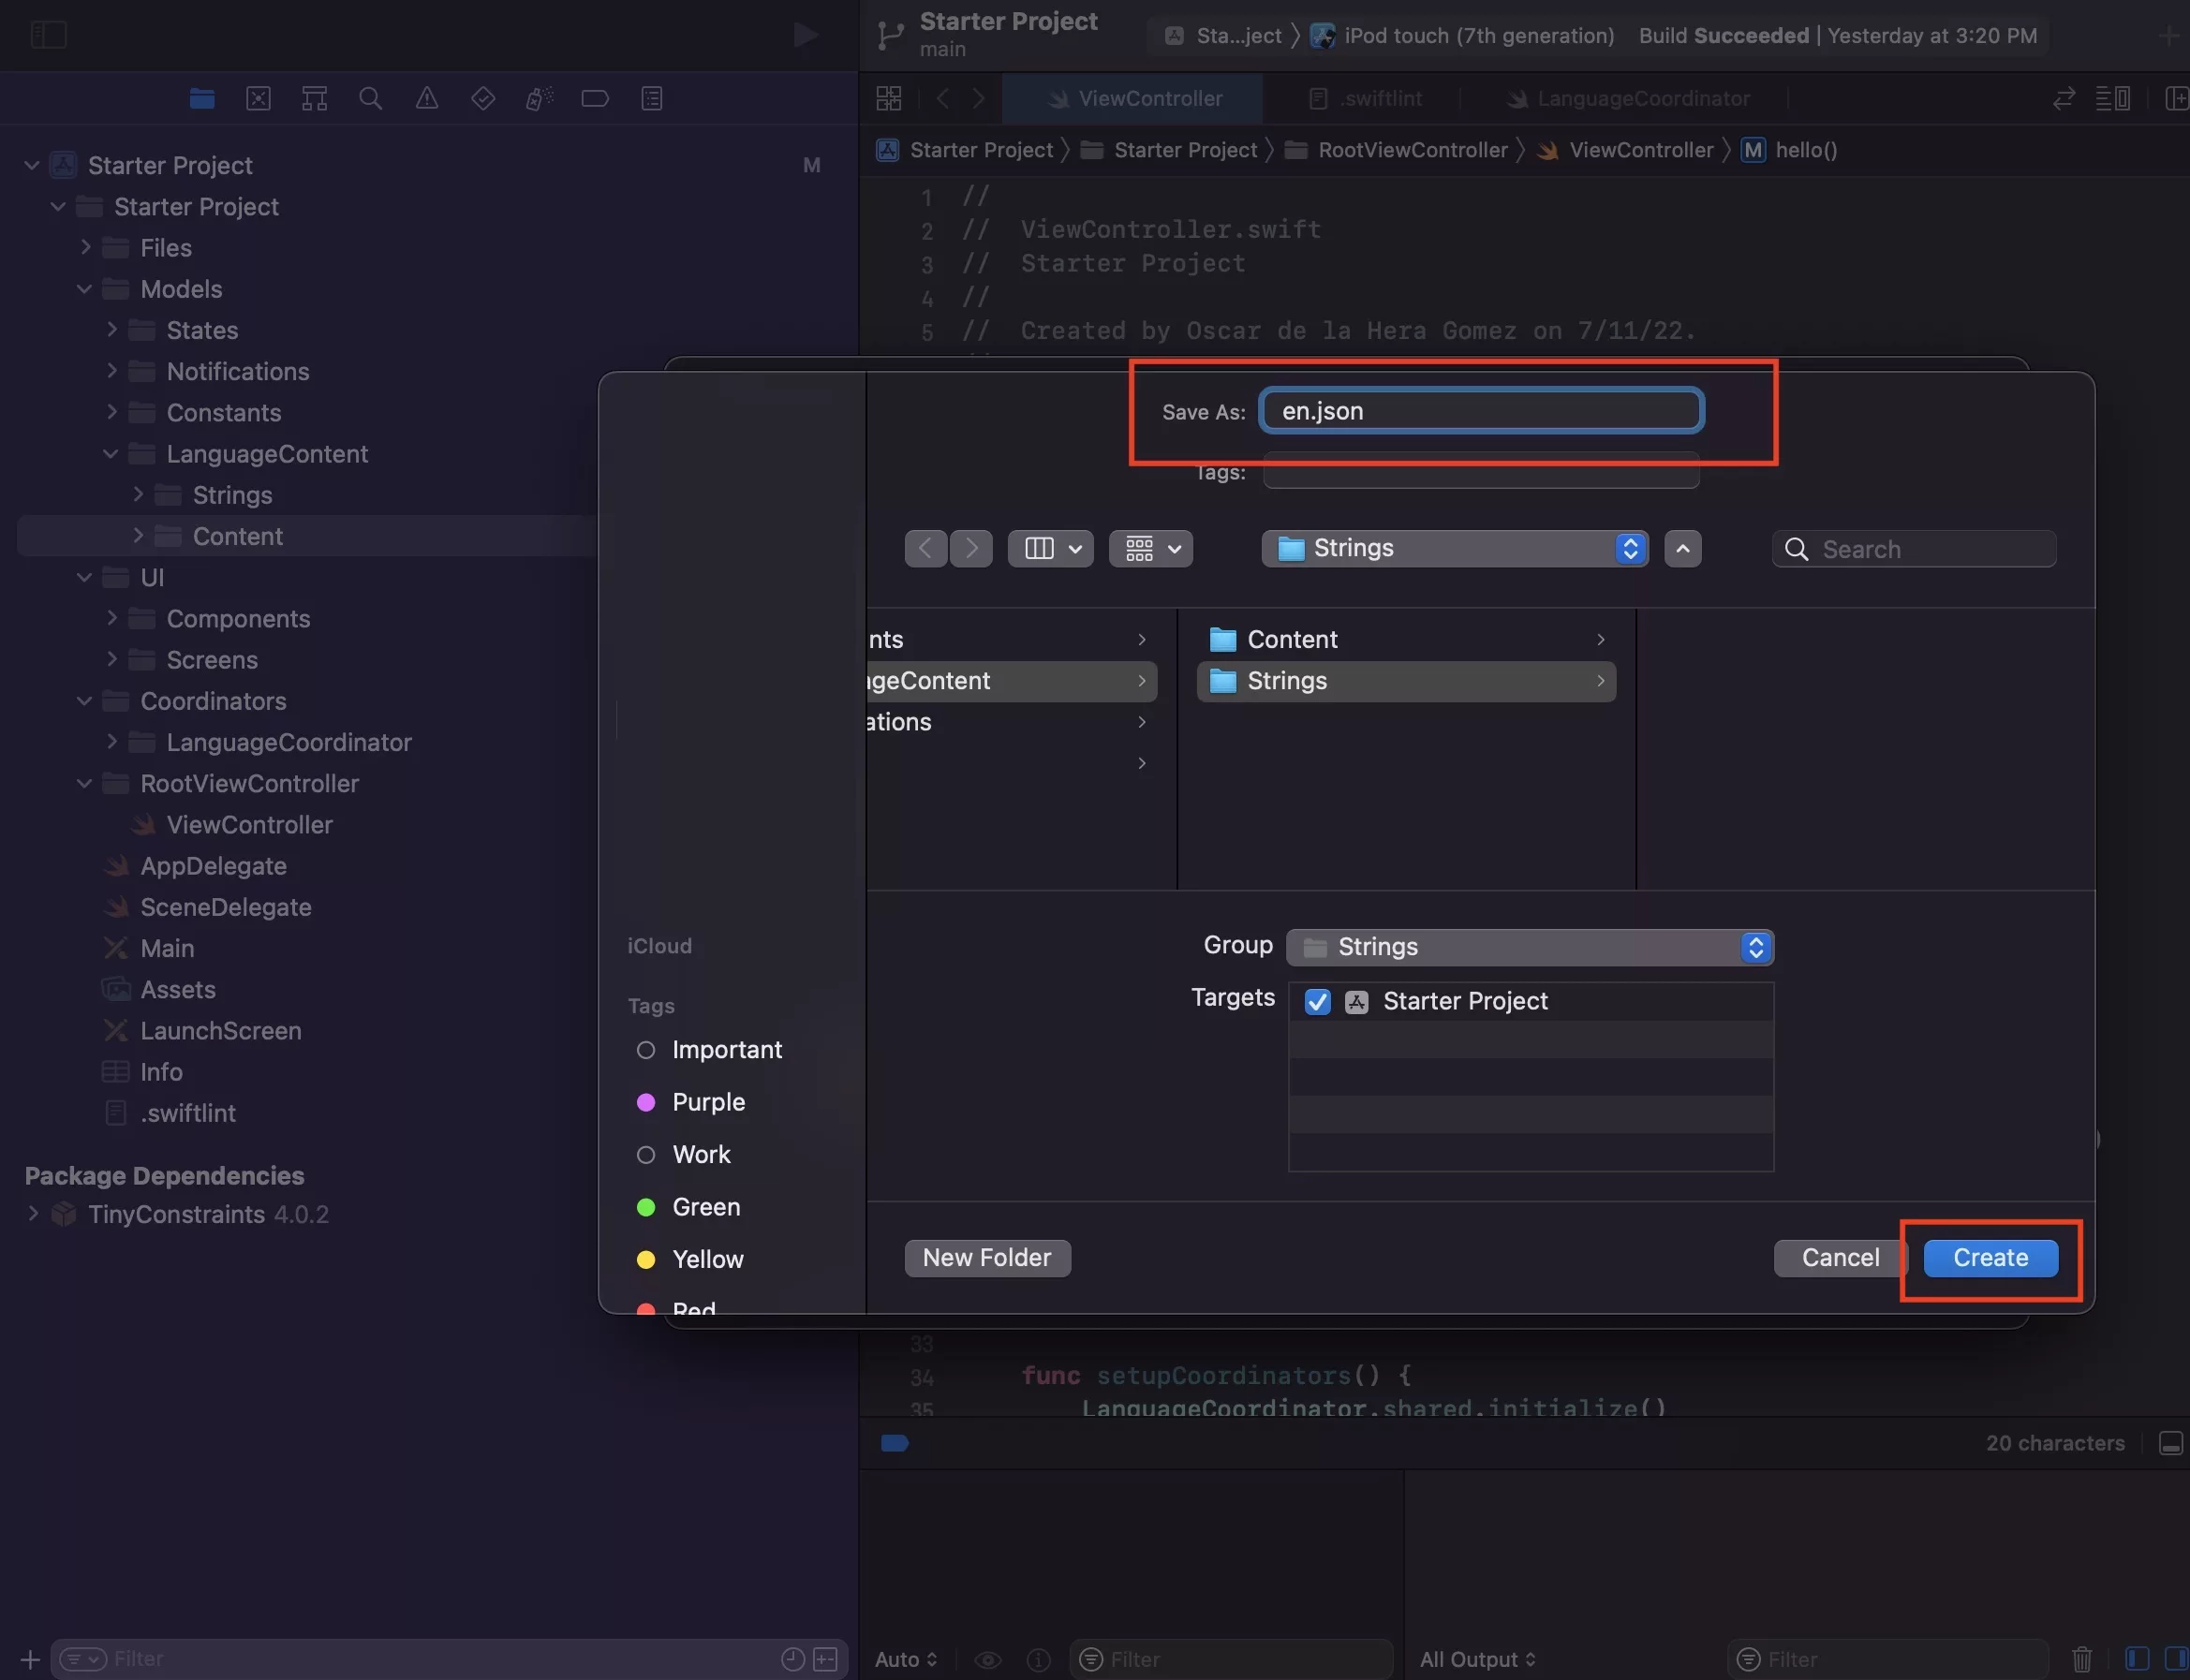
Select the Strings folder and press command + N to create a new file.
This will select the Swift, iOS file type. Press Next.
After that enter the name of your JSON files - en.json and es.json respectively - and press Create for each case.
Step Three: Confirm json file type

Press Use .json.
Step Four: Create json base
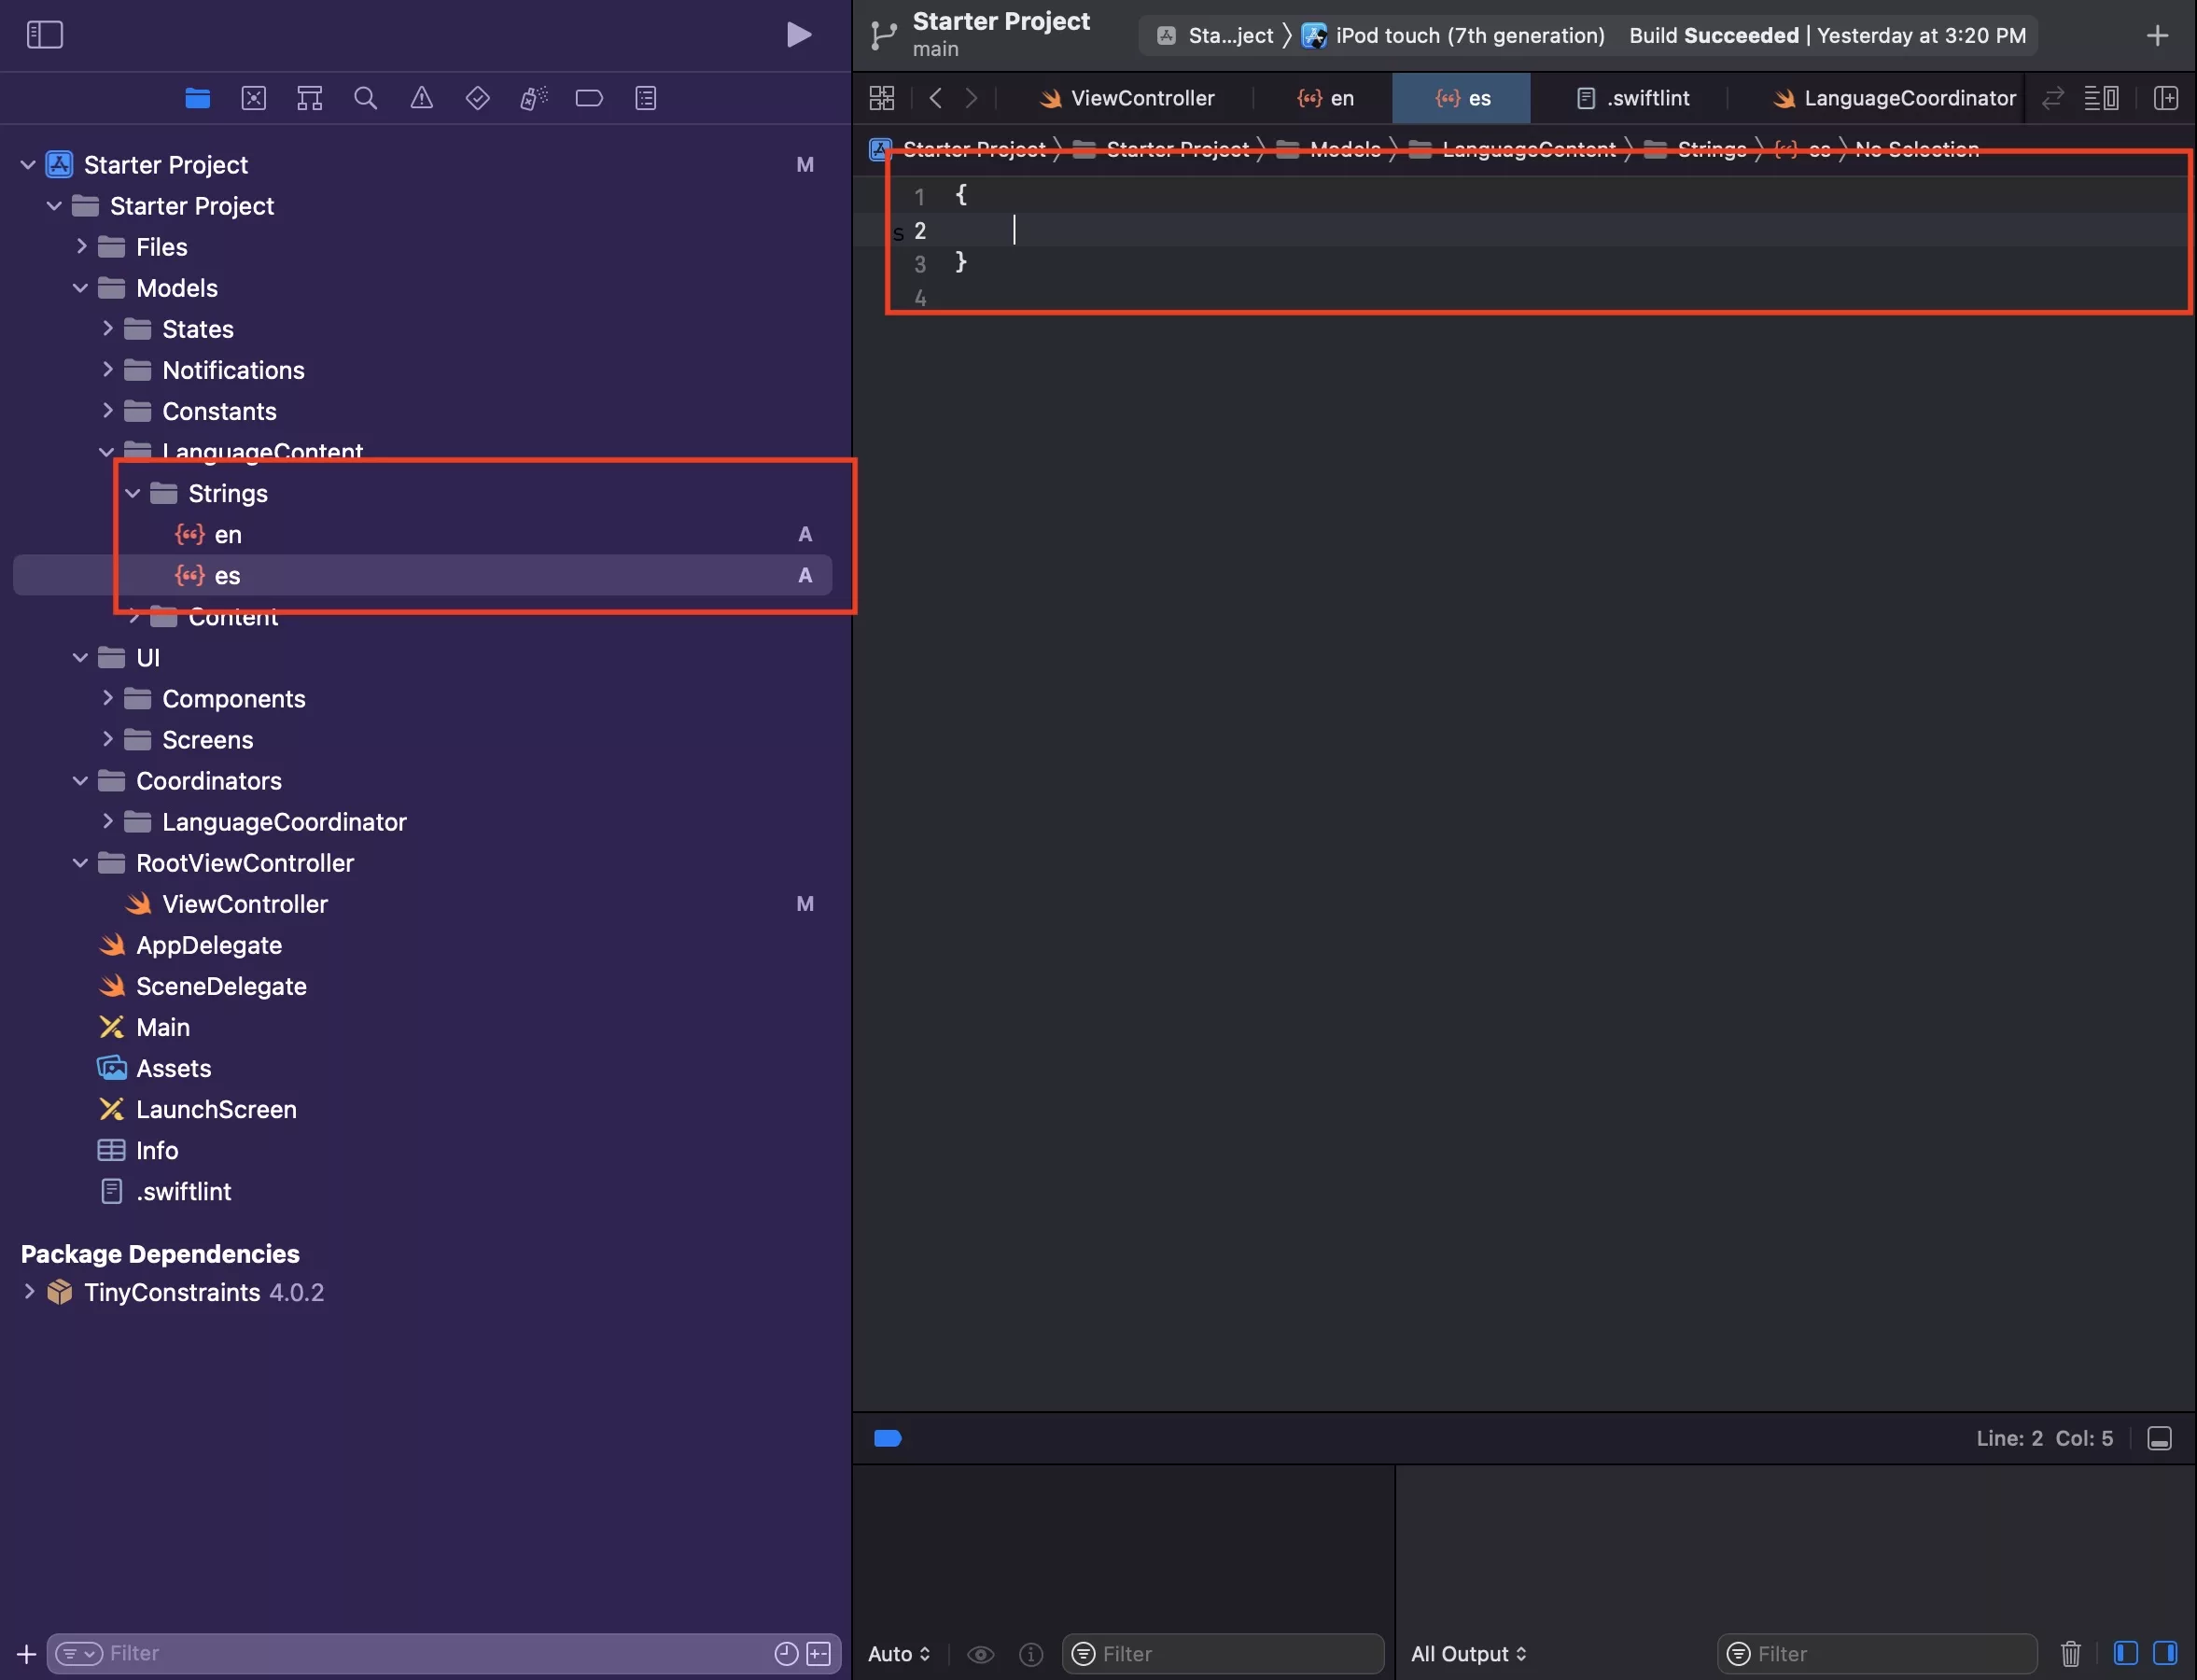
Replace the code in the created file with { }.
Step Five: Create UI Content File
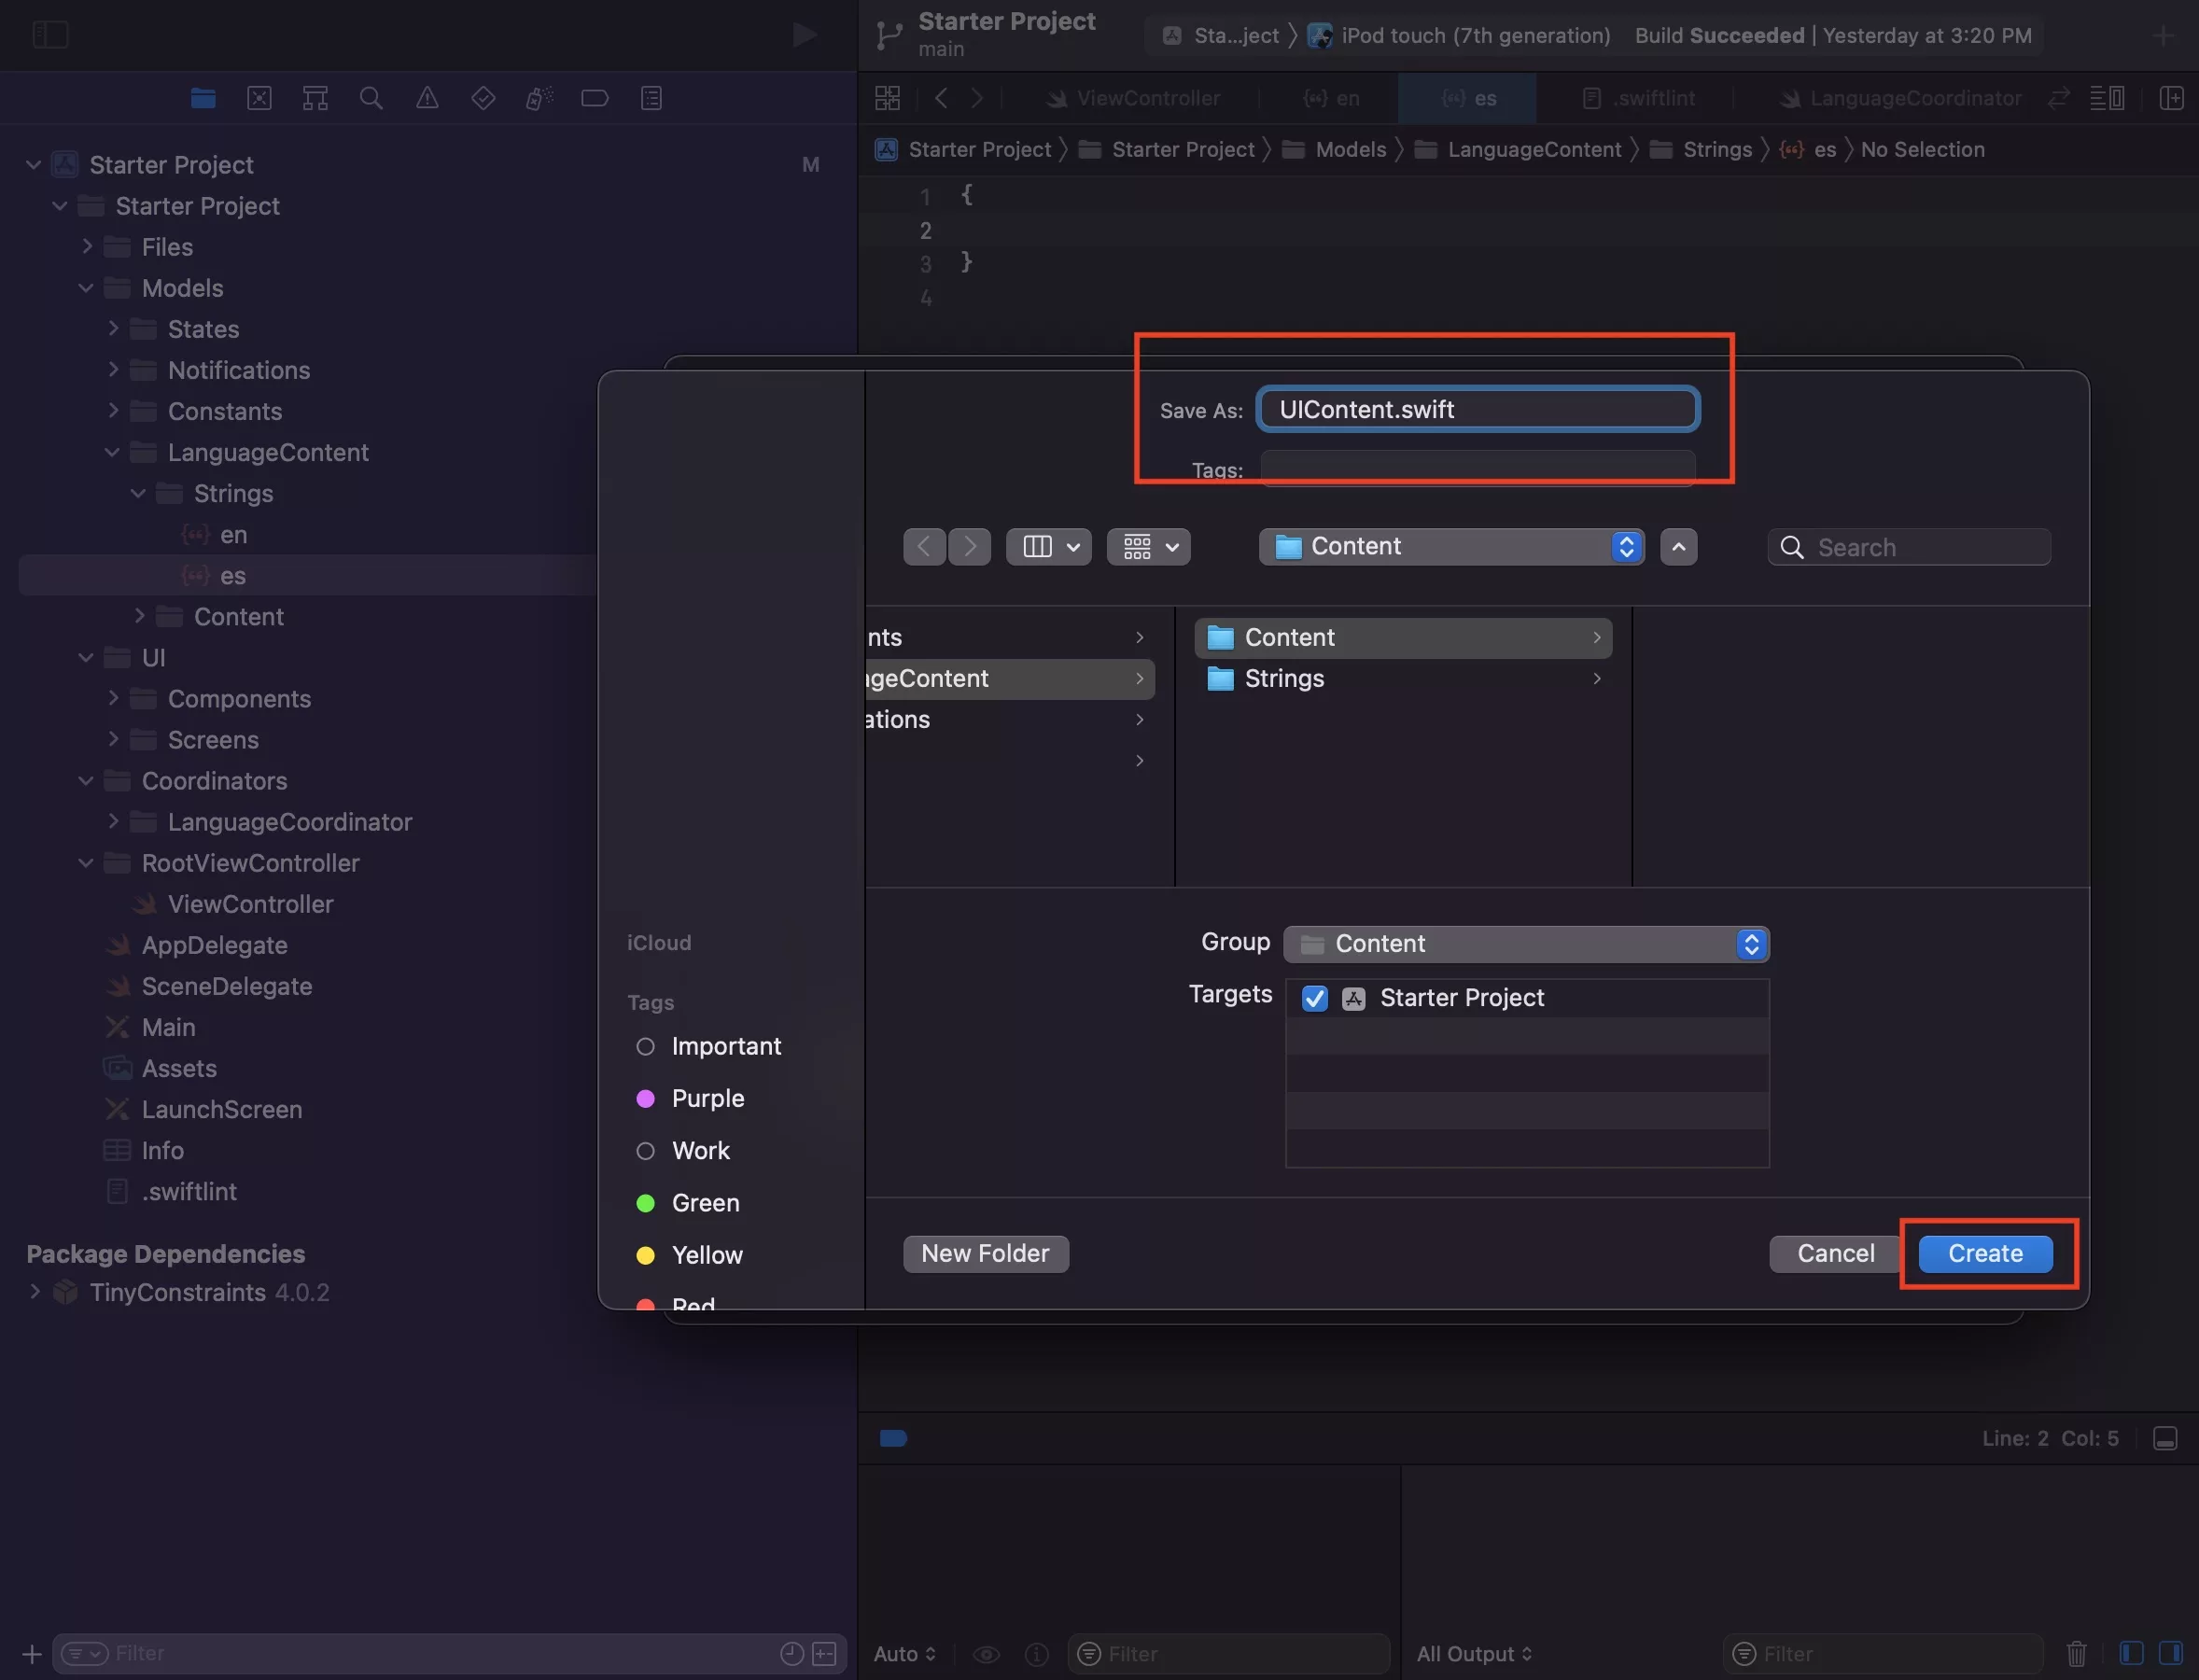
Select the Content folder and press Command + N.
This will select the Swift, iOS file type. Press Next.
After that enter the name of your UIContent file - UIContent.swift - and press Create.
Step Six: Create first content codable
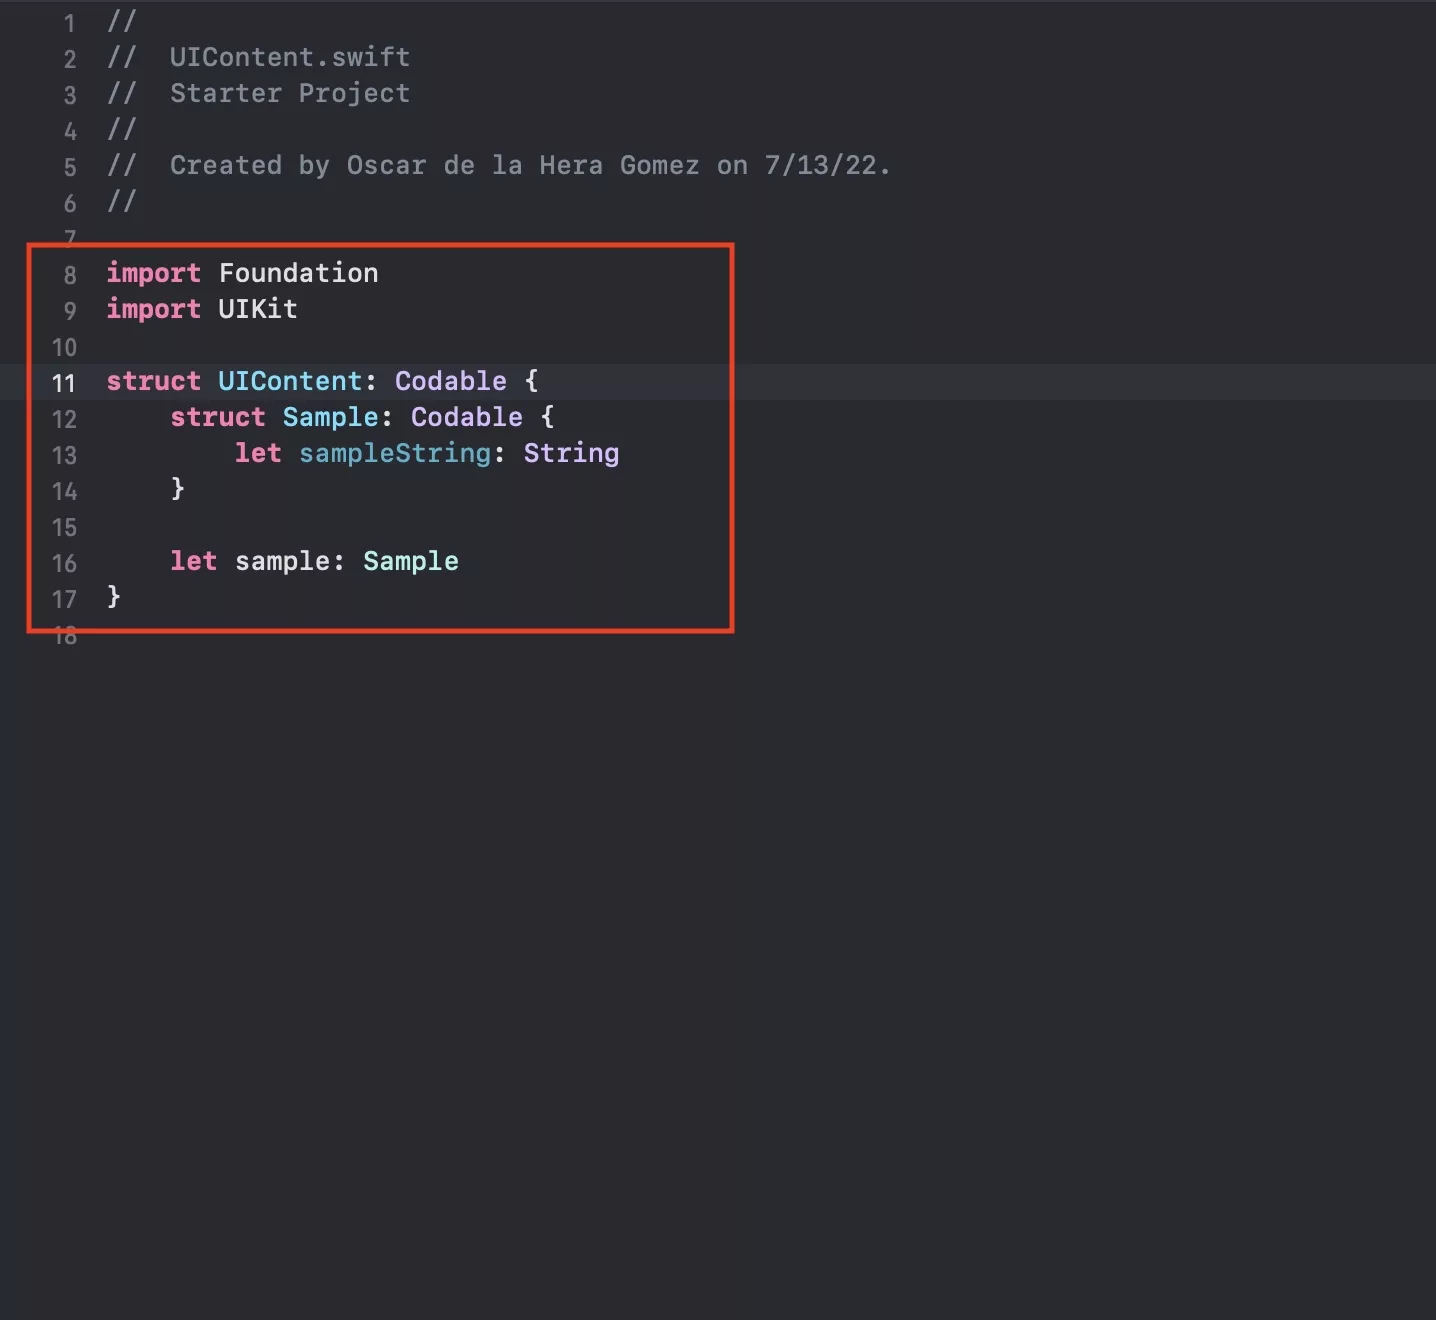
Copy the code below to create your UIContent struct as well as the first content.
This will create a Sample codable, which includes one string sampleString.
The constant below is what allows your content struct to make a sample constant available to your LanguageCoordinator, via LanguageCoordinator.shared.currentContent?.sample.
Step Seven: Add your content struct to your language json files
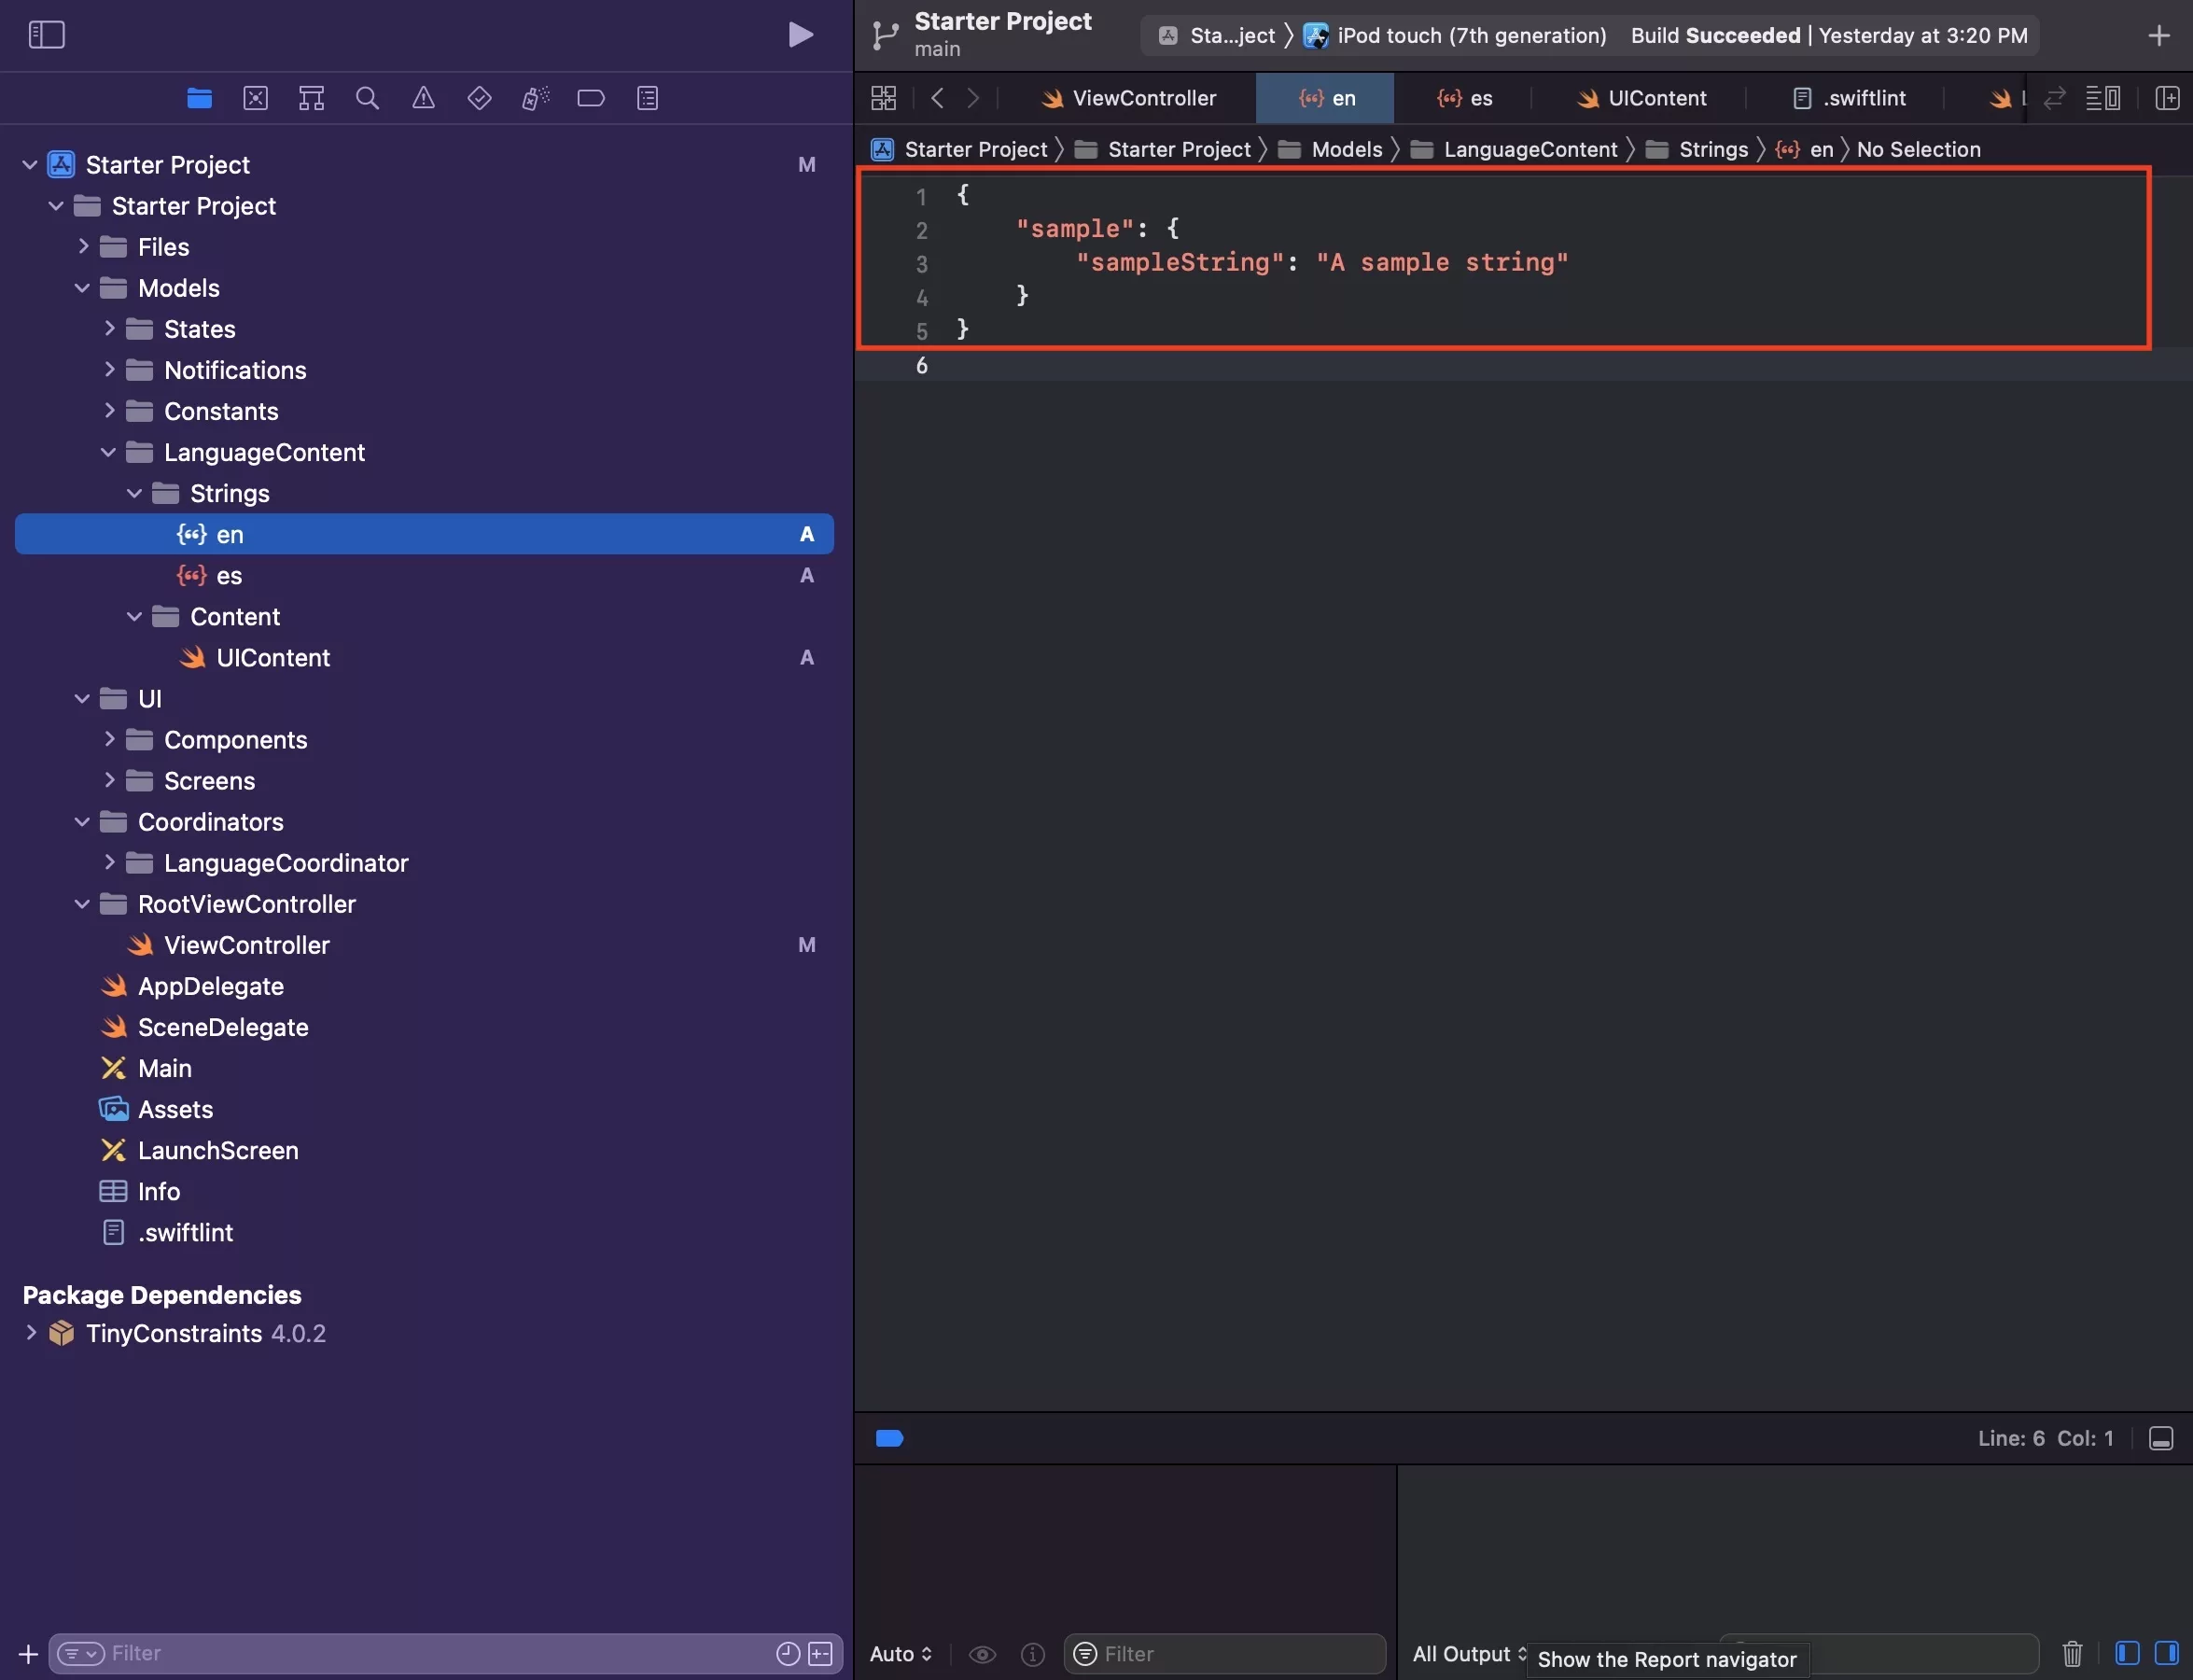
A sample English JSON update.
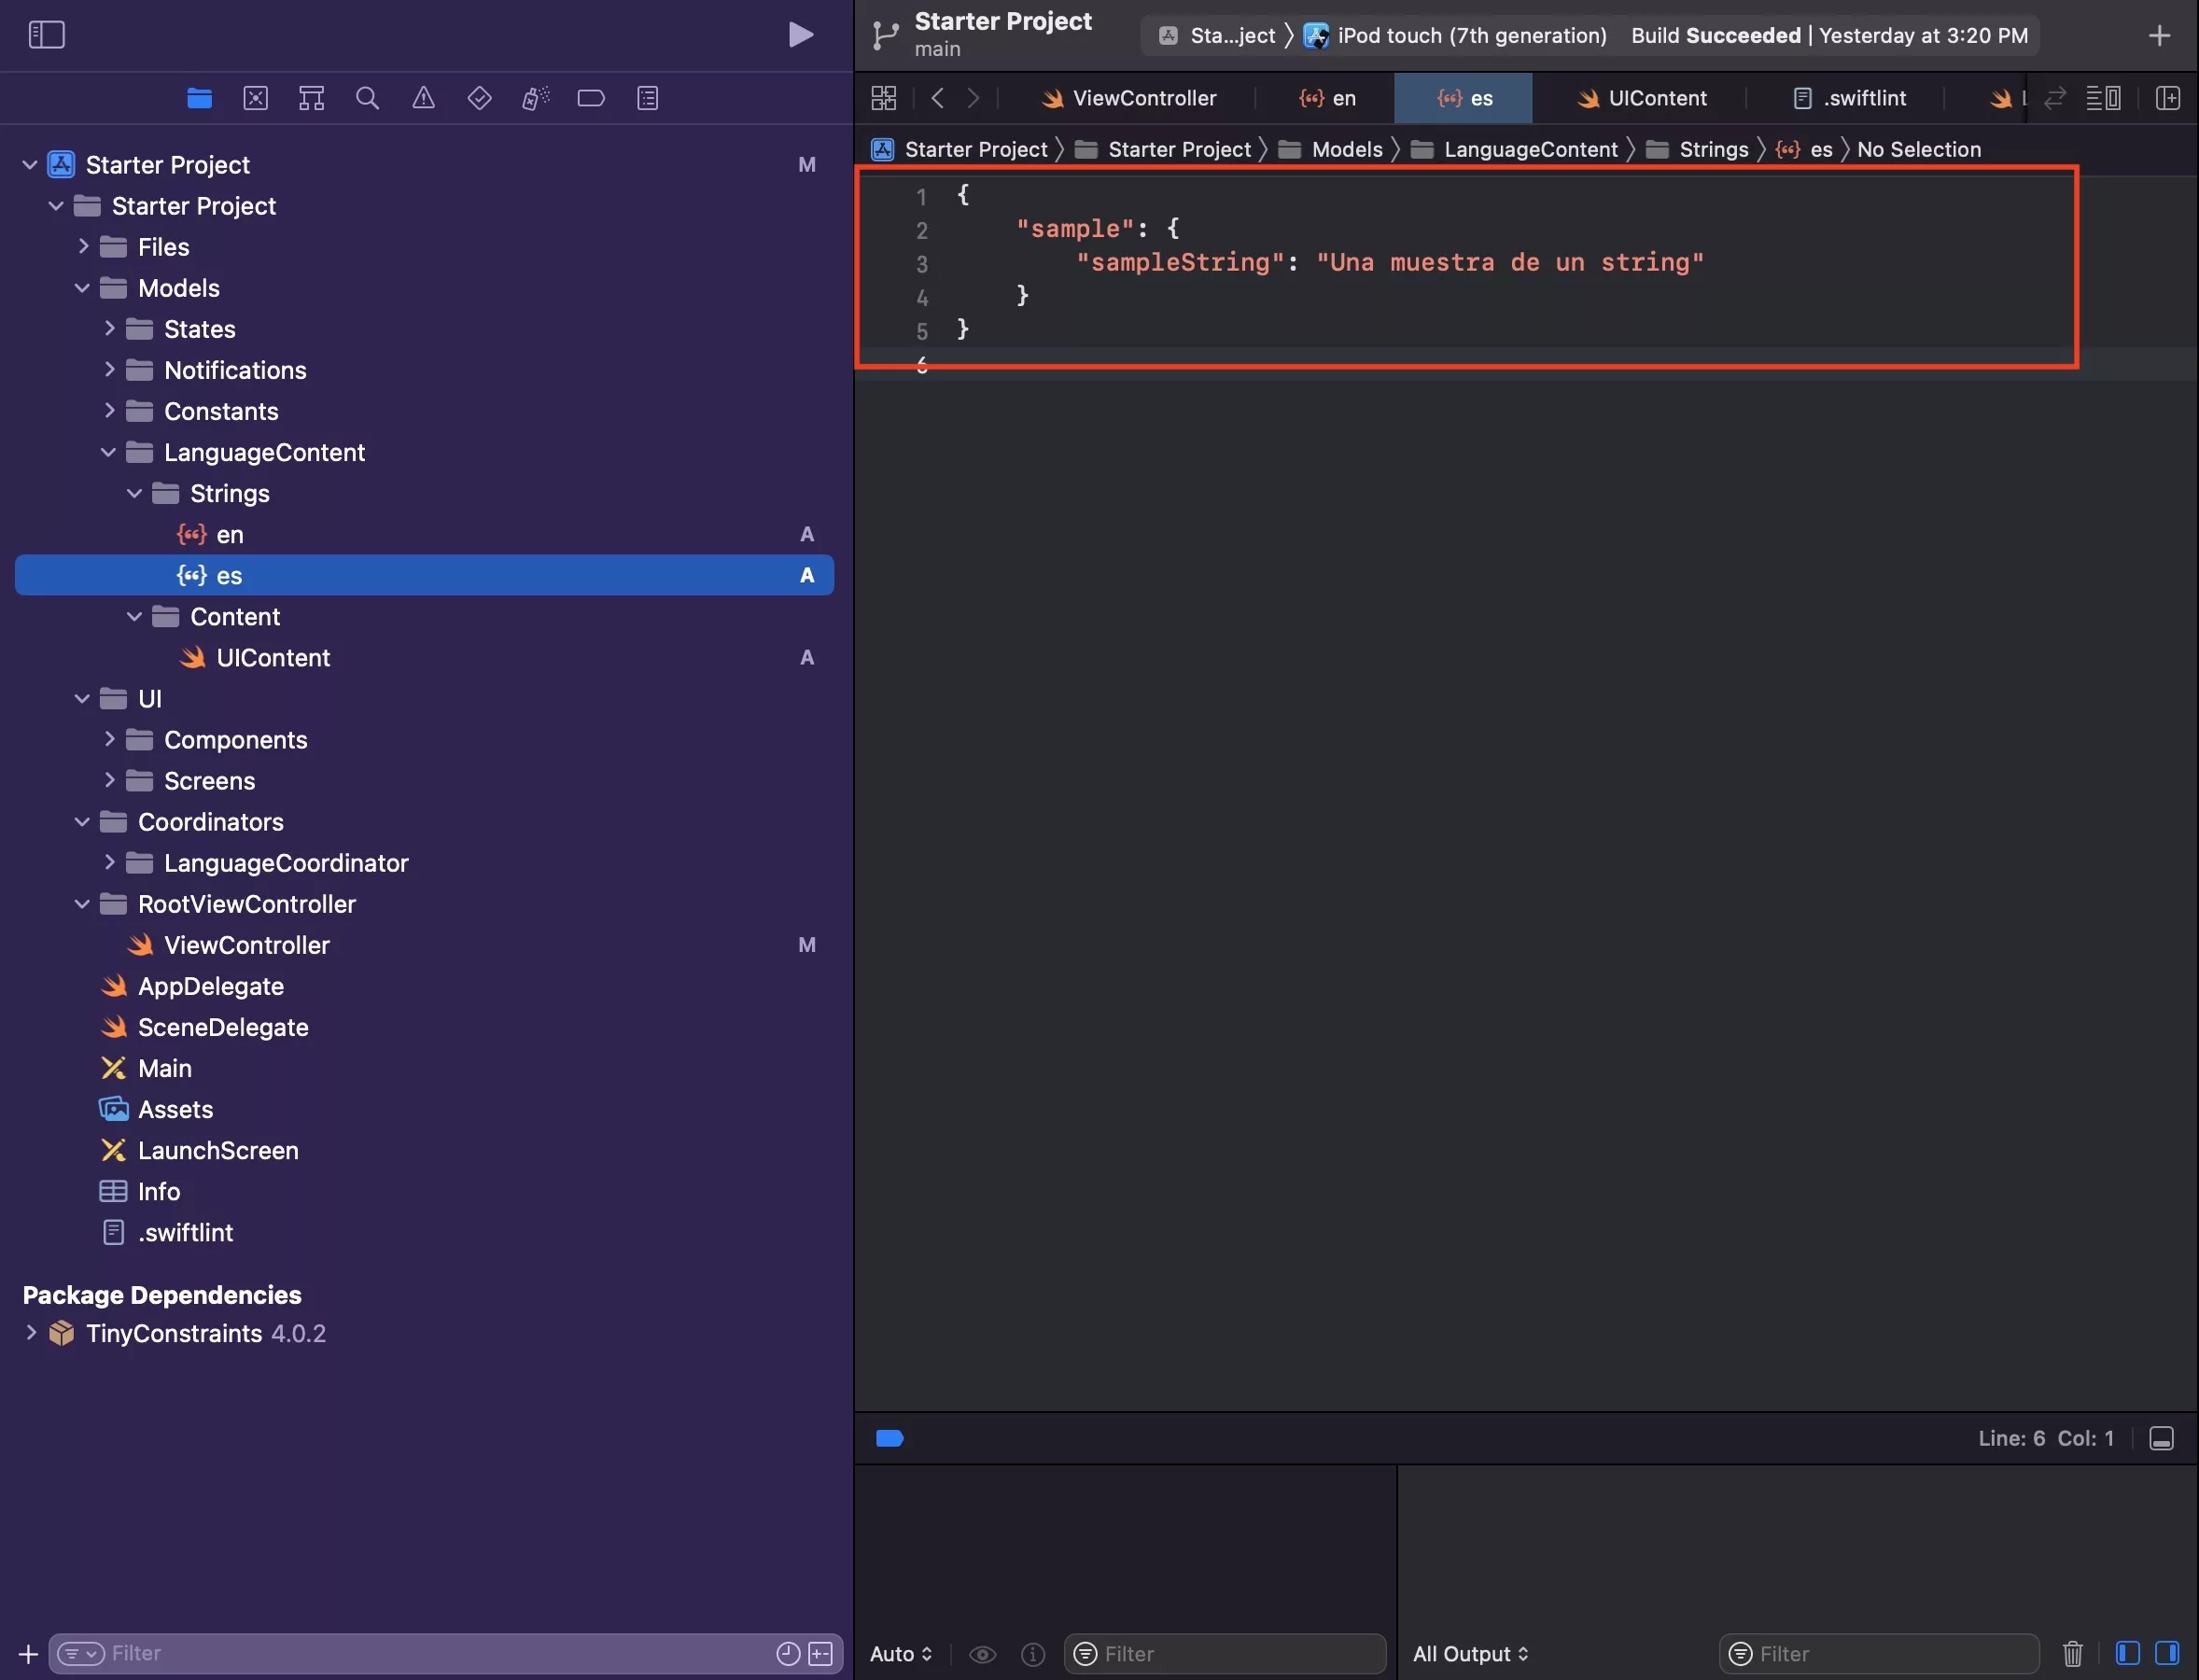
A sample Spanish JSON update.
The images above shows you how to create strings for the content structs that you create in Spanish and English. Code provided below.
As you can see it associates different language strings to sampleString which can be accessed via LanguageCoordinator.shared.currentContent?.sample.sampleString.
If the content isn't created for both languages using this pattern - the LanguageCoordinator will fail - making your application unable to render strings.
Step Eight: Create the Language file
Select the Content folder and press Command + N.
This will select the Swift, iOS file type. Press Next.
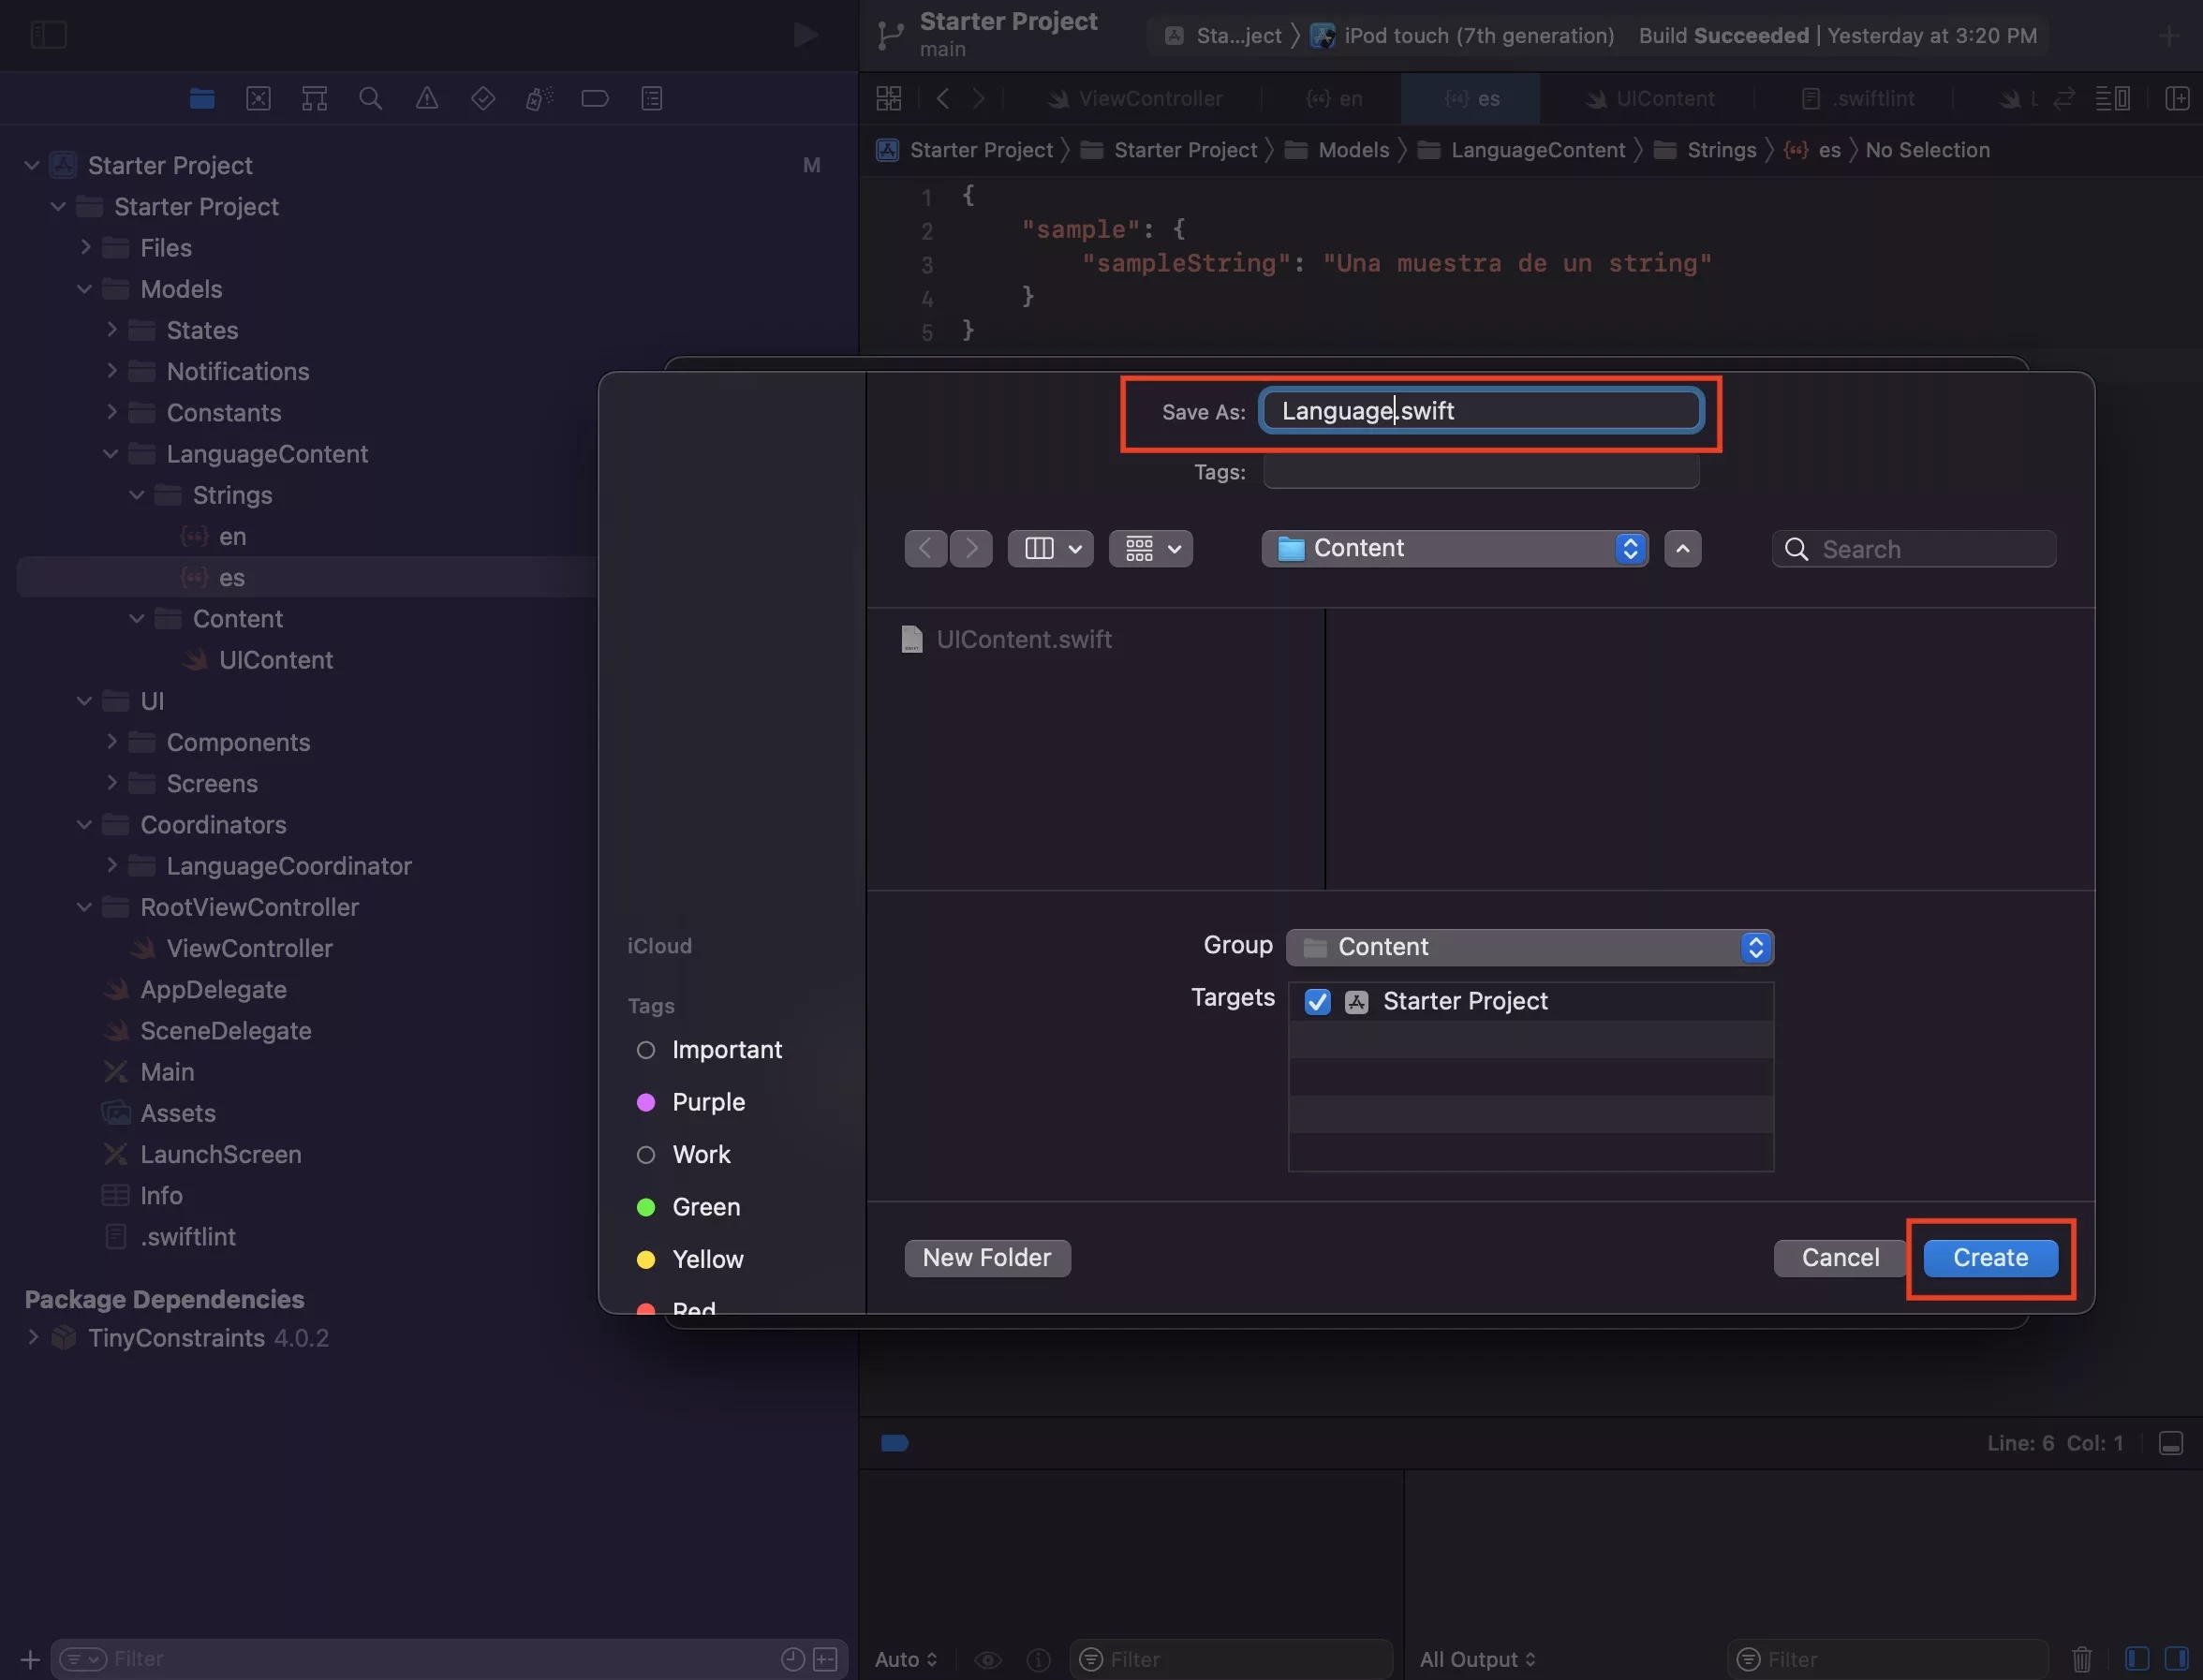
After that enter the name of your Language file - Language.swift - and press Create.
Step Nine: Create the Language Enumeration
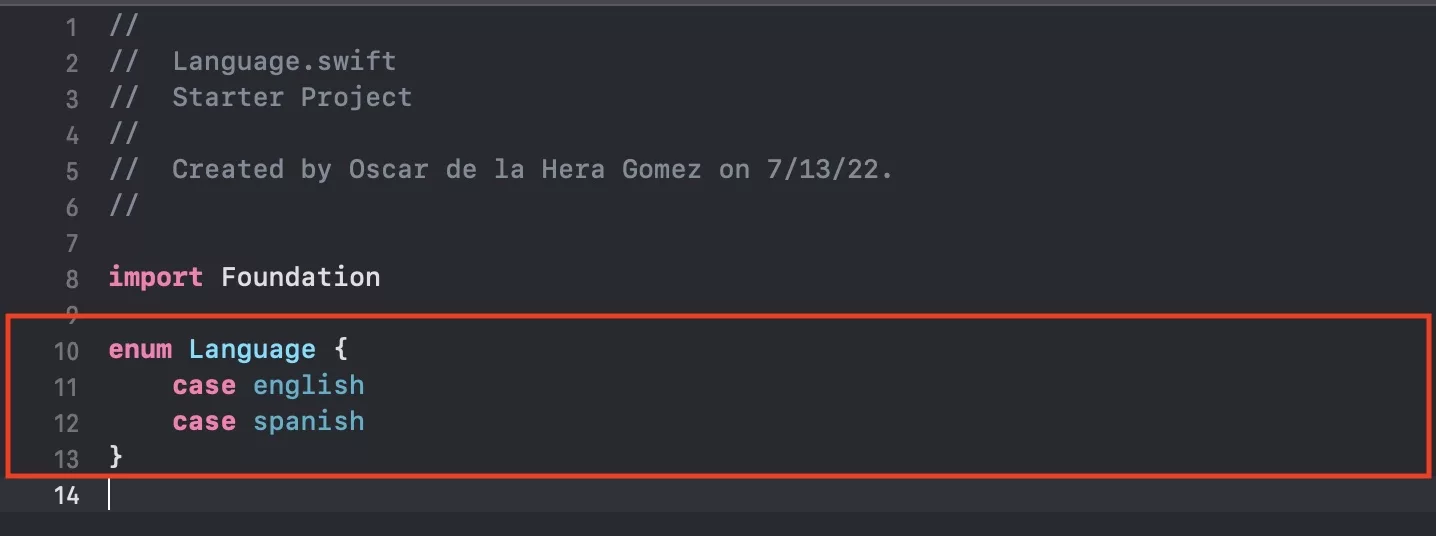
Paste the code below to create two languages for your app - English and Spanish.
For more languages or different languages, add or change the available cases.
Step Ten: Create your Language Coordinator

Create your Language Coordinator folder & file. A step by step tutorial on how to do so is available in the link below.
Step Eleven: Create your Language Coordinator extensions
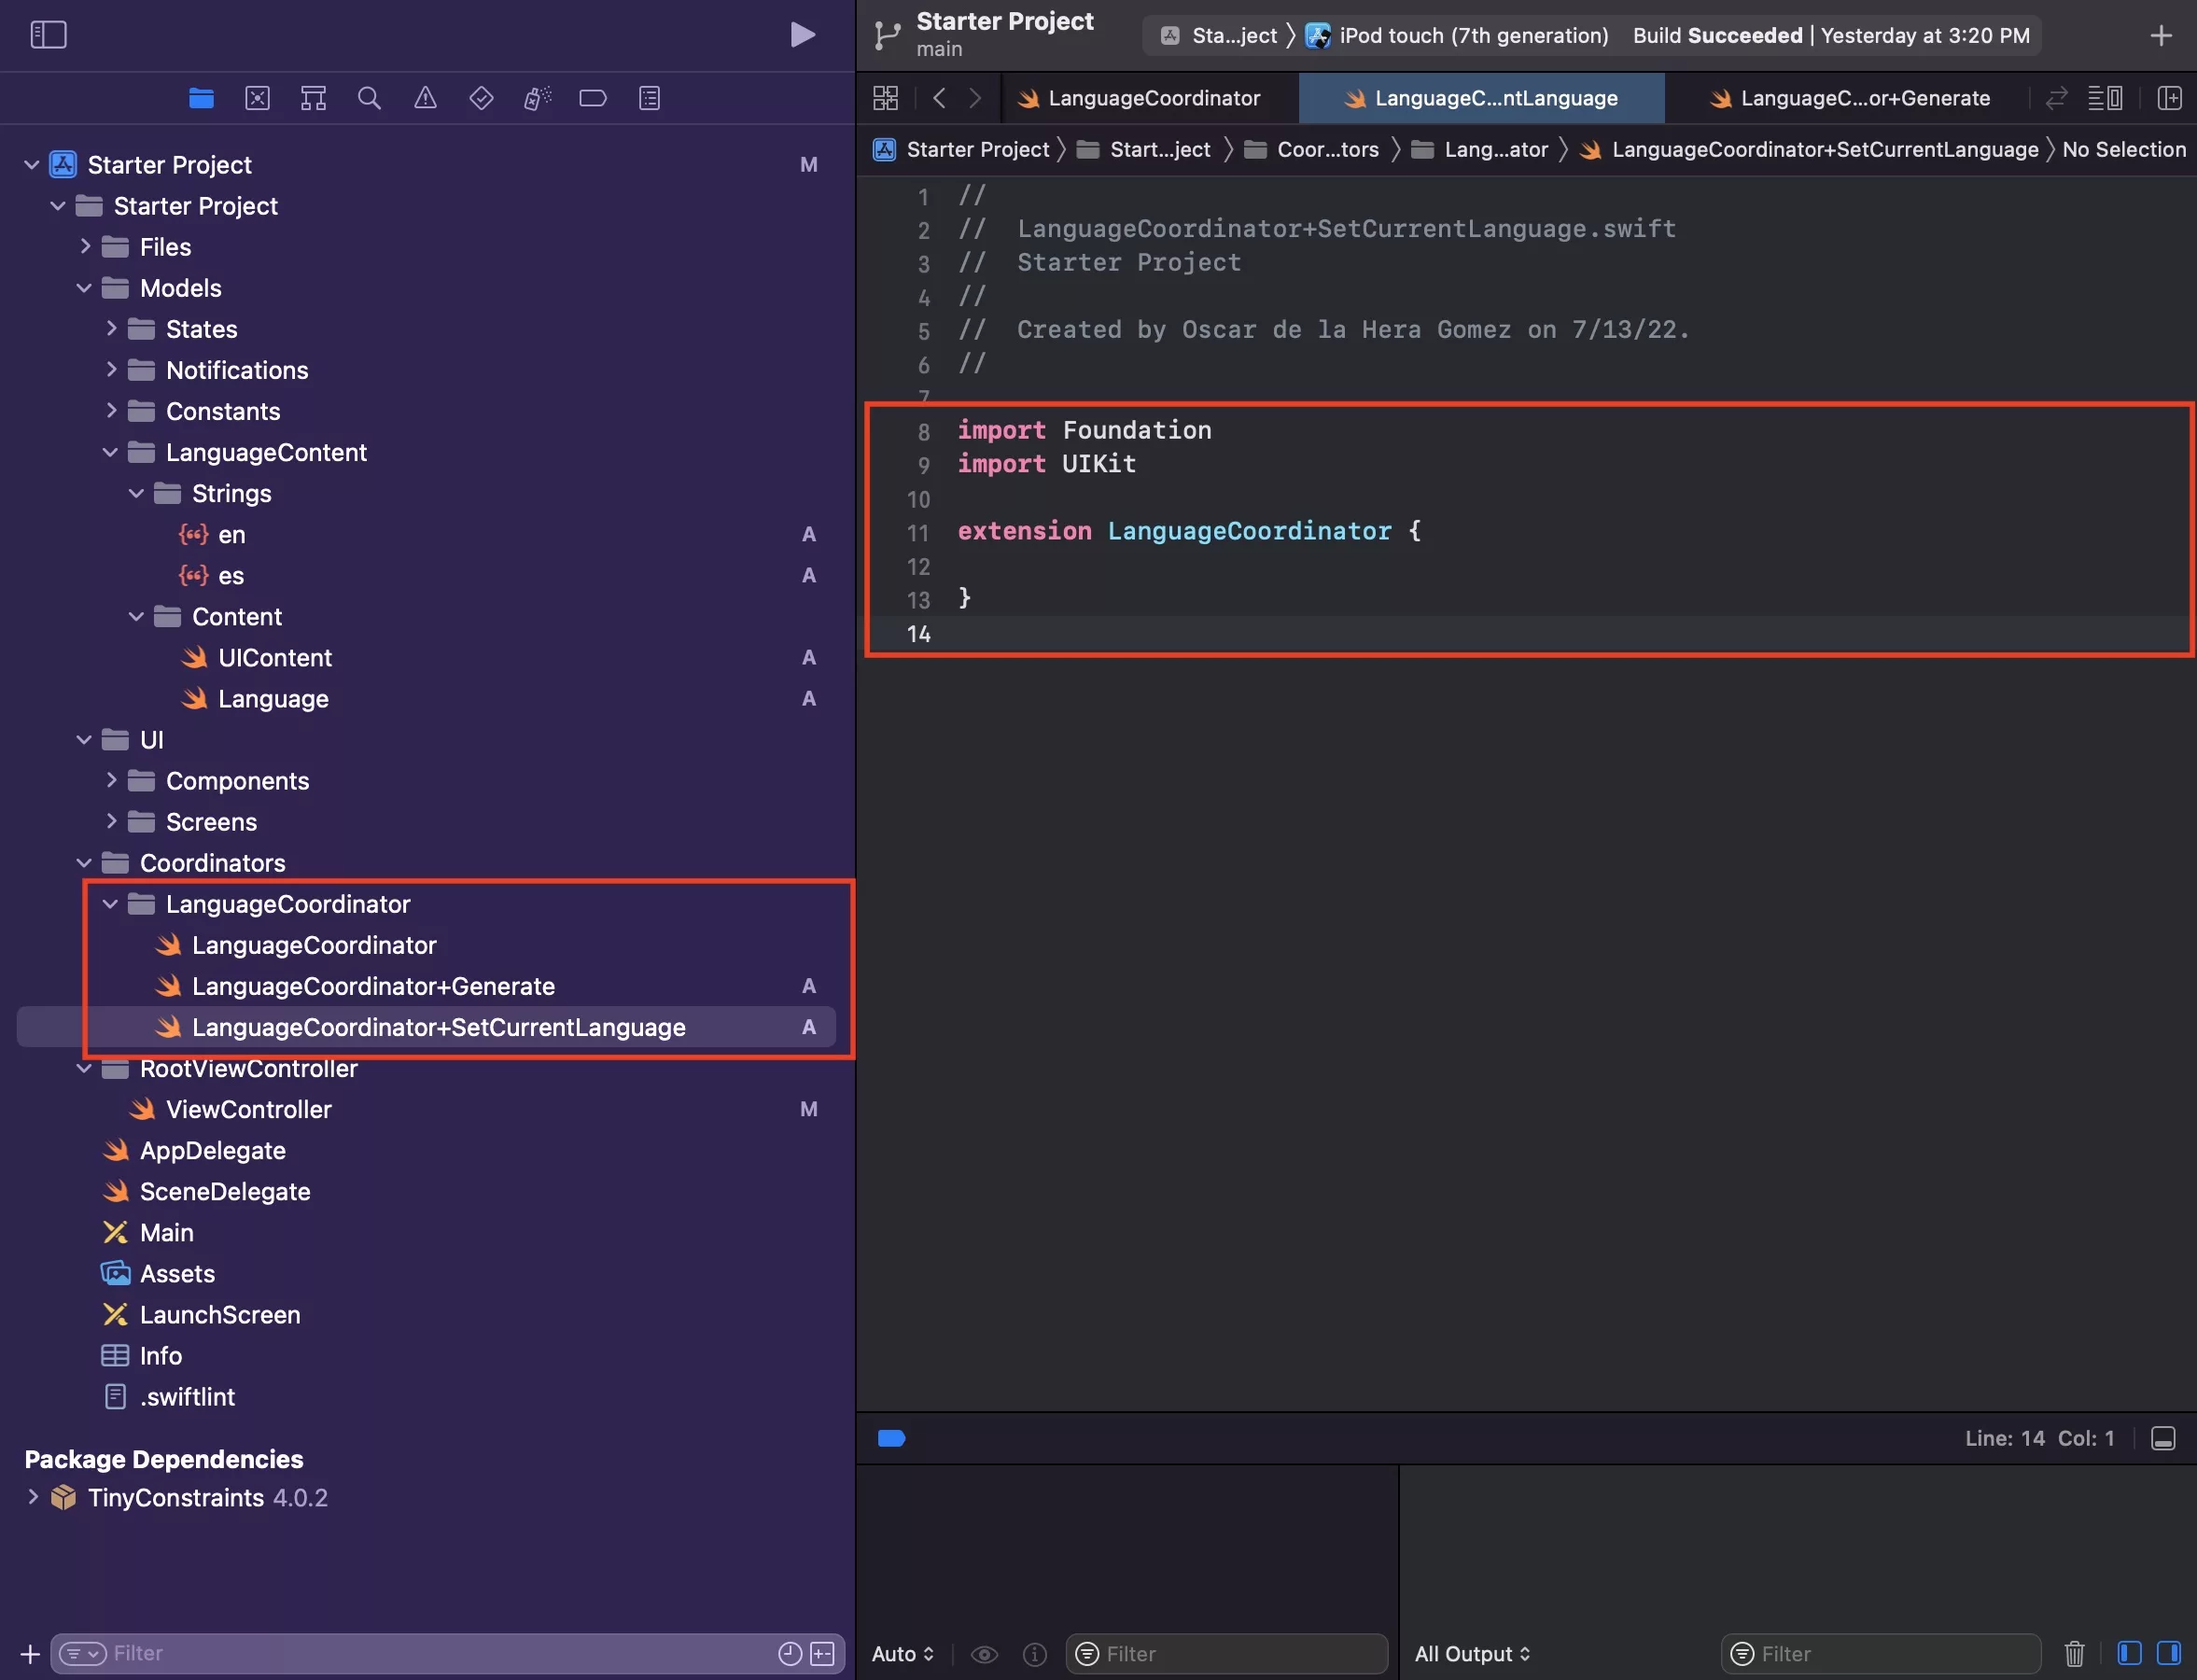
Select the LanguageCoordinator folder and press Command + N.
This will select the Swift, iOS file type. Press Next.
After that enter the name of your extensions - LanguageCoordinator+Generate.swift & LanguageCoordinator+SetCurrentLanguage respectively - and press Create for each case.
Step Twelve: Complete your Language Coordinator declaration
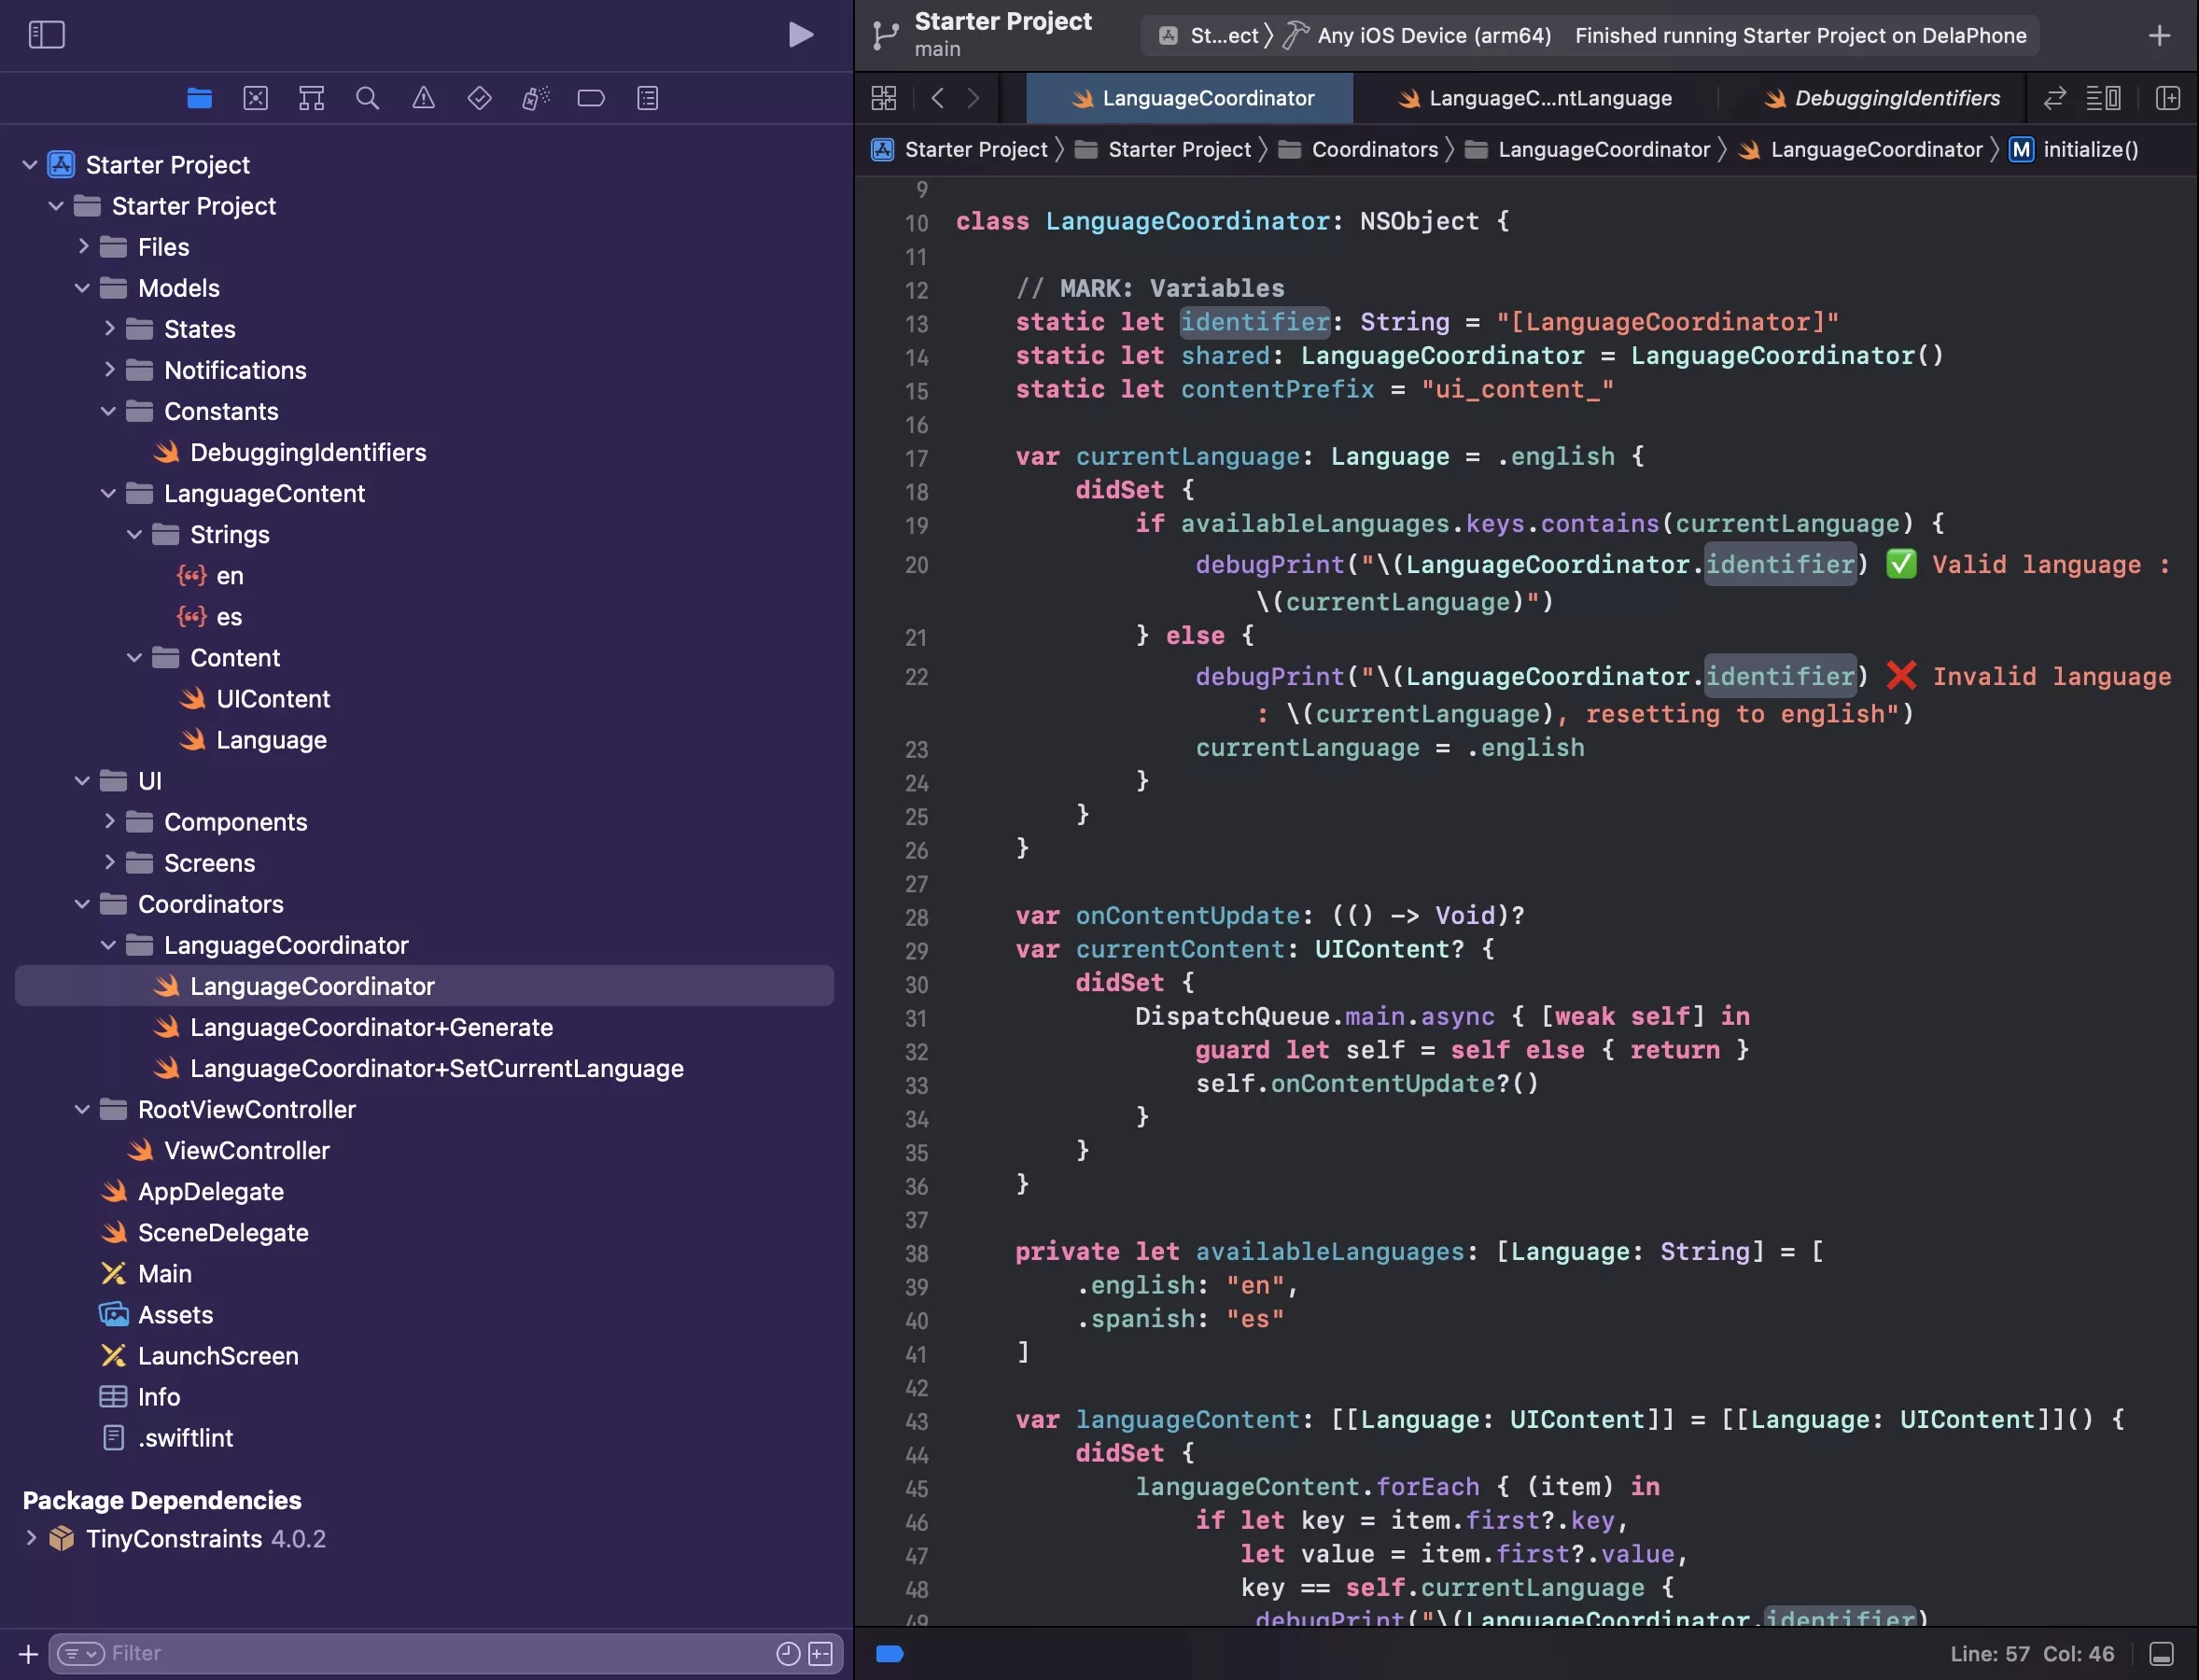
Copy the code below to complete your LanguageCoordinator.

Please note that you may get the error above - please note that the DebuggingIdentifiers were created as part of the following tutorial.
Step Thirteen: Complete your Language Coordinator generate functionality
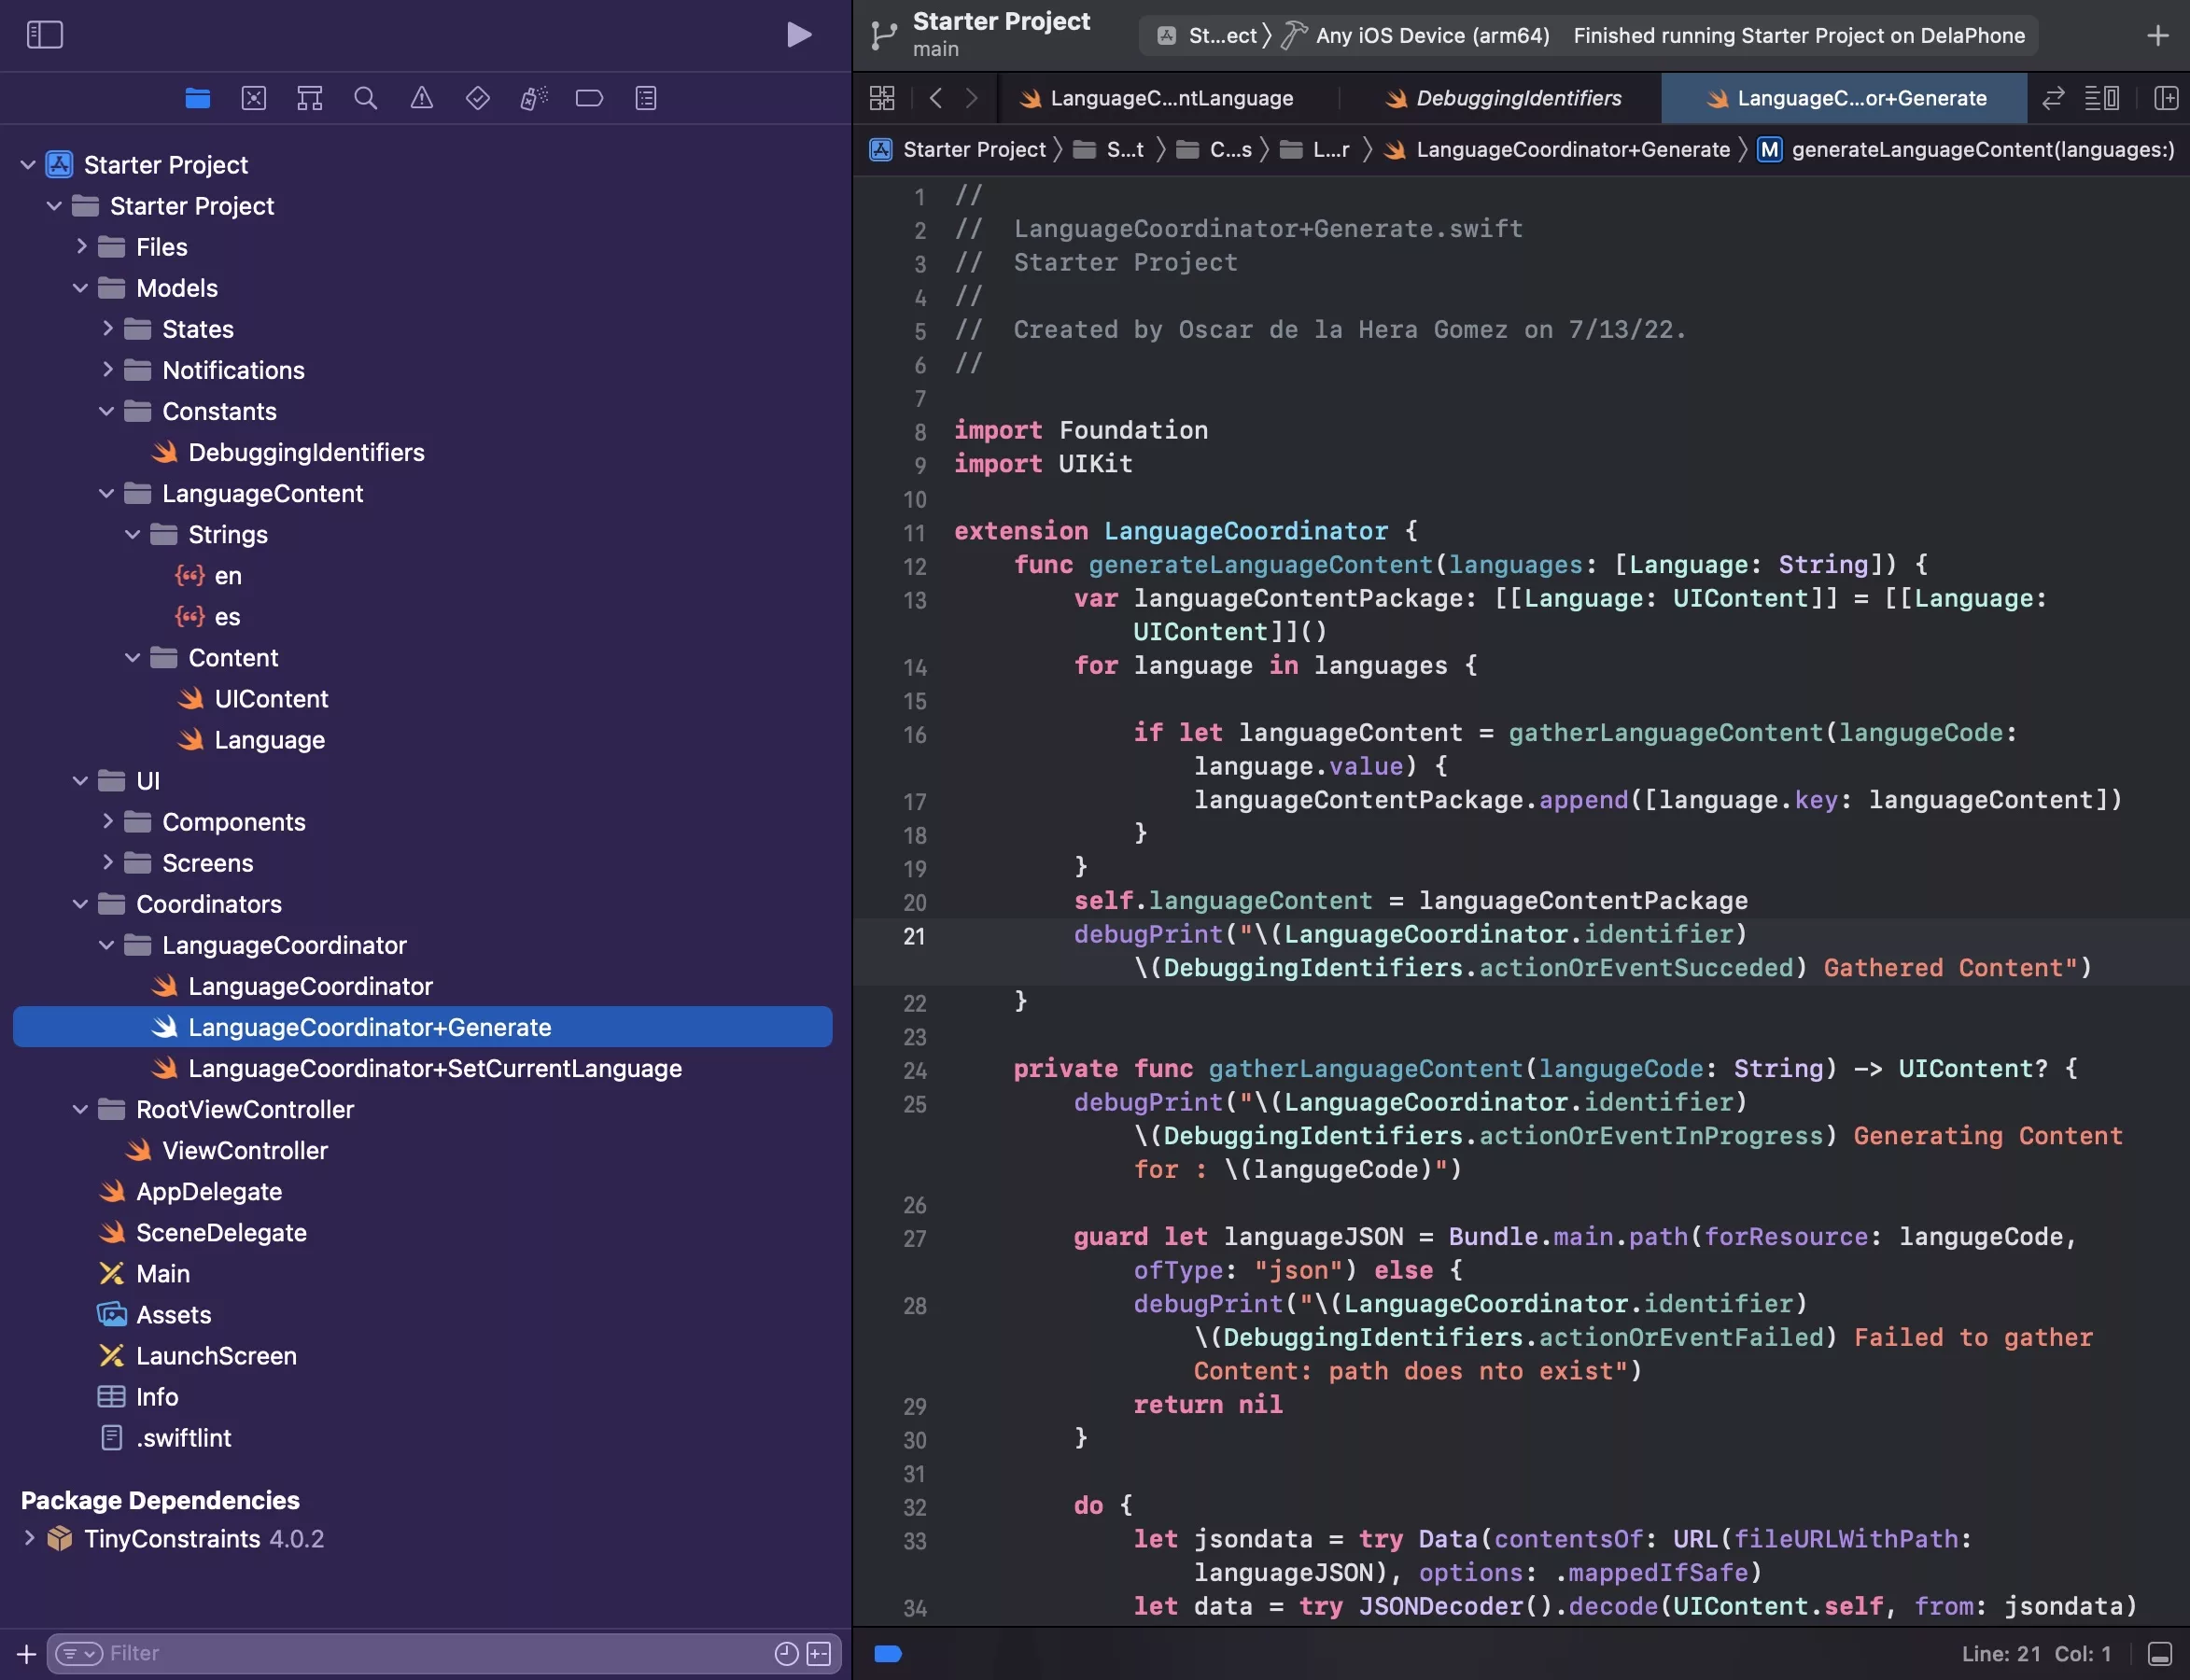
Copy the code below to complete your LanguageCoordinator generate functionality.
Step Fourteen: Complete your Language Coordinator set current language functionality

Copy the code below to complete your LanguageCoordinator set current language functionality.
Step Fifteen: Setup your content update listener
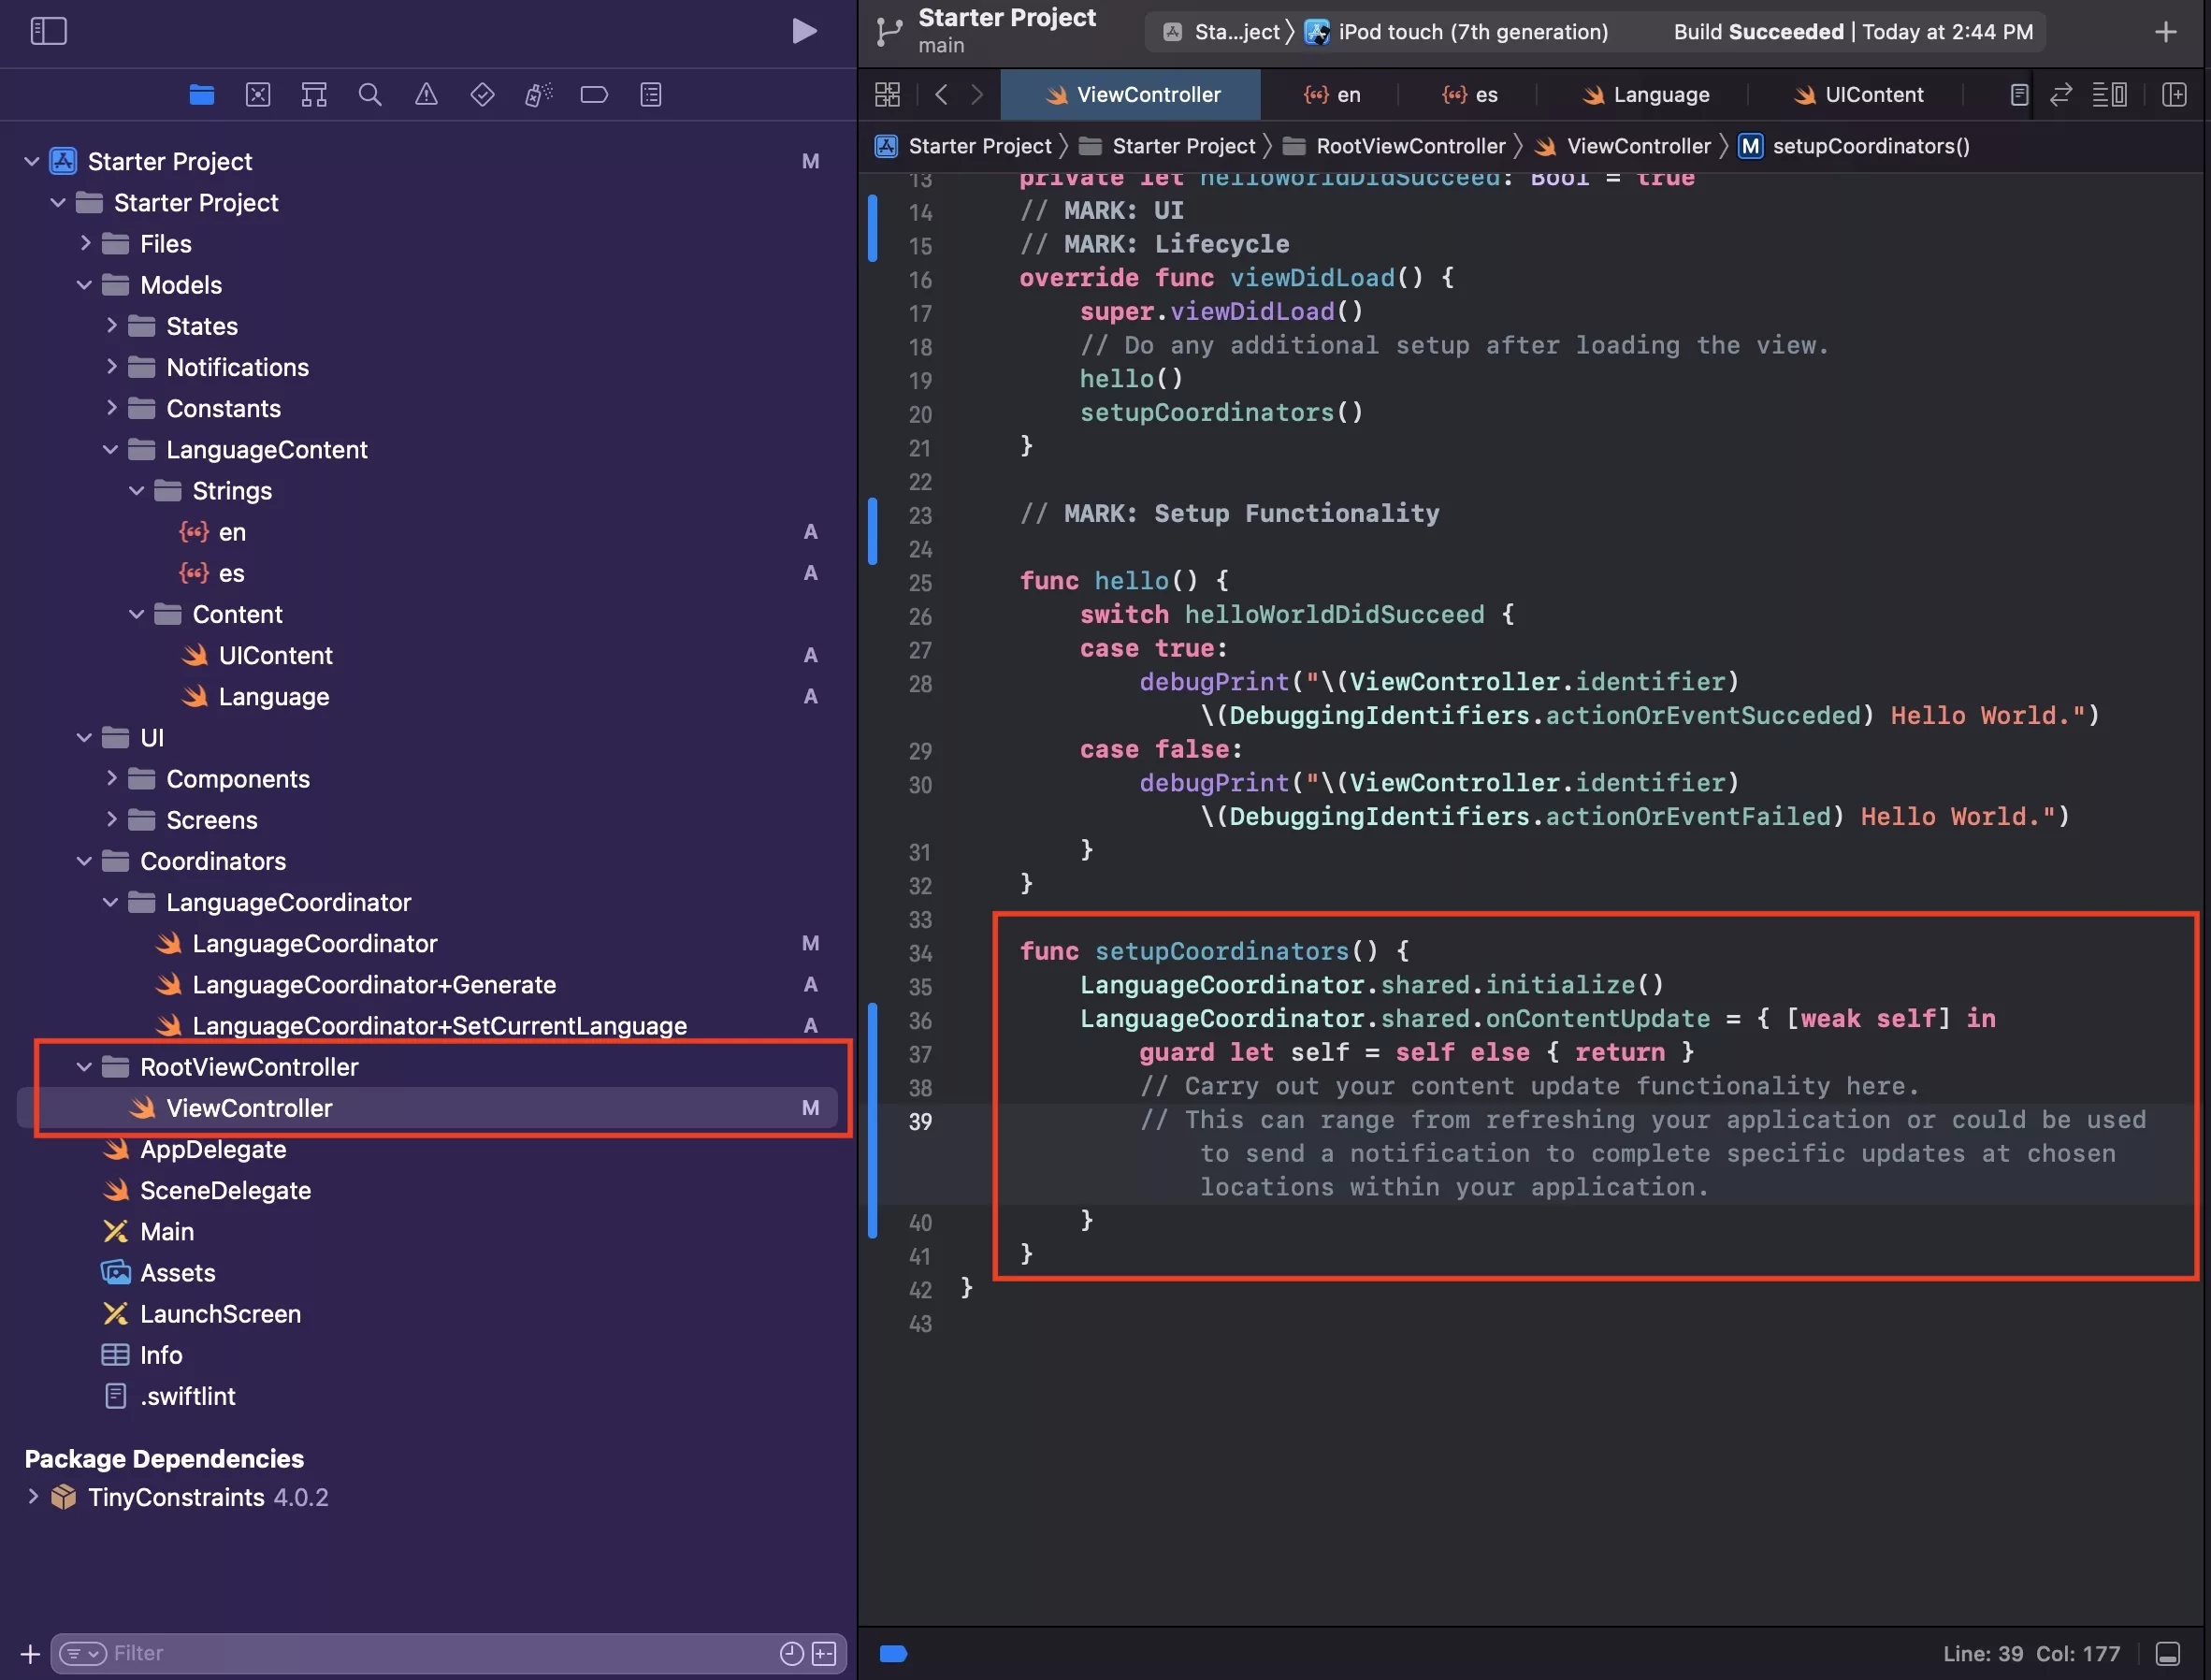
Add the listener to your ViewController.
Step Sixteen: Verify content
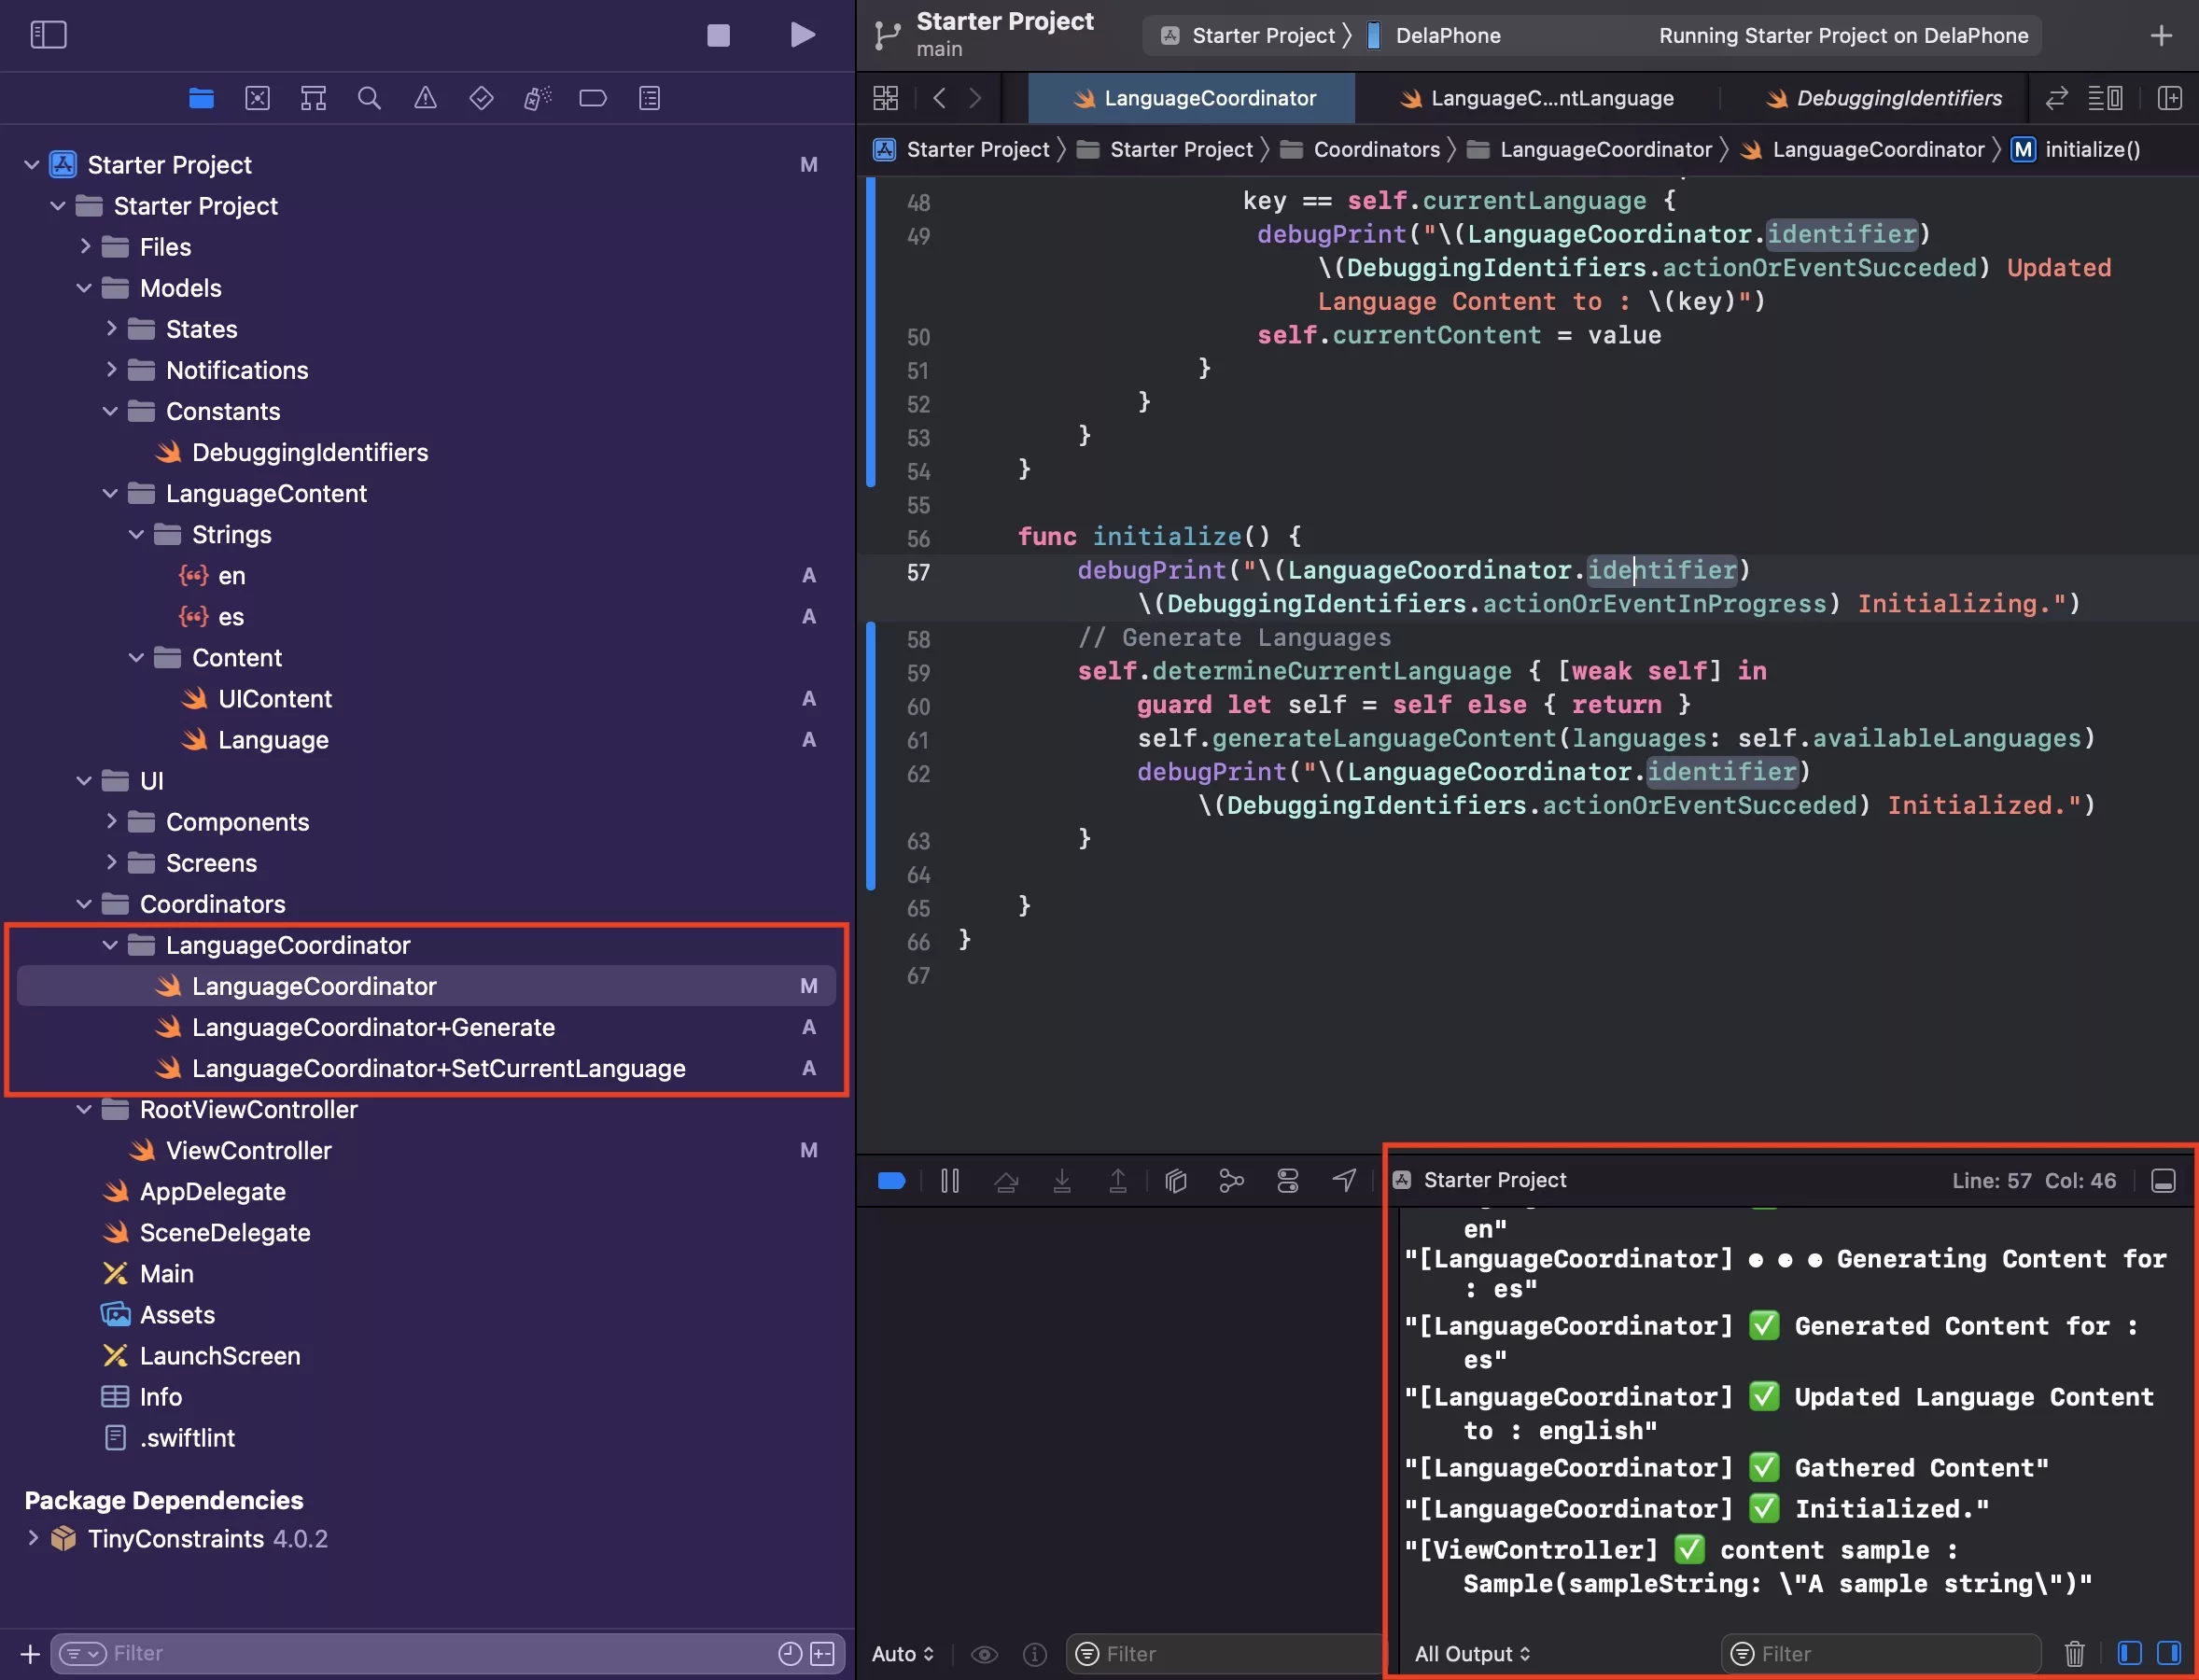
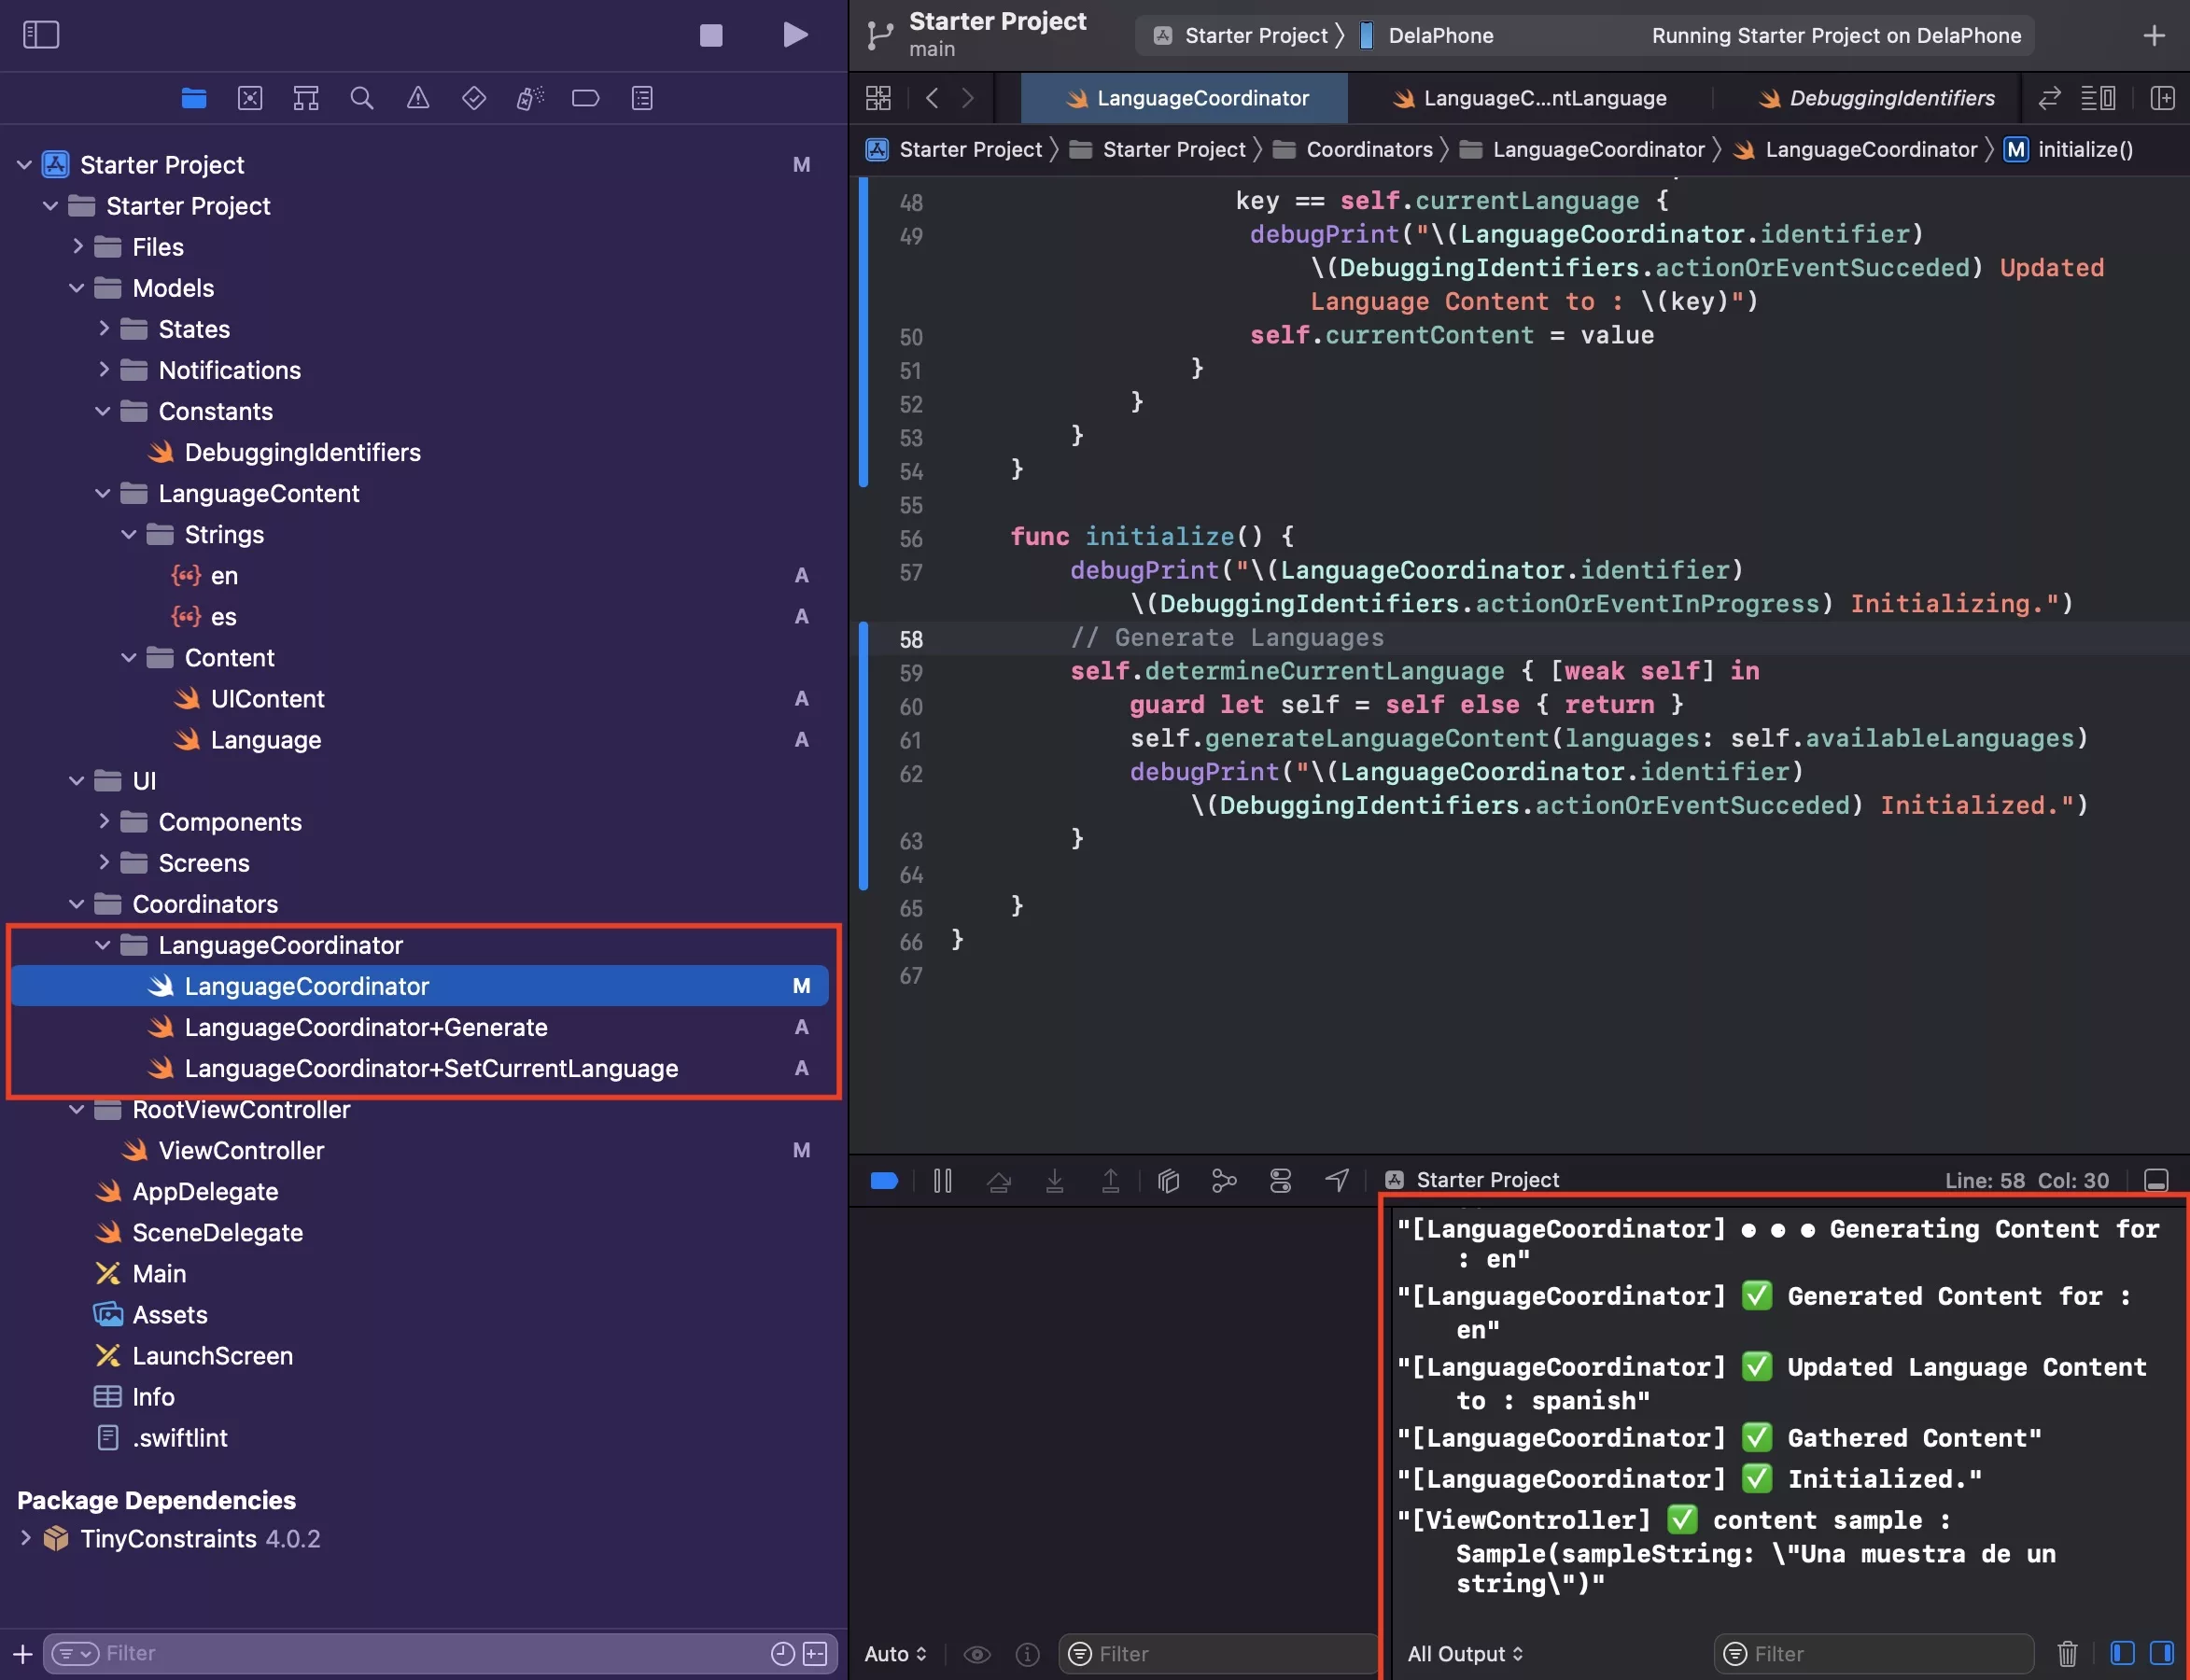
Start your app with Spanish and English as your primary language to confirm that it works. If you change language, your app will reset - triggering this process a new.
How do I access content in the application ?
To use the LanguageCoordinator content, use a guard to make sure that it works and then access it via a notation similar to that shown in the verification step (Step Sixteen) on the debugPrint found on line 62. An example is available in the tutorial below.
How do I add it to Swift Testing?
Follow our guide linked below to get the LanguageCoordinator working with Swift Testing.
Any Questions
We are actively looking for feedback on how to improve this resource. Please send us a note to inquiries@delasign.com with any thoughts or feedback you may have.