How to create & login with a passkey in React & Typescript Part III - Create a PassKey Login
Part III of a tutorial series for a proof of concept on creating & logging in with a passkey. This part of the series focuses on authenticating (i.e. login with) a passkey. Github repository included.


Part III of a tutorial series for a proof of concept on creating & logging in with a passkey in React & Typescript. This part of the series focuses on authenticating (i.e. login with) a passkey. Github repository included.
Download Open Source ProjectThe following tutorial walks you through how to create a passkey in React & Typescript and offers an open source project for both React Typescript and Gatsby Typescript.
We would like to thank Apple for their WWDC2022 session, in-person lab & technical support, Nick Steele for his guidance as well as WebAuthn for all the information and support provided in making this tutorial possible.
WARNING: Passkey's are not yet ready for implementation (July 2022)
As of July 25th 2022, on macOS Monterey (12.4), we can confirm that Passkeys are not yet ready for implementation as they do not work across Safari, Chrome and Mozilla Firefox on macOS or Windows. We will periodically check and update this post to inform on the state of Passkeys.
When using this tutorial, please use Safari on the latest version for it to function as expected.
Additionally, it is worth noting that in macOS Monterey, there is no way to delete passkeys. This led us to have created about multiple passkeys for this tutorial and will only be able to delete them once macOS Ventura is released around October 2022.
WARNING: This tutorial does not cover attestation
Please be aware that this tutorial does not cover the optional but strongly recommended process of attestation. For more information on attestation, please visit the WebAuthn website.
Tutorial : Authenticate (i.e. login with) a passkey
The tutorial was created by downloading our React Typescript + React Redux Open Source project and carrying out the steps described in Part I & Part II of this tutorial series which focused on setting up the project and user experience (Part I) and registering (i.e. creating) your first PassKey (PartII). Please consult the links below to learn more about the setup, user experience and registration process.
Step One: Create your authentication utilities
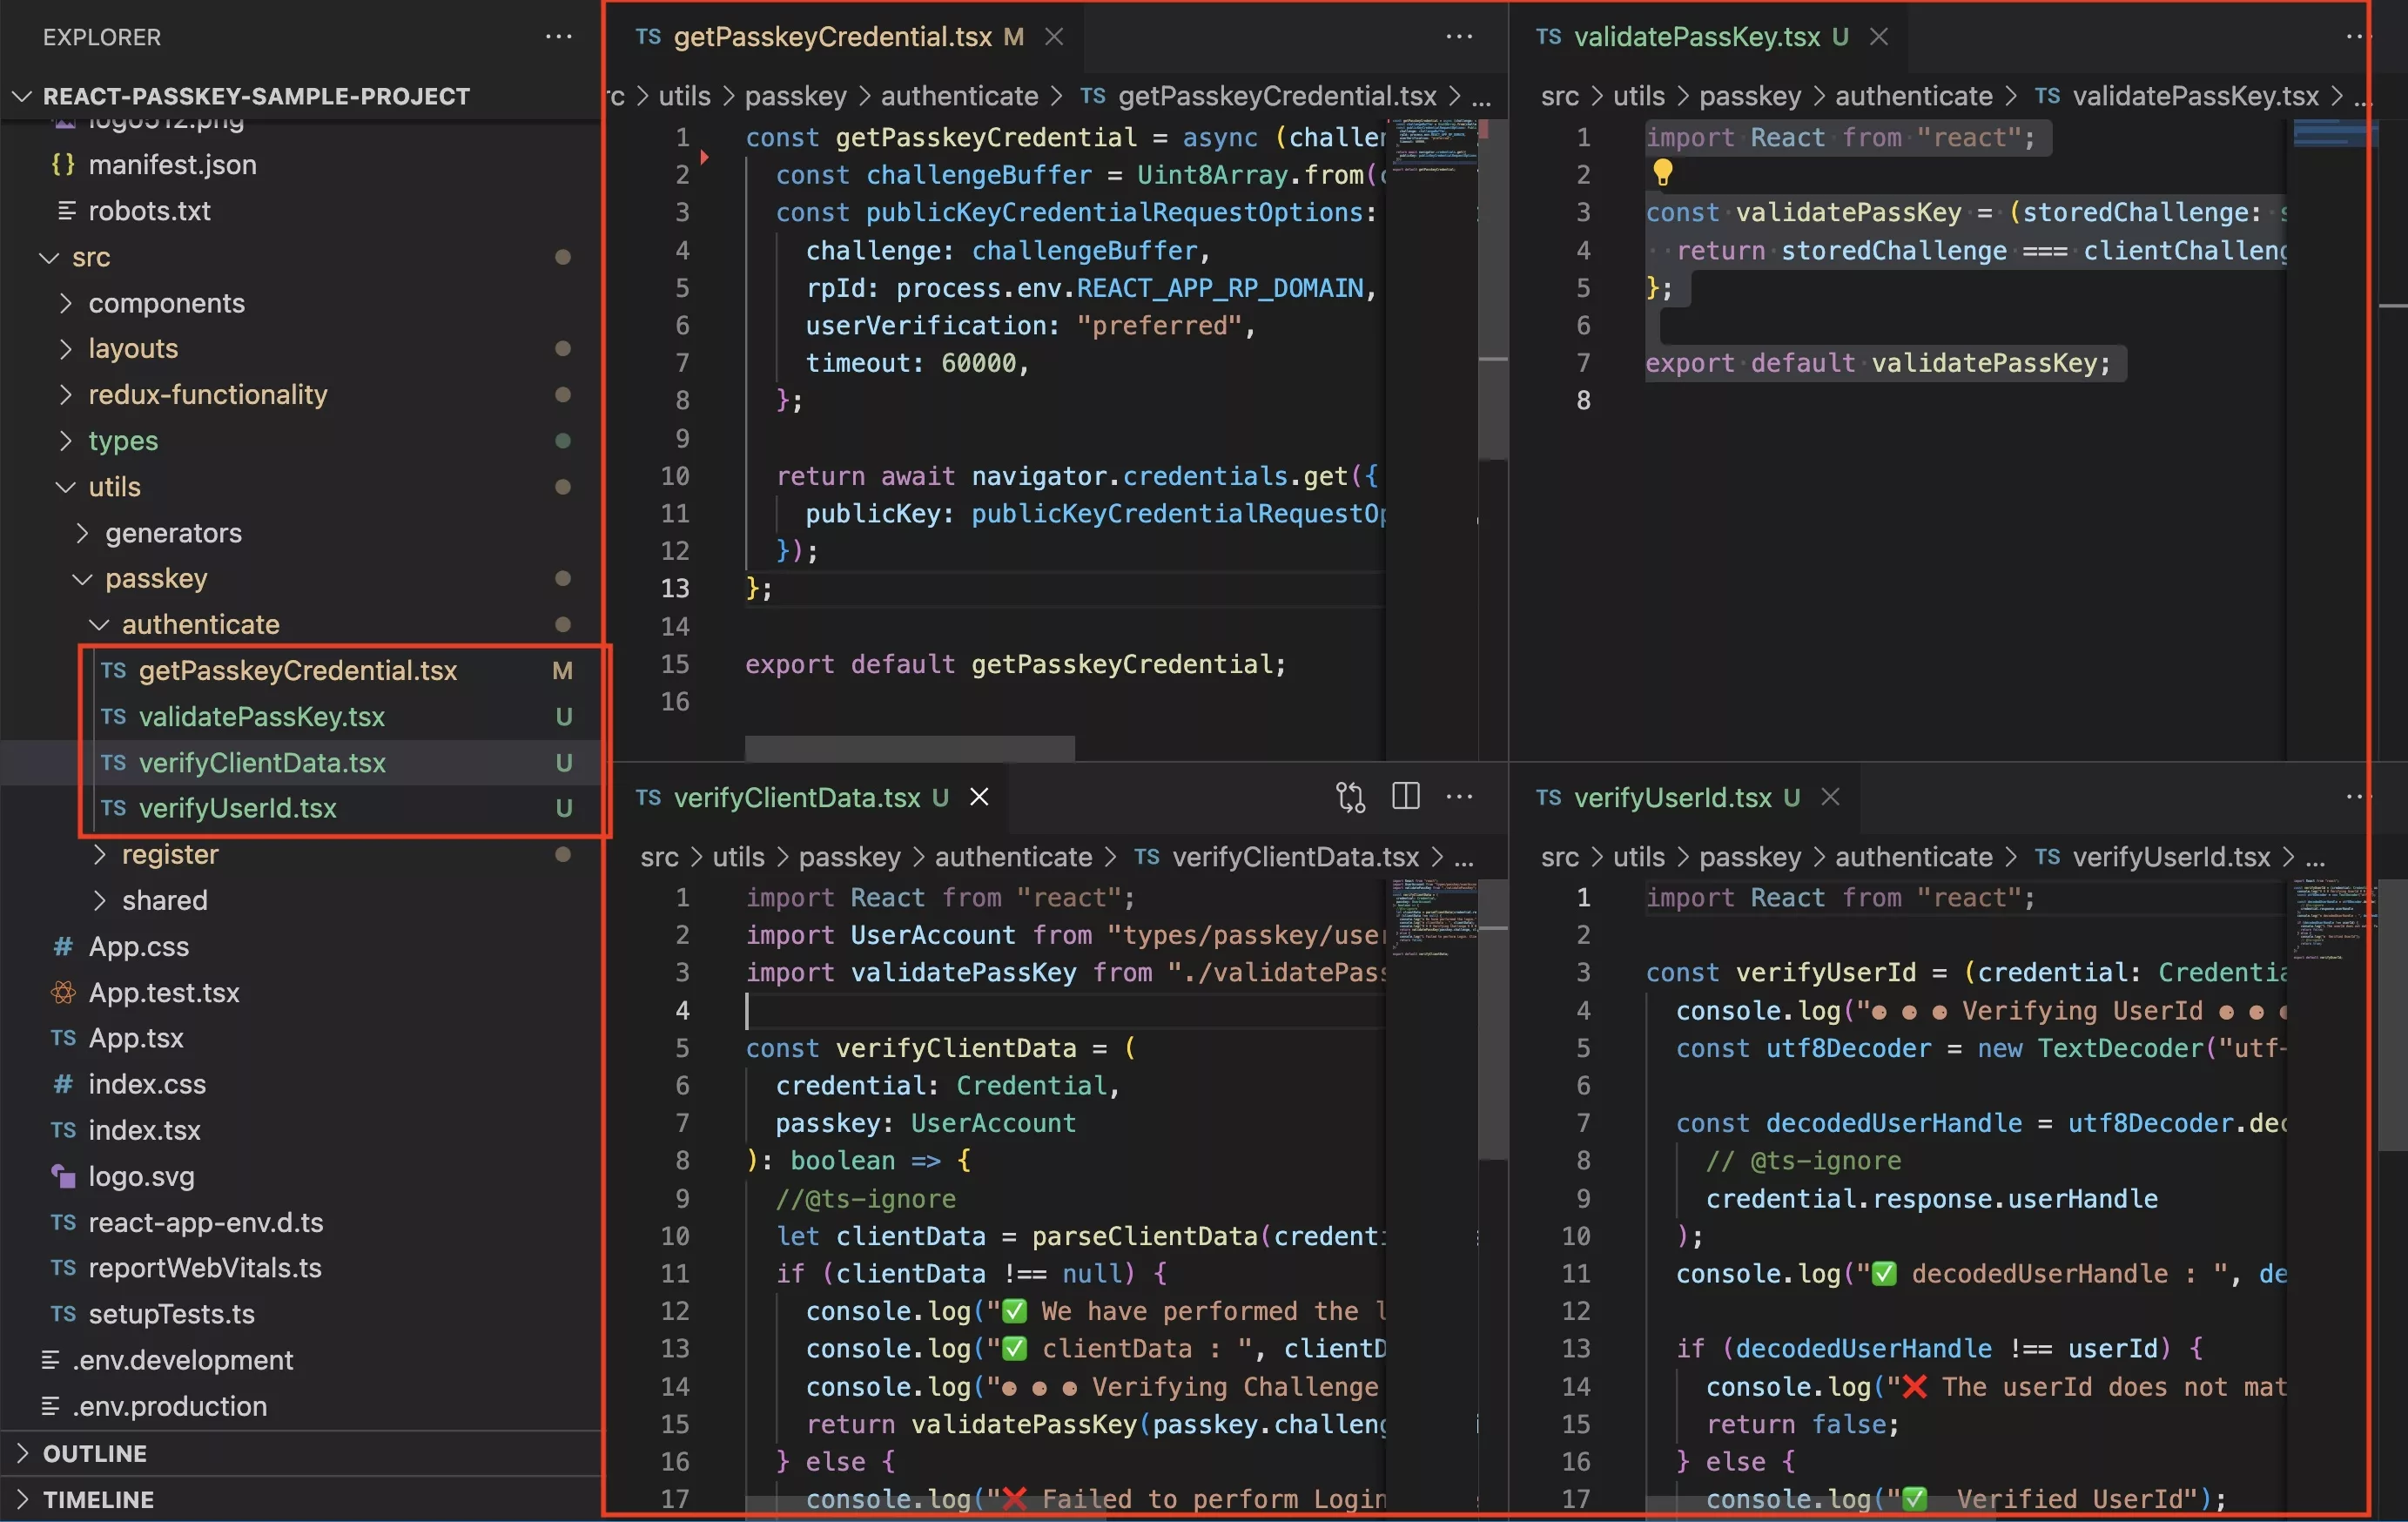
Within the utils folder, under the passkey folder create a folder called authenticate.
Within this folder create four files:
- getPasskeyCredential.tsx
- validatePassKey.tsx
- verifyClientData.tsx
- verifyUserId.tsx
Here is the code for them.
1 | getPasskeyCredential.tsx
Within the authenticate folder create a file called getPasskeyCredential.tsx and paste in the code below.
This code is responsible for taking in the challenge buffer gathered from the matched user on your backend and requesting the browser for passkey login.
Within the response that is generated by the request for the credential, which is considered a login, sits the clientDataJSON that in production must be sent in an APU to the backend to verify against.
In this proof of concept, we parse the data on the frontend and verify that the challenge and userId produced match the details of the account we created in Part II.
Please note that if you're using GatsbyJS you must replace REACT_APP with GATSBY.
2 | validatePassKey.tsx
Within the authenticate folder create a file called validatePassKey.tsx and paste in the code below.
This code is responsible for confirming that the challenge produced by the authentication client data json matches that stored in our account.
Please note that although we confirm this on the front-end for the proof of concept, this functionality must be carried out server side (i.e. backend) for security purposes.
3 | verifyClientData.tsx
Within the authenticate folder create a file called verifyClientData.tsx and paste in the code below.
This code is responsible for parsing the clientDataJSON produced by the authentication (i.e. login) and verifying that the challenge matches the challenge of the user account that is attempting to login.
Please note that although we confirm this on the front-end for the proof of concept, this functionality must be carried out server side (i.e. backend) for security purposes.
4 | verifyUserId.tsx
Within the authenticate folder create a file called verifyUserId.tsx and paste in the code below.
This code is responsible for decoding the userHandle produced by the authentication (i.e. login) and verifying that the userHandle matches the userId of the user account that is attempting to login.
Please note that although we confirm this on the front-end for the proof of concept, this functionality must be carried out server side (i.e. backend) for security purposes.
Step Two: Add User Accounts
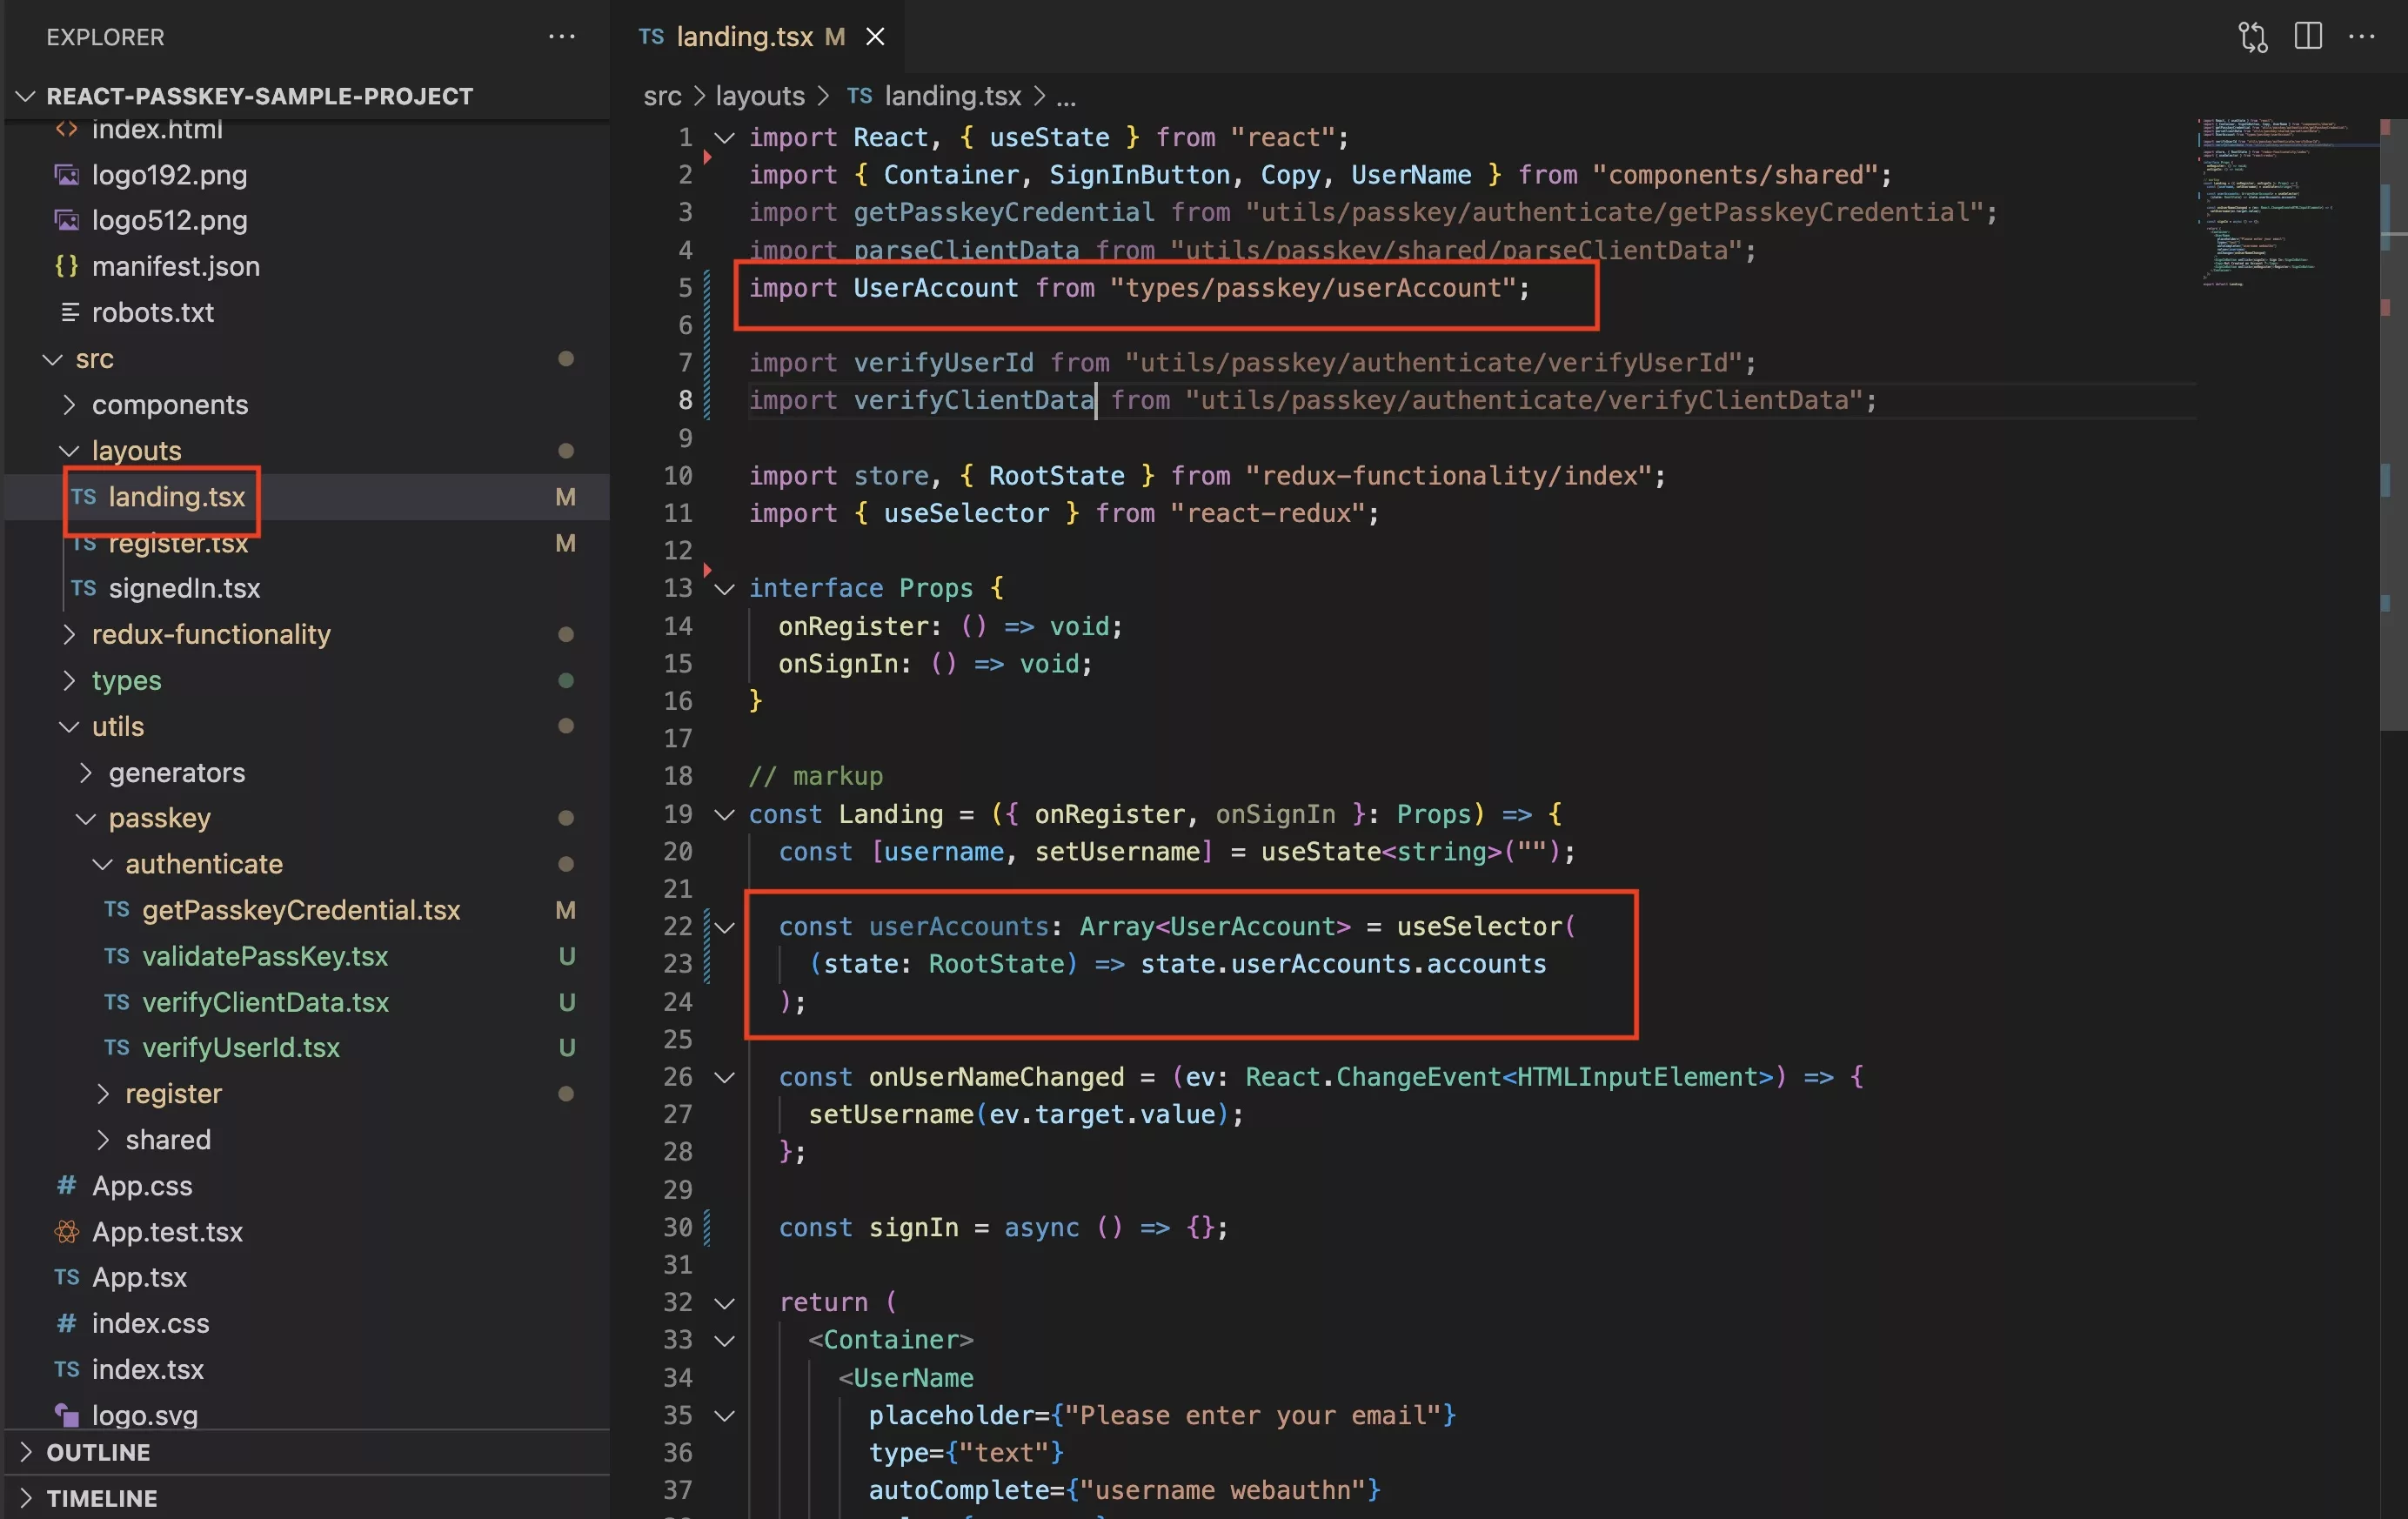
Add the following import & line to the top of the landing.tsx to import your Redux Store.
Please note this is for proof of concept purposes and the user accounts should only be stored and accessed on the server side (i.e. backend).
Step Three: Add the Sign In Flow Functionality
Navigate to layouts/landing.tsx and add the following functions.
The complete code is found below.
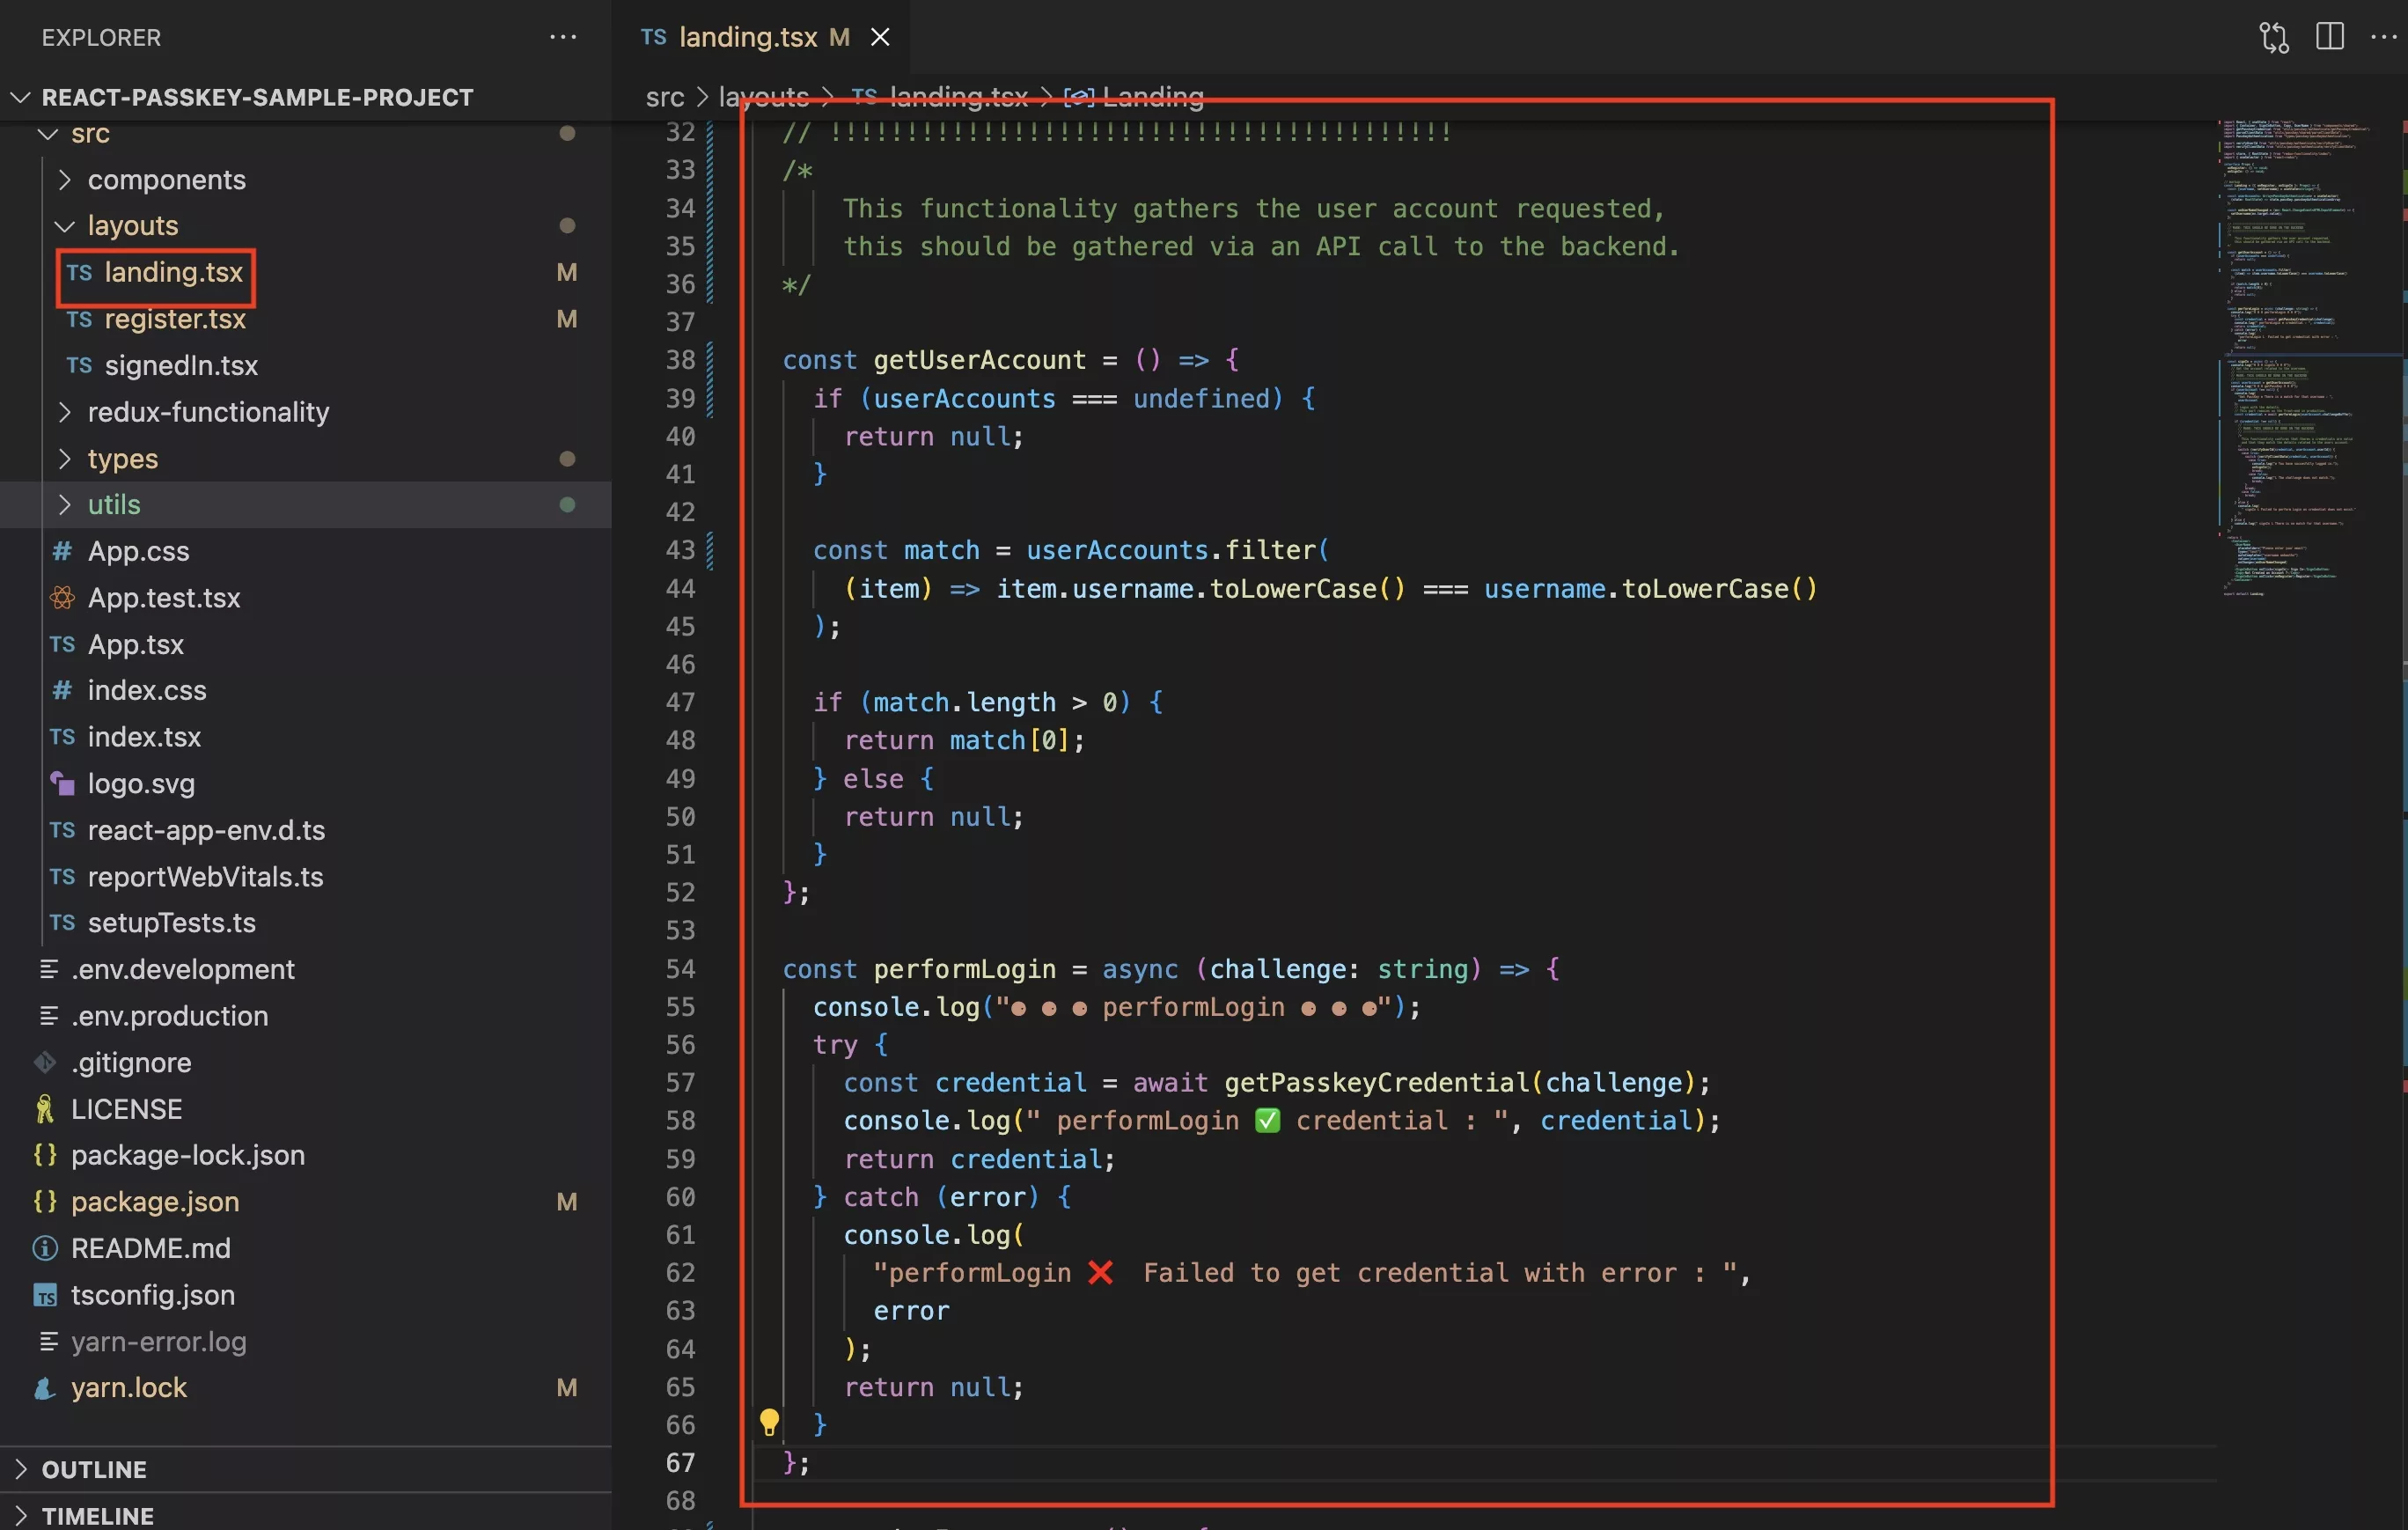
Get User Account
This function matches a username in the landing.tsx to one found in the Redux Store and returns a UserAccount object for us to assert against.
This is where you should call your backend to gather the user details - we are using redux as a proof of concept.
Perform Login
This function calls the utility that you created and returns the credential.
Step Four: Complete the Sign In Function
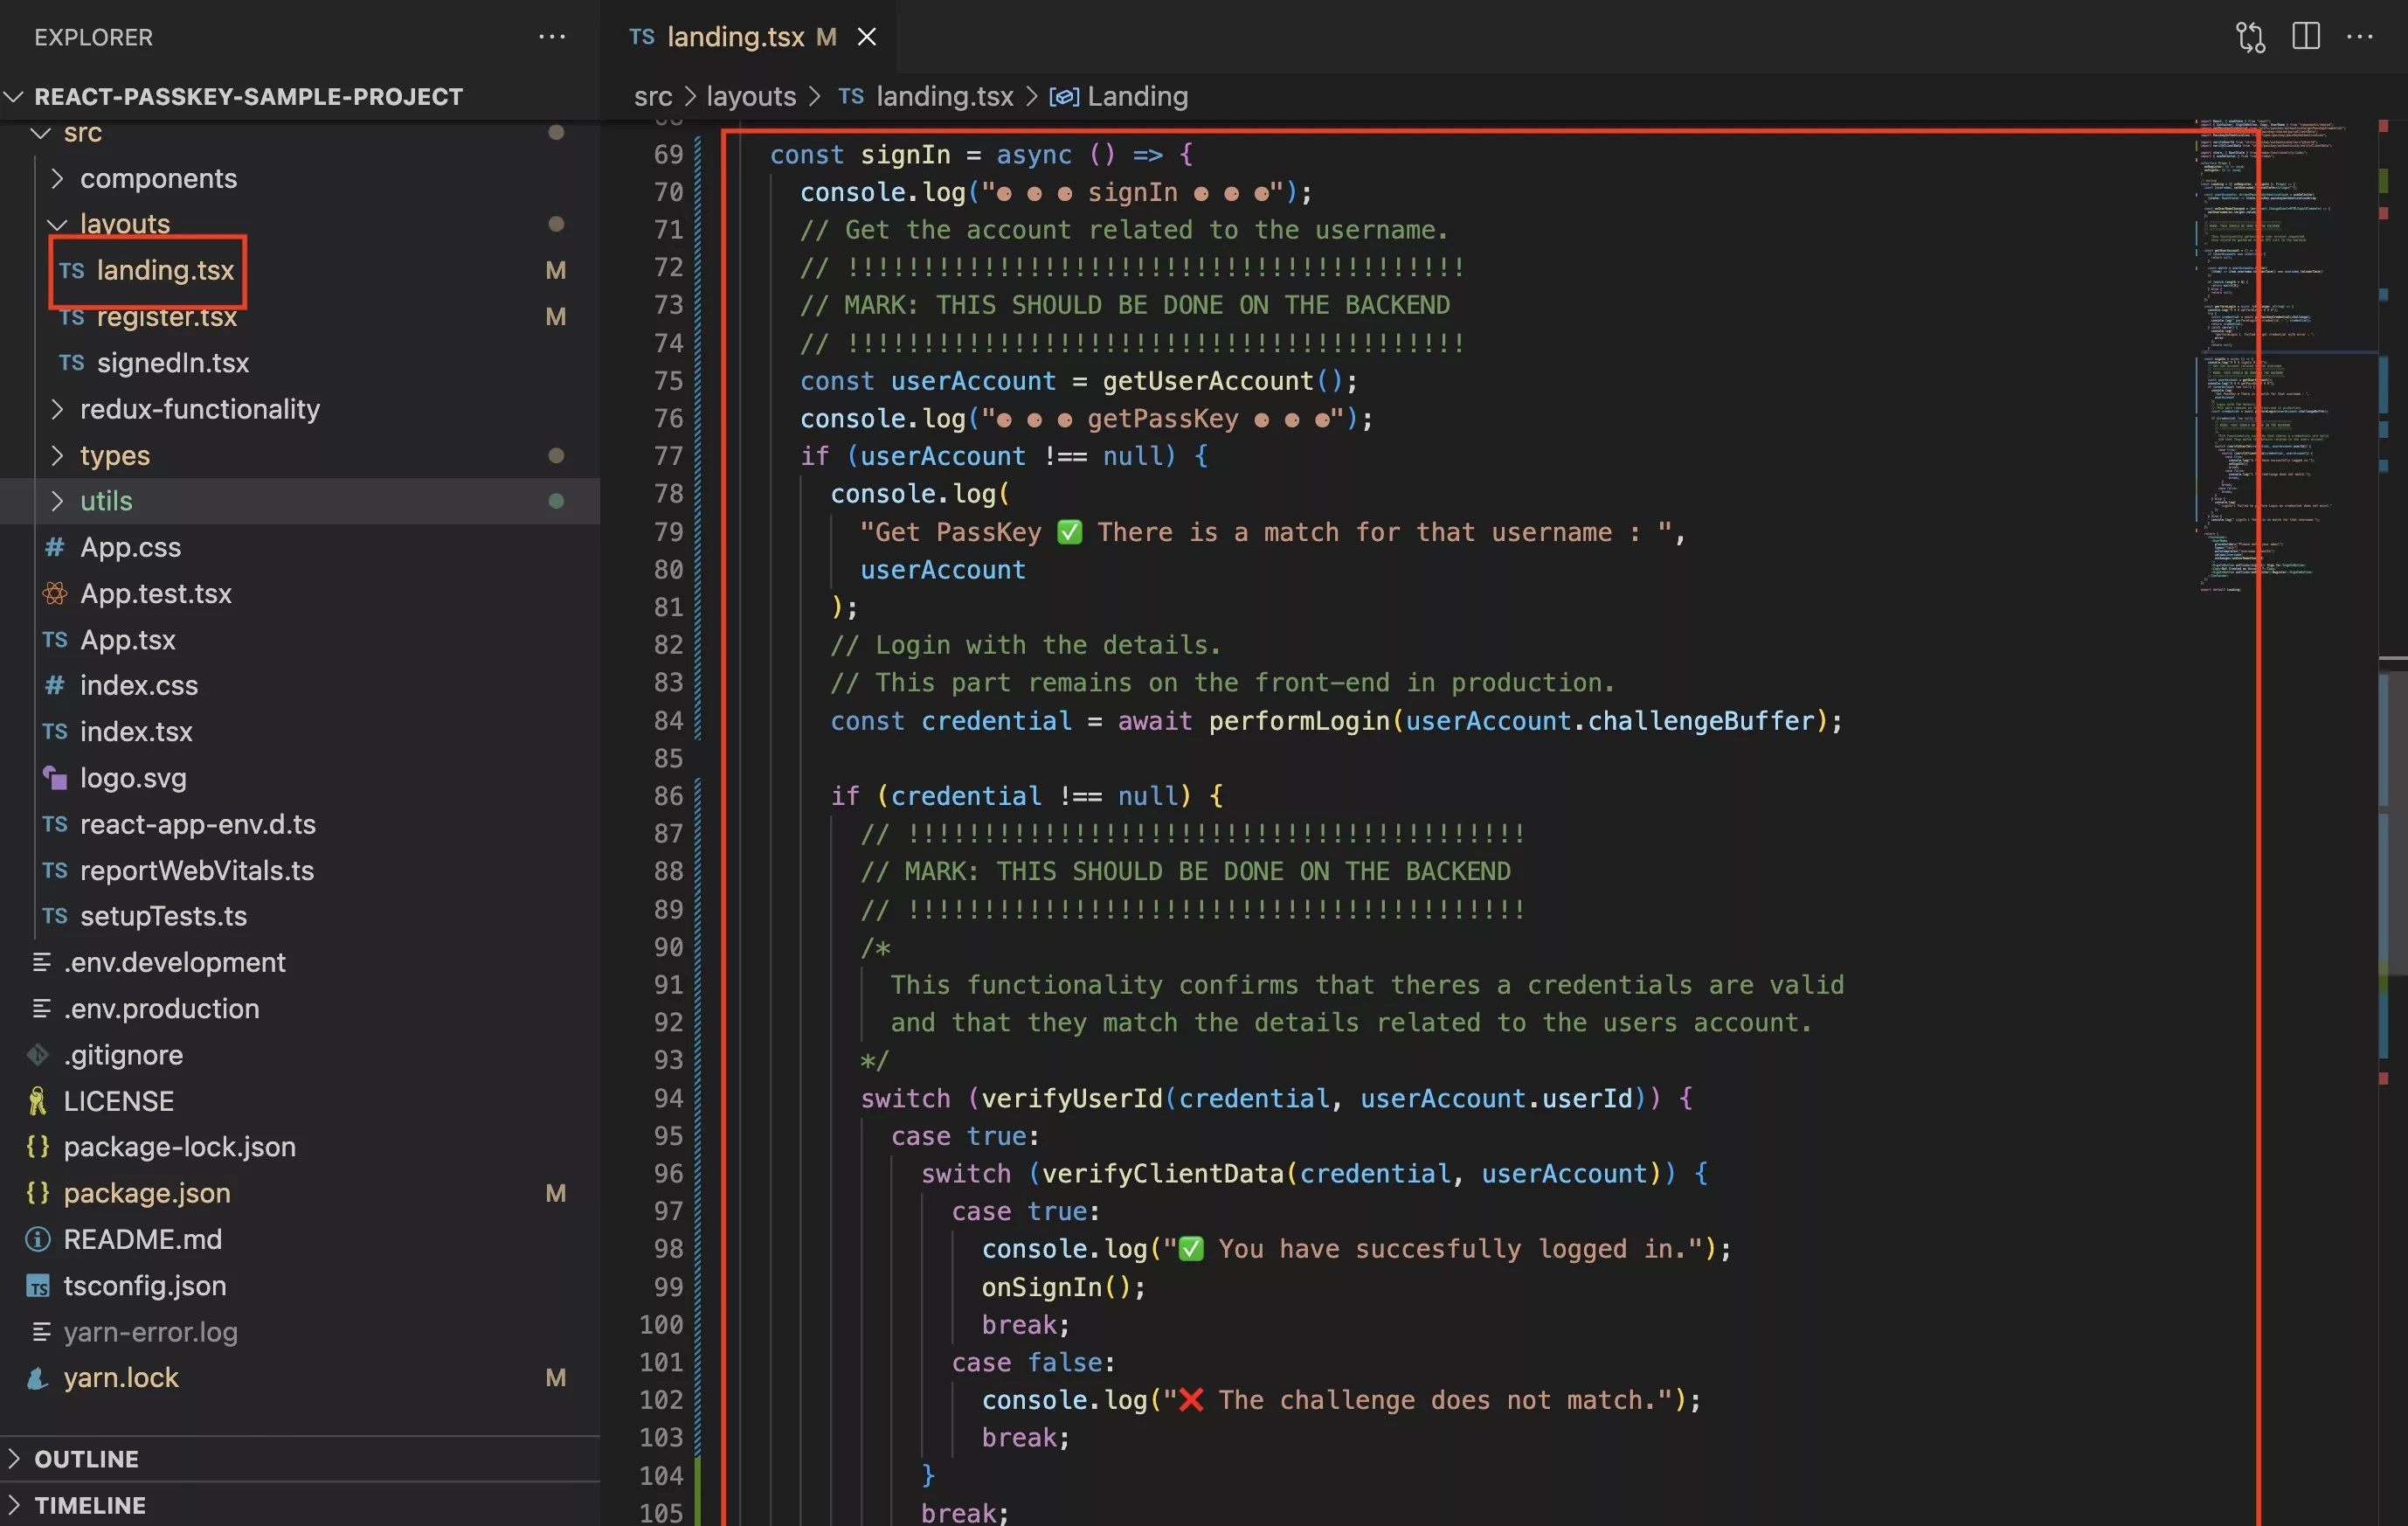
Replace the Sign In function with the code below, we believe that the logs tell the story of the sign in but do leave feedback if you feel that we could do better.
Step Five: Verify
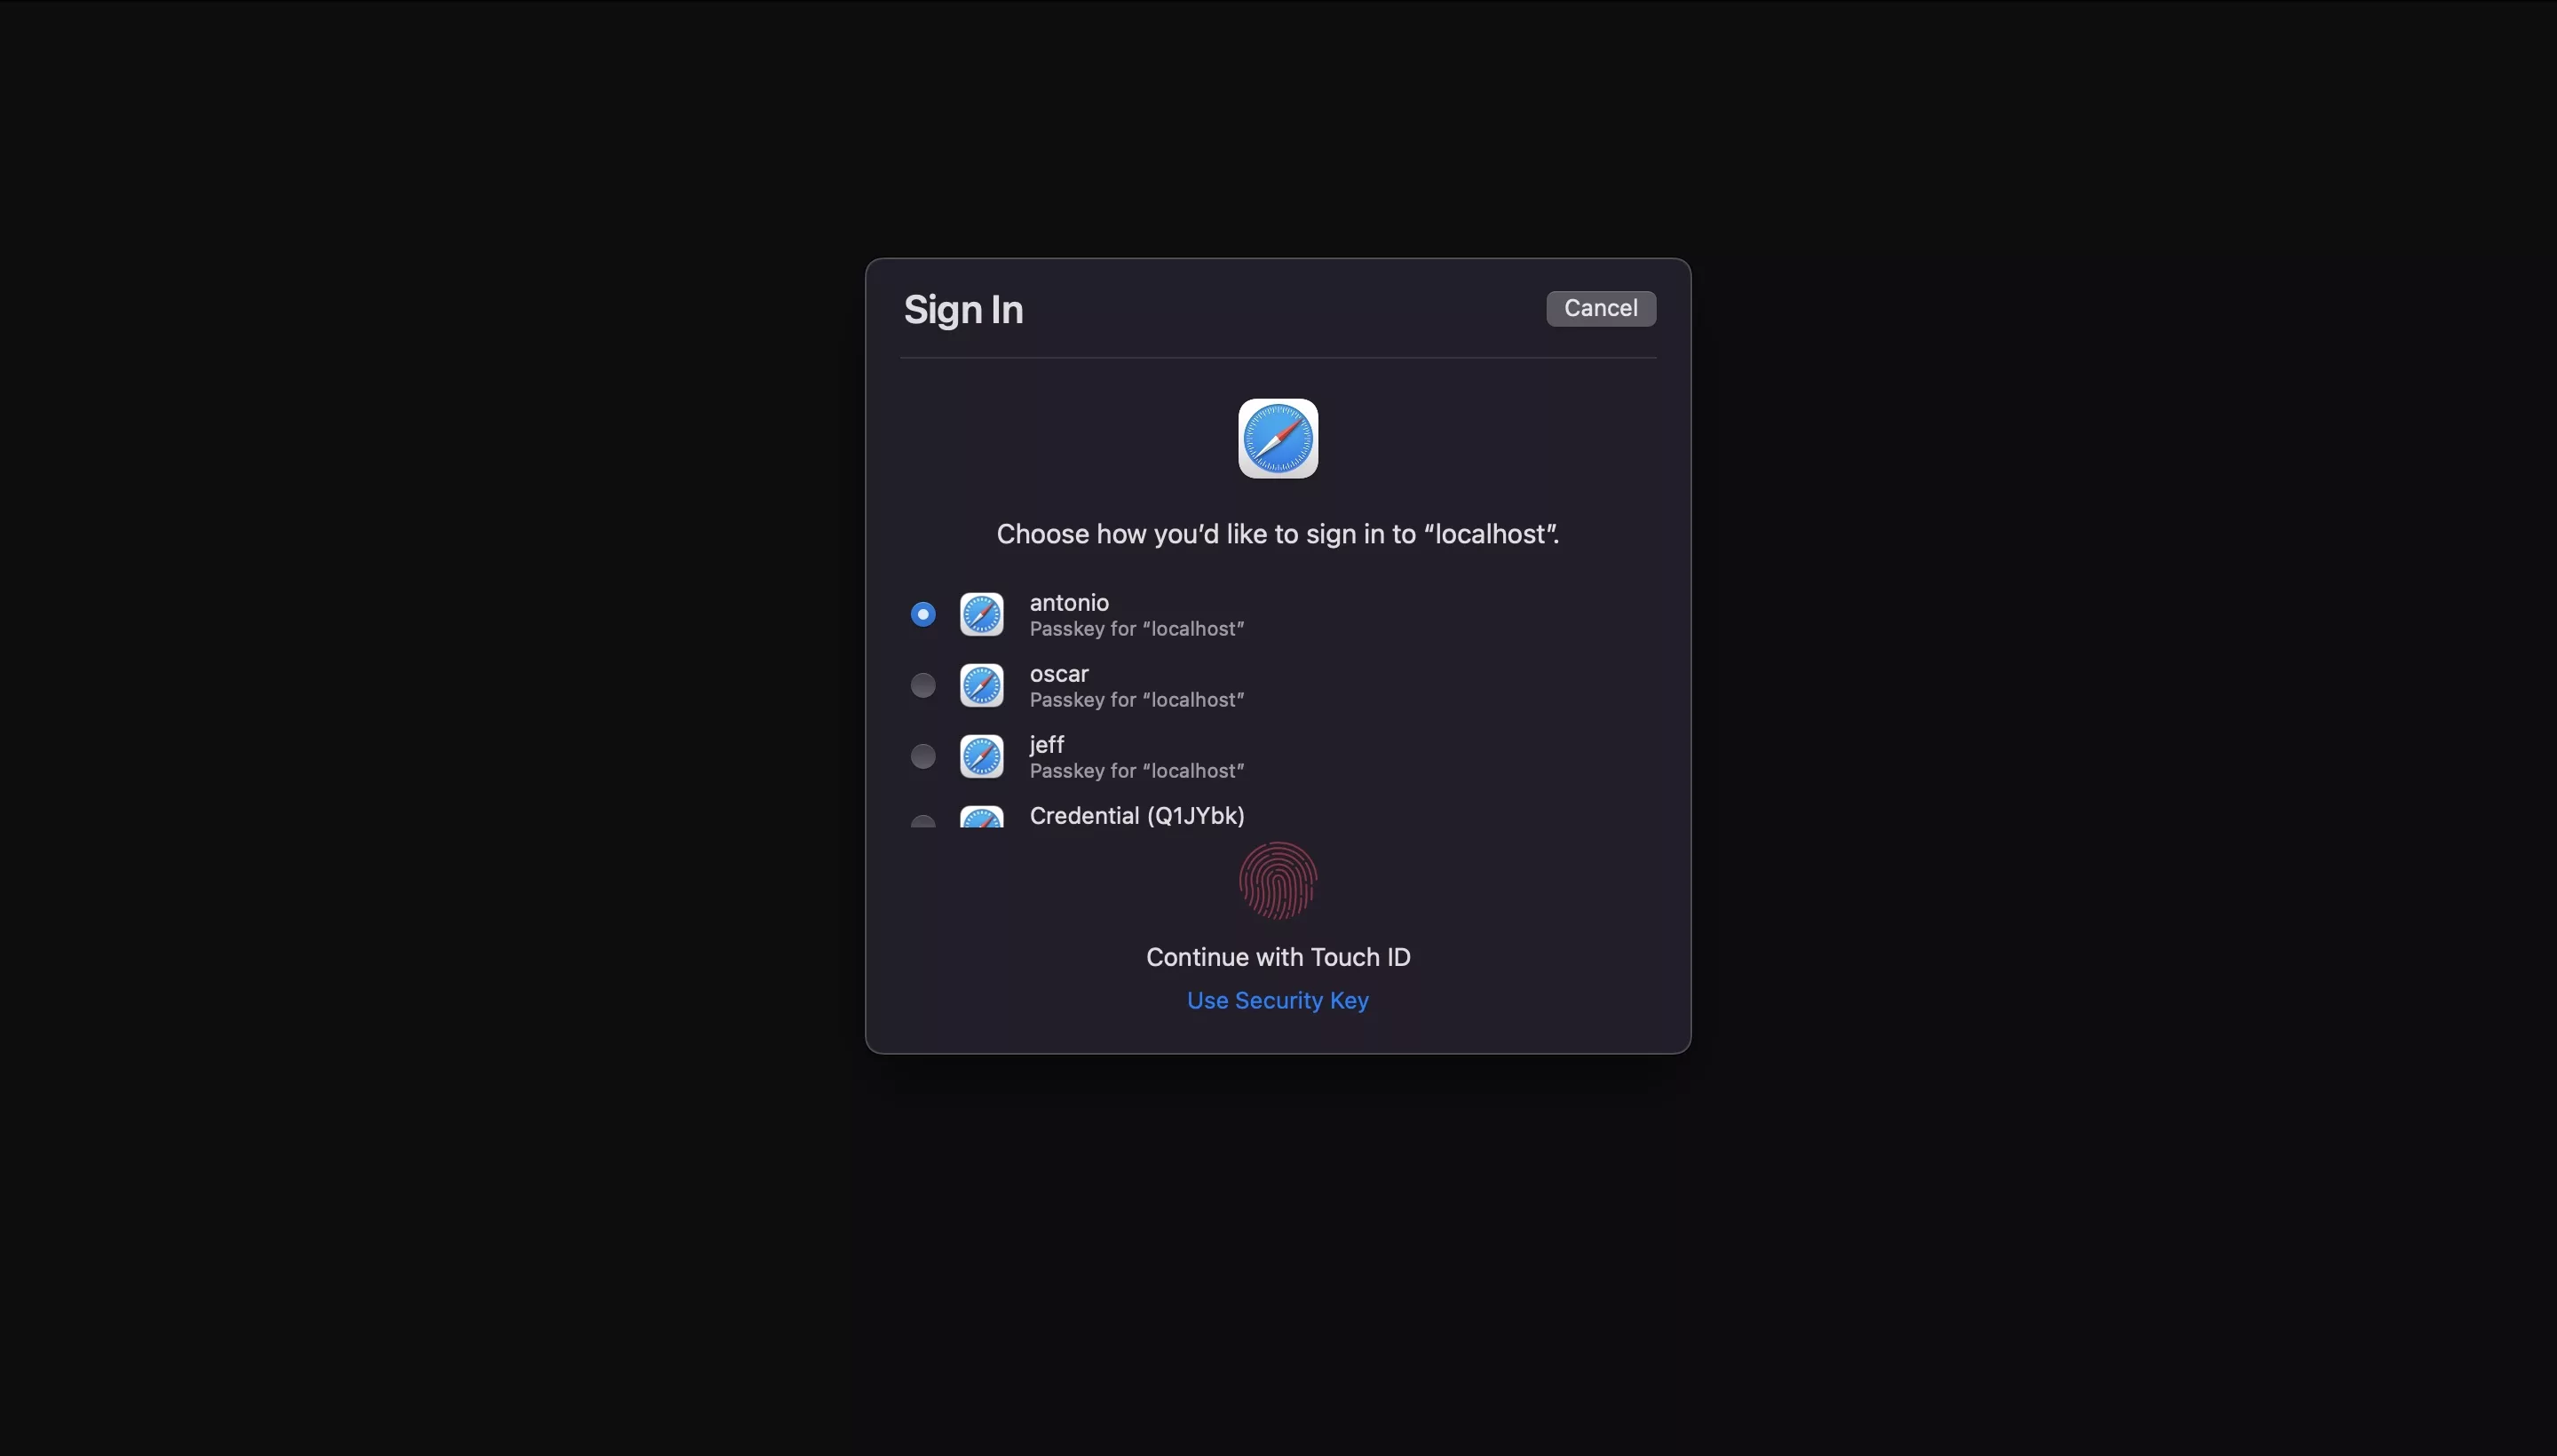
Create a new passkey and sign in to confirm that it works.
Complete landing.tsx Code
Incase anyone wants the full solution to check against or copy, we have provided a gist below.
Any Questions
We are actively looking for feedback on how to improve this resource. Please send us a note to inquiries@delasign.com with any thoughts or feedback you may have.