How to make a custom button in Swift
A step by step tutorial on making a custom button in Swift (iOS) using custom touches and callbacks. Github repository available.

A step by step tutorial on making a custom button in Swift (iOS) using custom touches and callbacks. Github repository available.
The following tutorial builds on our Open Source Swift starter project, which can be downloaded using the link below, and which walks you through how to create a custom button that animates based on the interaction and which makes use of custom touch events vs a UITapGestureRecognizer to determine the tap.
Please note that this custom button can be used for any MacOS, TVOS and WatchOS project that uses UIKit.
Please note this tutorial uses the TinyConstraints Swift package, which we added using the Swift Package Manager.
What are we making in this tutorial ?

In this tutorial we will be creating a custom UIView that acts as a button. It will have a label that uses attributed text and an appearance that animates depending on whether the button is being pressed or not, which will be determined via UITouch events.
Part of this tutorial will demonstrate how the UITouch location can be used to determine if the finger is within the button or not, whilst the touch is moving and when the touch ended. This is important as the onRelease callback - which is what gets called when your finger leaves the screen - will otherwise get called regardless of if your finger leaves the screen within the button or outside it.
For more information on UITouch events please consult the Apple documentation via the link below.
Tutorial
We recommend downloading our Open Source project, checking out the main branch and carrying out the steps outlined below. All relevant changes can be found on the tutorial/custom-touch-button branch.
git clone git@github.com:delasign/swift-starter-project.gitPlease note that we have removed the label, and associated variables and functionality, that we created as part of our how to create a label tutorial and formatted the screen to be white. These changes are not reflected in this walkthrough.
Step One: Add the Content
The following step aims at creating content for the button to be consumed by the application through our LanguageCoordinator.
For more information about our LanguageCooordinator and localization for the Apple Ecosystem please consult the tutorial below.
A | Create the UIContent
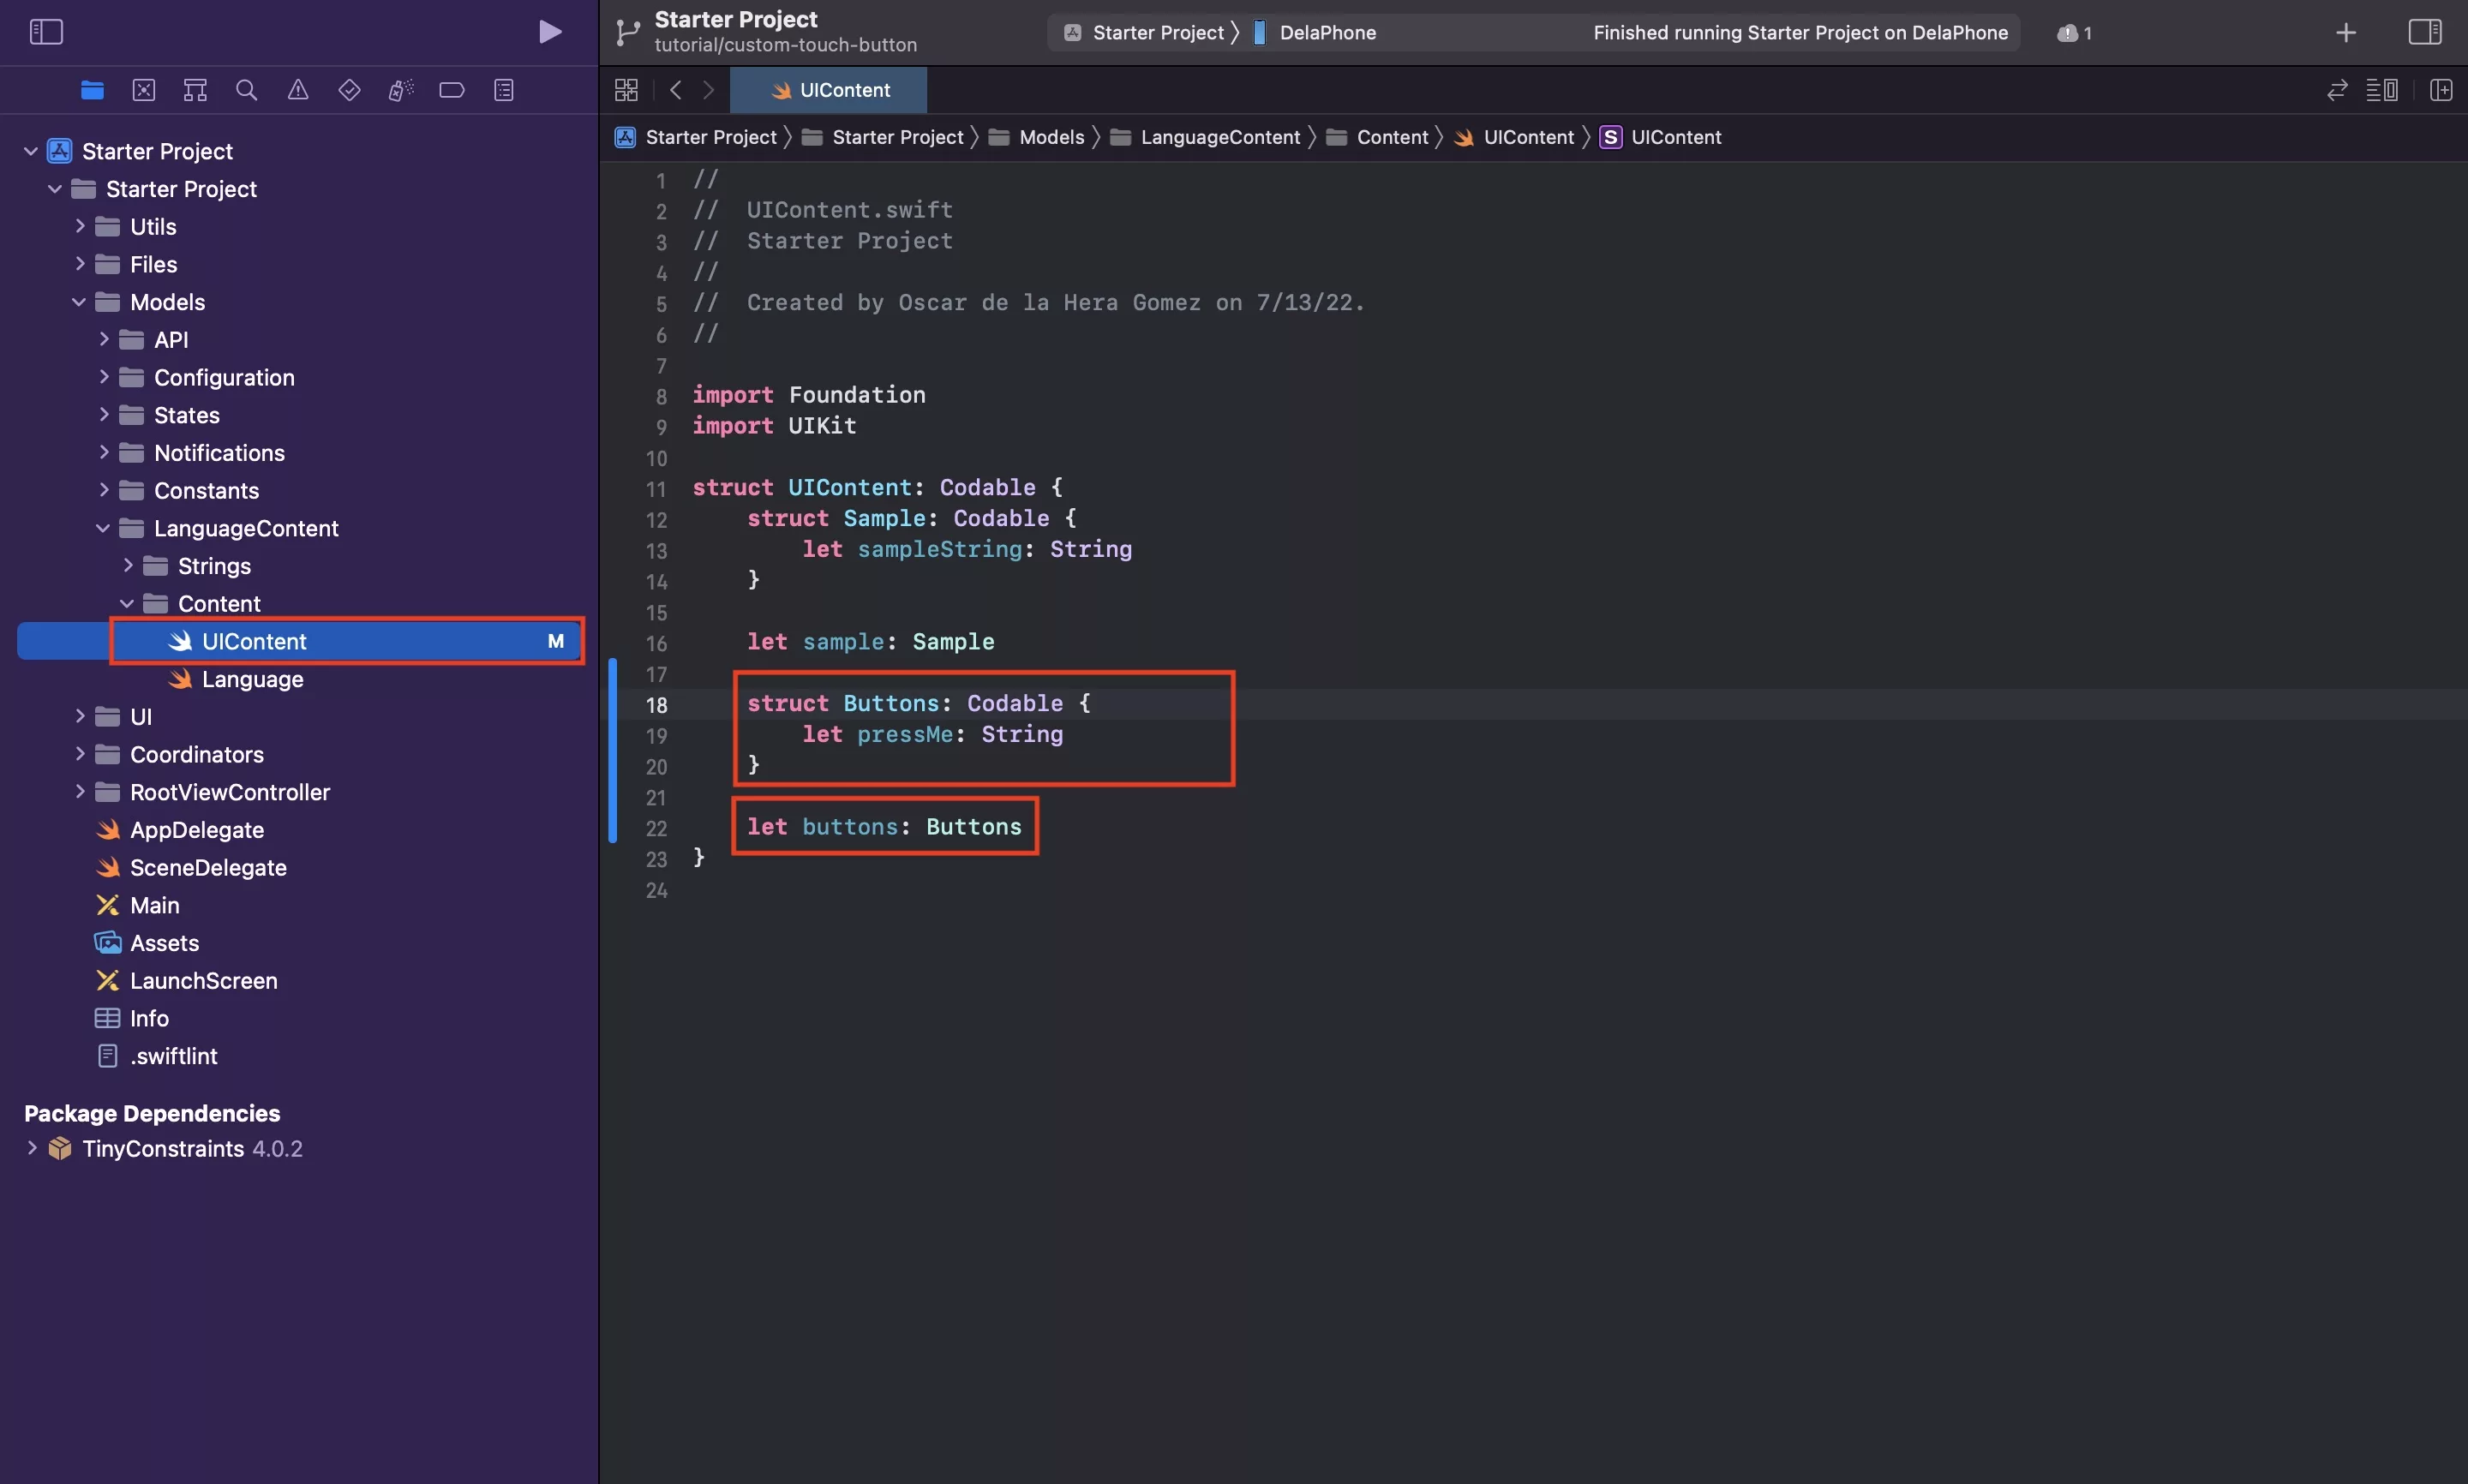
In UIContent.swift, create a new struct called Buttons and add a string within it for the button title called pressMe. Below it, declare a constant that can be coded to based on content in our JSONs (next part of this step).
The purpose of creating a new struct is to separate content to align with their purpose, whilst maximizing flexibility whilst avoiding repeating ourselves.
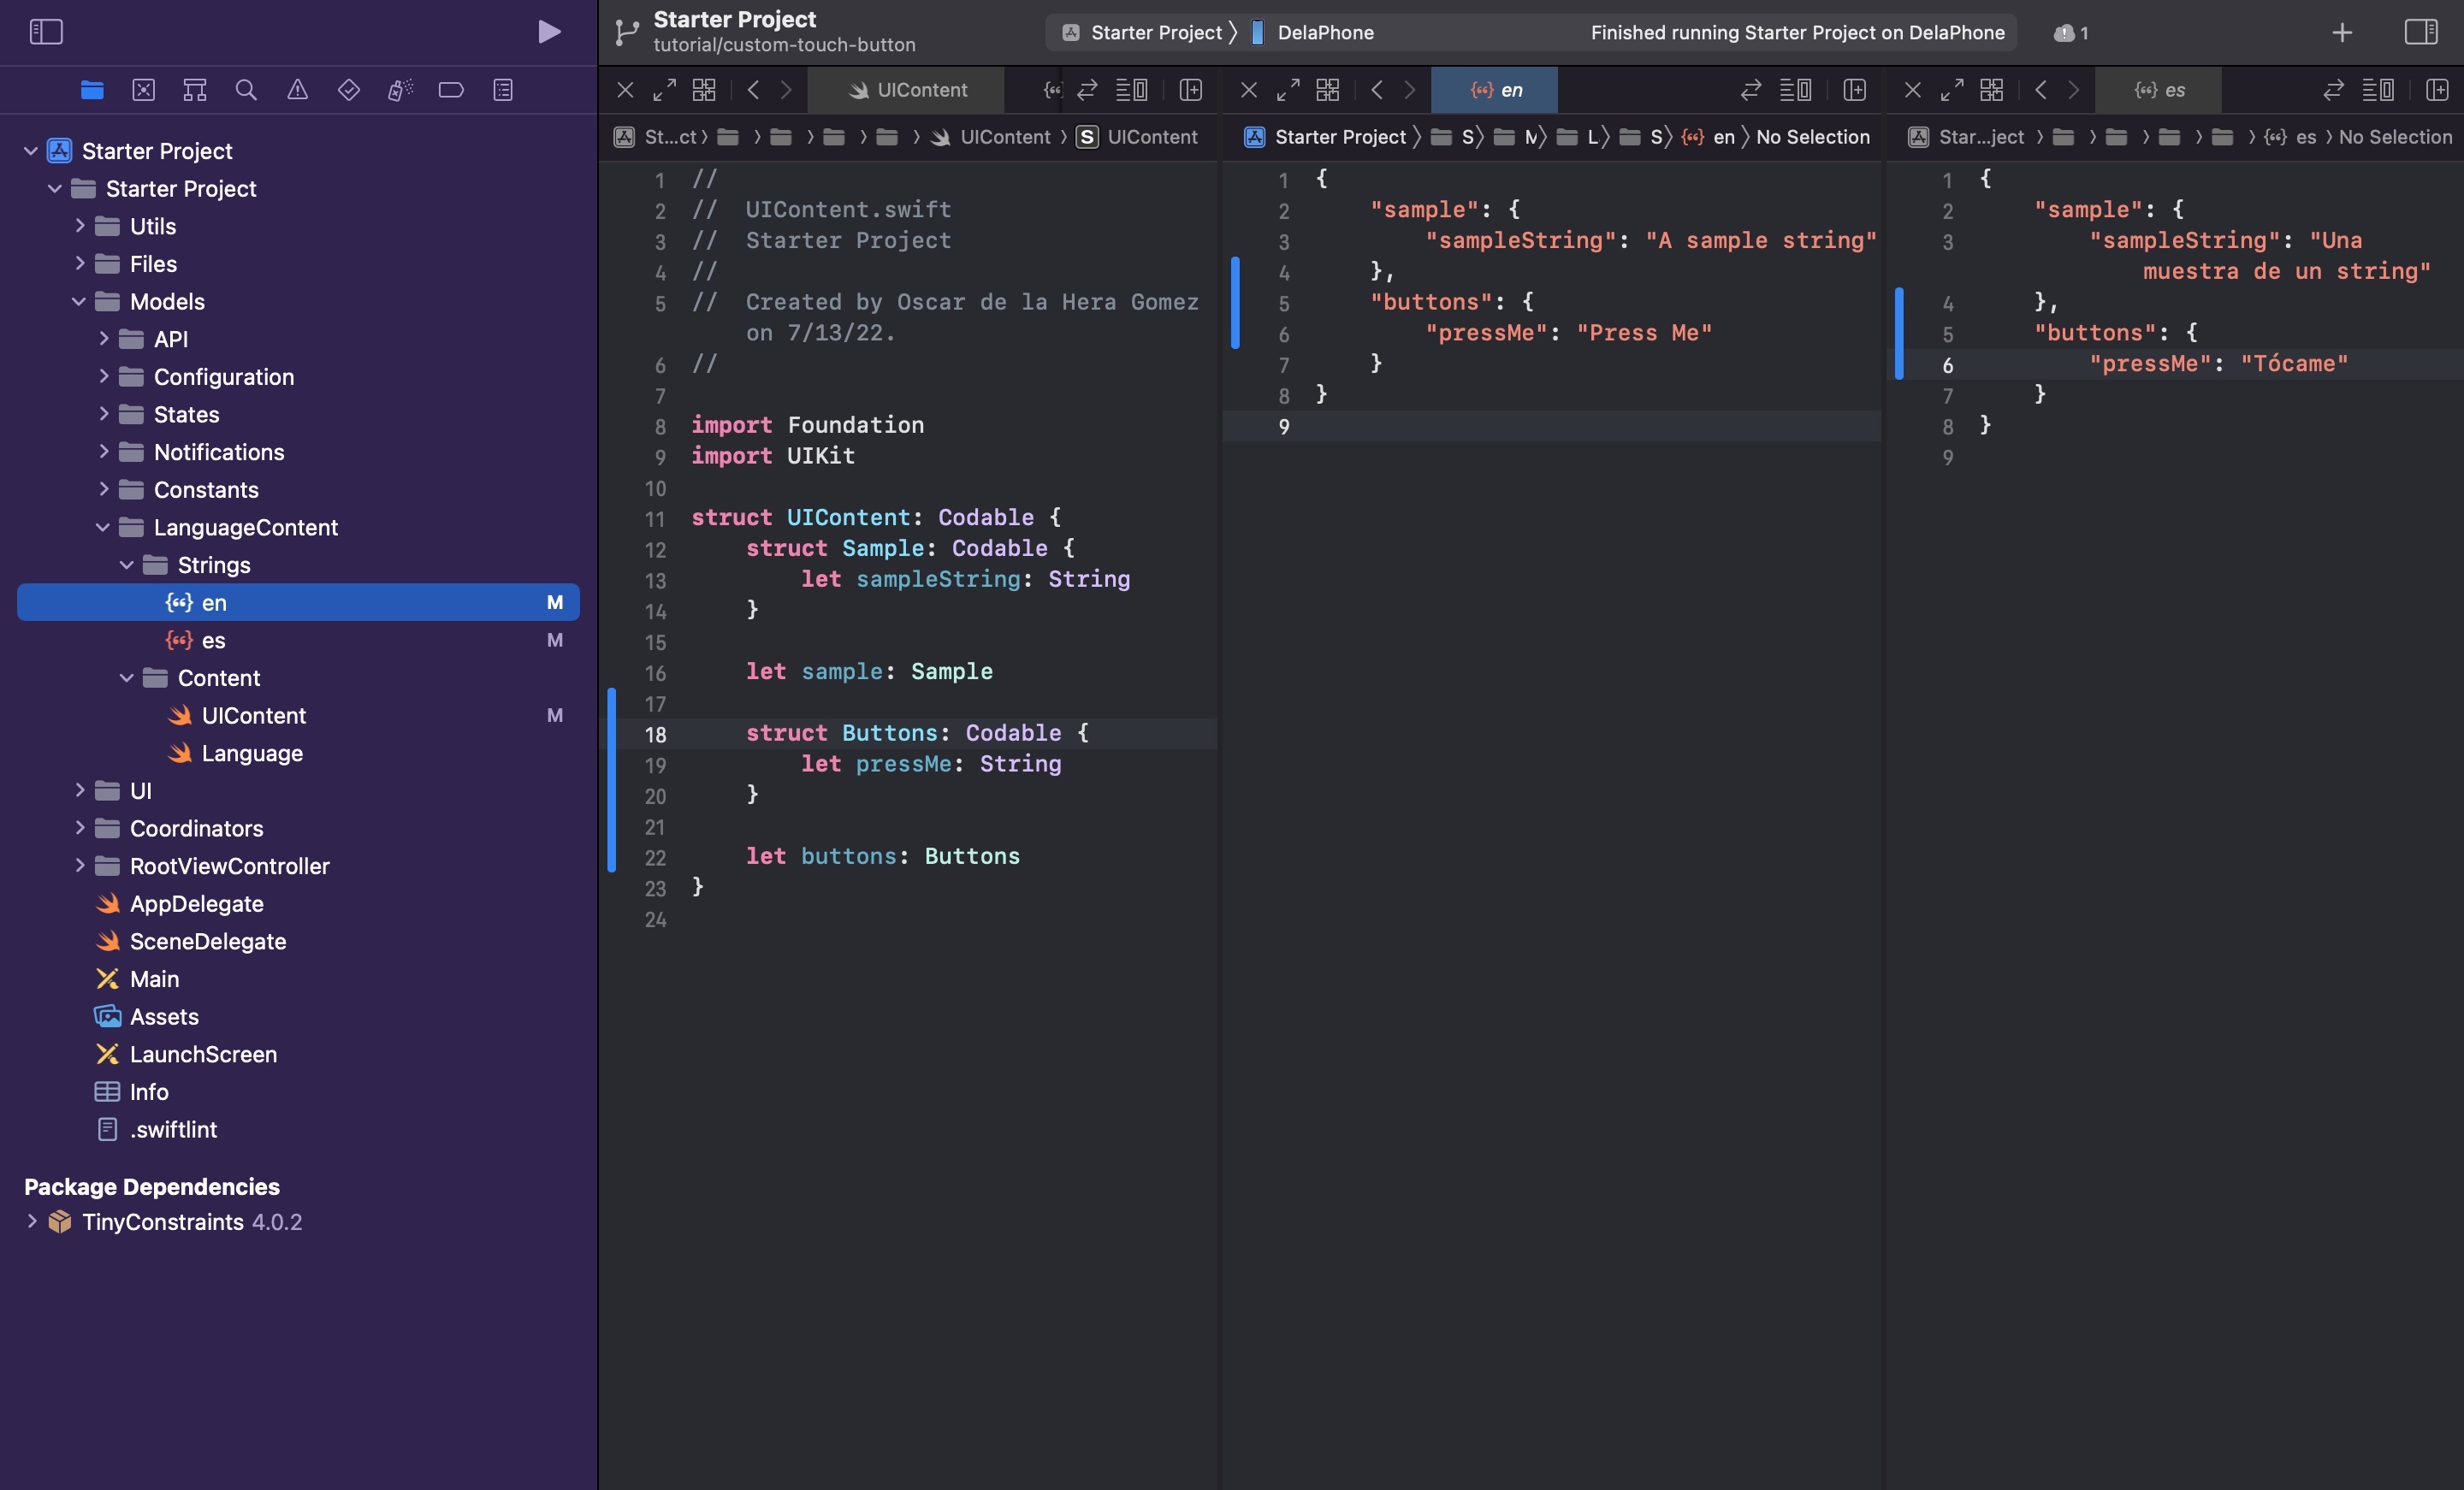
B | Add content to the localized JSONs
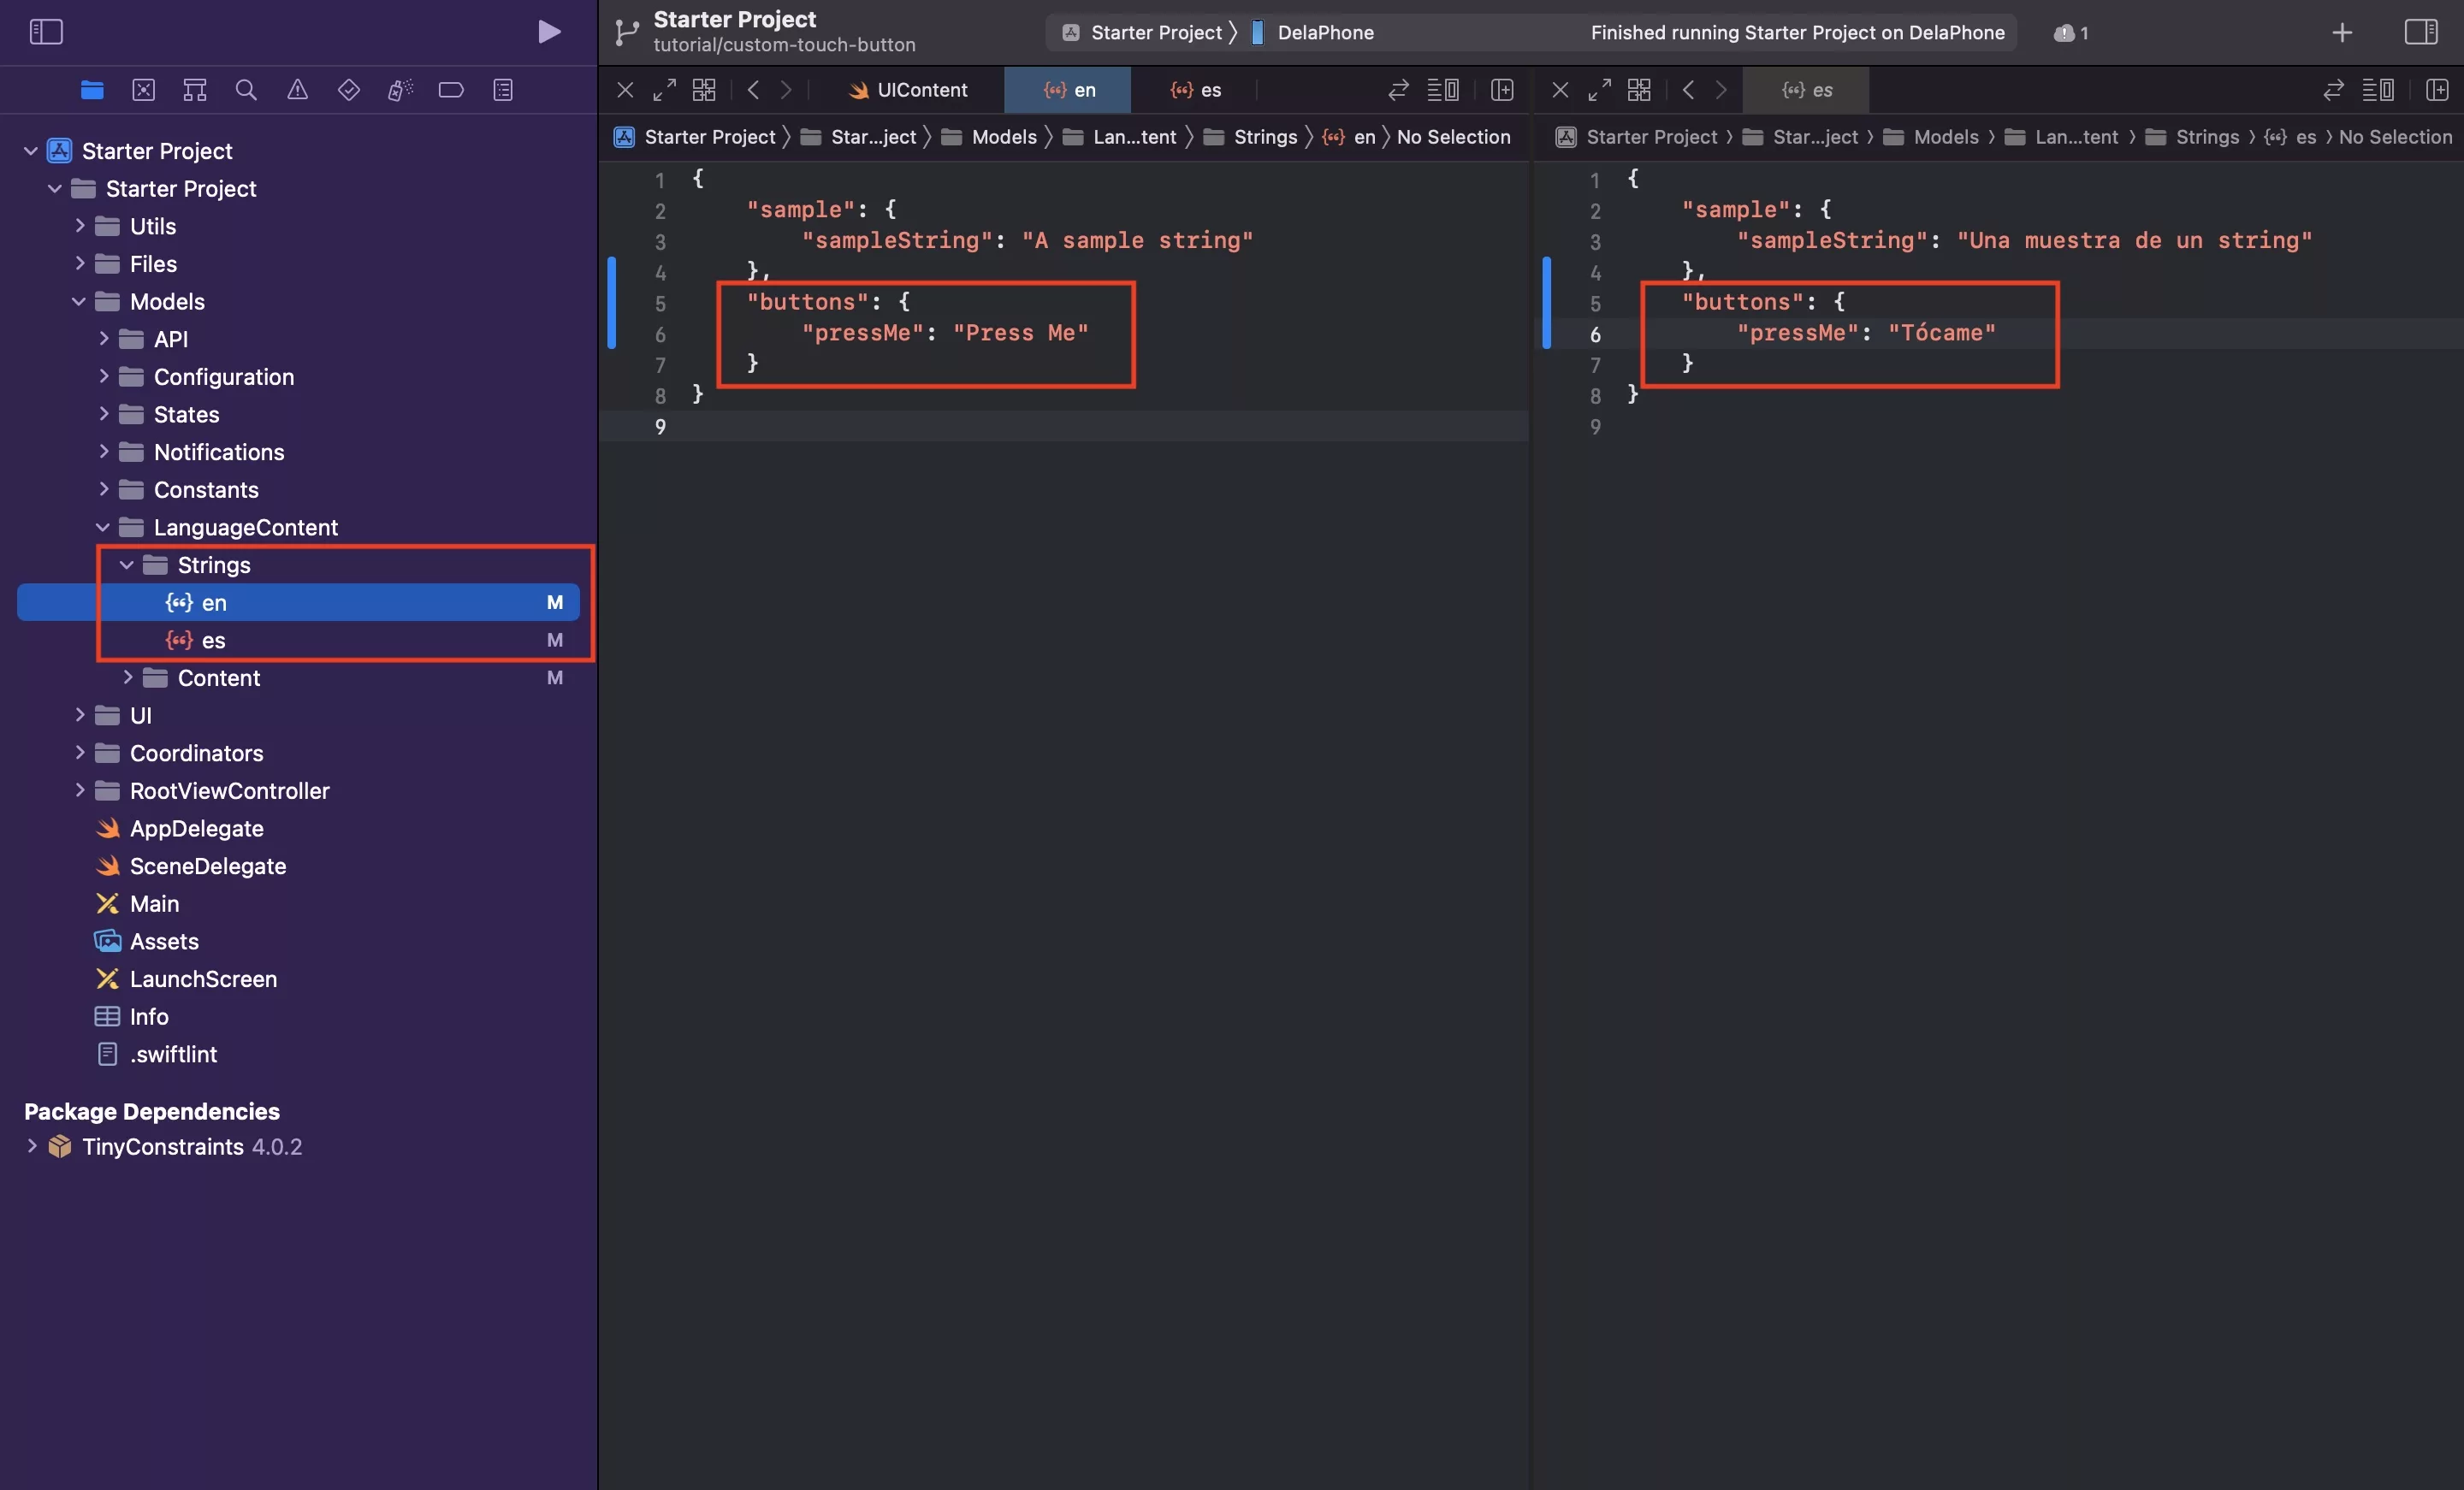
Add the content to the en.json and es.json.
Please note that given that our sample project is setup to use both English and Spanish, both JSONs must be filled in and coded appropriately for the app to function. To change this, alter the available languages provided to the LanguageCoordinator in the LanguageCoordinator.swift file, on line 38.
Step Two: Create the custom button style
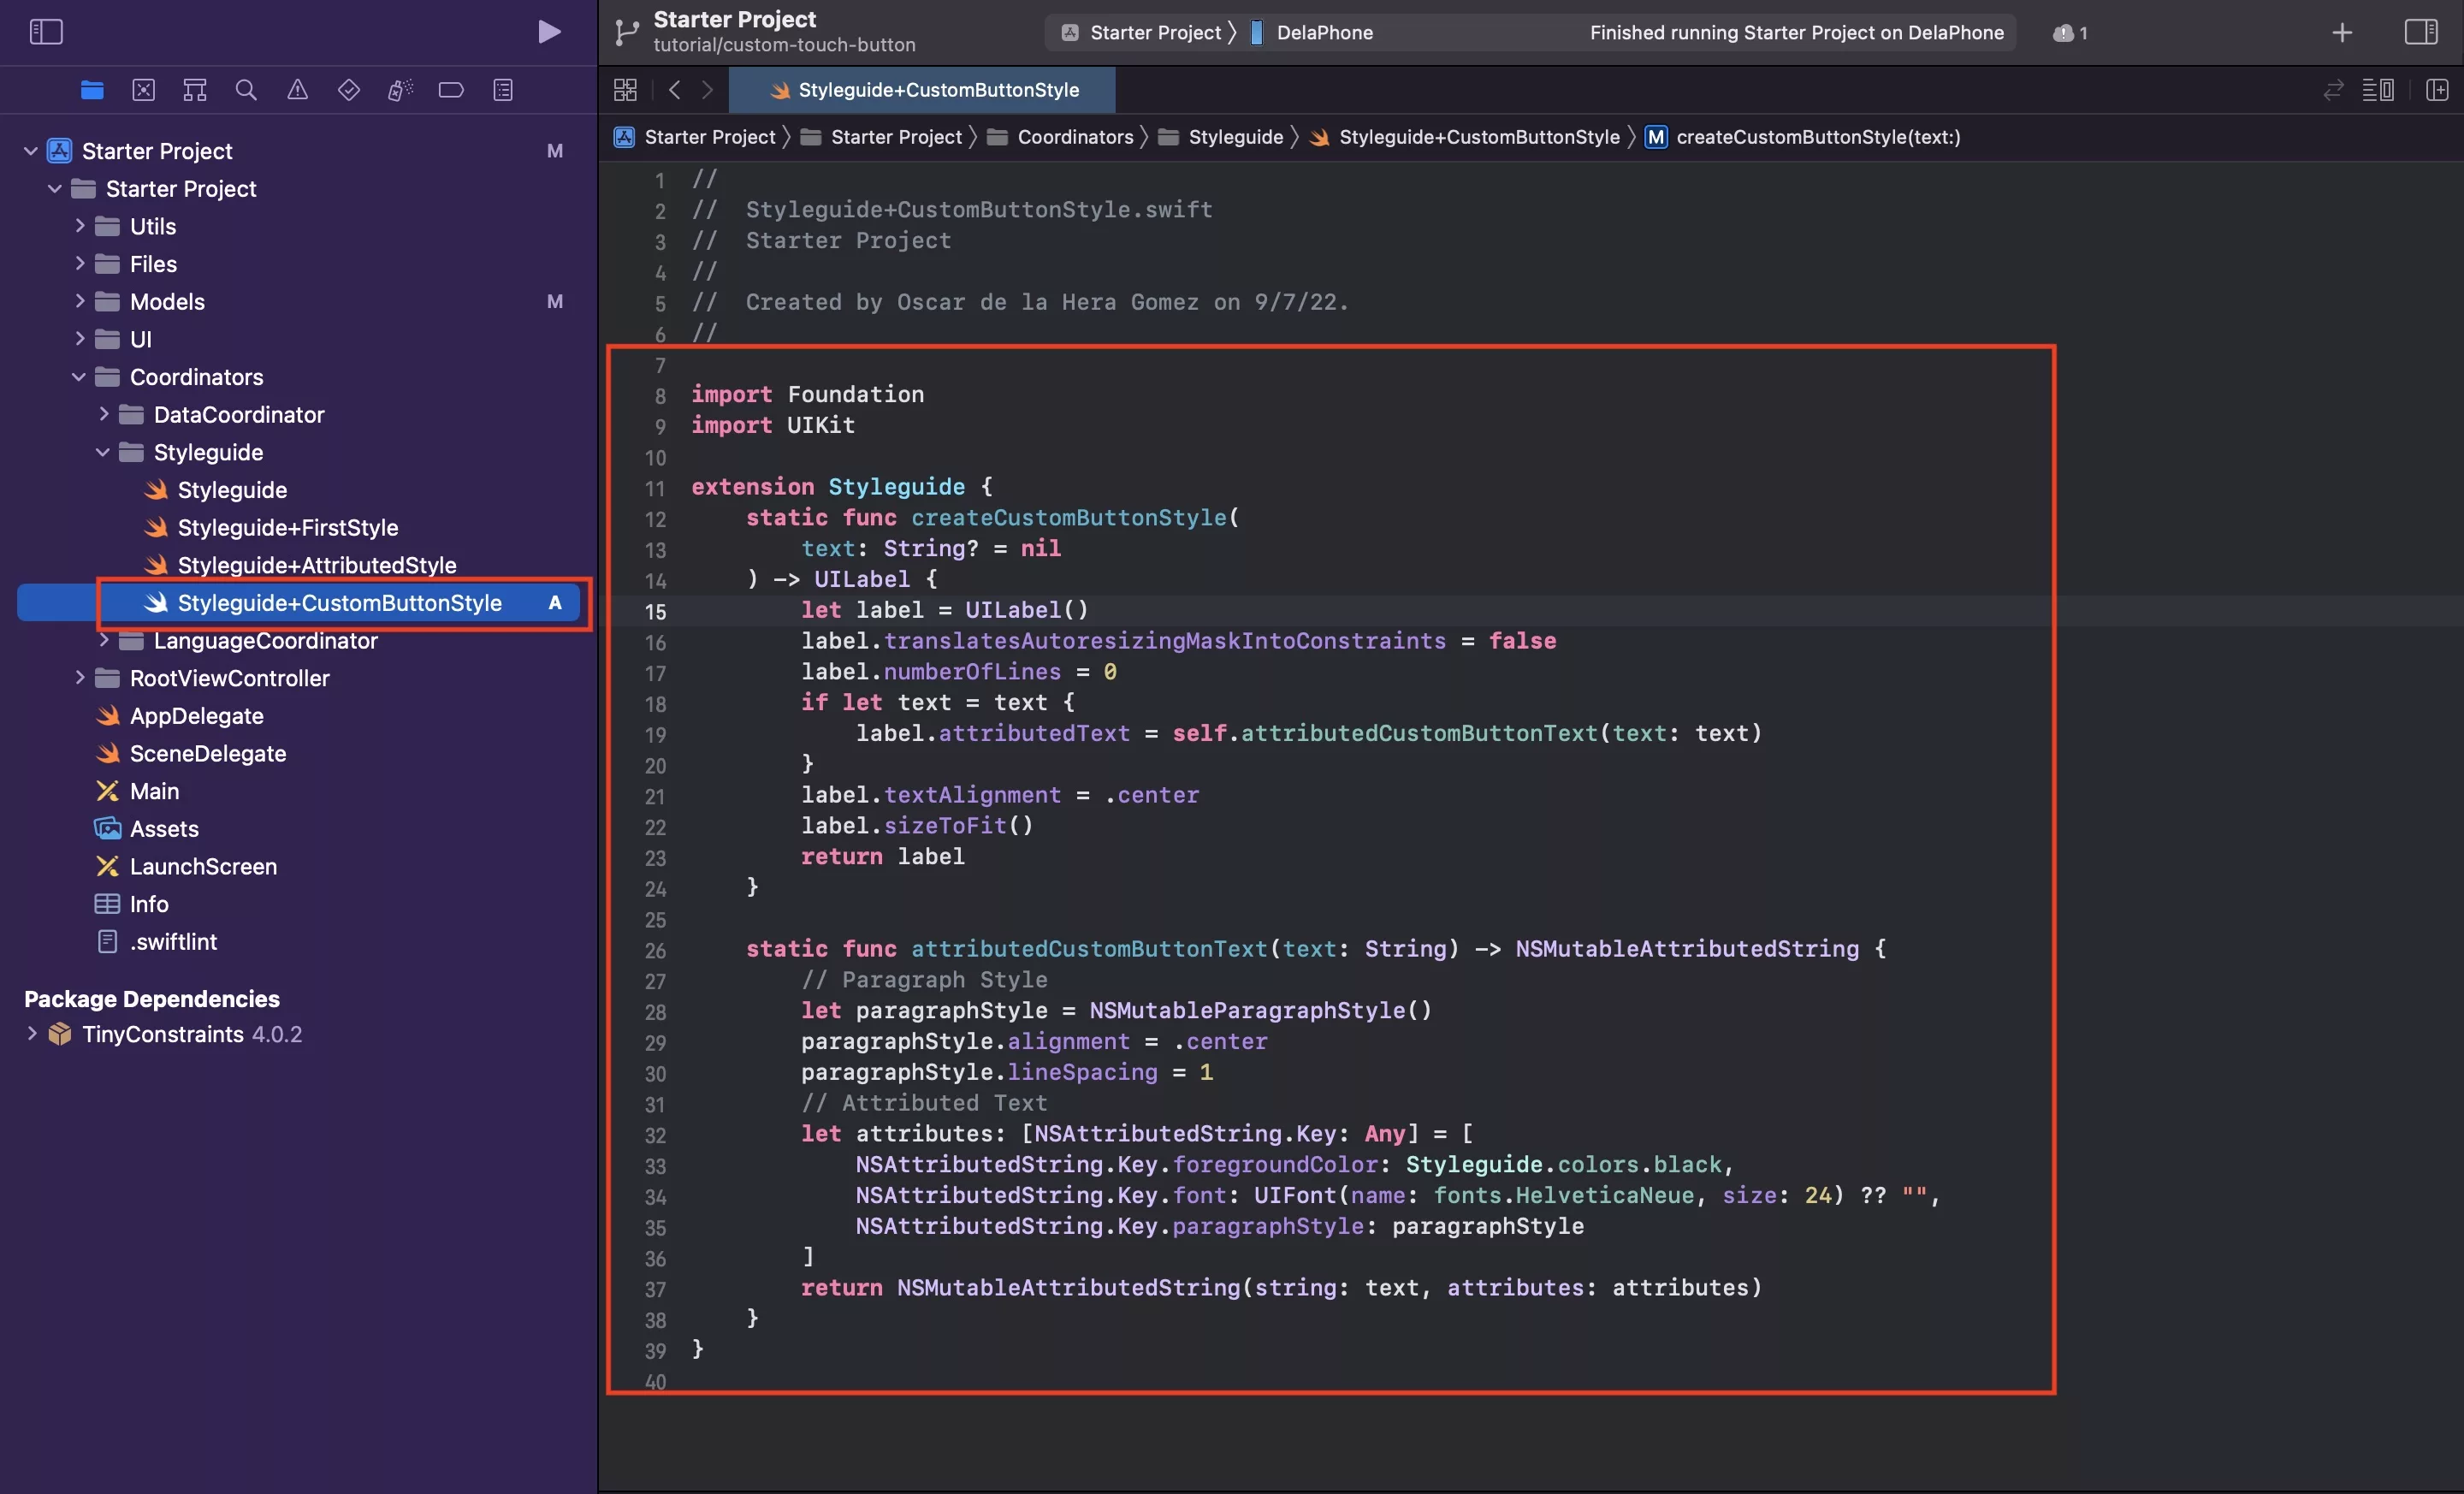
Under the Styleguide folder, create a new file called Styleguide+CustomButtonStyle.swift and paste in the code found below.
Step Three: Create the custom button
The following step walks you through how to create the custom button, along with its UI, touches and animations.
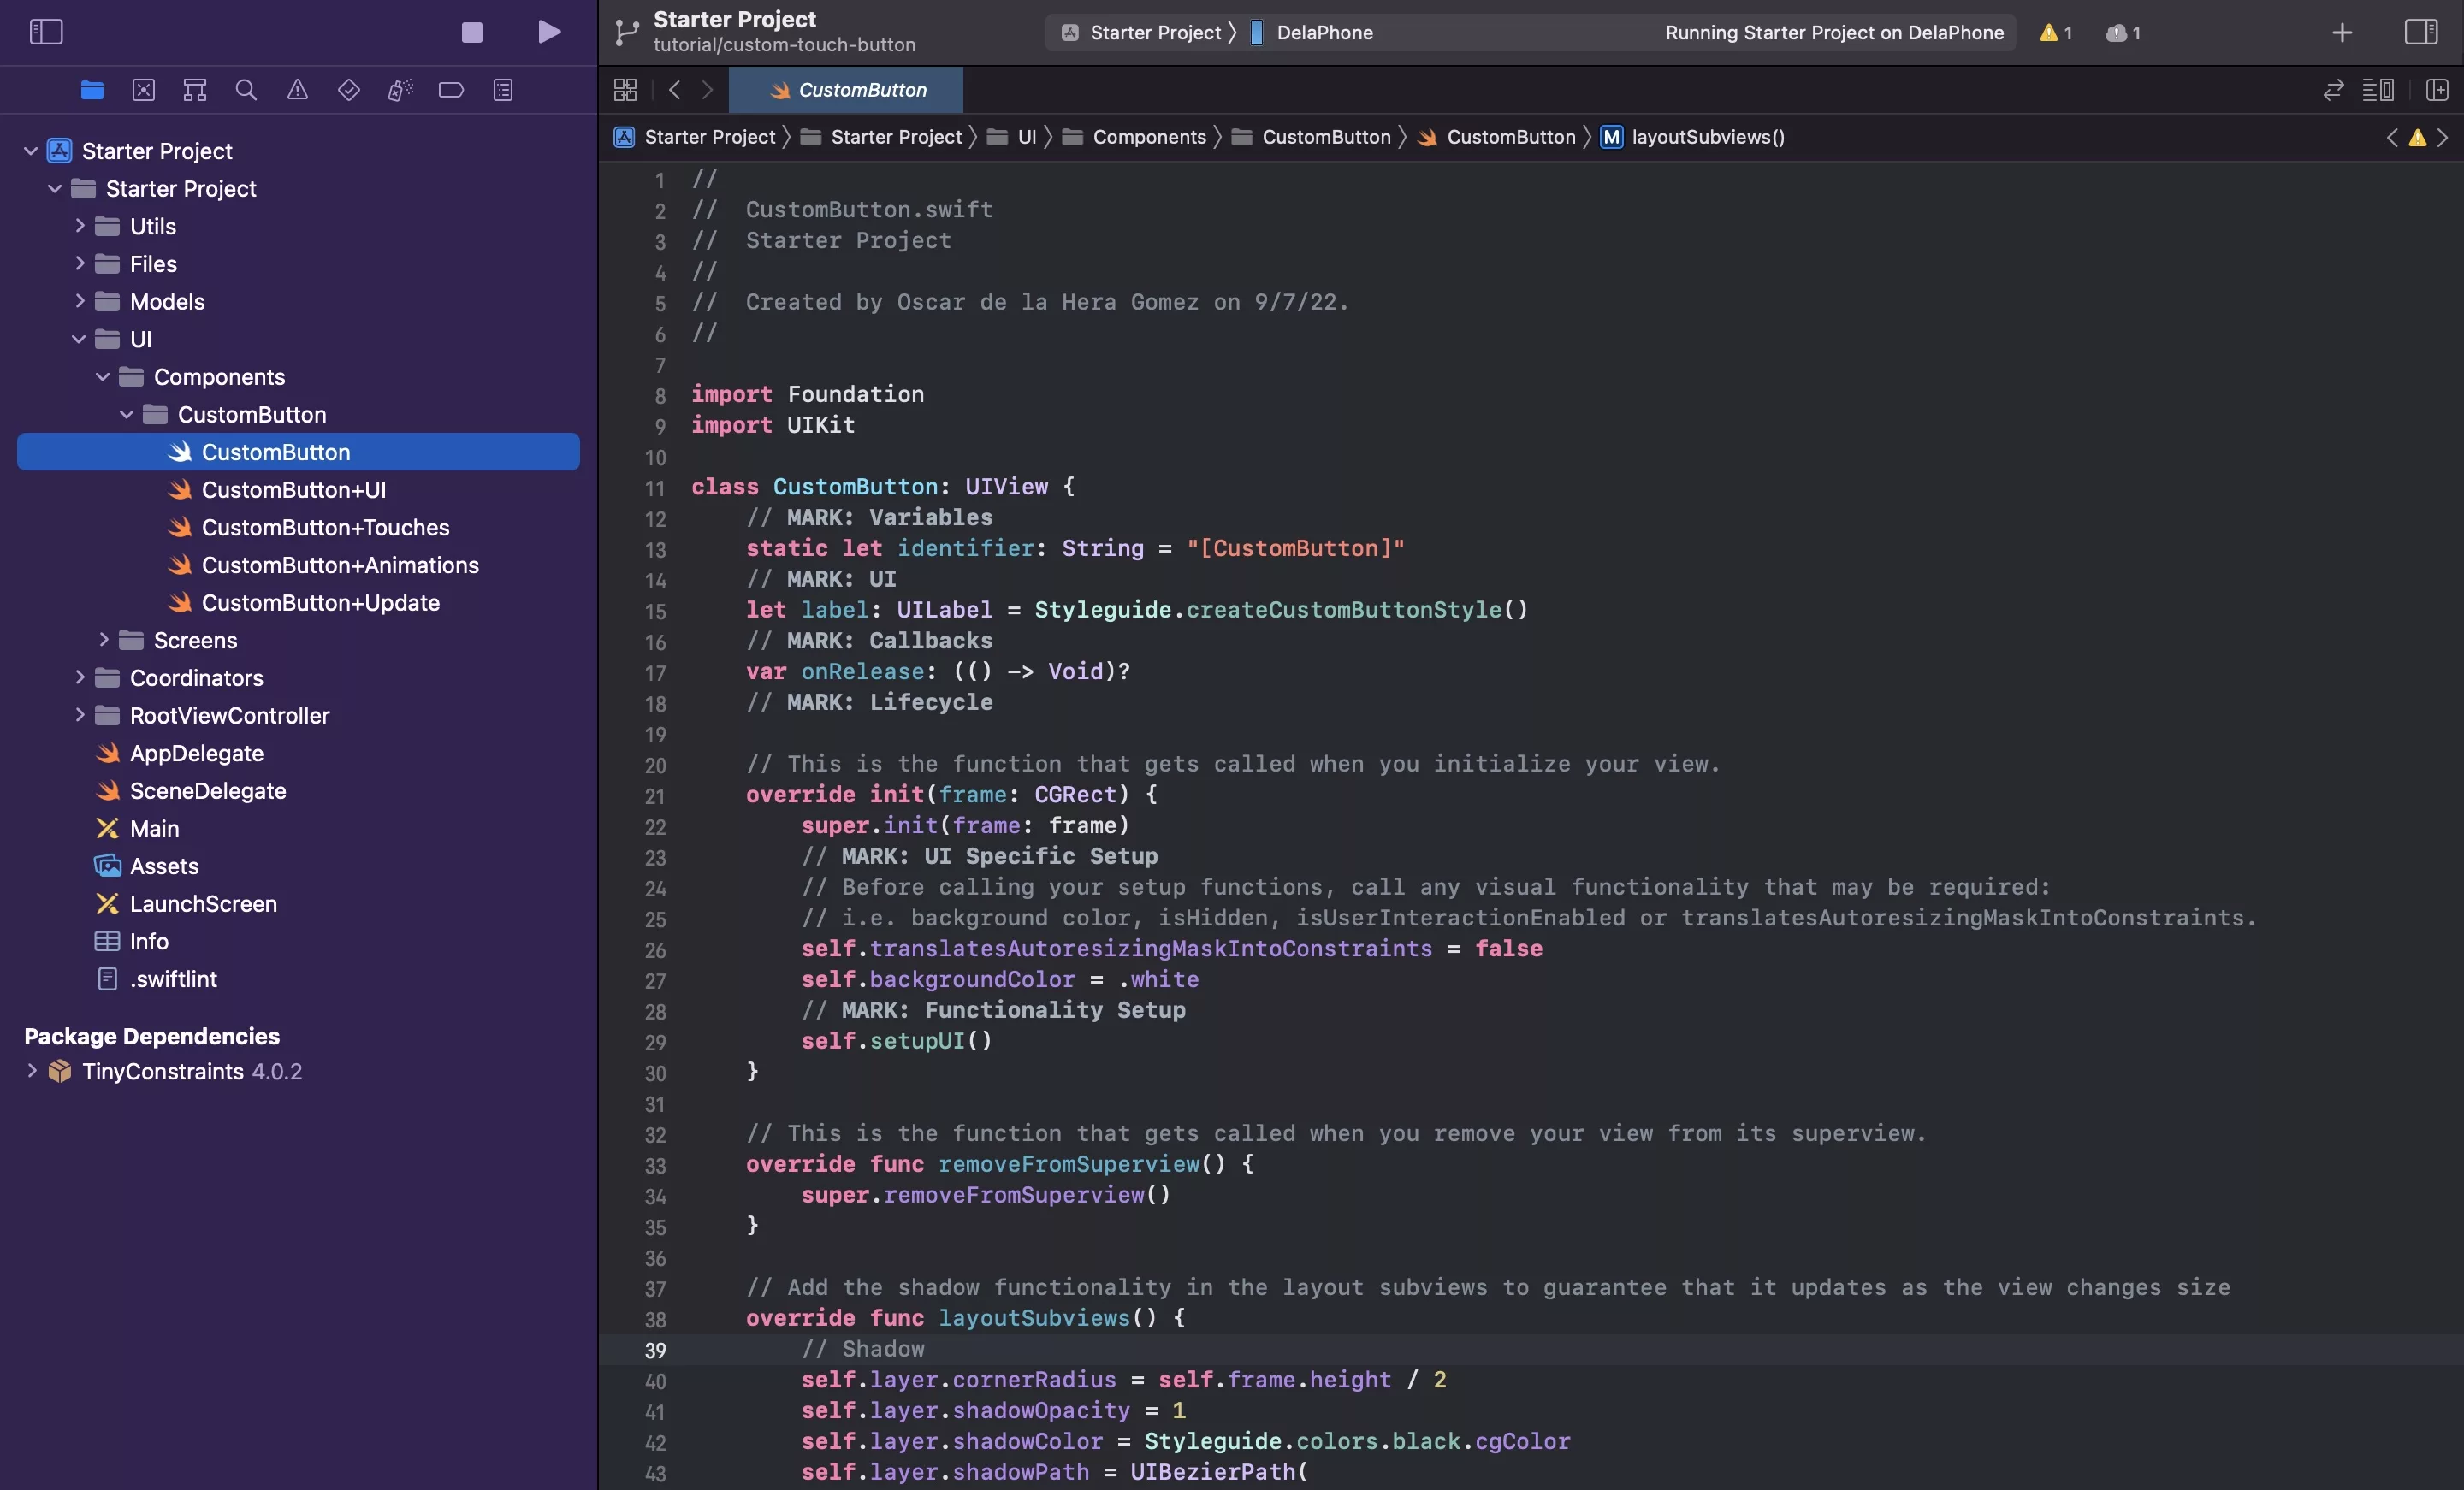
A | Create the CustomButton UIView

Under UI/Components create a new folder called CustomButton.
Within the newly created CustomButton folder, create a new file called CustomButton.swift and paste in the code found below.
Please note that the setupUI functionality will be created in the next step.
B | Create the CustomButton UI extension
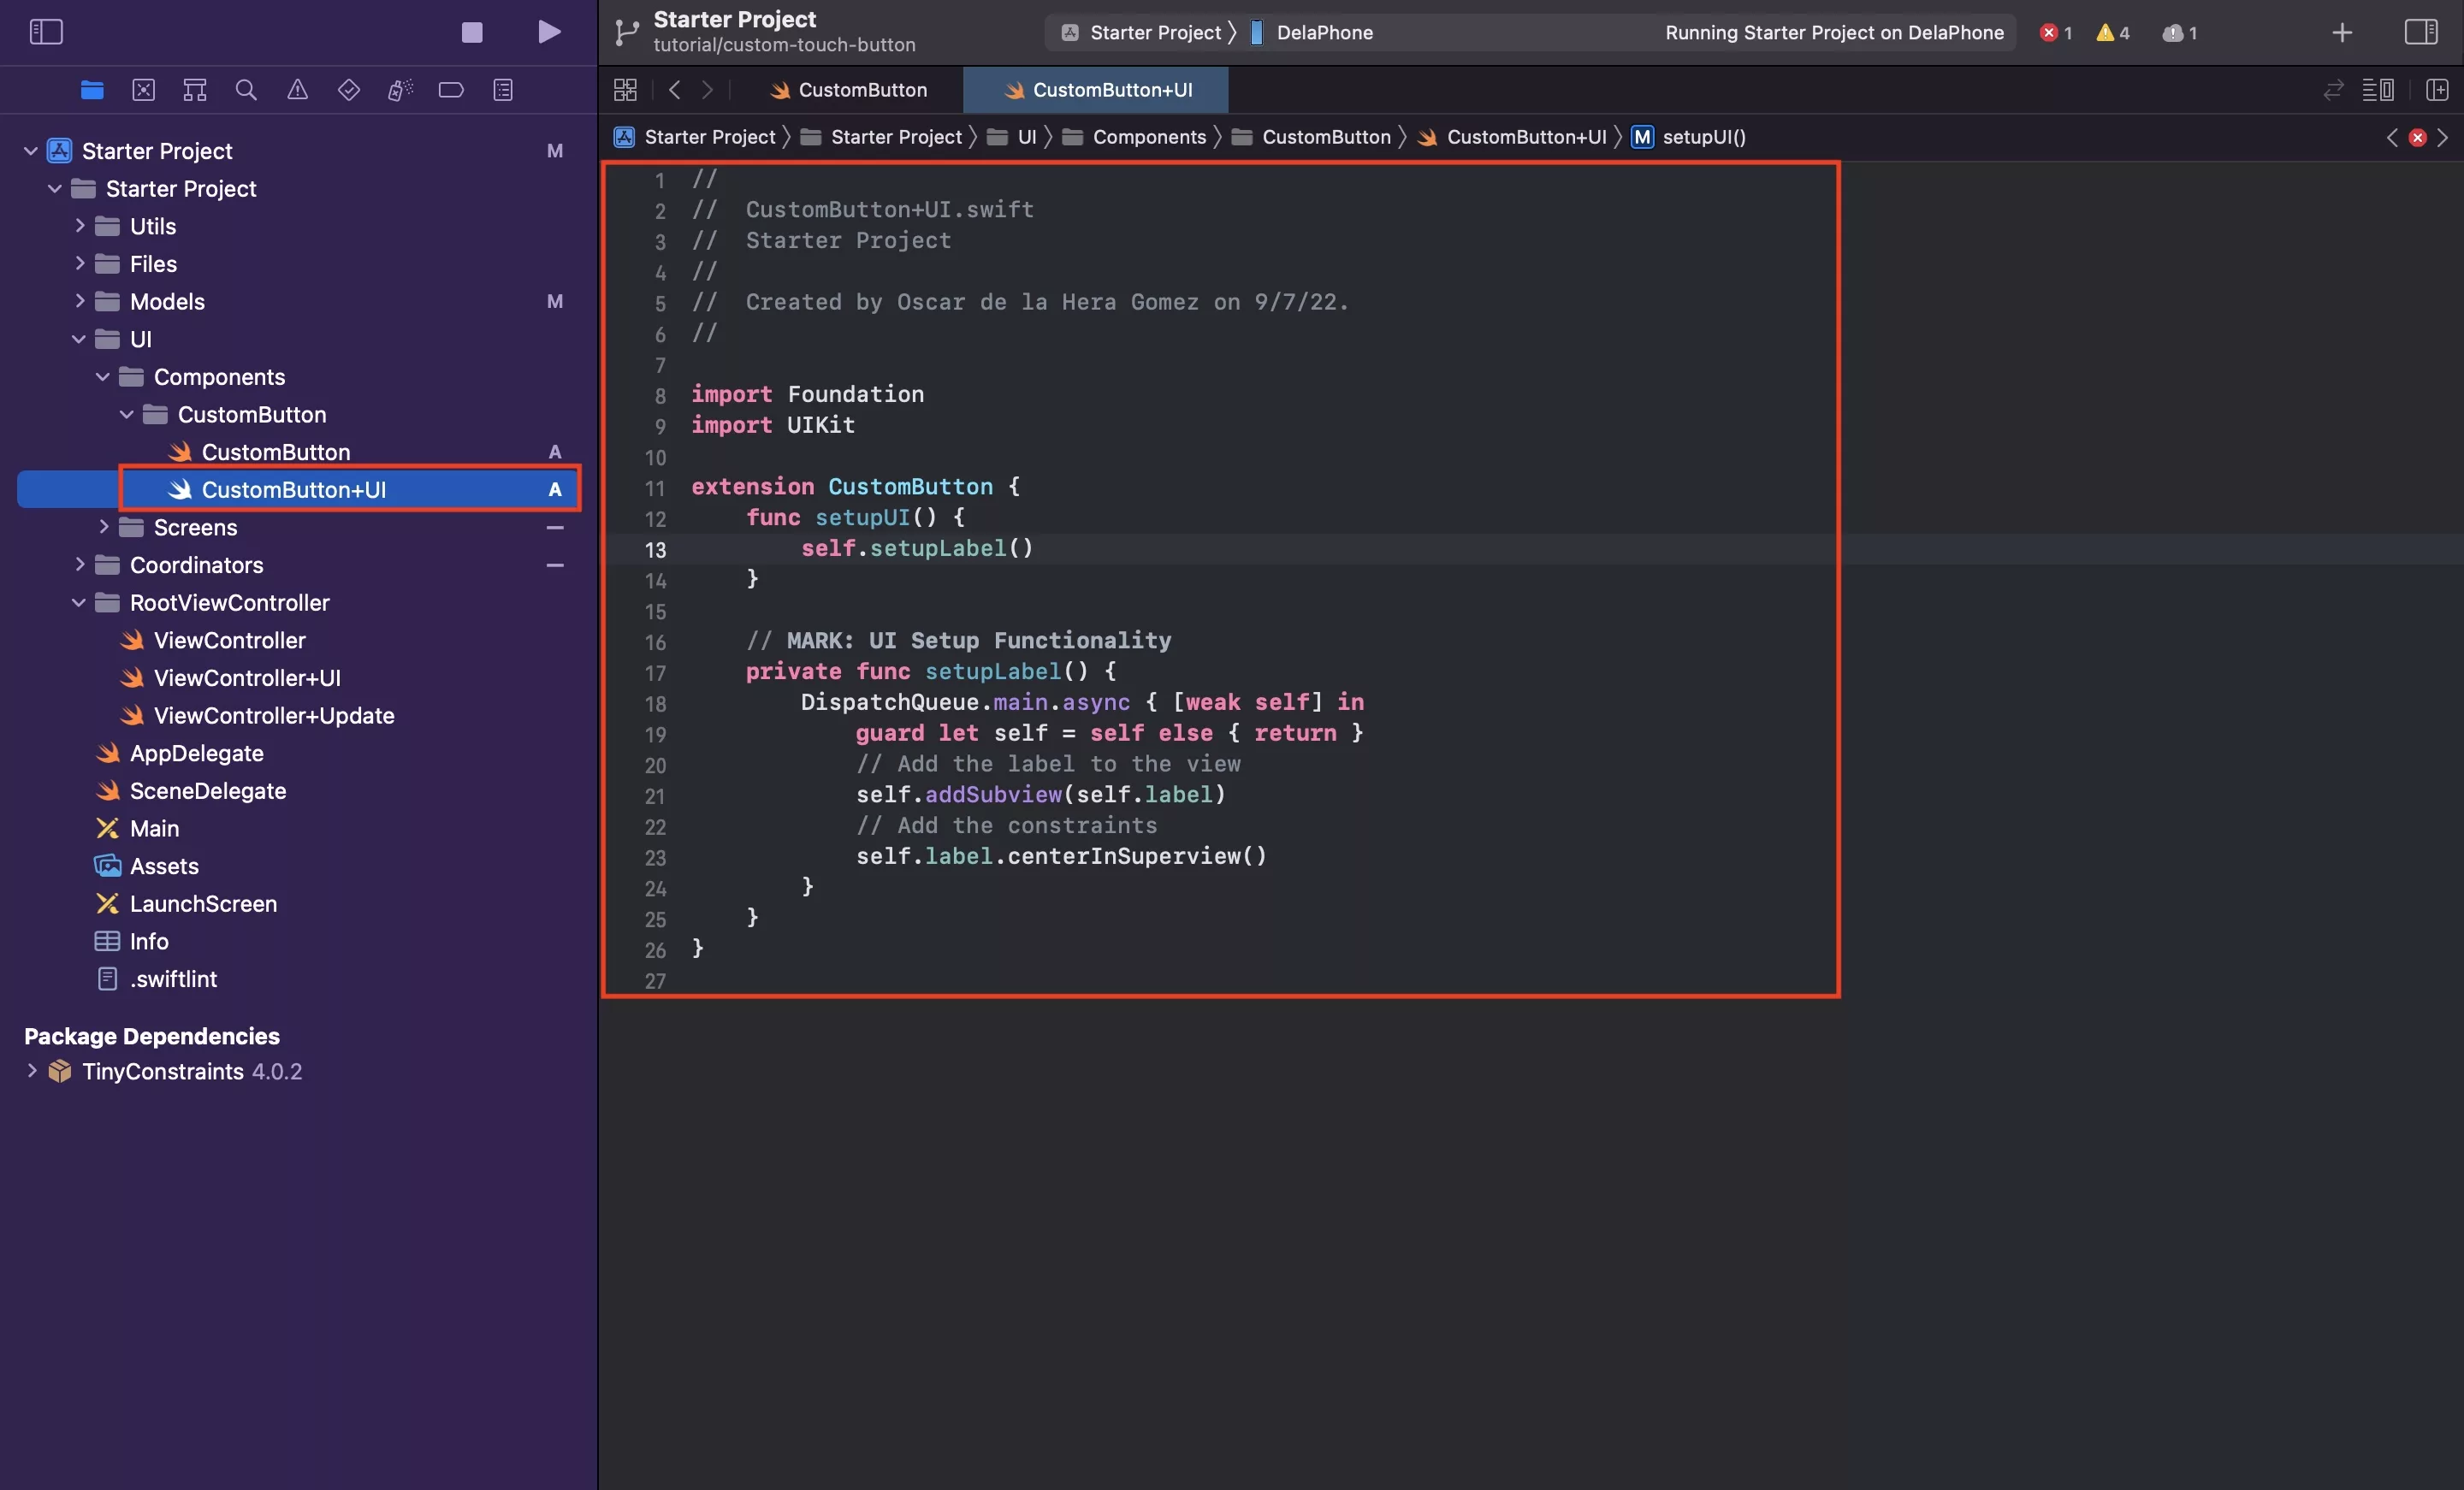
Under the CustomButton folder, create another file called CustomButton+UI.swift and paste in the code found below.
C | Create the CustomButton animation extension
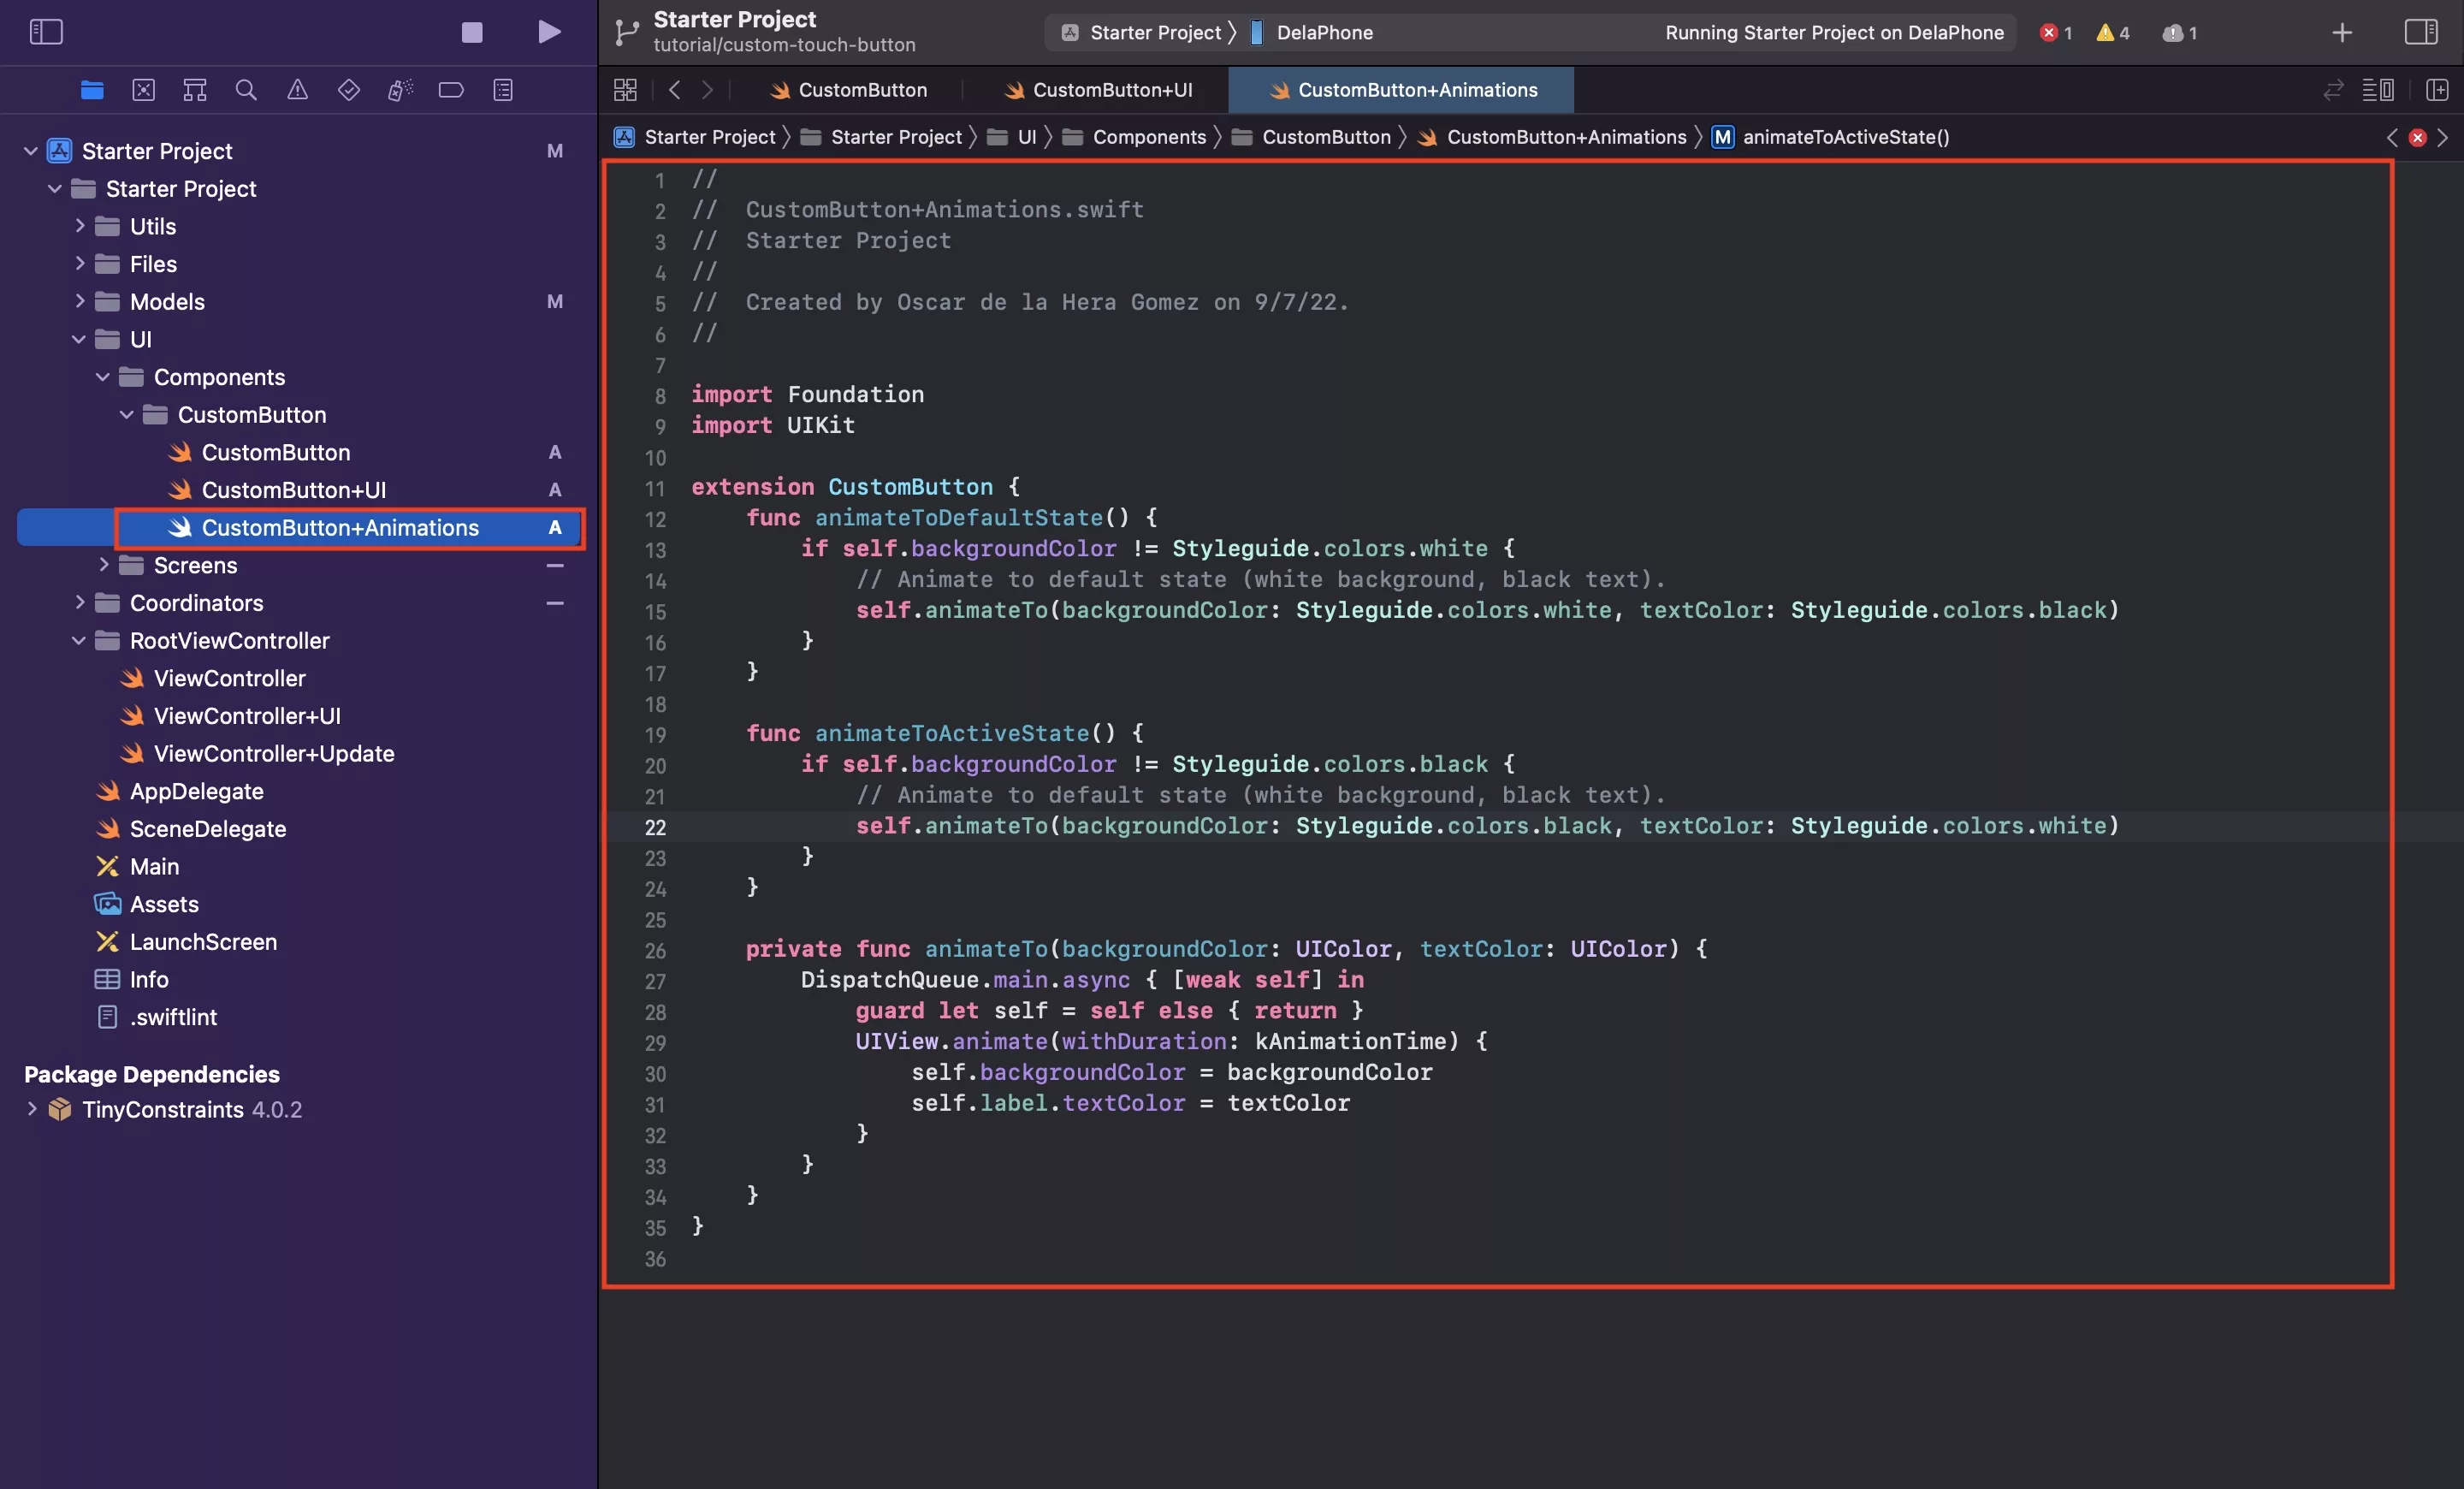
Under the CustomButton folder, create another file called CustomButton+Animations.swift and paste in the code found below.
D | Create the CustomButton touches extension
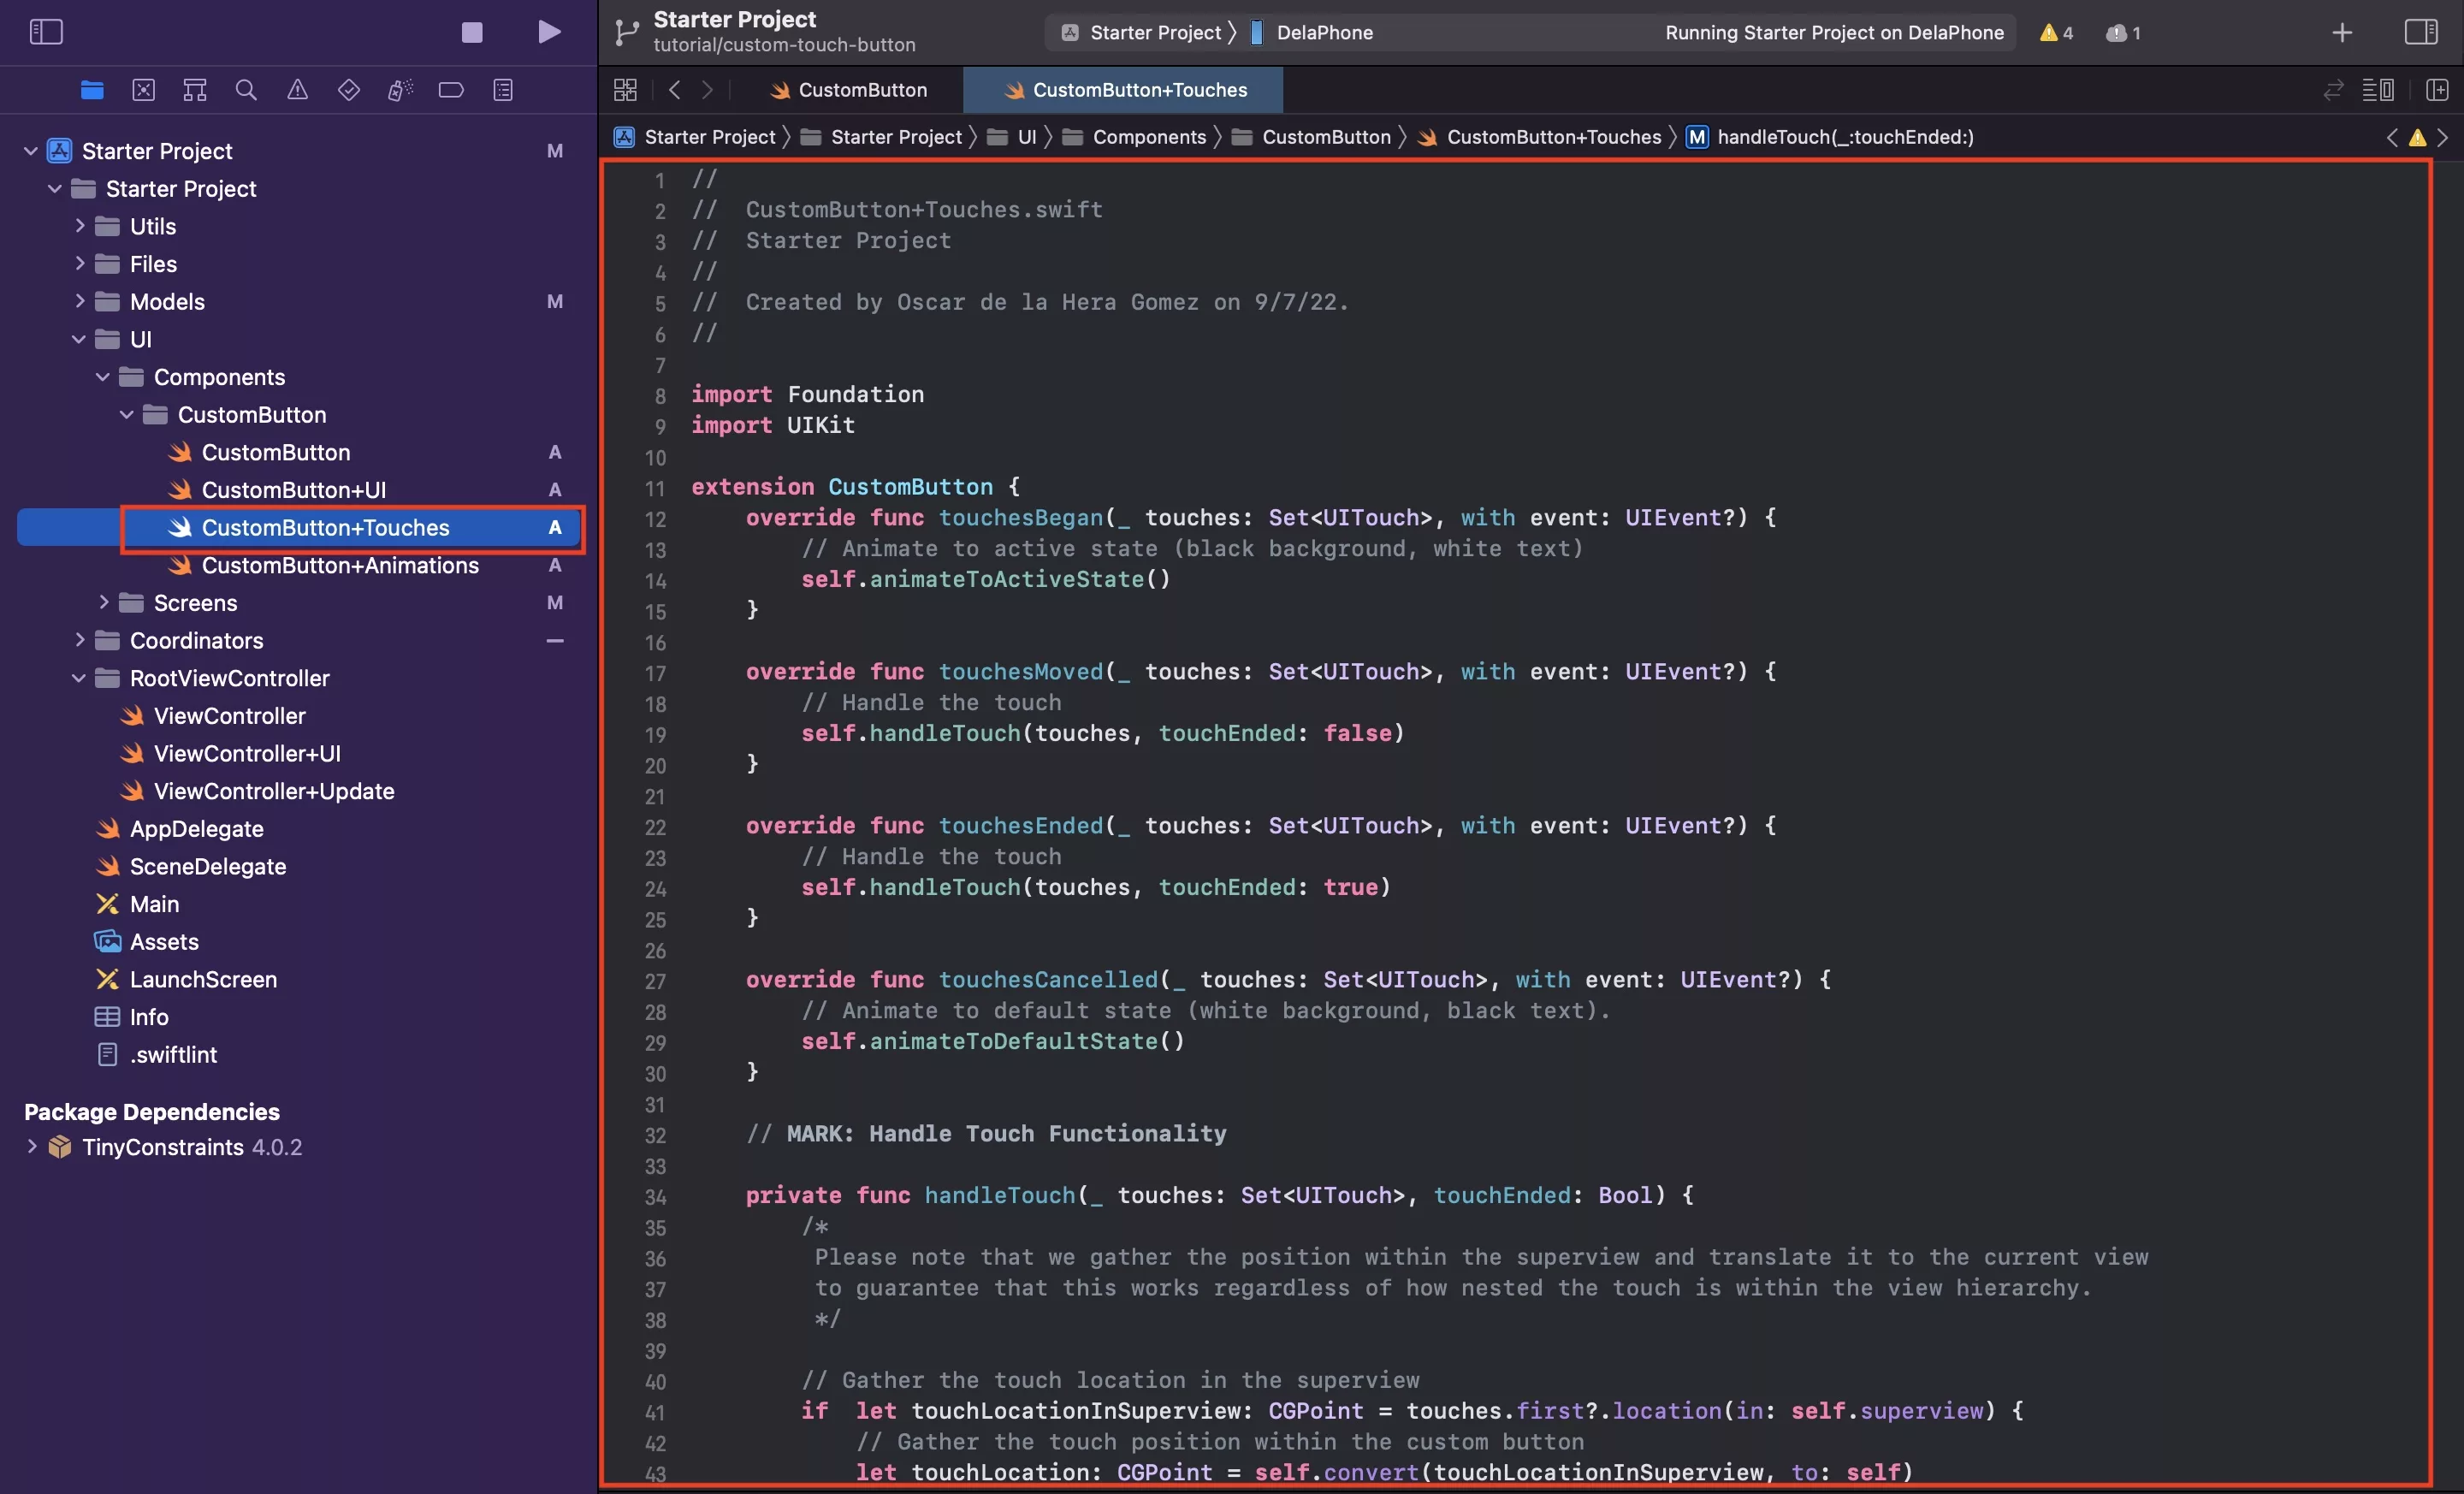
Under the CustomButton folder, create another file called CustomButton+Touches.swift and paste in the code found below.
We recommend that you place it above the CustomButton+Animations.swift file.
E | Create the CustomButton update extension
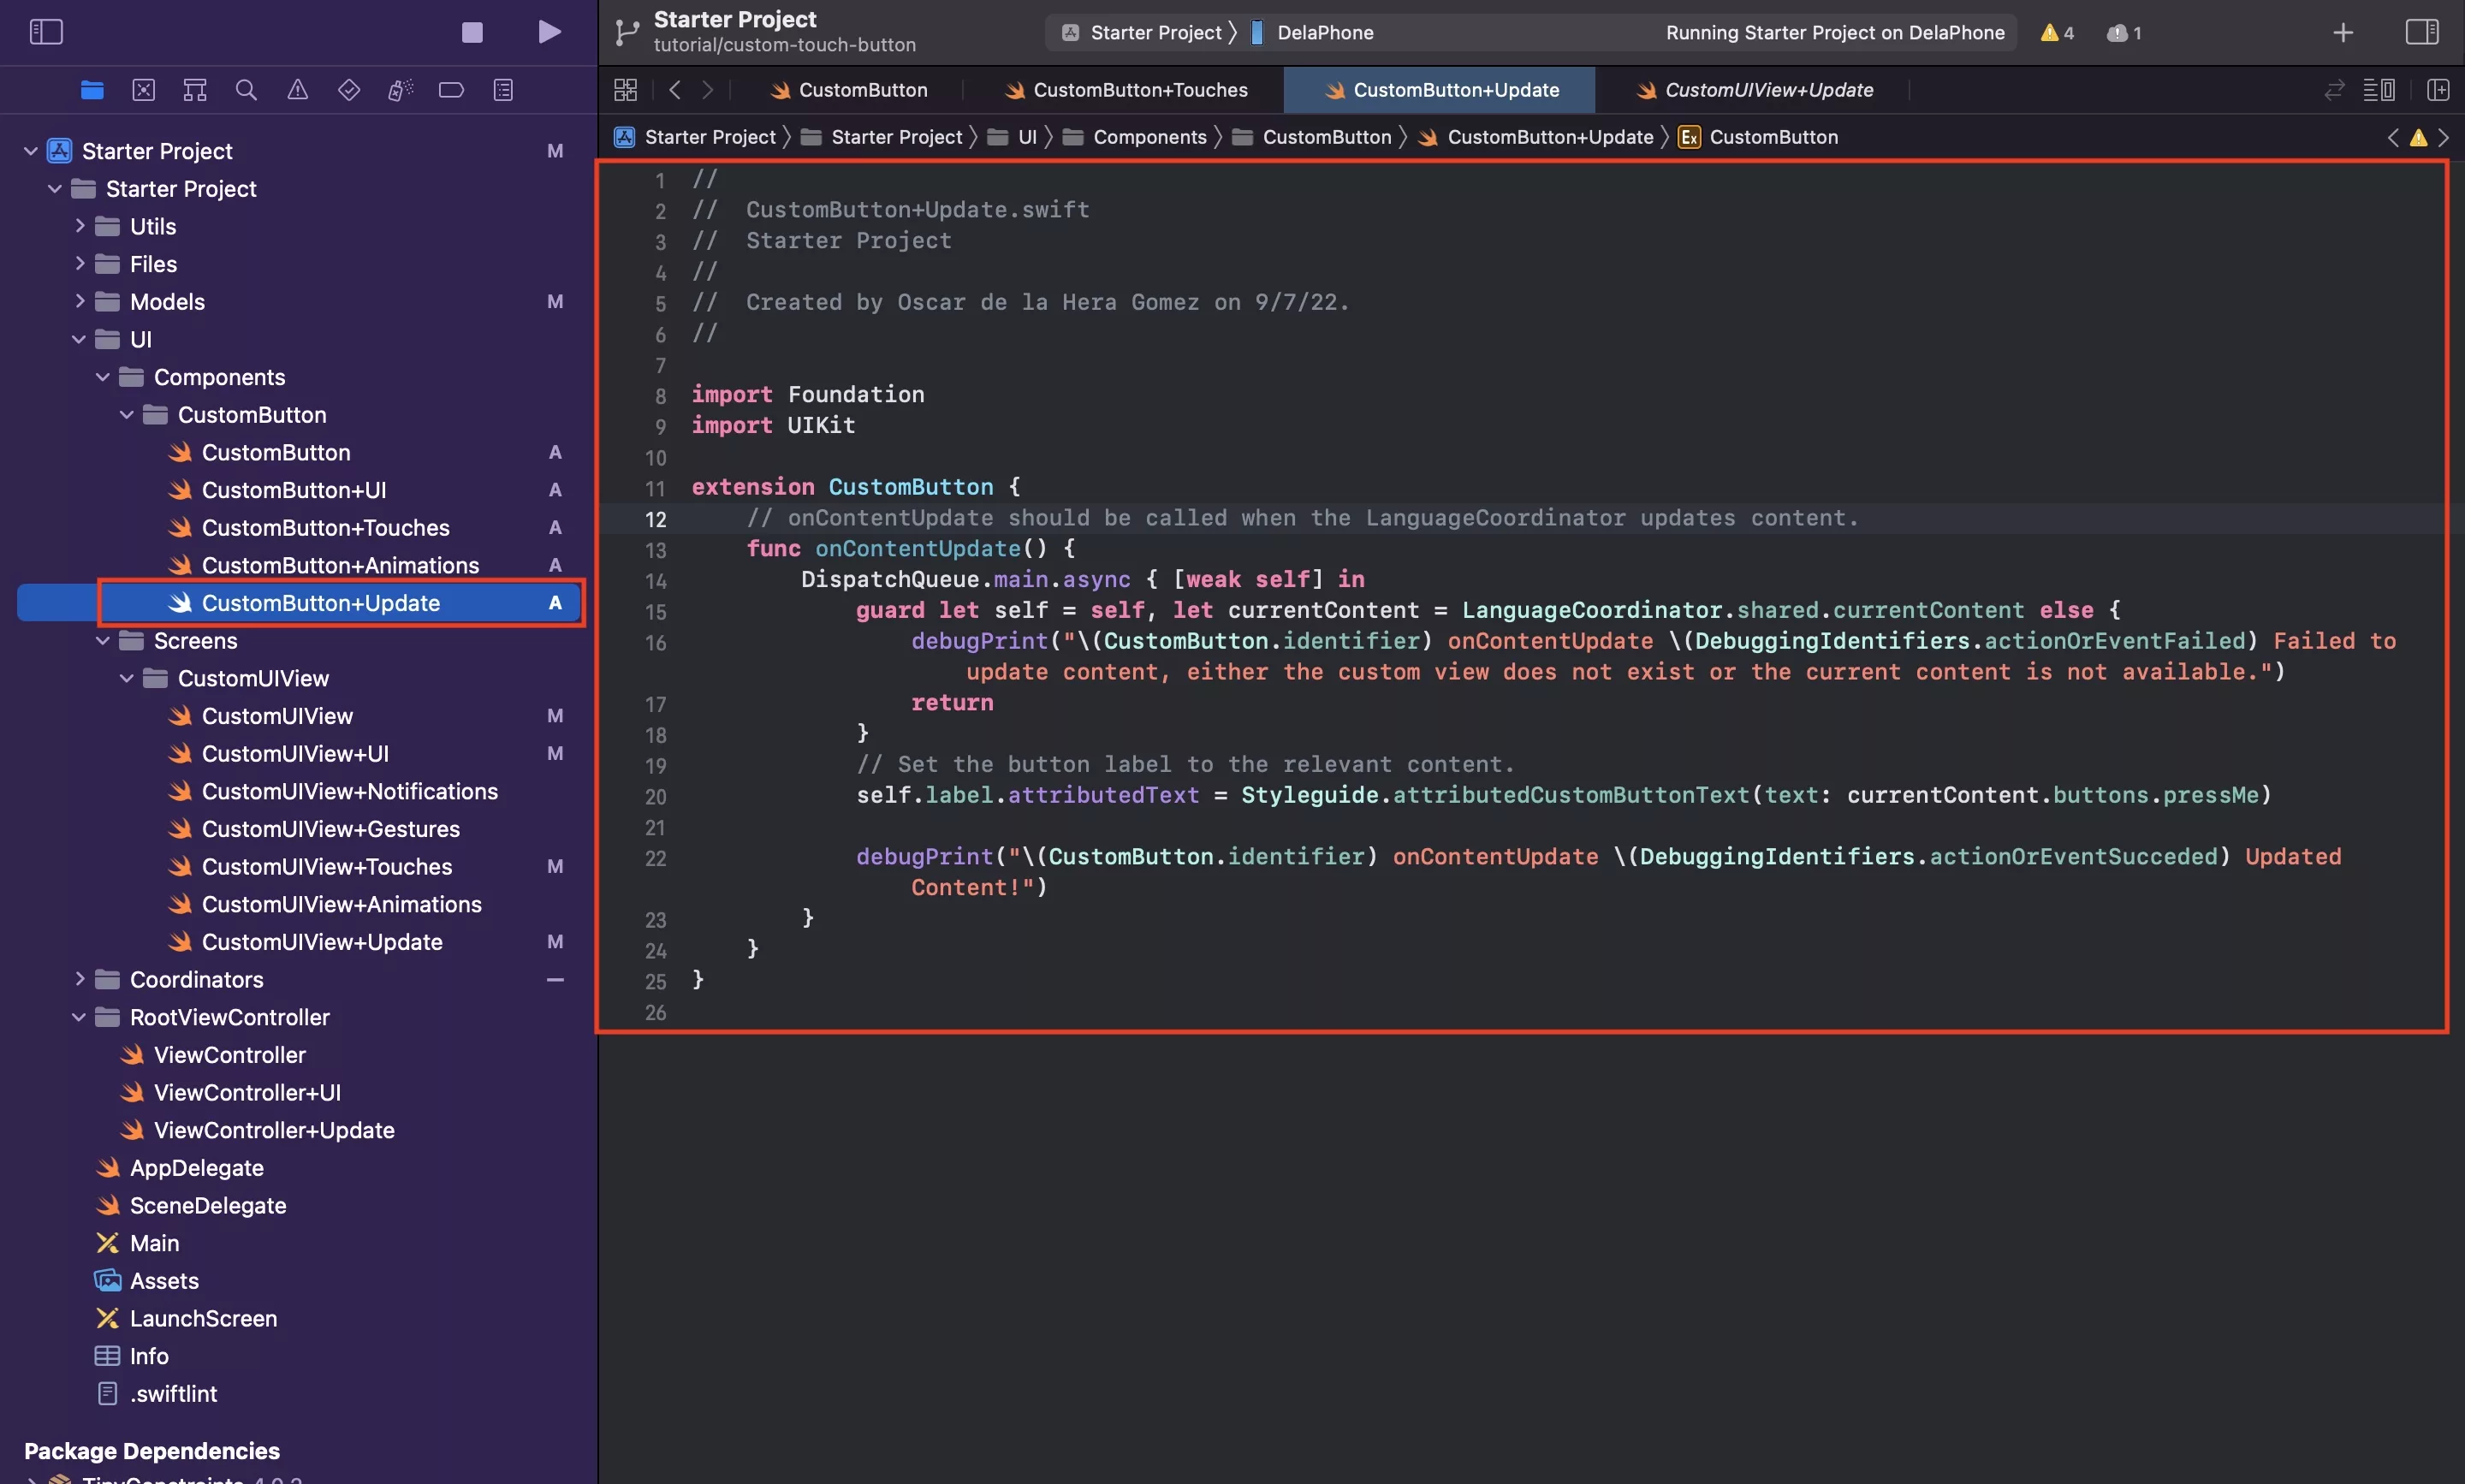
Under the CustomButton folder, create another file called CustomButton+Update.swift and paste in the code found below.
Step Four: Add your button to the interface
The following step walks you through how to add the CustomButton to the interface, update it's content to match that of the LanguageCoordinator & add a debugPrint that logs when the button has a successful onRelease has been triggered.
A | Declare the custom button
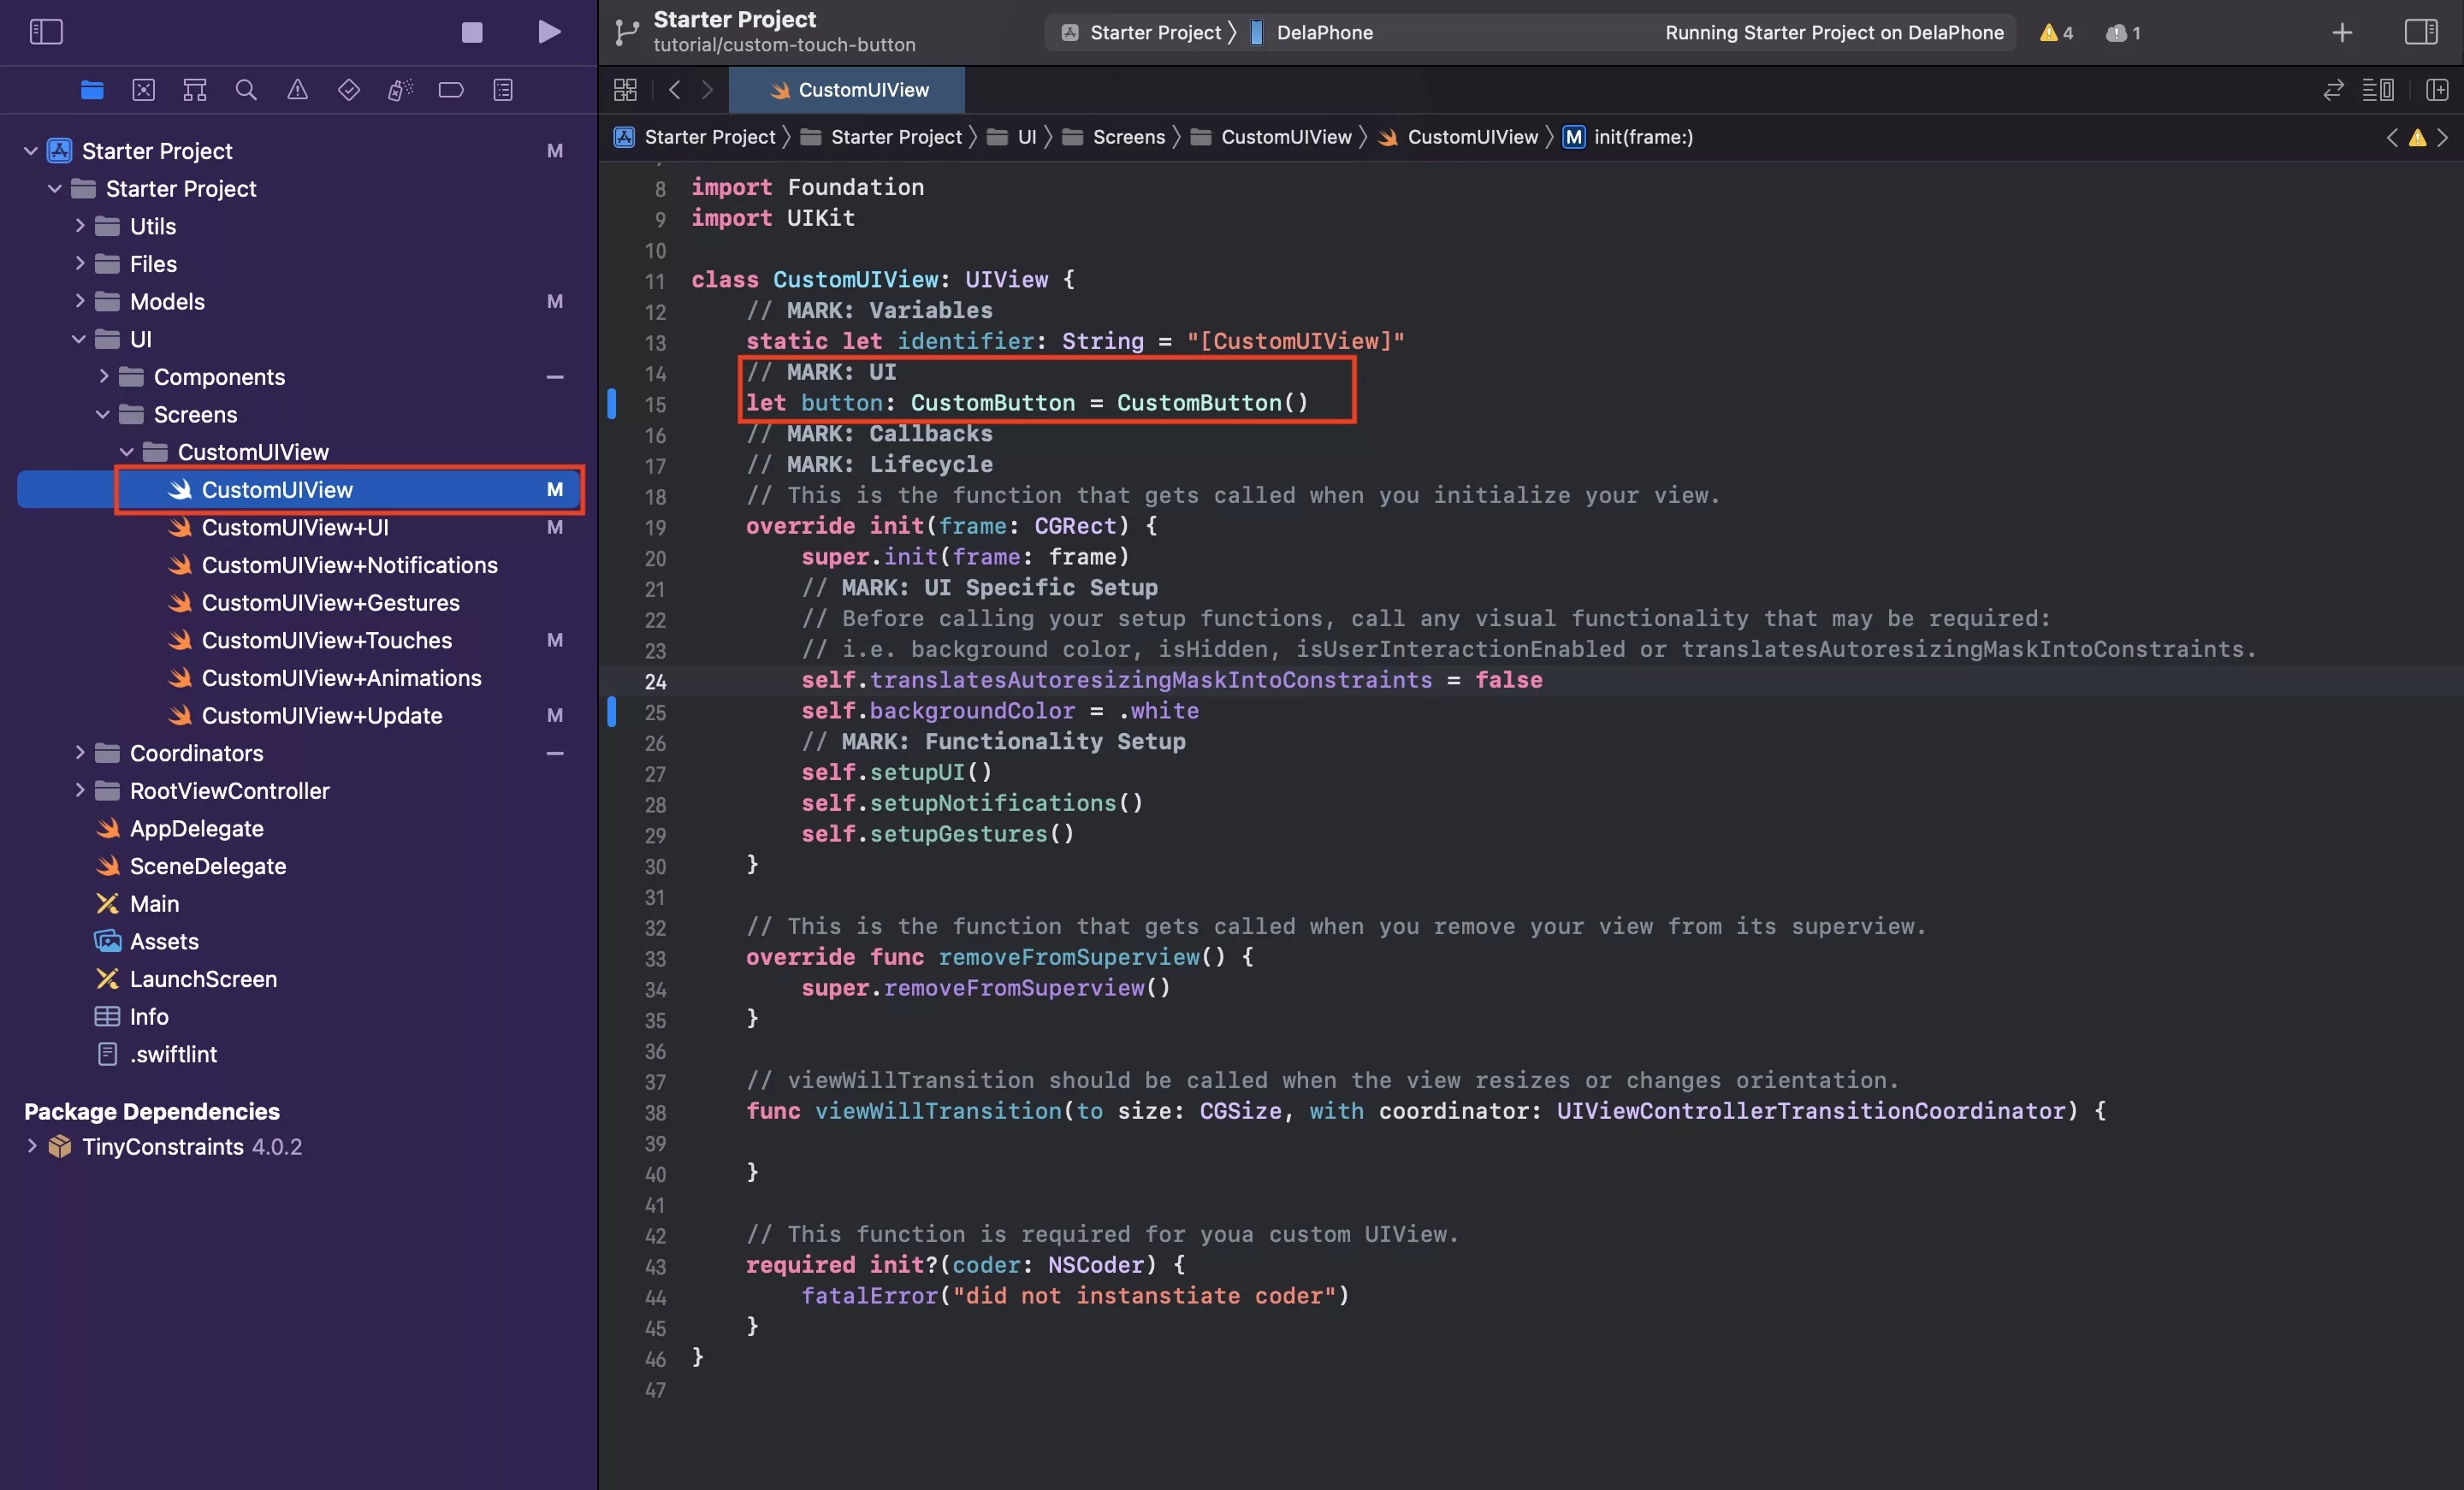
In CustomUIView.swift, declare the custom button constant.
B | Add the custom button to the UI

In CustomUIView+UI.swift, add the custom button to the interface.
Sample code provided below.
Please note that the debugPrint for the callback can be found on line 33. This is executed when the touch exits successfully.
C | Update the content
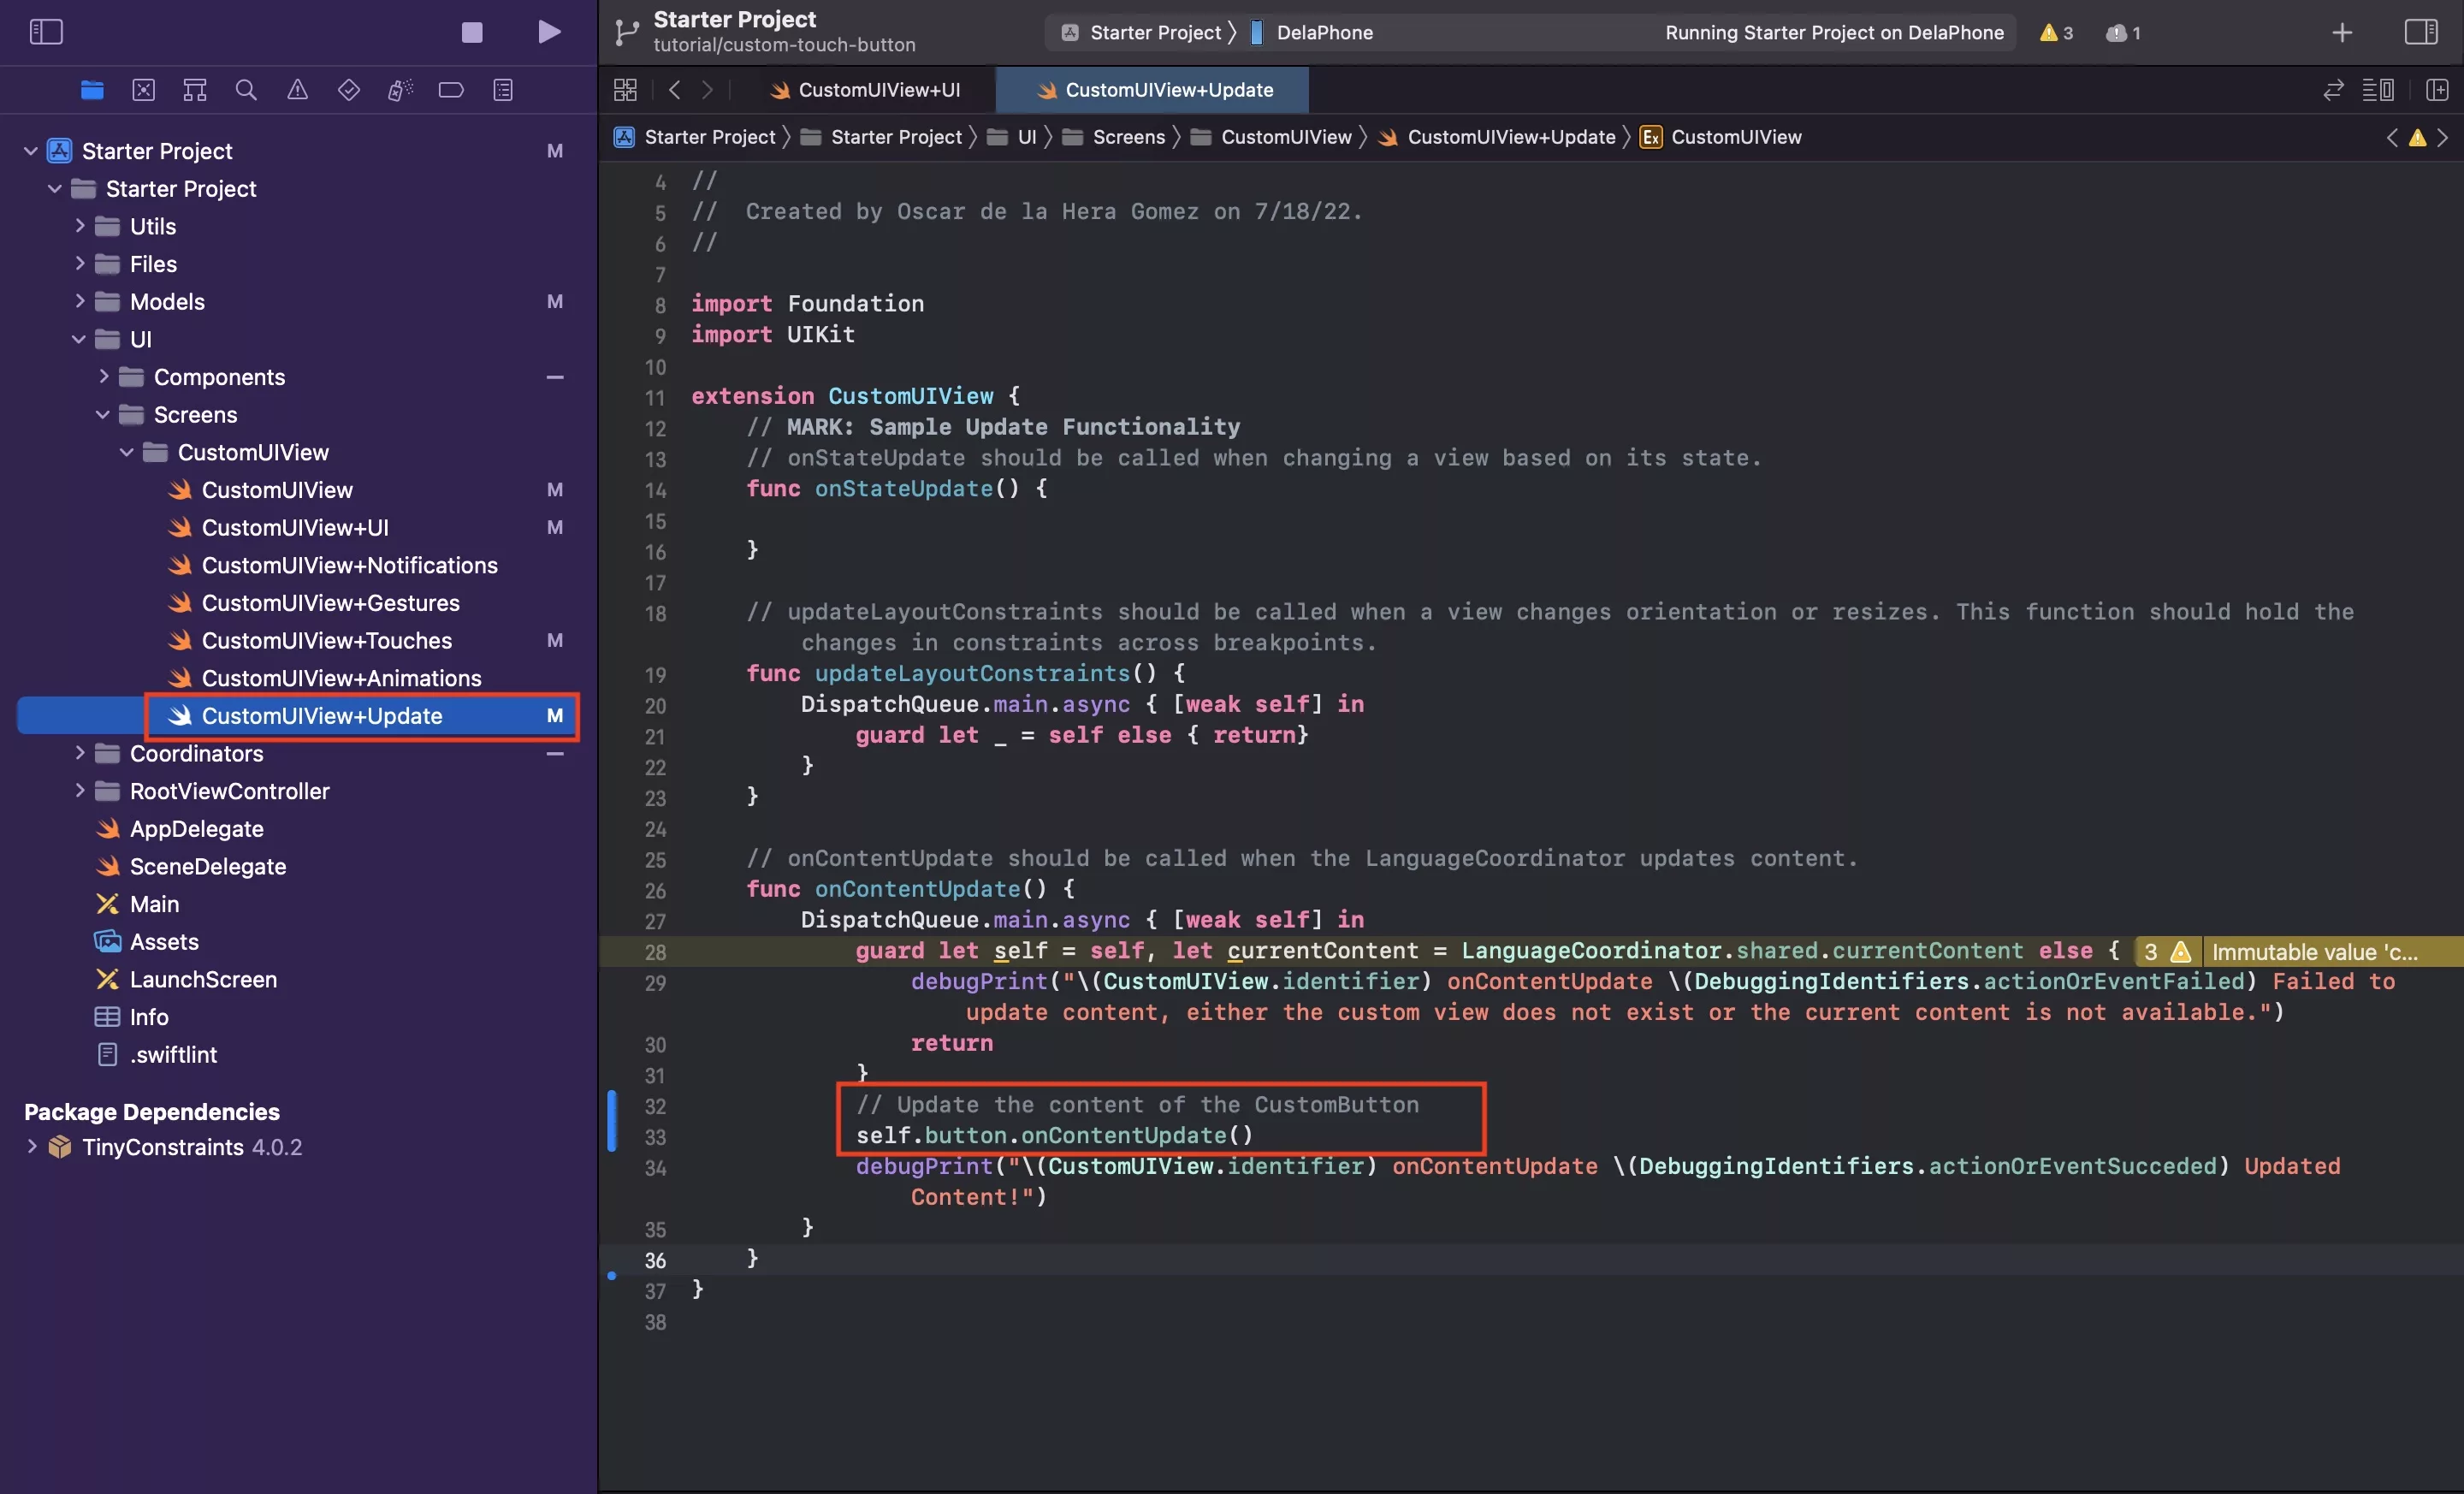
In CustomUIView+Update.swift, within the onContentUpdate function, call the equivalent function of the custom button.
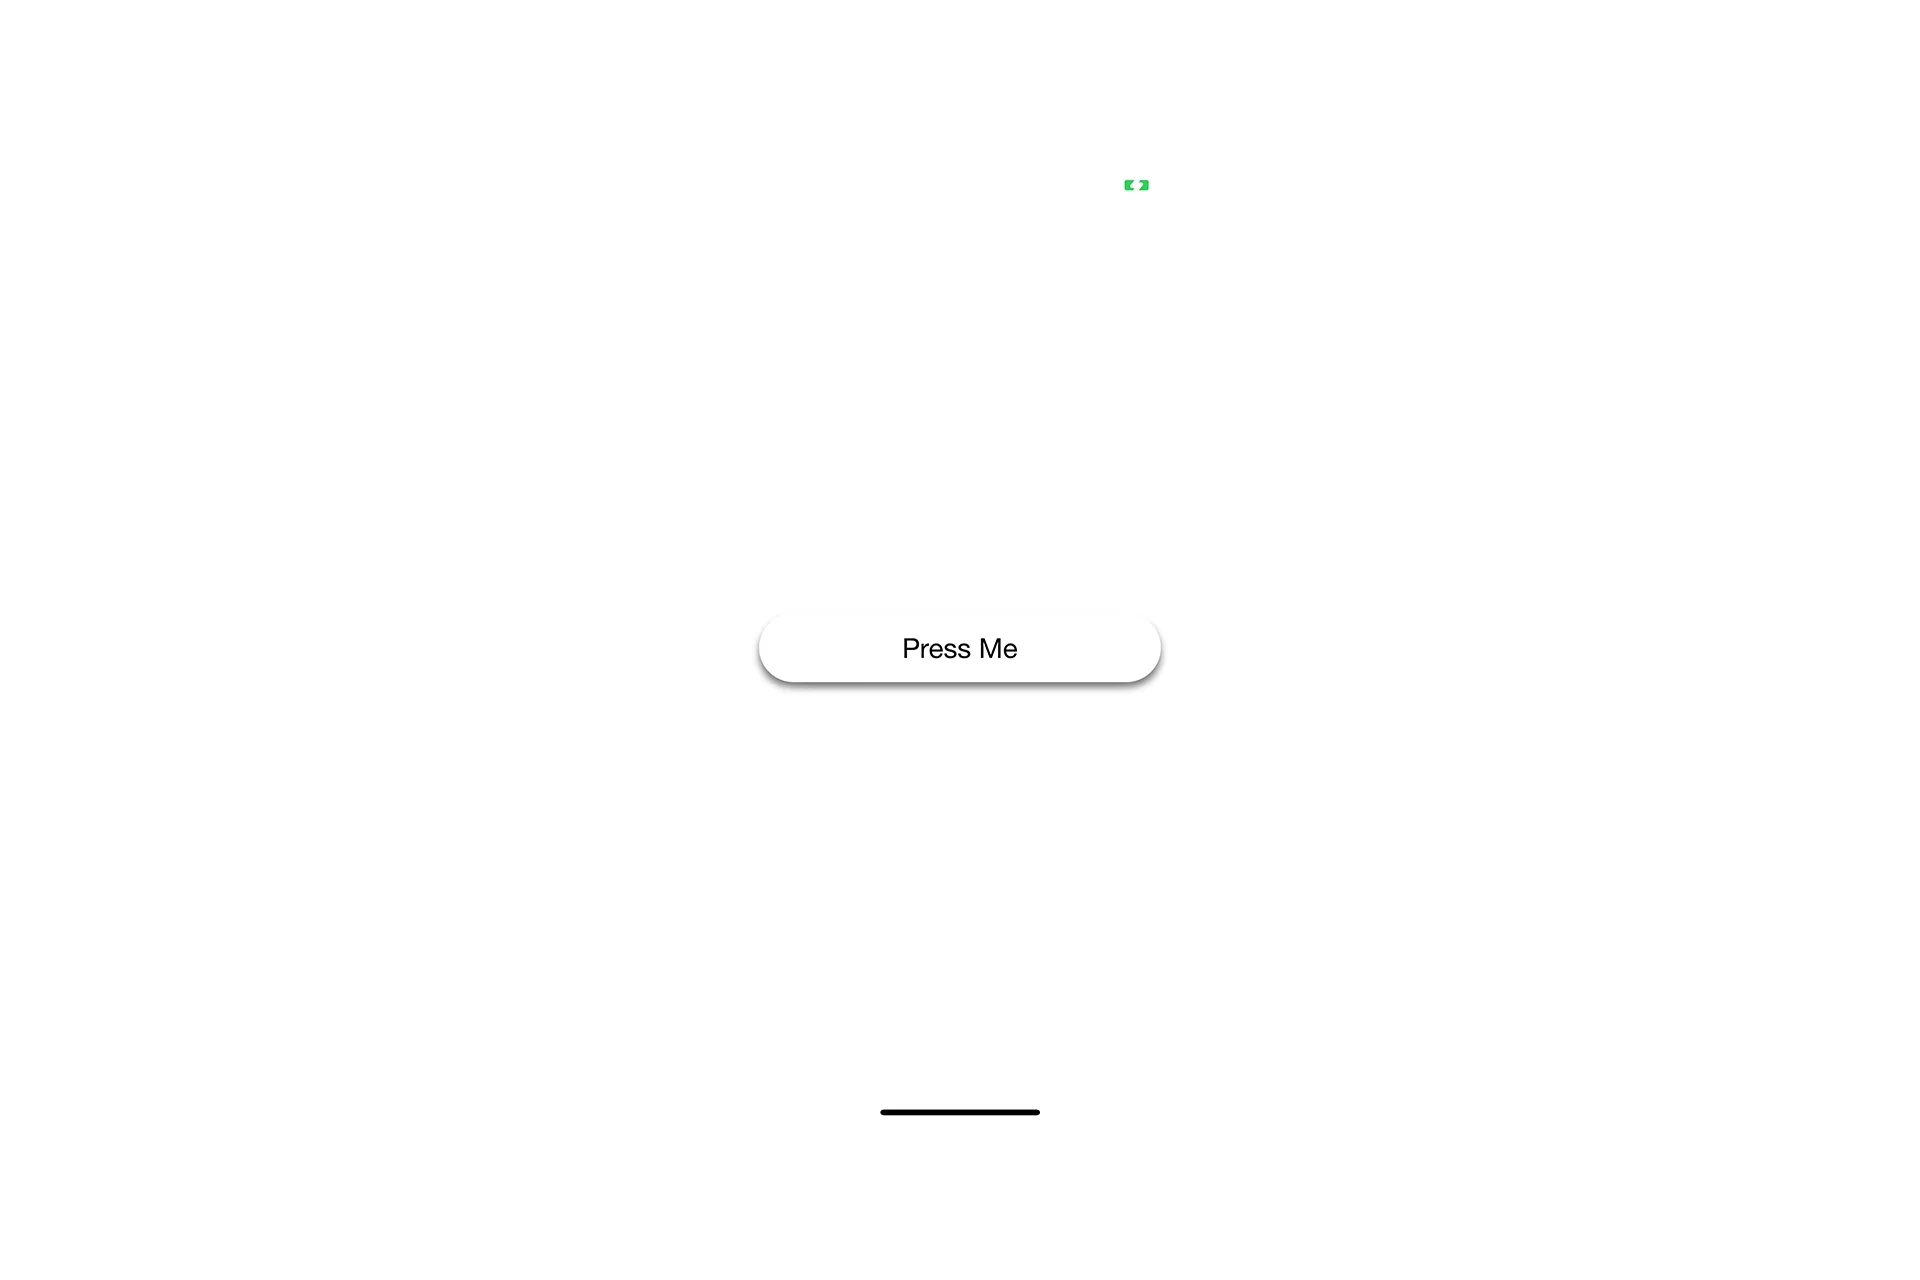
Step Five: Verify
Run the app and verify:
- The button appears on the screen and can be rotated, with constraints and shadow updating adequately.
- The button highlights on press.
- After a press, if your finger leaves the button, the button returns to normal.
- After a press, if your finger leaves and returns to the button, the button goes from highlighted to normal to highlighted.
- If you stop pressing the screen outside of the button, the debugPrint does not appear on the debug area.
- If you stop pressing the screen inside the button, the debugPrint appears in the debug area.
Any Questions ?
We are actively looking for feedback on how to improve this resource. Please send us a note to inquiries@delasign.com with any thoughts or feedback you may have.