How to continuously start and stop speech recognition in Swift
A step by step guide on creating endlessly looping speech recognition in Swift.

A step by step guide on creating endlessly looping speech recognition in Swift.
The following tutorial builds off Apple's Recognizing Speech in Live Audio tutorial linked below.
We recommend that you clone our Open Source Swift Starter Project, checking out the tutorial/voice branch and carrying out the steps below. The changes can be found on the tutorial/voice-loop branch.
Please note if you do this, you can skip Step One.
git clone git@github.com:delasign/swift-starter-project.gitStep One: Setup Speech Recognition
Setup Speech Recognition by following Apple's tutorial or following the tutorial below.
Step Two: Add Variables
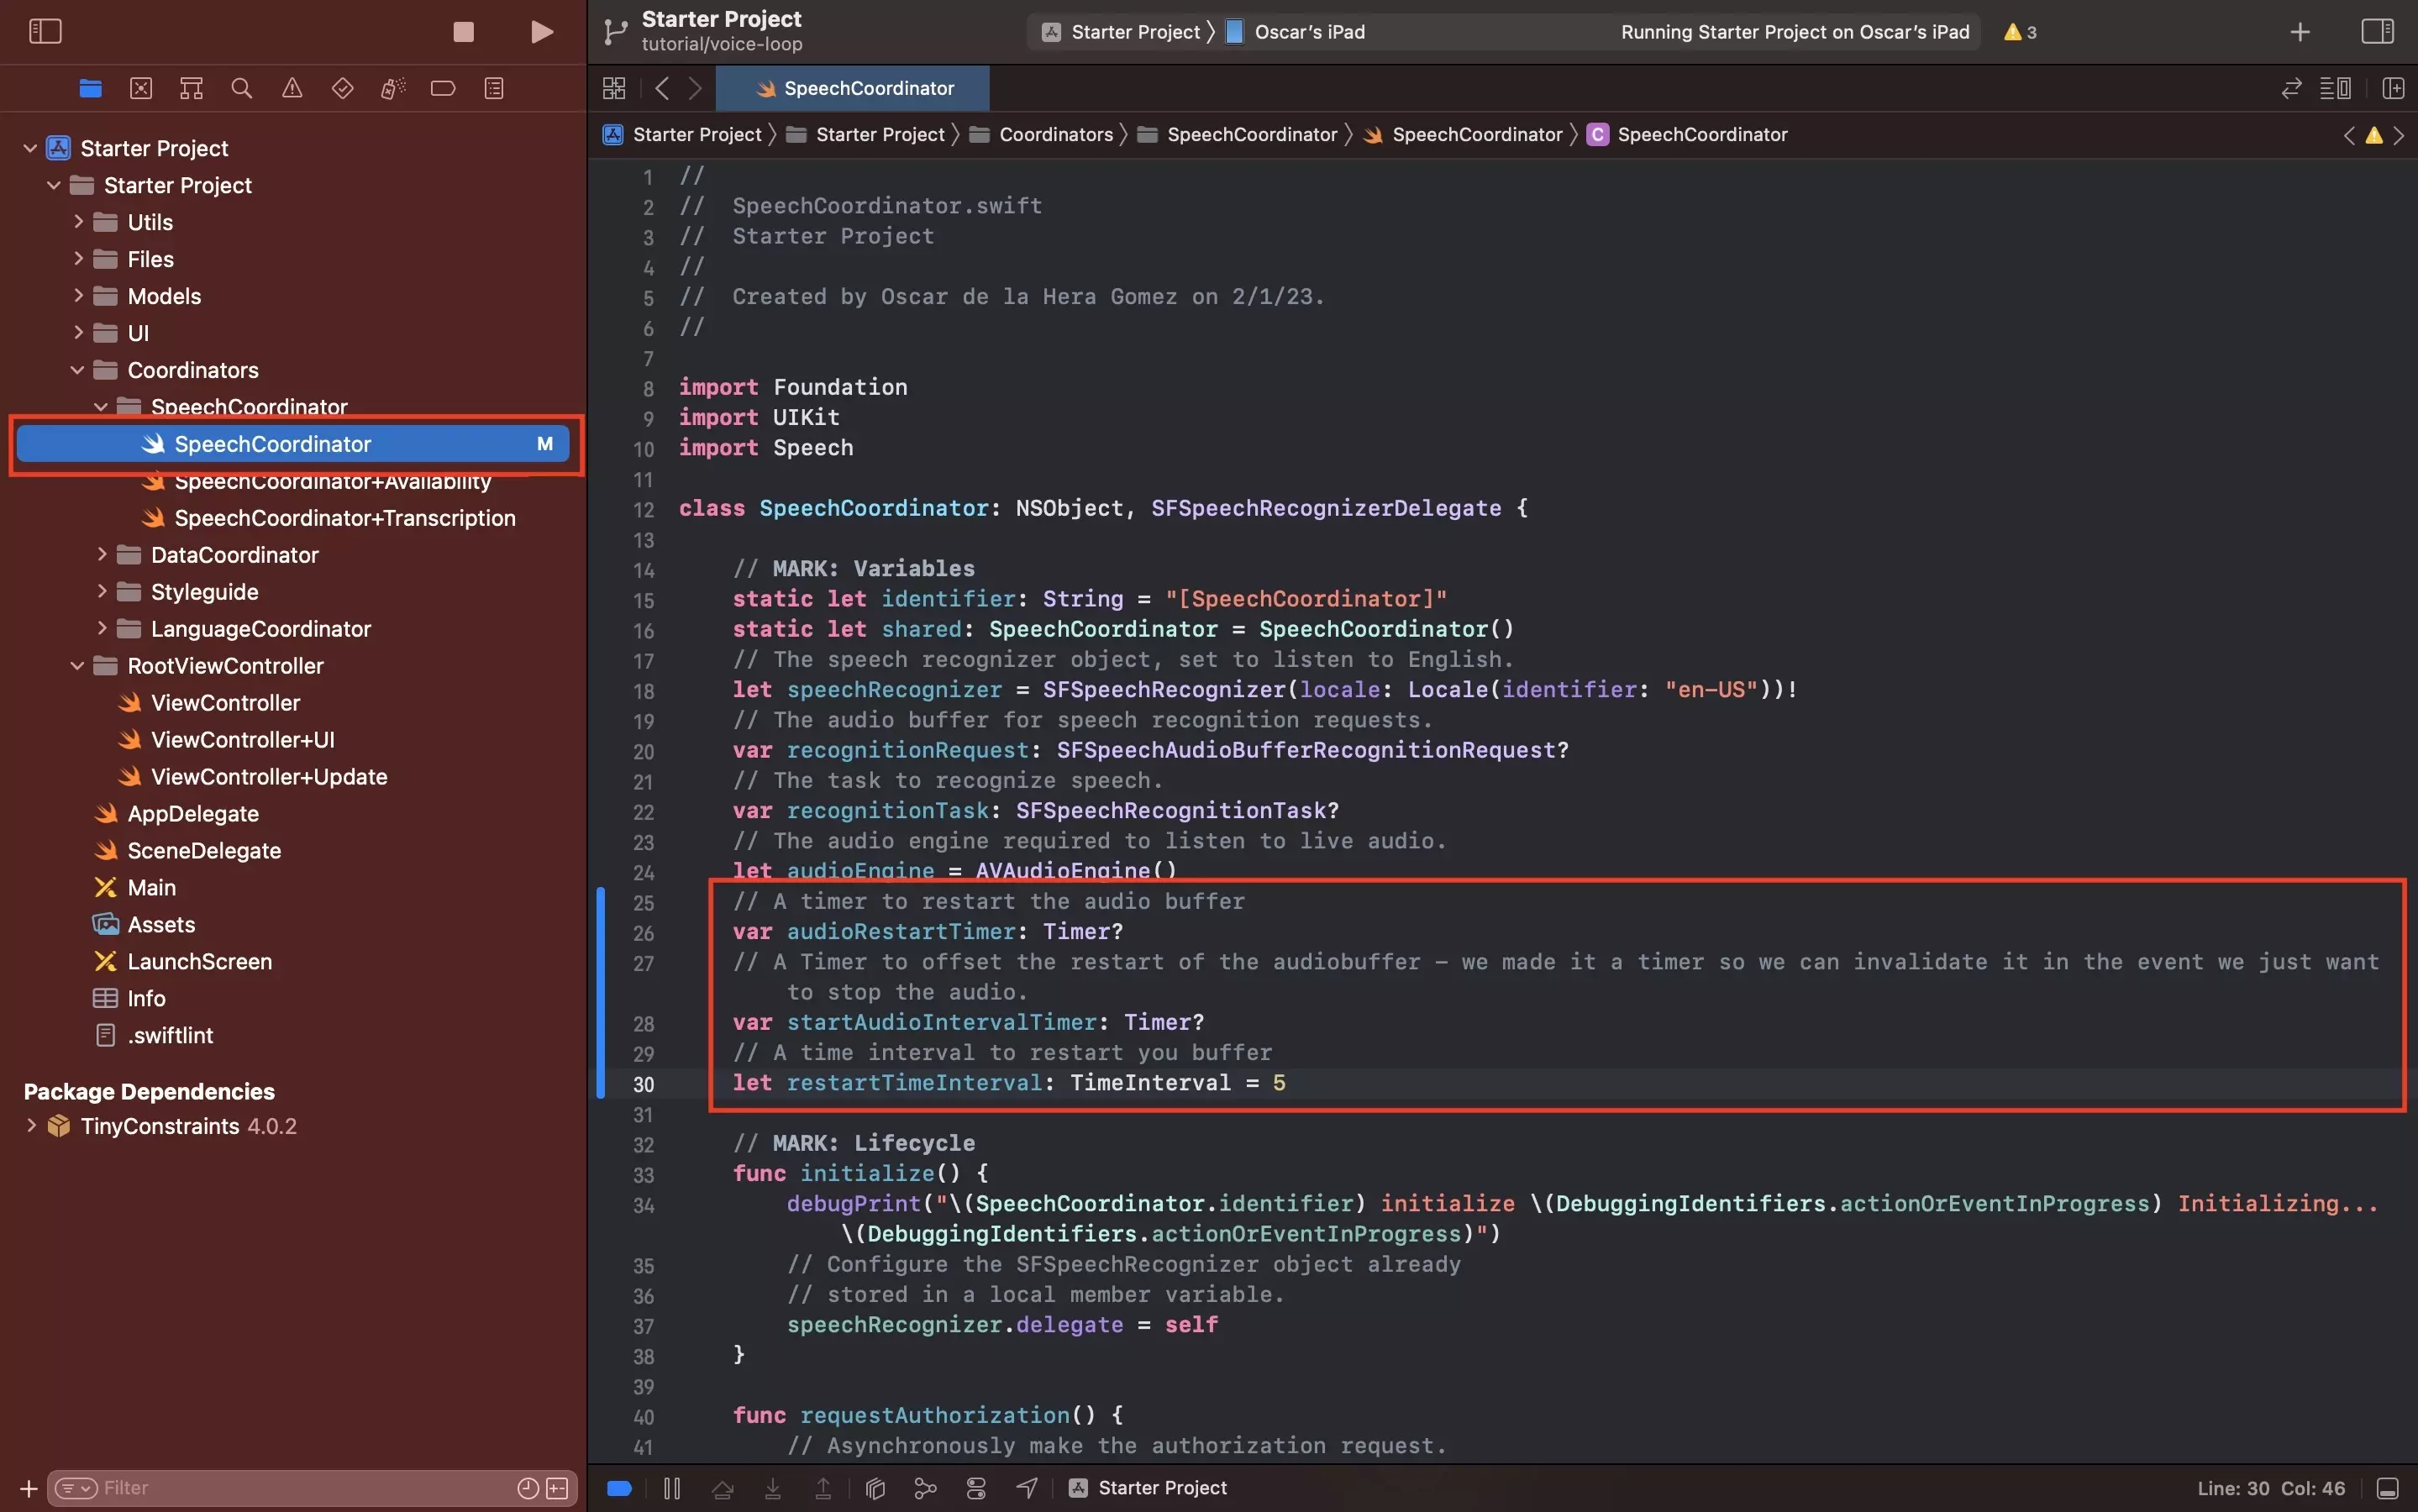
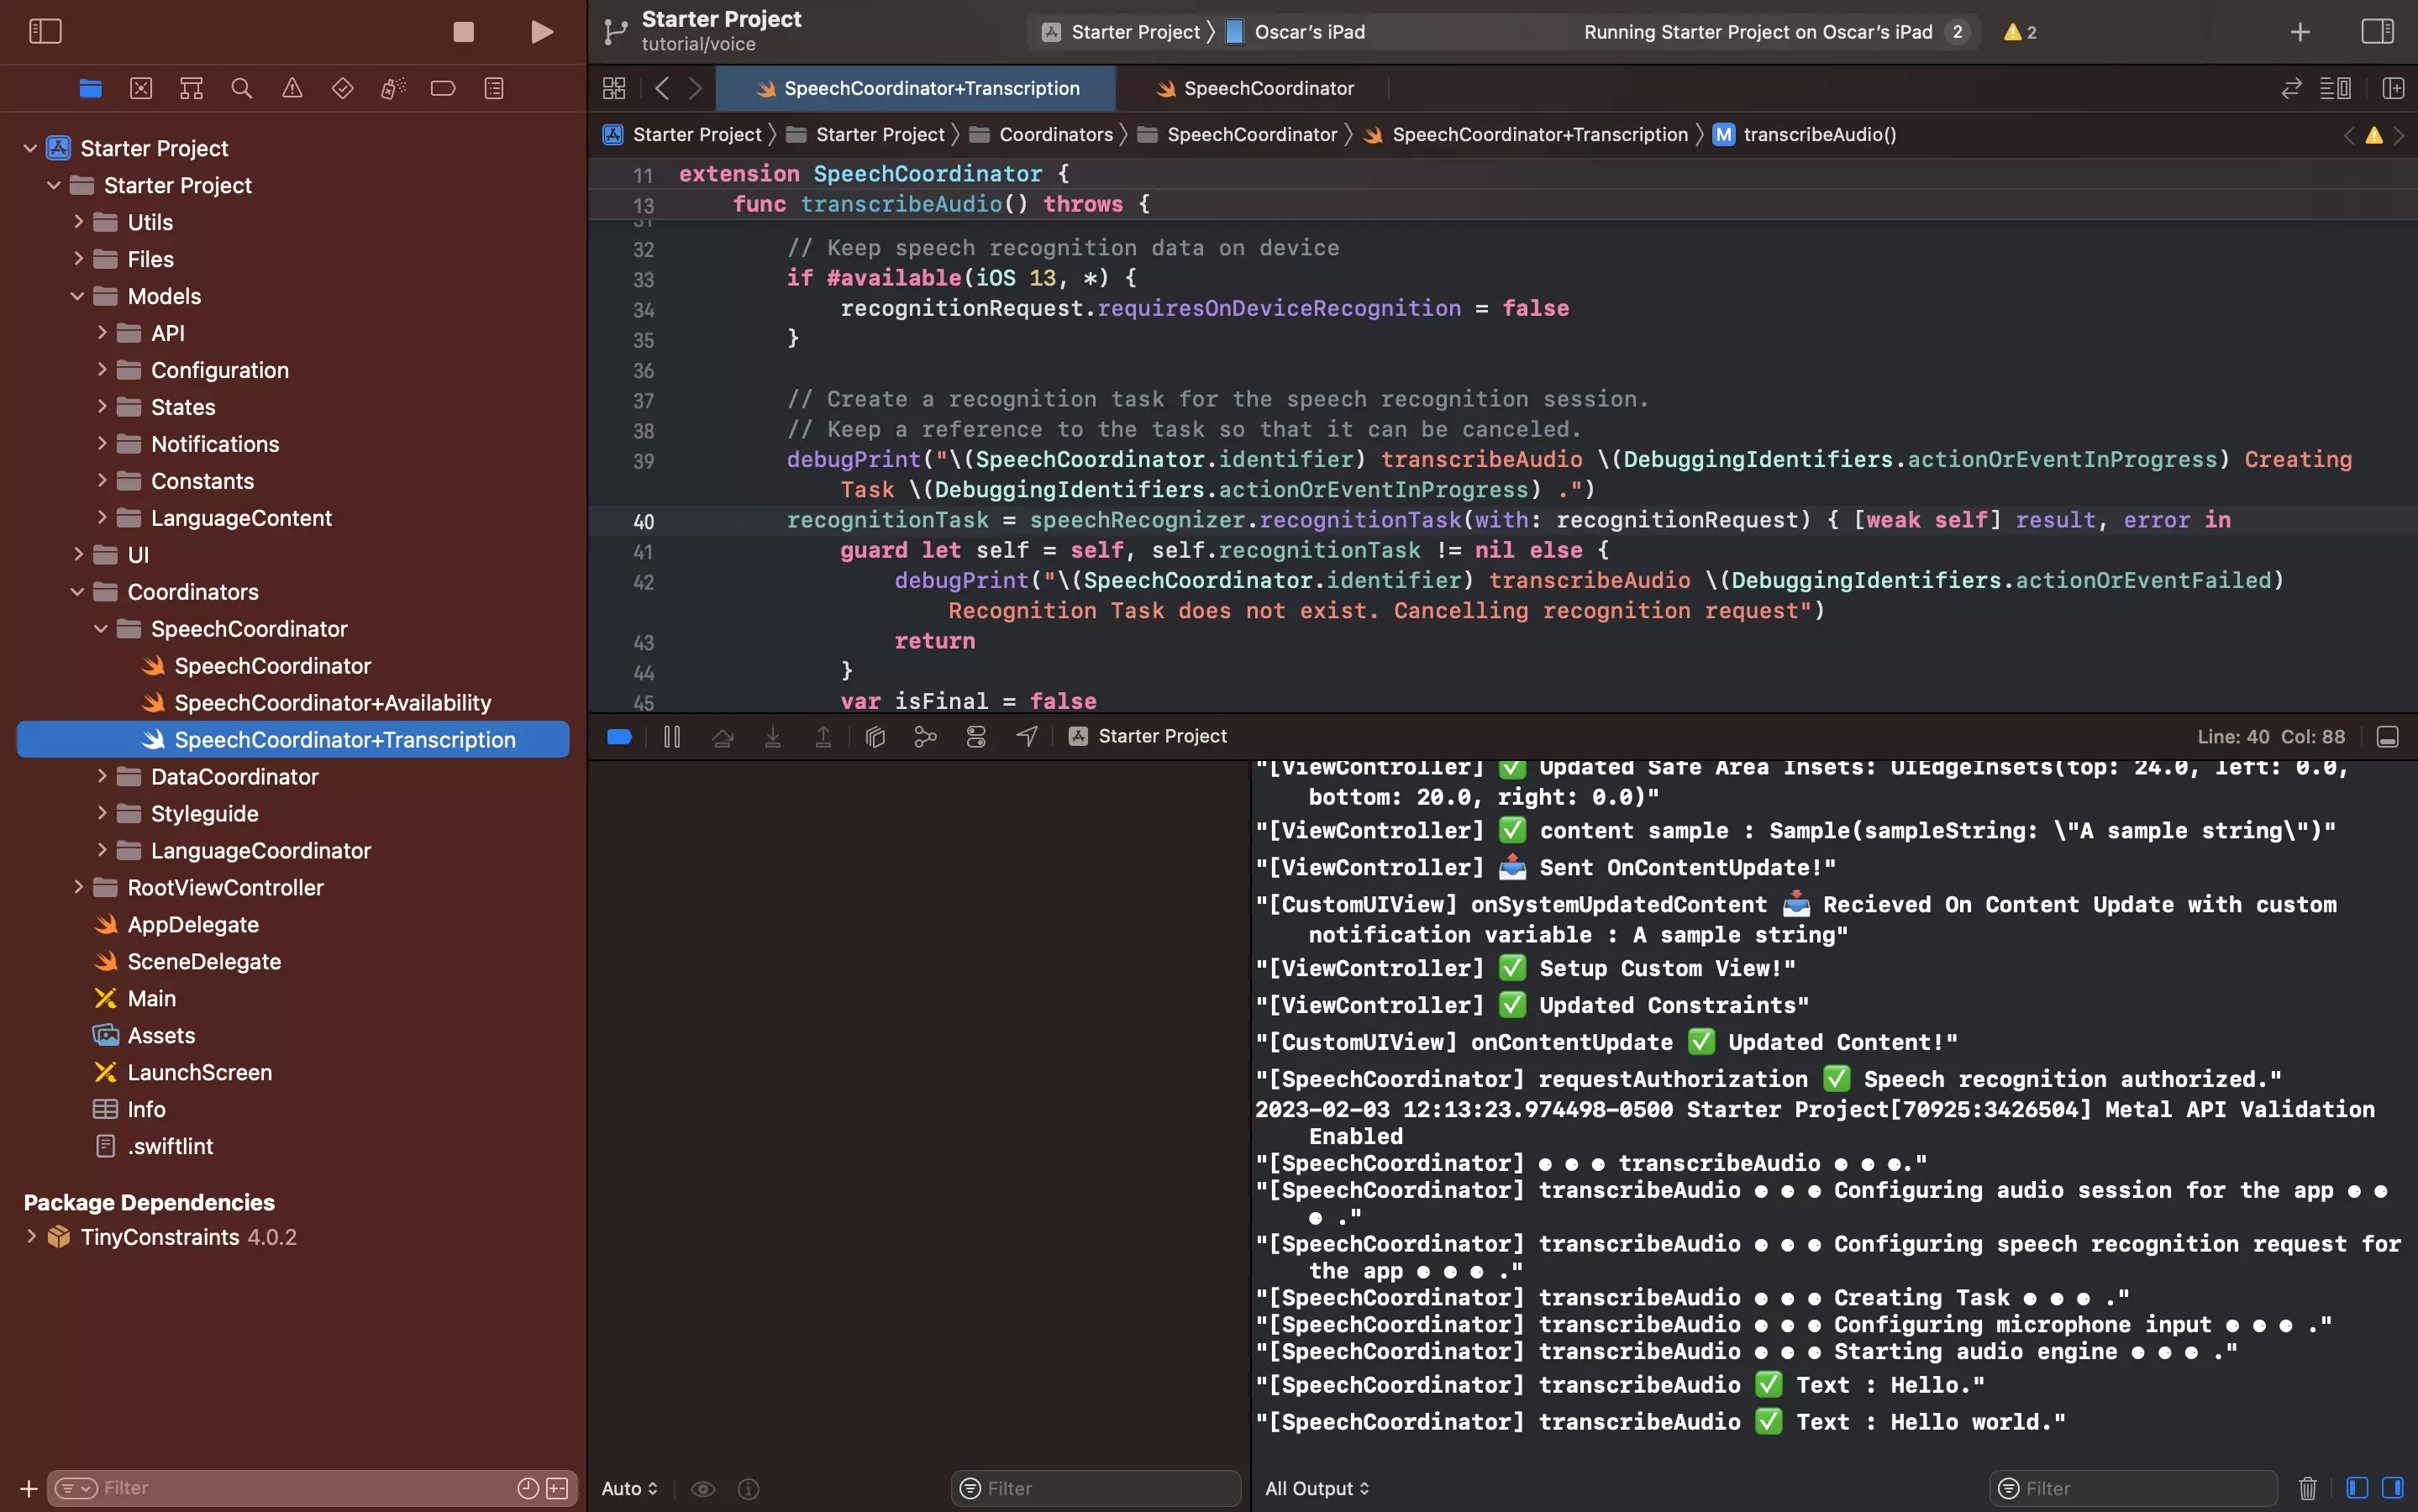
In SpeechCoordinator.swift, add the required variables. There are available in the snippet below.
Please note that we have set the algorithm to loop every 5 seconds, Apple advises to not make this more than 60 seconds as it has a high burden on the battery.
Plan for a one-minute limit on audio duration. Speech recognition places a relatively high burden on battery life and network usage. To minimize this burden, the framework stops speech recognition tasks that last longer than one minute. This limit is similar to the one for keyboard-related dictation.
Step Three: Add End Audio Recording Functionality
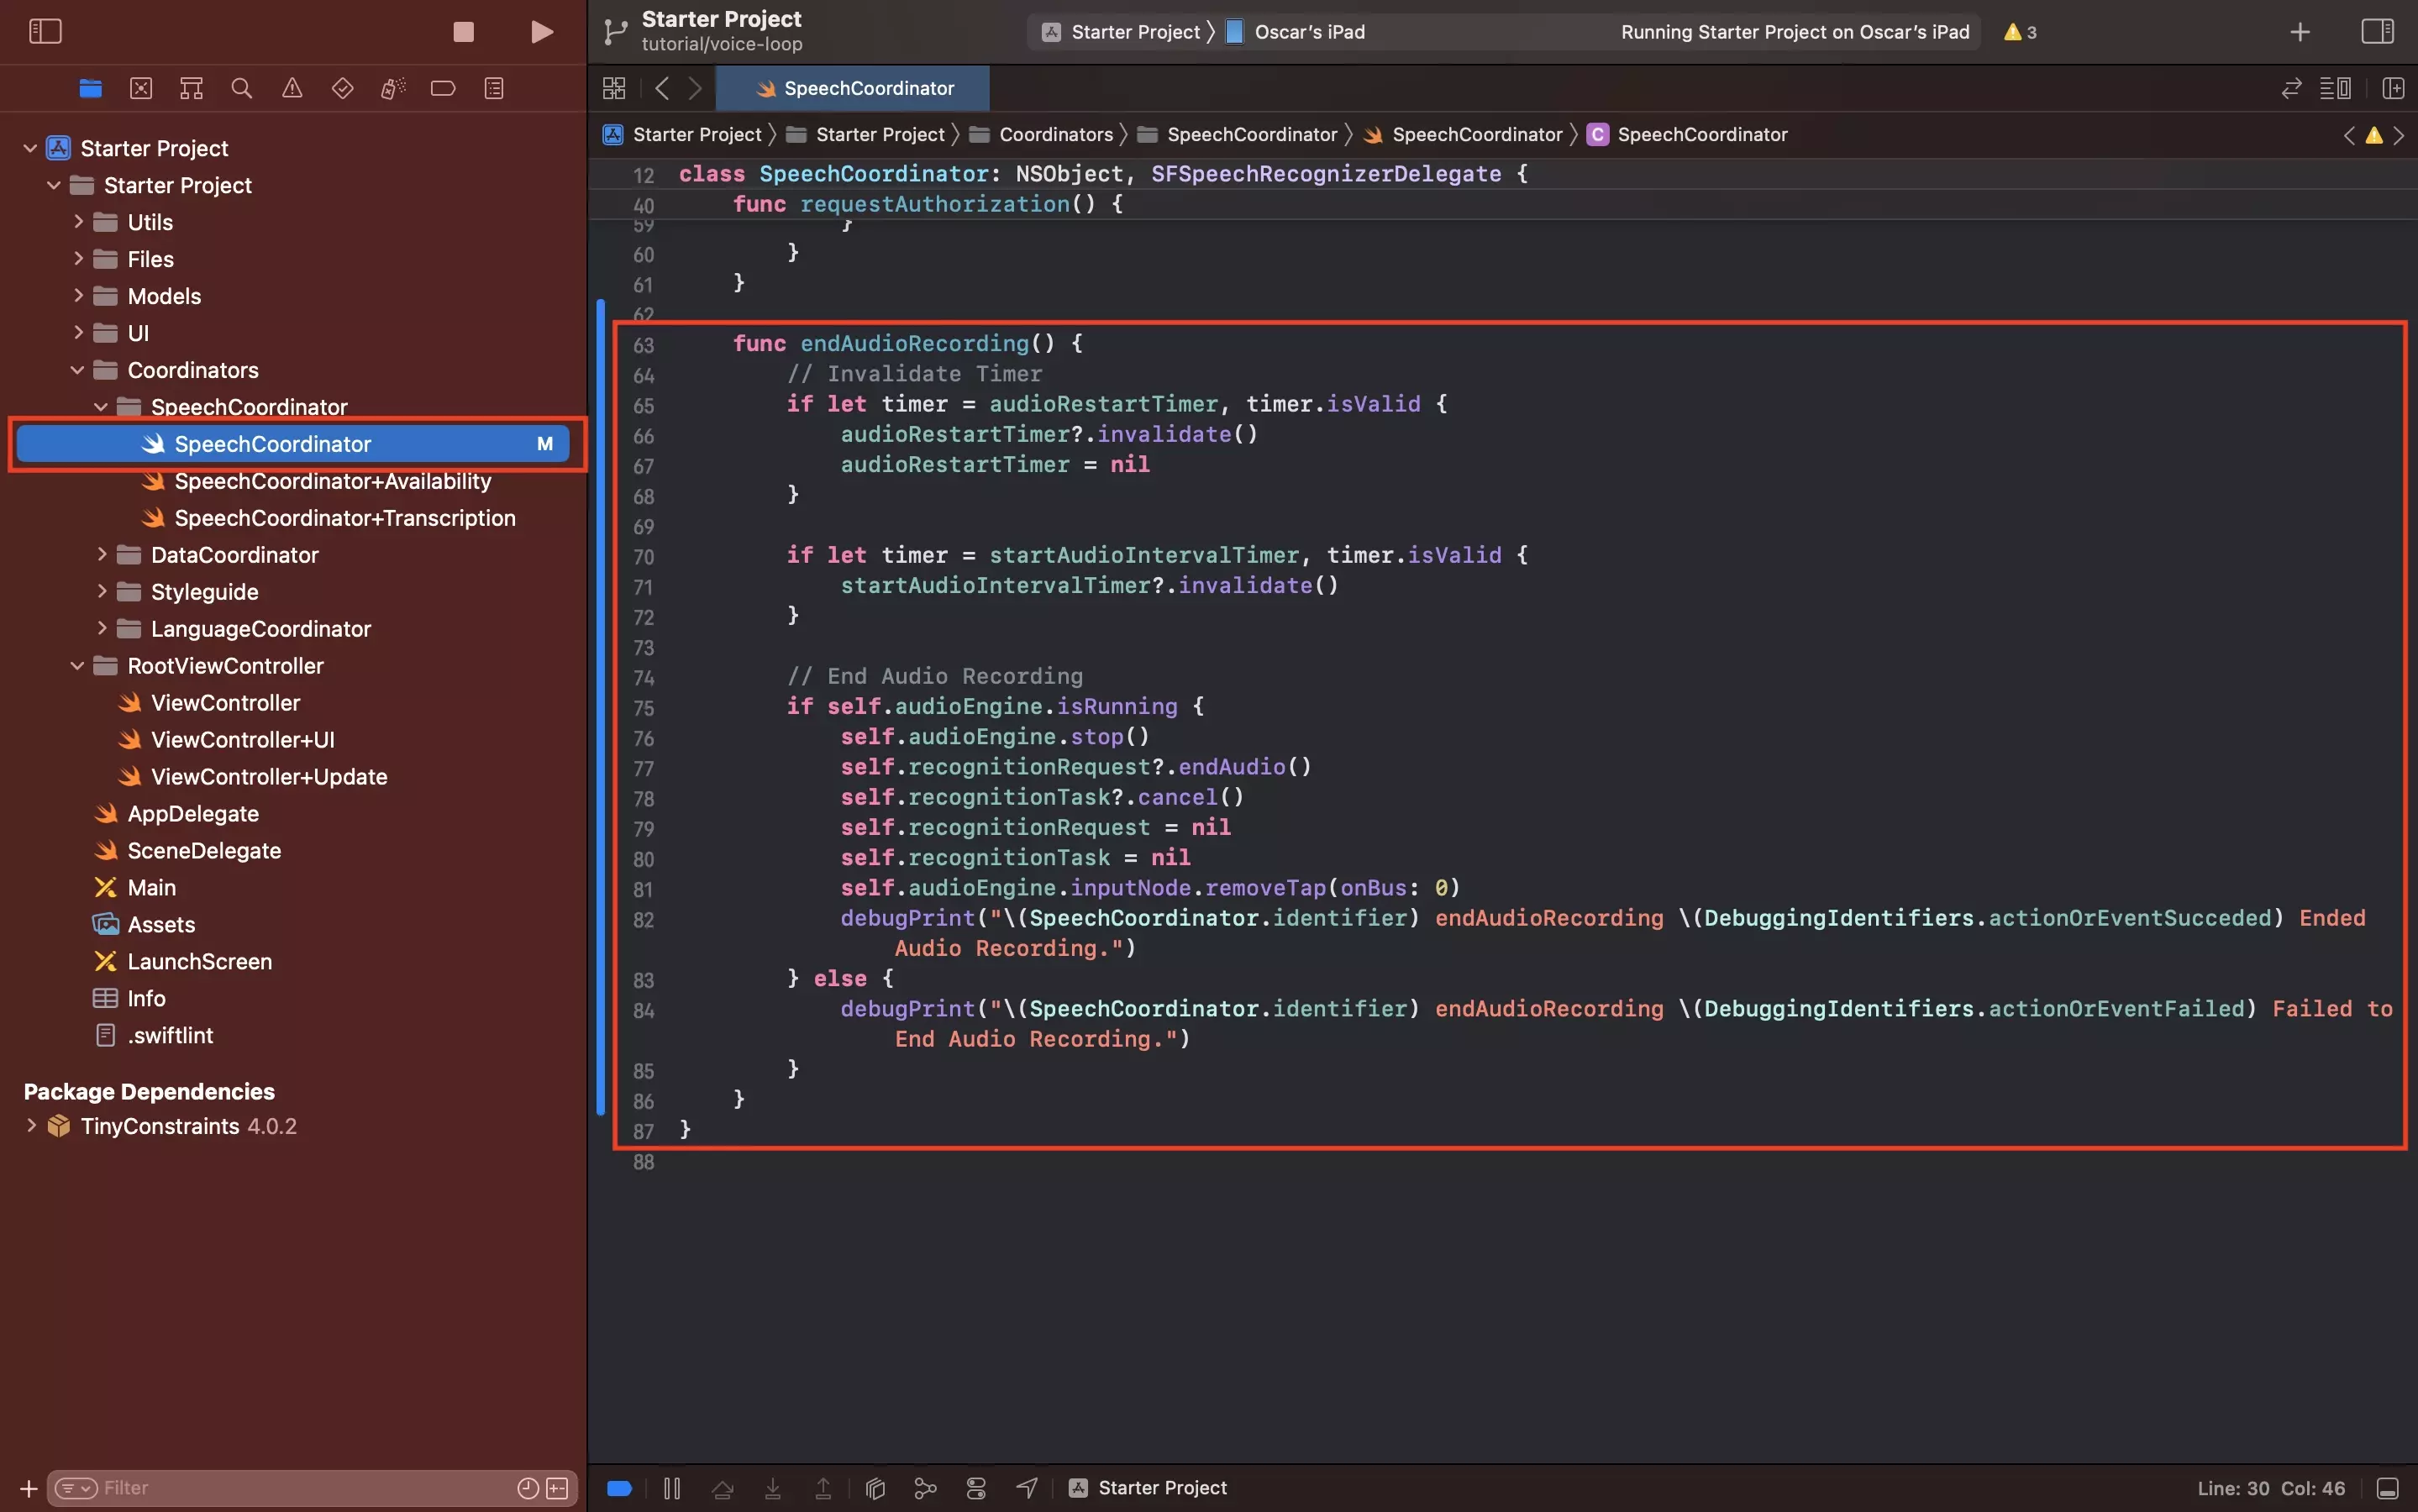
In SpeechCoordinator.swift, add the endAudioRecording function by pasting in the code below.
This can also be used to end the recording through a button or action.
Step Four: Add looping functionality
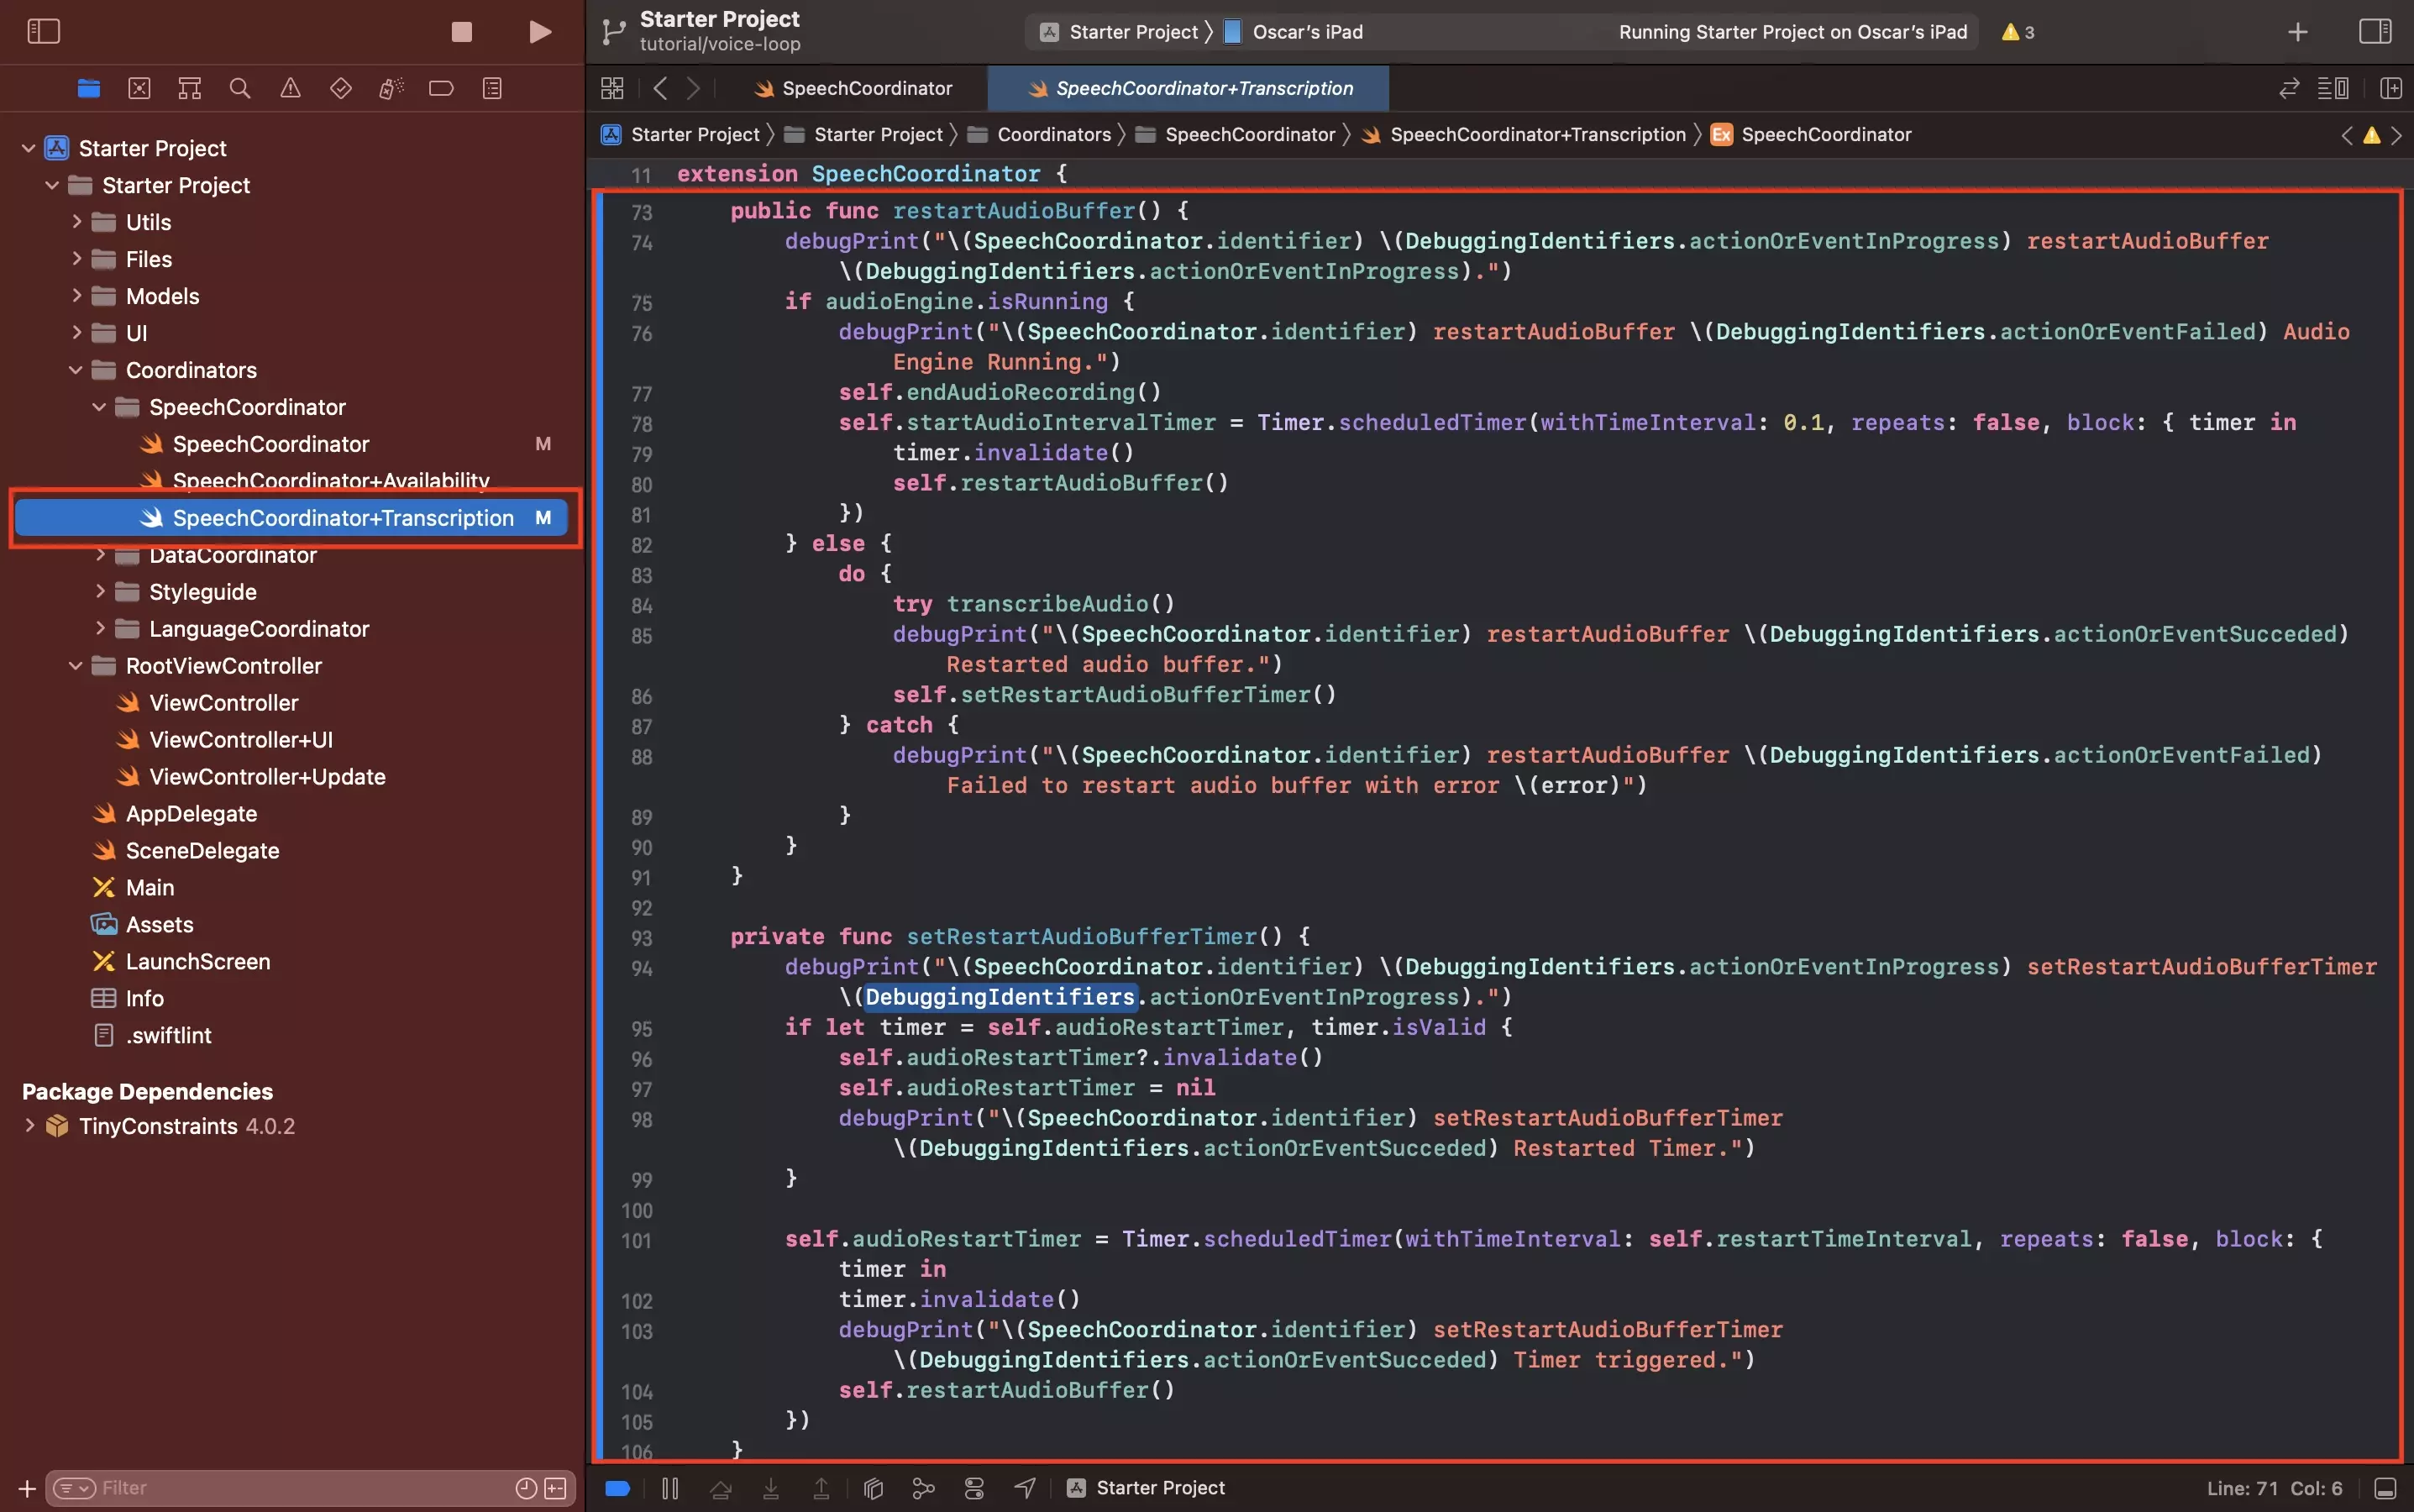
In SpeechCoordinator+Transcription.swift, add the restartAudioBuffer and setRestartAudioBufferTimer functions by pasting in the code below at the bottom of the extension.
Step Five: Update the Availability extension
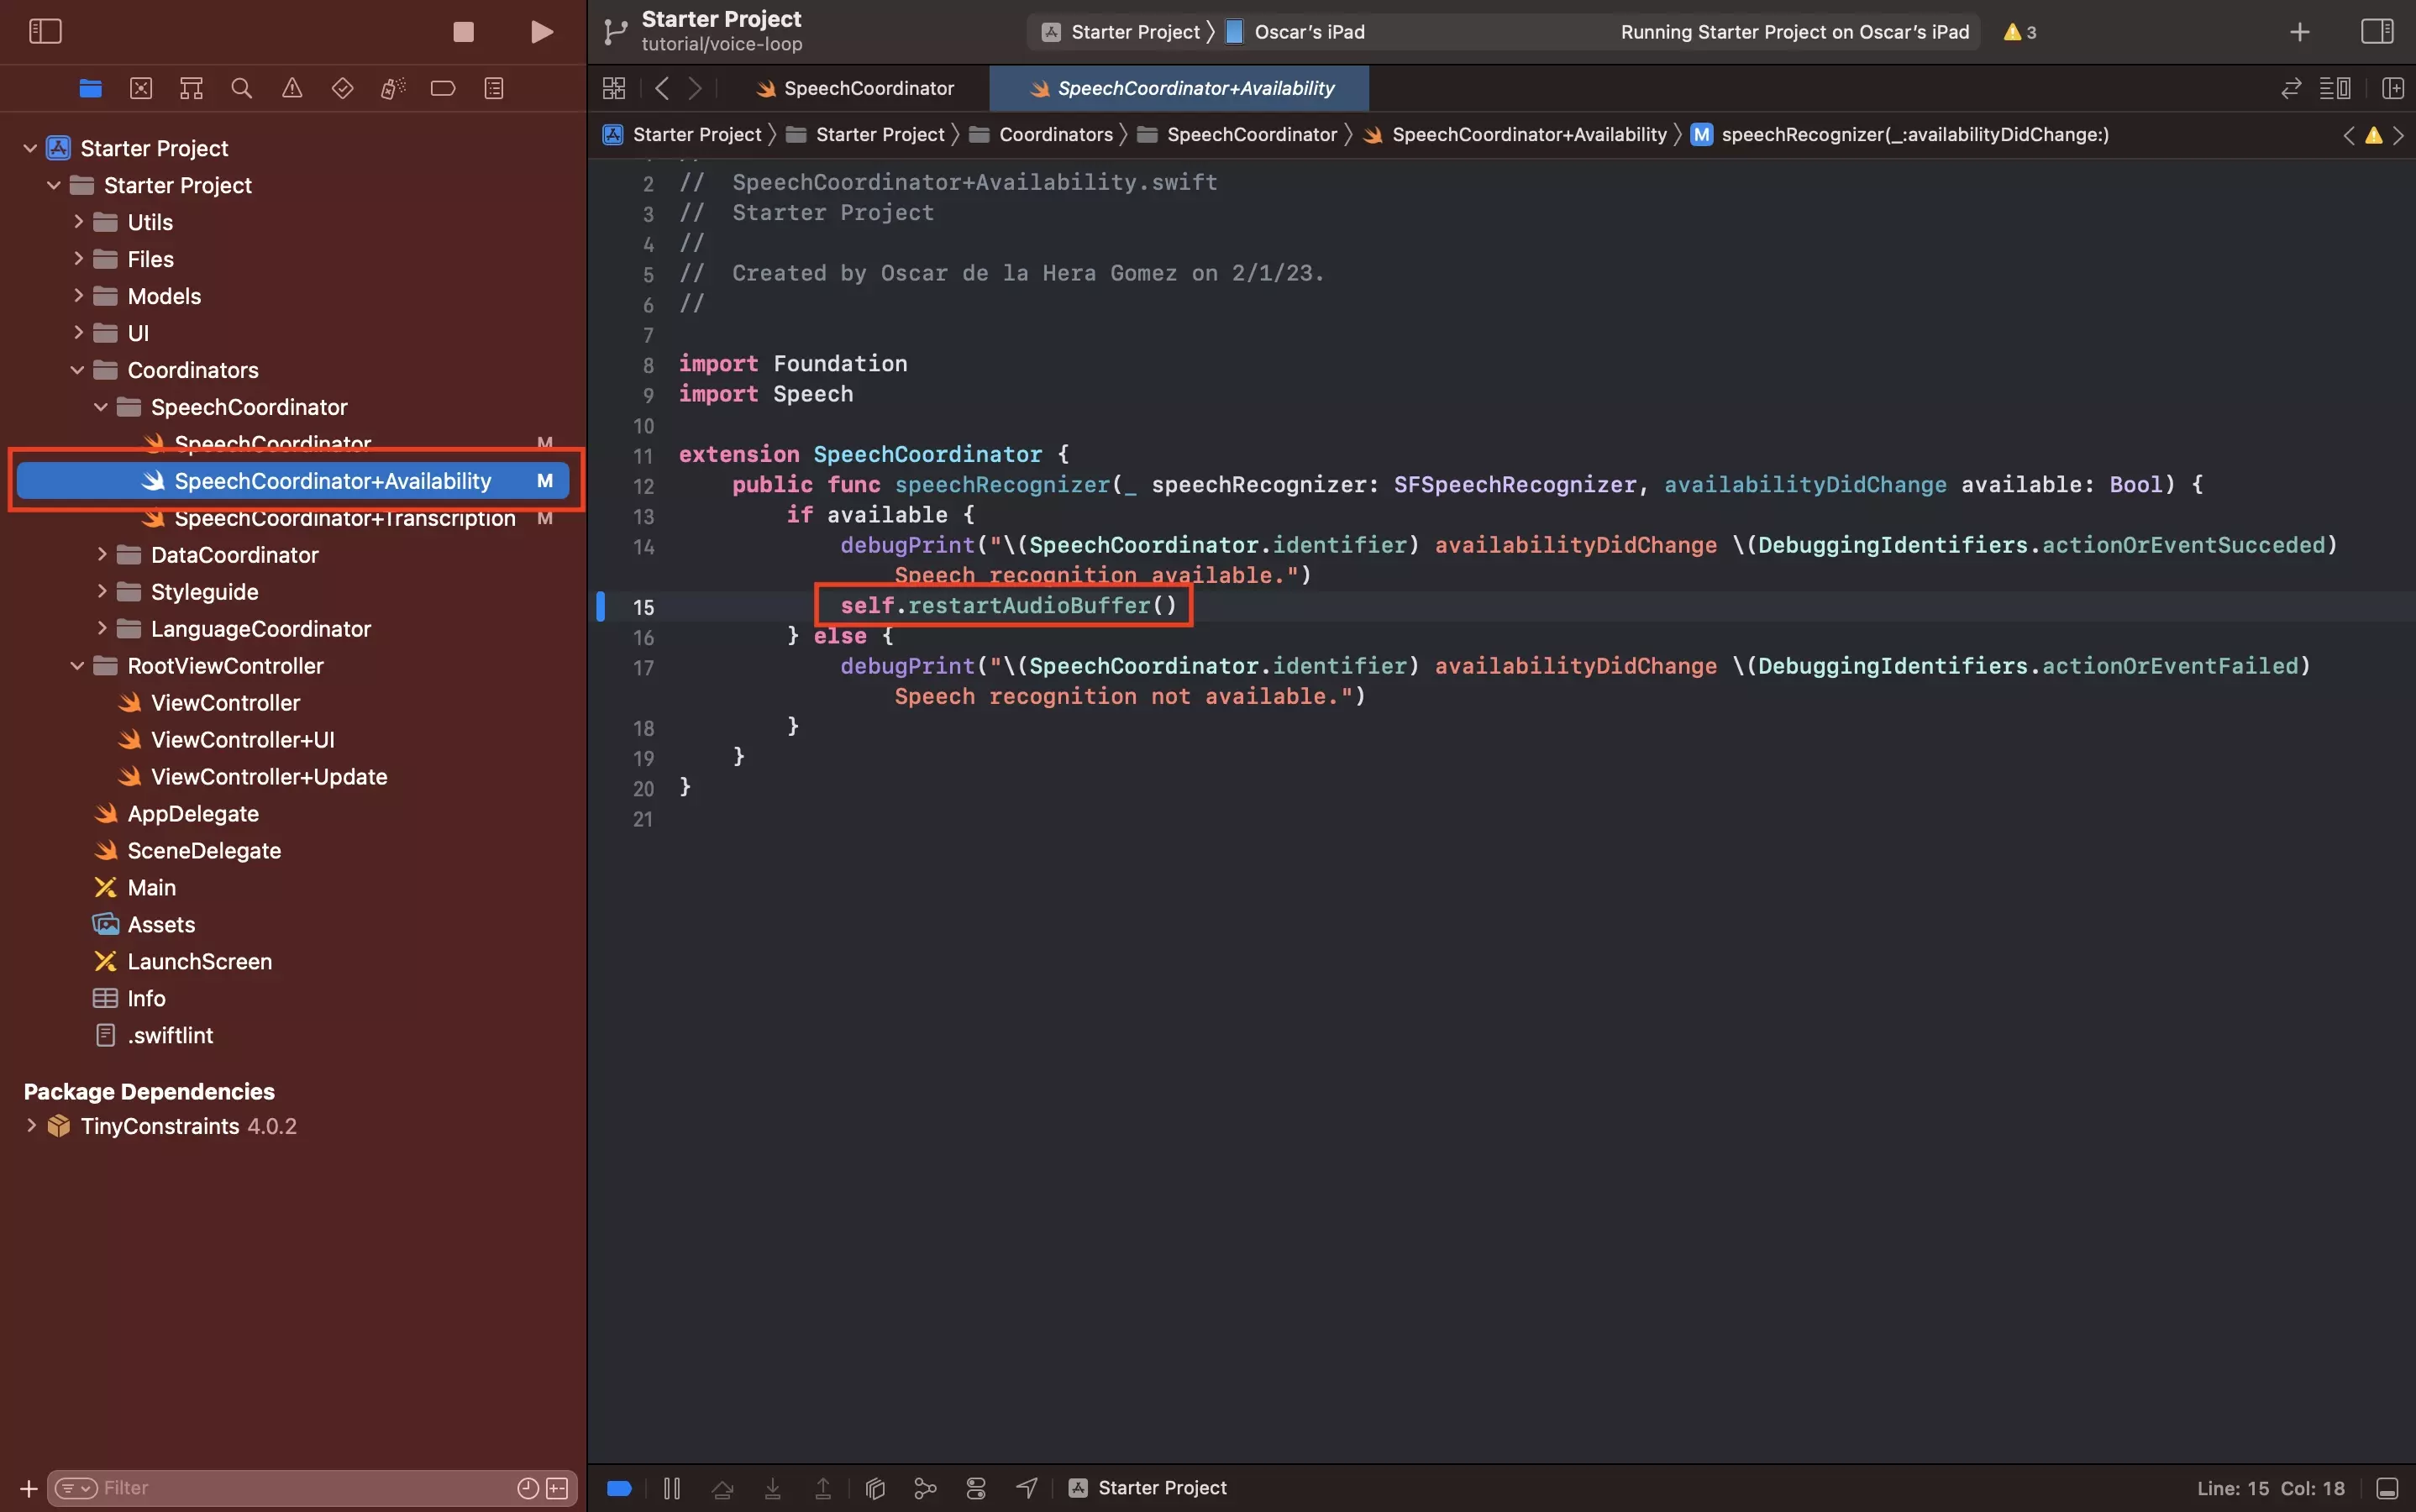
Update the In SpeechCoordinator+Availability.swift extension to call the restartAudioBuffer function instead of attempting to transcribe audio.
Step Six: Update the request authorization function
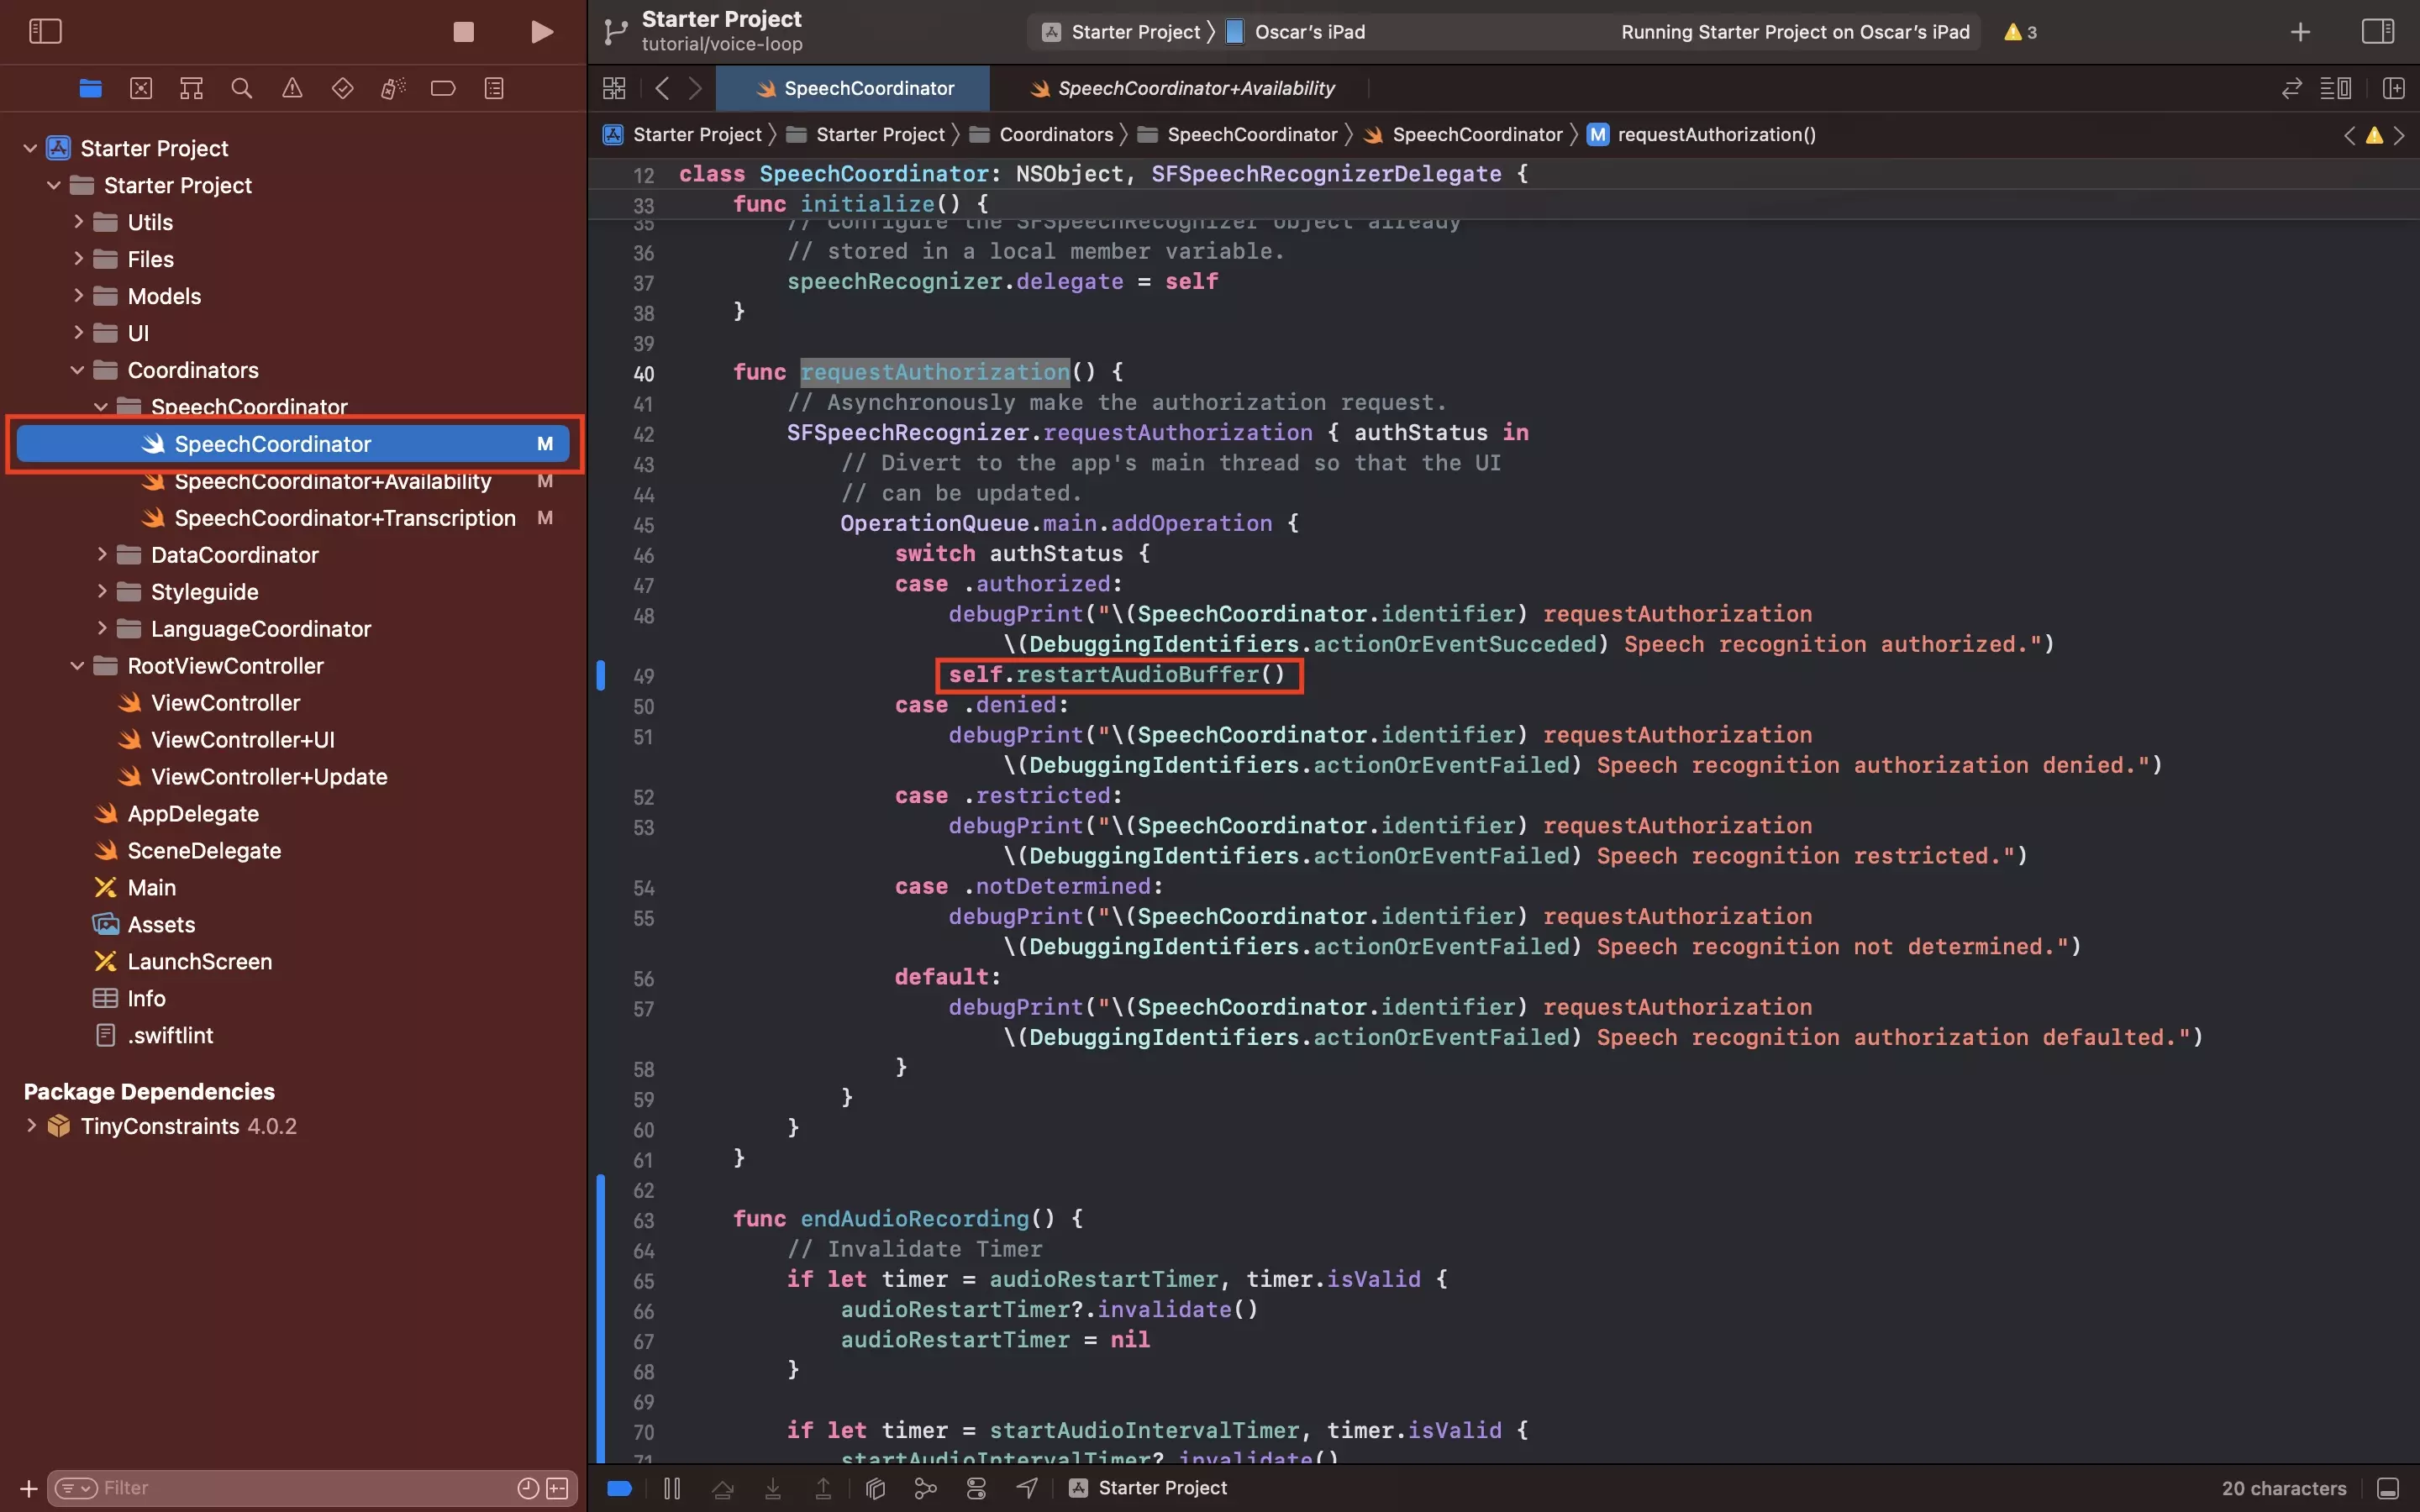
Update the In SpeechCoordinator.swift, in the requestAuthorization function call the restartAudioBuffer function instead of attempting to transcribe audio.
Step Seven: Verify
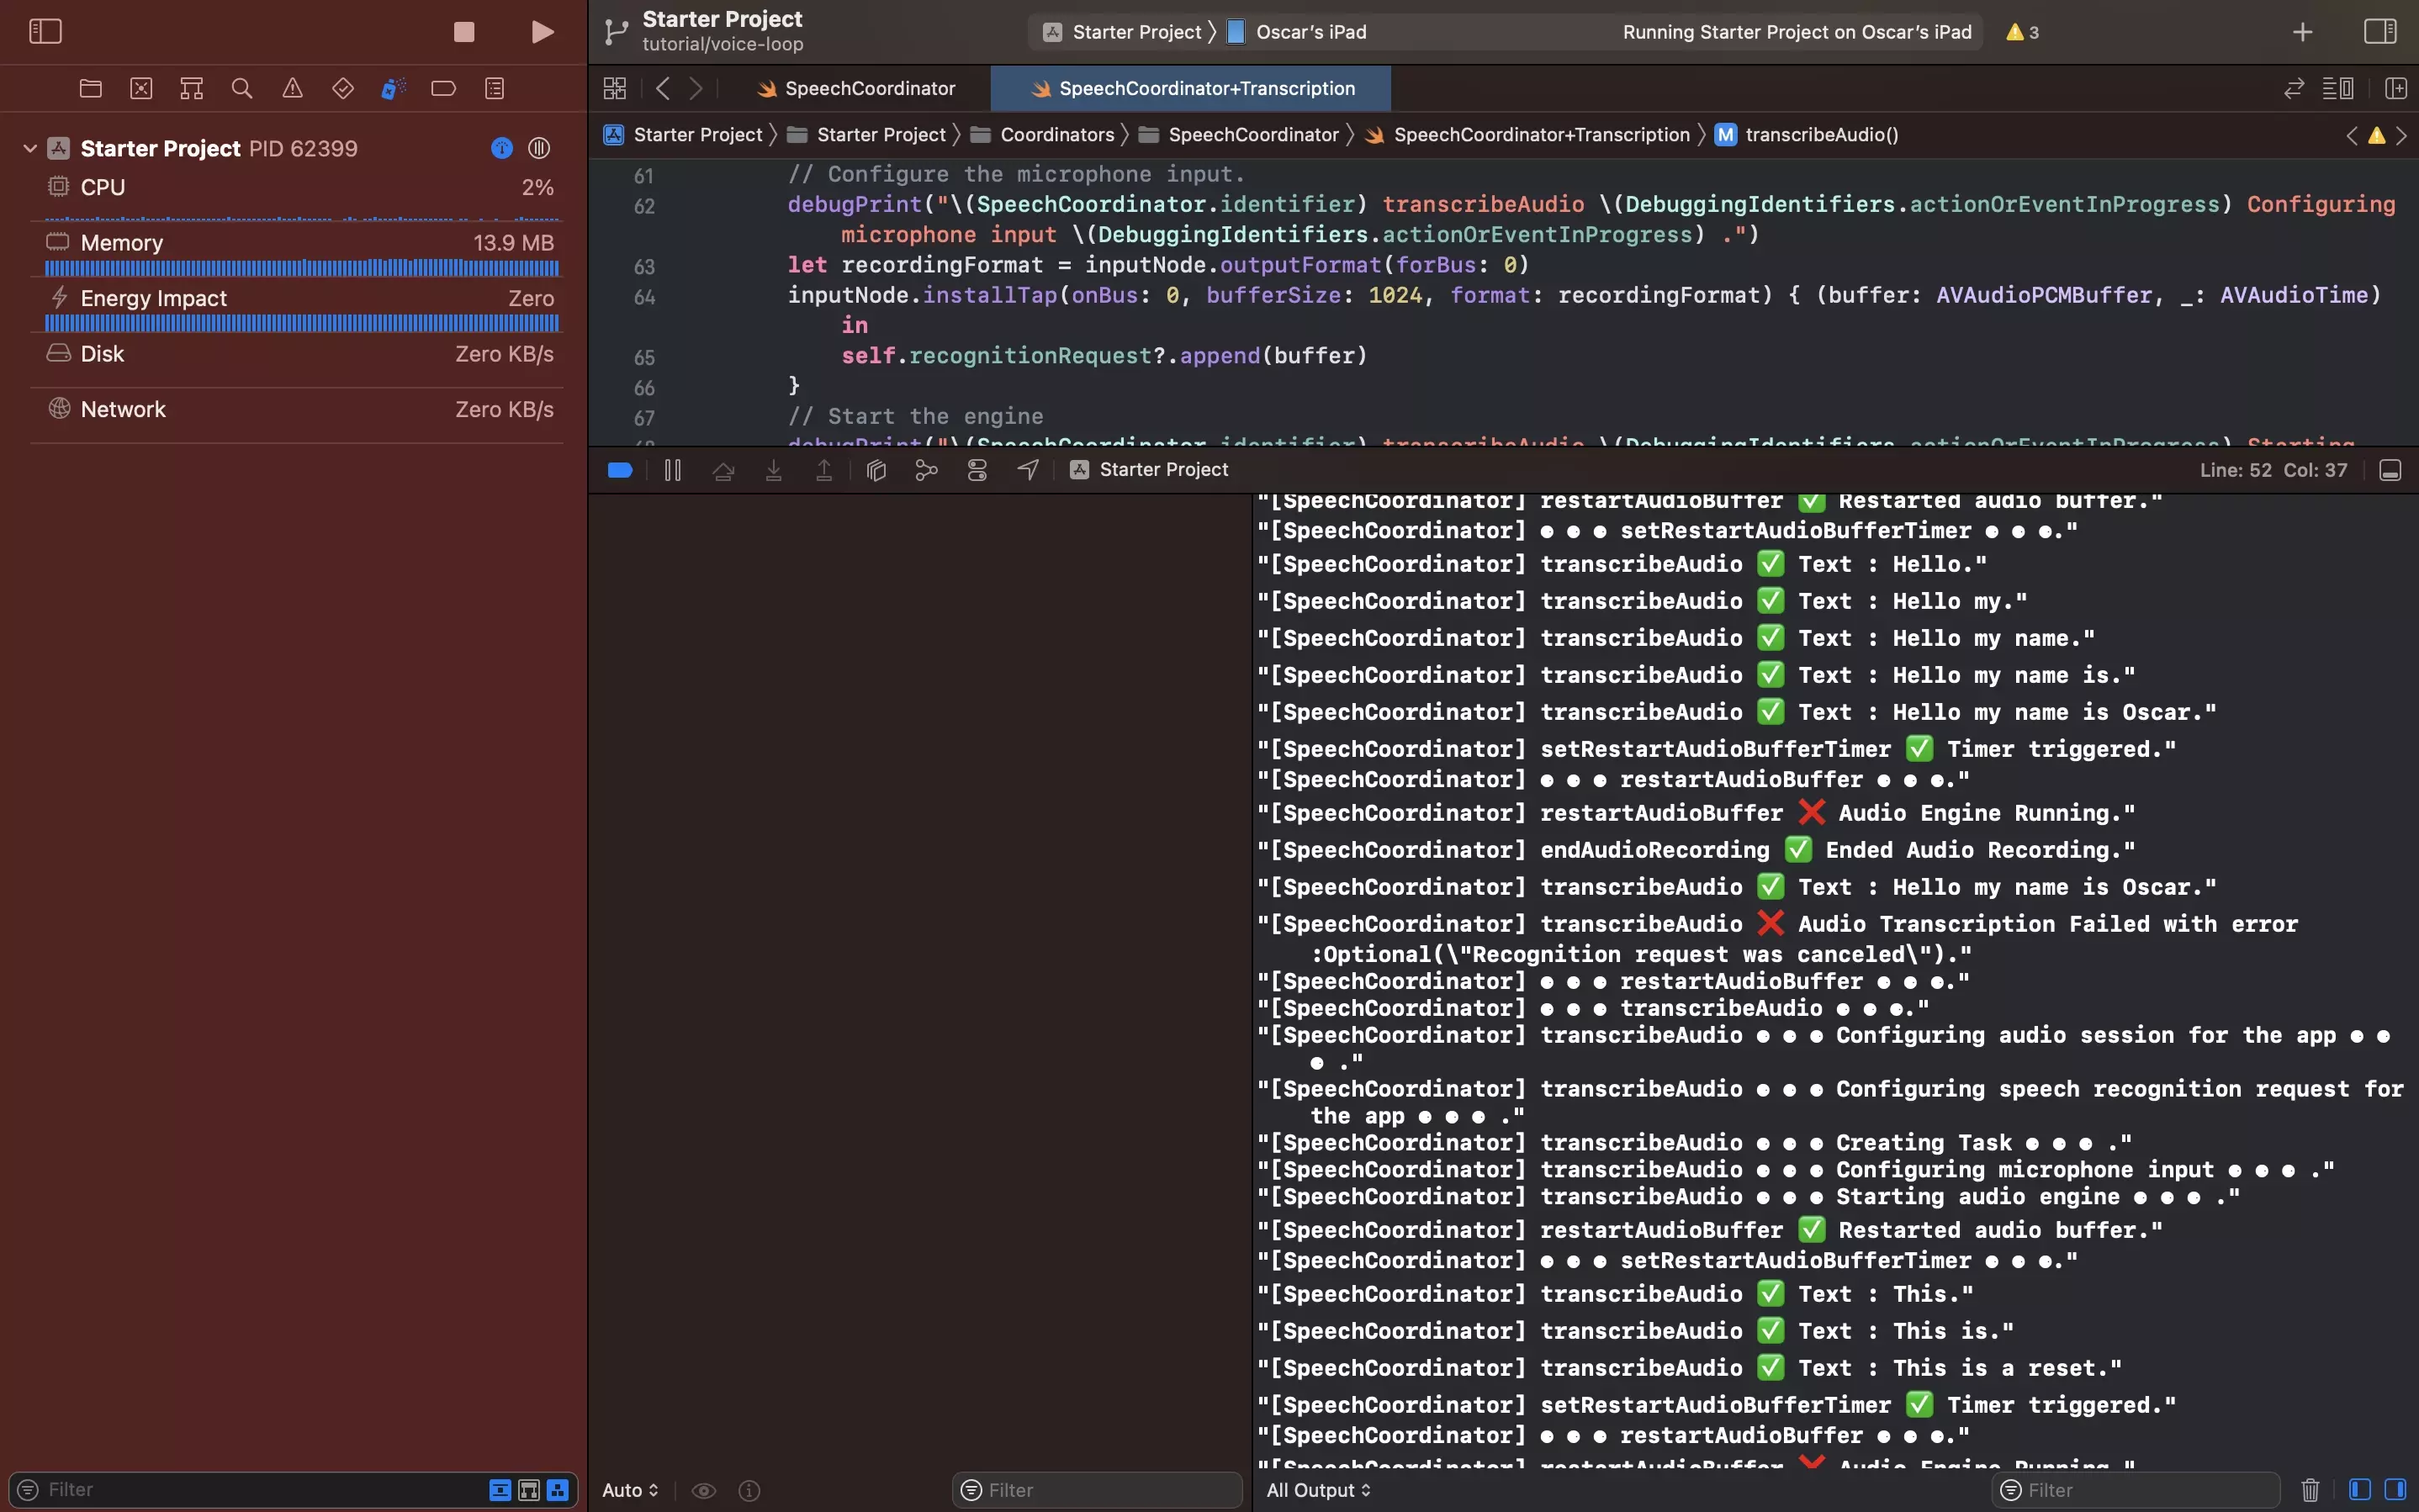
Run the app. You should now see that the speech recognition continuously loops and successfully listens to words throughout the process.