How to create a custom UIScrollView in Swift
A step by step tutorial on implementing a UIScrollView in Swift (iOS). Github repository included.

A step by step tutorial on implementing a UIScrollView in Swift (iOS). Github repository included.
The following tutorial builds on our Open Source Swift project and implements a UIScrollView in Swift (iOS). This tutorial starts on the main branch and the changes are available on the tutorials/custom-scrollview branch of the repository found below.
Clone the repo's main branch, before starting the tutorial.
git clone git@github.com:delasign/swift-starter-project.gitPlease note this tutorial uses the TinyConstraints Swift package, which we added using the Swift Package Manager.
What are we creating in this tutorial ?
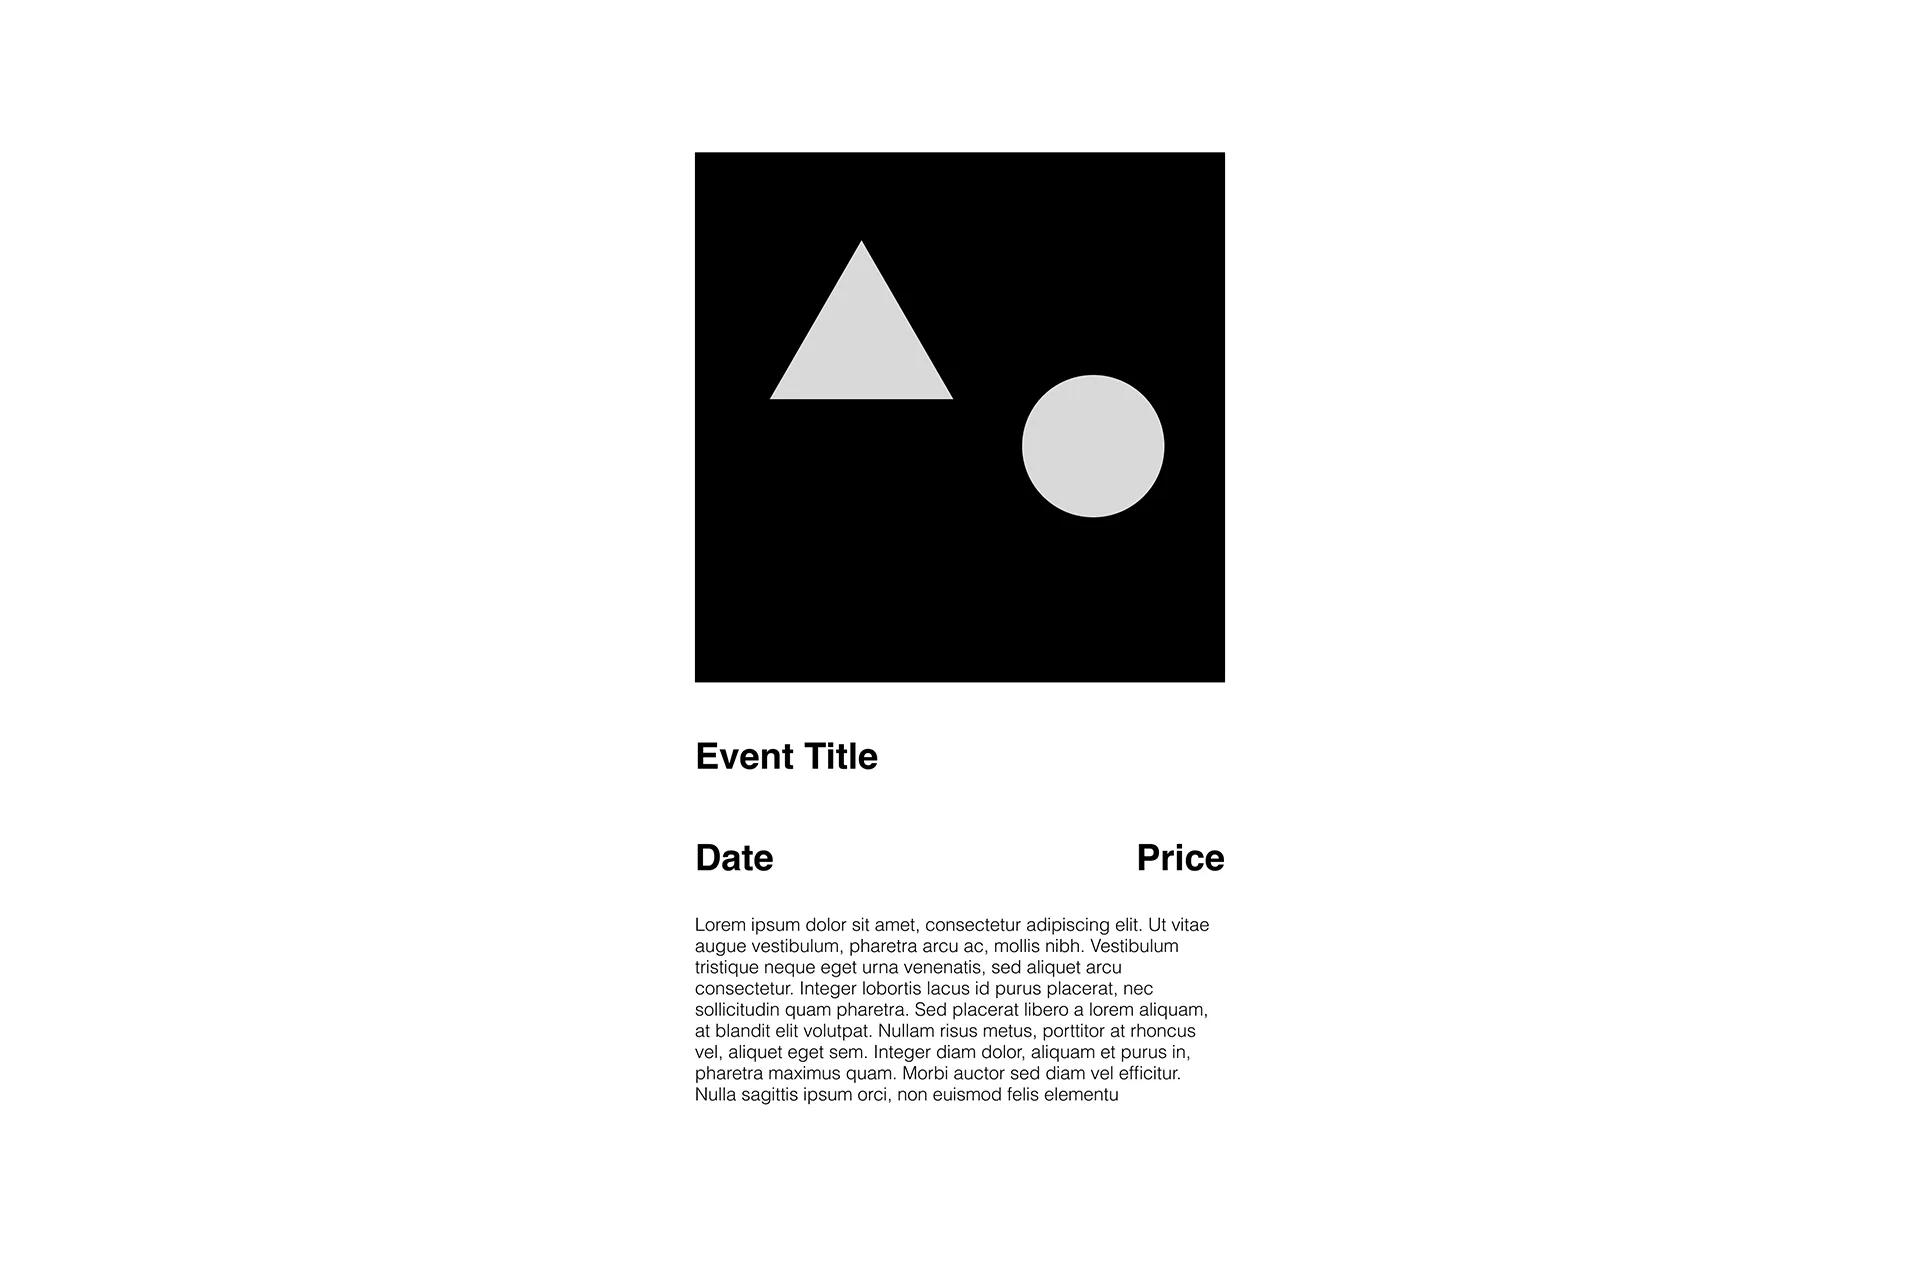
In this tutorial we will be programming the view that is shown in the image above which could be used in your app as a detail view.
Constraining to the content layout vs the frame layout
When coding constraints for subviews within the UIScrollView it is important to note that standard constraints are tied to the content and not the frame of the UIScrollView.
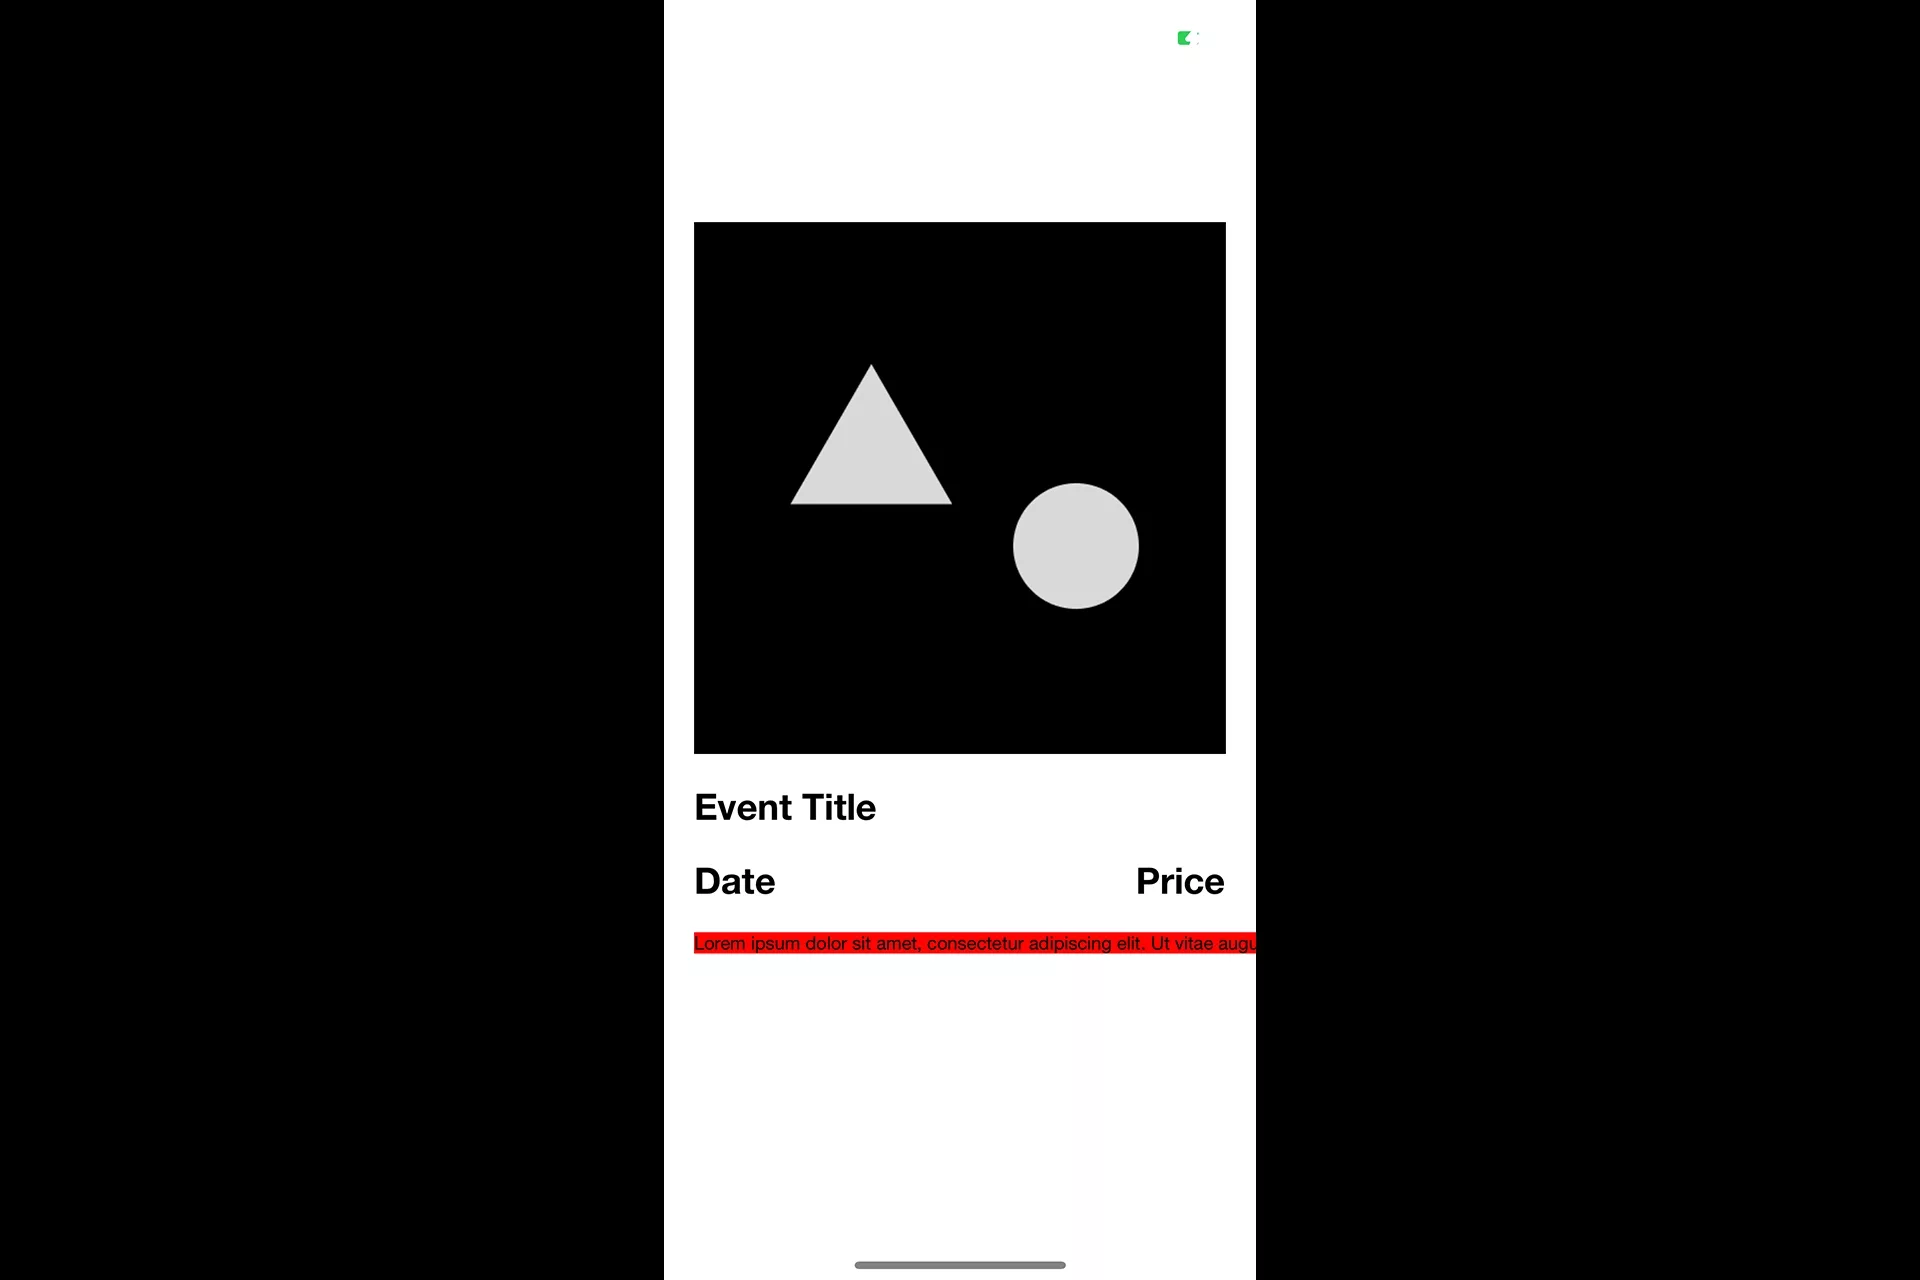
For example, we want the description label (shown as a lorem ipsum in the image above) of our custom scrollview to scale to its content. Our natural thought would be to code the constraints and size as follows:
self.descriptionLabel.topToBottom(of: date, offset: 20)
self.descriptionLabel.left(to: self.scrollView)
self.descriptionLabel.right(to: self.scrollView)
self.descriptionLabel.sizeToFit()
However, this would create an error shown in the image below - where the label scales infinitely laterally, and which cannot be fixed by making the contentSize of the scrollView match the size of your screen.
Issues like this can arise if you use a constraint expect a UIScrollView to work as a standard UIView.
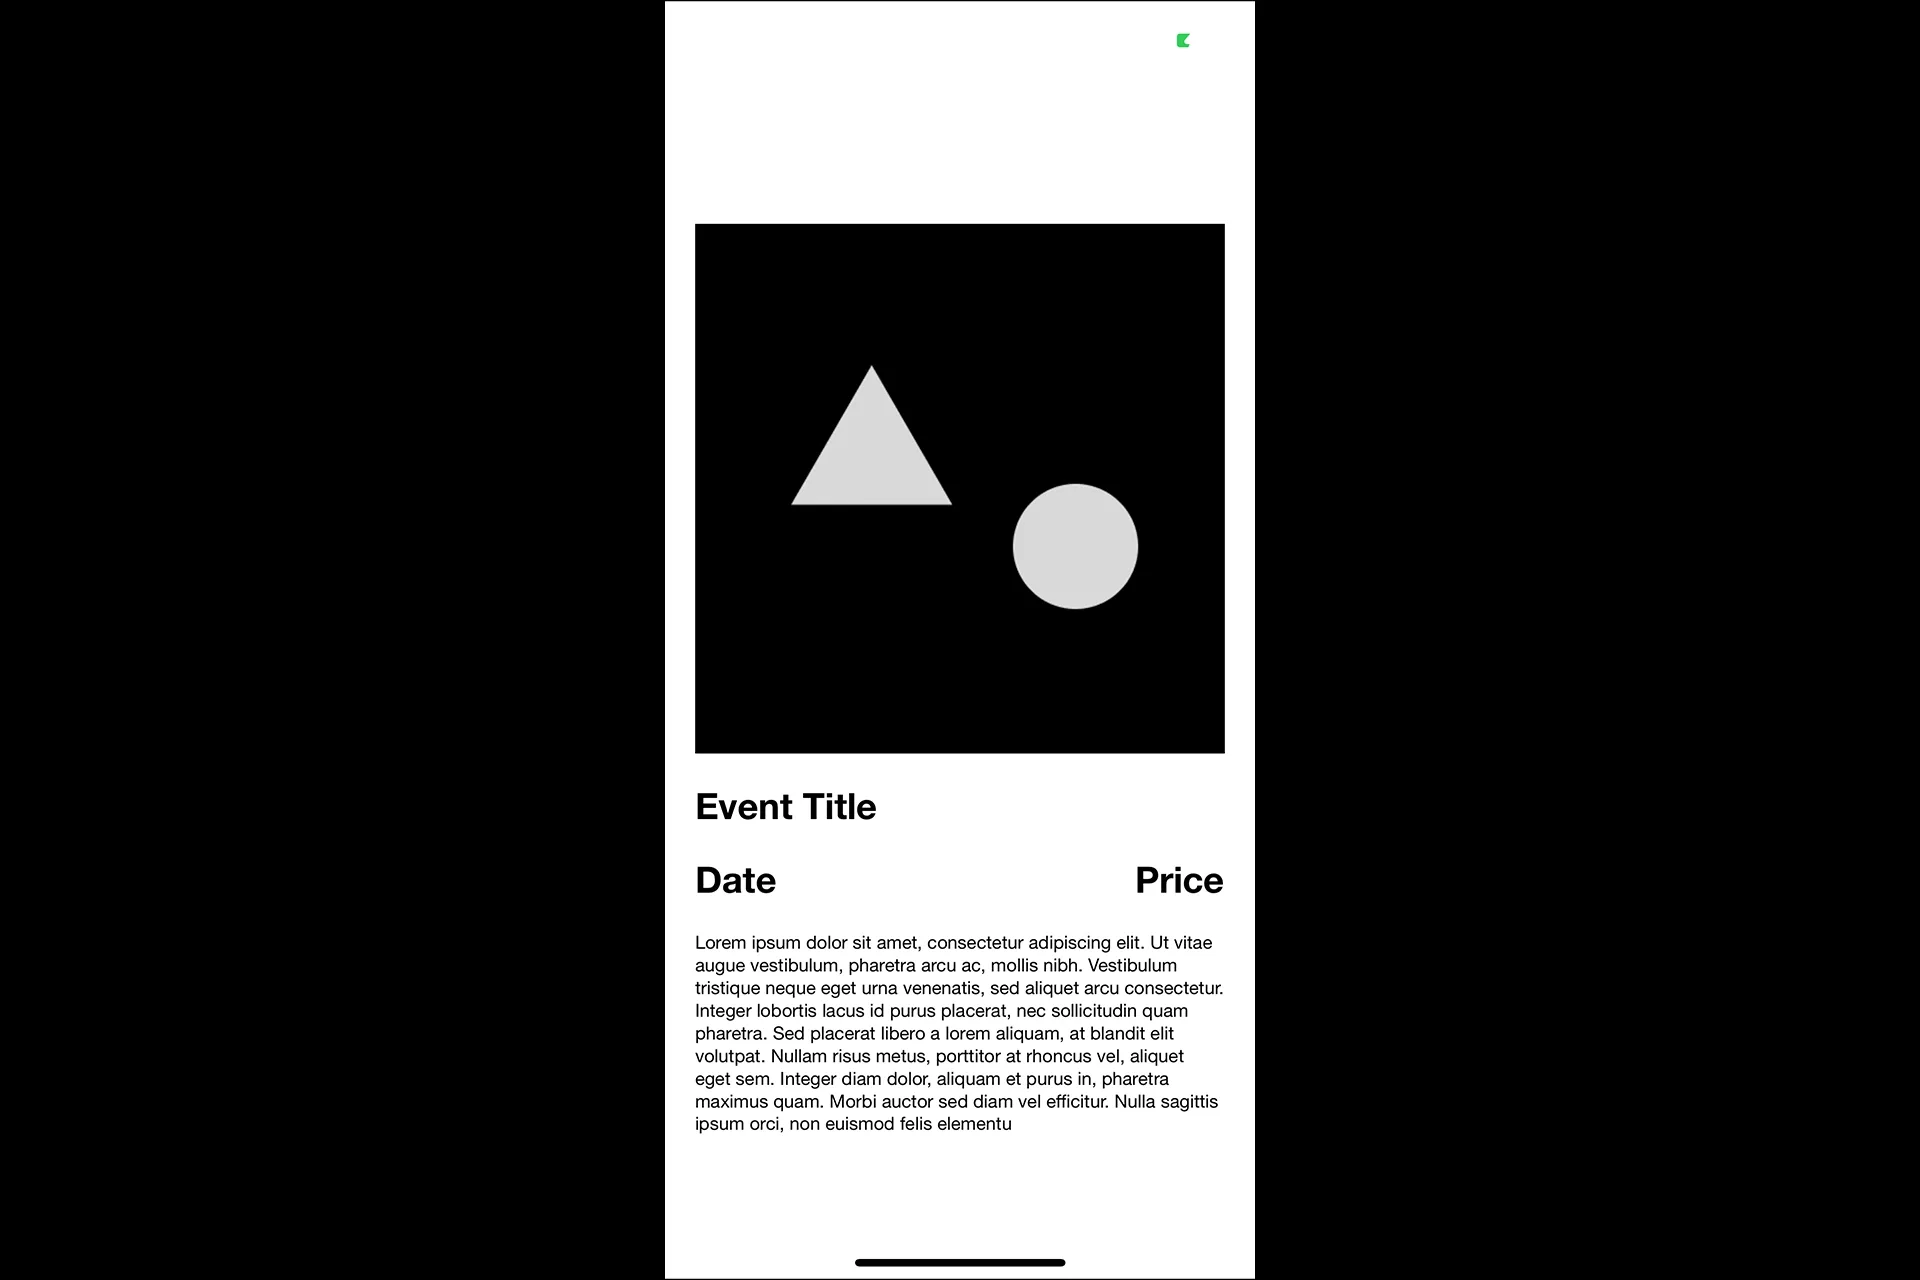
Instead, to make sure that the description label is constrained correctly to the right of the frame of the UIScrollView, we must update our right constraint to what follows:
self.descriptionLabel.right(to: self.scrollView.frameLayoutGuide)This results in the desired layout as shown in the image below.
Tutorial
As mentioned above, we recommend downloading our open source project and carrying out the steps outlined below.
git clone git@github.com:delasign/swift-starter-project.gitStep One: Create your attributed headline style
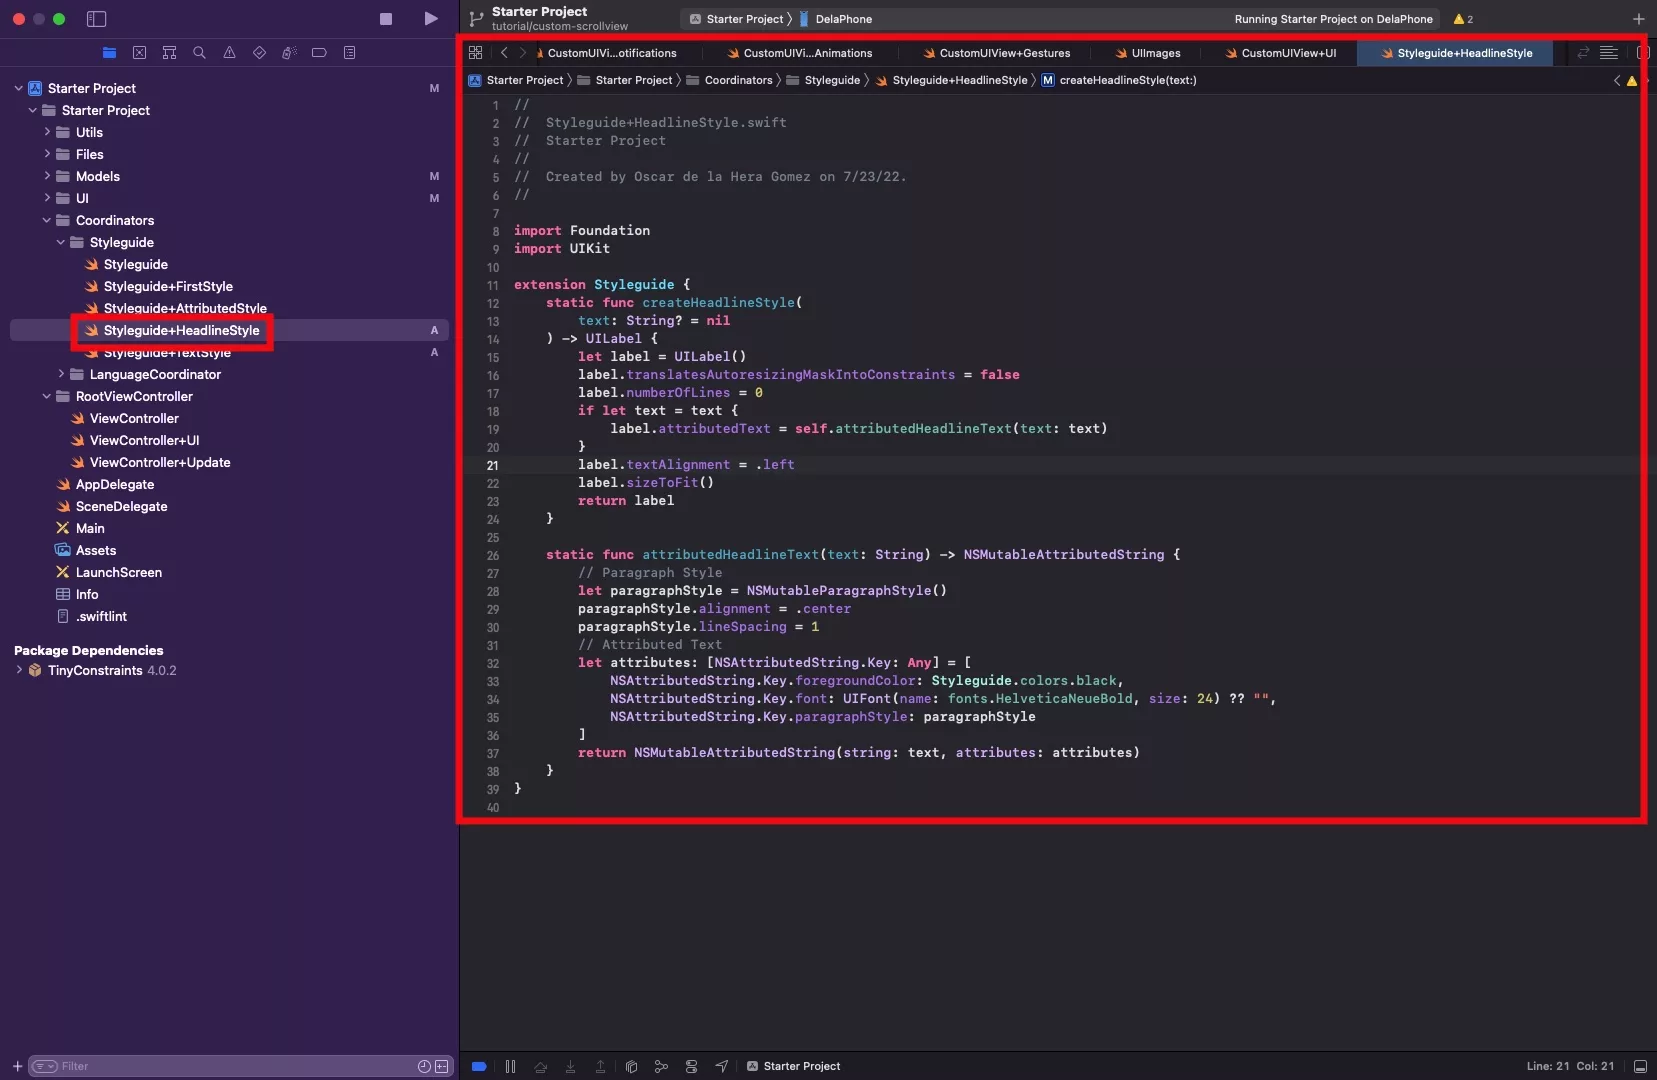
Under the Coordinators folder, create a new file in the Styleguide folder called Styleguide+HeadlineStyle.swift & copy the code below.
Please note that we added Helvetica Neue Bold to our fonts. Finding fonts can be found using our printSystemFonts() utilities function found in Utils -> Fonts.
Step Two: Create your text style
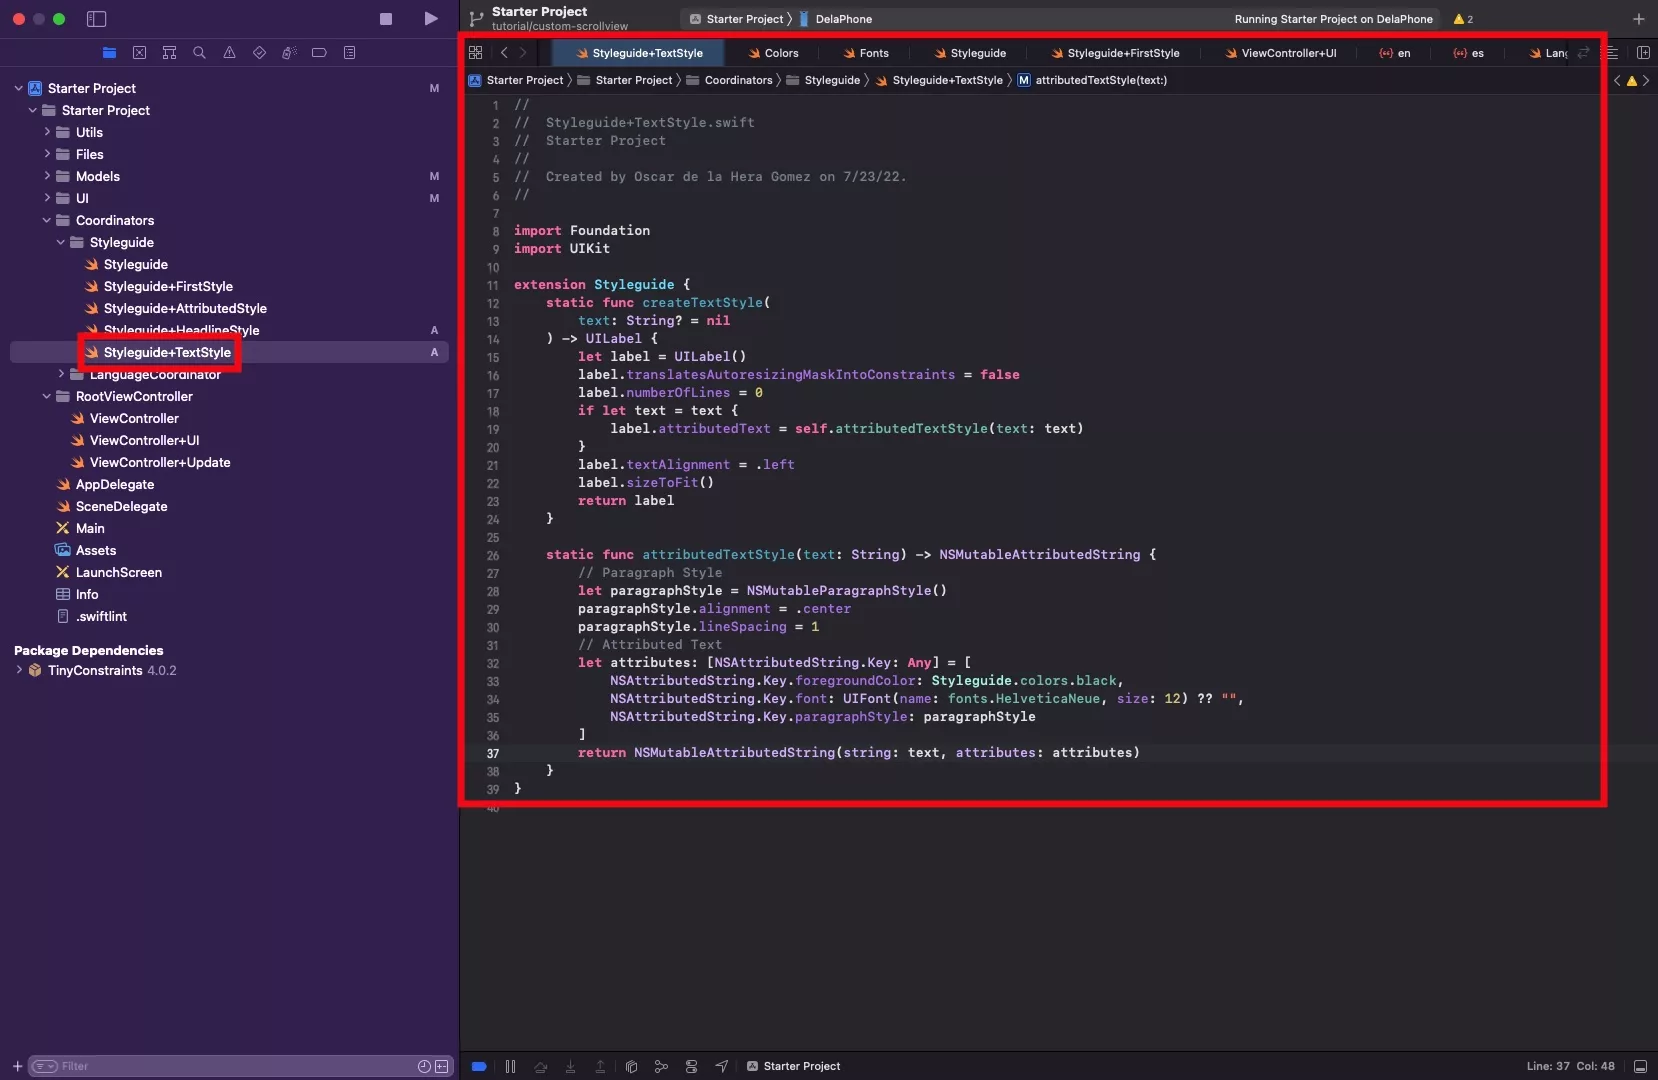
Under the Coordinators folder, create a new file in the Styleguide folder called Styleguide+TextStyle.swift & copy the code below.
Step Three: Declare your variables
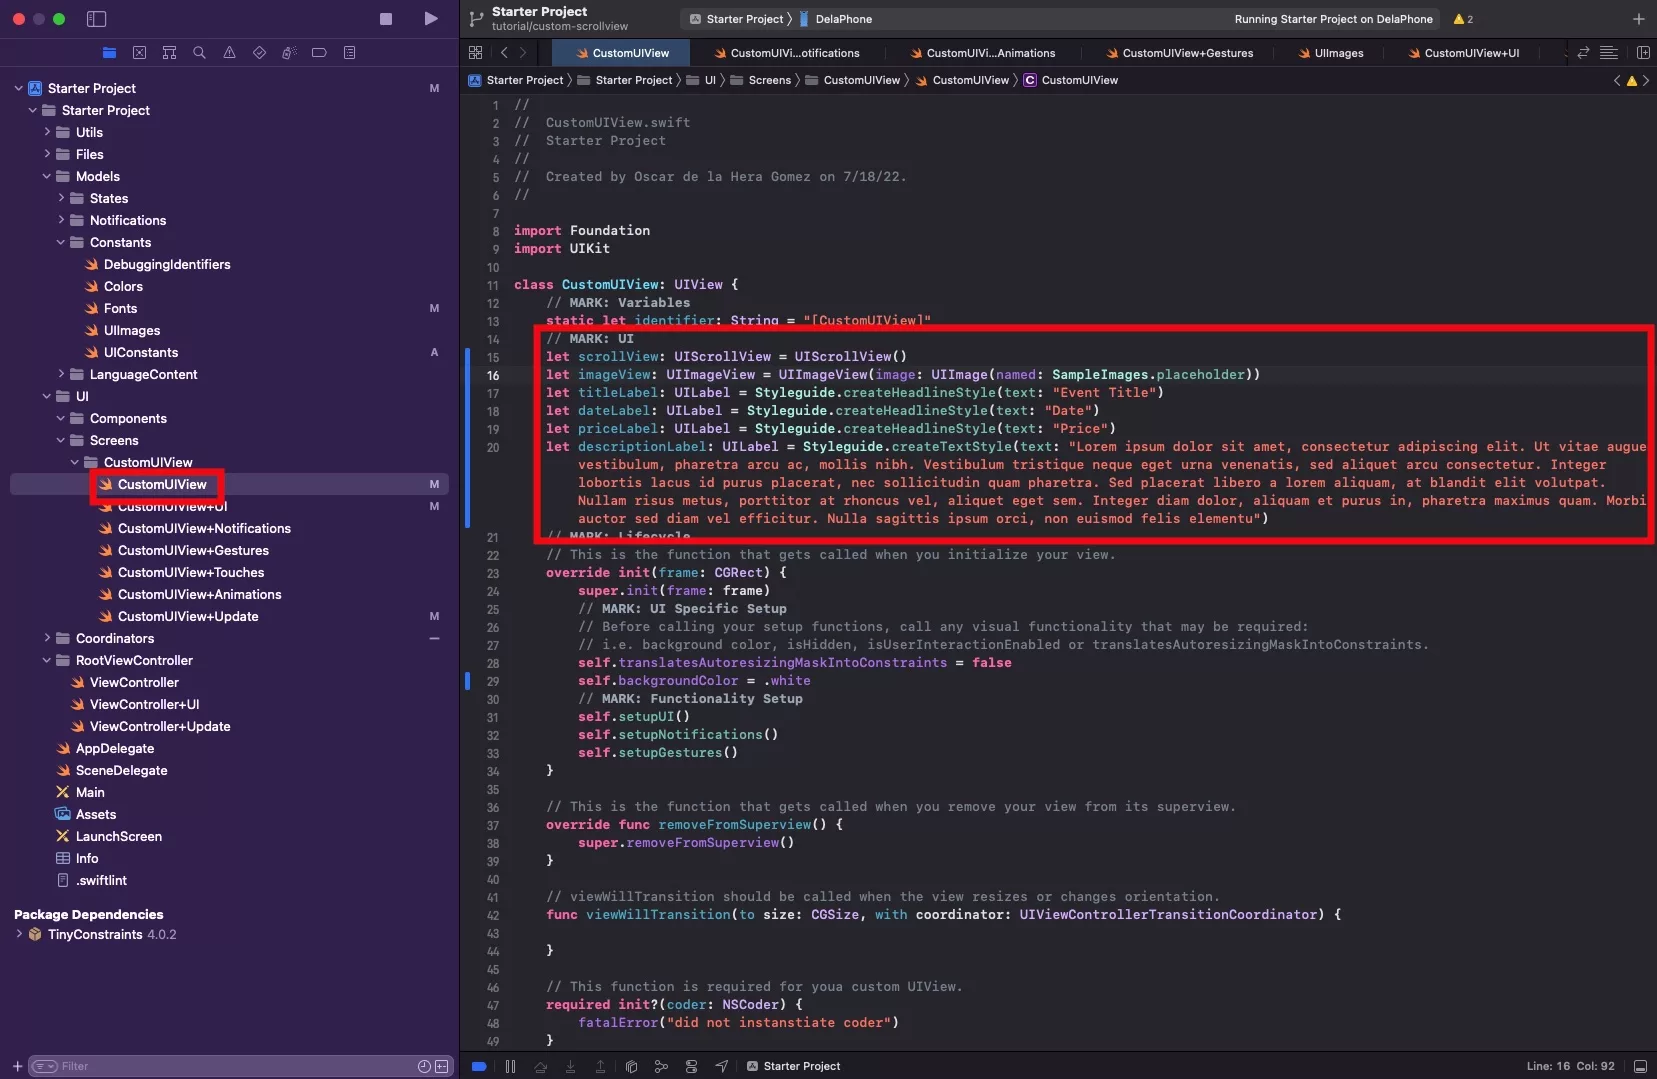
In CustomUIView.swift, declare the following variables:
- scrollView: UIScrollView
- imageView: UIImageView
- titleLabel: UILabel
- dateLabel: UILabel
- priceLabel: UILabel
- descriptionLabel: UILabel
The code for these declarations is available below.
let scrollView: UIScrollView = UIScrollView()
 let imageView: UIImageView = UIImageView(image: UIImage(named: SampleImages.placeholder))
 let titleLabel: UILabel = Styleguide.createHeadlineStyle(text: "Event Title")
 let dateLabel: UILabel = Styleguide.createHeadlineStyle(text: "Date")
 let priceLabel: UILabel = Styleguide.createHeadlineStyle(text: "Price")
 let descriptionLabel: UILabel = Styleguide.createTextStyle(text: "Lorem ipsum dolor sit amet, consectetur adipiscing elit. Ut vitae augue vestibulum, pharetra arcu ac, mollis nibh. Vestibulum tristique neque eget urna venenatis, sed aliquet arcu consectetur. Integer lobortis lacus id purus placerat, nec sollicitudin quam pharetra. Sed placerat libero a lorem aliquam, at blandit elit volutpat. Nullam risus metus, porttitor at rhoncus vel, aliquet eget sem. Integer diam dolor, aliquam et purus in, pharetra maximus quam. Morbi auctor sed diam vel efficitur. Nulla sagittis ipsum orci, non euismod felis elementu")
Step Four: Setup your UIScrollView
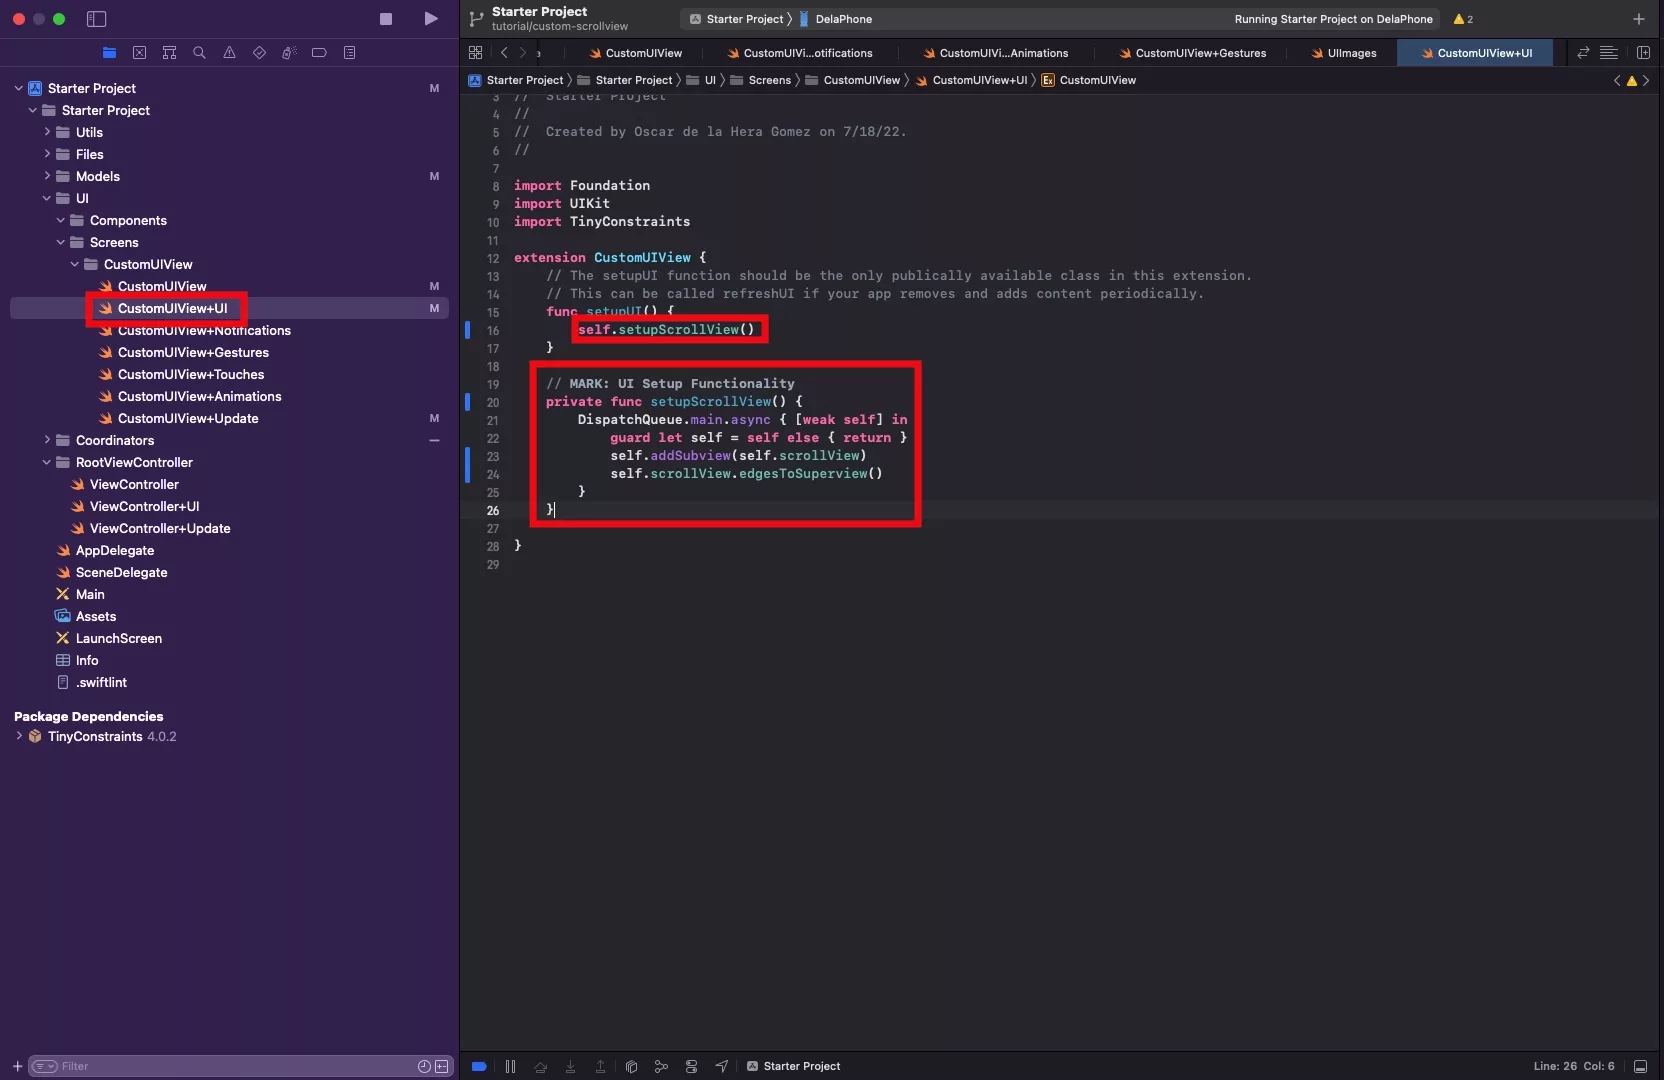
In CustomUIView+UI.swift, setup your UIScrollView.
Code available at the end.
Step Five: Setup your UIImageView
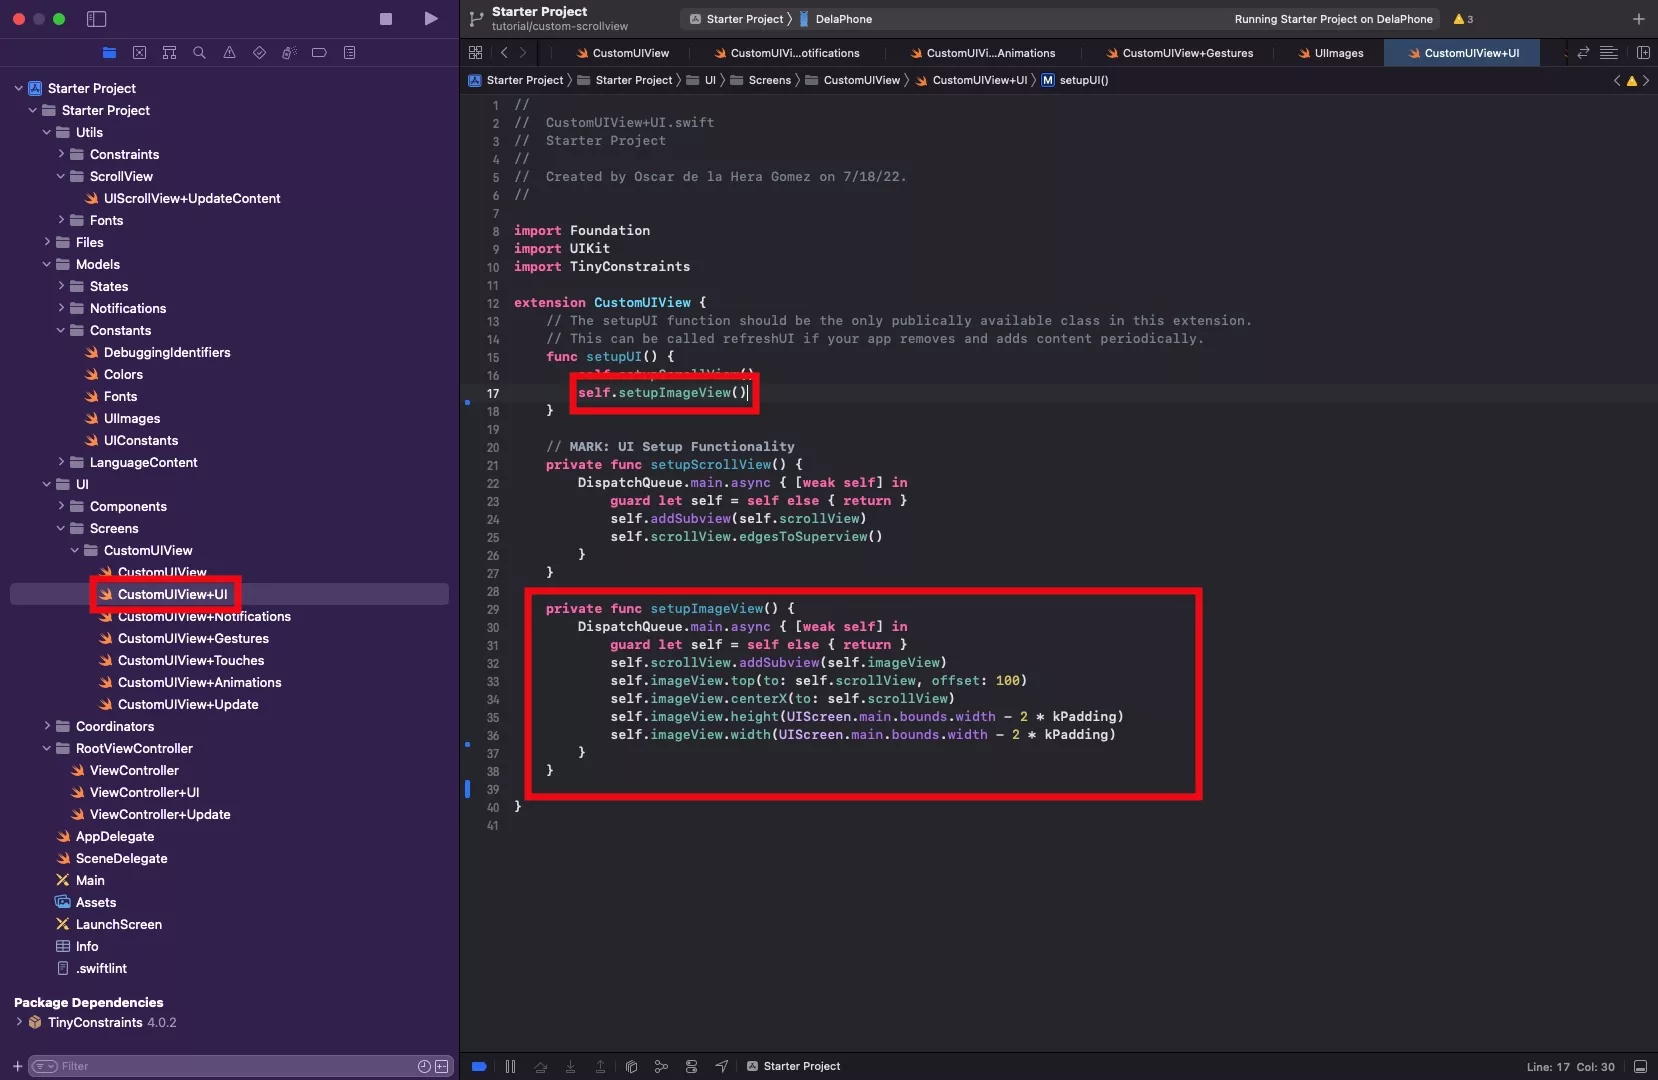
In CustomUIView+UI.swift, setup your UIImageView and add it to your UIScrollView.
Please note that we created the padding constant 'kPadding' in the UIConstants.swift file found under Models -> Constants.
Code available at the end.
Step Six: Setup your title label
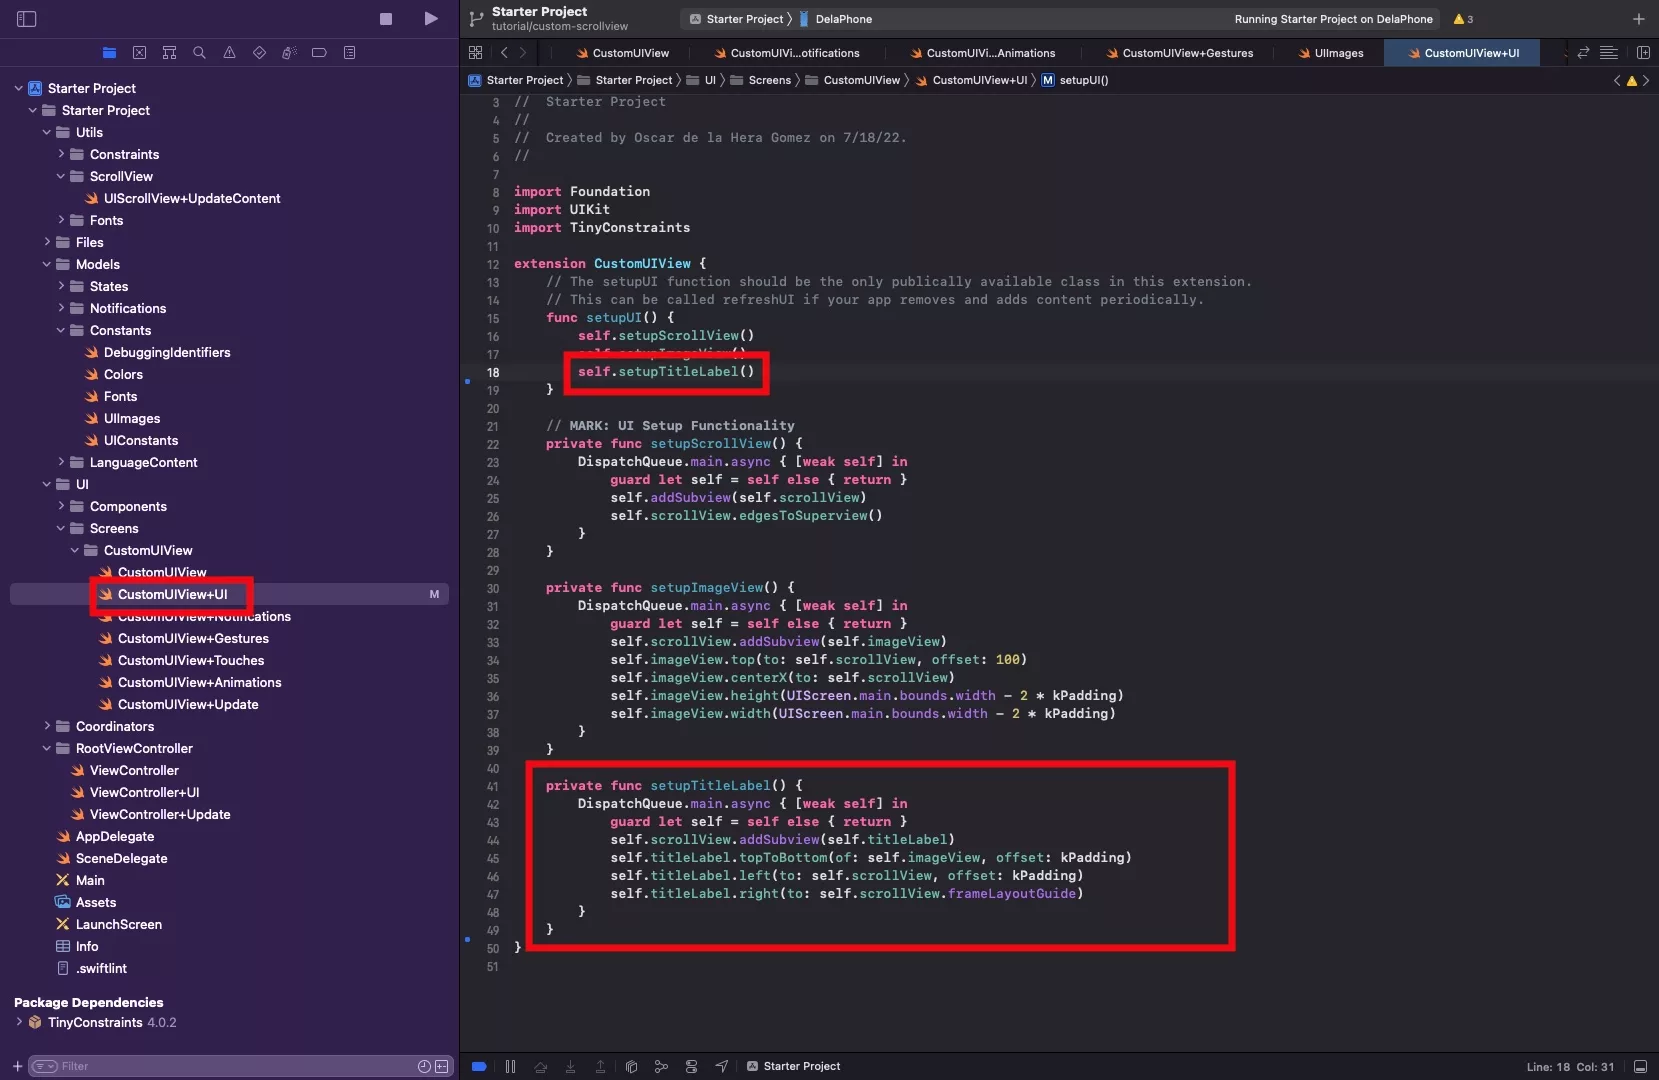
In CustomUIView+UI.swift, setup your title label and add it to your UIScrollView.
Make sure to use the frameLayoutGuide for the right constraint.
Code available at the end.
Step Seven: Setup your date label
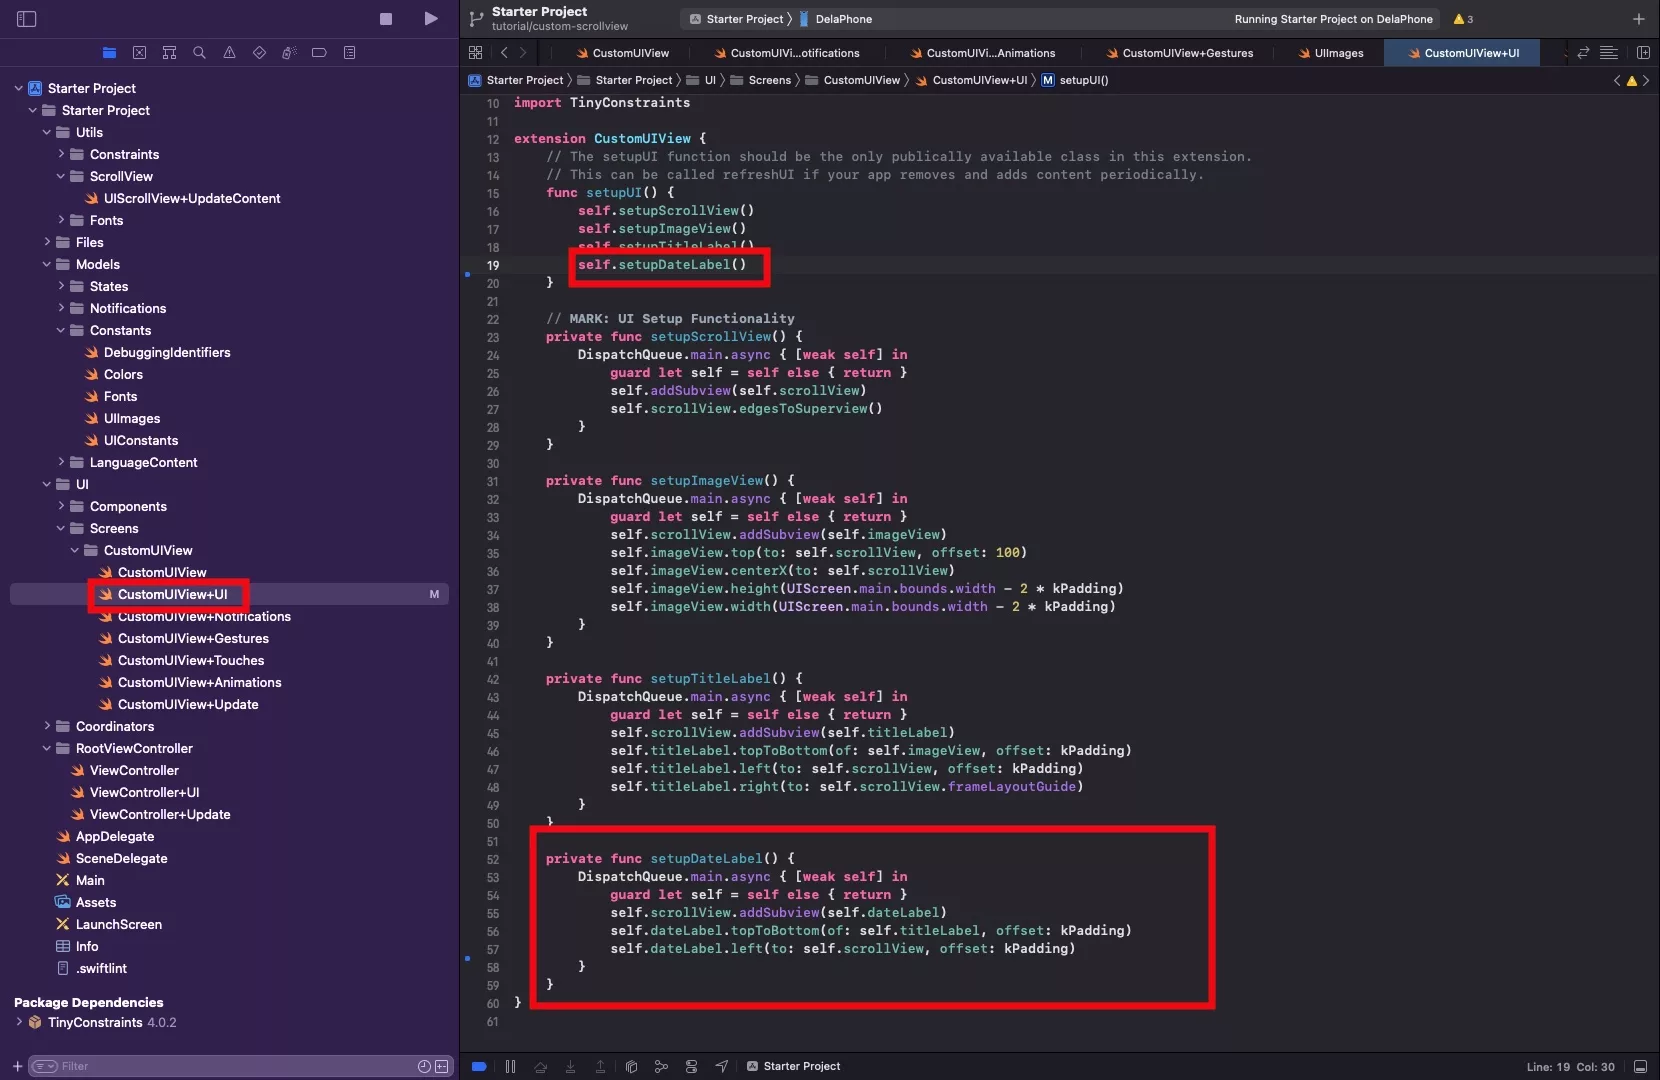
In CustomUIView+UI.swift, setup your date label and add it to your UIScrollView.
Code available at the end.
Step Eight: Setup your price label
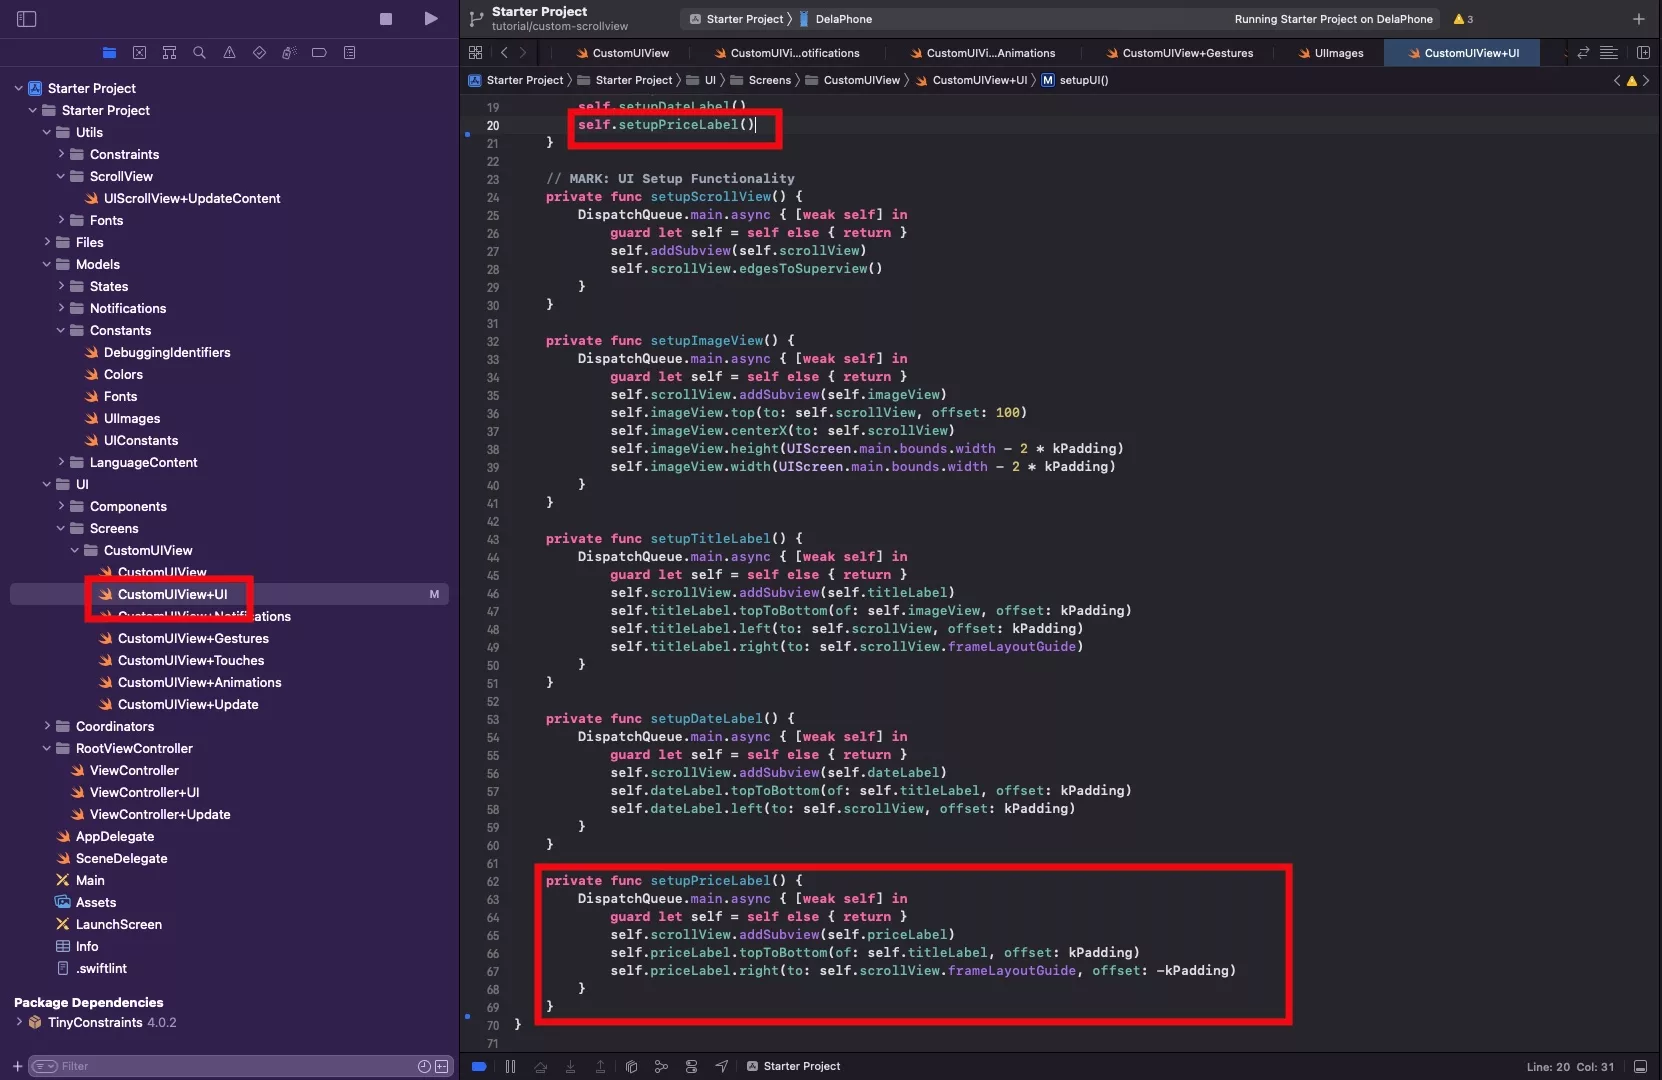
In CustomUIView+UI.swift, setup your price label and add it to your UIScrollView.
Make sure to use the frameLayoutGuide for the right constraint.
Code available at the end.
Step Nine: Setup your description label
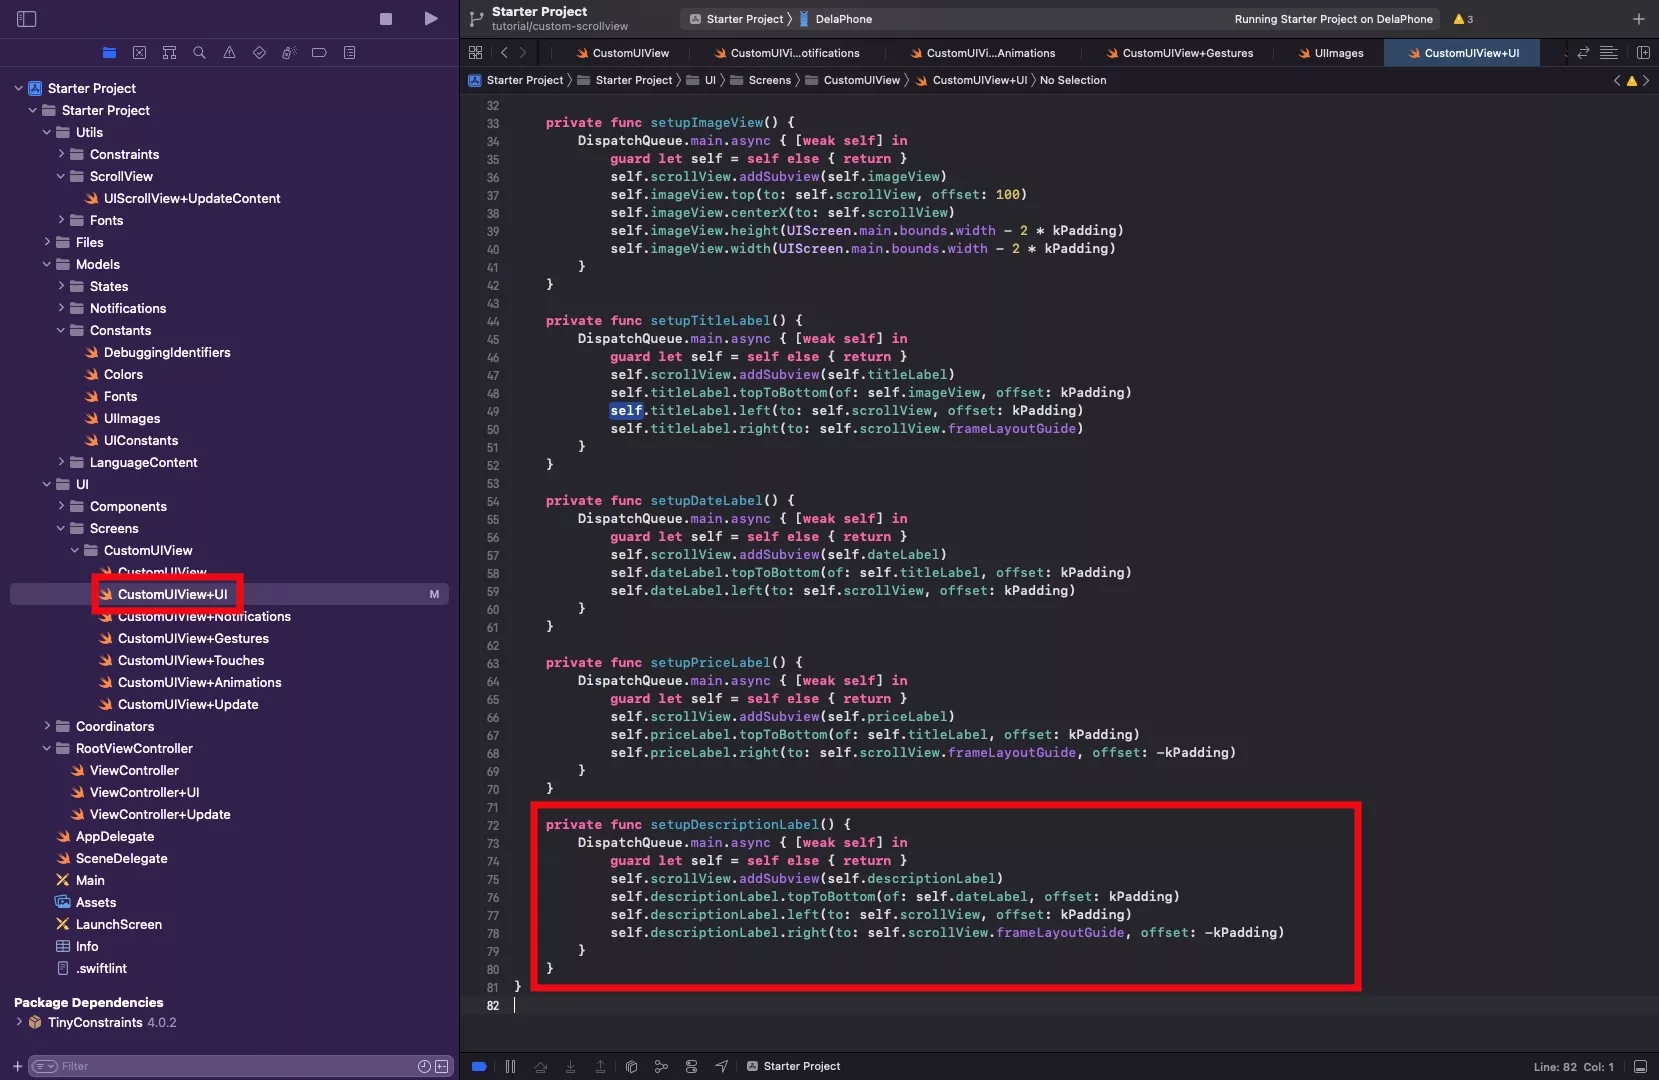
In CustomUIView+UI.swift, setup your description label and add it to your UIScrollView.
Make sure to use the frameLayoutGuide for the right constraint.
Although not shown in the screenshot, do not forget to add it to setupUI.
Code available at the end.
Step Ten: Resize your UIScrollView to fit content
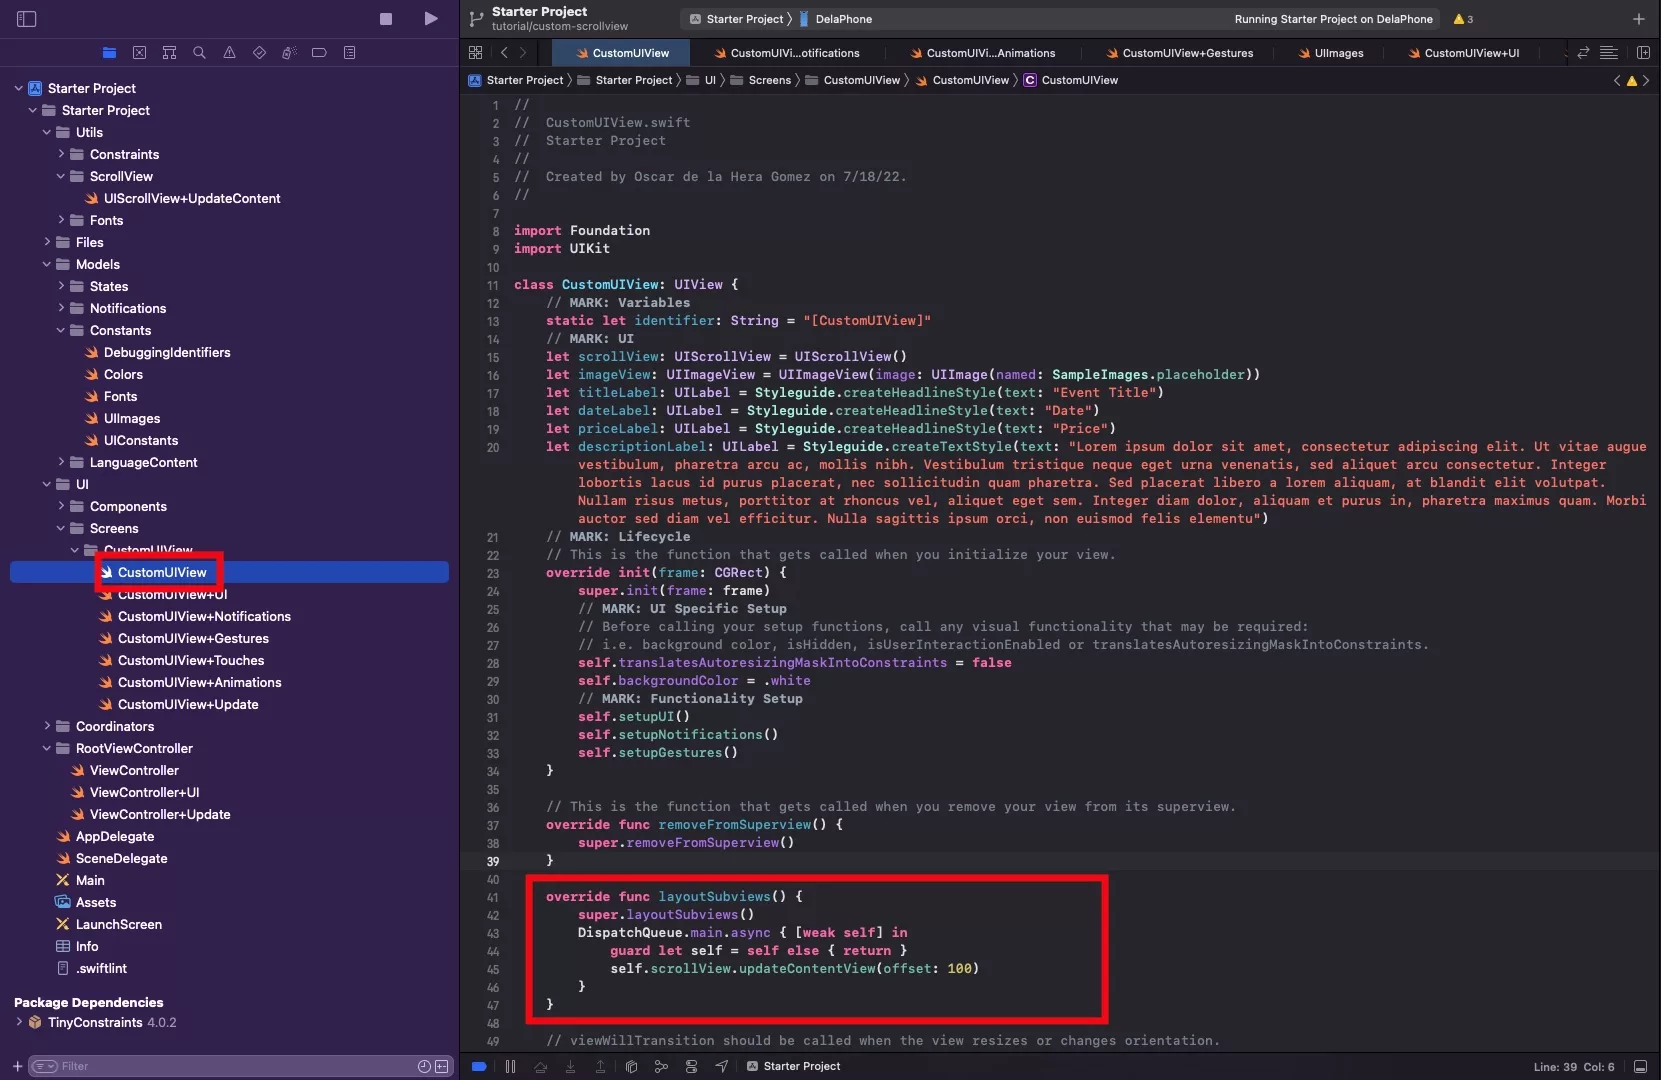
In CustomUIView.swift, override the layoutSubviews function and call the updateContentView utilities function defined in Utils -> ScrollView -> UIScrollView+updateContentView.swift, and add an offset of 100 so that there is a gap at the bottom, after scrolling.
Please note that the layoutSubviews is called:
- When a subview is added to the UIView.
- When the UIView changes size (which occurs on orientation changes).
- When the setNeedsLayout() function is called.
- When the layoutIfNeeded() function is called.
Step Eleven: Verify
Run your app and verify that it looks right.
Complete Code
CustomUIView.swift
CustomUIView+UI.swift
Any Questions
We are actively looking for feedback on how to improve this resource. Please send us a note to inquiries@delasign.com with any thoughts or feedback you may have.