How to add & use path aliases with Typescript & Serverless
A step by step tutorial on implementing path aliases to a Serverless Typescript project, with a demonstration on how to use them.

A step by step tutorial on implementing path aliases to a Serverless Typescript project, with a demonstration on how to use them.
The following step by step tutorial builds off and adds to our Open Source starter project for Typescript & Serverless by adding two folders and making them available to the system via aliases. Finally, it checks that it works by invoking (i.e. running) the hello serverless function locally through terminal.
Step One: Install serverless-tscpaths

In order for path alias's to work with Serverless in Typescript, we must add the serverless-tscpaths npm package.
yarn add serverless-tscpaths -Dor
npm i --dev serverless-tscpathsStep Two: Add the plugin
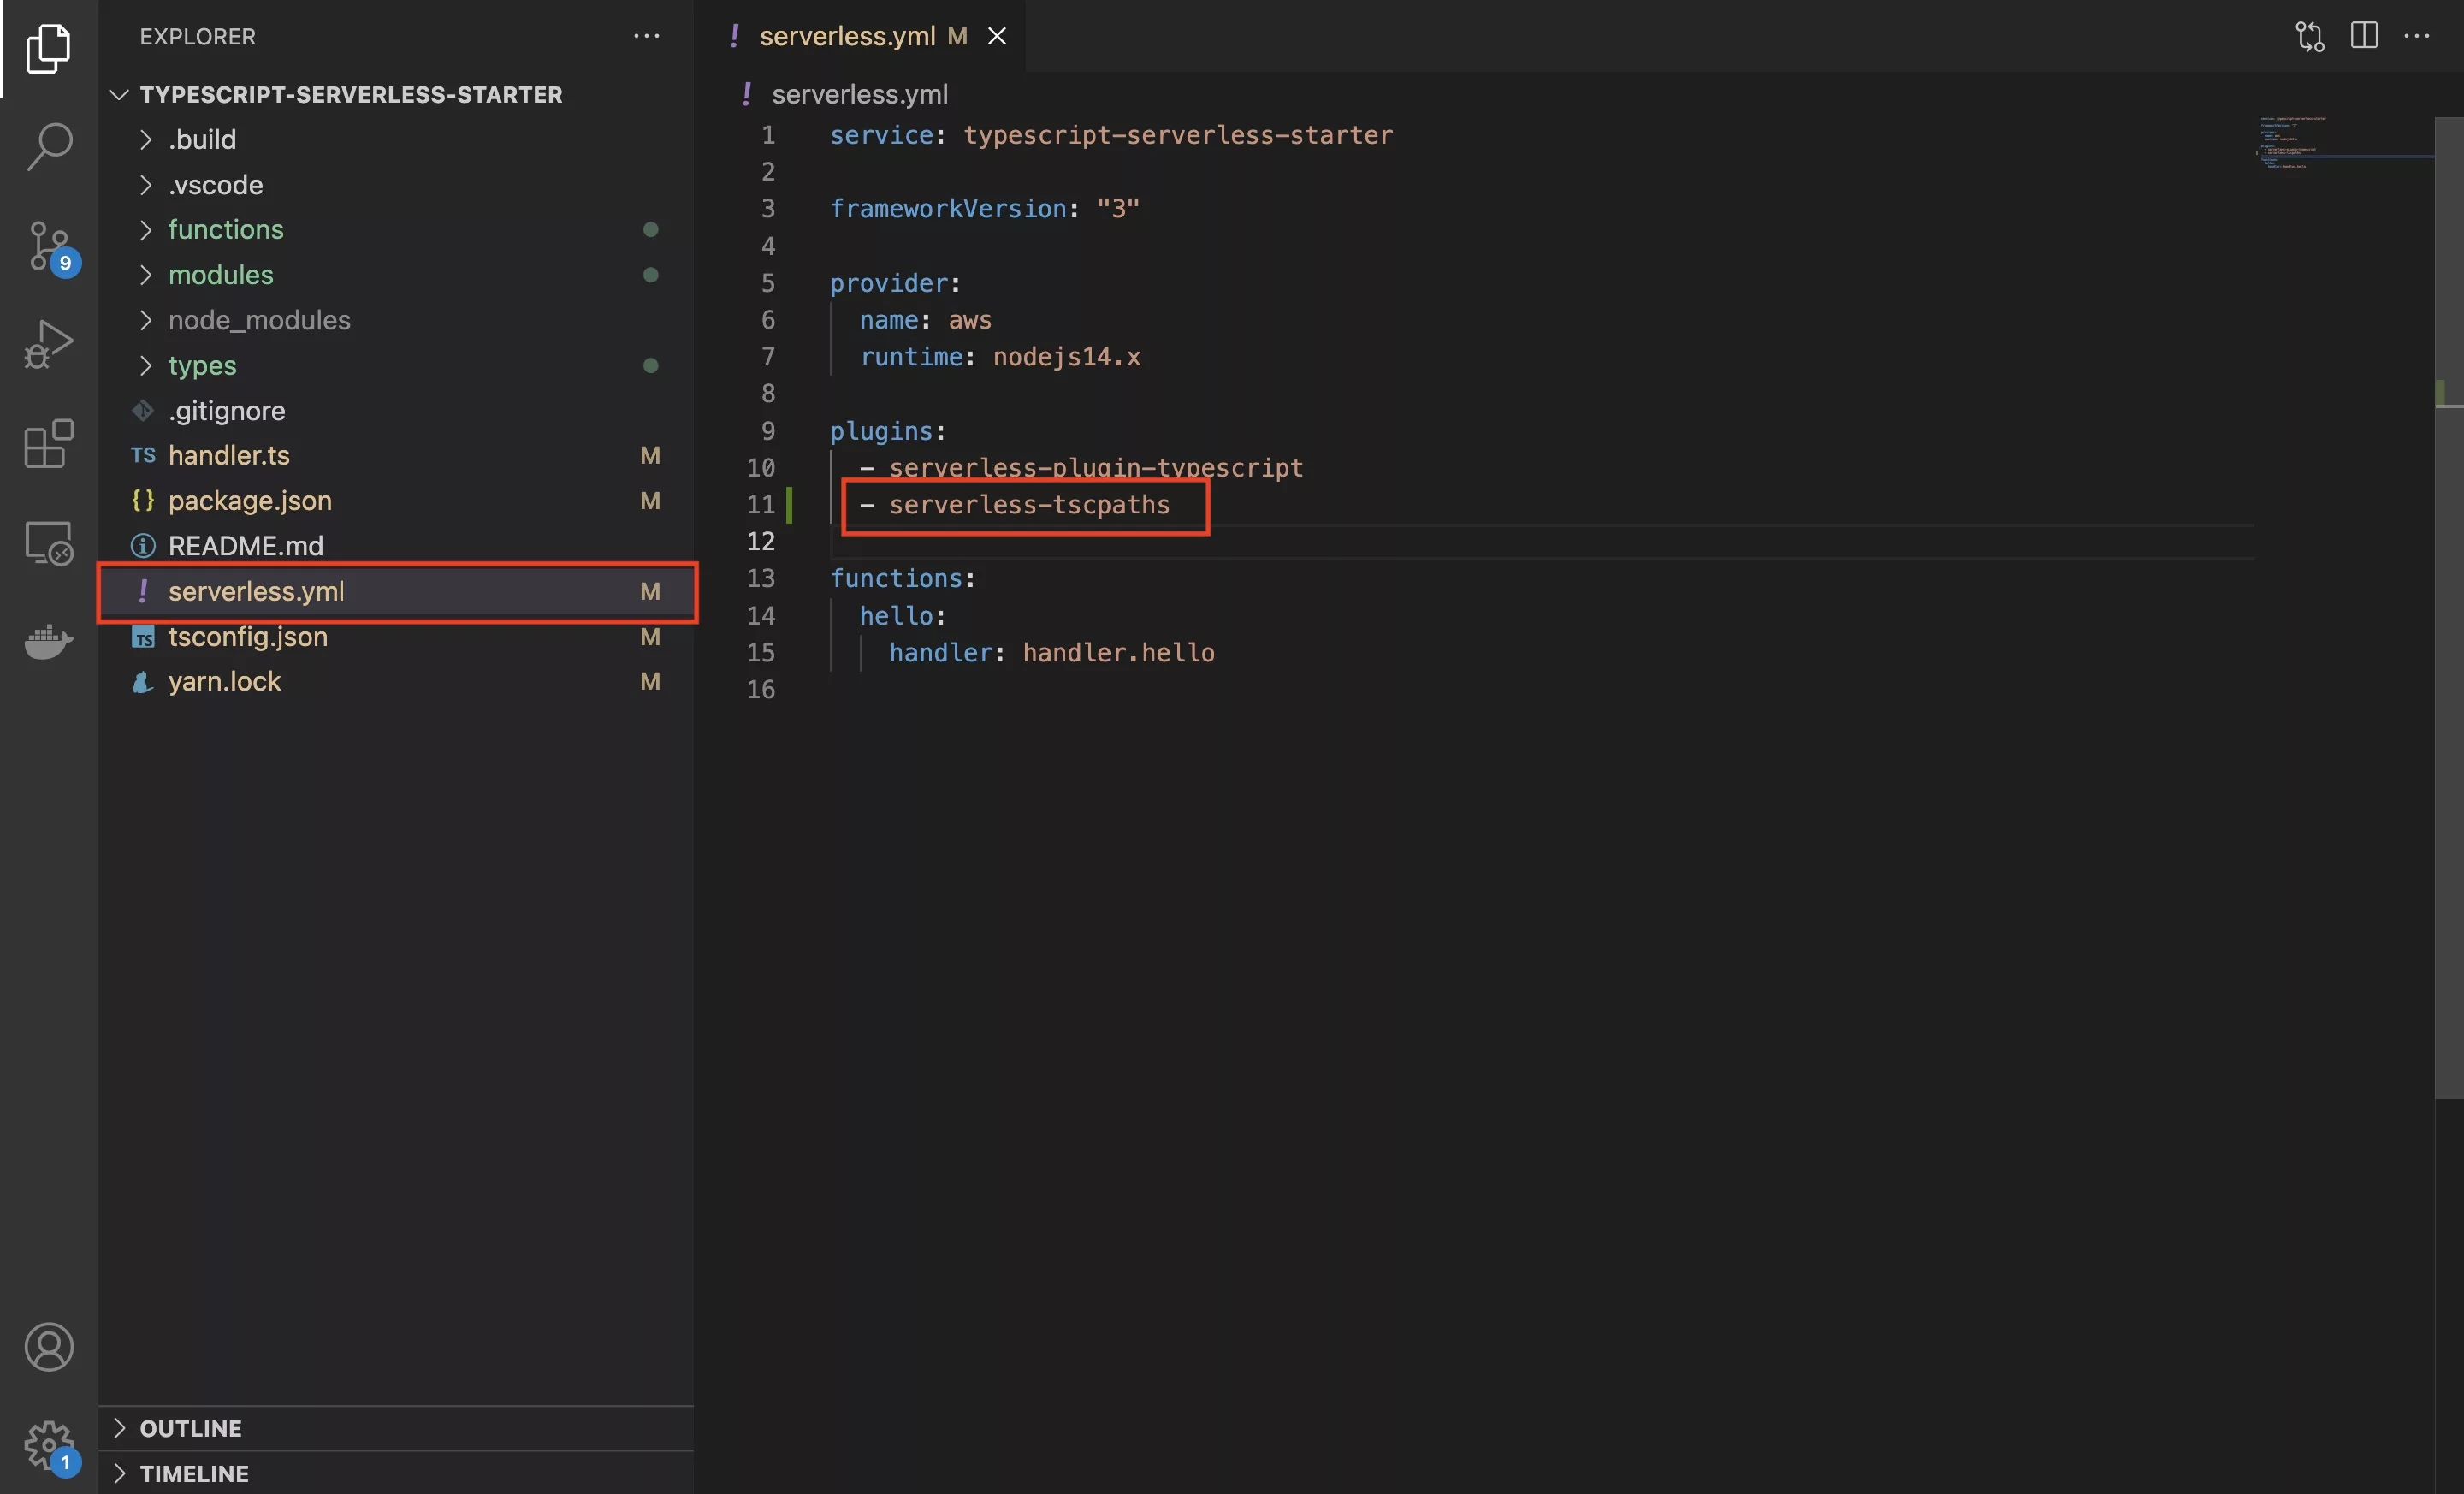
In the serverless.yml add the new serverless-tscpaths plugin below the serverless-plugin-typescript
Step Three: Create the folders
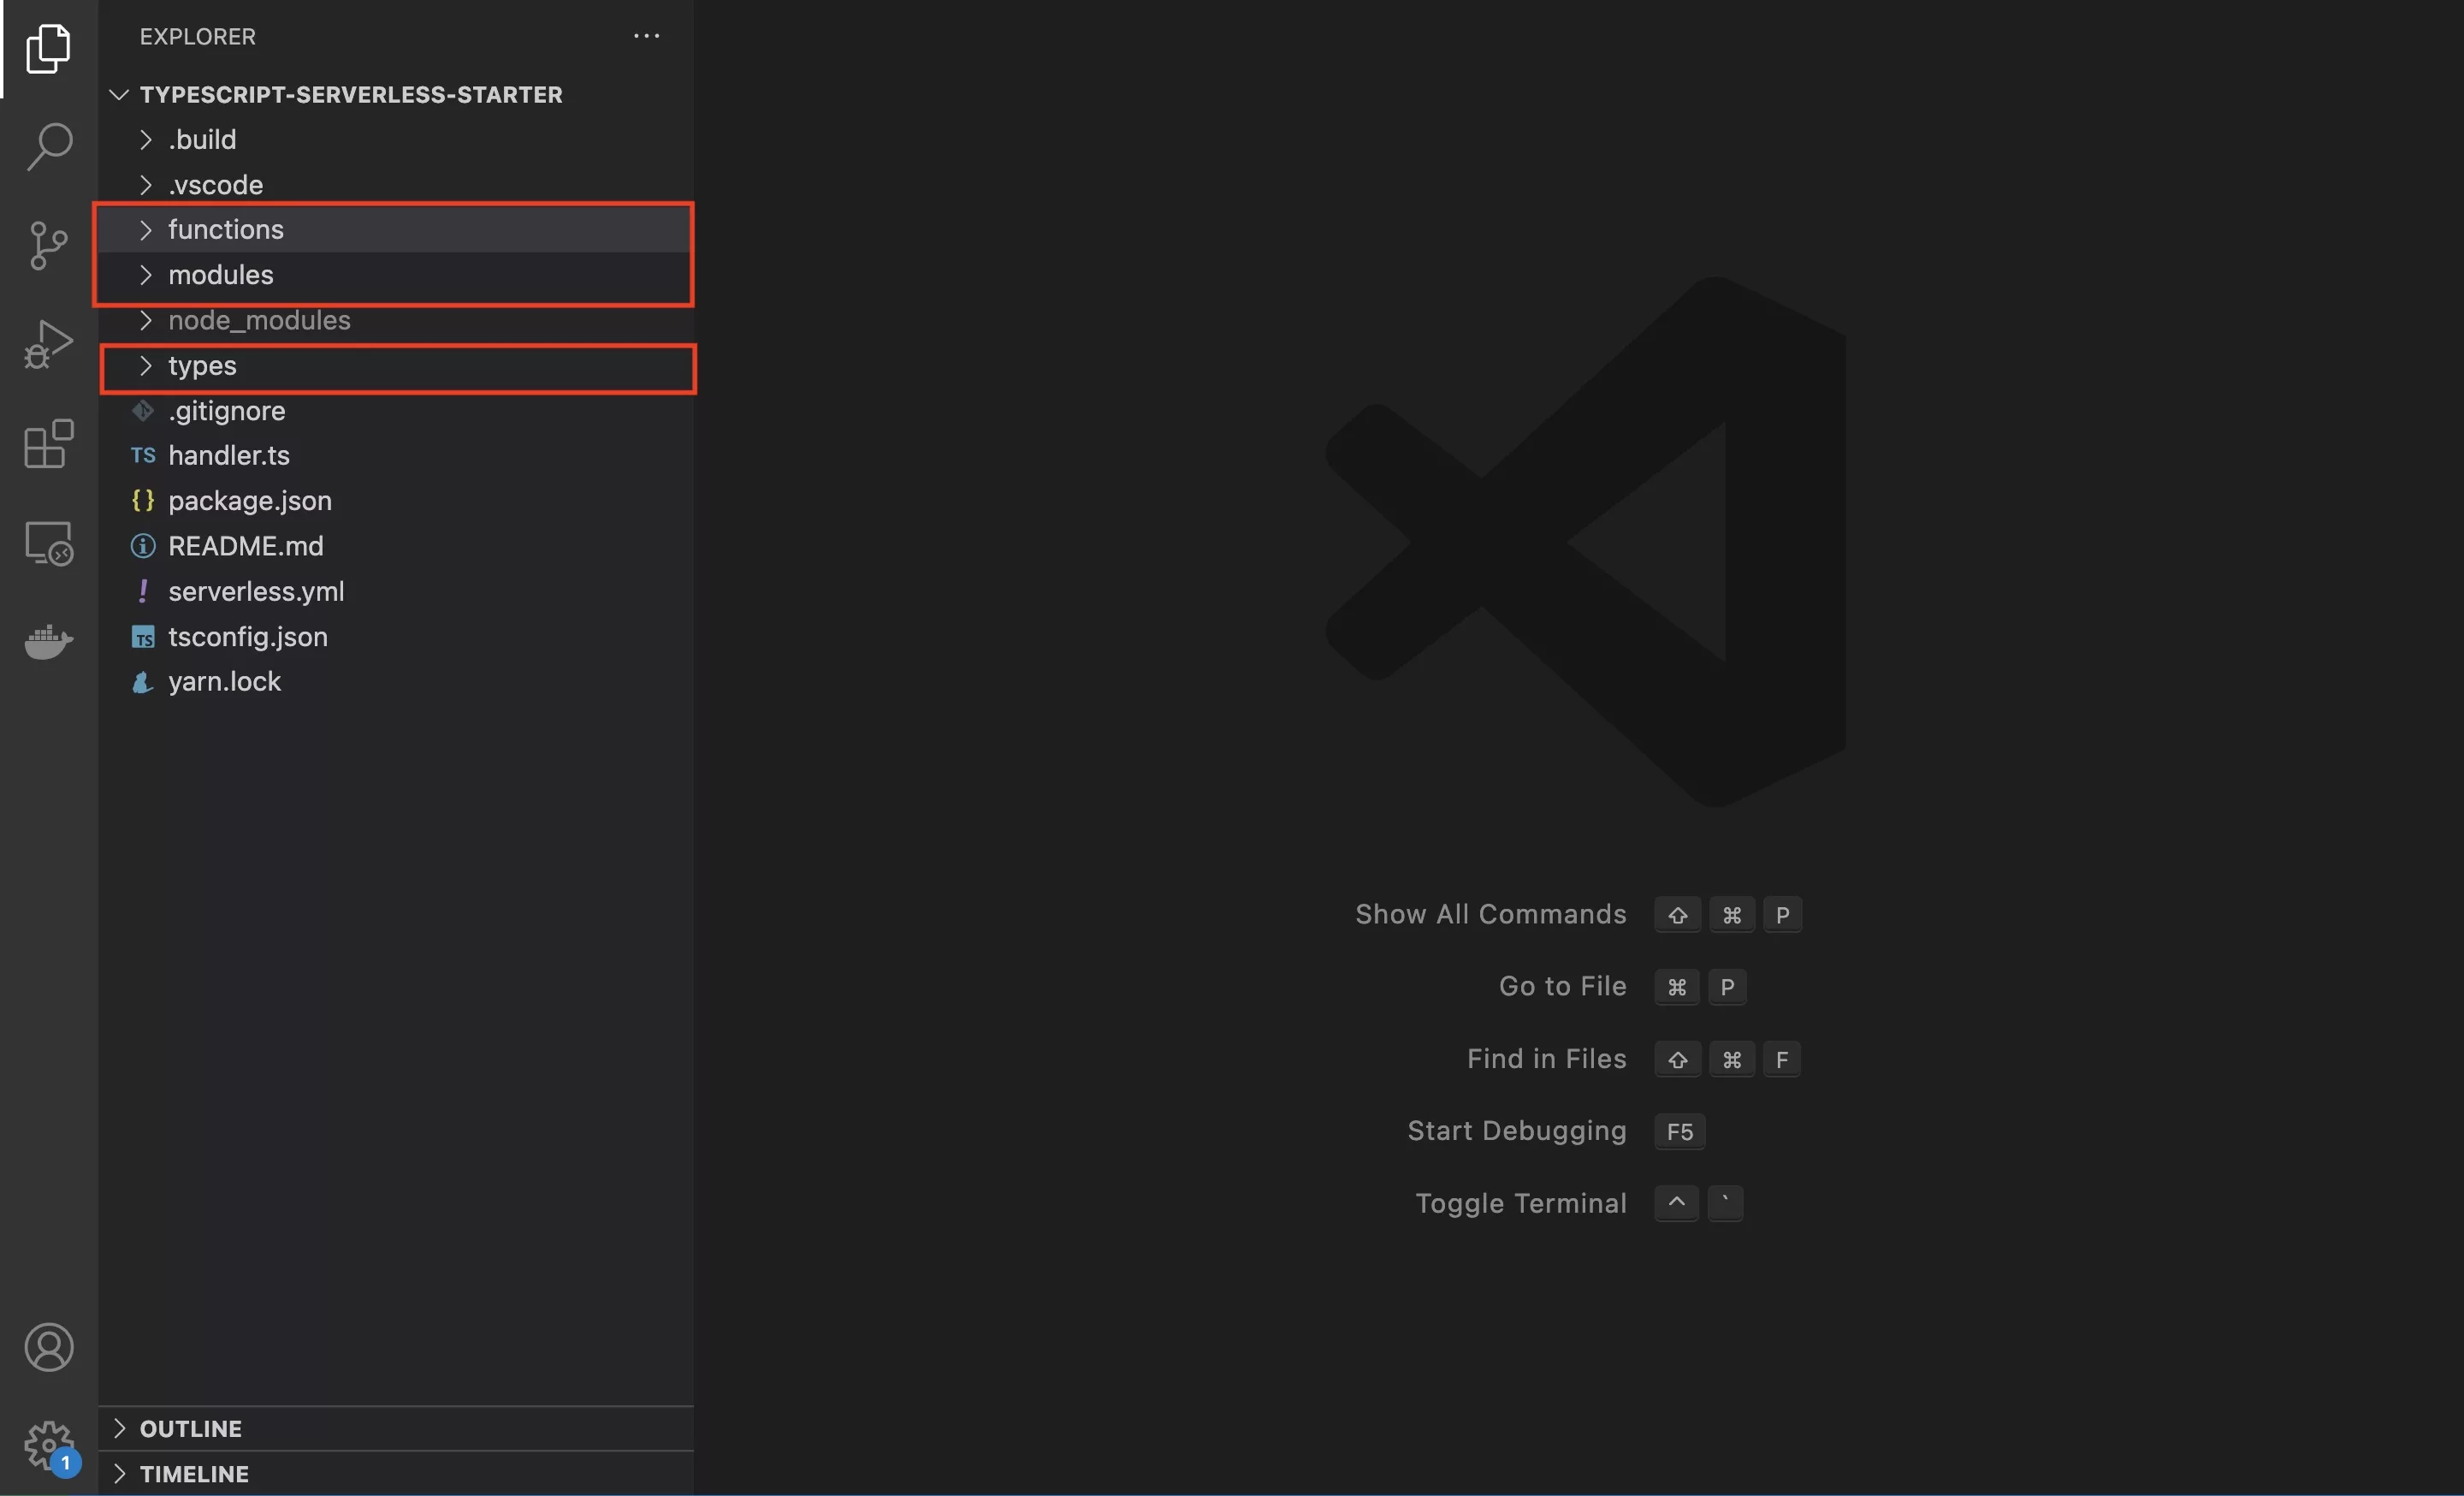
Open VSCode or your preferred IDE and add the relevant folders that you wish to add an alias to.
In the case of our Open Source starter project, we have added three folders:
- functions
- modules
- types
Step Four: Create the alias's
The following step is dedicated to adding the alias's to the project.
If at any moment in the future you wish to add new alias's, this is the two part step that you must carry out.
A | Update tsconfig

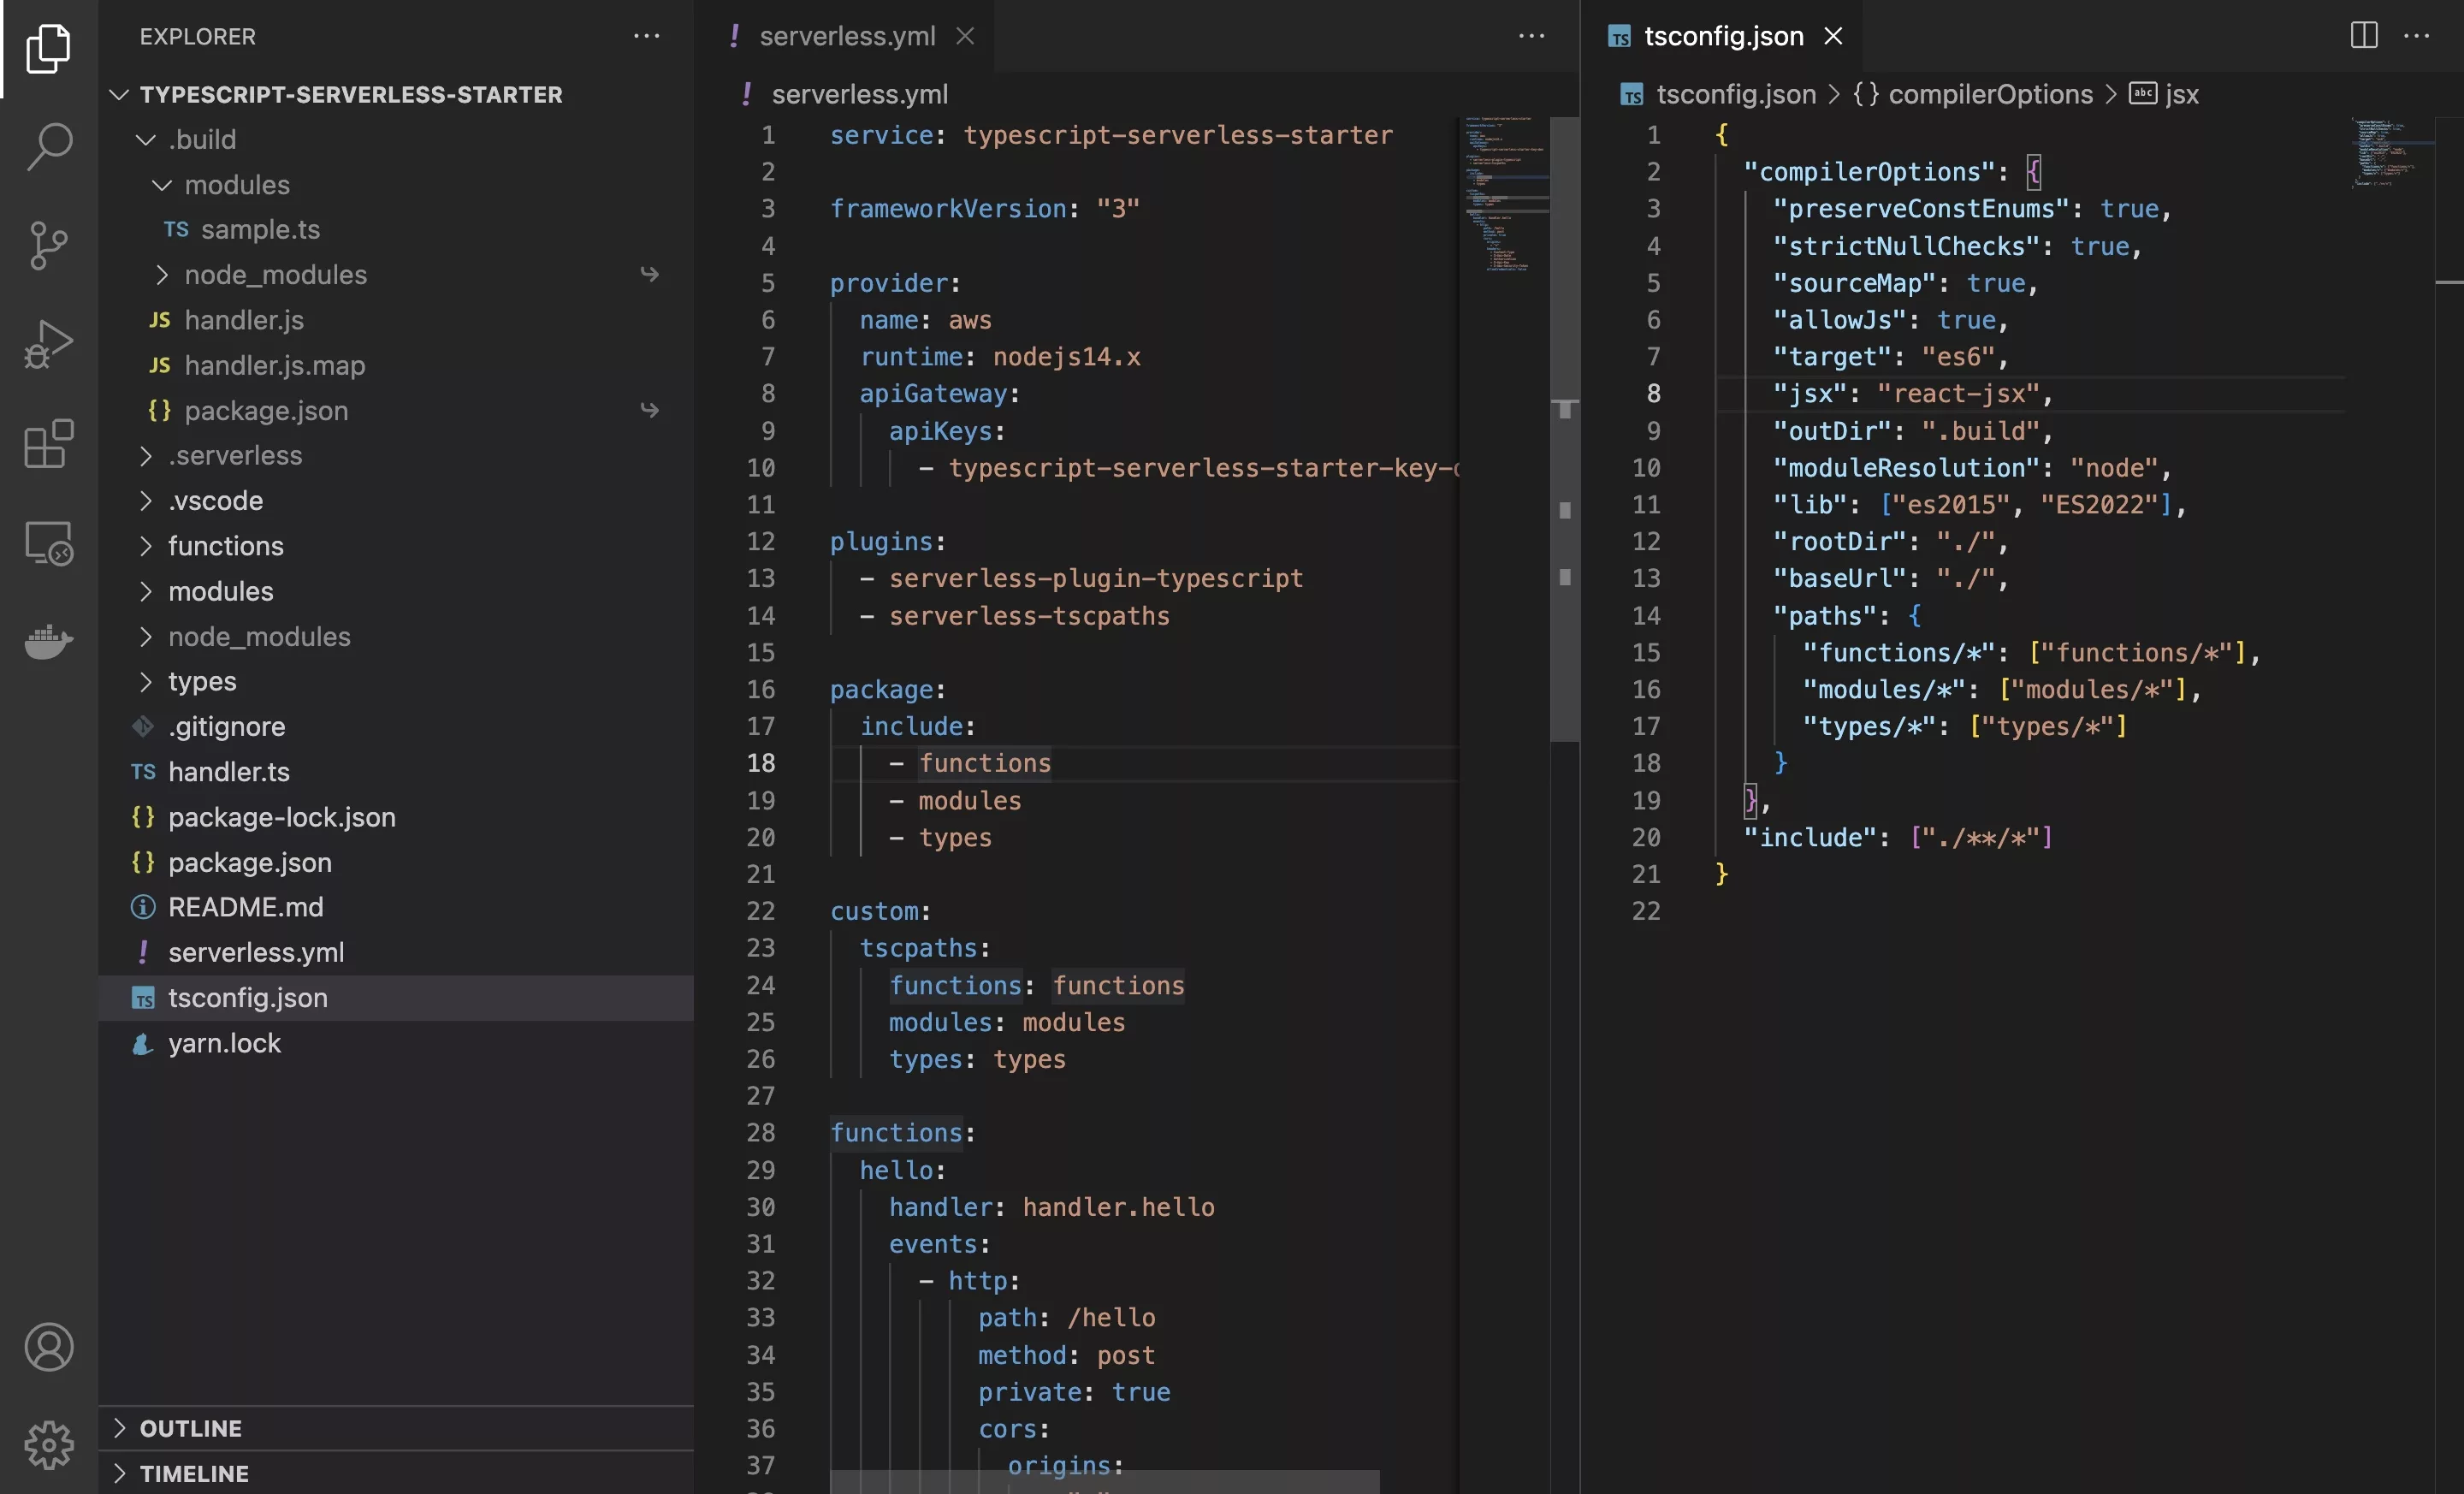
Update the tsconfig.json to include a baseUrl and the alias paths.
B | Update serverless.yml
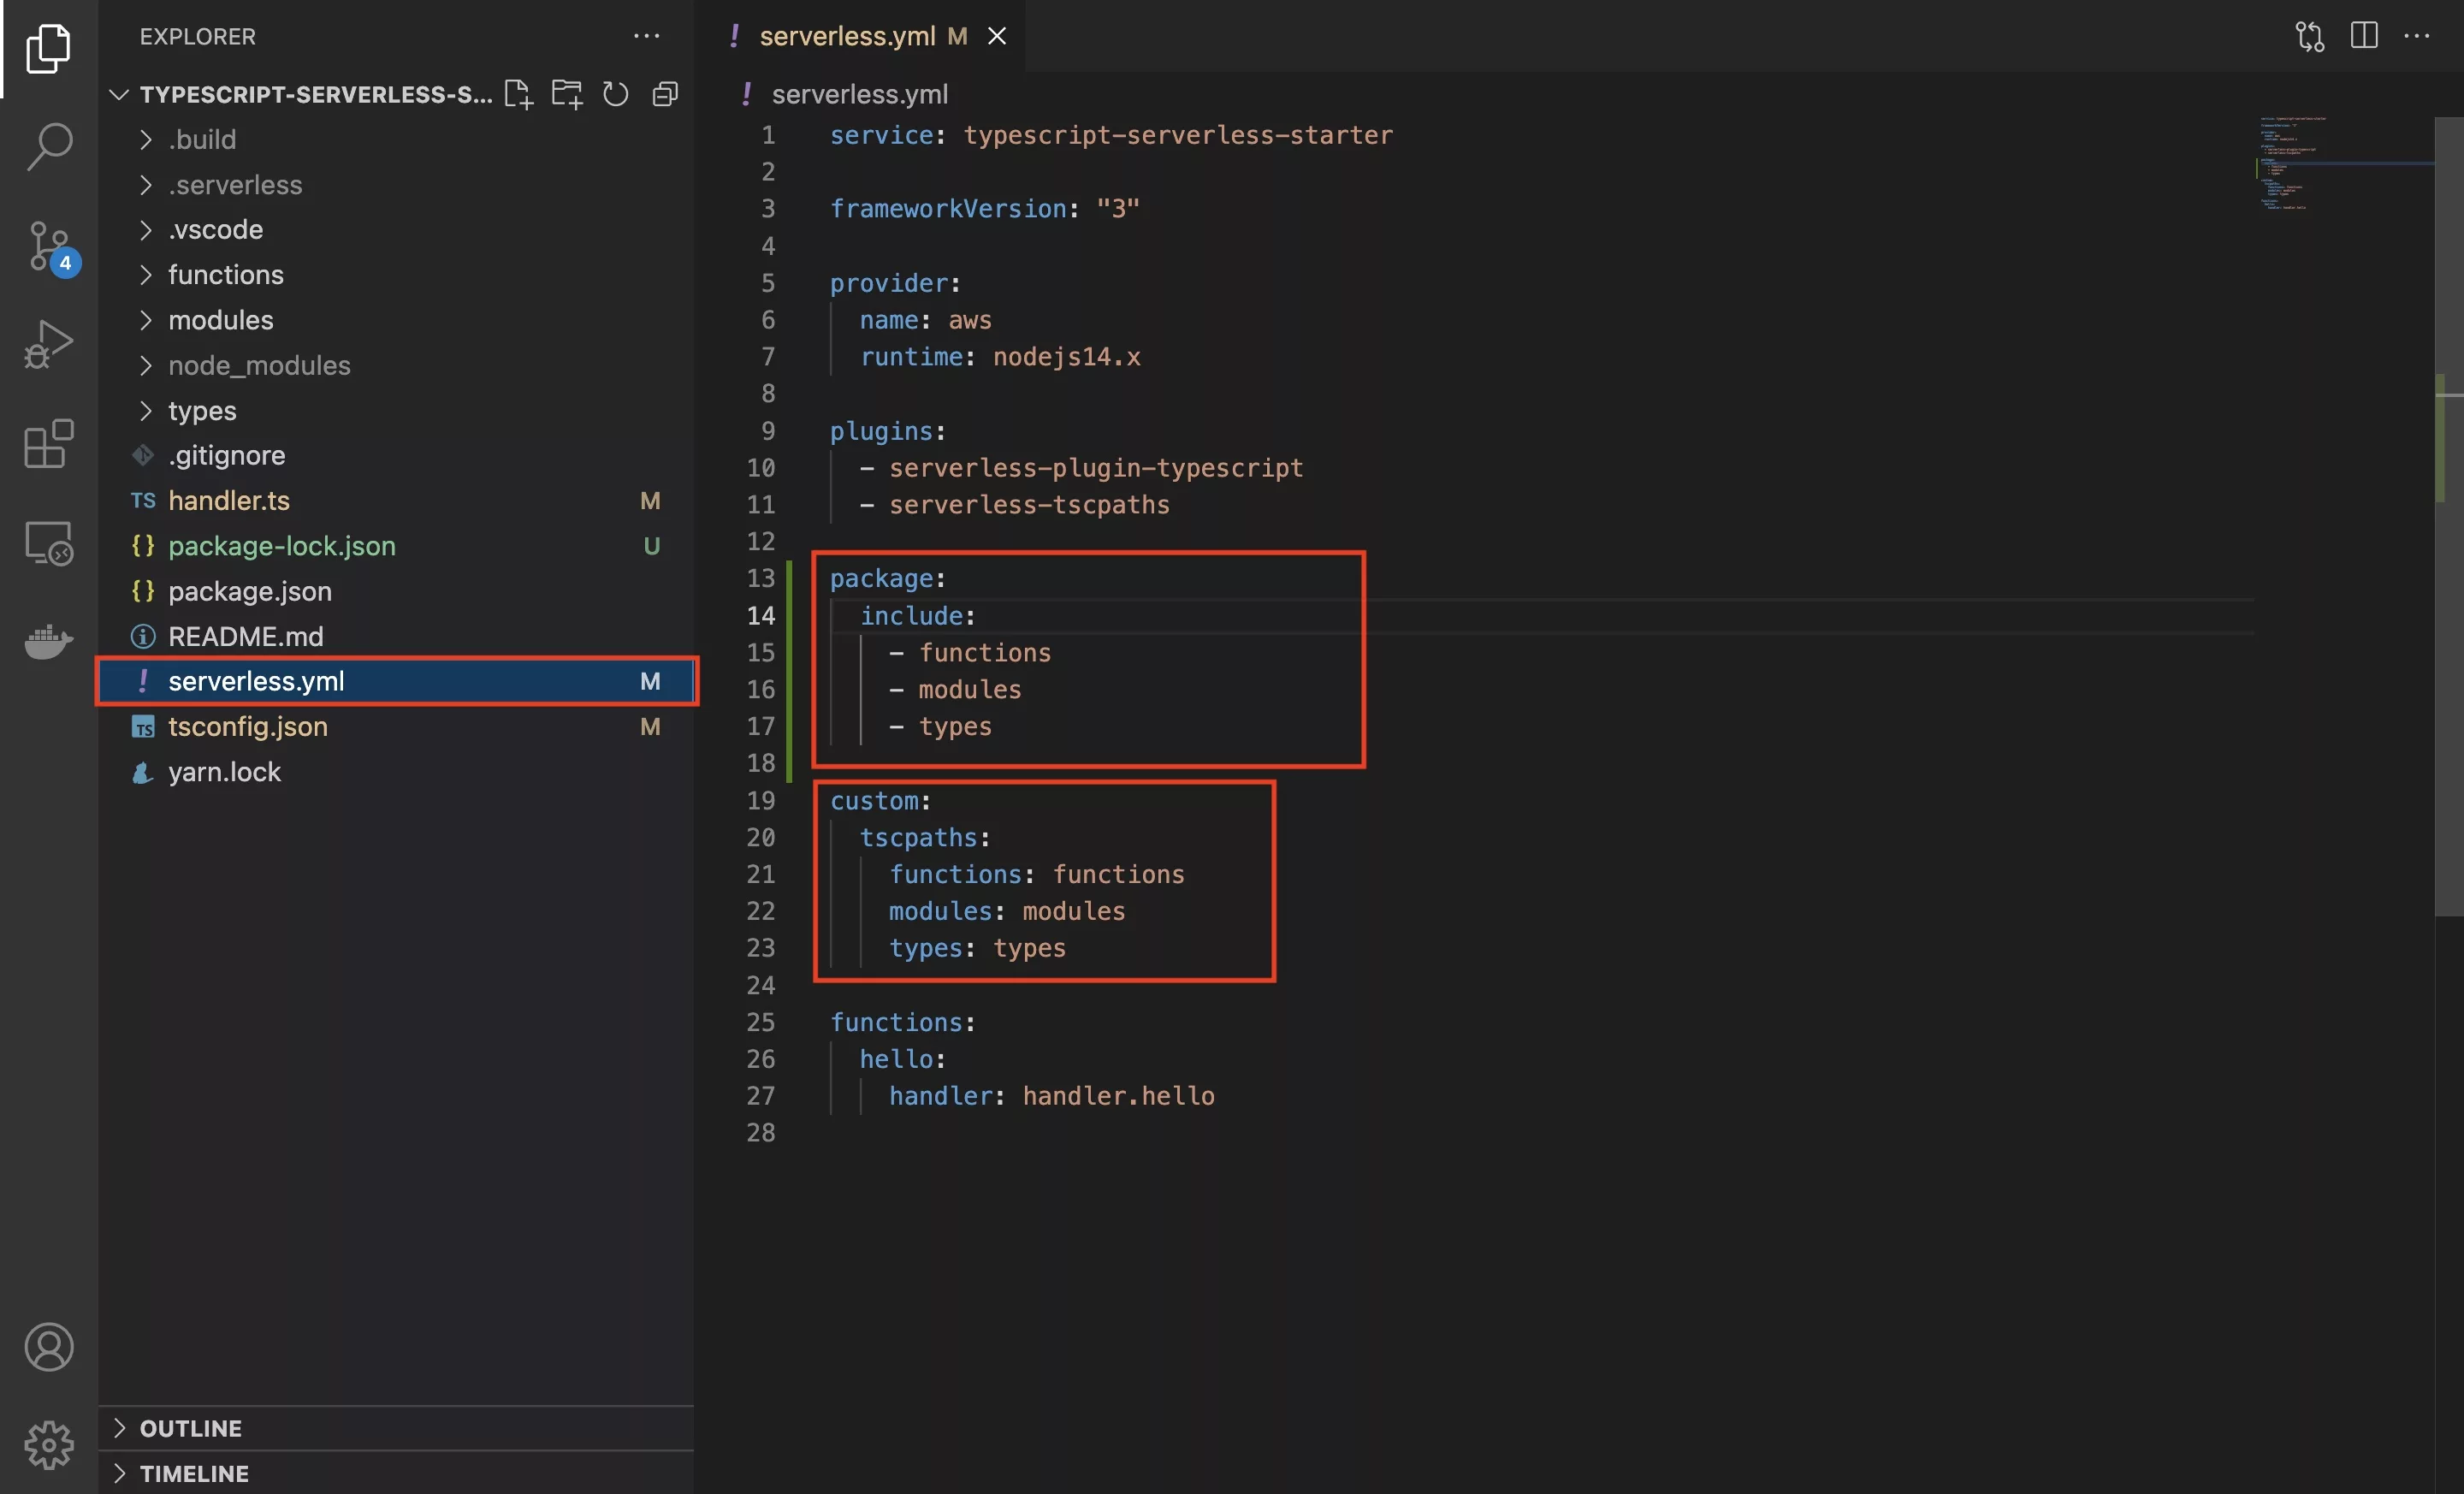
Update the serverless.yml to include your custom paths as demonstrated in the image above.
Critical things here are:
- Make sure the package includes the folders that you use
- Add the paths under the tscpaths
Step Five: Verify
The following step is dedicated to demonstrating how to make use of an alias in Typescript & Serverless.
A | Create a new function
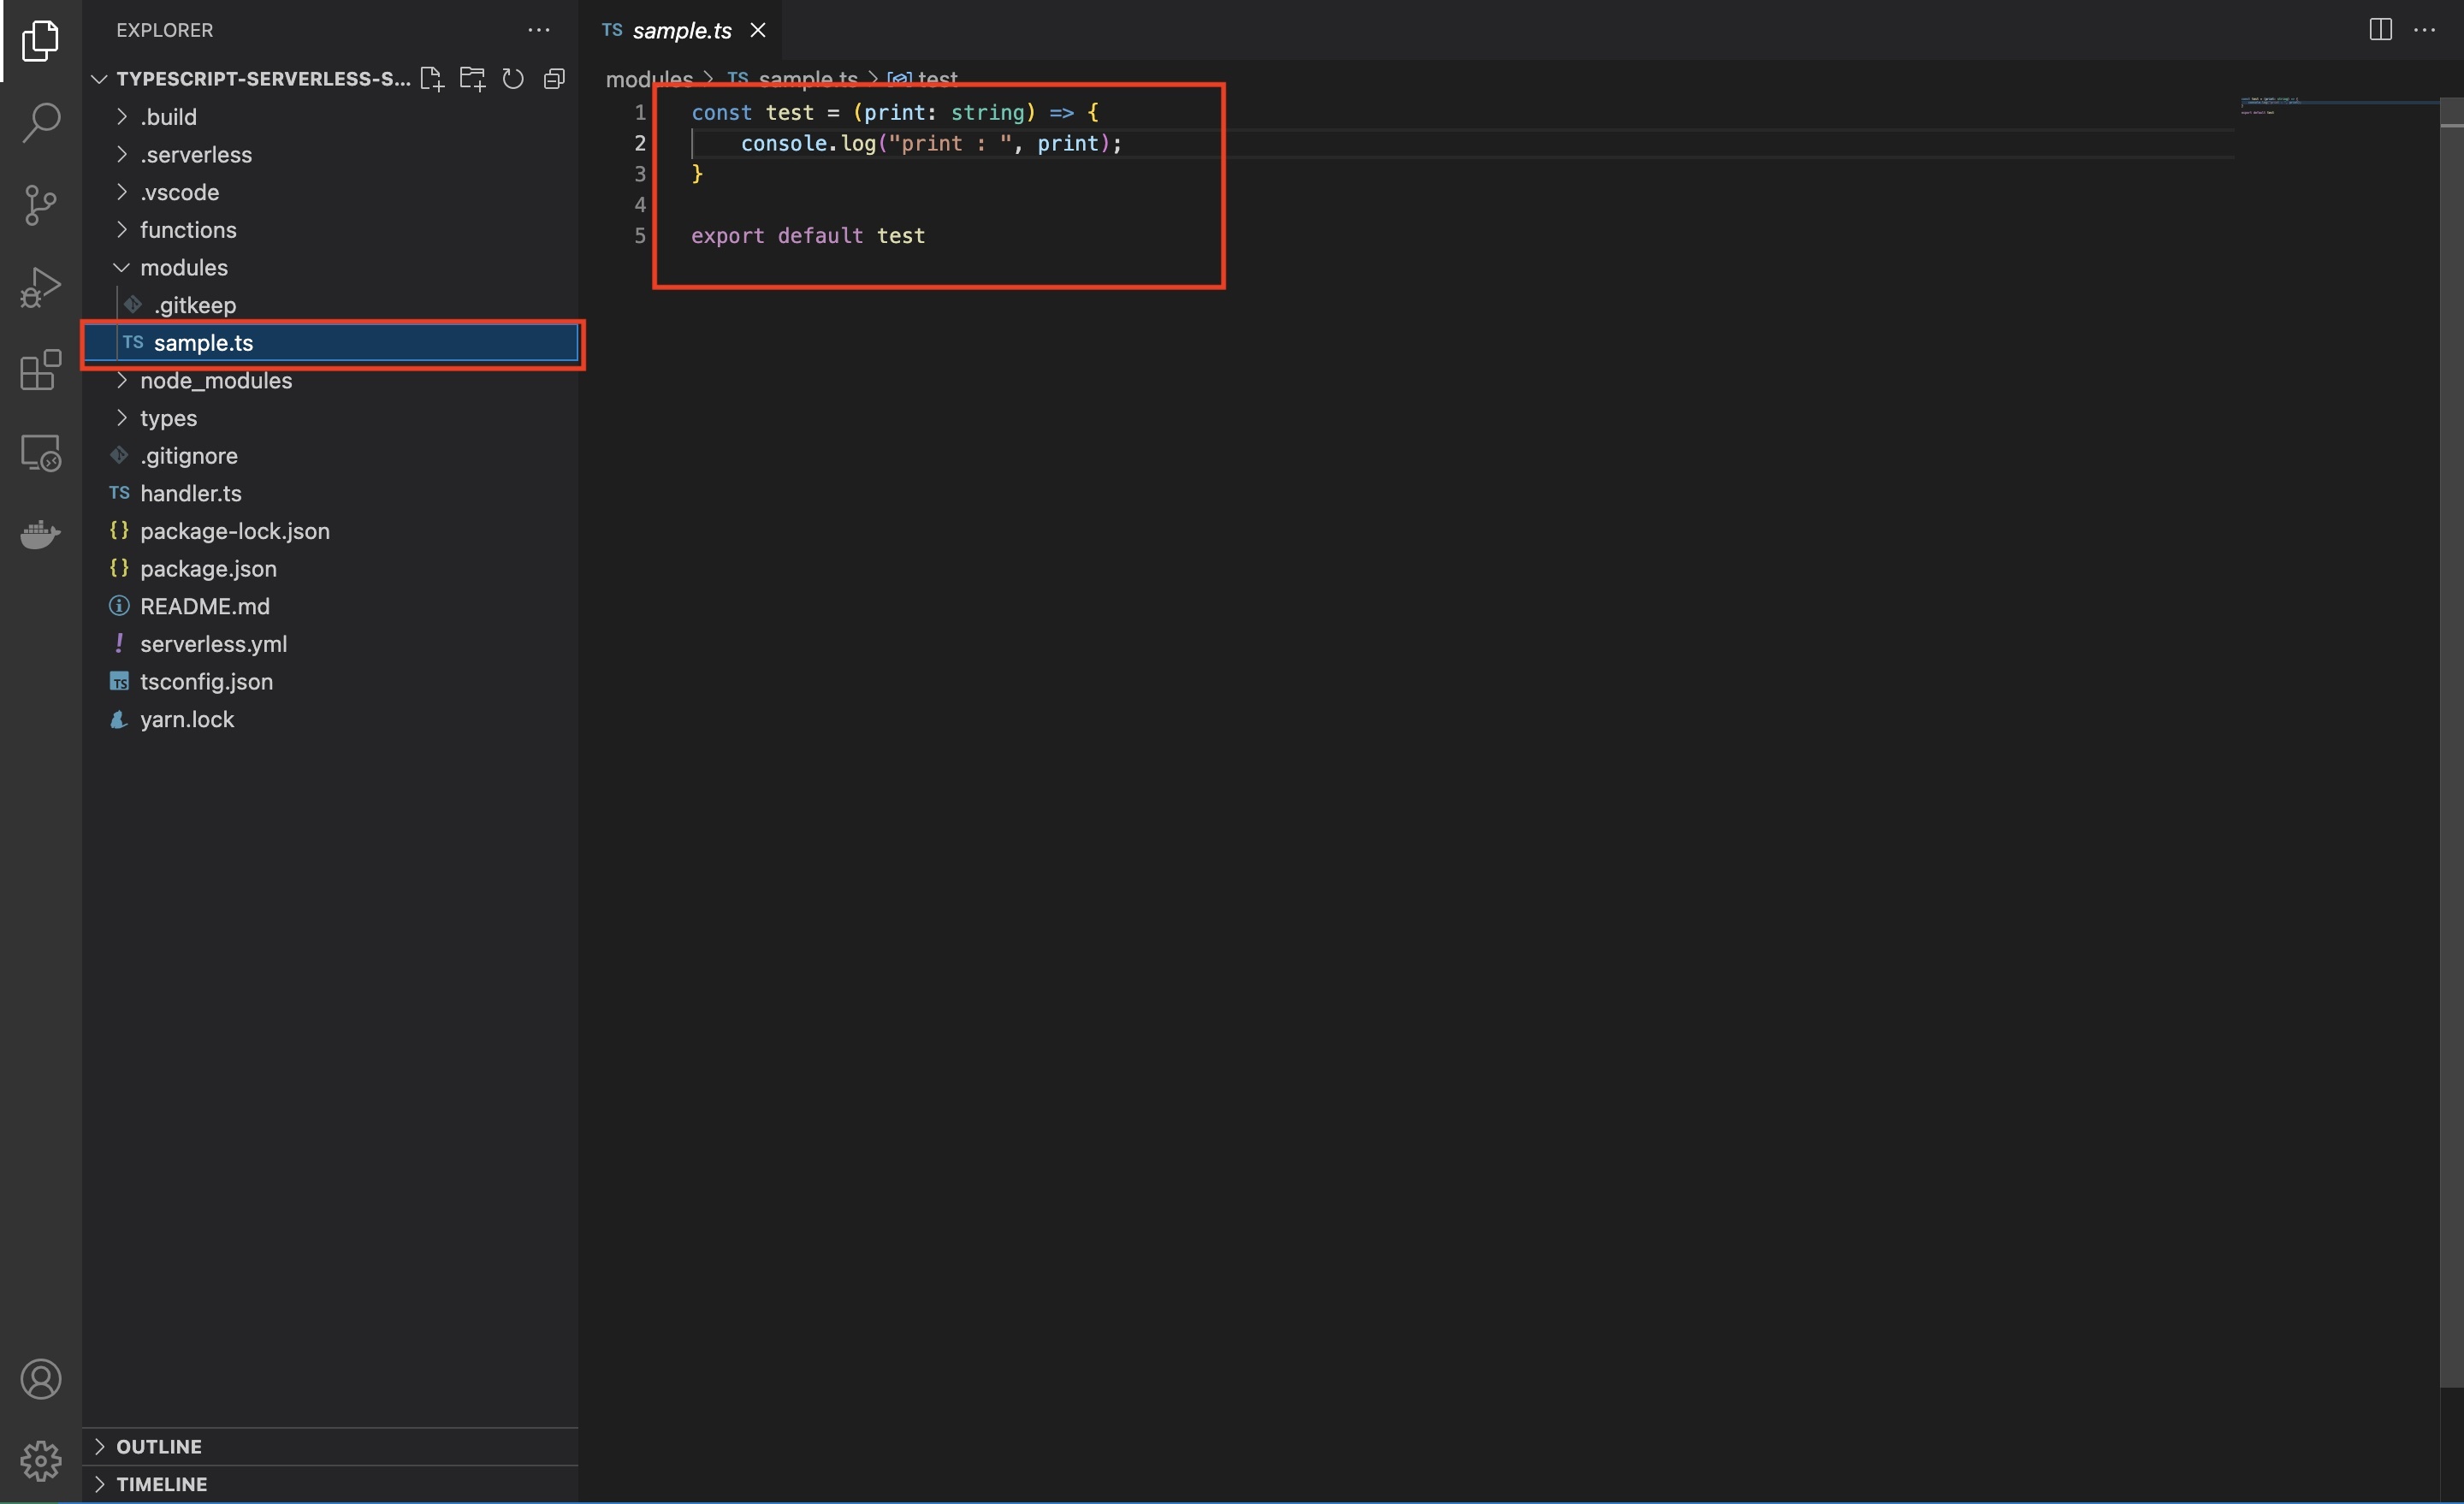
In the modules folder, create a new Typescript file called sample.ts.
Within it create a function, in our case we created a test which takes in a print, of type string and logs it to the console.
Please note that it is is exported using export default test.
B | Call the function
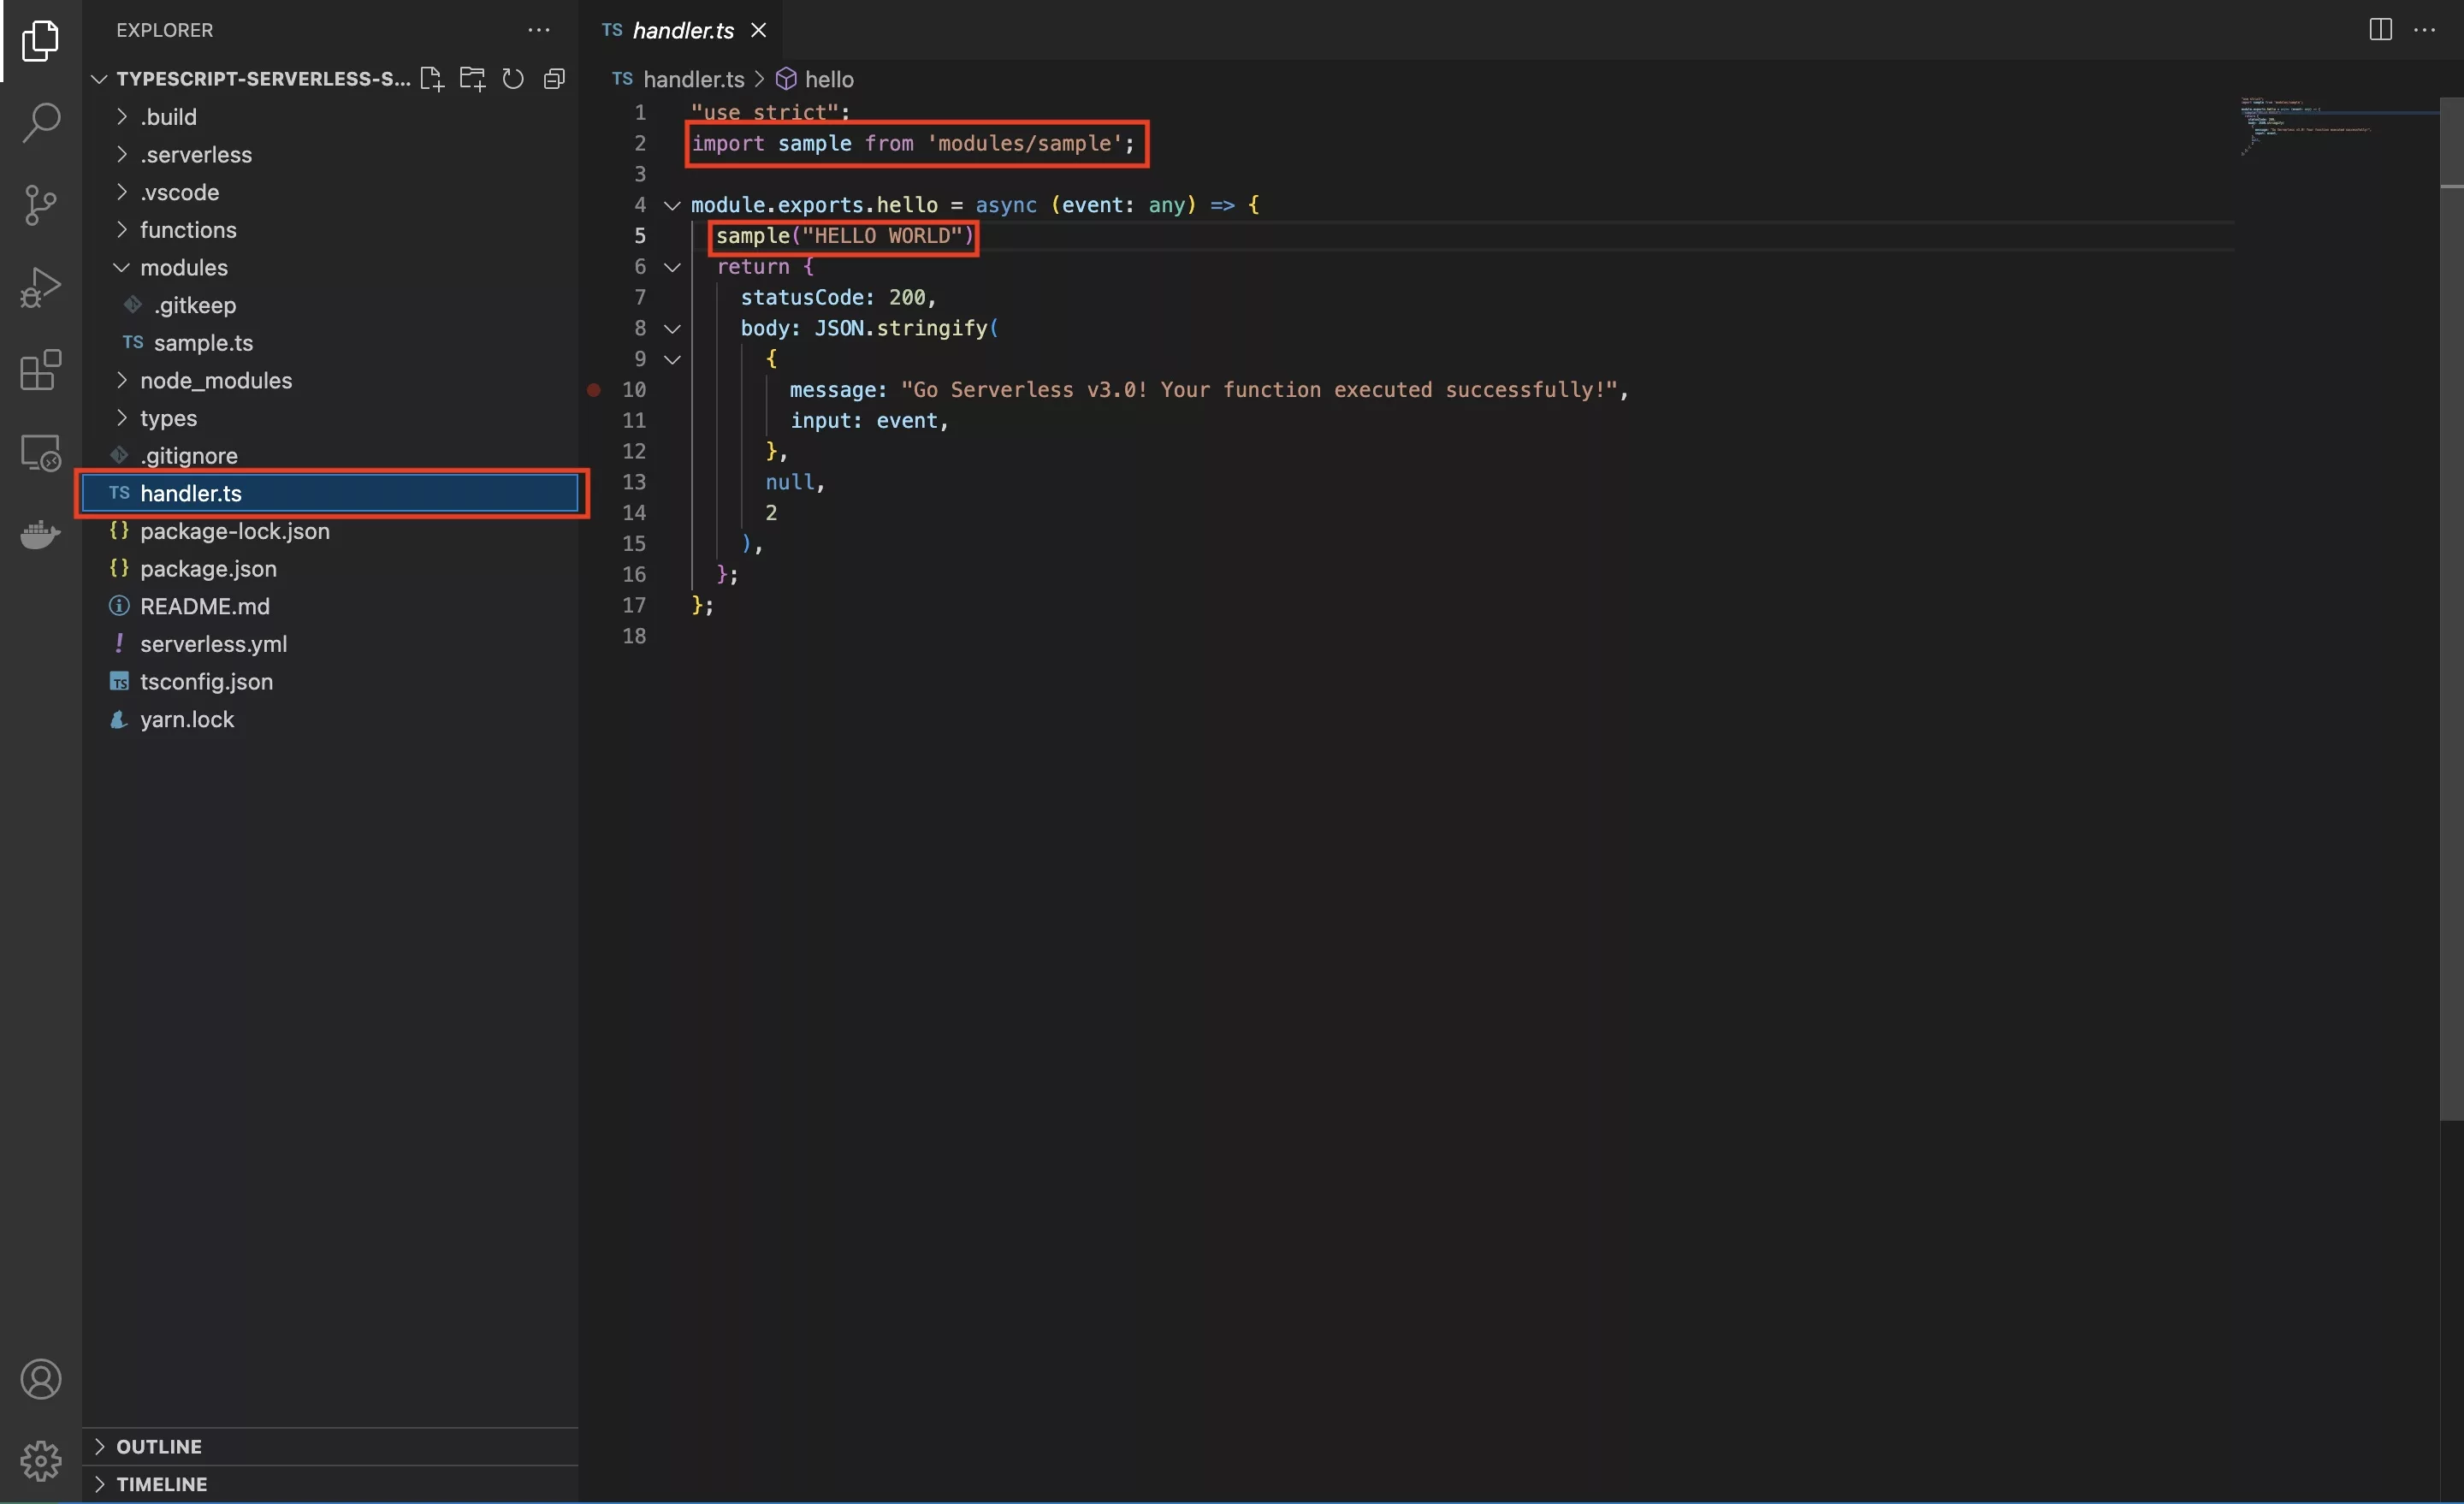
Within the handler.ts file:
- Require the Sample module that we created & make sure you use the .ts suffix.
- Call the sample function with a string to print.
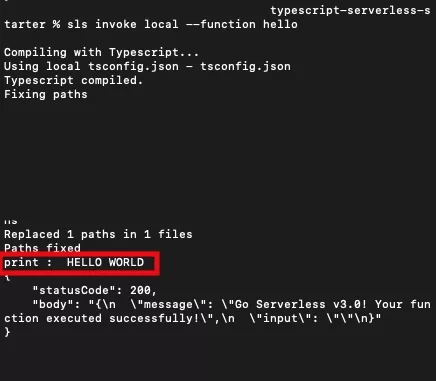
C | Test
Invoke the hello function using terminal.
For more details consult the tutorial below.
Any Questions ?
We are actively looking for feedback on how to improve this resource. Please send us a note to inquiries@delasign.com with any thoughts or feedback you may have.