How to create a Typescript Serverless project
A step by step tutorial on creating a Typescript Serverless project. Github repository included.

A step by step tutorial on creating a Typescript Serverless project. Github repository included.
The following step by step tutorial walks you through how to create a Typescript Serverless project and provides a Github repository incase you wish to jump start the process.
Please note that the Github repository provided is for AWS, Node.js.
Please note that this tutorial assumes that you have installed Node.js and NPM on your machine.
Step One: Install Serverless
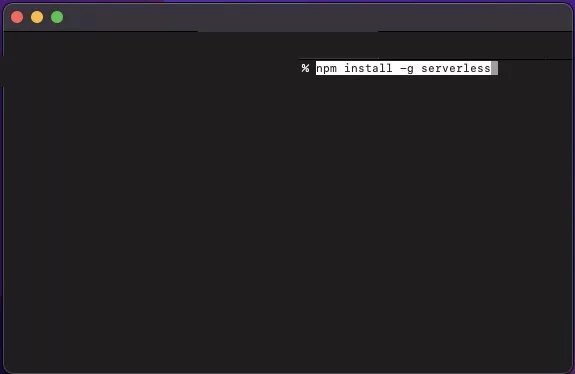
Open Terminal and run the following command to globally install serverless on your machine.
npm install -g serverlessIf you ever want to upgrade serverless, run the same command.
Step Two: Create the project
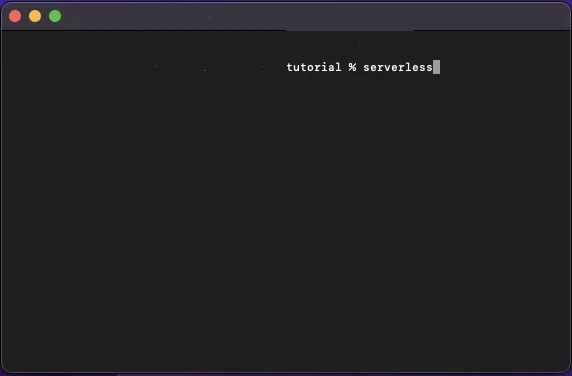
In Terminal, set the directory to that which you wish you create the project in and run the following command
serverlessThis command will run you through a setup process that will create your project.
Please note that the repository that we offer makes use to AWS Node.js Starter.
Step Three: Add Typescript

In Terminal, set the directory to the newly created project and run the following command line
yarn add --dev serverless-plugin-typescript typescriptIf you wish to use npm run the following command
npm install -D serverless-plugin-typescript typescriptIf you wish to learn more about this plugin, please consult the link below.
Step Four: Add the plugin to the Serverless.yml
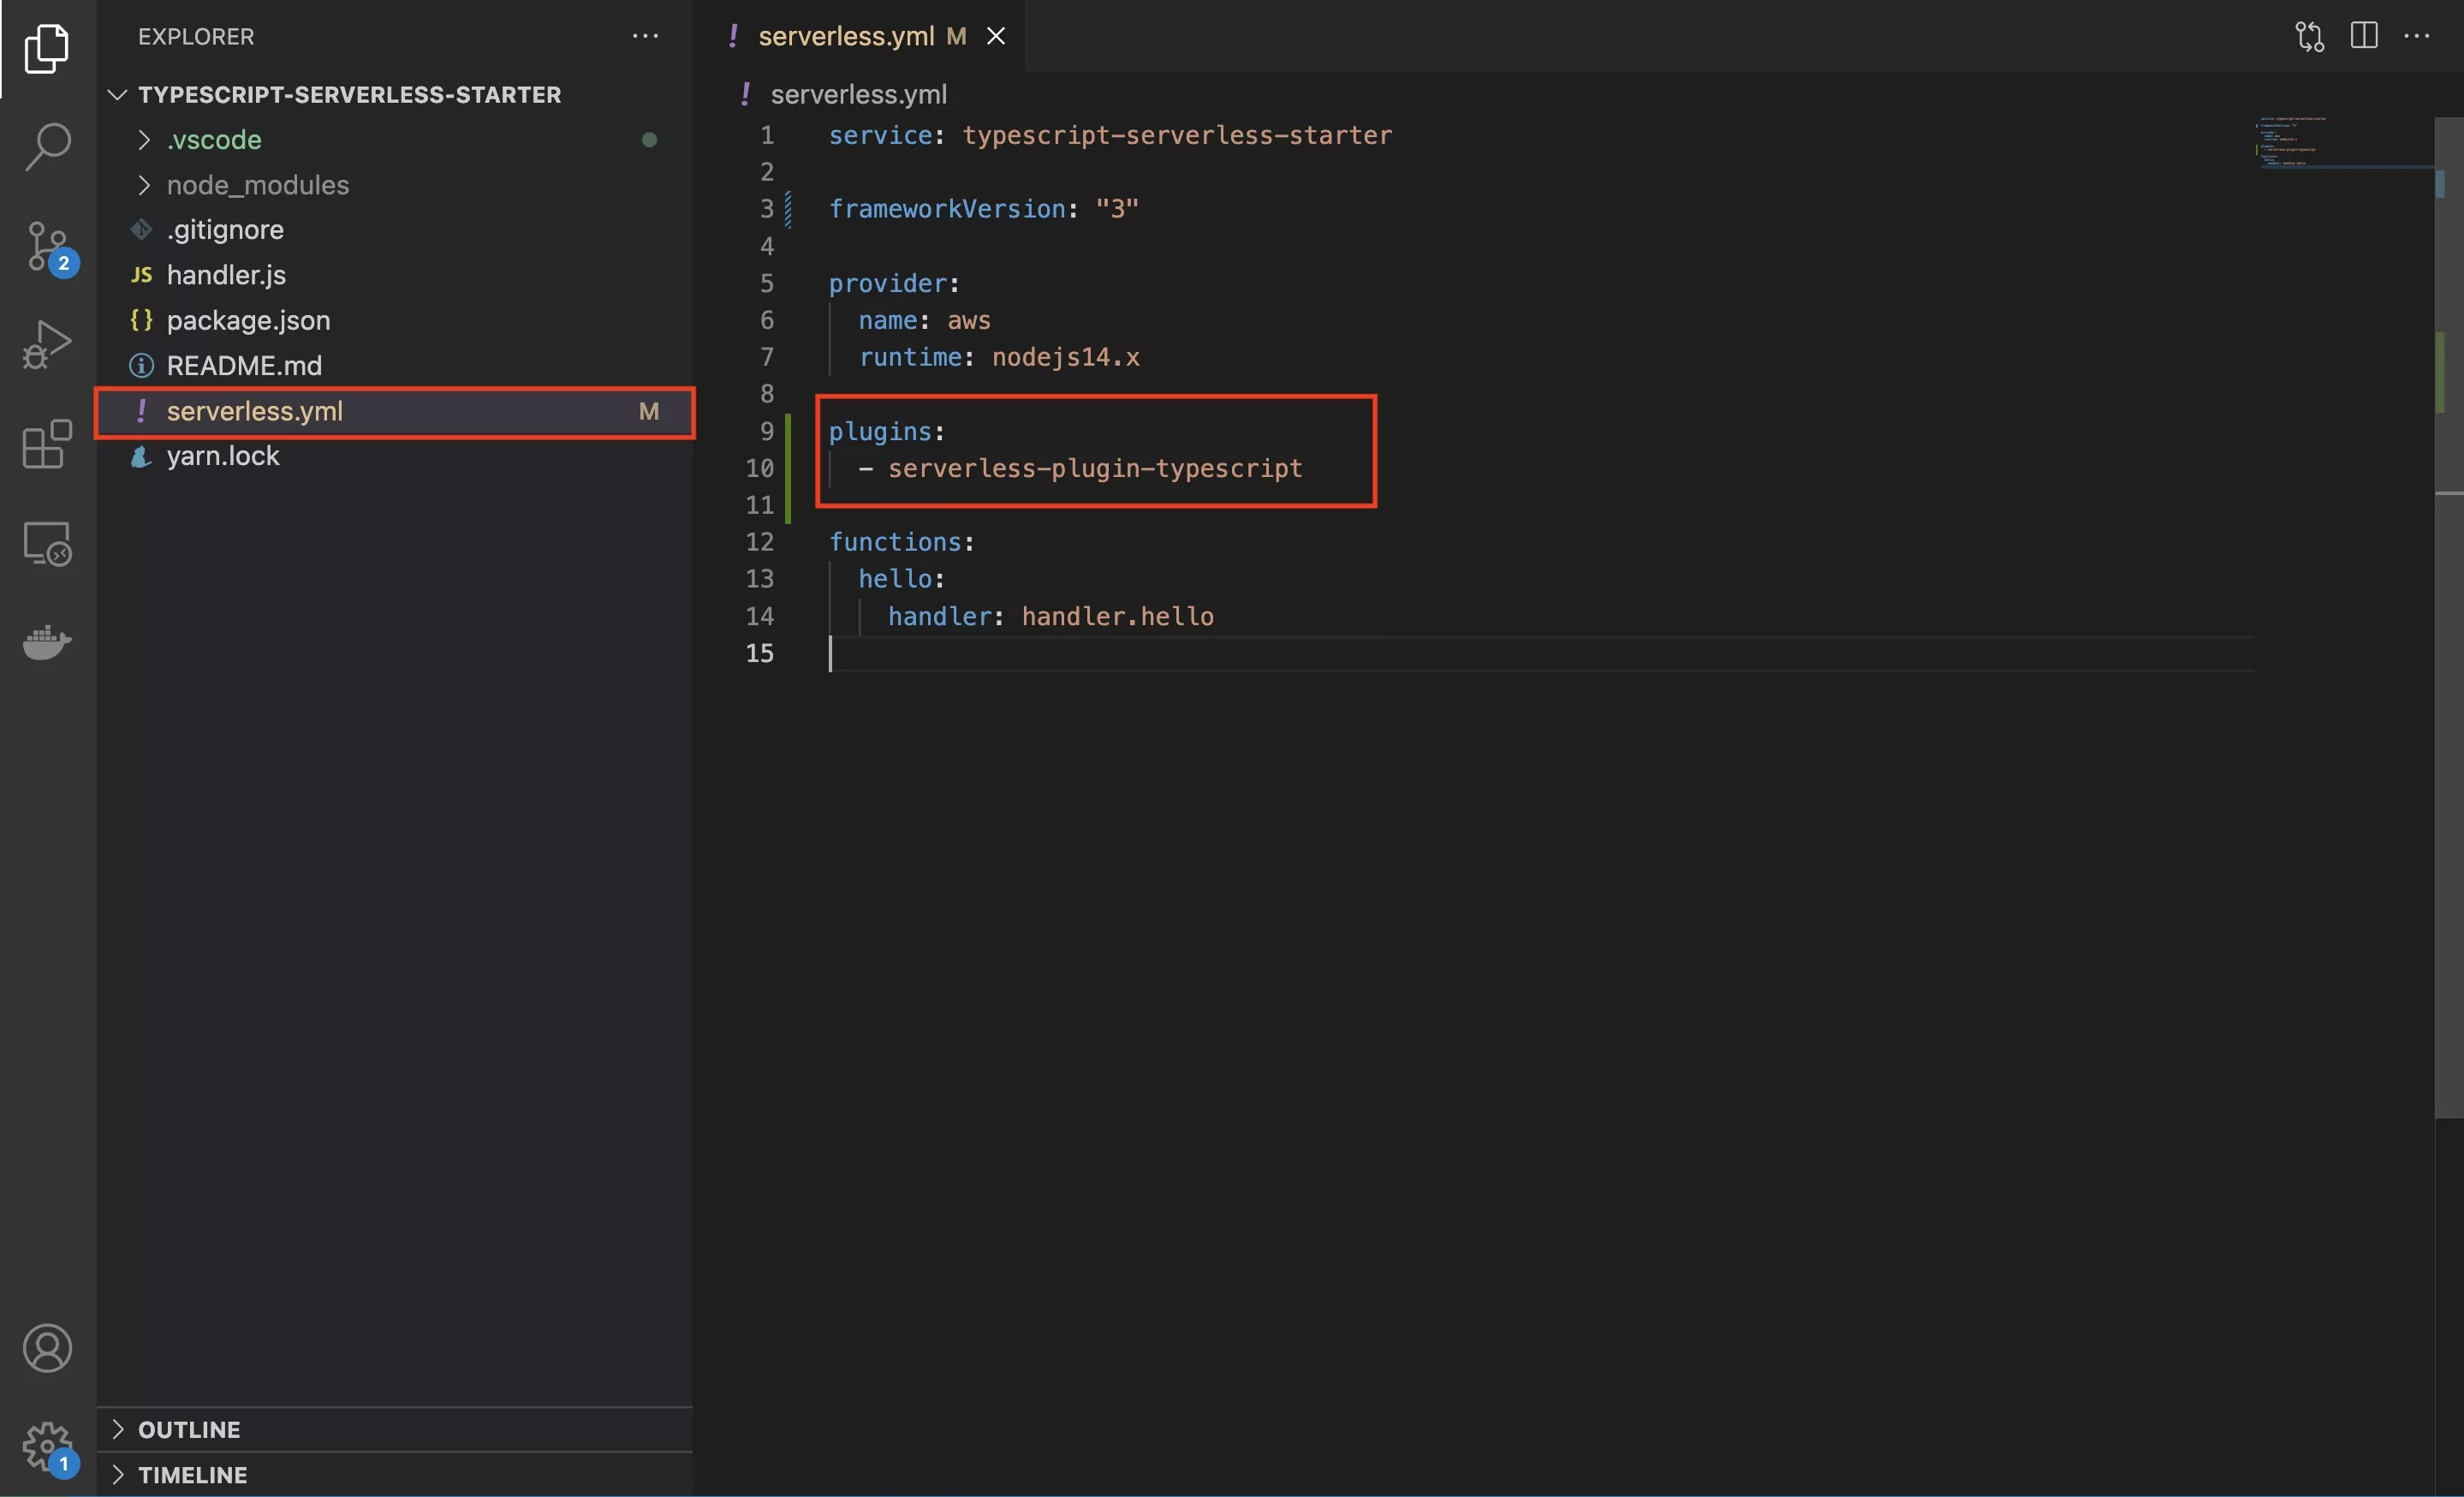
In the serverless.yml, add the typescript plugin.
Step Five: Create the Typescript configuration file
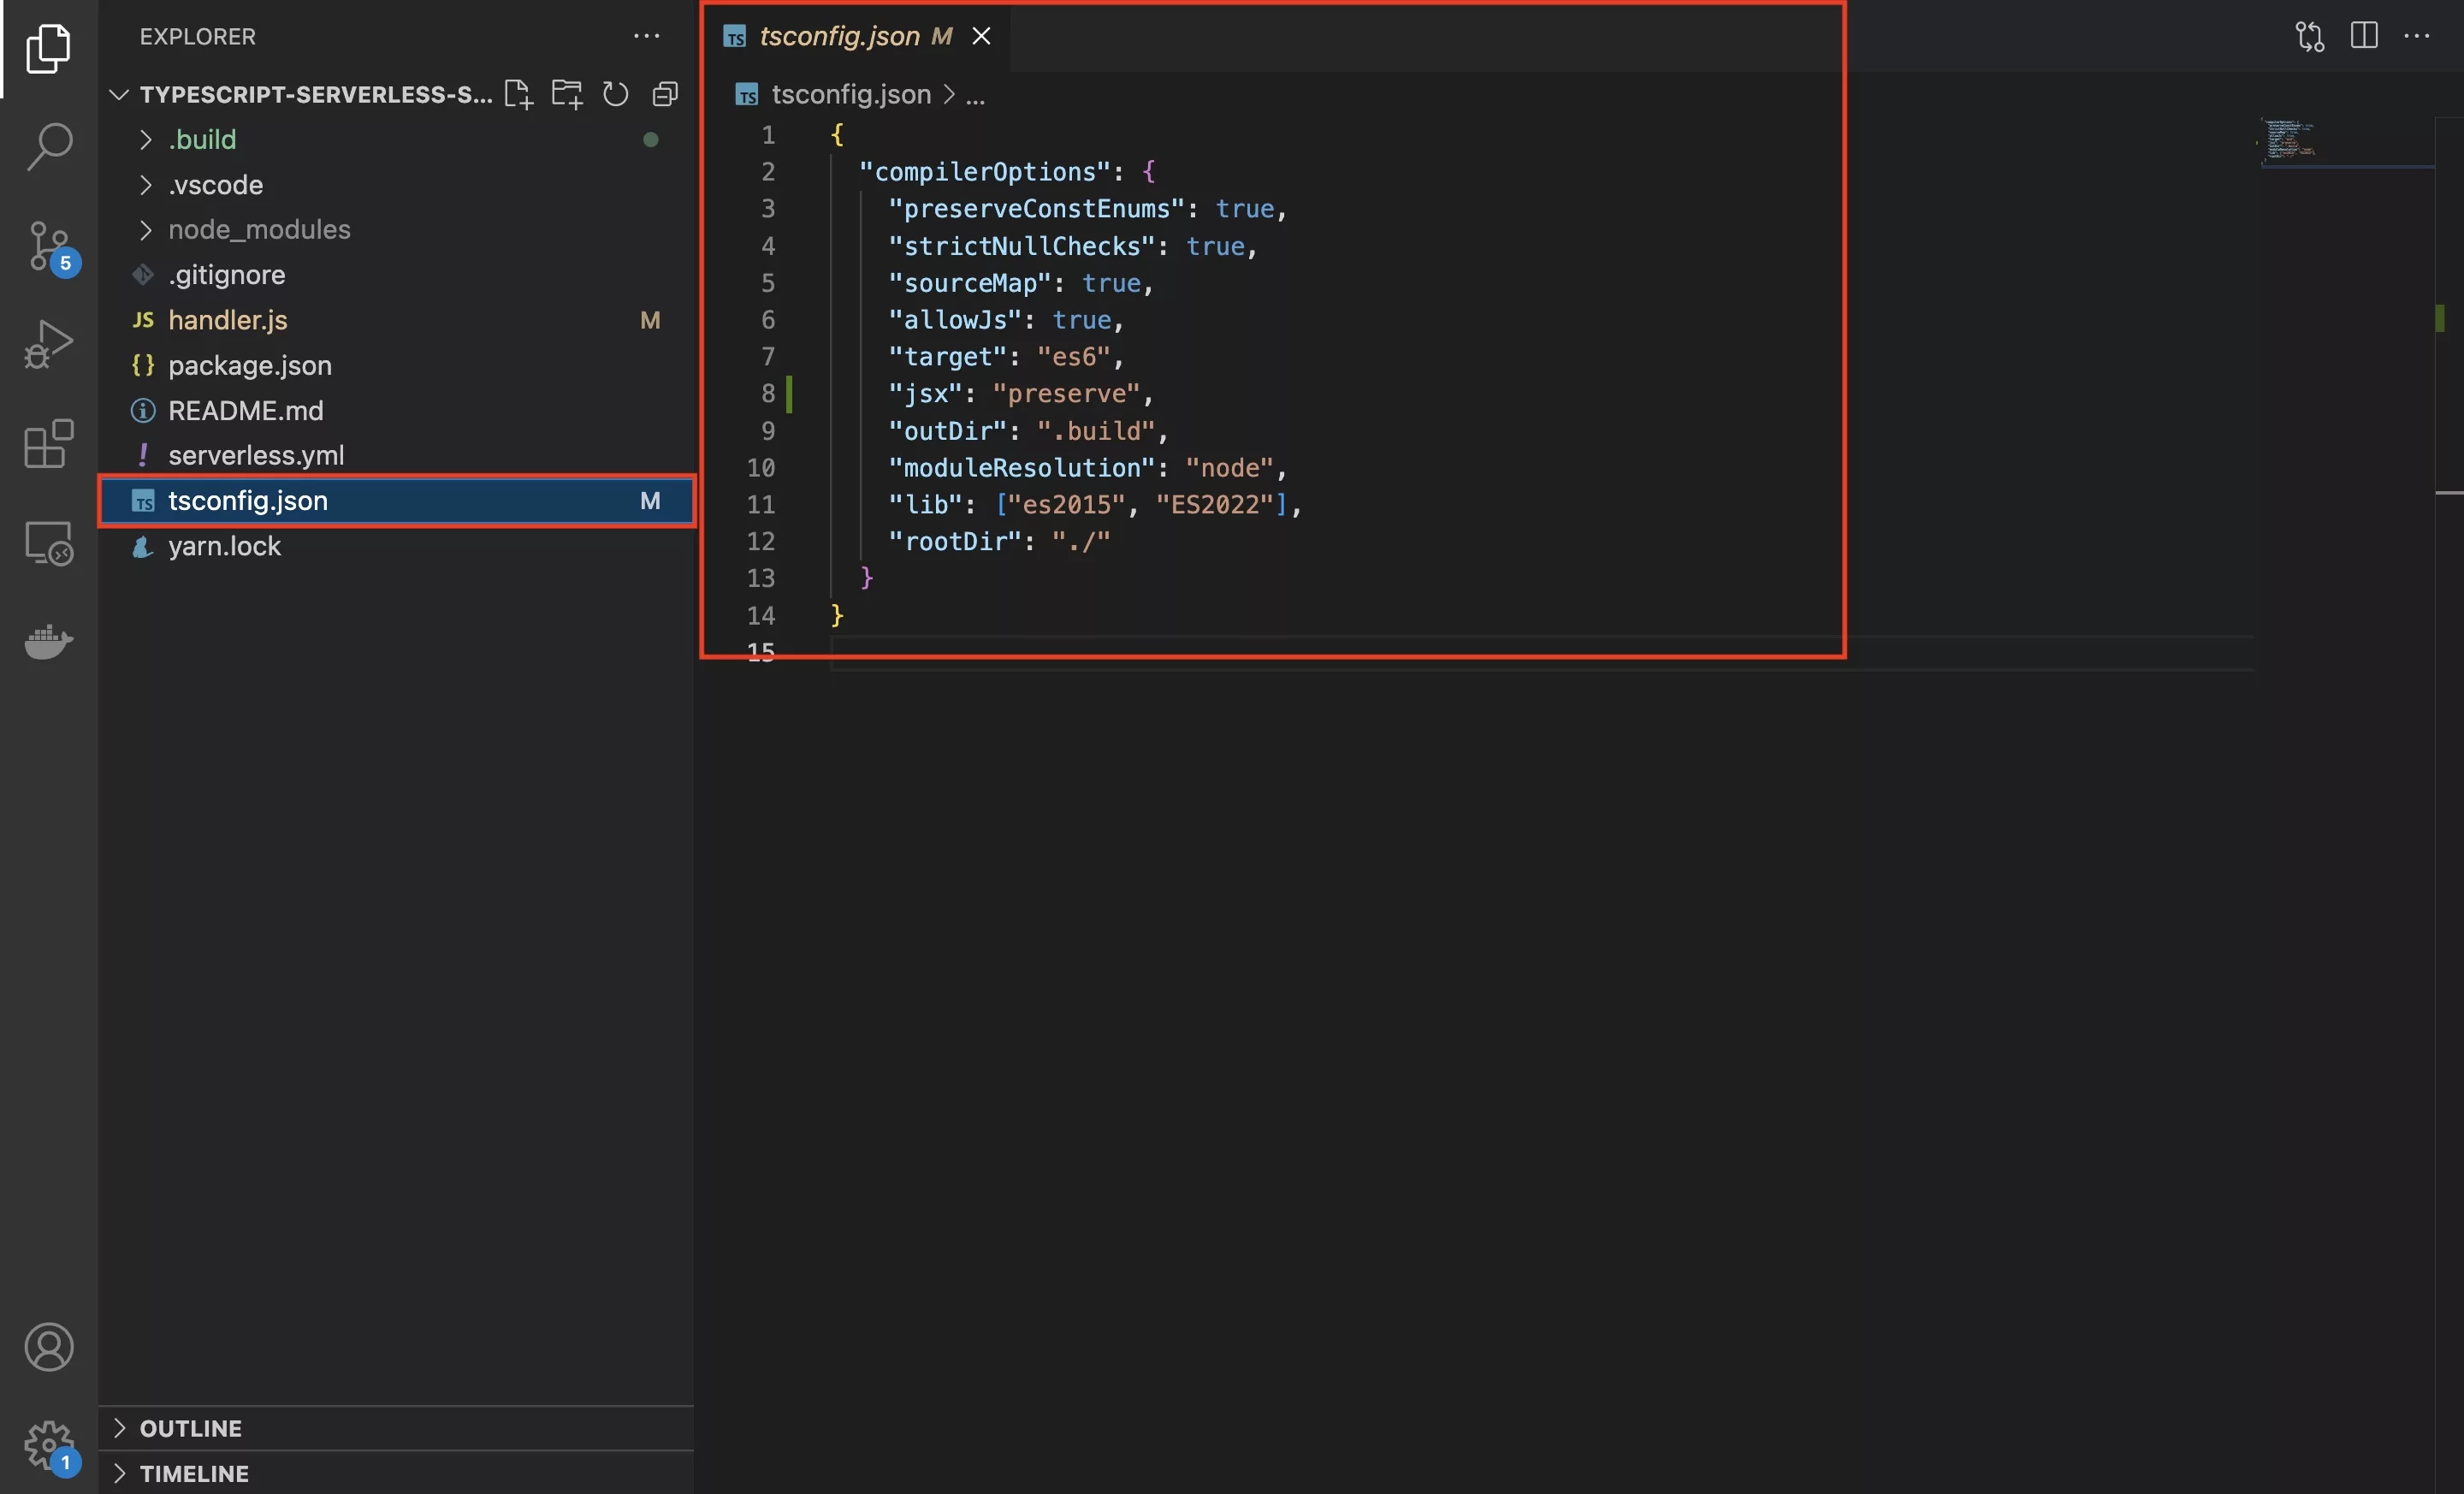
In the root of the project, create a new file called tsconfig.json and paste in the code below.
Step Six: Rename handler
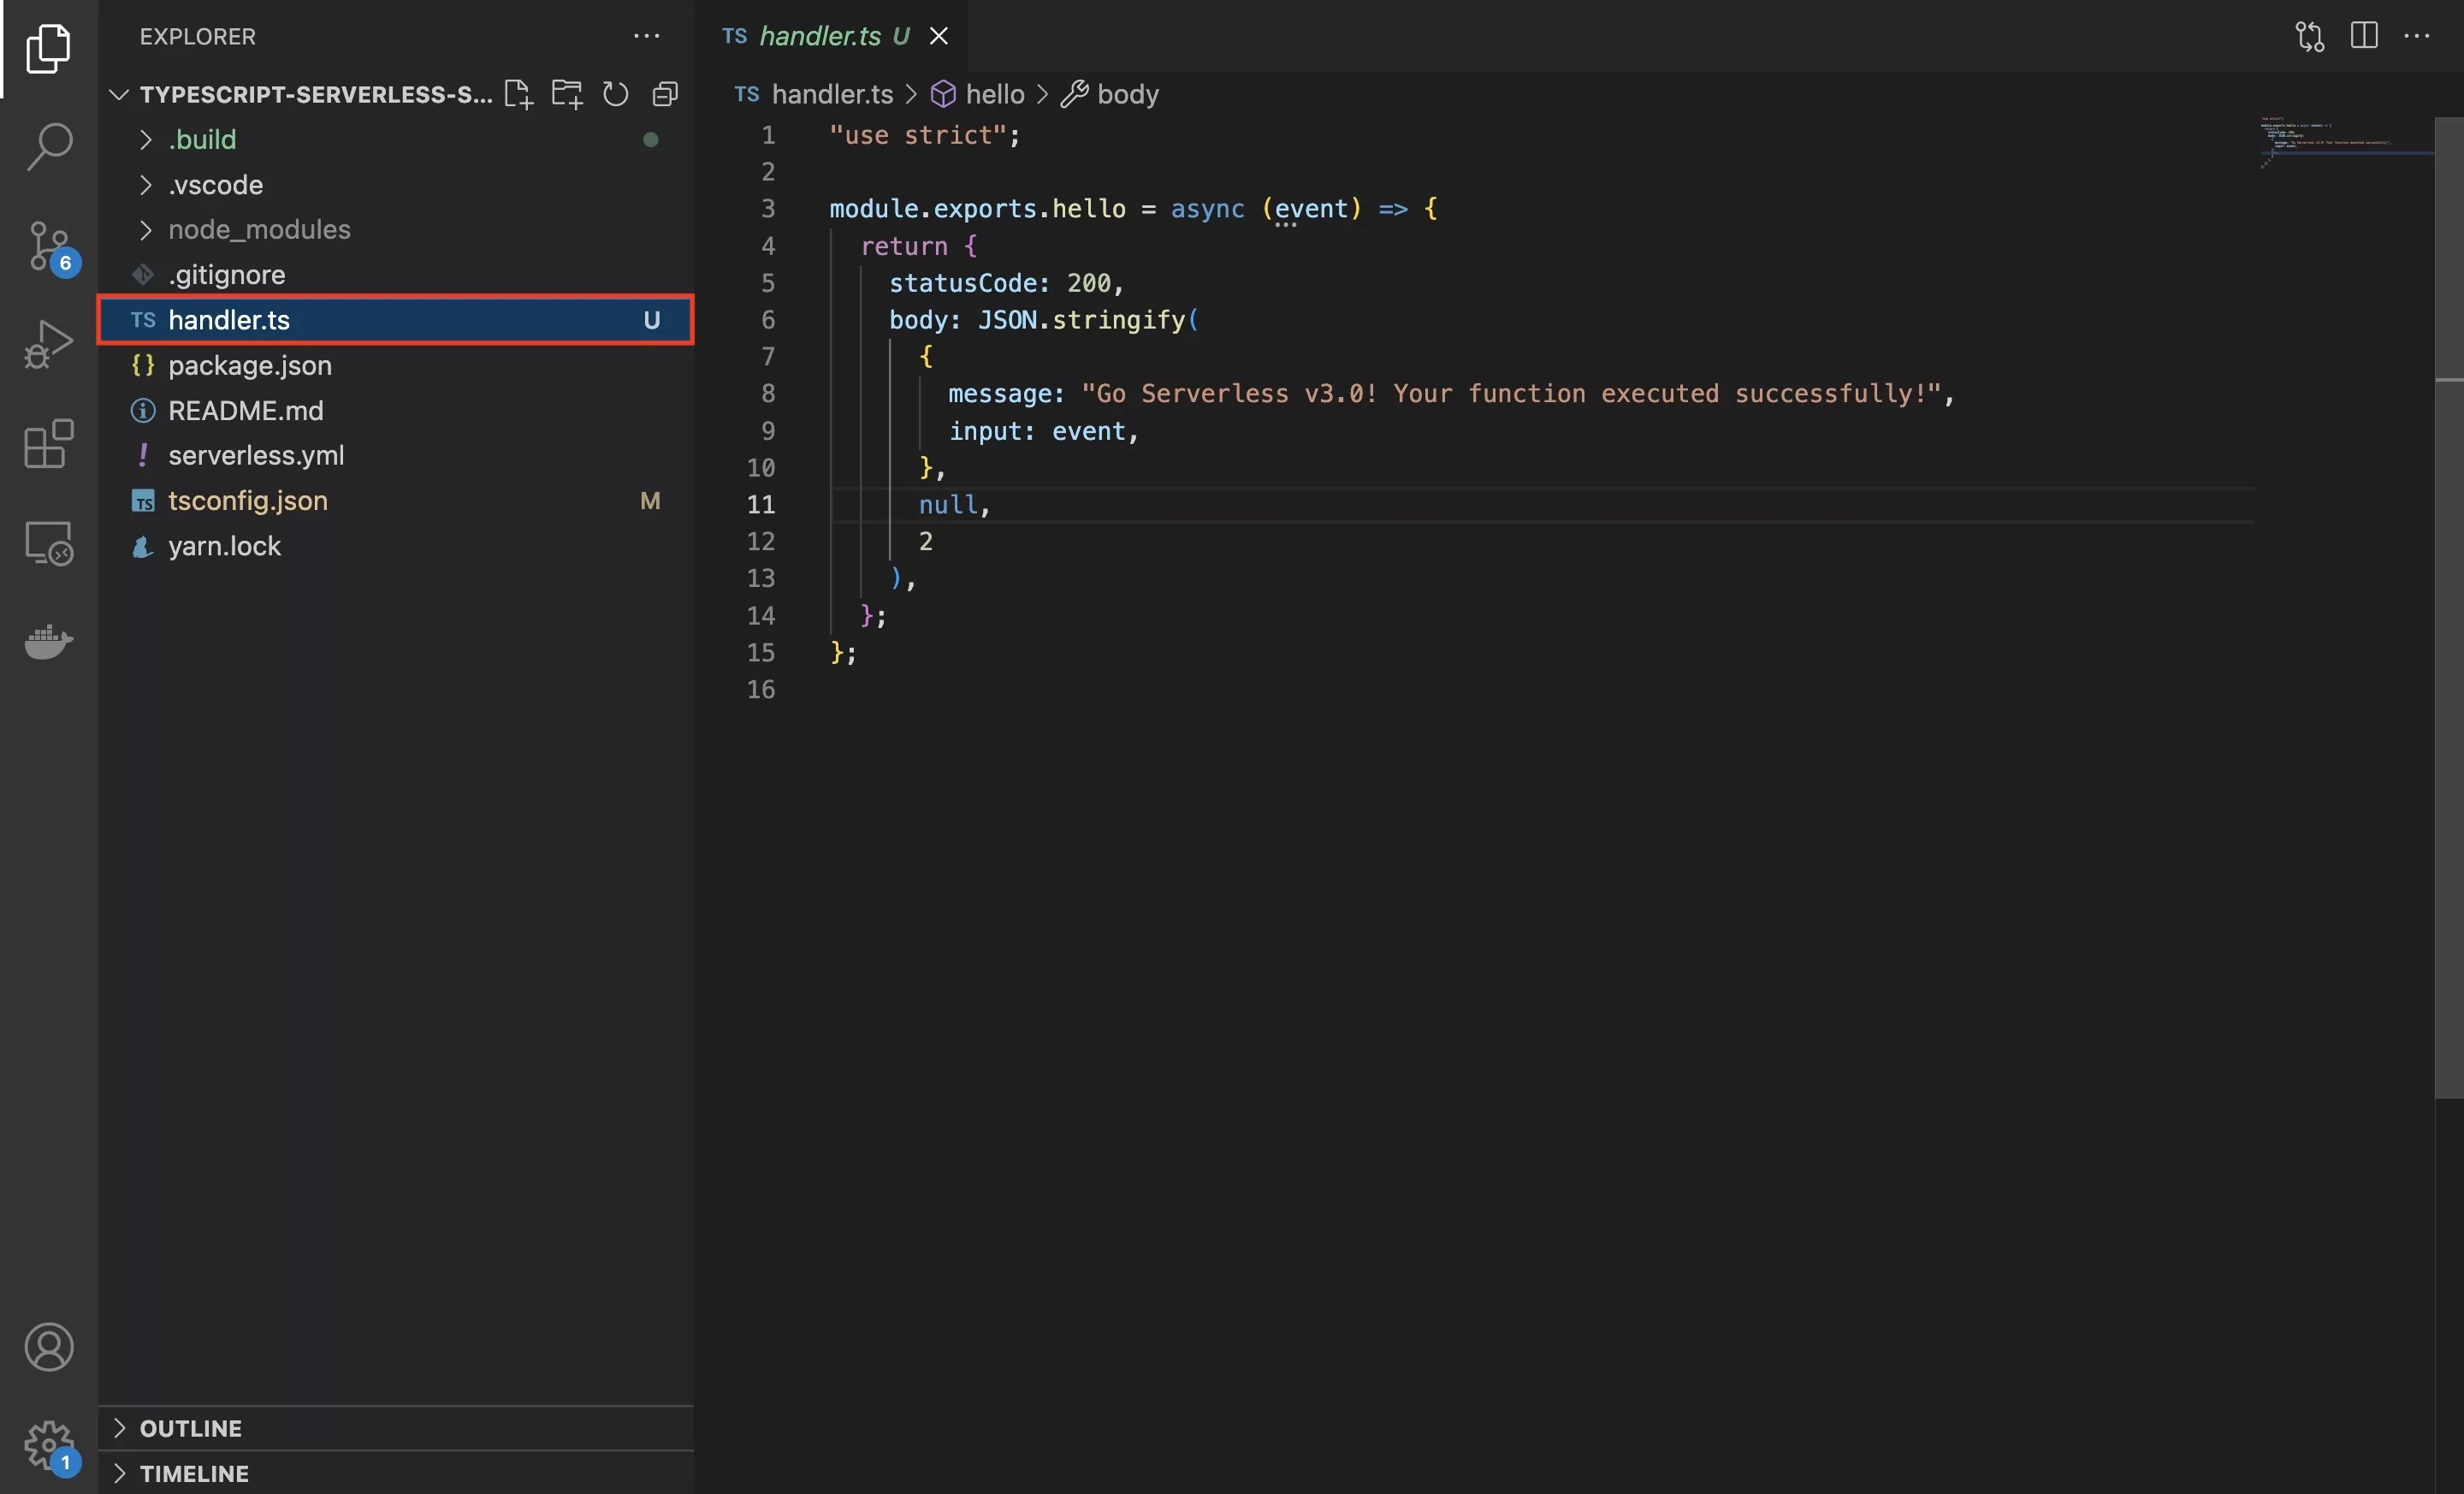
Change the name of handler.js to handler.ts.
Please note that only javascript (.js) or typescript (.ts) are supported, Typescript JSX files (.tsx) are not supported.
Step Seven: Update gitignore
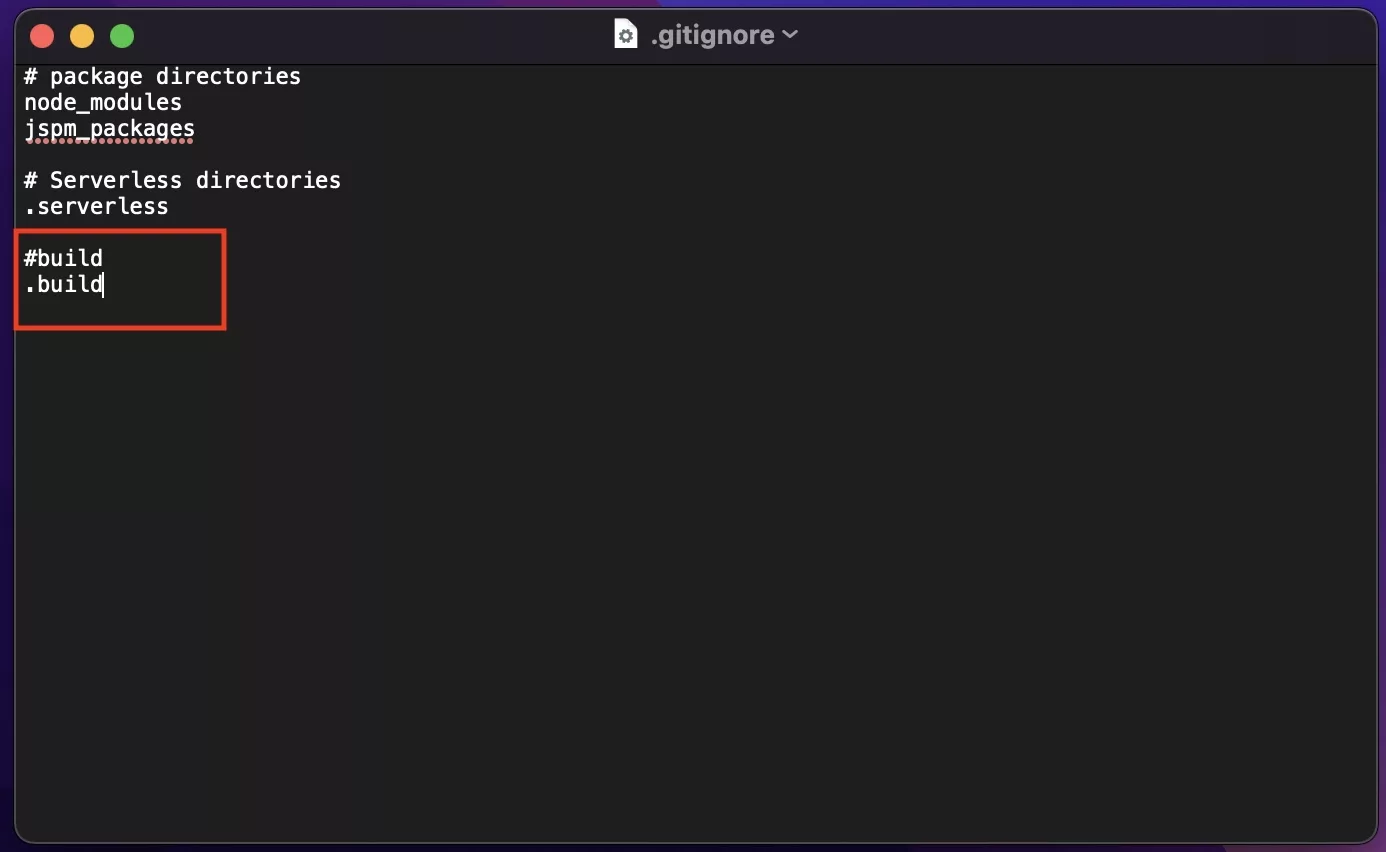
Update the .gitignore to not track the build folder (.build).
Any Questions?
We are actively looking for feedback on how to improve this resource. Please send us a note to inquiries@delasign.com with any thoughts or feedback you may have.