How to create & setup a plugin in Craft CMS
A step by step walkthrough on creating a plugin in Craft CMS 4. Github repository included.

A step by step walkthrough on creating a plugin in Craft CMS 4. Github repository included.
"Most customizations come in the form of a module or a plugin.
As Yii’s documentation puts it(opens new window), modules are “self-contained software units that consist of models, views, controllers, and other supporting components”. In other words, modules extend the system in various ways, without needing to change any of the core system code.
Modules can be simple, serving a single purpose like providing a new Dashboard widget type, or they can be complex, introducing entirely new concepts to the system, like an ecommerce application.
Plugins are a Craft-specific concept, so you won’t find any mention of it in the Yii docs. They can do everything modules can do (plugins actually are modules, technically), and some other things that make them better for being publicly distributed:
- They can be installed/trialed/purchased from the Craft Plugin Store.
- They can make database changes when installed, updated, or uninstalled.
- They get their own settings page within the Settings section of the control panel.
- They can be enabled/disabled by an admin, without running any Composer commands.
If the thing you want to build would benefit from those features, make it a plugin. Otherwise, a module might be better."
The following tutorial walks you through how to create a Plugin and set it up with a Craft CMS project, ready for development and private deployment.
To speed up the process, we recommend that you either use pluginfactory.io to create the base plugin files or clone our repository by checking out the main branch and setting it up using our tutorial before carrying out the steps below. All changes can be found on the tutorial/plugin branch.
git clone git@github.com:delasign/craft-cms-starter.gitStep One: Setup your folder structure and base files
This step involves creating the Plugin.php base file and folder structure that allows your plugin to work with Craft CMS.
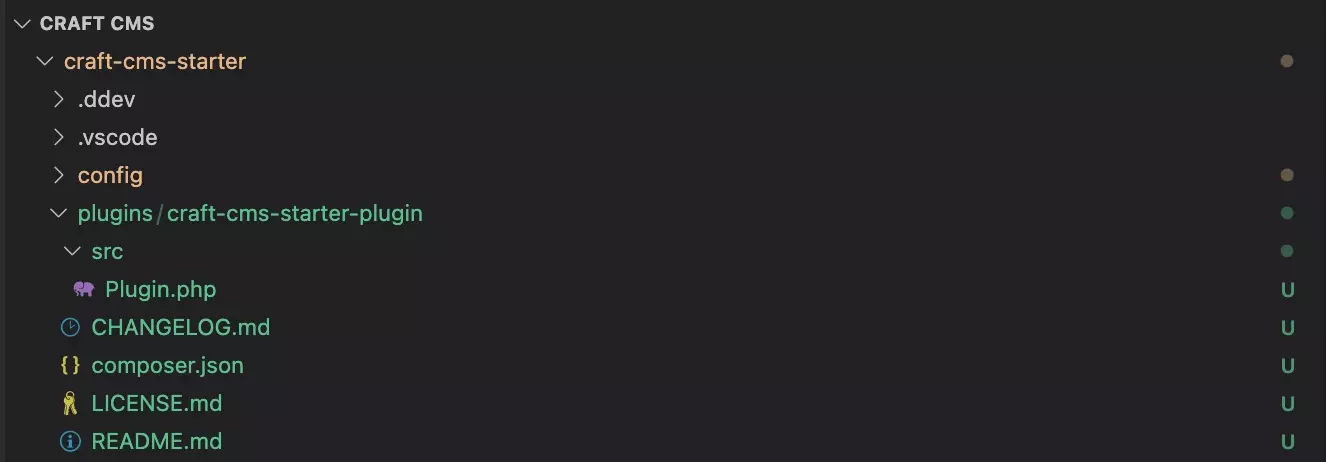
To do this, Craft CMS recommends that we create a folder and file structure similar to the one below where root-folder is the folder that holds the folder of your Craft CMS folder (craft-cms-starter) and the plugin folder (craft-cms-starter-plugin).
We recommend that the "root-folder" is used to hold all your Craft CMS projects as this plugin is intended to be reusable.
Please note that the code for the Plugin.php & composer.json are found in subsequent steps.
~/root-folder
├── craft-cms-starter
│ ├── .git
│ └── ...
└── craft-cms-starter-plugin
 ├── CHANGELOG.md
 ├── LICENSE.md
 ├── README.md
 ├── composer.json
 └── src
 └── Plugin.php
Please note Plugin.php falls under the src folder. The HTML wouldn't let it keep its formatting.
For this tutorial, we have chosen to make a private plugin and make it available as part of the repository, which allows us to deploy it as part of the same project. This would have an architecture as follows:
~/root-folder
├── craft-cms-starter
├── .git
├── ...
└── plugins
 └── craft-cms-starter-plugin
 ├── CHANGELOG.md
 ├── LICENSE.md
 ├── README.md
 ├── composer.json
 └── src
 └── Plugin.php
Please note Plugin.php falls under the src folder. The HTML wouldn't let it keep its formatting.
Step Two: Code the Plugin.php base
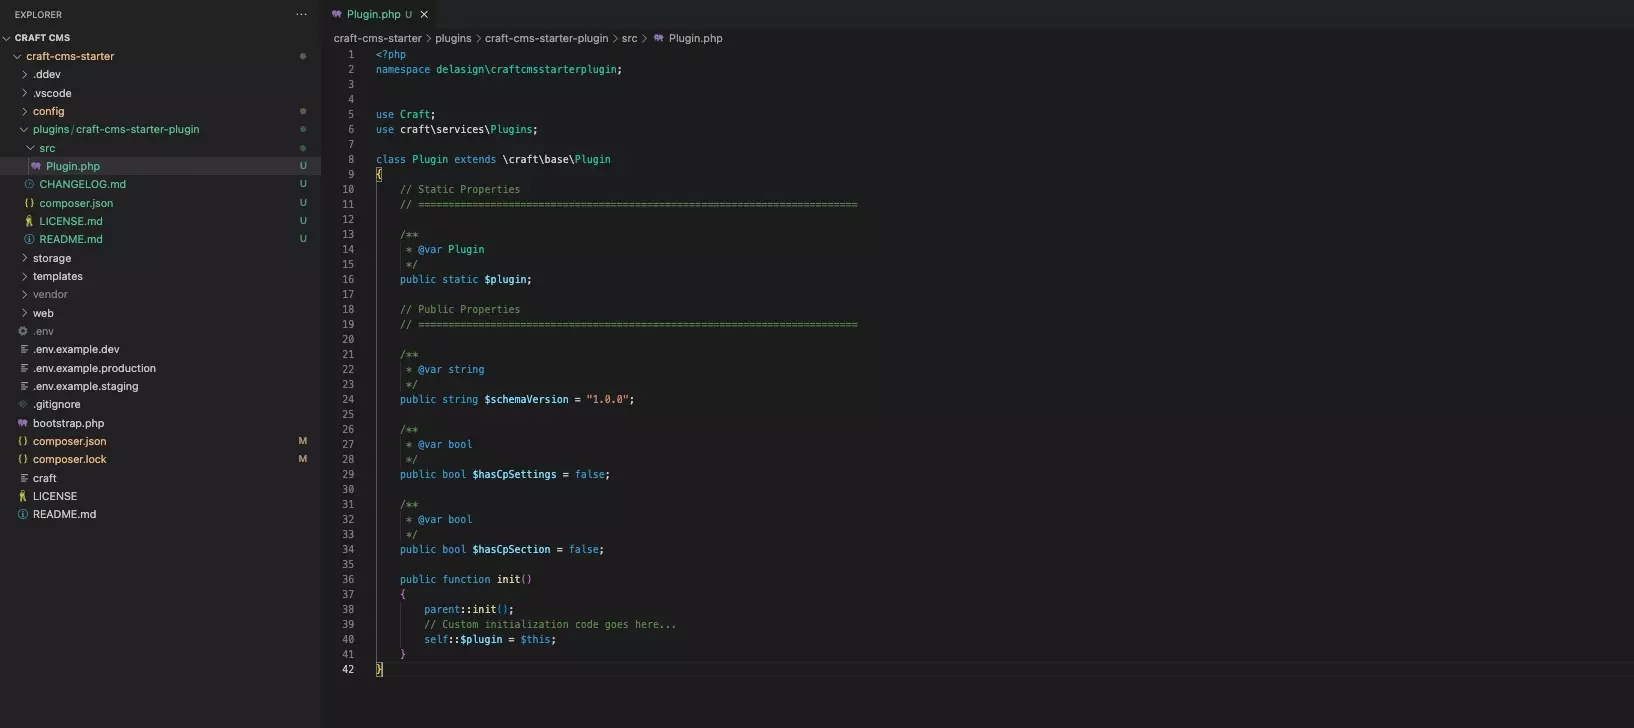
Copy the code below into your Plugin.php.
Replace mynamespace with your vendor name and package name in the format package\name (i.e. delasign\craftcmsstarterplugin). Please note that namespaces cannot use dashes or spaces.
Step Three: Code the composer.json
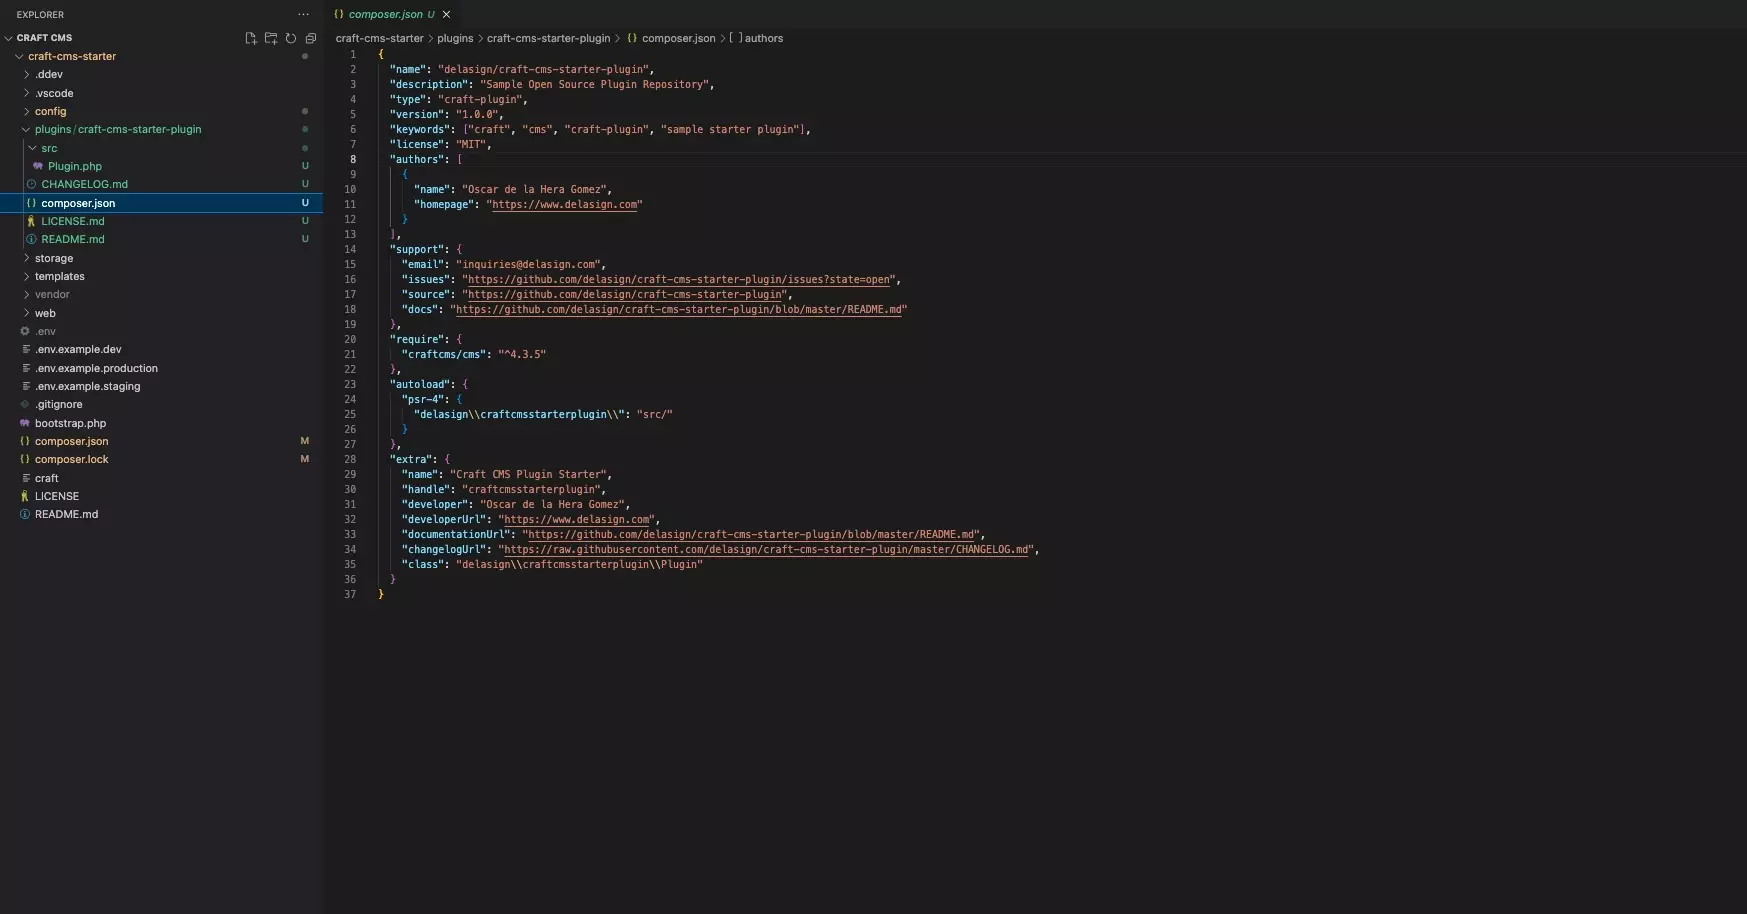
Copy the code below into your composer.json.
Replace:
- package/json with your vendor name and package name that you used in step two (i.e. delasign/craft-cms-starter-plugin). Please note package names can use dashes but no spaces.
- namespace\\prefix with your namespace and plugin i.e. delasign\\craftcmsstarterplugin\\. This should match the same as in your Plugin.php.
Please note that the composer's requirement for craftcms/cms must match your project's minimum for it to work. i.e. a plugin with 3.1.0 only works with a project whose minimum is 3.1.0. If you forget this, when you go to install the plugin, you will be alerted.
This completes the base requirements for your plugin. The next steps involve setting it up for development.
Step Four: Add the plugin to your project

In your Craft CMS project composer.json (i.e. craft-cms-starter/composer.json) add the following code to the top of your composer file, replacing "../my-plugin" with the path to your plugin i.e. "../plugin/craft-cms-starter-plugin" or "../craft-cms-starter-plugin" if it sits outside your project repository.
Please replace @mynamespace on line 40 with an @ followed by the namespace of your plugin. This will help you access your directory when constructing your plugin.
Step Five: Make your project require the plugin
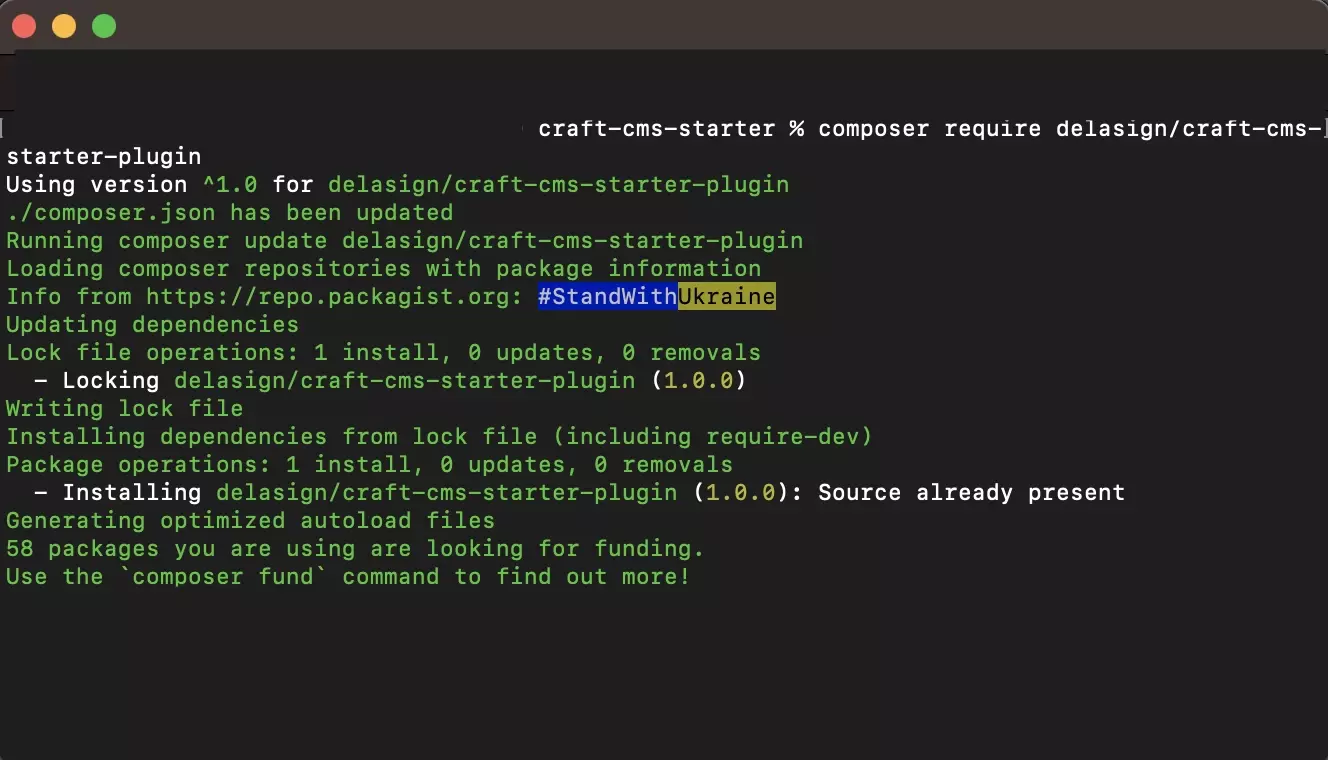
In Terminal, in the current directory of your Craft CMS project (i.e. root-folder/craft-cms-starter), run the following line:
Please replace "package/name" with the name that you gave your plugin in the composer.json that you created in Step Two (i.e. delasign/craft-cms-starter-plugin)
composer require package/nameStep Six: Install
Install the plugin to verify that the setup is complete.
A | Login
Log into your Craft CMS development instance.
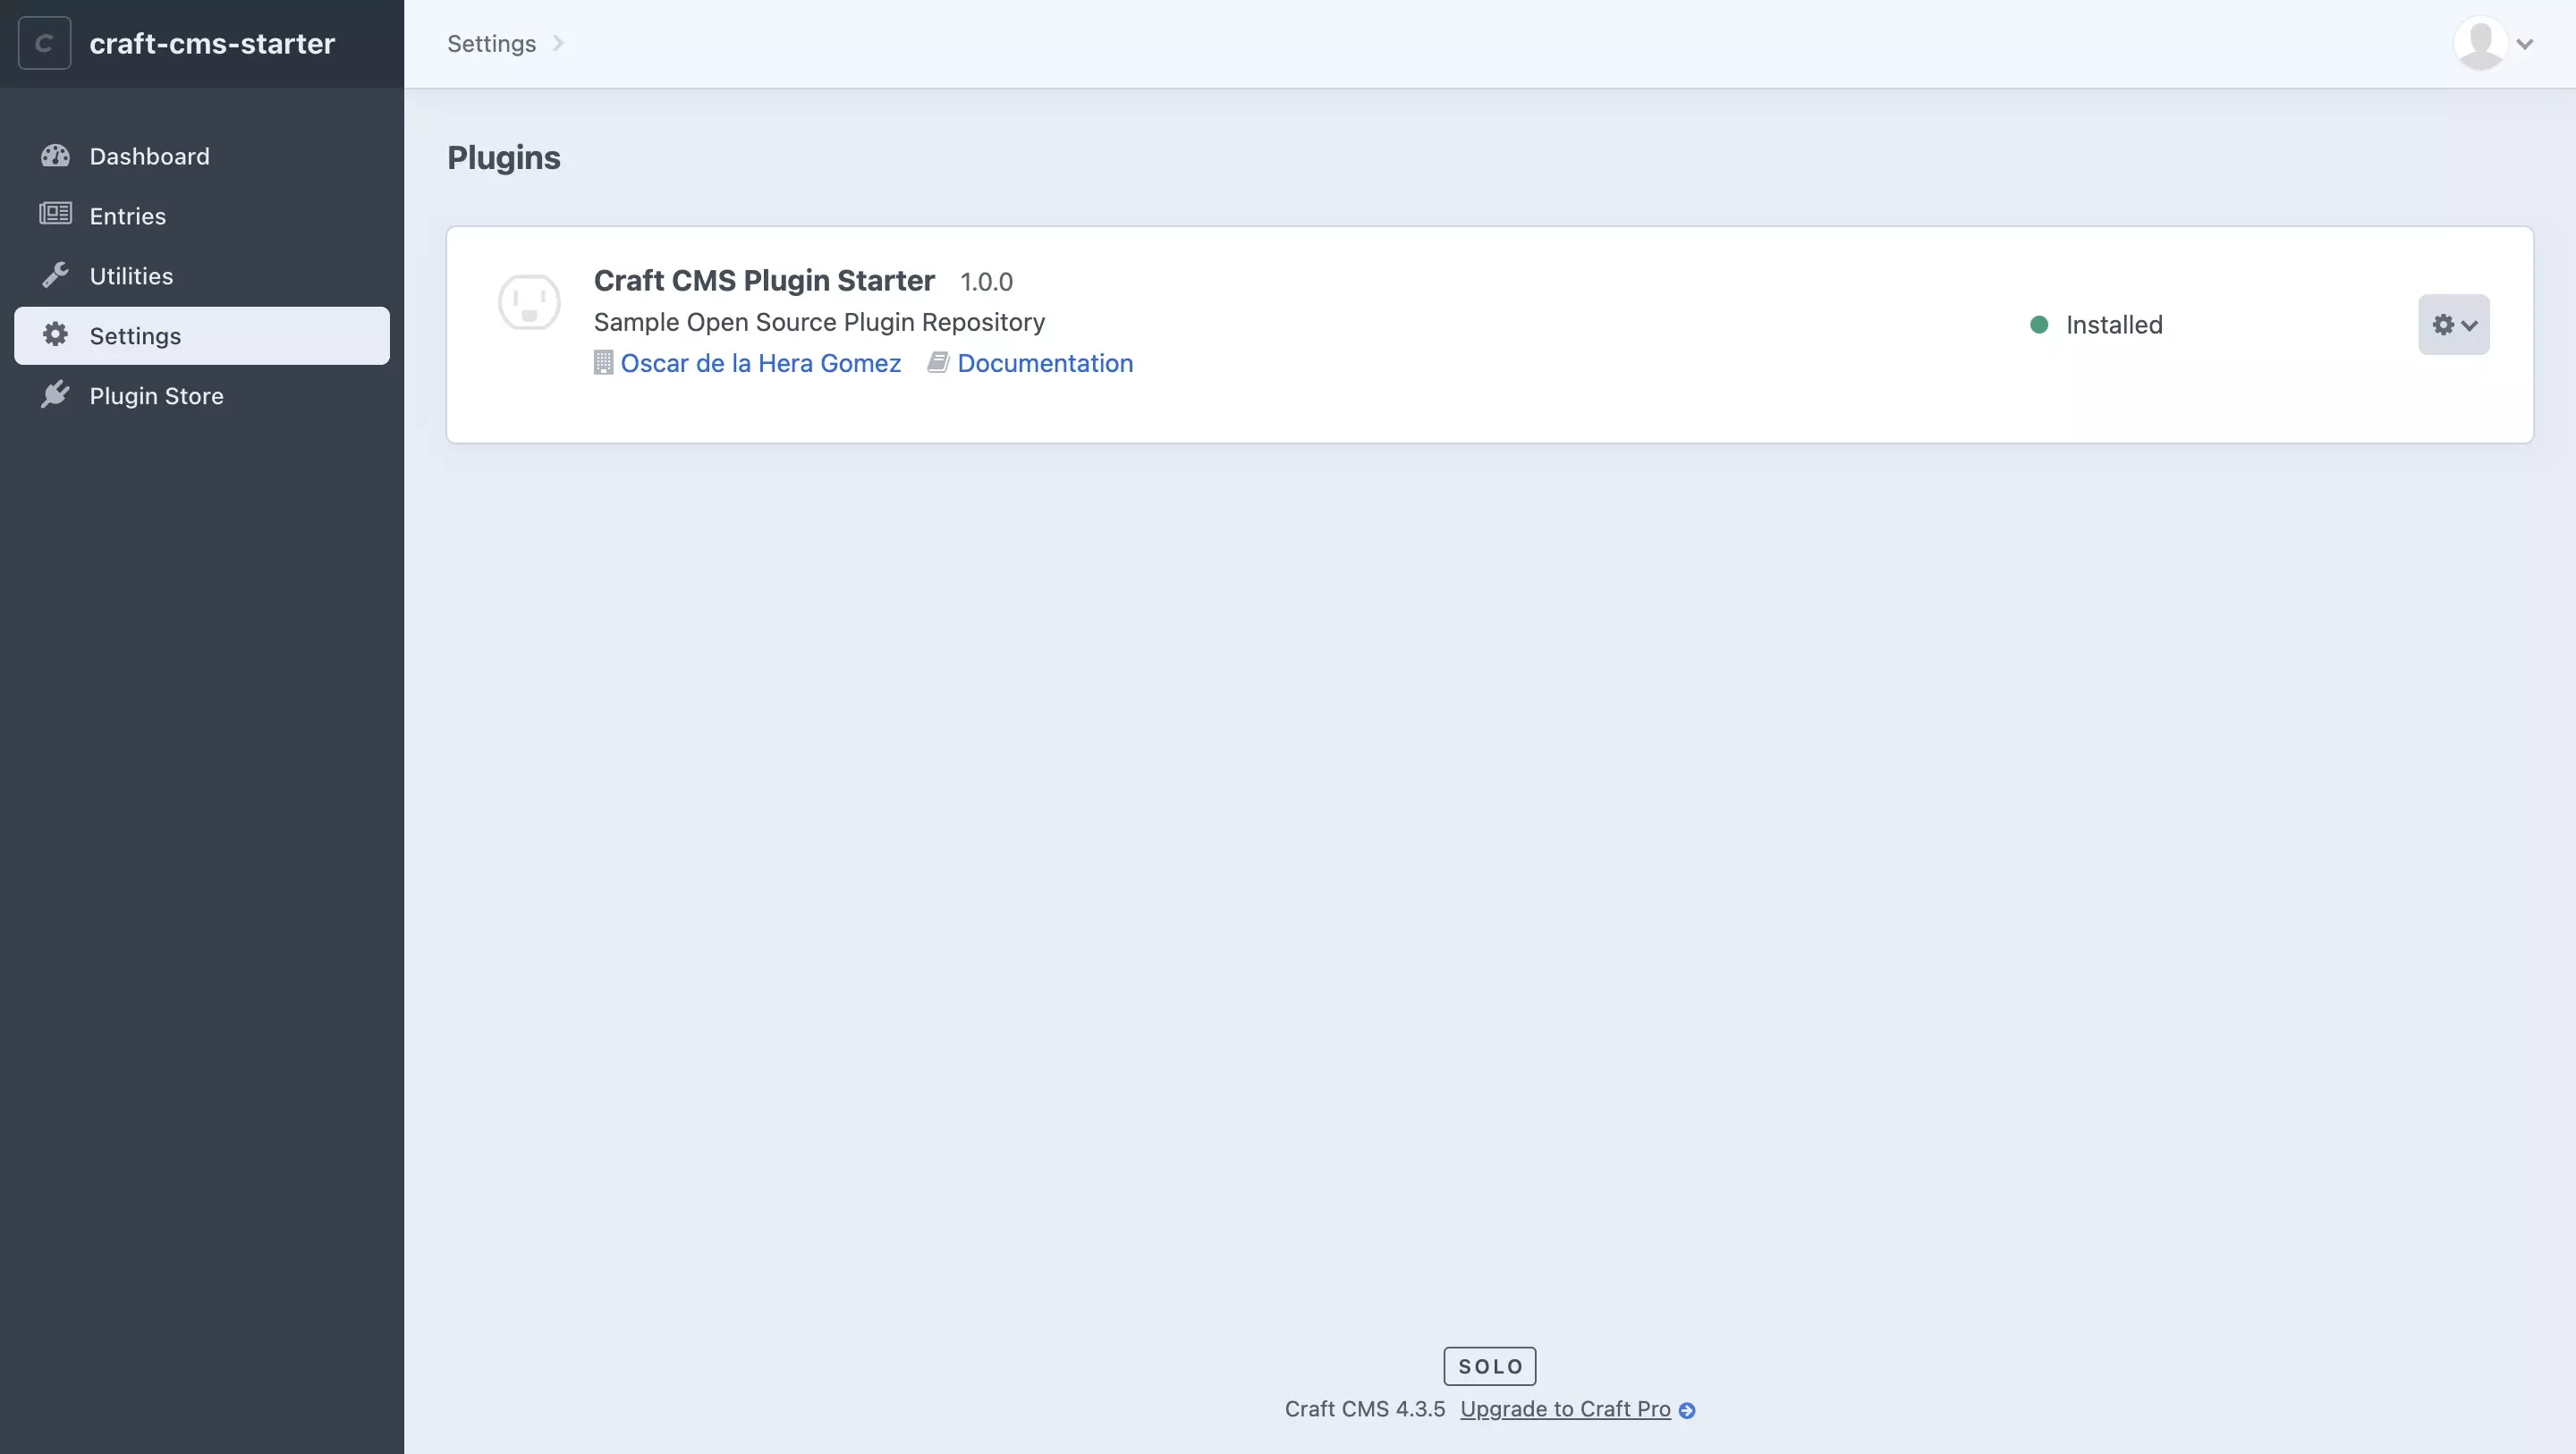
B | Select Settings
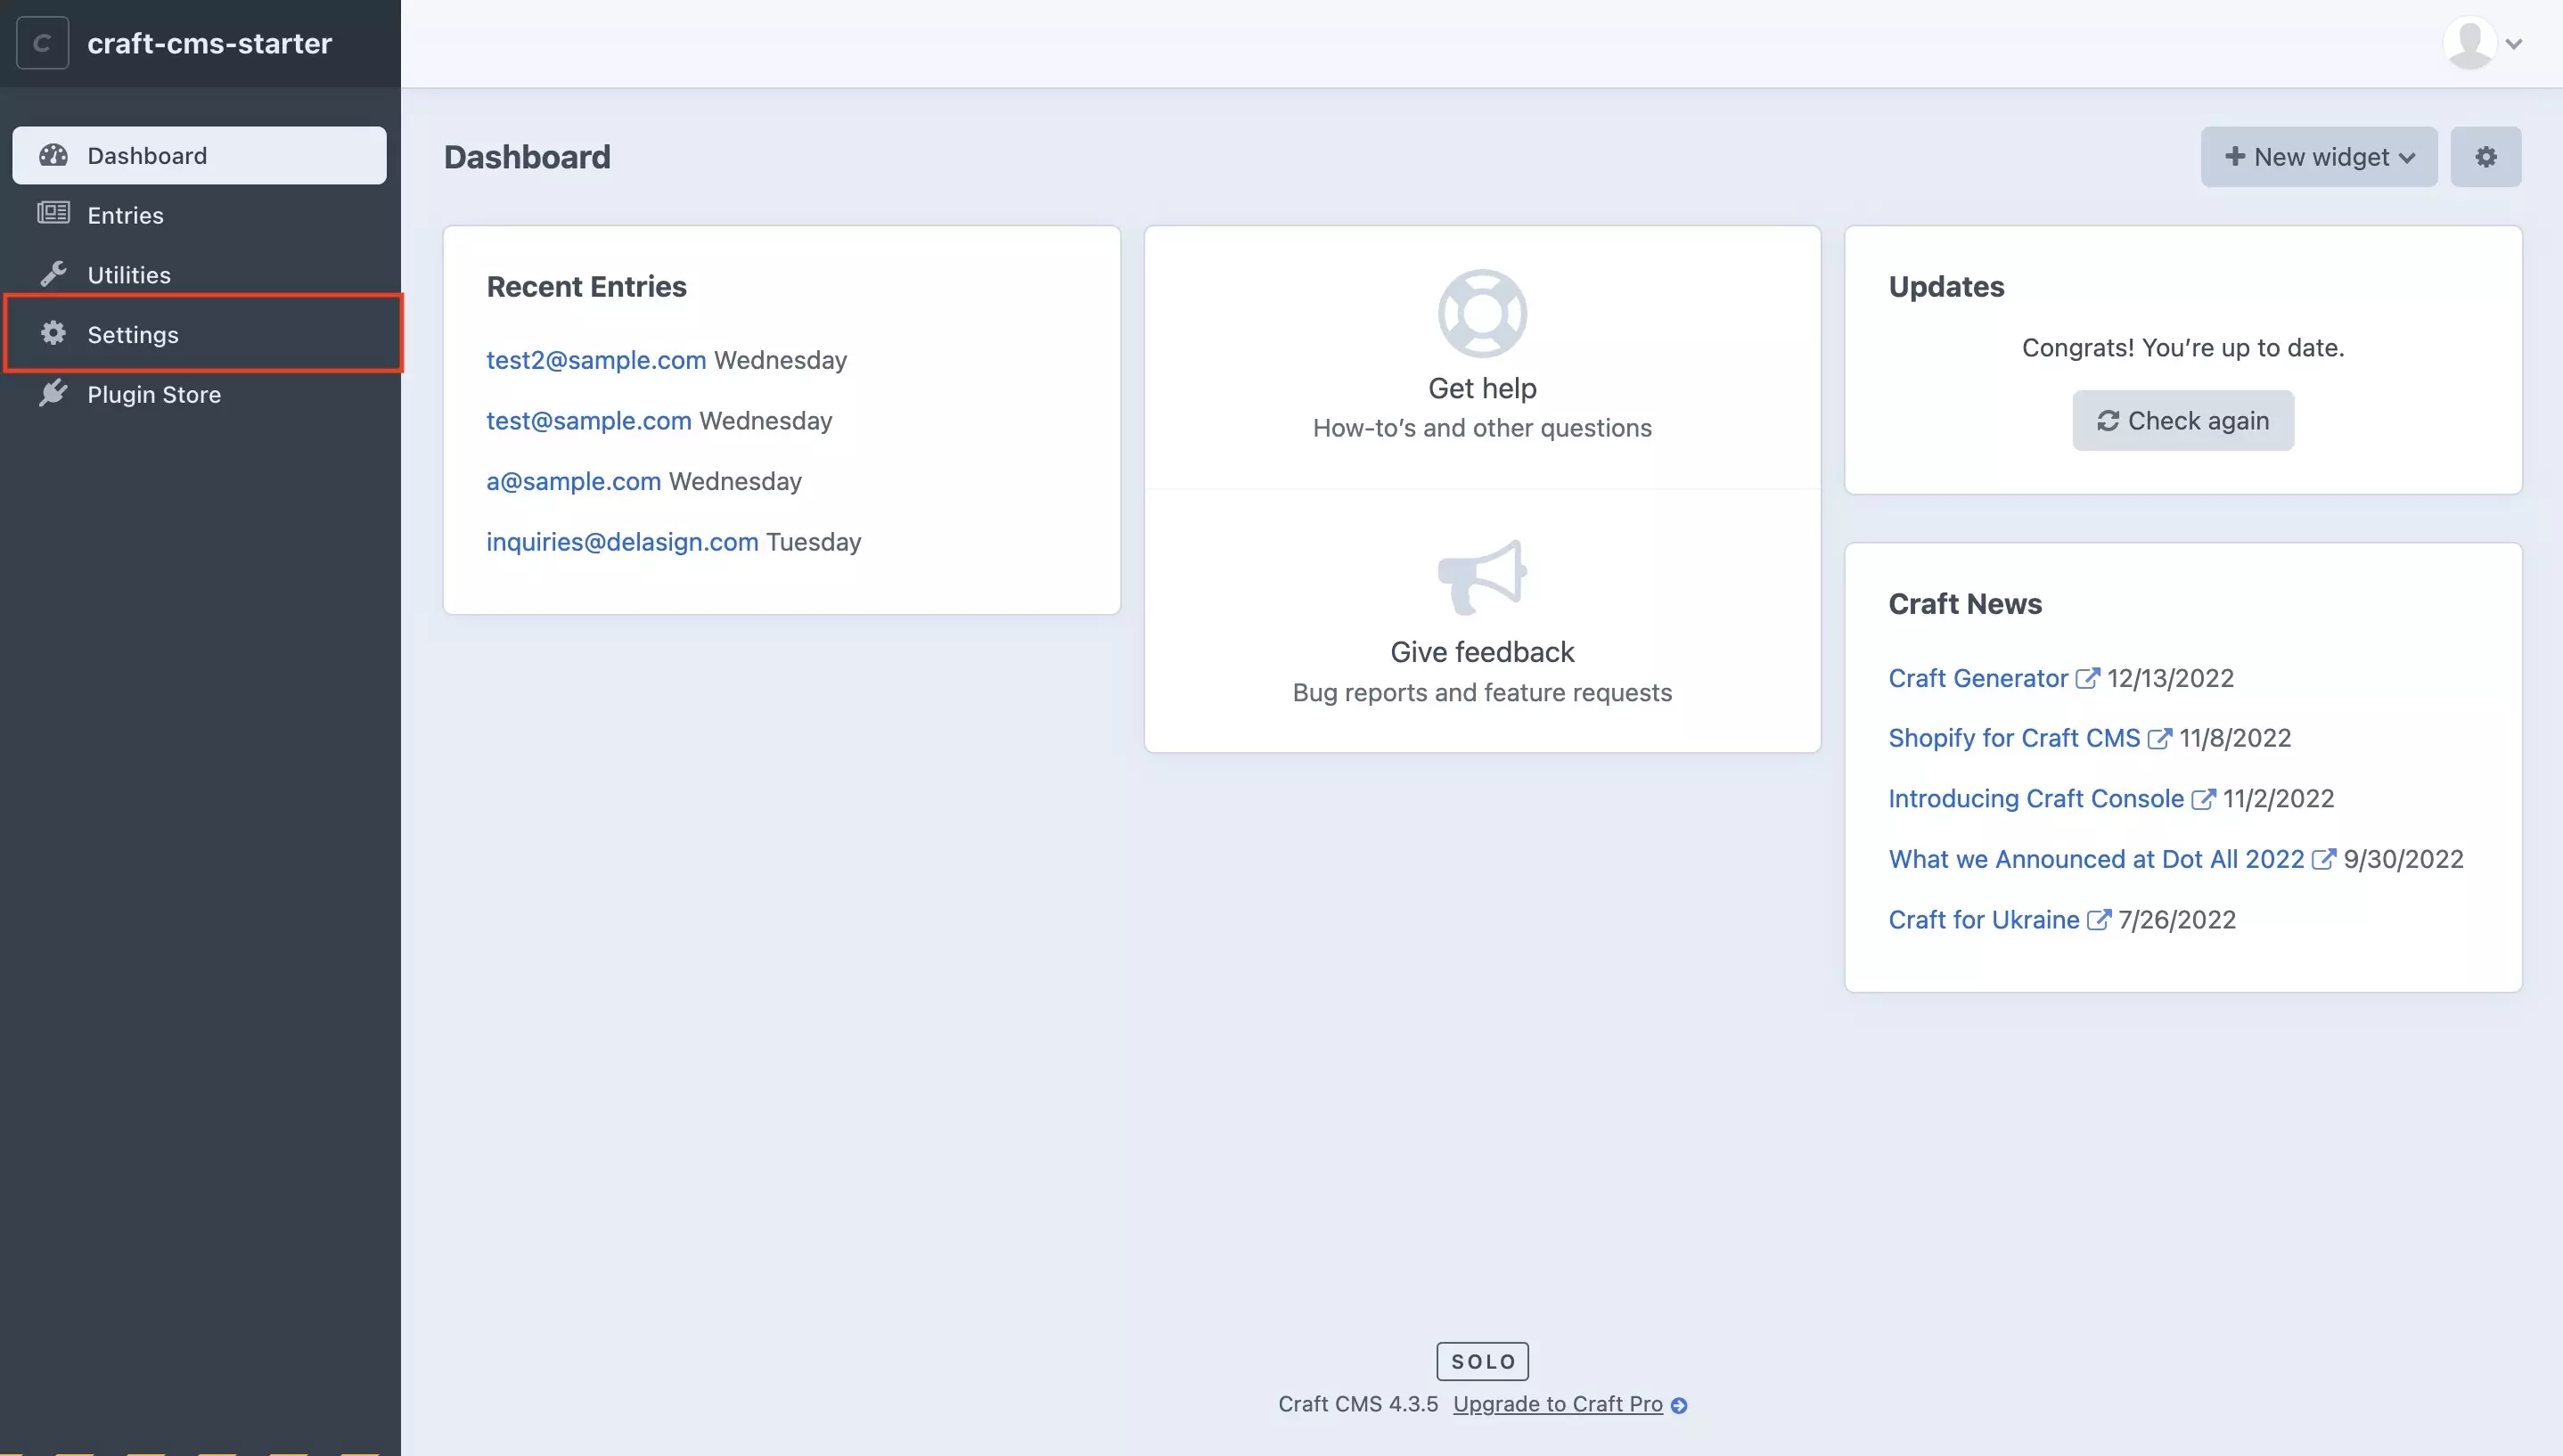
On the menu on the left side bar, select Settings.
C | Select Plugins

In the Settings window under System, select Plugins.
D | Install
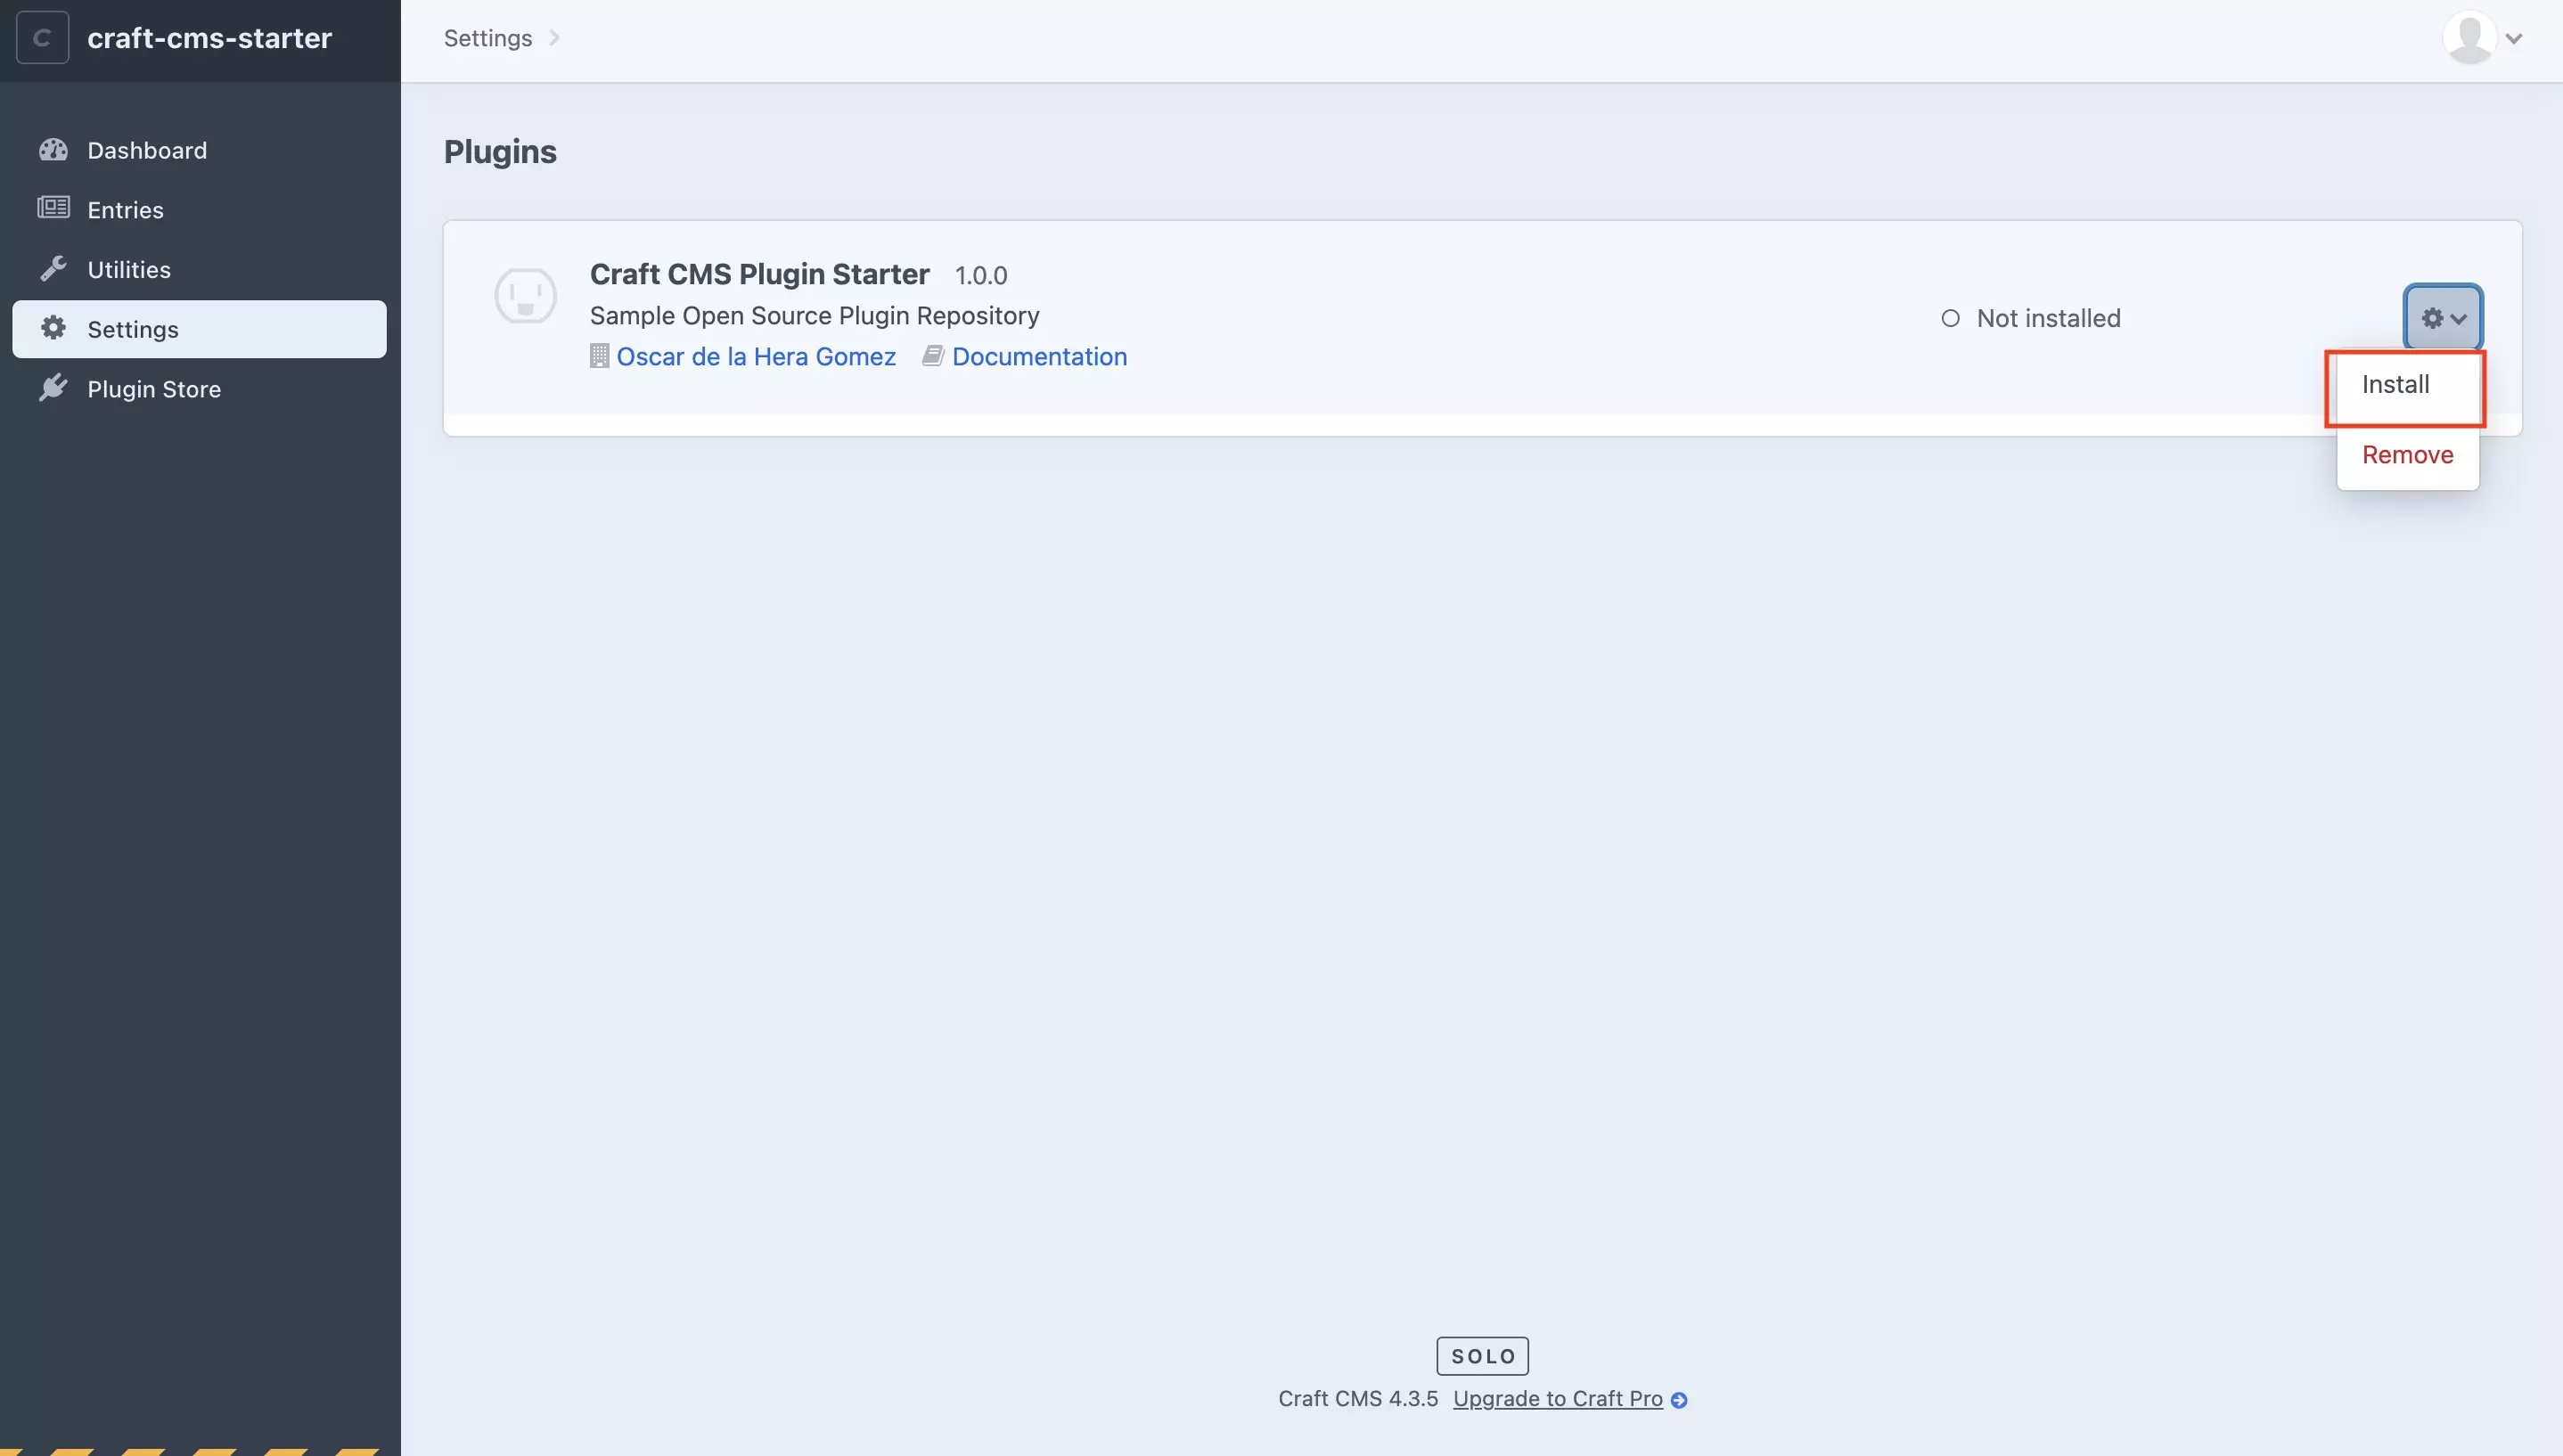
Press the Gear next to the plugin you created and select Install from the pop up that appears.
It should lead to a screen that labels the plugin as installed with a green circle, similar to the one below.
Would you like to change the icon? Follow our tutorial linked below.
Any Questions ?
We are actively looking for feedback on how to improve this resource. Please send us a note to inquiries@delasign.com with any thoughts or feedback you may have.