How to create & setup a Craft CMS Module
A step by step walkthrough on creating a Craft CMS 4.x module. GitHub repository included.

A step by step walkthrough on creating a Craft CMS 4.x module. GitHub repository included.
The following tutorial builds on our Open Source Craft CMS starter project and walks you through how to add a module to a Craft CMS project through the lens of a subscription module which we will use later for our API tutorial.
We recommend cloning or downloading our Open Source Project, checking out the main and completing the setup before continuing the steps outlined below. All changes can be found on the tutorial/module branch.
git clone git@github.com:delasign/craft-cms-starter.gitStep One: Setup your module file and folder structure
This step involves creating a base modules folder that allows you to structure modules in a way that's suggested by Craft. To do this, create a folder and file structure similar to the one below, where the foo folder that holds your Module.php.
my-project
├── modules
│ └── foo
│ └── Module.php
├── templates
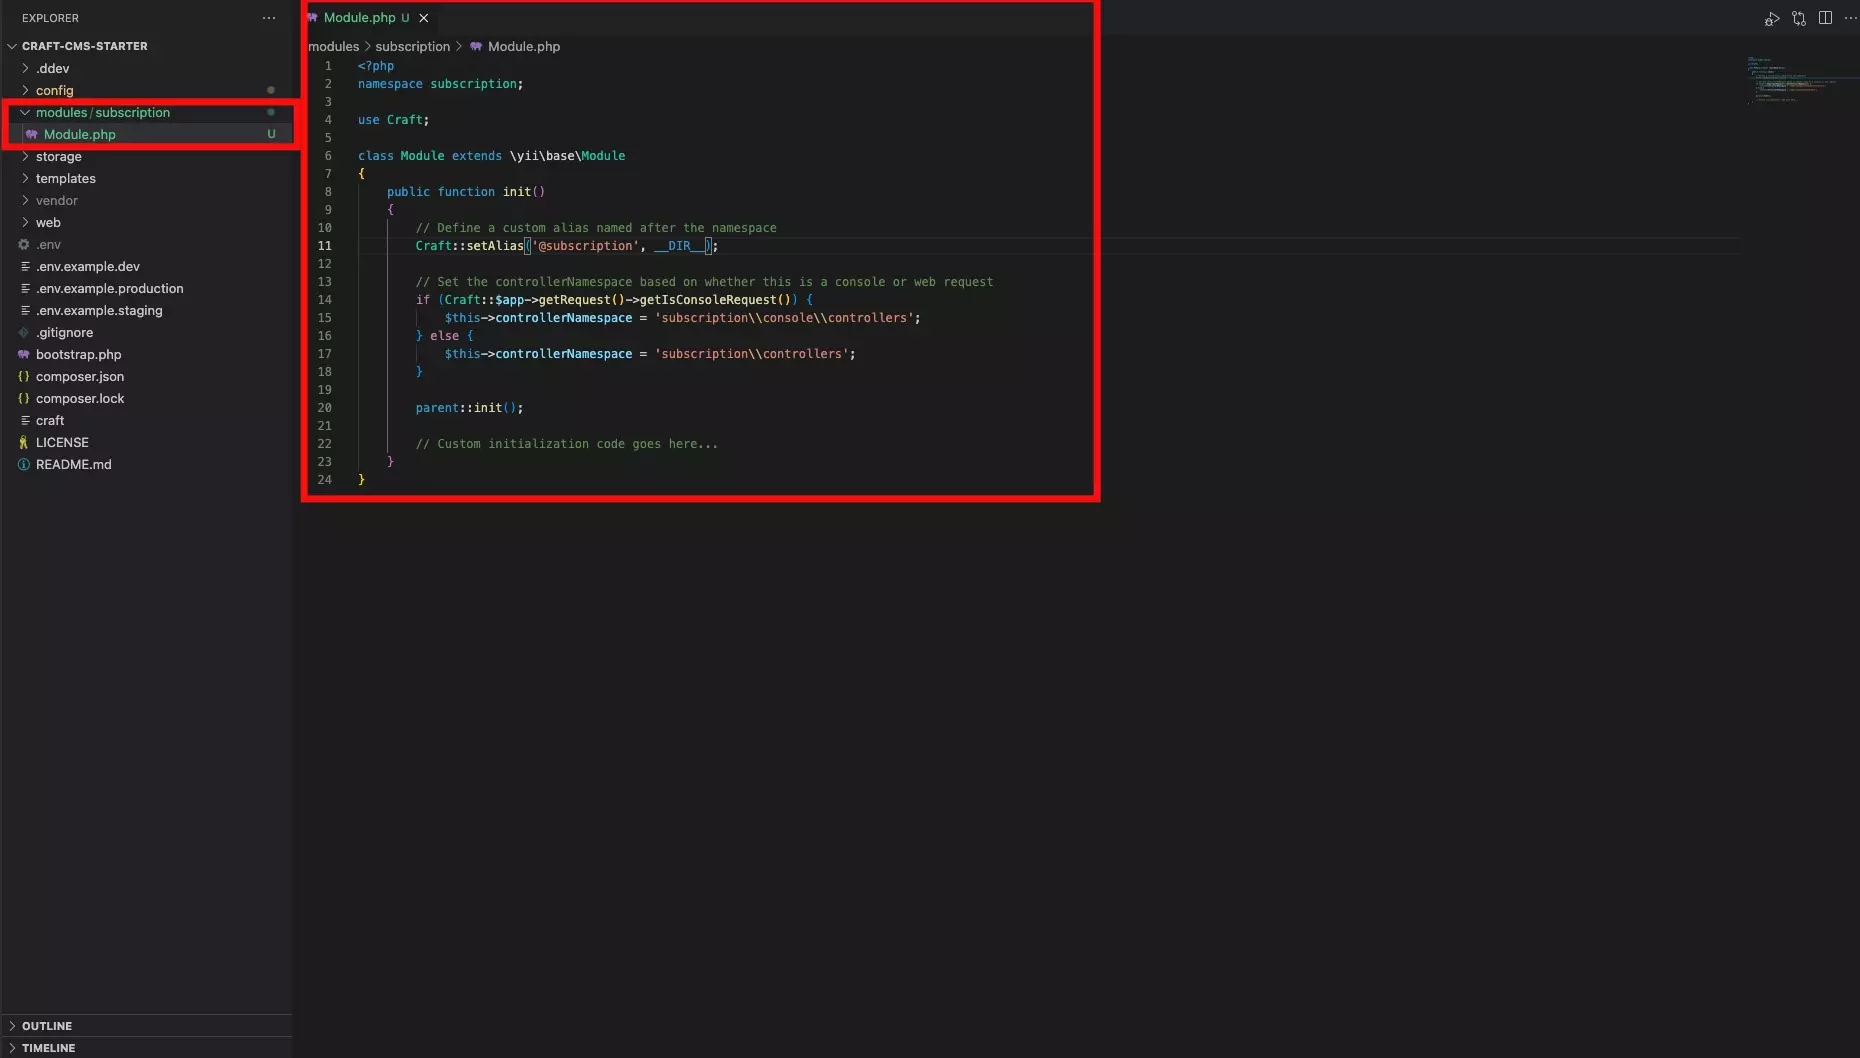
└── ...foo in our case is subscription. We left Module.php as is and added the code in the code below.
Please note that the code below is based off the Craft CMS module guide and we have changed line two to use the subscription namespace (this is foo in the Craft CMS sample code).
If you are using a Craft CMS 3.x project, you can navigate to the Plugin Factory website using the link below and define your module by setting the API Version to Craft CMS Module versions 3.x and filling out the details. Please note Plugin Factory does not work for Craft 4.x.
Please note that whatever name you give your module, the service will add "module" to the end of it i.e. subscription will become subscriptionmodule.
Once complete, scroll to the bottom of the page and press BUILD MY MODULE.
This will trigger the website to create the folder and file structure, which upon completion will be downloaded to your downloads folder.
Place this folder in your modules folder.
Step Two: Add the module to your project configuration
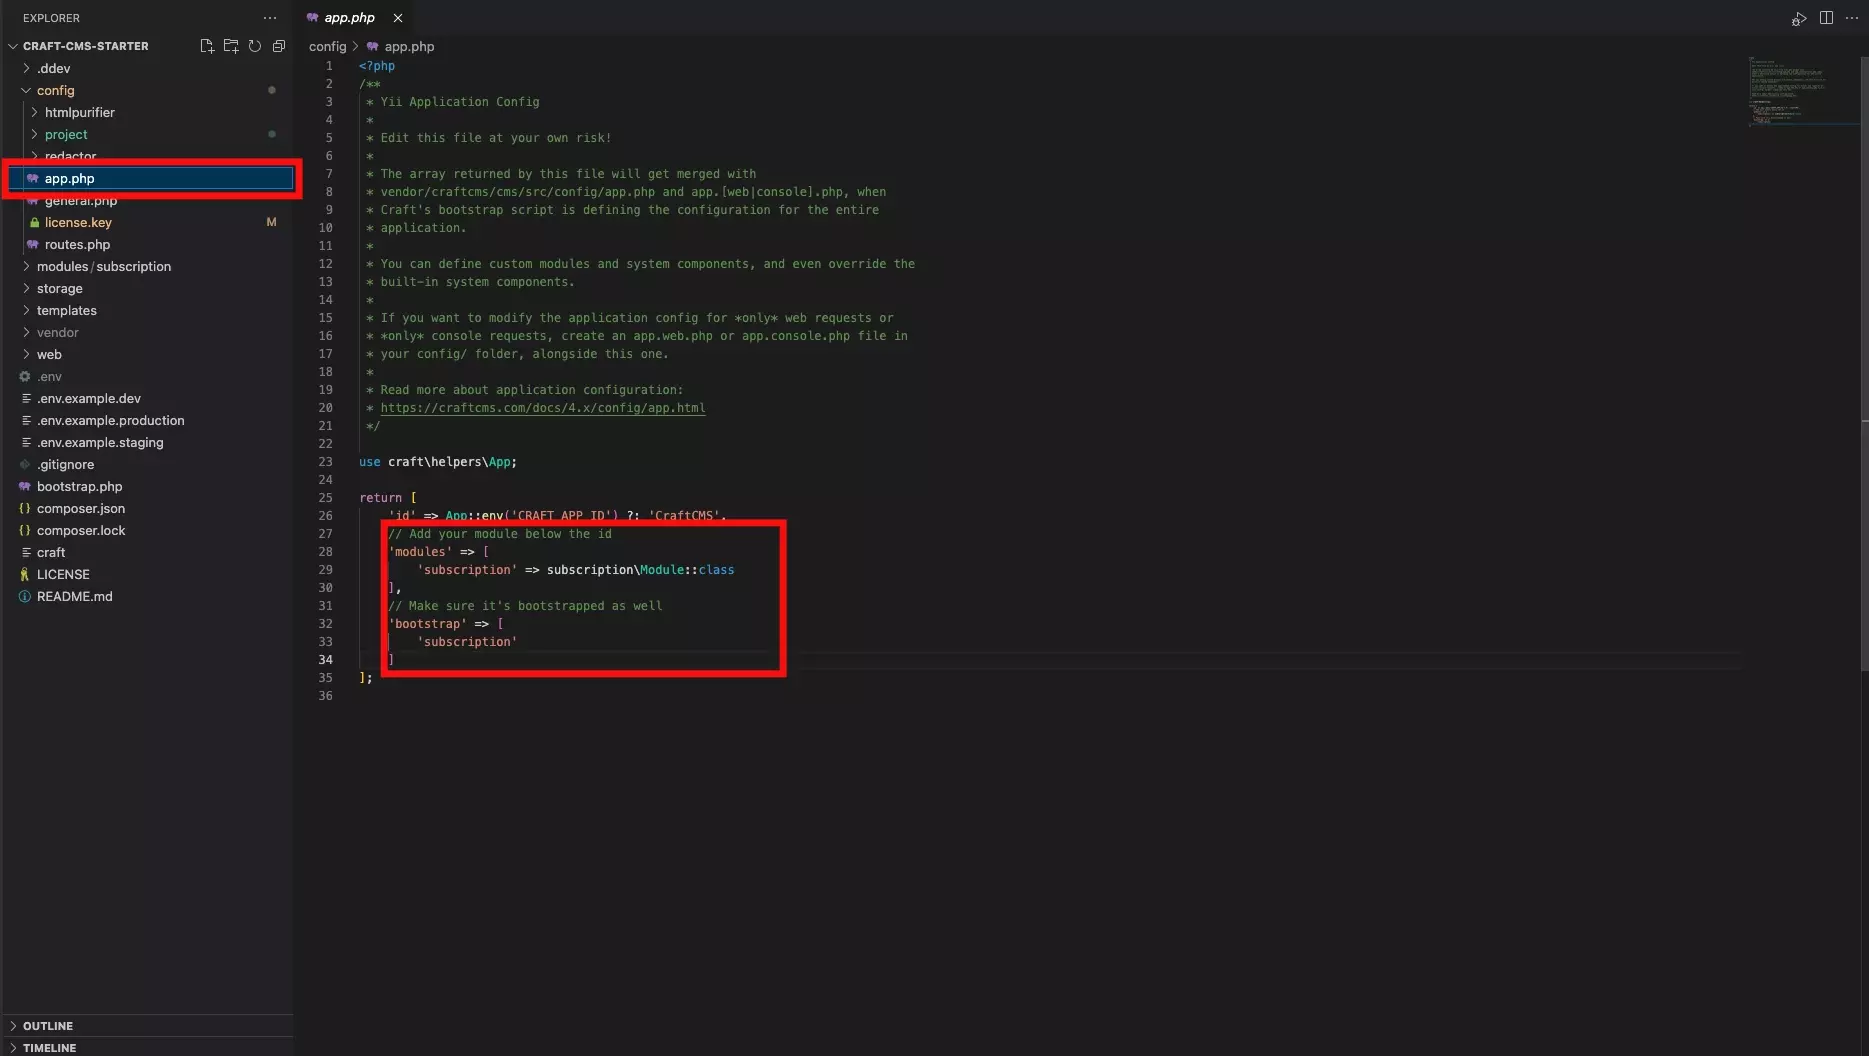
Open app.php found at config/app.php and add the code found in the snippet below.
What's critical is the modules and bootstrap, which adds the module to the Craft CMS project and tells the project to load every request via bootstrap.
Step Three: Setup class autoload
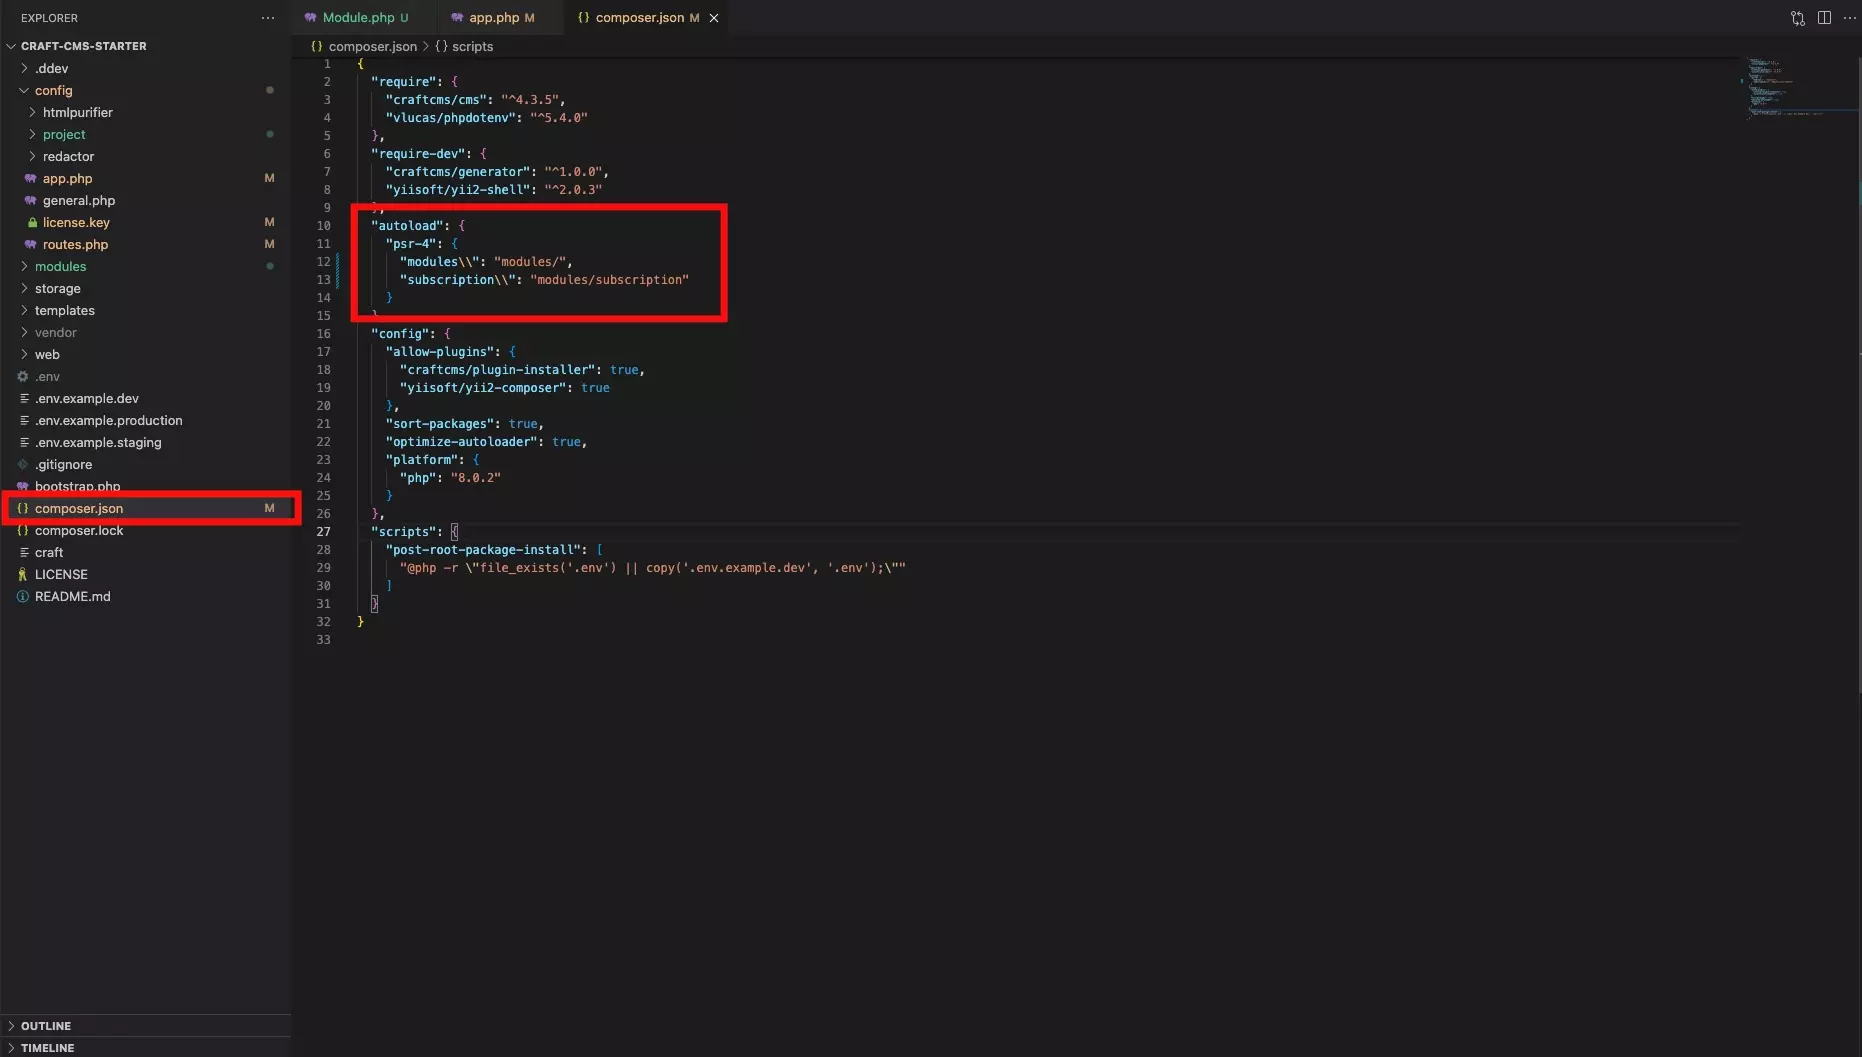
You need to tell the Composer how to find your module's classes by setting the module in the autoload field in the projects composer.json. The sample below shows how we add the subscription module to autoload. This is added on line 13.
Step Four: Run Autoload Command

In Terminal, run the command found below. It will tell Composer to update its class autoloader script based on your new autoload mapping that you set in Step Three.
composer dump-autoload -aAny Questions ?
We are actively looking for feedback on how to improve this resource. Please send us a note to inquiries@delasign.com with any thoughts or feedback you may have.