How to create an apk in Unity & install it on a Meta Quest 2
A step by step tutorial on creating a VR experience production .apk in Unity and installing (side loading) it on a Meta Quest 2 using SideQuest.

A step by step tutorial on creating a VR experience production .apk in Unity and installing (side loading) it on a Meta Quest 2 using SideQuest.
The following tutorial walks you through how to create a VR experience APK using Unity and subsequently, installing the production APK on a Meta Quest 2 using SideQuest. We recommend that you download our Open Source tutorial to learn how to create and install the APK using this tutorial before applying it to your own project.
Please note that the first four steps are dedicated to installing SideQuest and preparing your headset to use it.
Please note that this tutorial uses previously created settings to allow a build to run in VR on a Meta Quest 2. To setup your project to use these settings, please consult the tutorial below
Step One: Download Sidequest
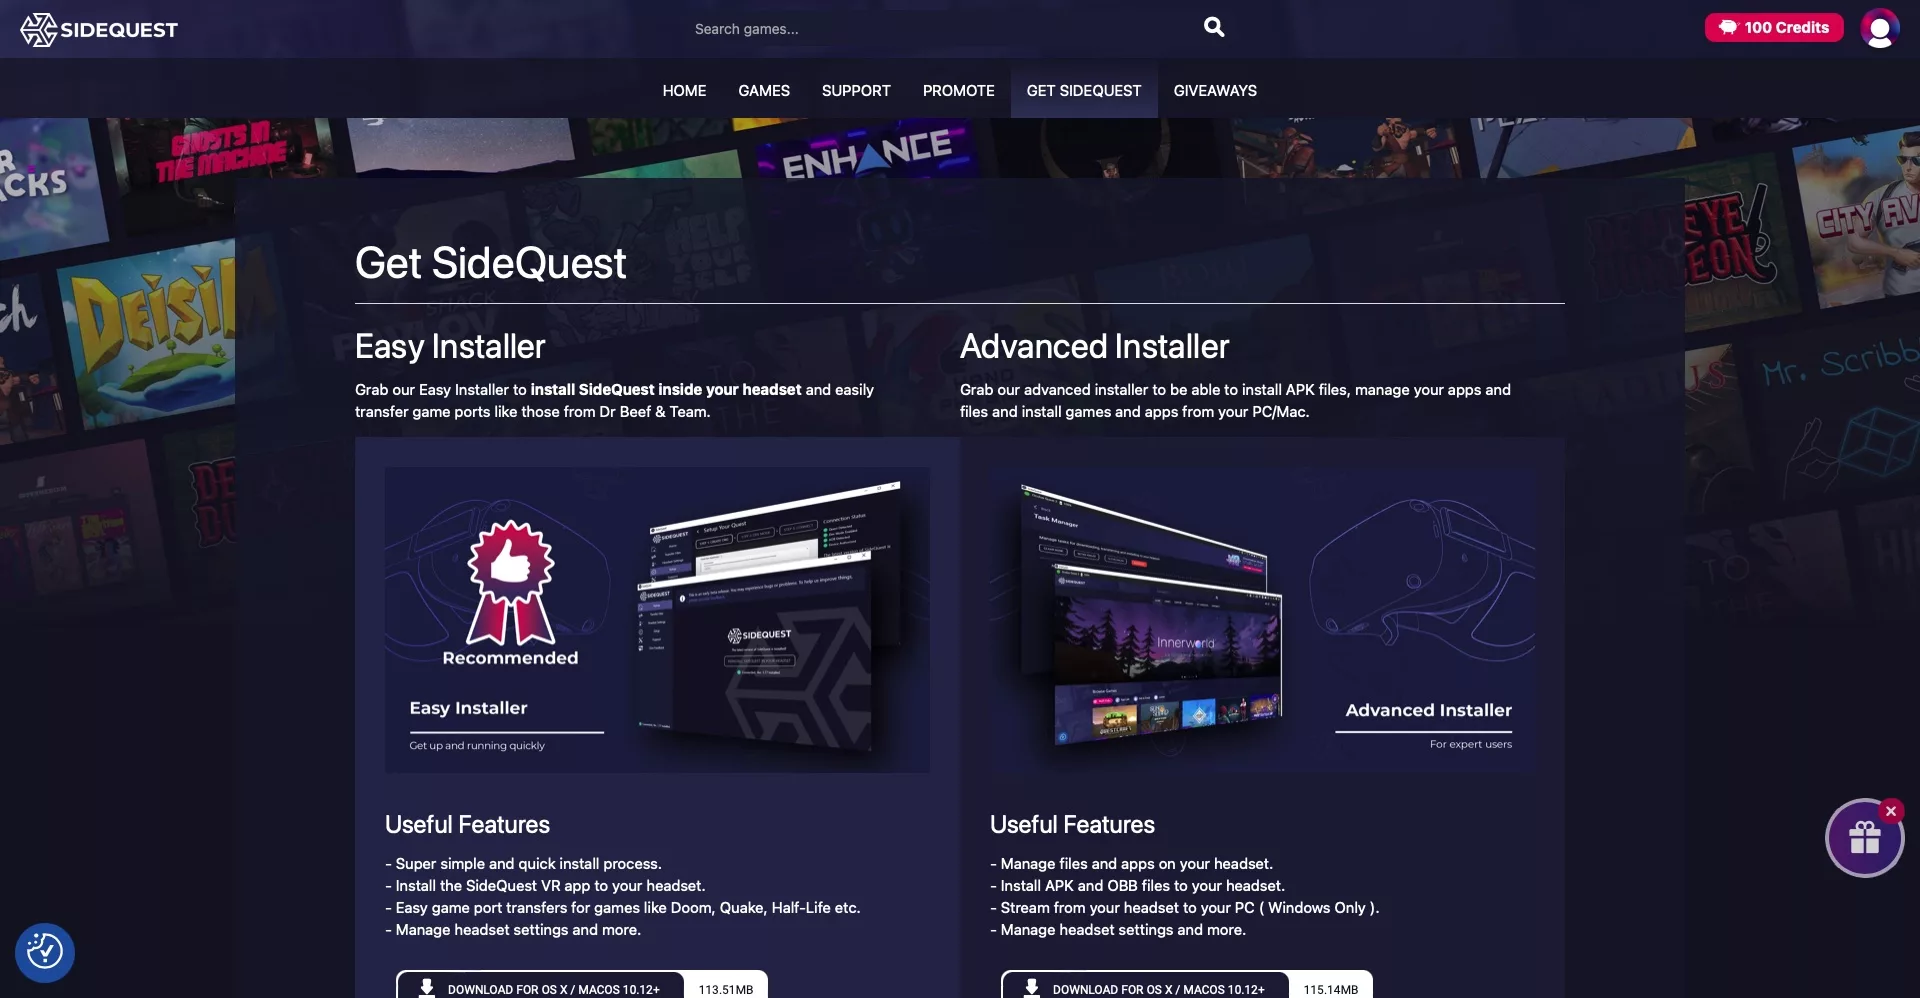
Go to the link below and download SideQuest. Make sure you install the advanced installer.
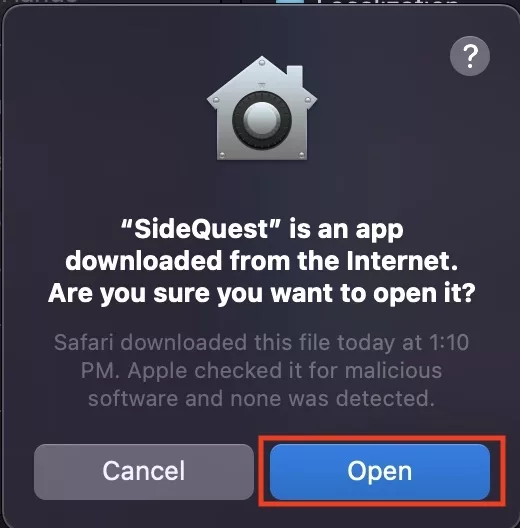
Step Two: Install SideQuest
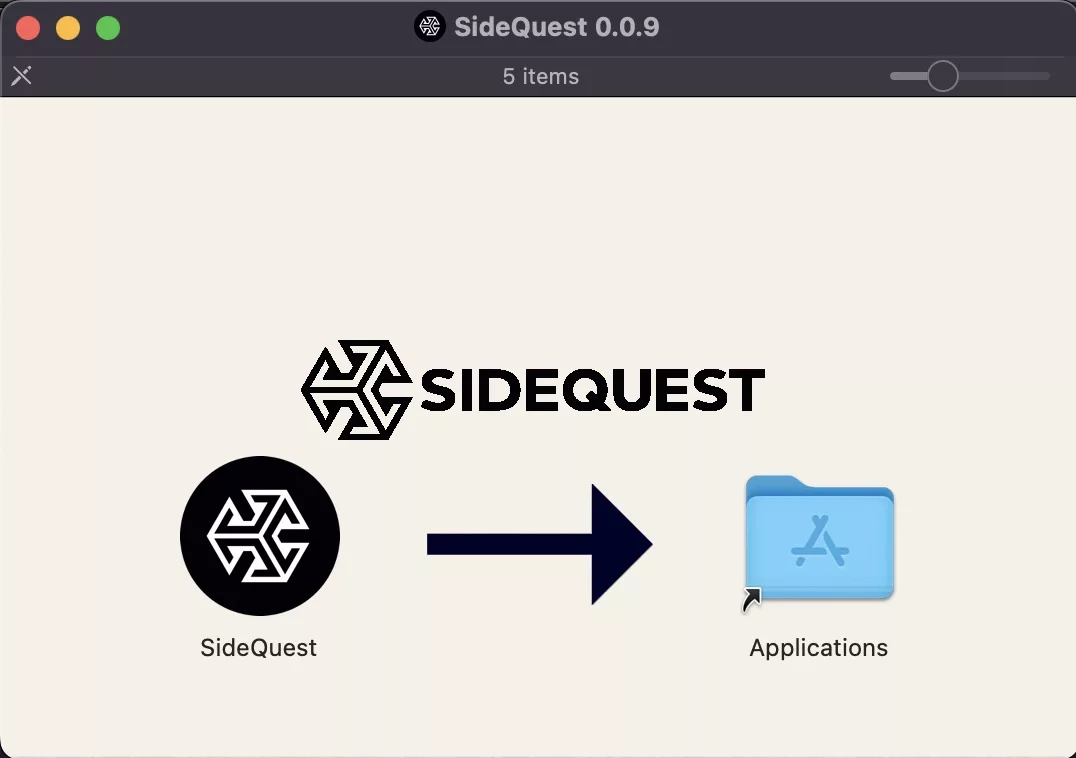
Using the file downloaded from the link above, install SideQuest.
Step Three: Plug in the Meta Quest 2 into the computer
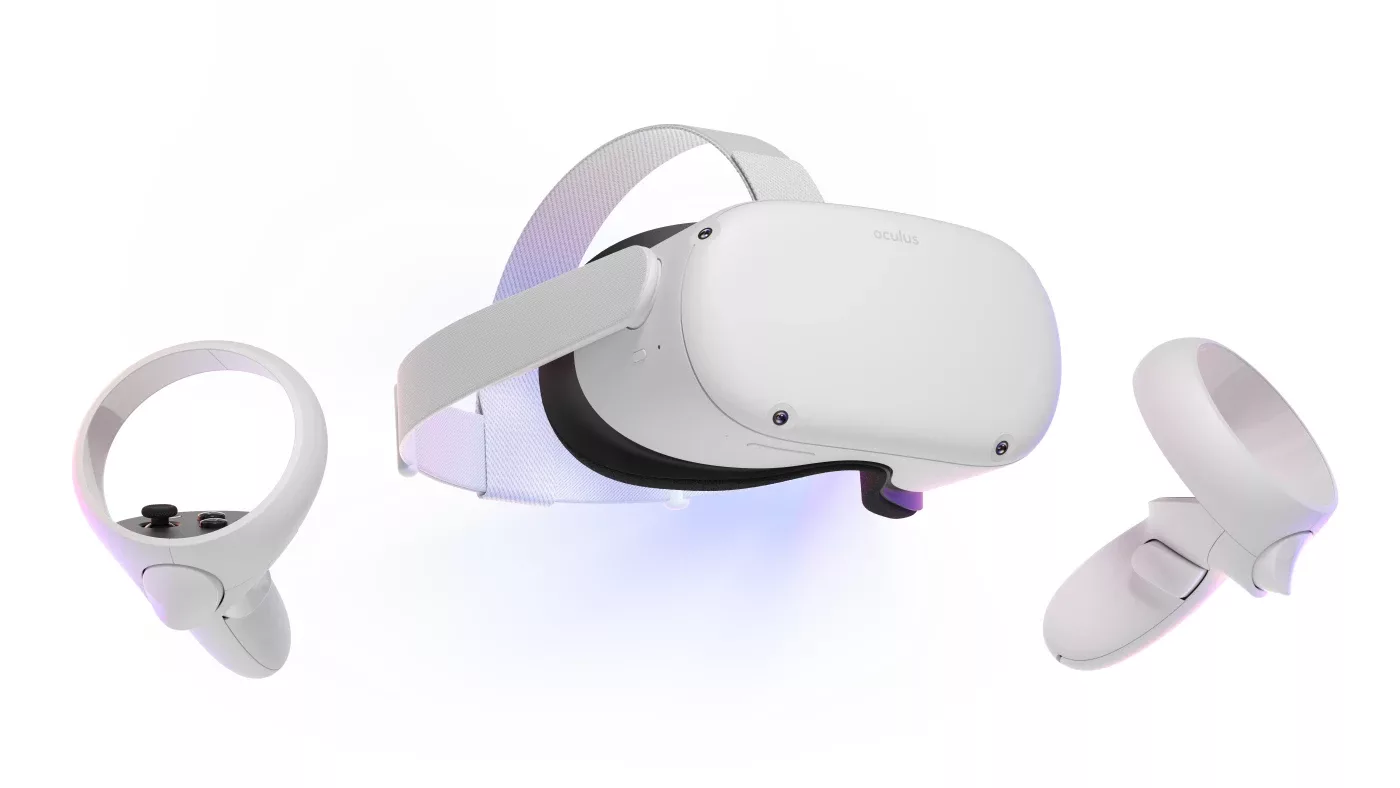
Using the USB-C provided by Meta, plug in the Meta Quest 2 into the computer that you wish to install the apk from.
Step Four: Open SideQuest
Open the recently installed SideQuest application.
Step Five: Open the Unity project
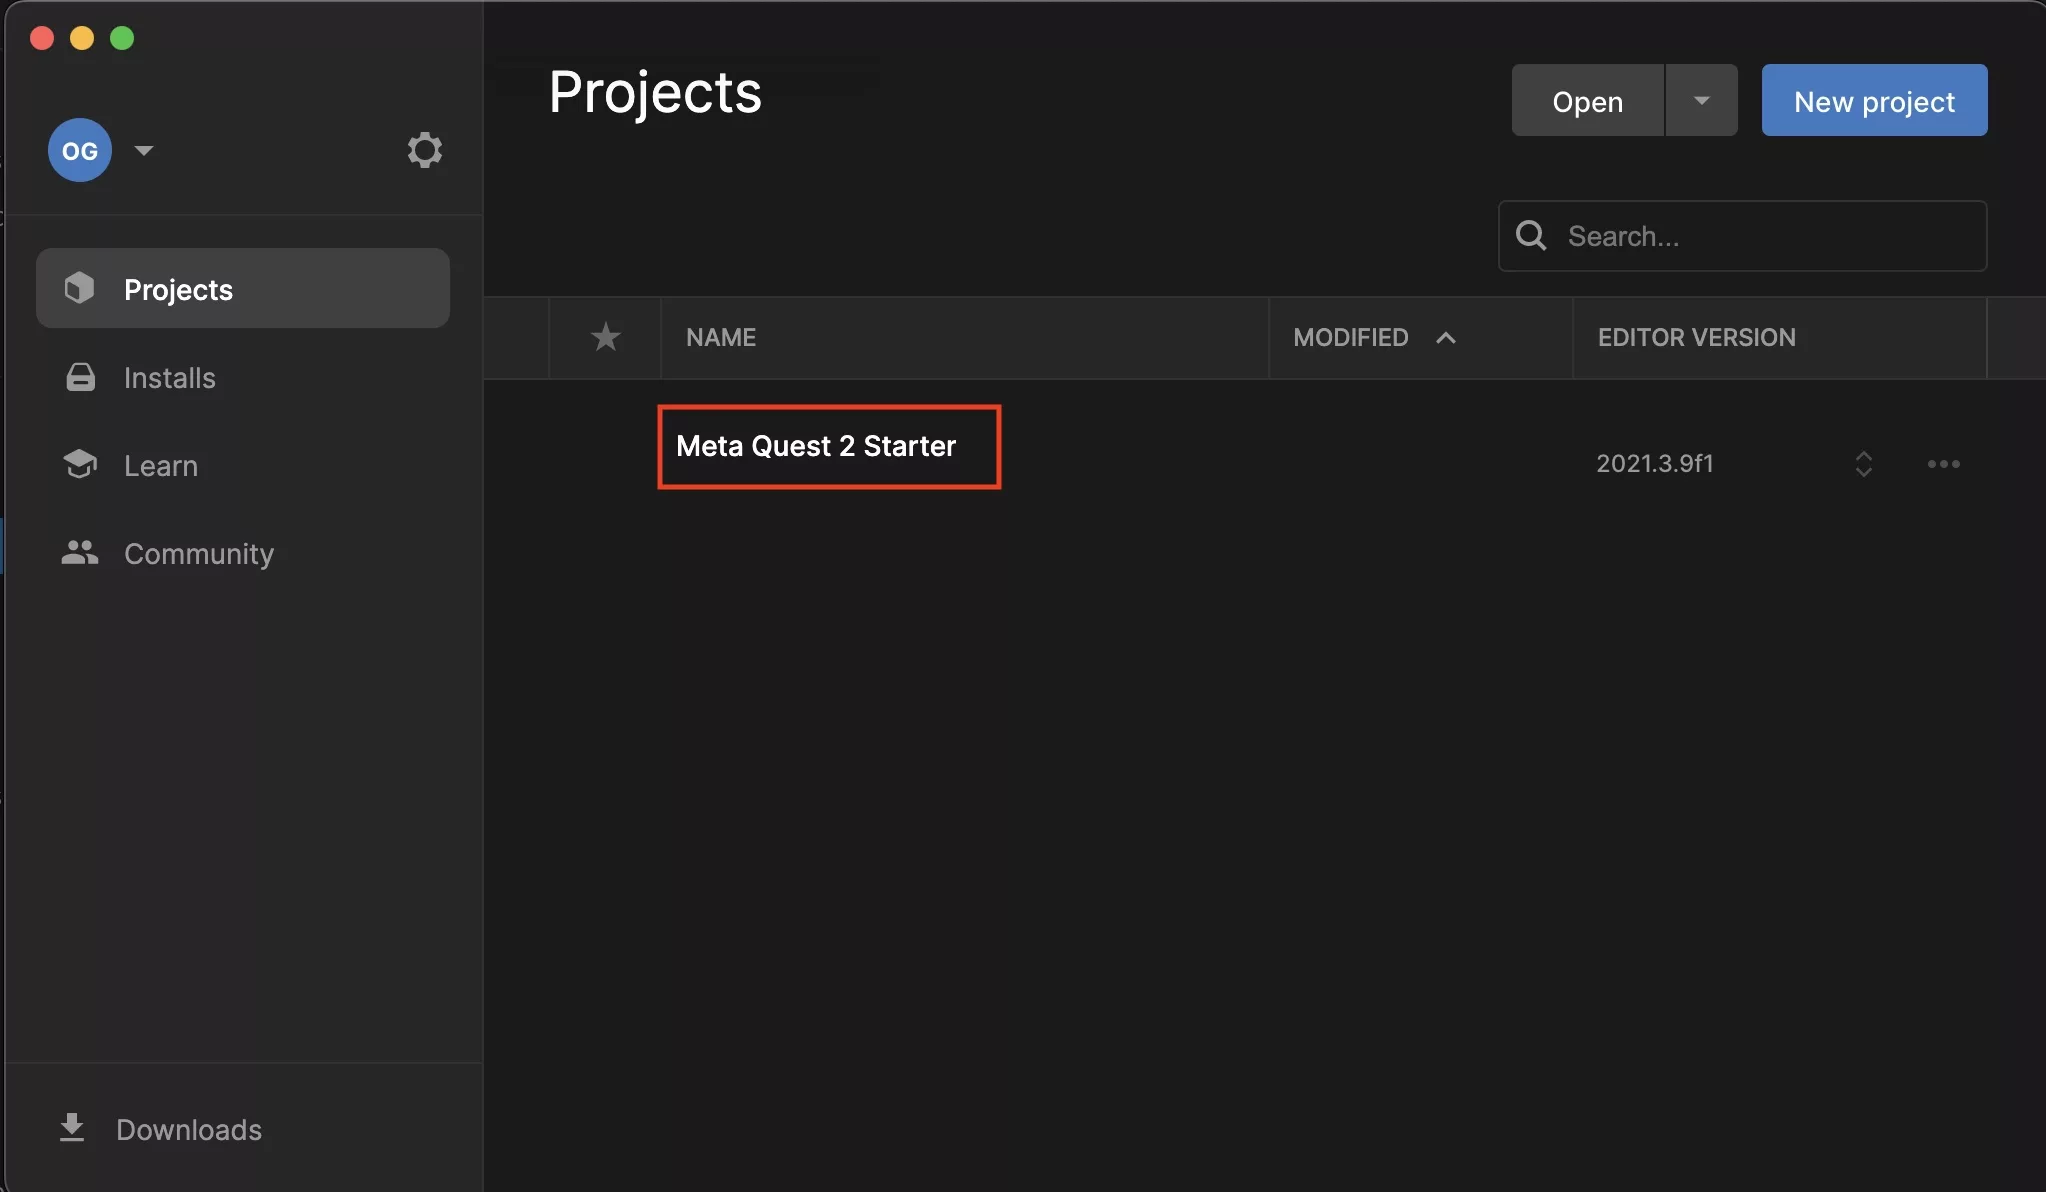
Open Unity and select the project that you wish to create an apk for.
Step Six: Open Build Settings
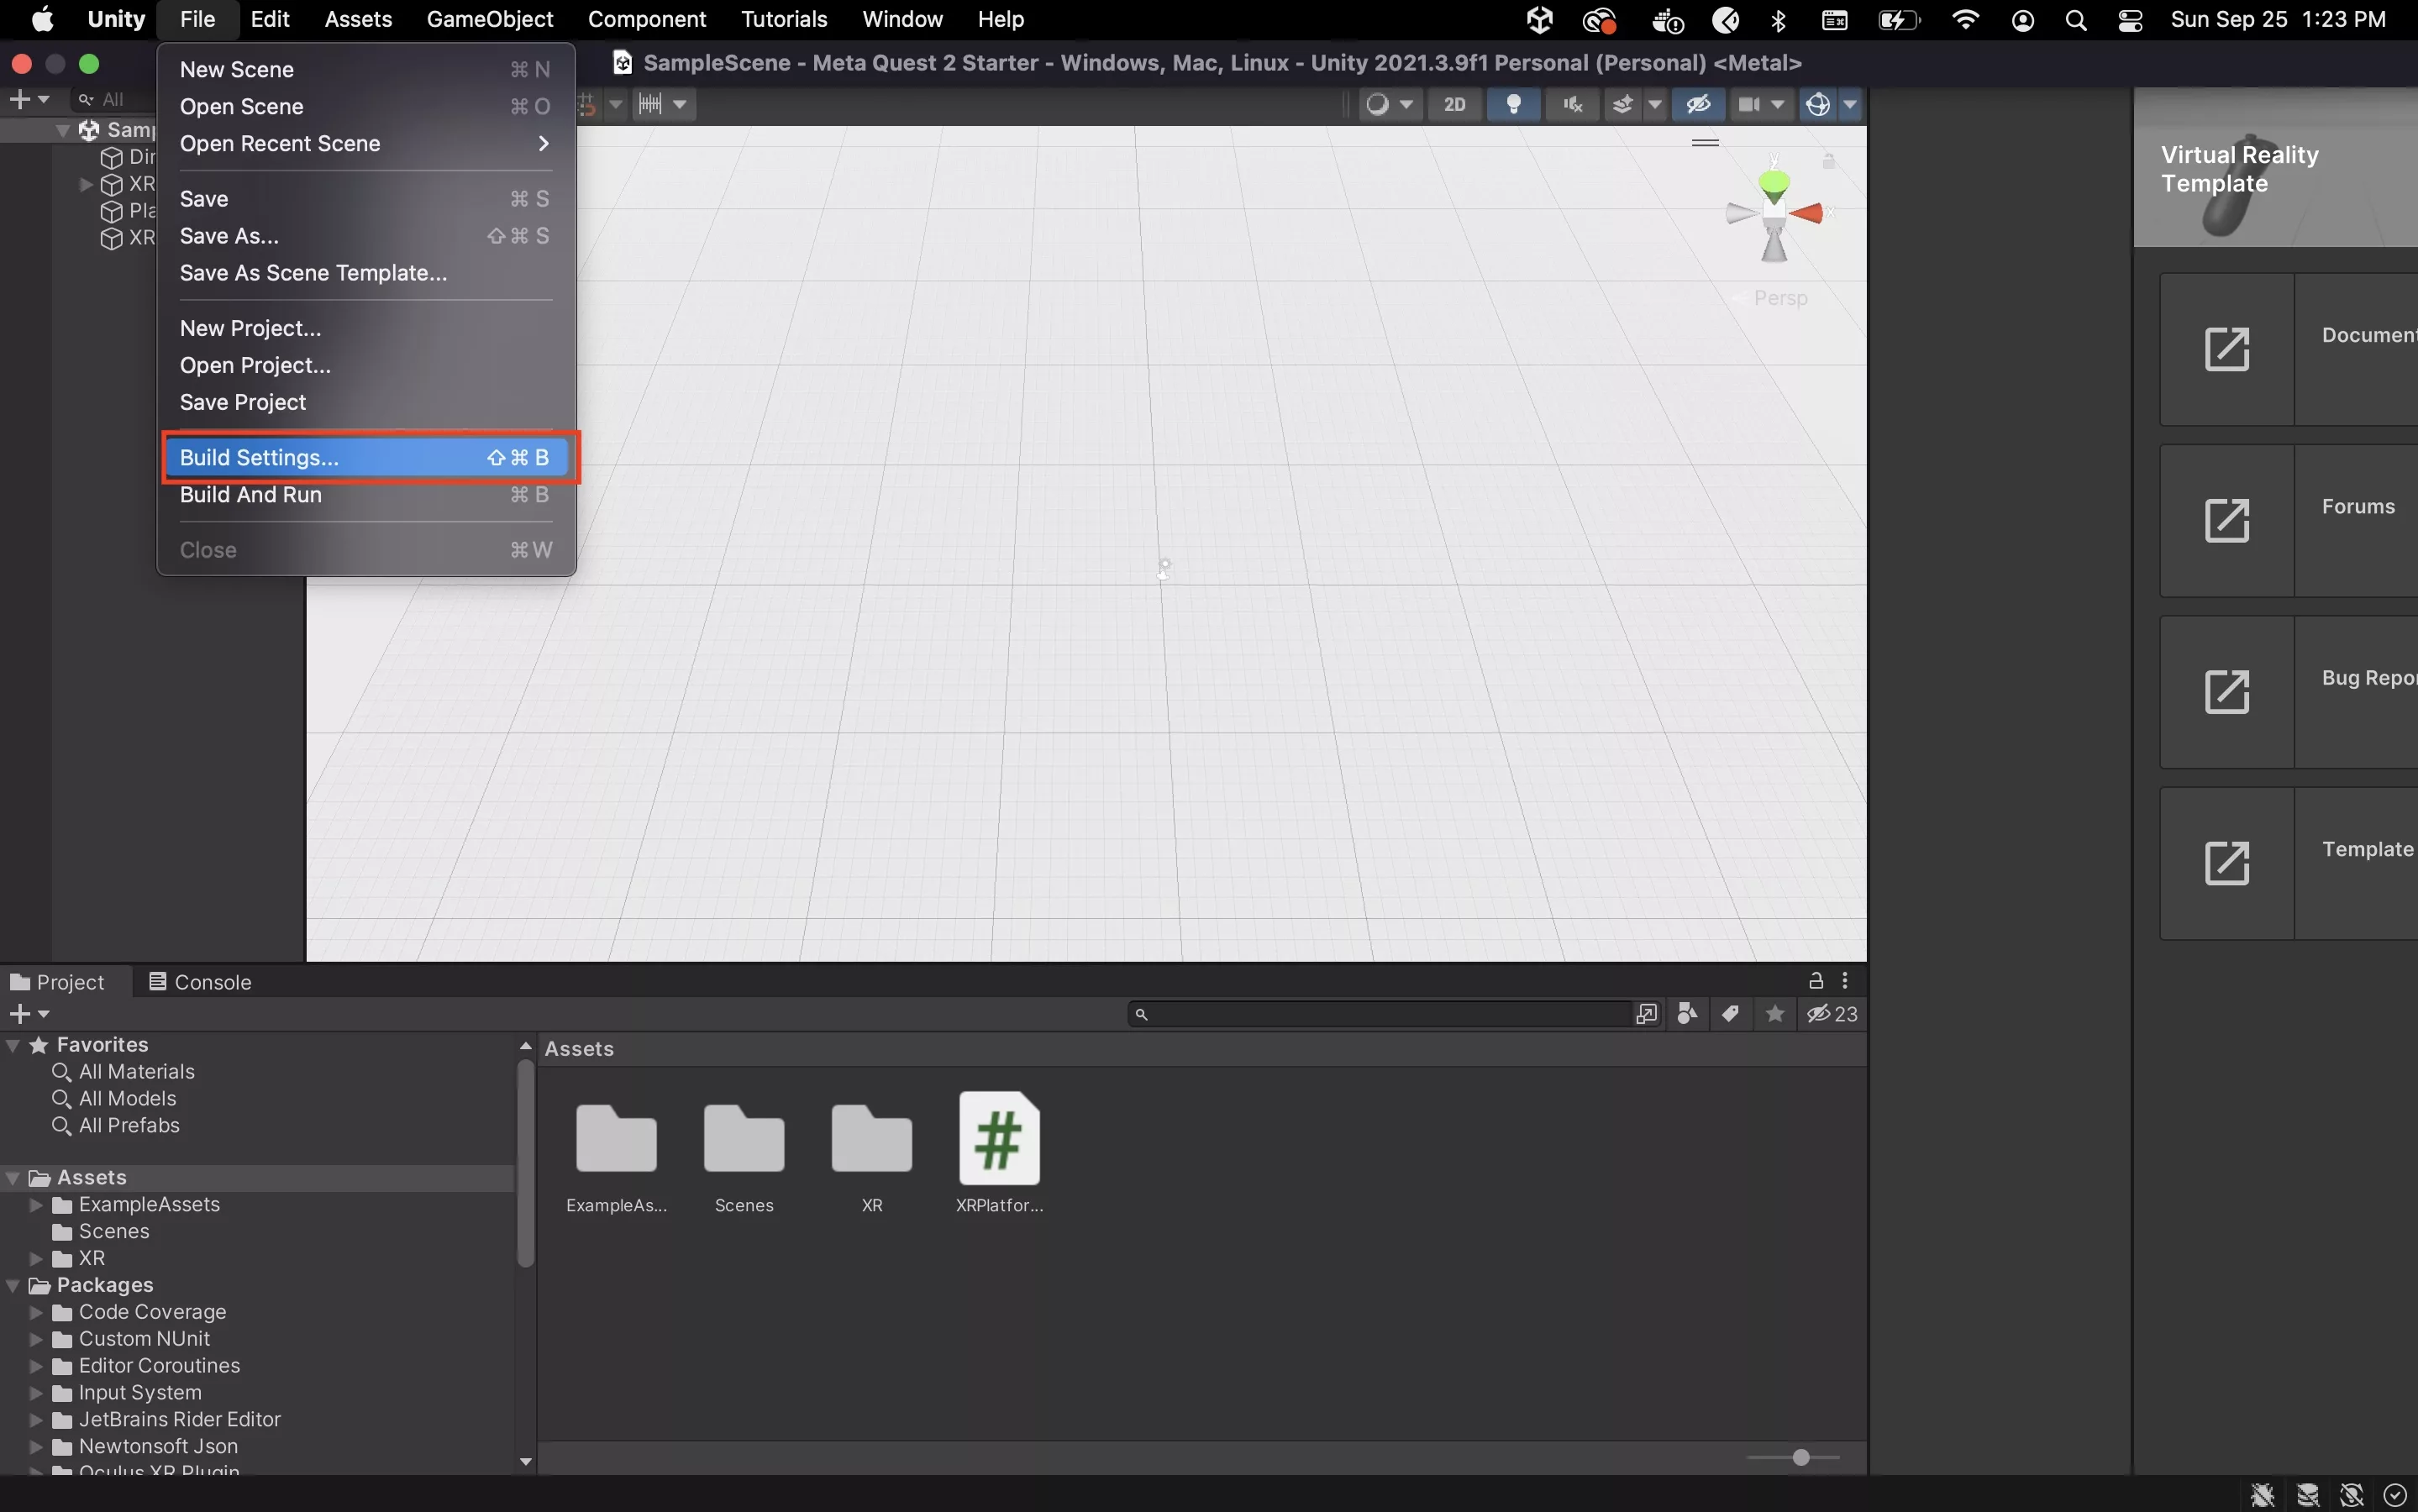
In Unity, open the Build Settings through File > Build Settings.
Step Seven: Select Android, Add Open Scenes & Switch Platform
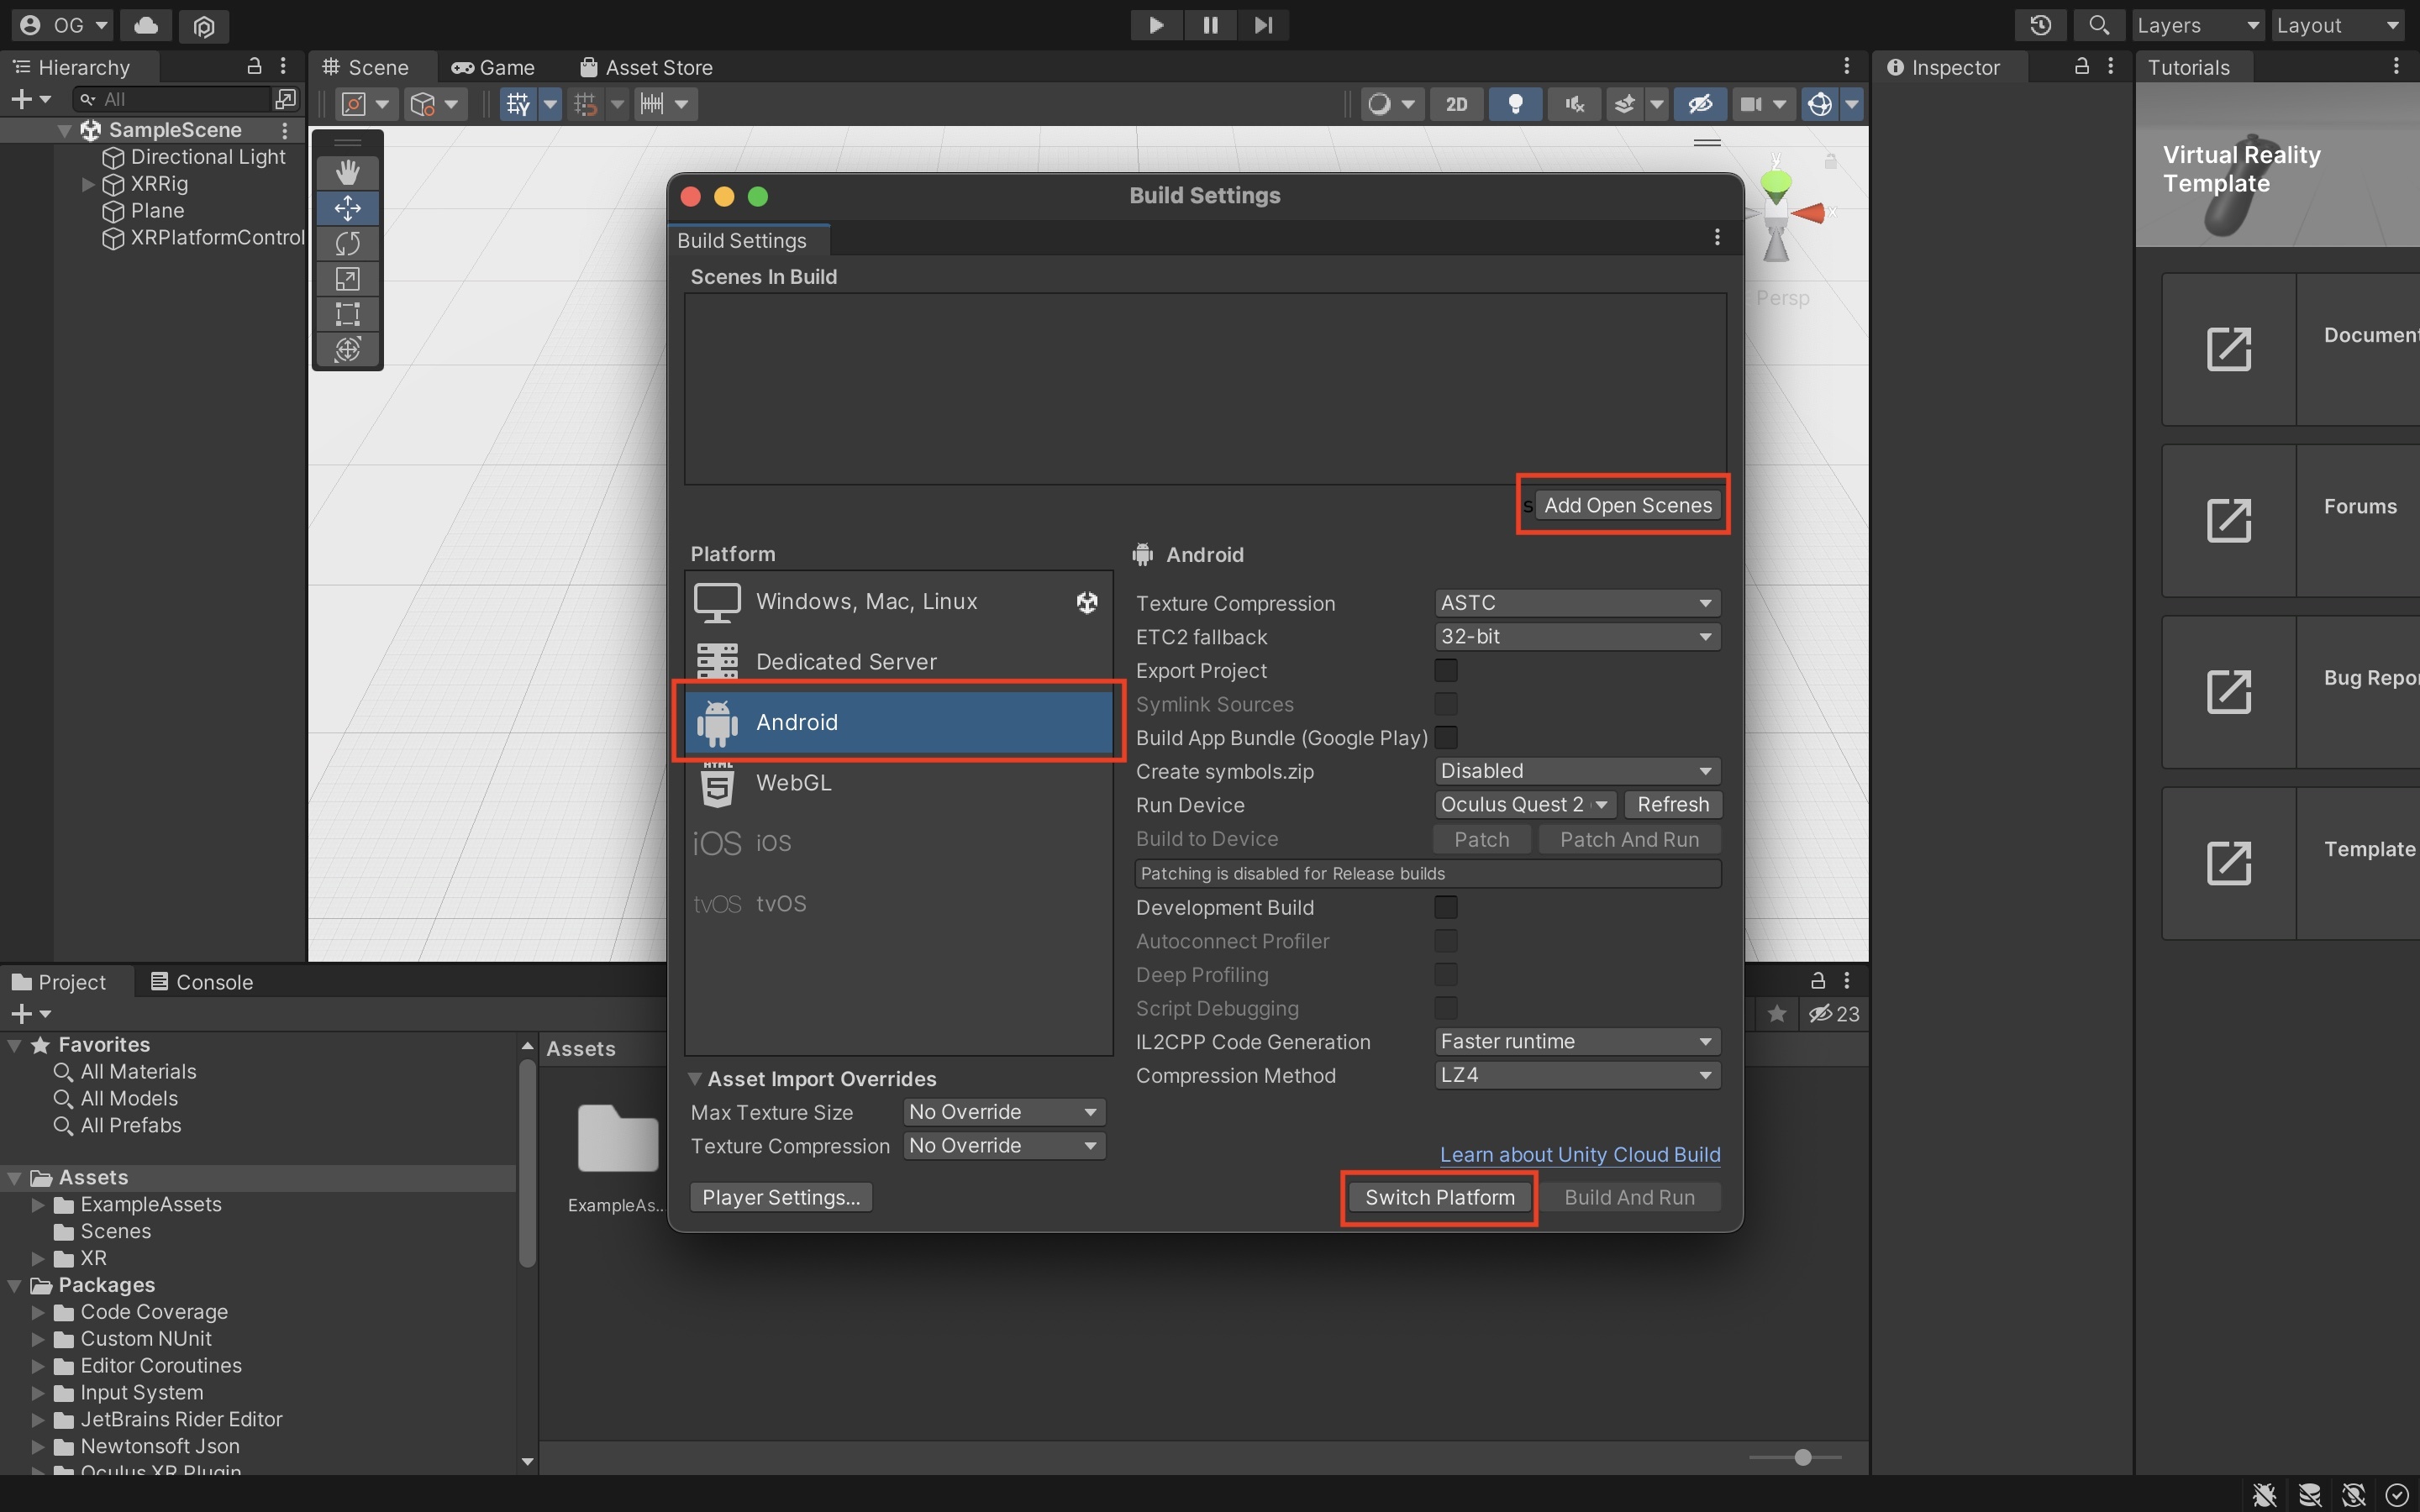
In the Build Settings window that appears, select Android, Add Open Scenes and then Switch Platform.
Please note that the settings shown were created as part of our How to setup & run a Unity VR development project on a Meta Quest 2 tutorial that is available below.
Step Eight: Build
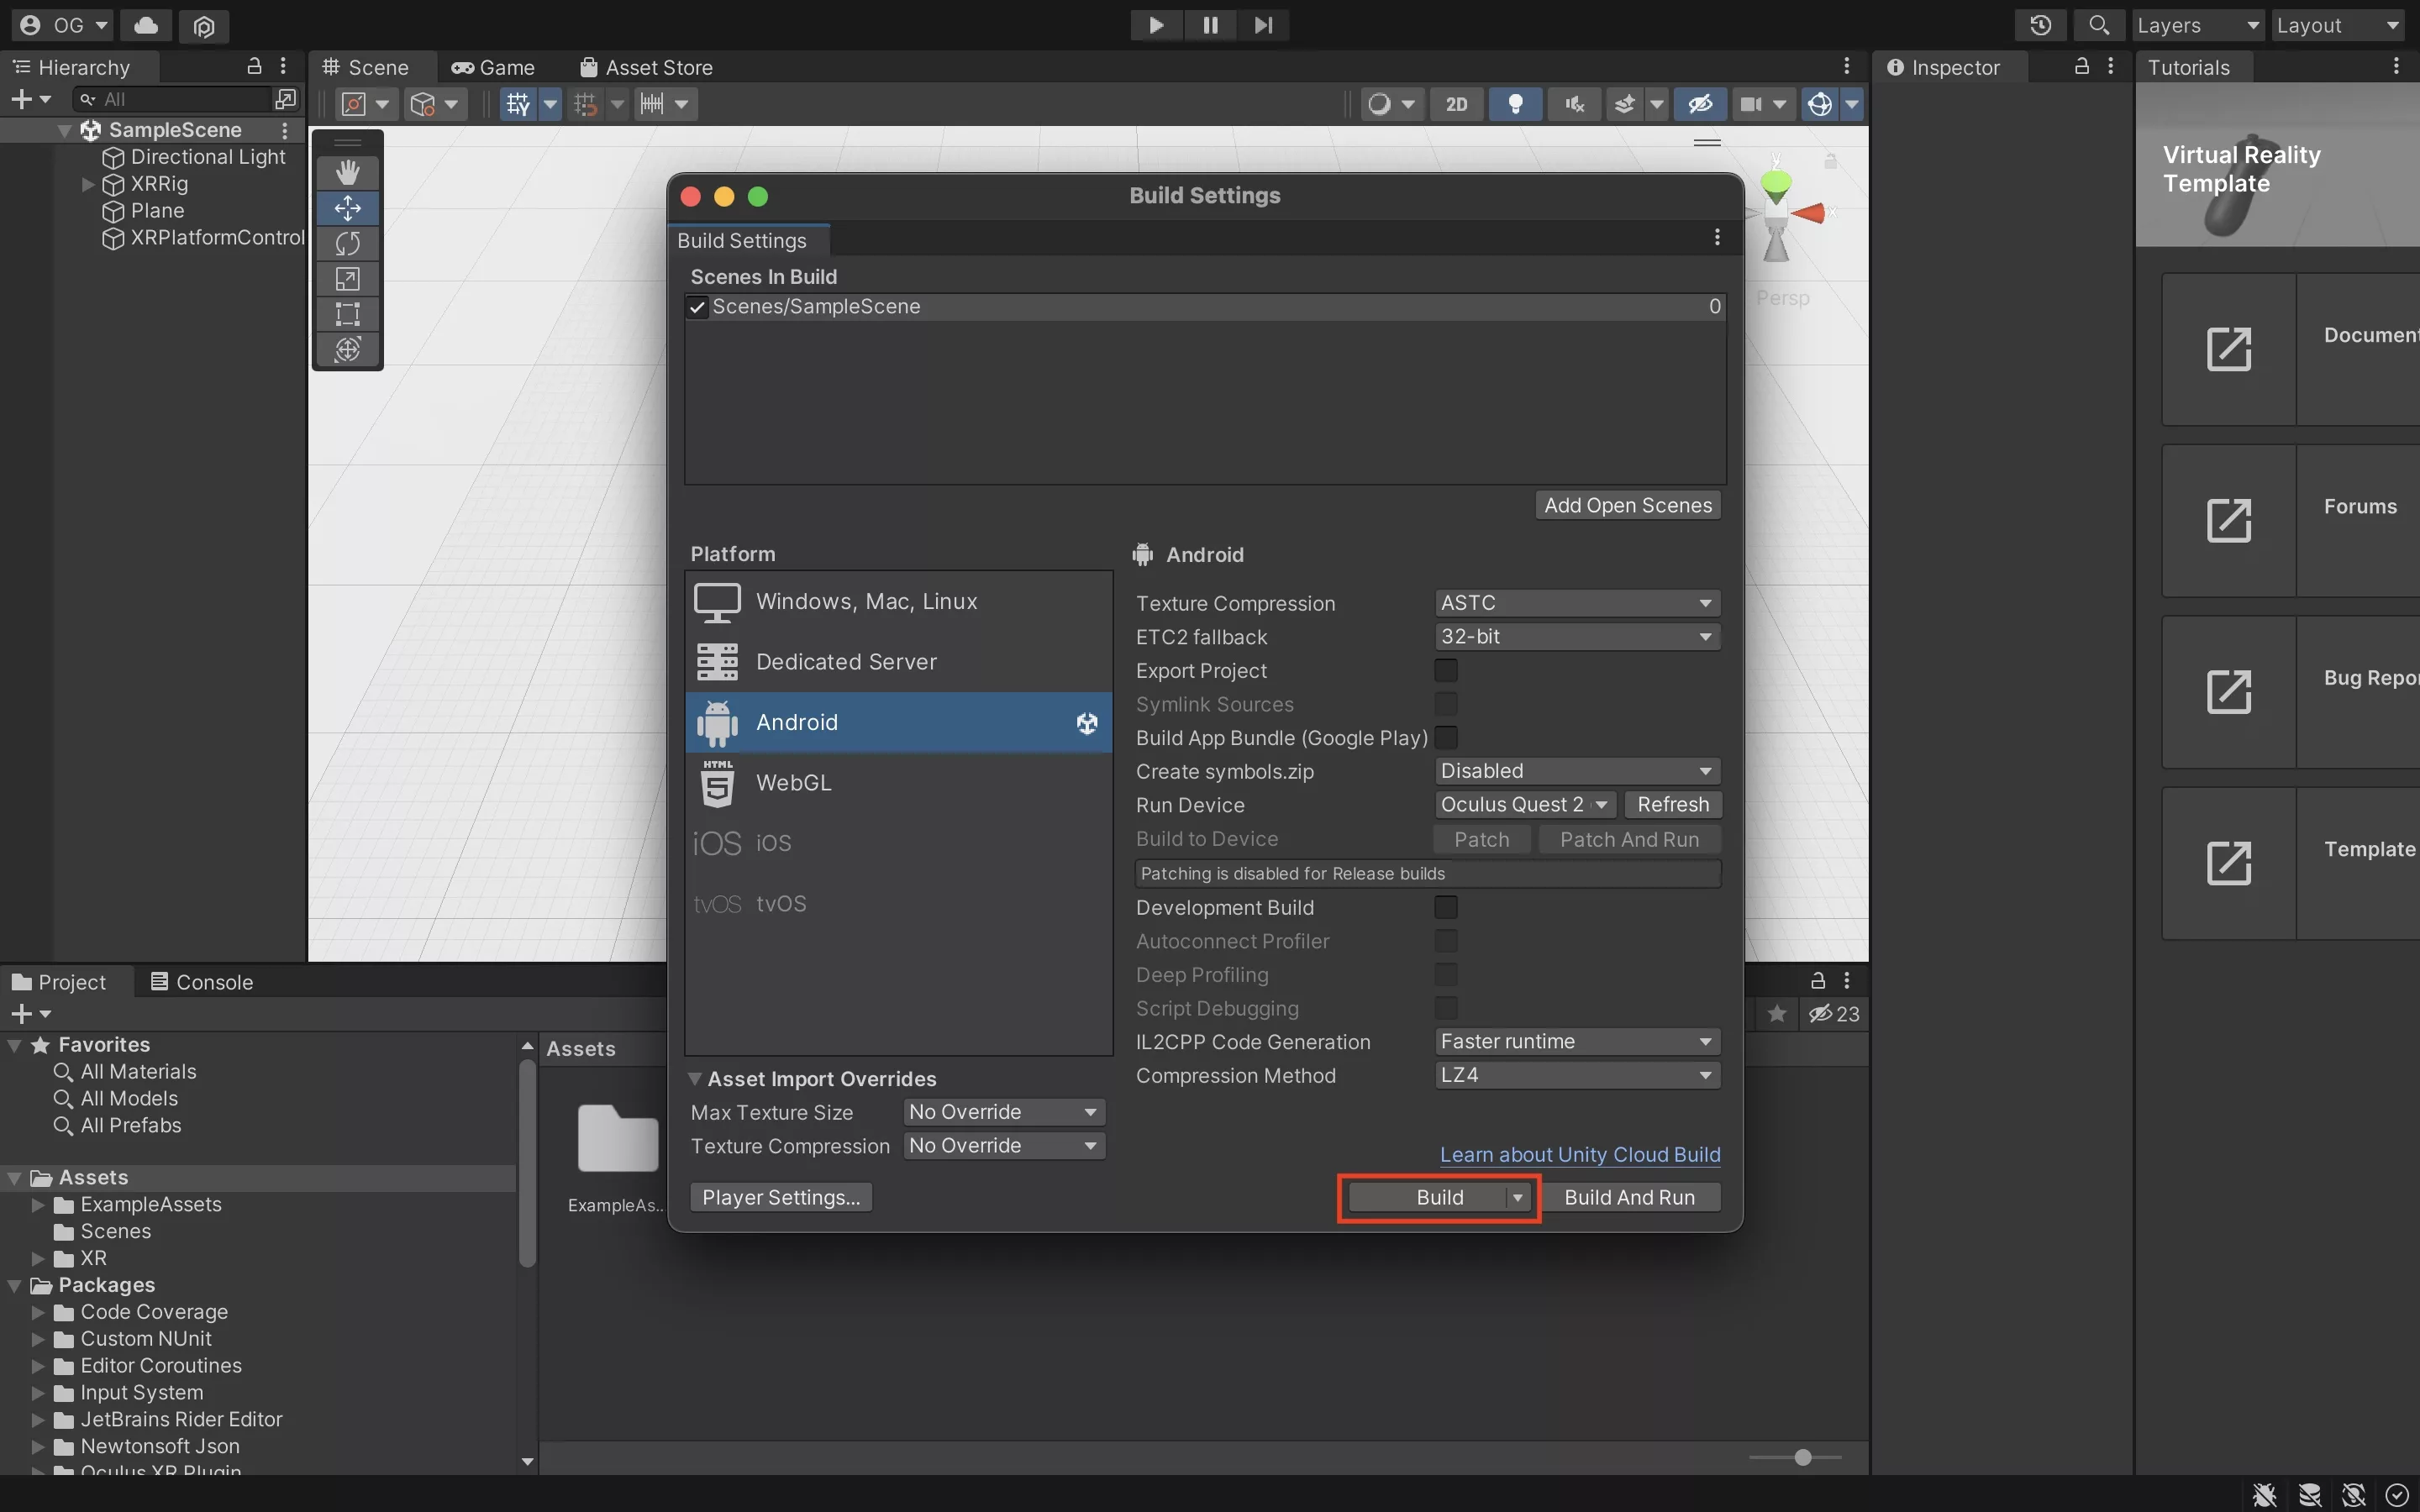
Select Build.
Step Nine: Name & Save
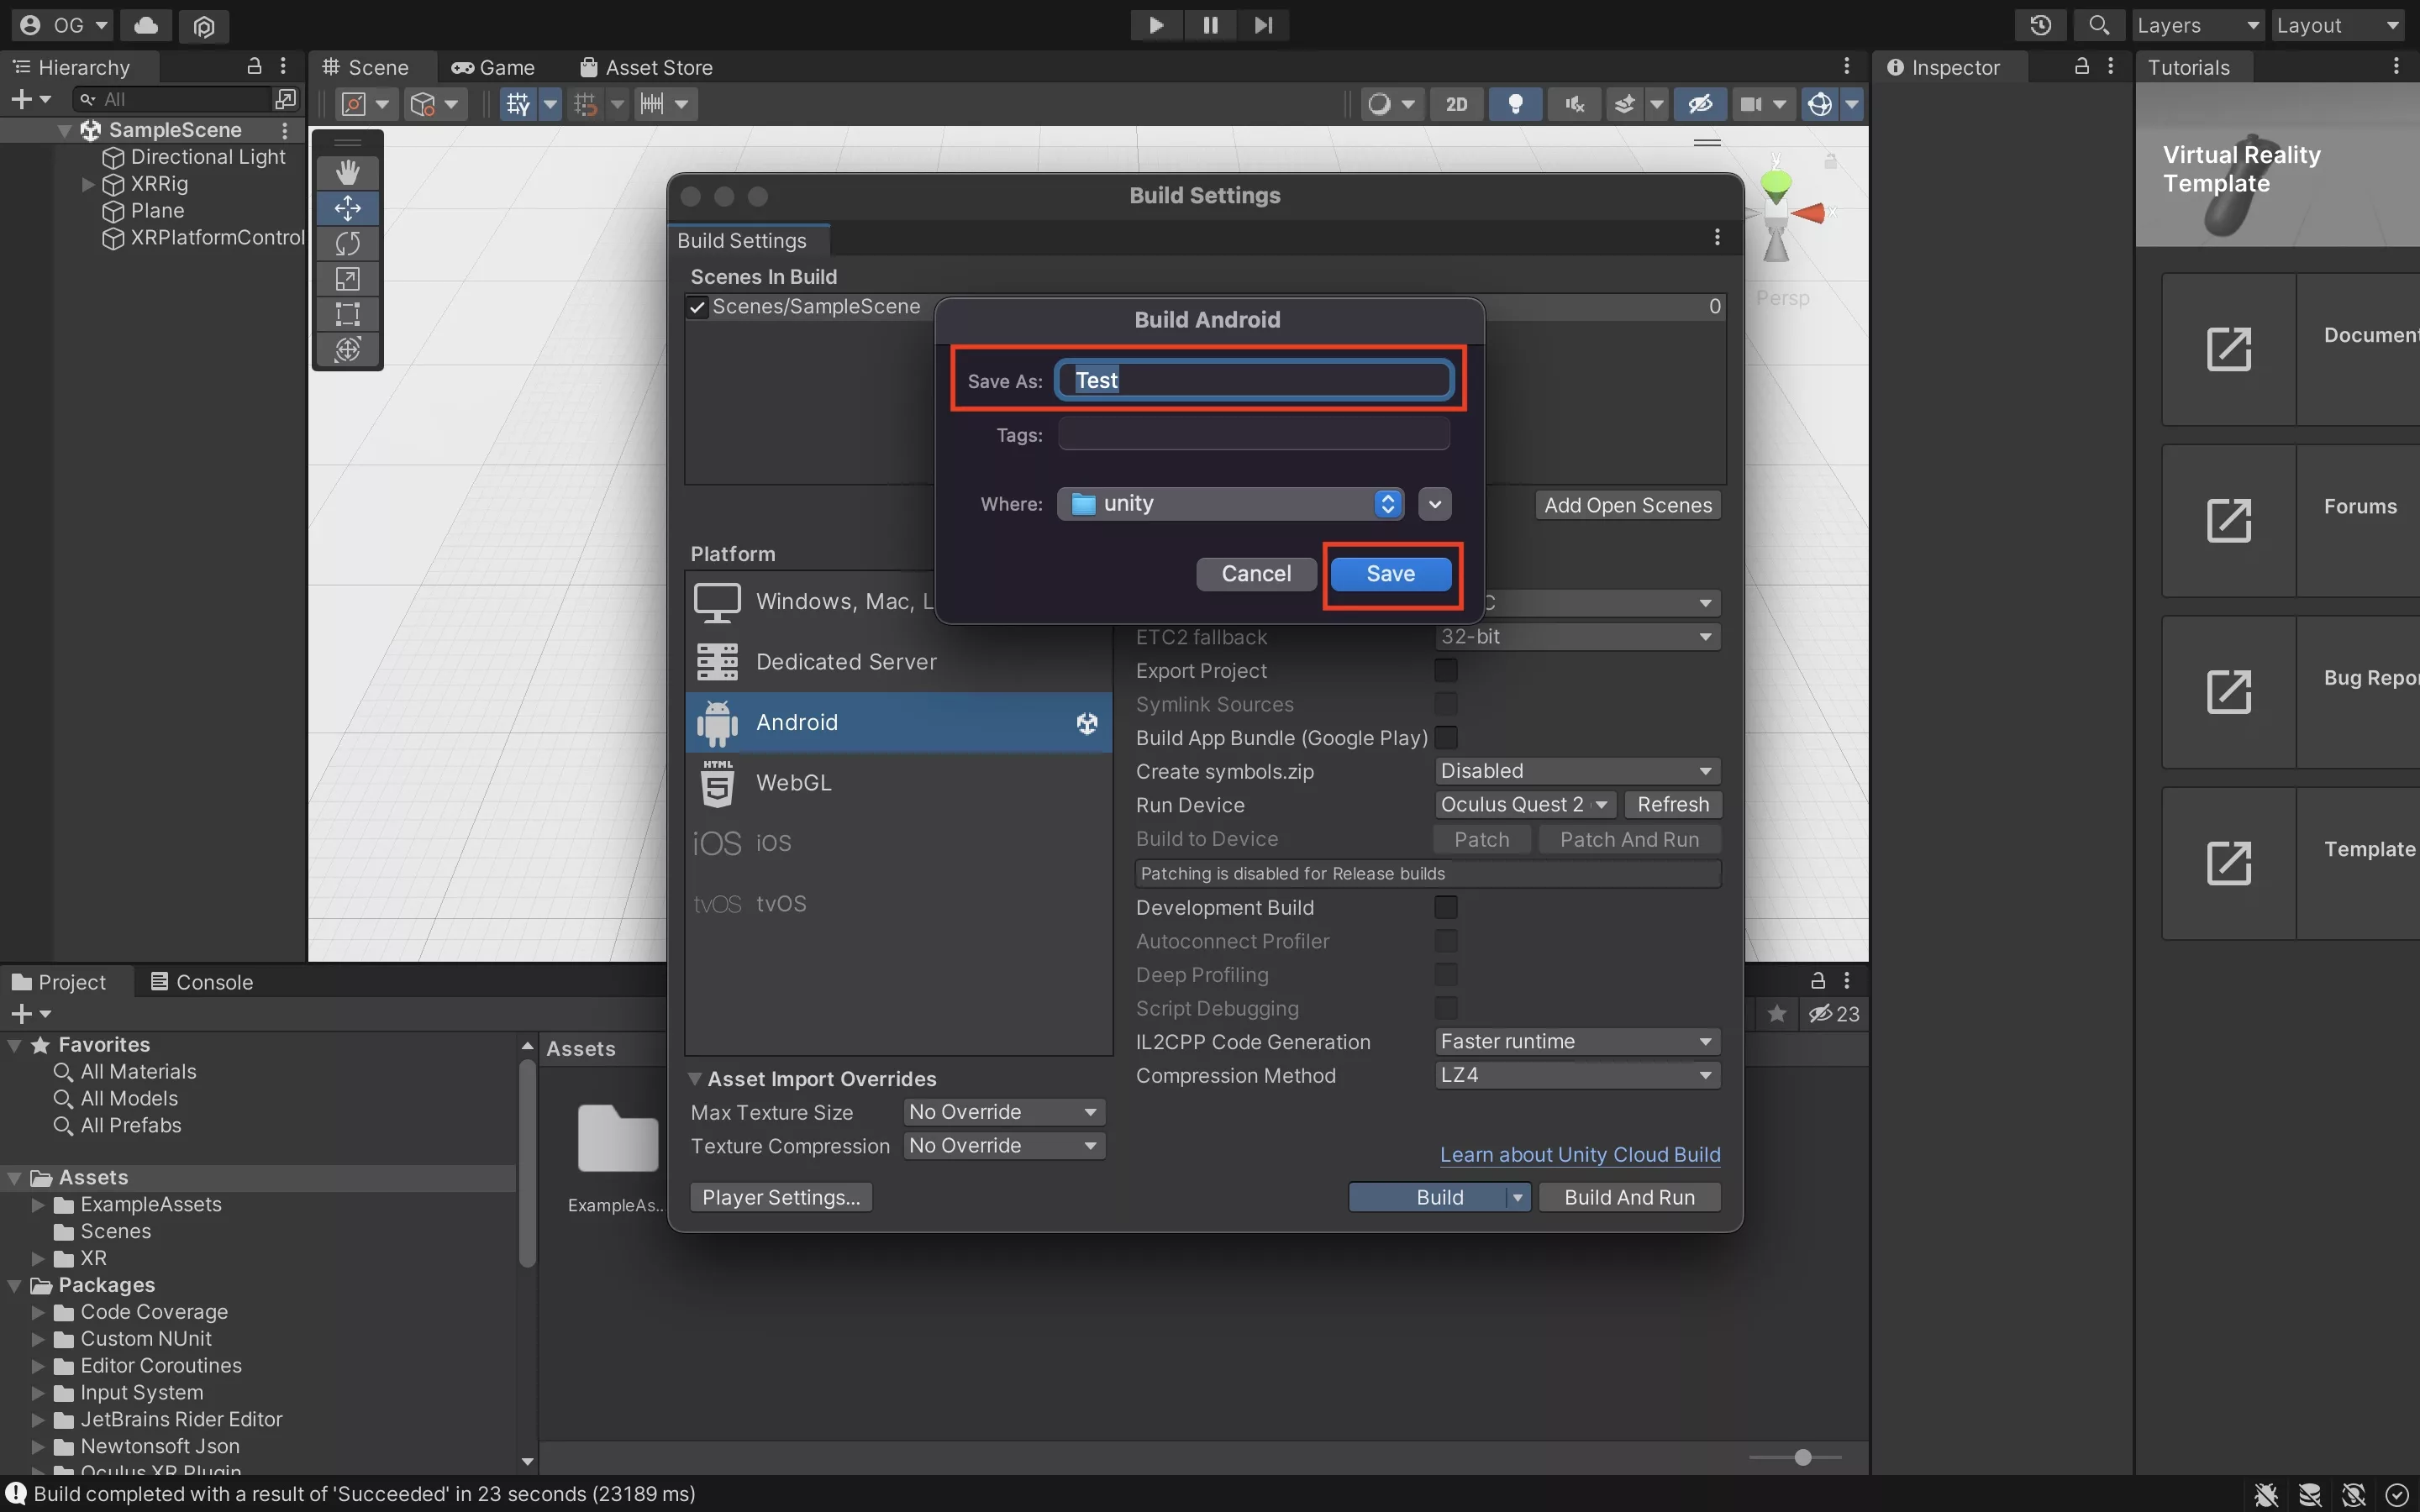
Name the build & press Save. In our case we called it Test.
Step Ten: Install apk using SideQuest
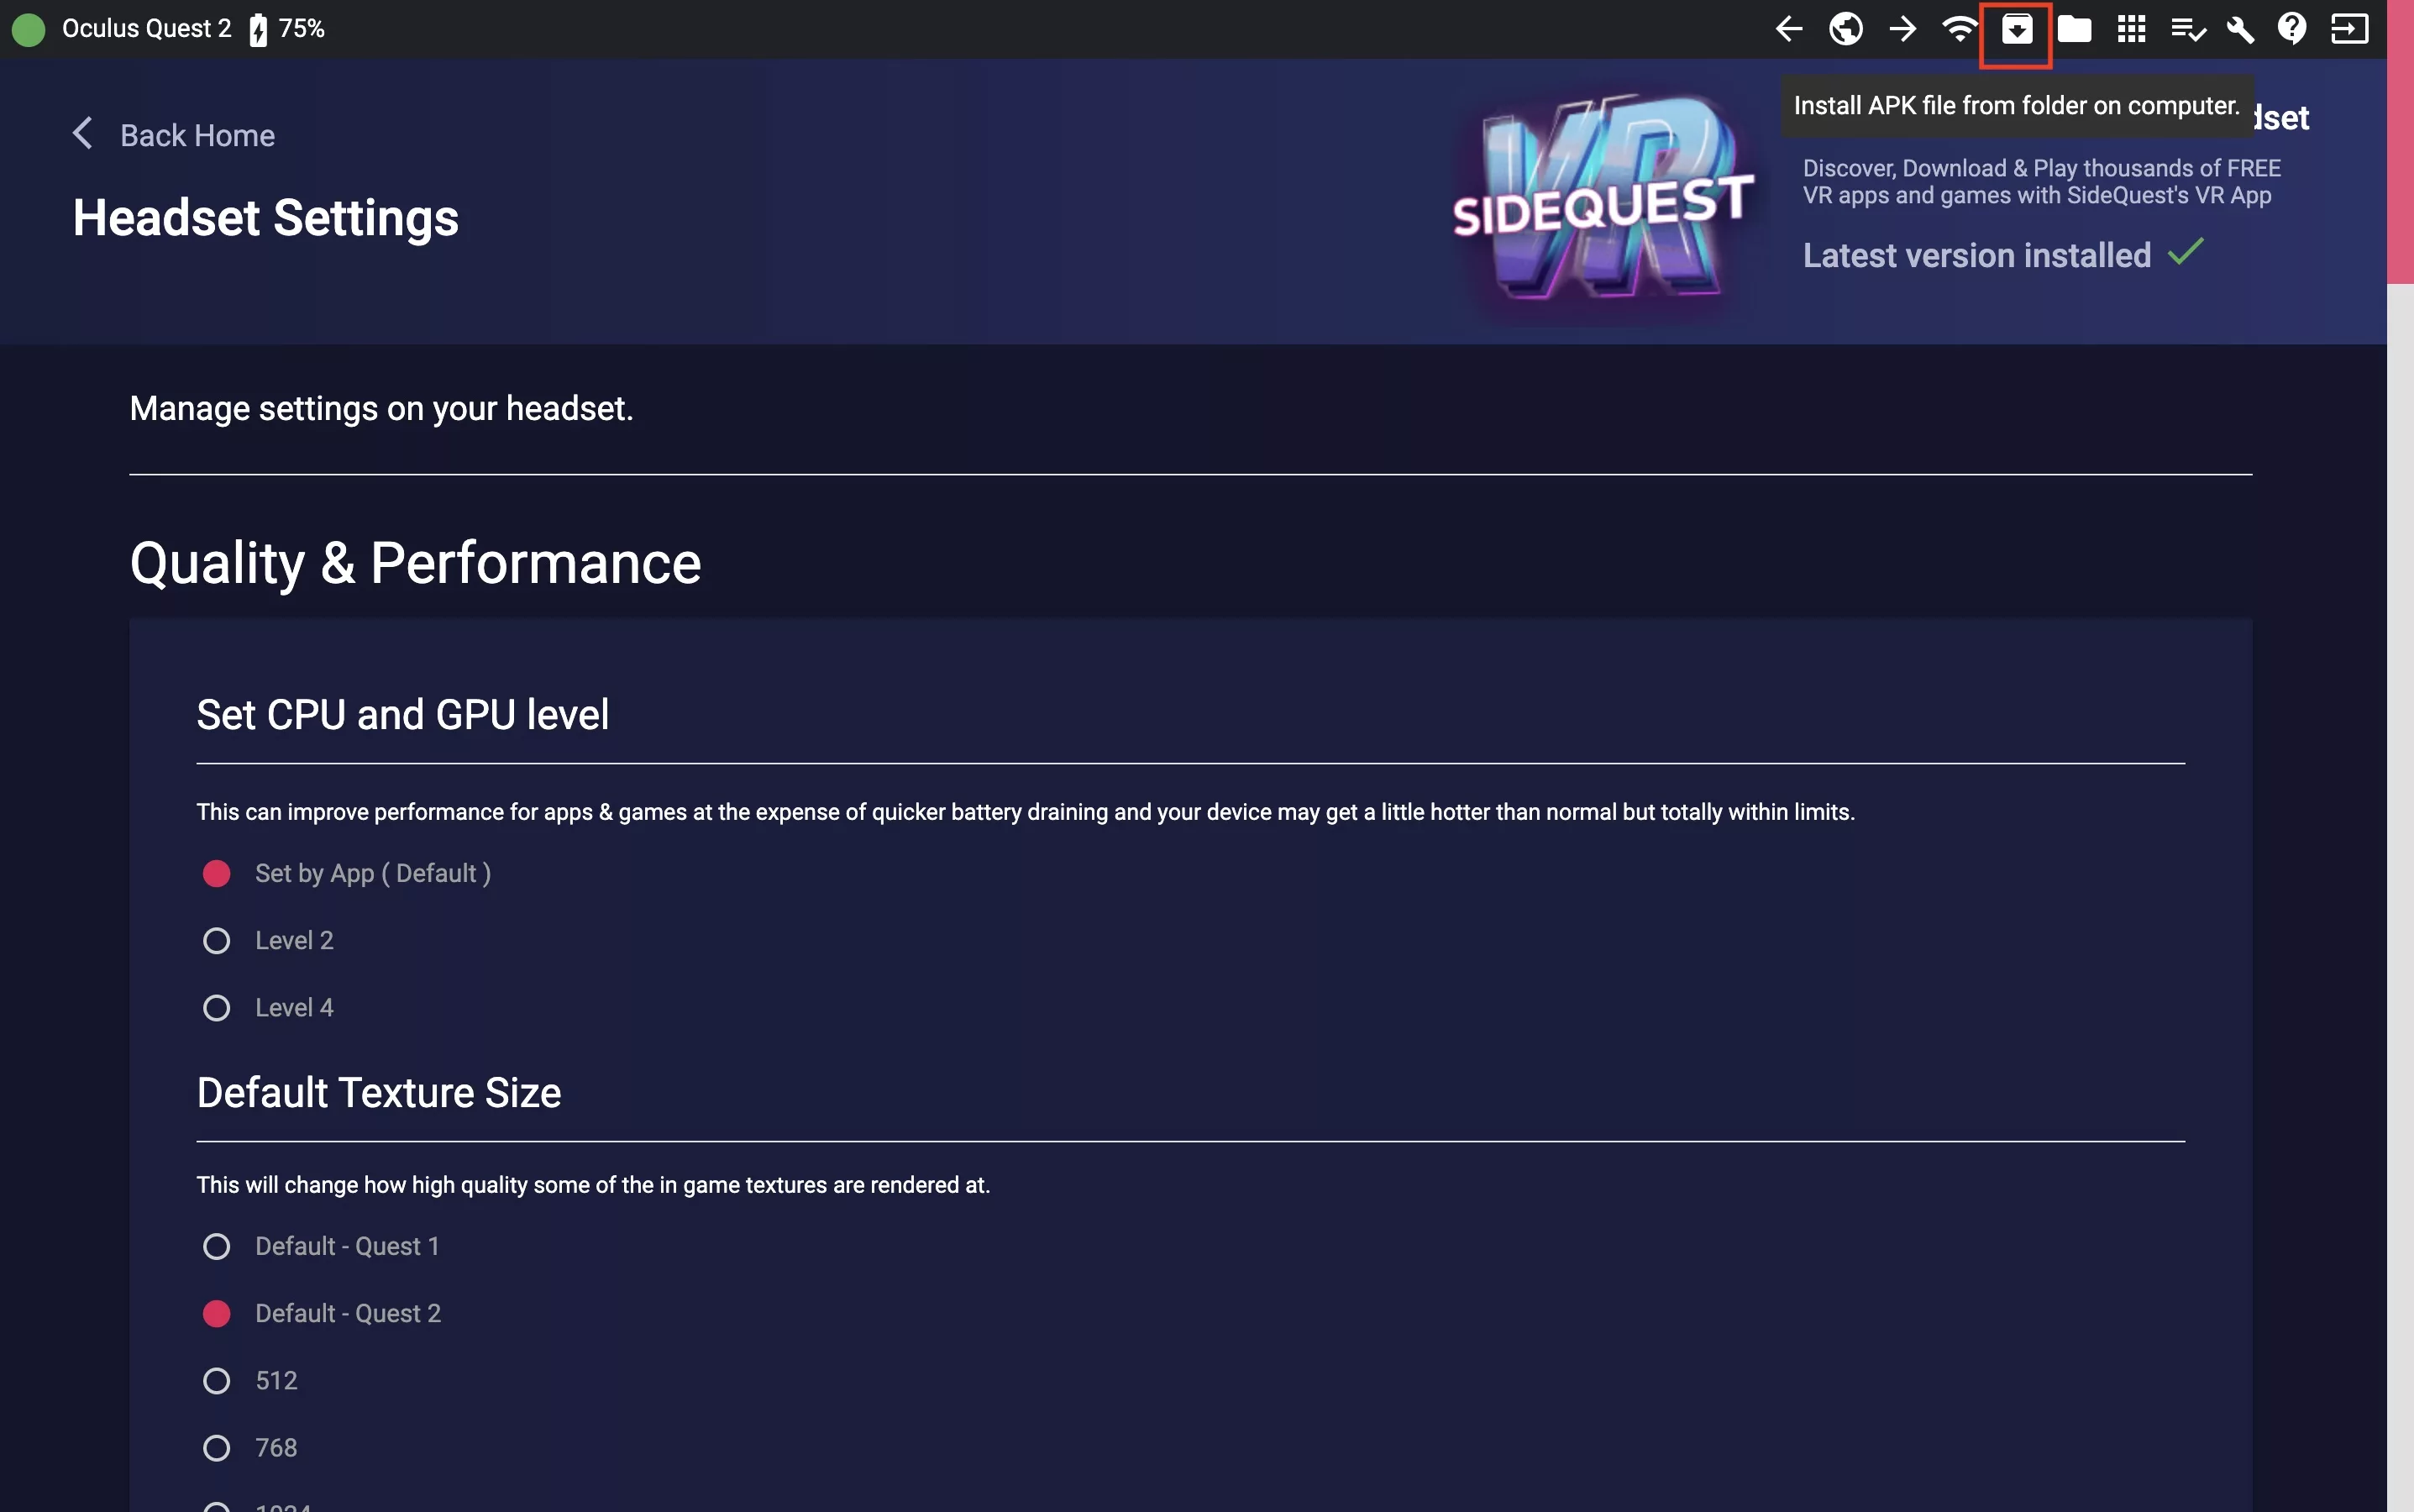
Go back to SideQuest and press the install apk button on the navigation bar. In the window that pops up, select the apk that you created.
Please note that the Meta Quest 2 must be connected and in developer mode for this to work. To learn how to setup developer mode please consult the tutorial below.
How do I open the APK ?
Consult our step by step tutorial to learn how to open an APK installed using SideQuest.
Any Questions ?
We are actively looking for feedback on how to improve this resource. Please send us a note to inquiries@delasign.com with any thoughts or feedback you may have.