How to setup & run a Unity VR development project on a Meta Quest 2
A step by step tutorial on setting up & running a Unity VR development project on a Meta Quest 2.

A step by step tutorial on setting up & running a Unity VR development project on a Meta Quest 2.
The following tutorial builds on our Open Source tutorial & project for creating Meta Quest 2 VR experiences in Unity and walks you through how to run a Unity VR development project on a Meta Quest 2.
Please note that in order for this tutorial to work the Meta Quest 2 must have Developer Mode enabled, be turned on and plugged into your computer using the USB that comes with the Meta Quest 2.
Step One: Open the Project
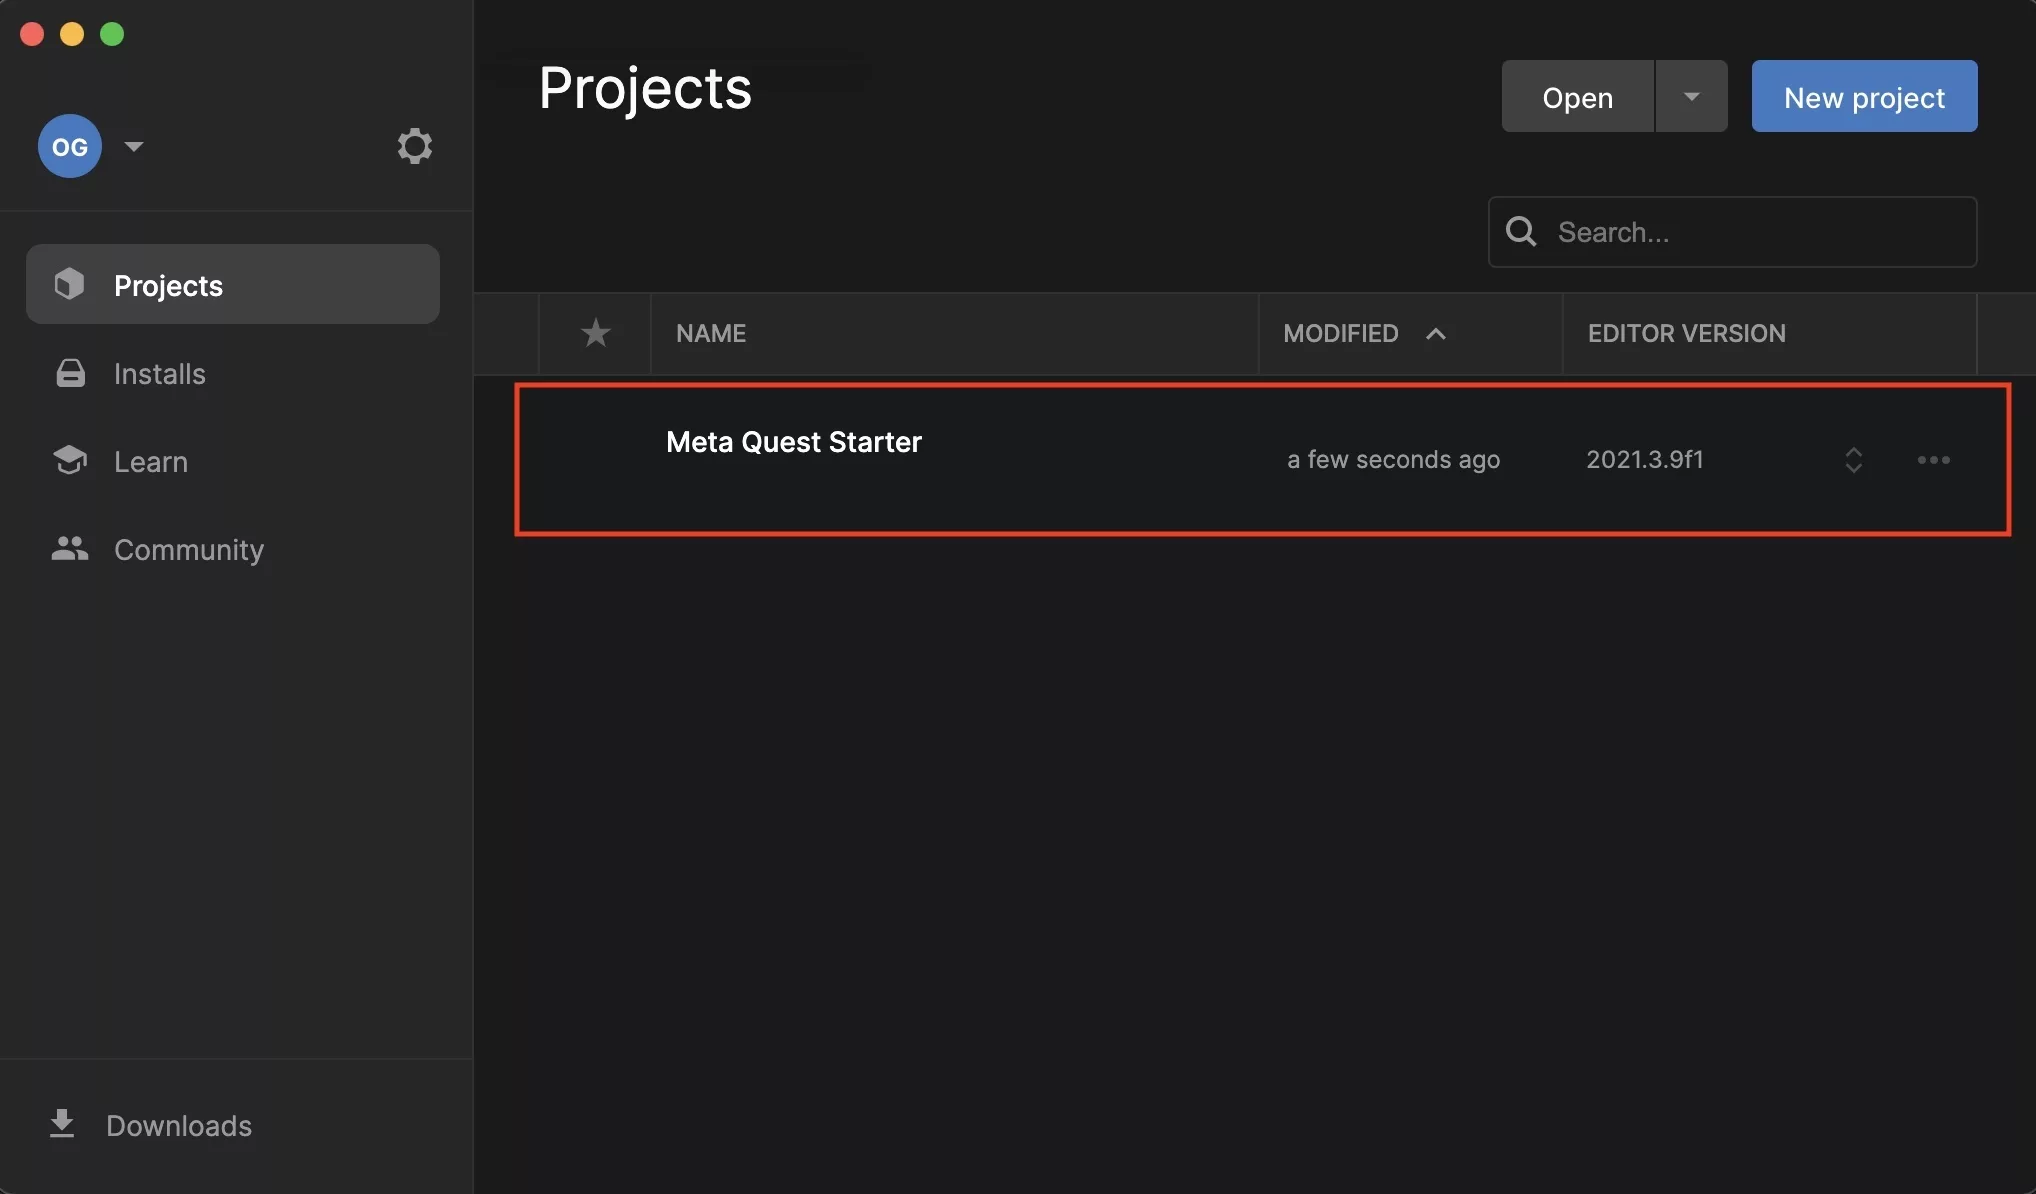
Open Unity and select the project you wish to run in development mode.
Step Two: Open Build Settings
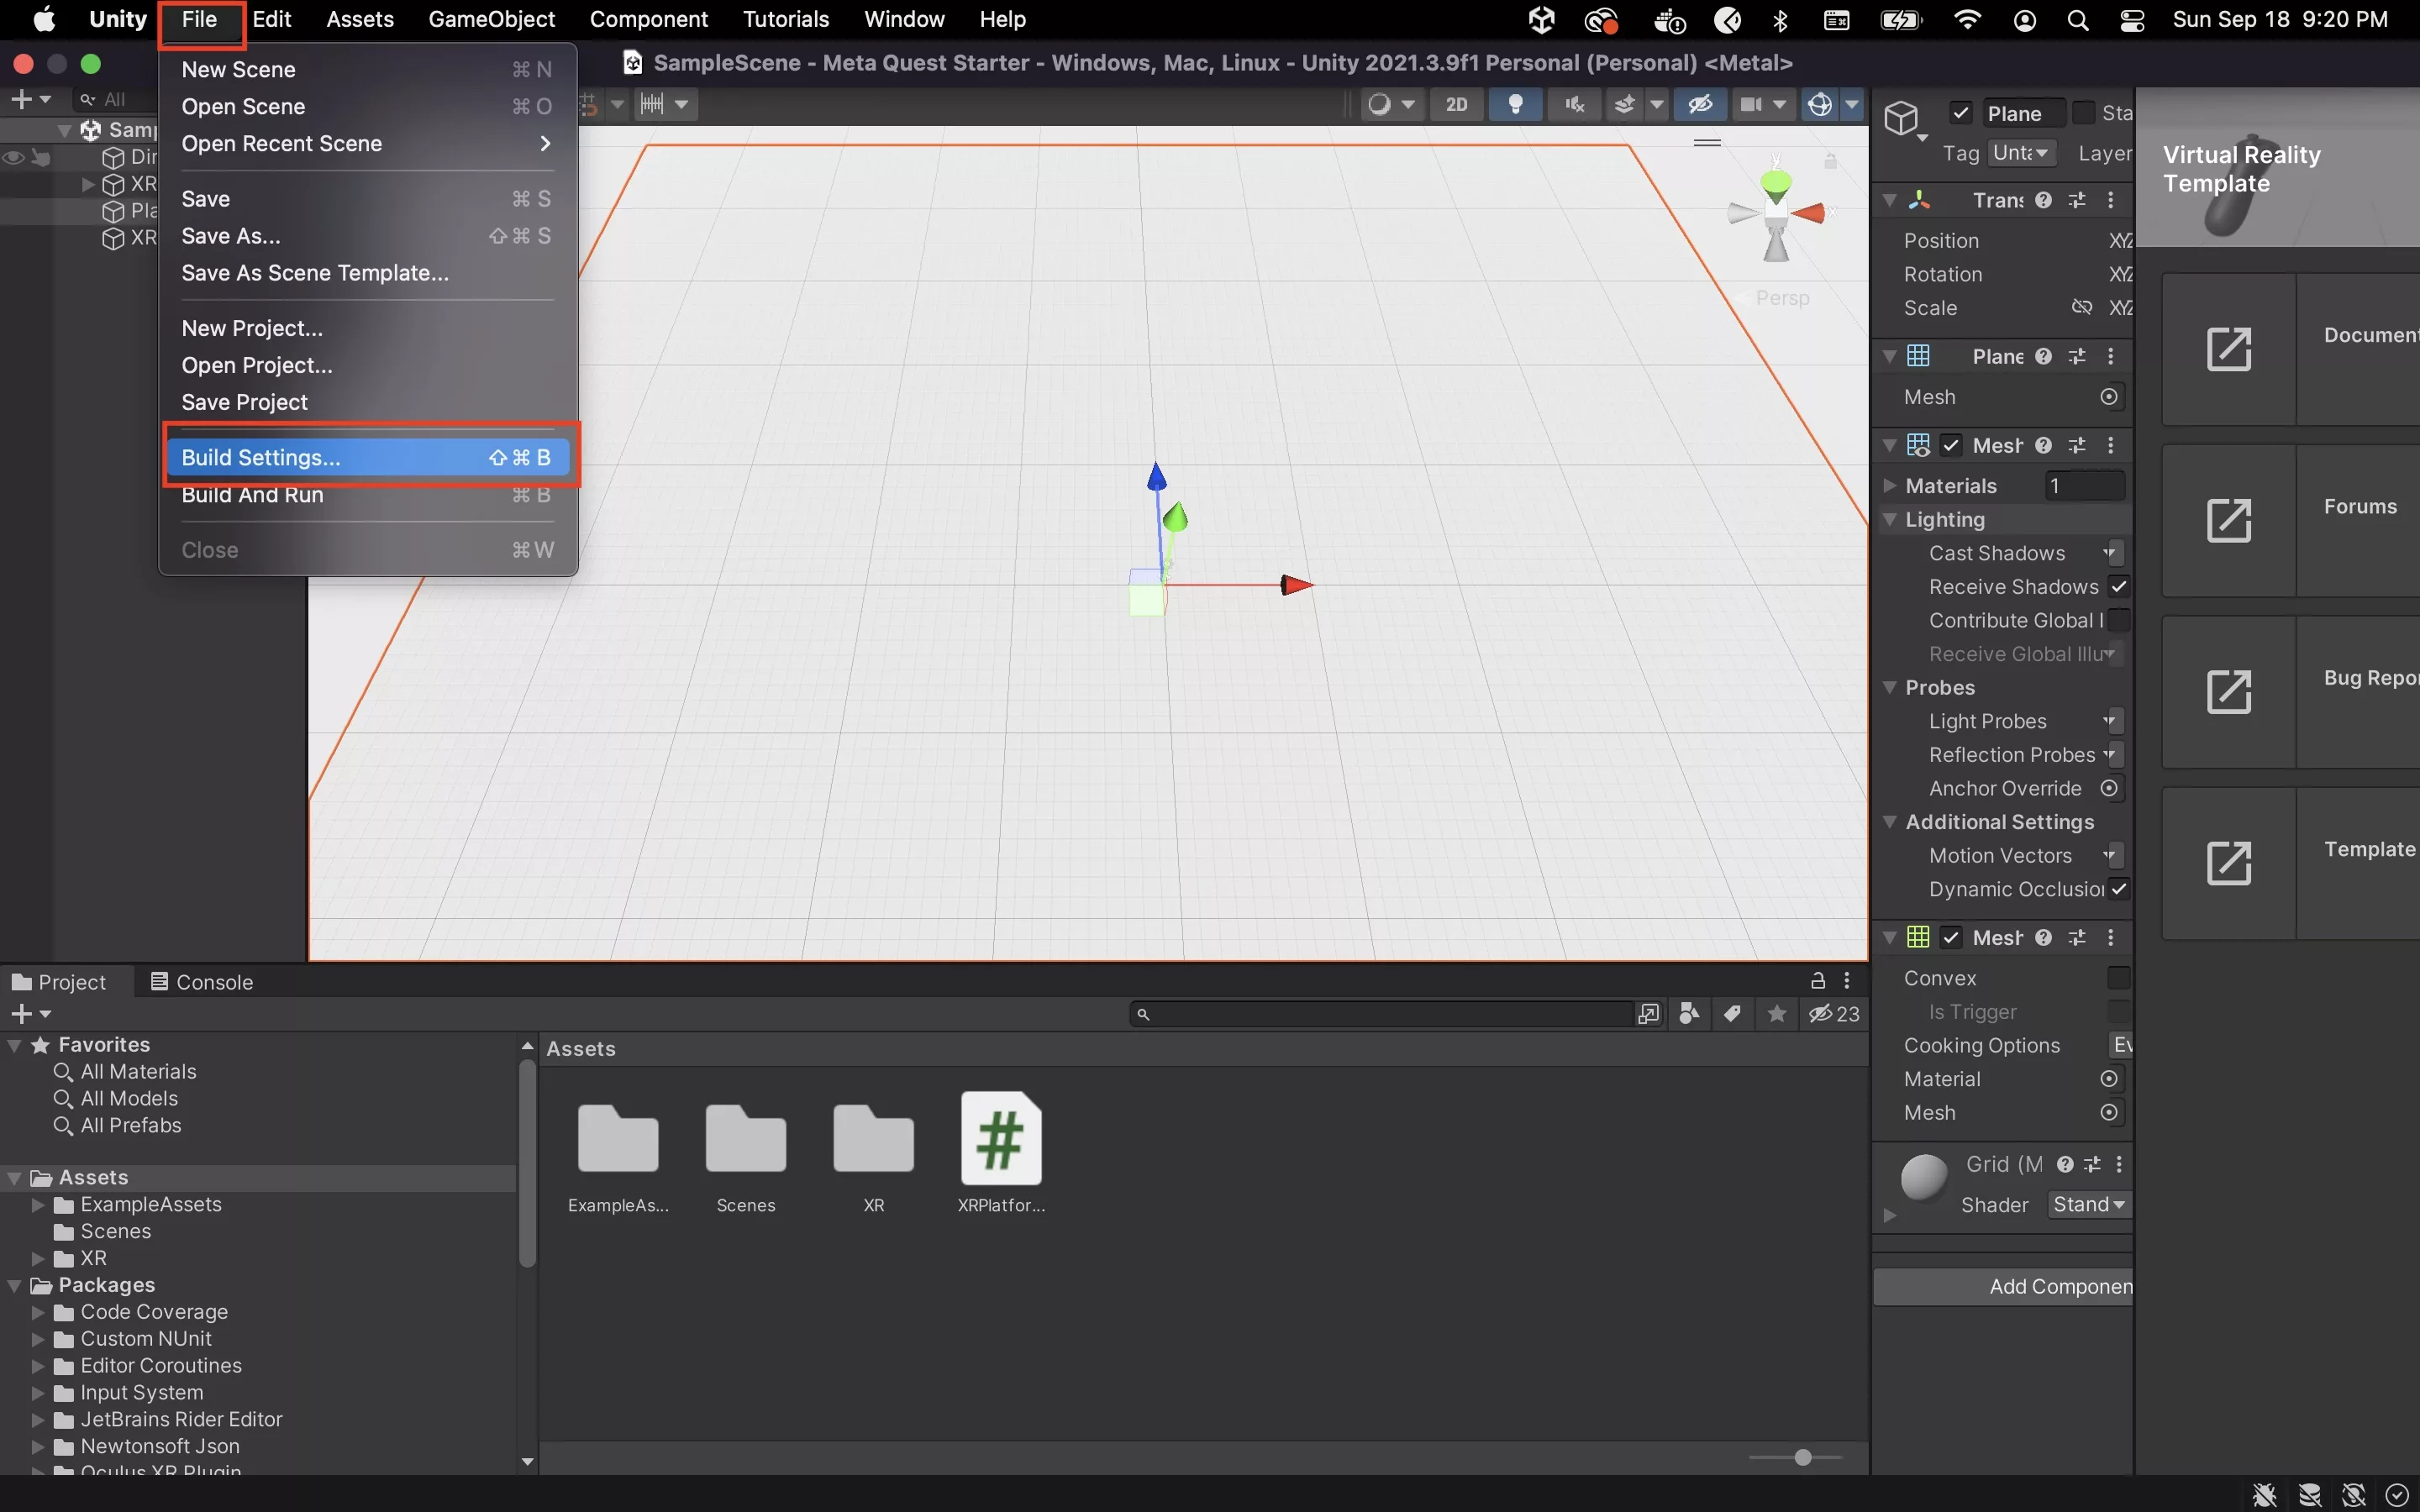
Open the Build Settings by going to File > Build Settings.
Step Three: Install Android
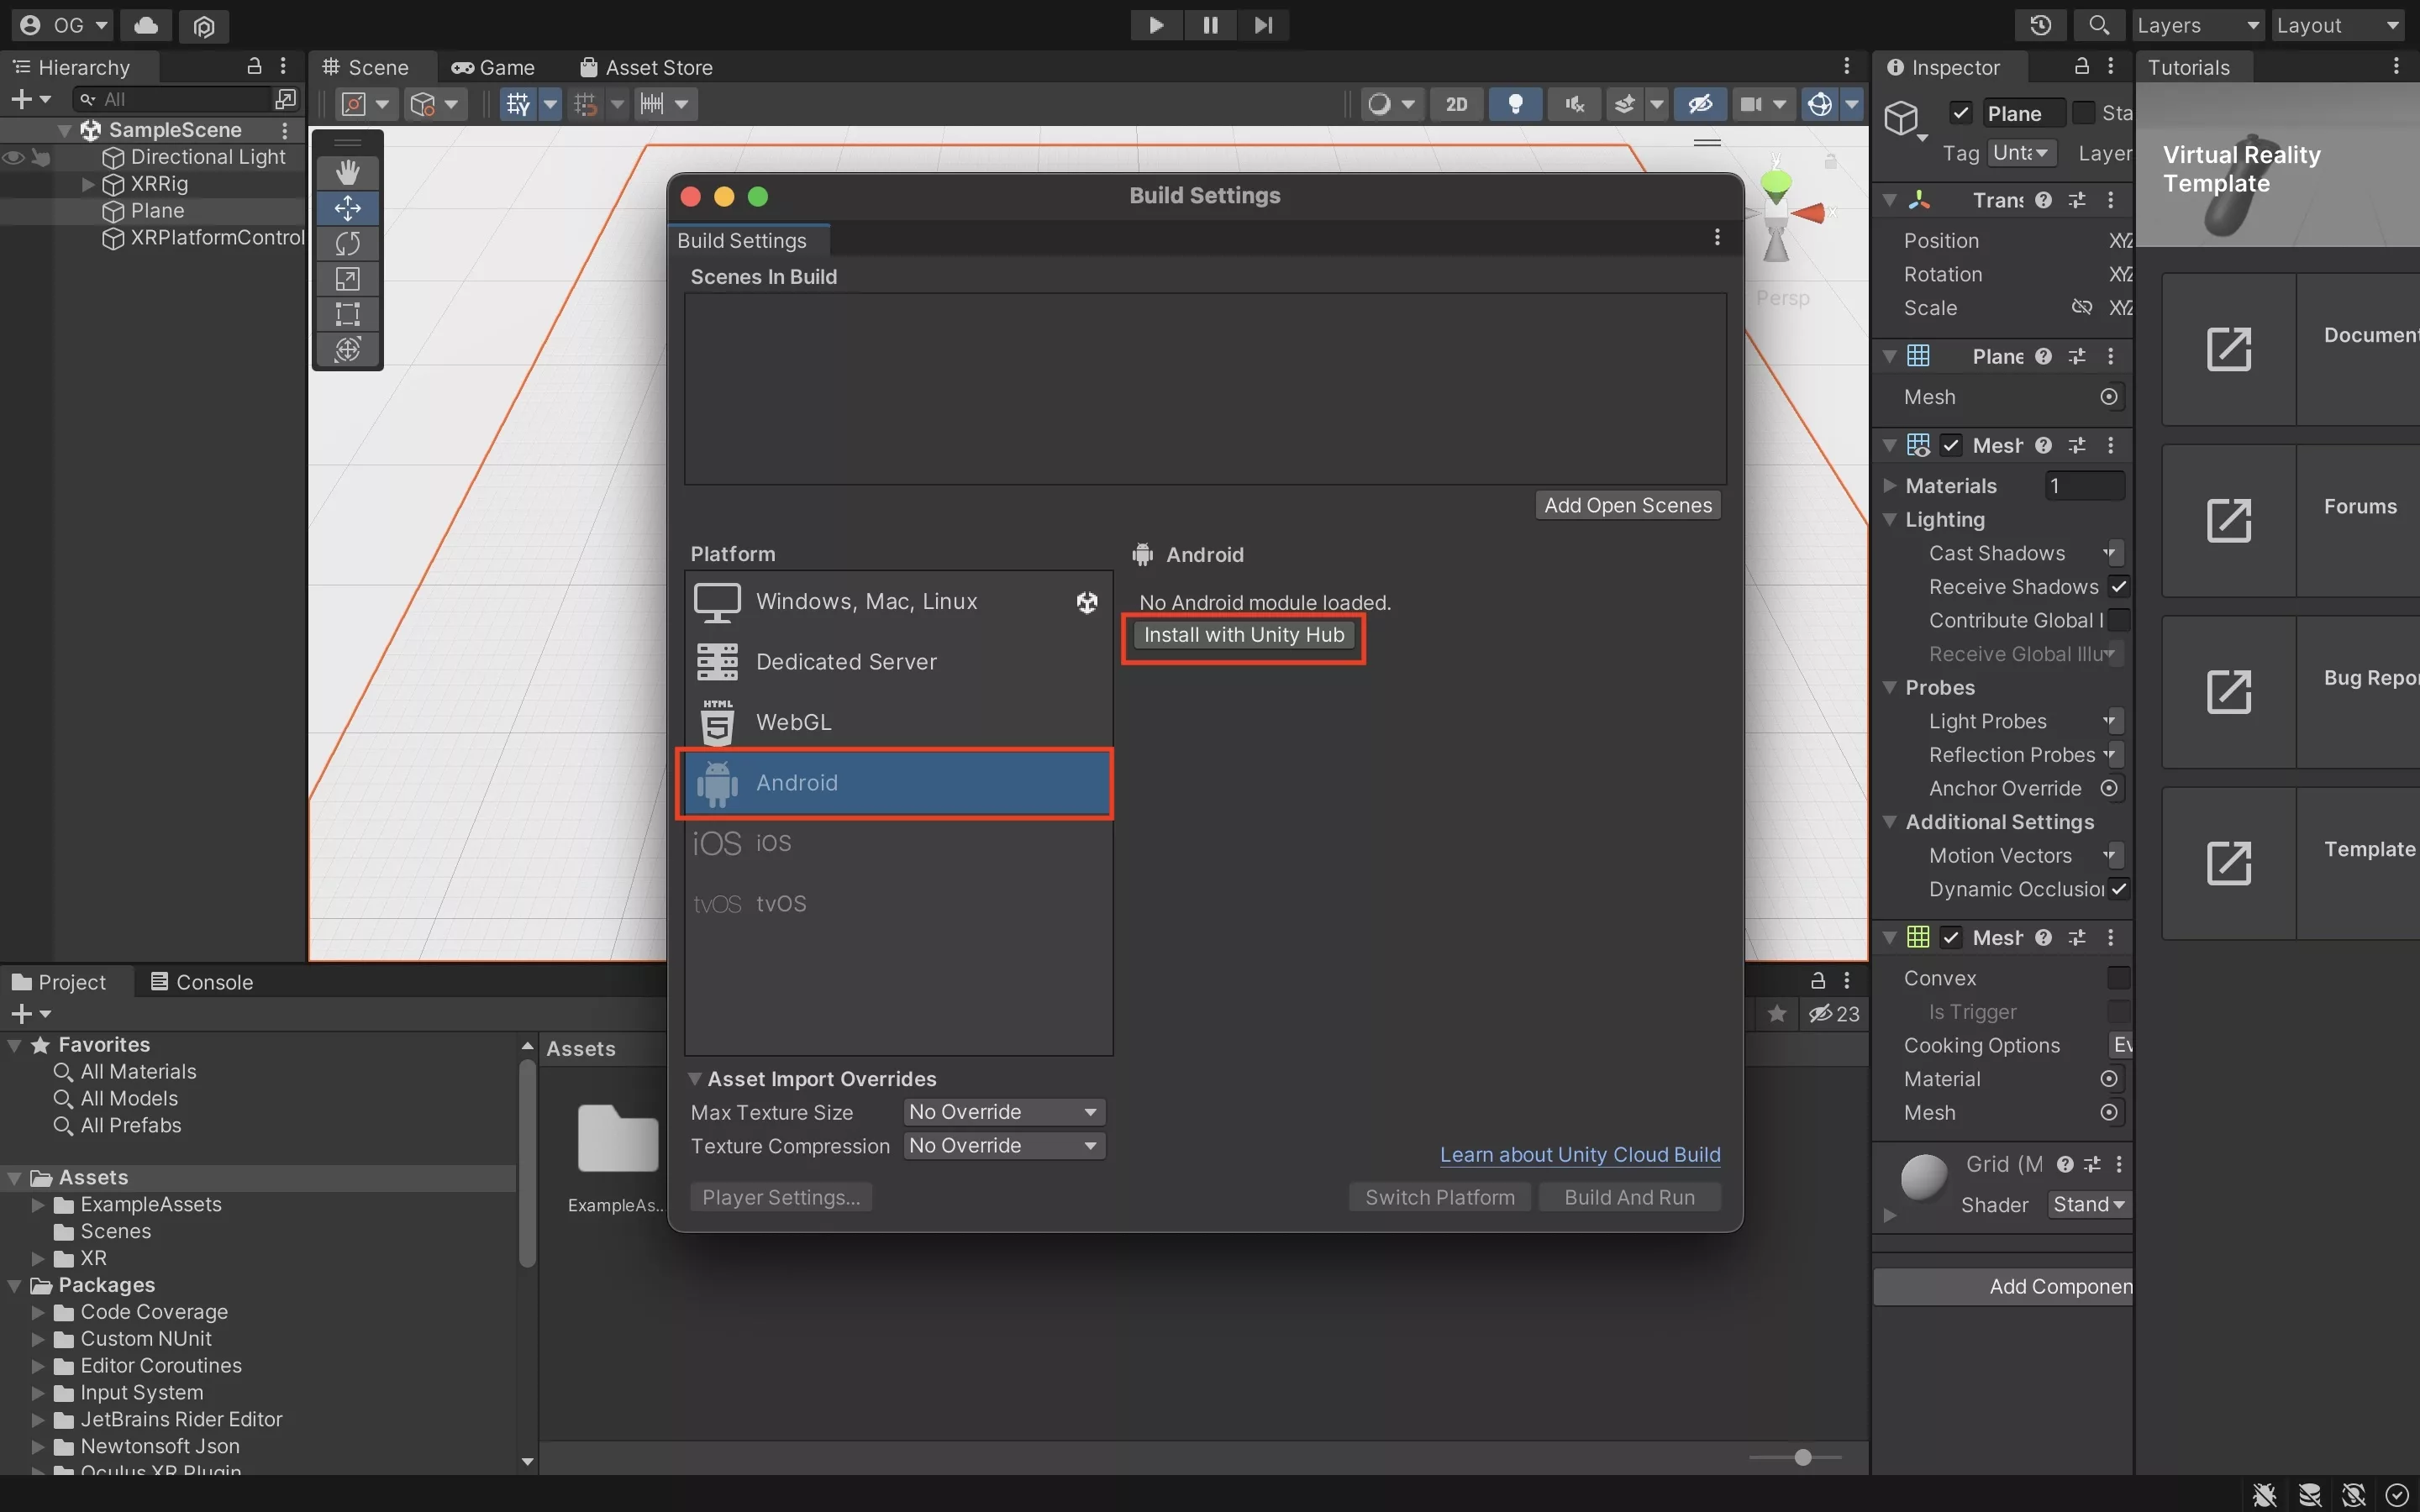
In the window that appears, select Android. Then Select Install with Unity Hub.
Step Four: Add Android Build Support
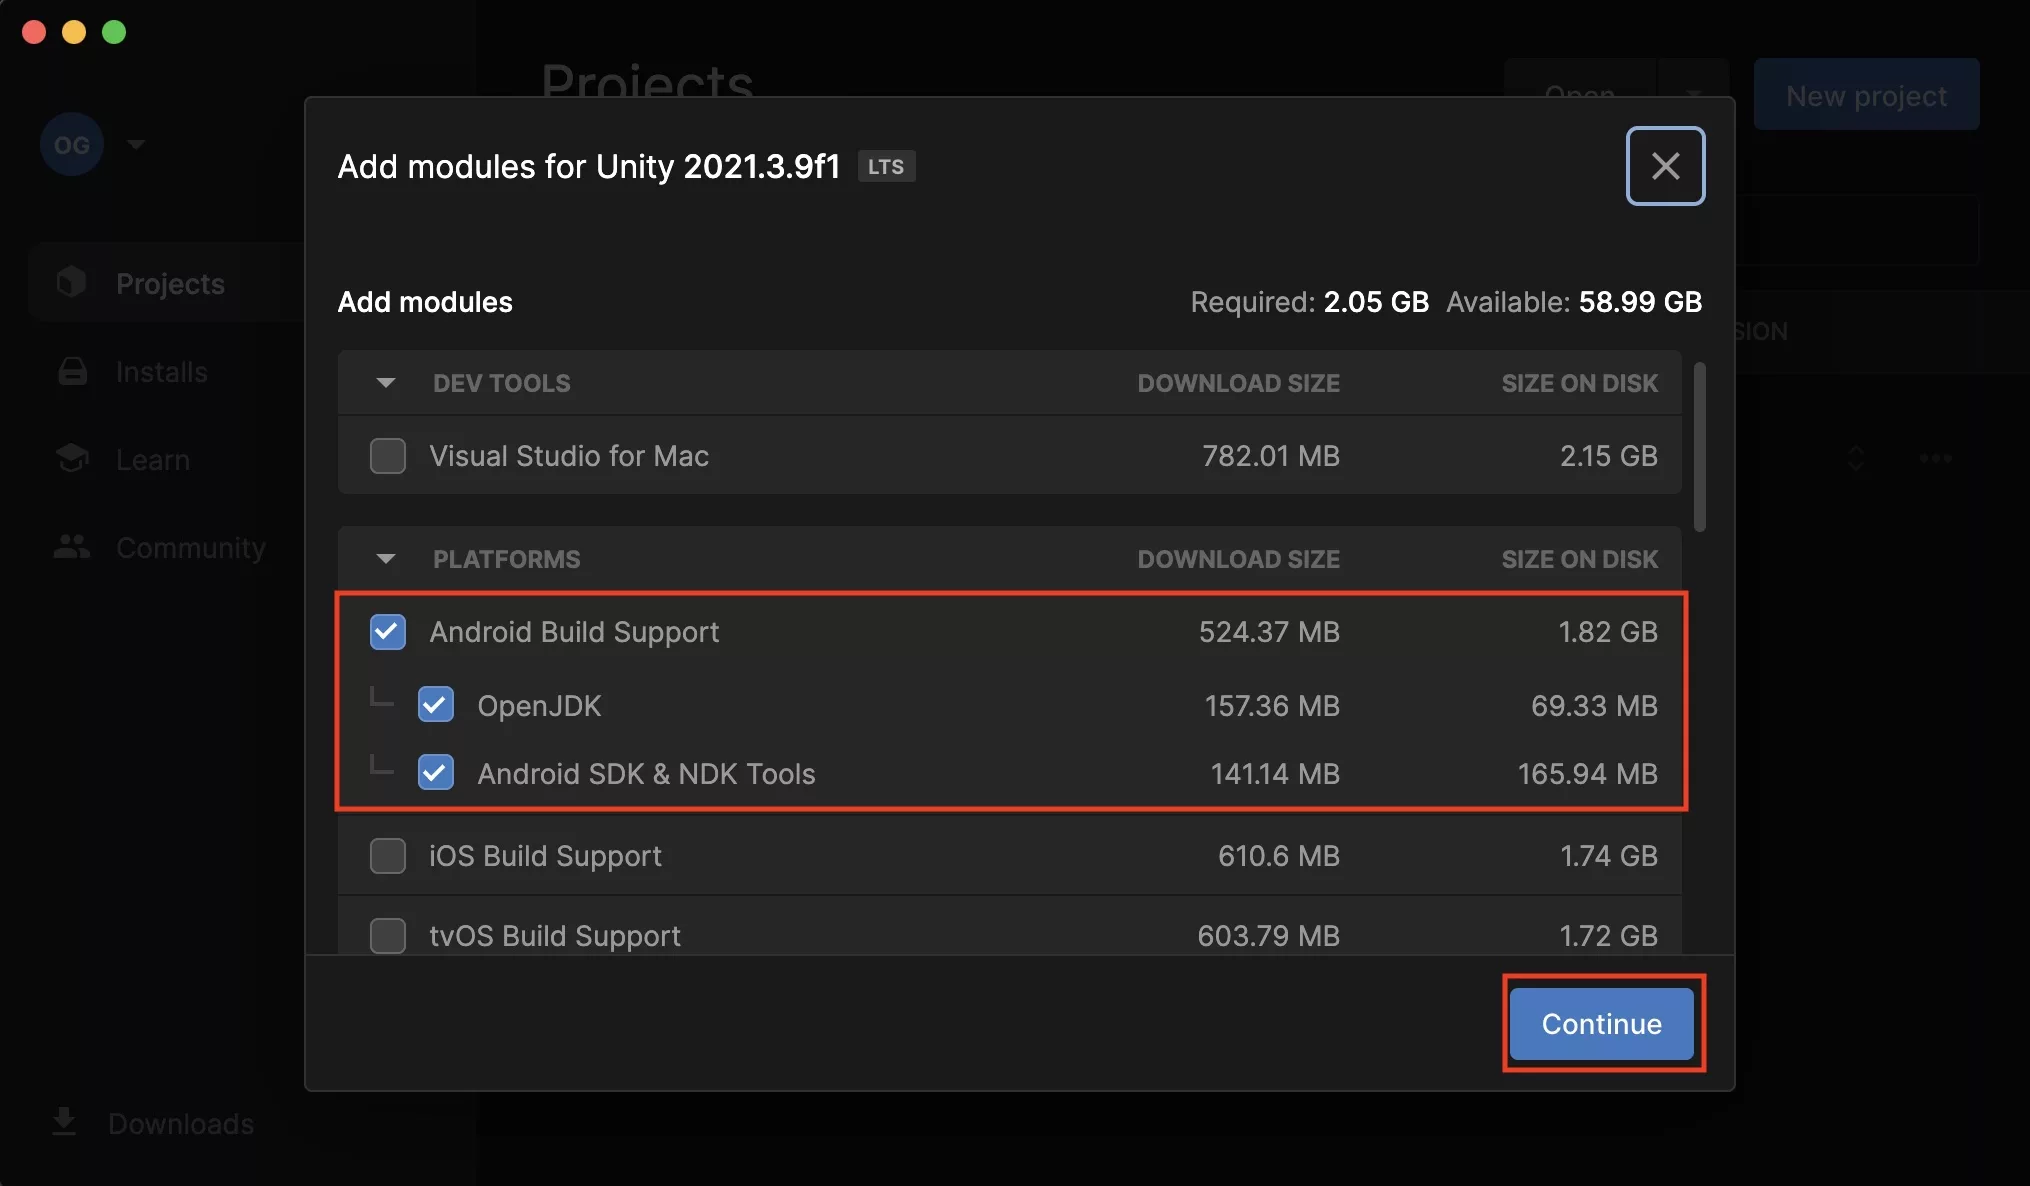
If you are not automatically redirected to the Unity Hub, navigate to it.
The Unity Hub should have animated to a window similar to the one in the image above, where you are offered to add Android Build Support, including OpenJDK and Android SDK & NDK Tools.
Make sure both are selected and press Continue.
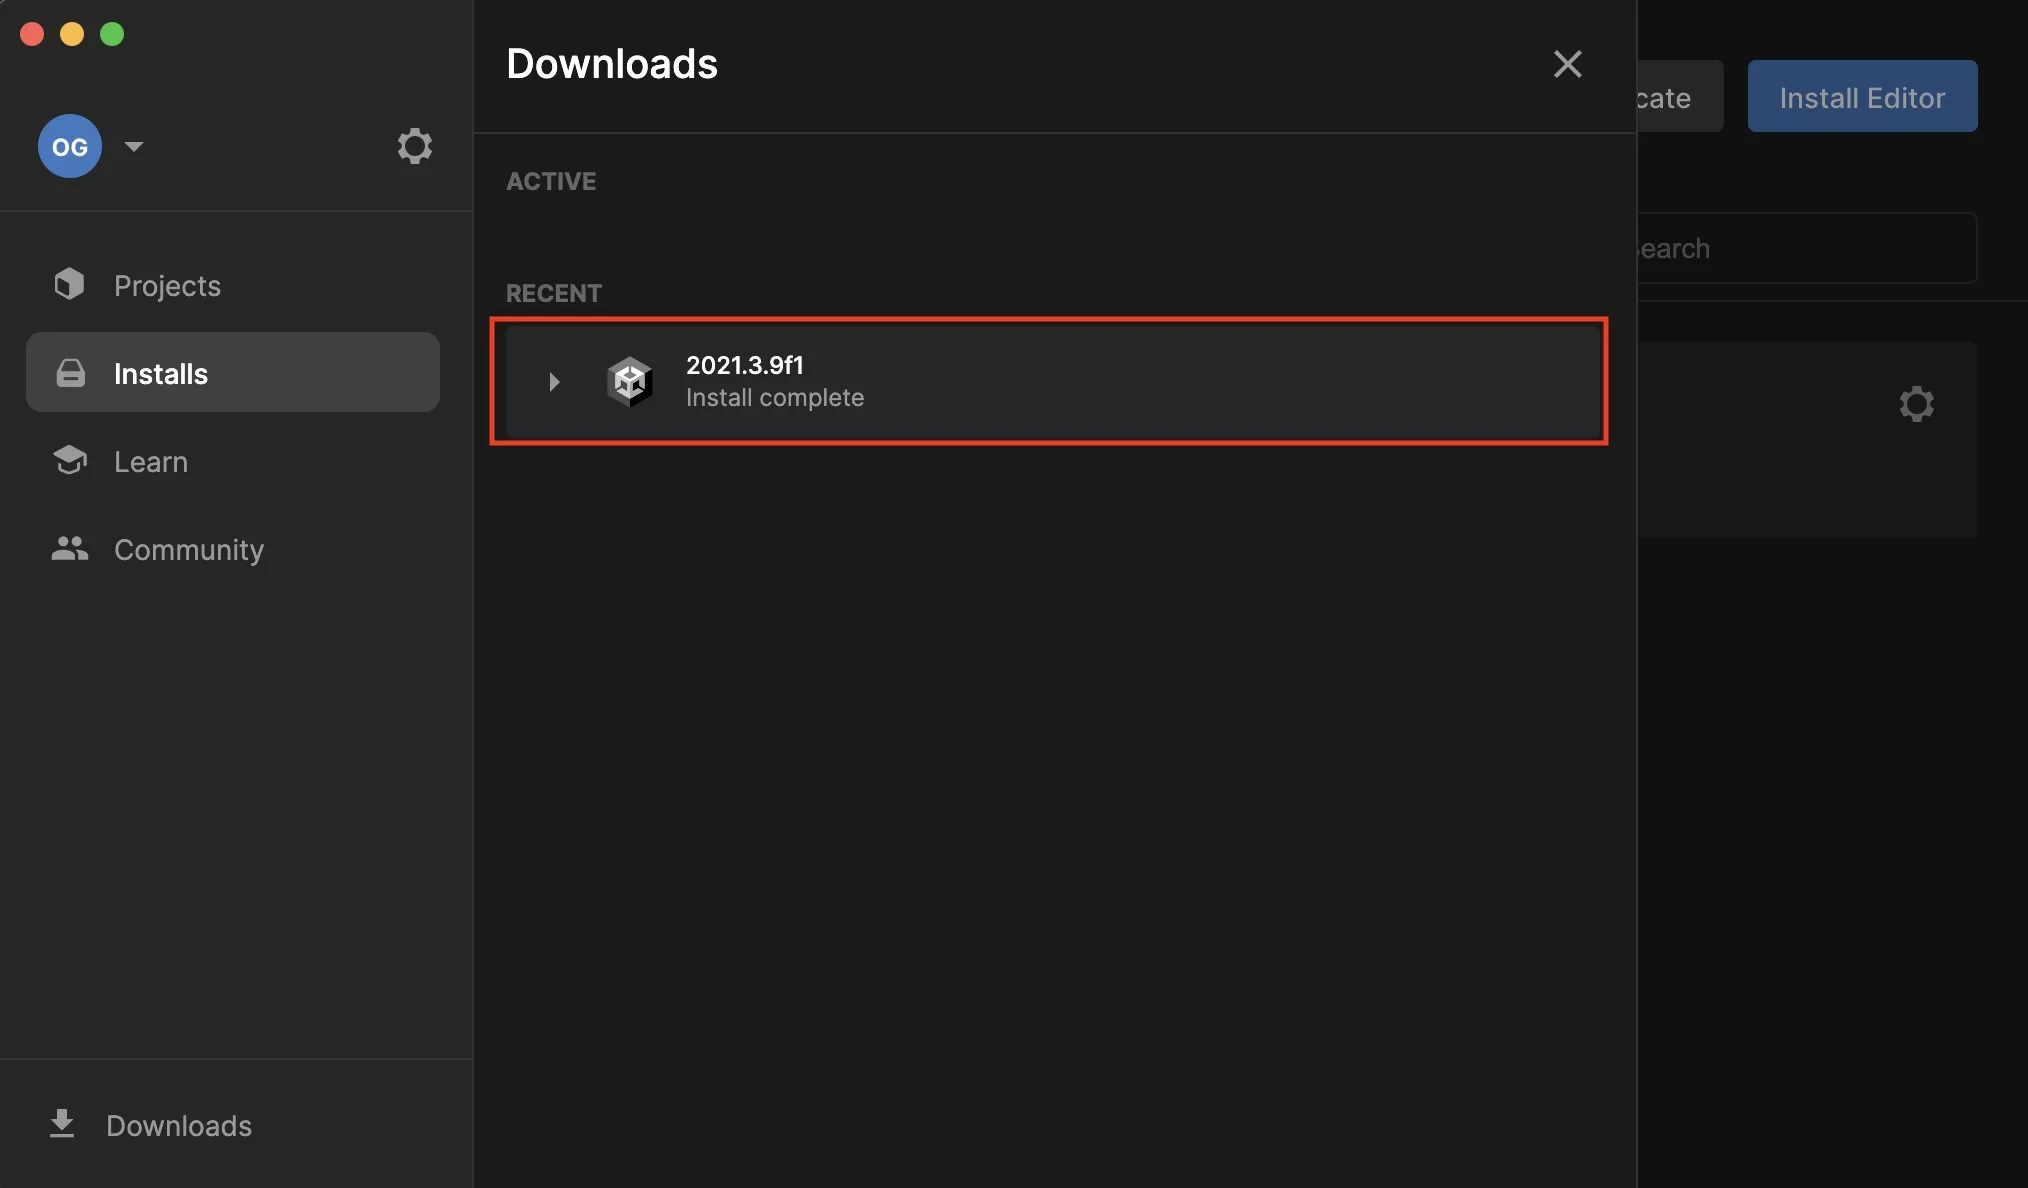
Wait until the download has completed, when it is complete it will look similar to that below.
Step Five: Close & Reopen the project
In order for Android to have registered in the system, you must close and open the project.
Step Six: Open Project Settings
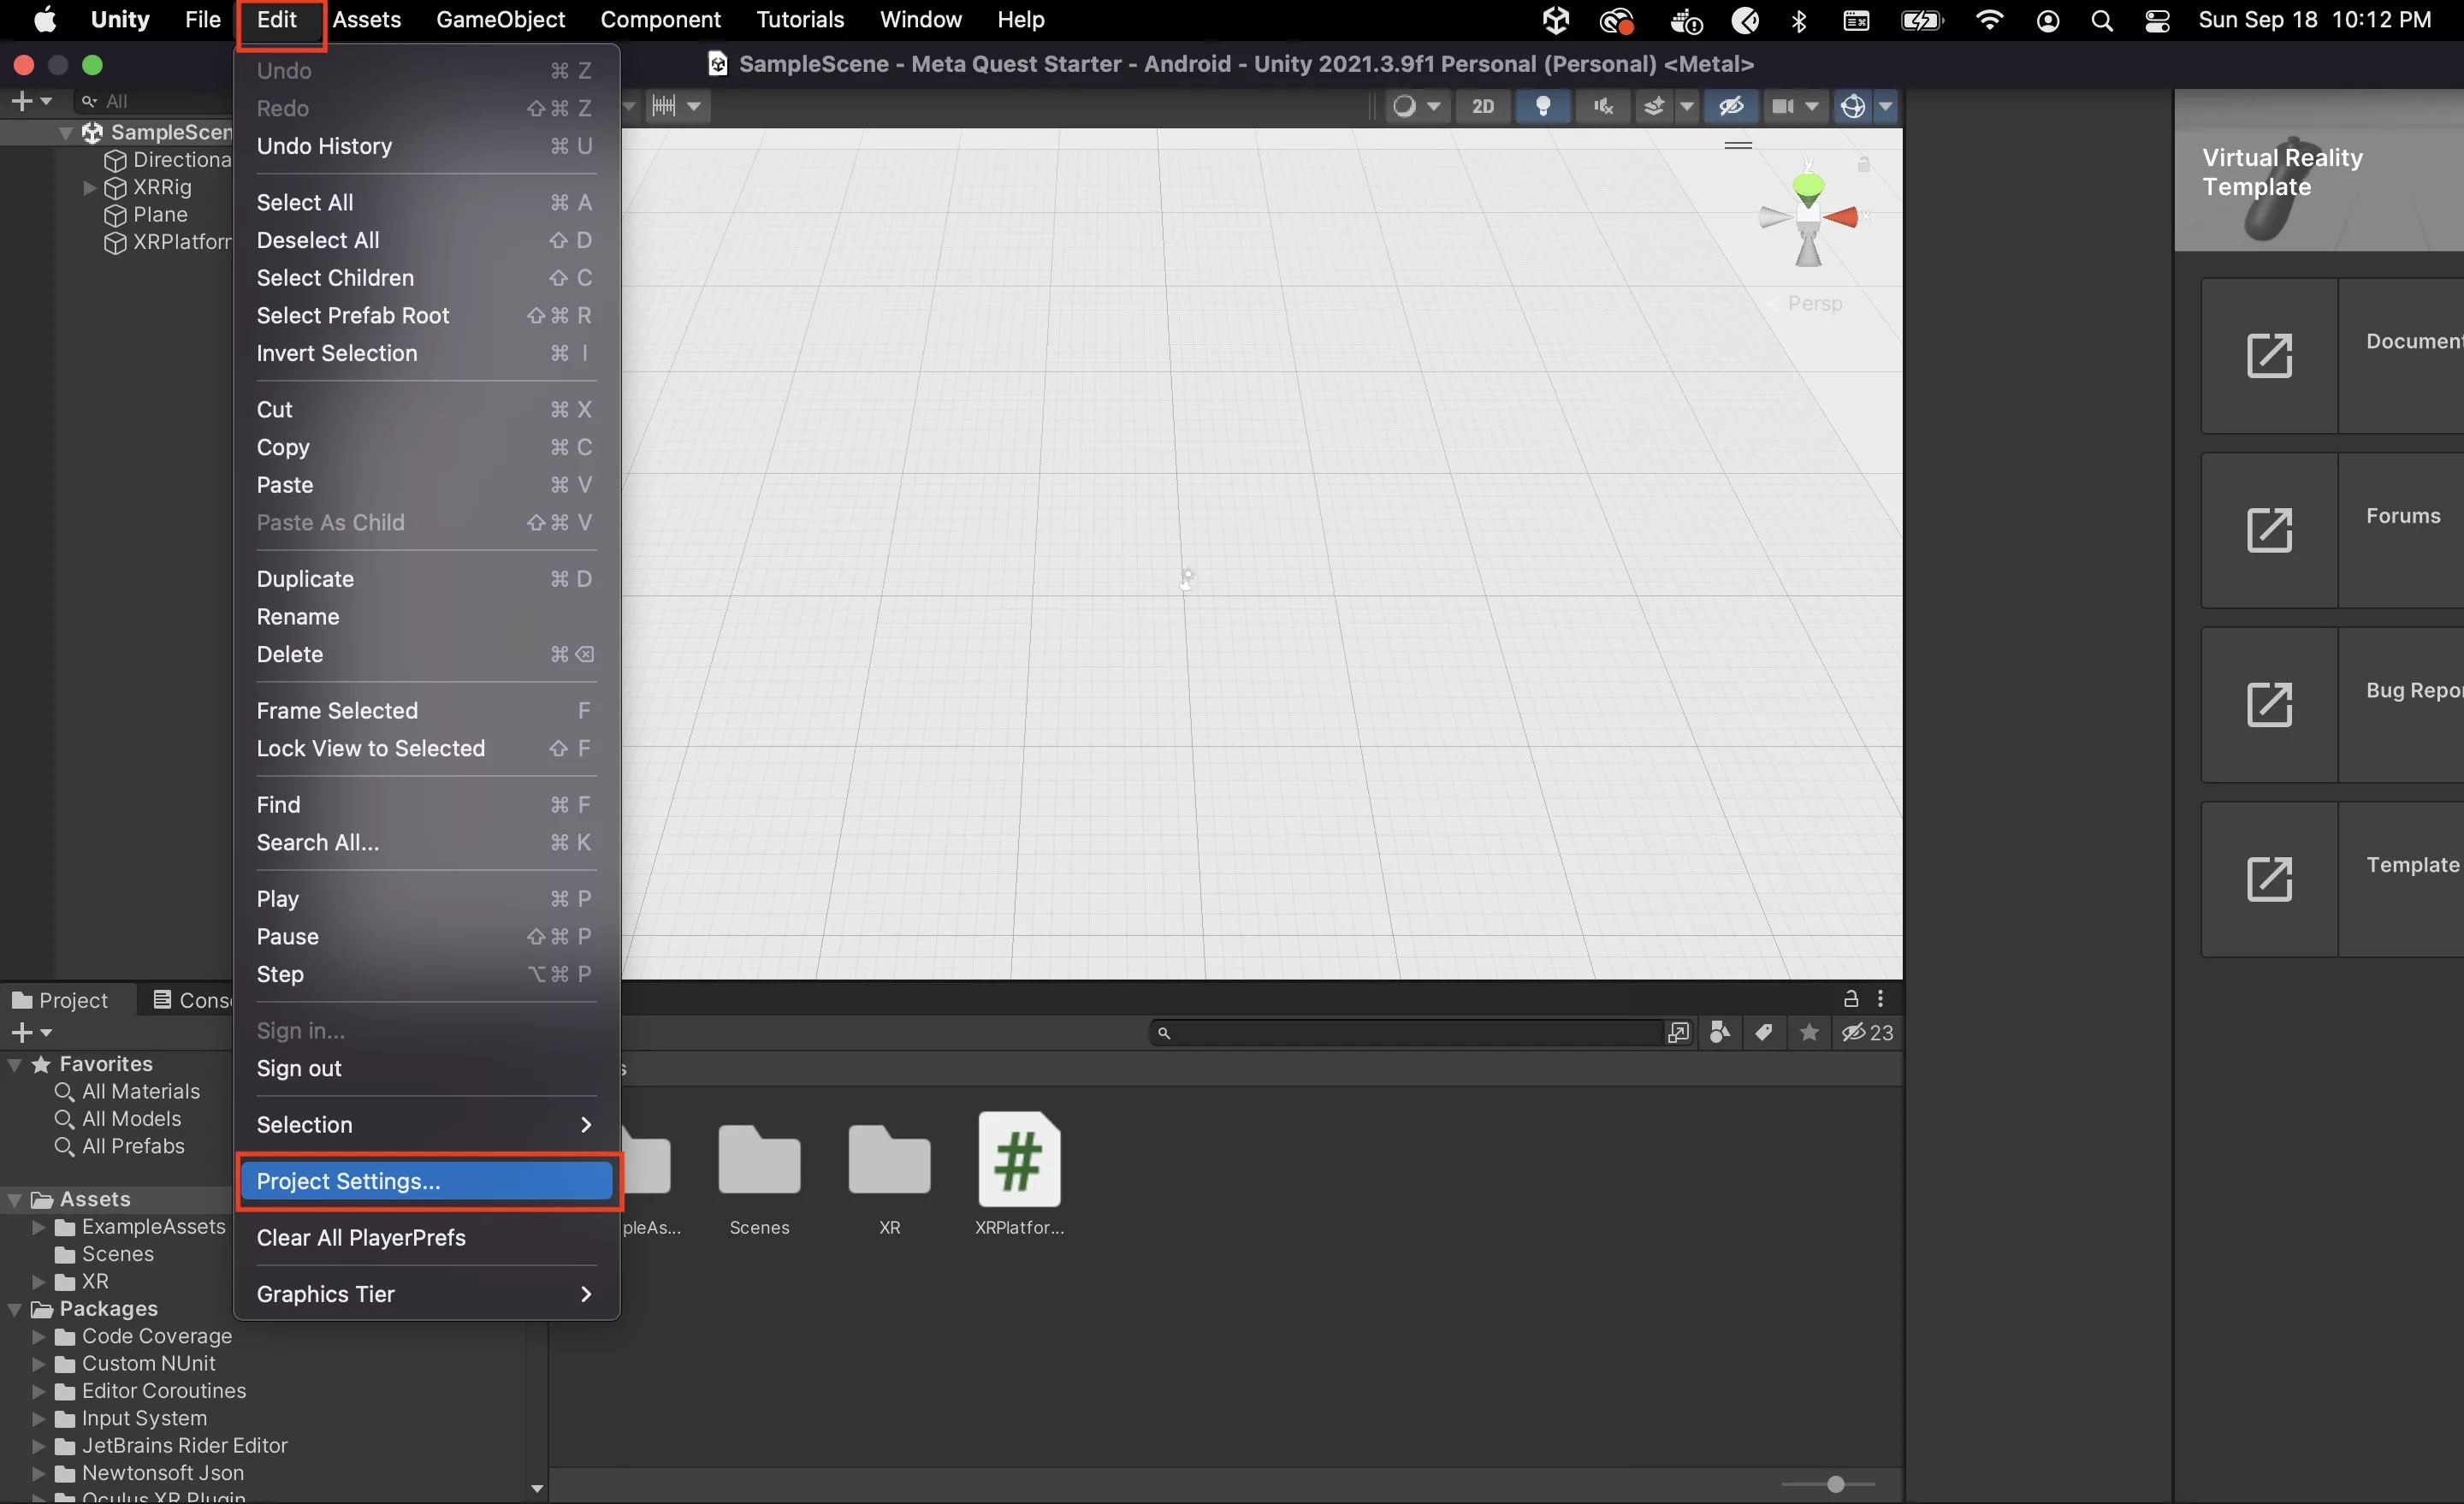
Open the Project Settings by going to Edit > Project Settings.
Step Seven: Enable Oculus
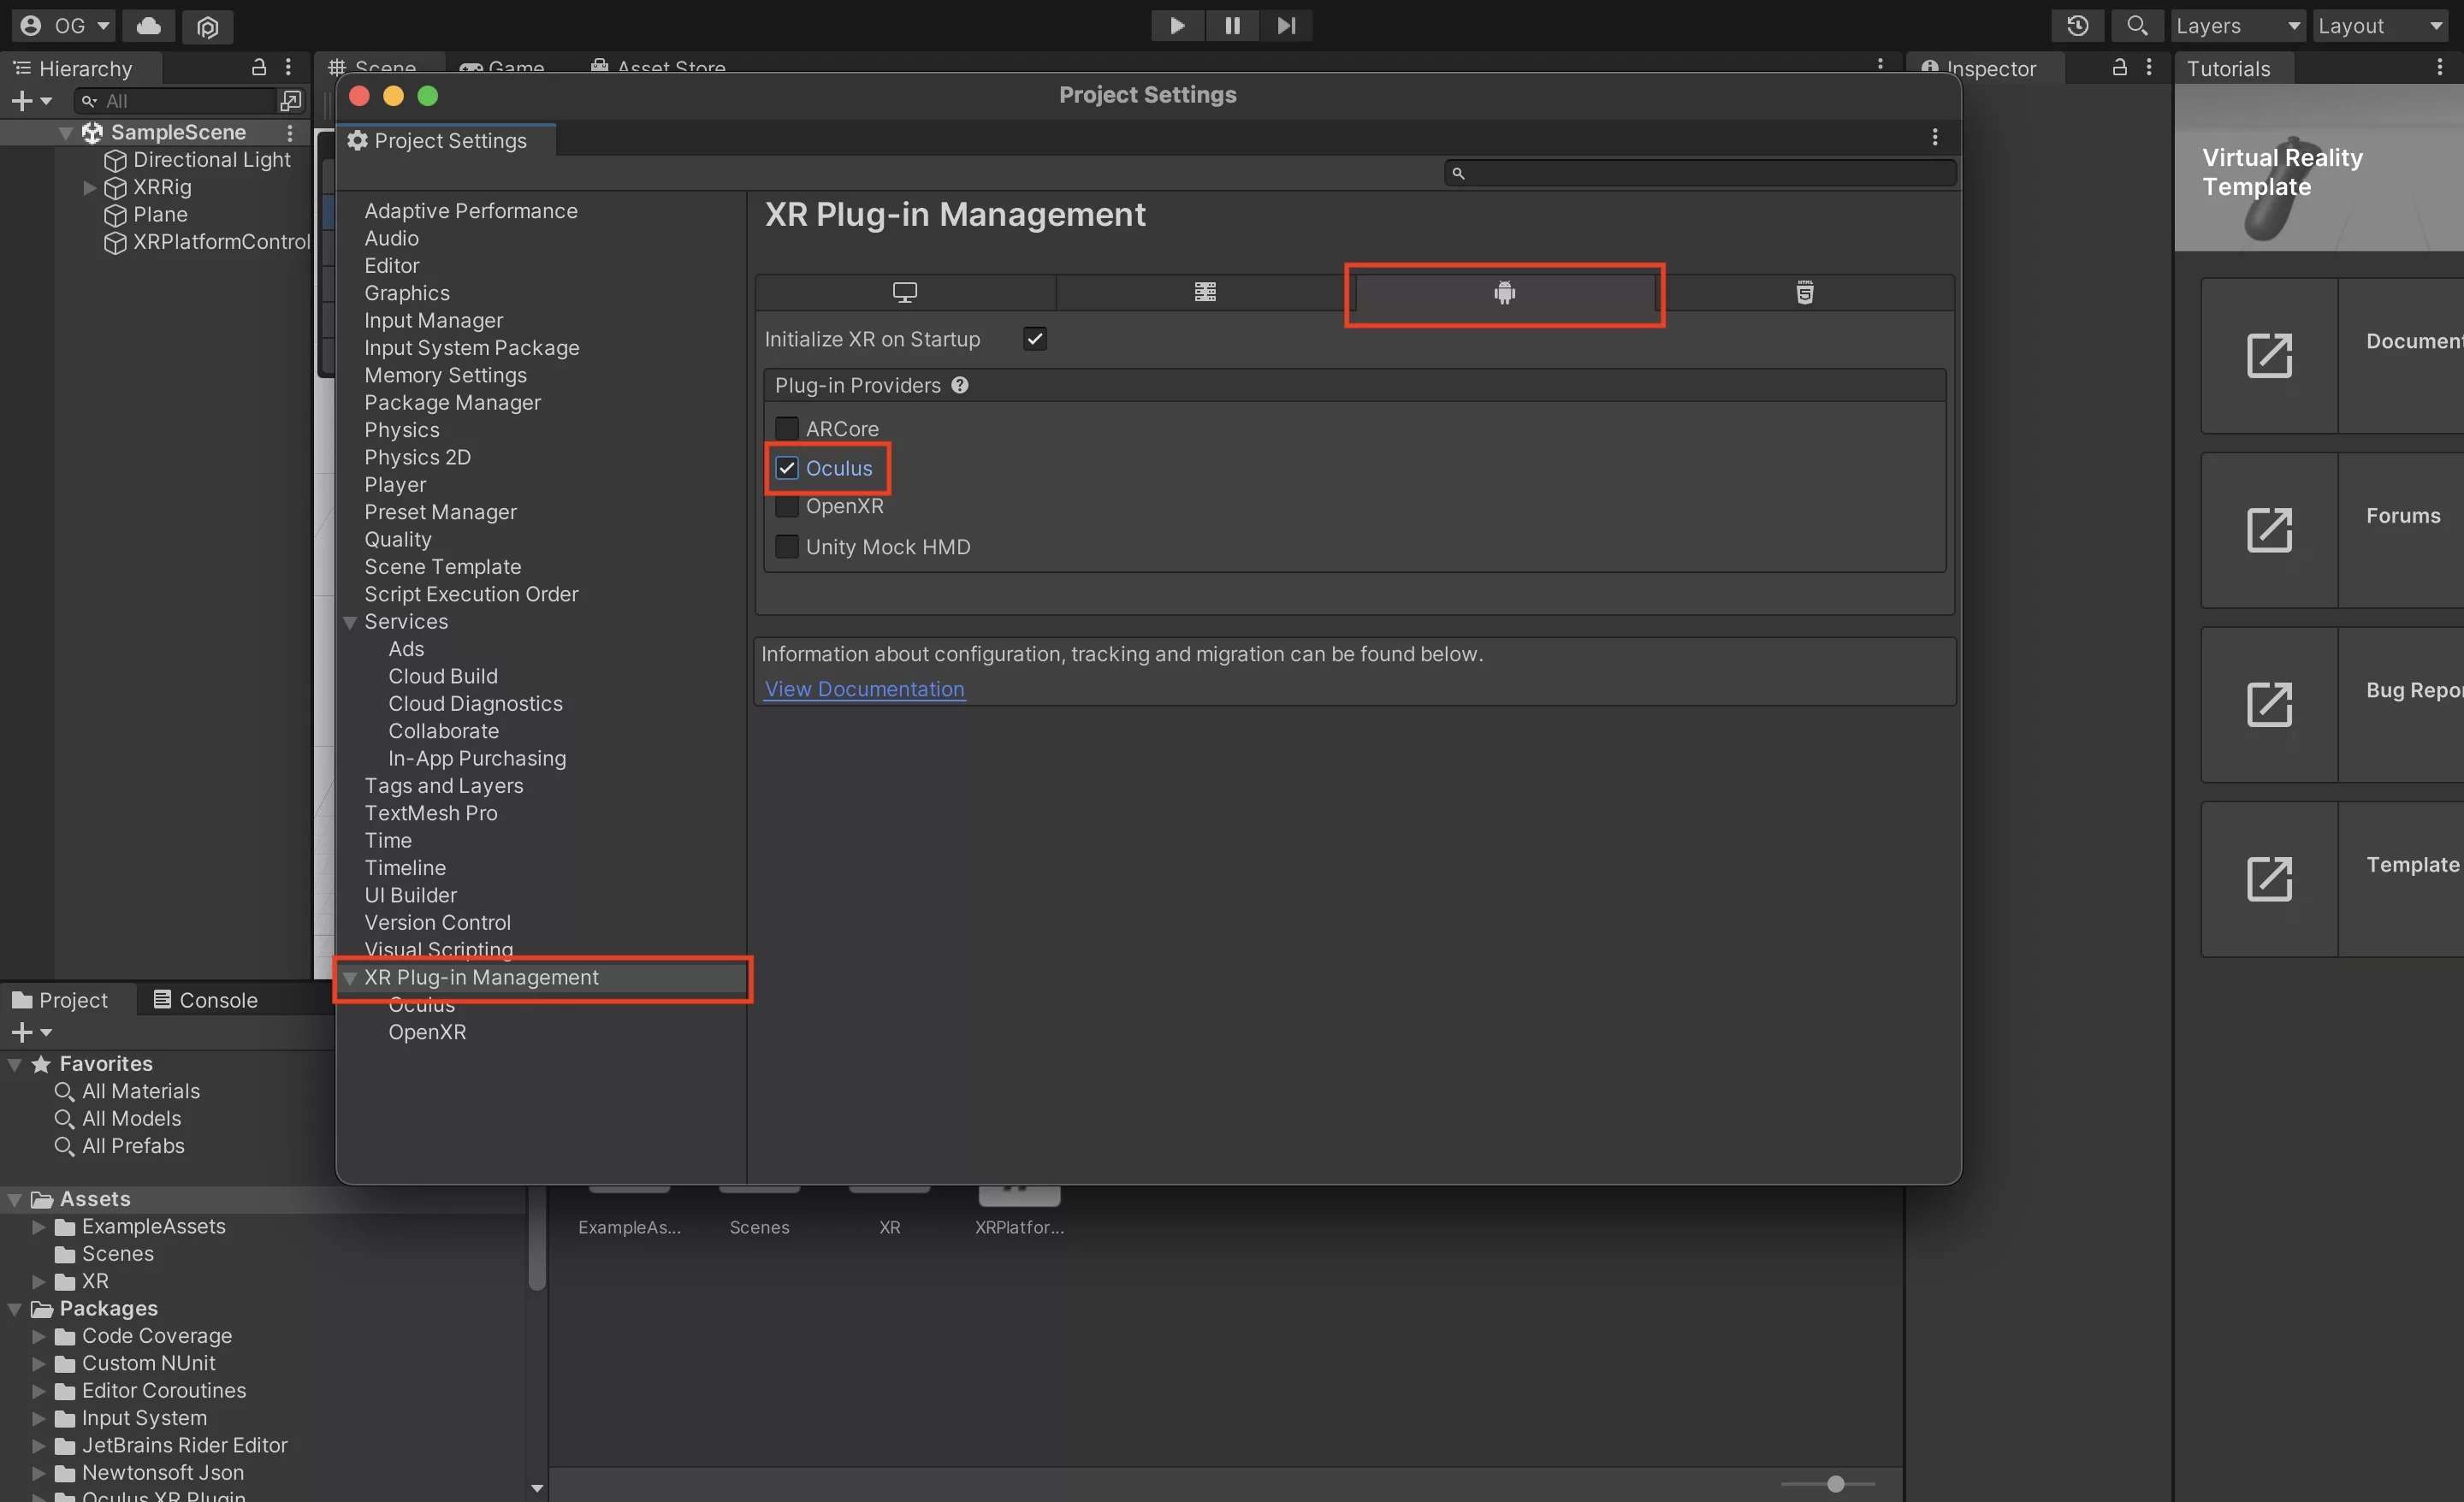
Select XR Plug-in Management on the side bar, then select the Android tab and make sure that Oculus is selected under Plug-in Providers.
Step Eight: Open Build Settings
Close the Project Settings window and open the Build Settings by going to File > Build Settings.
Step Nine: Complete the settings
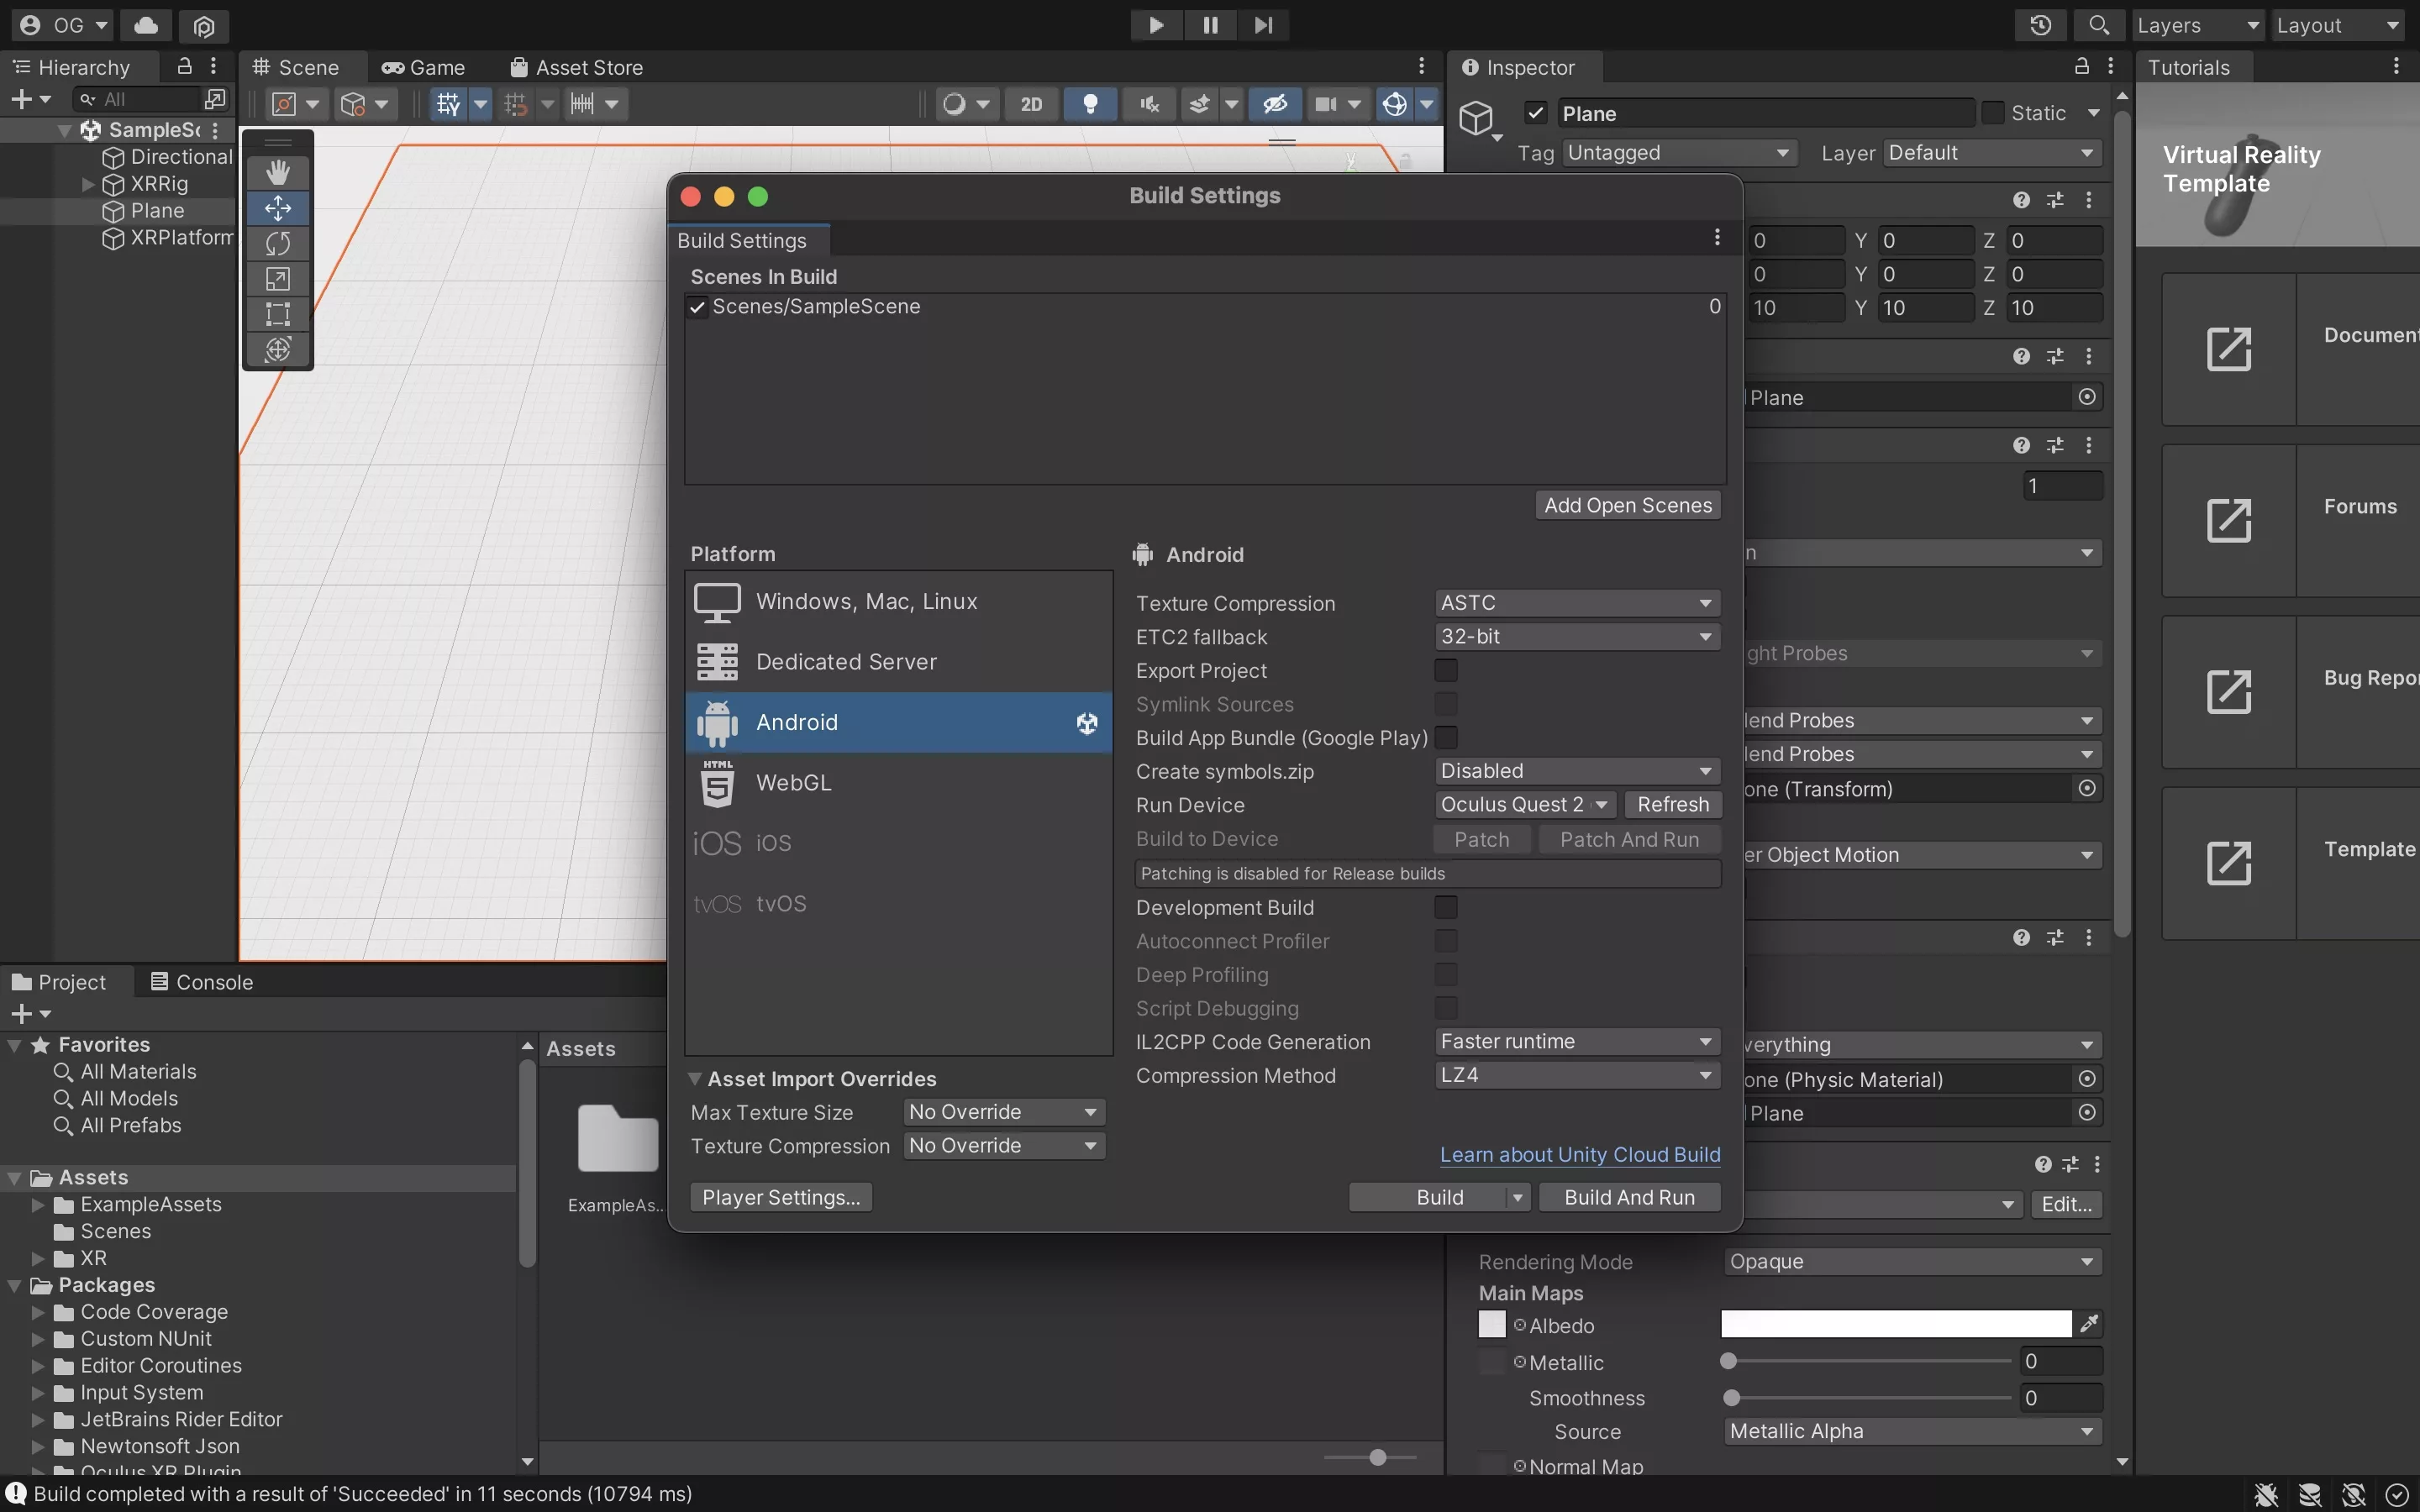
The following step is aimed at completing the settings required for the project to run on a Meta Quest 2. Make sure that the Android tab is selected as you follow each sub step.
A | Select ASTC Texture Compression
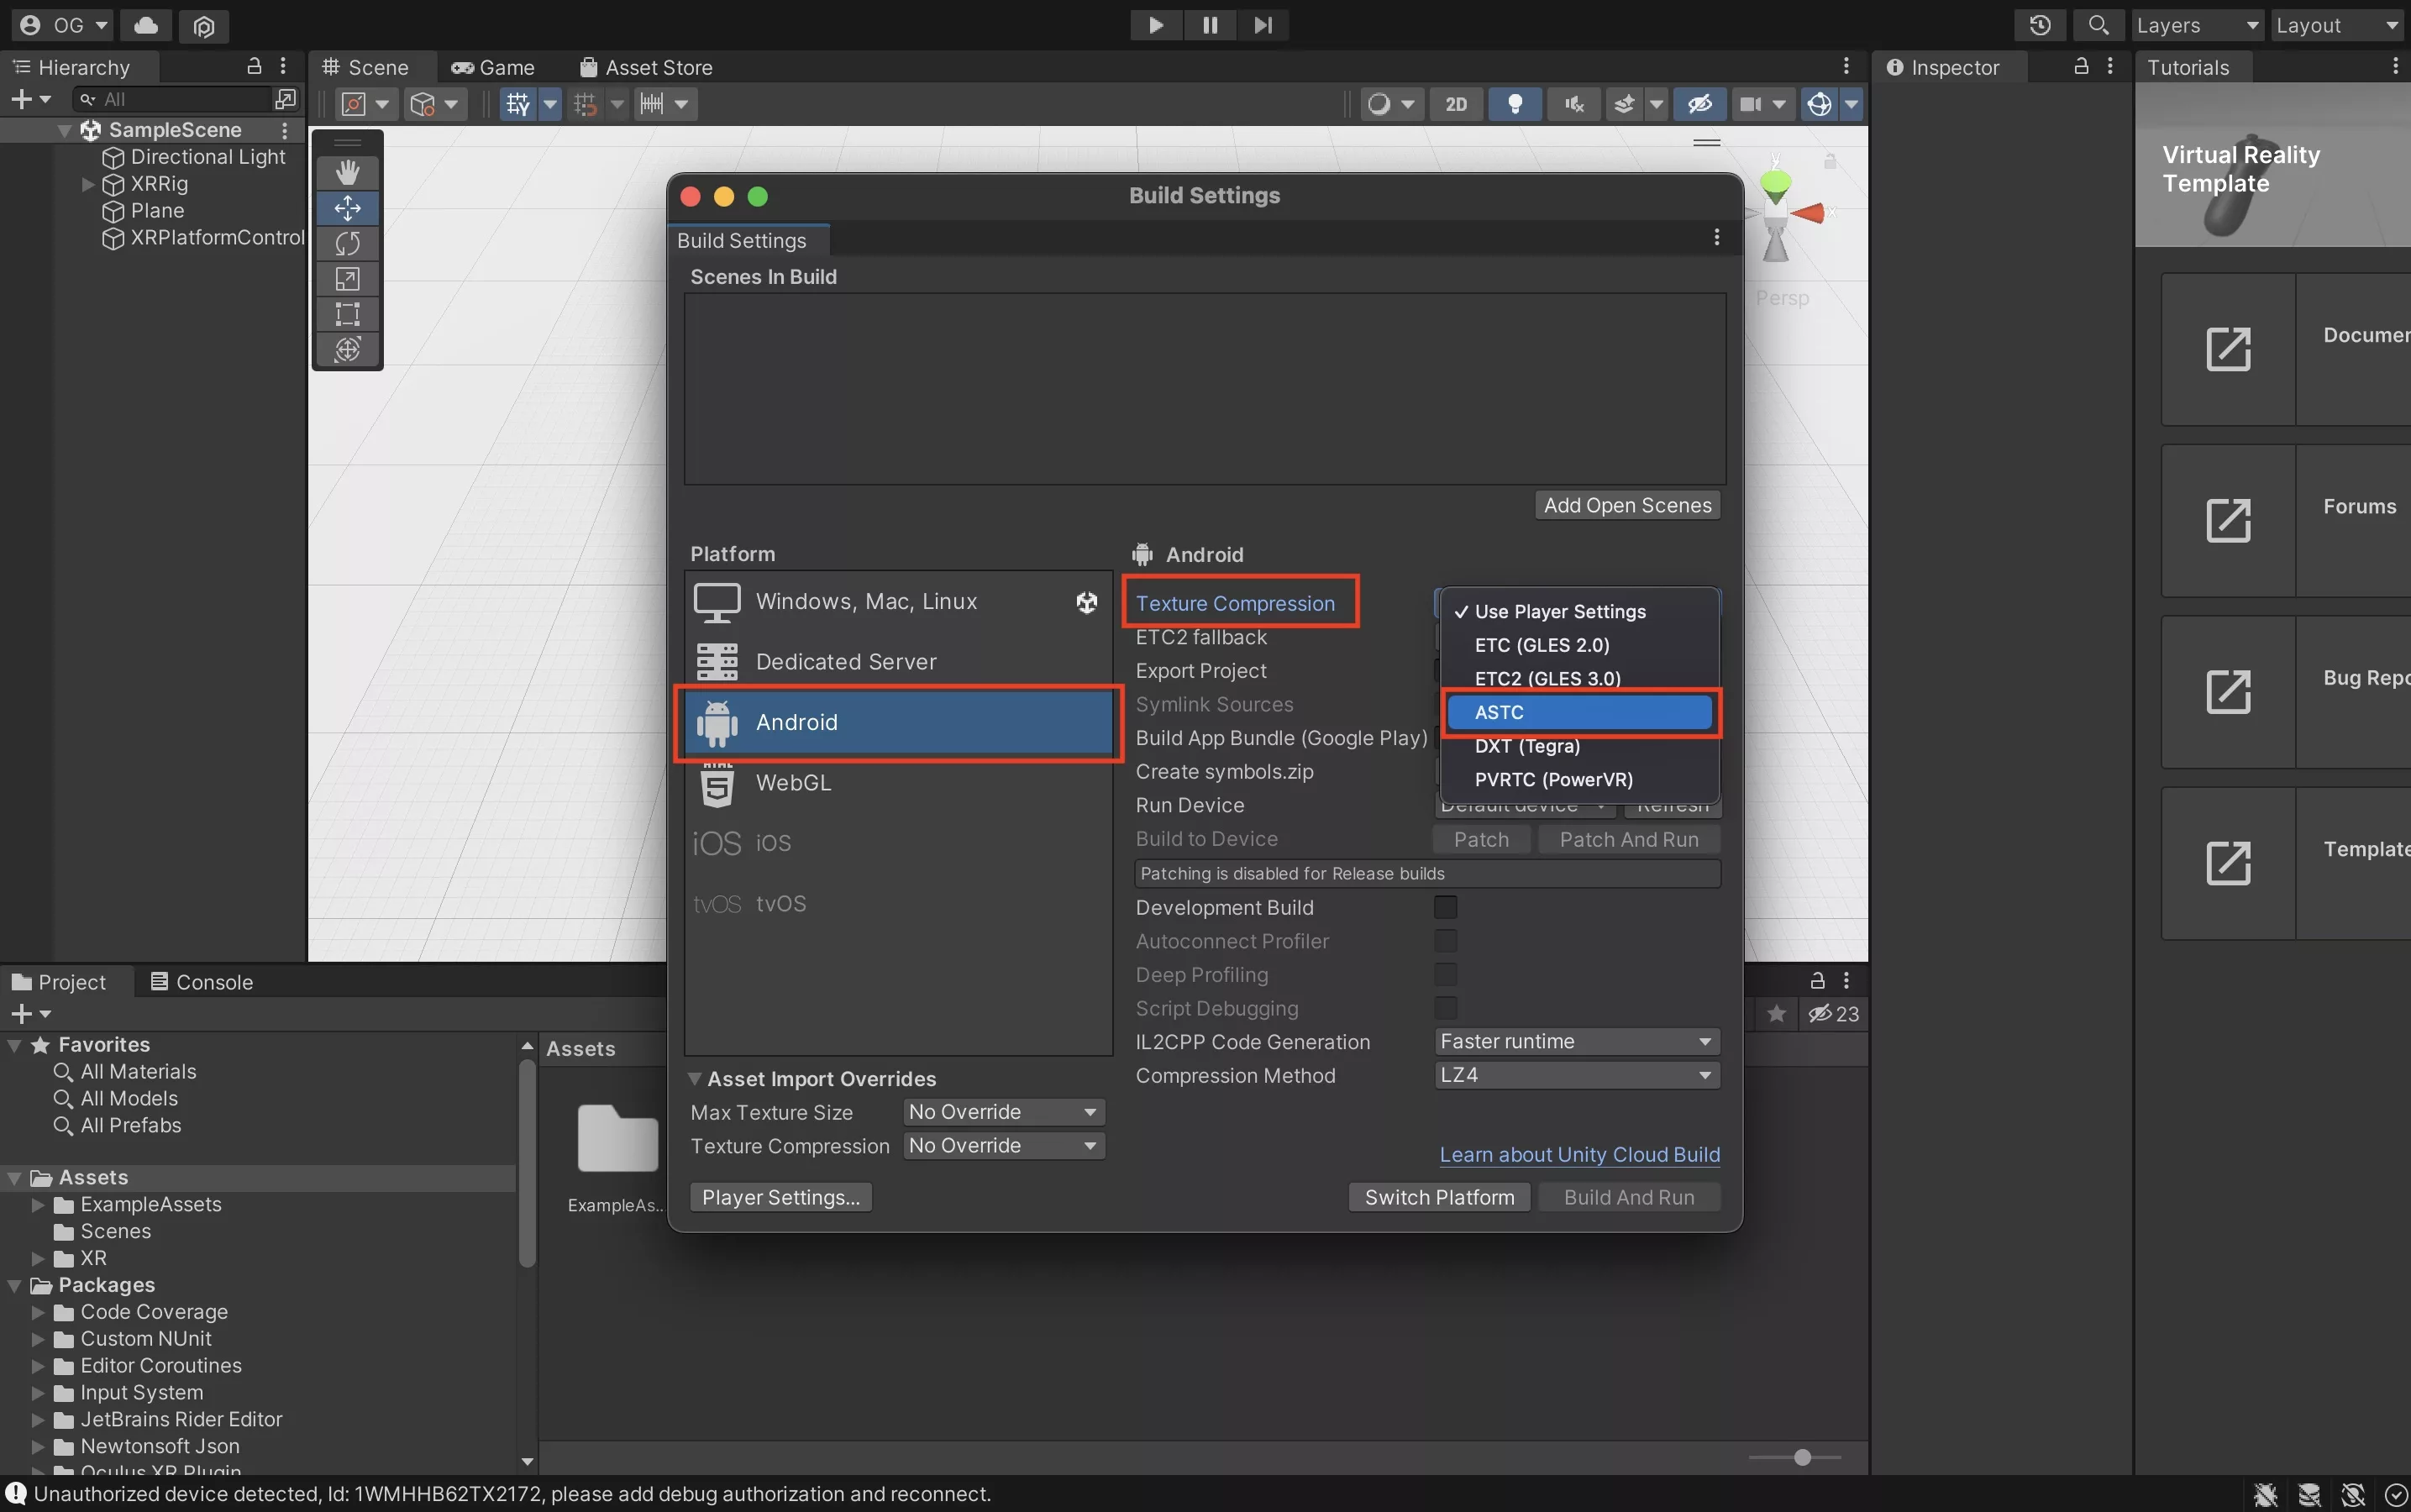
In the Texture Compression dropdown select ASTC.
B | Select Run Device
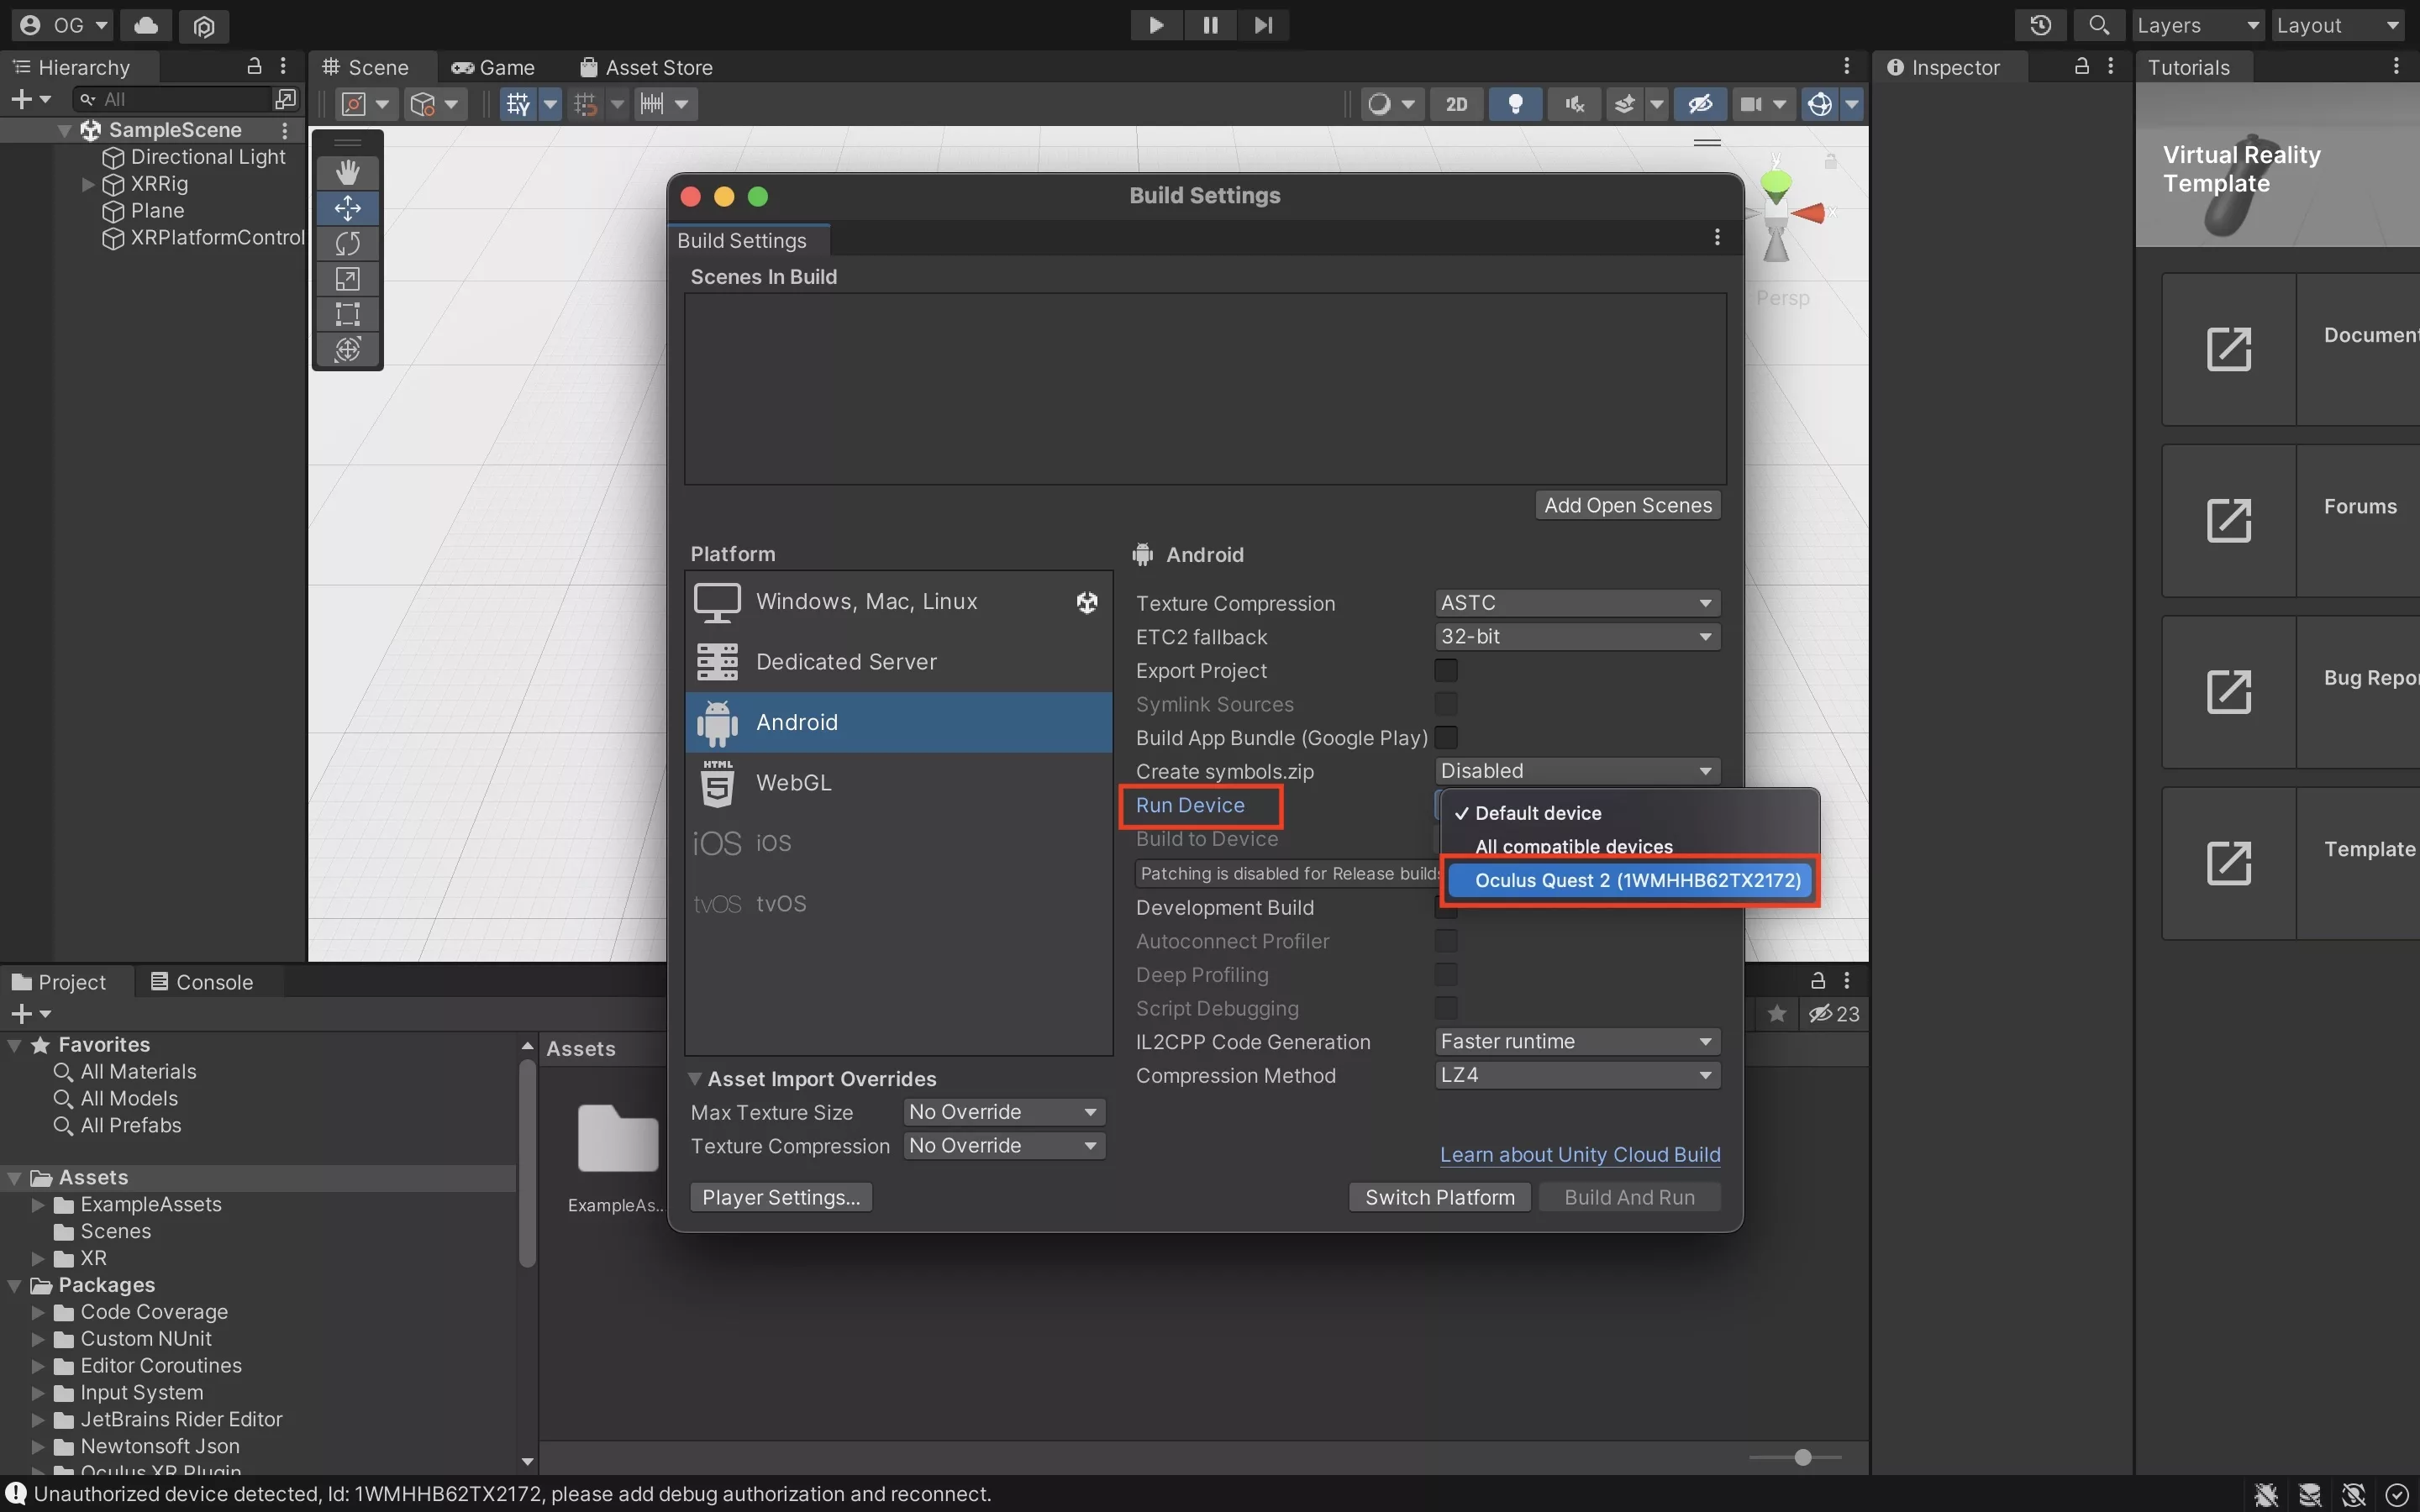
In the Run Device dropdown, select the Meta Quest 2 that you wish to develop on. If it does not appear, press Refresh.
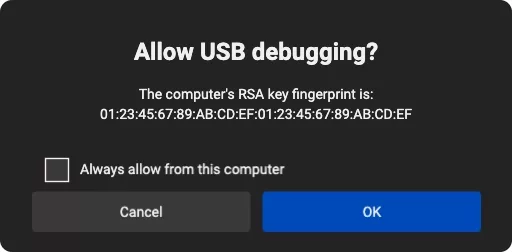
If it still does not appear, put your Meta Quest on and enable USB Debugging. It should look similar to the screenshot below.
Once you have enabled USB Debugging, press Refresh again and the Meta Quest 2 should appear in the dropdown.
C | Select Switch Platform
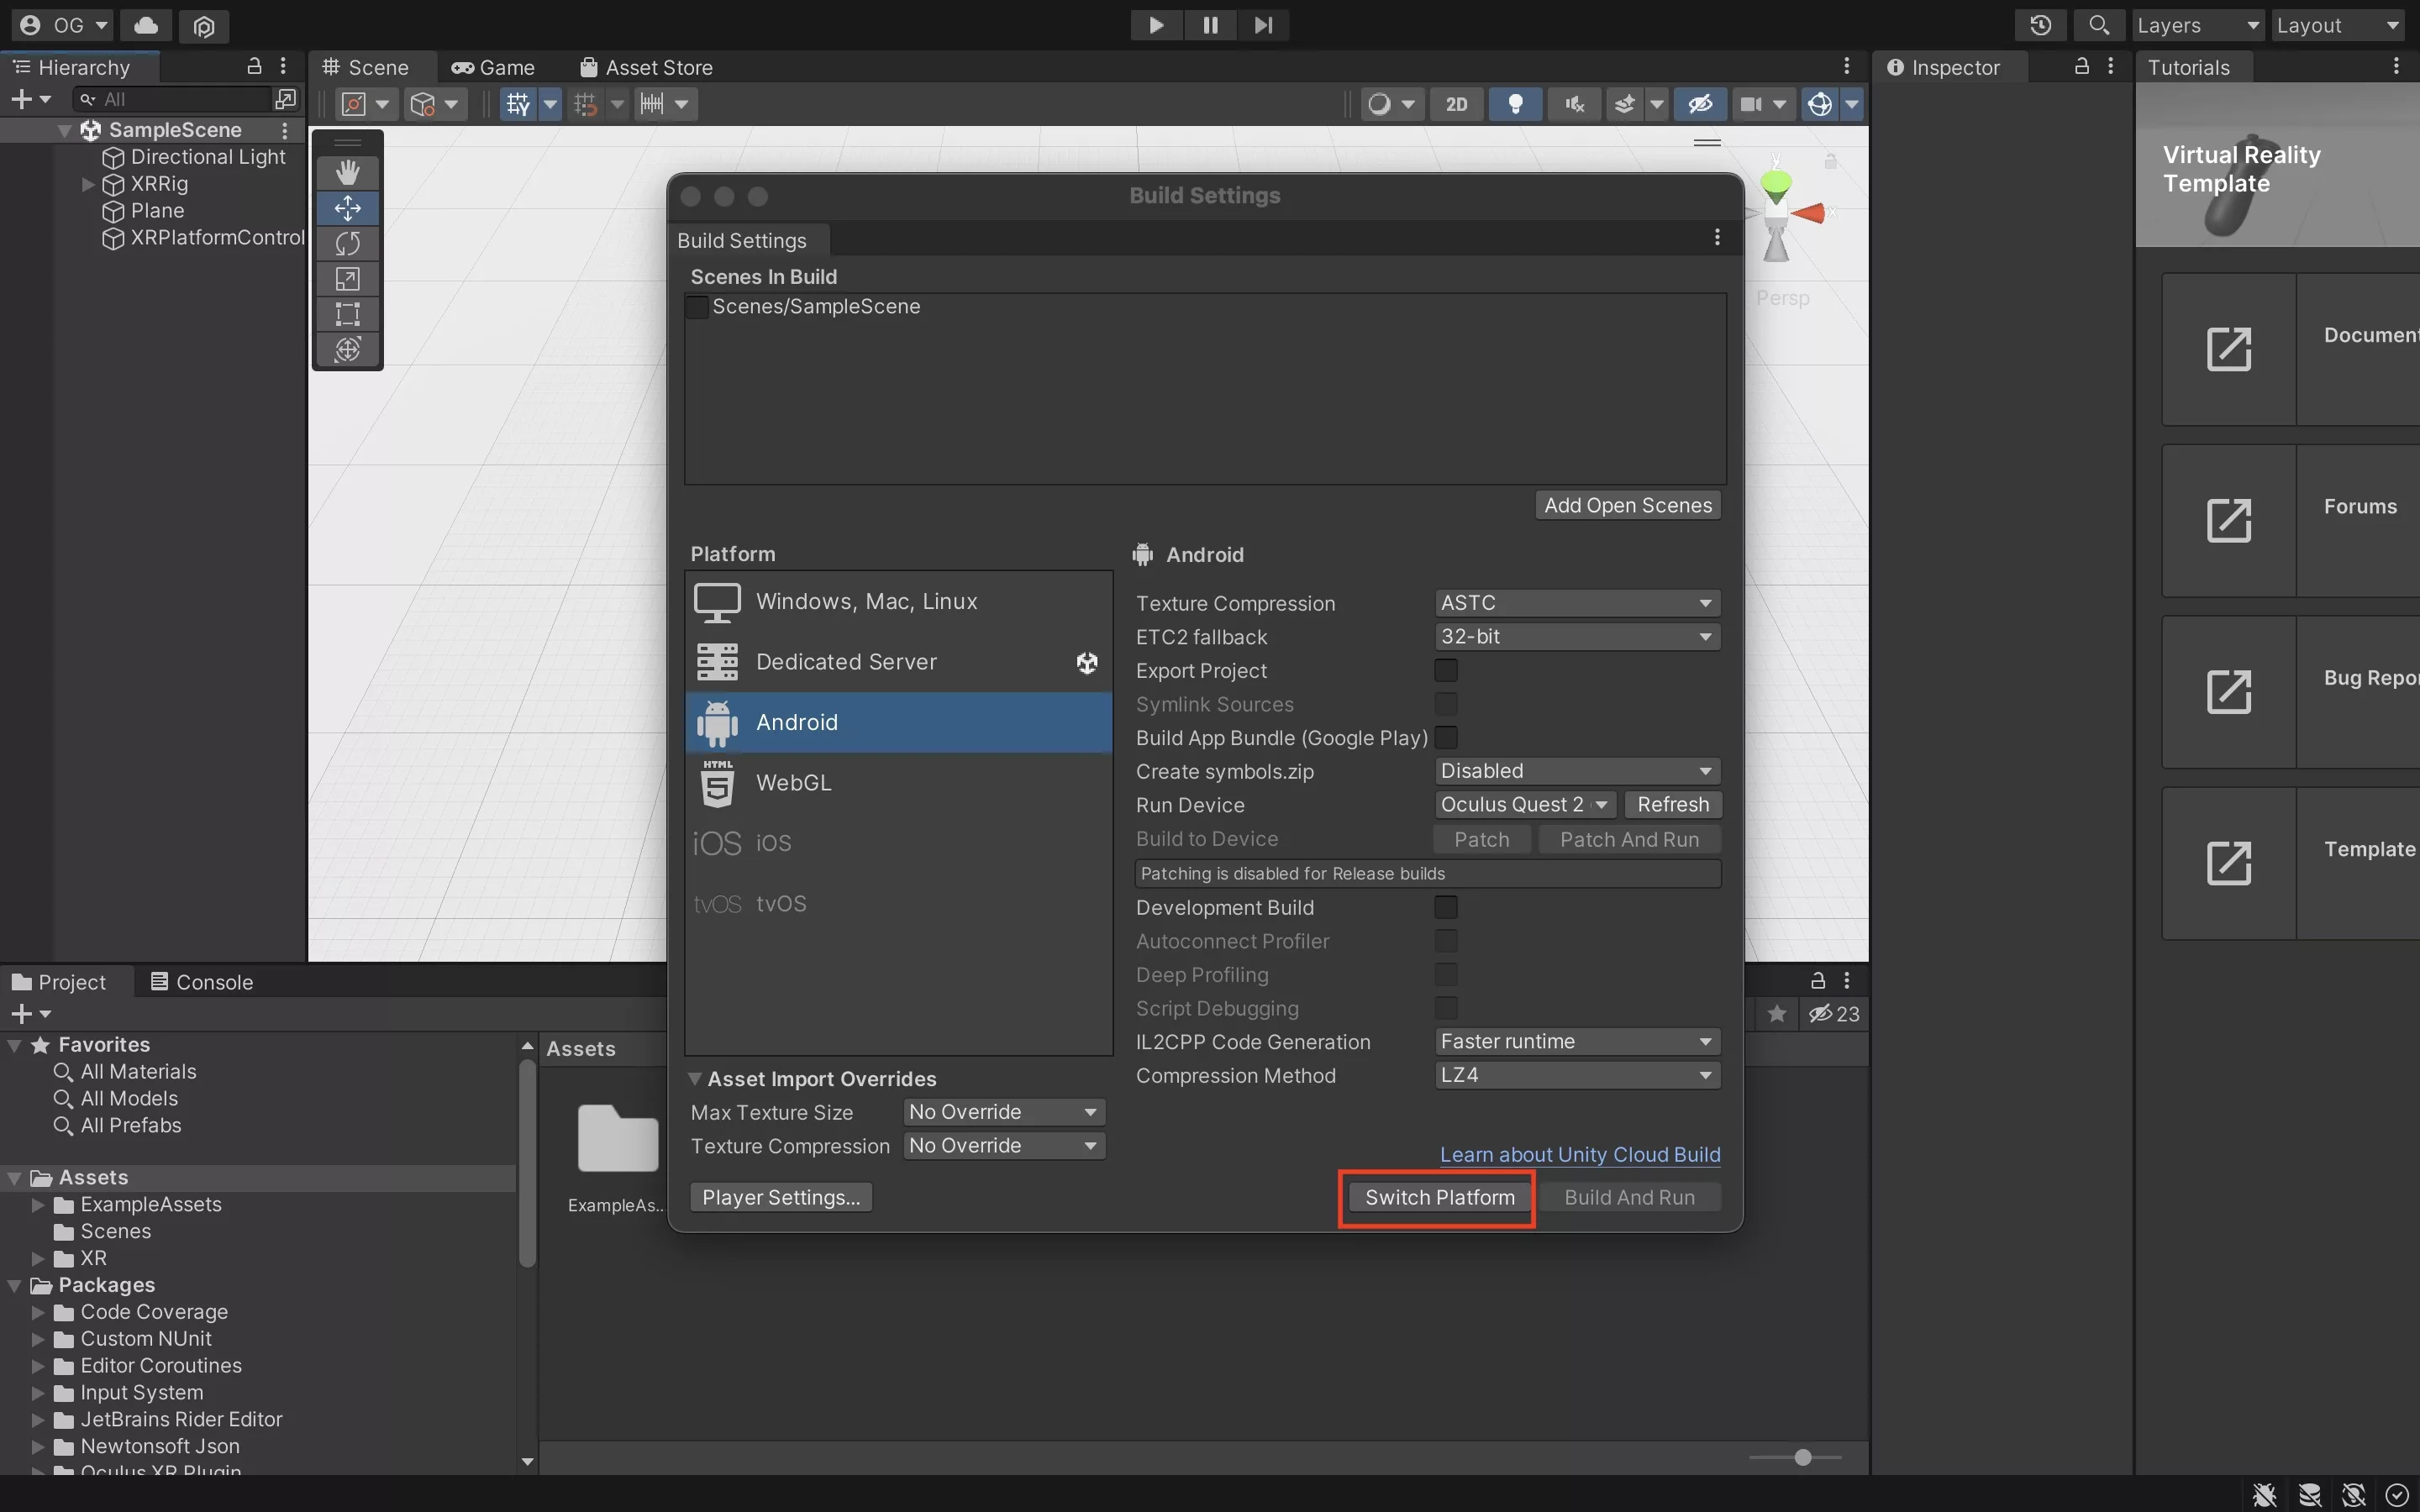
Press Switch Platform at the bottom of the window.
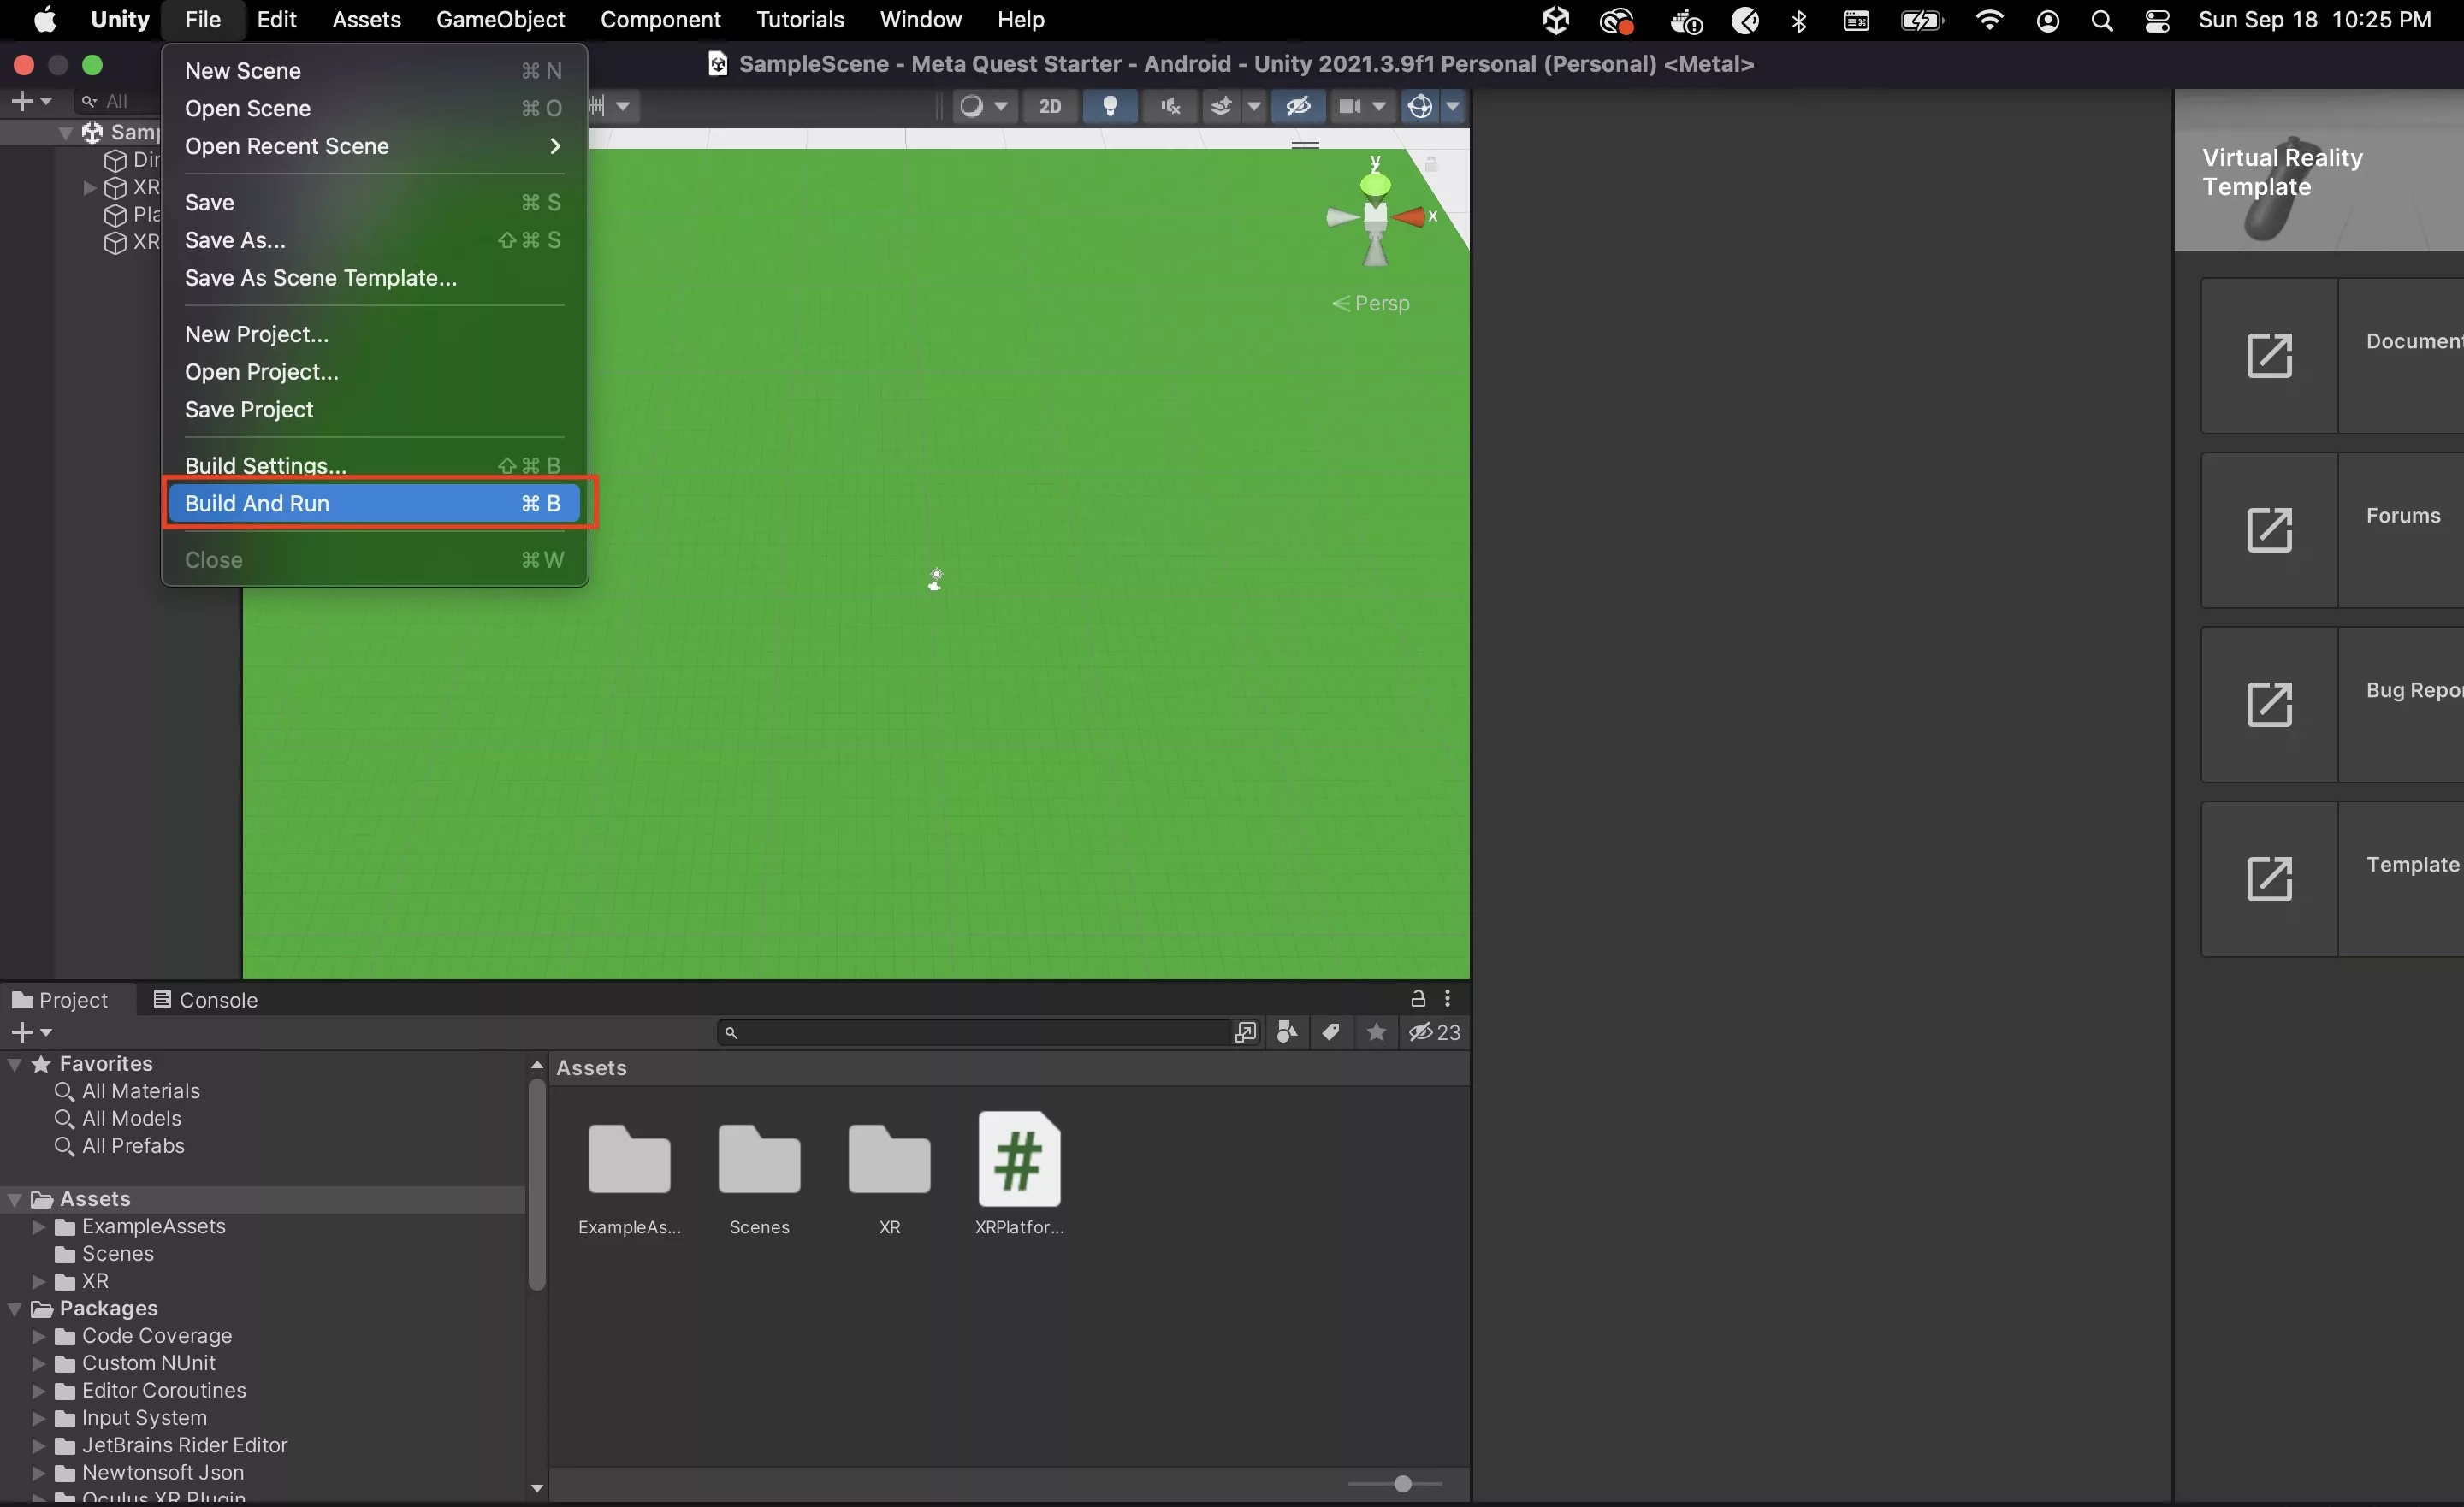
Step Ten: Build and Run

Press Build and Run in the Build Settings window.
Step Eleven: Save the Build
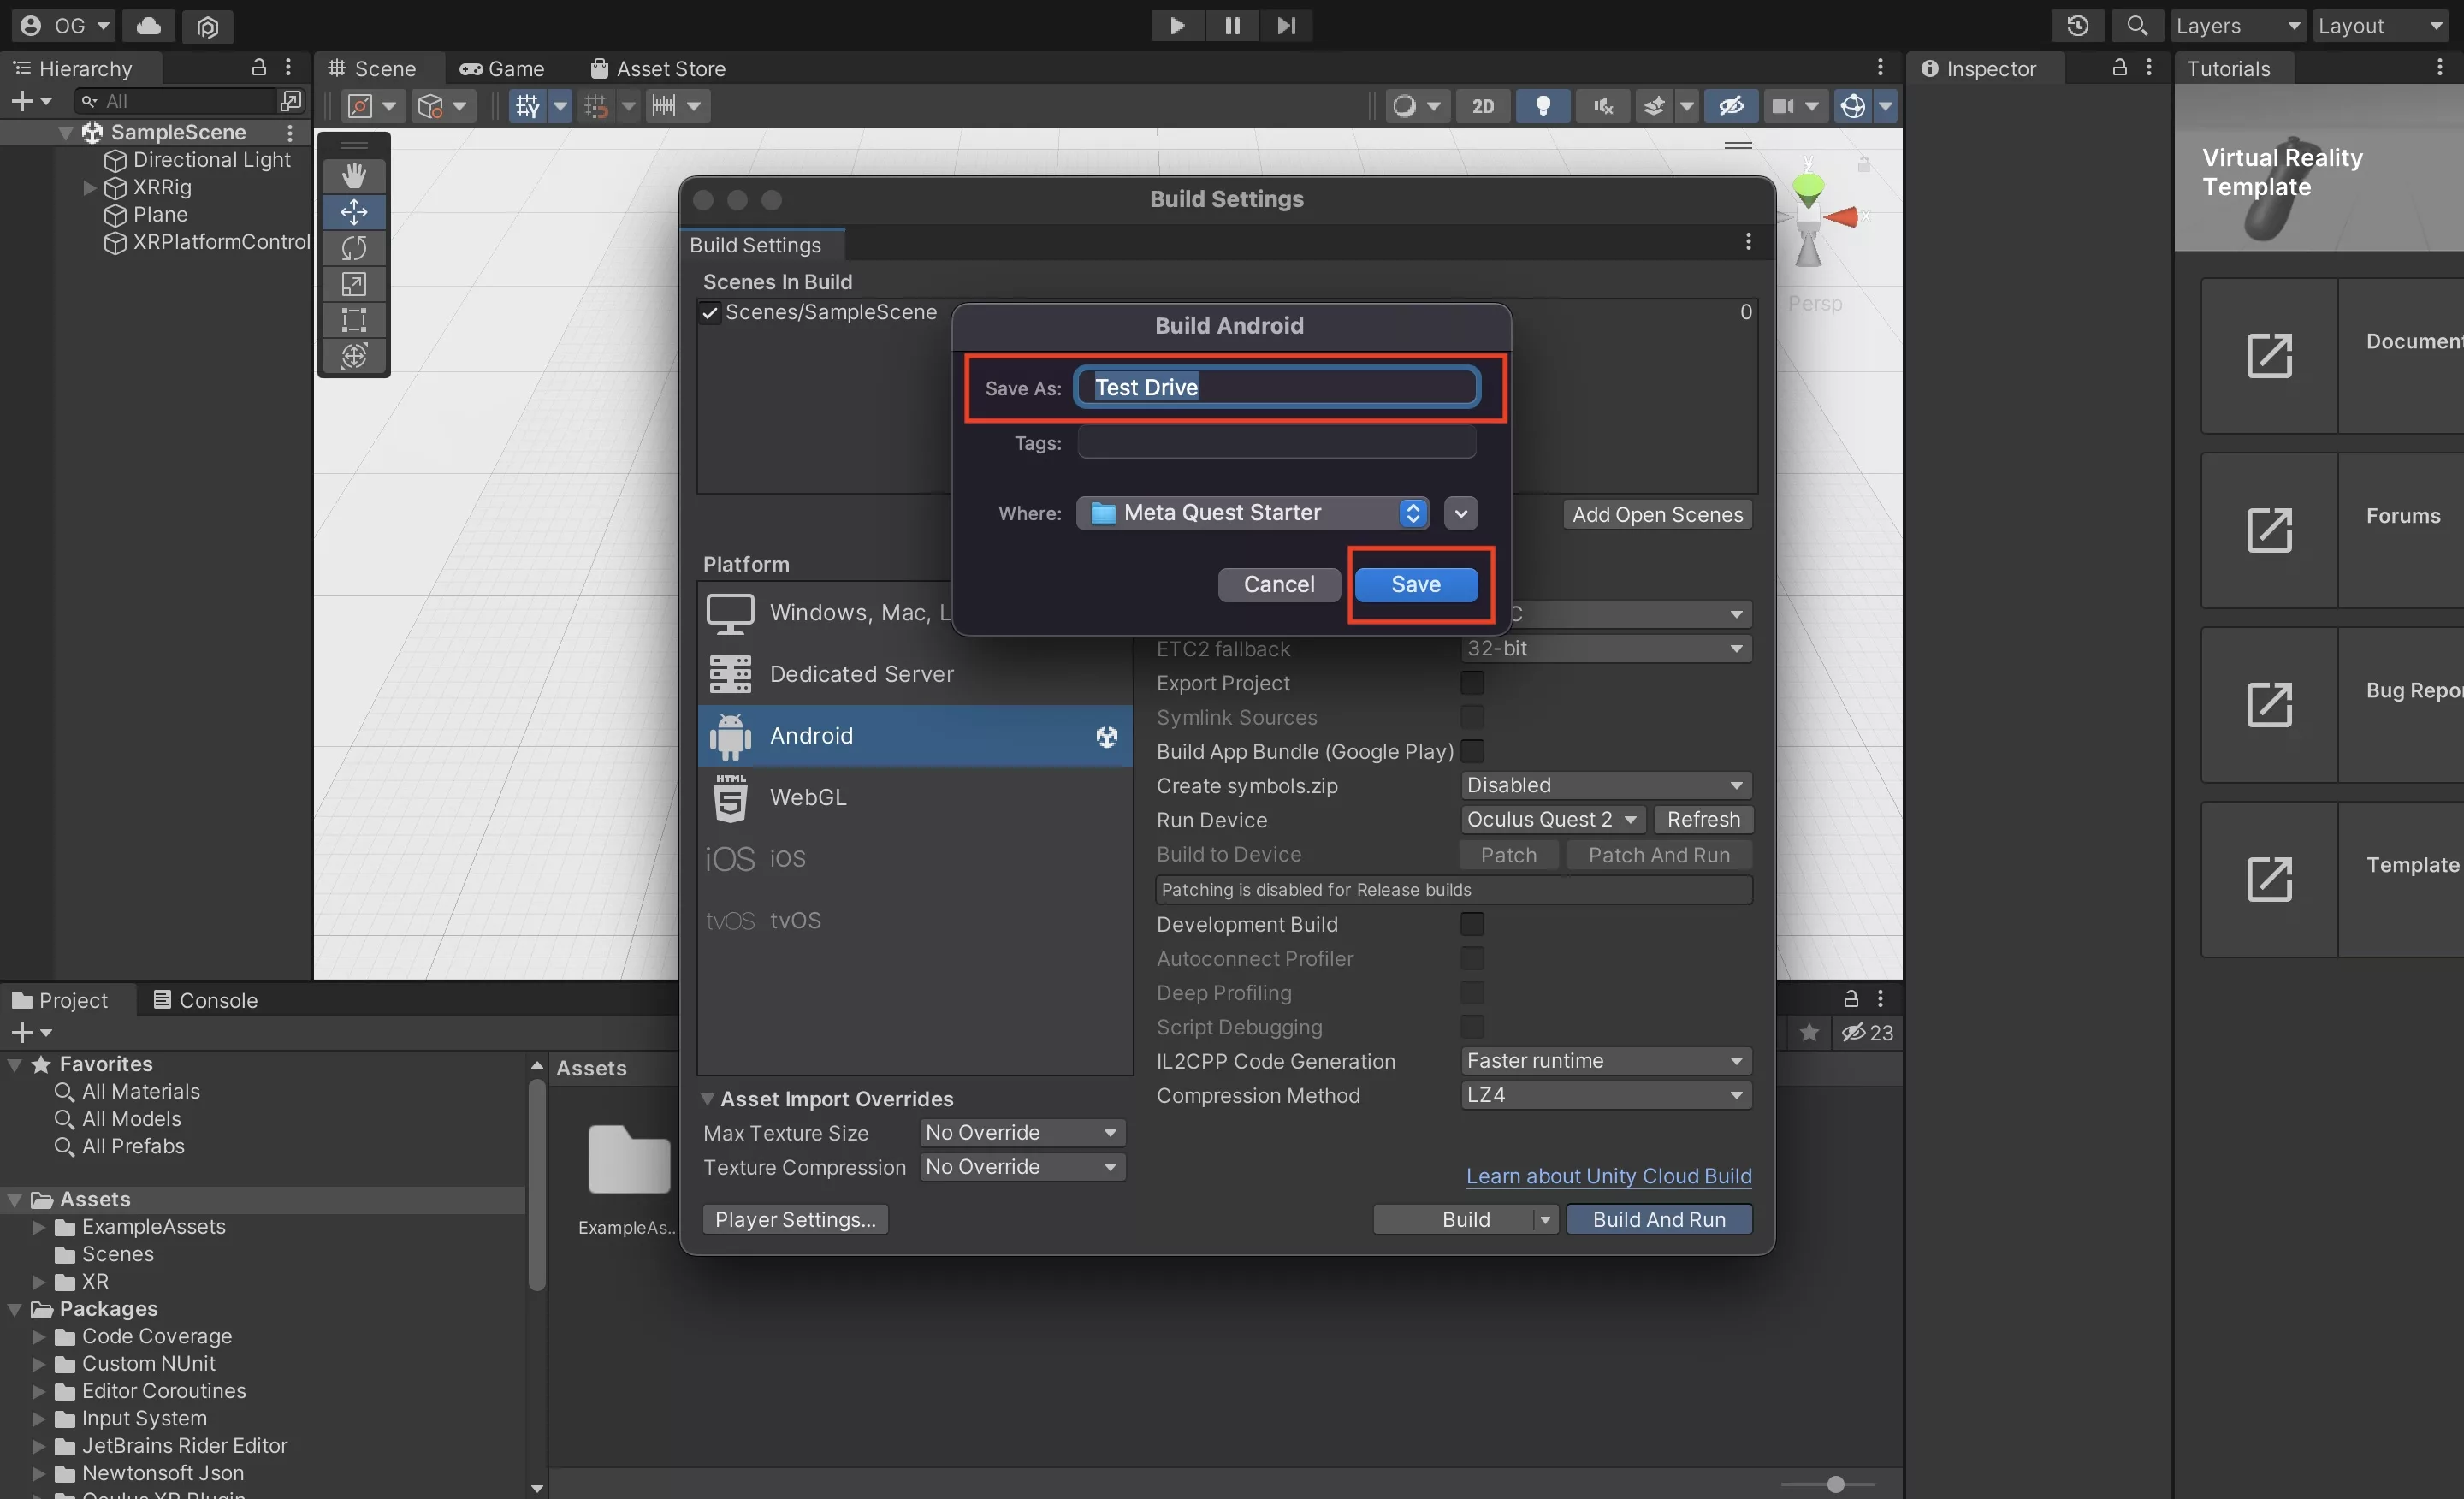
Select the location where you wish to save your project and the name that you wish to give to it. We called it Test Drive for purposes of the Tutorial.
Step Twelve: Verify
Put on the Meta Quest 2 and immerse yourself in the Unity VR experience.
What is the fastest way to update the build?
The fastest way to see changes to your project, is by going to File > Build And Run.
This is also available as a keyboard shortcut via Command + B (MacOS) or Control + B (Windows).
How do I open the APK without running ?
Consult our tutorial on opening a development APK for a step by step tutorial.
Any Questions ?
We are actively looking for feedback on how to improve this resource. Please send us a note to inquiries@delasign.com with any thoughts or feedback you may have.