How to create & login with a passkey in React & Typescript Part I - Setup the project & UX
Part I of a tutorial series for a proof of concept on creating & logging in with a passkey. This part of the series focuses on setting up the project and UX in React & Typescript.

Part I of a tutorial series for a proof of concept on creating & logging in with a passkey.
This part of the series focuses on setting up the project and creating a user experience that allows for passkeys to be registered (i.e. created) and authenticated (i.e. login). Github repository included for React Typescript.
Download Open Source ProjectThe following tutorial walks you through how to setup a proof of concept for passkeys in React & Typescript and offers an open source GitHub repository.
We would like to thank Apple for their WWDC2022 session, in-person lab & technical support; Nick Steele for his guidance and time as well as WebAuthn for all the information and support provided in making this tutorial possible.
If you are looking for how we registered (i.e. created) the passkey or authenticated the passkey (i.e. login) or the theory behind it, please access the later parts of this tutorial series.
WARNING: Passkey's are not yet ready for implementation (July 2022)
As of August 8th 2022, on macOS Monterey (12.4), we can confirm that passkeys are not yet ready for implementation as they do not work across Safari, Chrome and Mozilla Firefox on macOS or Windows. We will periodically check and update this post to inform on the state of passkeys.
When using this tutorial, please use Safari on the latest version for it to function as expected.
Additionally, it is worth noting that in macOS Monterey, there is no way to delete passkeys. This led us to have created about multiple passkeys for this tutorial and will only be able to delete them once macOS Ventura is released around October 2022.
WARNING: This tutorial does not cover attestation
Please be aware that this tutorial does not cover the optional but strongly recommended process of attestation. For more information on attestation, please visit the WebAuthn website.
Tutorial: Setup your project
The tutorial was created by downloading our React Typescript + React Redux Open Source project and carrying out the steps below. Before continuing make sure to clone the repo below, or follow the tutorial to recreate it.
The purpose why we use React Redux, is to create a Proof of Concept that allows us to save and authenticate passkey credentials locally without the use of a backend. Please note that this is not recommended for production as state in Part II of the tutorial series.
git clone git@github.com:delasign/react-redux-tutorial.gitStep One: Add Environment Variables
Create two files for your environment variables:
- .env.development
- .env.production
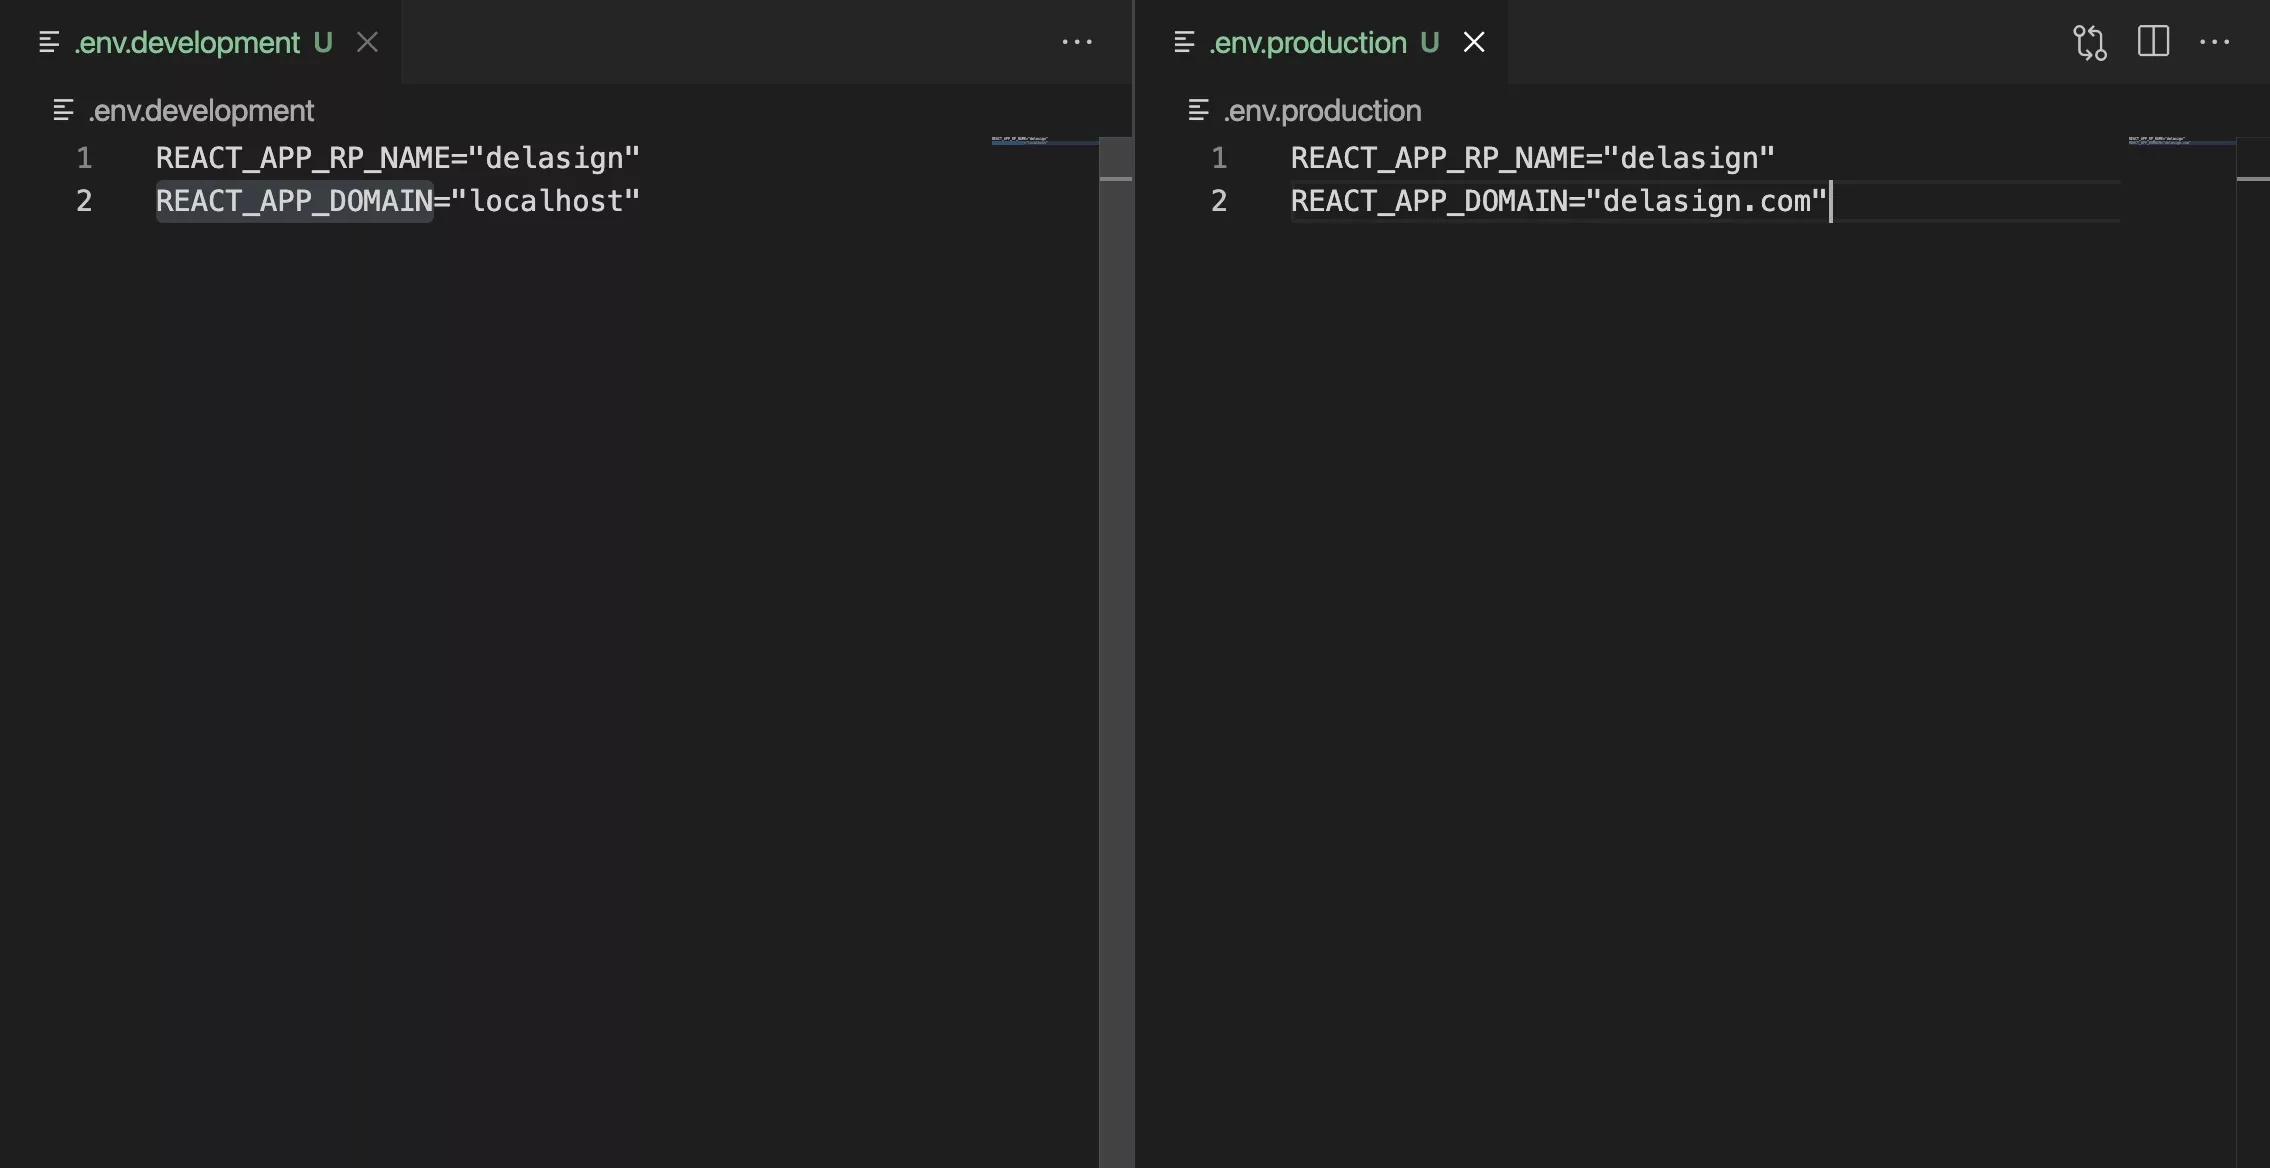
As shown below, these environment variables are used to tell the Navigator what domain you are creating / accessing passkeys for as well as the domain name.
This is important as if your domain does not match that of the url present - the system will not work.
This is one of the great security upgrades of Passkeys as it prevents phishing.
Below is sample code for the .env.development and .env.production.
.env.development
.env.production
Step Two: Confirm you can access your environment variables

Run your project and access your environment variables using the code below.
Please replace REACT_APP with GATSBY if you are using GatsbyJS.
RP NAME : process.env.REACT_APP_RP_NAME
Domain : process.env.REACT_APP_DOMAIN
Step Three: Create the UX
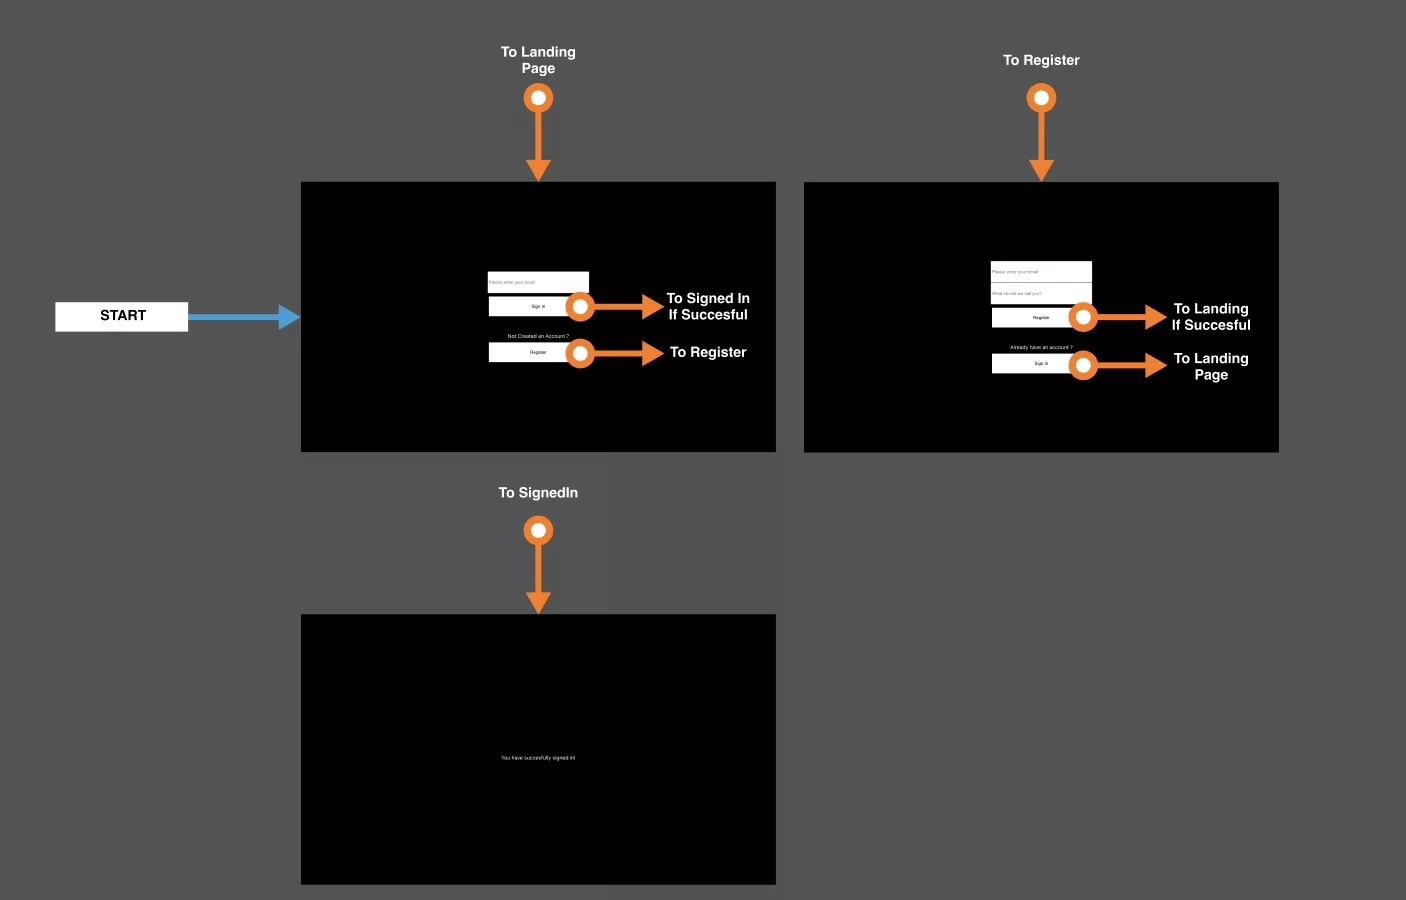
This part involves integrating the desired user experience for sign up and registration.
For simplicity we have provided sample code for the layouts and index.tsx below that produce a sample user experience for the flow detailed in the image above. This flow allows users to navigate between a register layout, a sign in layout & a signed in layout.
This flow requires the creation of the following structure:
- src/layouts
- landing.tsx
- register.tsx
- signedIn.tsx
Incase it's not clear, create a folder under src called layouts and within that folder three files: landing.tsx, register.tsx & signedIn.tsx
Additionally, create a folder called components & create a new file called shared.tsx - this is where we will hold our shared components for the three layouts.
App.css
Update your App.css to reflect that the body is black.
App.tsx
Replace your App.tsx with the code below.
components/shared.tsx
Enter the following code into your shared.tsx file.
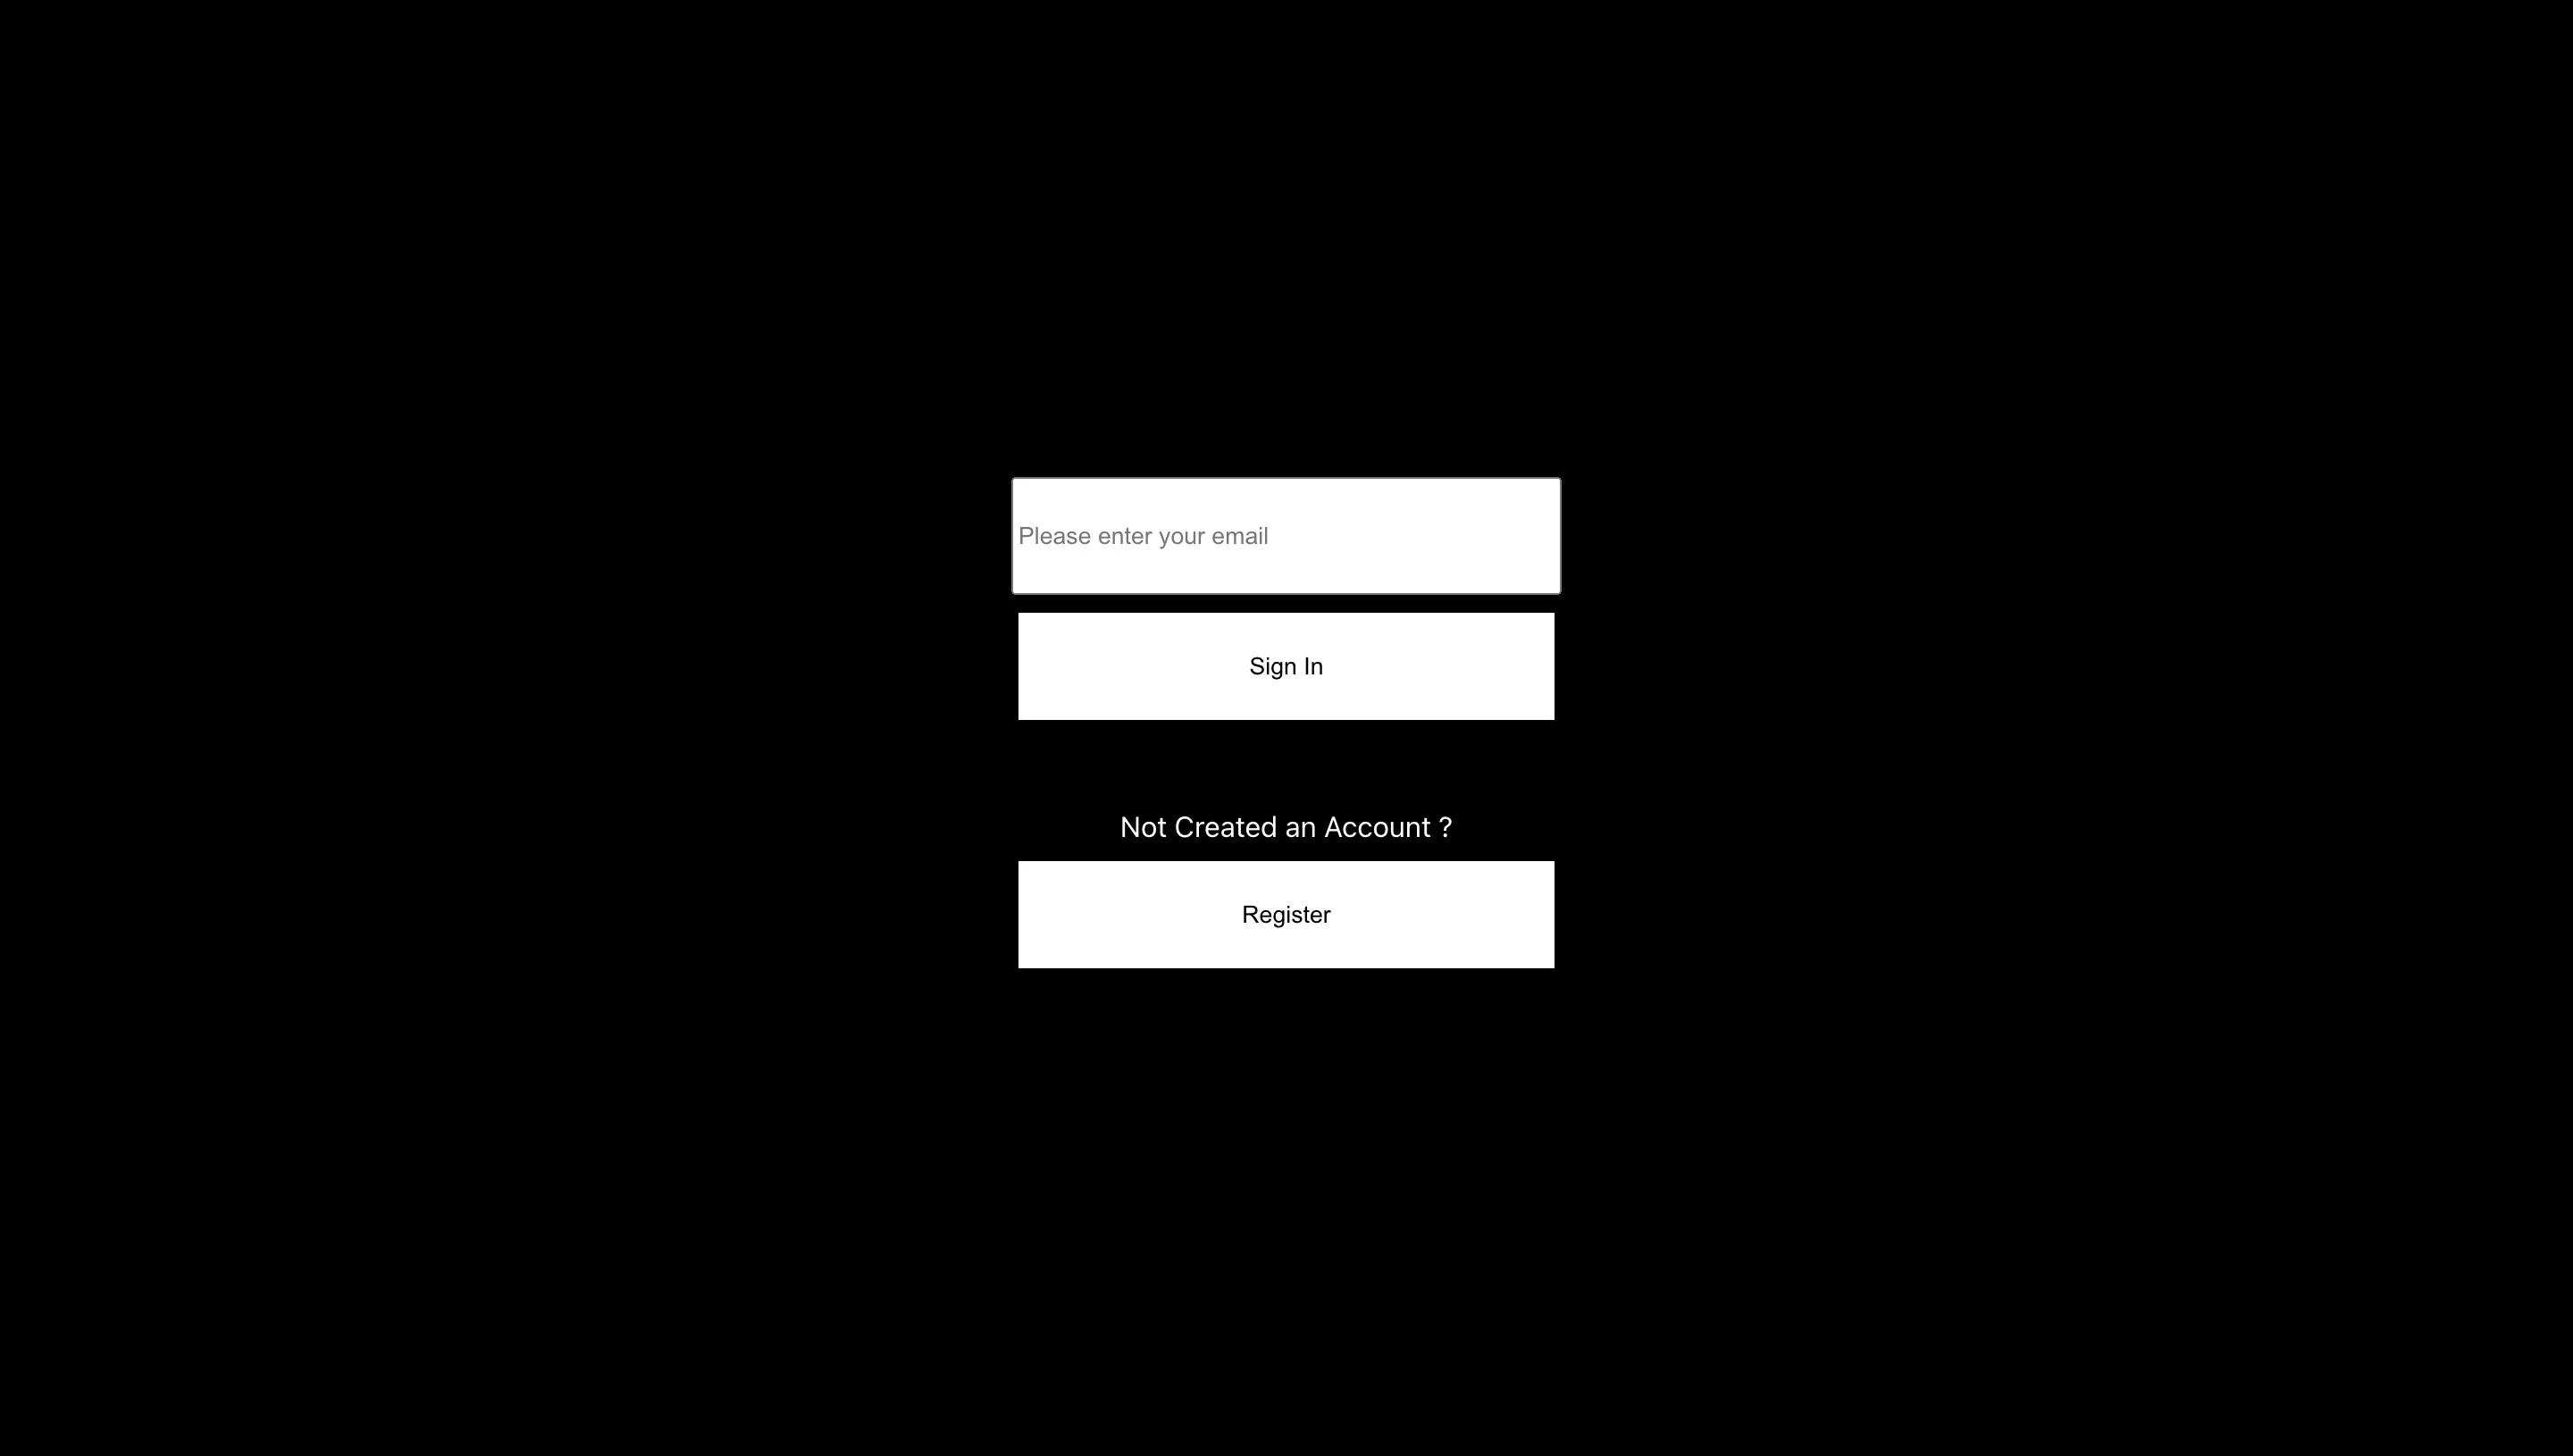
layouts/landing.tsx
Enter the following code into your landing.tsx file.
layouts/register.tsx
Enter the following code into your register.tsx file.
layouts/signedIn.tsx
Enter the following code into your signedIn.tsx file.
Step Four: Verify your flow
Run your app and make sure that you can flow through the user experience.
If you wish to test the SignedIn page, change your signedIn state on your landing.tsx to true.
Next Step: Register (create) a passkey
Congratulations, you have setup your project for success and have a user experience which can be used to allow passkeys to be created and for users to login with passkeys. Please continue to the next part of our series in the link below.
Any Questions
We are actively looking for feedback on how to improve this resource. Please send us a note to inquiries@delasign.com with any thoughts or feedback you may have.