How to create a UIView that dynamically adapts to its contents
A step by step guide on creating a UIView that dynamically changes its width and height to fit the text within it.

A step by step guide on creating a UIView that dynamically changes its width and height to fit the text within it.
SubscribeThe following tutorial uses our Open Source Swift Starter Project to walk you through how to create a UIView that adapts to the size of a UILabel, whilst making sure that the UIView does not stretch past a maximum width.
We recommend that you clone our Open Source Swift Starter Project, checking out the main branch and carrying out the steps below. The changes can be found on the tutorial/custom/dynamic-uiview branch.
git clone git@github.com:delasign/swift-starter-project.gitStep One: Add the Content
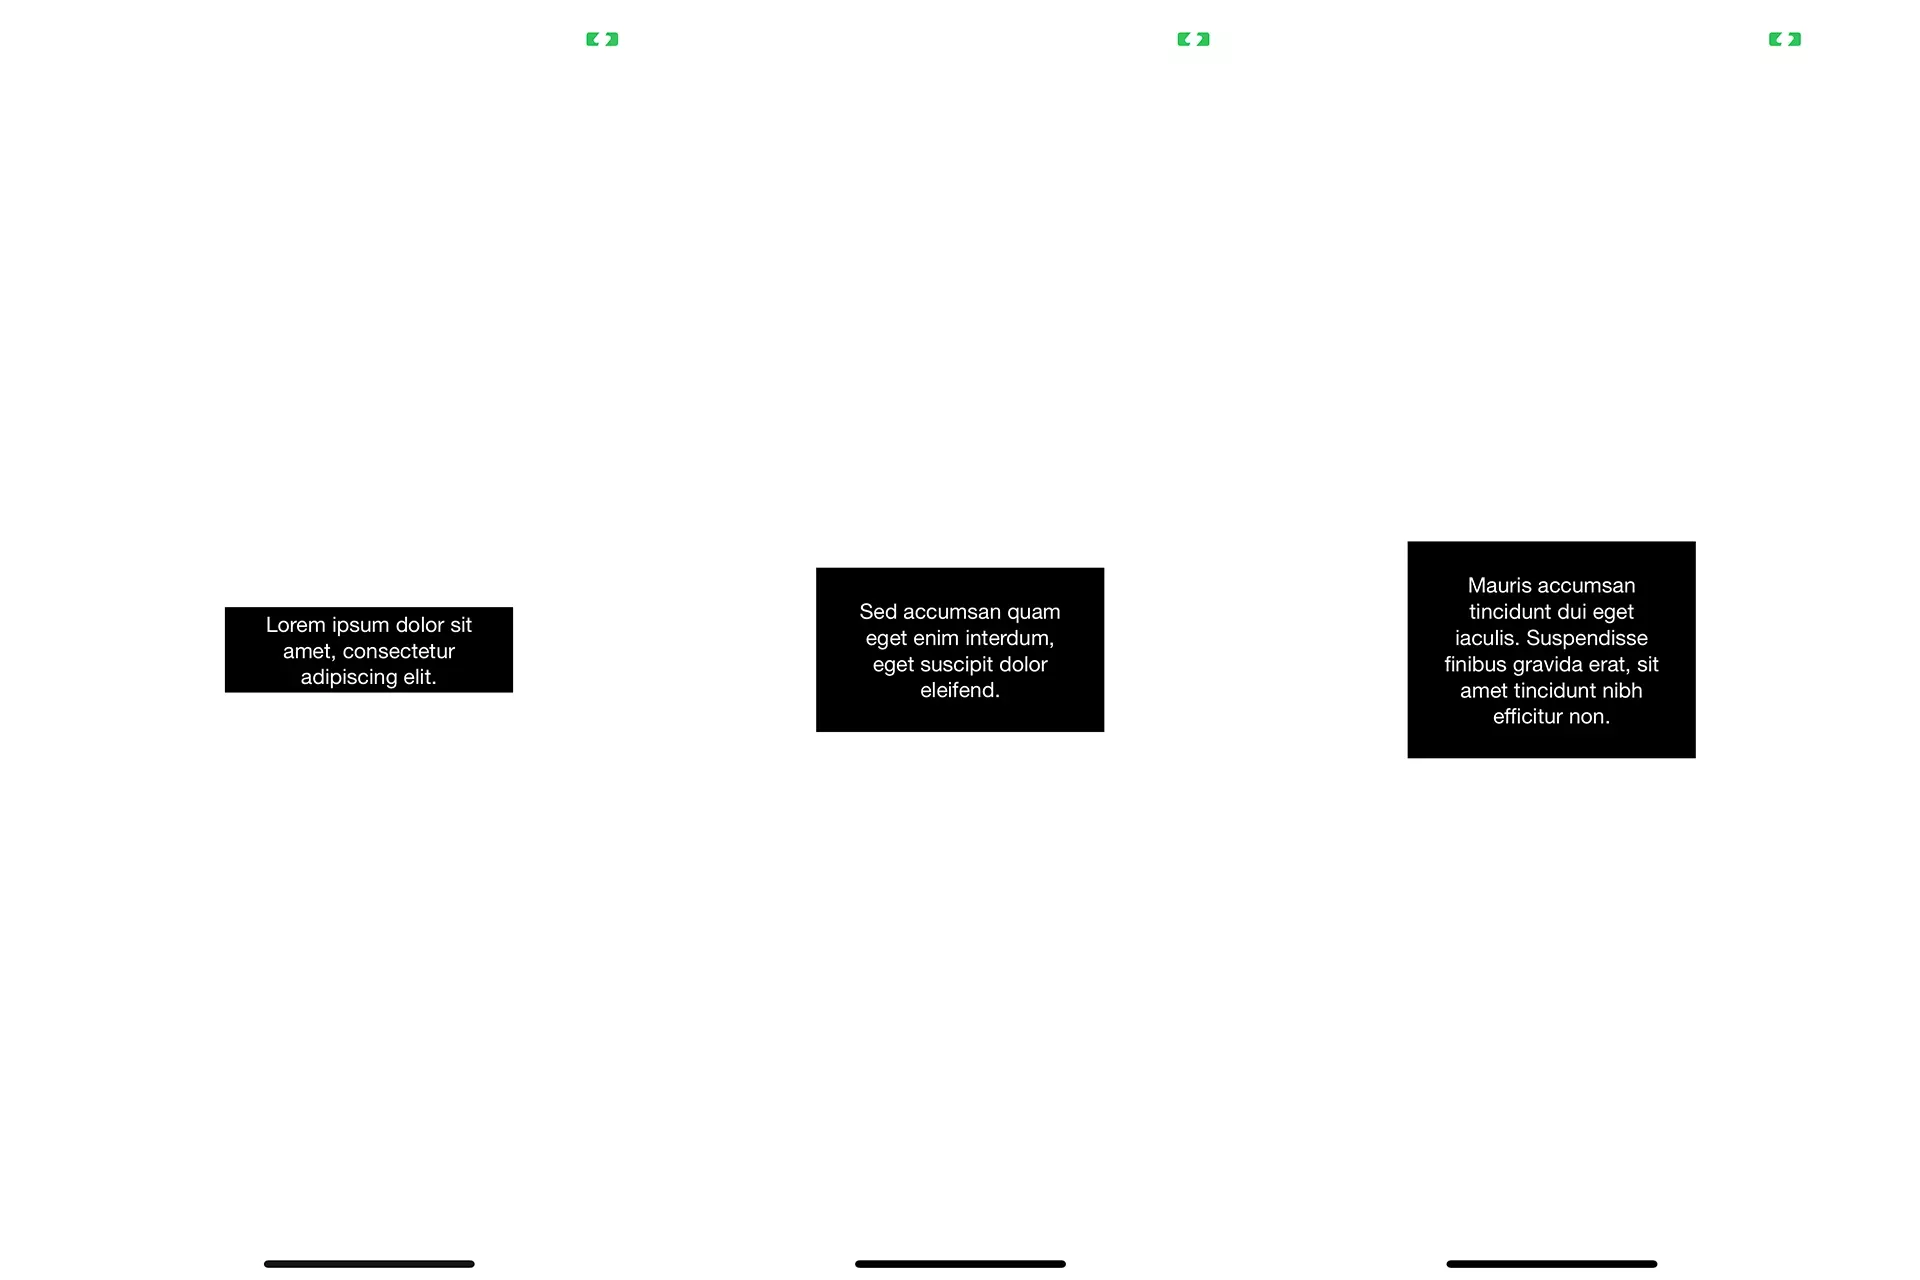
The following step is intended to create three sample strings that will be consumed by the application.
This step builds on our Localization tutorial which is available below and follows our methodology that allows apps to be created for multiple languages.
A | Create the UIContent
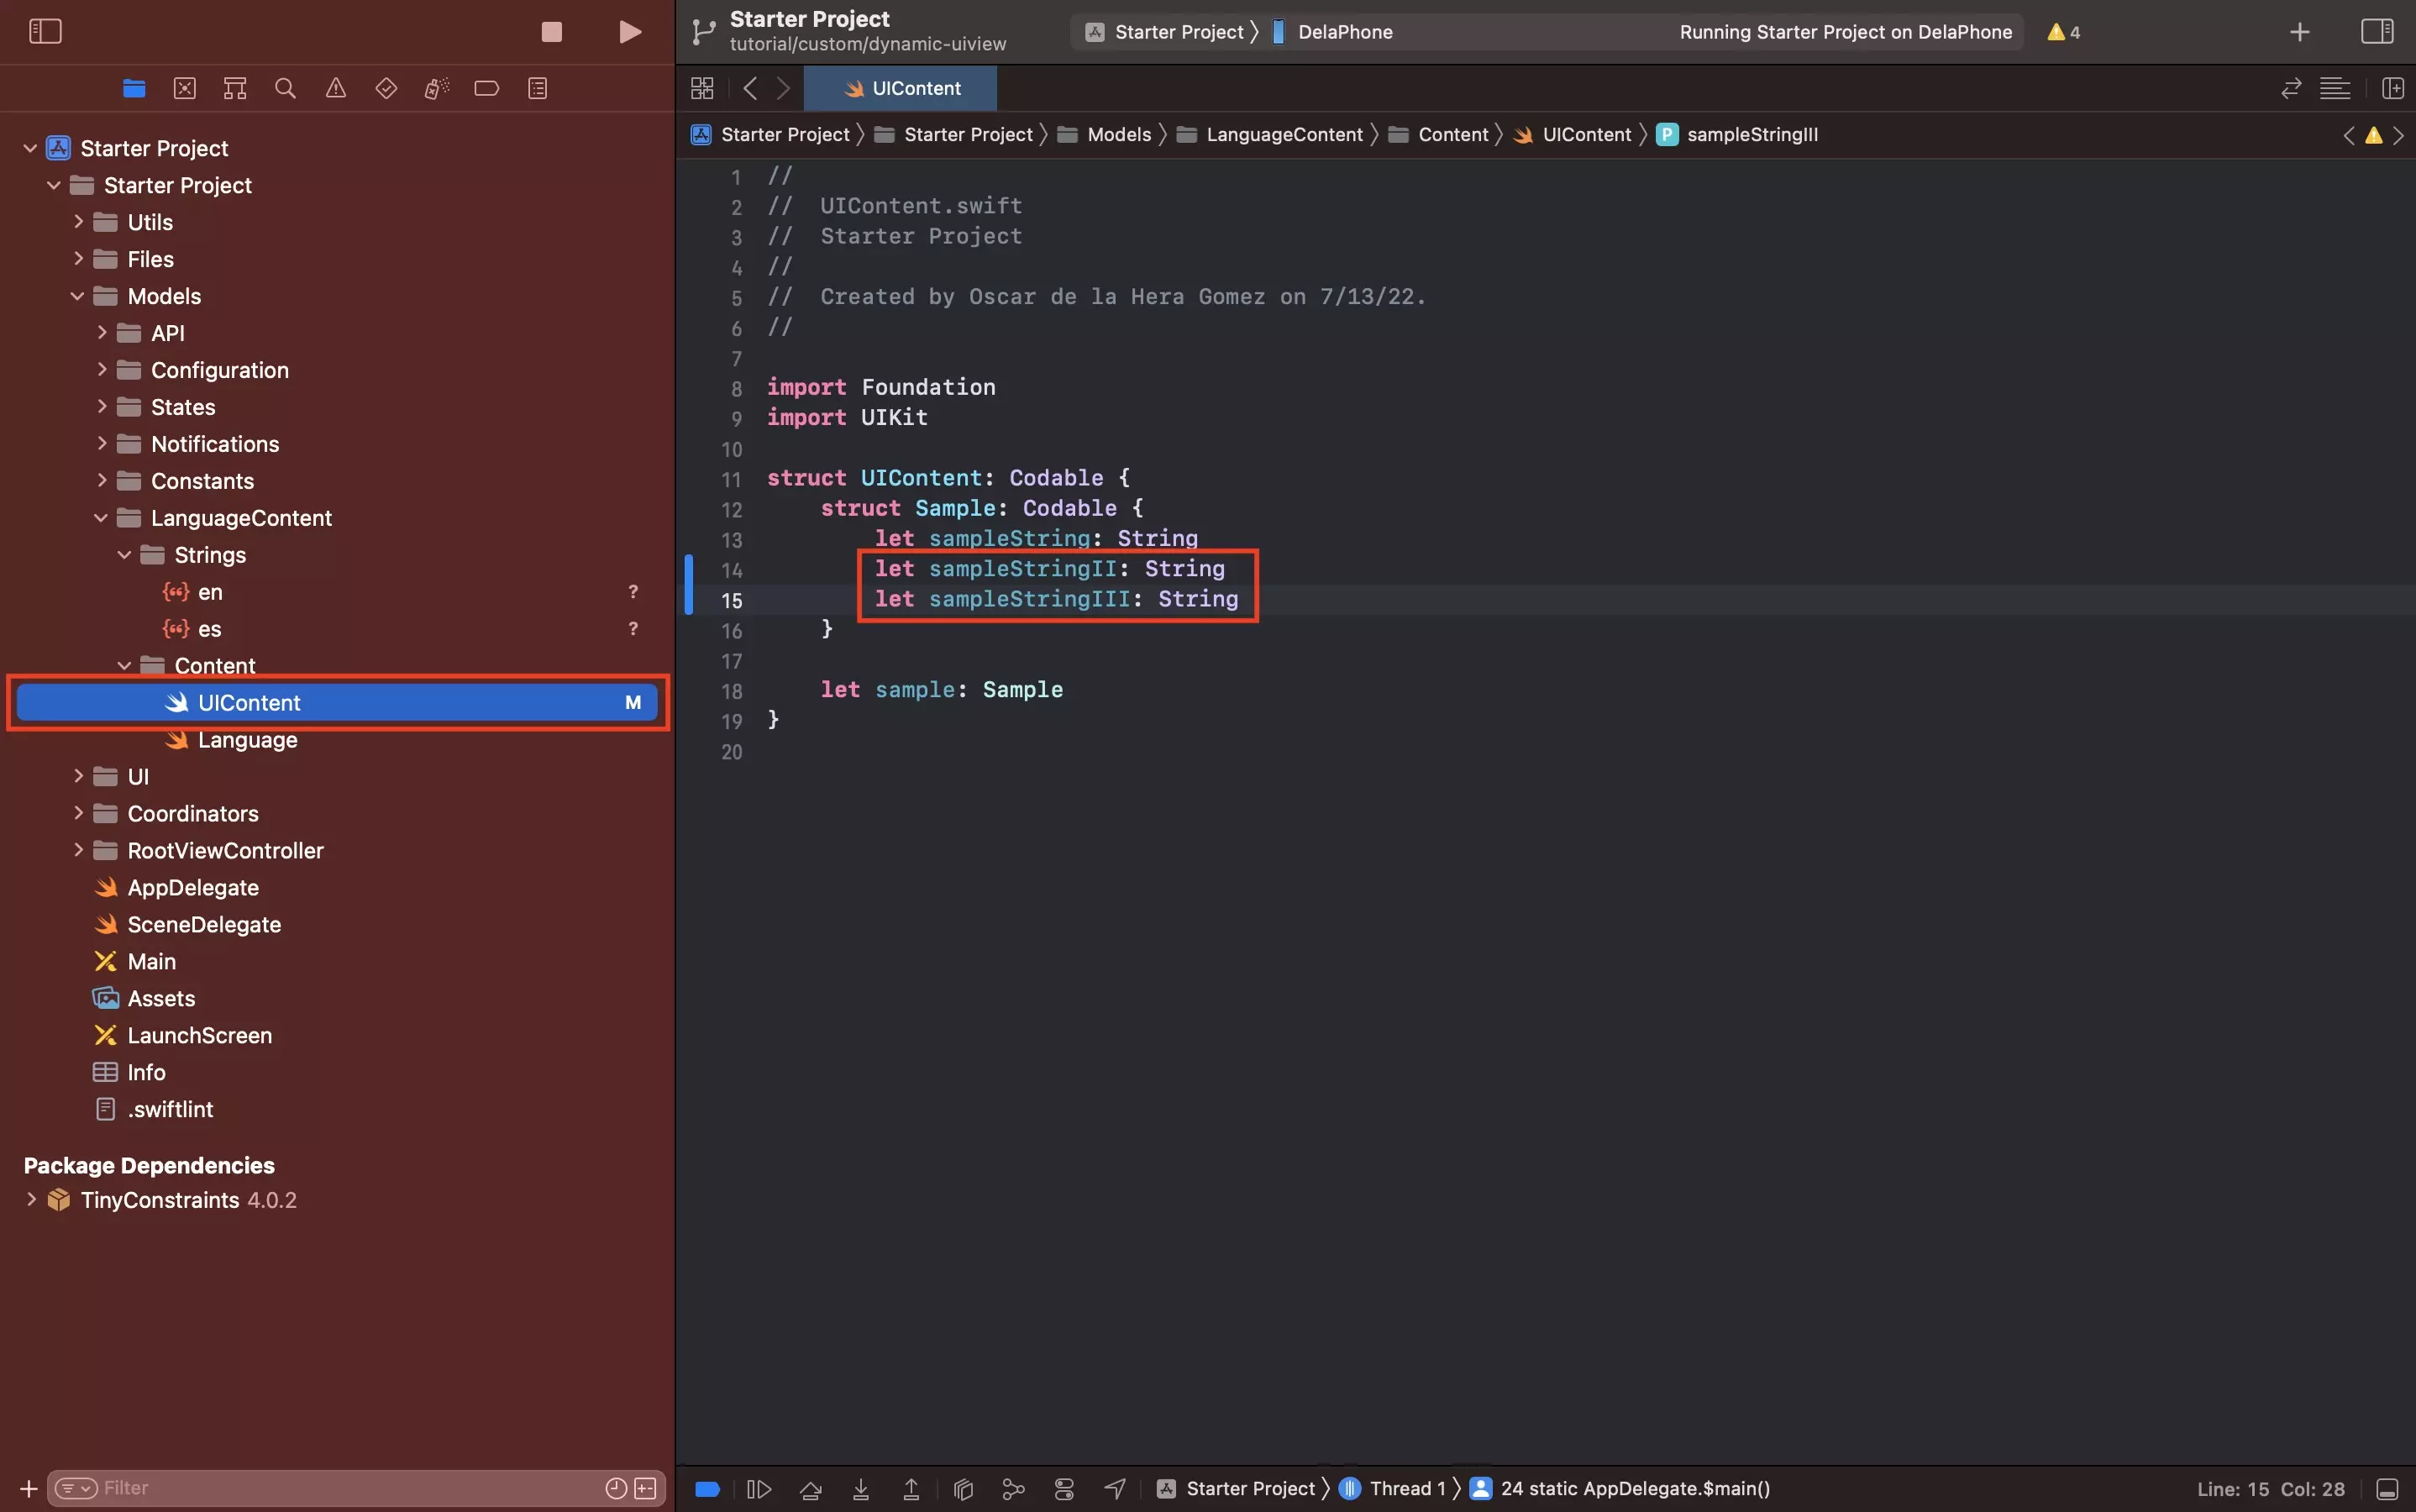
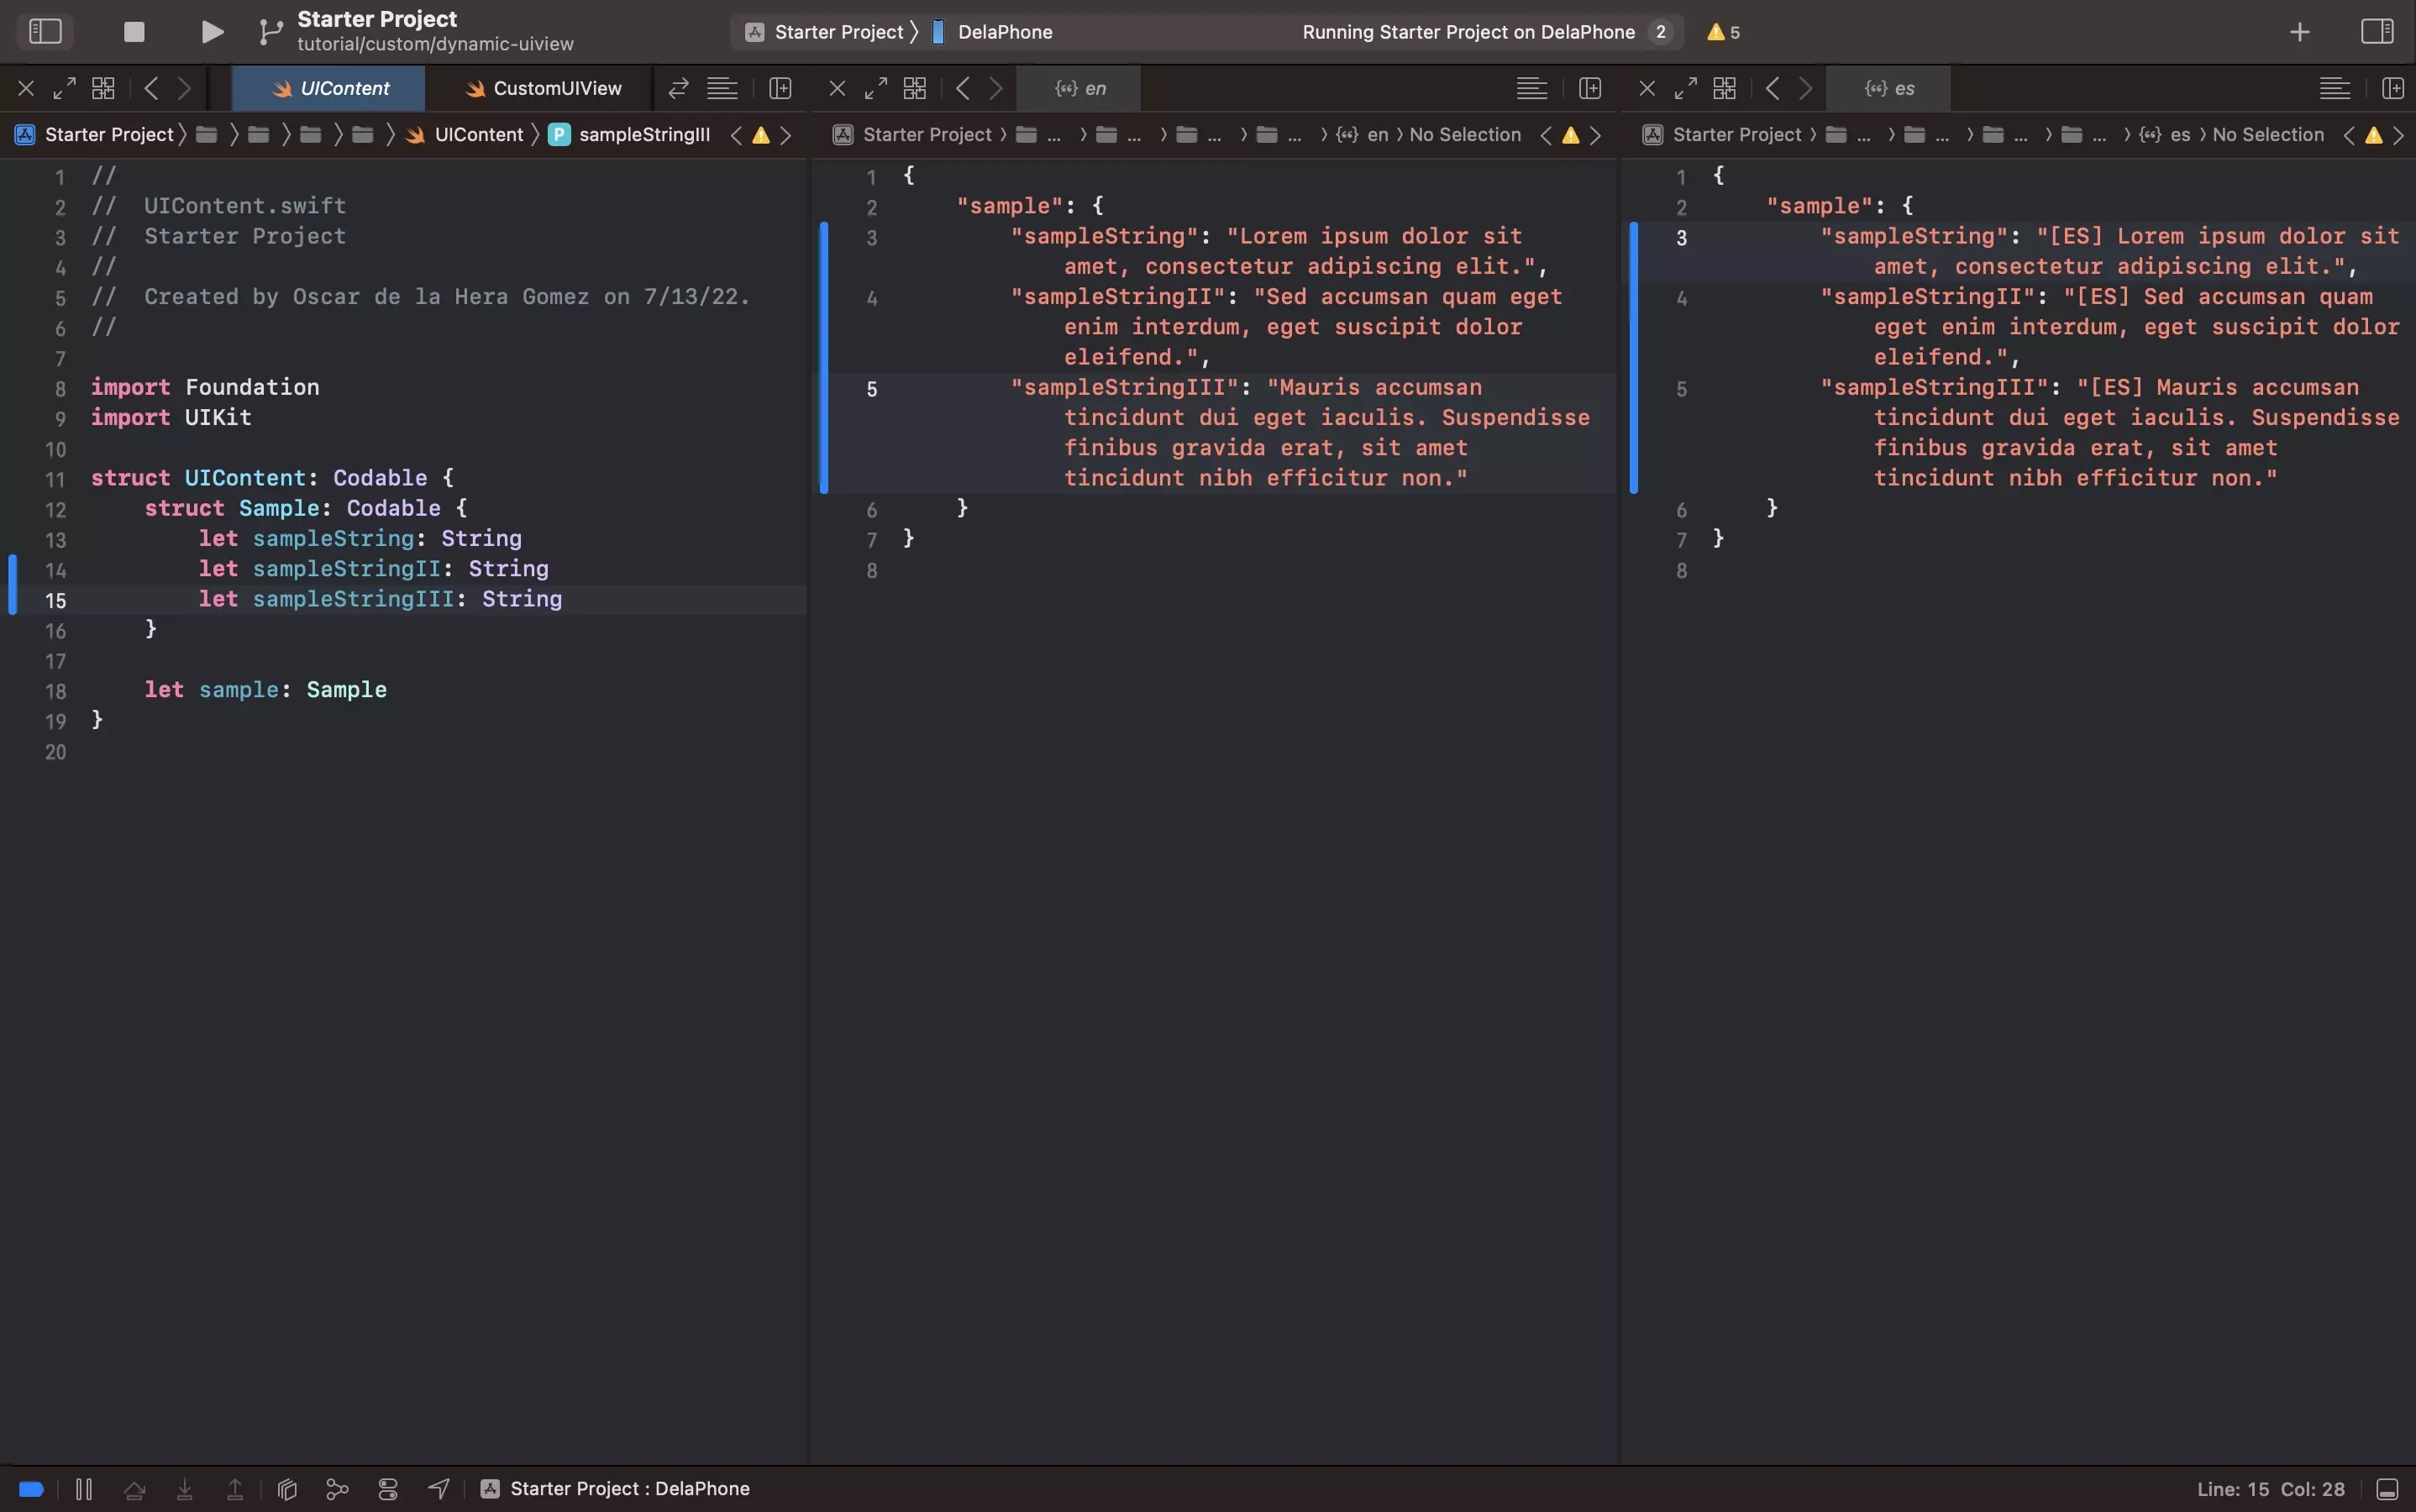
Add your content to the UIContent.swift file, found under Model/LanguageContent/Content.
In our case we have added two additional sample strings to the existing sample string.
B | Add Strings
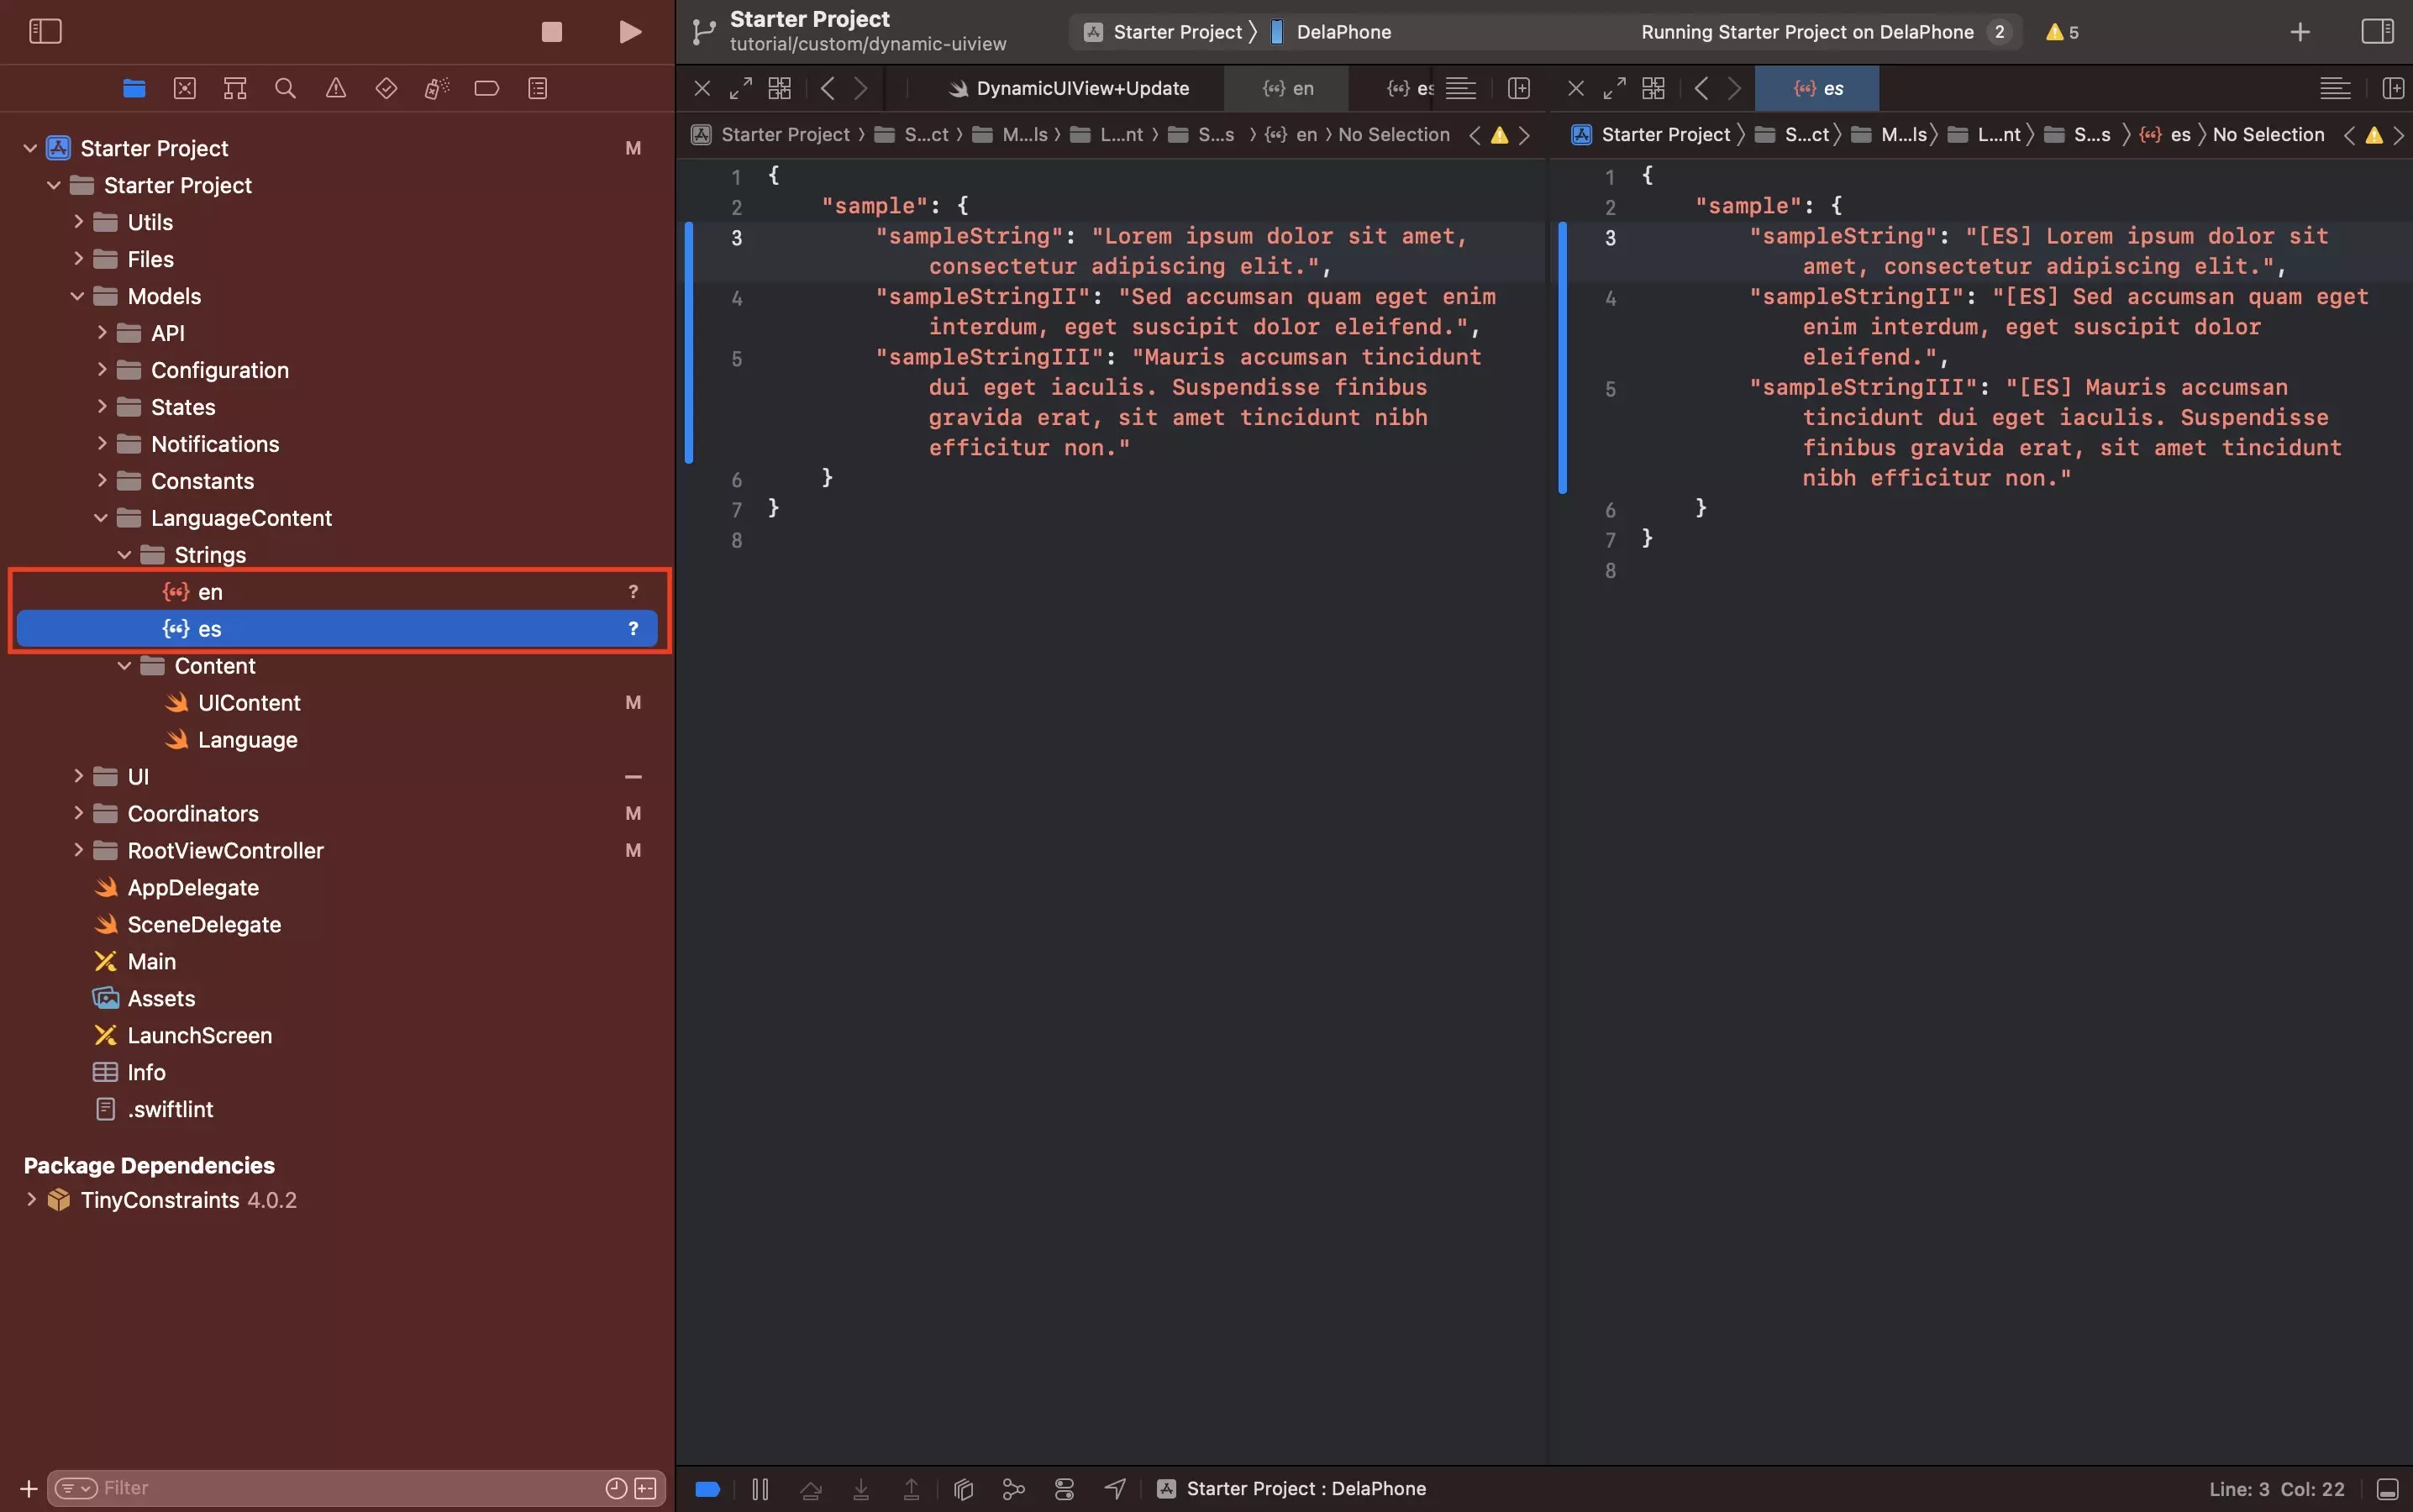
Add the relevant strings to en.json and es.json found under Model/LanguageContent/Strings.
Step Two: Add the Attributed Style
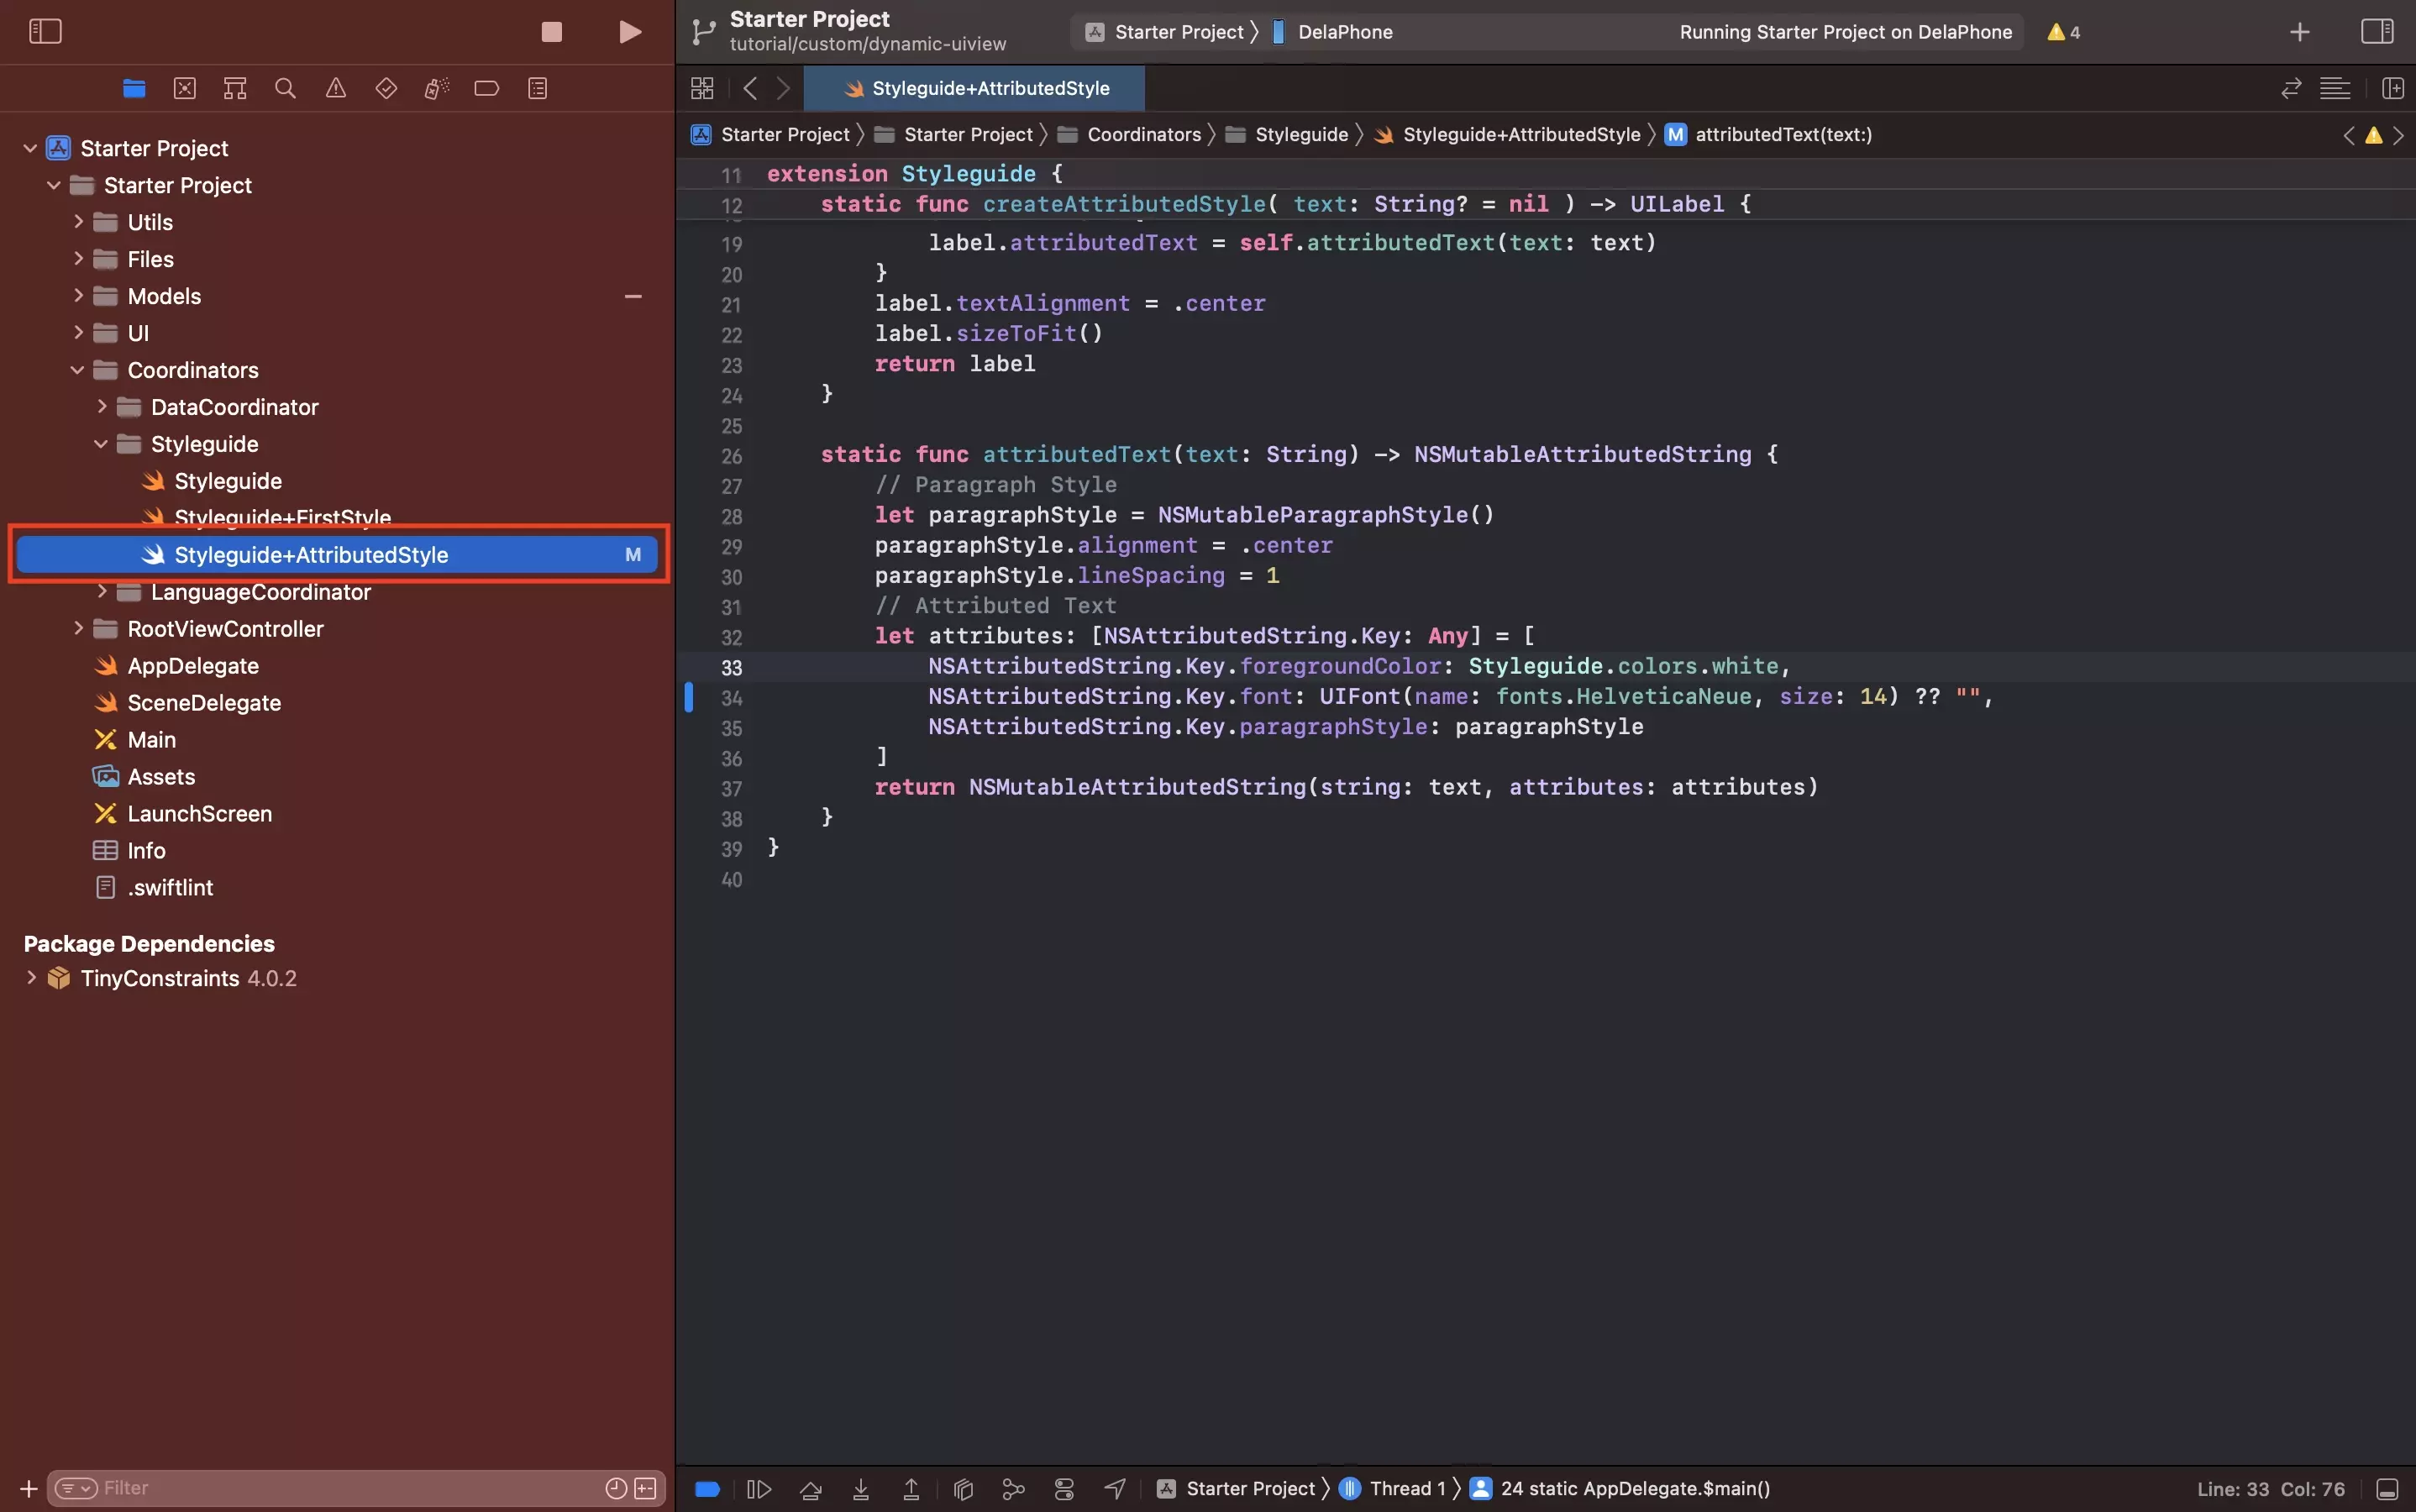
As part of this step, we modified a previously created custom attributed style.
For more information on how to create these or why we use them, please consult the articles below.
Step Three: Create the UIView
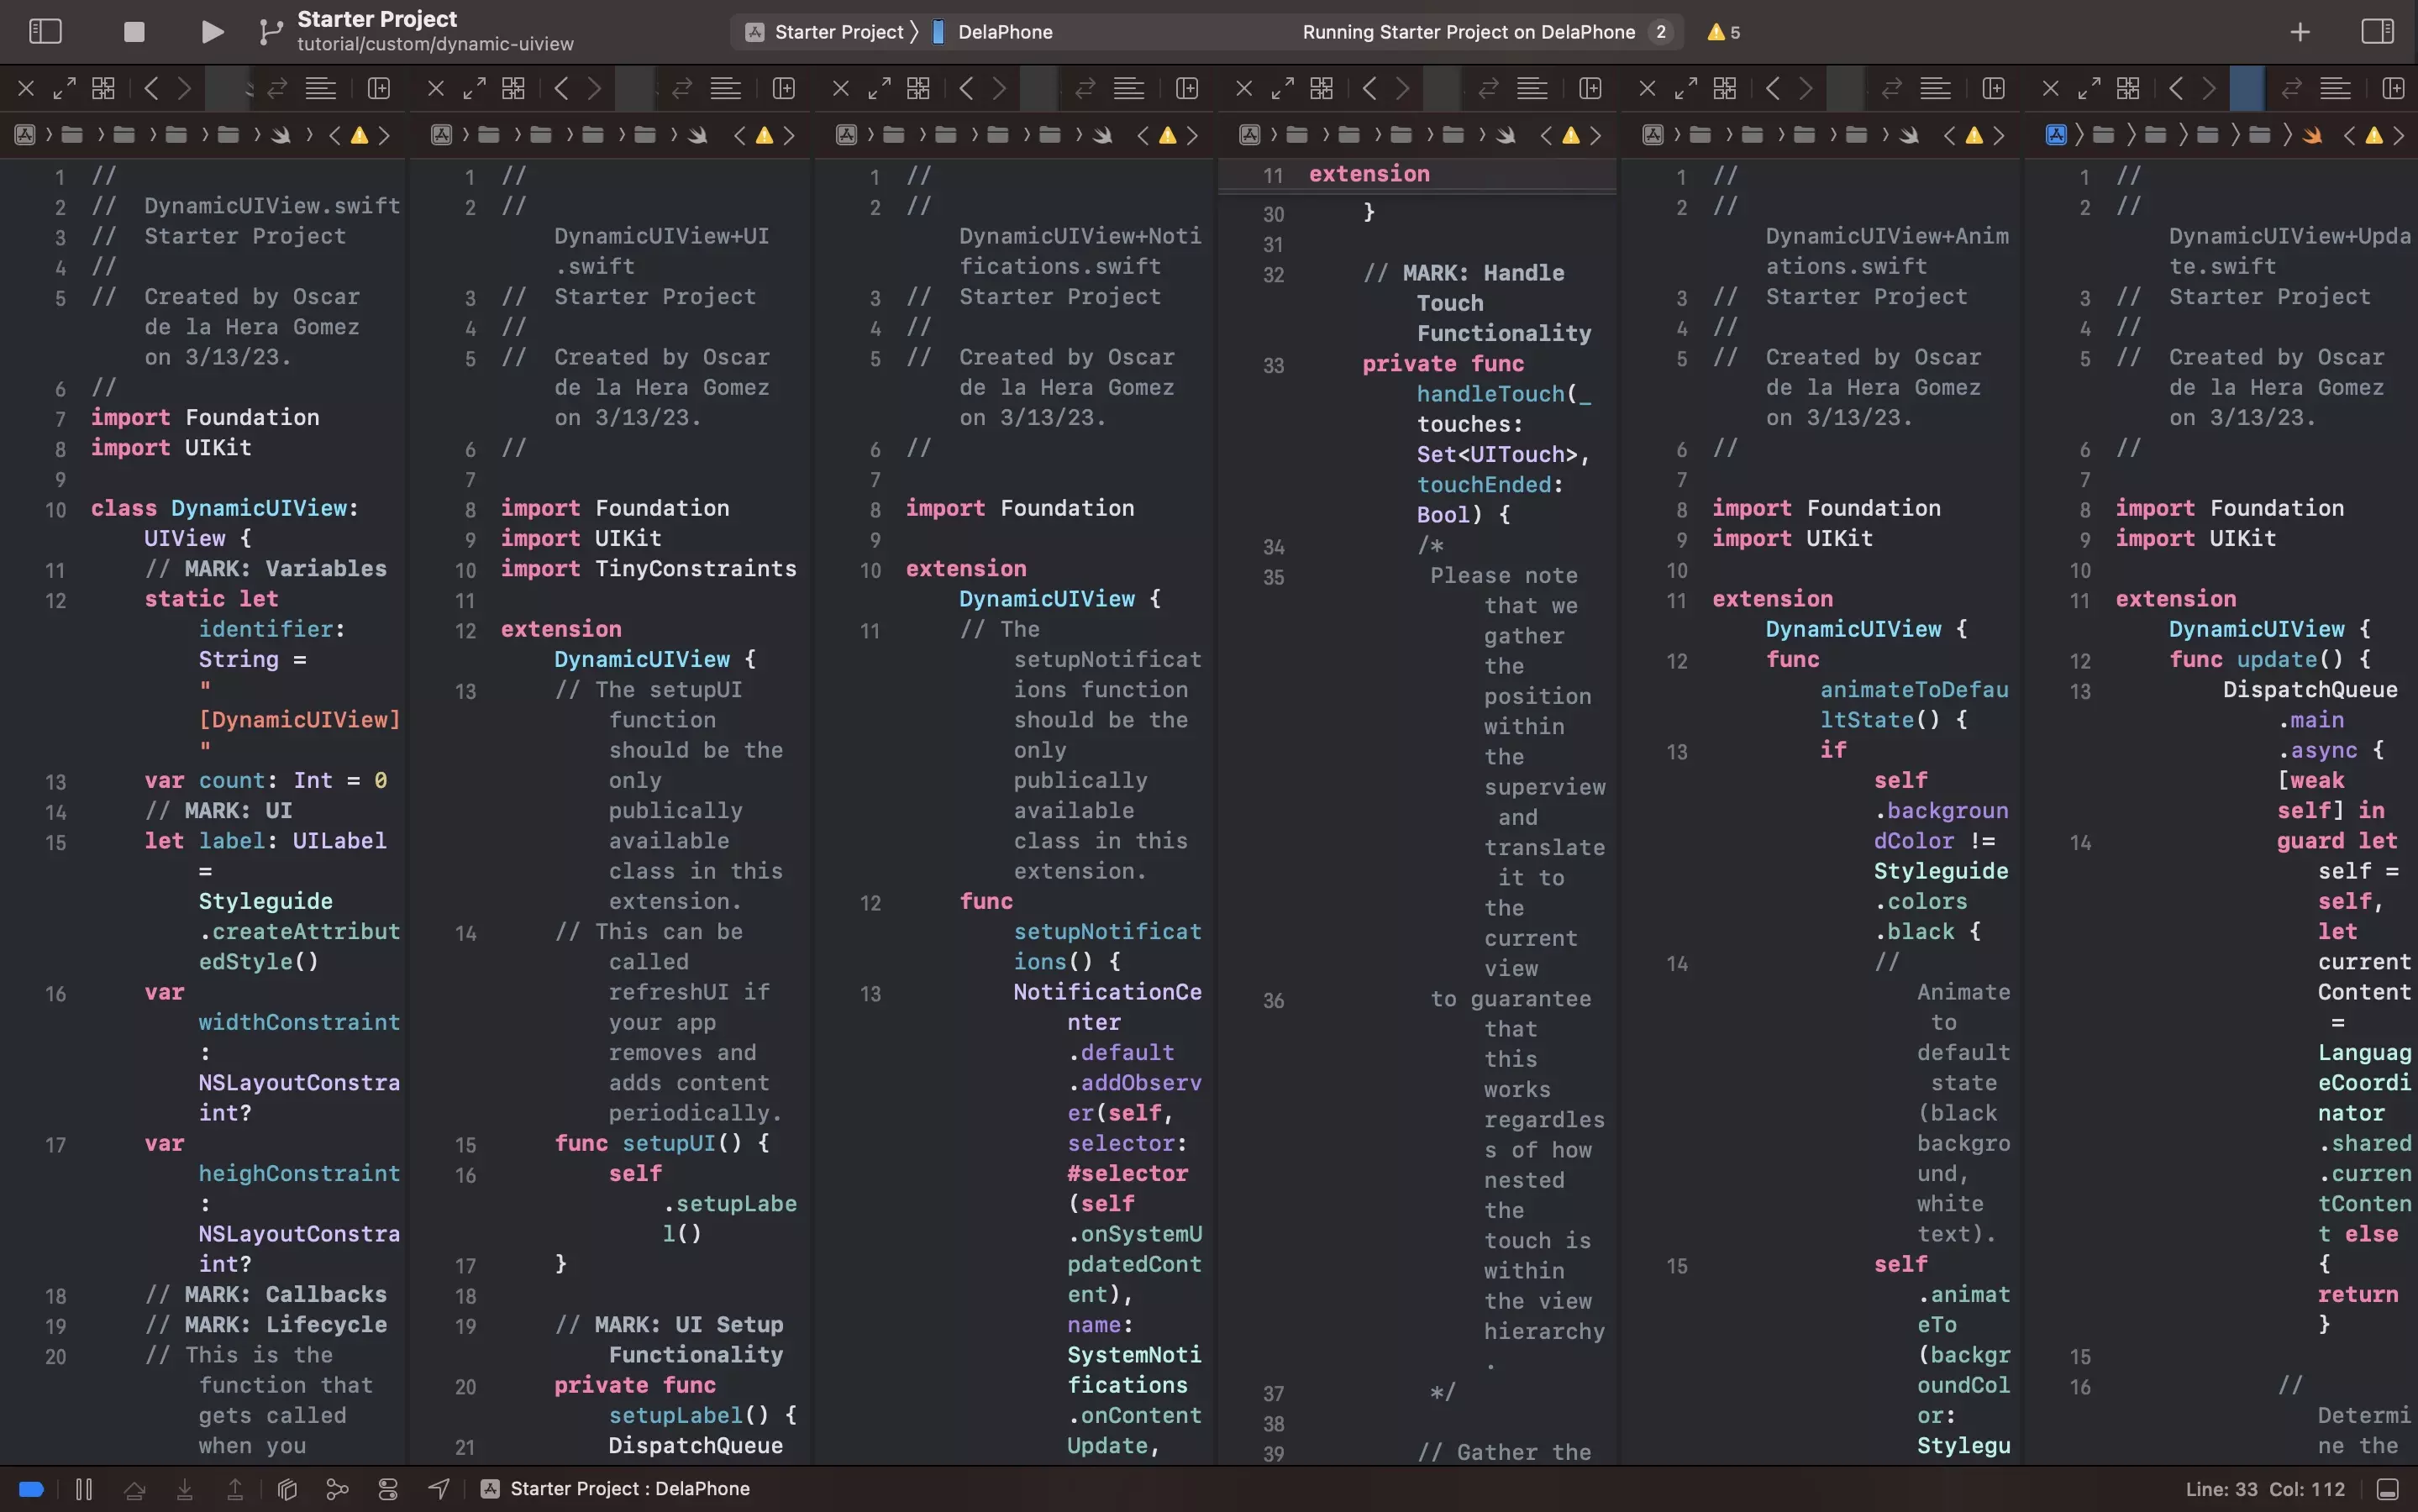
The following step demonstrates how to create a custom UIView that adapts its size to fit its content. This content updates every time the user touches the screen and dynamically animates to fit the size.
To do this we create a series of files, which are structured to boost developer performance as well as to help identify where functionality lies within a view.
A | Create the declaration file
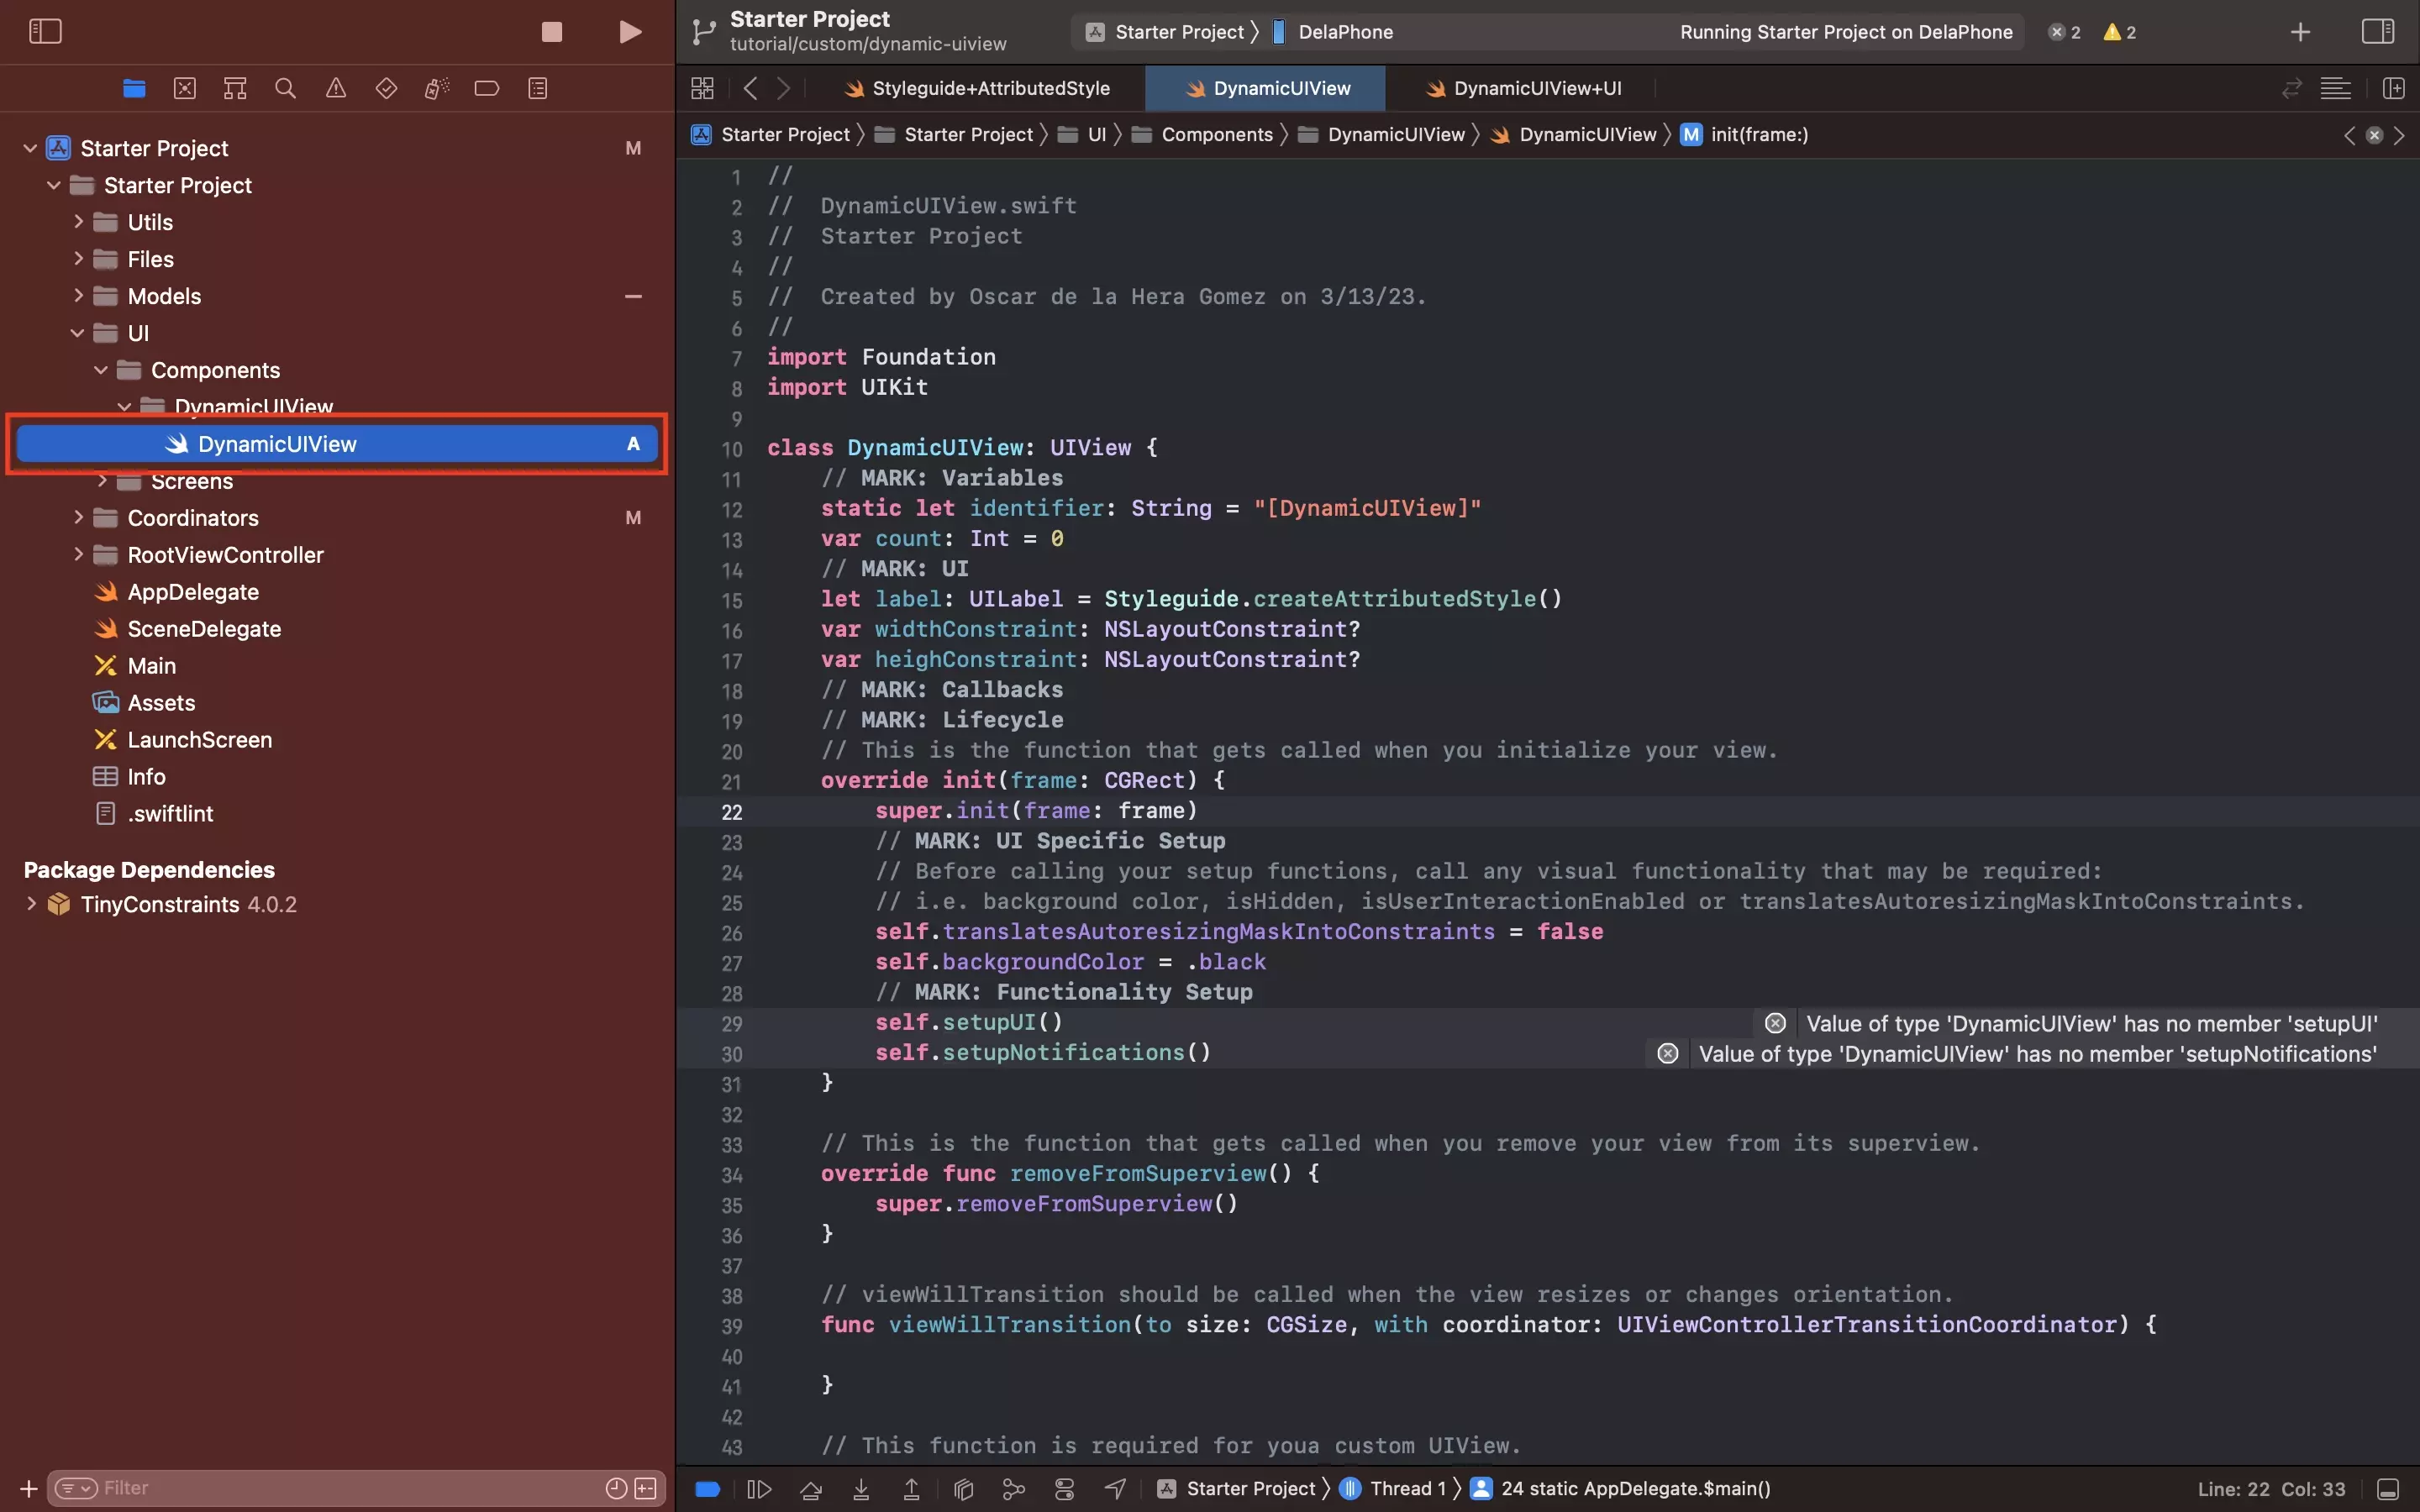
Under UI/Components, create a new folder called DynamicUIView.
Within the newly created DynamicUIView folder, create a new file called DynamicUIView.swift and paste in the code below.
This file is responsible for declaring the UIView and all the variables that are required as well as setting up all the functionality.
B | Create the UI Extension
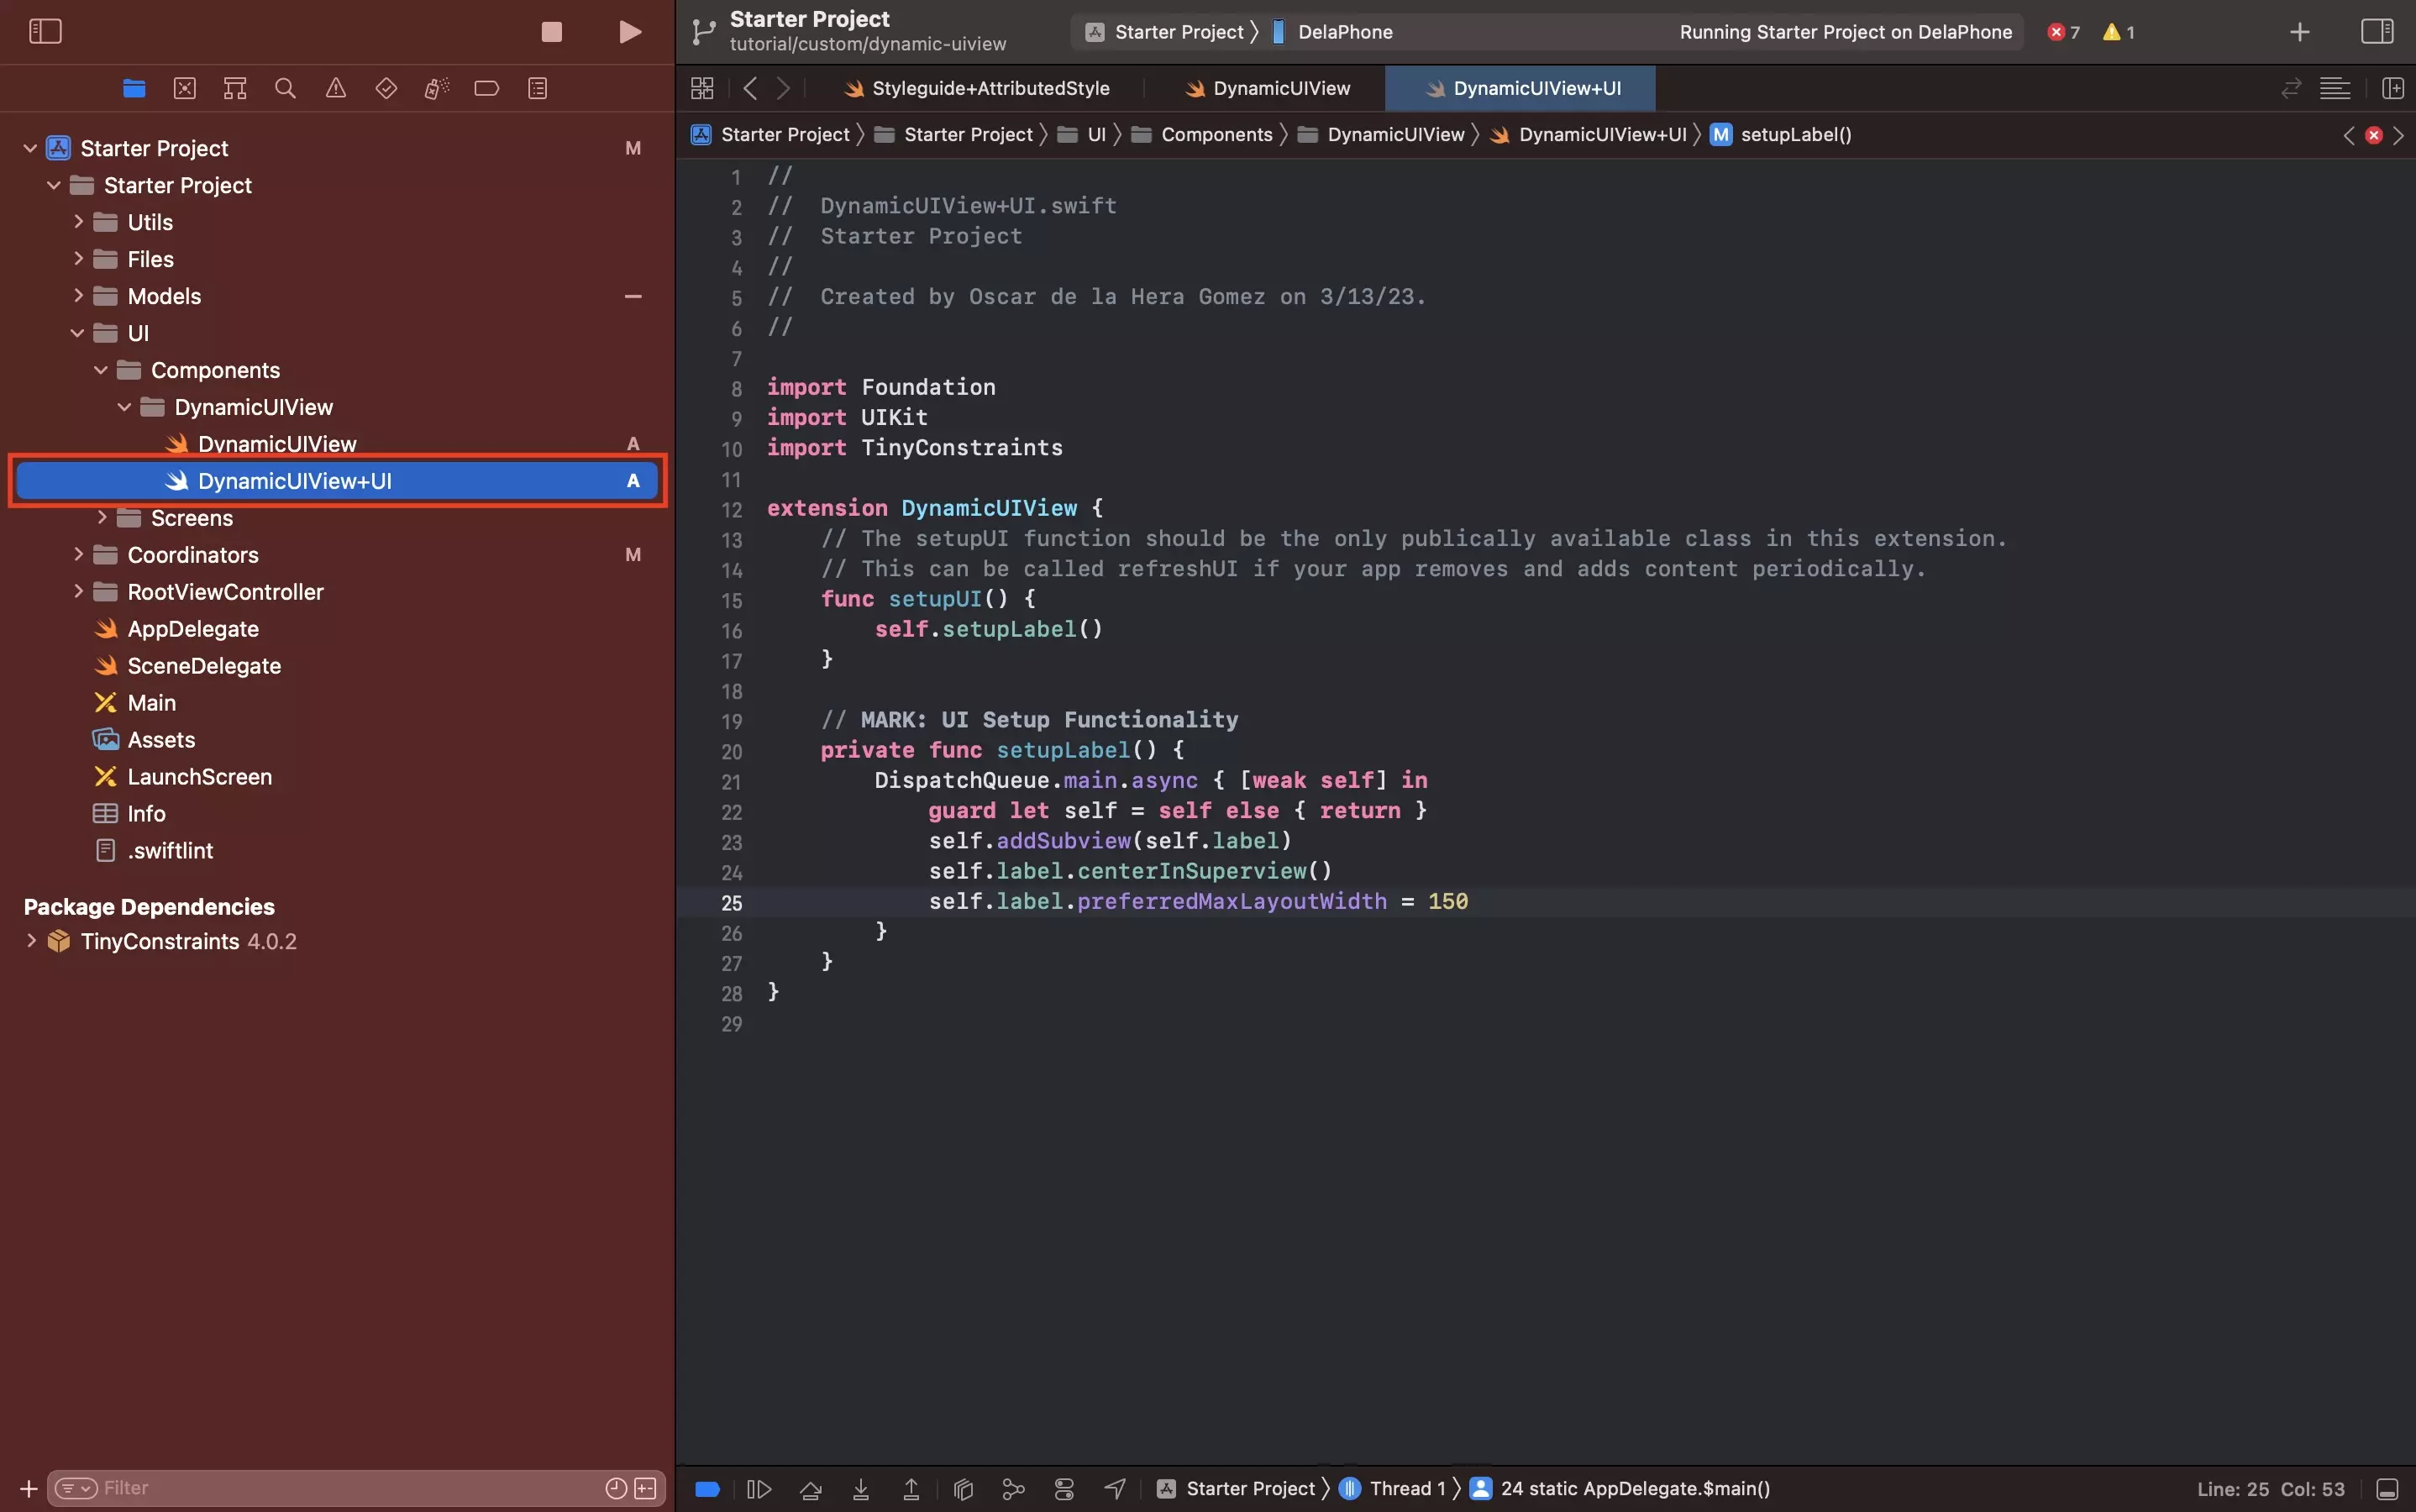
In the newly created DynamicUIView folder, create a new file called DynamicUIView+UI.swift, and paste in the code below.
This is responsible for adding the label to the view and setting the maximum width for the label (150 px).
C | Create the Notifications Extension
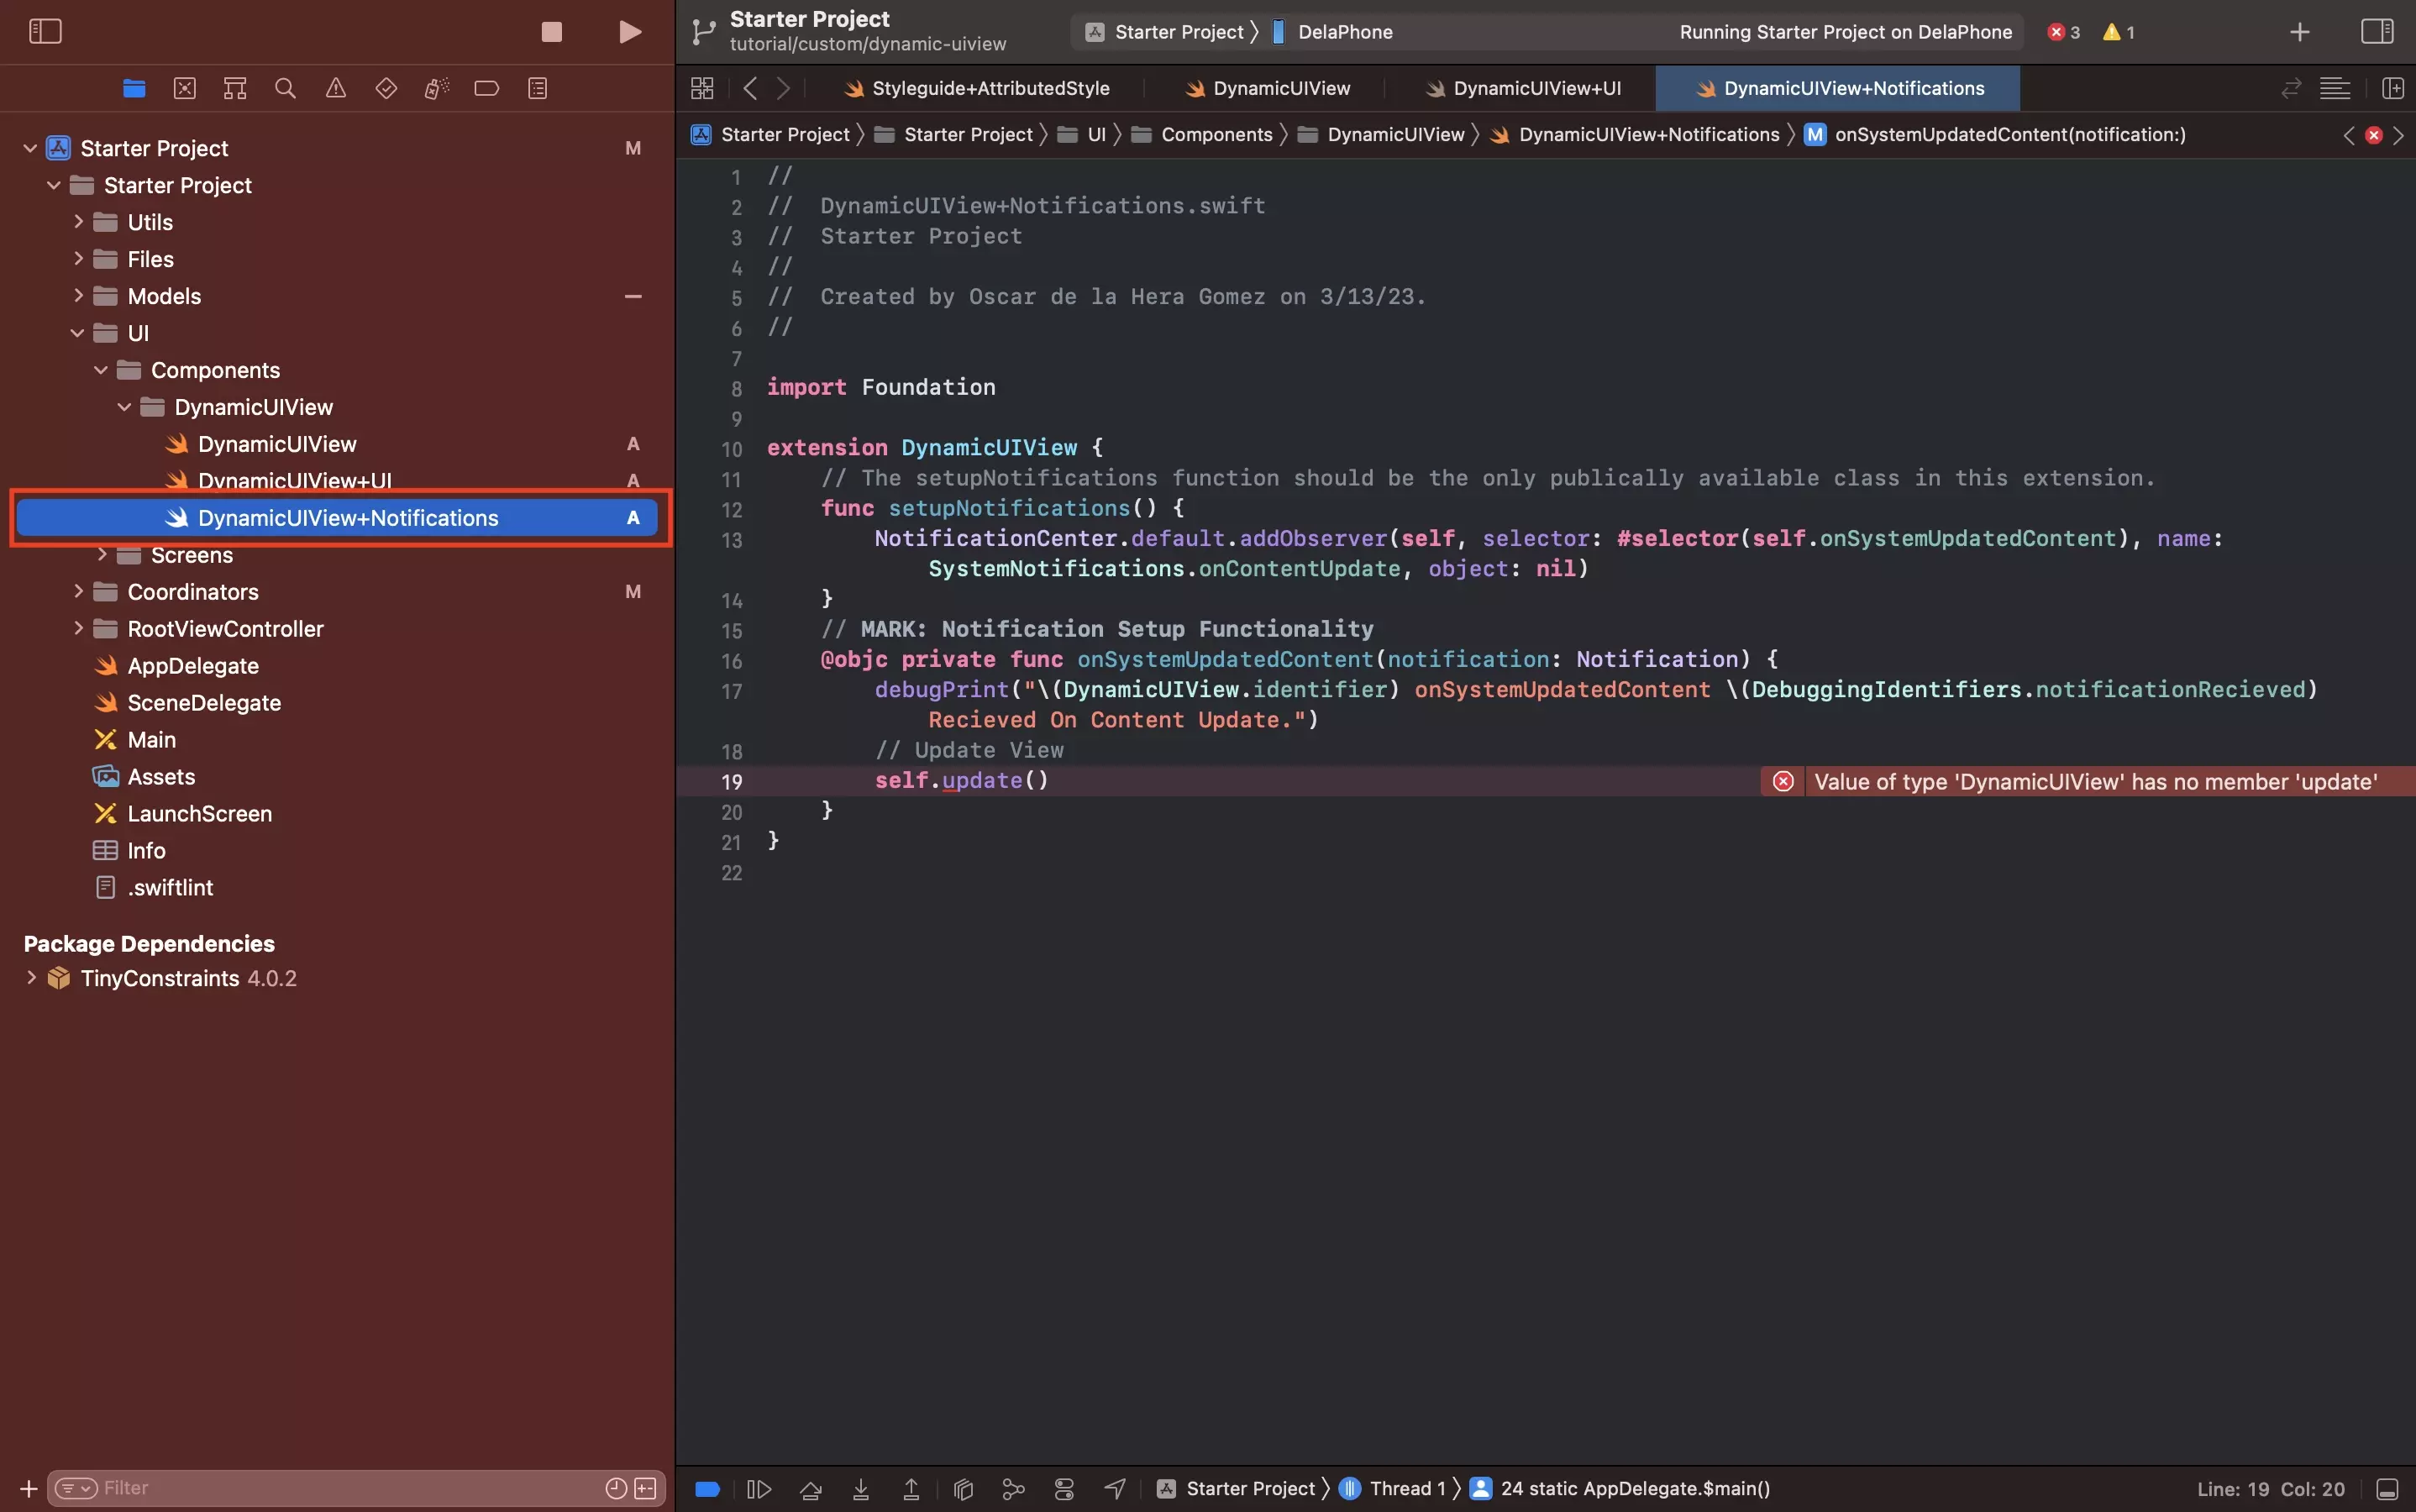
In the newly created DynamicUIView folder, create a new file called DynamicUIView+Notifications.swift, and paste in the code below.
This code is responsible for detecting when the LanguageCoordinator makes the content available, and updates the view to its initial state by calling update, which is defined in Part F.
D | Create the Touches Extension
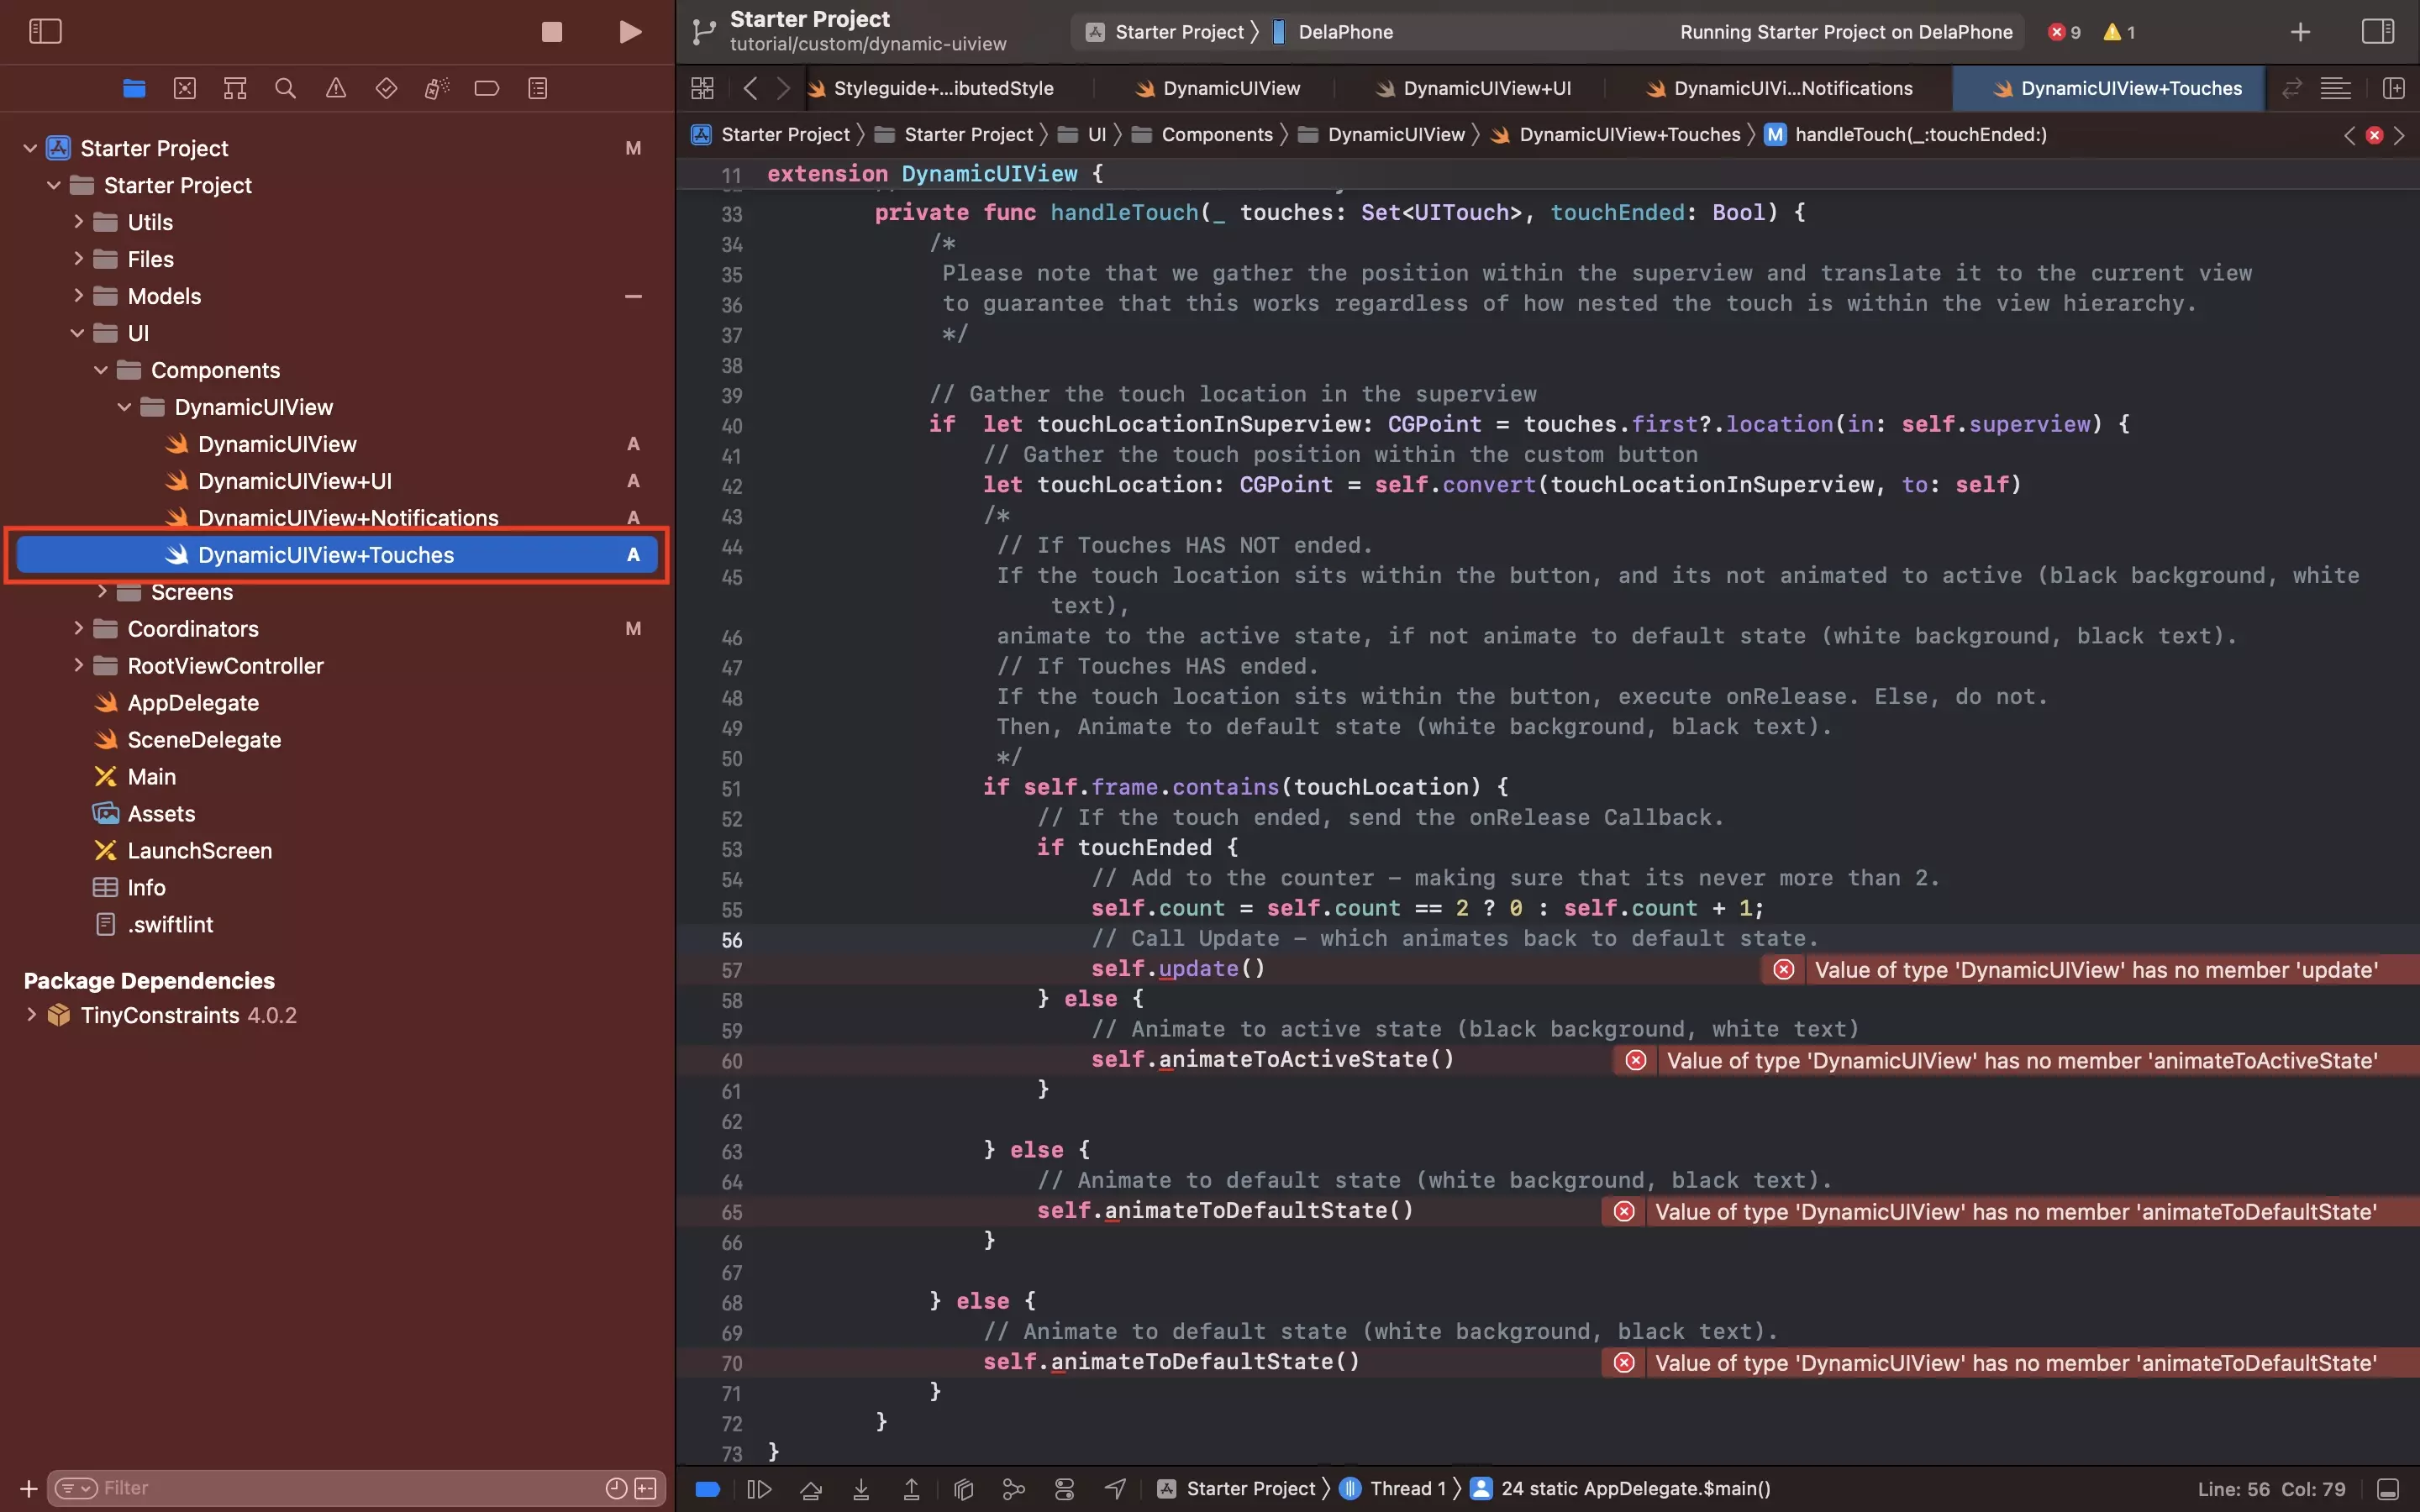
In the newly created DynamicUIView folder, create a new file called DynamicUIView+Touches.swift, and paste in the code below.
This code is responsible for handling the logic on when the user touches the view, as well as calling all associated animations.
E | Create the Animation Extension
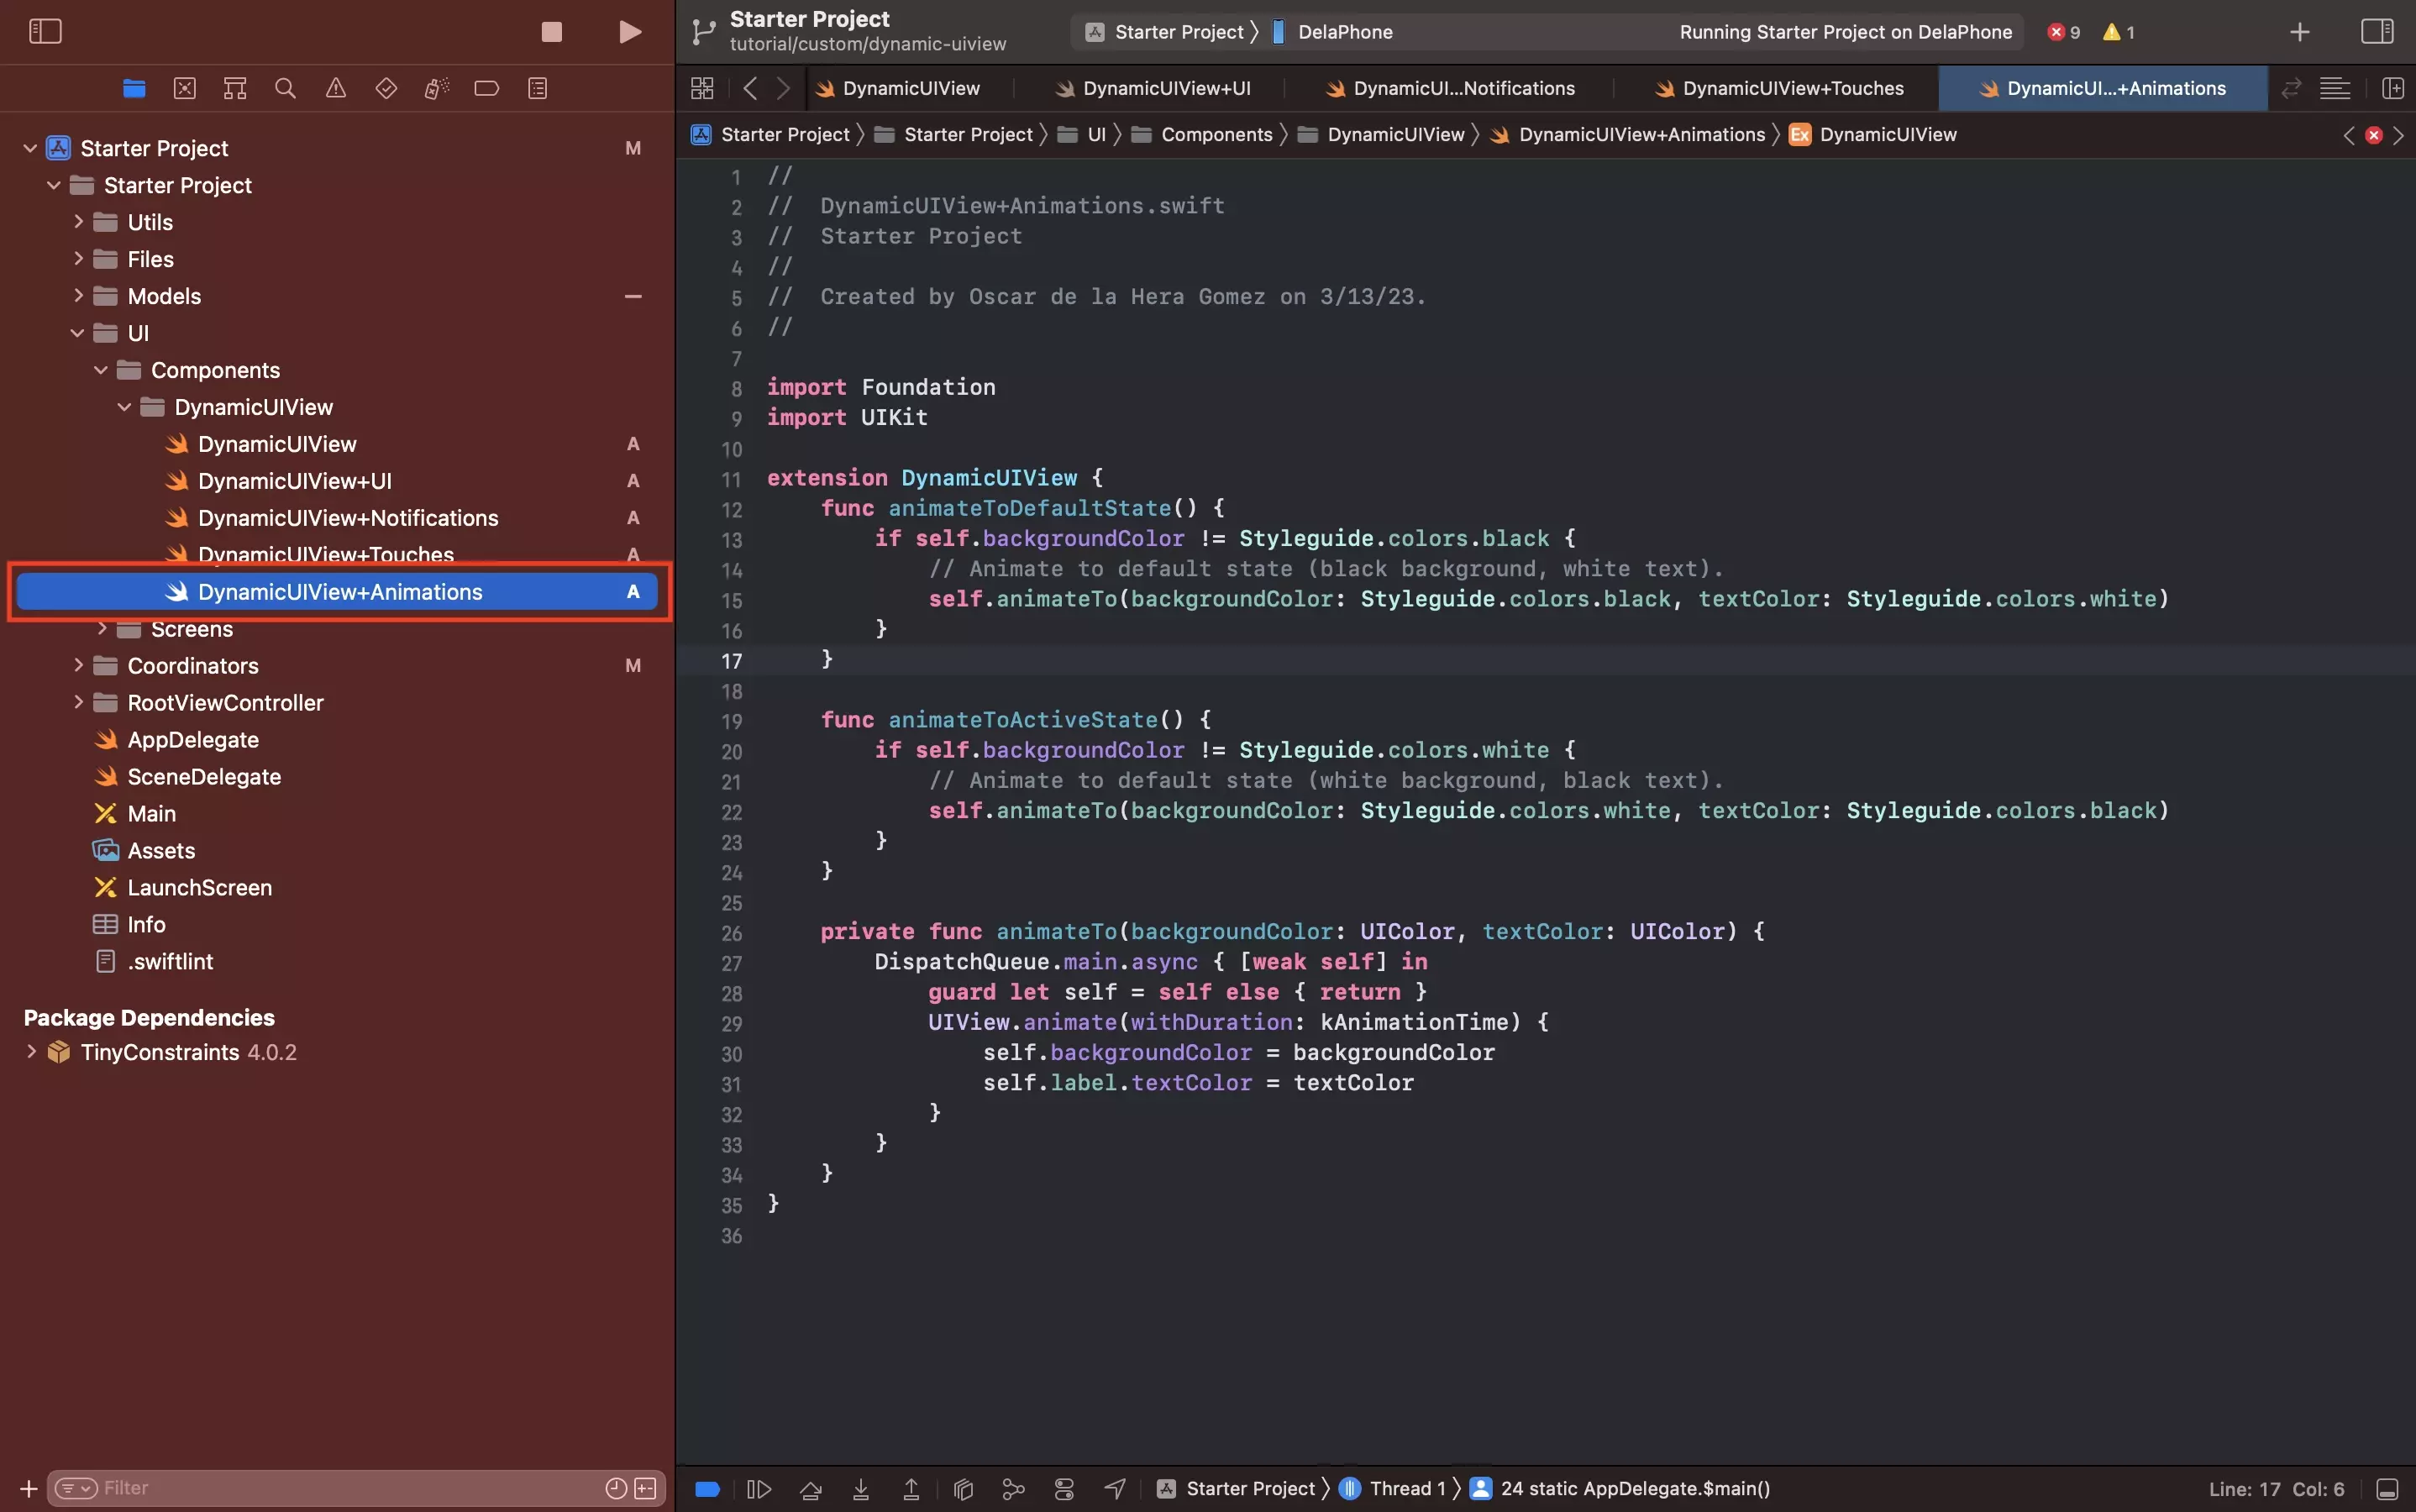
In the newly created DynamicUIView folder, create a new file called DynamicUIView+Animations.swift, and paste in the code below.
This code is responsible for managing all the animations for the touch states.
F | Create the Update Extension
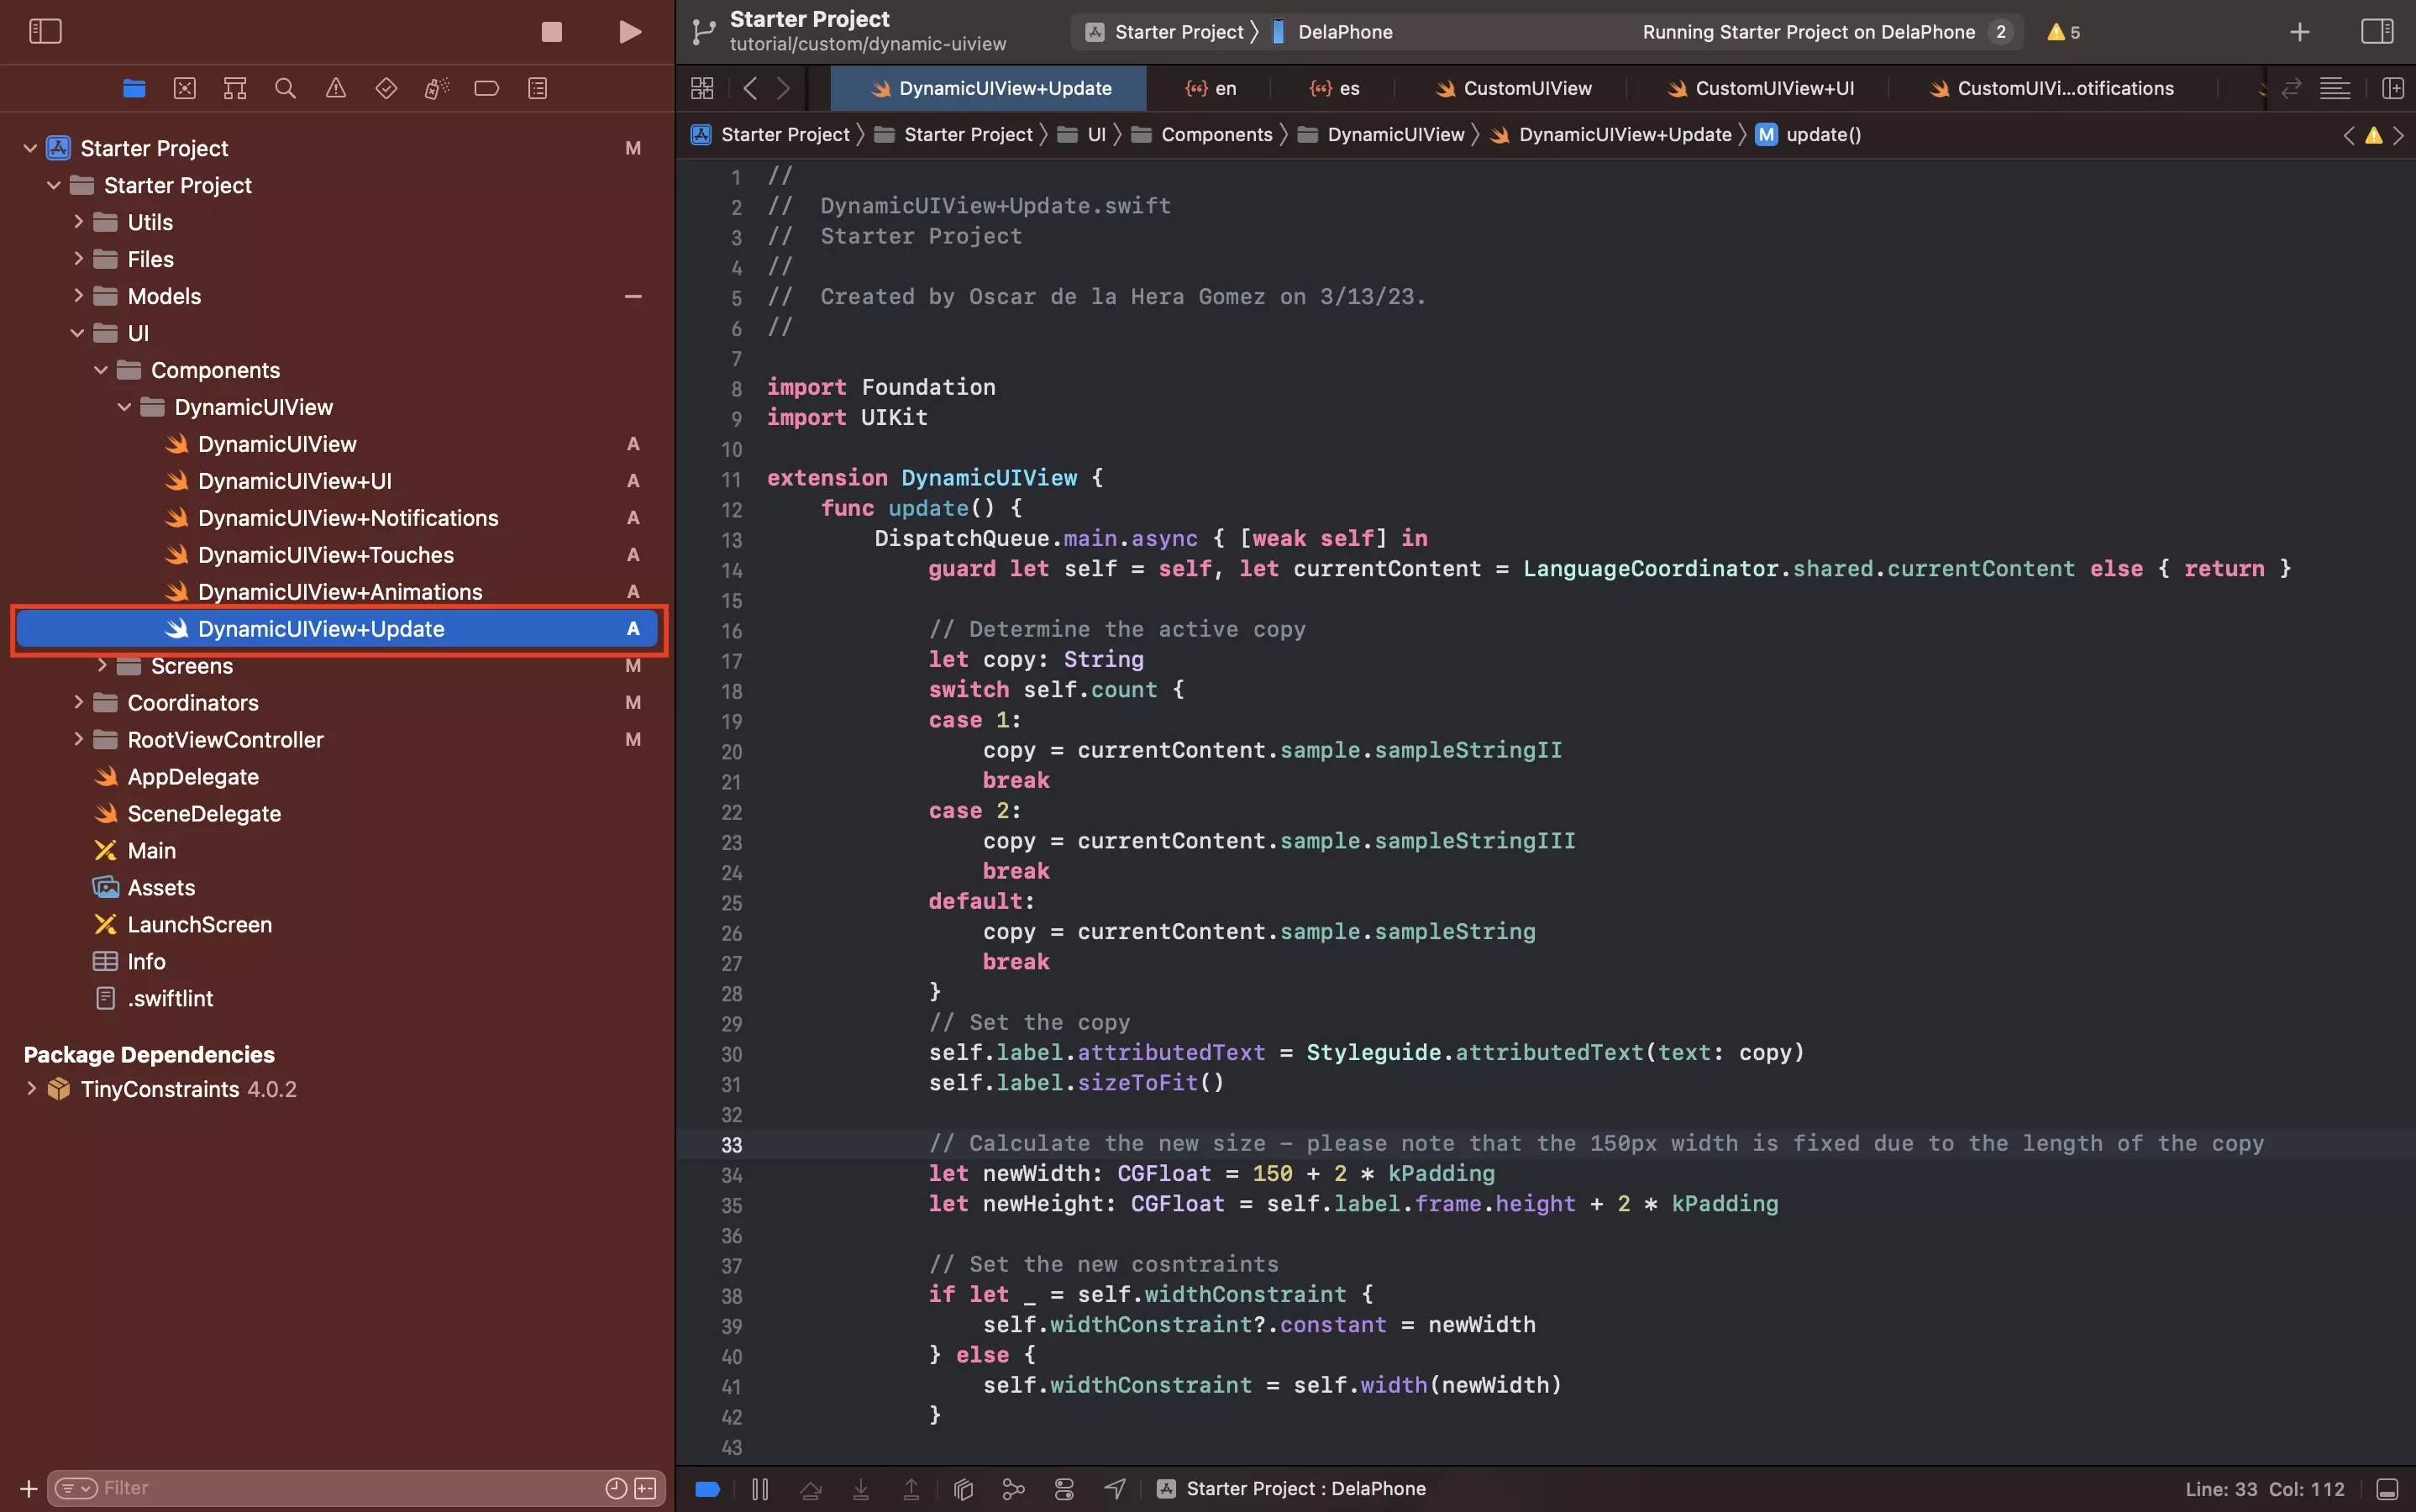
In the newly created DynamicUIView folder, create a new file called DynamicUIView+Update.swift, and paste in the code below.
This code is responsible for managing the change in copy, as well as animating the UIView to the new size.
Please note that we have chosen to make the UIView width constant due to the size of the labels but had the strings been shorter, you could have opted to animate the width as well as the height.
Step Four: Setup the UIView
The following step details how to add the DynamicUIView to the CustomUIView.
Please note that we have removed all the label functionality and altered the background color. This change in functionality is not described as part of this tutorial.
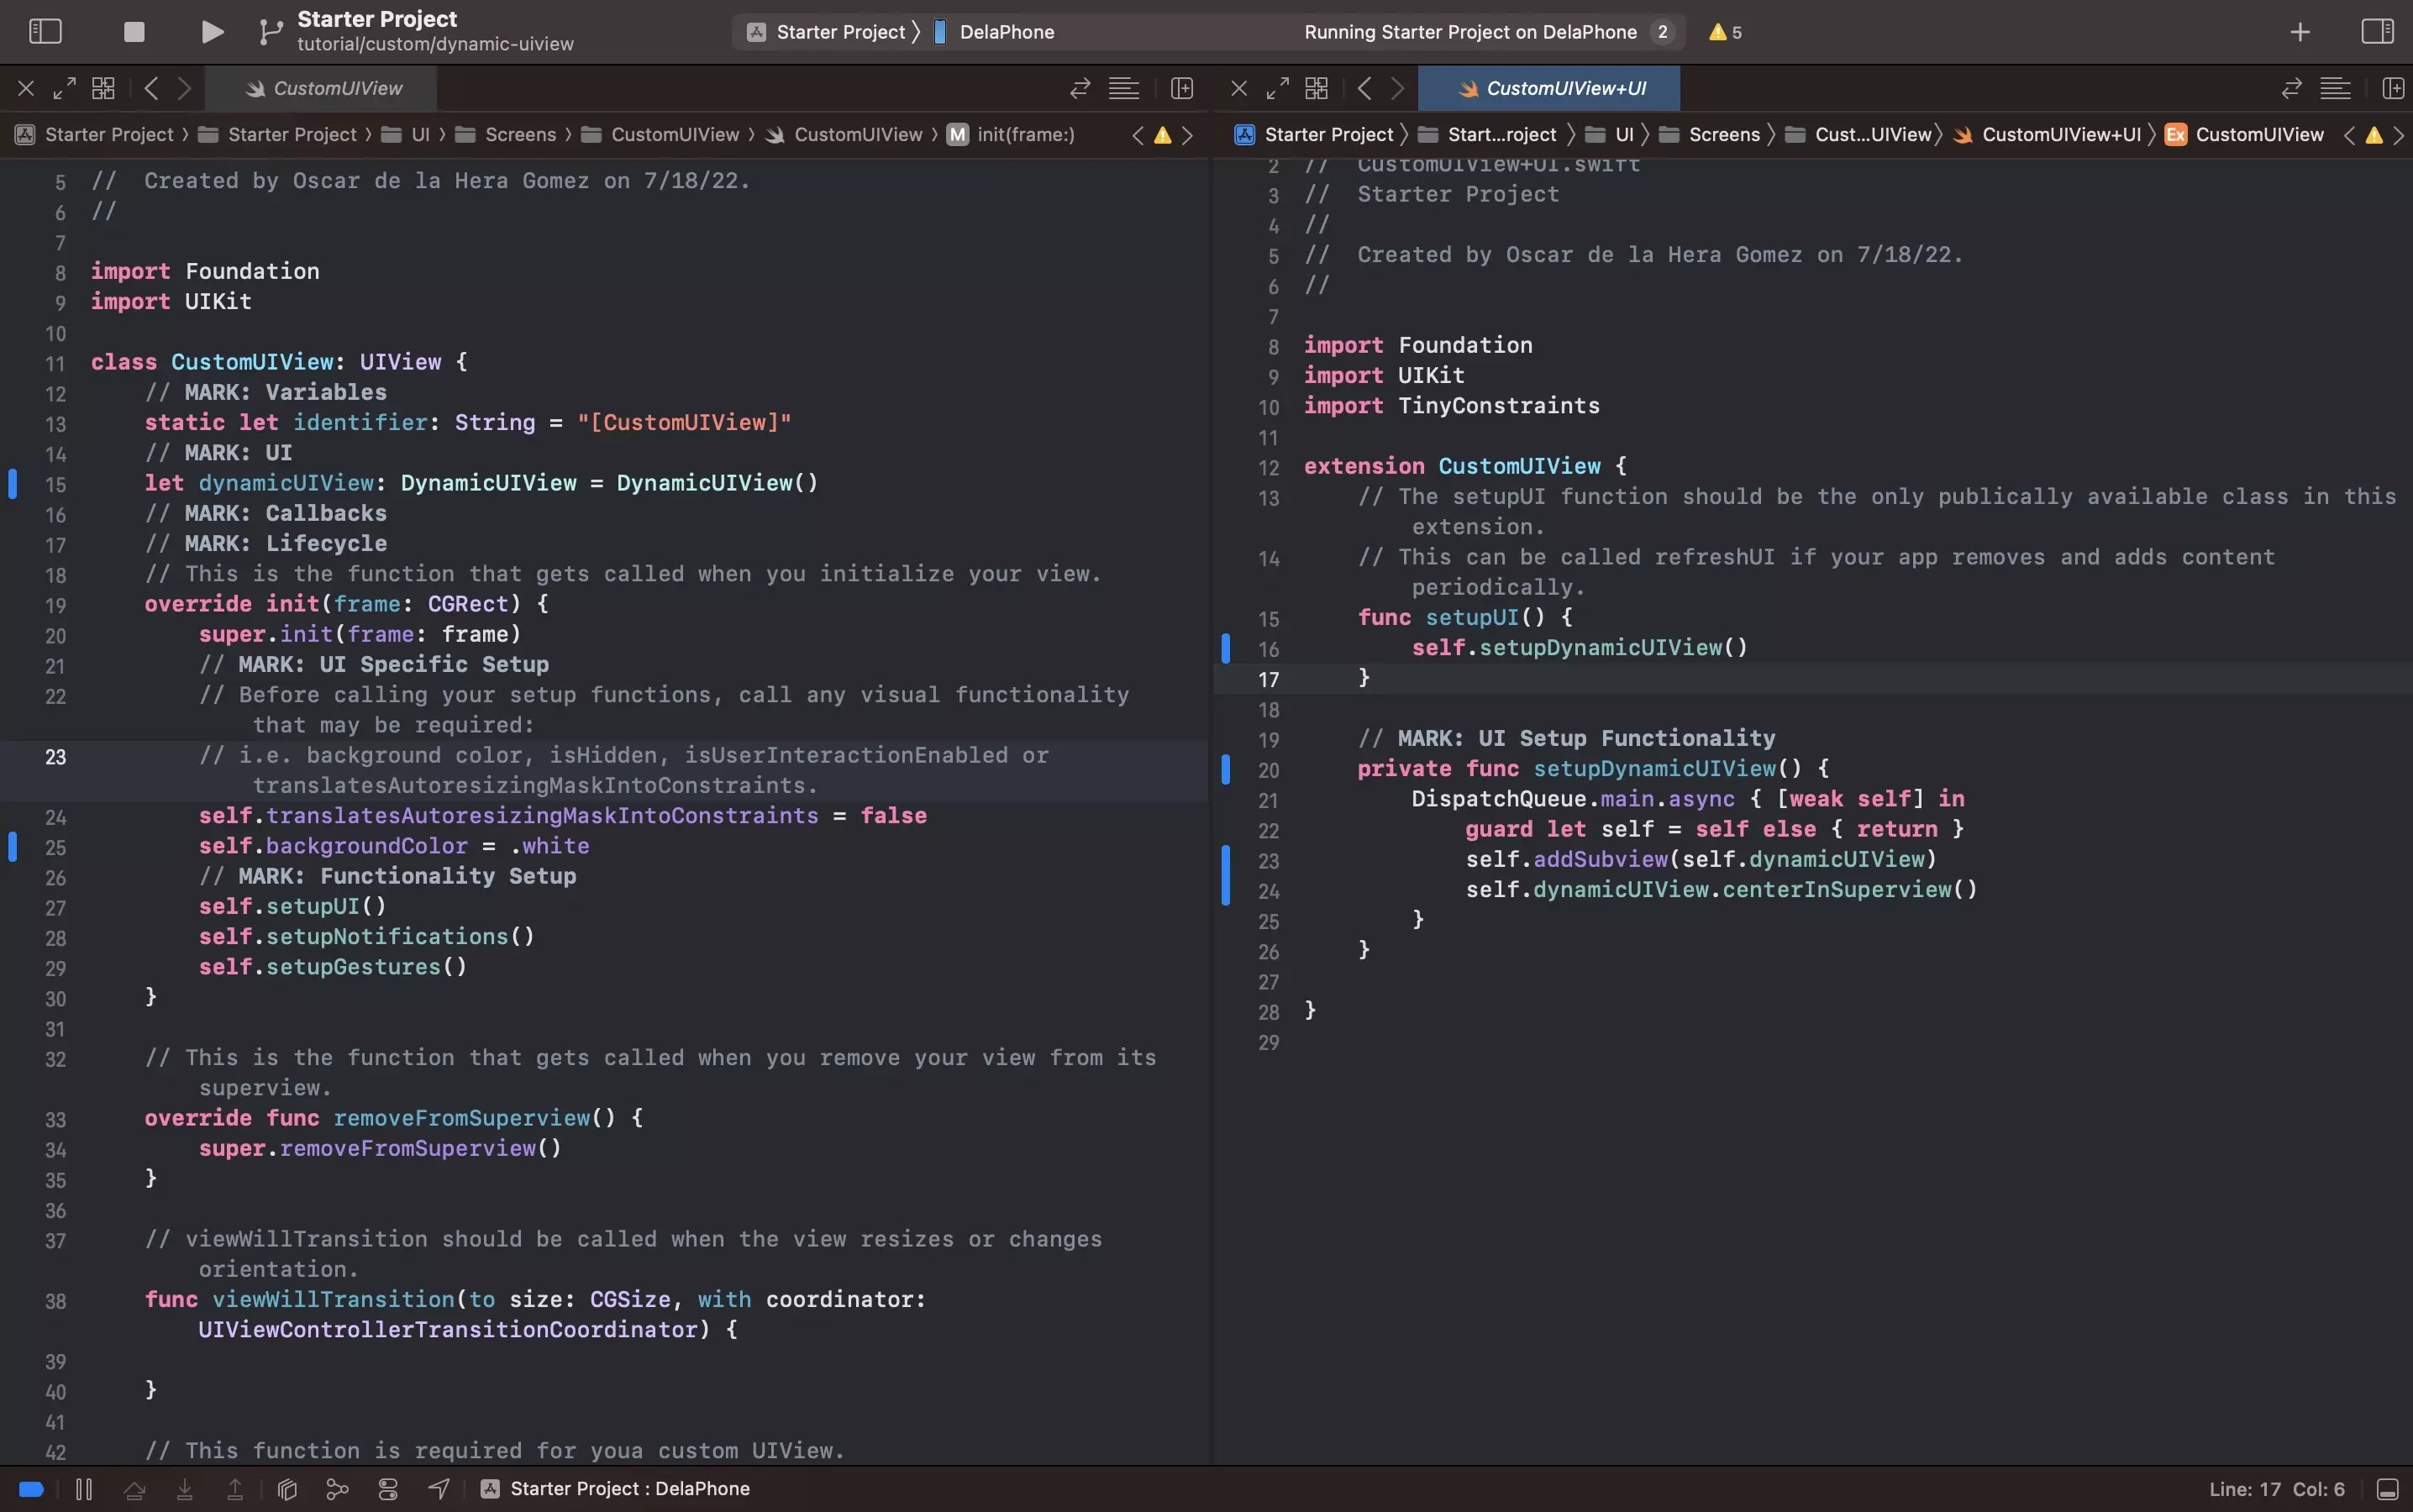
A | Declare the DynamicUIView
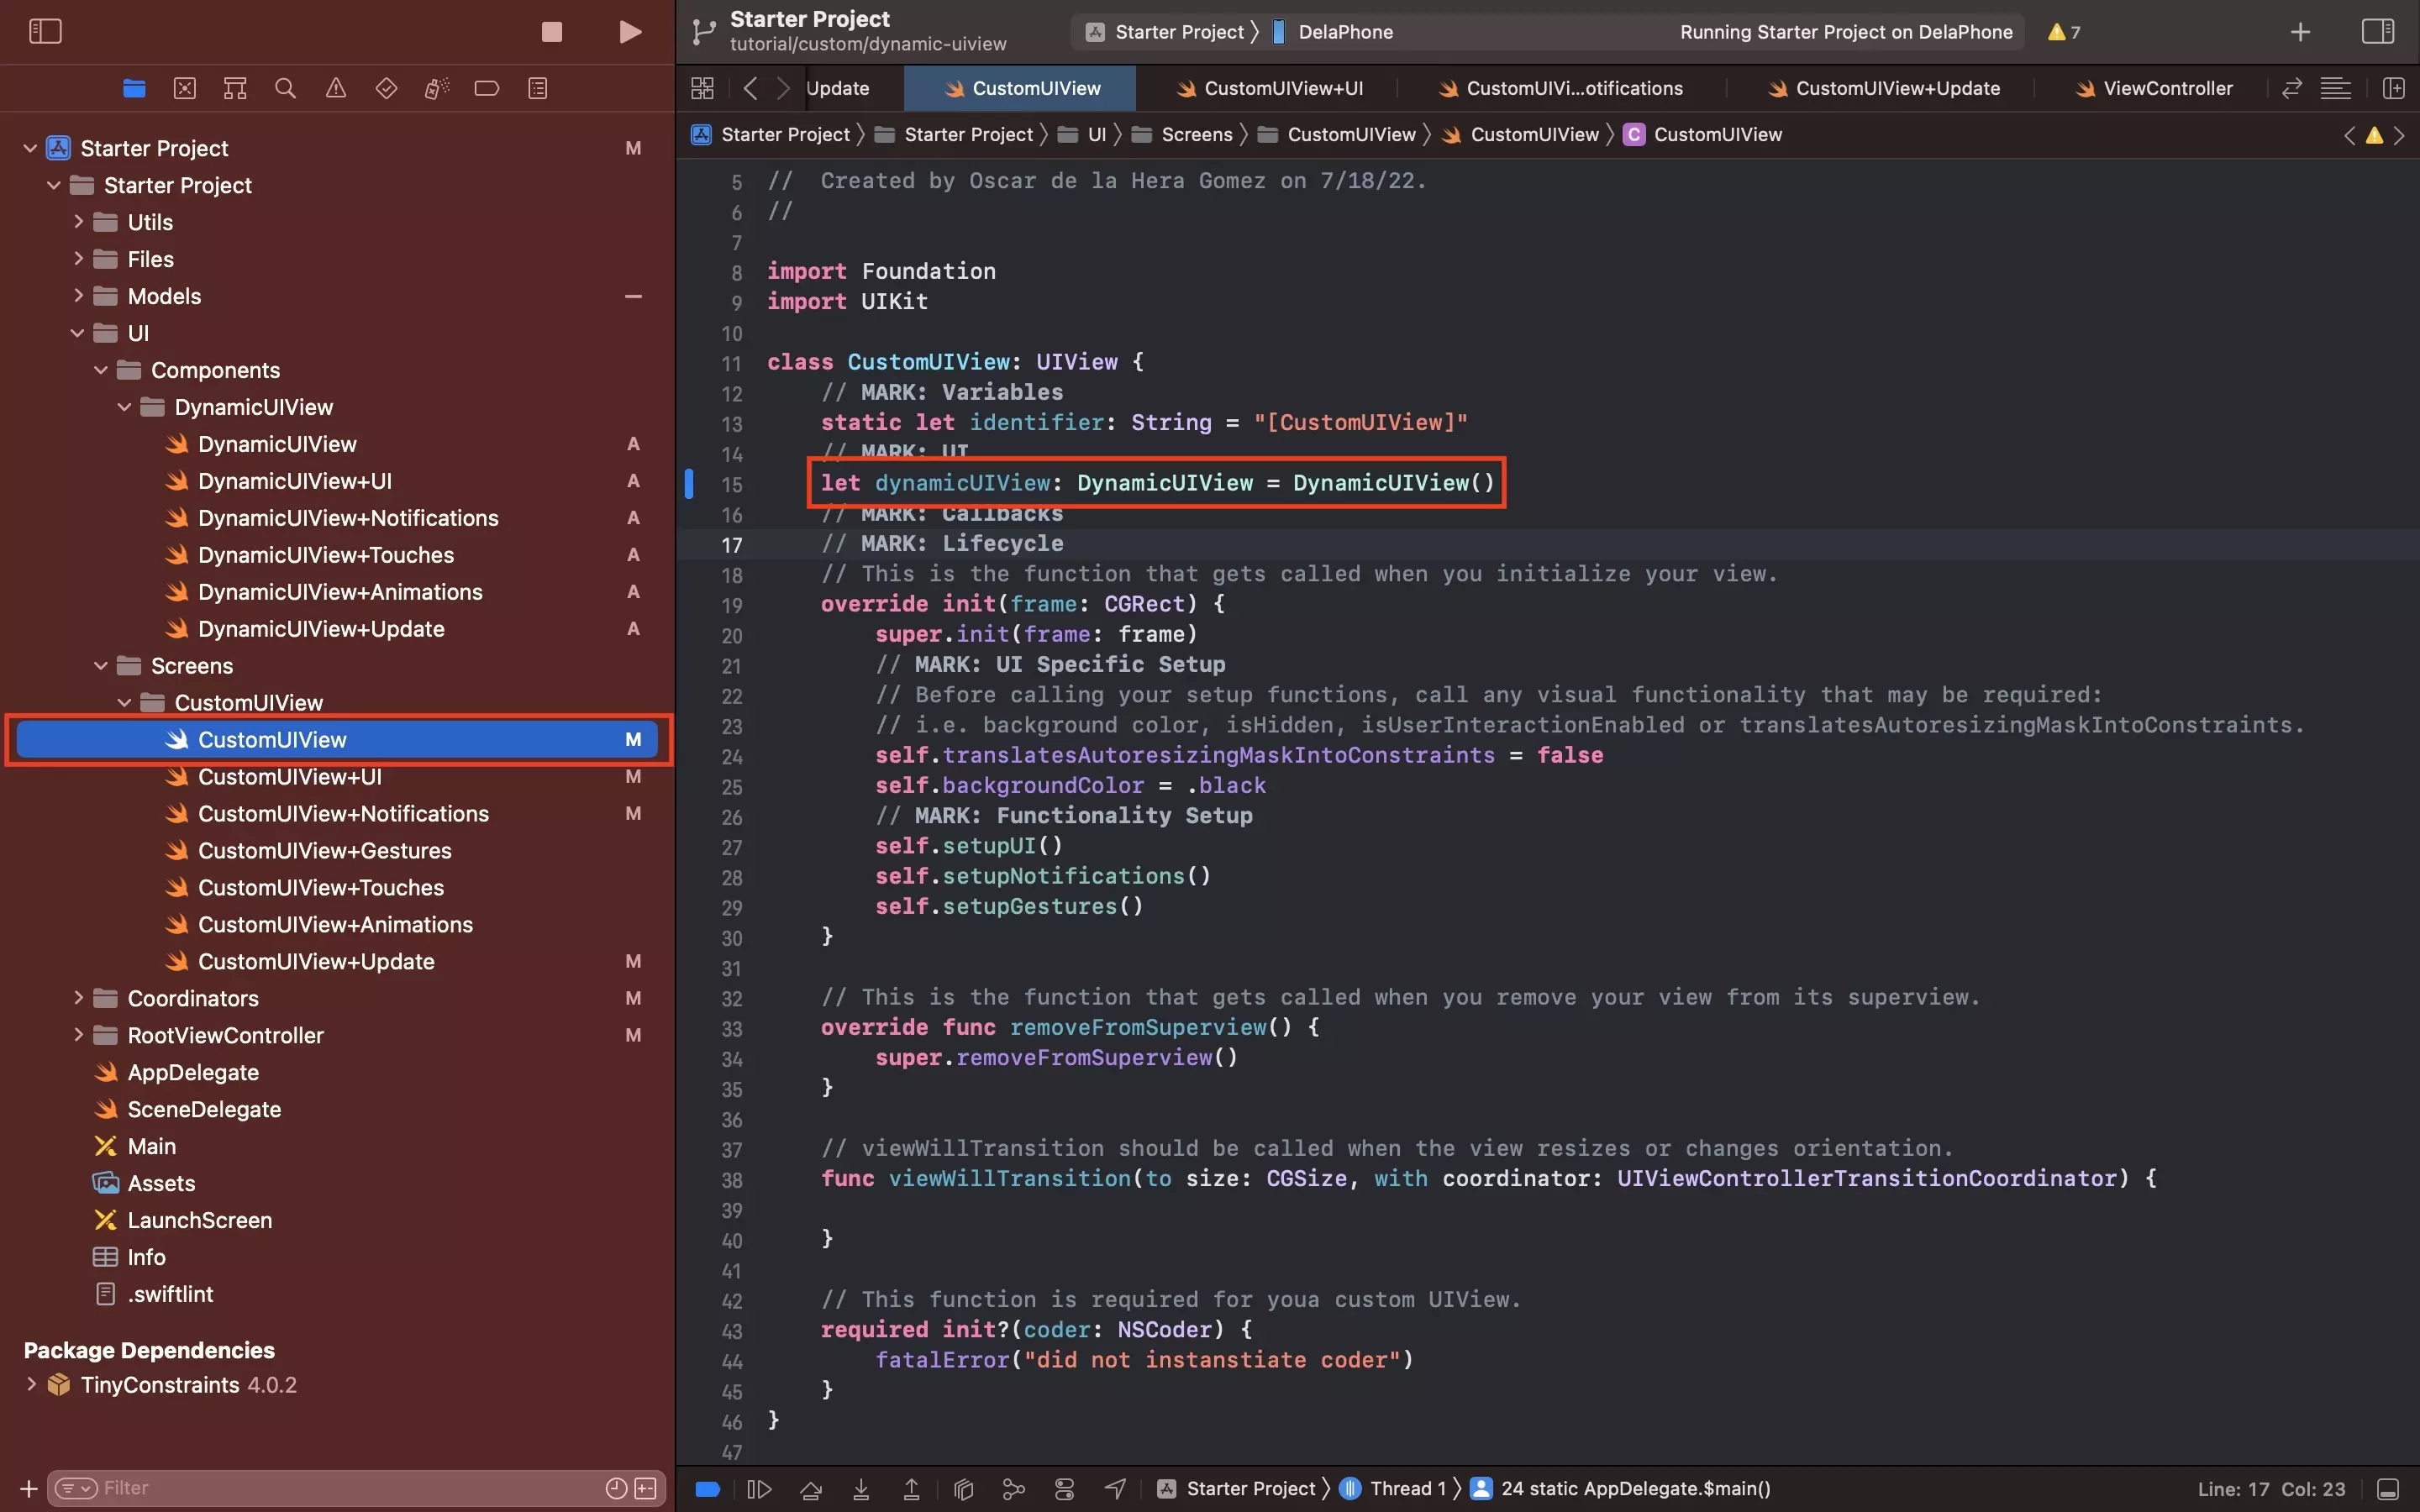
Under UI/Screens/CustomUIView, in the CustomUIView.swift file, declare the DynamicUIView.
B | Add the DynamicUIView
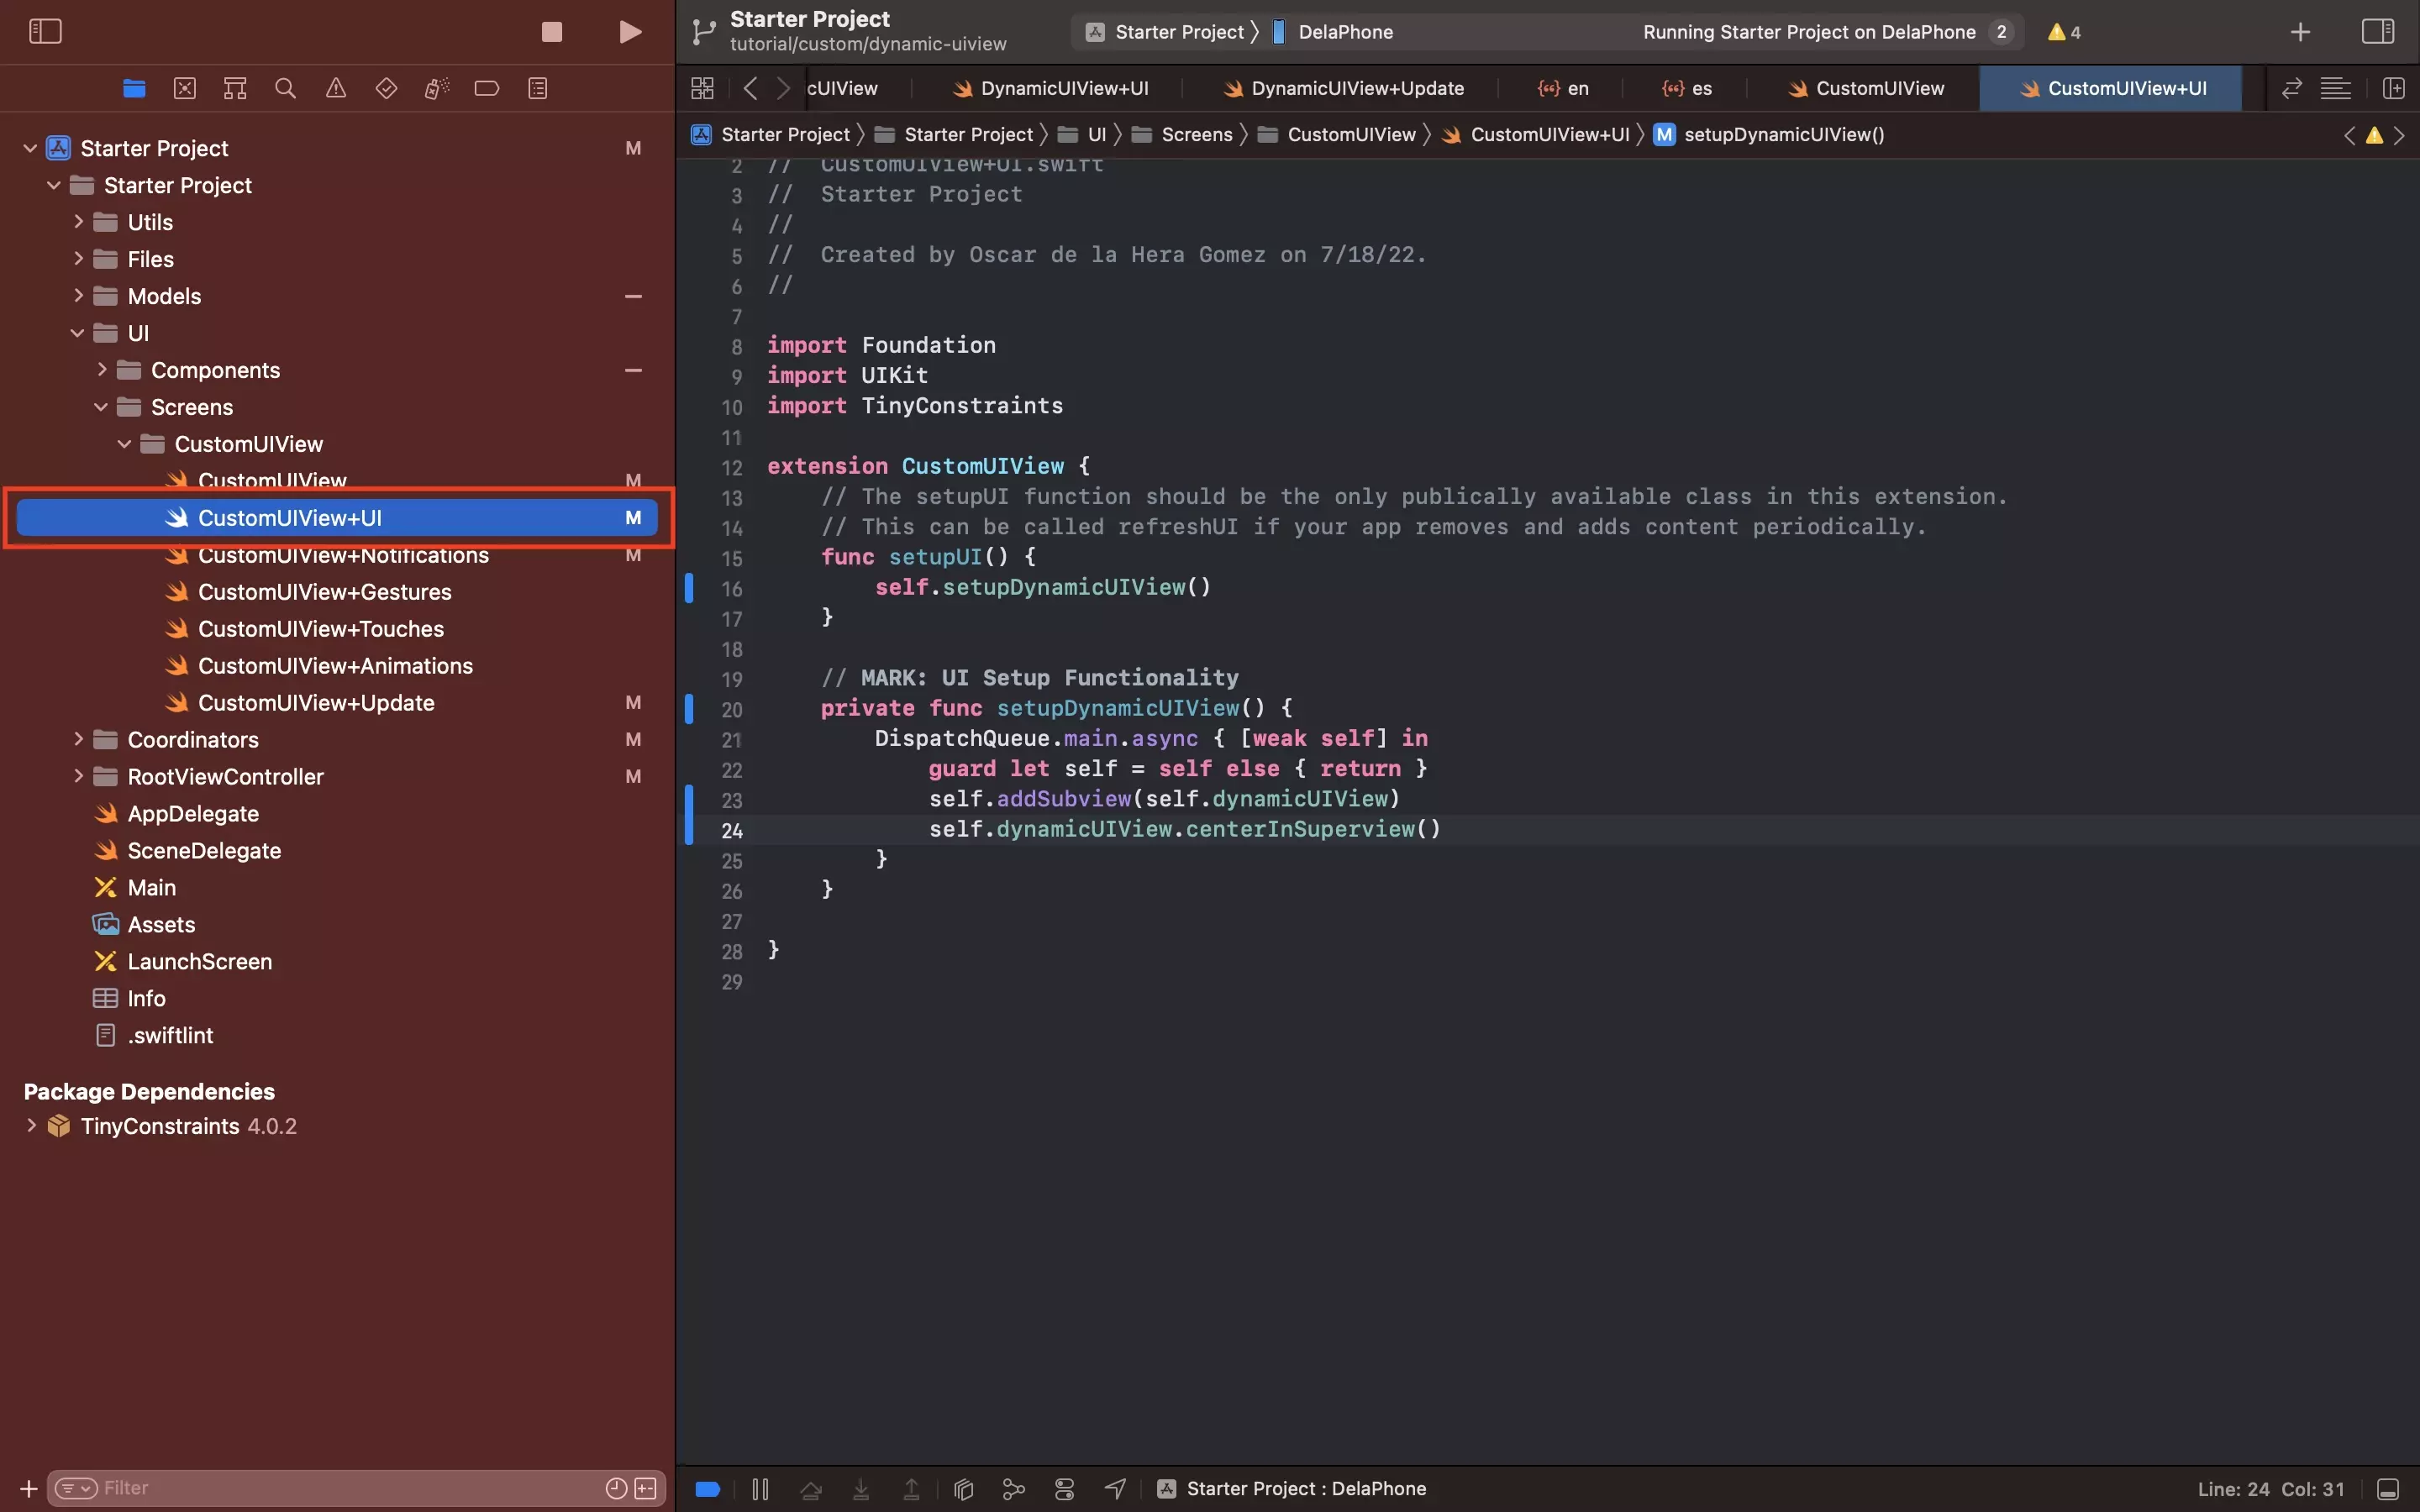
Under UI/Screens/CustomUIView, in the CustomUIView+UI.swift file, add the DynamicUIView to the CustomUIView.
Step Five: Verify
Run the app and tap the DynamicUIView to see how to alters size to fit the labels.