How to make a GraphQL API call in Swift
A step by step tutorial for making a GraphQL call in Swift (iOS) using XCode. Github repository included.

A step by step tutorial for making a GraphQL call in Swift (iOS) using XCode. Github repository included.
SubscribeThe following tutorial makes use of the free Pokemon API (PokeAPI), which is a free RESTful Pokémon API, that uses GraphQL to process requests. The tutorial gathers GraphQL data using this API and print it on the Xcode console.
The tutorial builds on our Open Source starter project and starts at the main branch. All the changes are found in the tutorial/graphql/api branch.
Please note that although we wished to provide a custom solution, we have discovered that the best way to use the GraphQL using Swift is via the Apollo Swift Package Manager (v1.5.2).
Tutorial
We recommend downloading our Open Source project, checking out the main branch and carrying out the steps outlined below. All relevant changes are found in the tutorial/graphql/api branch.
git clone git@github.com:delasign/swift-starter-project.gitStep One: Determine your API & Query
Before starting, make sure that you have noted down the API that you will use for your GraphQL call.
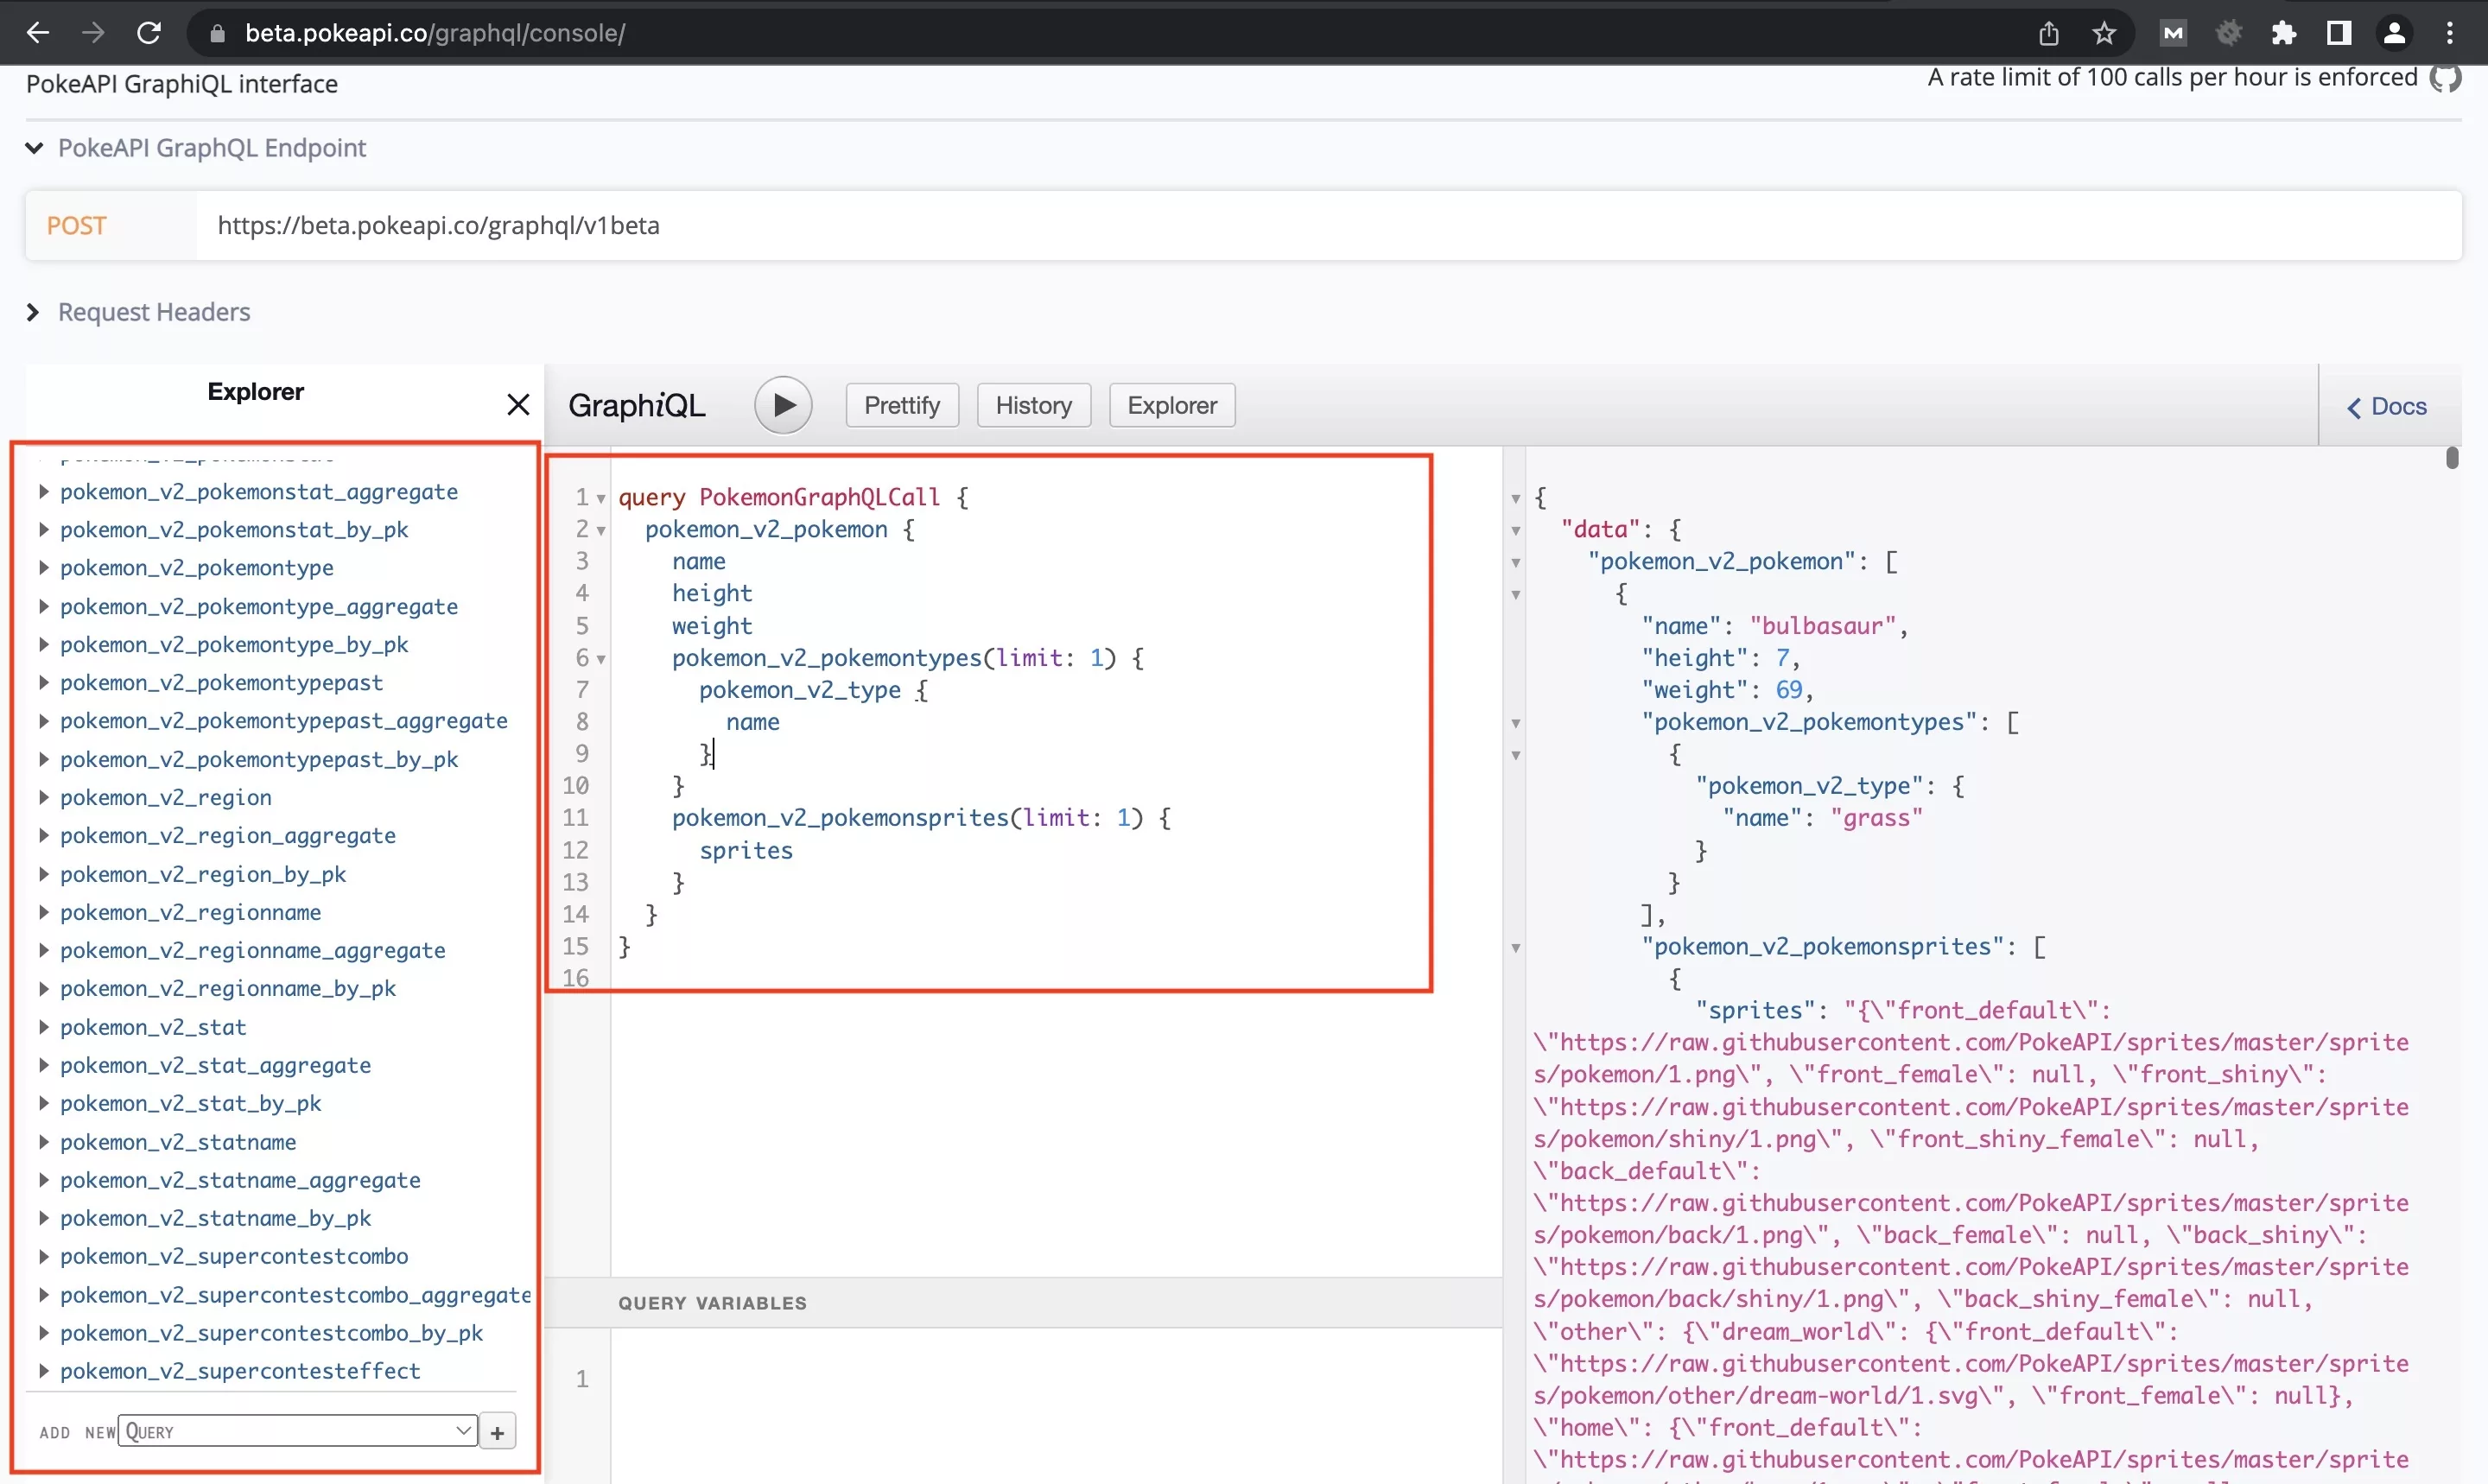
For this tutorial we will use the sample GraphQL query found below along with the free Pokemon API (PokeAPI).
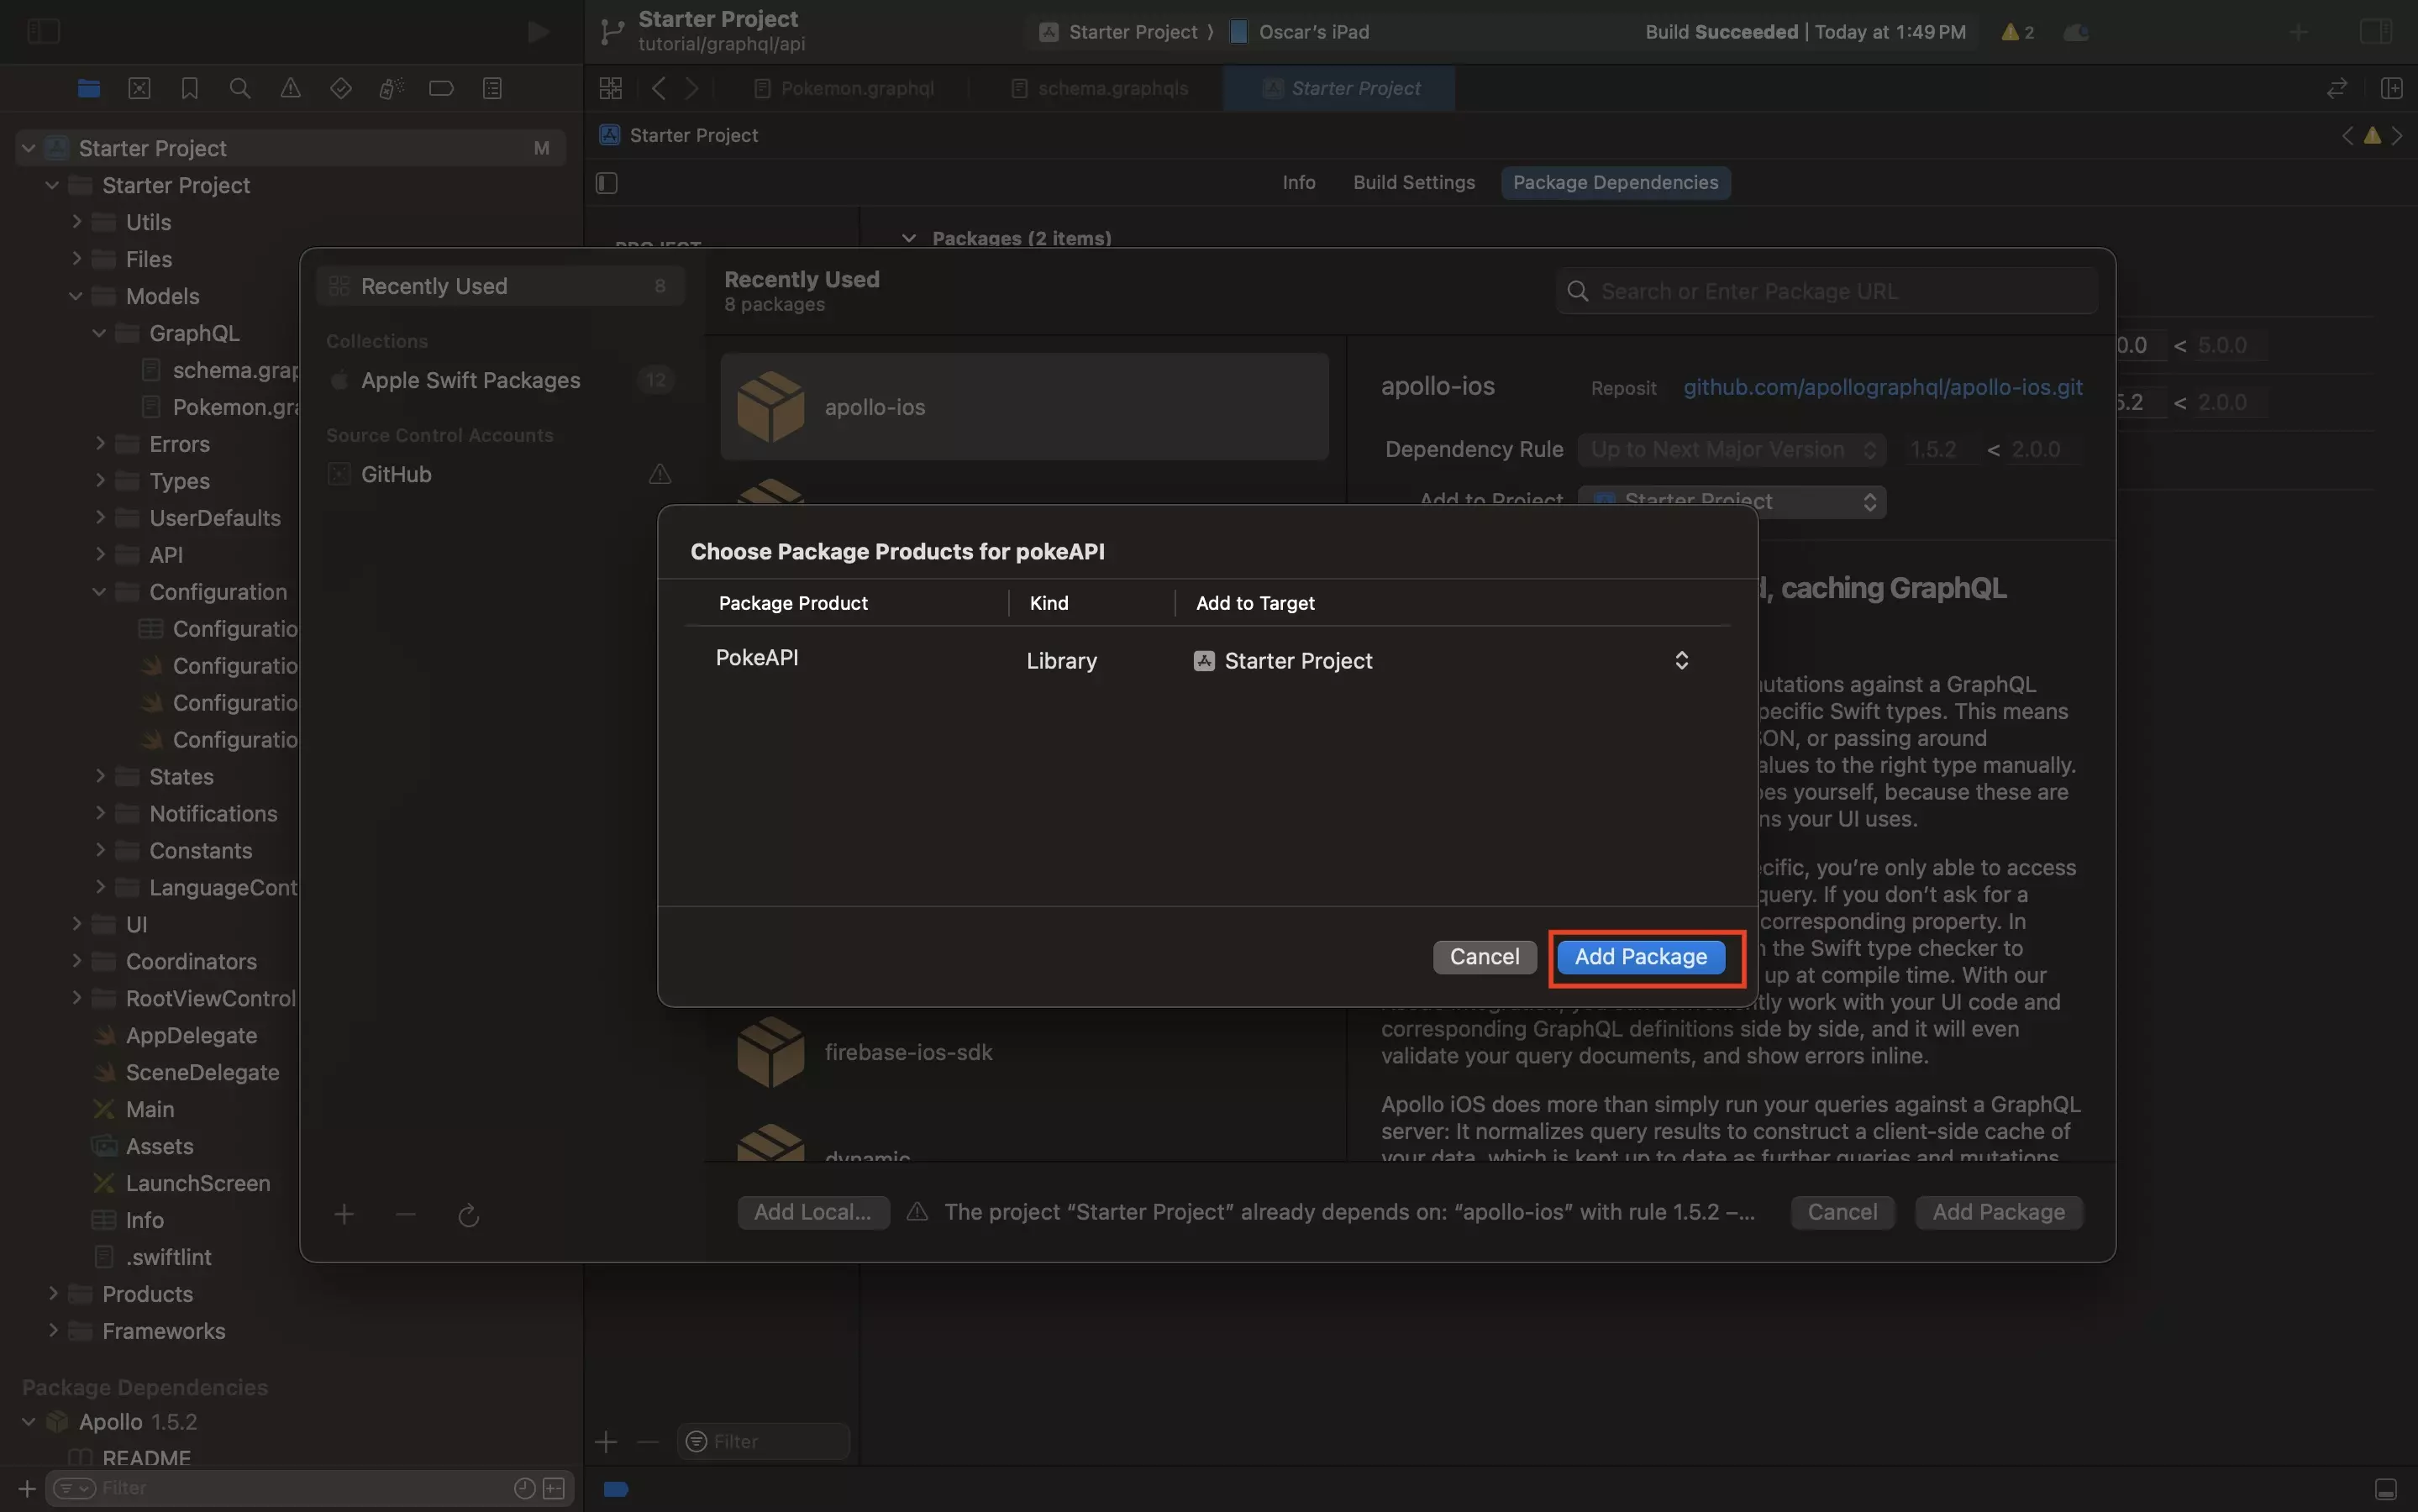
Step Two: Add the Apollo Swift Package
Apollo iOS is an open-source GraphQL client for native iOS apps, written in Swift. It enables you to execute queries and mutations against a GraphQL server and returns results as operation-specific Swift types.
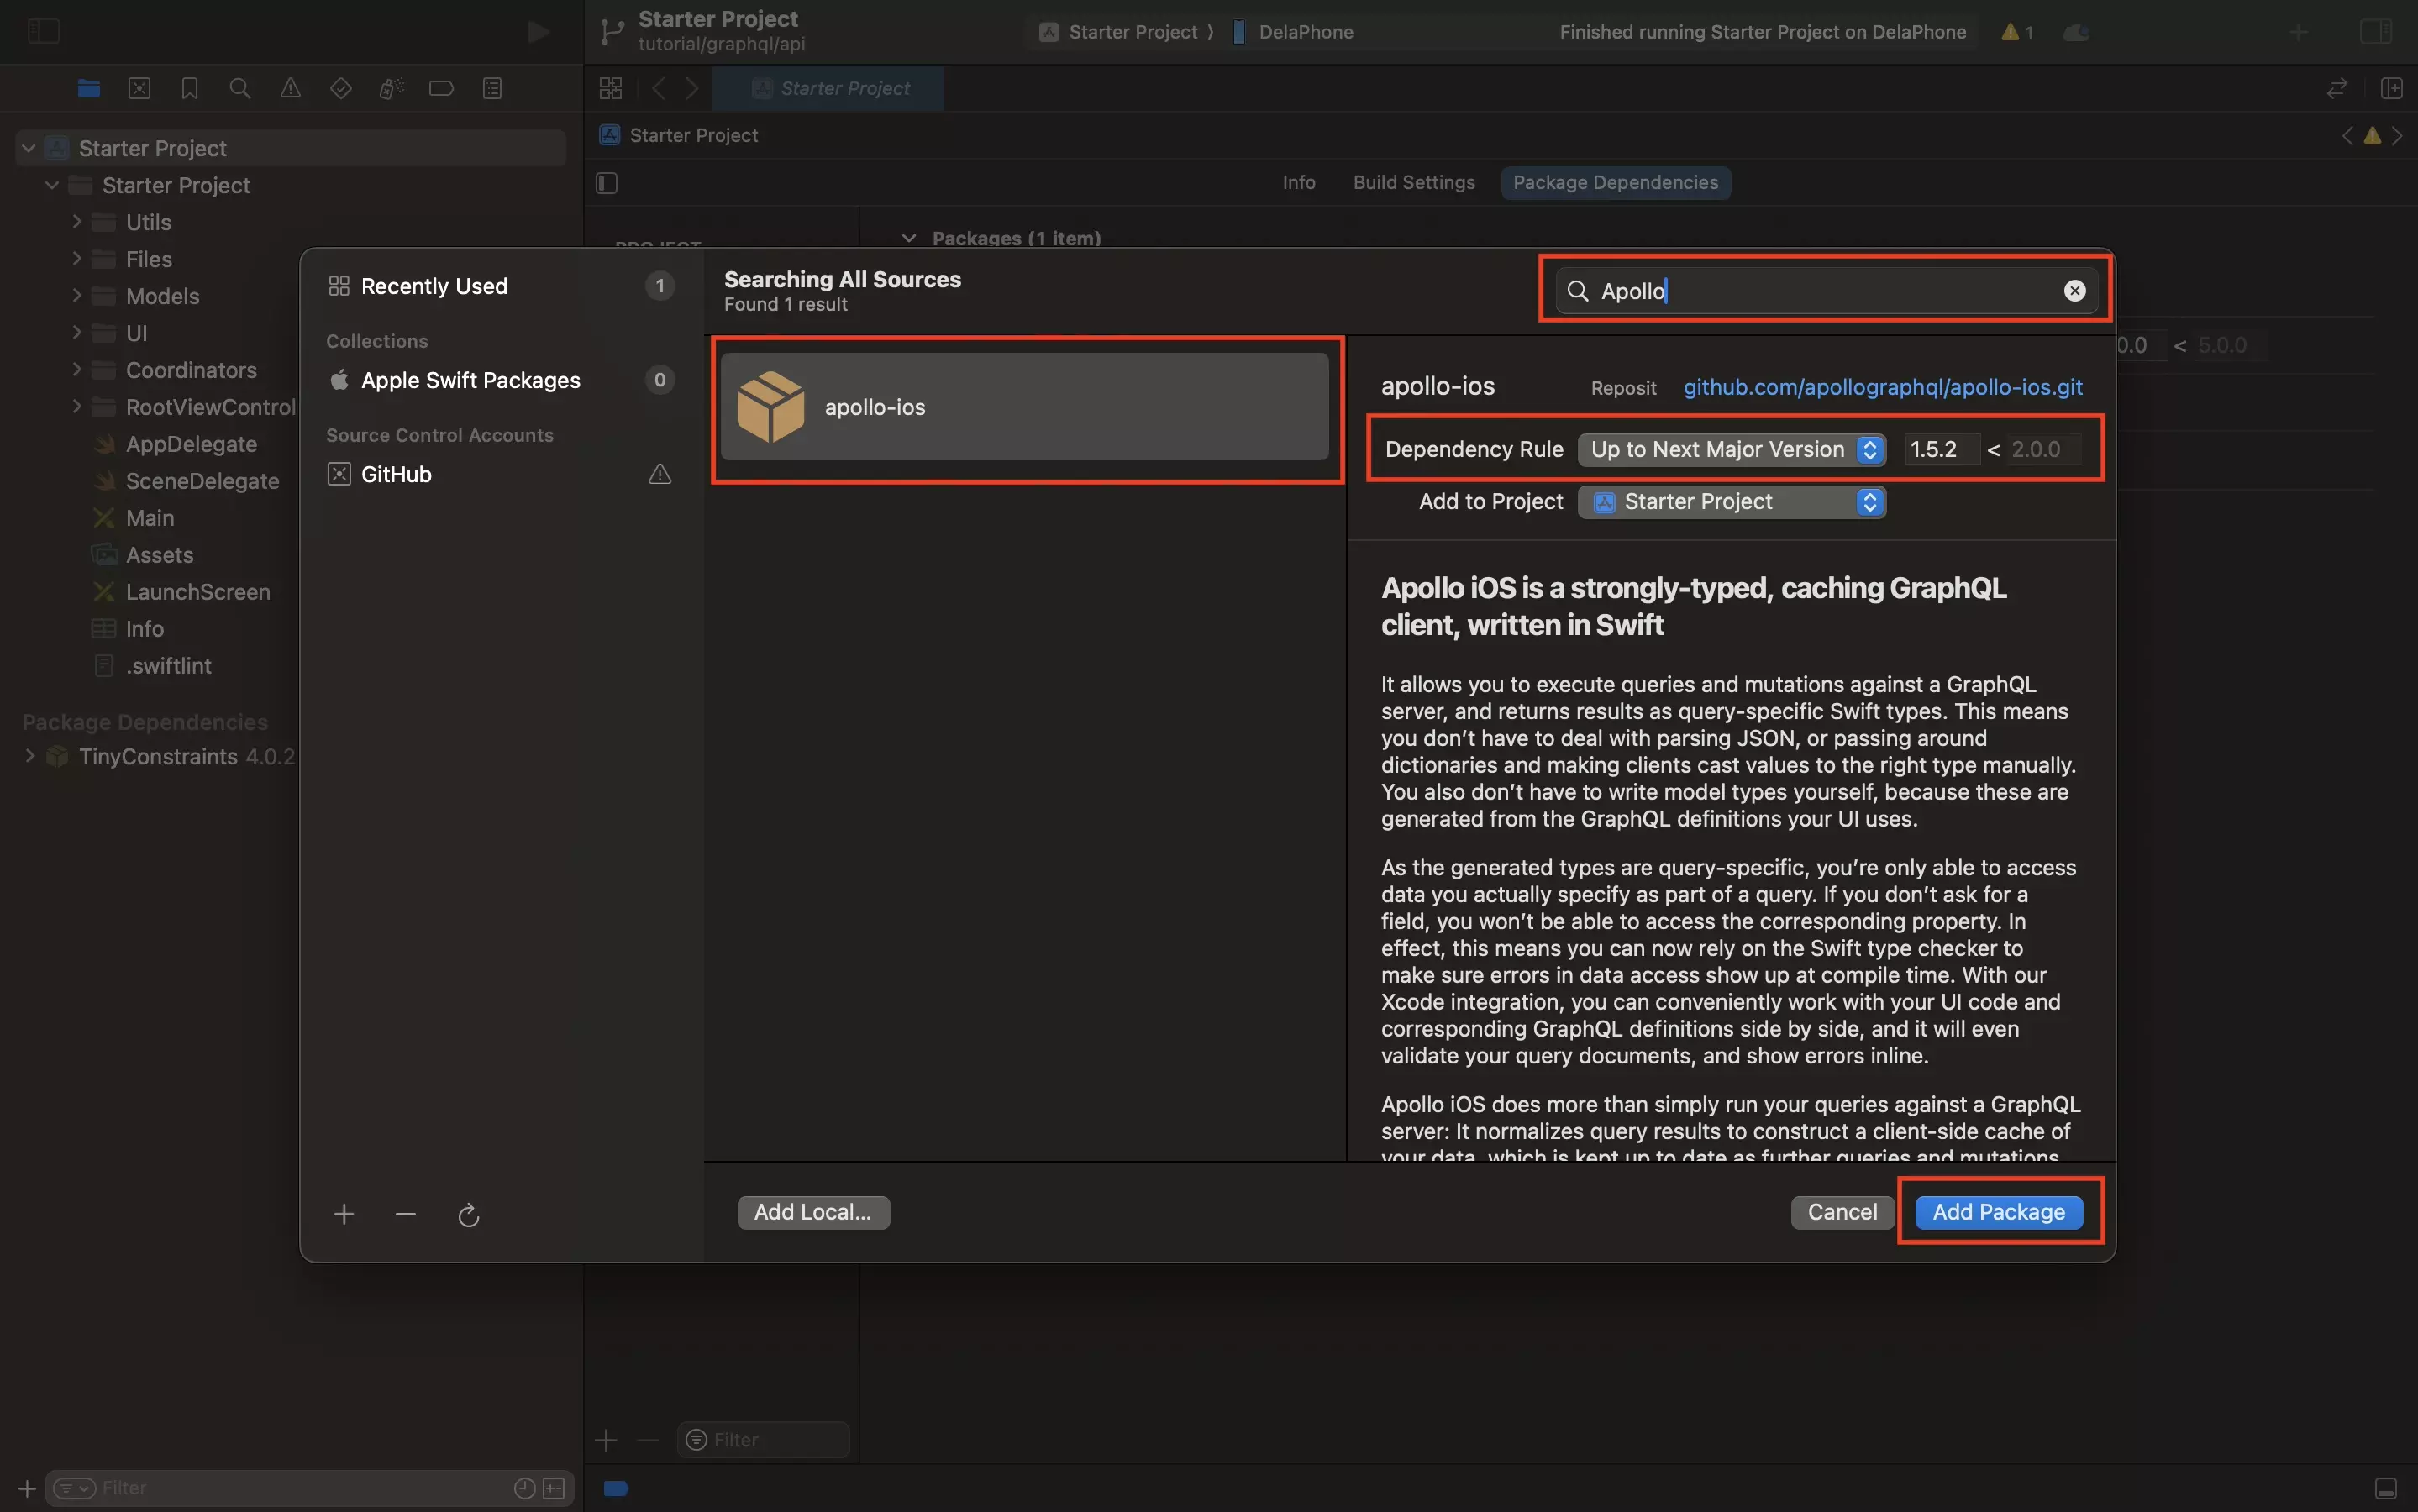
Add the Apollo Swift Package using the Github link below:
https://github.com/apollographql/apollo-ios.git
In the window that appears make sure that you select:
- Package: apollo-ios
- Dependency Rule: Up to Next Minor Version with version 1.5.2

In the modal that appears, click Add Package.
If you are confused as to how one can add a Swift Package to their project, please follow our step by step guide on adding packages through the Swift Package Manager using the link below.
Step Three: Remove Unnecessary Libraries
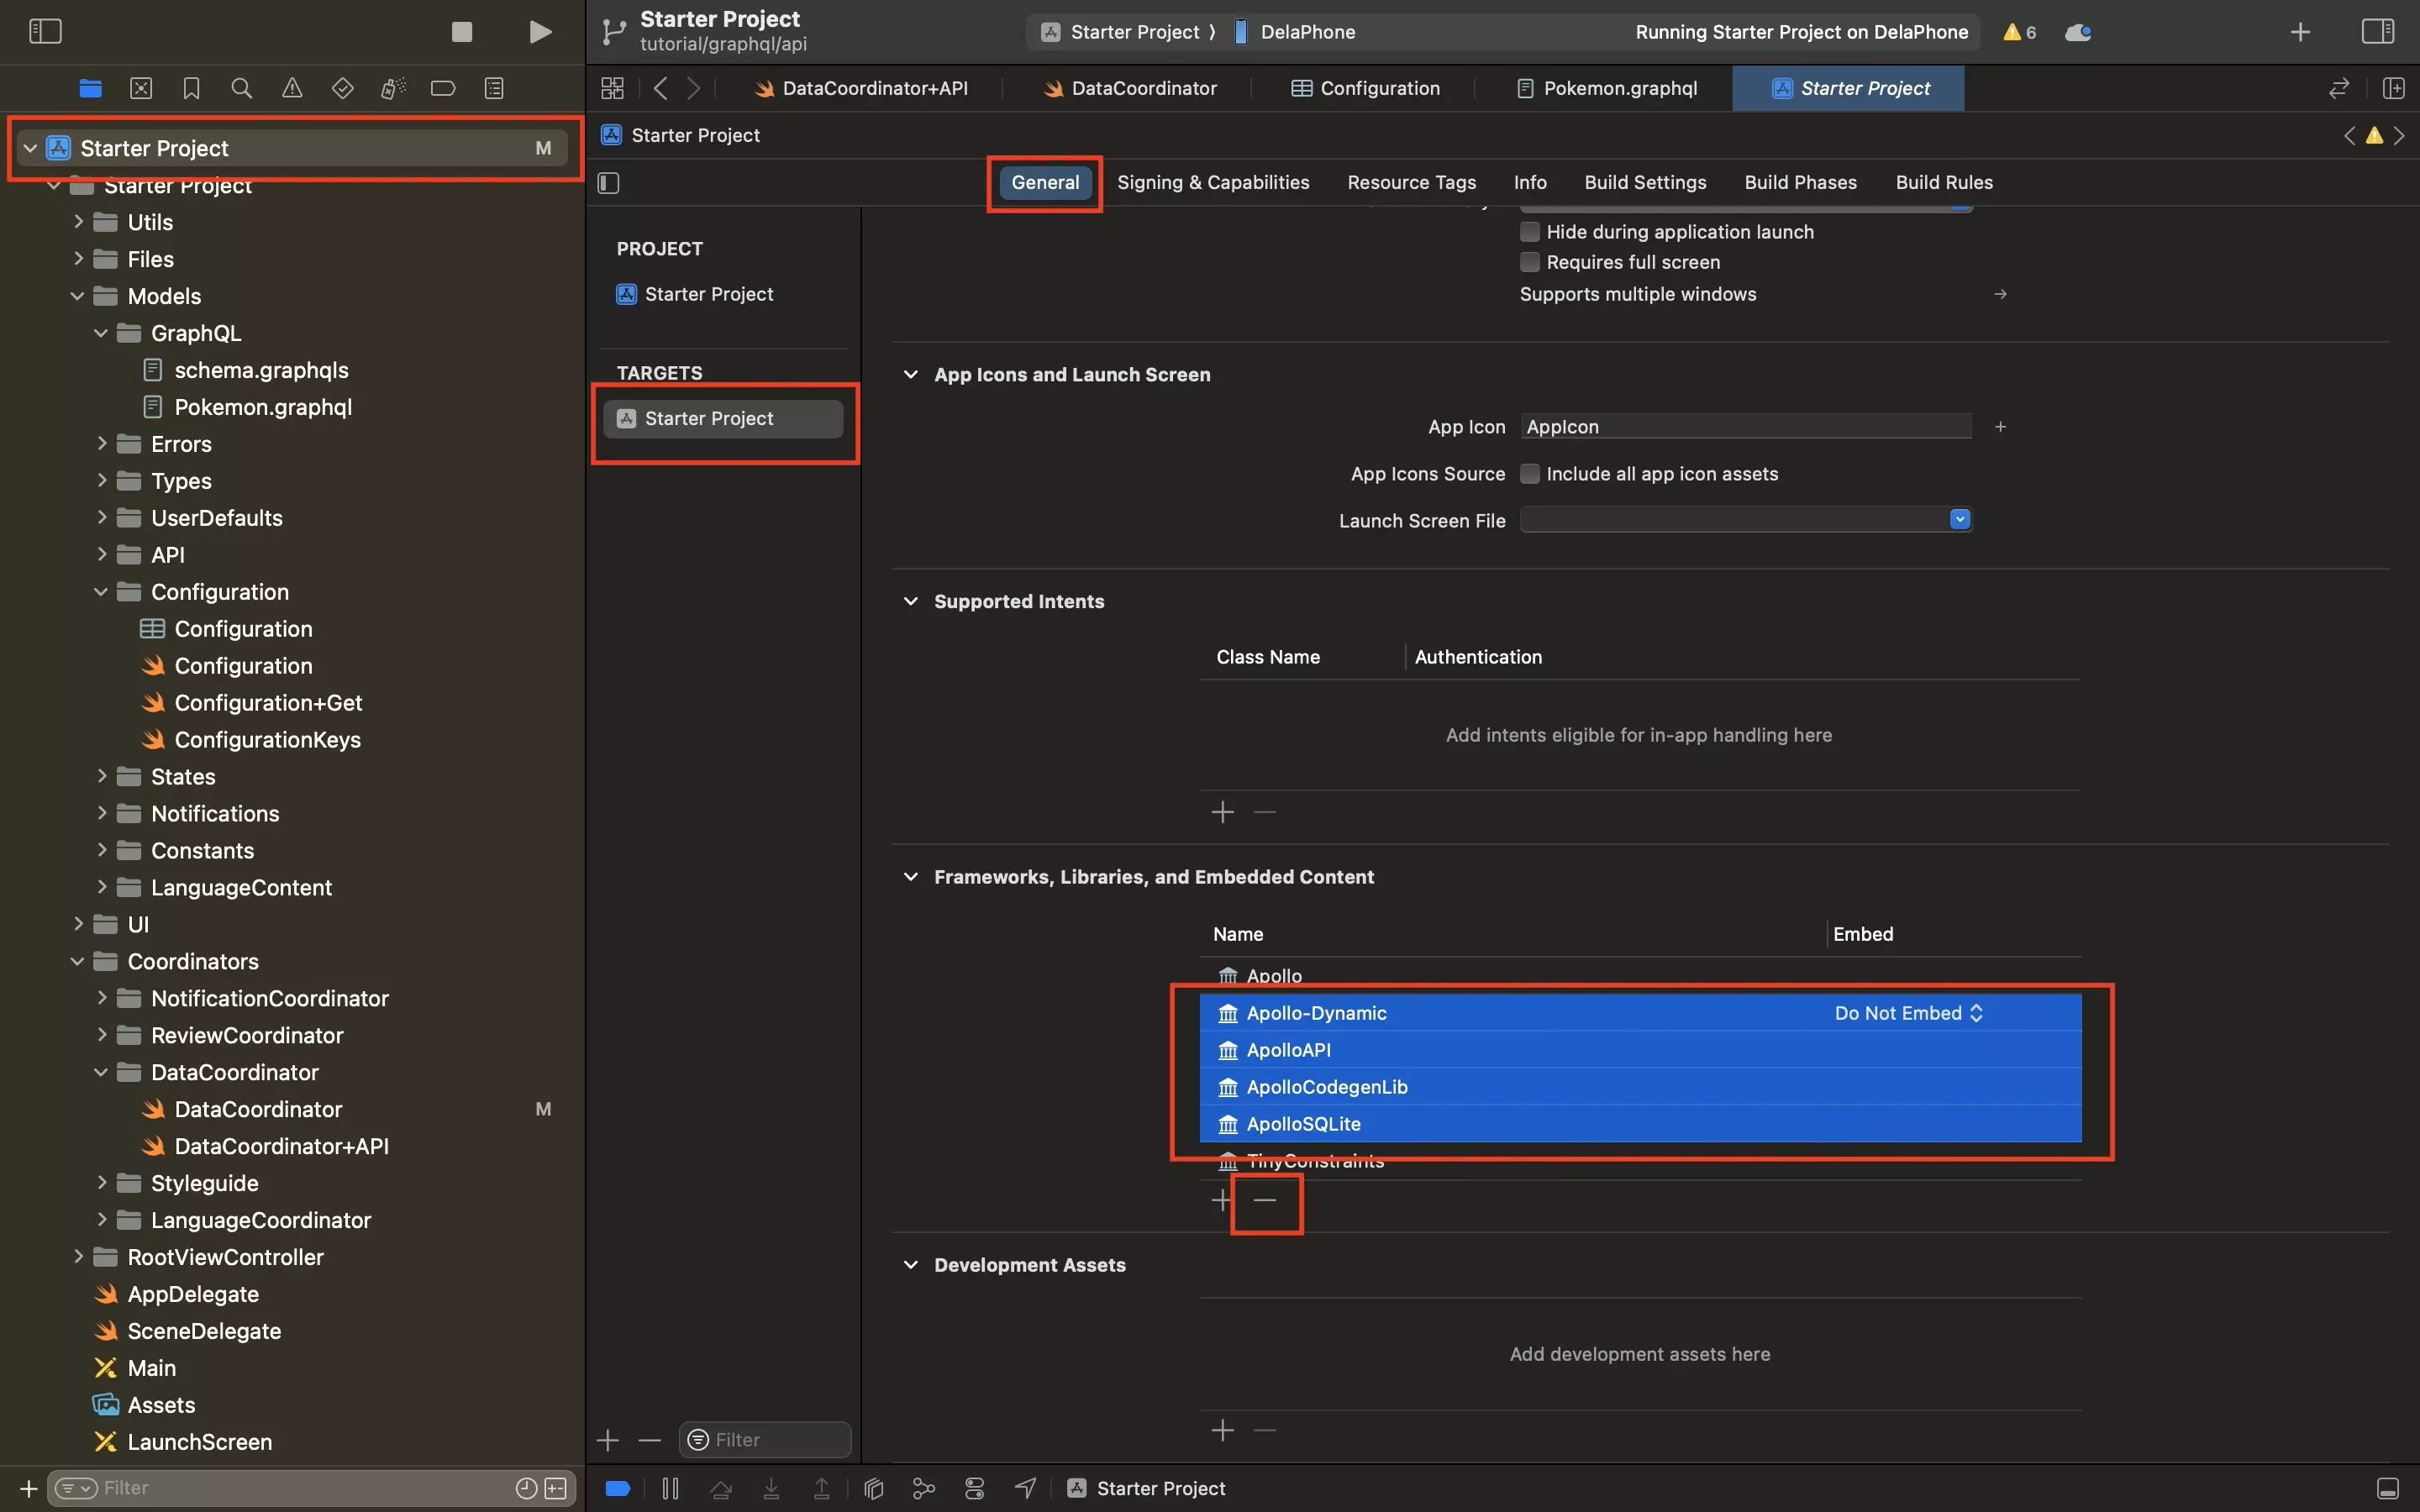
In the Projects settings, select the Target (i.e. Starter Project) and in the General tab find the Frameworks, Libraries and Embedded Content area.
In this table, select all the Apollo libraries, except the actual Apollo library, that were added by the Swift Package Manager and remove them by pressing "-."
This step is required as all the other libraries are not required for your project to run and will cause build errors.
Step Four: Clean the Project
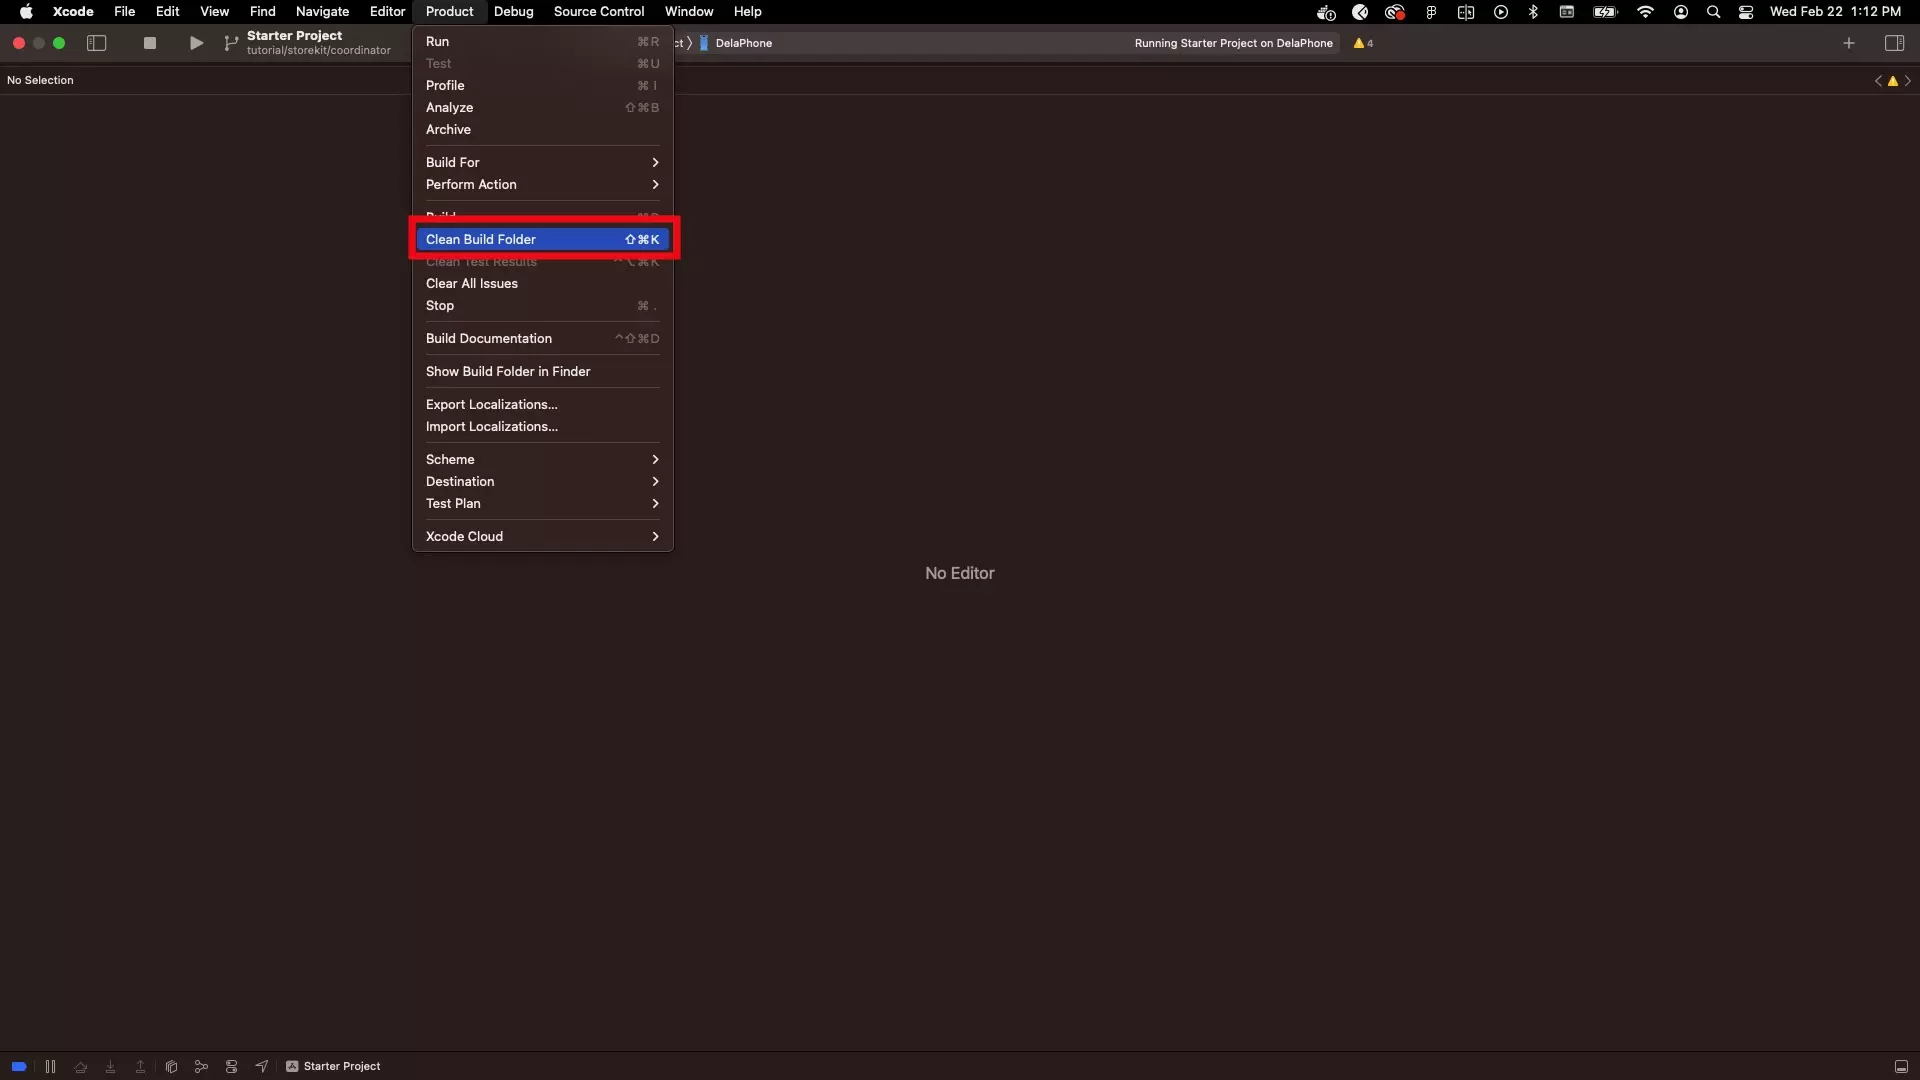
Clean the project to remove any issues pertaining to Apollo libraries that were not necessary.
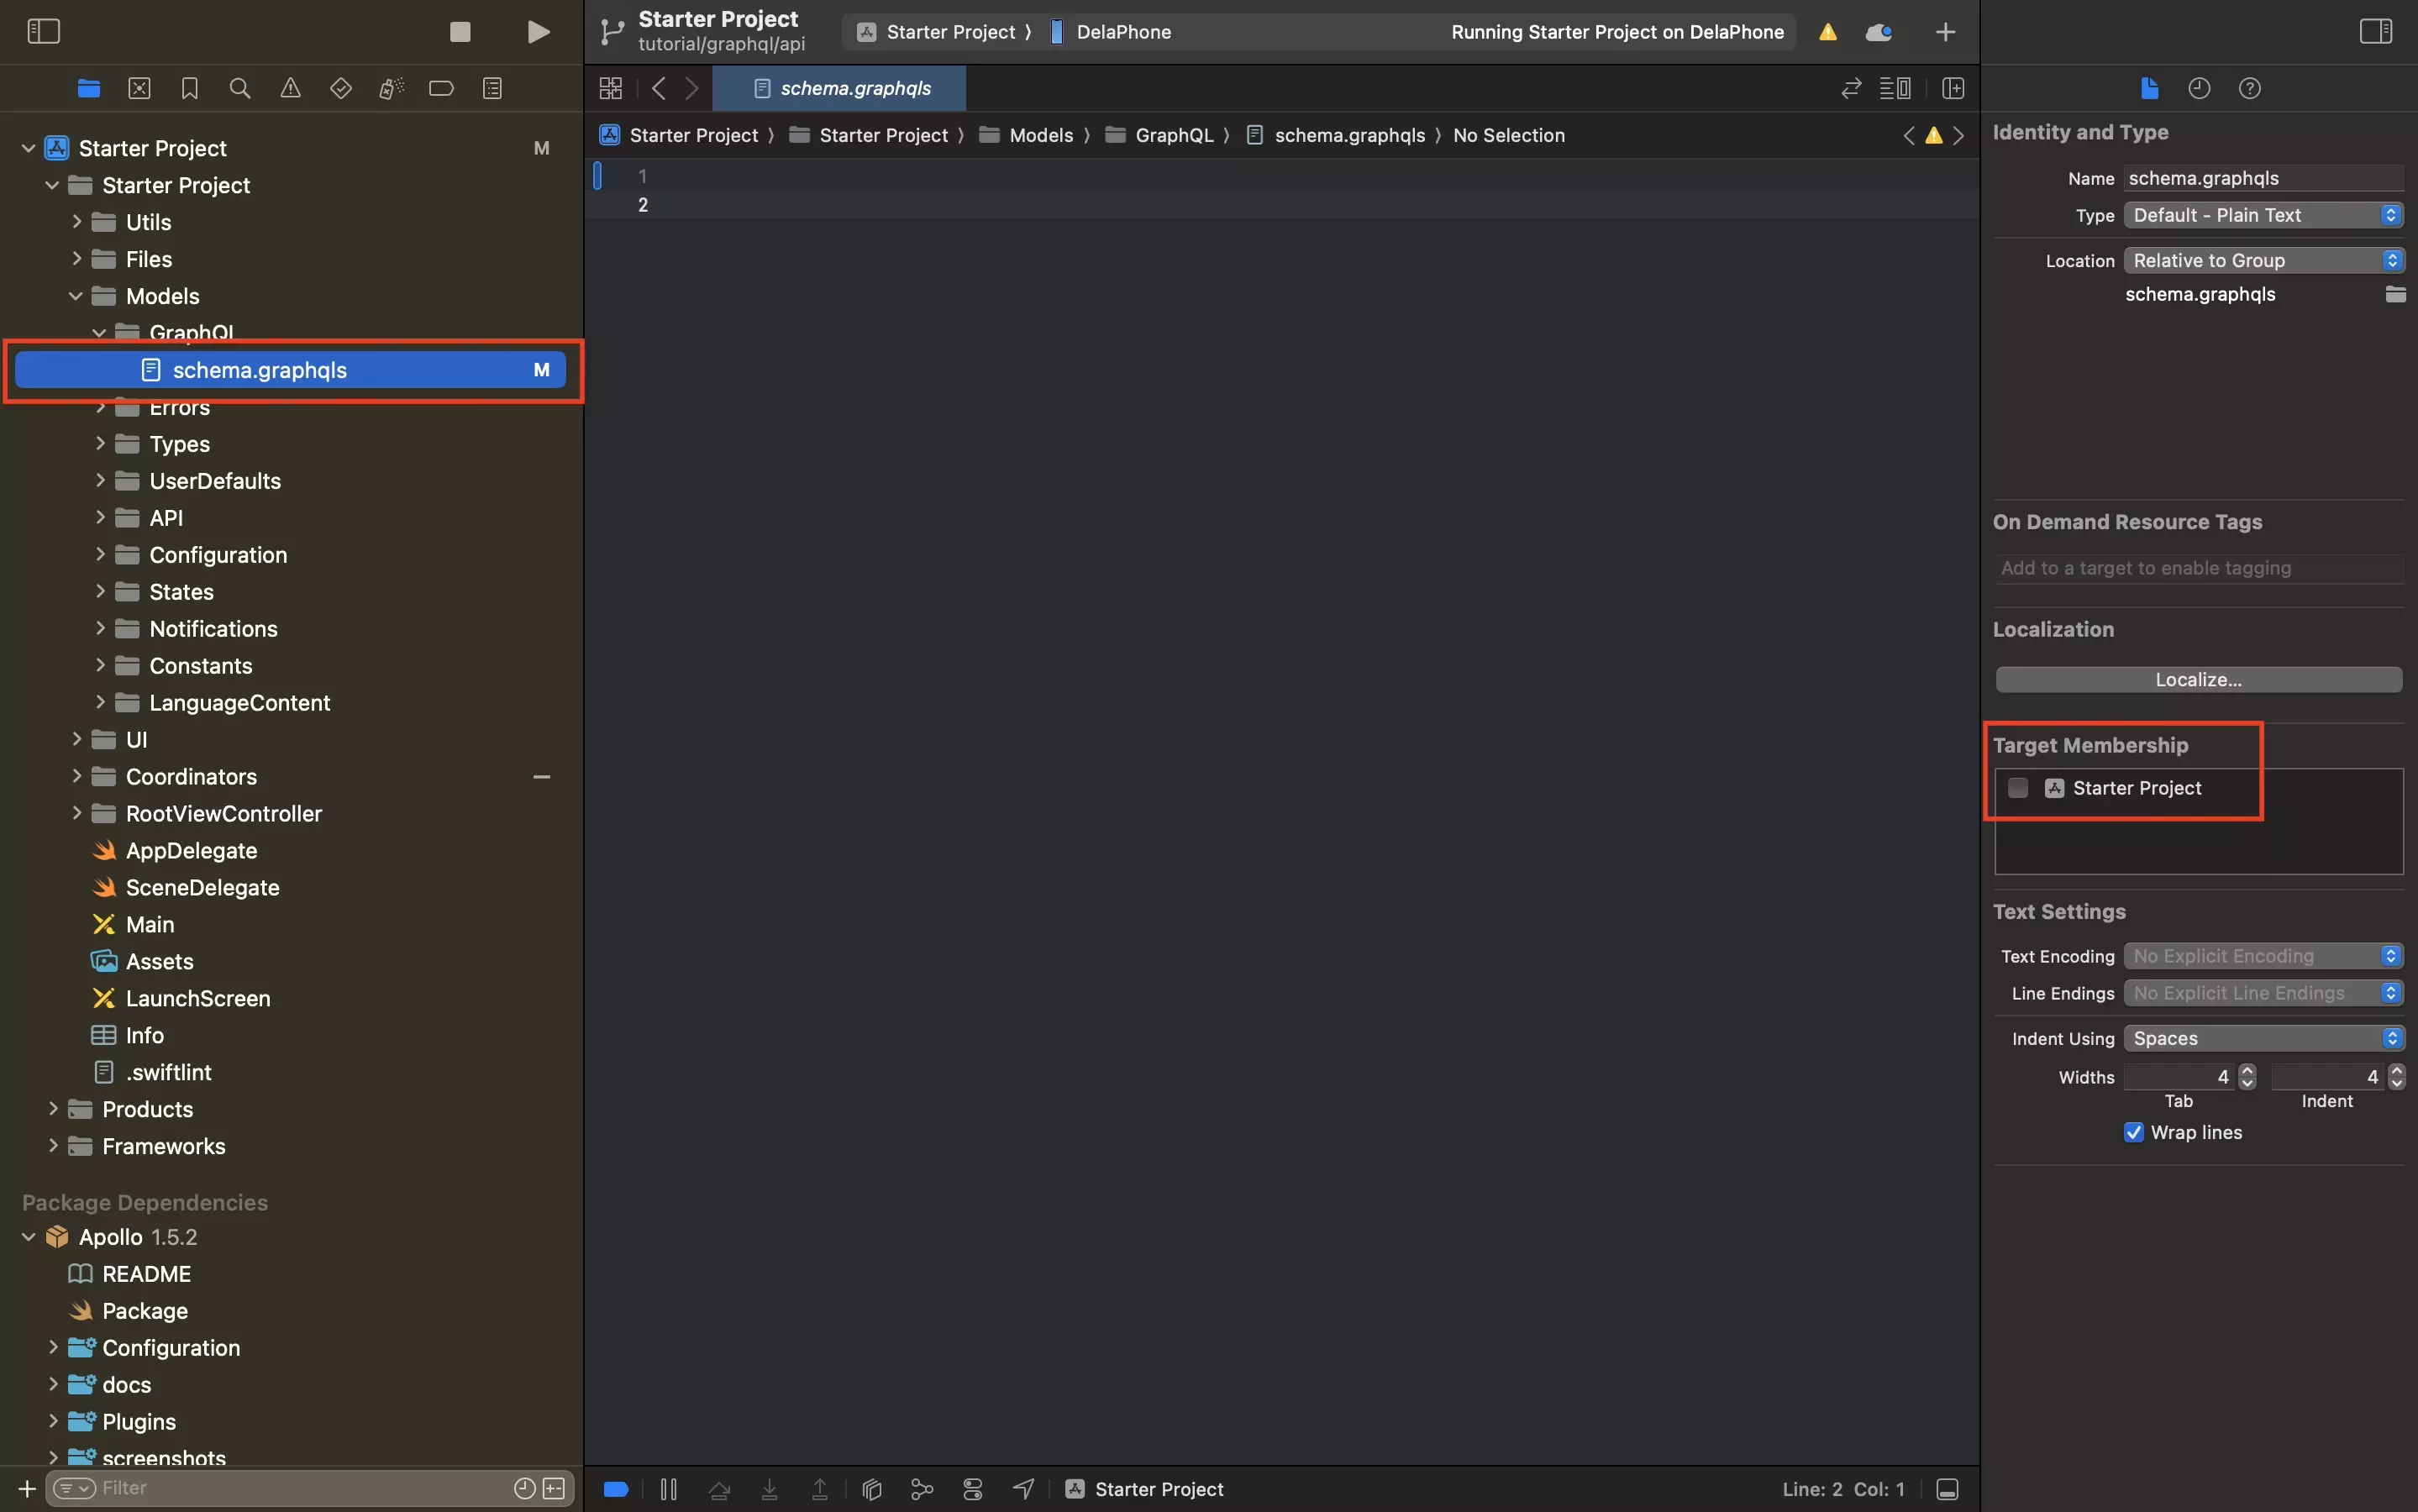
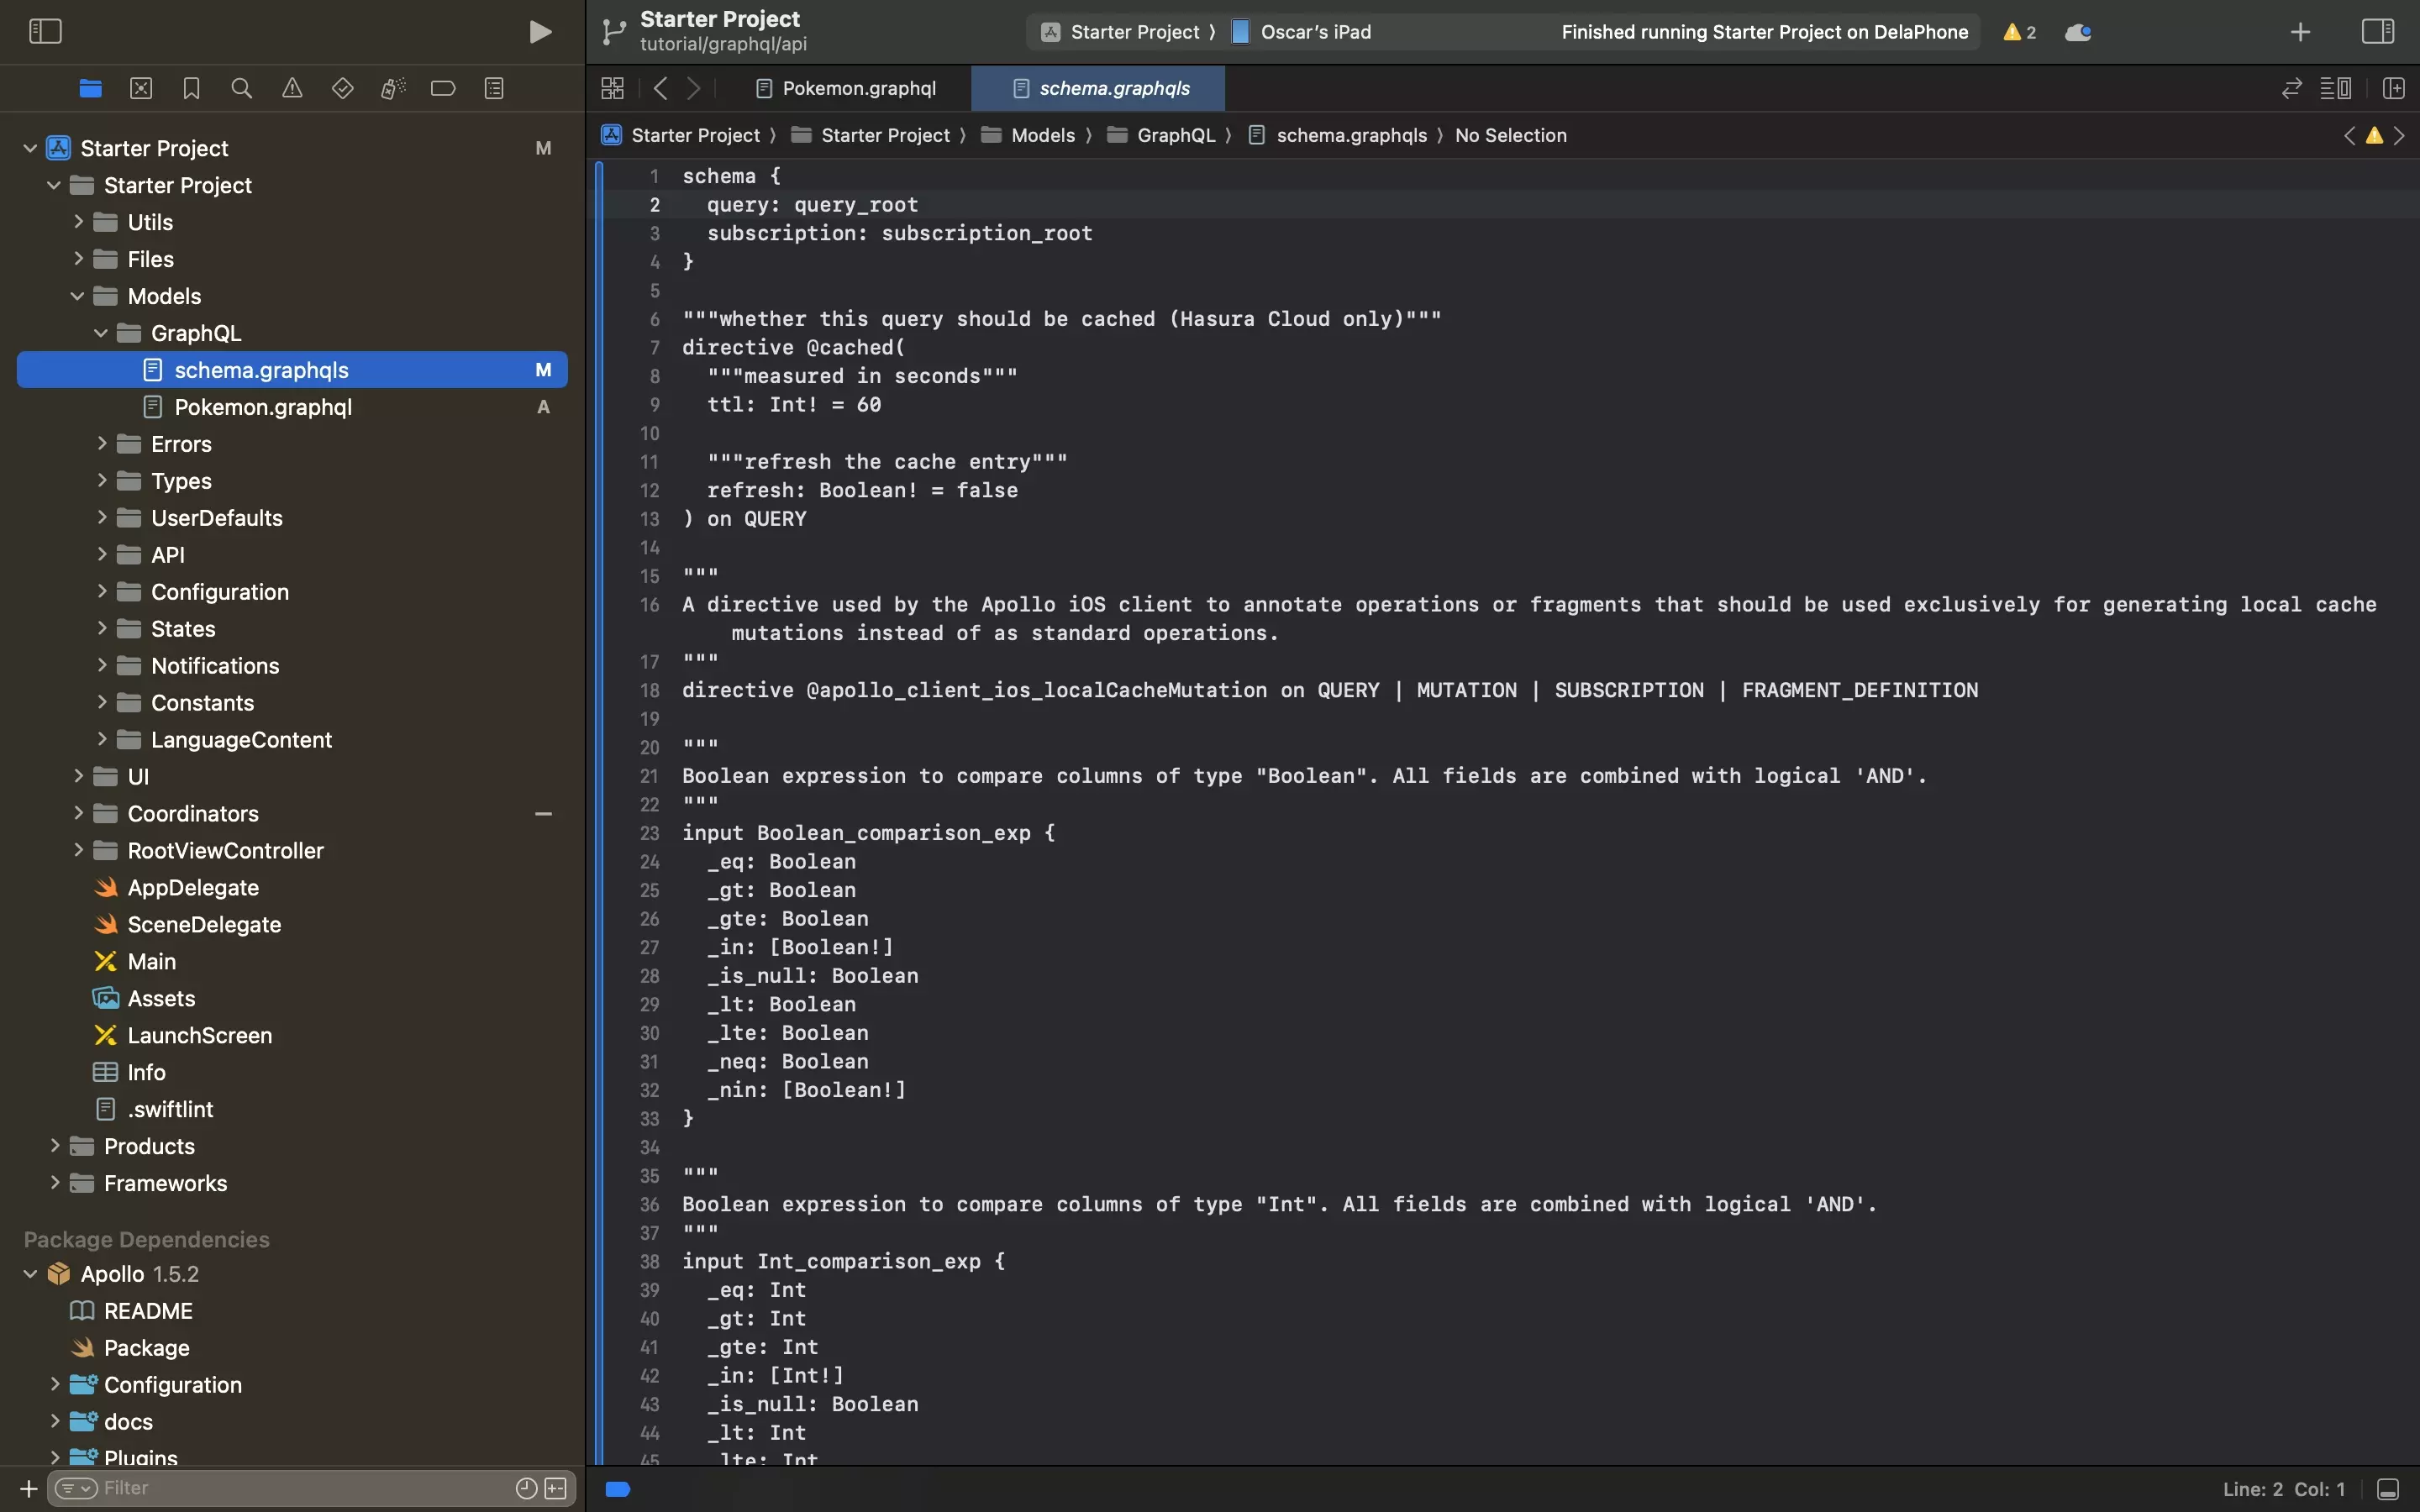
Step Five: Create the Schema File
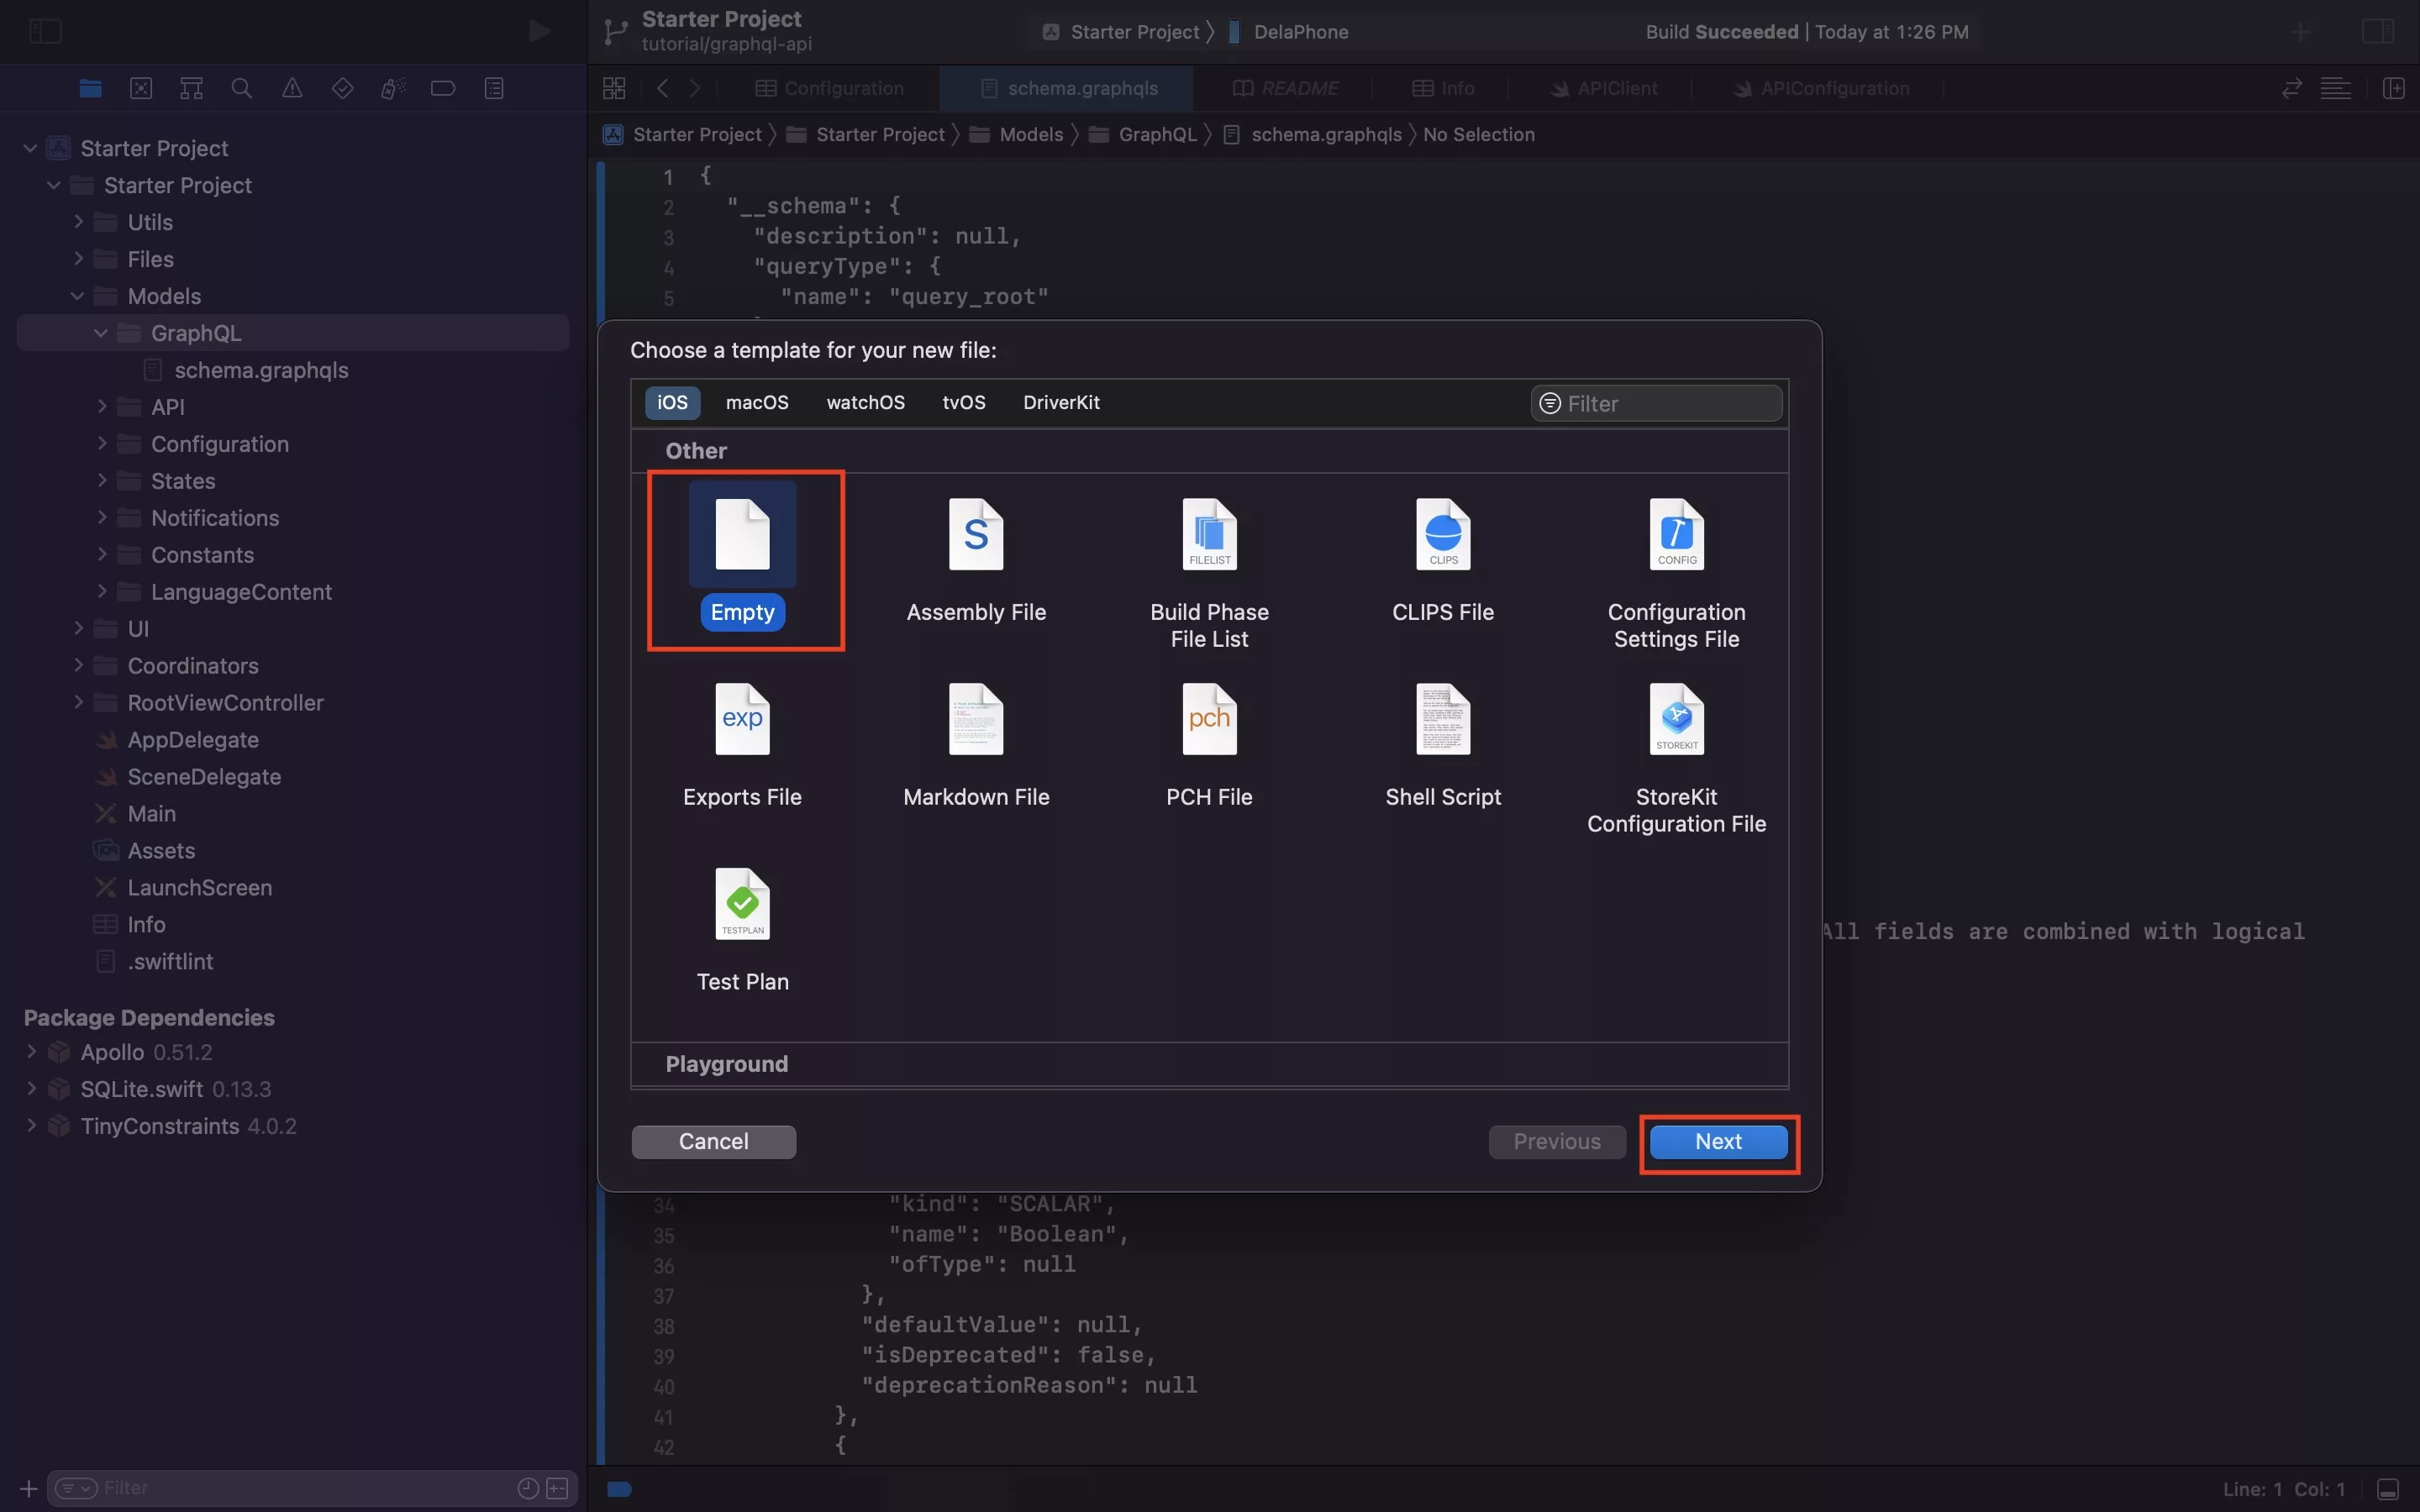
In the project, create a new empty file called schema.graphqls.
Make sure that it has no target membership.
Step Six: Create the GraphQL files
In the project, for each of the queries that you wish to make, a new empty file called QUERY_NAME.graphql.
Make sure that it has no target membership.
Within the file, paste in the GraphQL query.
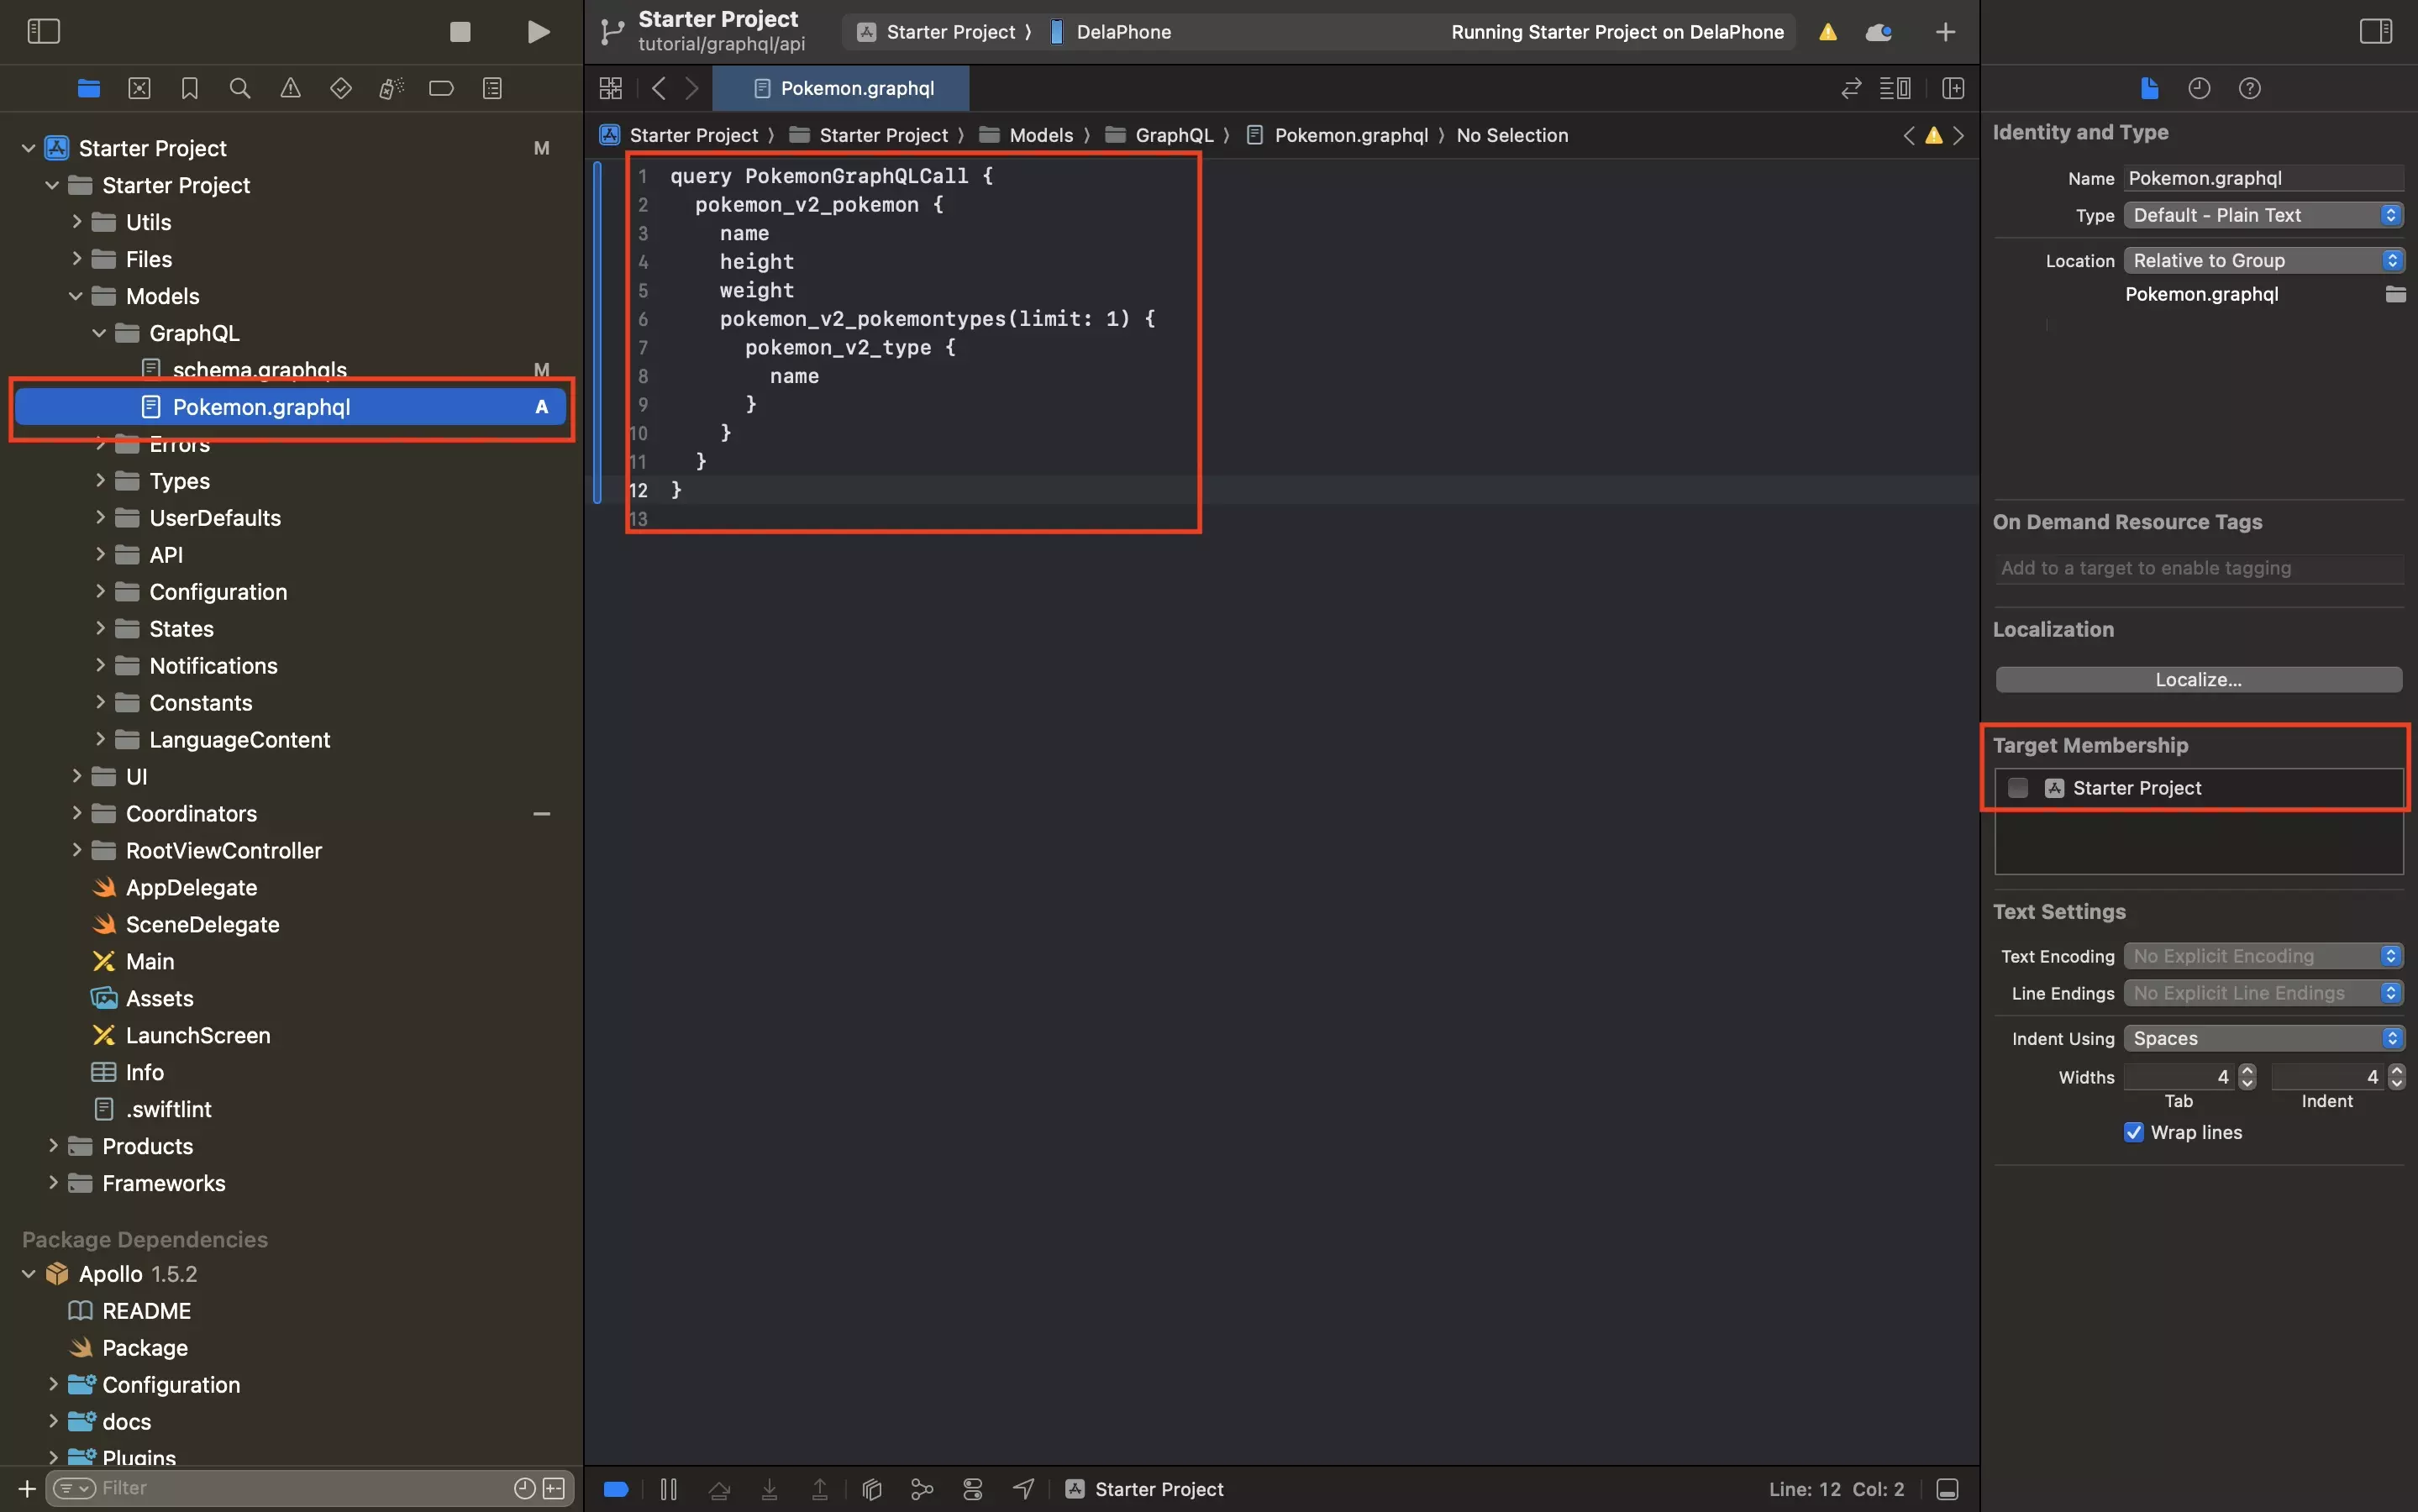
Here is the sample query that we added to the file above.
Step Seven: Install the Apollo Cli
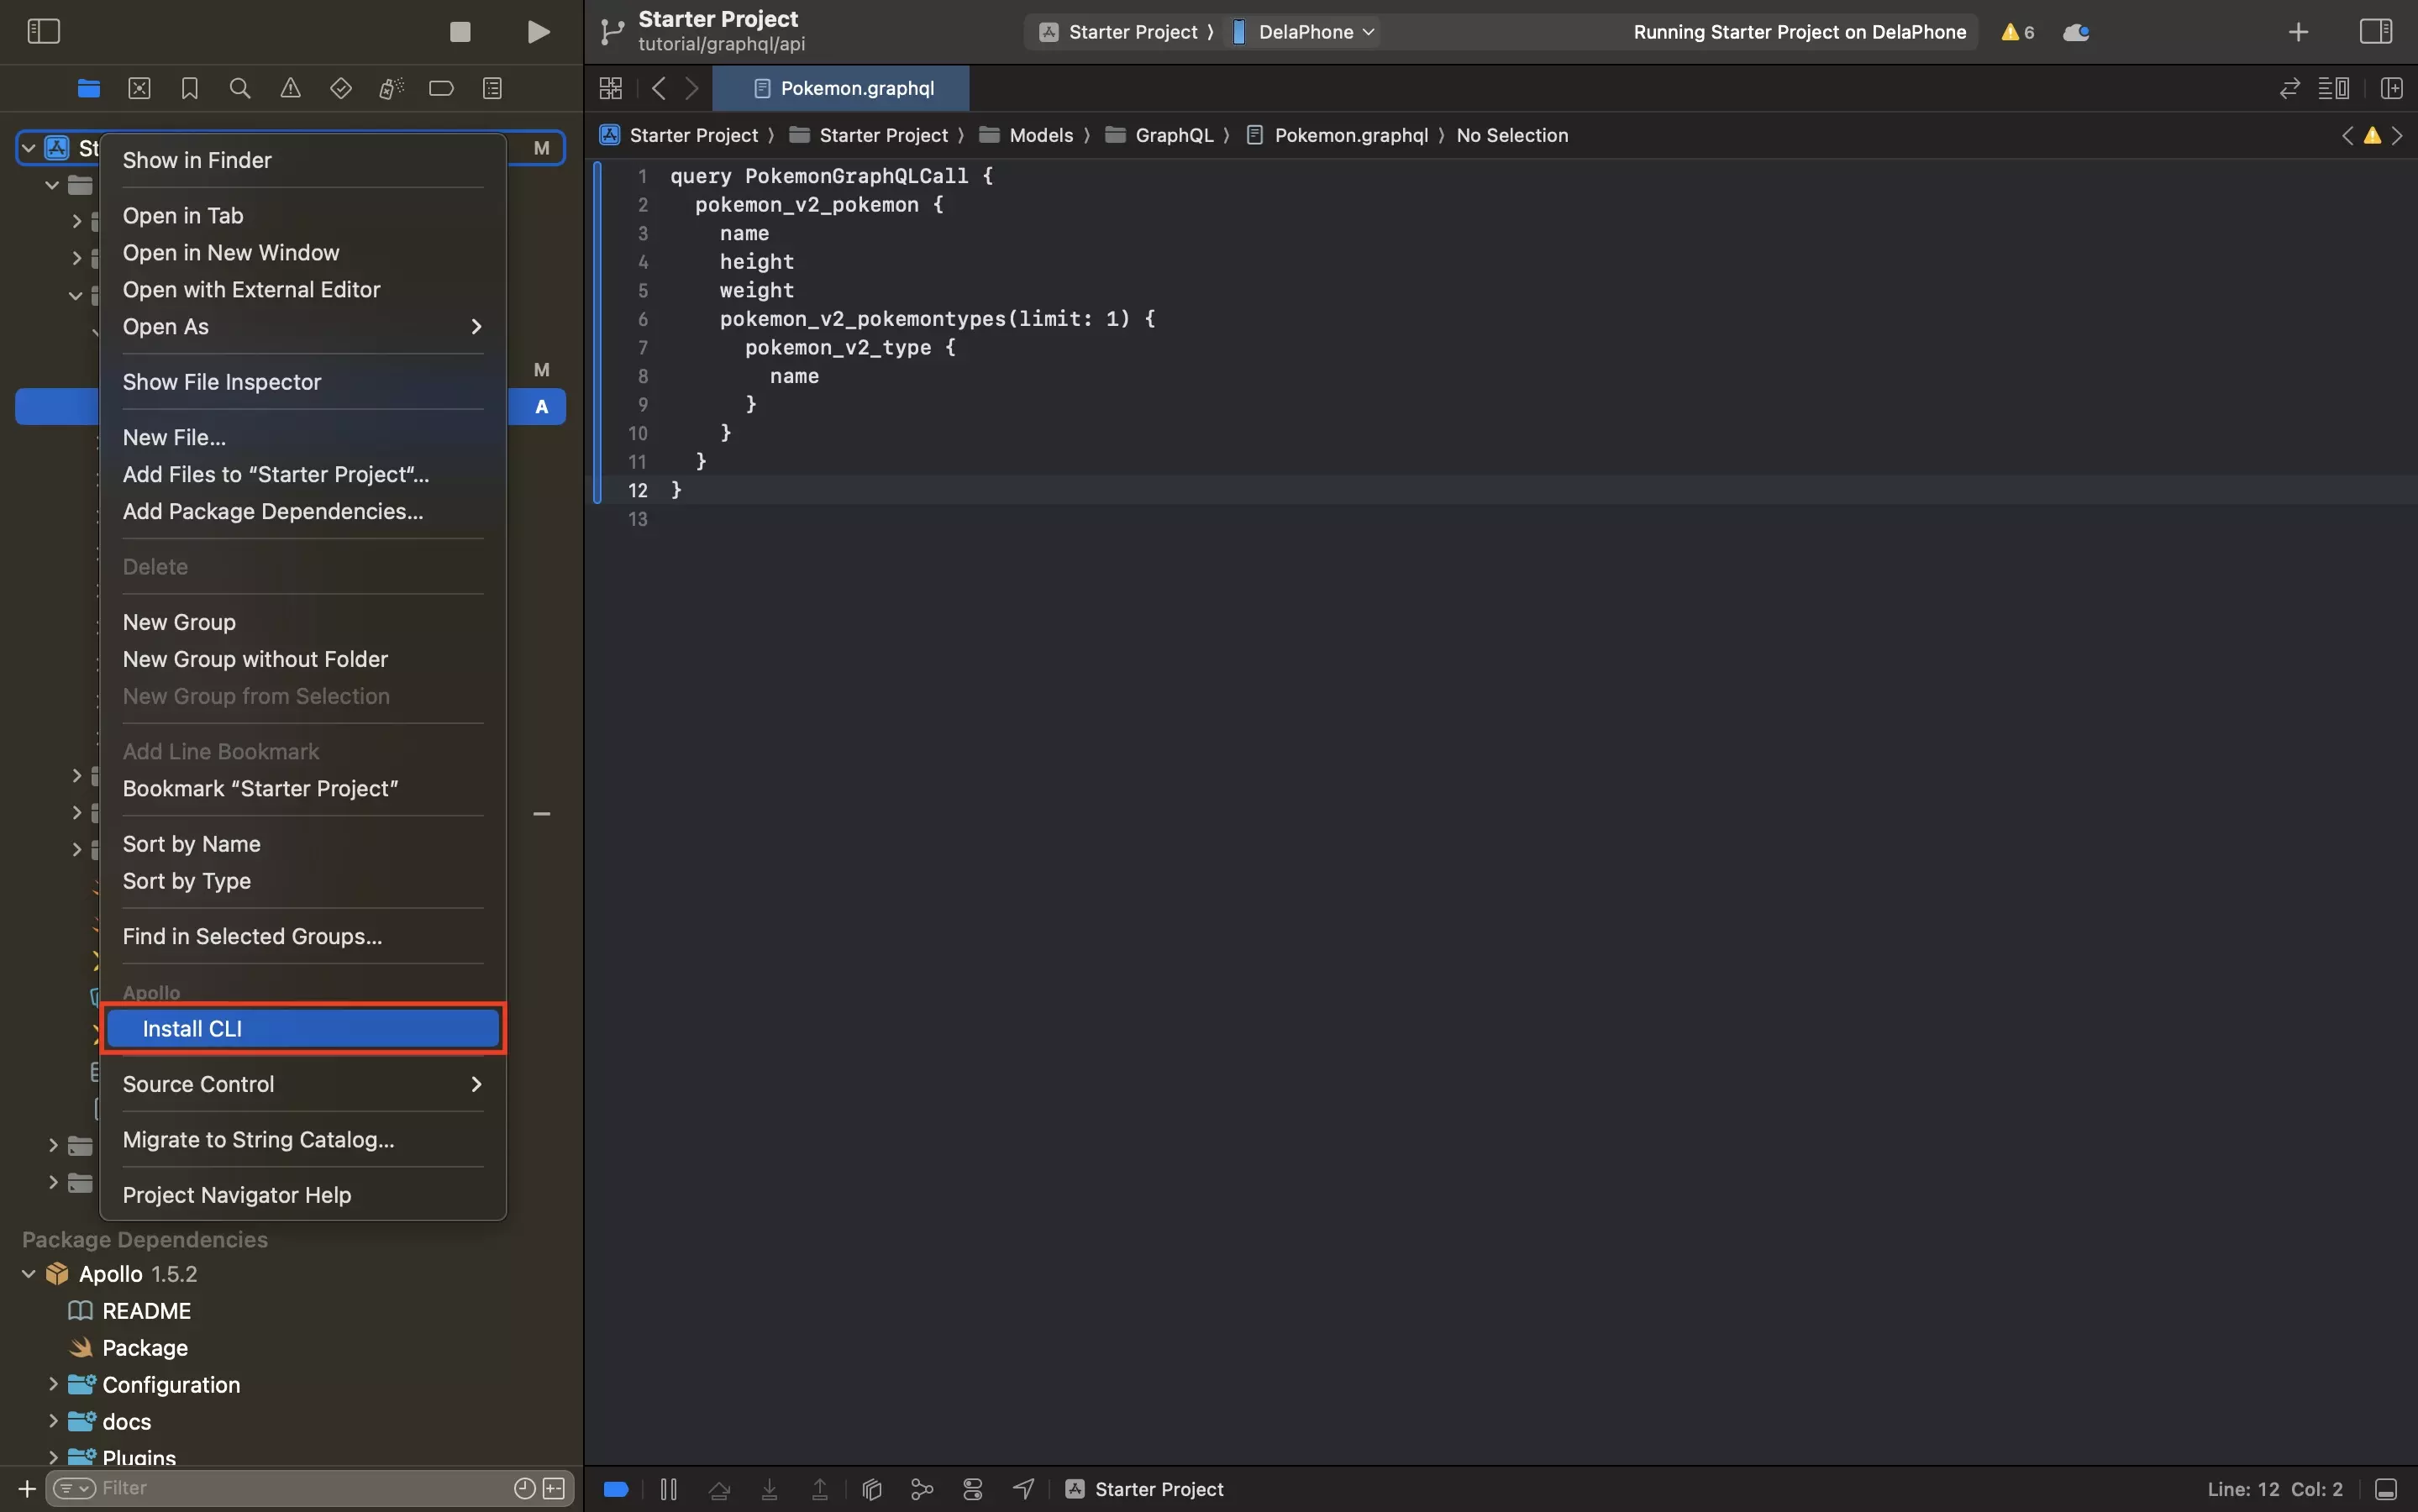
On the left menu side bar, right click the name of your project and in the menu that appears click Install Cli.
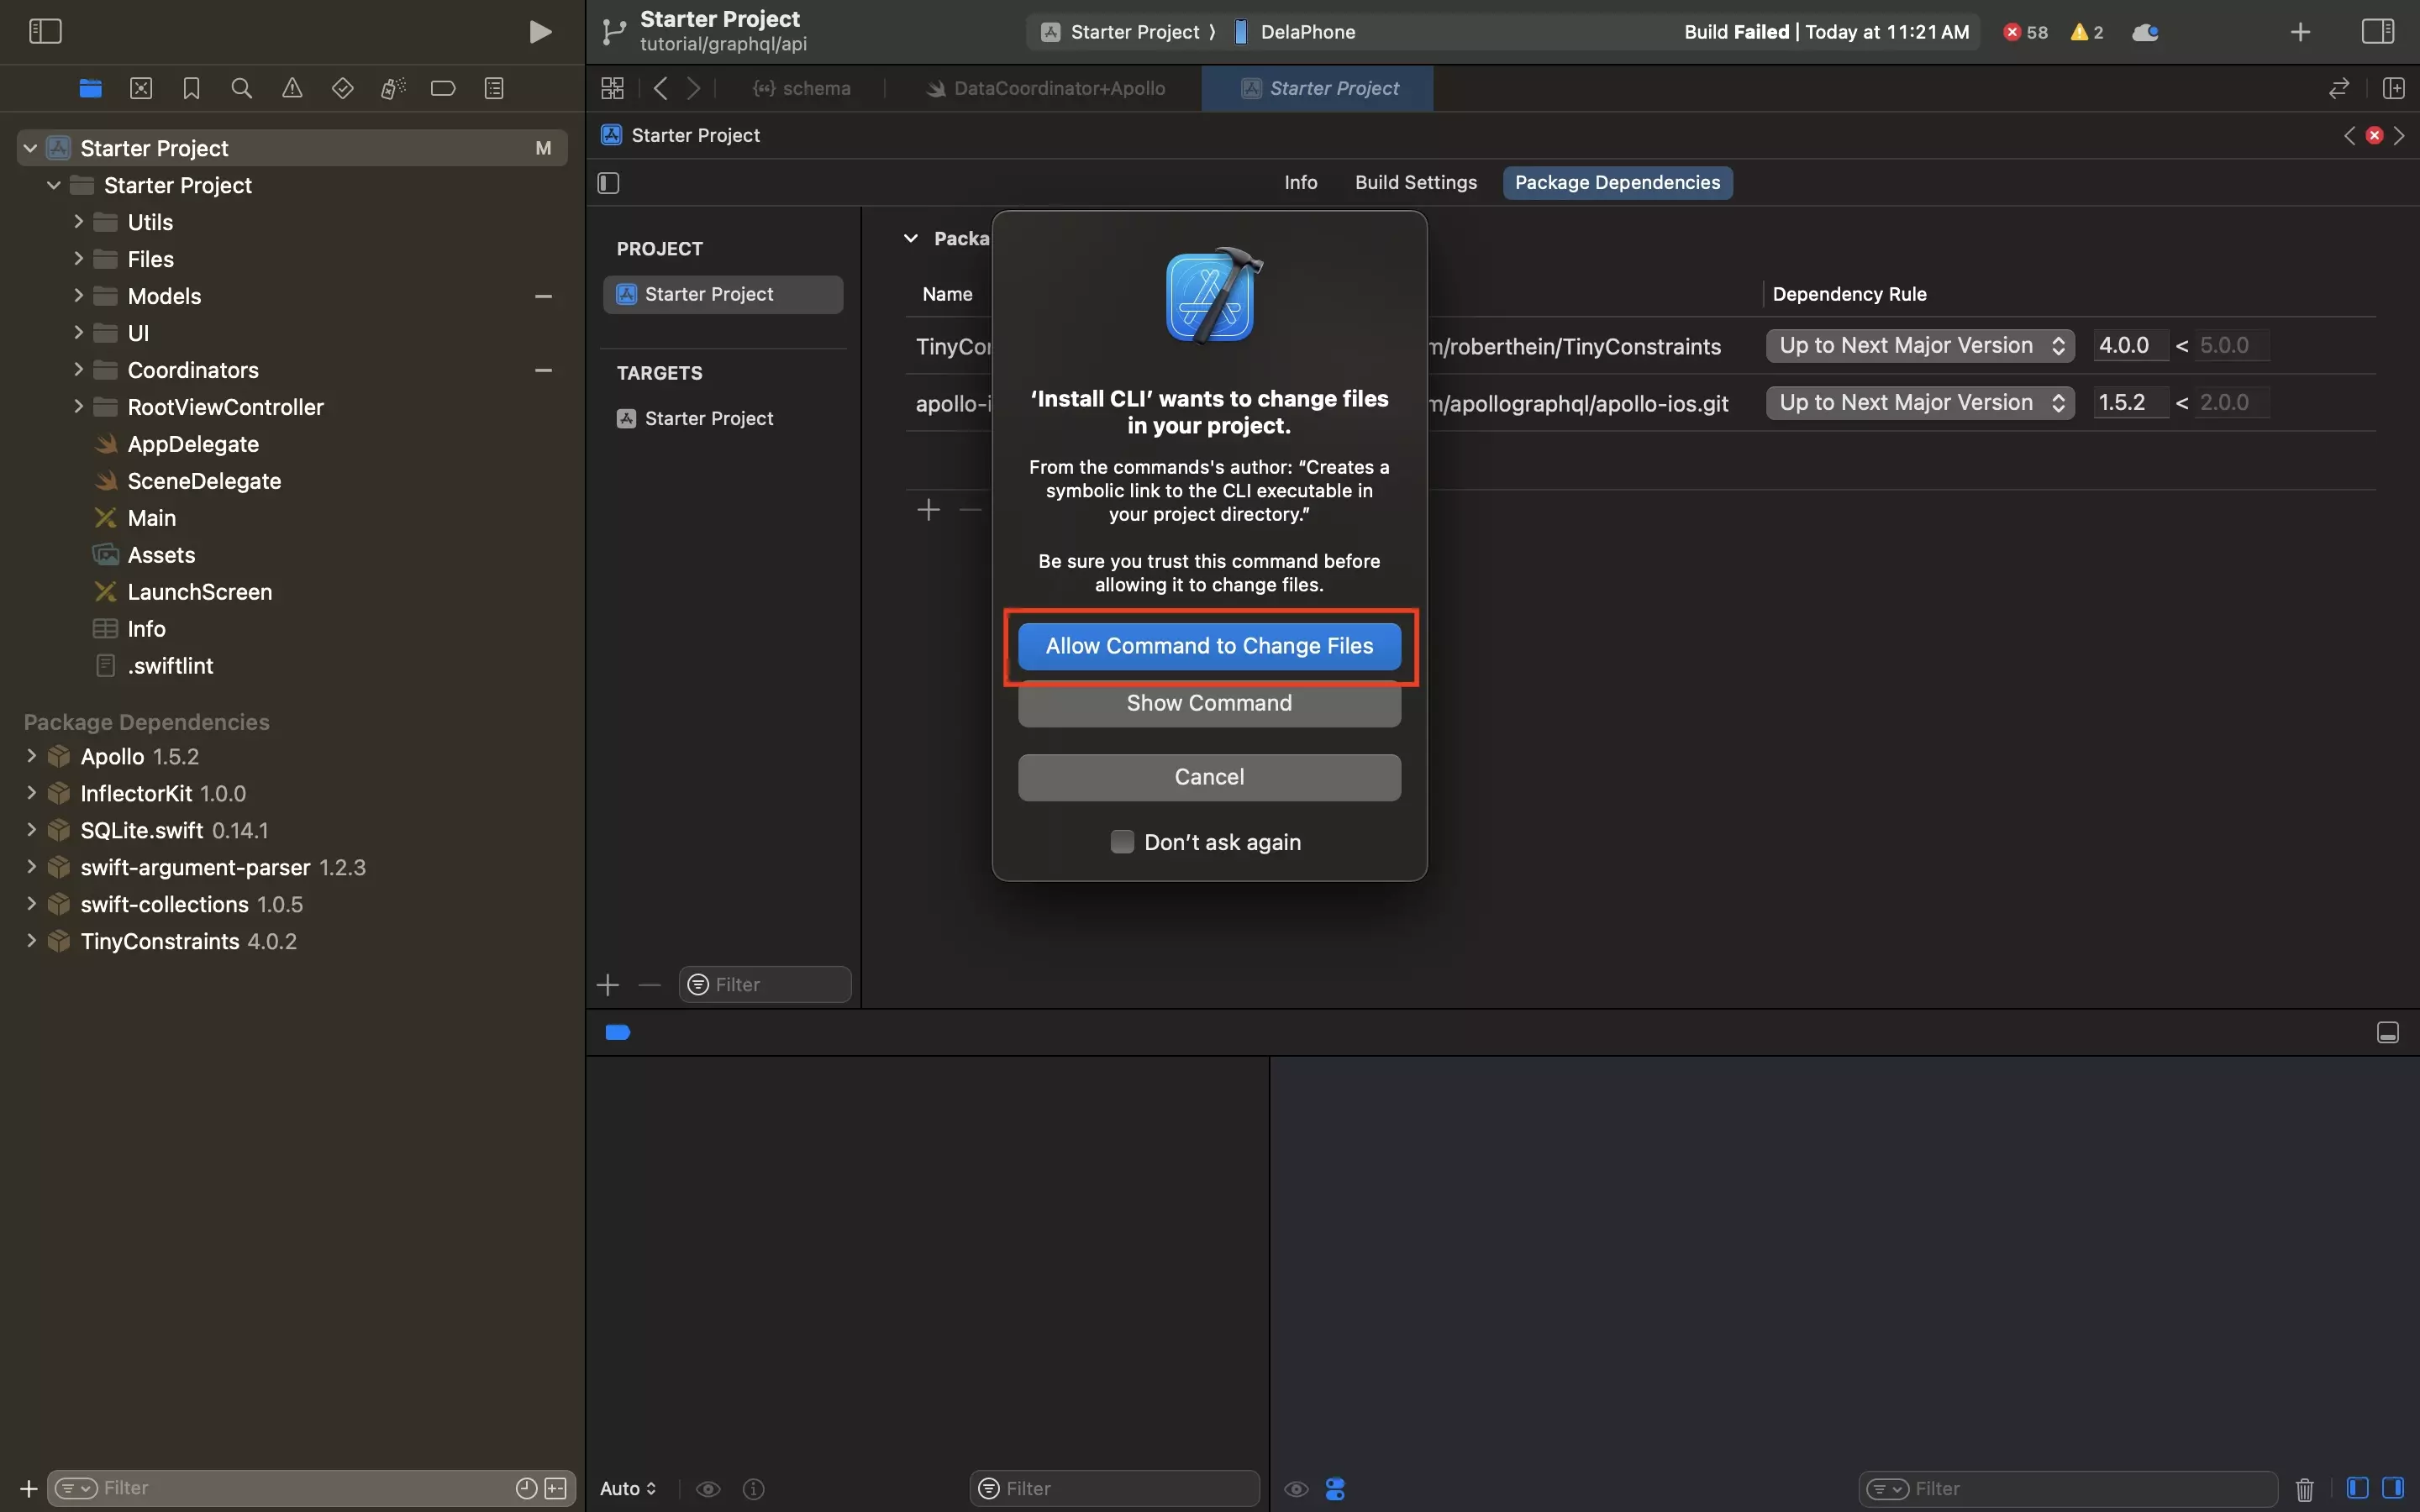
In the modal that appears, select Allow Command to Change Files.
Step Eight: Initialize the Apollo Client
Open Terminal and set the current directory to that of your Swift project.
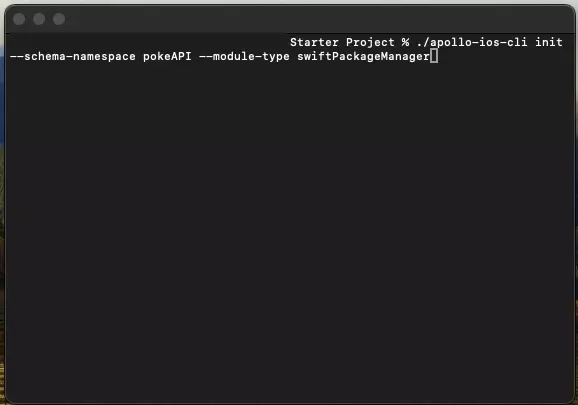
Subsequently, initialize the Apollo client by running the following line:
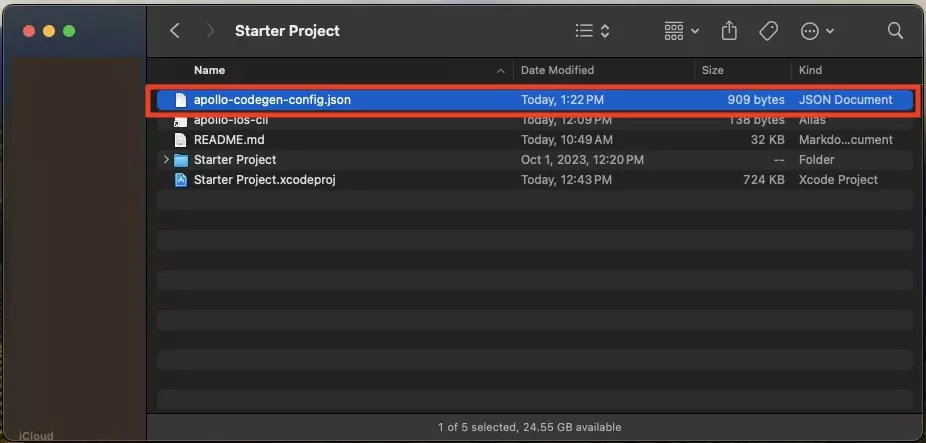
./apollo-ios-cli init --schema-namespace YOUR_API_NAME --module-type swiftPackageManagerPlease replace YOUR_API_NAME with the name of your API (i.e. PokeAPI).
This will create a apollo-codegen-config.json file in the root of your project.
Step Nine: Add the Schema Download Configuration
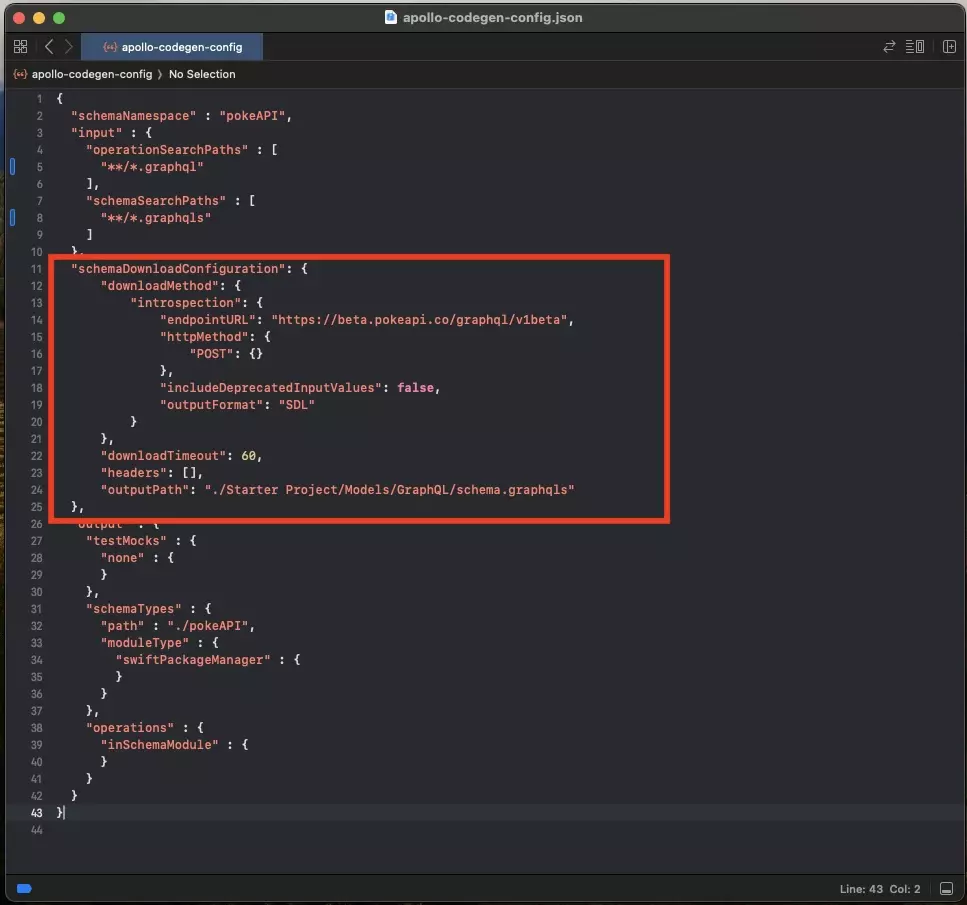
Open the apollo-codegen-config.json file and add in the schemaDownloadConfiguration using the sample code below.
Make sure to update:
- YOUR_ENDPOINT_URL to the url of your endpoint (i.e. https://beta.pokeapi.co/graphql/v1beta).
- PATH/TO/YOUR/SCHEMA.GRAPHQLS to the location of the graphqls that you created in Step Five (i.e. ./Starter Project/Models/GraphQL/schema.graphqls).
Please note that as shown in the point above, Apollo doesn't do spaces in the way Terminal does (i.e. Starter\ Project becomes Starter Project).
Step Ten: Fetch the Schema
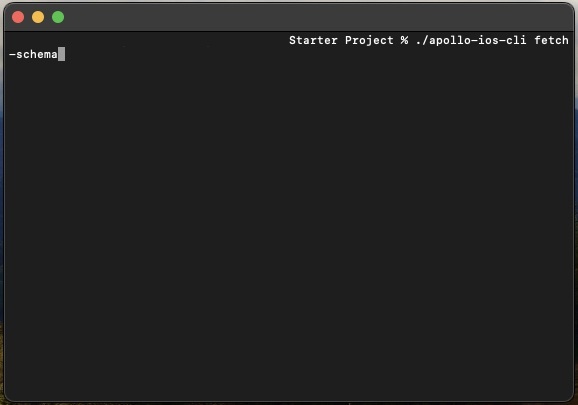
In Terminal, with the current directory set to that of your Swift project, run the following line:
./apollo-ios-cli fetch-schemaThis will fetch the Schema and place it in the Schema.graphqls file that you defined in Step Nine (which should match that in Step Five).
Step Eleven: Generate the API Package
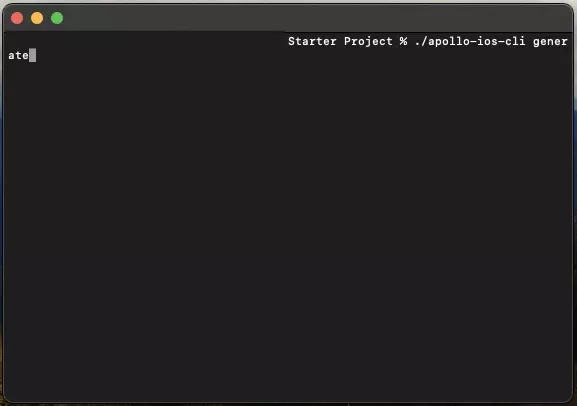
In Terminal, with the current directory set to that of your Swift project, run the following line:
./apollo-ios-cli generateThis will generate a folder named after the YOUR_API_NAME that you set in Step Eight.
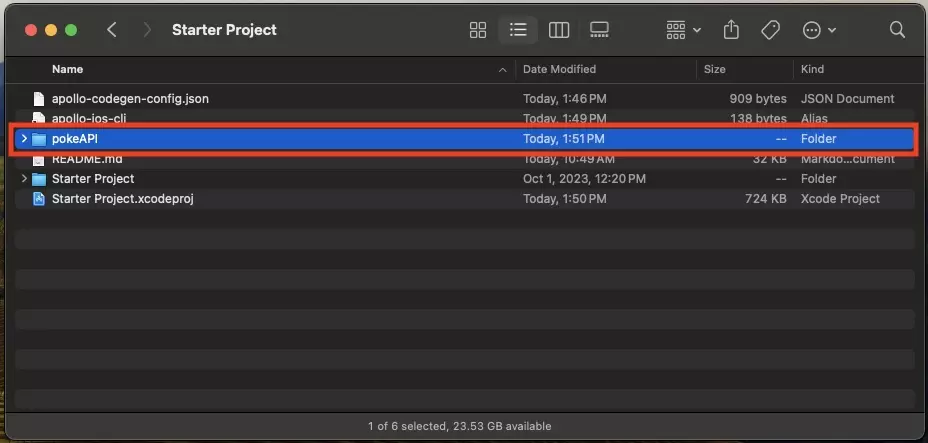
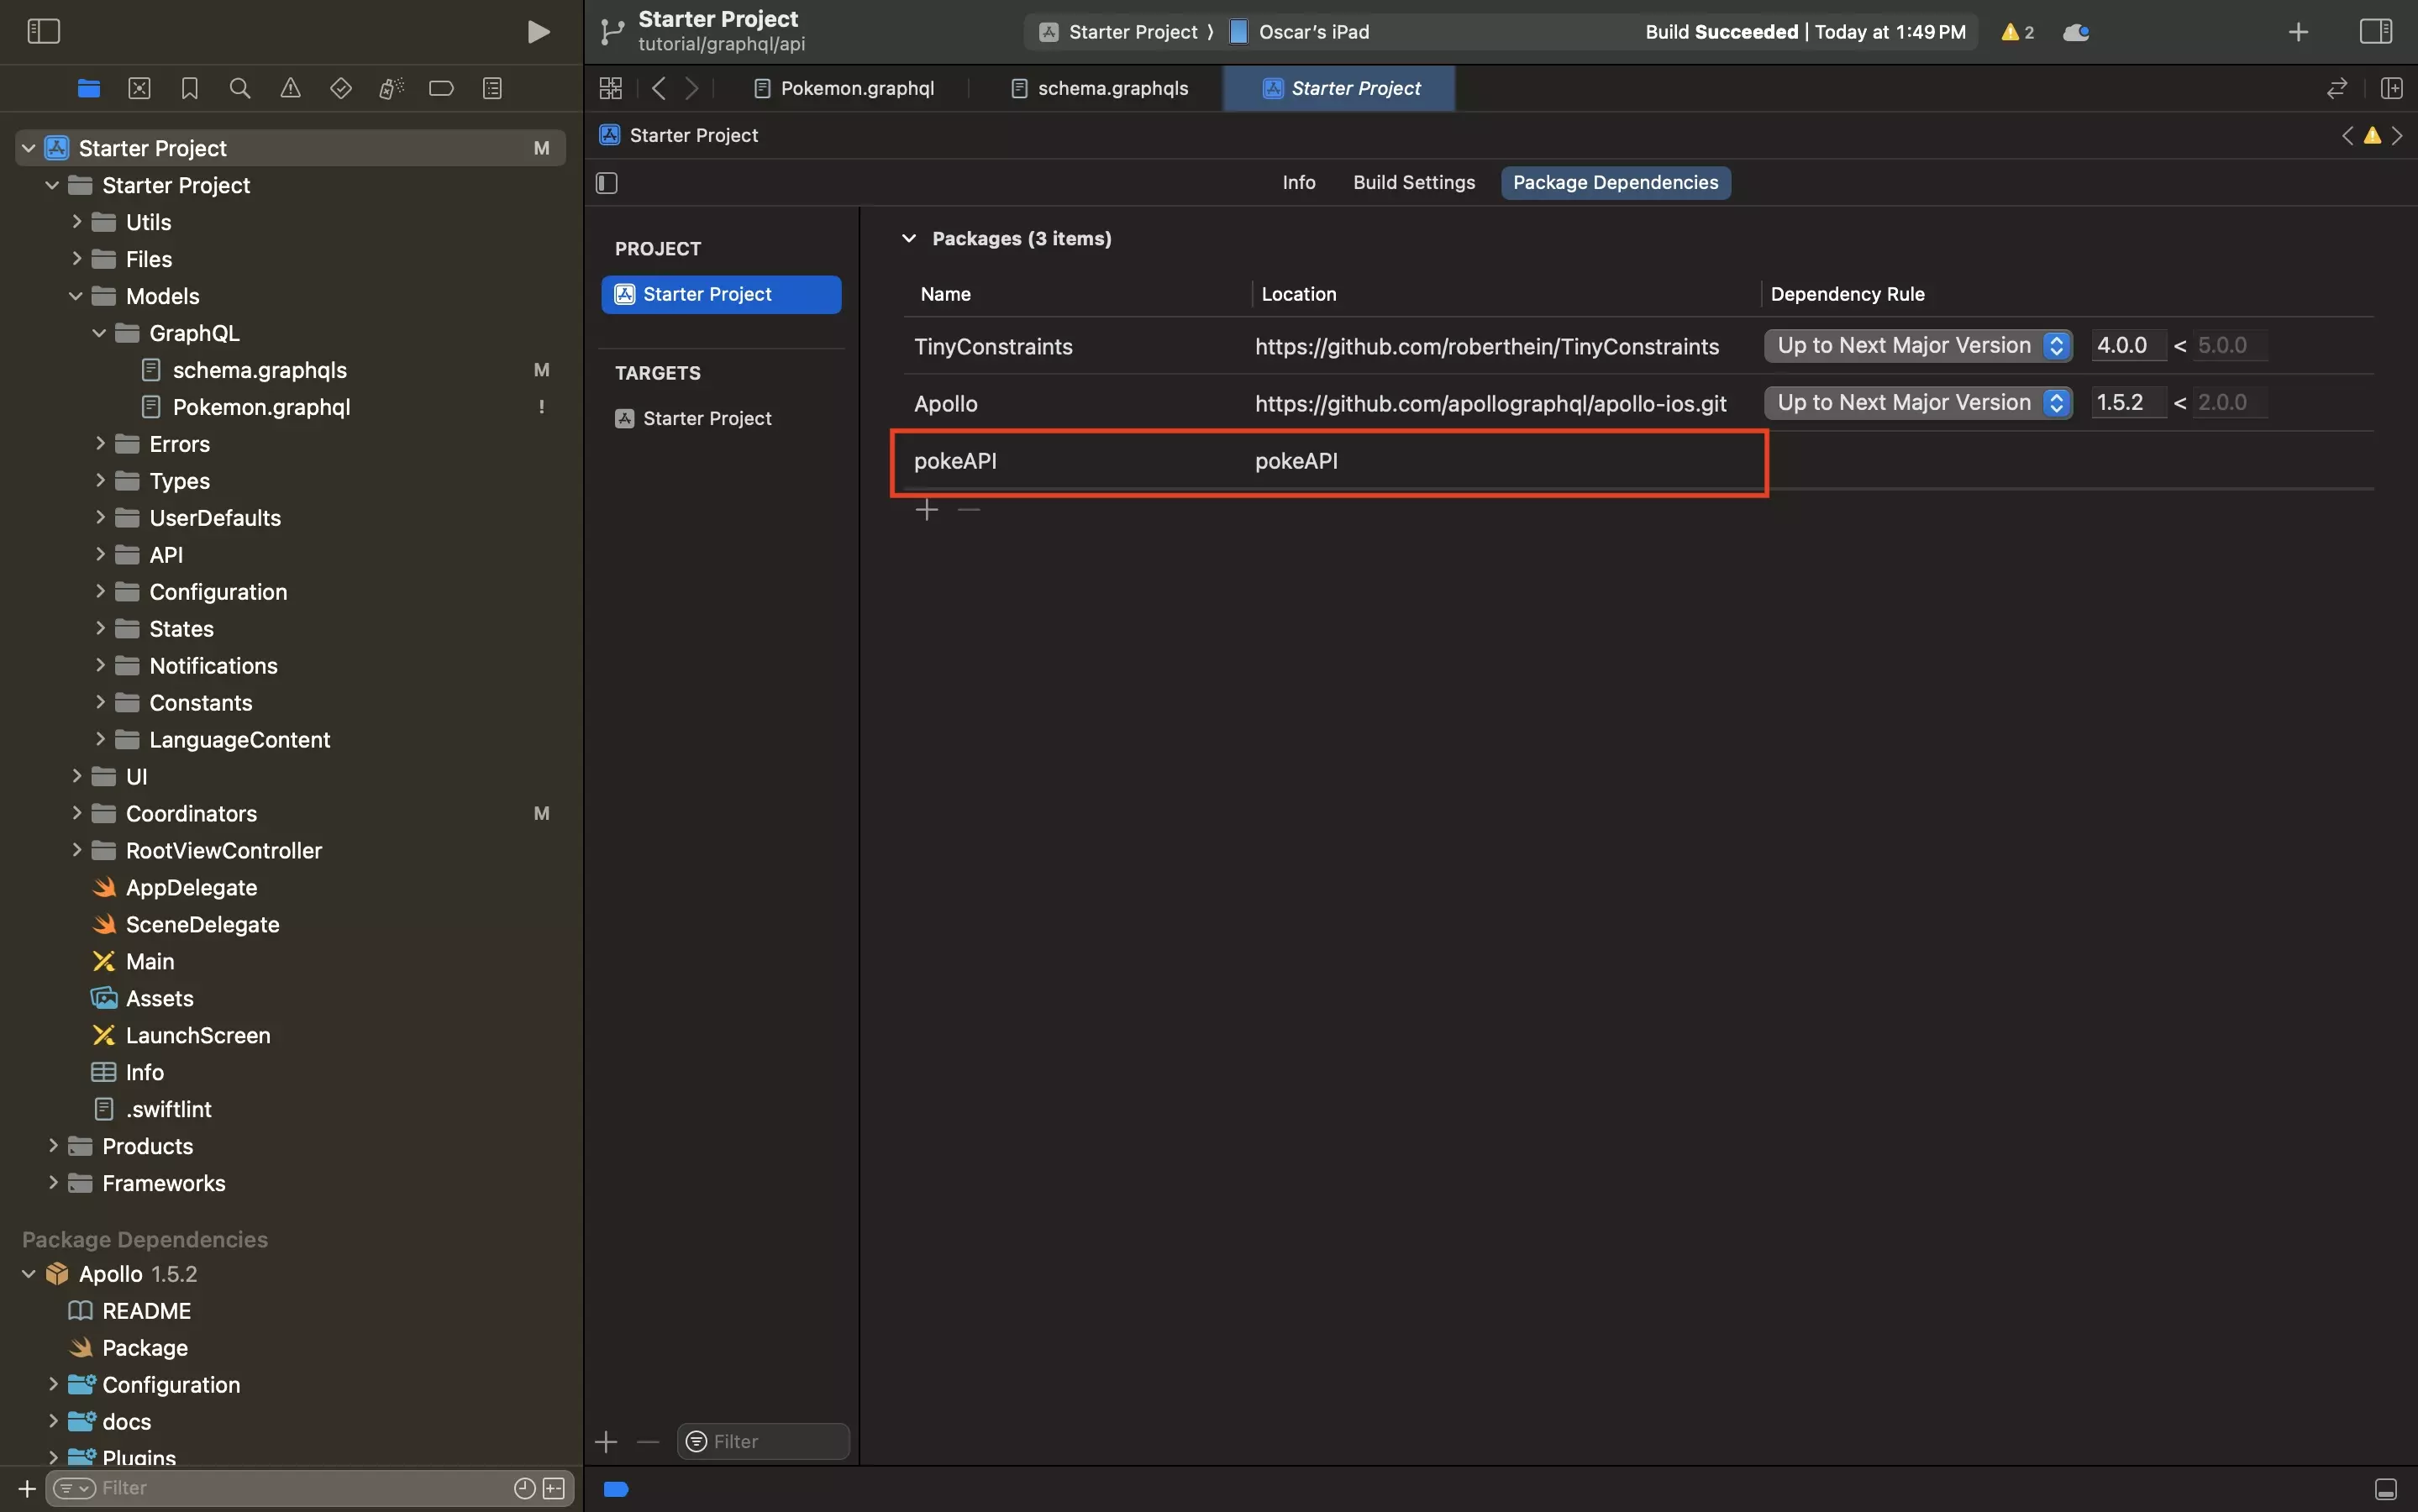
Step Twelve: Add the API Folder as a Local Package
Navigate to the projects package dependencies and add a new dependency.
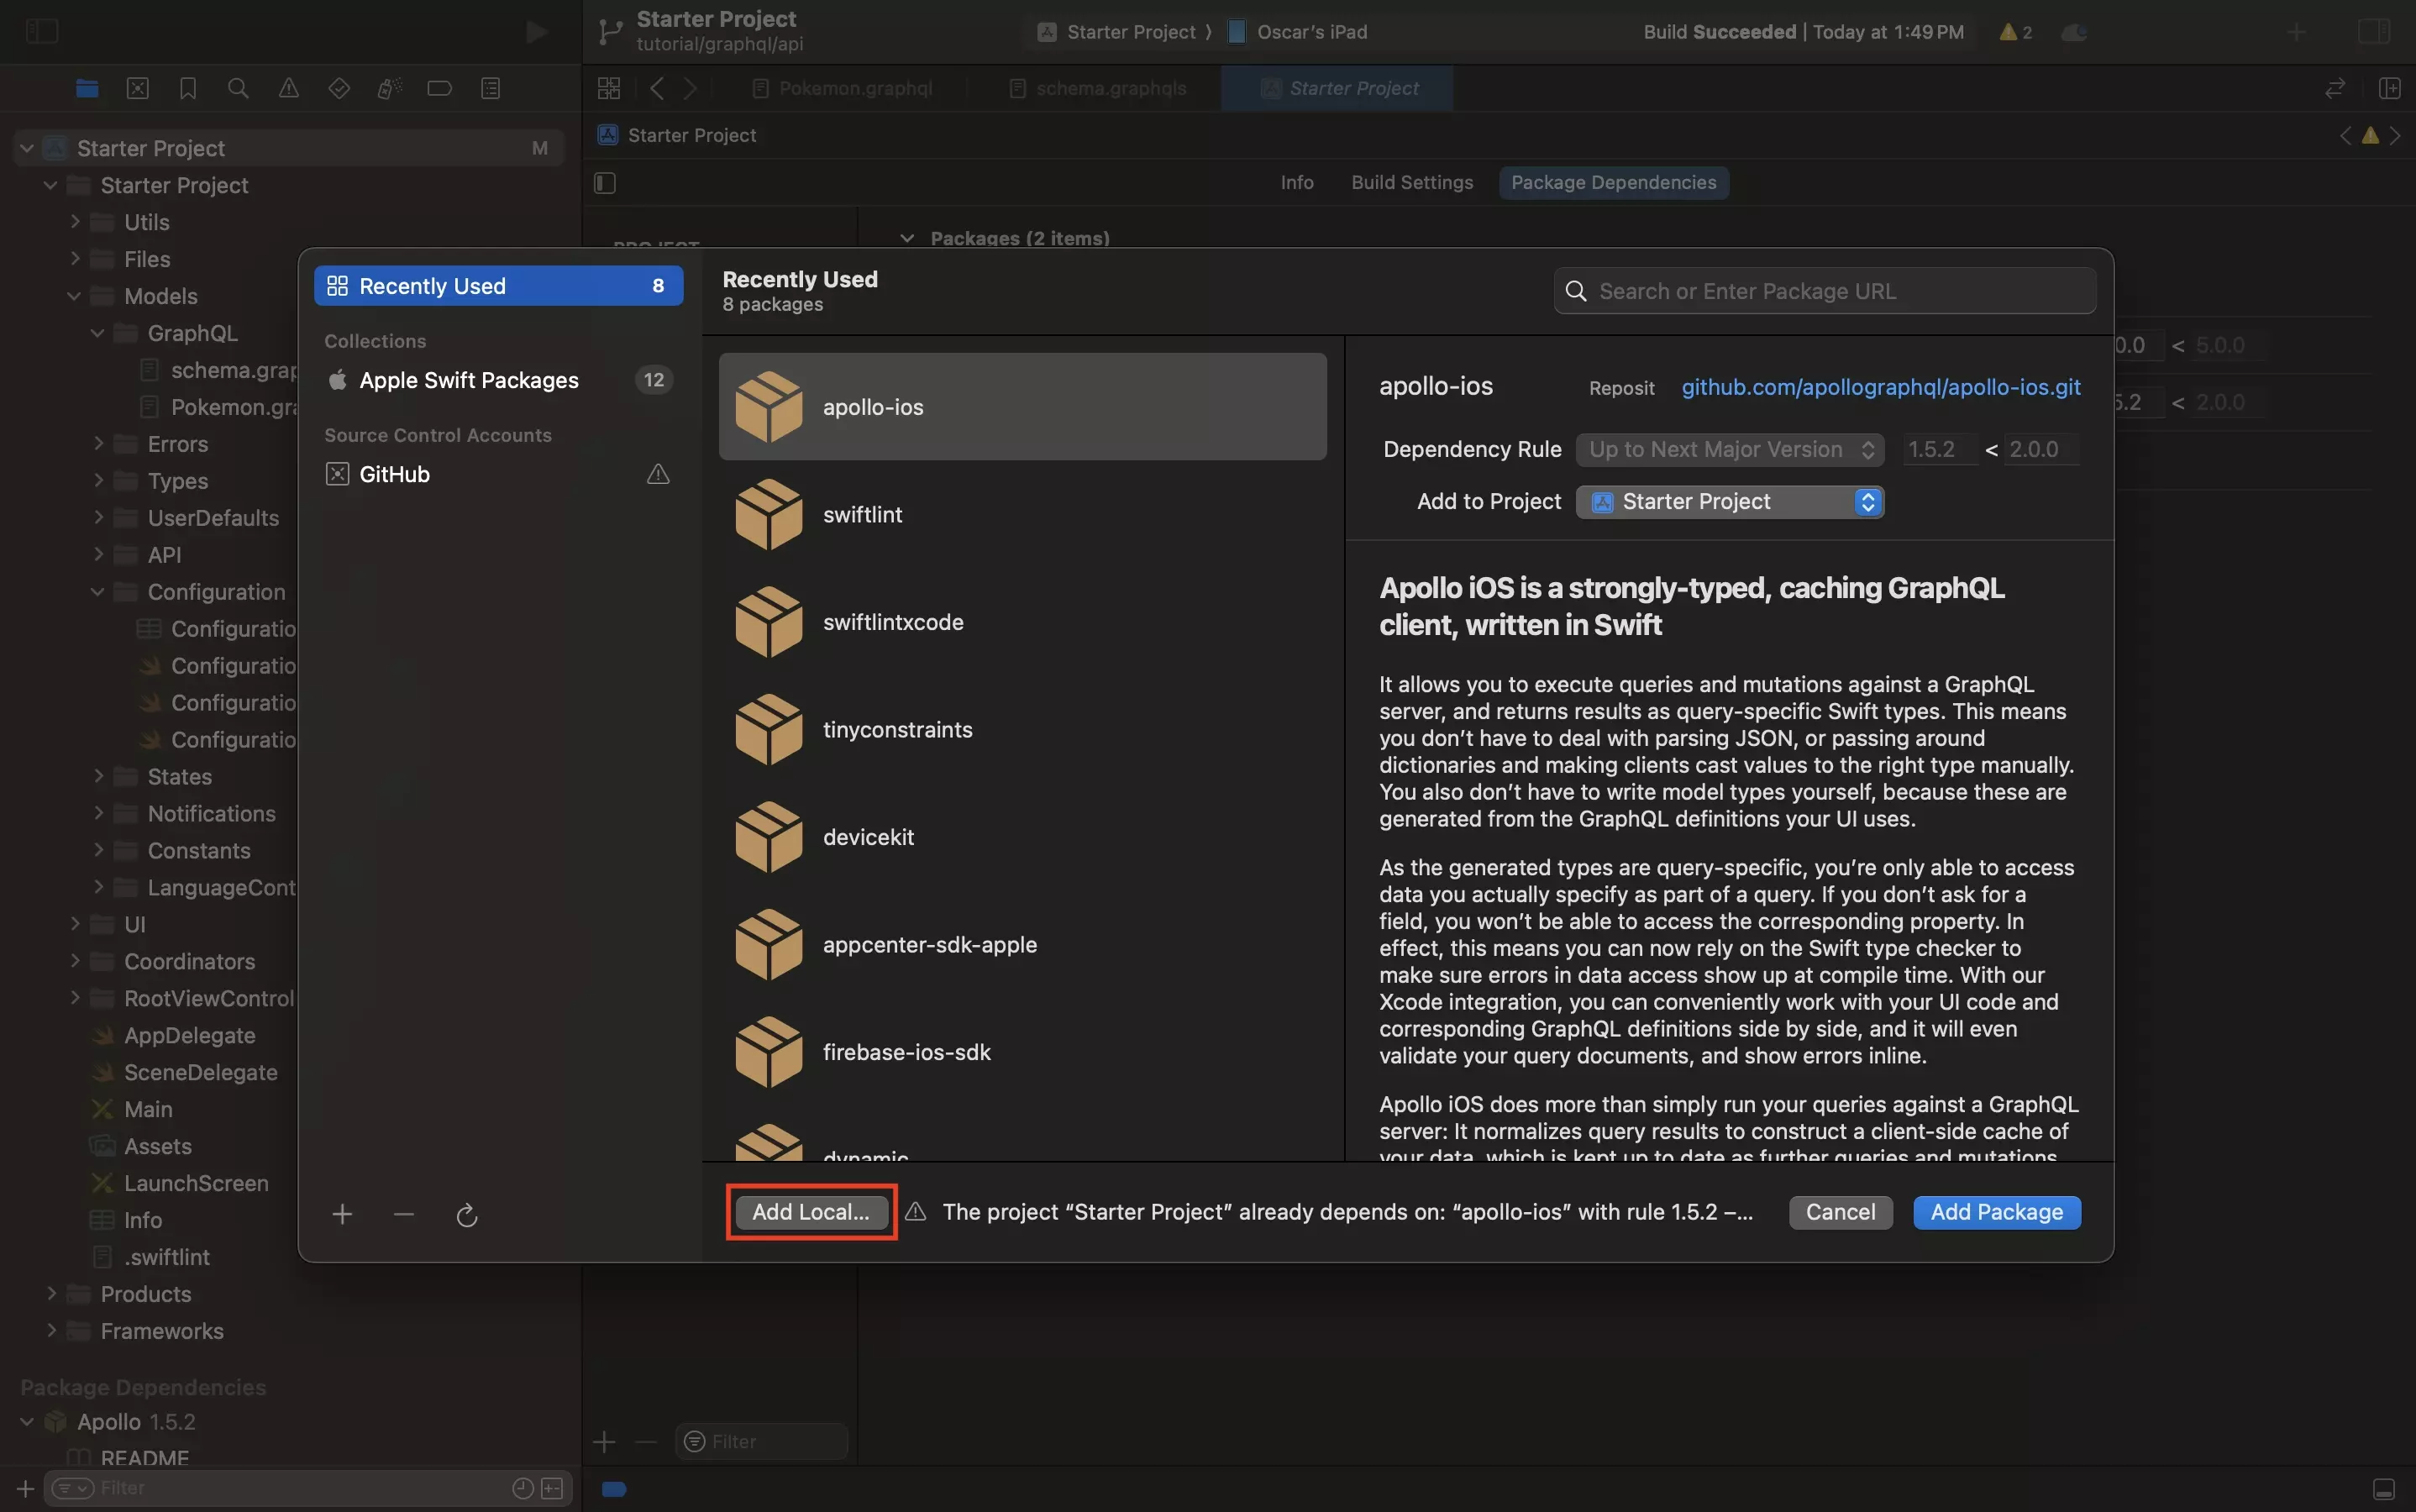
In the modal that appears, select Add Local...
In the modal that appears, navigate to the folder that was generated in Step Eleven. Select it and click Add Package.
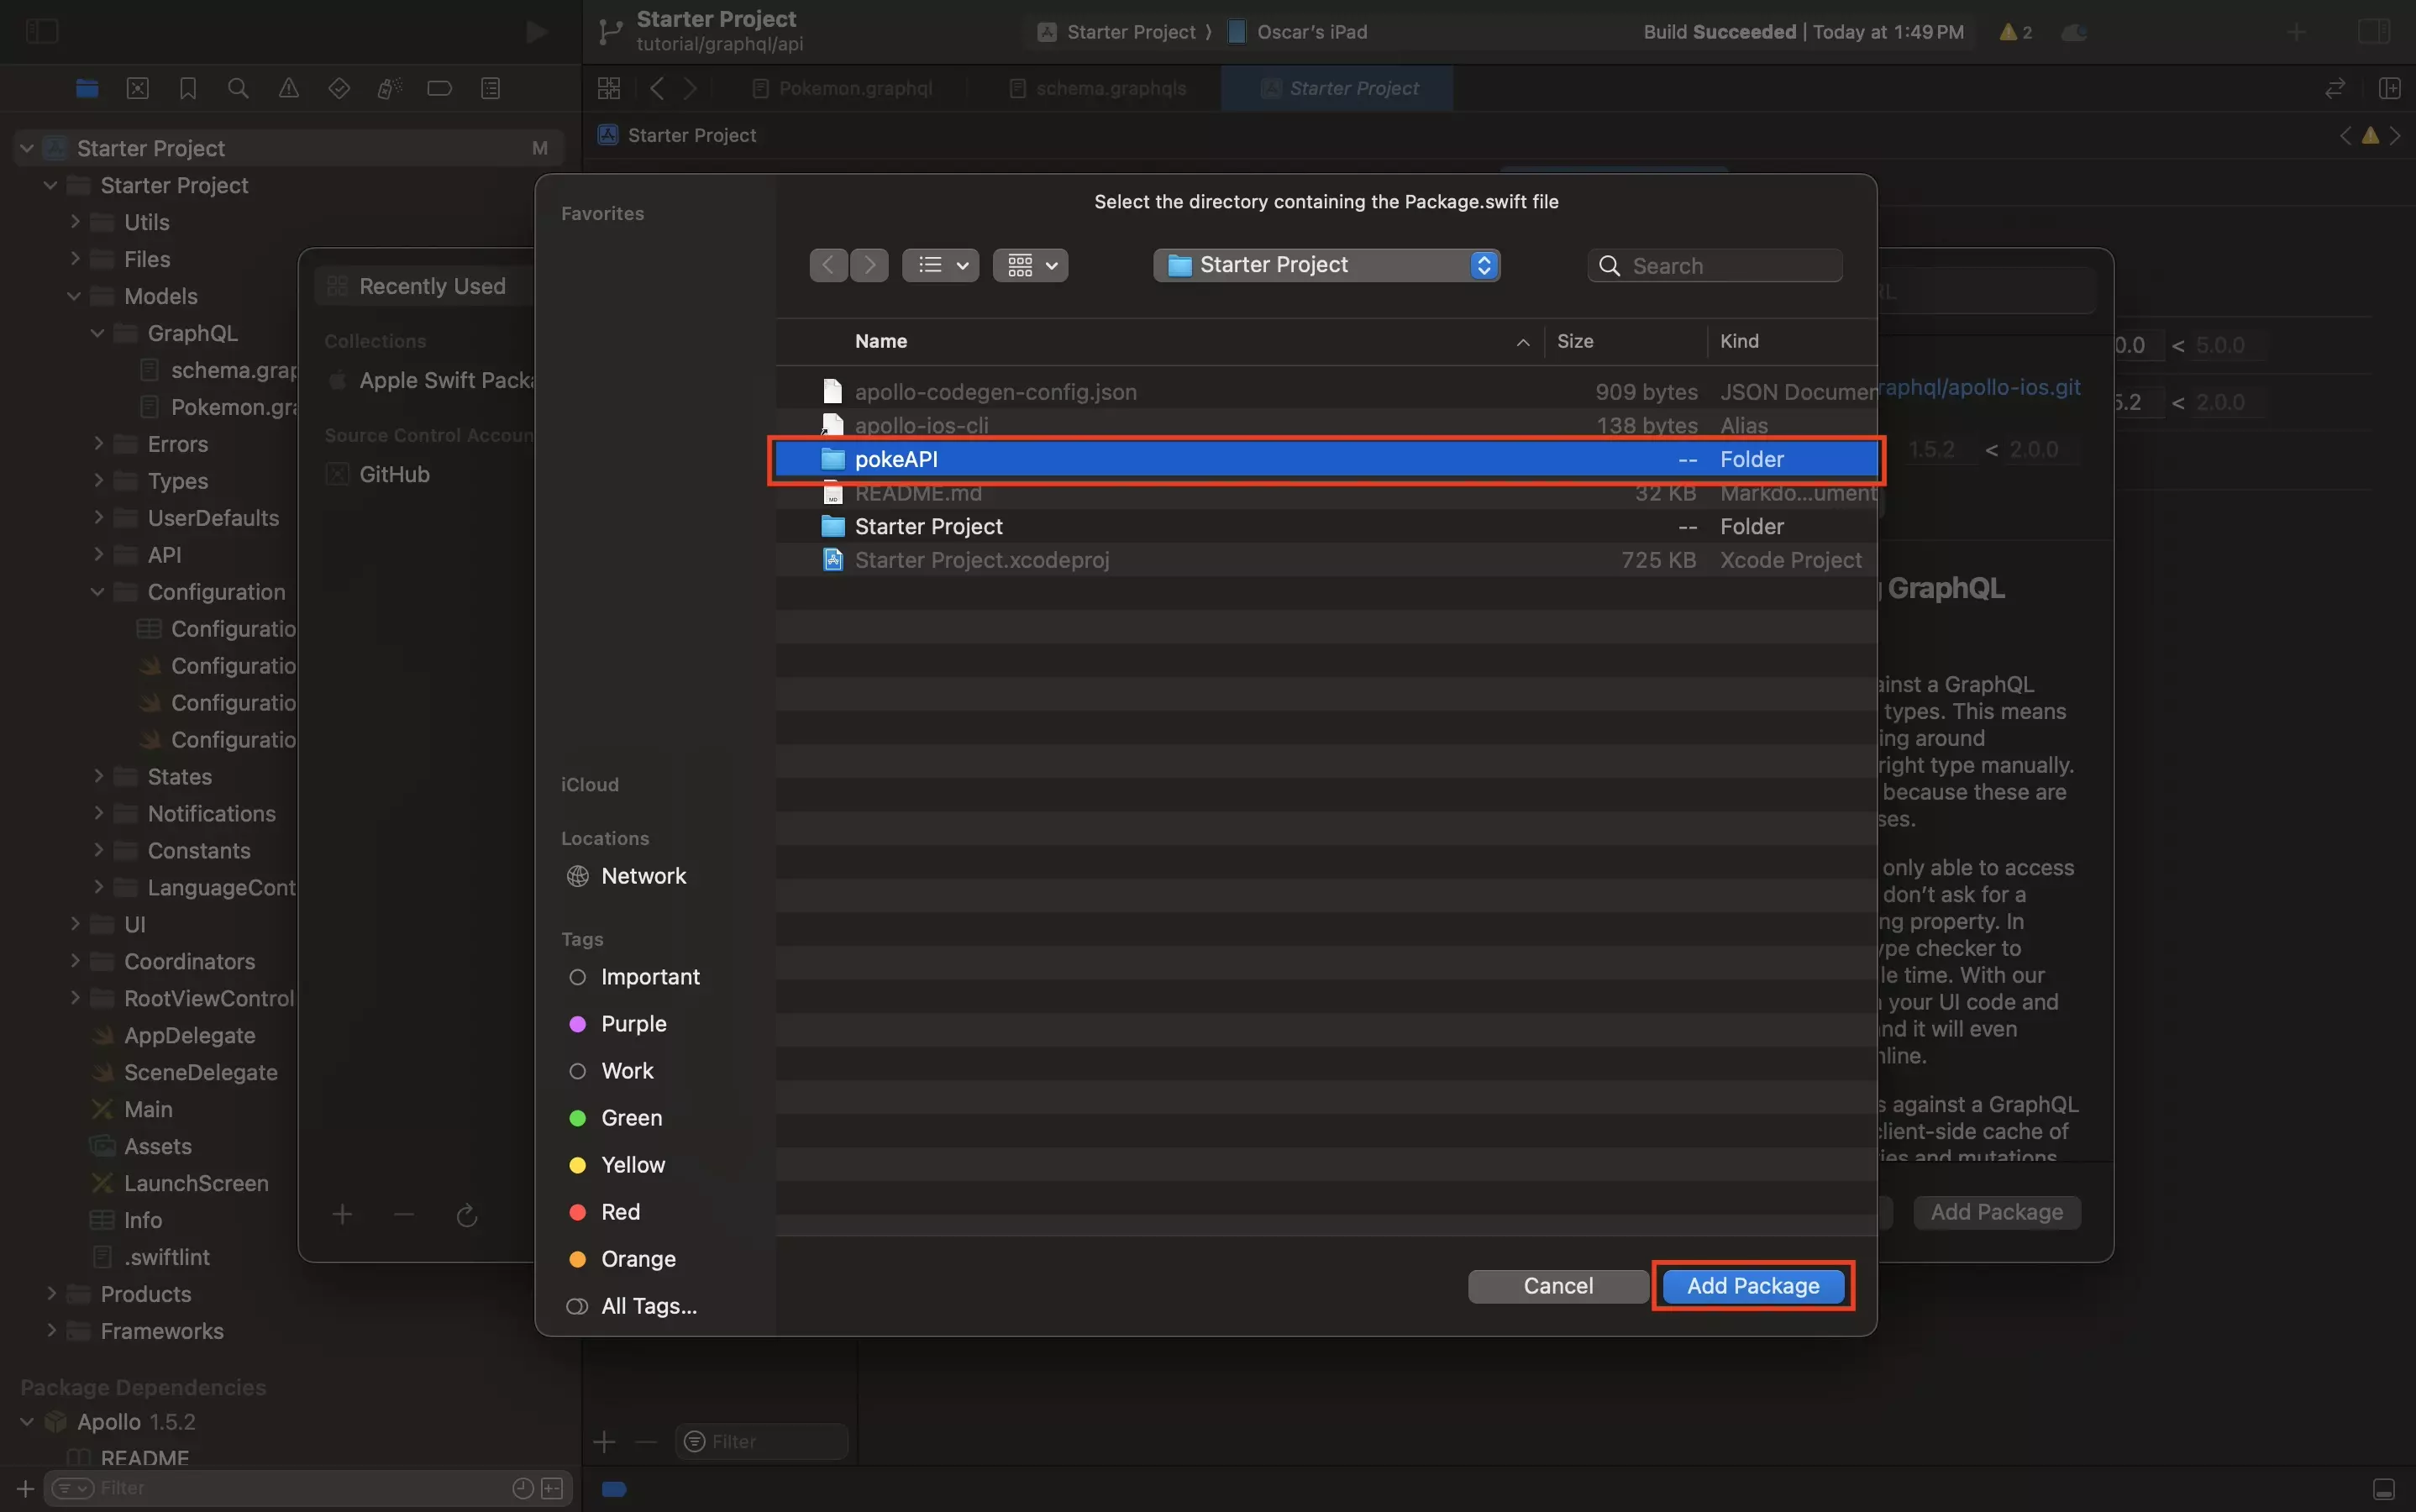
In the confirmation modal that appears, click Add Package.
The local package will now be added to the projects package dependencies.
Step Thirteen: Update your Configuration.plist
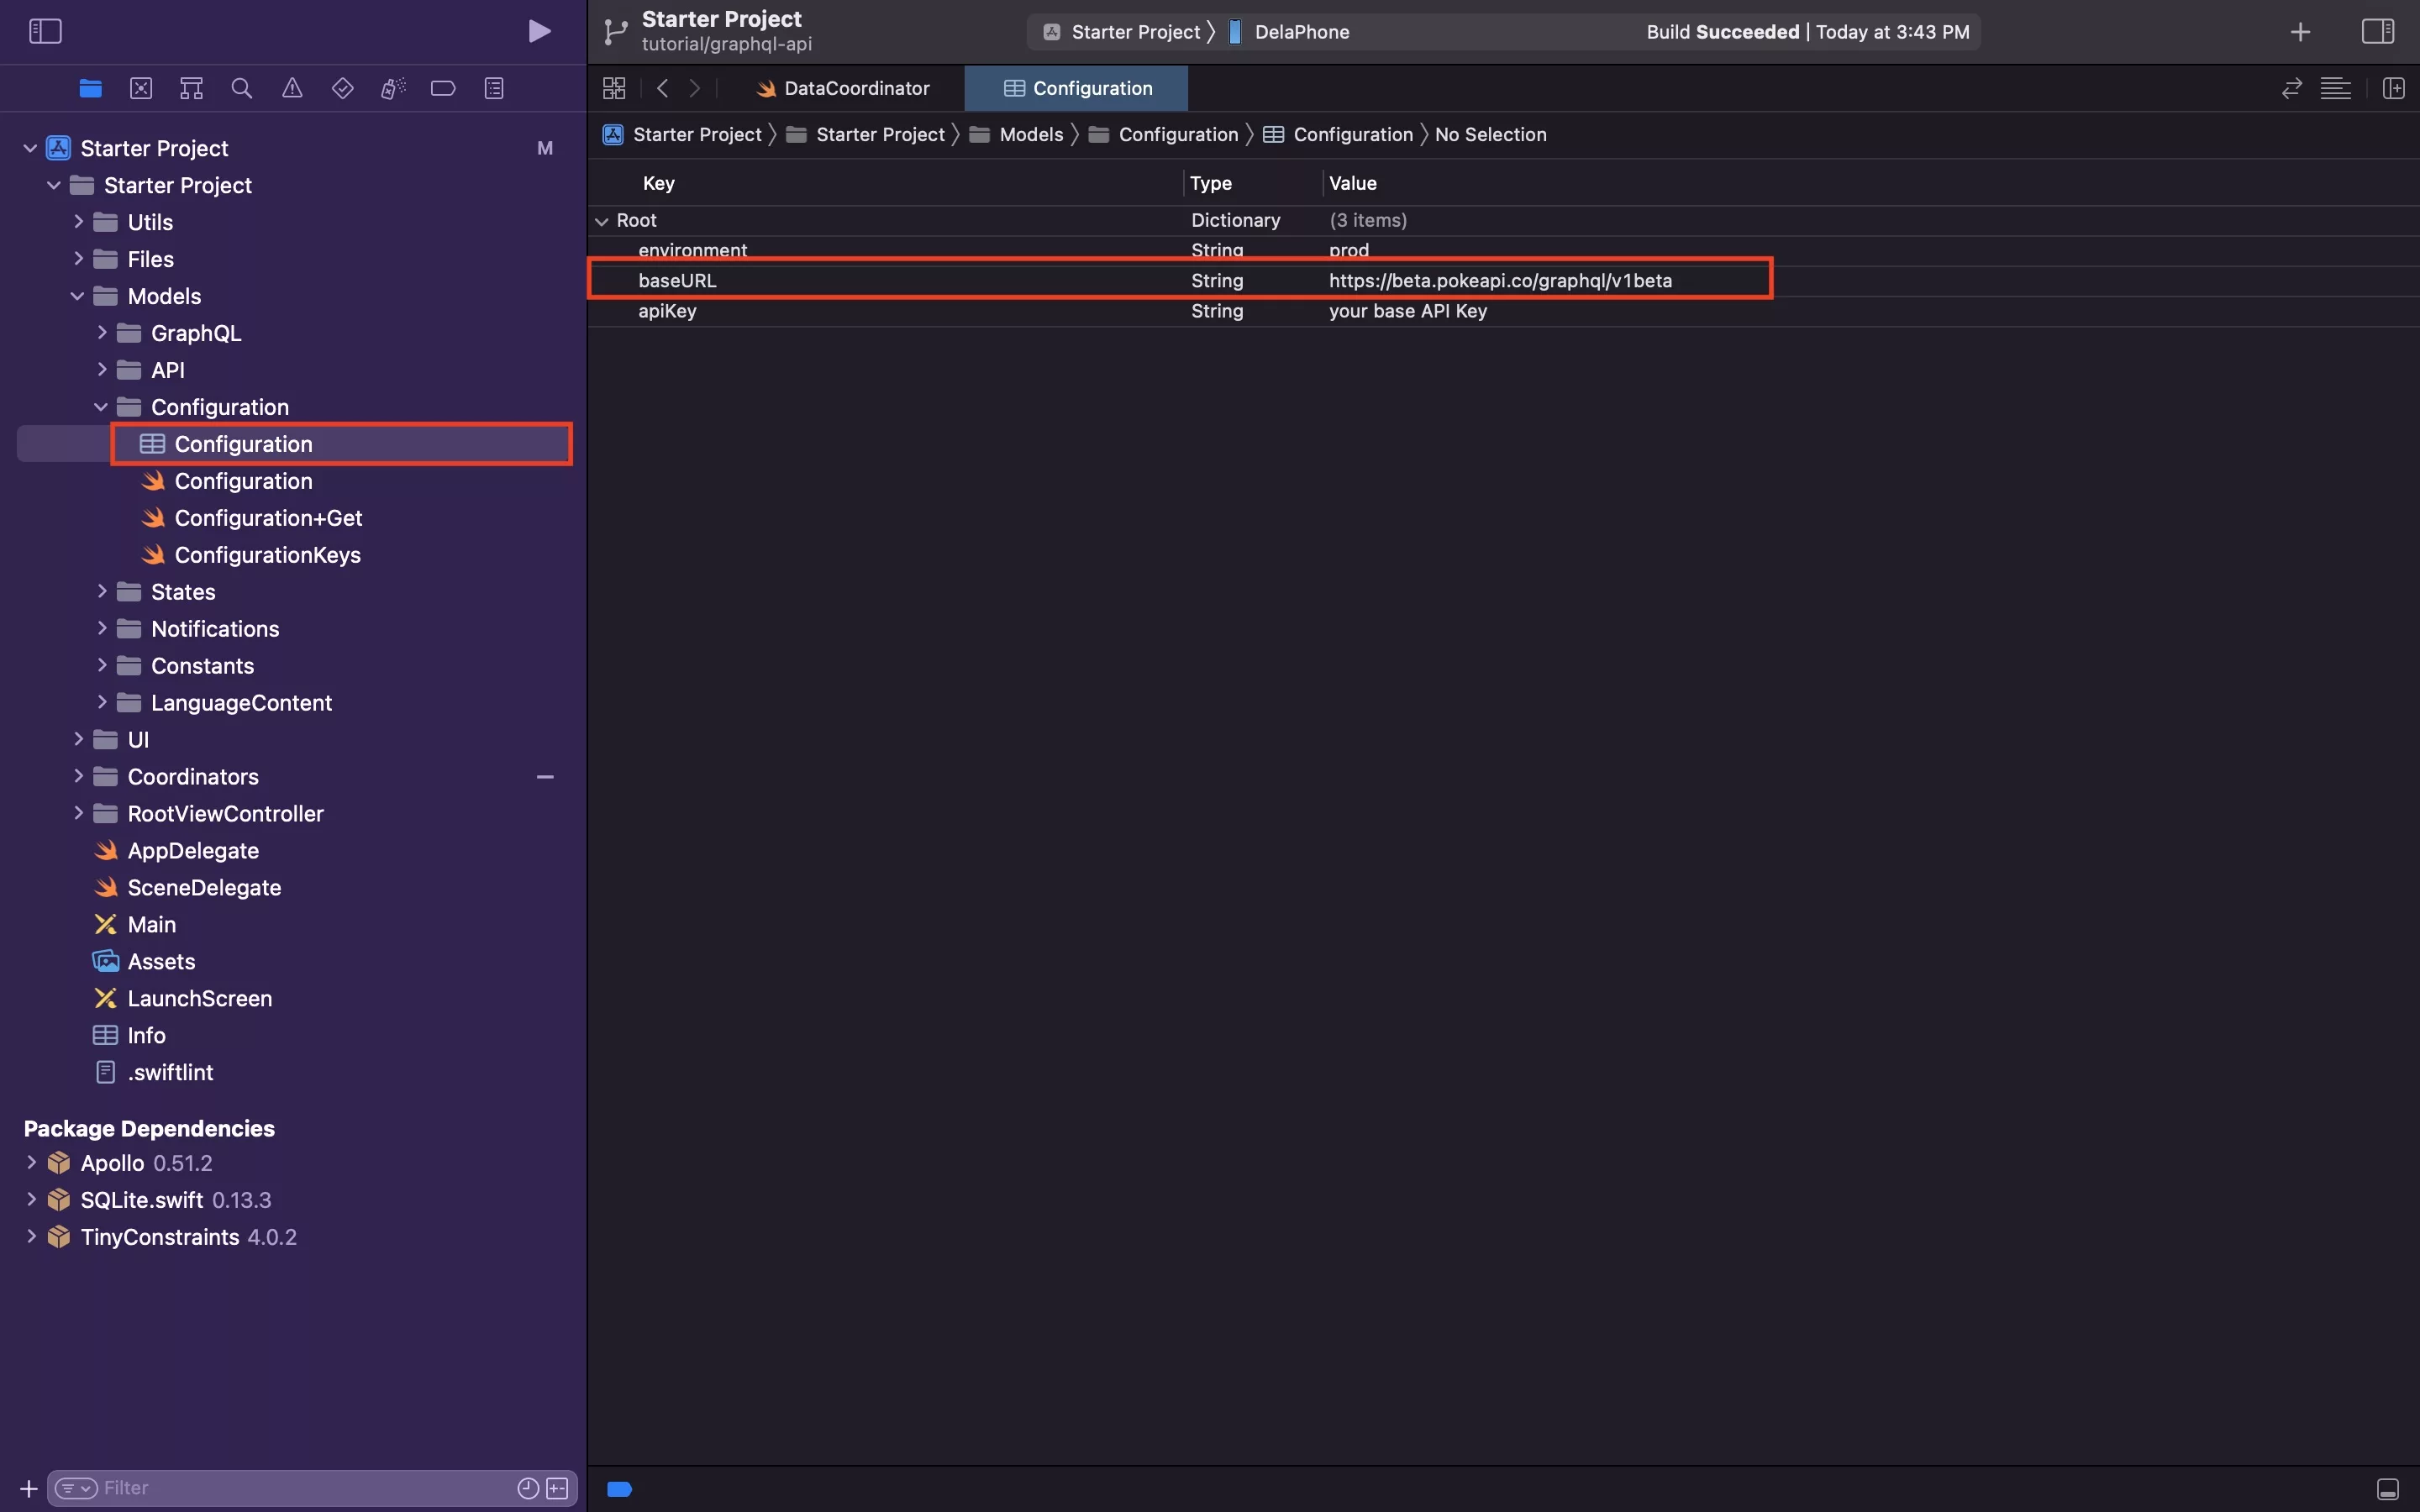
Update your Configuration.plist to take in the URL that you determined in Step One.
Step Fourteen: Declare and Initialize the Apollo Client
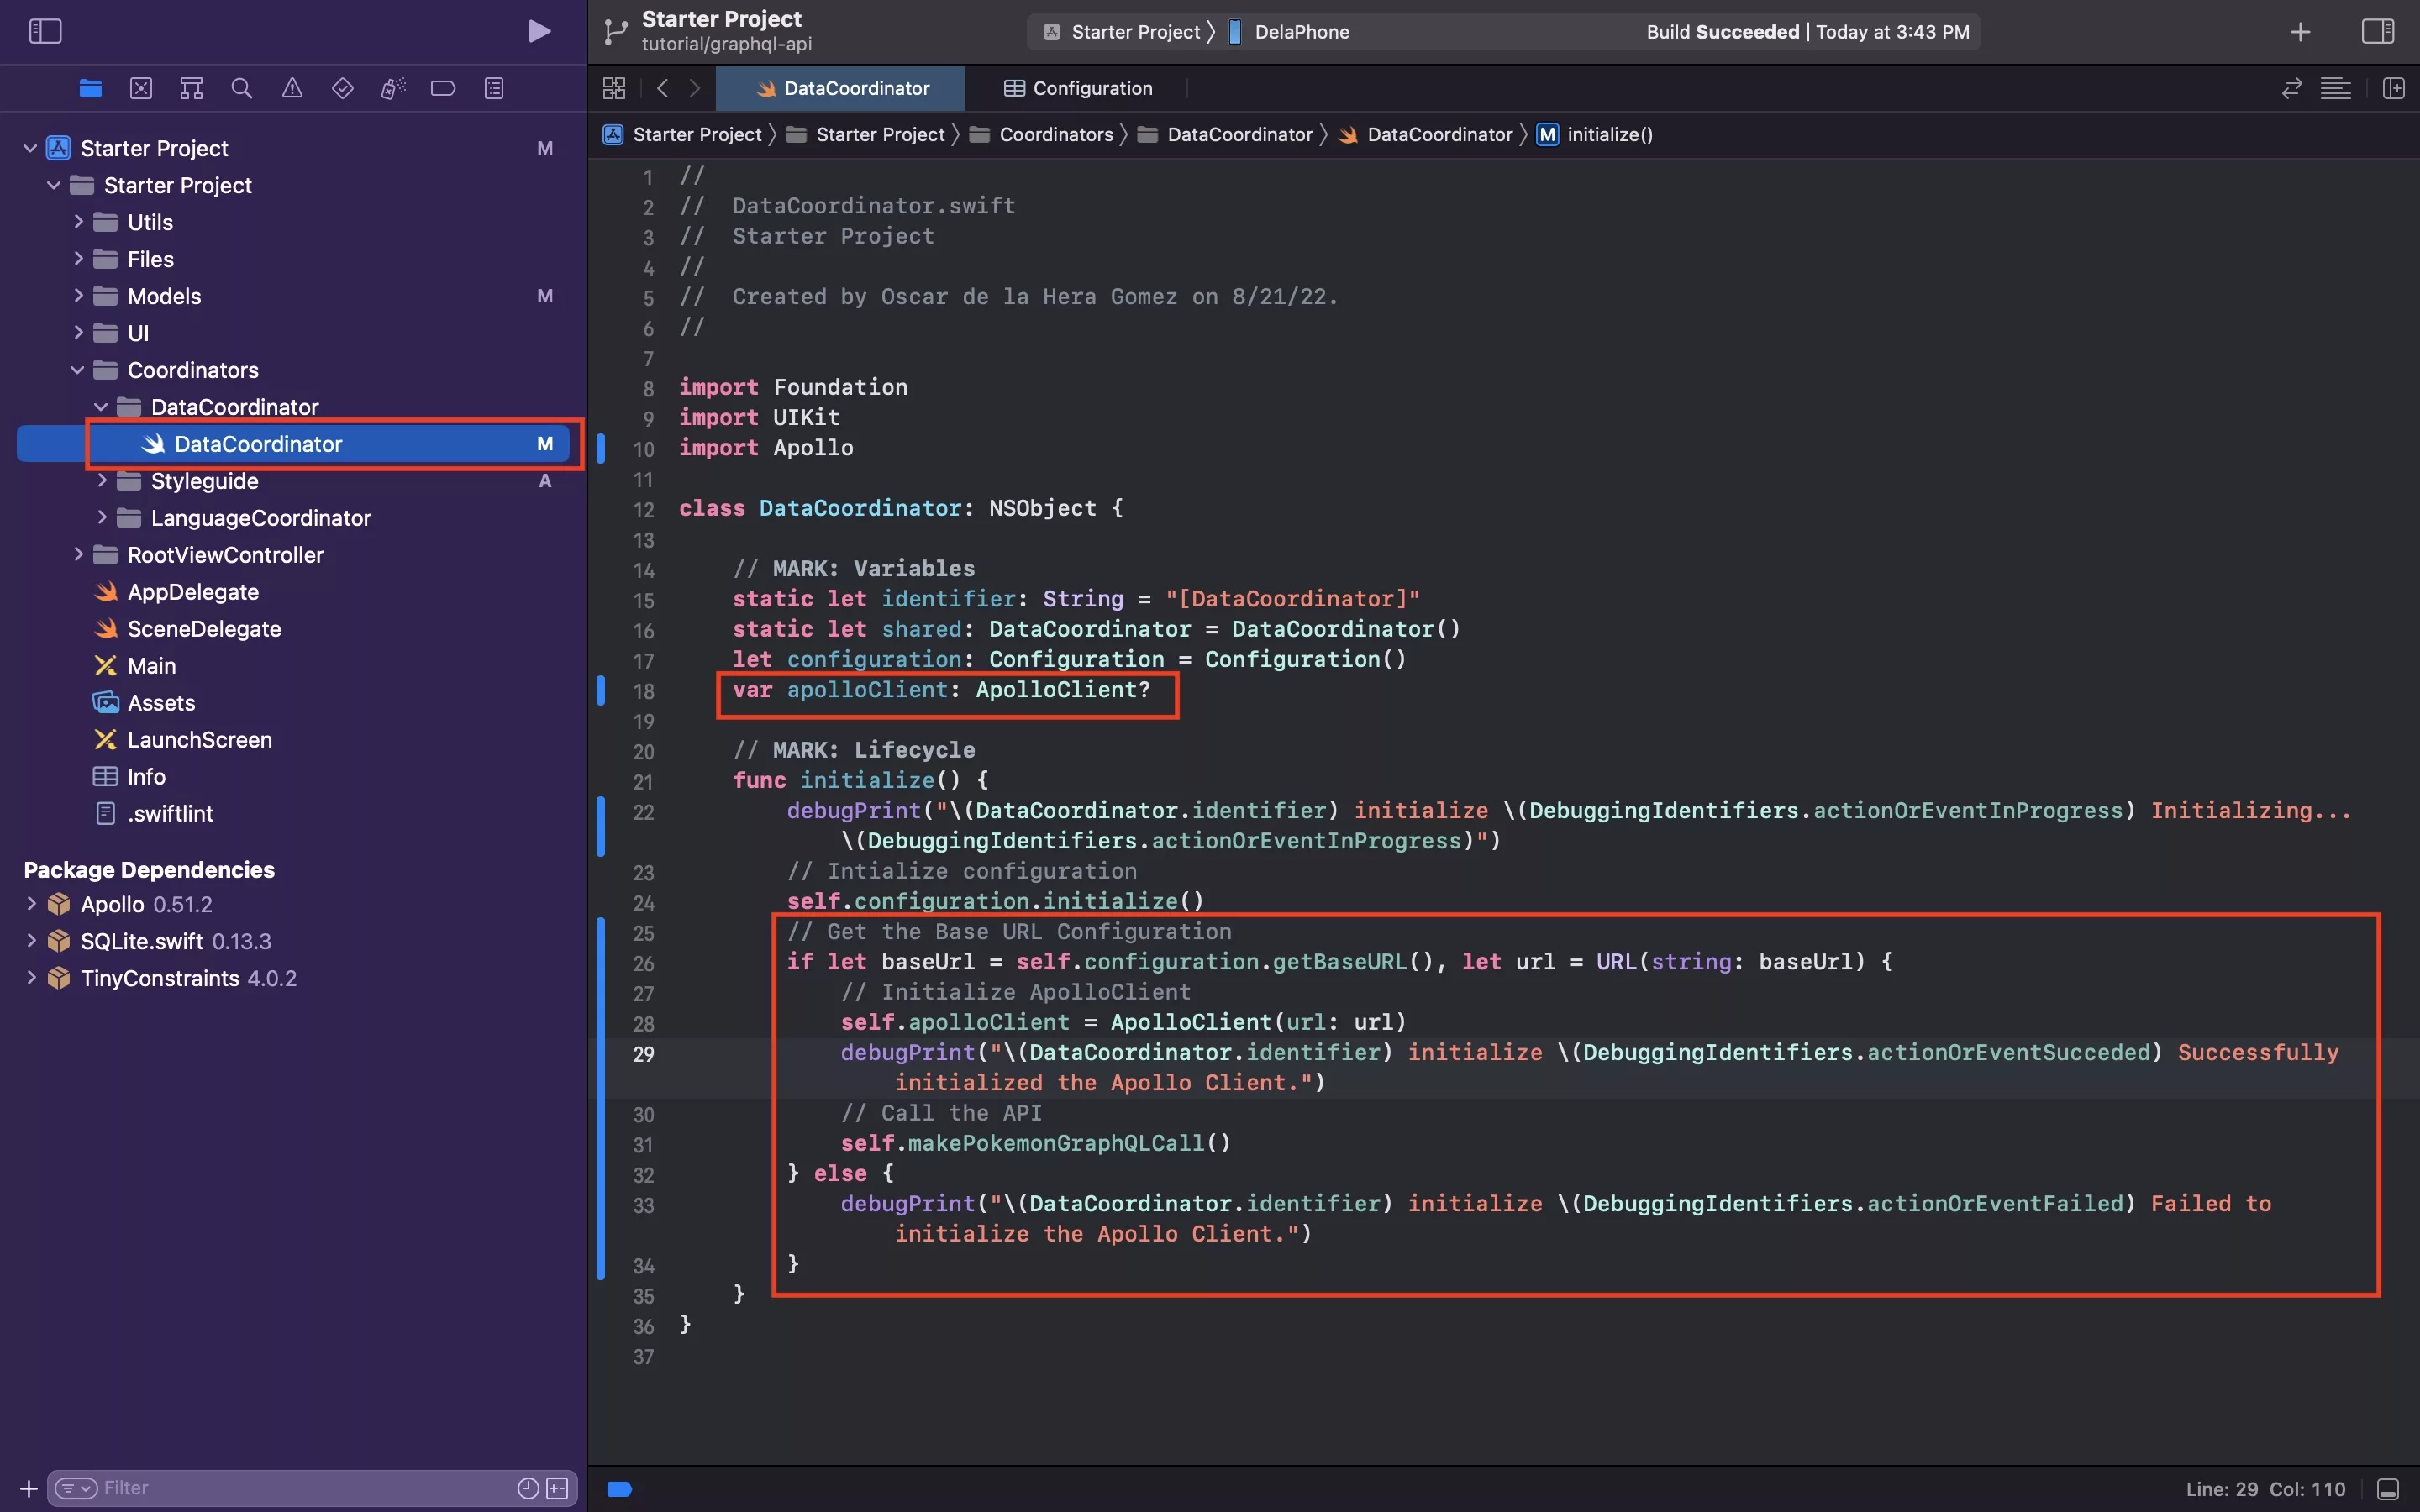
In DataCoordinator.swift, declare the Apollo Client as an optional and initialize it in the initialization function.
Please note that we call the GraphQL API call function written in Step Fifteen.
Step Fifteen: Create the API Extension
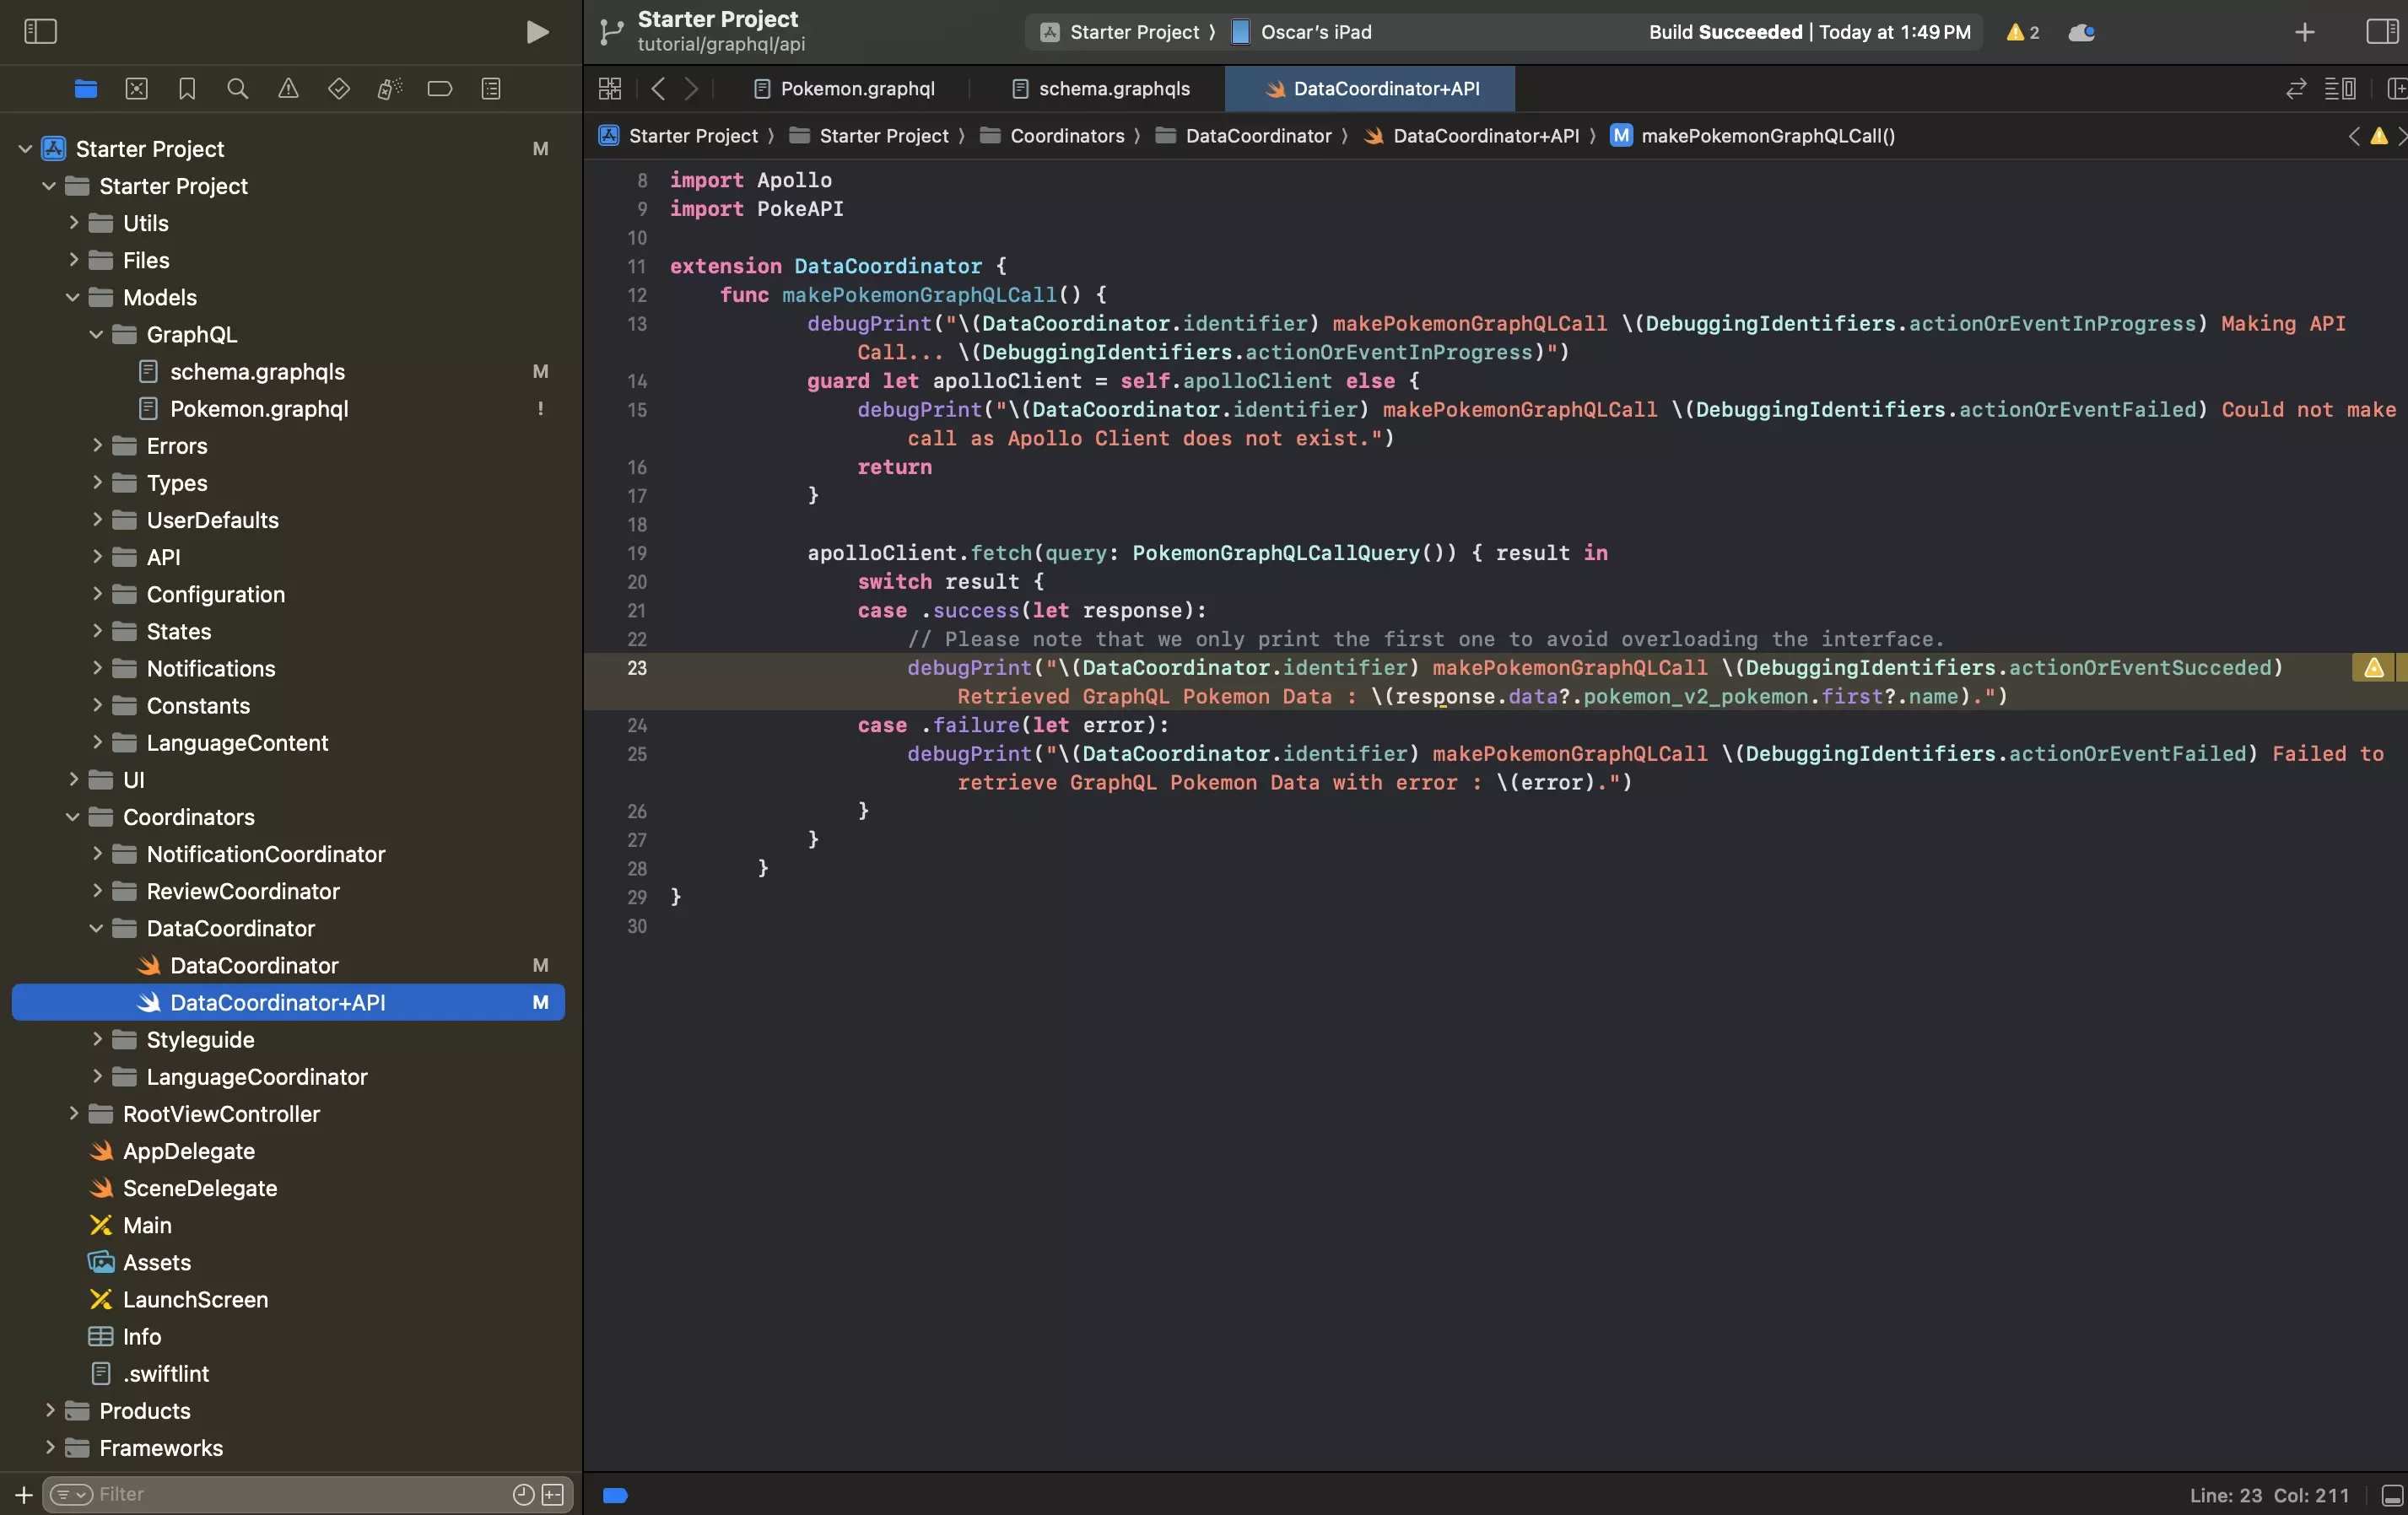
As demonstrated in our API call tutorial, we recommend making all the functionality for API in an extension in the DataCoordinator.
In the DataCoordinator folder, create a new file called DataCoordinator+API.swift and paste in the code found below:
Step Sixteen: Verify
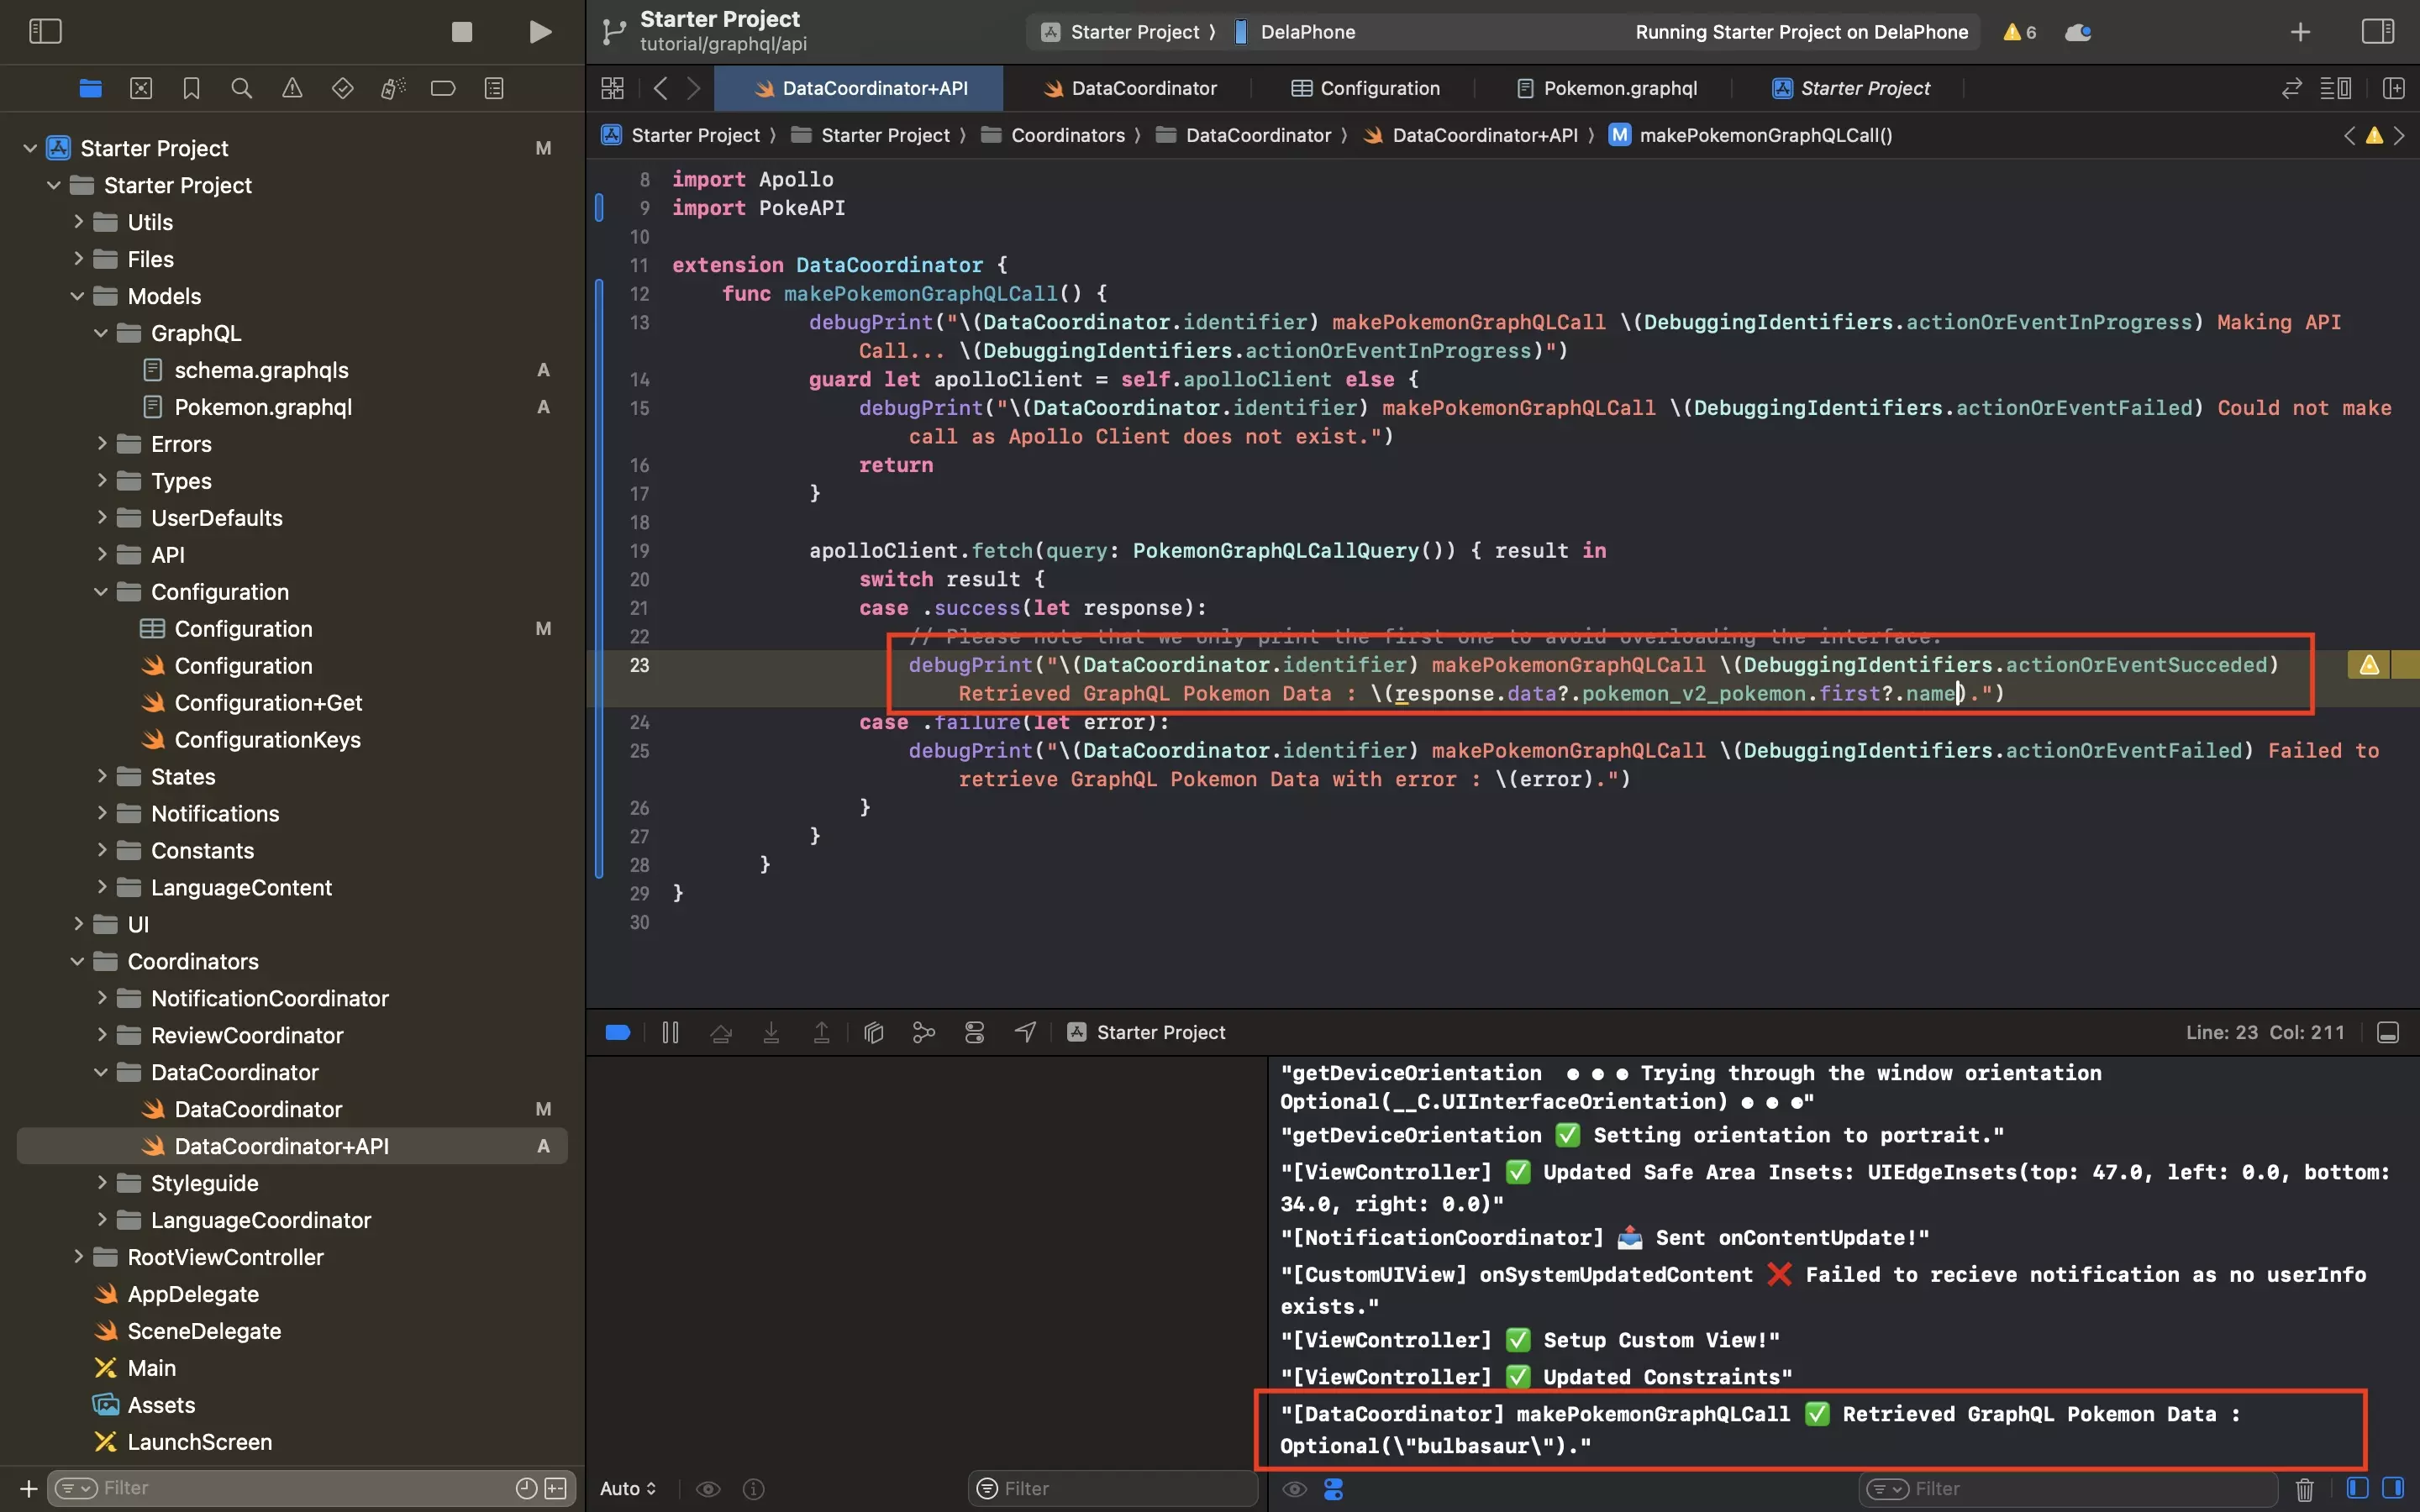
Run your project, you should see the results appear in the console as demonstrated in the image above.