How to add a custom font to an XCode Project
A step by step tutorial on adding a font to an iOS, MacOS, TVOS or WatchOS project in XCode and Swift.

A step by step tutorial on adding a font to an iOS, MacOS, TVOS or WatchOS project in XCode and Swift.
The following tutorial builds on our Open Source Swift project, which can be downloaded using the link below, and which walks you through how to add a font to your project in Xcode. Please note that this process is the same for iOS, MacOS, TVOS and WatchOS.
Please note that this tutorial makes use and expands on Apple's reference for adding fonts to an XCode project.
Tutorial
We recommend downloading our Open Source project, checking out the main branch and carrying out the steps outlined below. All relevant changes can be found on the tutorial/add-a-font branch.
git clone git@github.com:delasign/swift-starter-project.gitStep One: Add your font to XCode
The following step details how to add a font to your project. Please note that we will be using Montserrat, which we gathered using Google Fonts.
A | Select Add the File to your project in Xcode
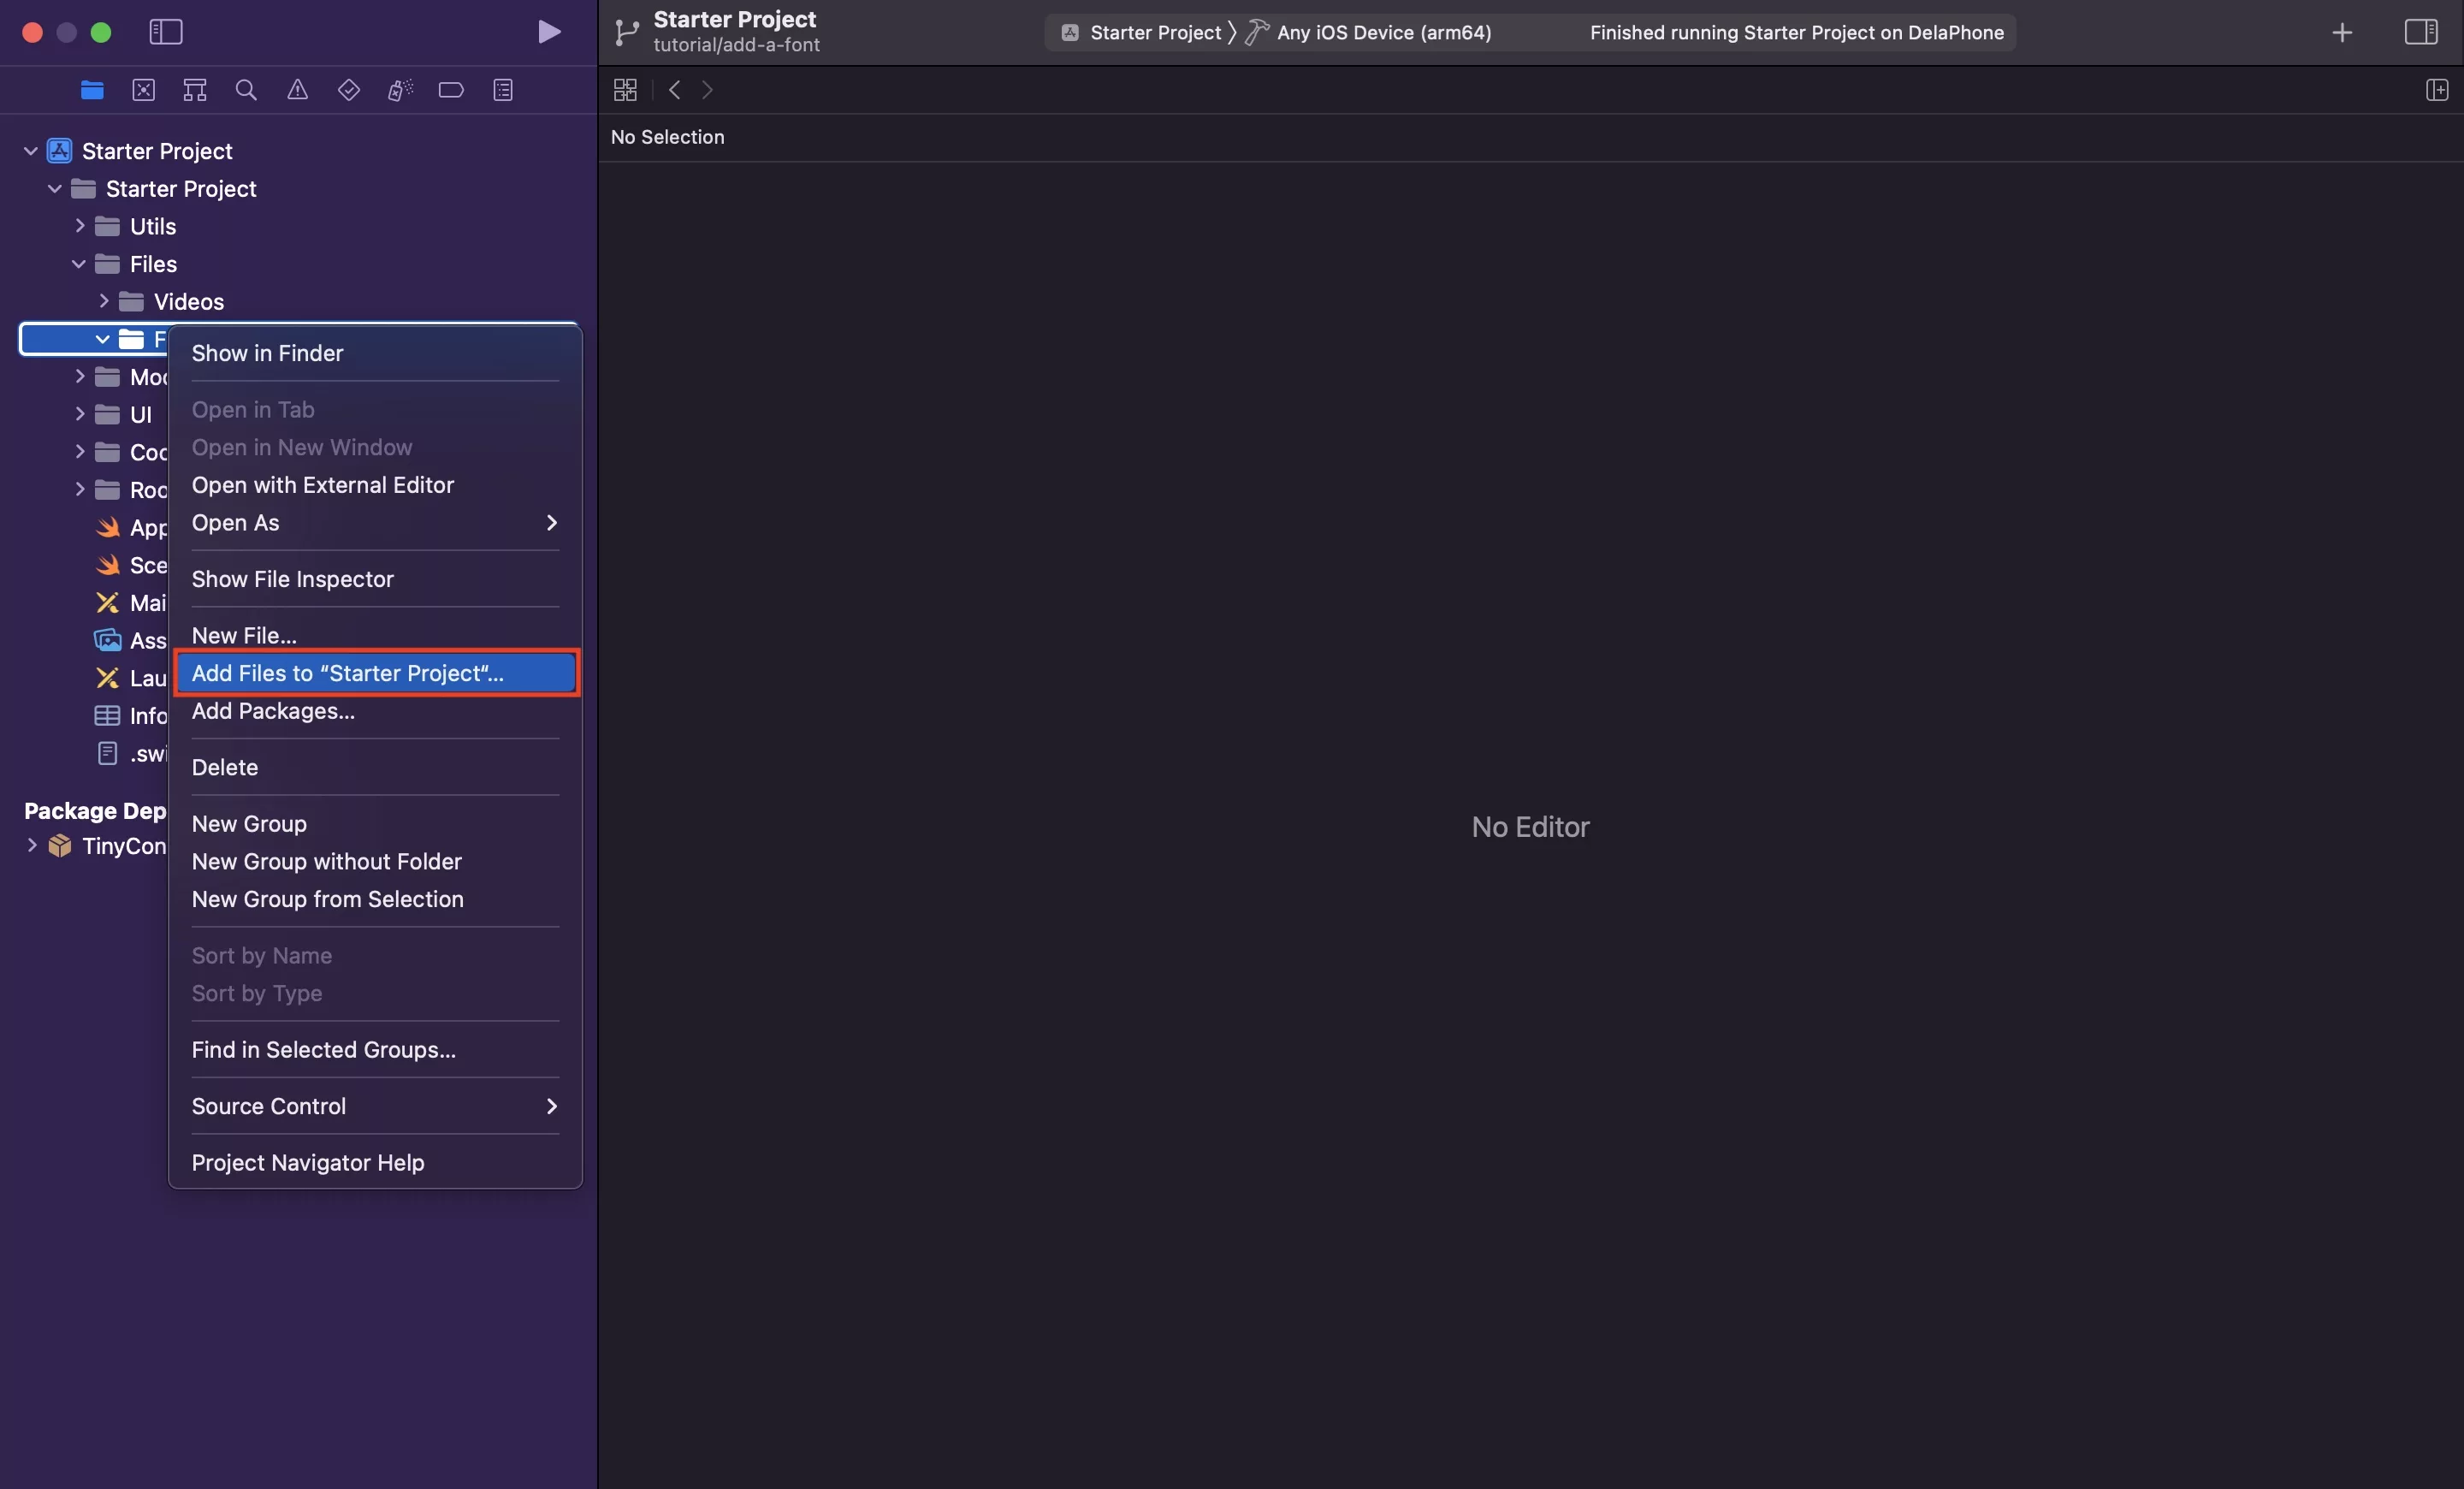
Under the Files folder, within the Fonts folder, right click and select Add Files to "Starter Project"...
Please note that "Starter Project" is the name of our Open Source starter project and will be different if this is in your own project.
B | Add your Font to Xcode
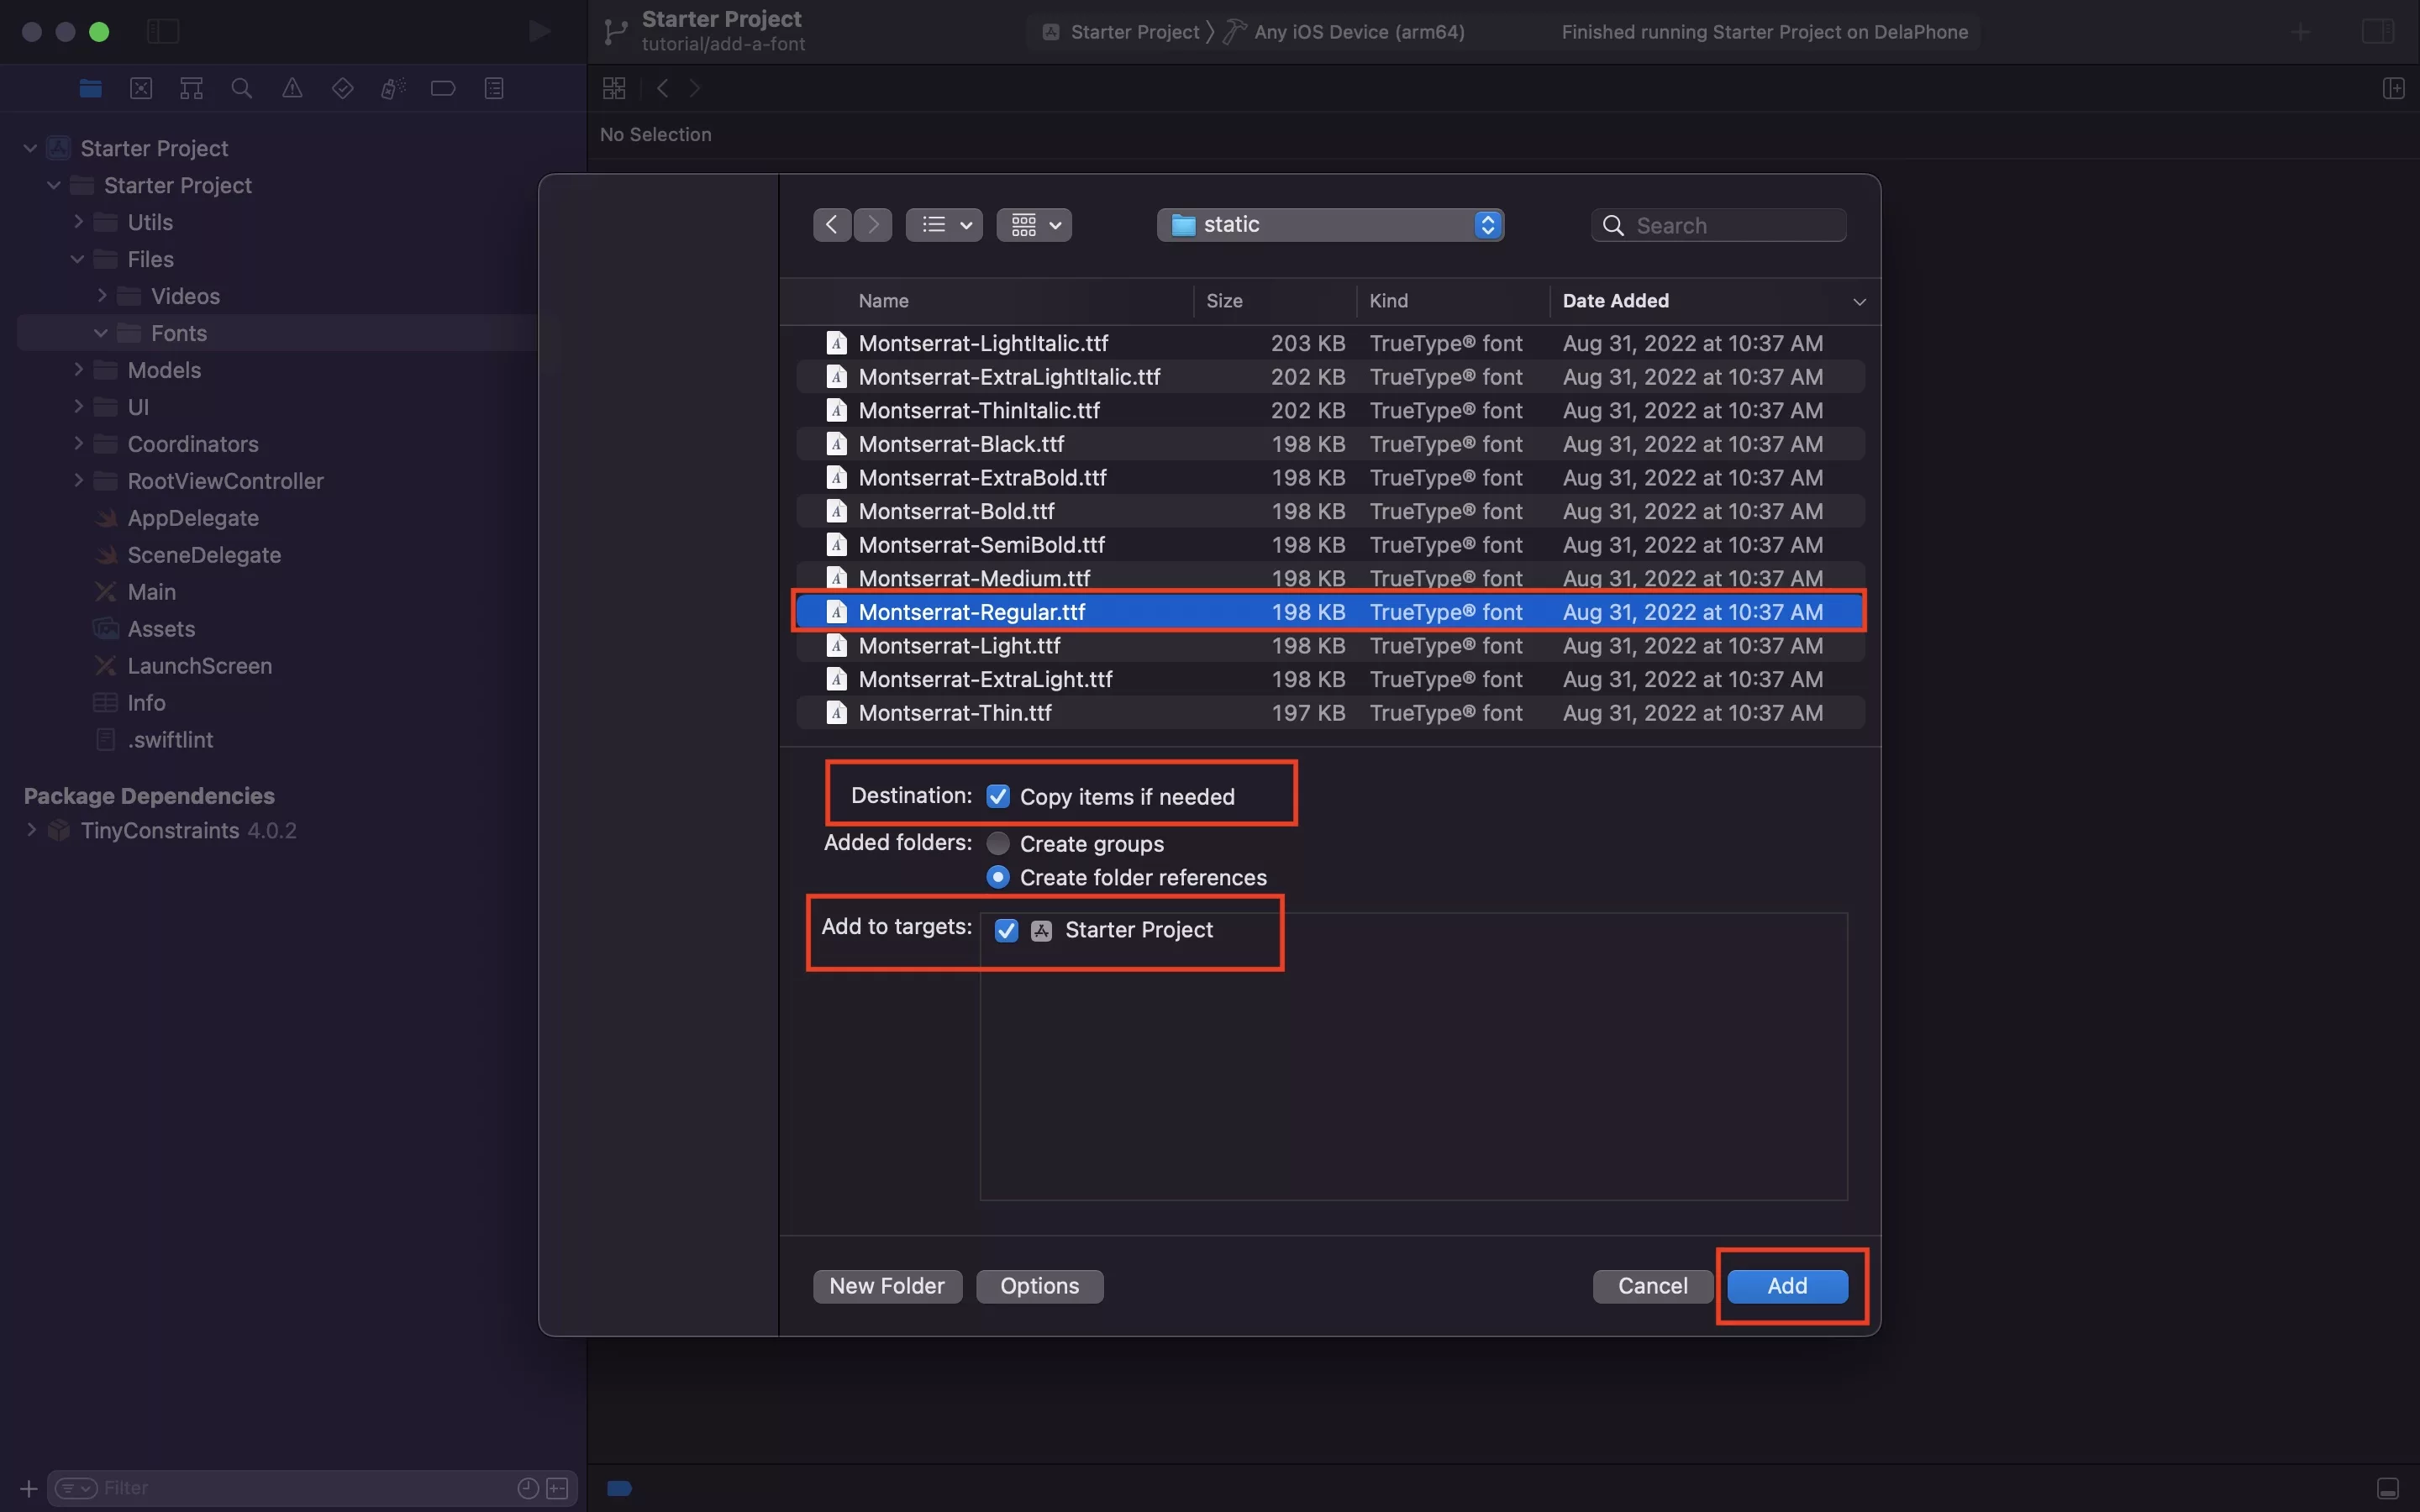
In the Finder window that appears, navigate to the location of the Font. Once you have selected it, make sure that:
- The destination has Copy items if needed checked off.
- The Add to Targets section has a checkbox next to your project.
Once you're ready, click Add.
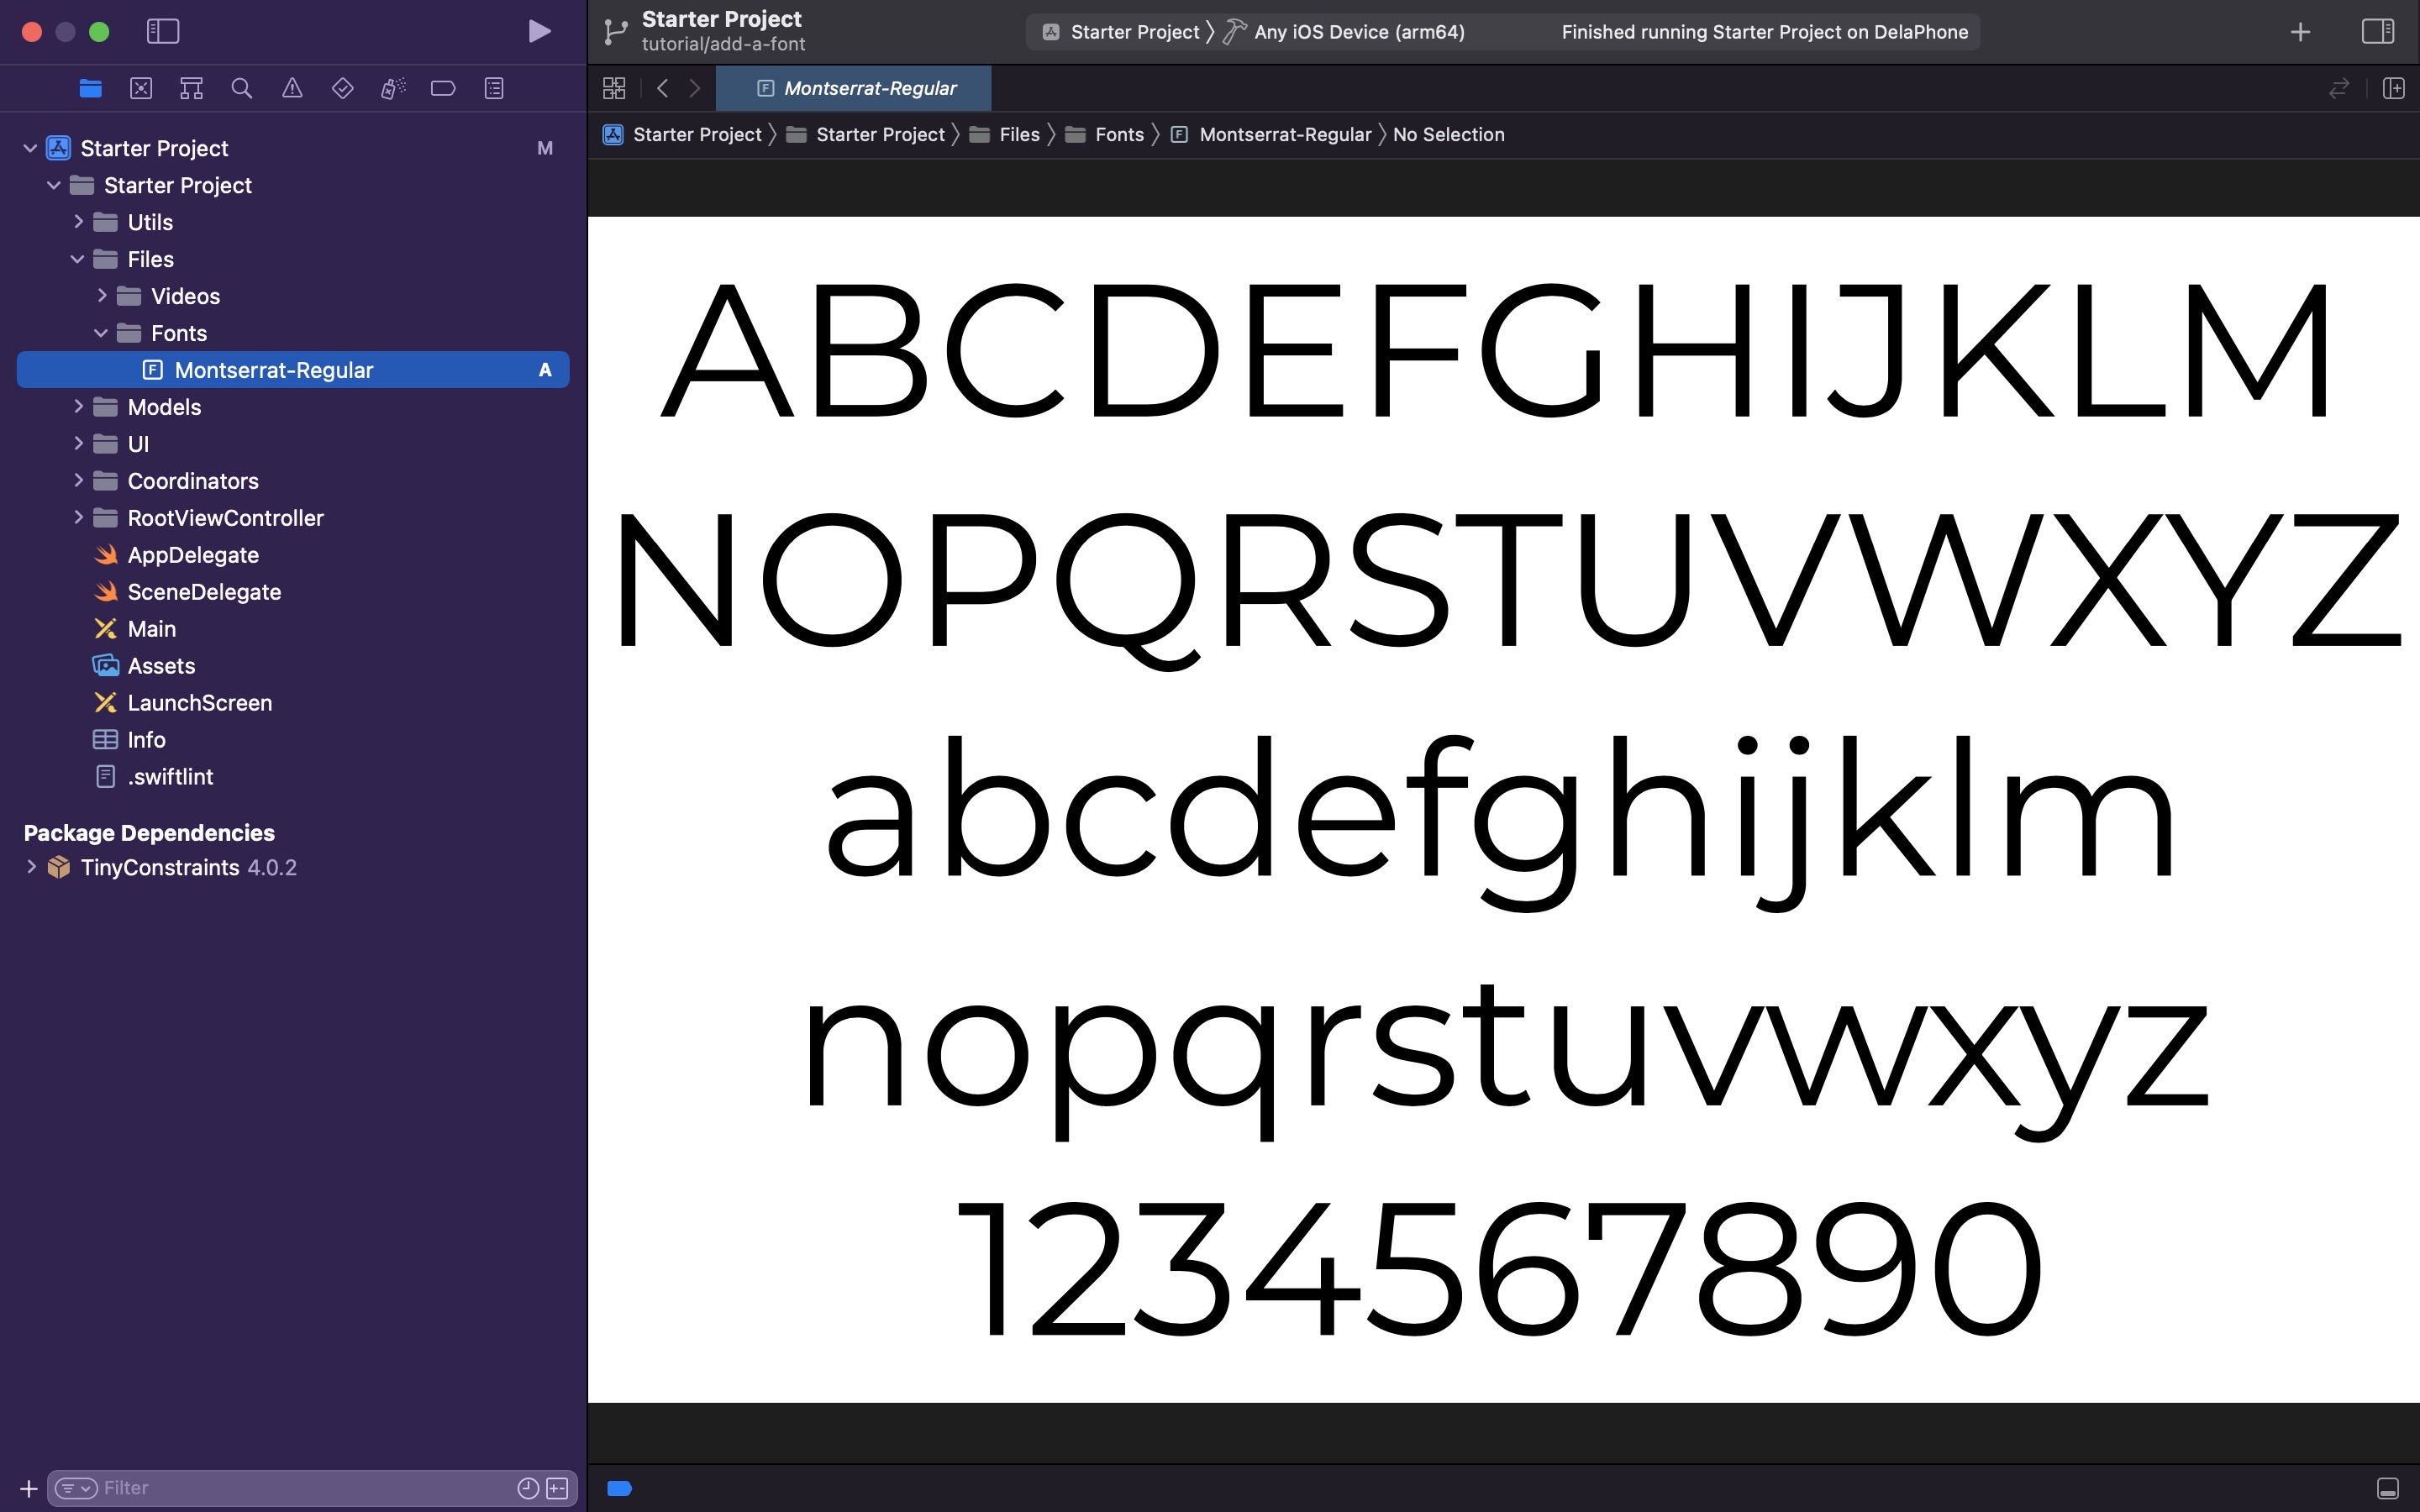
Step Two: Copy the name of the font
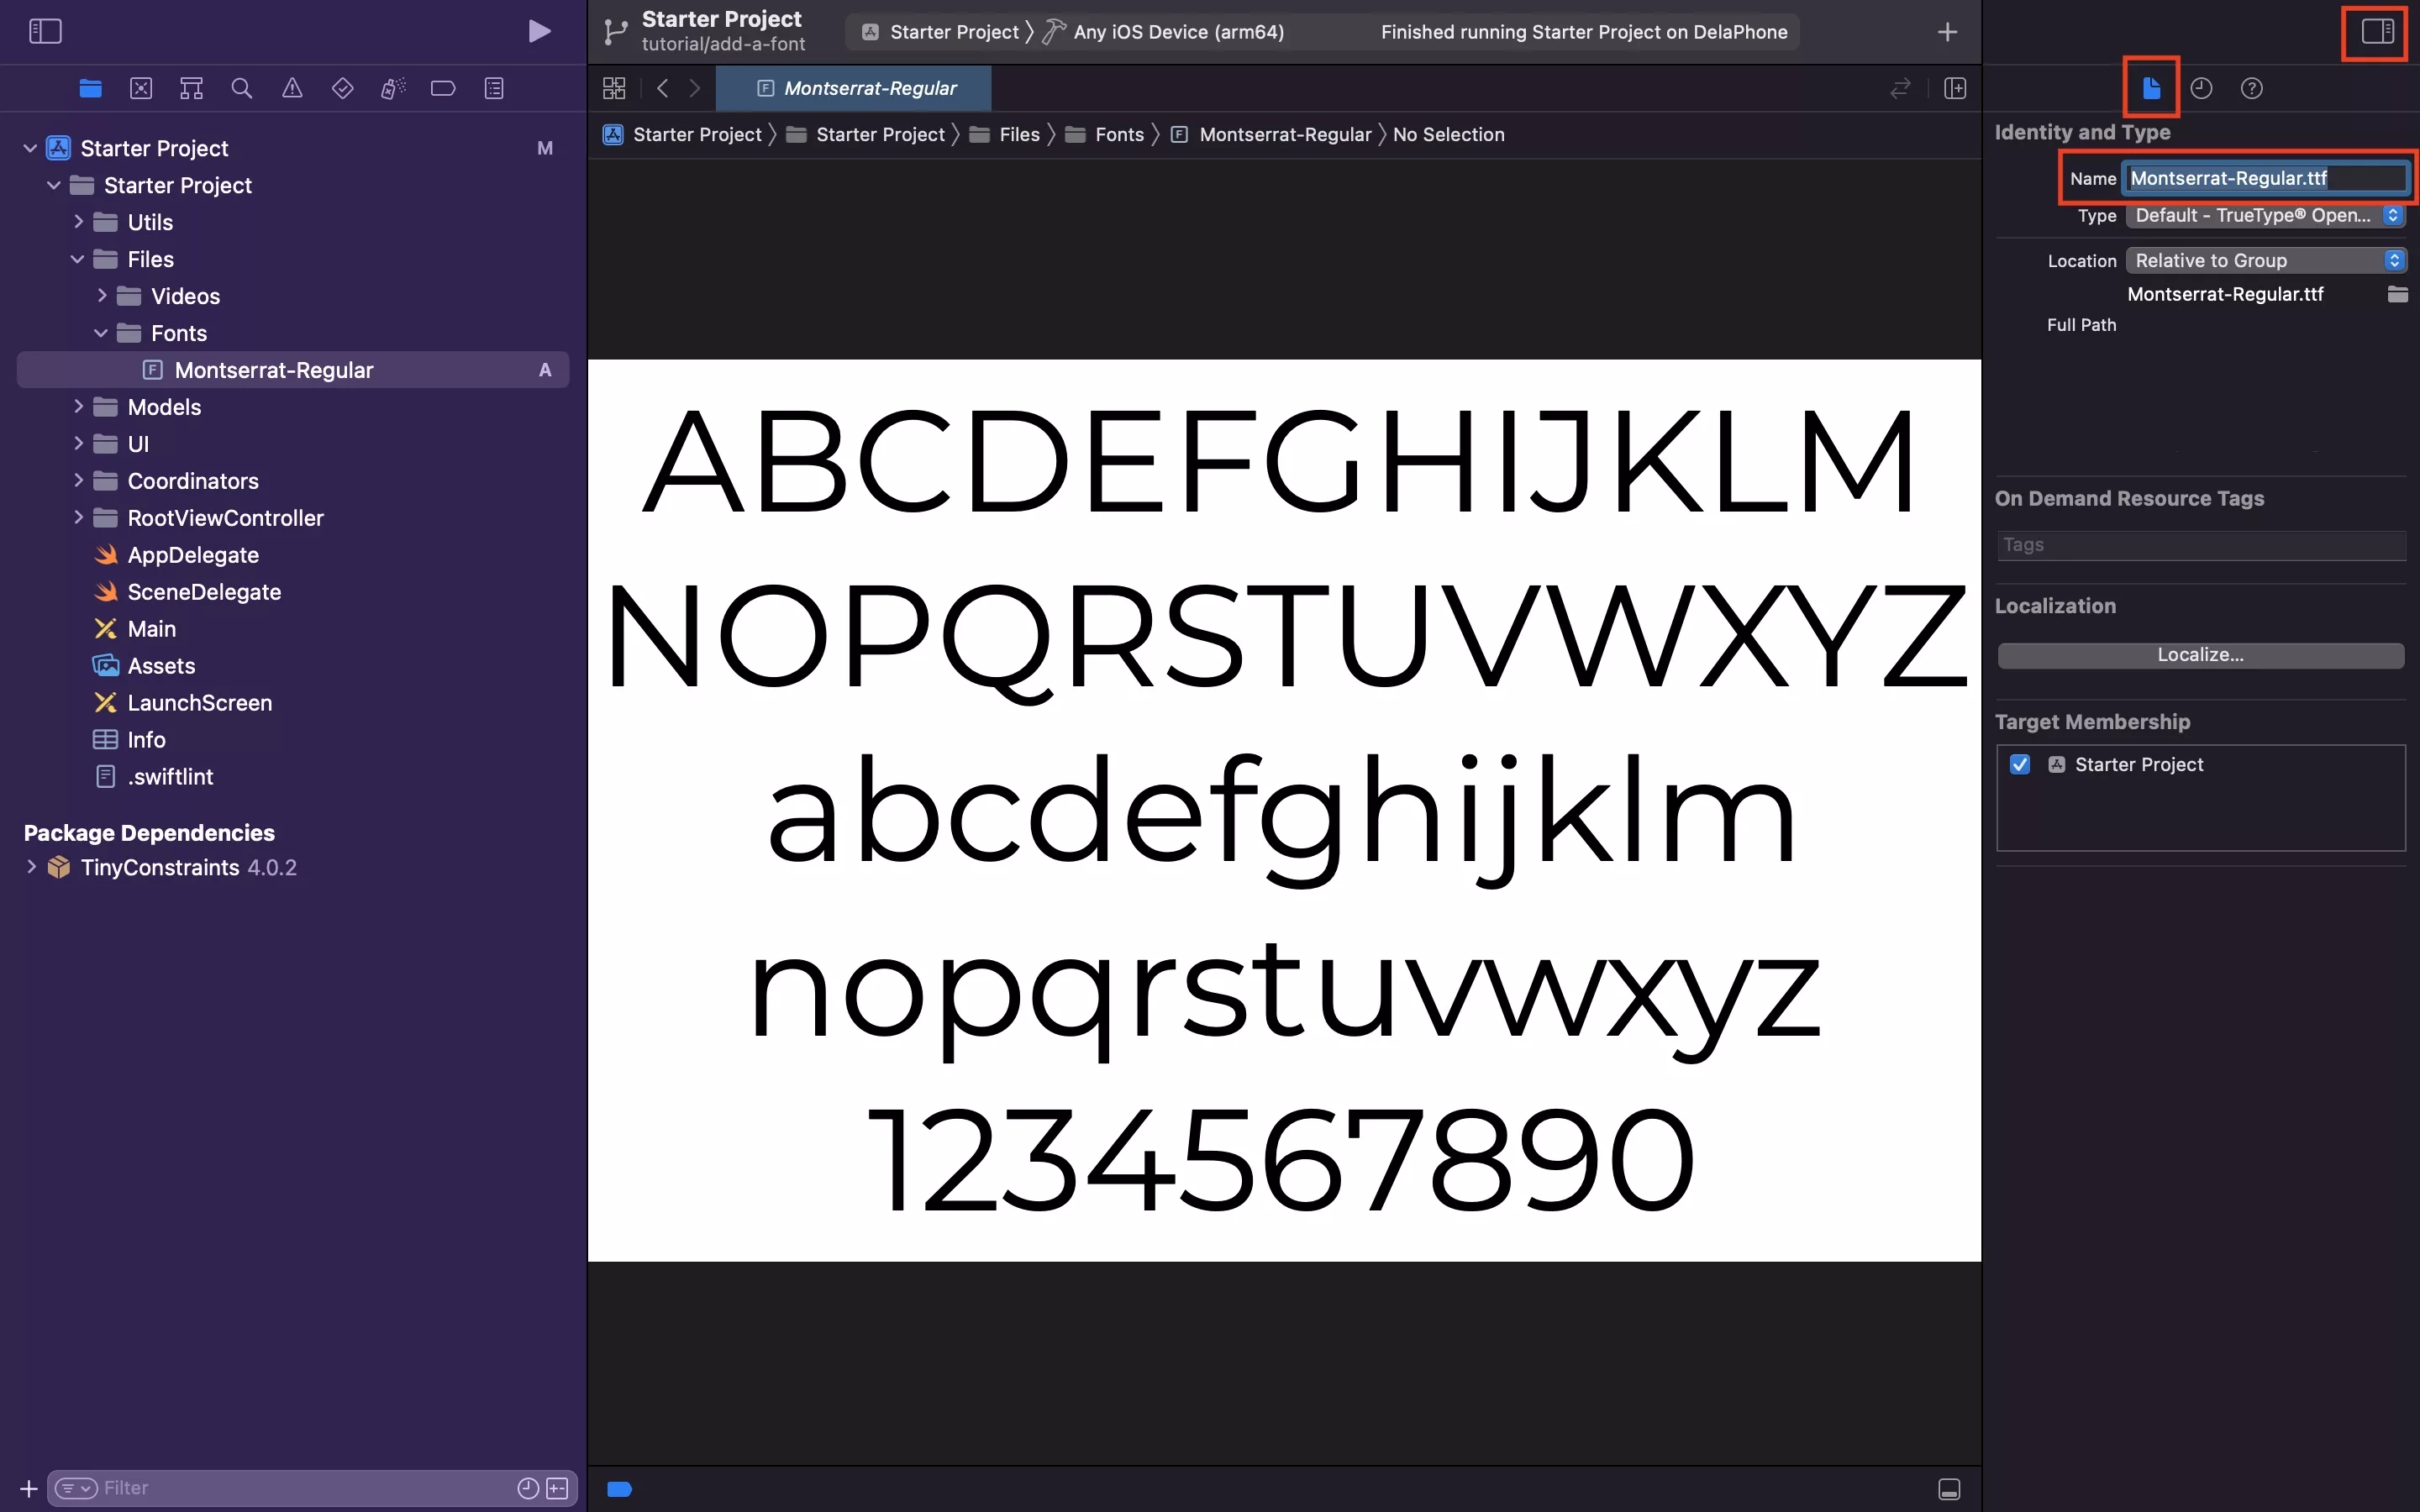
In Inspector, on the right hand side of XCode, under Identity and Type - Copy the name of the font.
Please note that in order to make the Inspector appear you must select the button on the top right that is outlined in red.
Step Three: Add font to the Info.plist
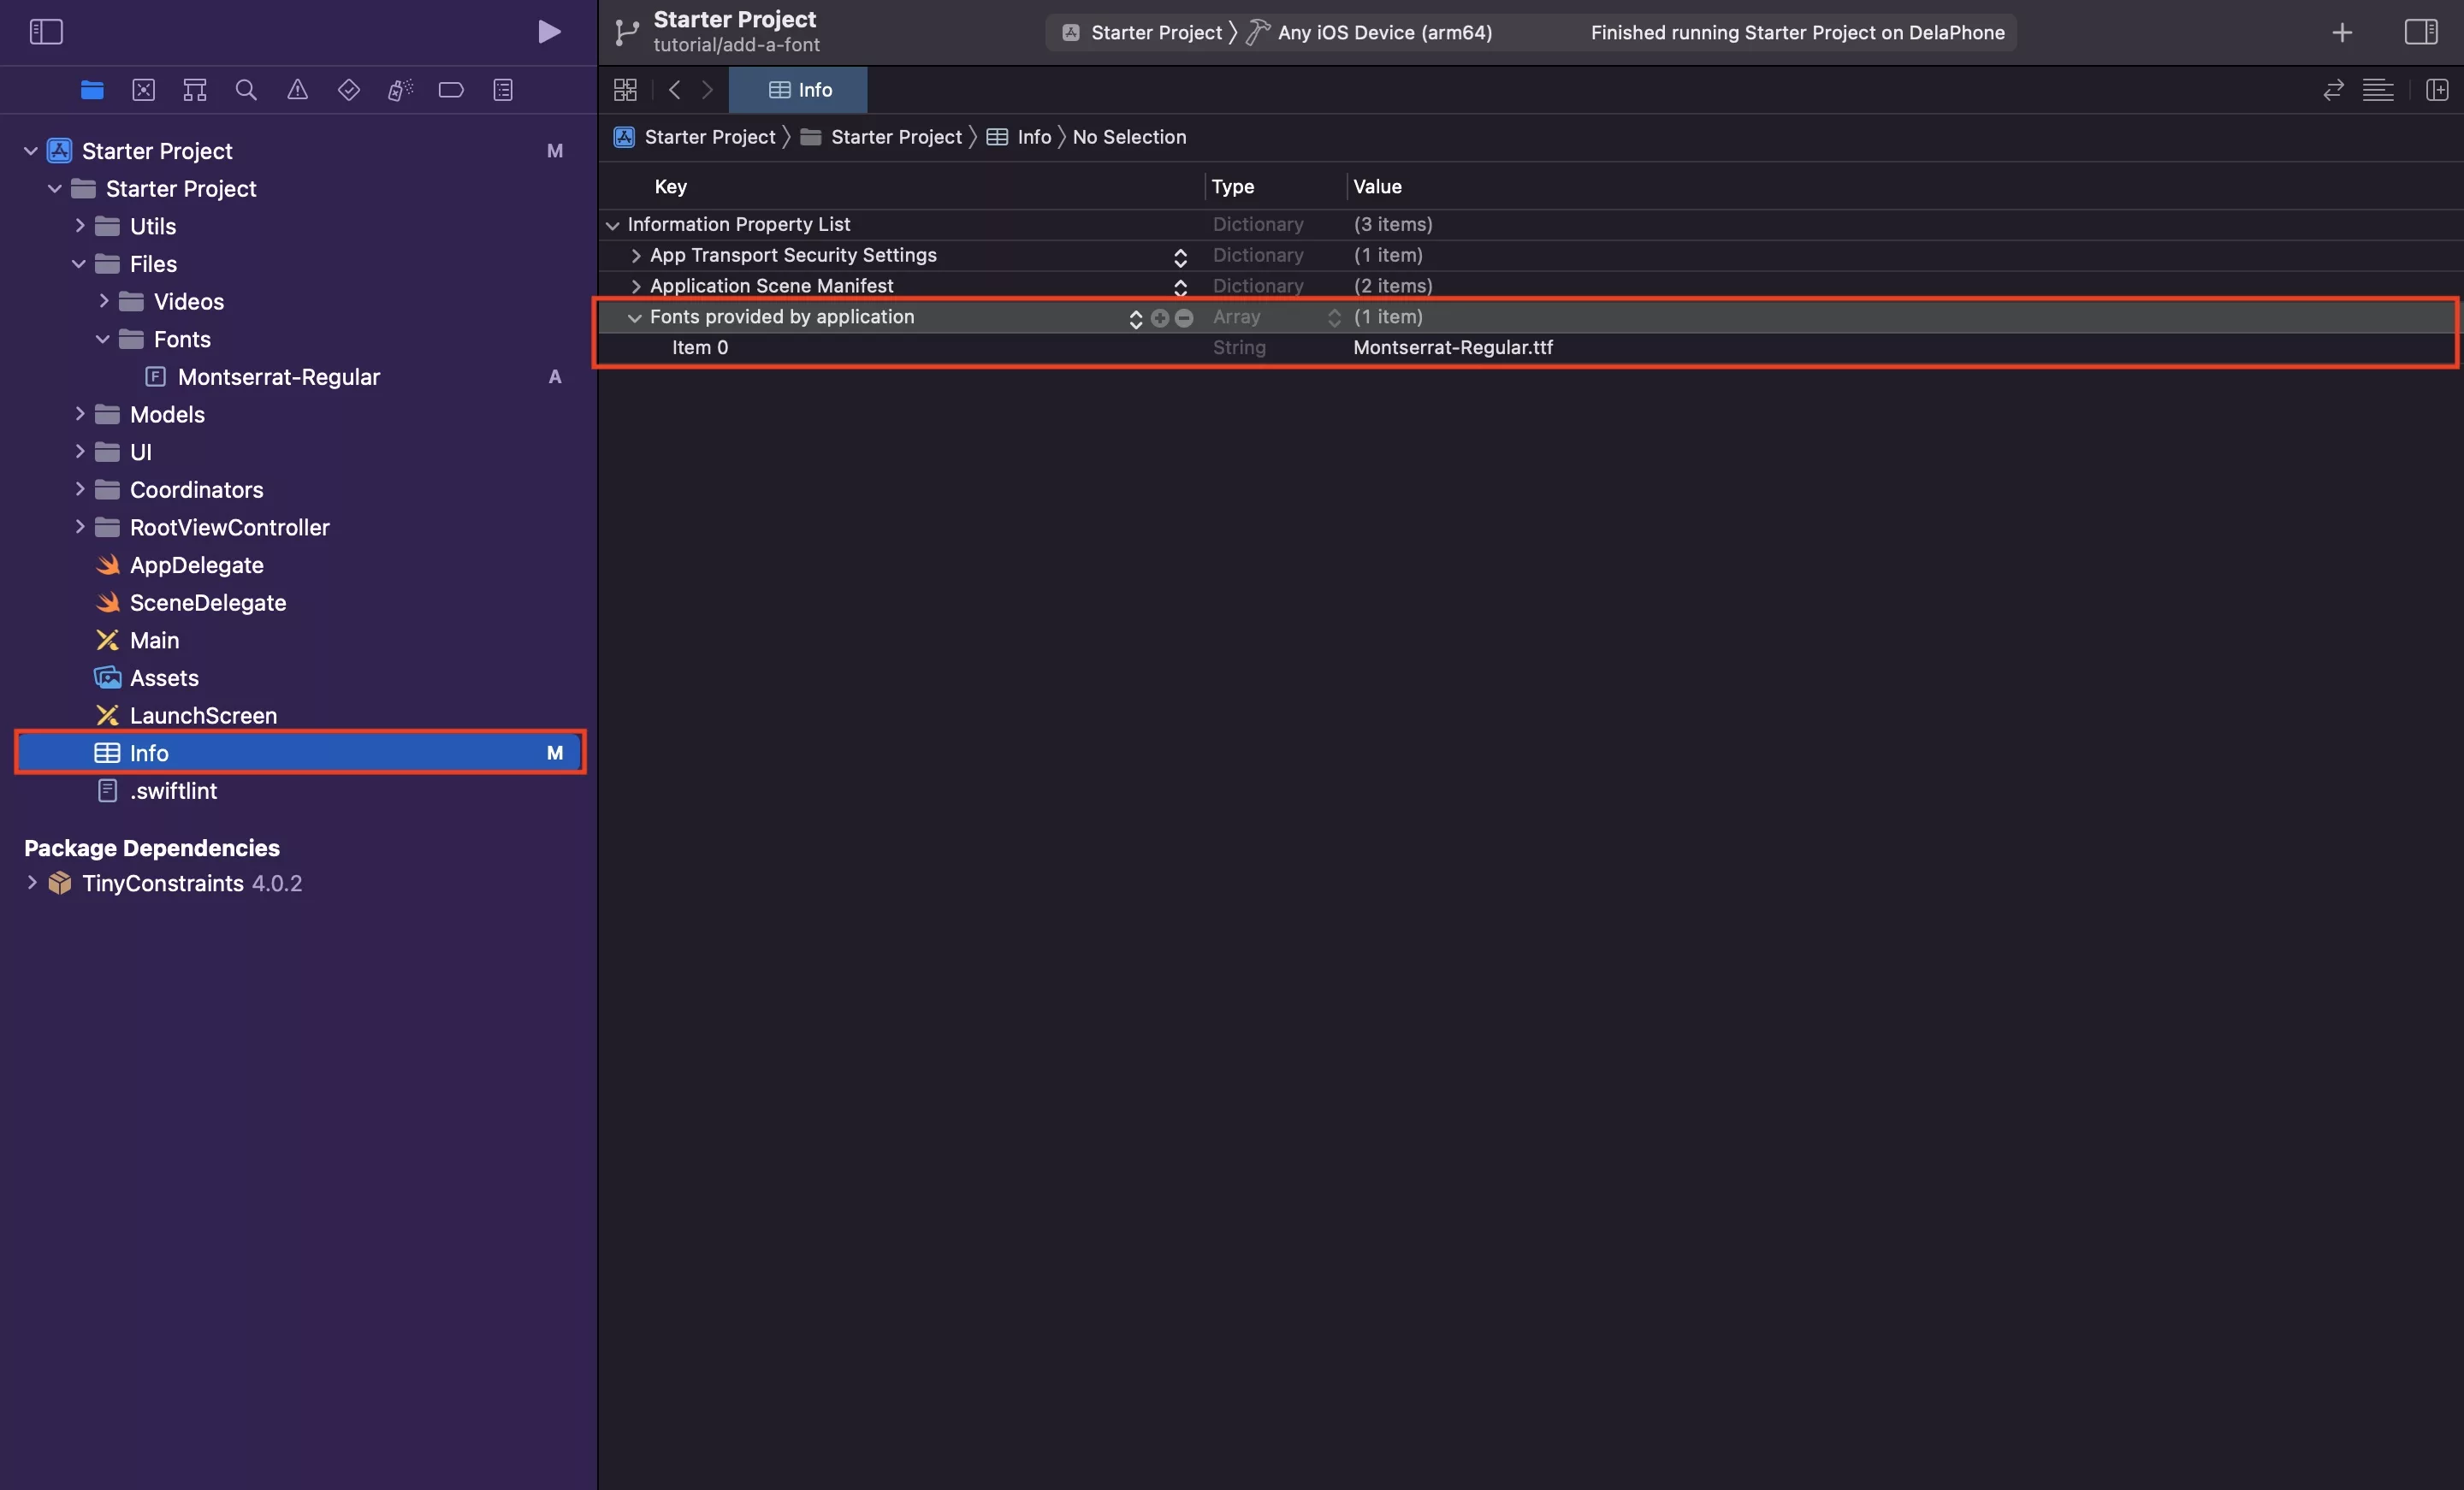
Select the Info.plist and add a new row. In the row that appears, enter Fonts provided with applications - which will create an array with an empty item. In this empty item, paste the name of the font that you copied in Step Two.
Please note that at this step, Xcode has incorporated the font into the app and it can now be used. The next step informs you on how you can use it.
Step Four: Add the font to the Fonts.swift
The following step details how to determine what string the system uses for the font that you added in this tutorial, and to make it available via the fonts on our Styleguide, which are declared in Fonts.swift.
A | Print all the system fonts
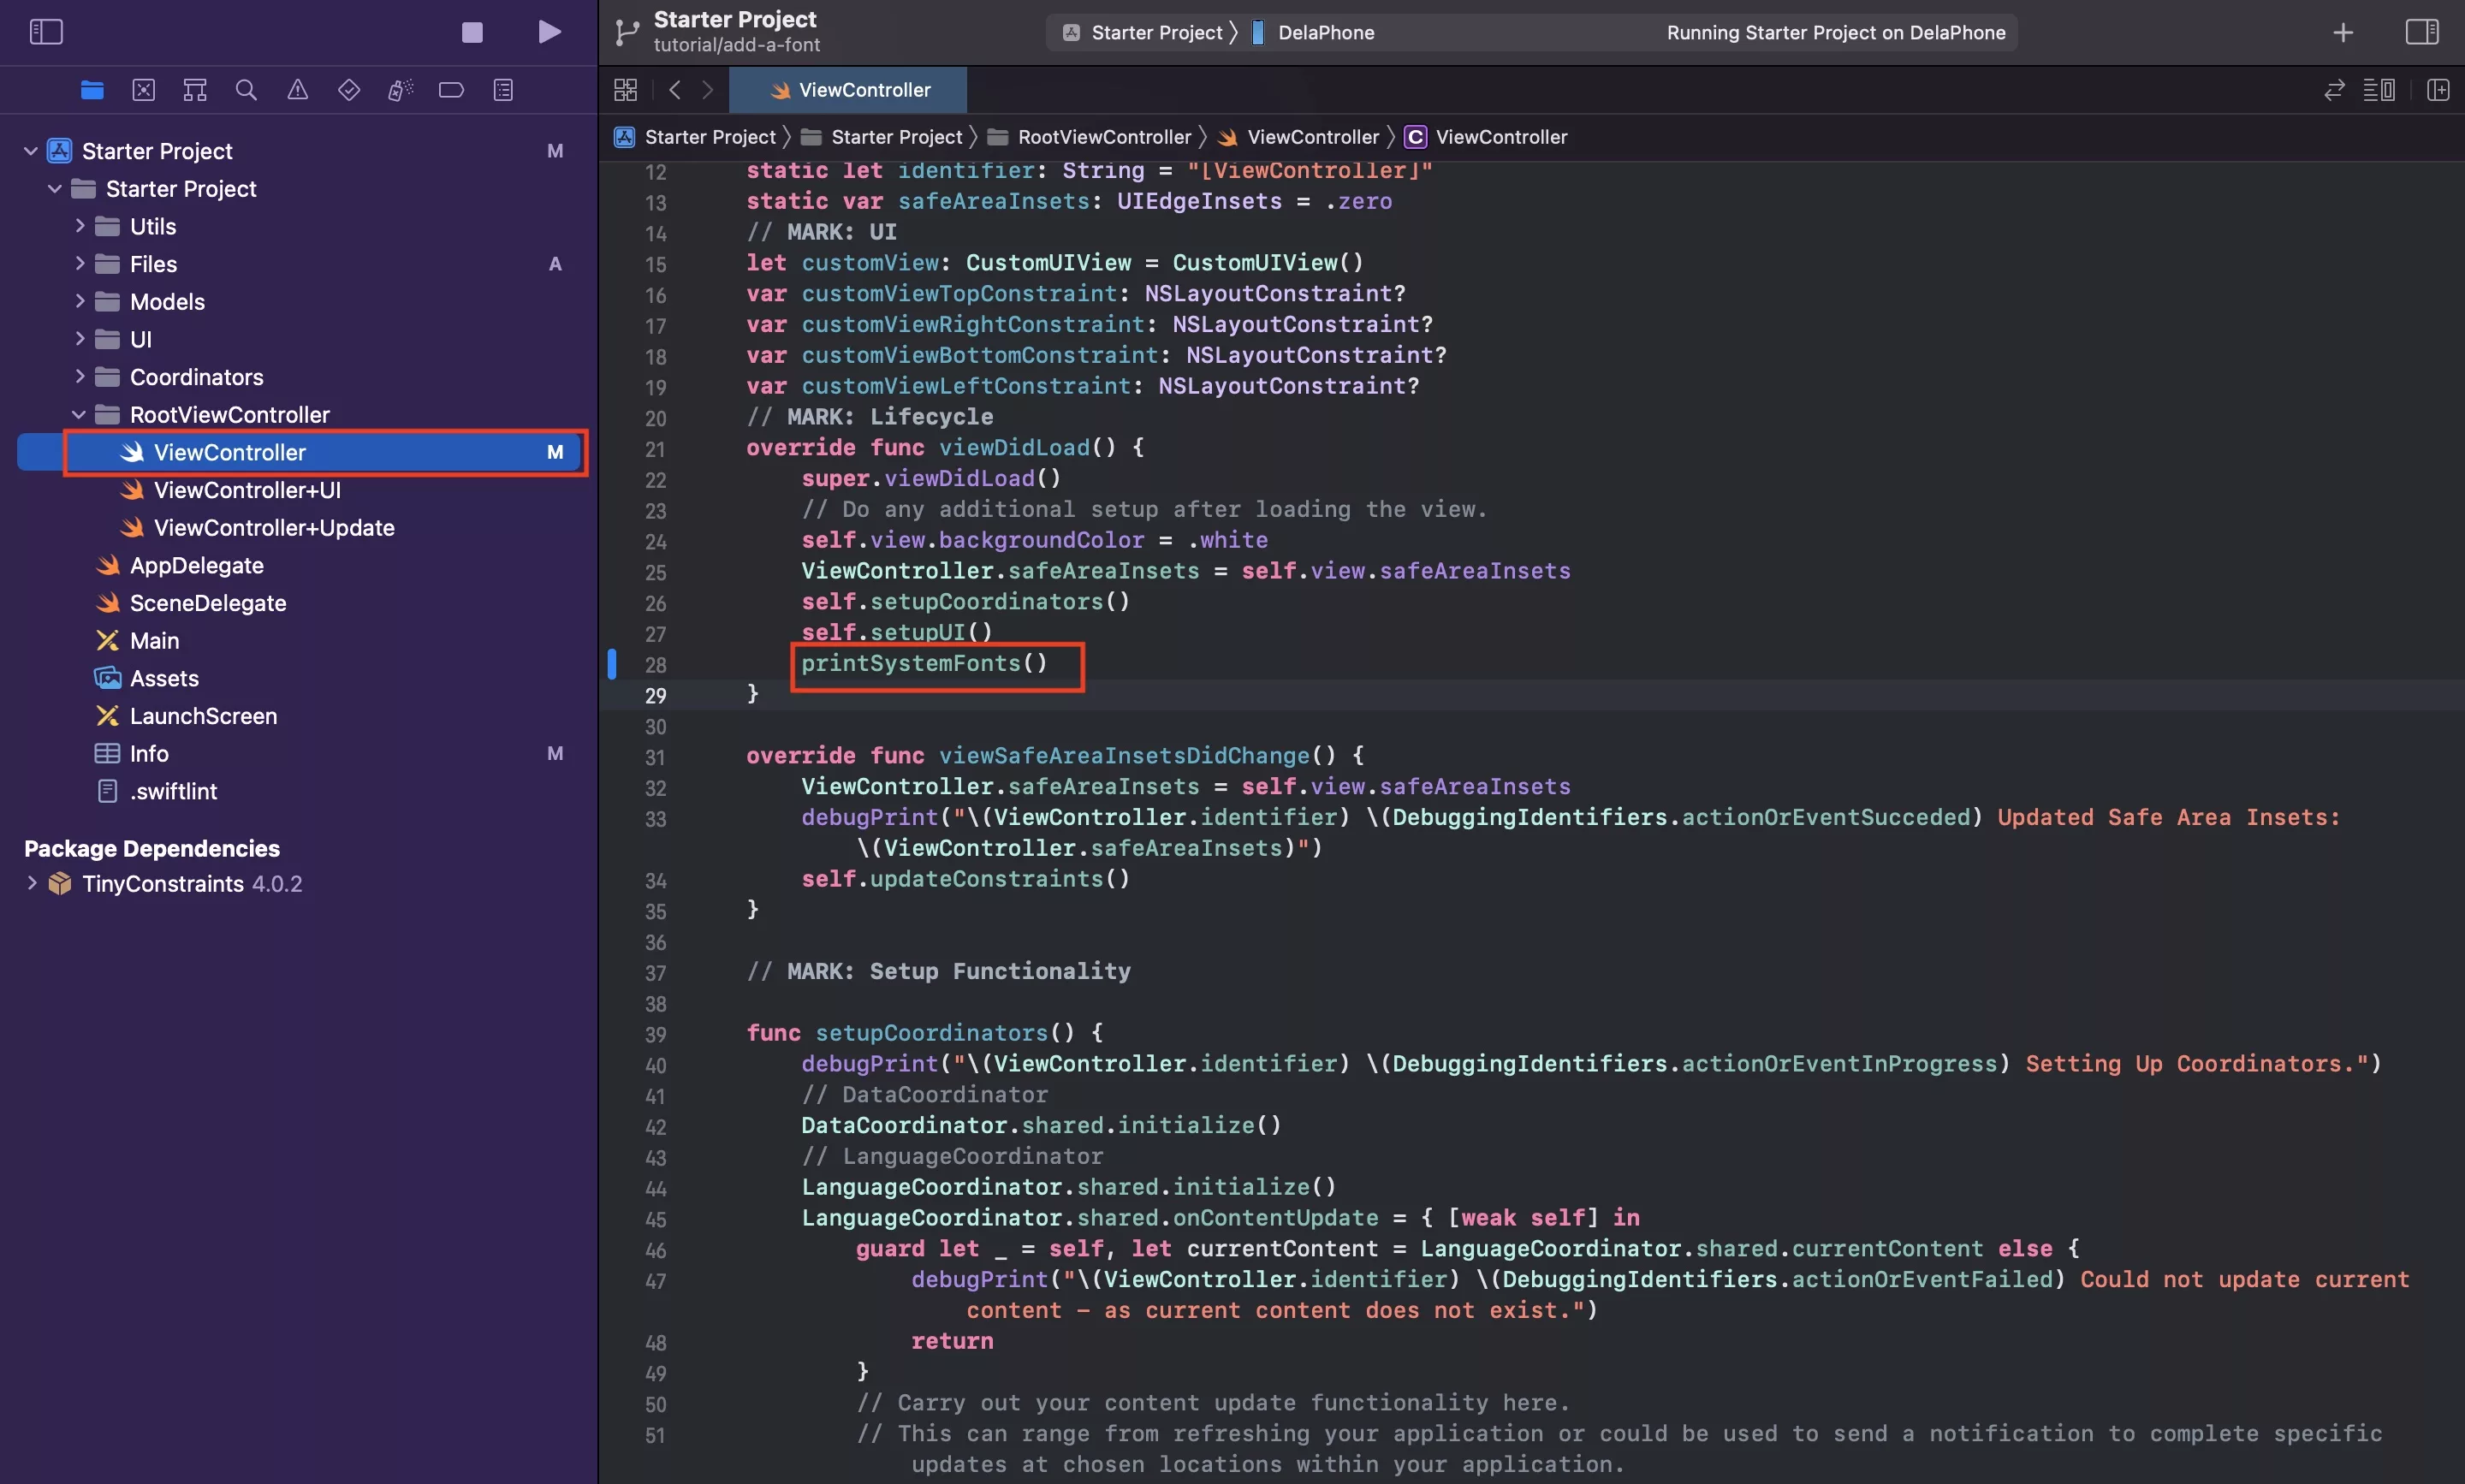
Navigate to ViewController.swift and in ViewDidLoad, call the printSystemFonts utility.
For your convenience, we have provided the code to the utility below.
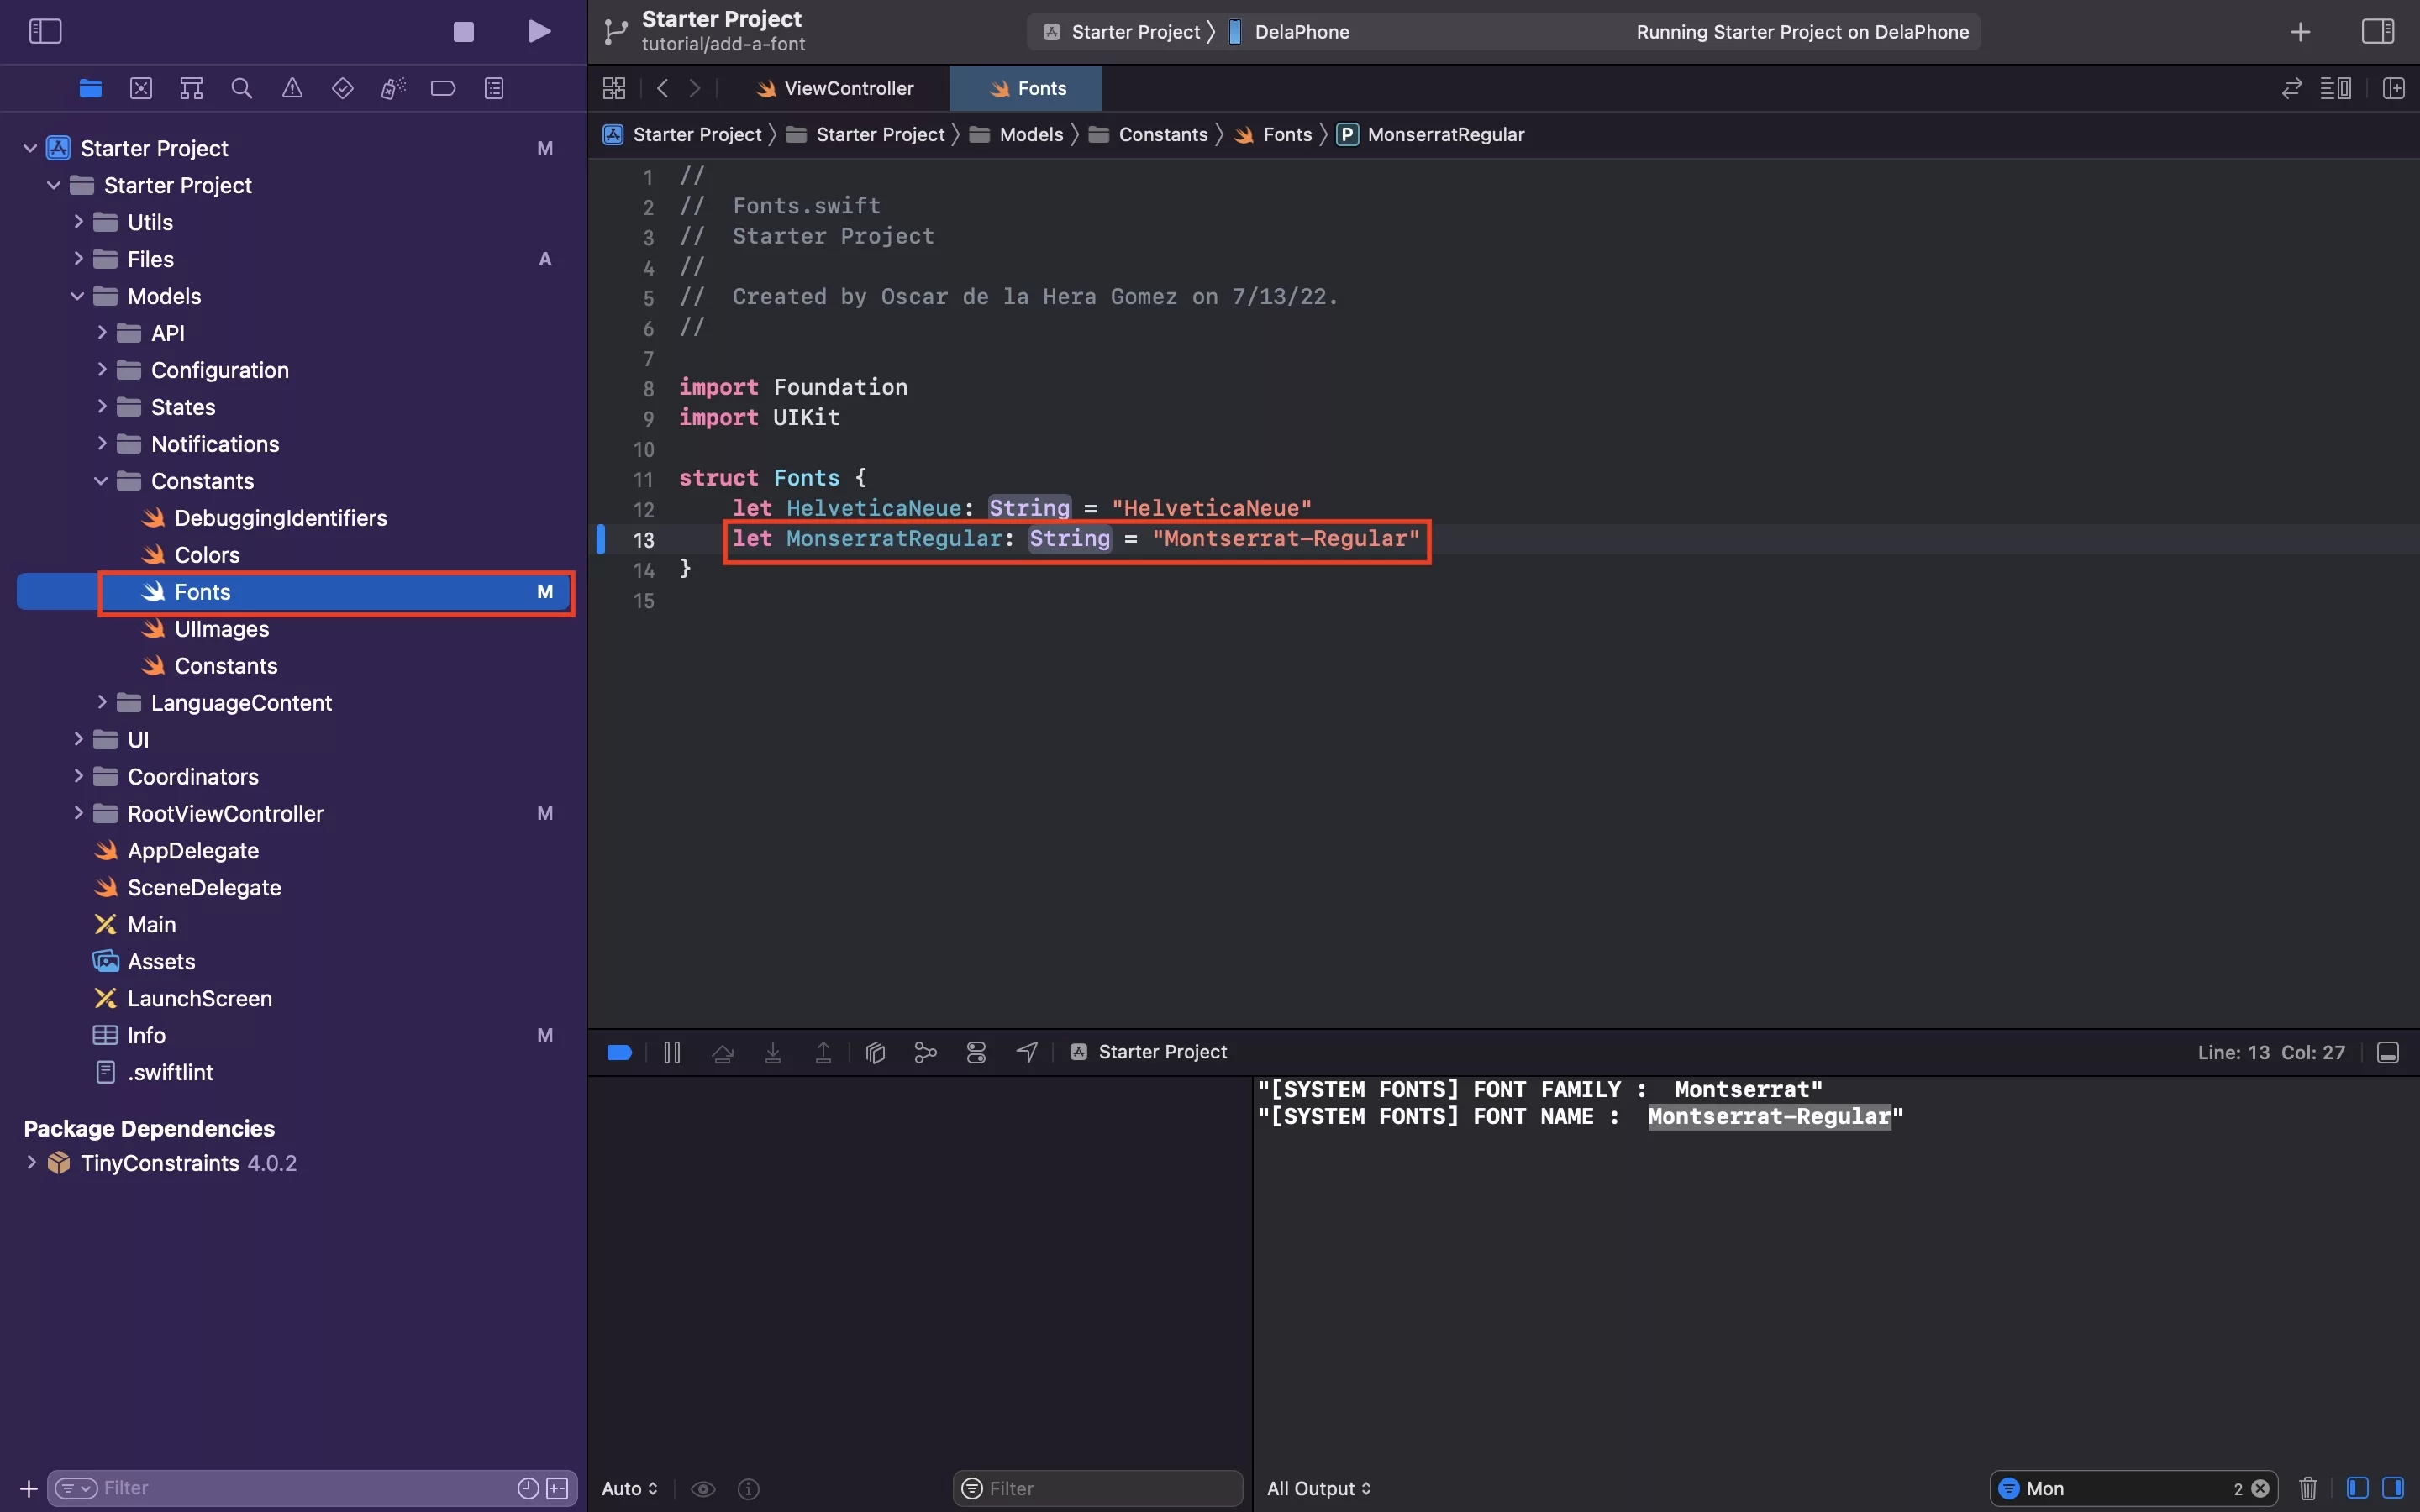
B | Determine the system name for the font
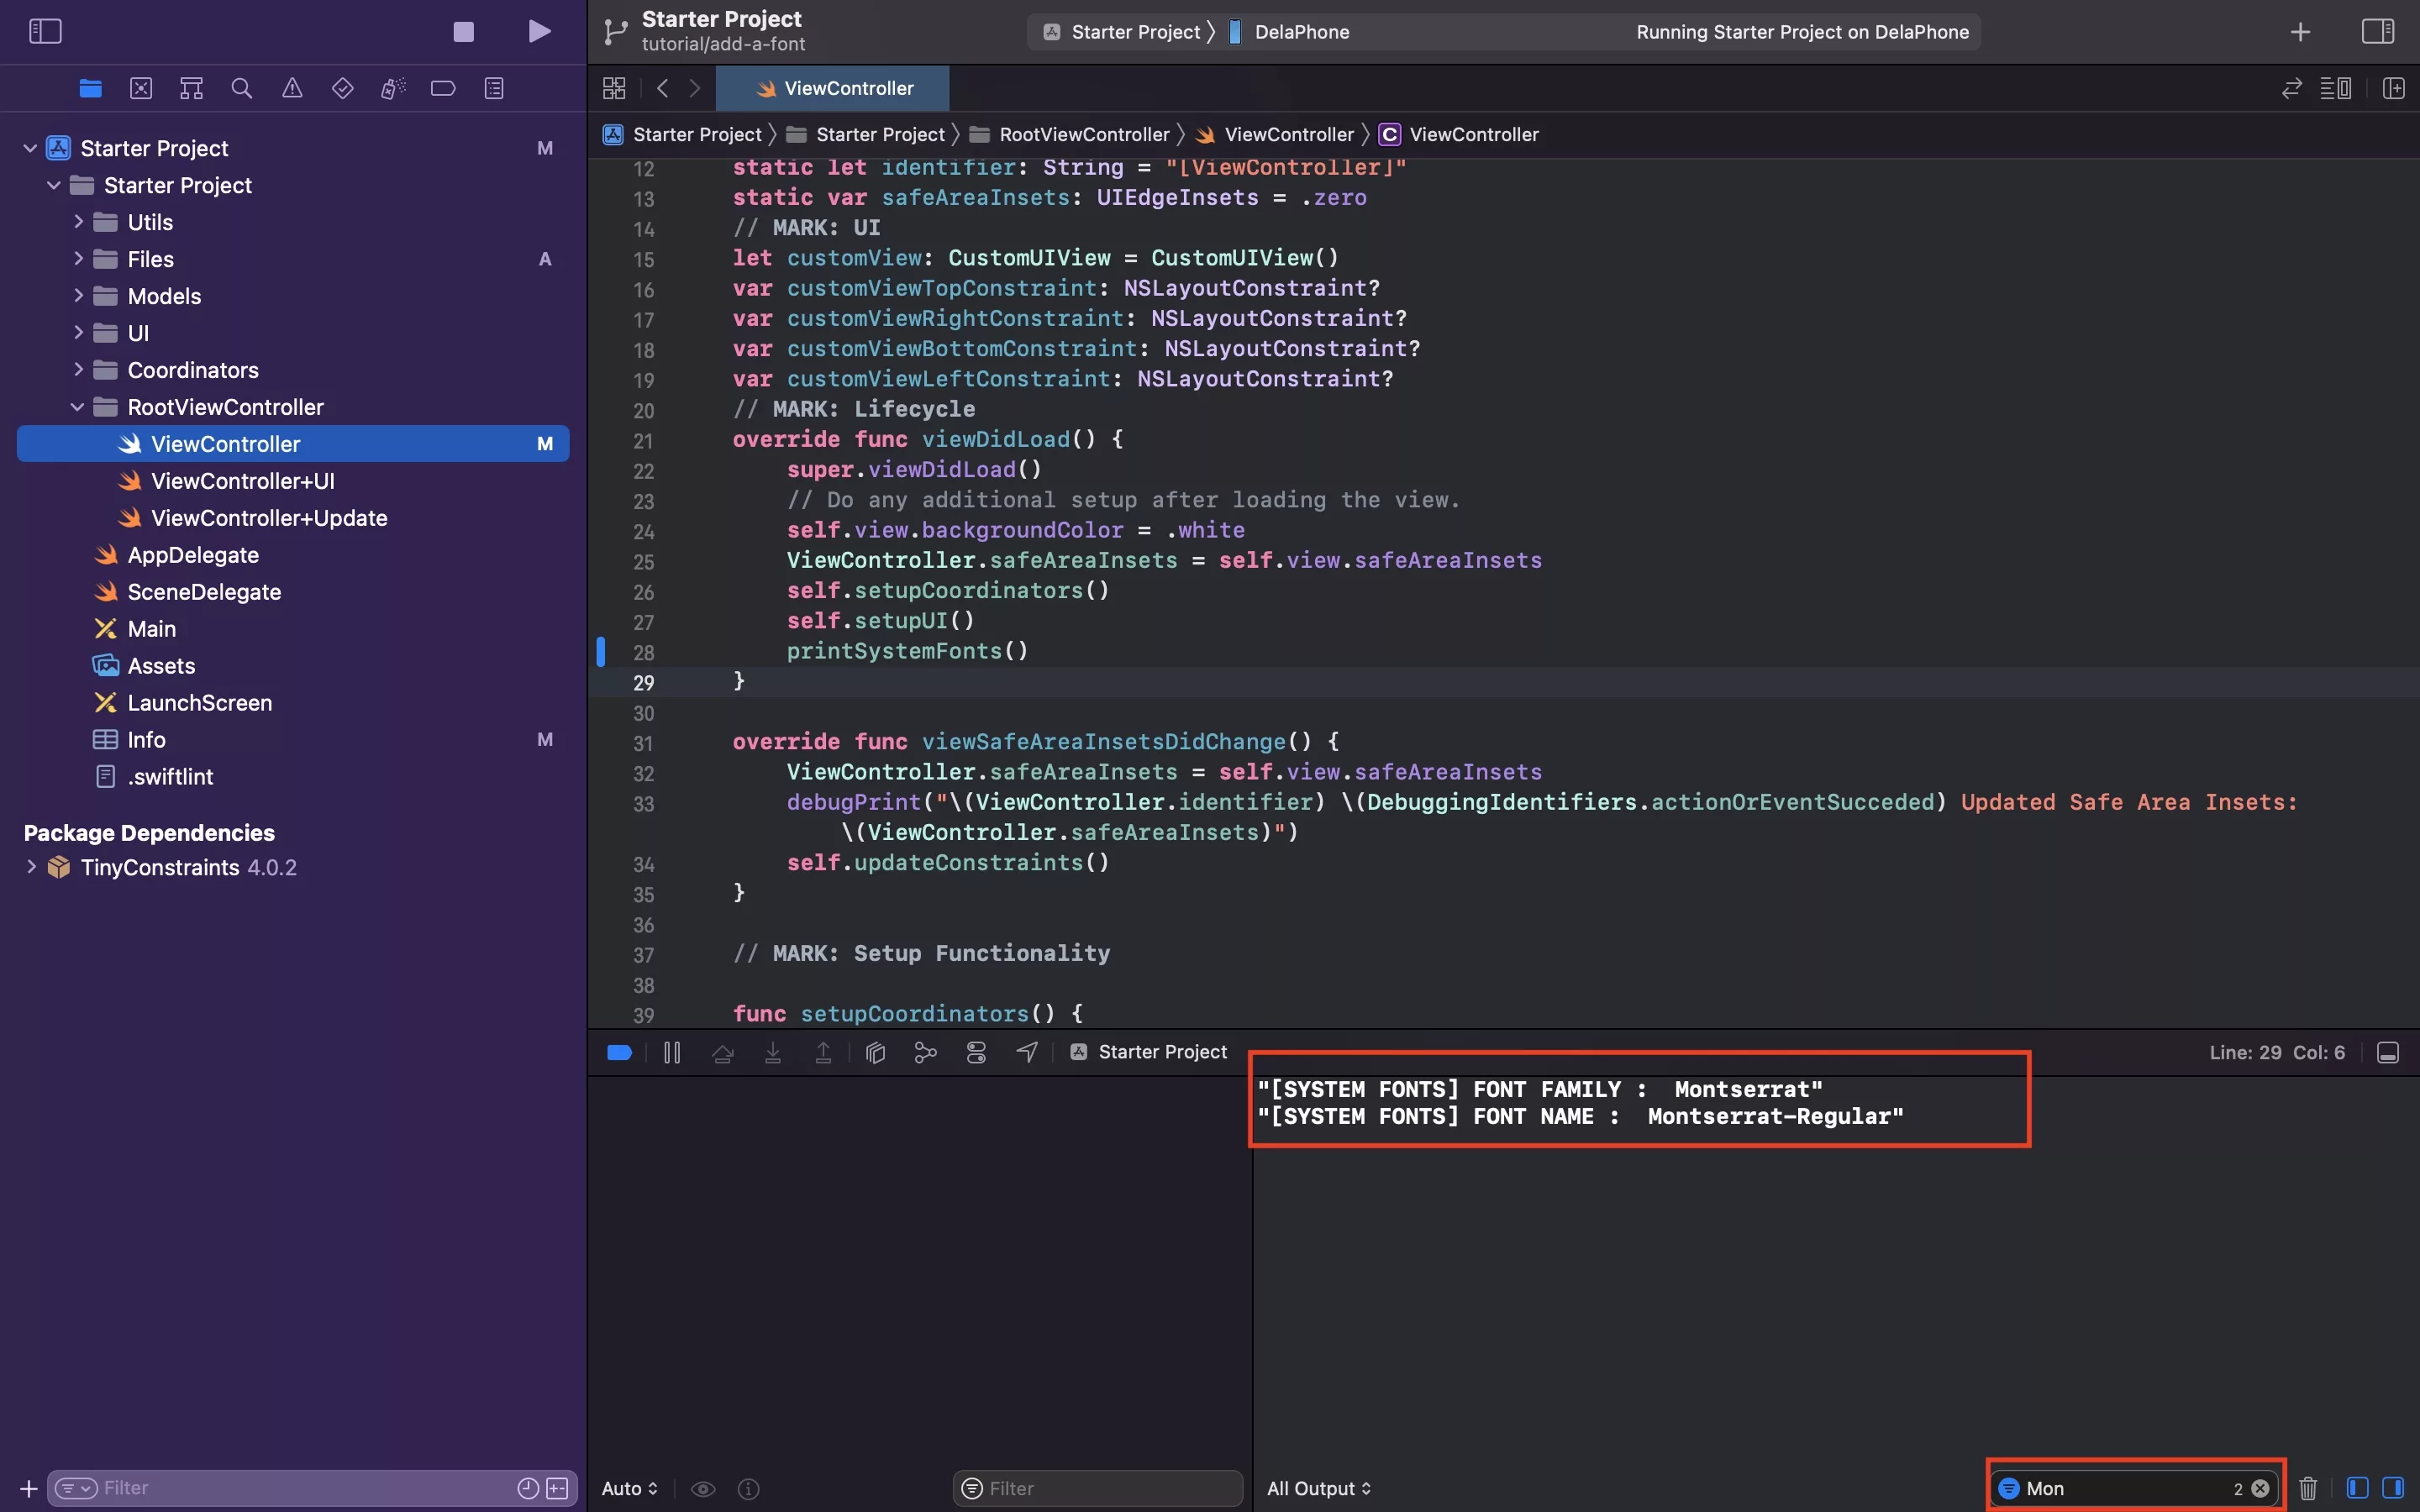
Run your app, and filter the logs for the your font name. Once you find it, copy the name - in the case of this tutorial its Montserrat-Regular.
C | Add the font to Fonts.swift
In Fonts.swift add your font to the Fonts struct as demonstrated in the image above.
Seeking to apply the font to a label ?
If you wish to learn about our Styleguide and how we use it to create standard or attributed labels please consult our tutorials below.
Any Questions ?
We are actively looking for feedback on how to improve this resource. Please send us a note to inquiries@delasign.com with any thoughts or feedback you may have.