How to create a local StoreKit In-App Purchase in XCode

Oscar de la Hera Gomez
A flower that represents StoreKit next to one that represents XCode. Beneath it sits the text "Local In-App Purchase."

A step by step guide on creating consumable or non-consumable In-App Purchases in a local StoreKit configuration file in XCode.

Step One: Select the StoreKit Configuration File

A screenshot of Xcode showing a newly created local Storekit file.

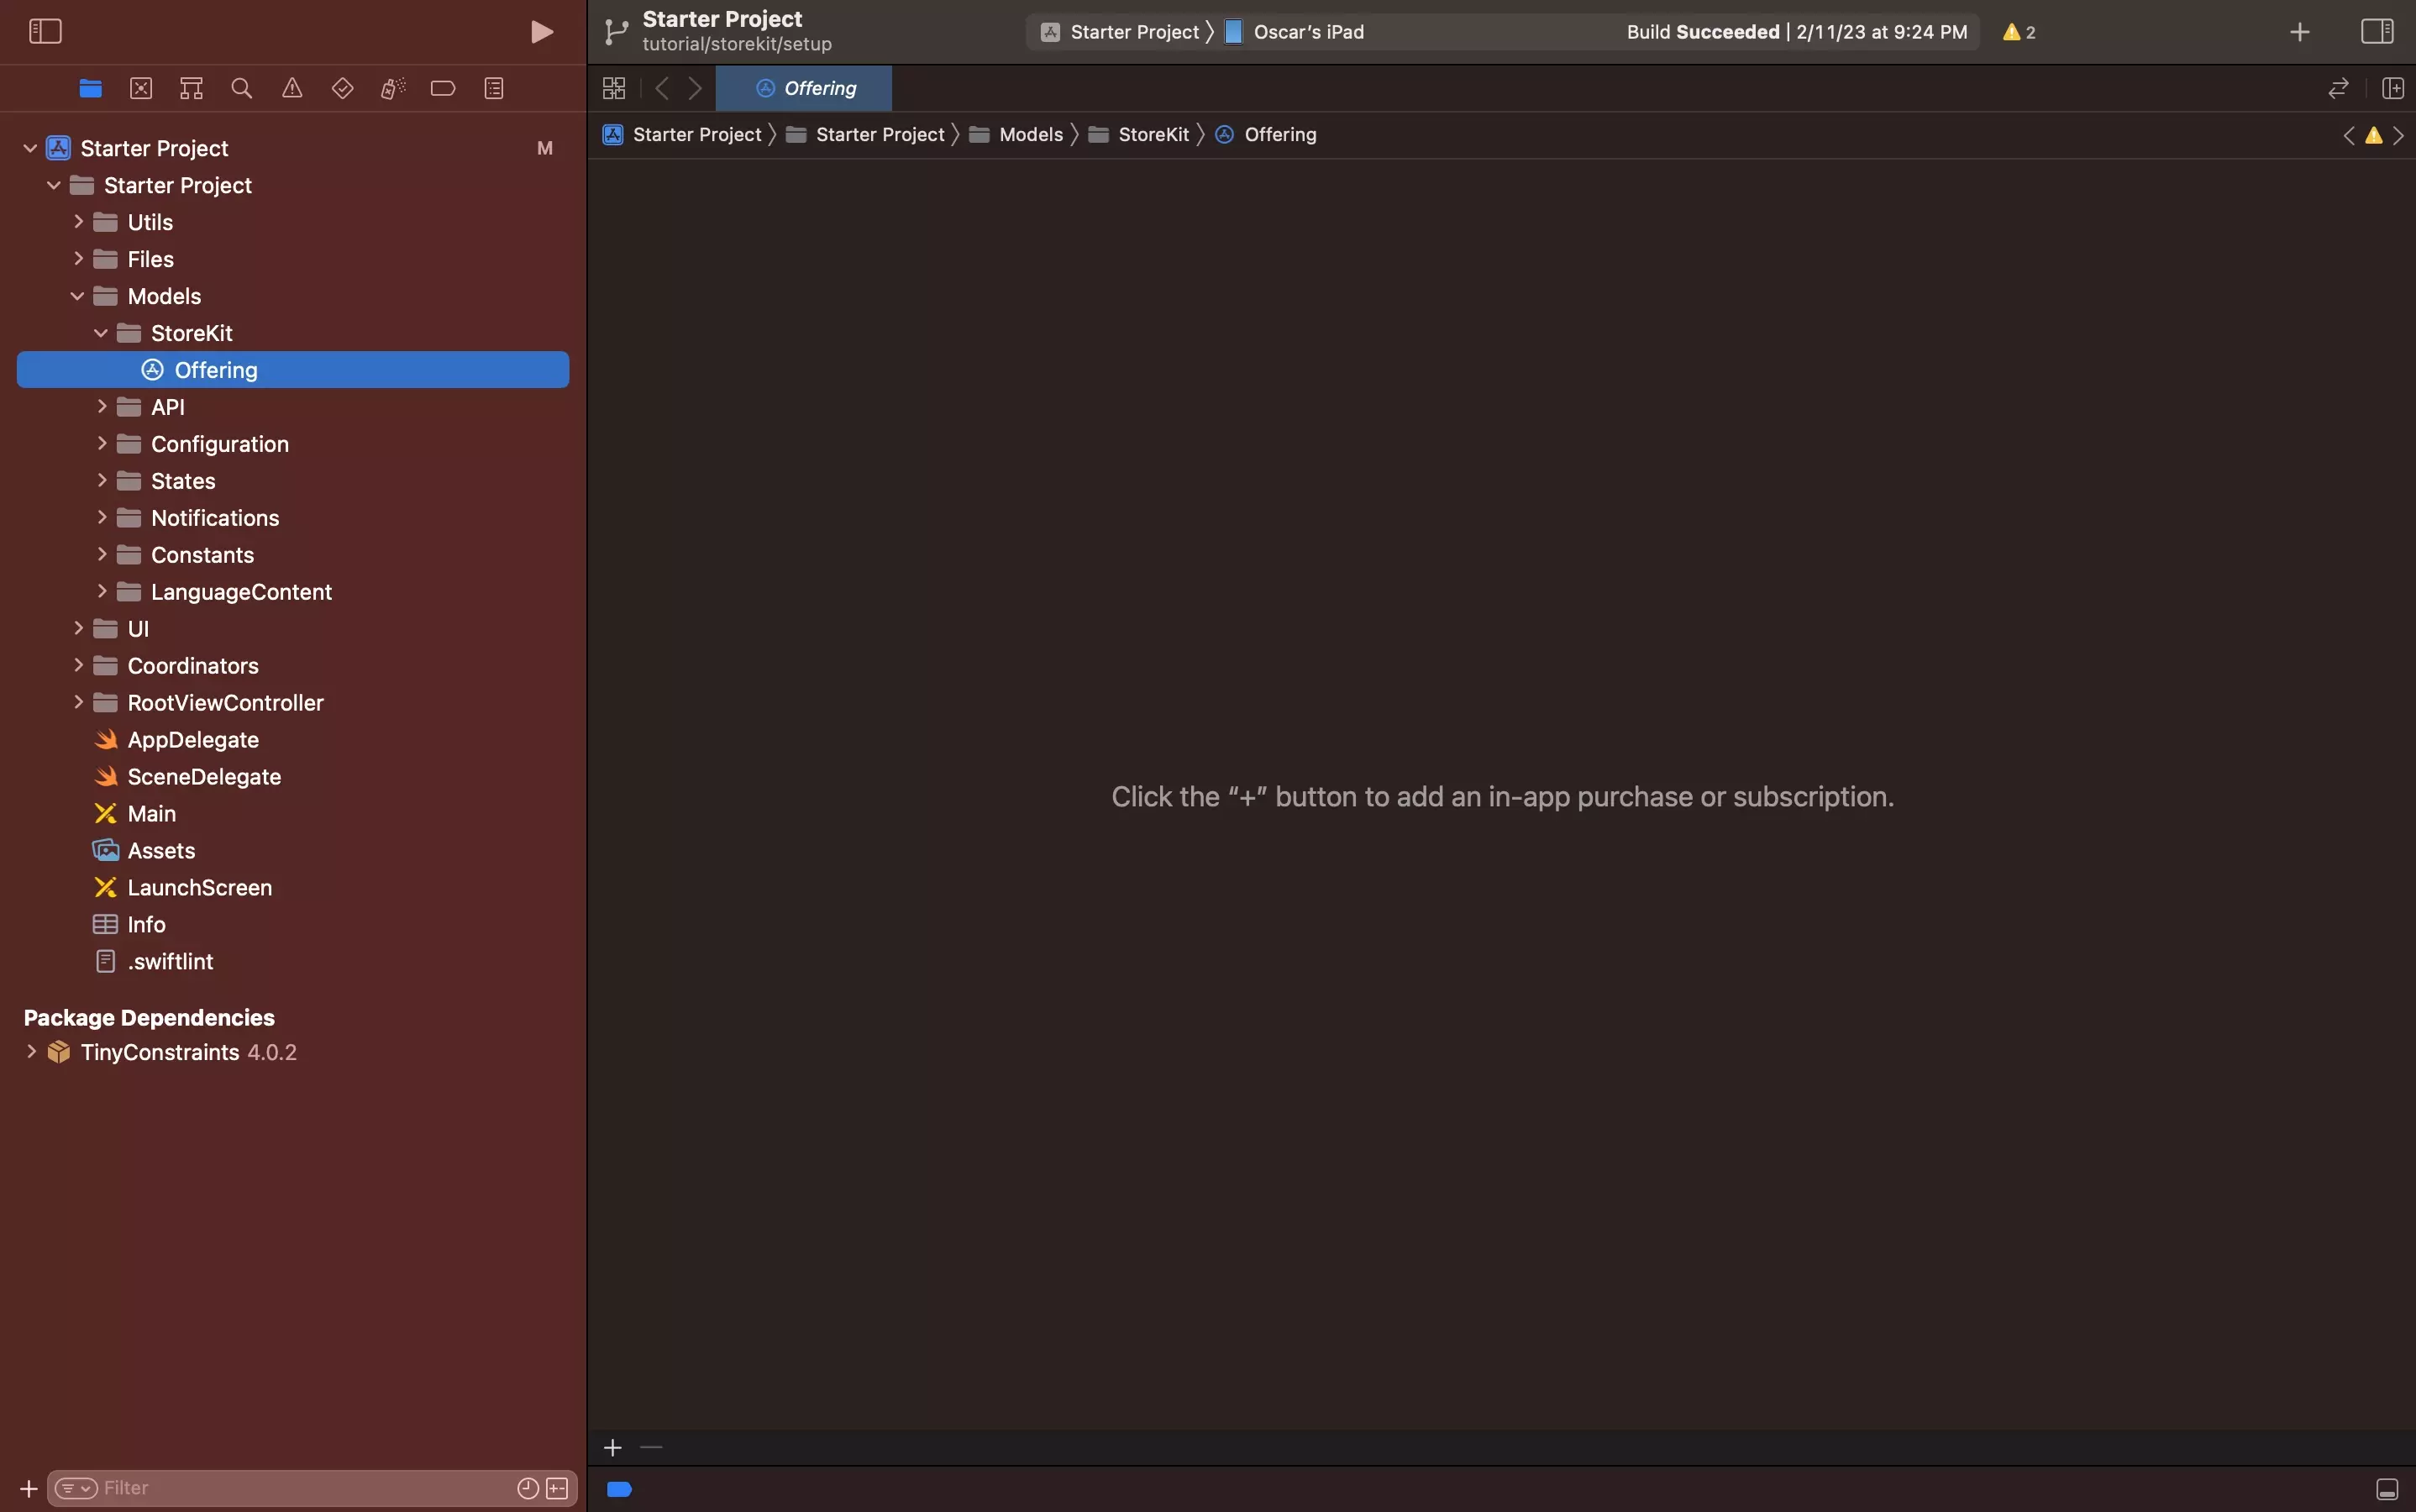
Select the local StoreKit configuration file.

If you have yet to create one, follow the tutorial below.

If you are interested in creating auto-renewable and non-renewing subscriptions, please consult the tutorial below.

Step Two: Add the In-App Purchase

A screenshot of an empty local StoreKit configuration file in Xcode. We have highlighted the + icon on the bottom right, which if clicked allows you to create in app purchases and subscriptions from a menu. In this menu, we have highlighted the top half, which offers you the ability to add a consumable in-app purchase and a non-consumable in app purchase when you click them.

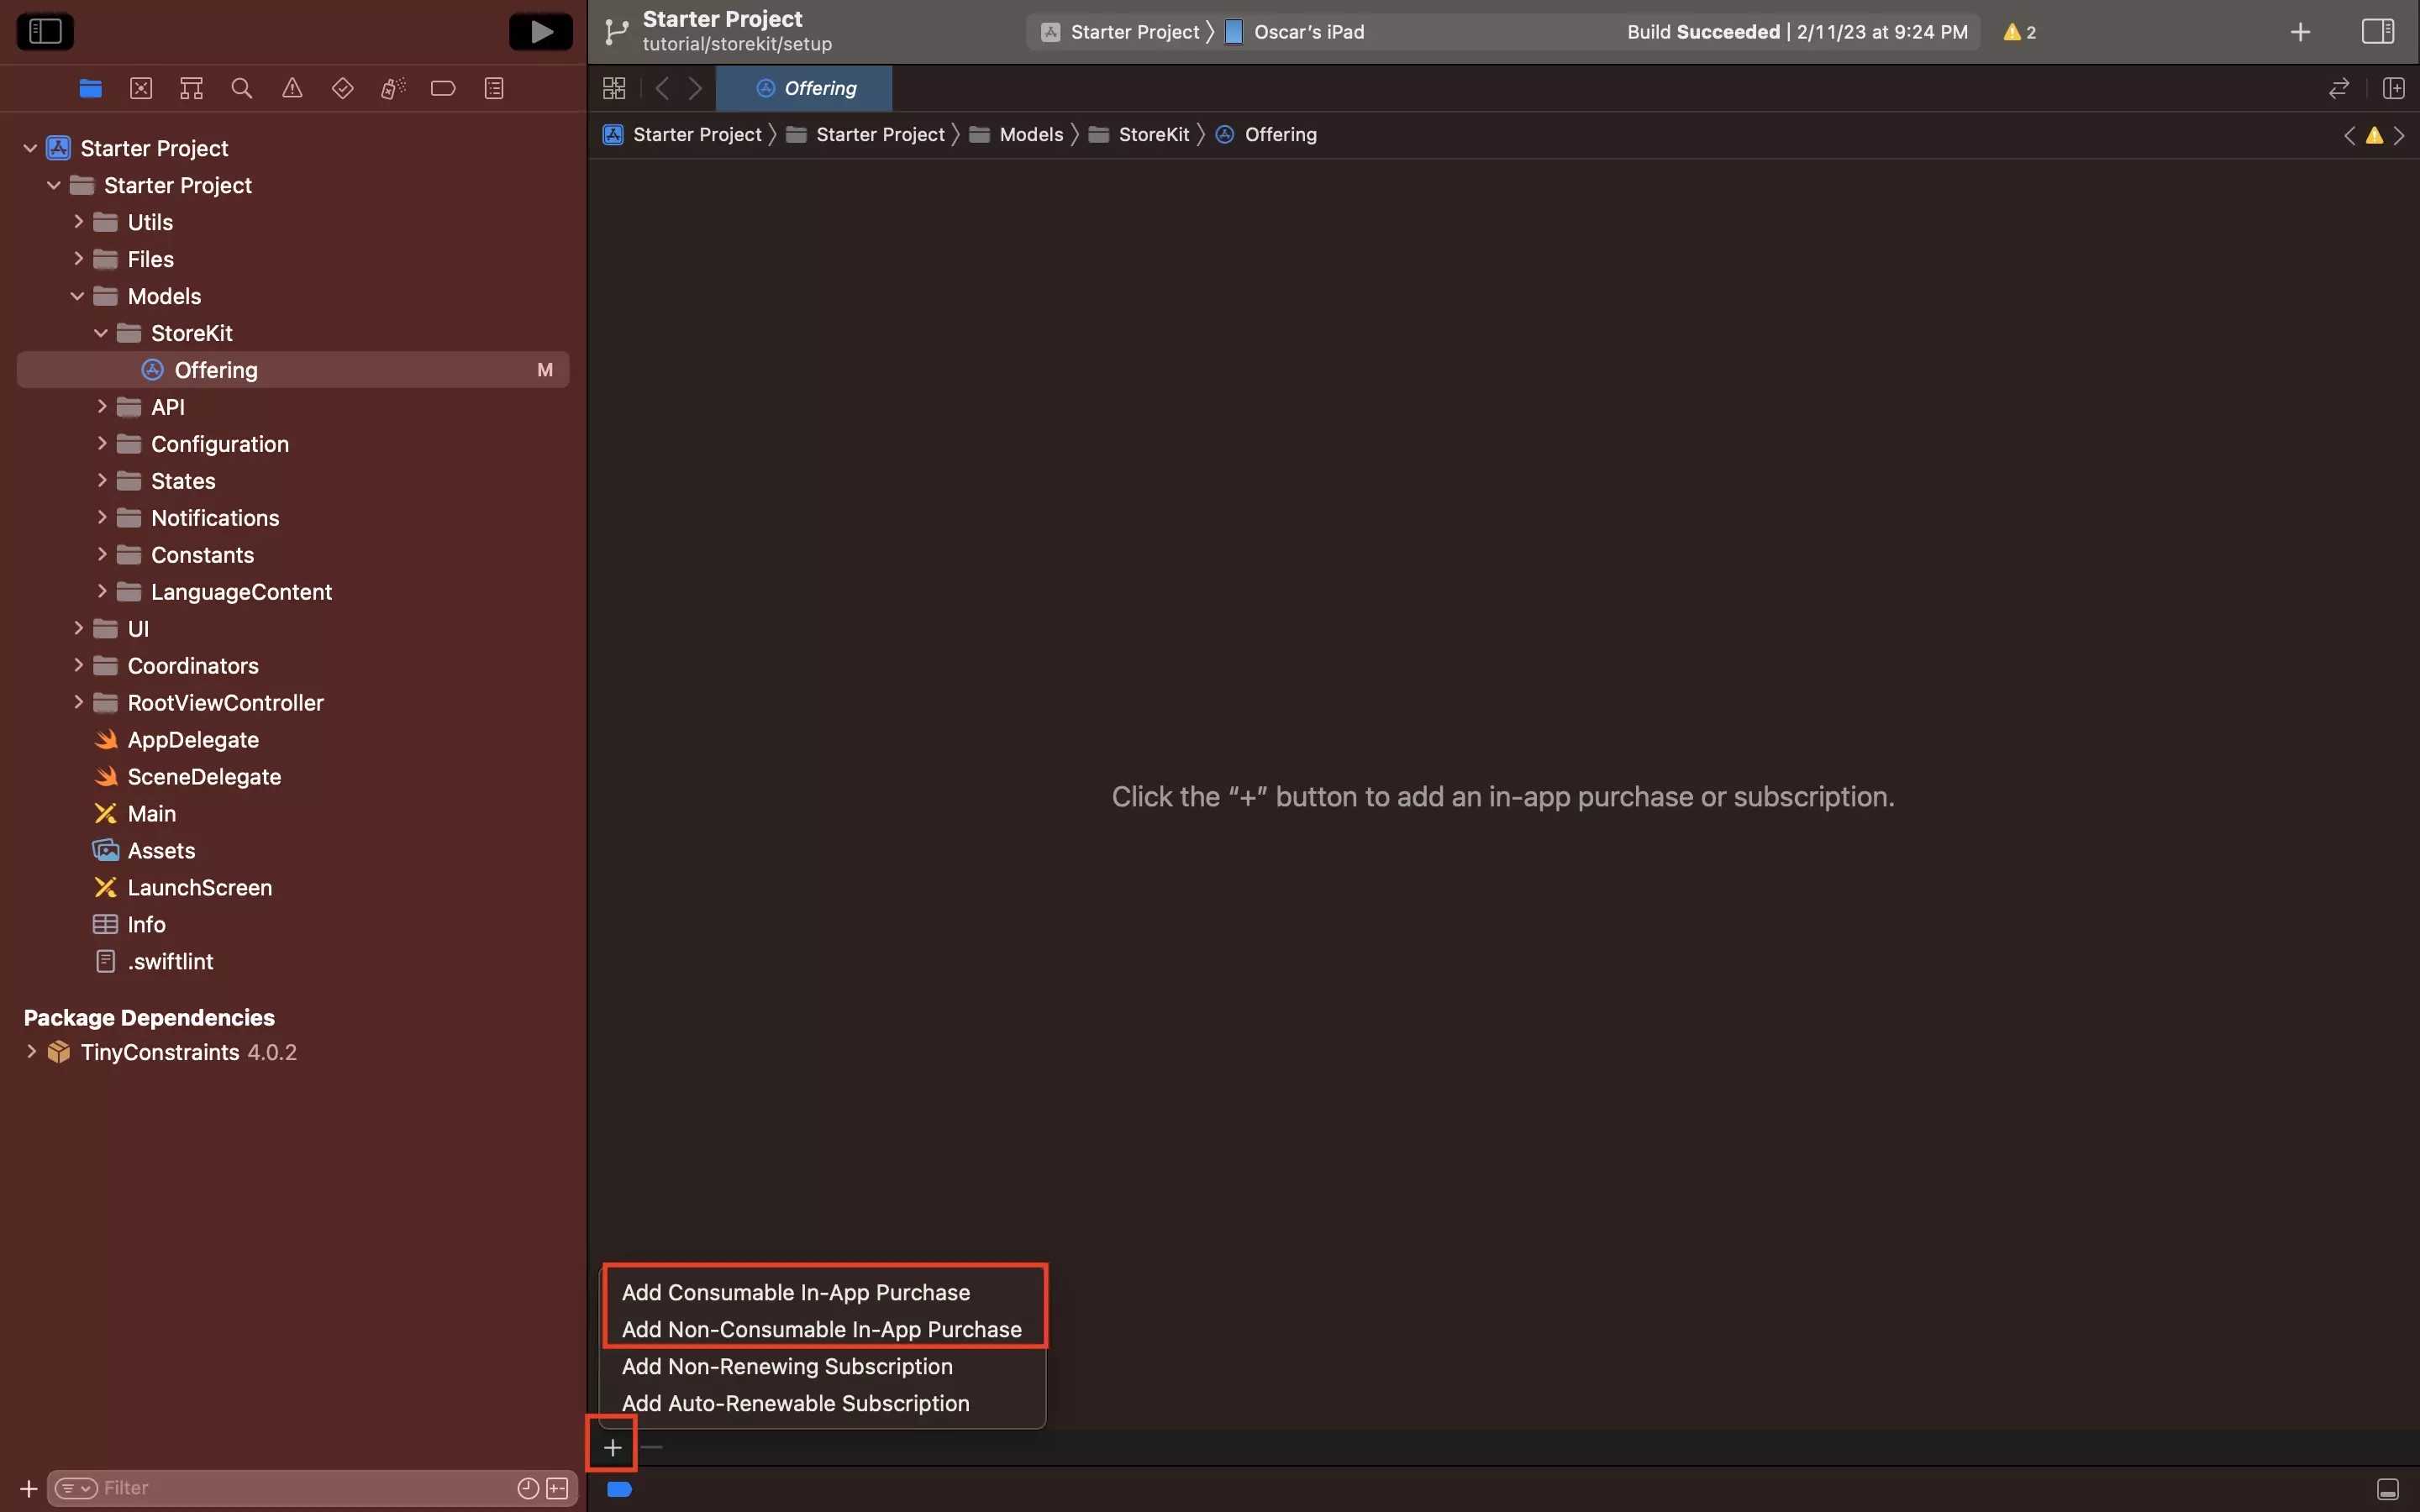
Click the + icon at the bottom left of the local StoreKit Configuration File.

In the menu that appears, click on Add Non-Consumable In-App Purchase or Add Consumable In-App Purchase.

Step Three: Fill in the product details

A screenshot of a local StoreKit configuration file, with a non-consumable in-app purchase selected. Highlighted under Non Consumable In App Purchase are the details that you must fill in.

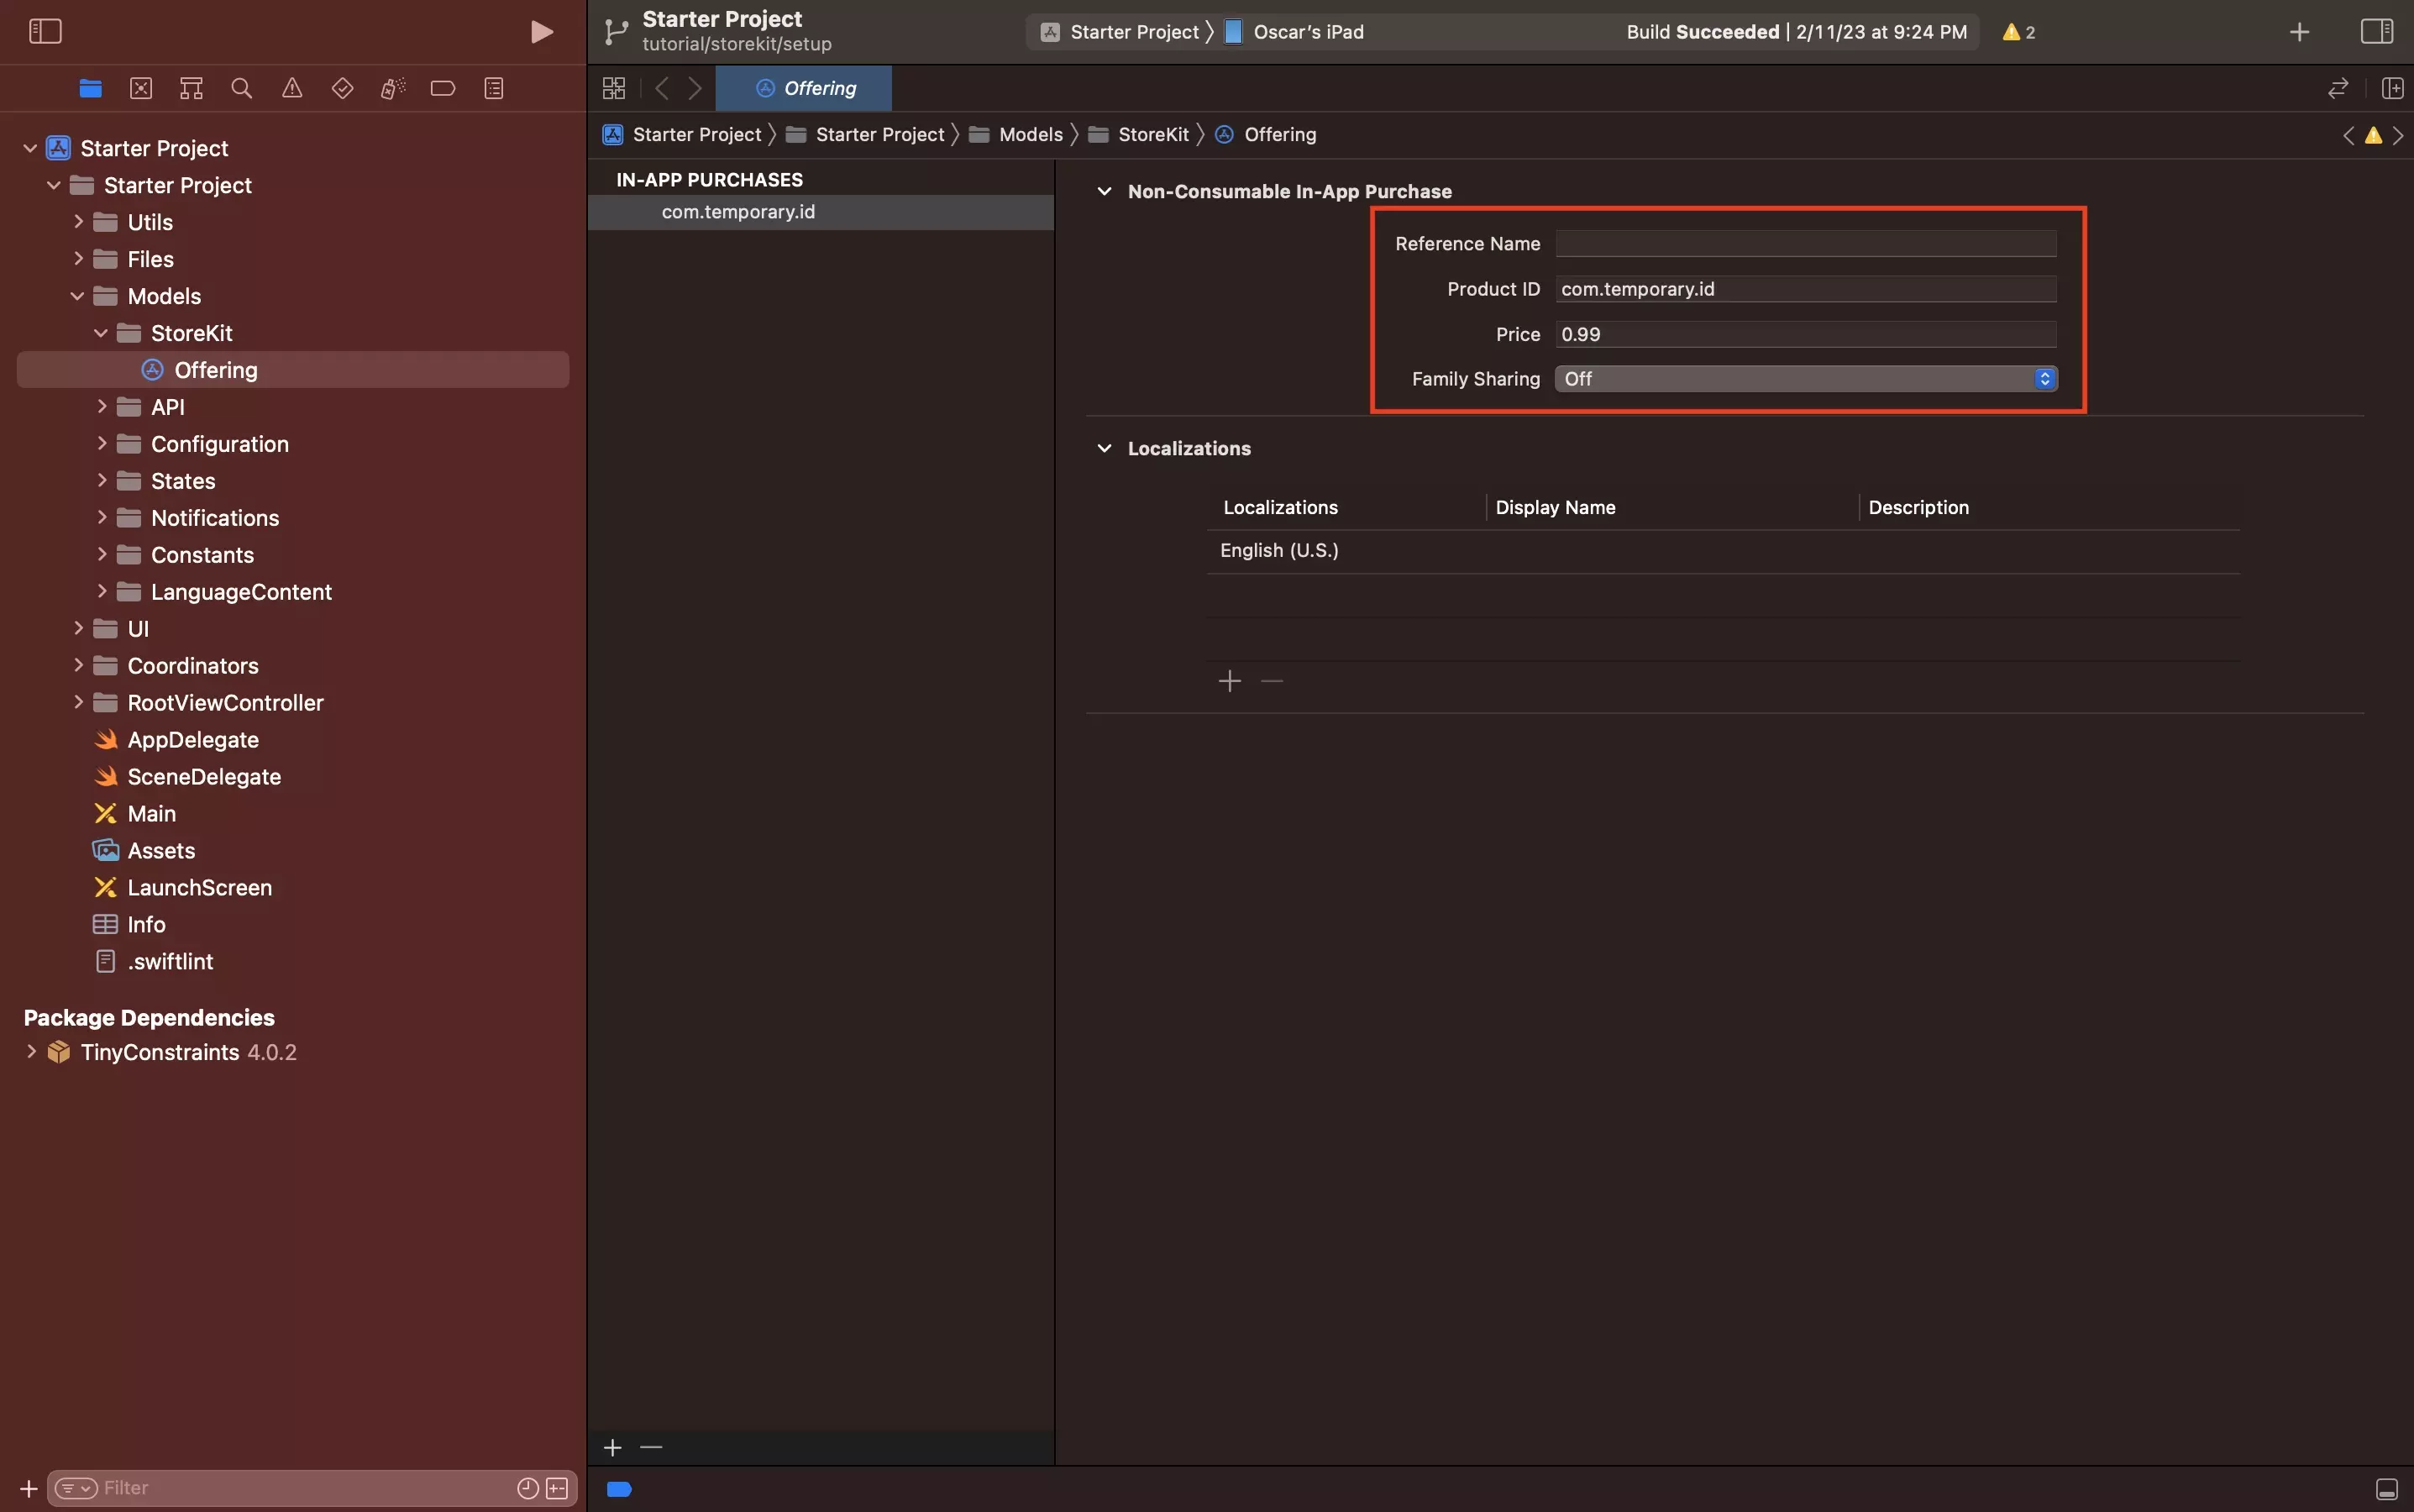
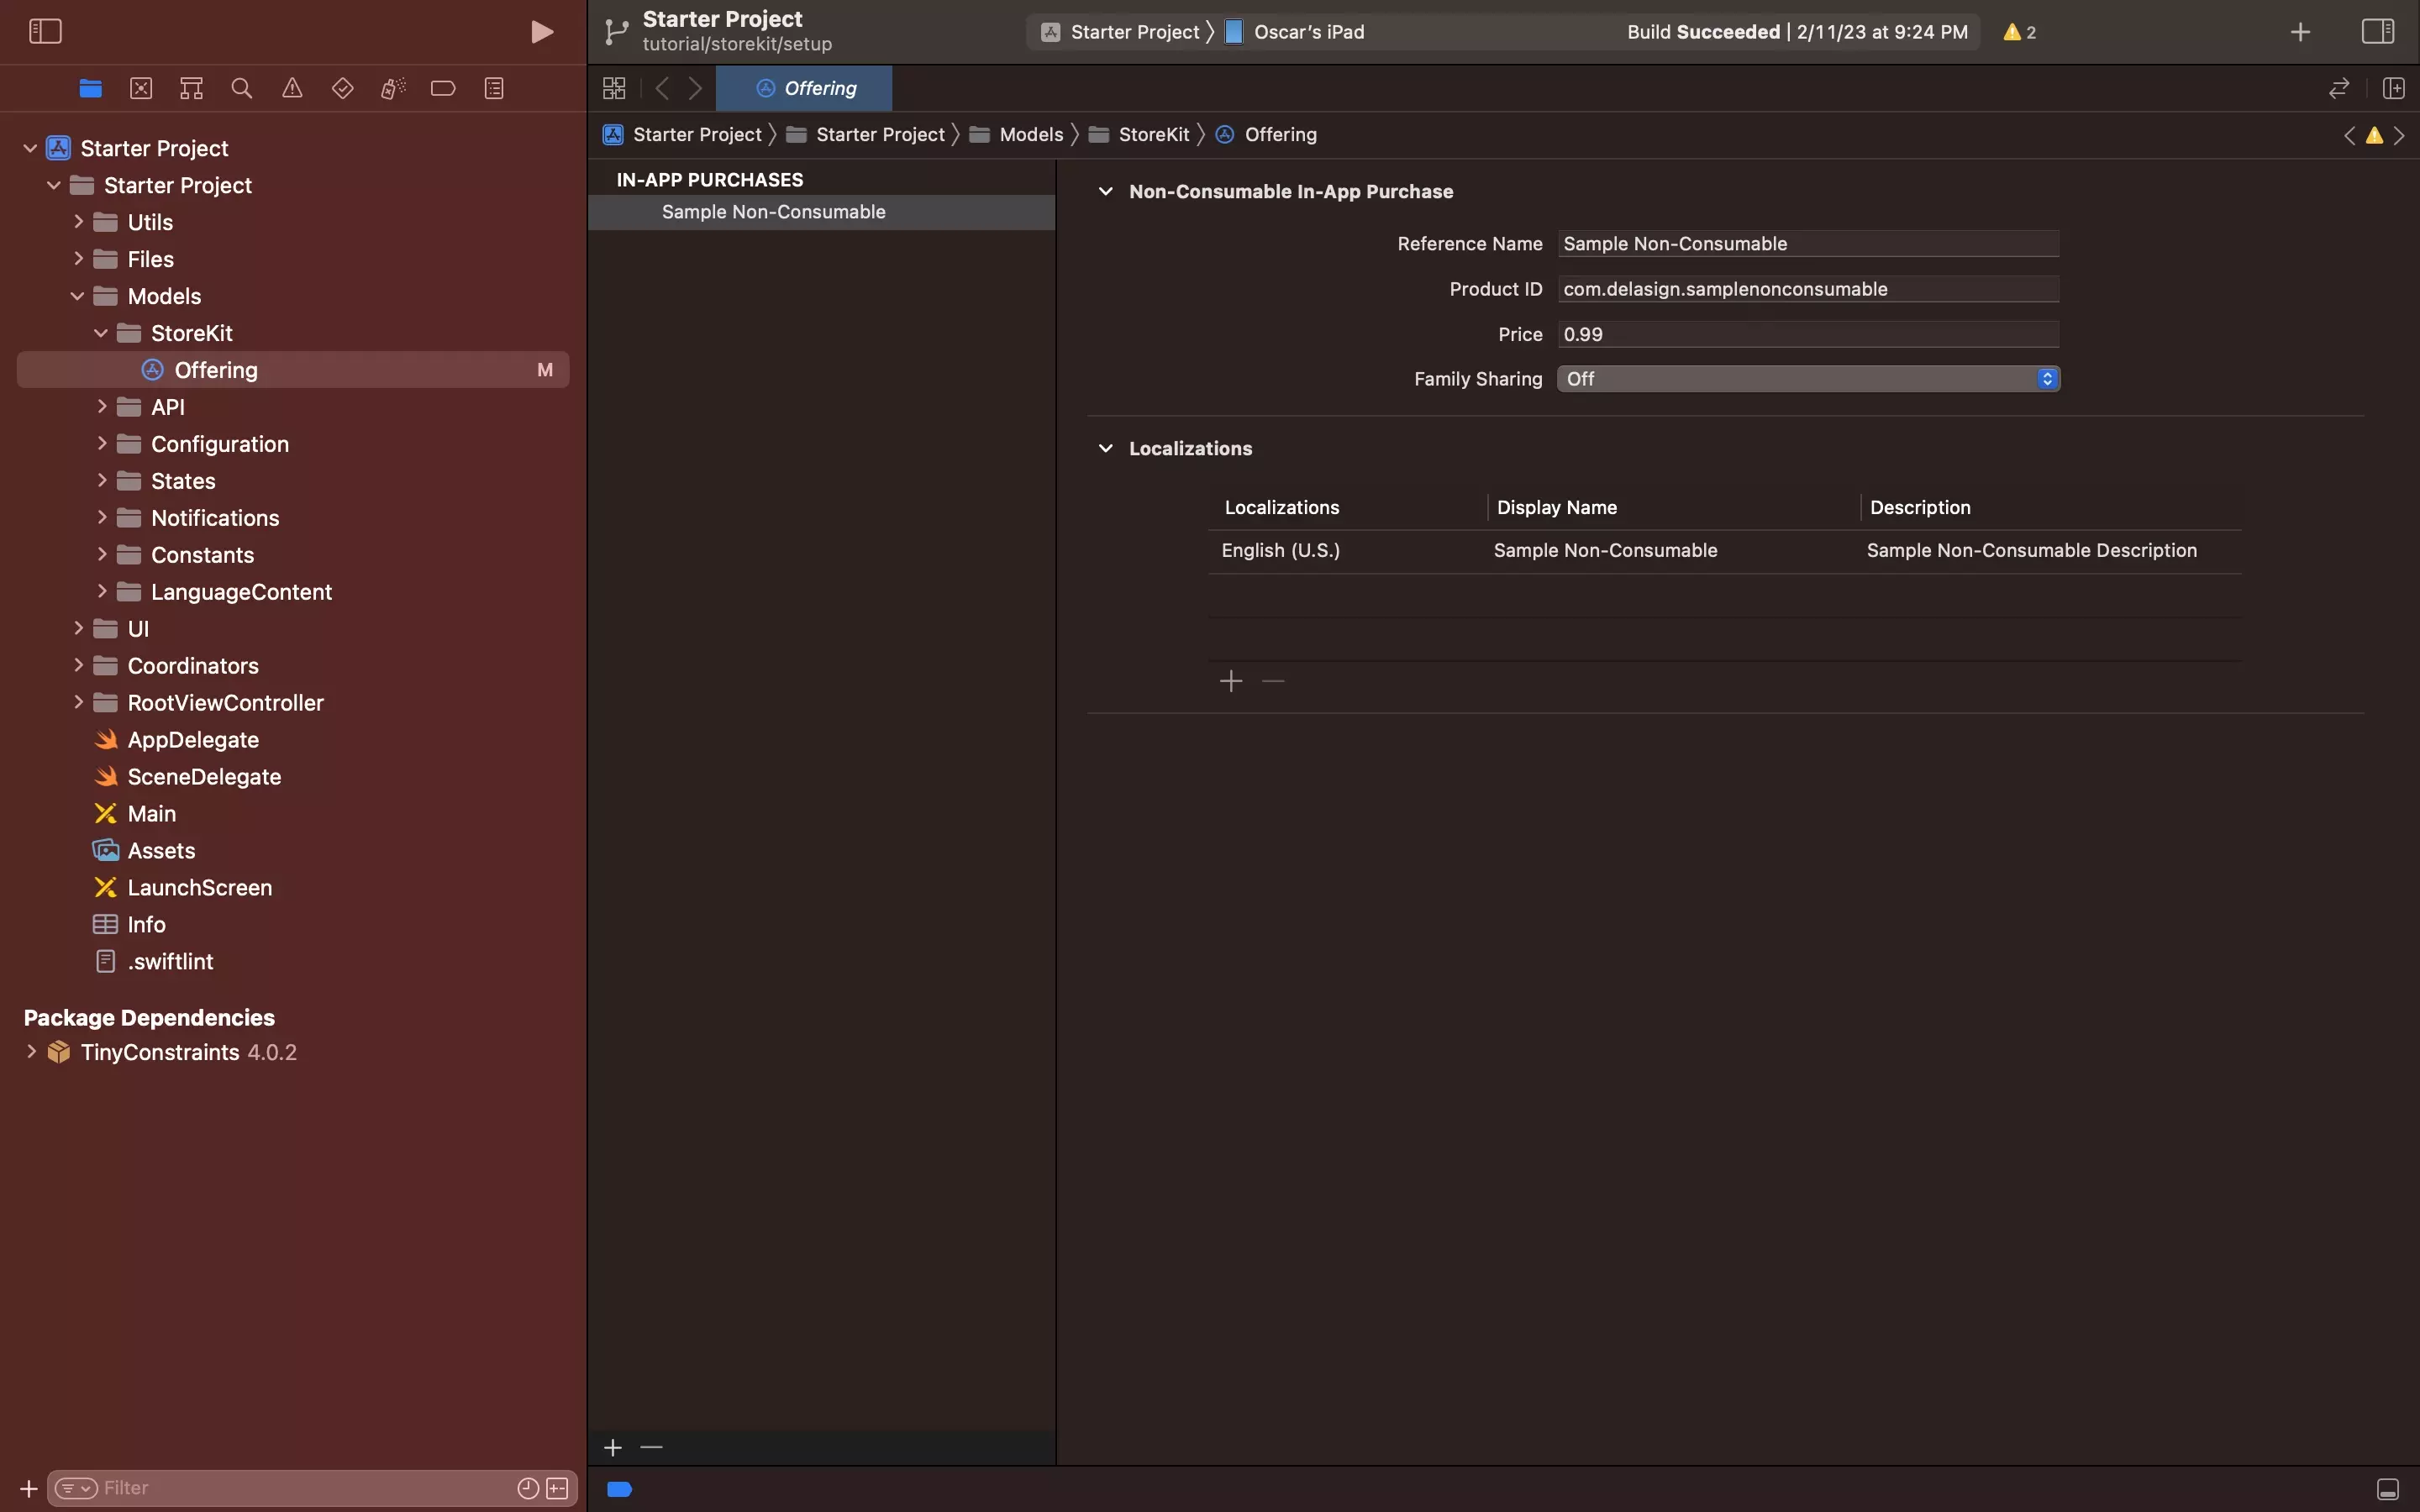
Under the relevant title (Non-Consumable In-App Purchase or Consumable In-App Purchase), complete the following details:

  • Reference Name
  • Product Id (Must be Unique)
  • Price

Additionally, if you have created a non-consumable In-App Purchase, you have the option to turn on Family Sharing (i.e. Apple family plan).

Step Four: Add Localizations

A screenshot of a local StoreKit configuration file, showing a non-consumable in-app purchase with all the details filled in.

Please note that this is the information that users see when they manage their in-app purchases.

In the Localizations section of the local In-App Purchase:

A | Double click English (U.S.)

A screenshot of a local StoreKit Configuration File, with a non-consumable selected. Highlighted is the "English (U.S.)" bar under "Localizations." Double click it to open up the local localizations editor.

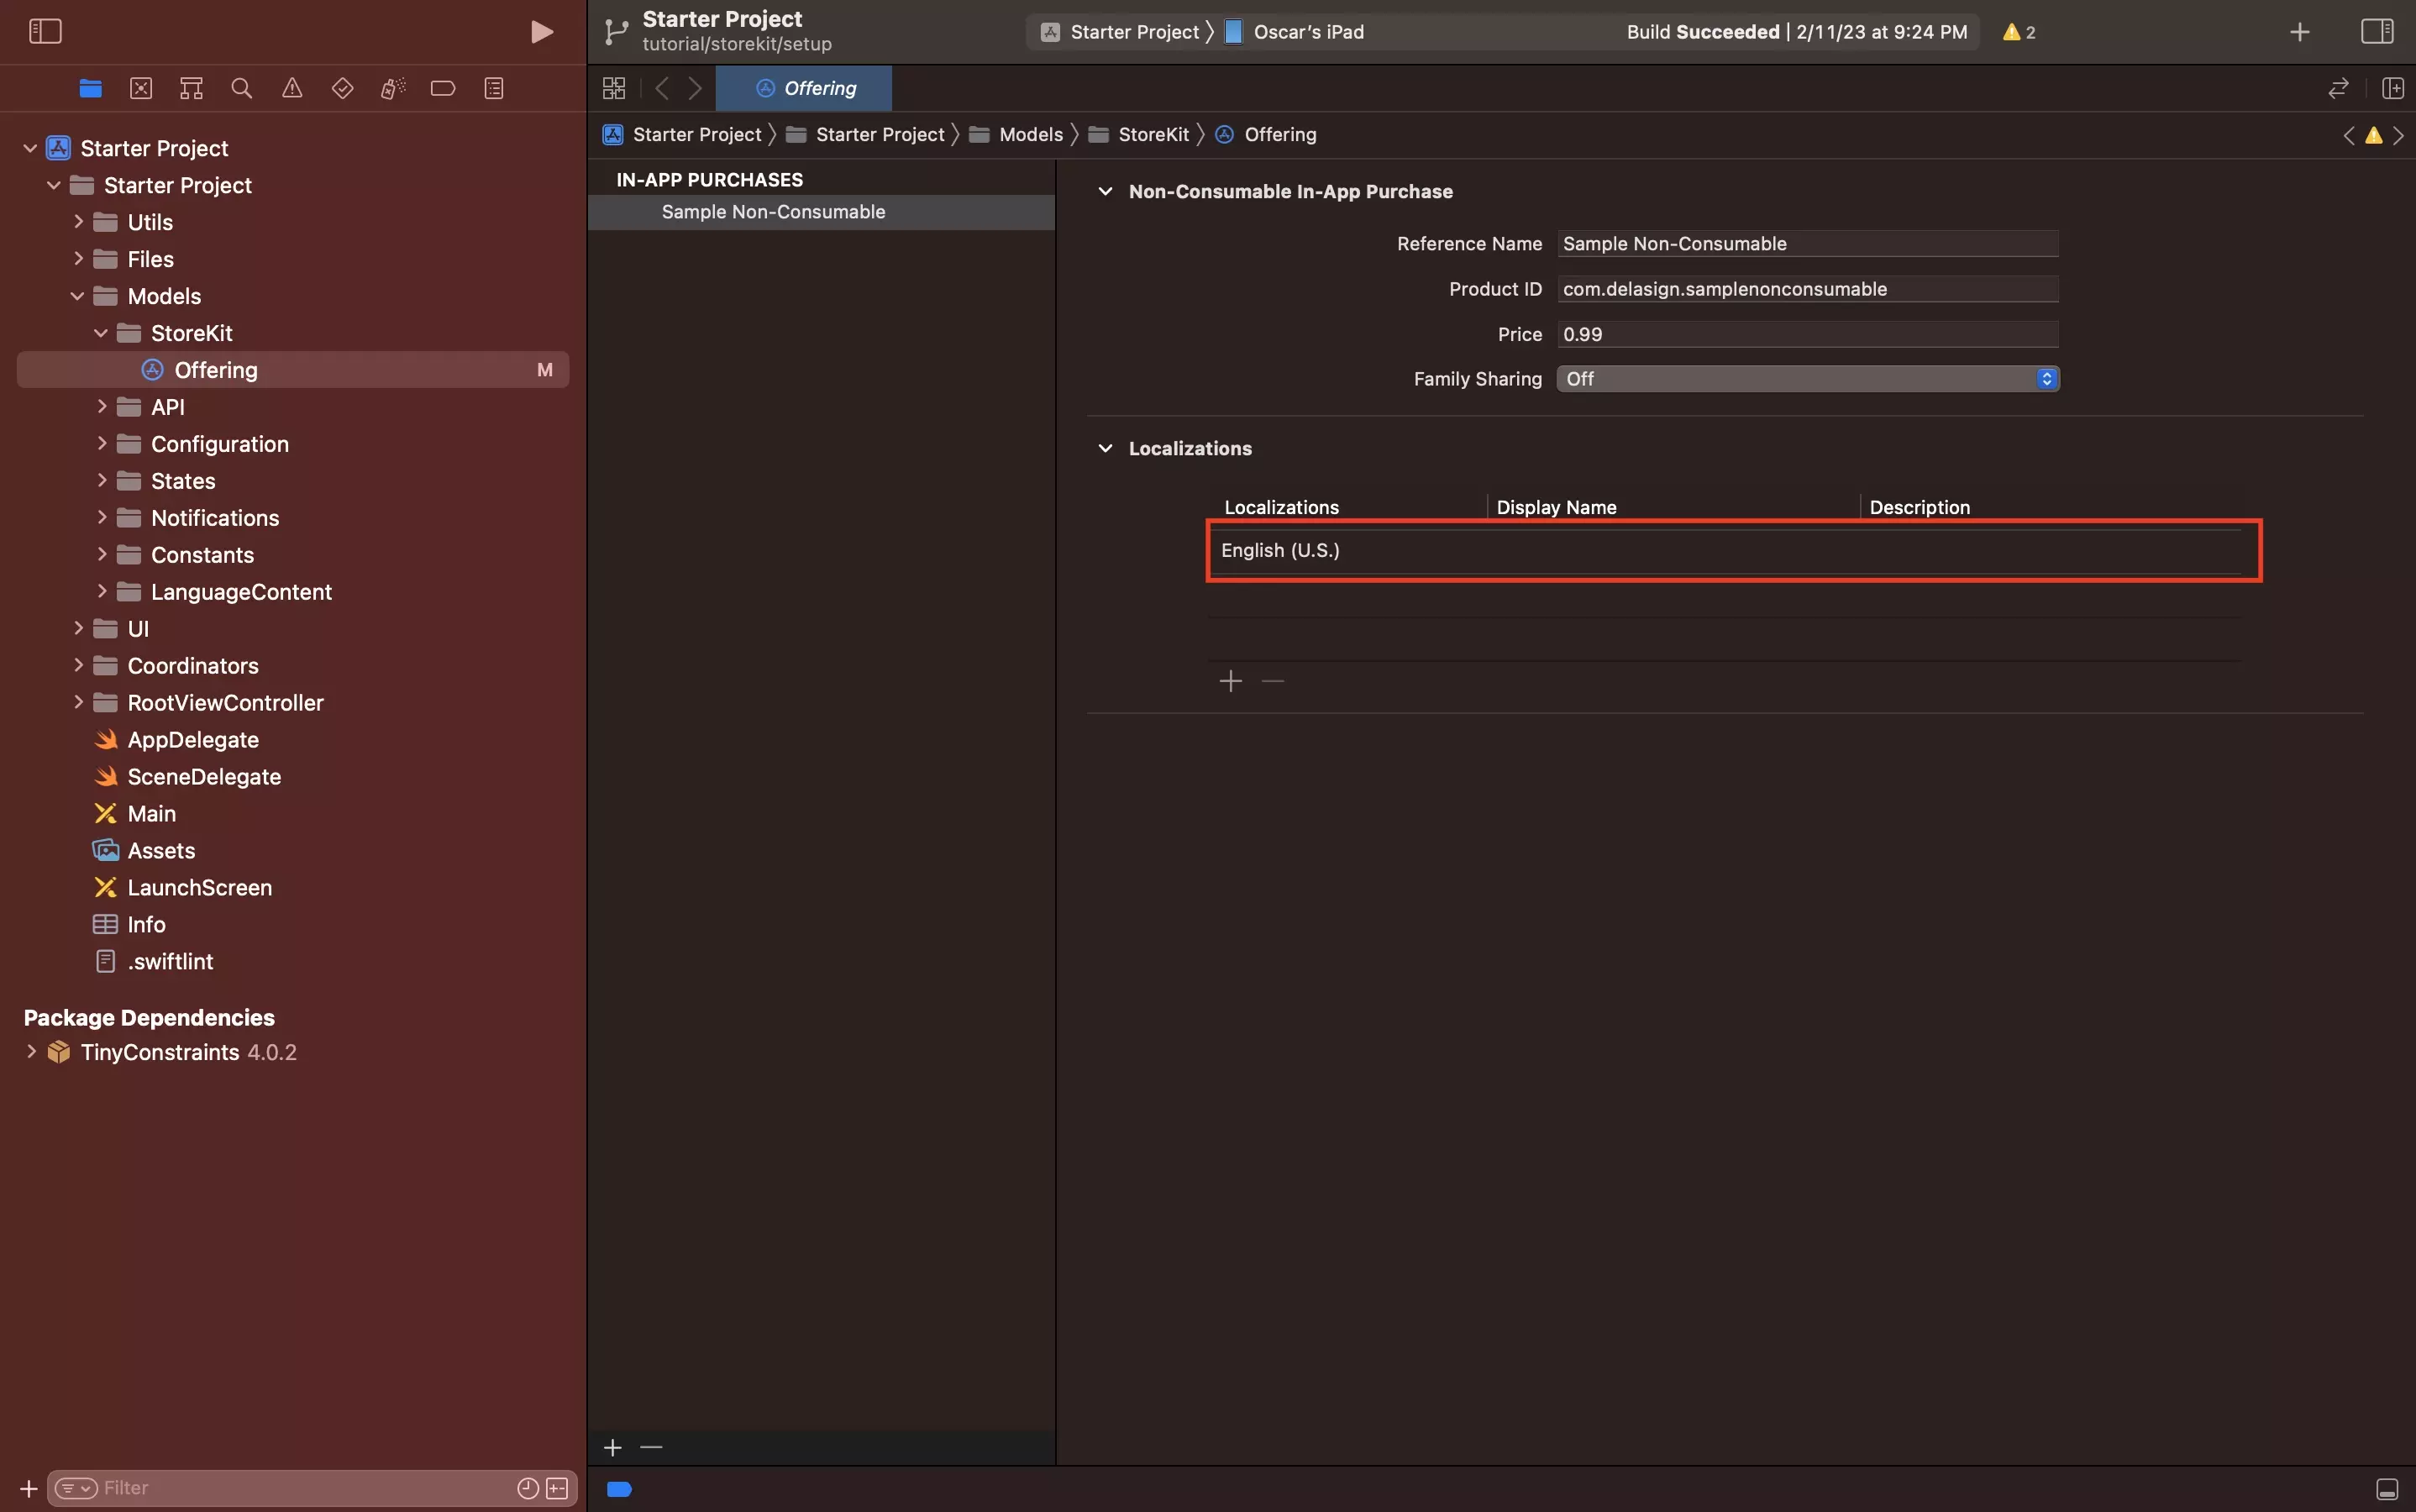
Double click the English (U.S.) localizations bar to bring up the modal that allows you to input the localizations.

B | Configure Localization

A screenshot of the Xcode Configure In-App Purchase Localization editor. Highlighted is the Display Name and Description fields that you must fill in. Once you've entered them, please click the "Done" button, which we have highlighted on the bottom right.

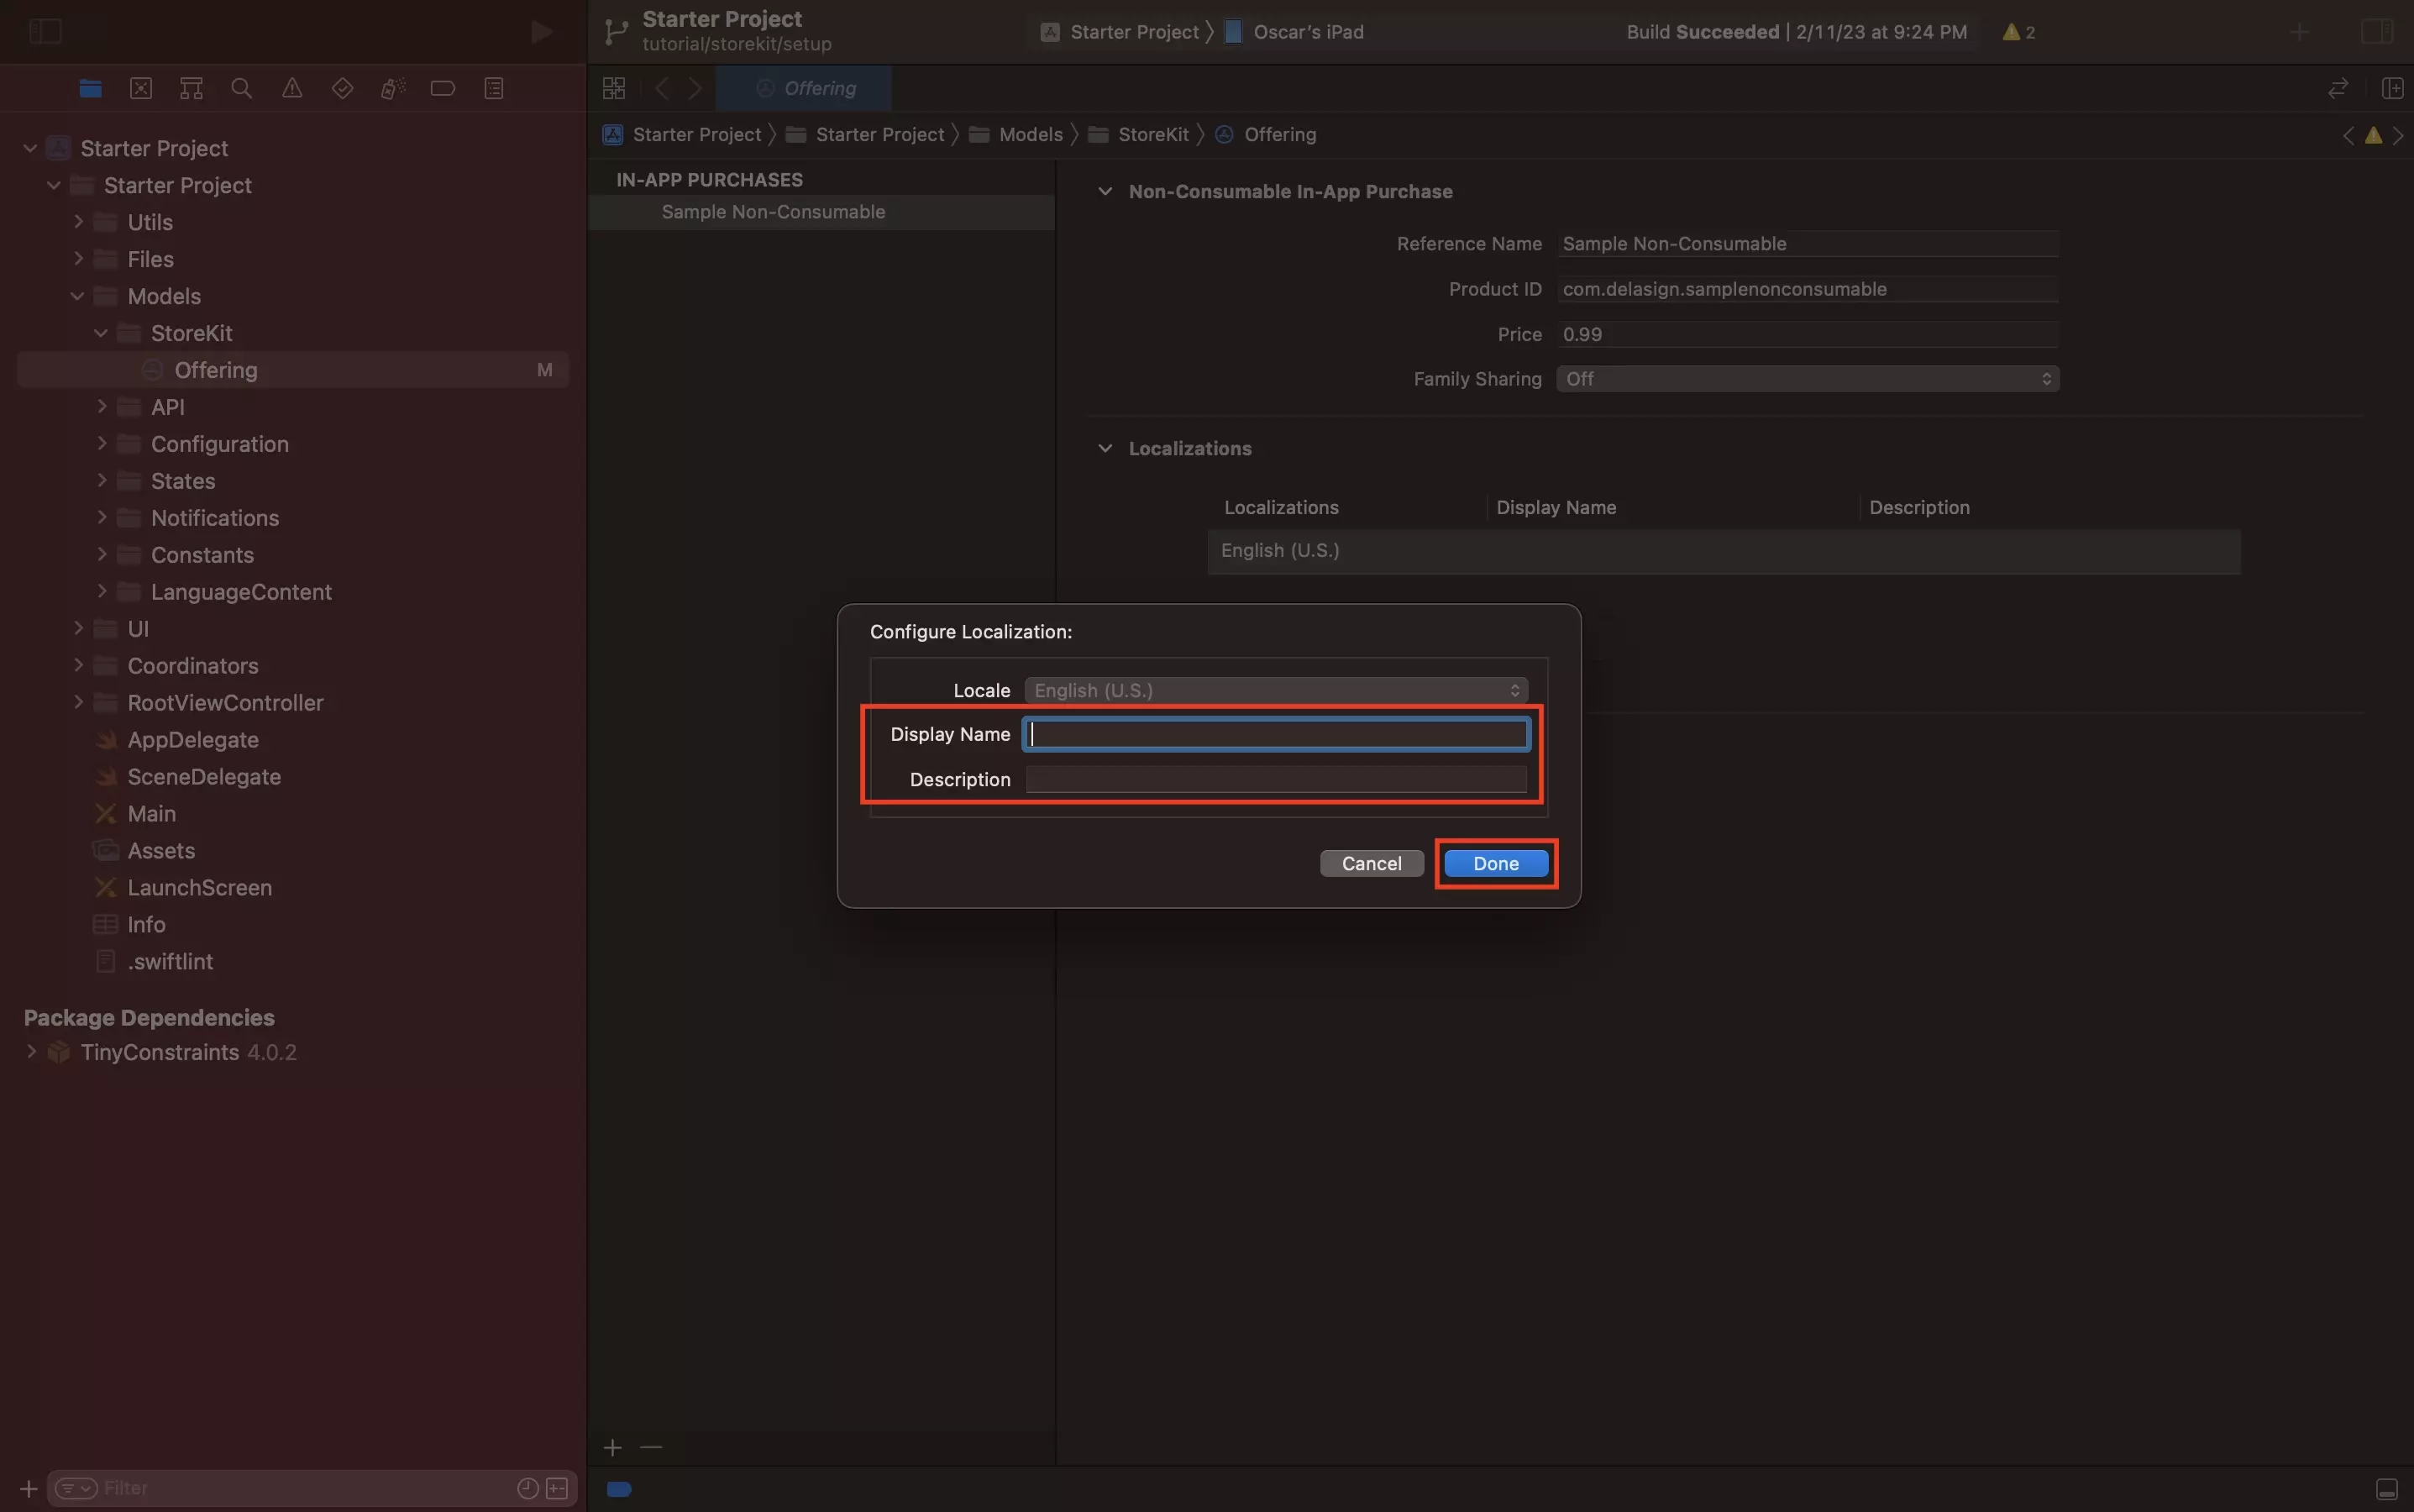
Enter the Display Name and Description. Then press Done.

A screenshot of a local StoreKit configuration file, showing a non-consumable in-app purchase with all the details filled in.

Sample local non-consumable in-app purchase with localizations.

A screenshot of a local StoreKit configuration file, showing a consumable in-app purchase with all the details filled in.

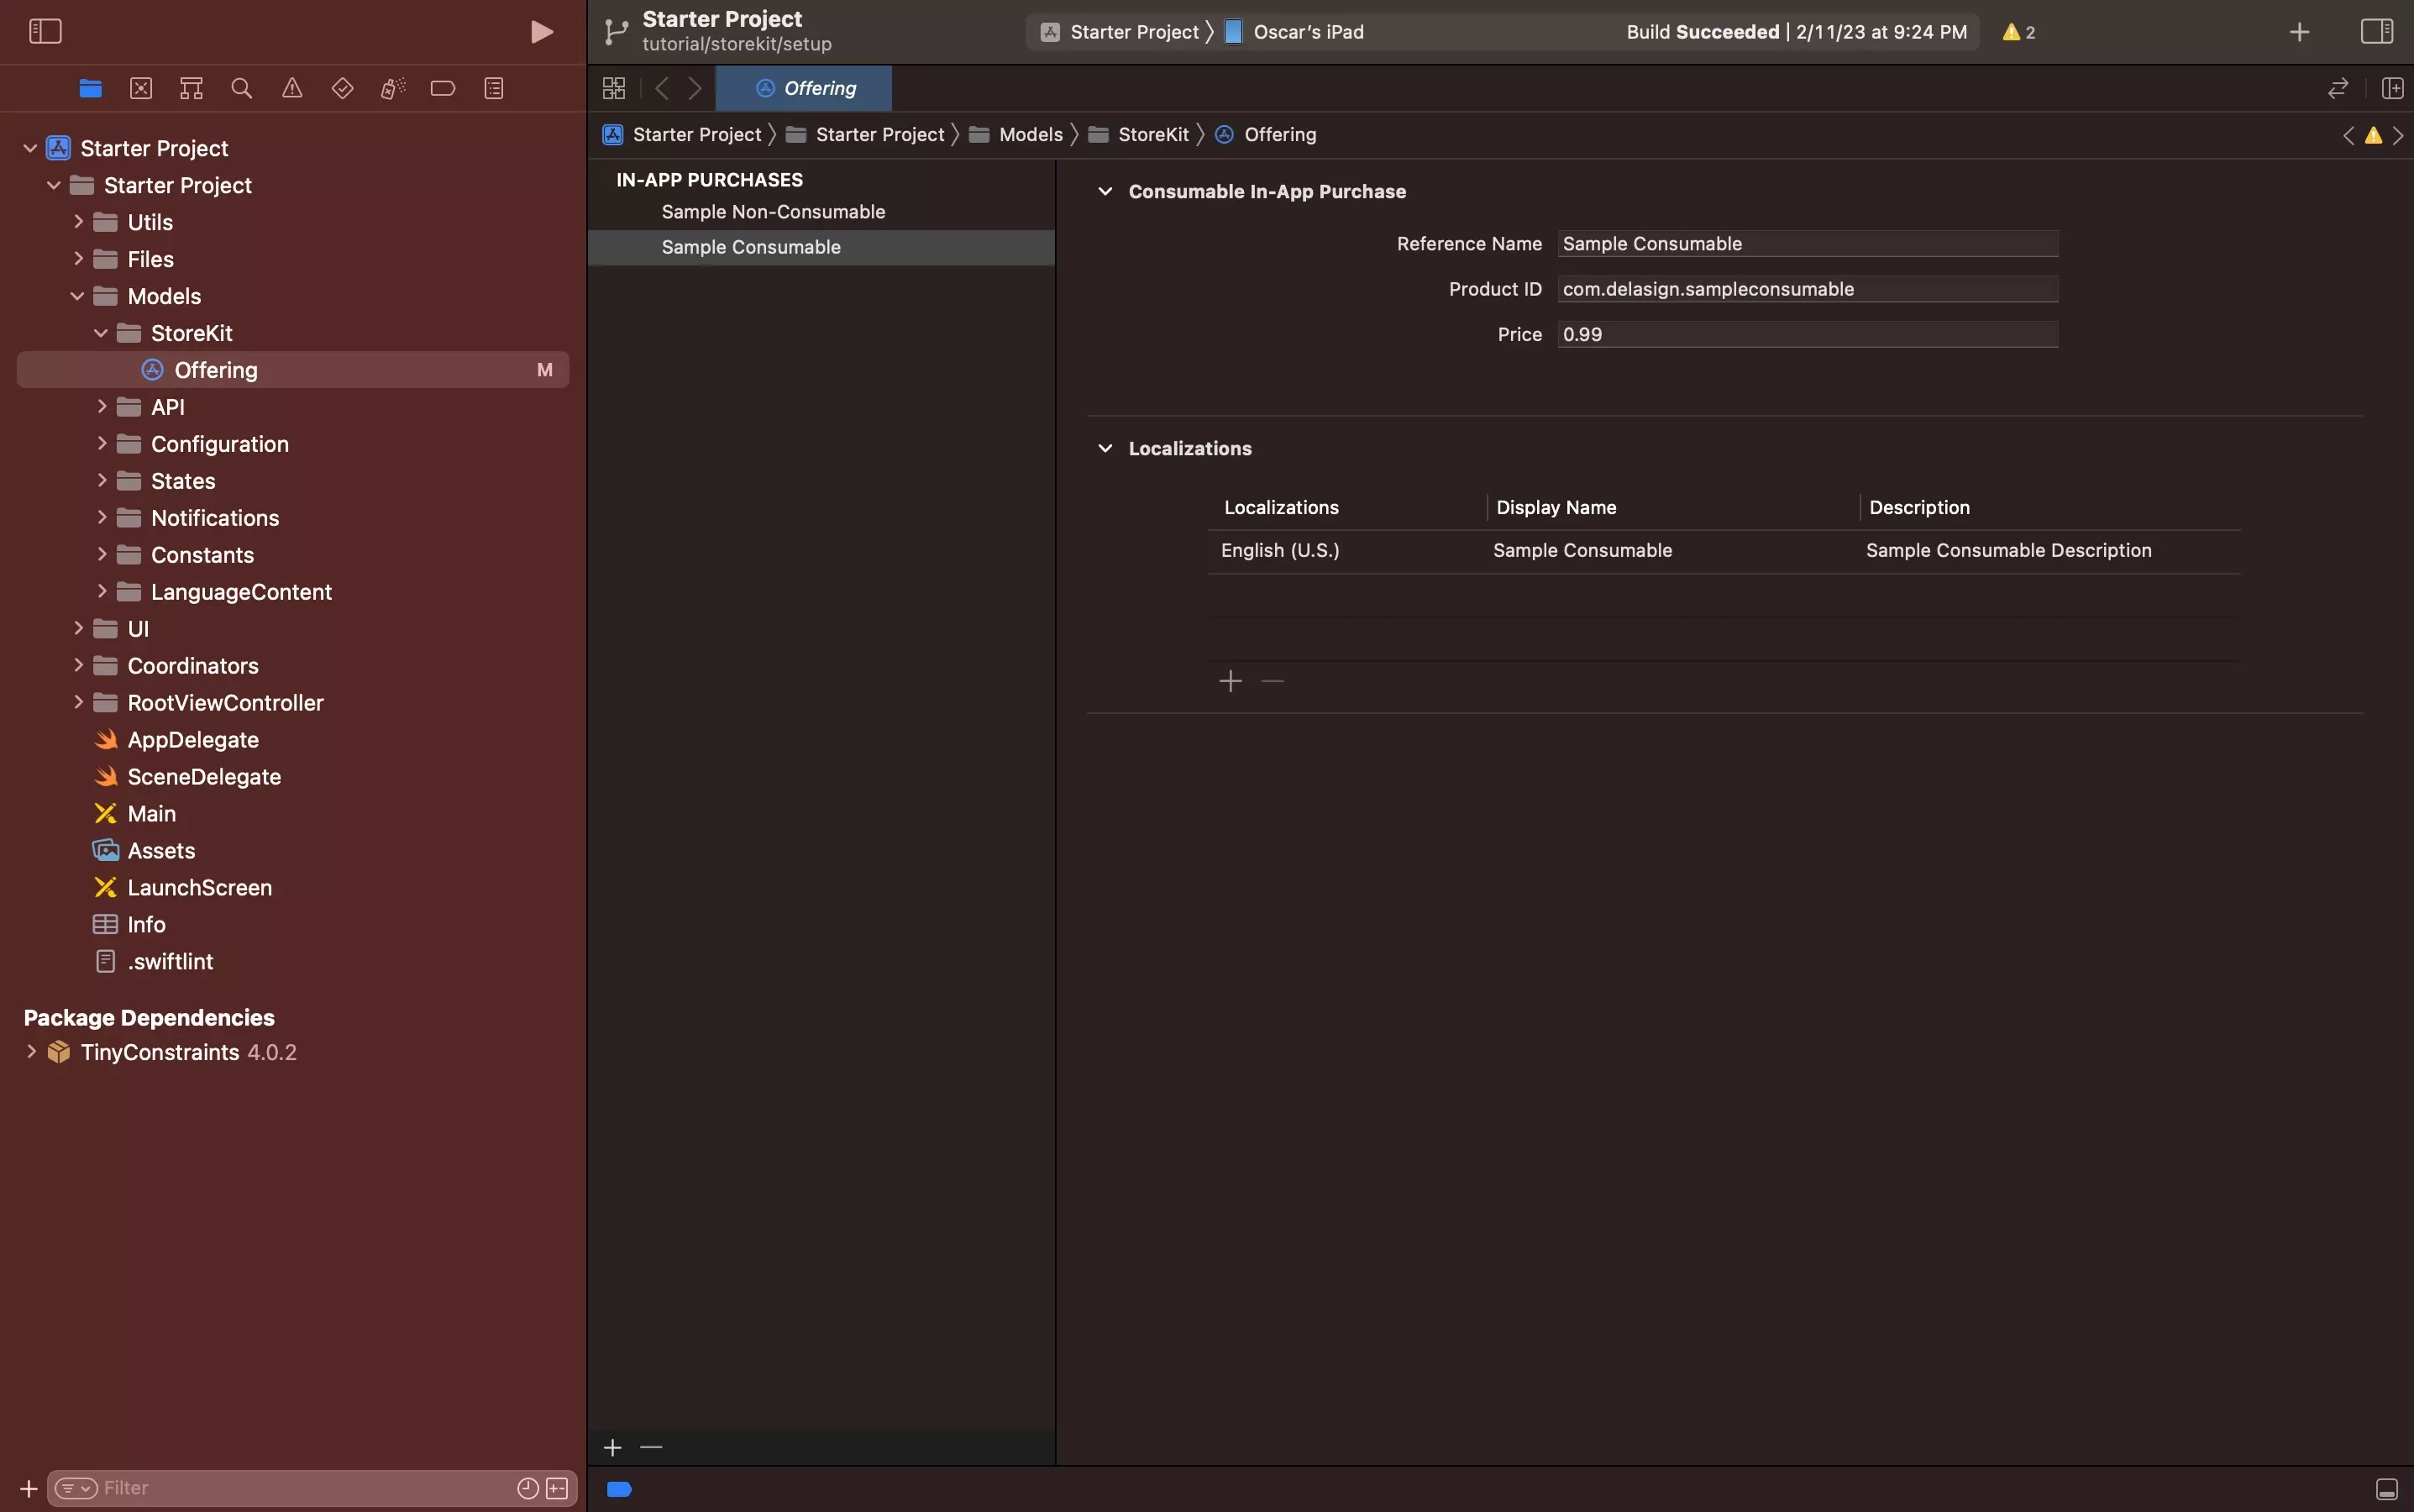
Sample local consumable in-app purchase with localizations.

Any Questions?

We are actively looking for feedback on how to improve this resource. Please send us a note to inquiries@delasign.com with any thoughts or feedback you may have.
delasign logo

Book a Free Consultation.

An icon of an email.

Click here to email us.

Fill in the details below to book a free consultation or to let us know about something else. Whatever it is, we are here to help.

How can we help you ?

Contact Details