How to make a custom data driven UICollectionView
A step by step tutorial on creating a custom data driven UICollectionView in Swift (iOS). Github repository included.

A step by step tutorial on creating a custom data driven UICollectionView in Swift (iOS). Github repository included.
SubscribeThe following tutorial walks you through how to create a data driven UICollectionView from data gathered from a GraphQL API call in Swift (iOS) using XCode. The project builds on our Open Source Swift project and implements a UICollectionView with a single custom UICollectionViewCells.
This tutorial starts on the tutorial/graphql/api branch and the changes are available on the tutorial/graphql/data-driven-collectionview branch of the repository found below.
Please note this tutorial uses the TinyConstraints & Apollo Swift package, which we added using the Swift Package Manager.
What are we making in this tutorial ?
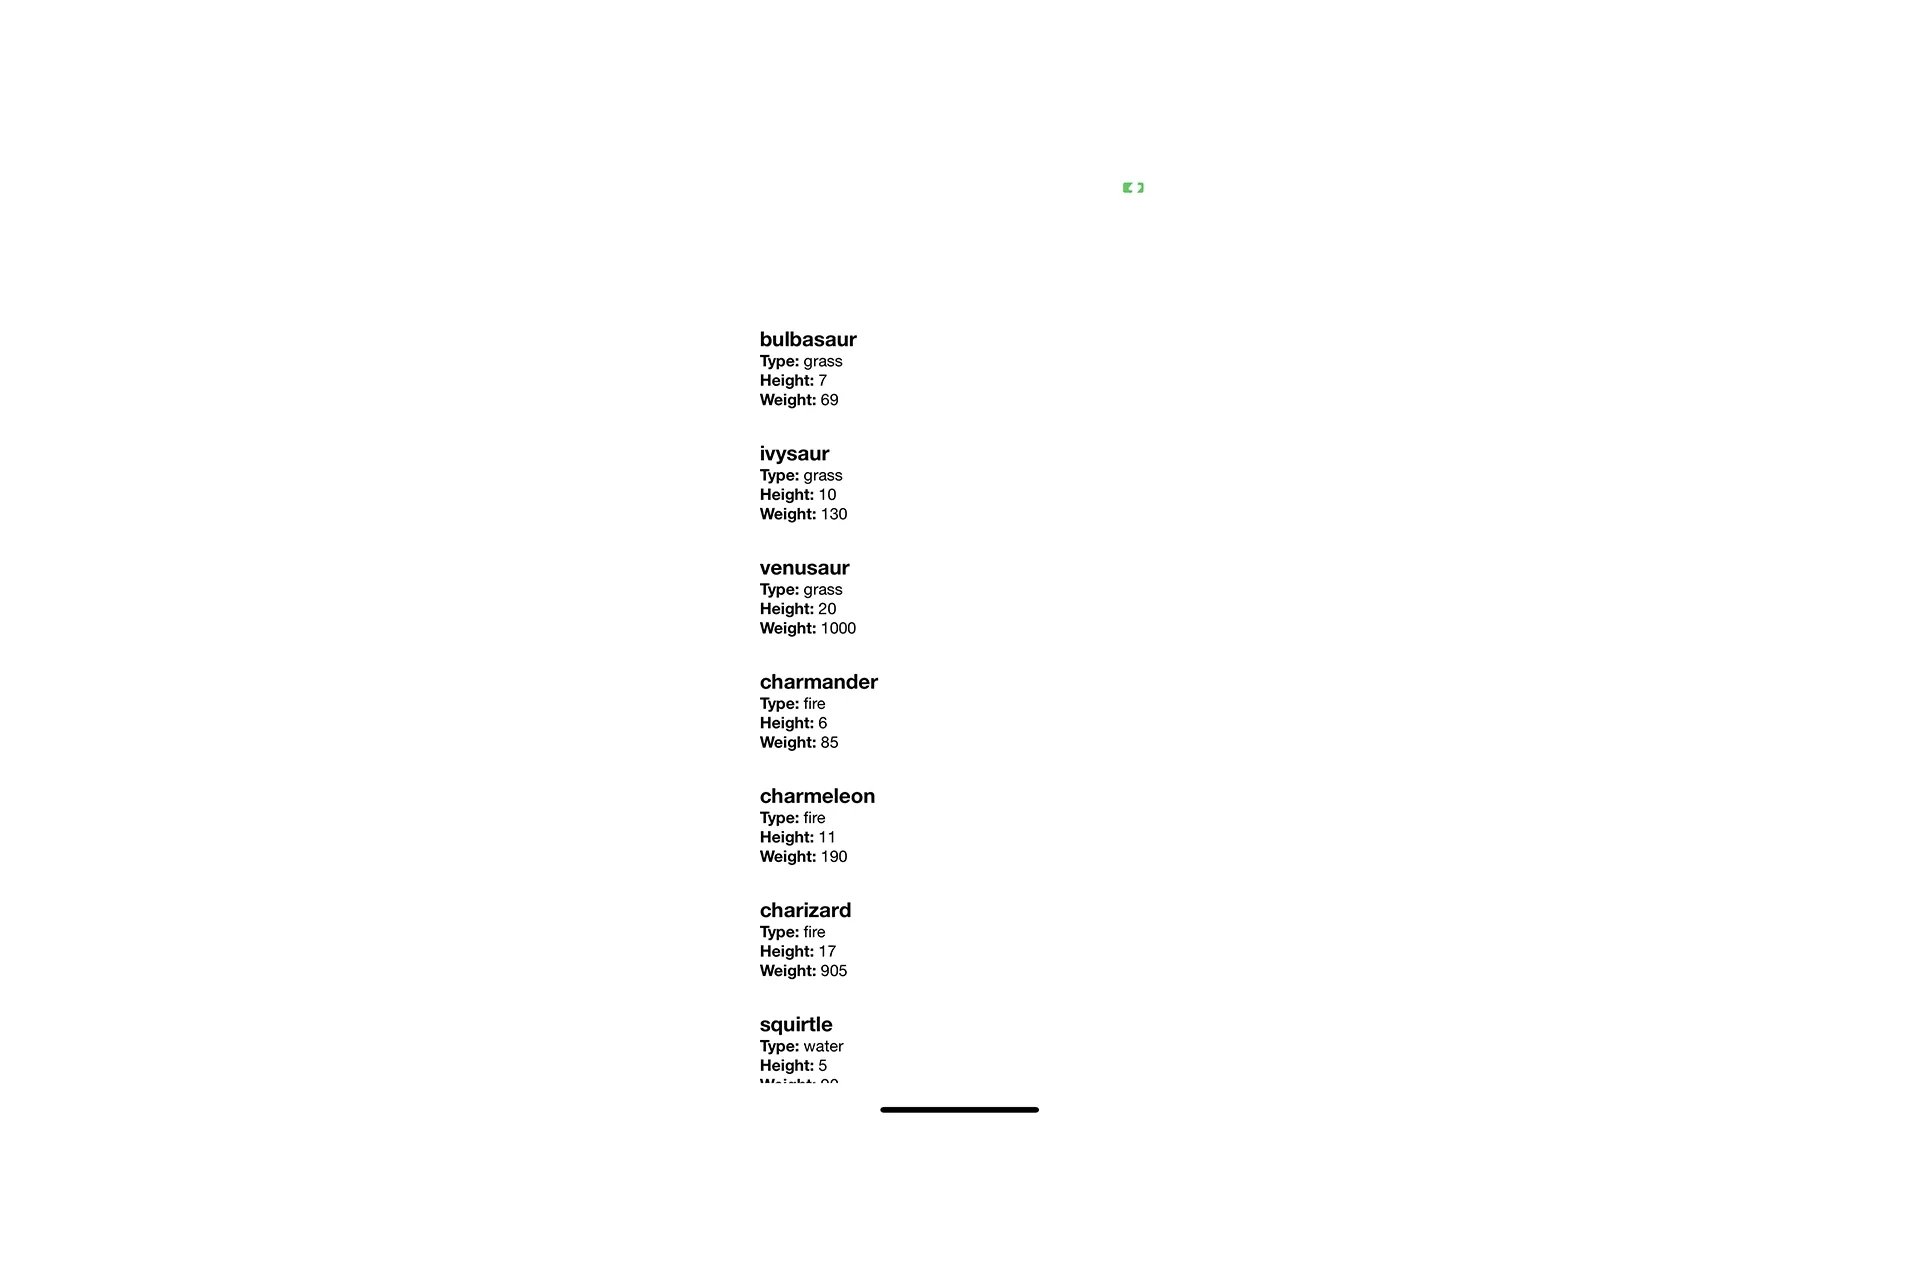
In this tutorial we will be creating a UICollectionView that allows you to browse through all the pokemons gathered from the free Pokemon API (PokeAPI), which is a free RESTful Pokémon API, that uses GraphQL to process requests.
For details on how we gathered the data, please consult the tutorial in the link below.
Tutorial
We recommend downloading our Open Source project, checking out the tutorial/graphql/api branch and carrying out the steps outlined below. All relevant changes are found in the tutorial/graphql/data-driven-collectionview branch.
git clone git@github.com:delasign/swift-starter-project.gitStep One: Create the Content
The following step is centered around creating the static content required for the system.
In this case, it is the strings for Type, Height & Weight.
For more information on how to create localized content, please use the tutorial below.
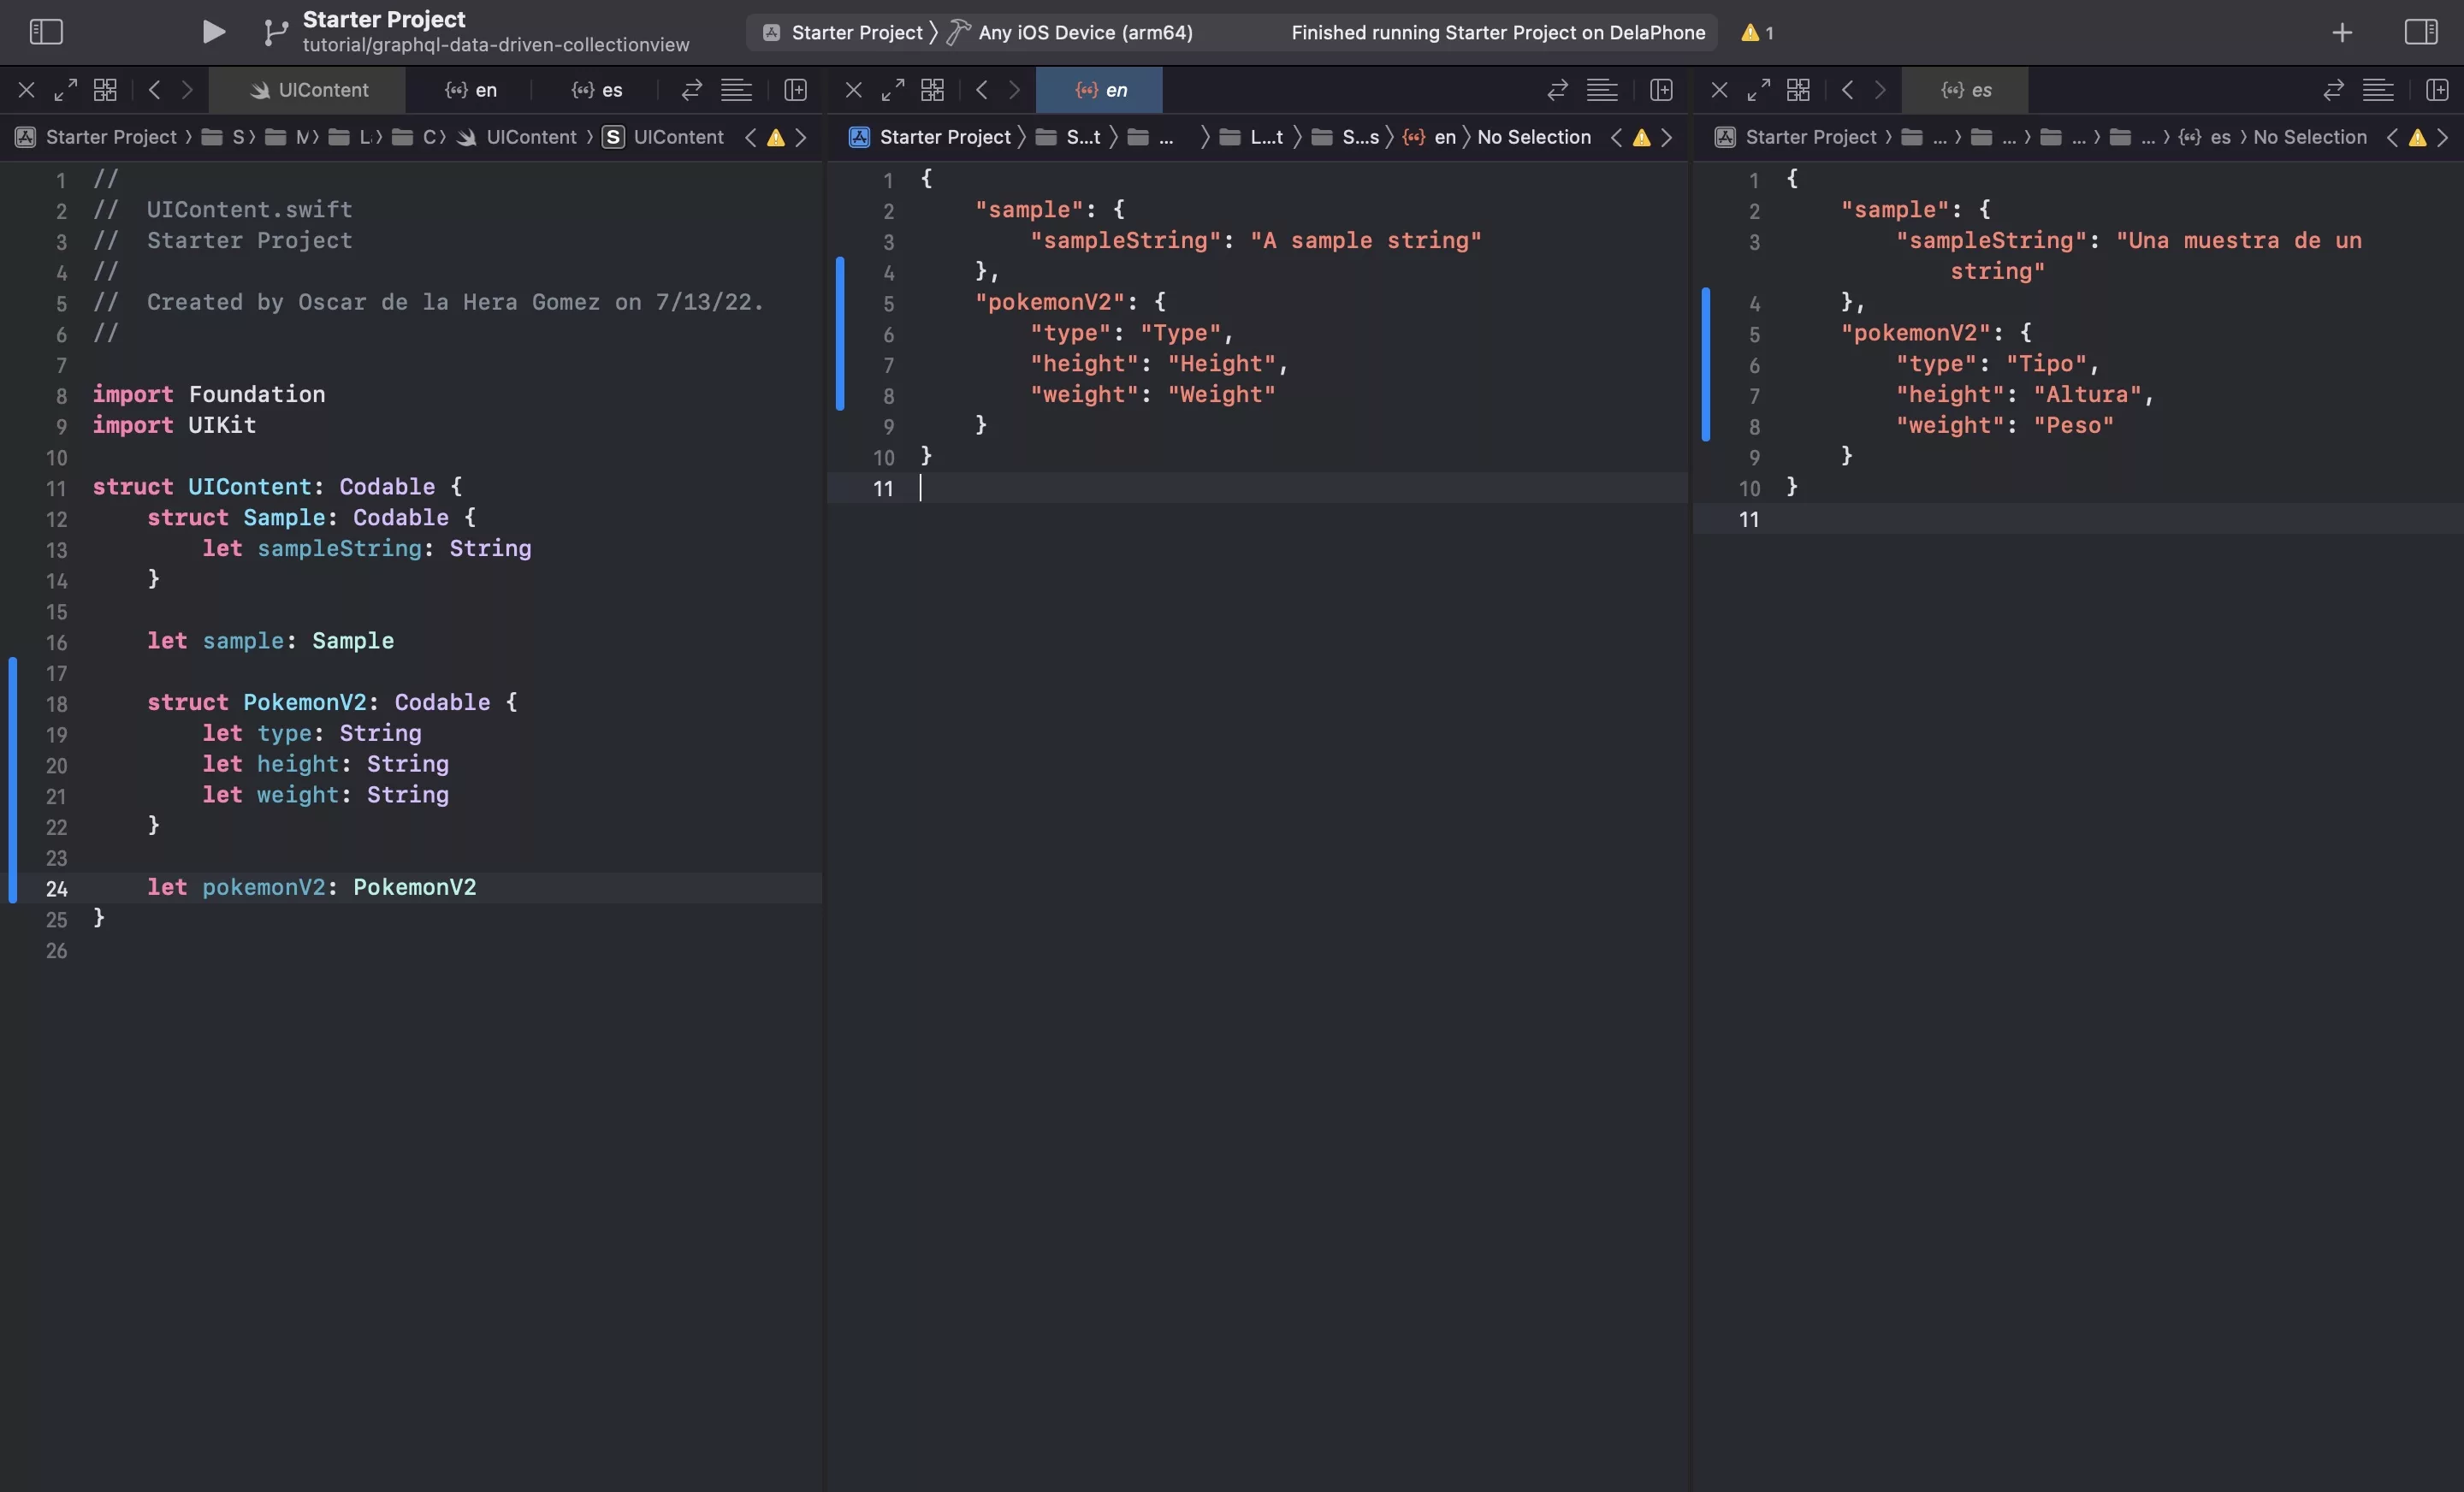
A | Create the UIContent
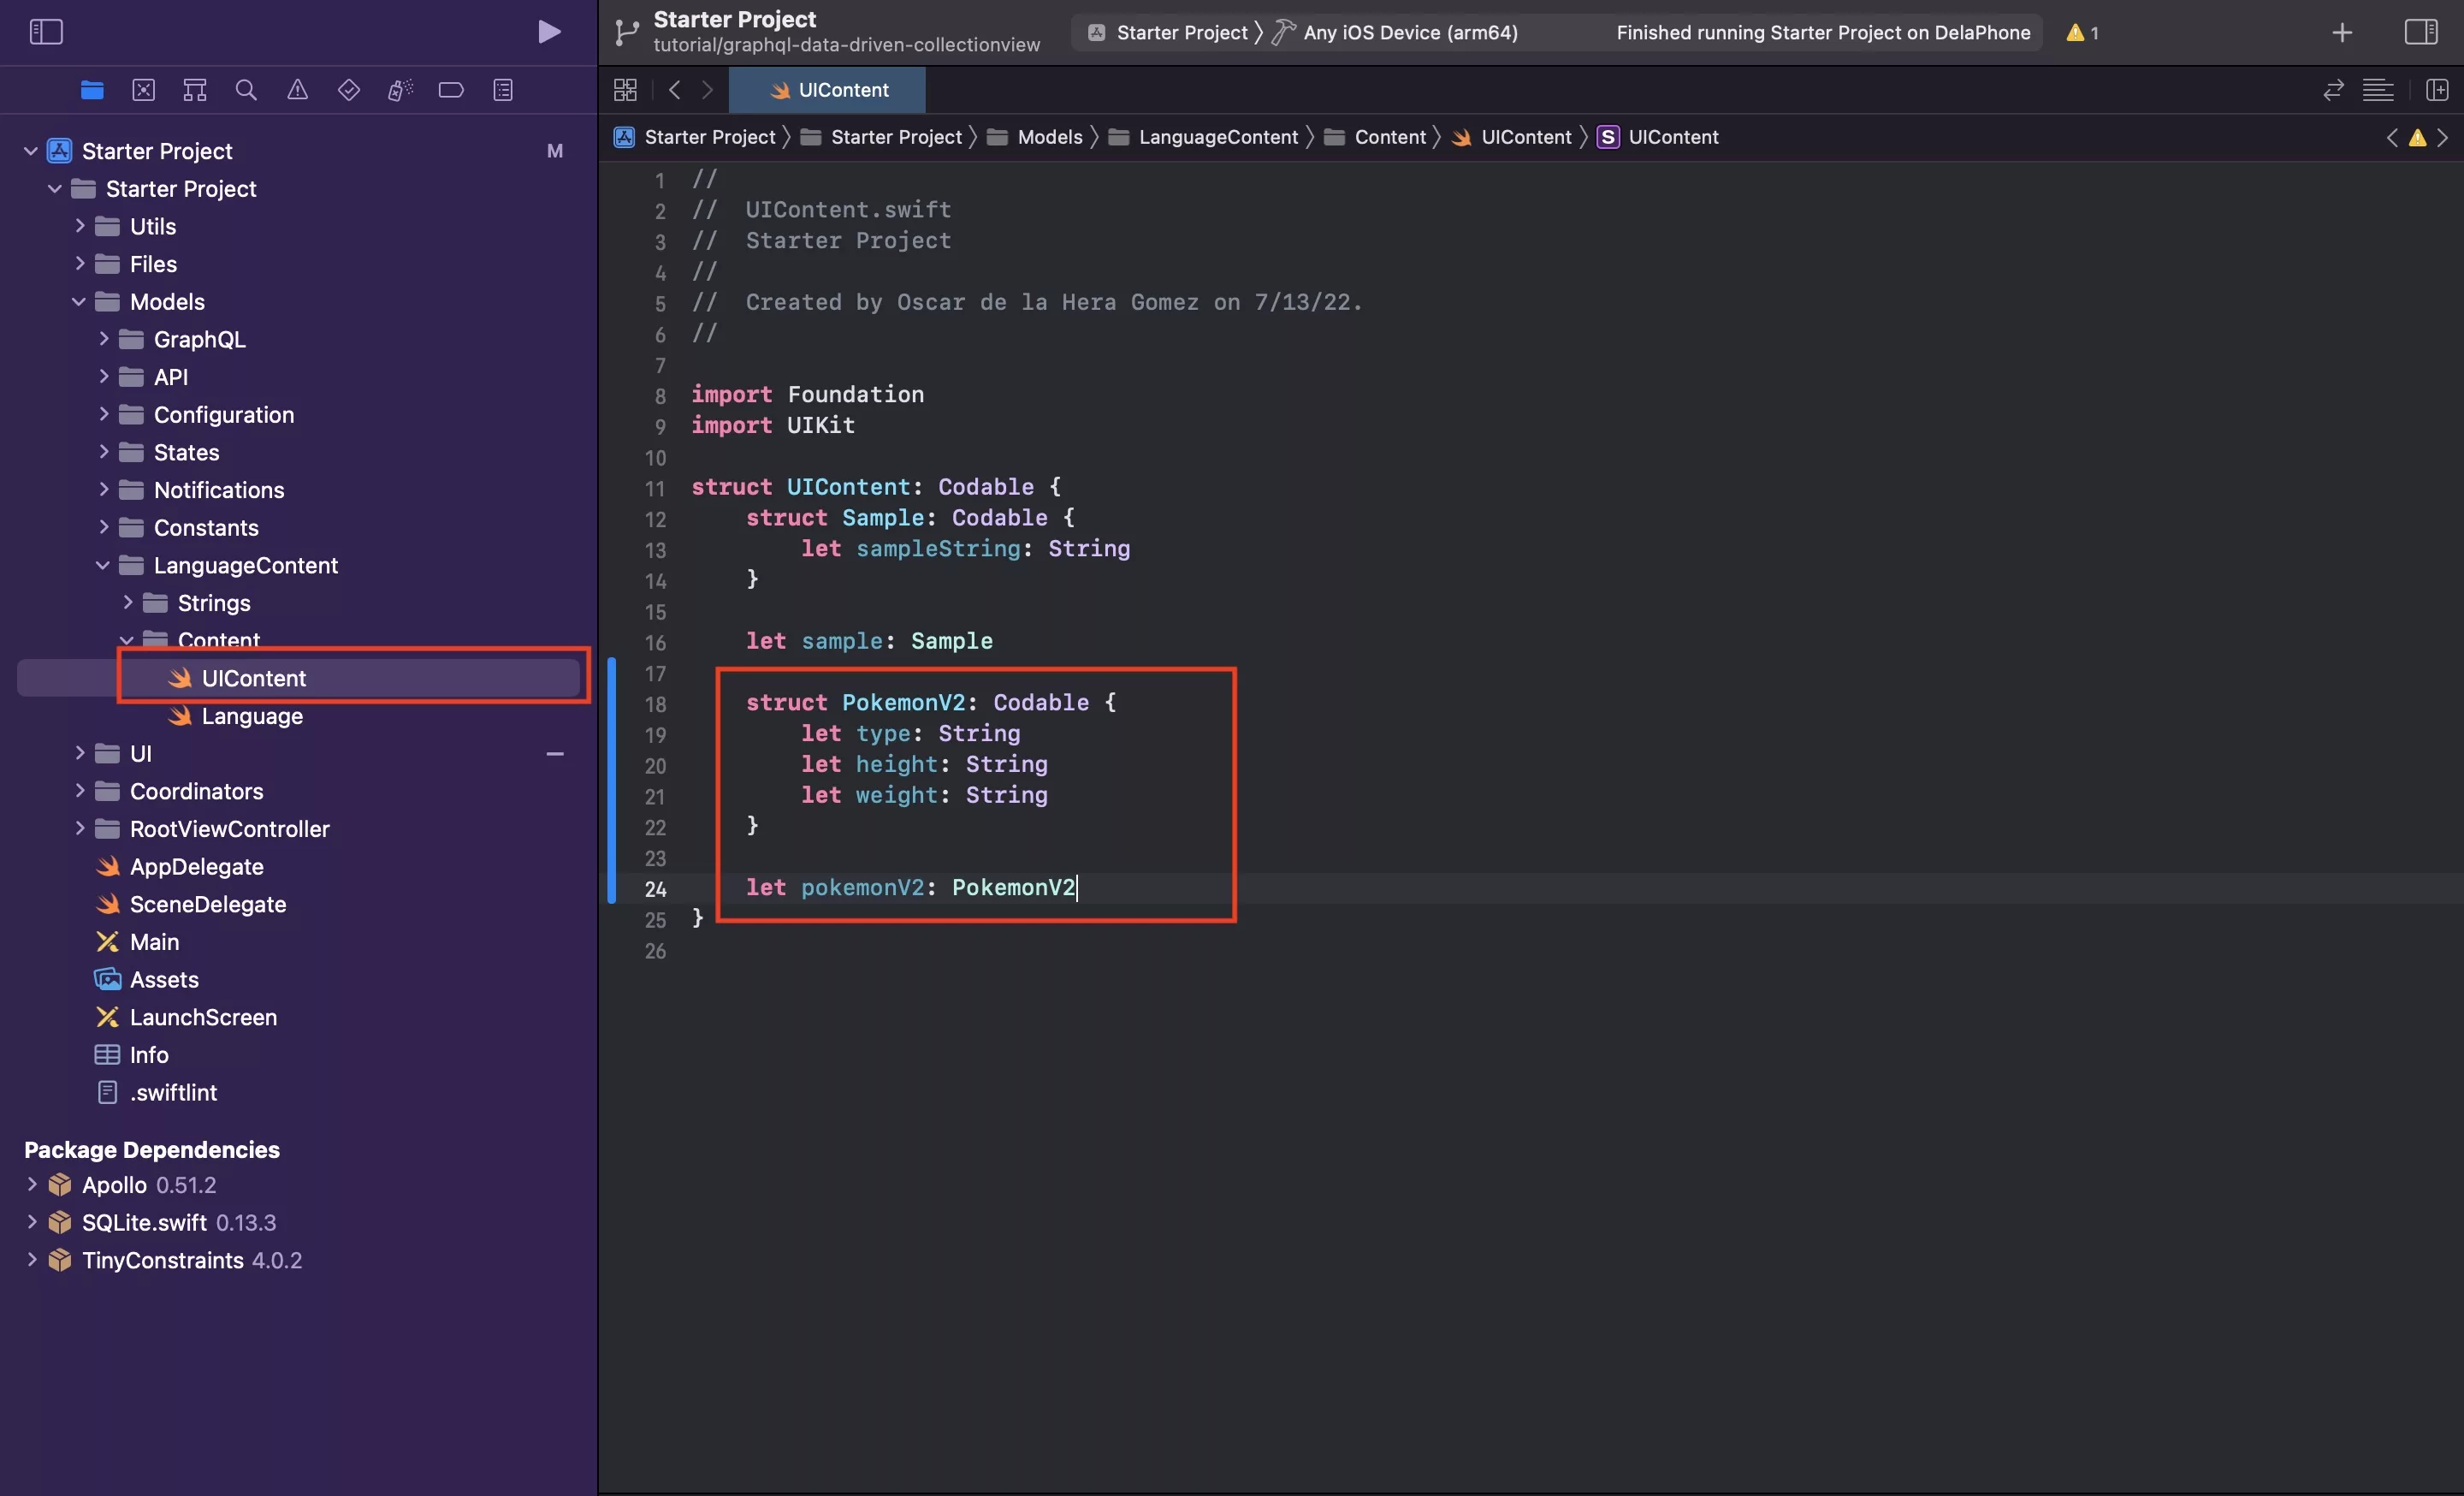
In UIContent.swift create a new codable called PokemonV2 and add three string constants: Type, Height & Weight.
B | Create the Strings
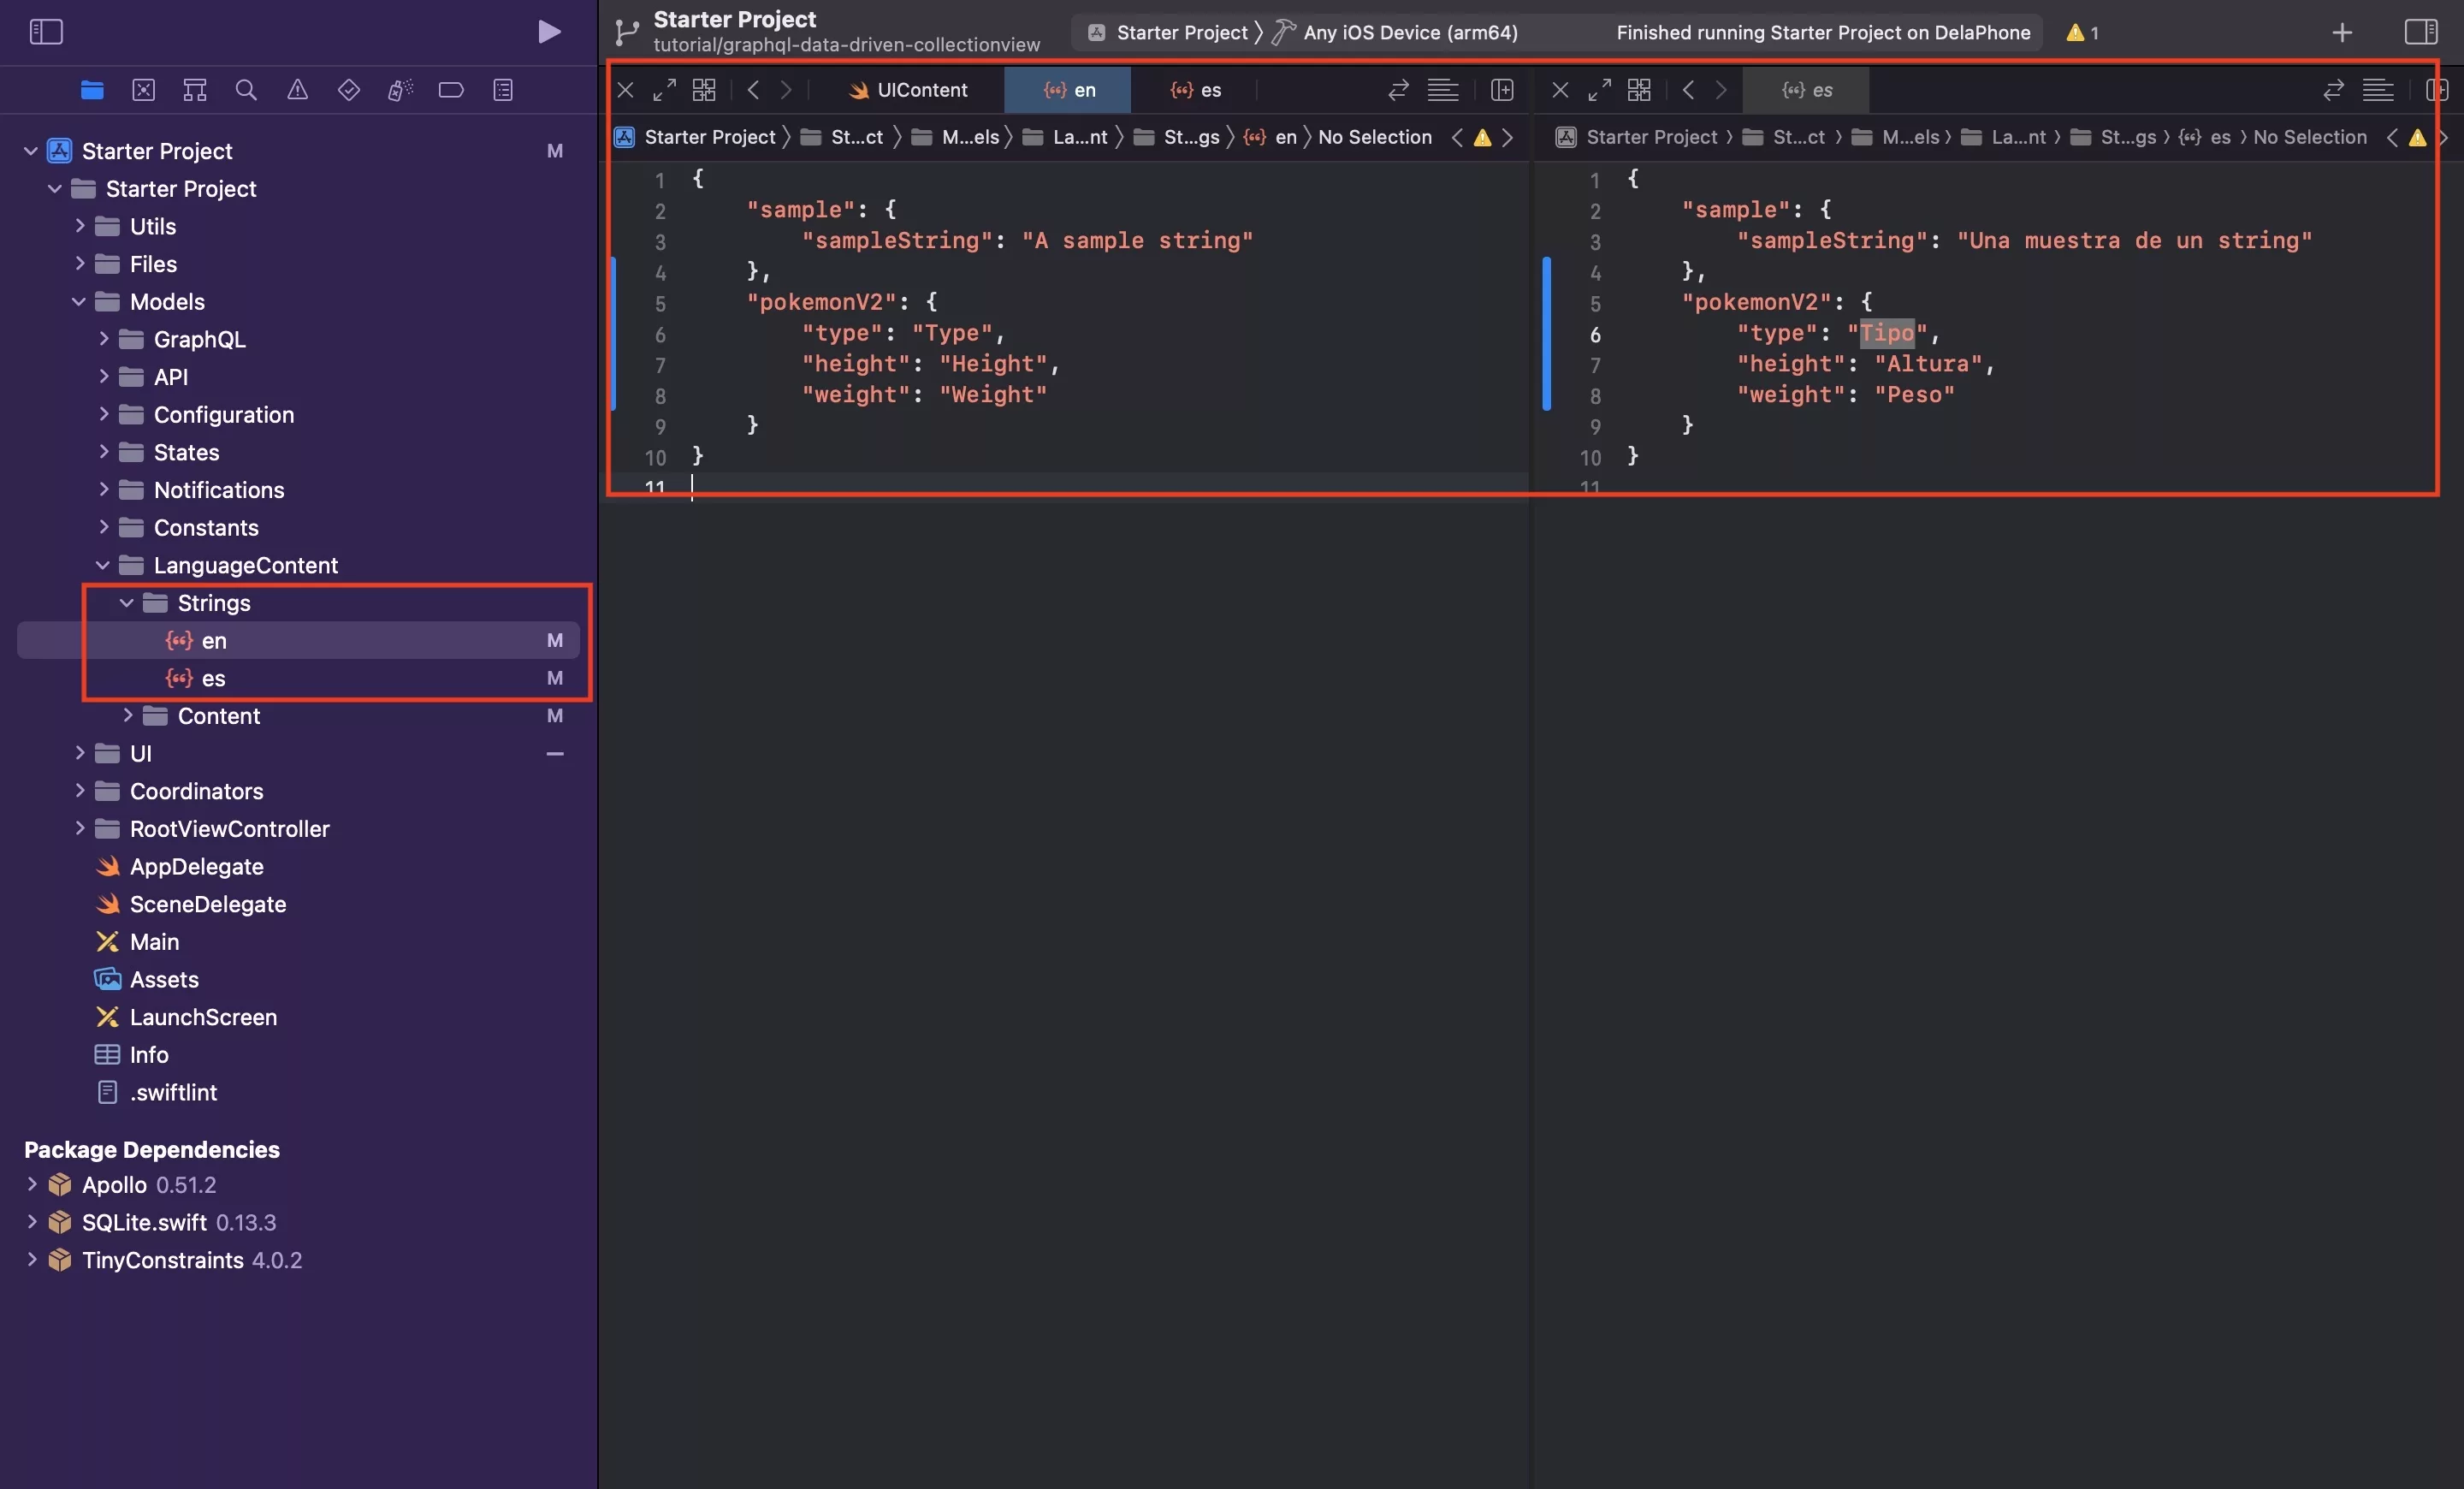
Add the relevant strings to en.json and es.json.
For more information on how to create localized content, please use the tutorial below.
Step Two: Declare your Fonts & Styles
The following step involves creating the attributed text required to execute our design.
In this case, we are updating our code to include one more font and two labels: Header & Metric.
The Metric style is an example of an attributed label that uses two font types.
A | Declare your fonts

In Fonts.swift, add the relevant fonts that you need your system to use. In the case of this tutorial we added Helvetica Neue Bold.
We recommend that you use our utility function printSystemFonts (Found in Utils -> Fonts -> PrintSystemFonts.swift) to print out the font name used by the system, as this is the name that is required for it to register correctly.
For this tutorial, we choose to call the printSystemFonts function in the ViewDidLoad function in the ViewController.swift.
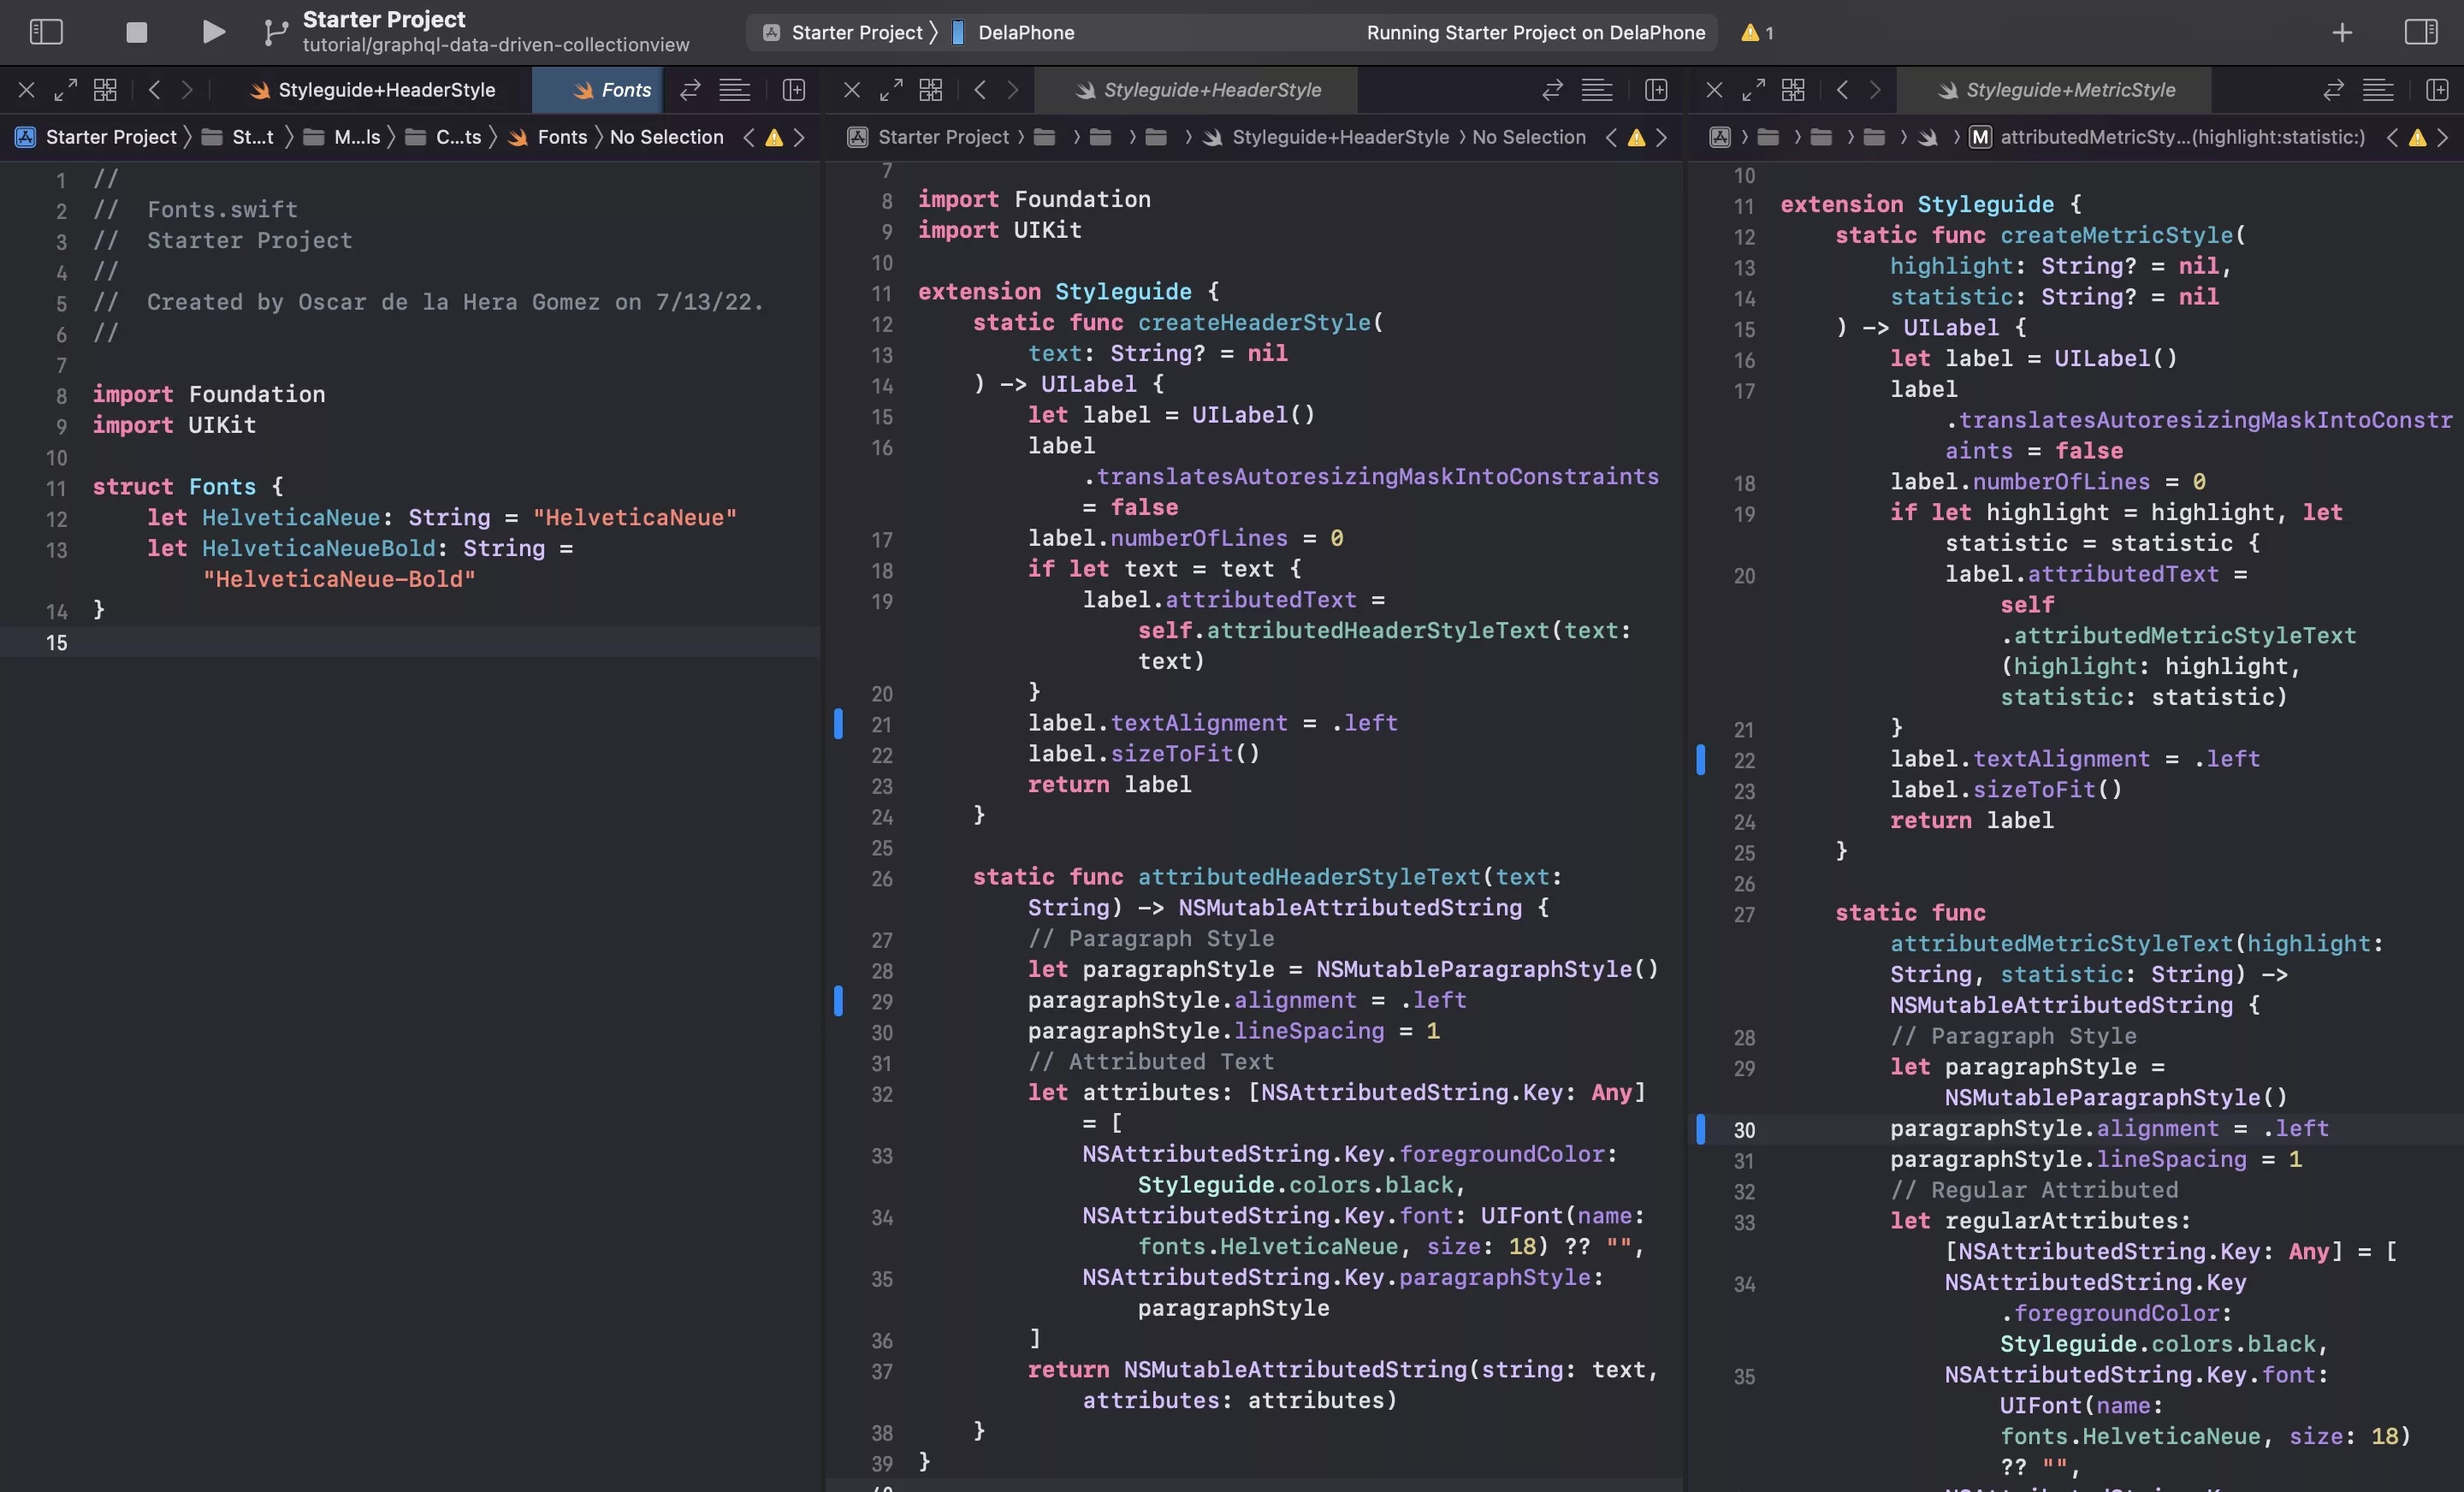
B | Create the Header Style

In the Styleguide folder, create a new file called Styleguide+HeaderStyle.swift and paste in the code found below.
C | Create the Metric Style
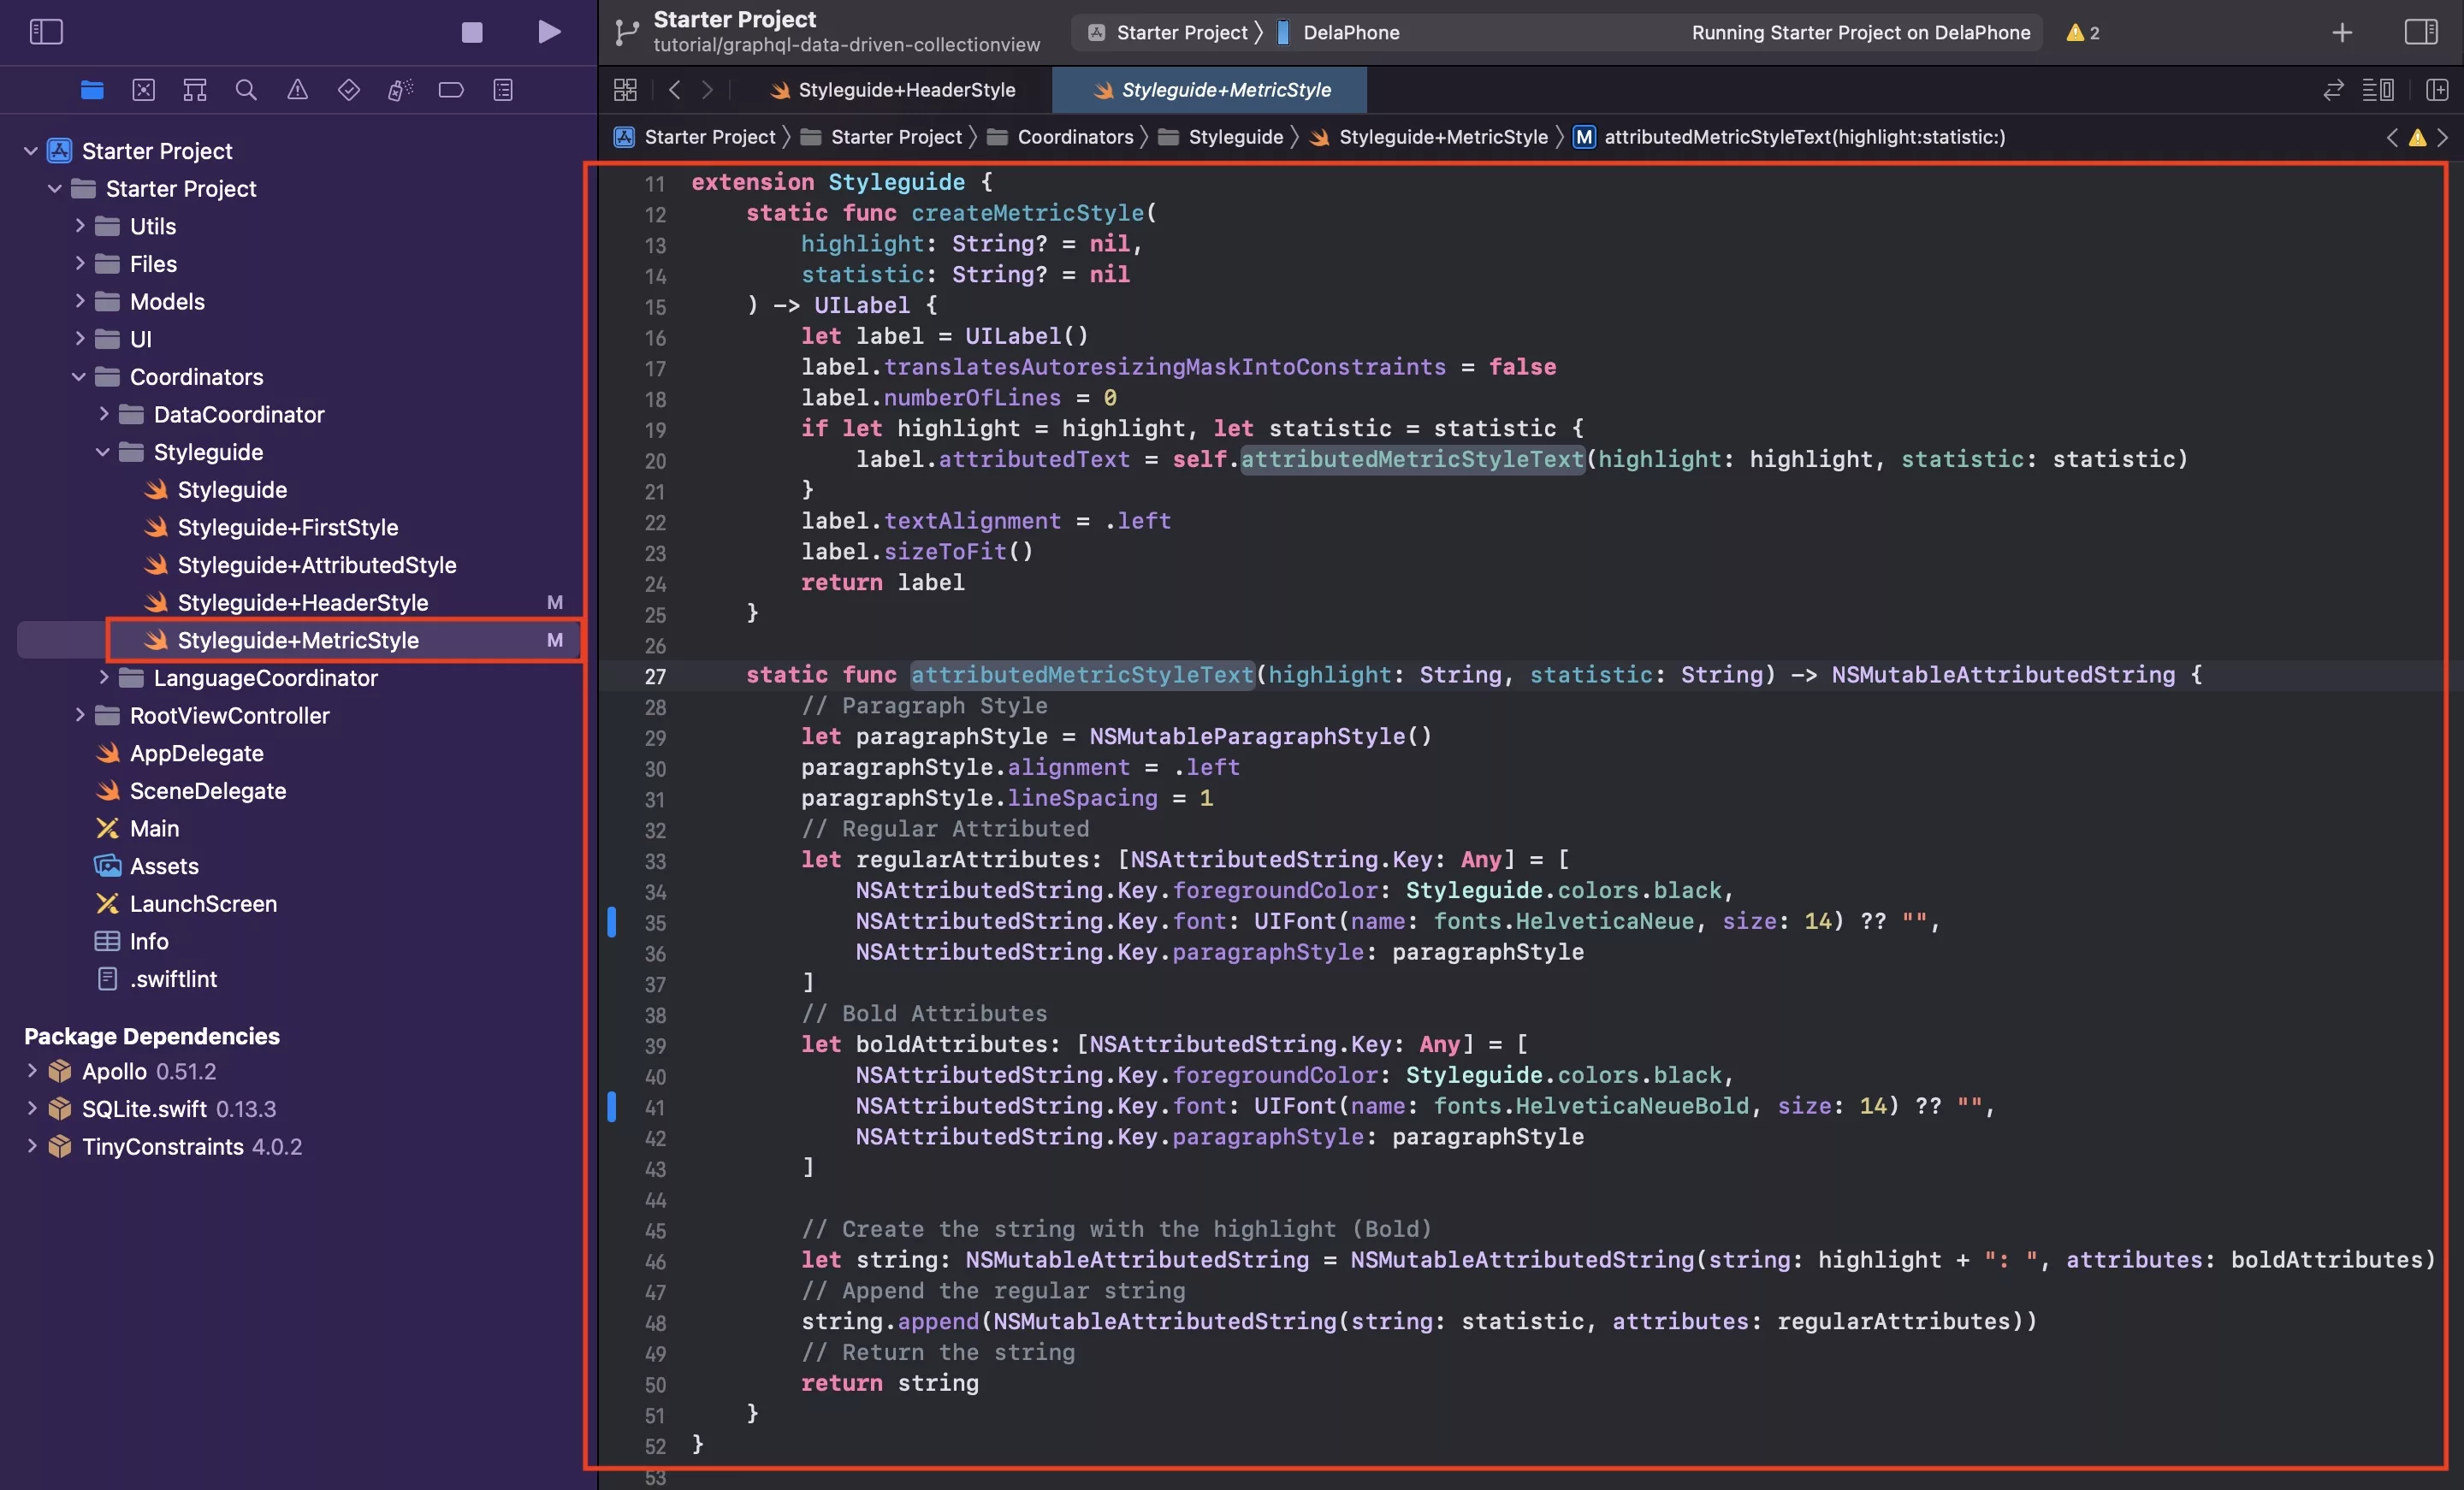
In the Styleguide folder, create a new file called Styleguide+MetricStyle.swift and paste in the code found below.
As you can see, we declare the attributes for the regular and bold strings on lines 33 and 39 respectively and create a concatenated string on line 46 and 48 with these attributes.
Step Three: Declare and set the Data
The following step is centered around declaring a variable that holds onto the data to be consumed by the UICollectionView and setting it from the API call.
As aforementioned, we setup the project to gather data and created the infrastructure to consume the data in a previous tutorial found below.
A | Declare the data variable

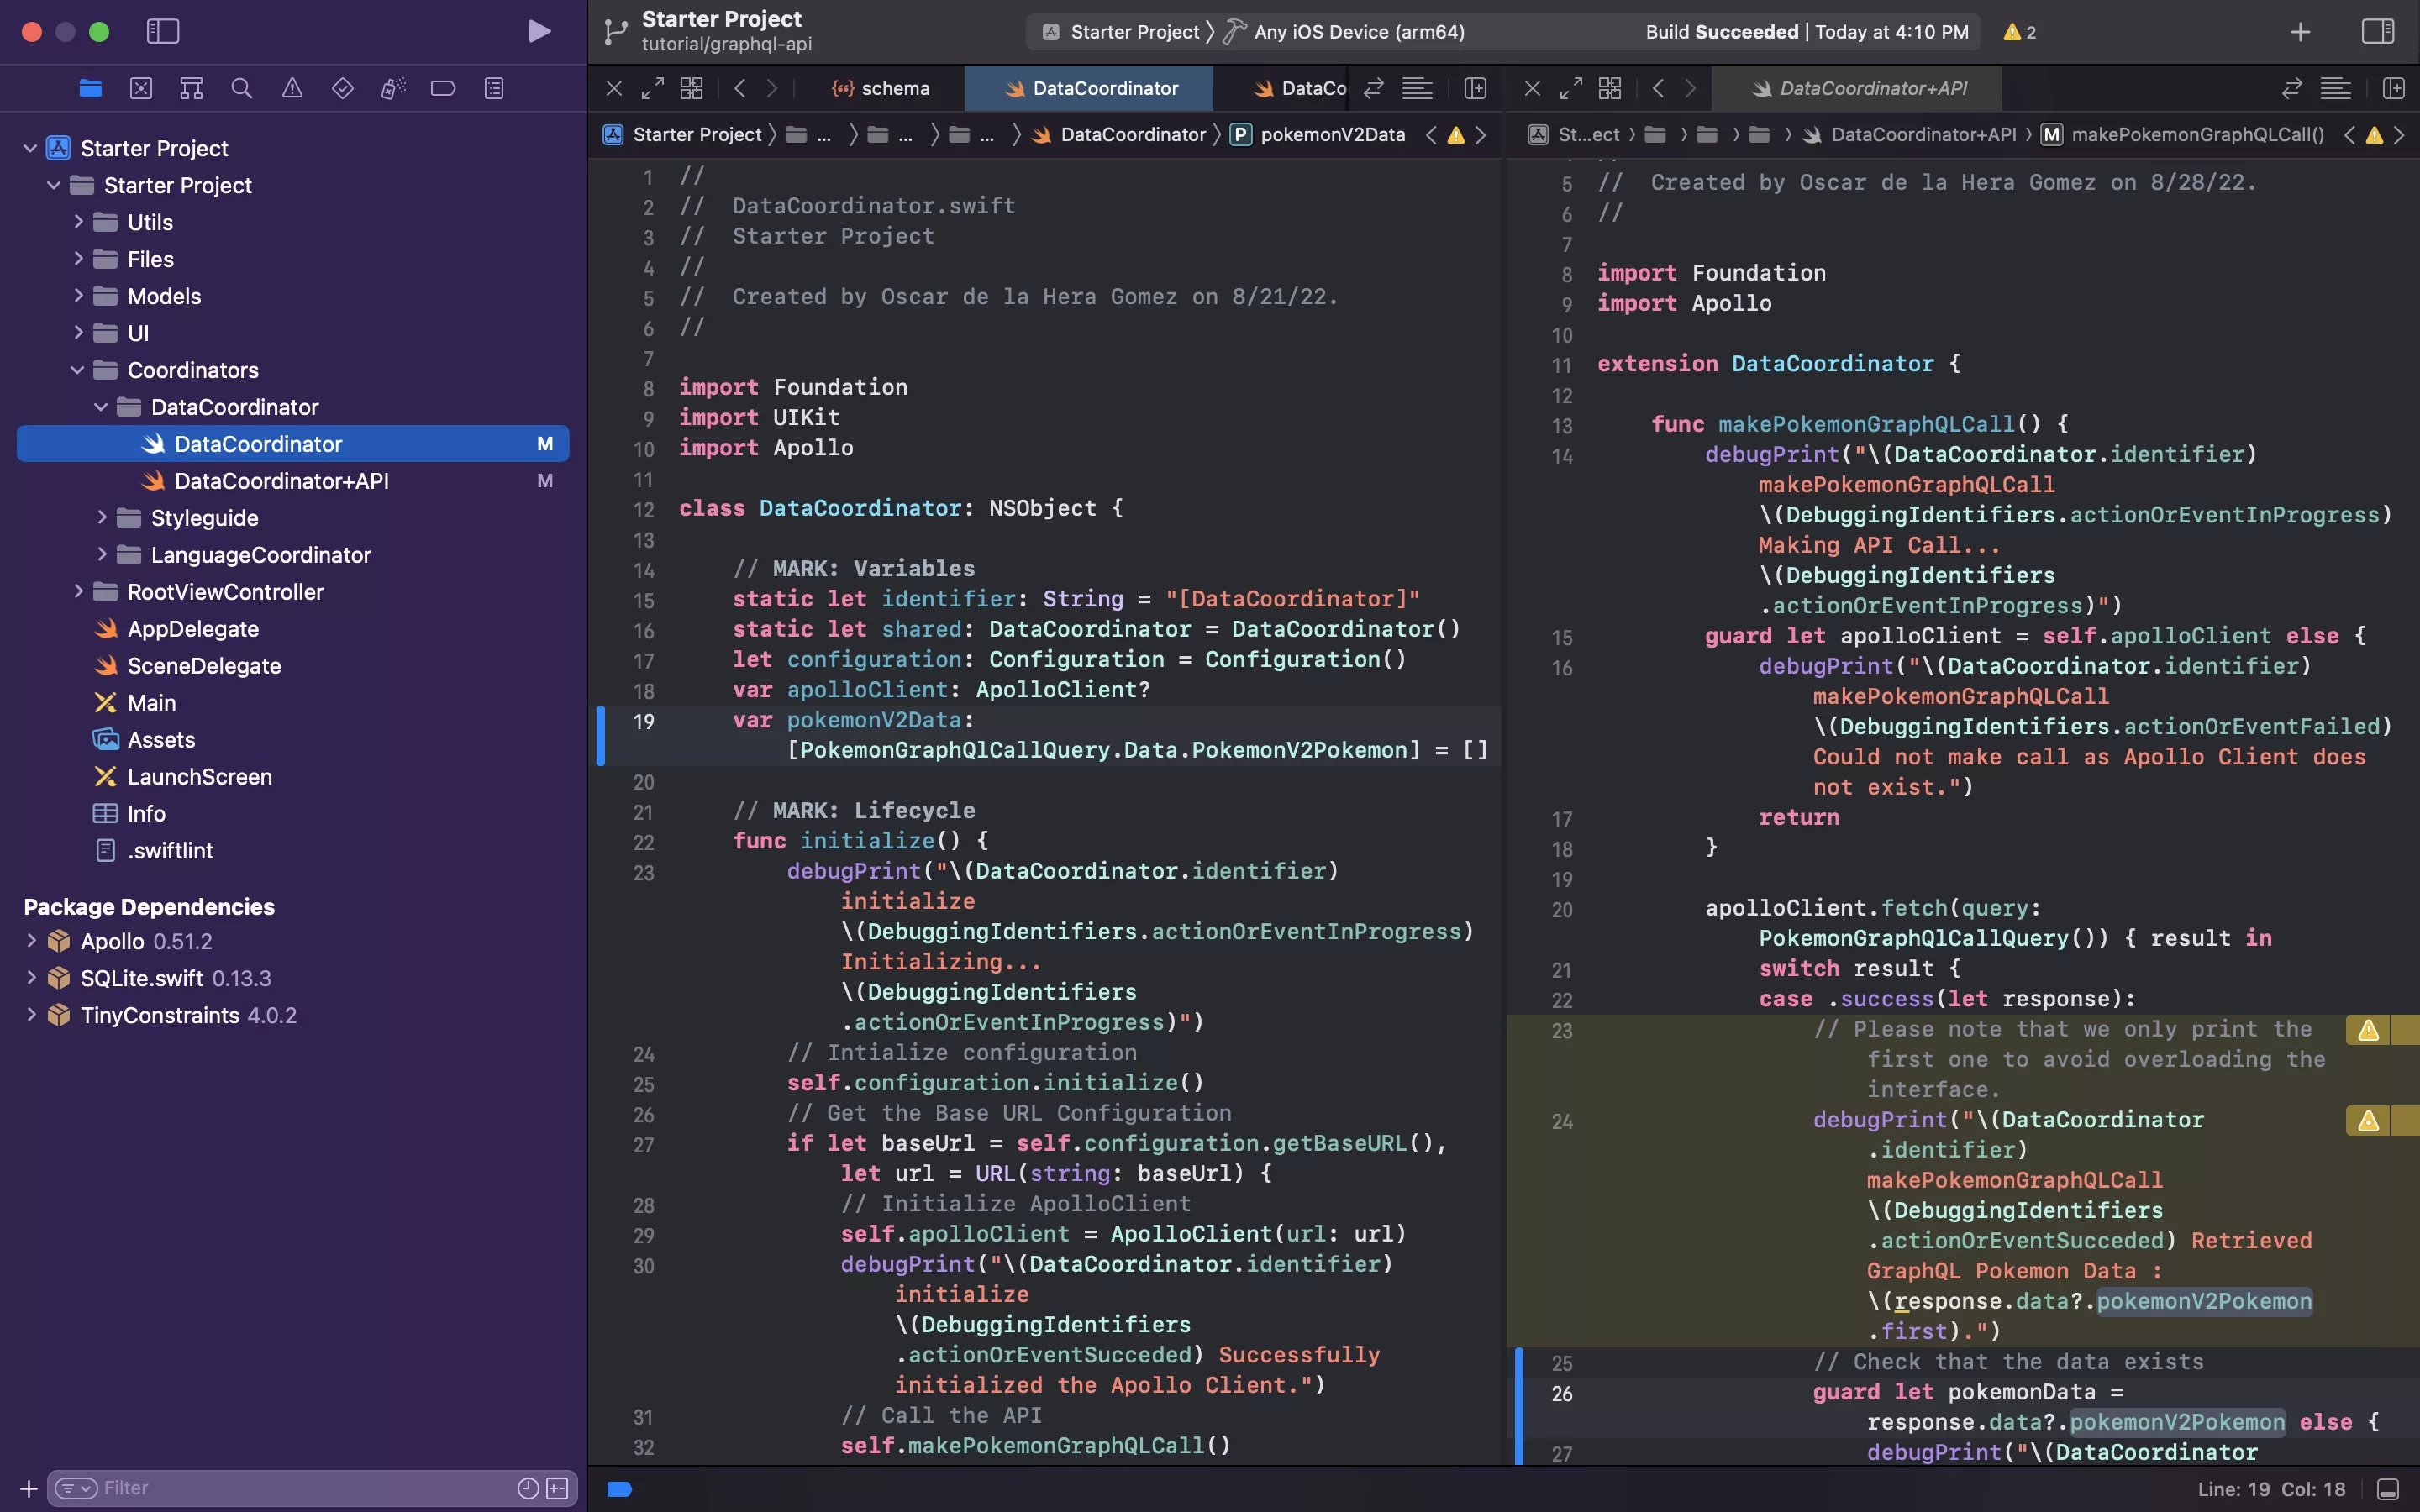
In DataCoordinator.swift, declare a variable to hold your data. In the case of this tutorial we called it PokemonV2Data.
Please note that the variable type is now PokemonGraphQLCallQuery.Data.Pokemon_v2_pokemon and requires you to import the PokeAPI.
B | Set the data variable
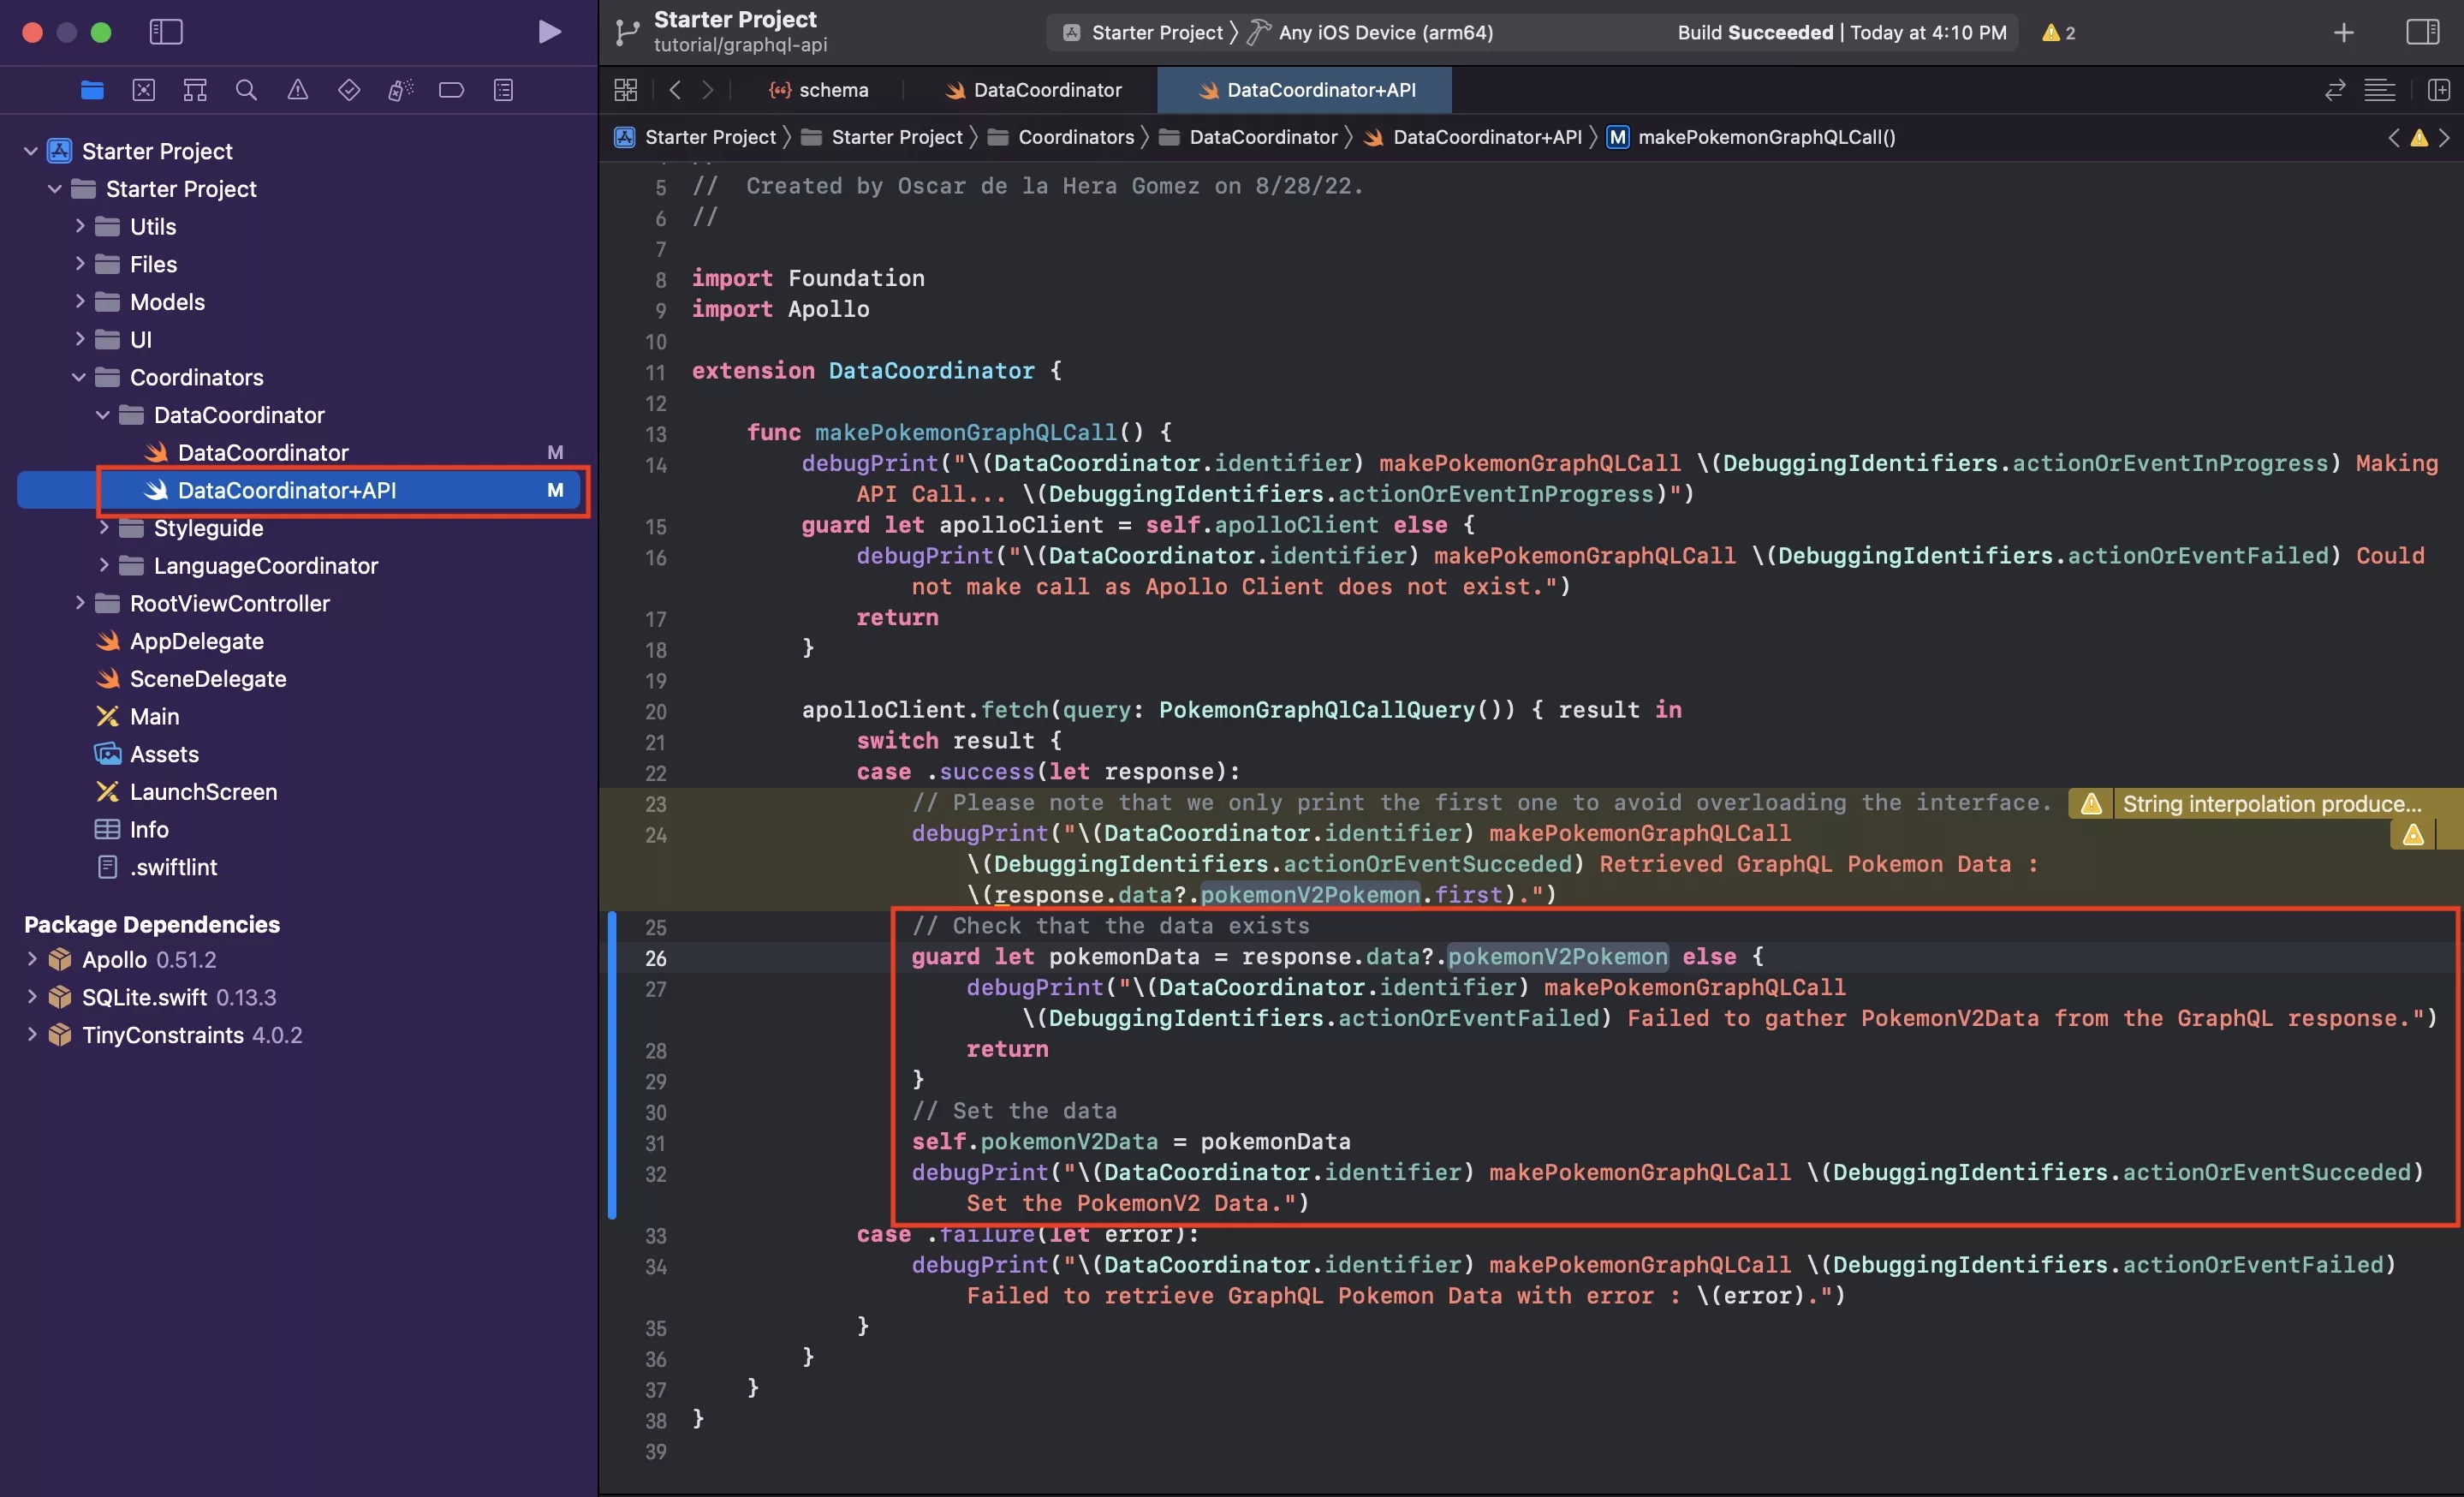
In DataCoordinator+API.swift, within a successful response, set the previously declared variable to the incoming data.
Sample code provided below.
Step Four: Declare the notification and send the notification when the data gets updated
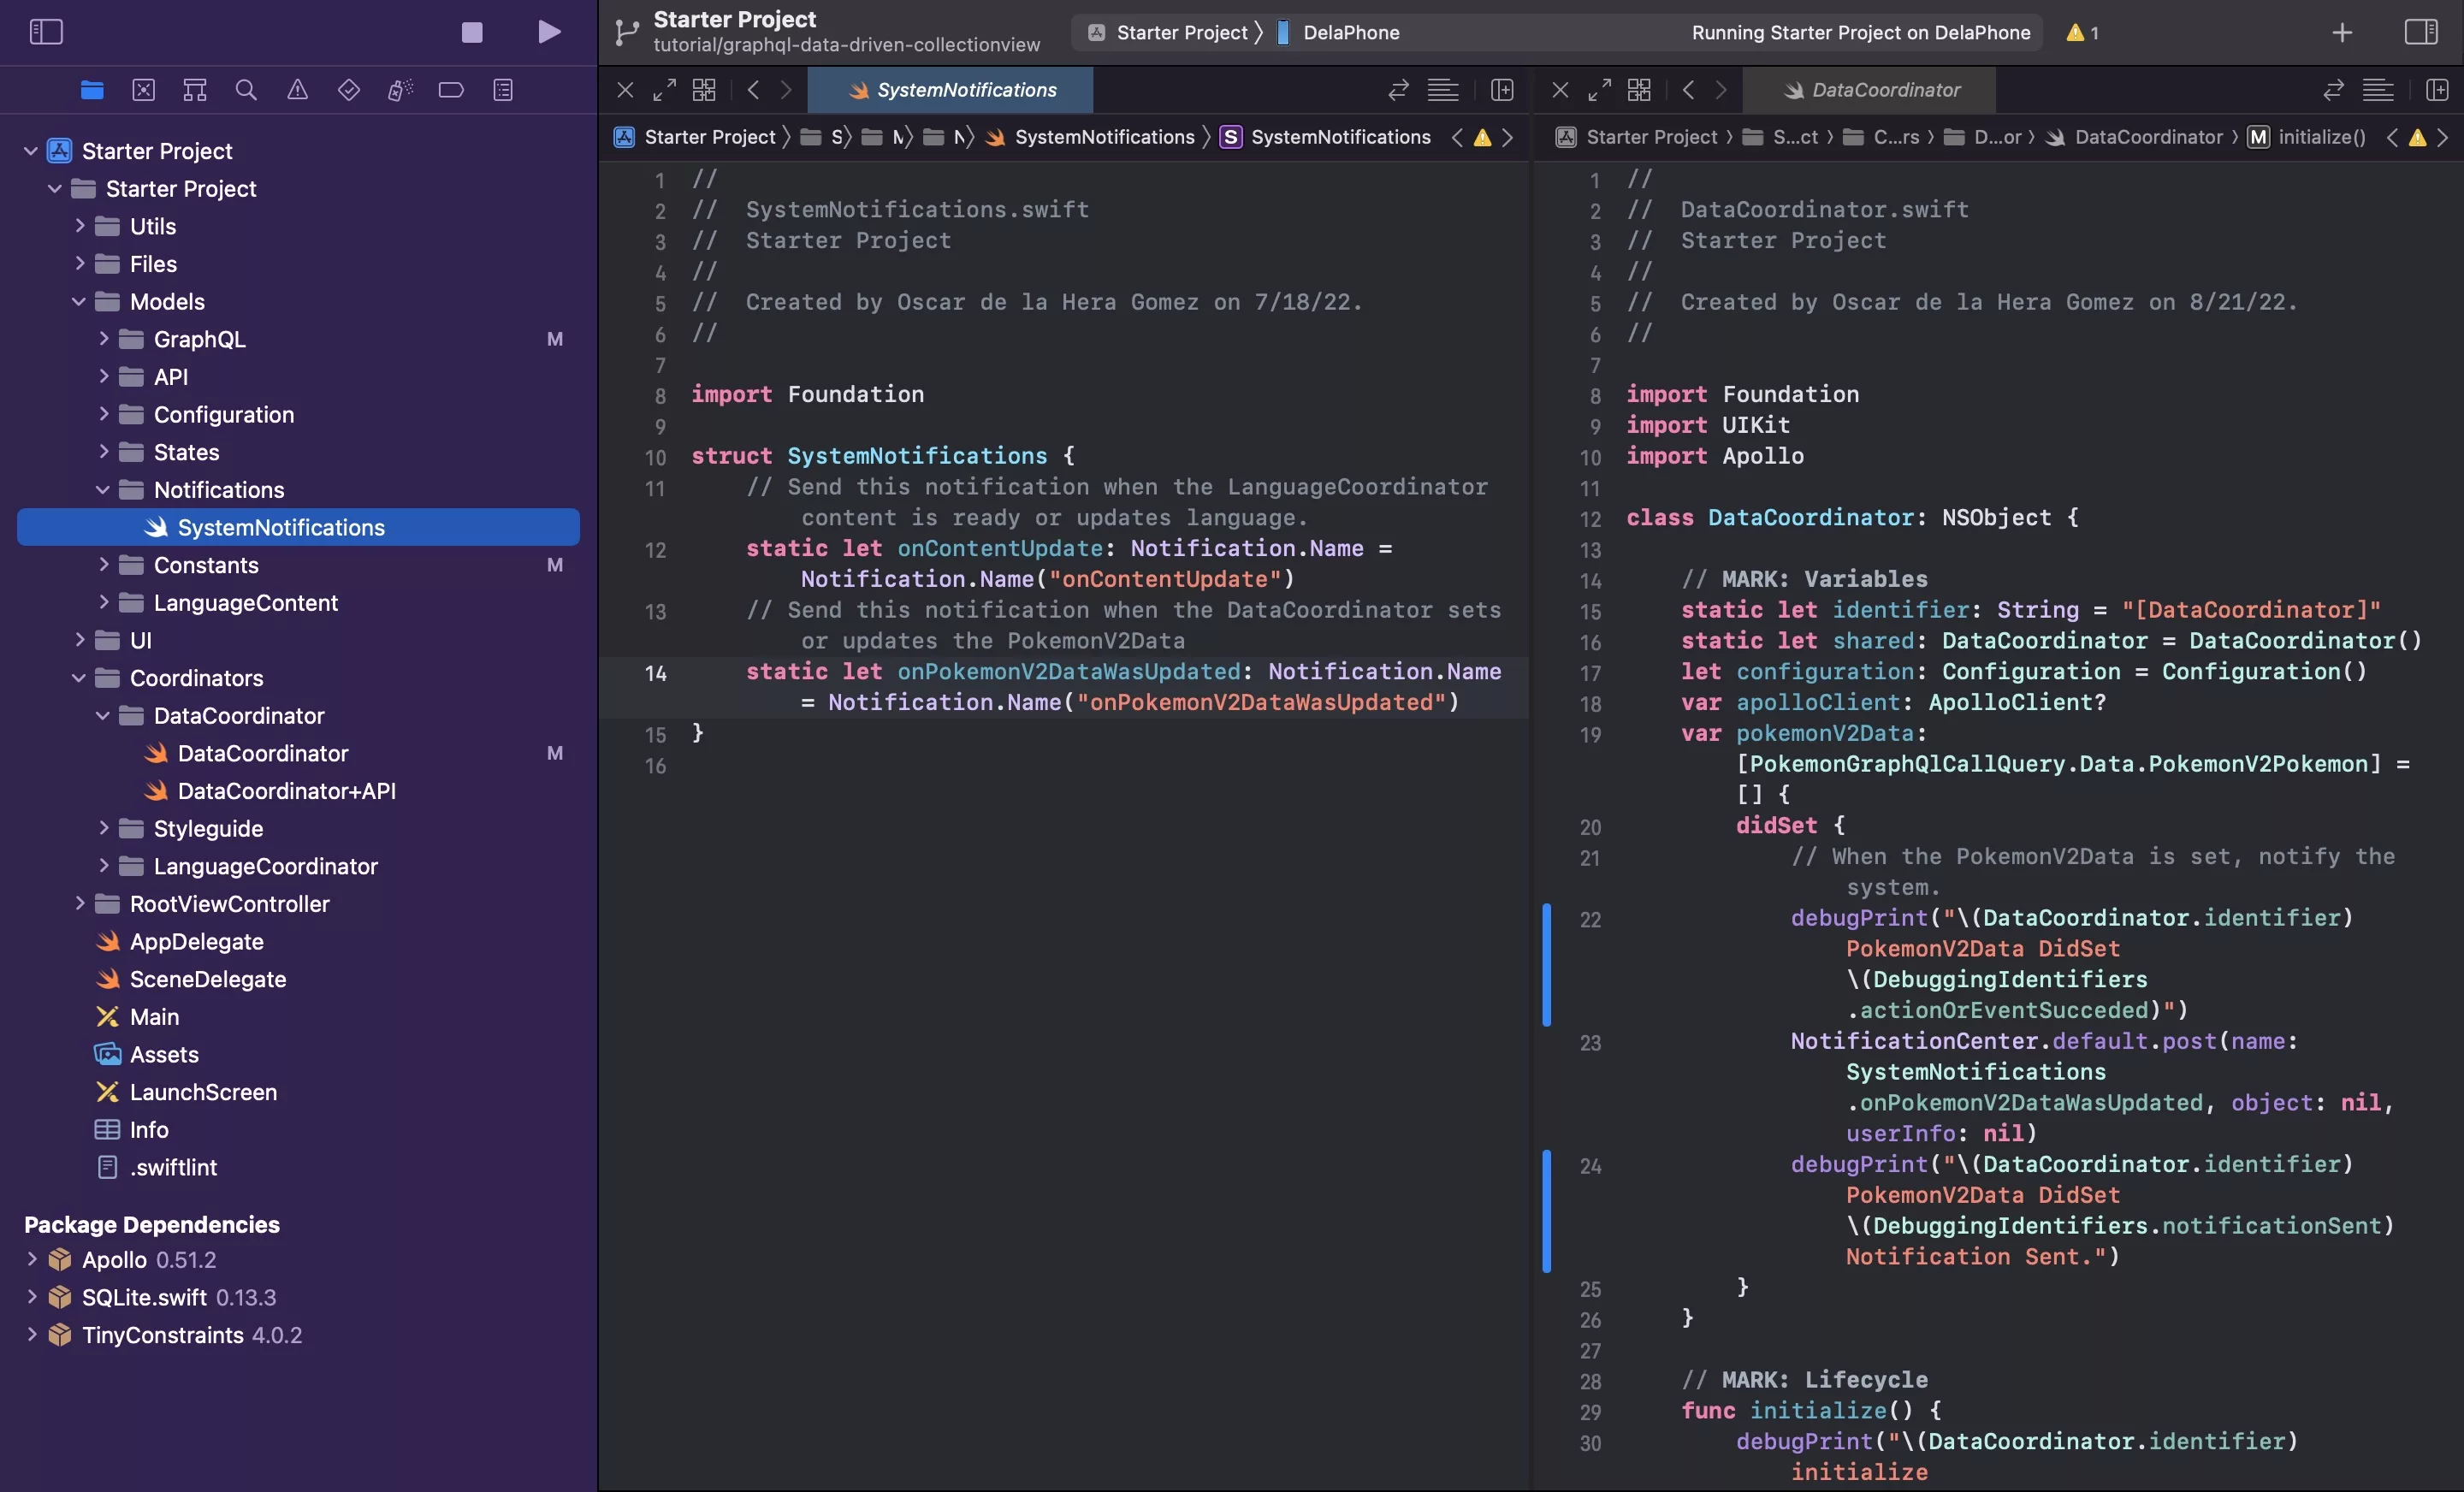
The following step is centered around declaring a Notification that informs the system that the PokemonV2Data was updated and subsequently, to send the notification when the data is updated (i.e. set).
A | Declare the Notification
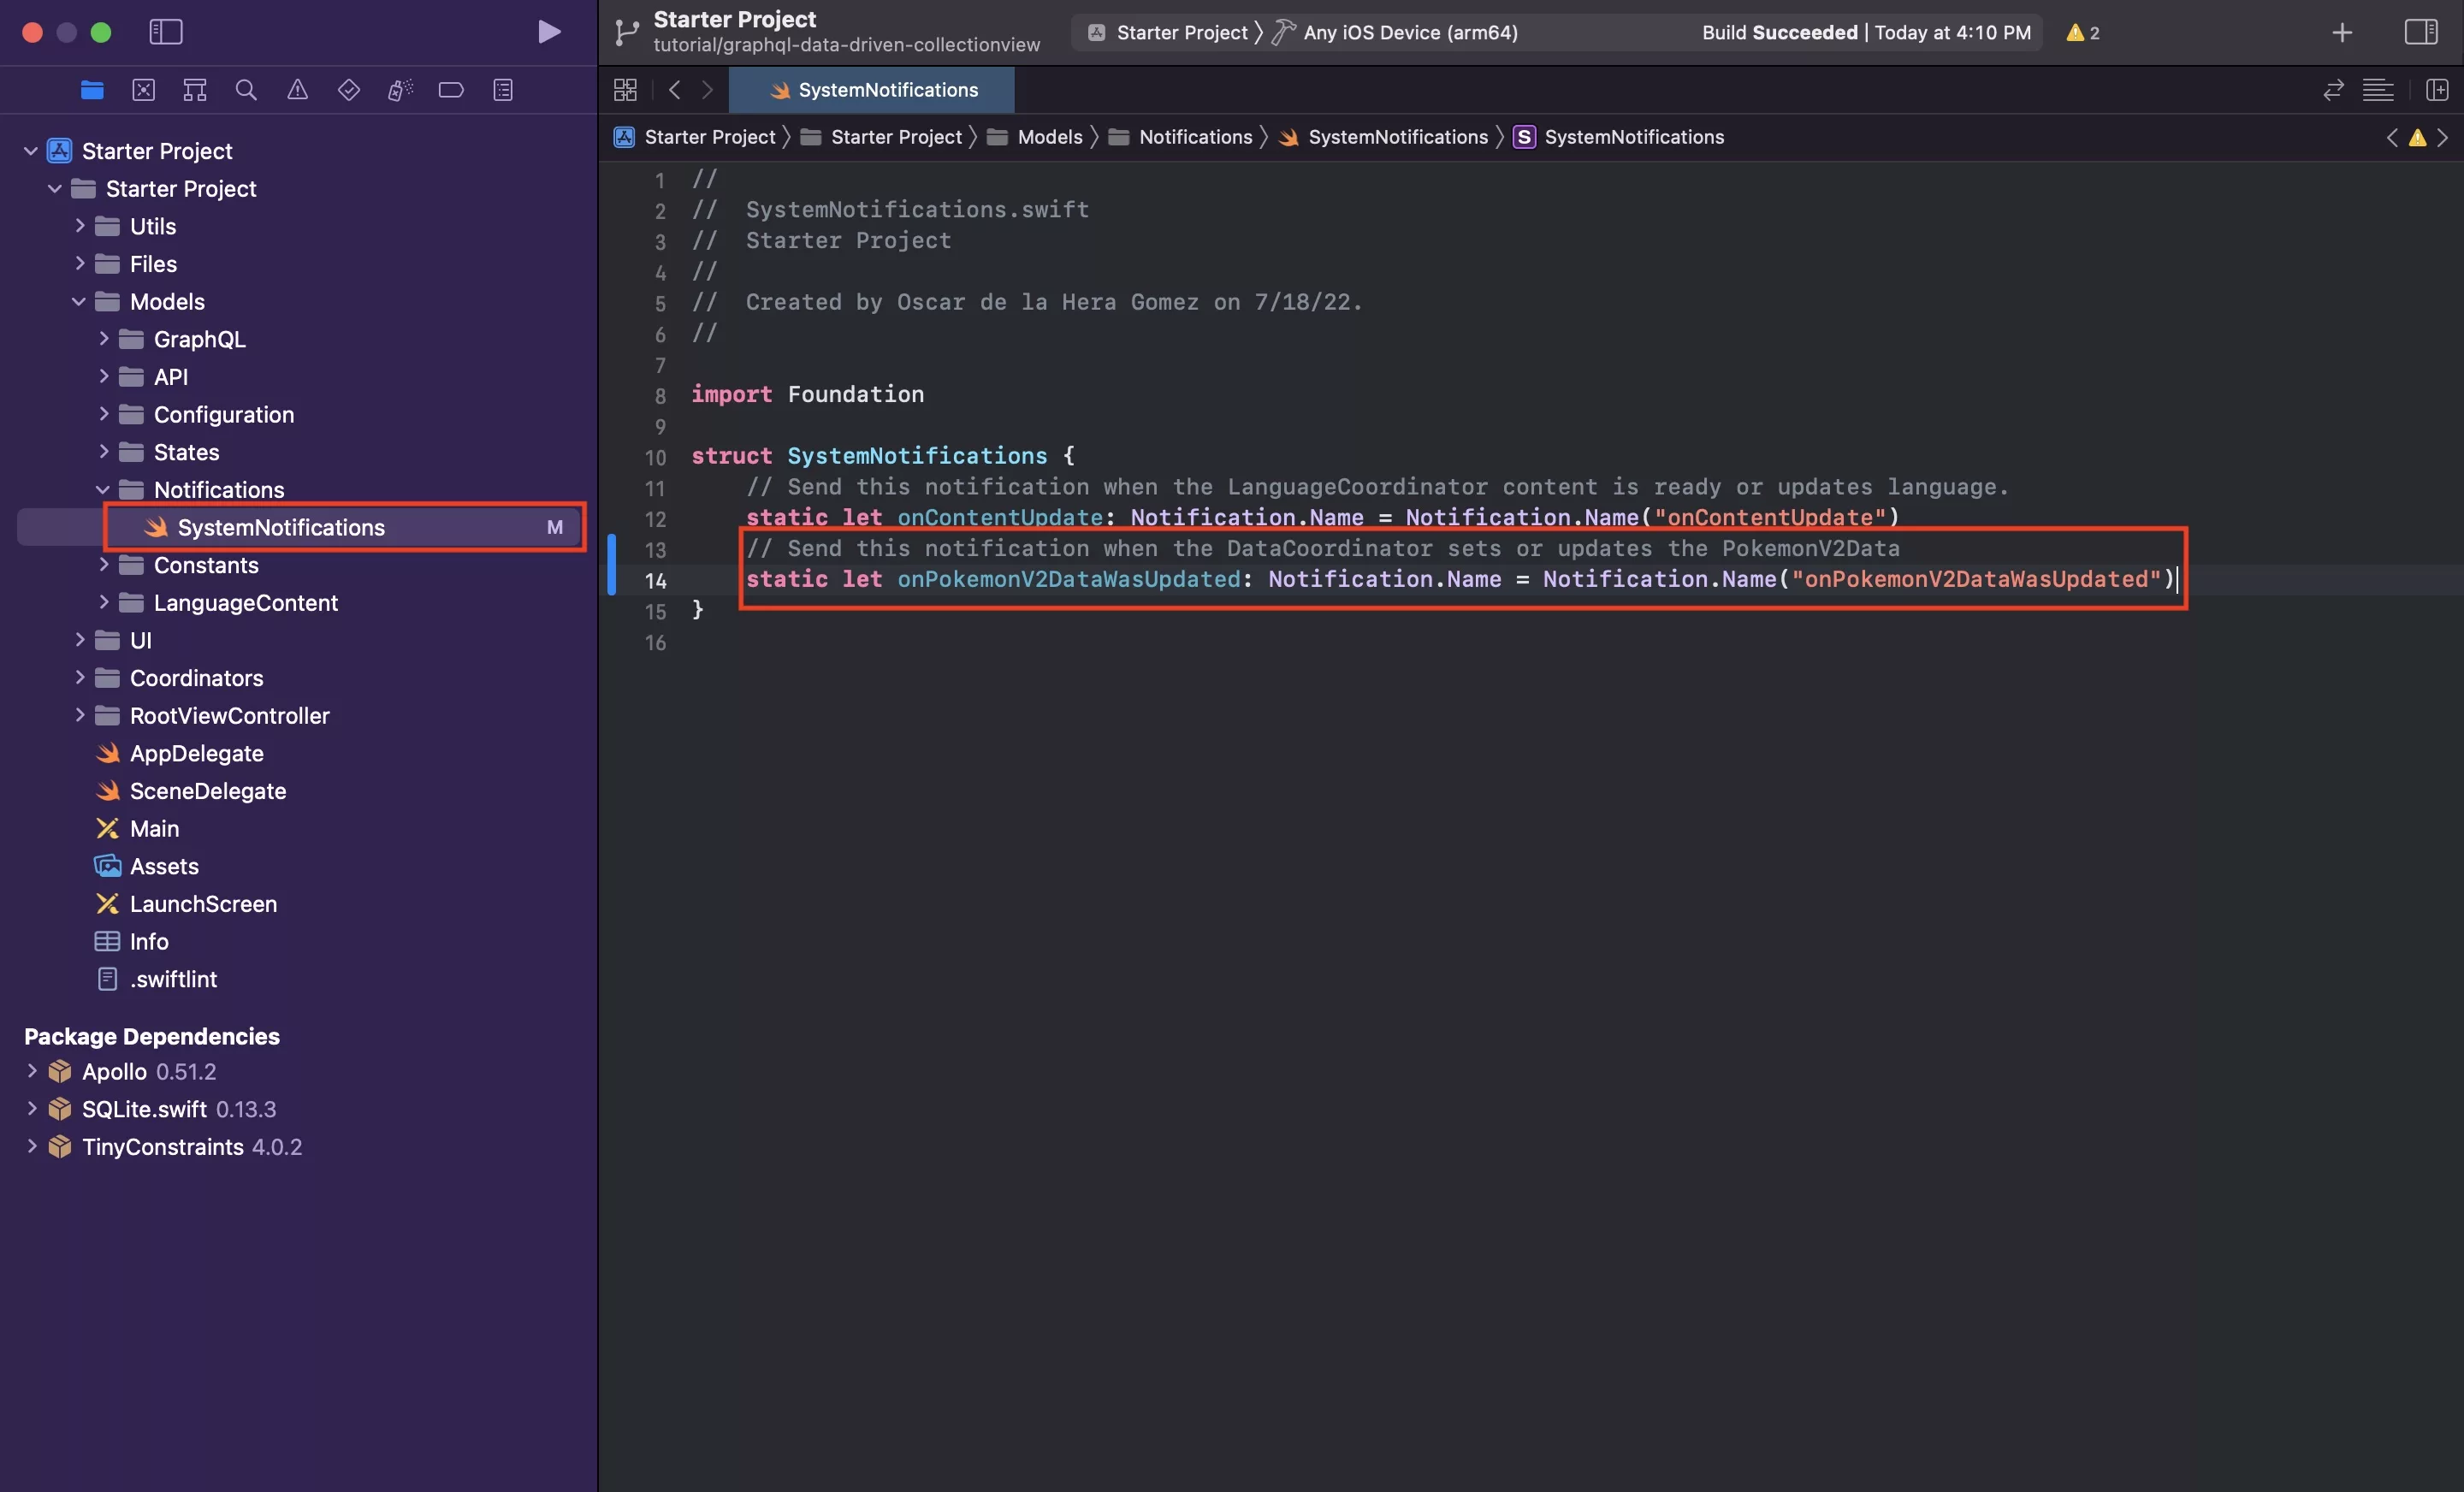
In SystemNotifications.swift, create a new notification called onPokemonV2DataWasUpdated.
B | Send the notification
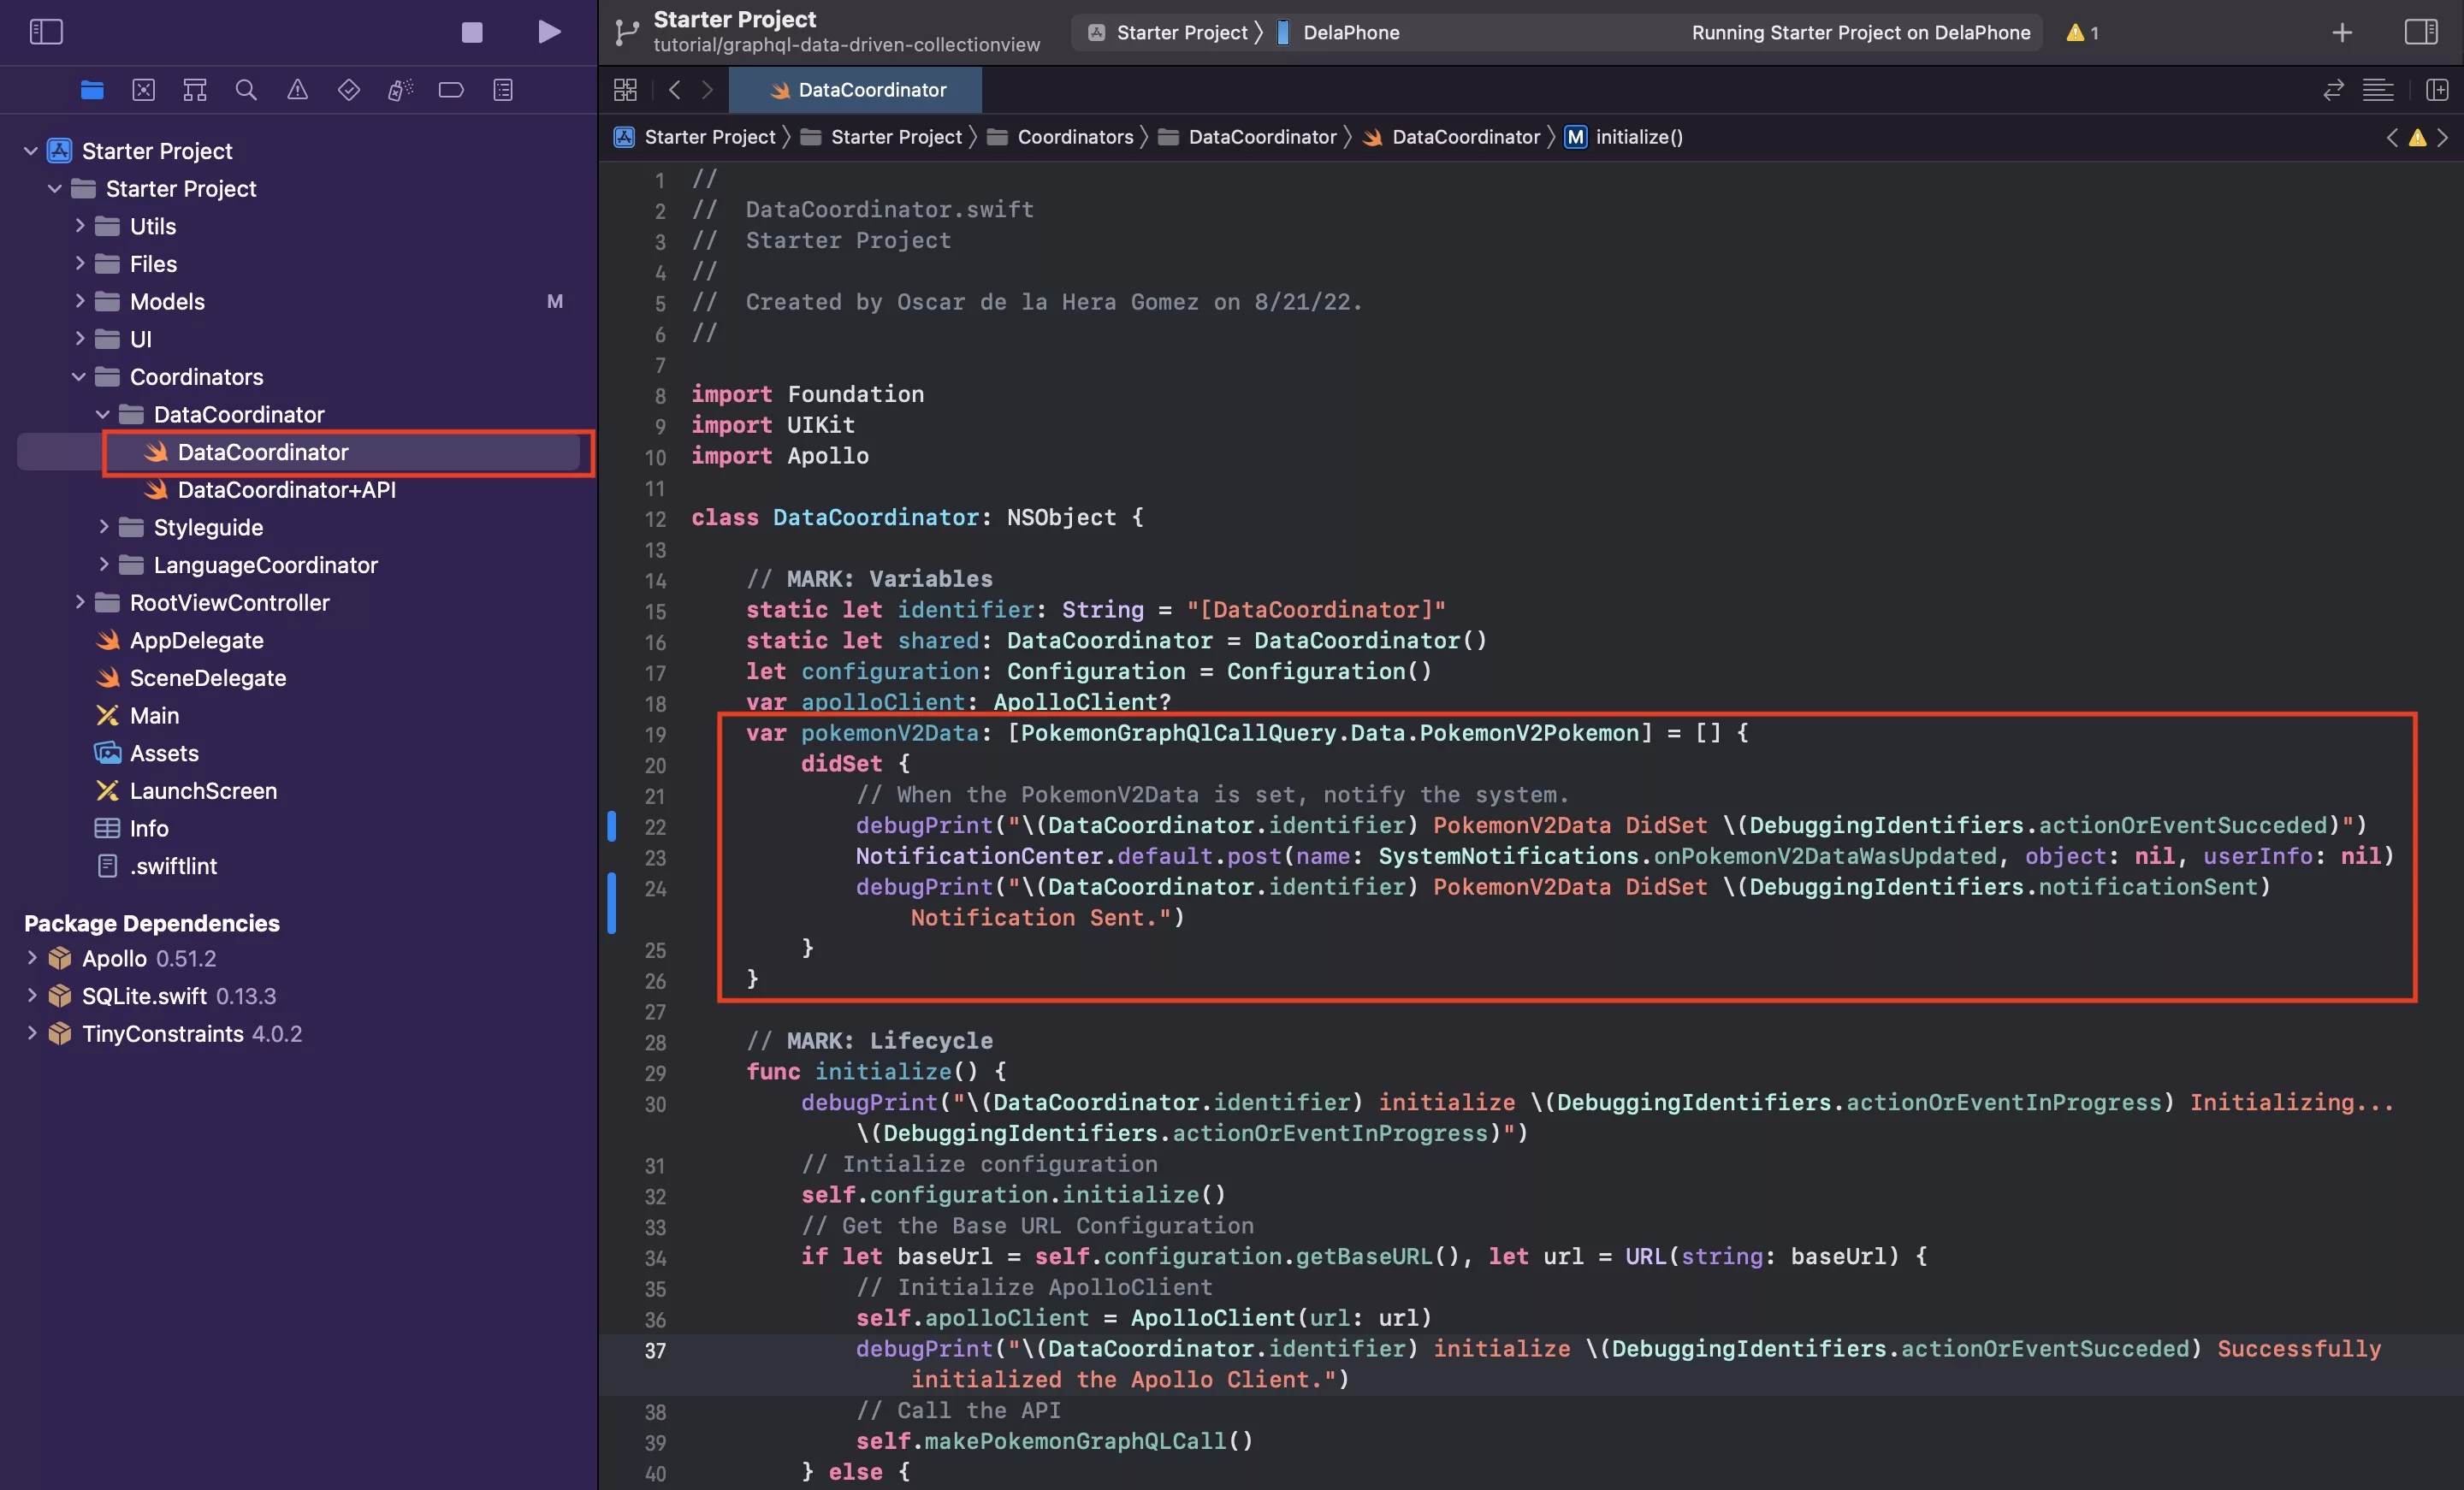
In DataCoordinator.swift, send the notification in the didset property observer as demonstrated in the image above.
Please note that we have updated this functionality to work with our NotificationCoordinator.
This implies that every time the PokemonV2Data gets set, it will set the notification.
For more information on Property Observers, please consult the Swift Programming Language Guide in the link below and search for didSet.
Step Five: Create the PokemonV2Cell
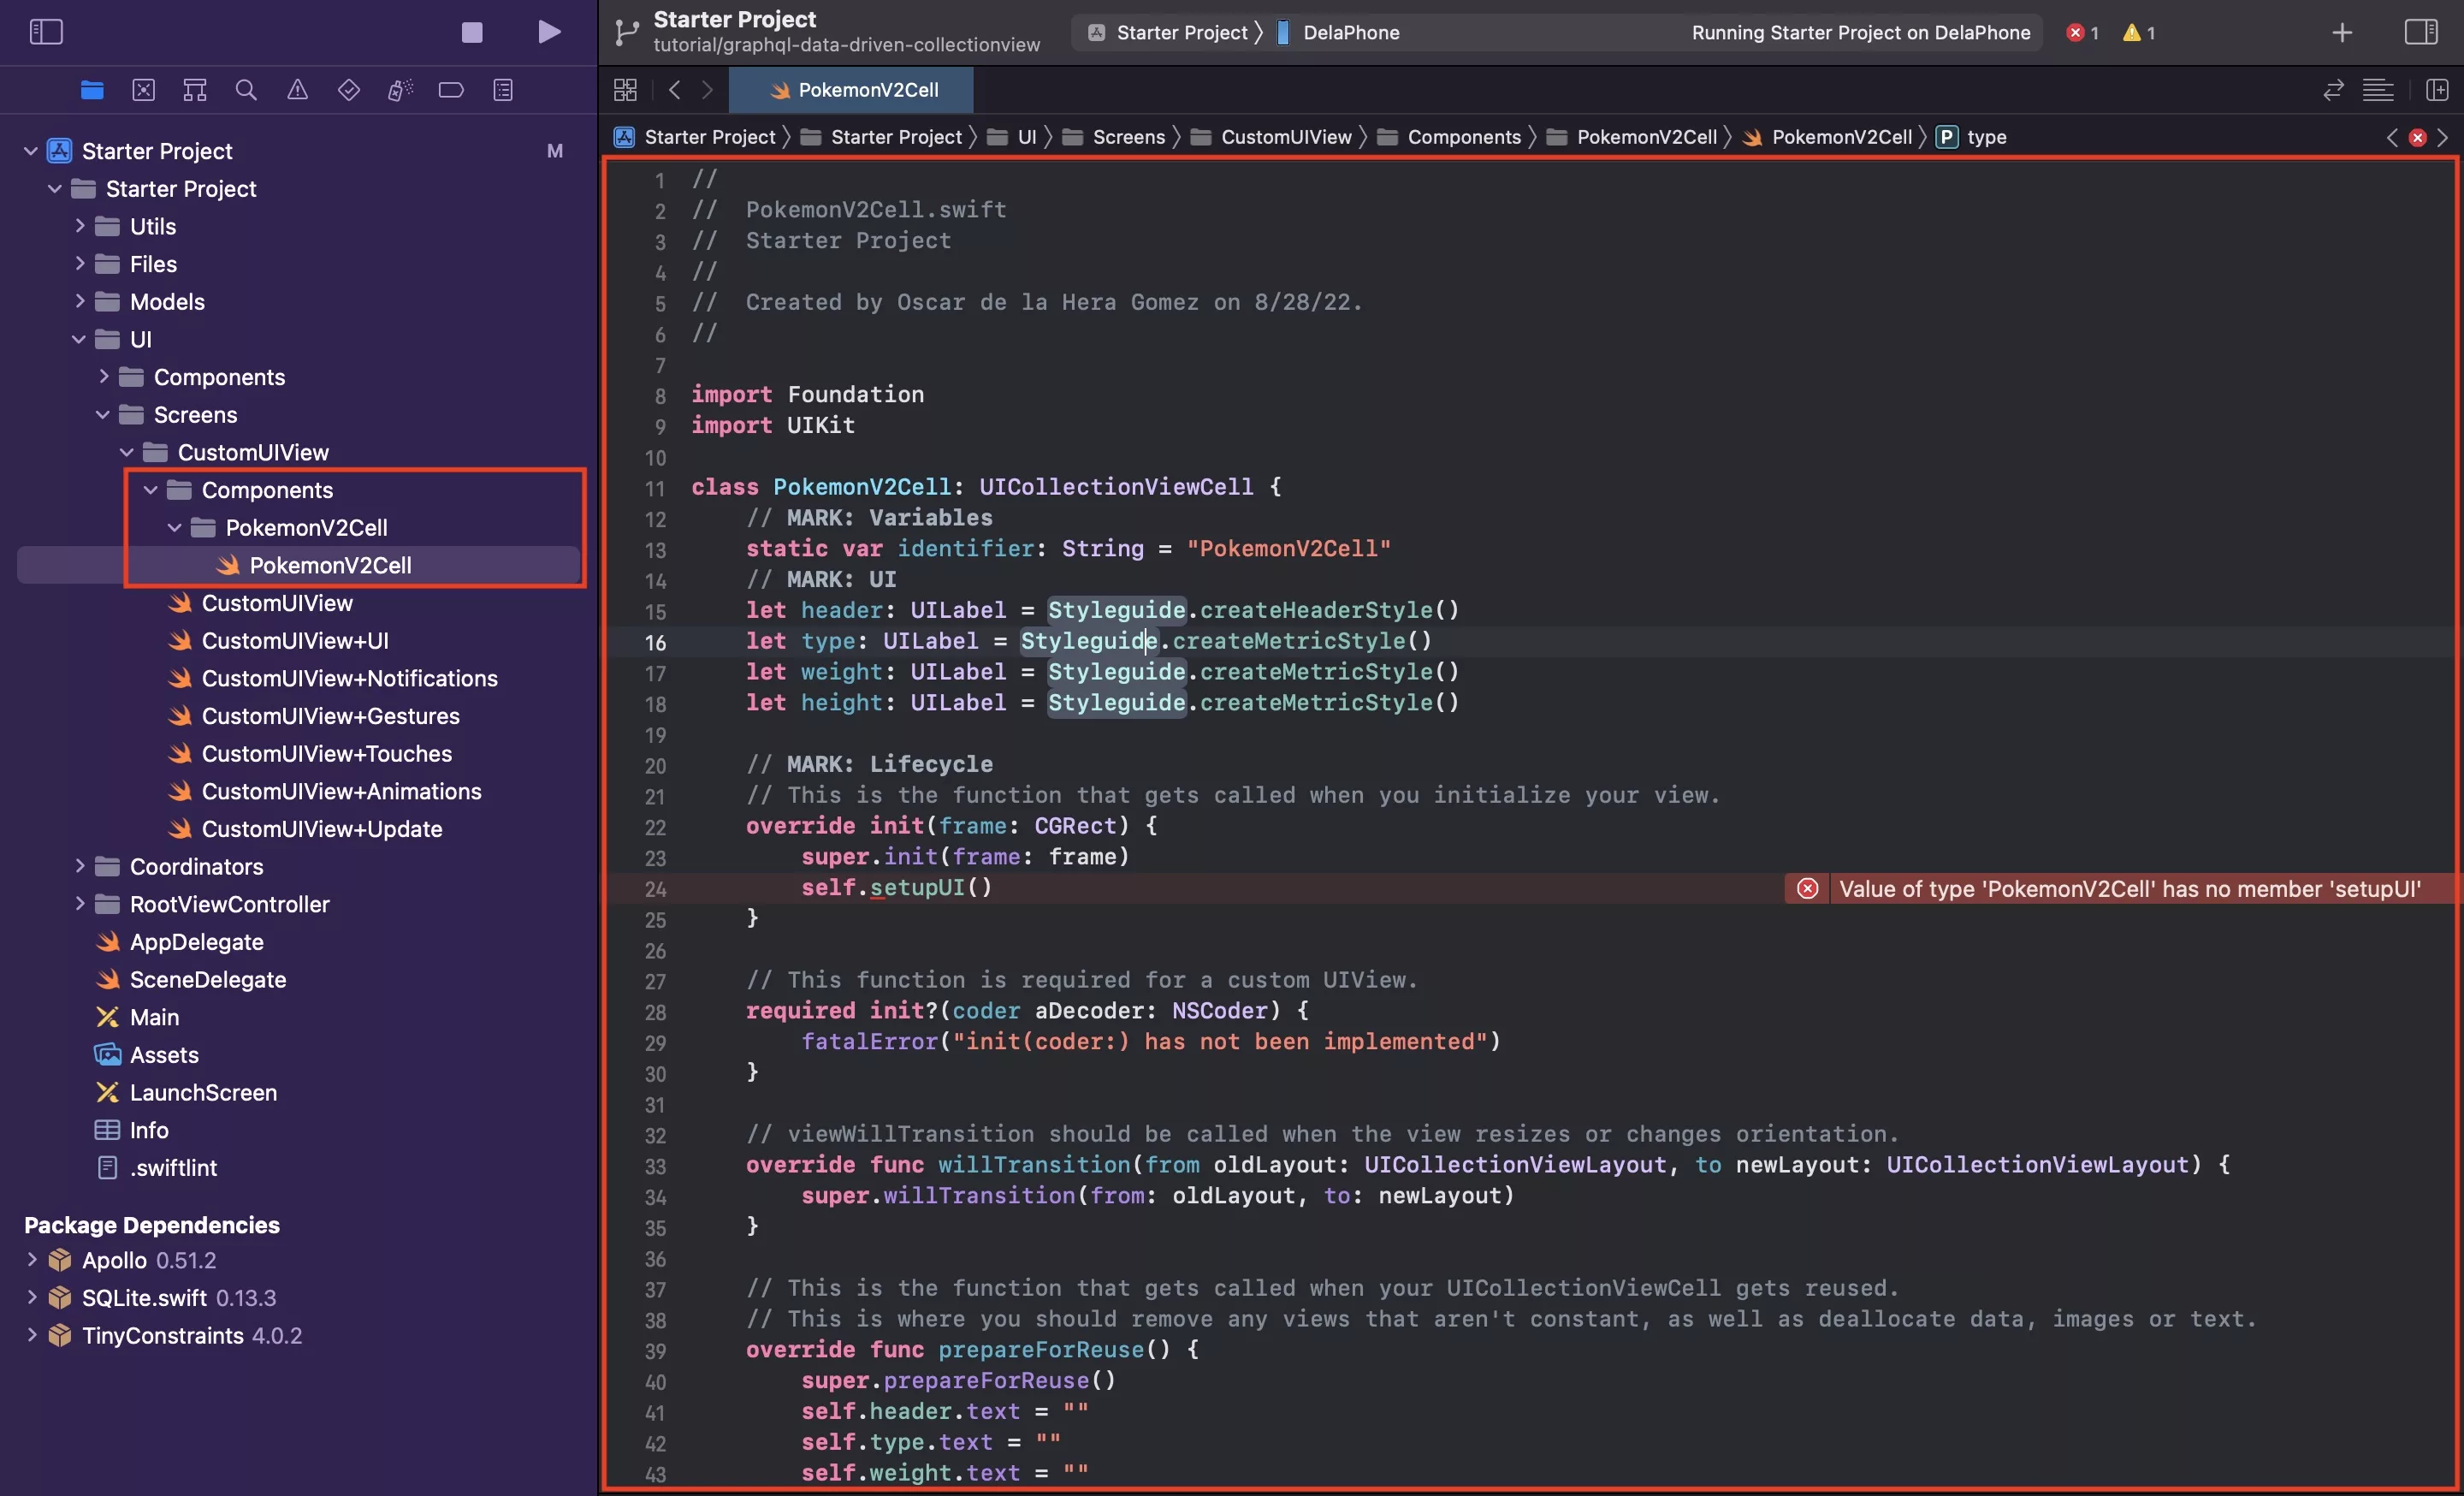
In the CustomUIView folder, create a new folder called Components.
Within the Components folder, create another folder called PokemonV2Cell.
Within the PokemonV2Cell folder create a new file called PokemonV2Cell.swift and paste in the code found below.
Please note that we create the setupUI functionality in the next step.
Step Six: Create the PokemonV2Cell UI extension
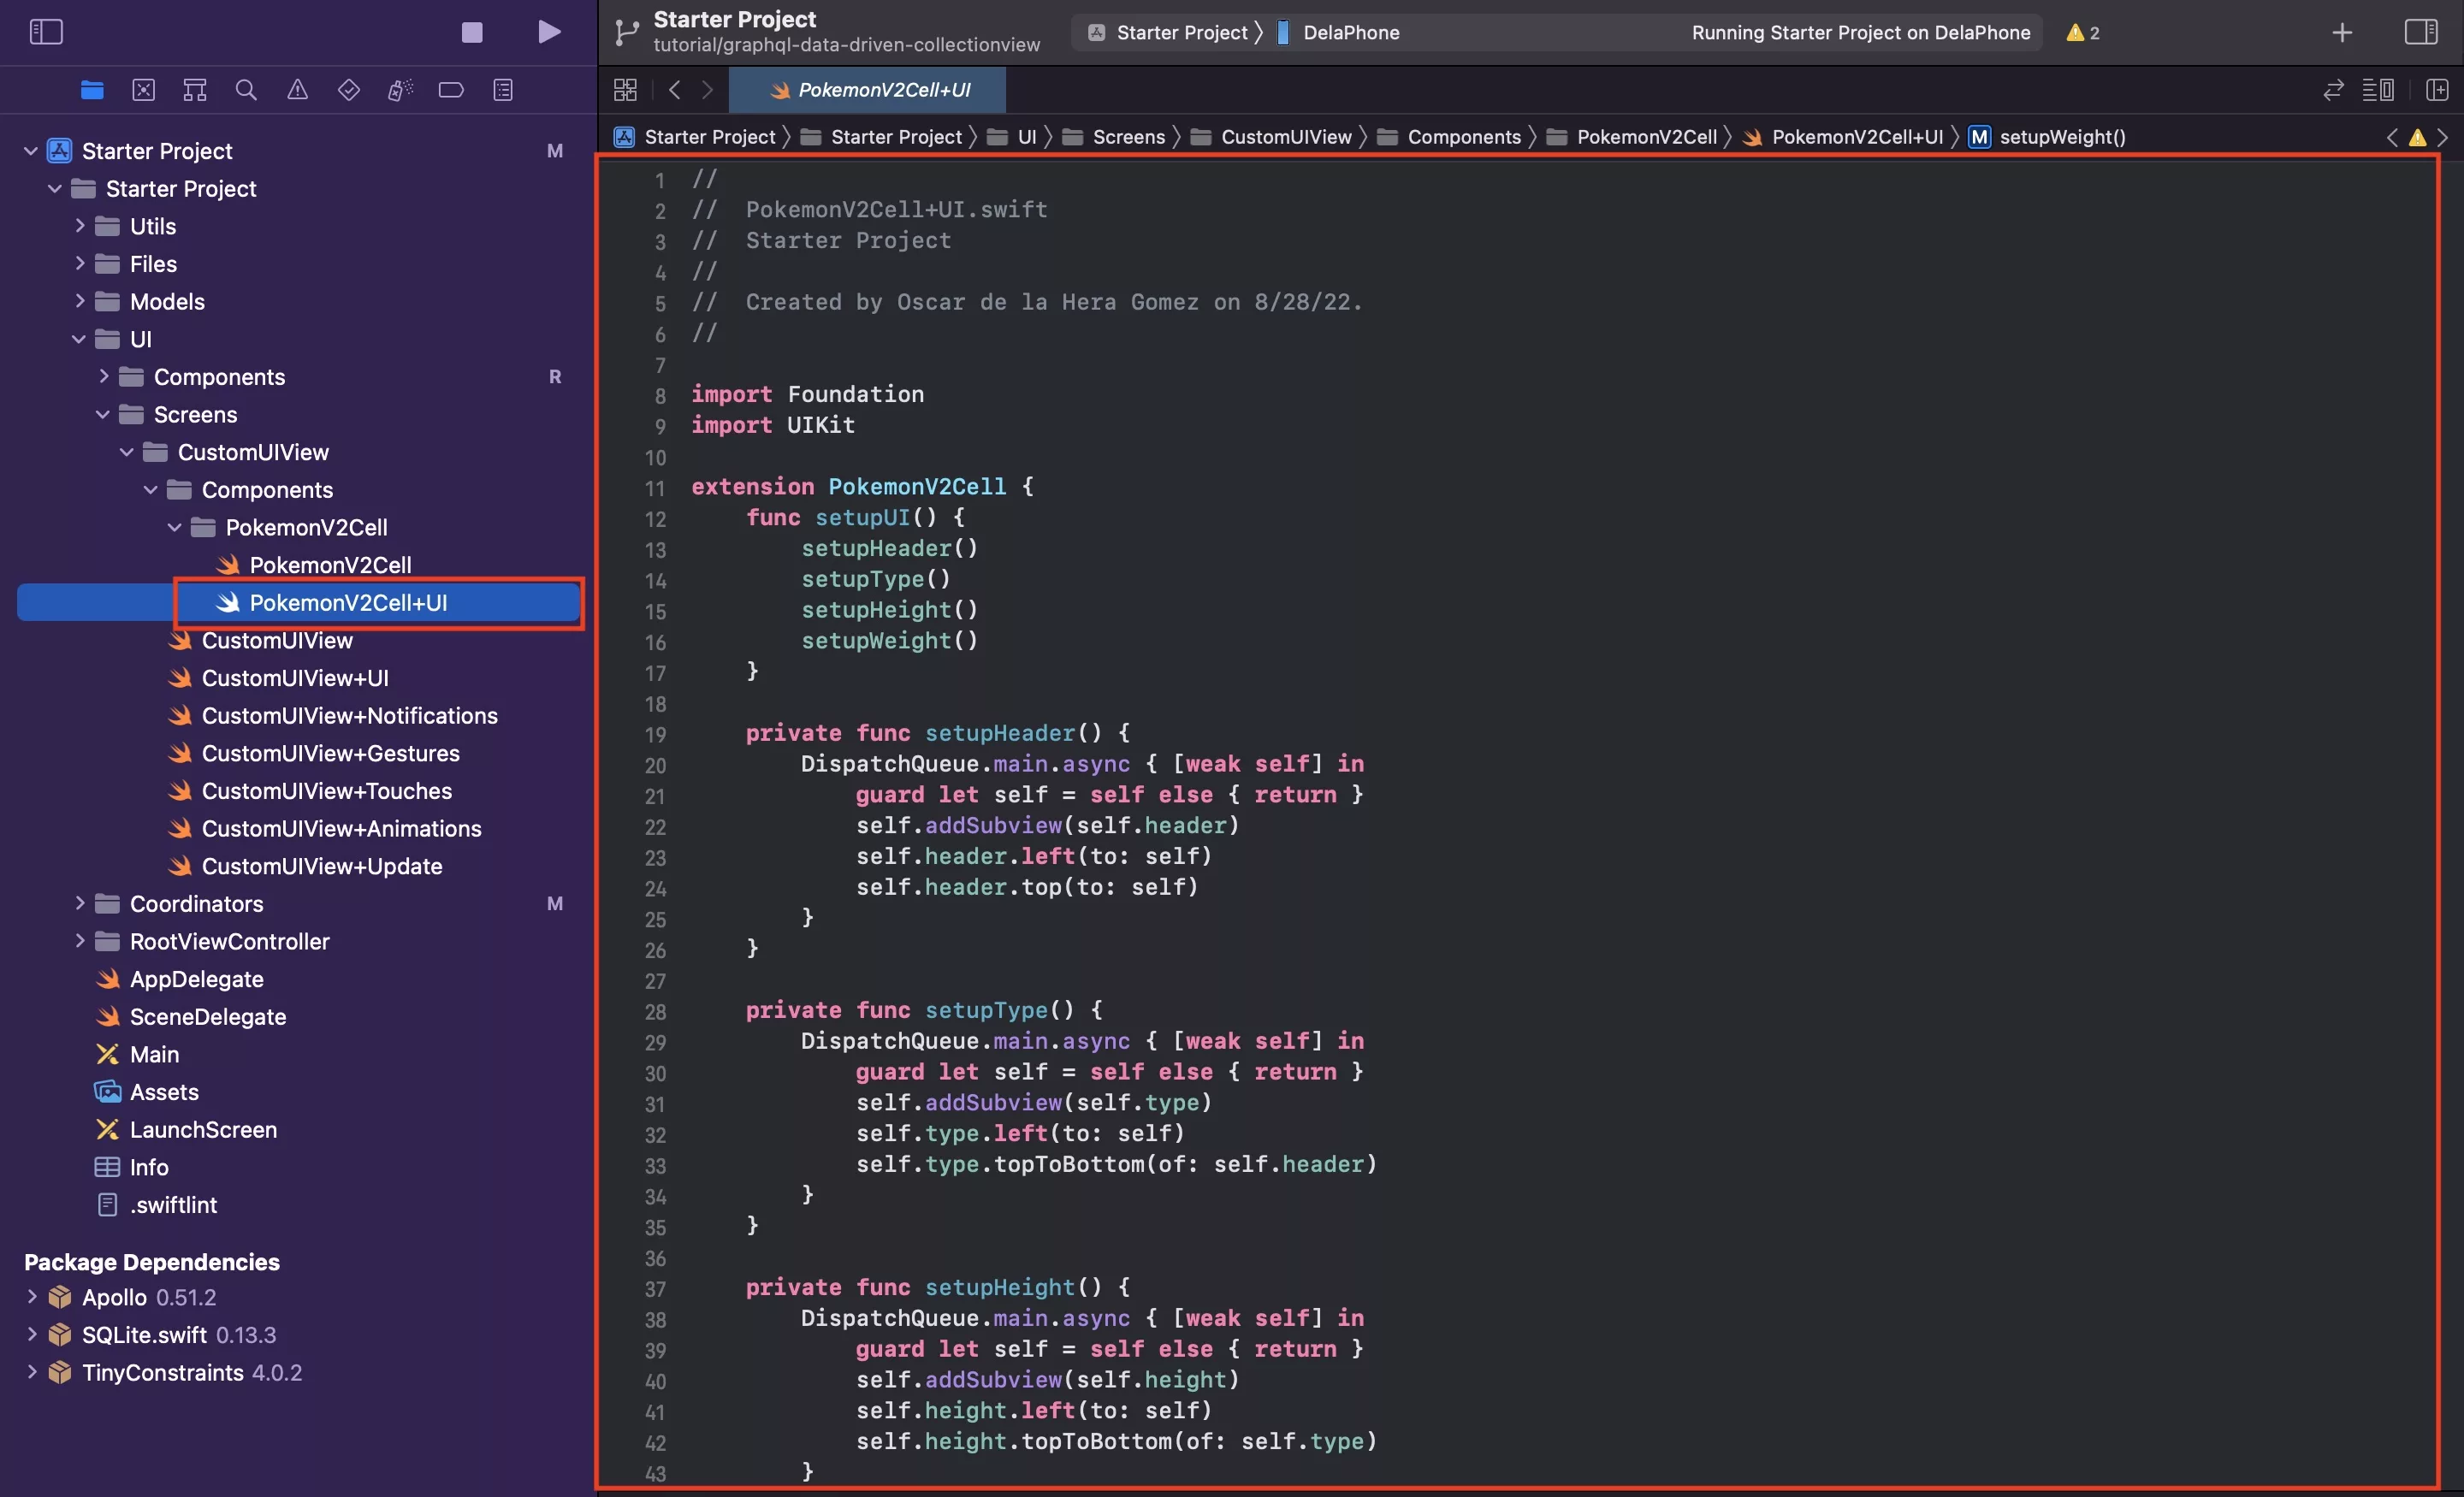
Within the PokemonV2Cell folder create a new file called PokemonV2Cell+UI.swift and paste in the code found below.
Step Seven: Create the PokemonV2 Update Extension
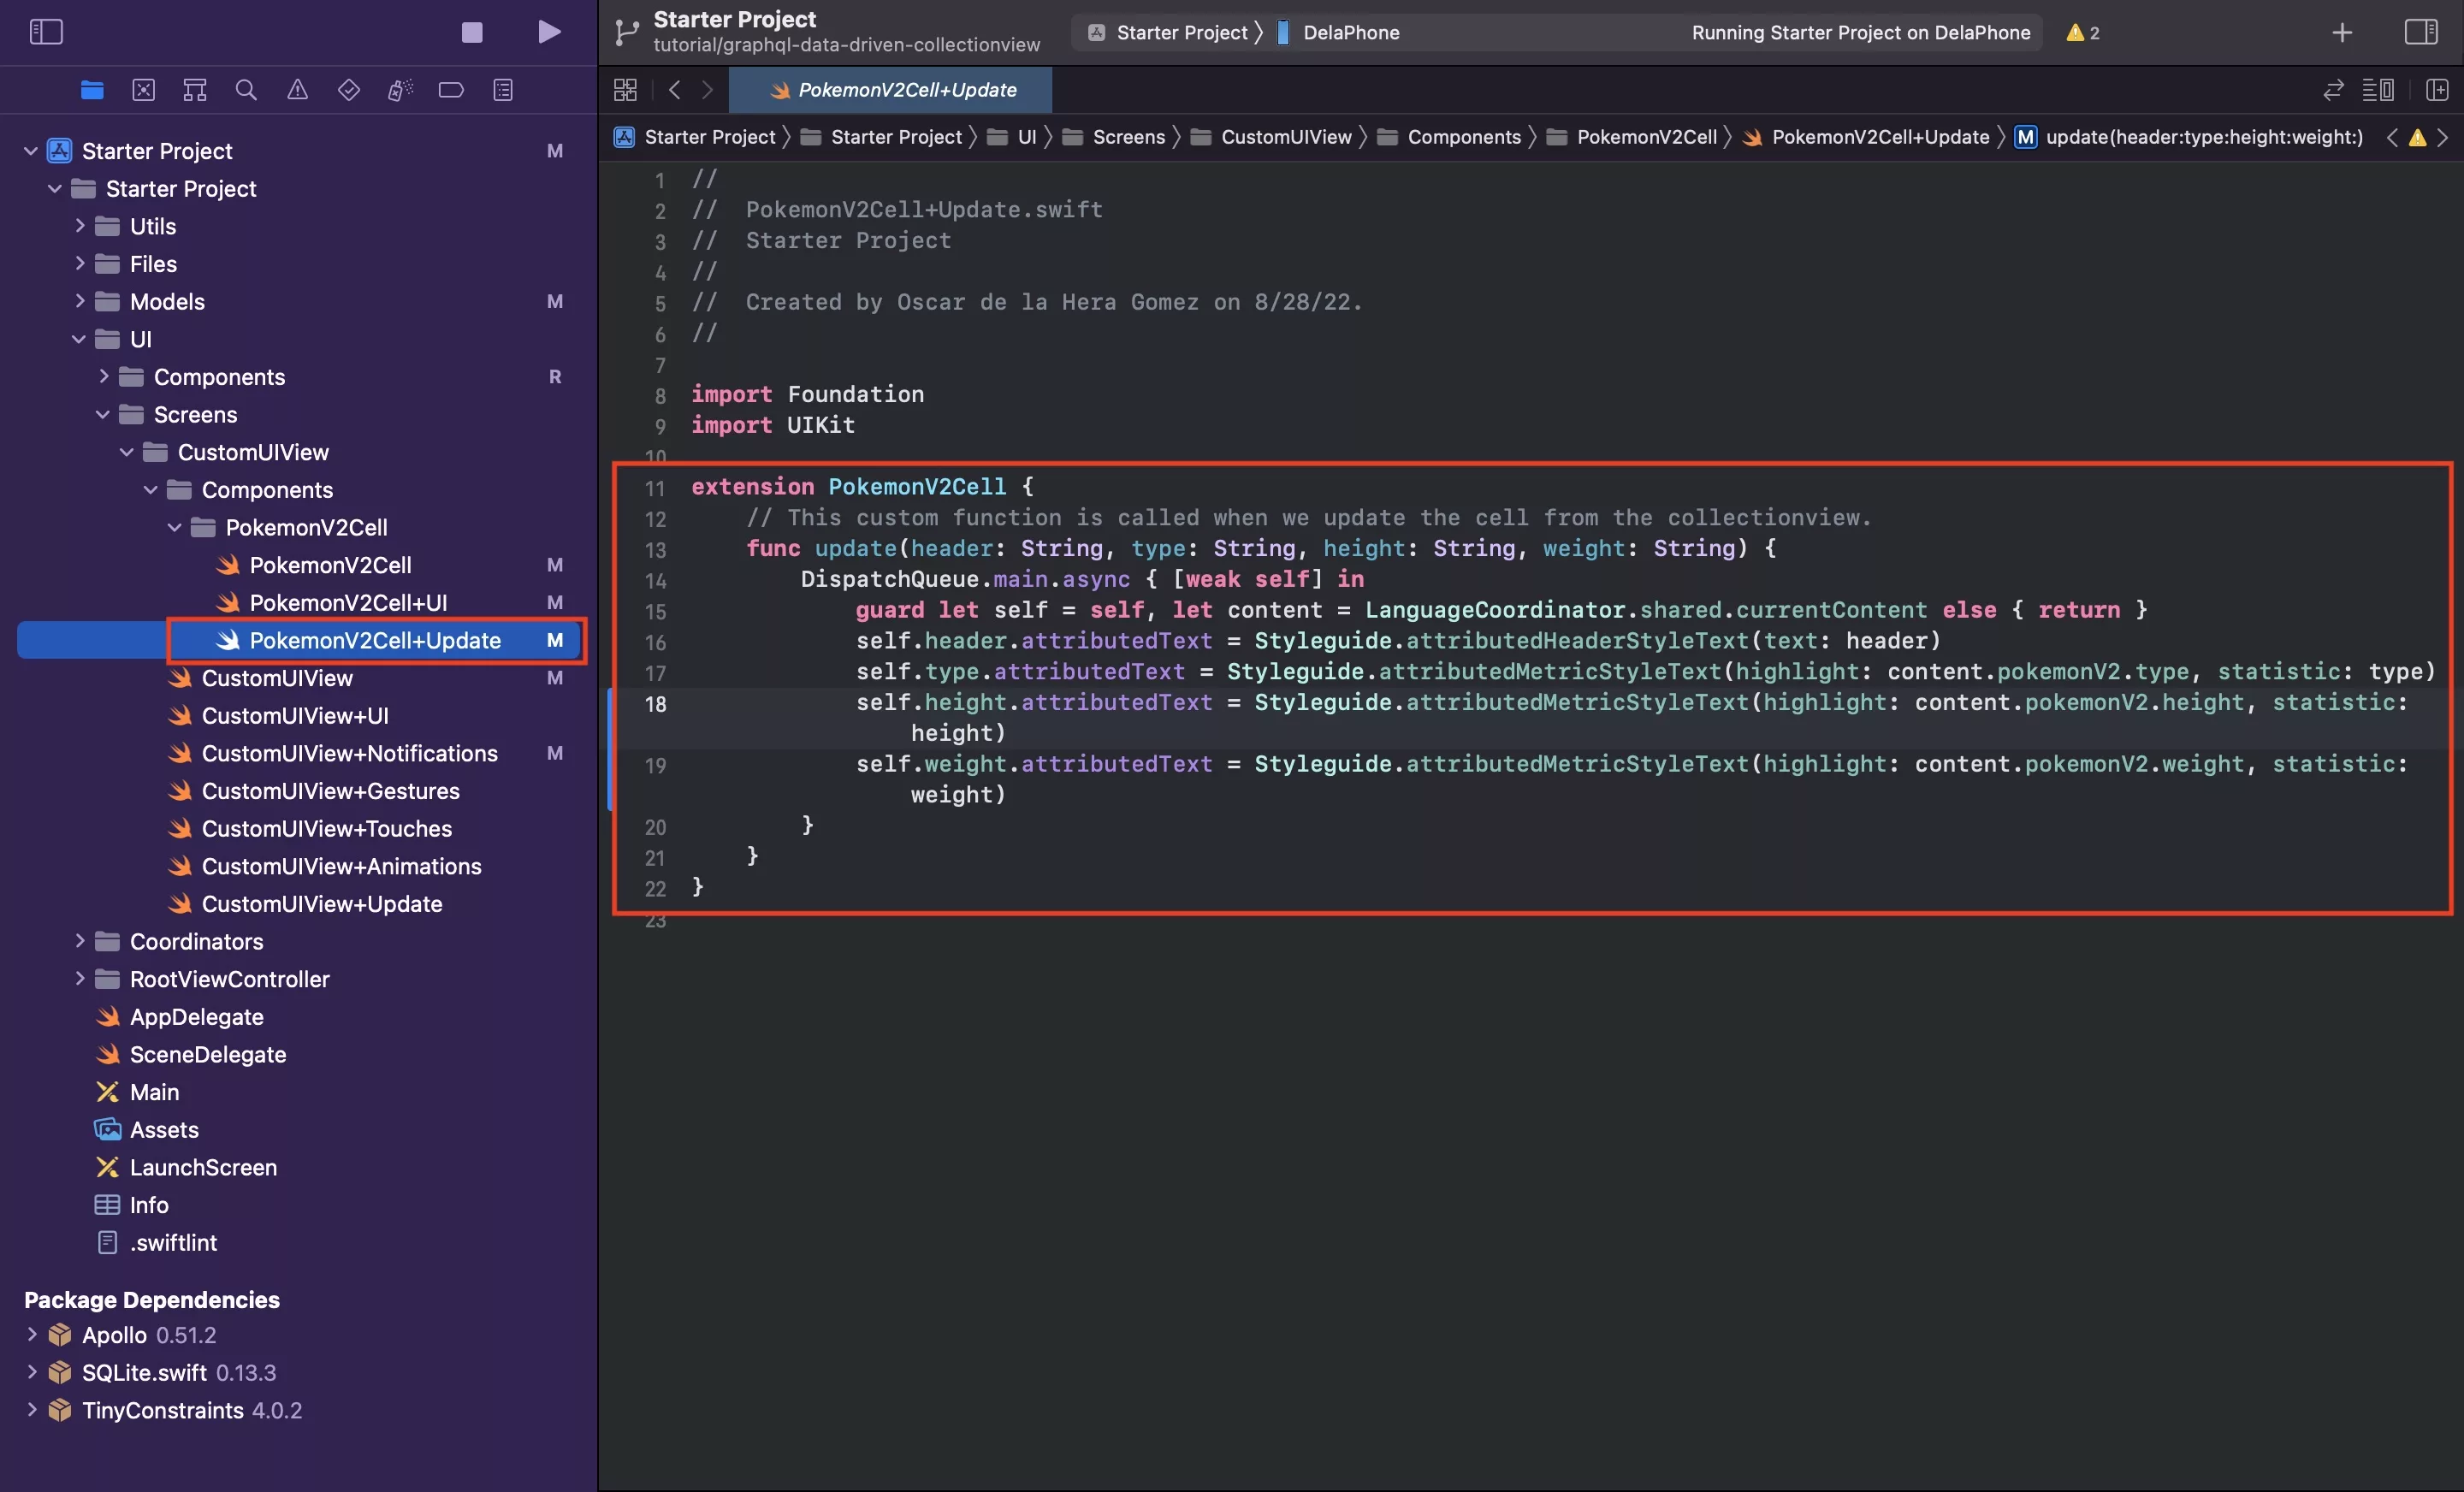
Within the PokemonV2Cell folder create a new file called PokemonV2Cell+Update.swift and paste in the code found below.
Step Eight: Declare the UICollectionView Variables
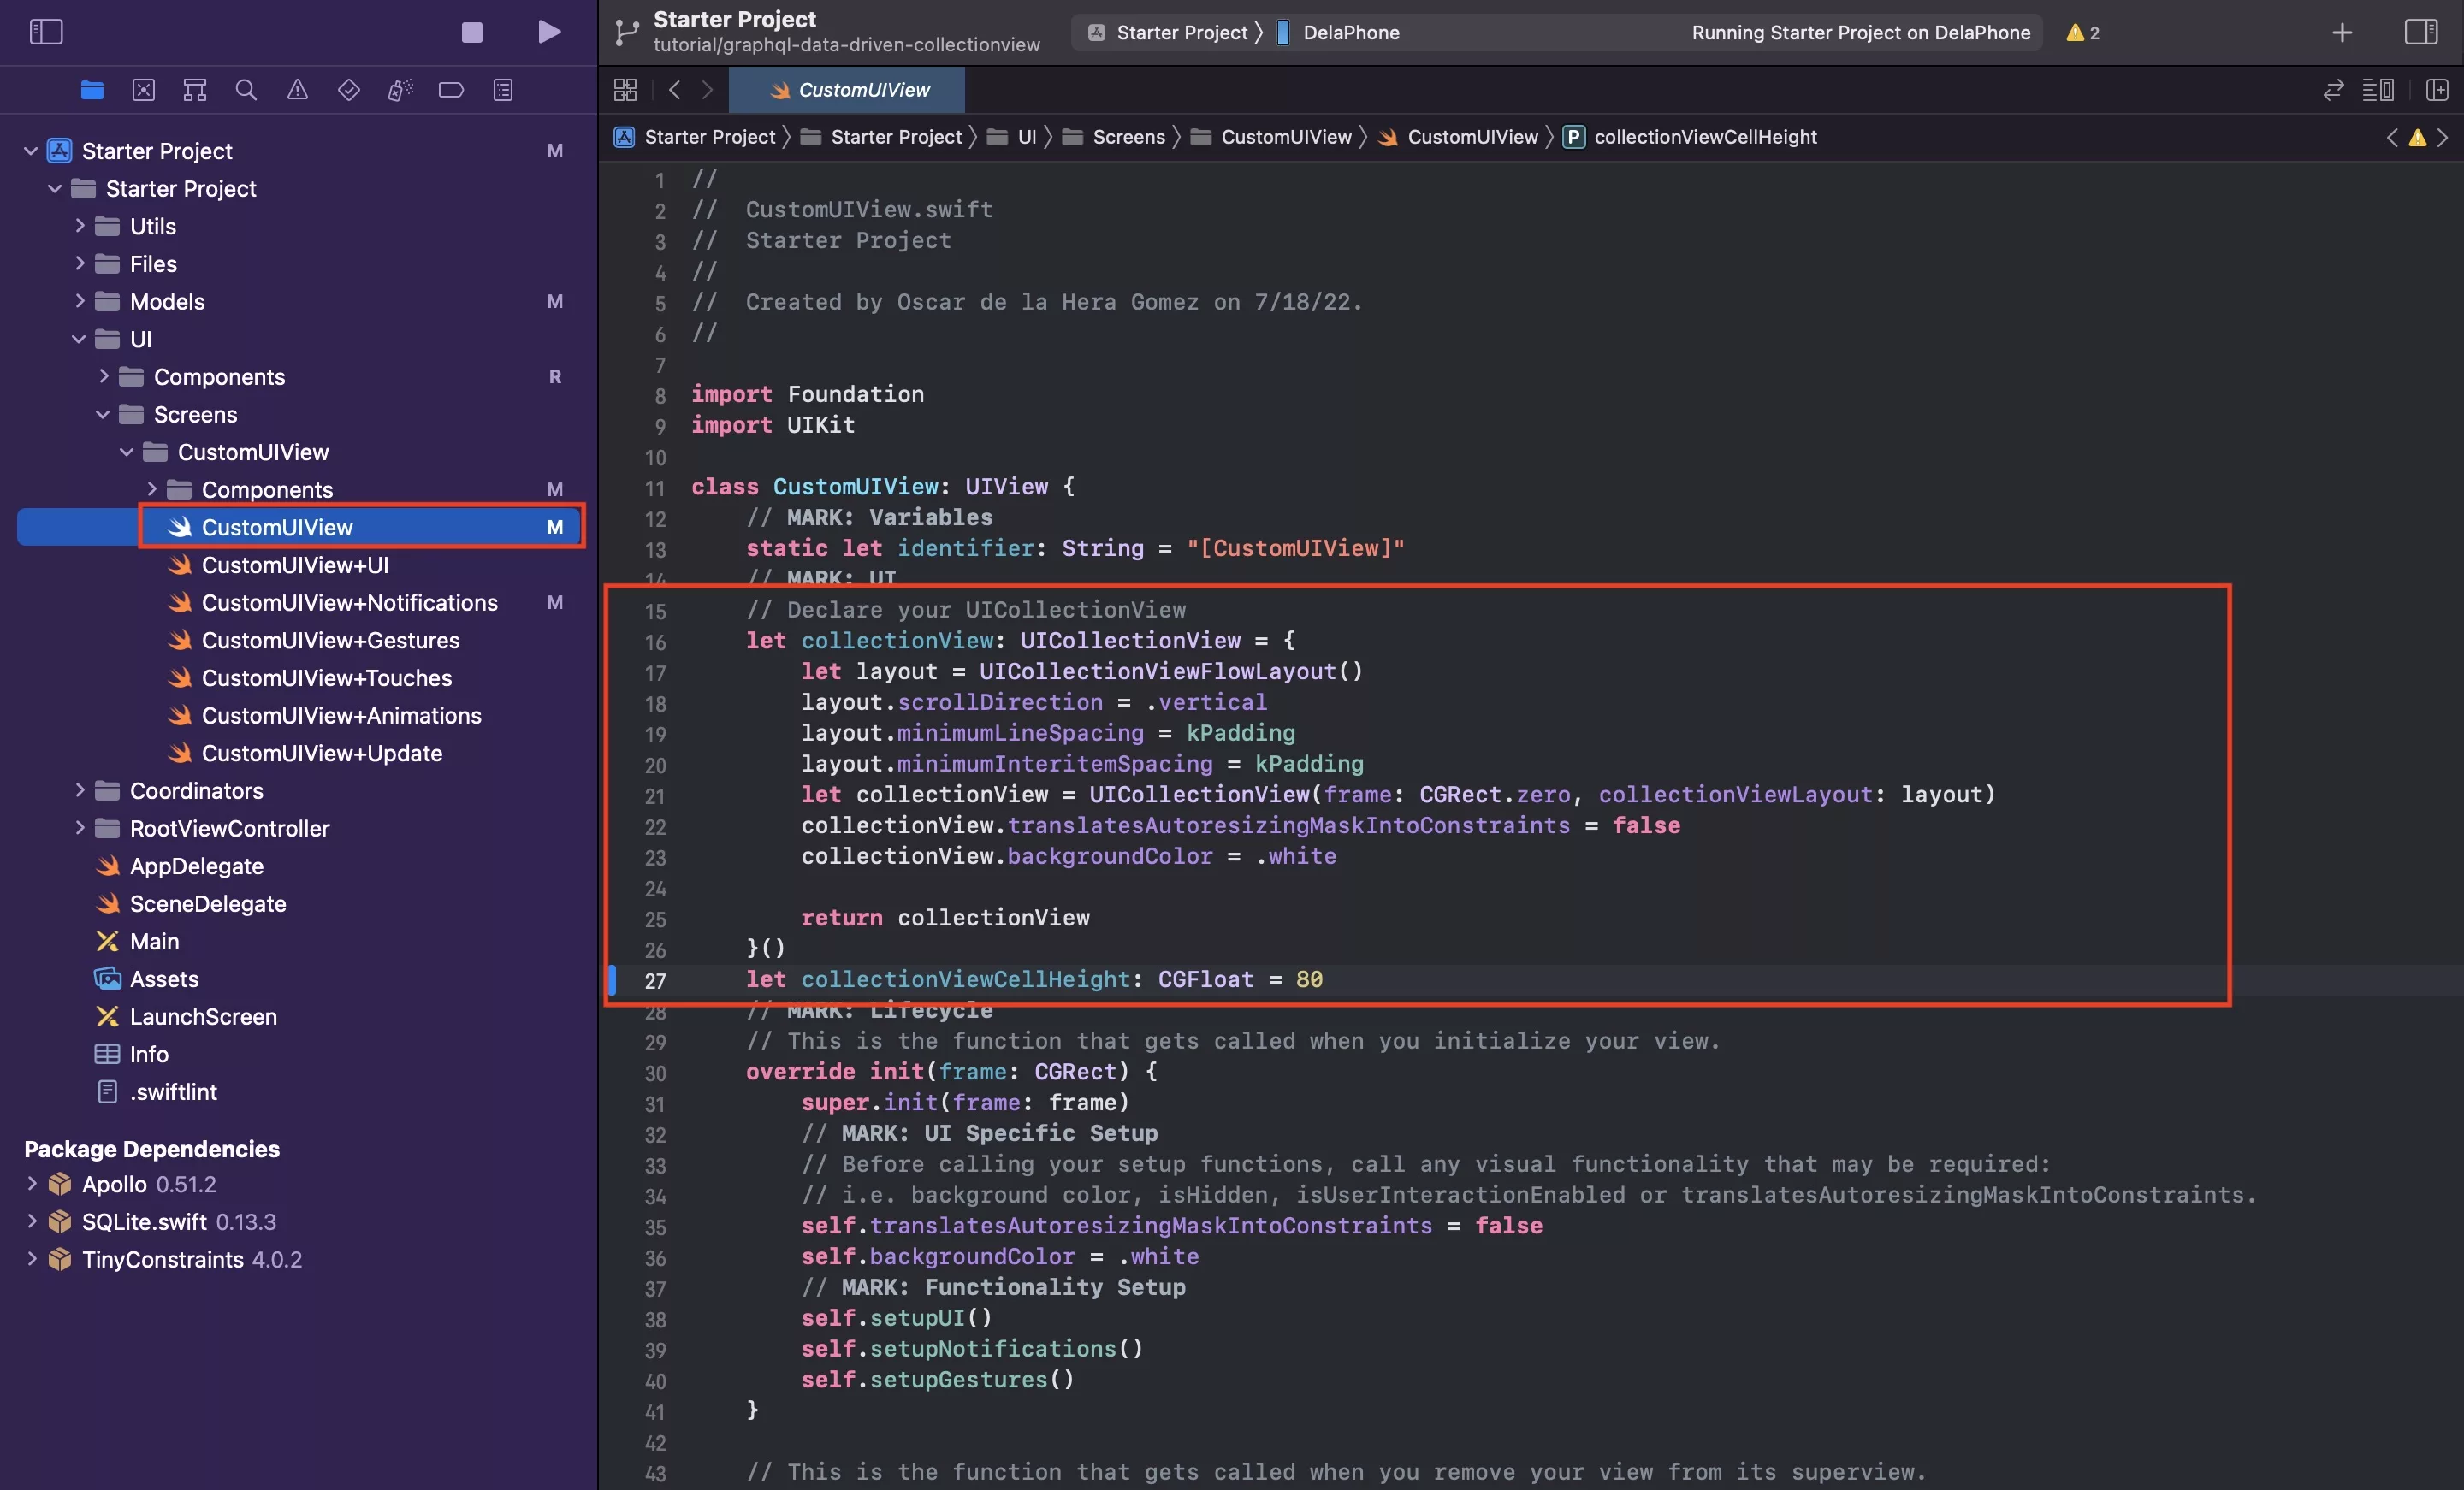
In CustomUIView.swift, declare the variables required for your UICollectionView. In this case we are declaring:
- The UICollectionView
- The height of the UICollectionViewCell
Please note that we have removed the label from our CustomUIView as part of this step and have set the backgroundColor to white.
For a tutorial on setting up a UICollectionView with multiple sections please consult the link below.
Step Nine: Setup the UICollectionView
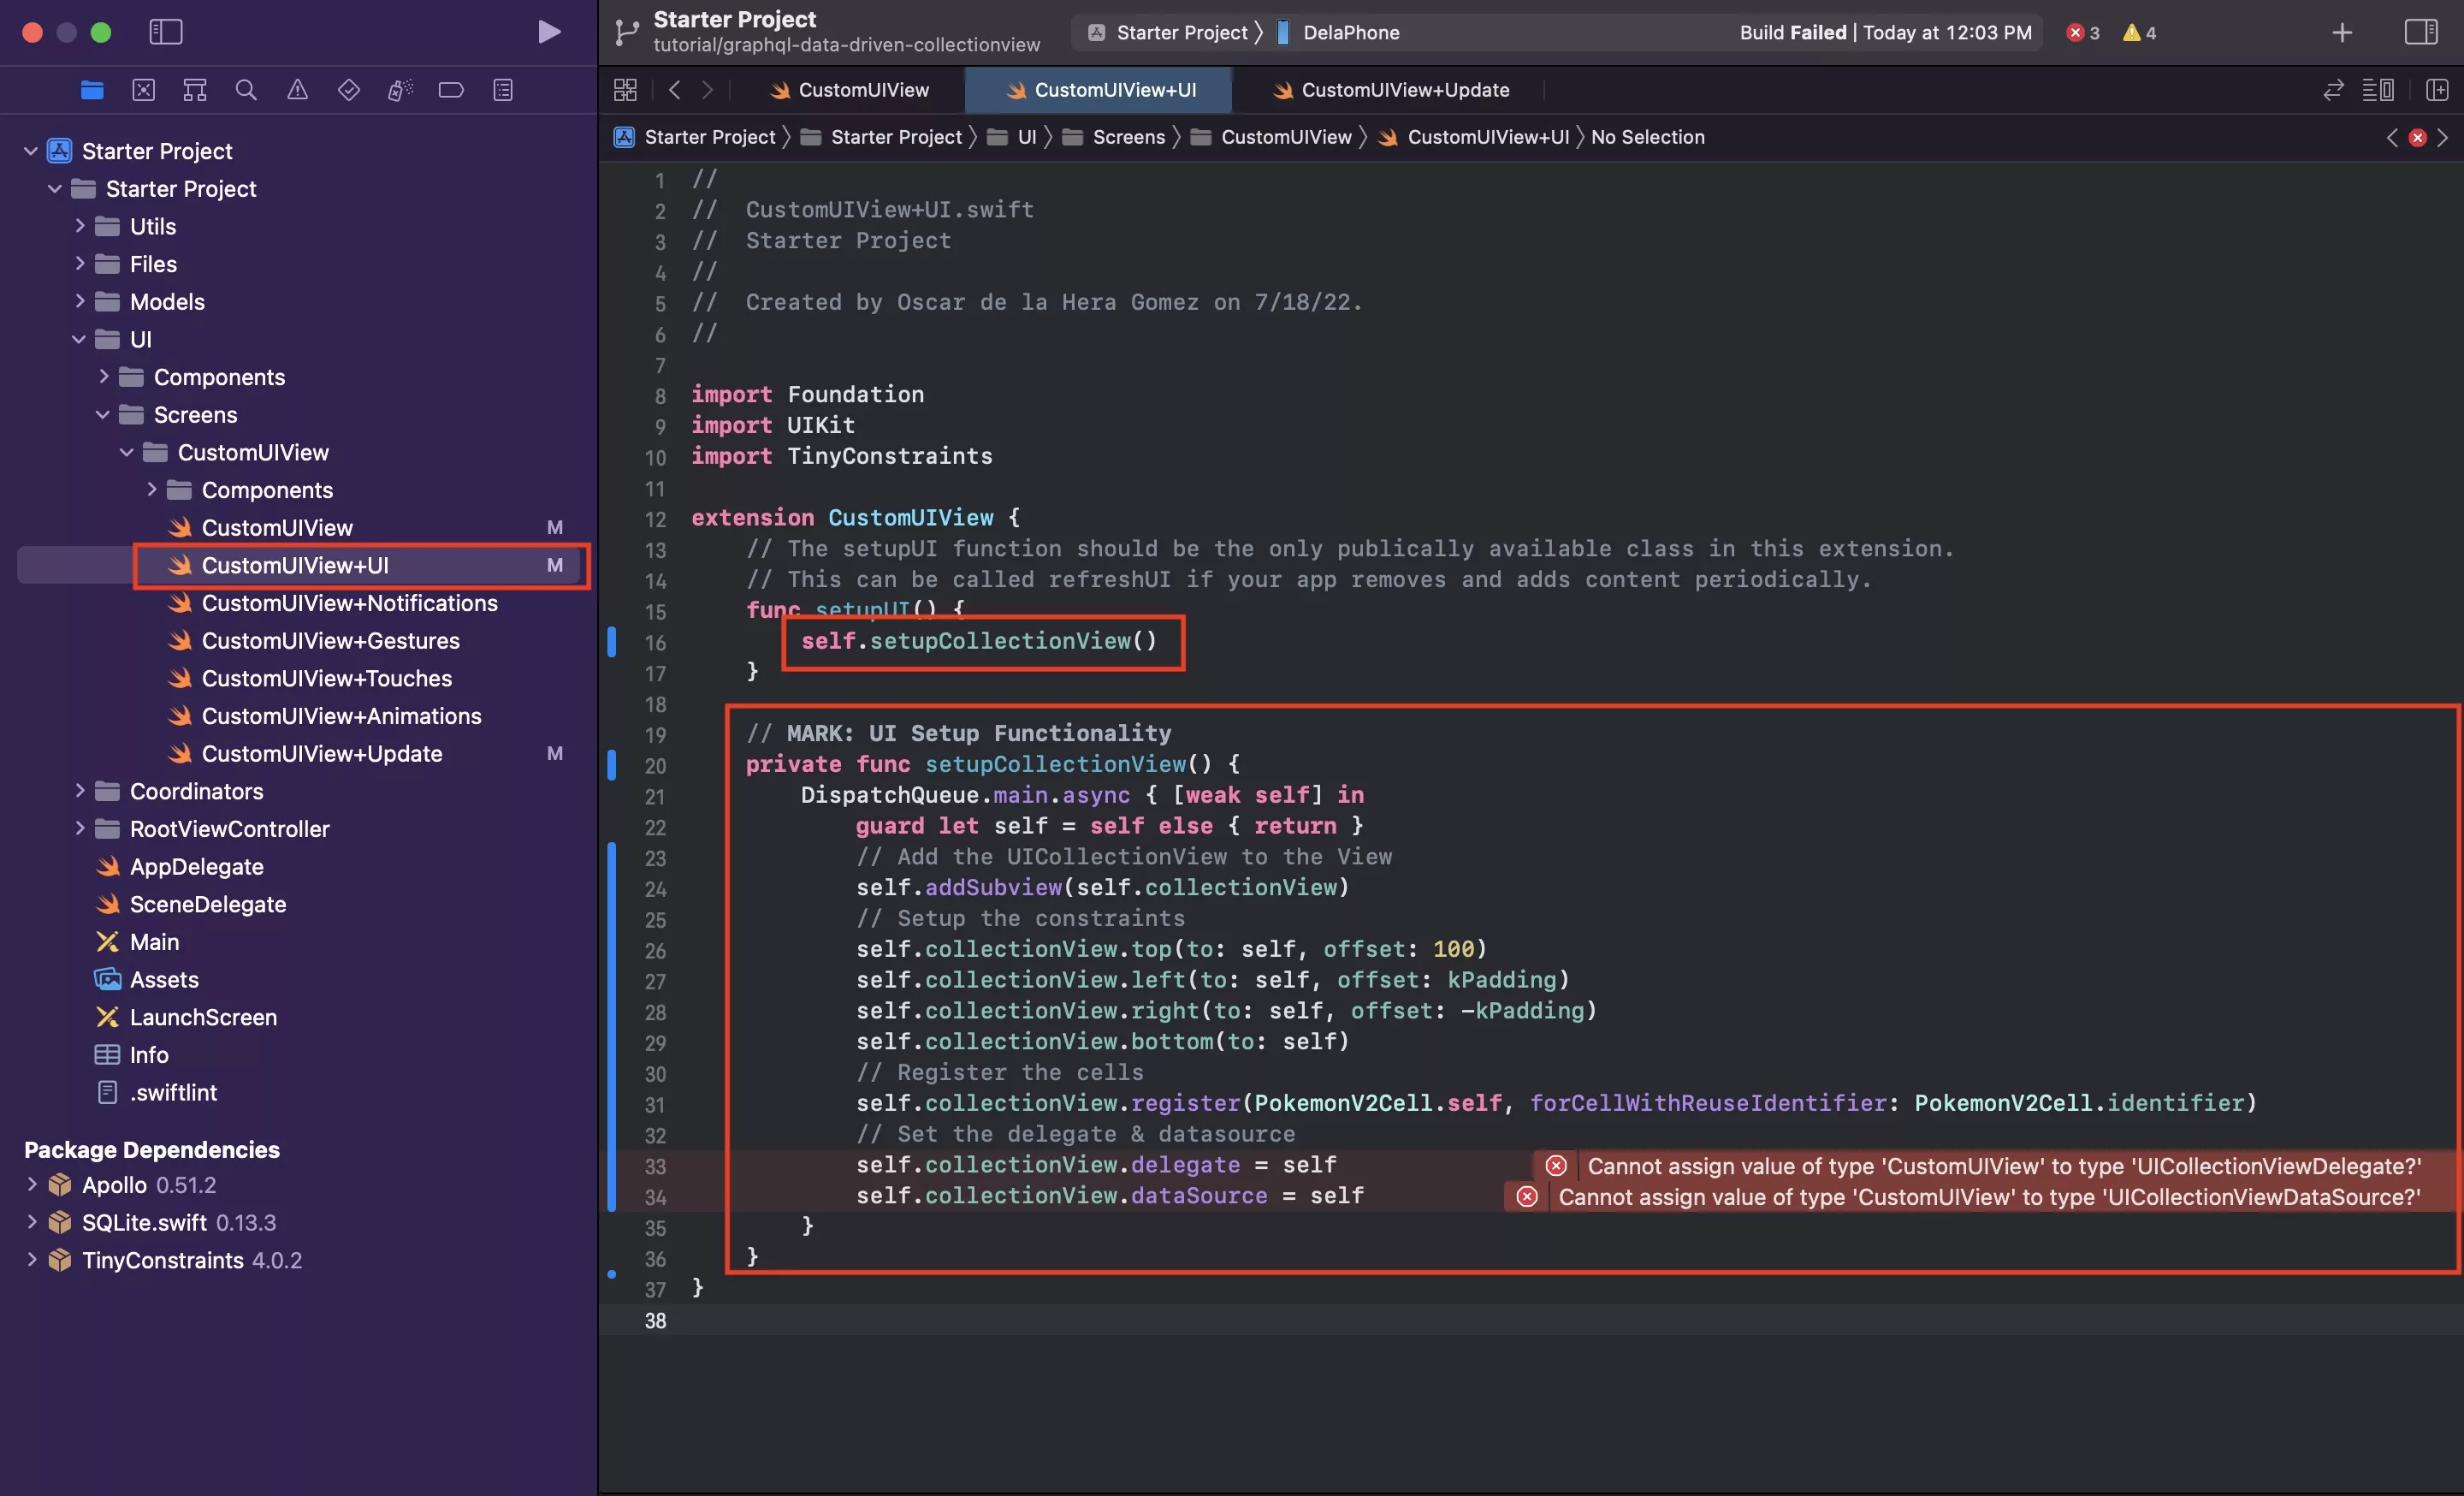
In CustomUIView+UI.swift, setup your UICollectionView.
Please note that the delegate and data source functionality is setup in the next step.
Step Ten: Add the delegate and datasource functionality
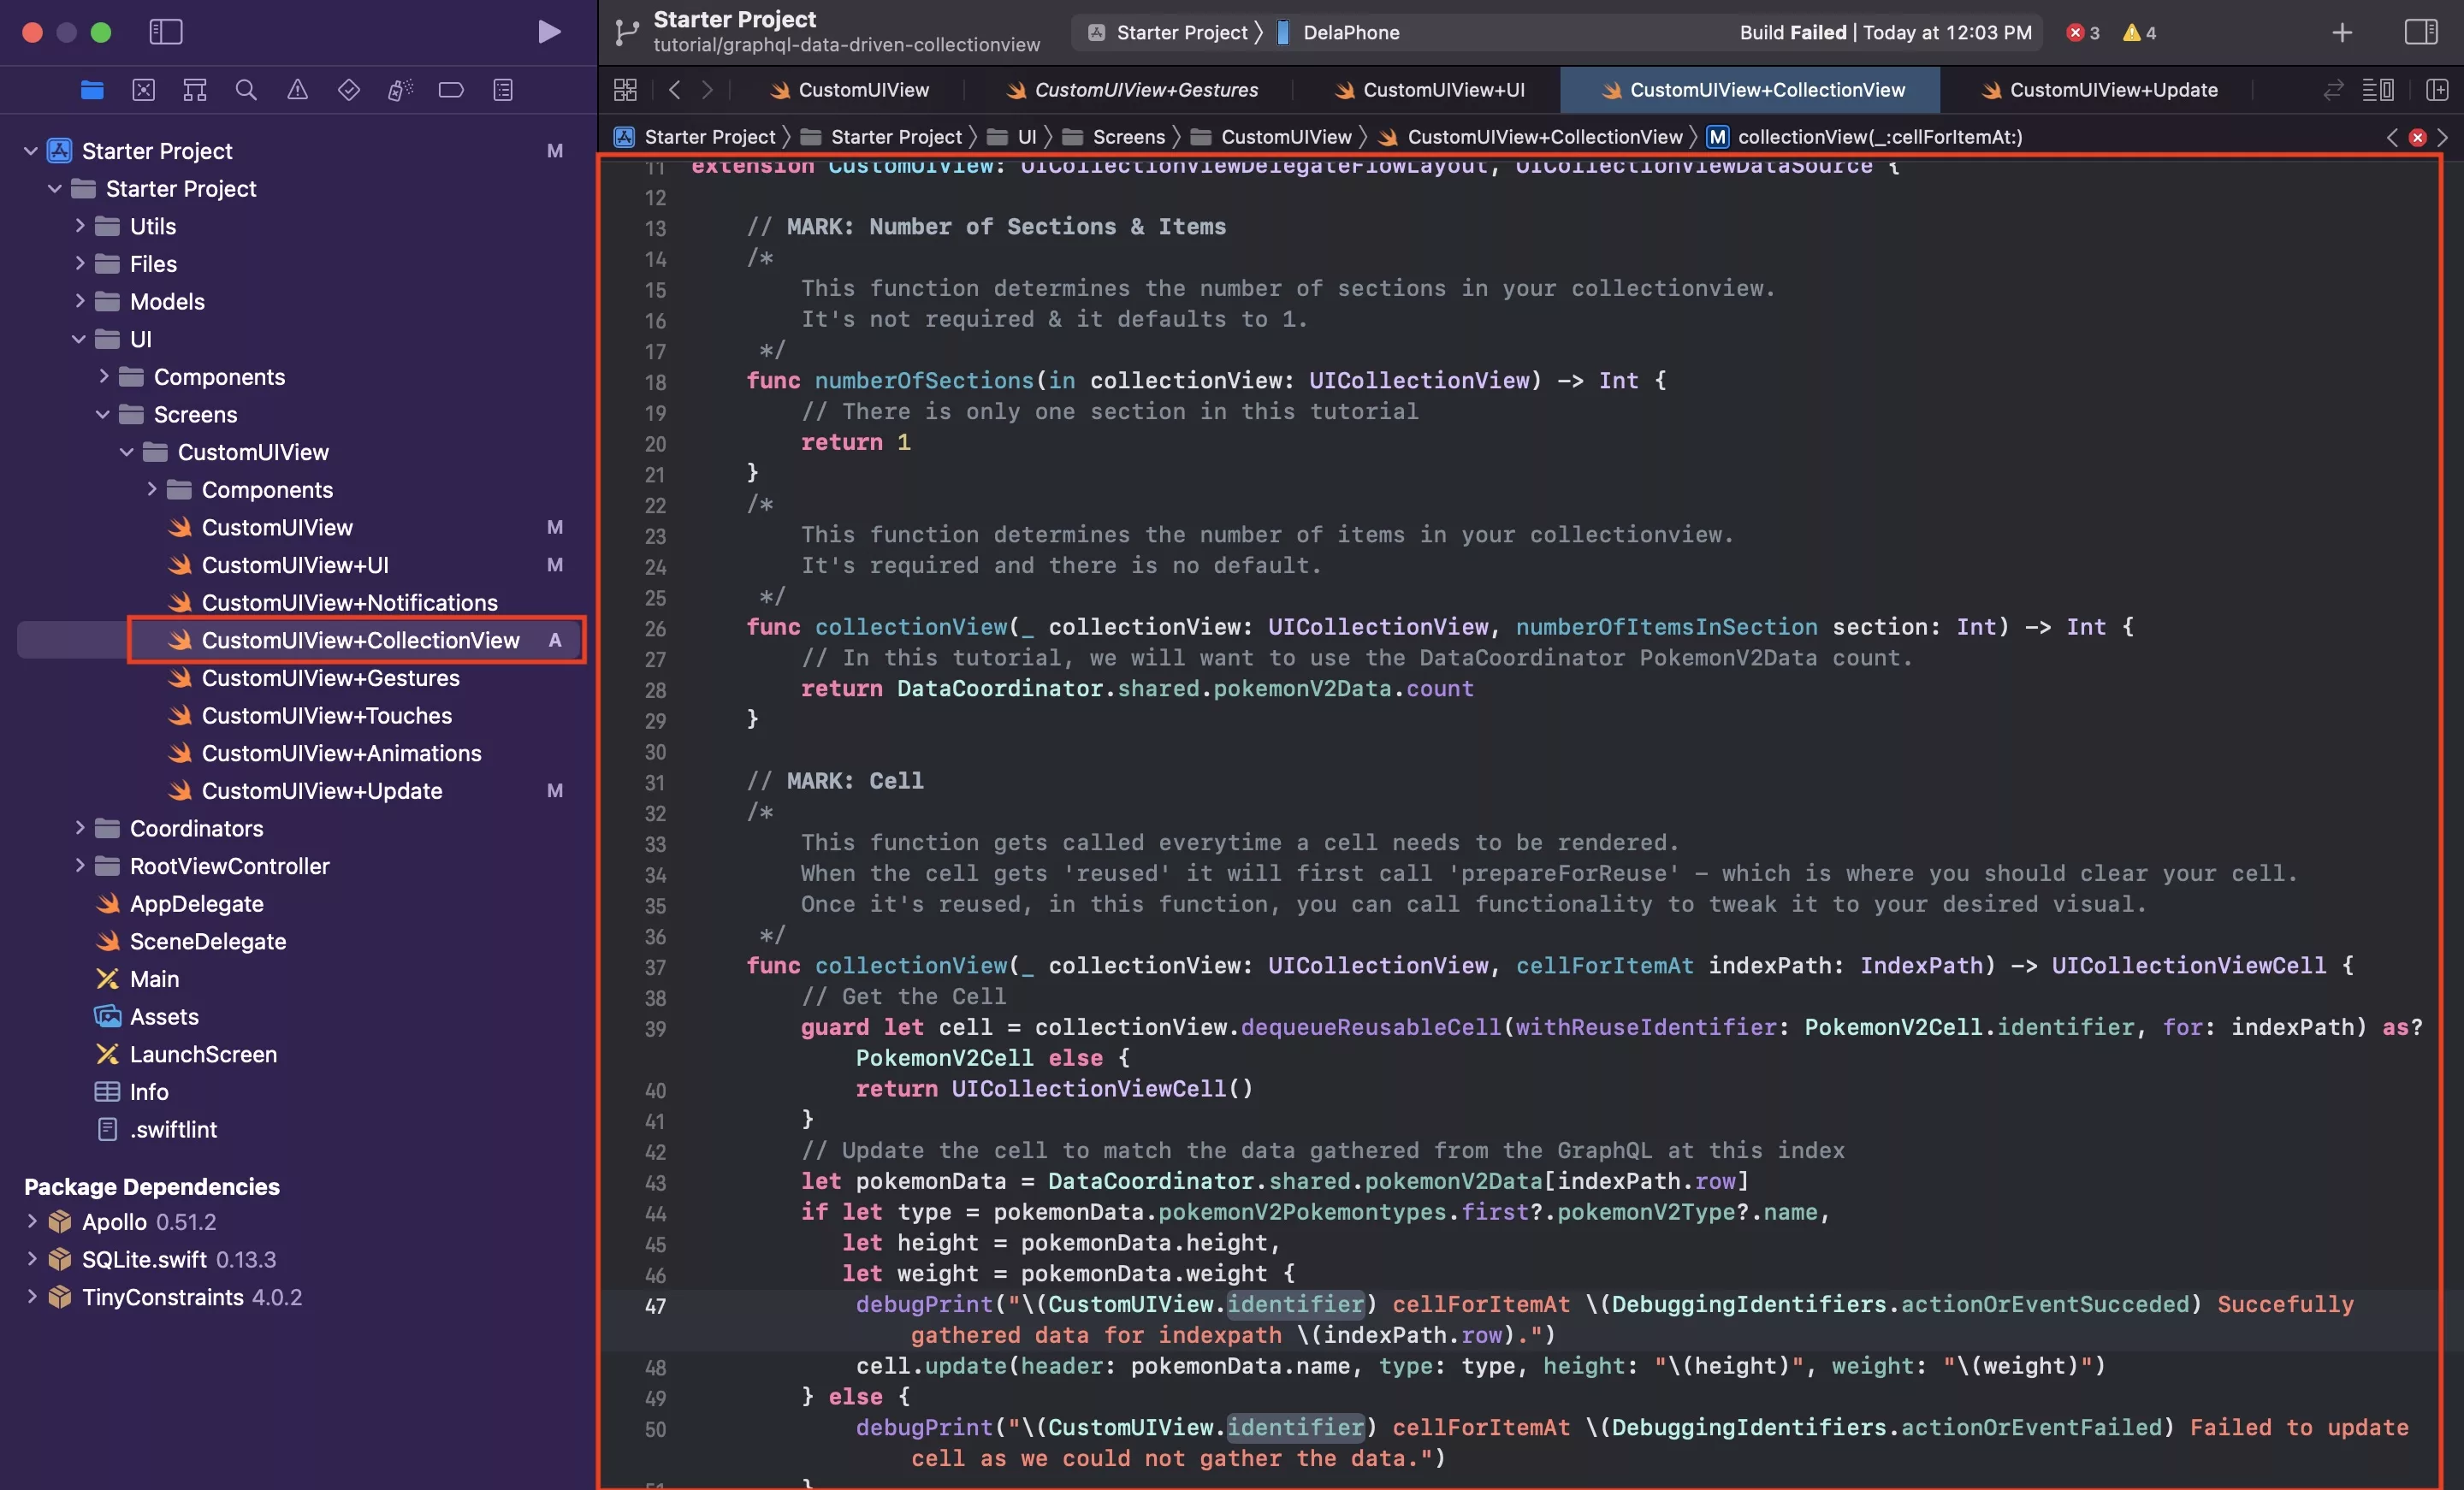
Under the CustomUIView folder, create a new file called CustomUIView+CollectionView.swift.
Within this, paste in the code found below.
We recommend that you place it under the +Notifications extension.
Step Eleven: Add the visual parameters functionality
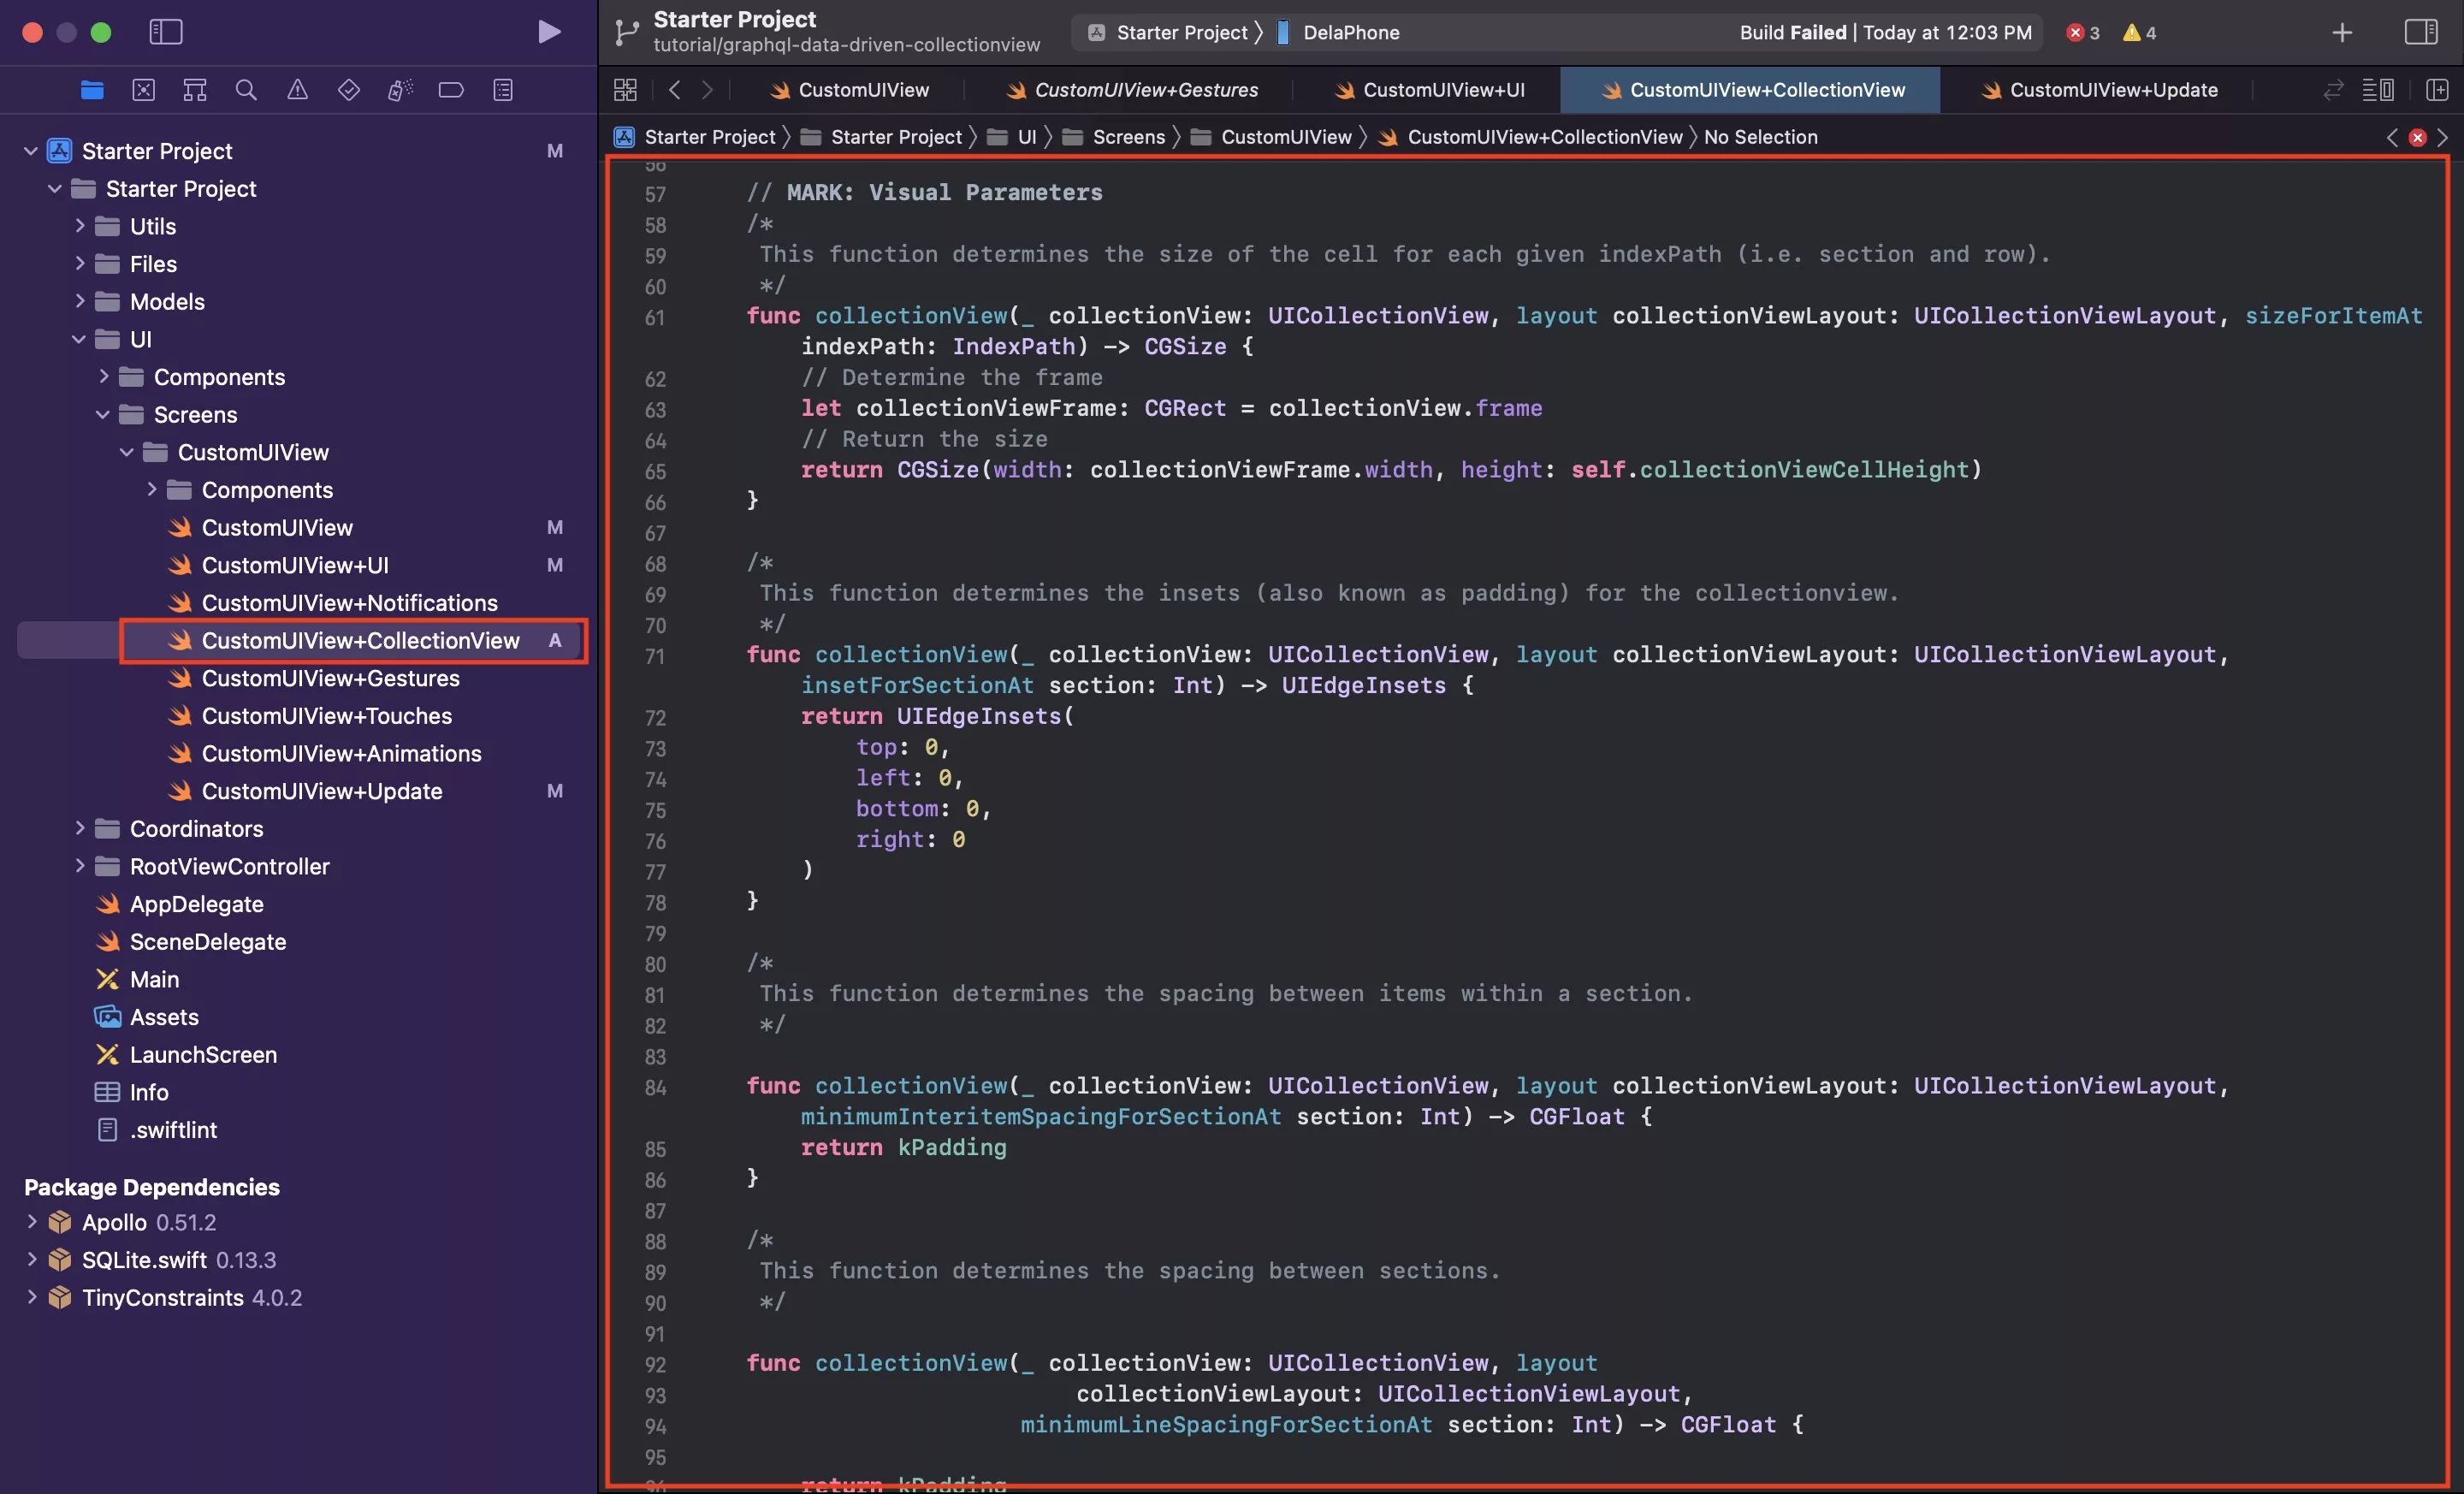
Within CustomUIView+CollectionView.swift, below the delegate and datasource functionality, add the following code.
Step Twelve: Reload UICollectionView on content update
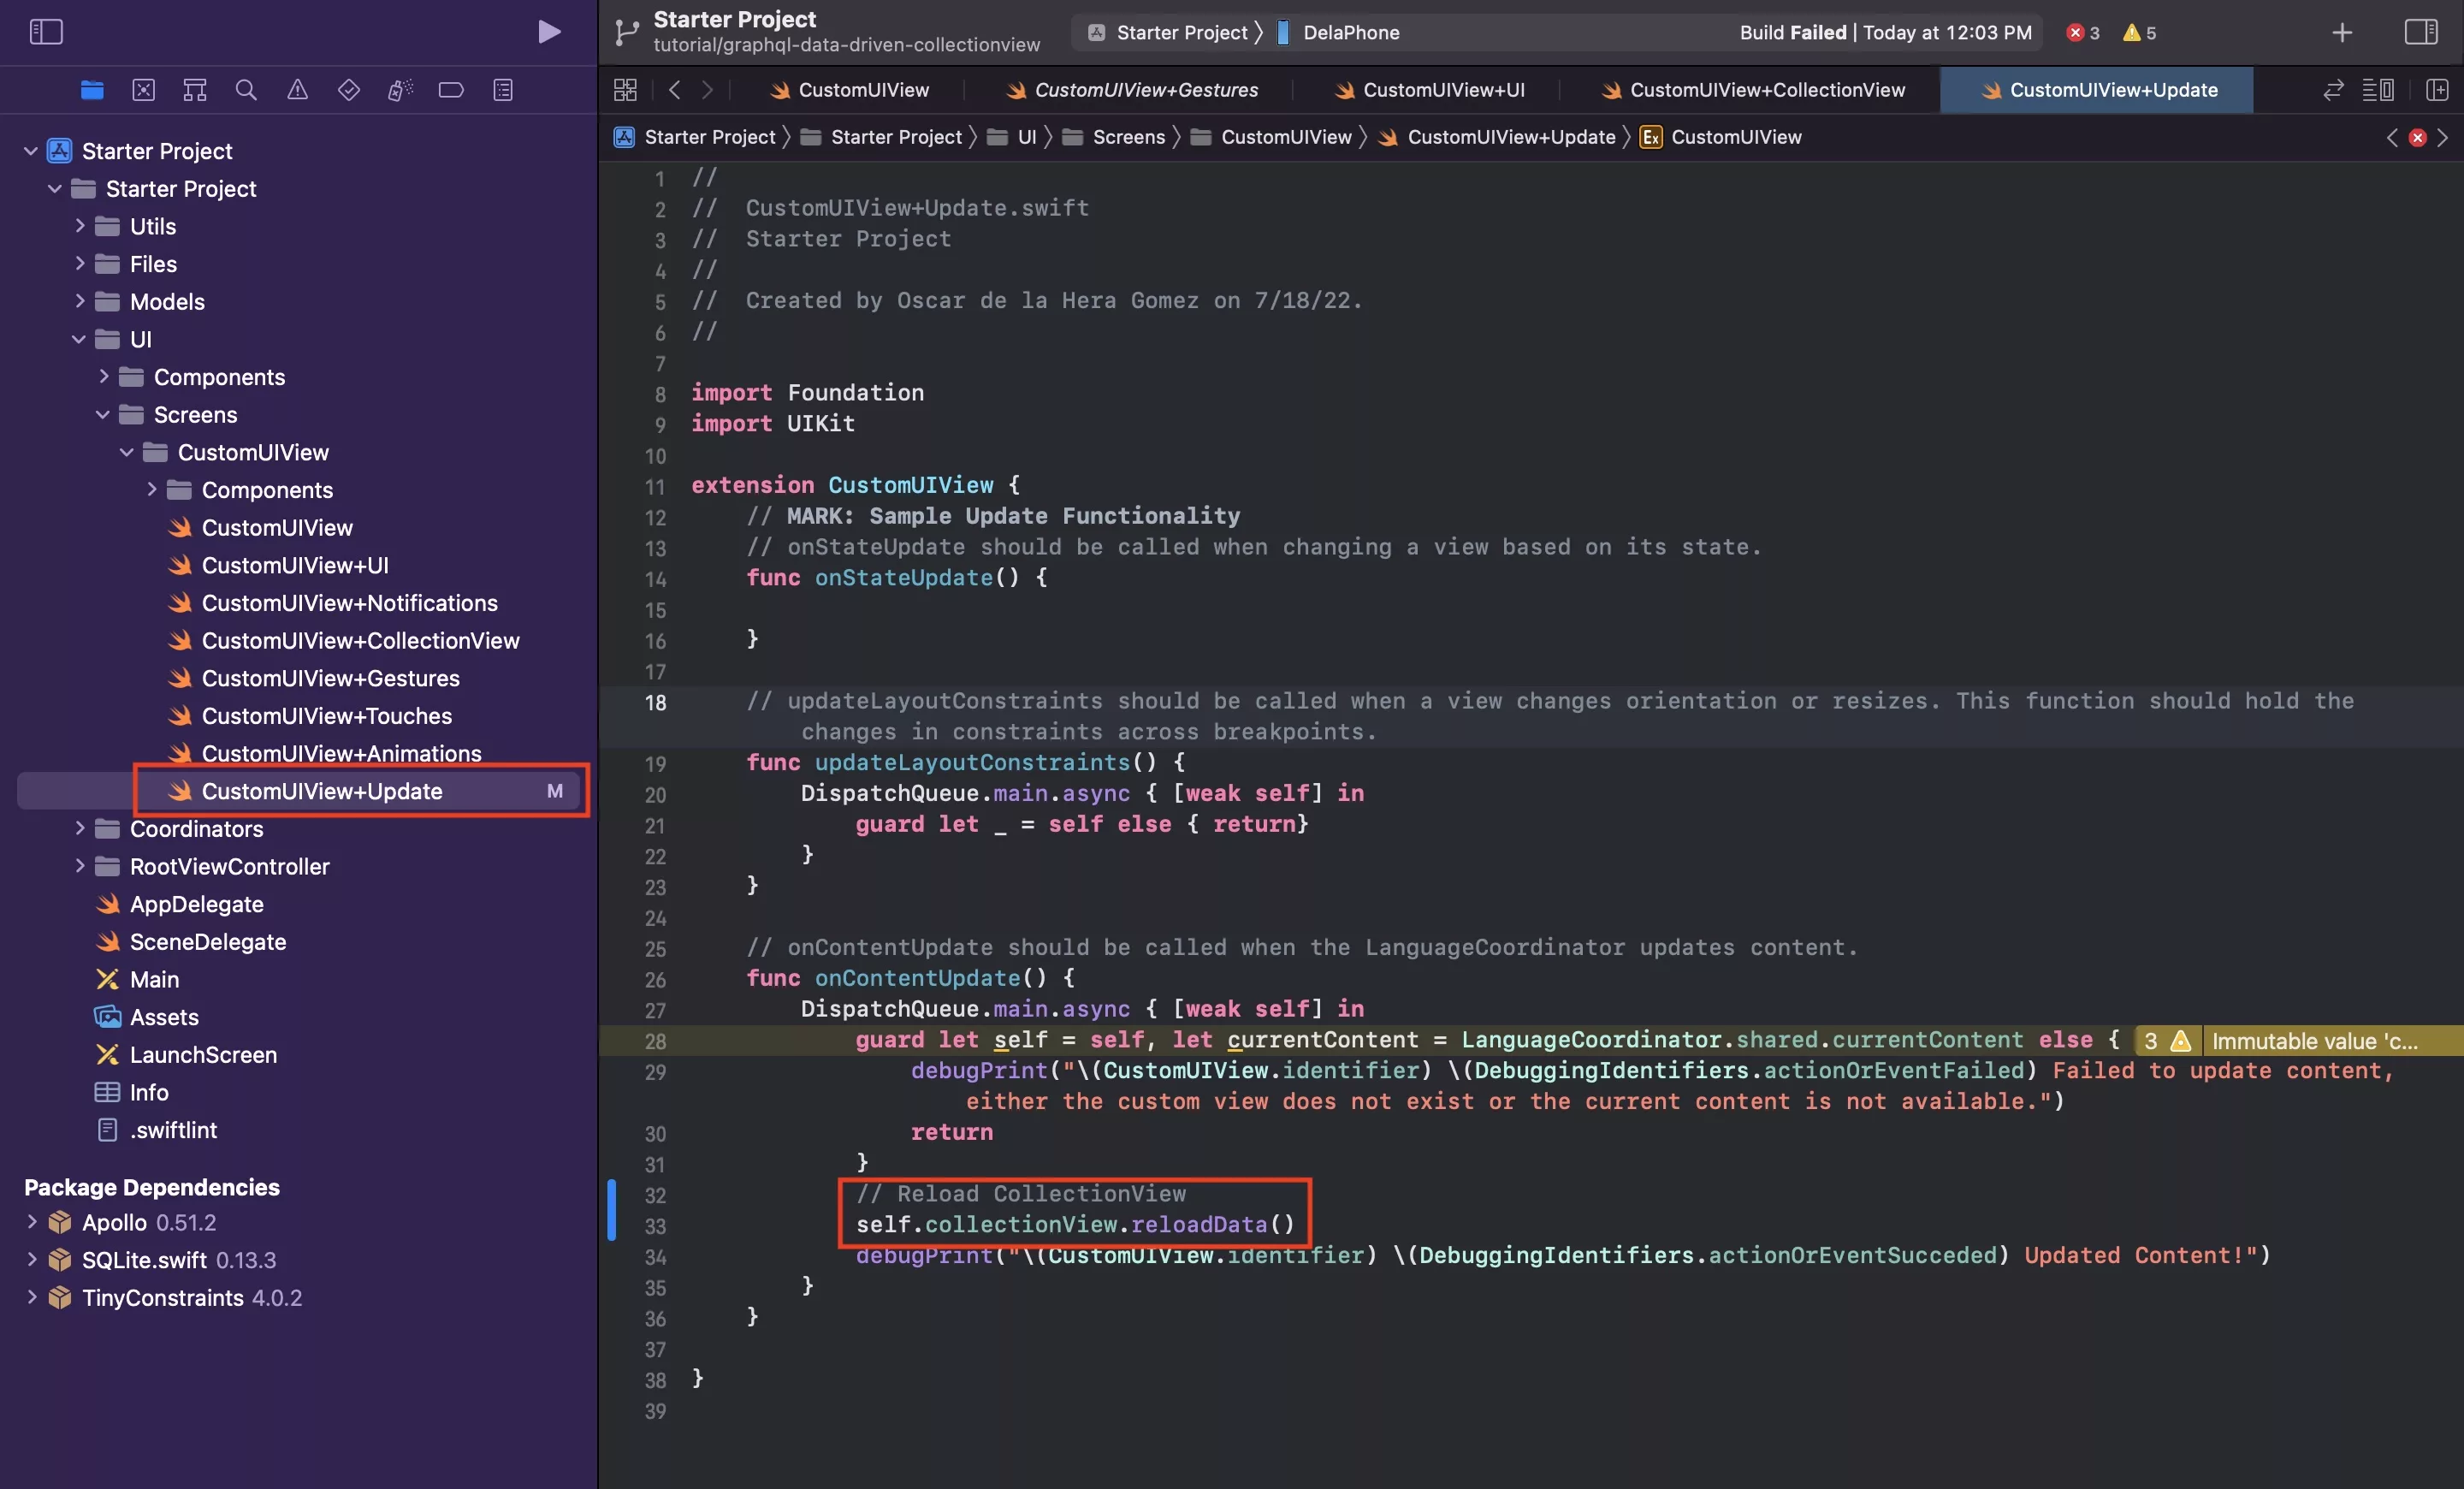
In CustomUIView+Update.swift, in the onContentUpdate function, reload the UICollectionView's data by running the line below.
self.collectionView.reloadData()Step Thirteen: Reload UICollectionView on PokemonV2Data update

In CustomUIView+Notifications.swift, setup an observer for the notification created in Step Two and in the selector that receives the notification, tell the UICollectionView to reload.
Sample code provided below.
Step Fourteen: Invalidate the Carousel Layout
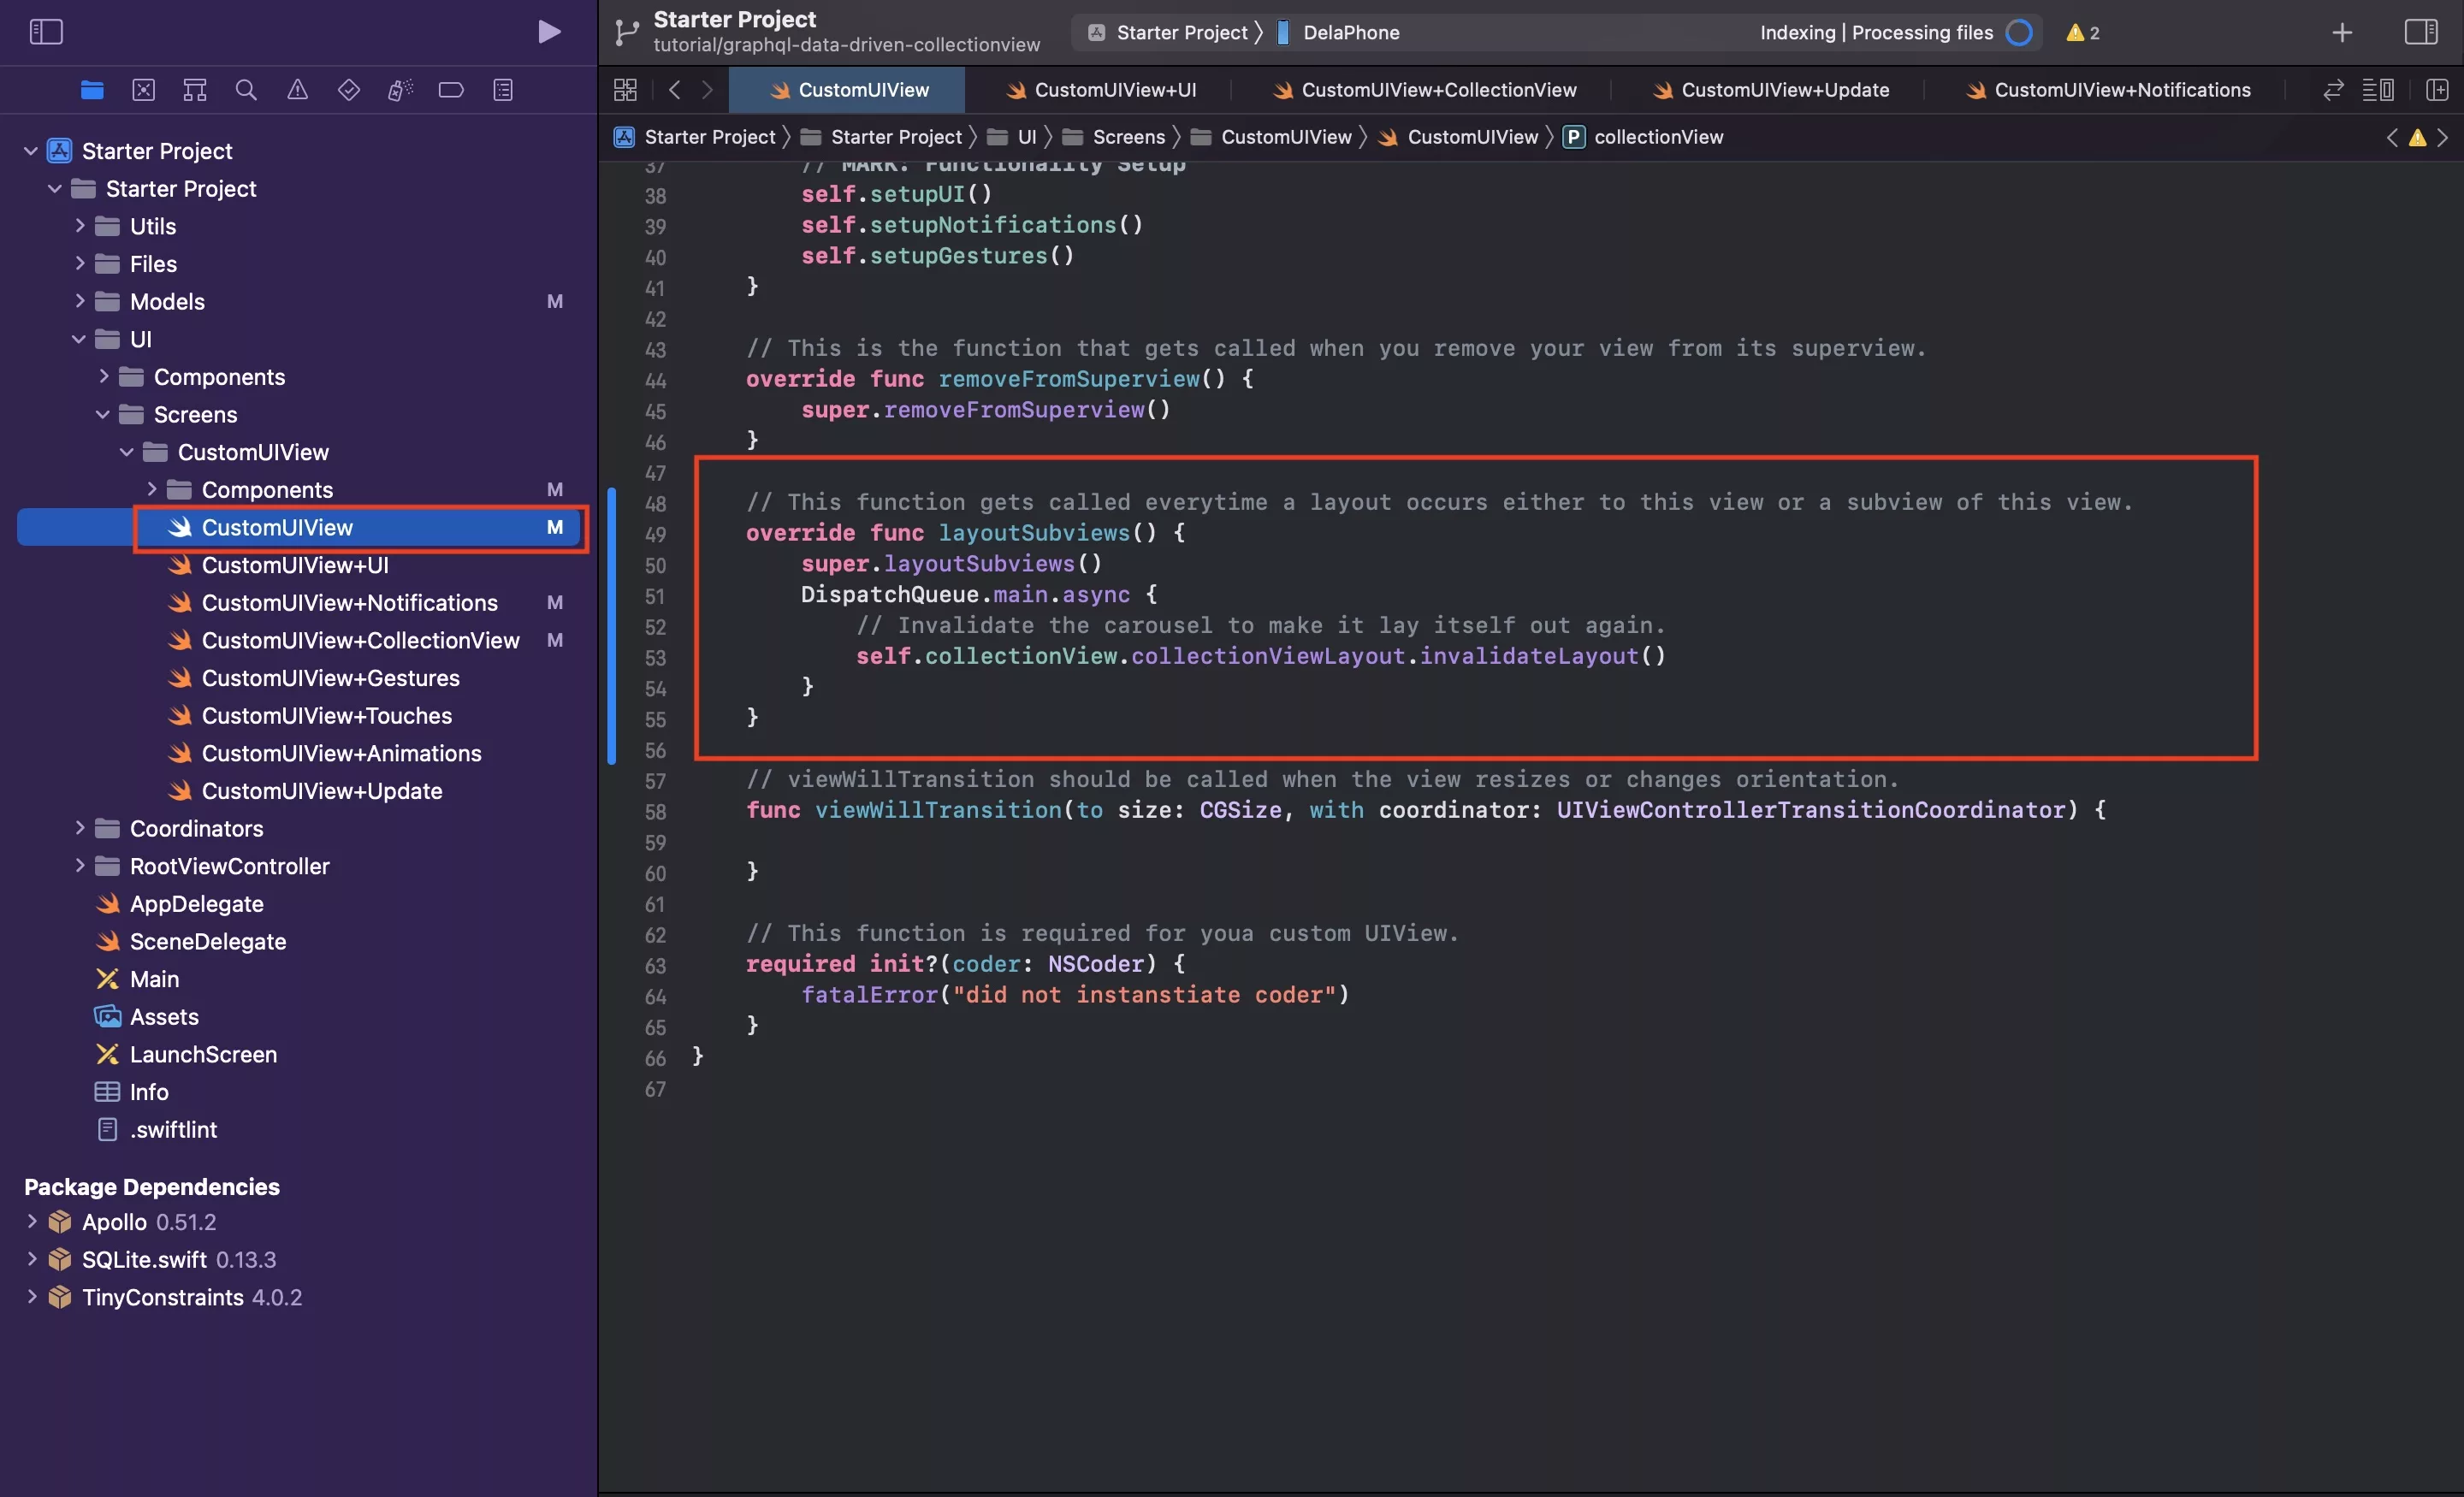
In CustomUIView.swift, add the following code to your lifecycle, below the removeFromSuperview functionality.
Step Fifteen: Verify
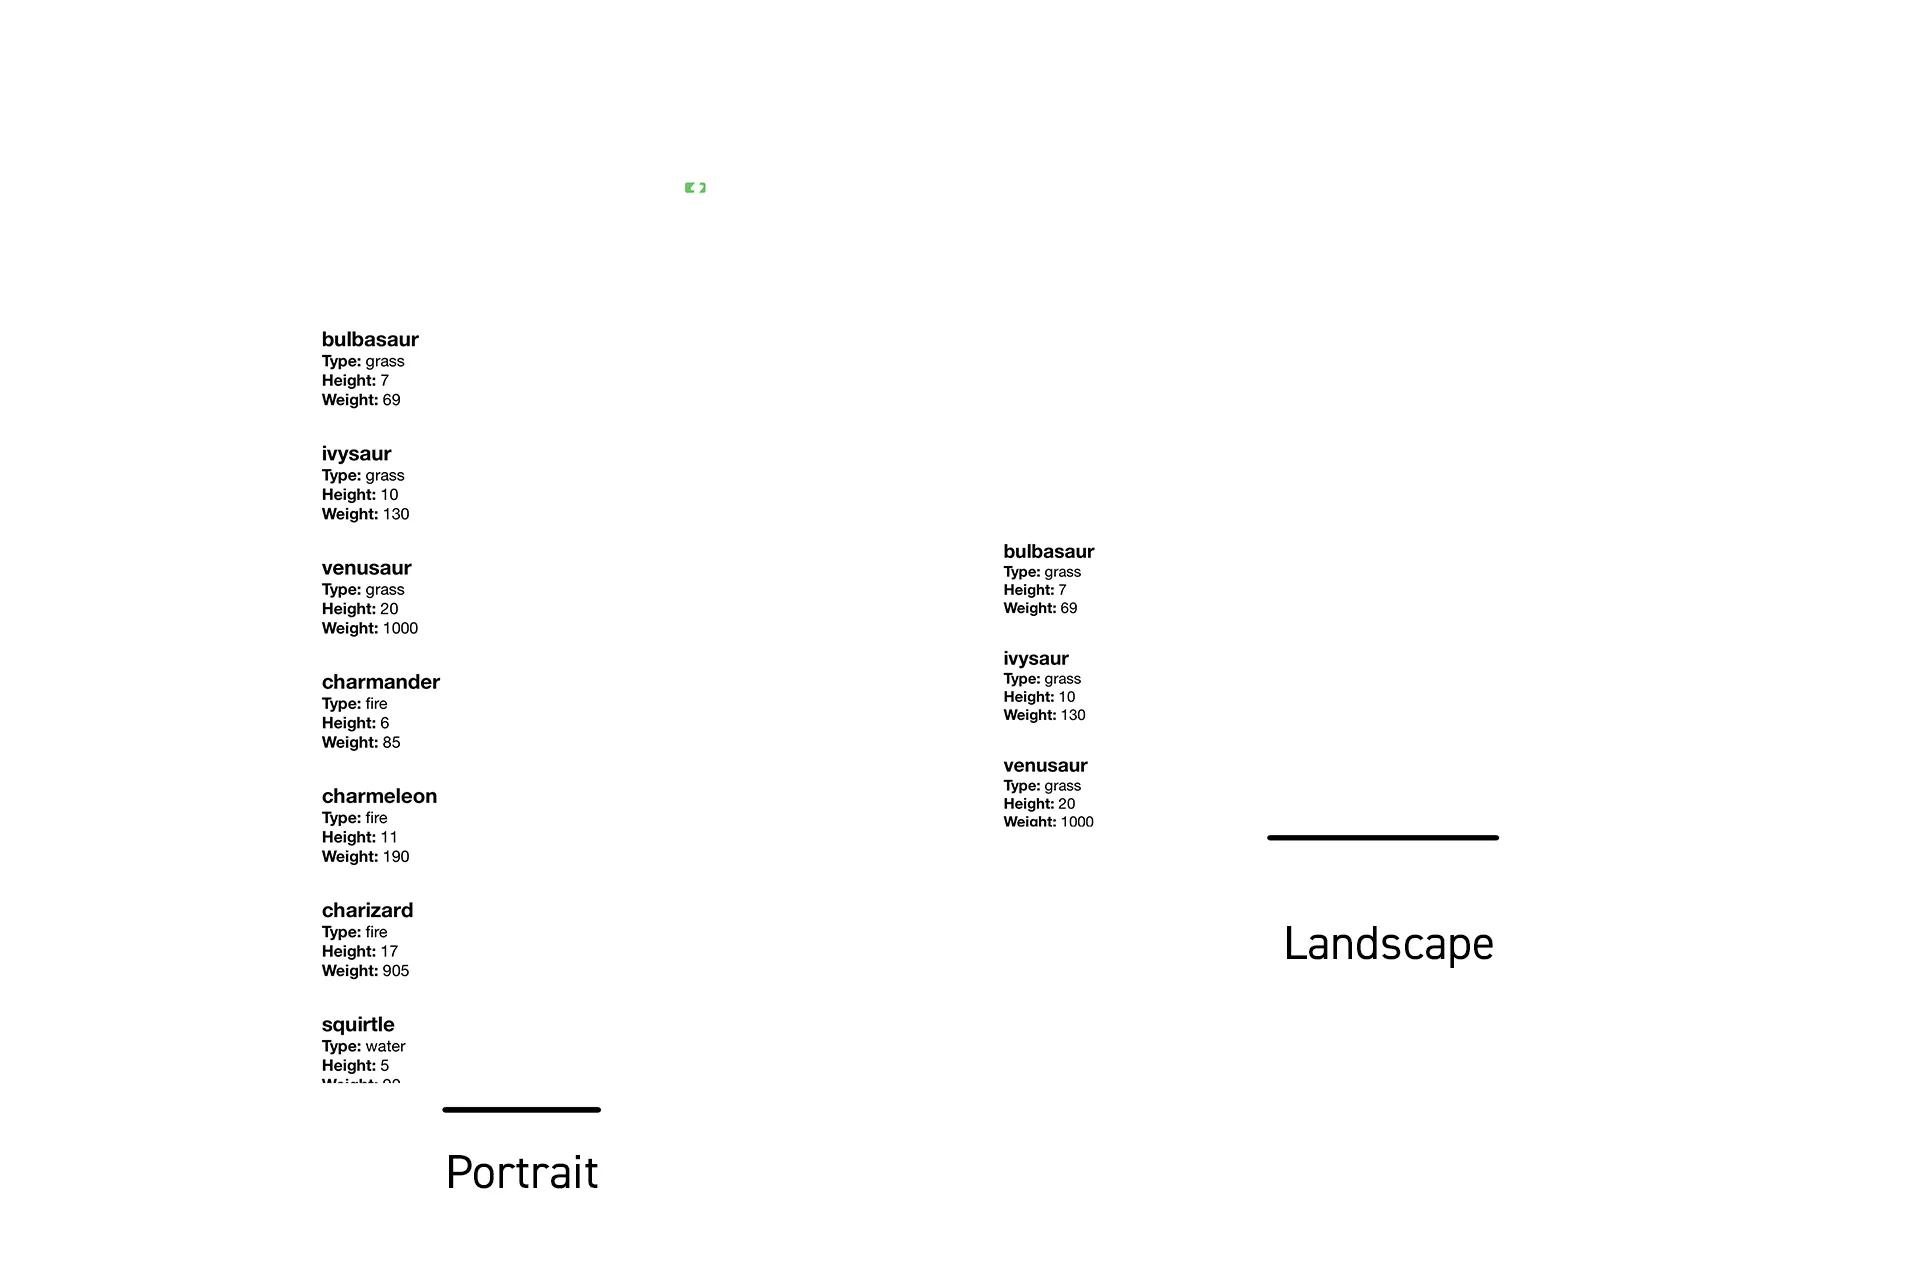
Run your code to see your results. It should look as above.