How to make an API that makes GraphQL mutation queries in Serverless
A step by step tutorial on making an API that implements GraphQL Mutations protected by an Authorization Bearer token using Typescript & Serverless.

A step by step tutorial on making an API that implements GraphQL Mutations protected by an Authorization Bearer token using Typescript & Serverless.
The following tutorial walks you through how to setup a Serverless & Typescript project to work with GraphQL requests and demonstrates how to make GraphQL Mutation requests that uses an authorization token to gather all the Subscribers from a Craft CMS.
The tutorial requires you to have a GraphQL-enabled server ready, with a schema and token that allows mutations to make changes to data.
We recommend cloning or downloading our Open Source Serverless & Typescript starter project and checking out the main branch and carrying out the steps outlined below. All changes can be found on the tutorial/graphql-mutation branch.
git clone git@github.com:delasign/typescript-serverless-starter.gitStep One: Install graphql-request
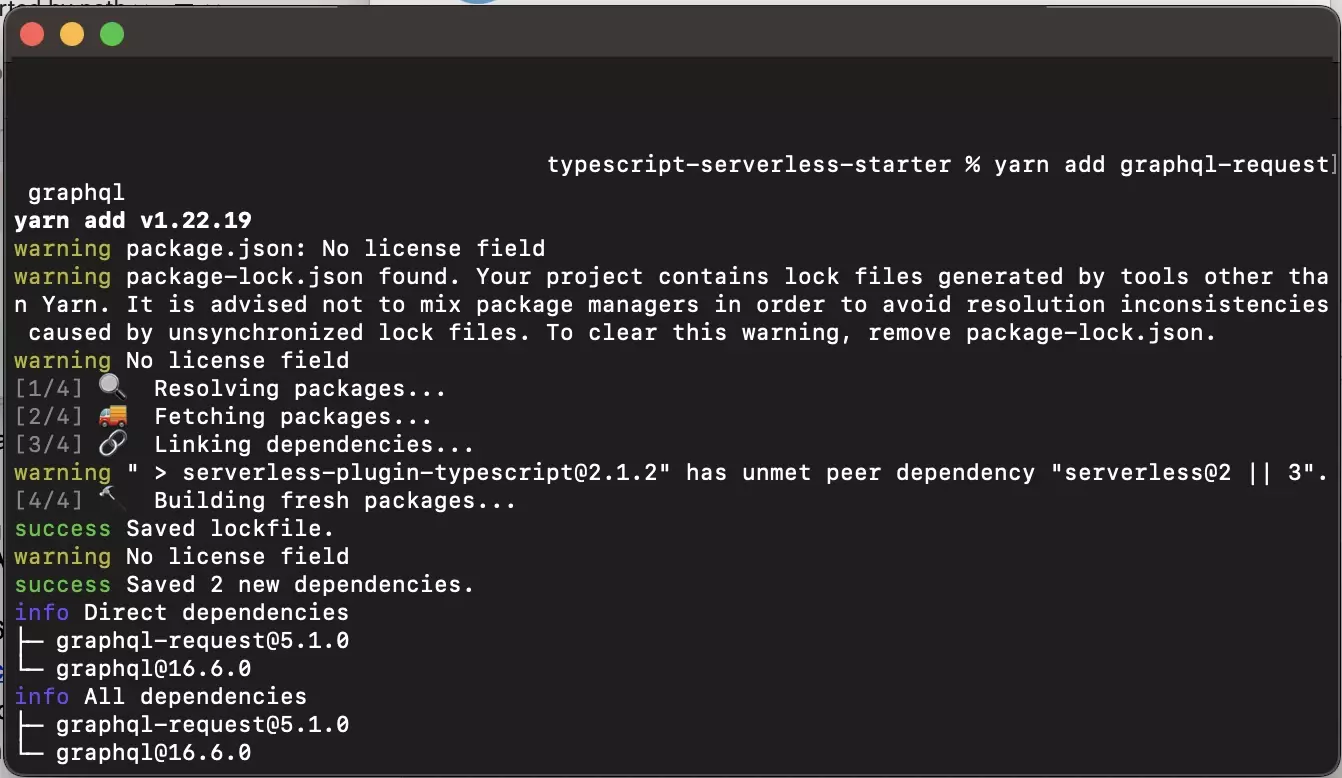
In Terminal, set the current directory to that of your Typescript & Serverless project, and add the graphql-request npm package by running the following line:
yarn add graphql-request graphqlStep Two: Complete the Serverless function
A | Import the package
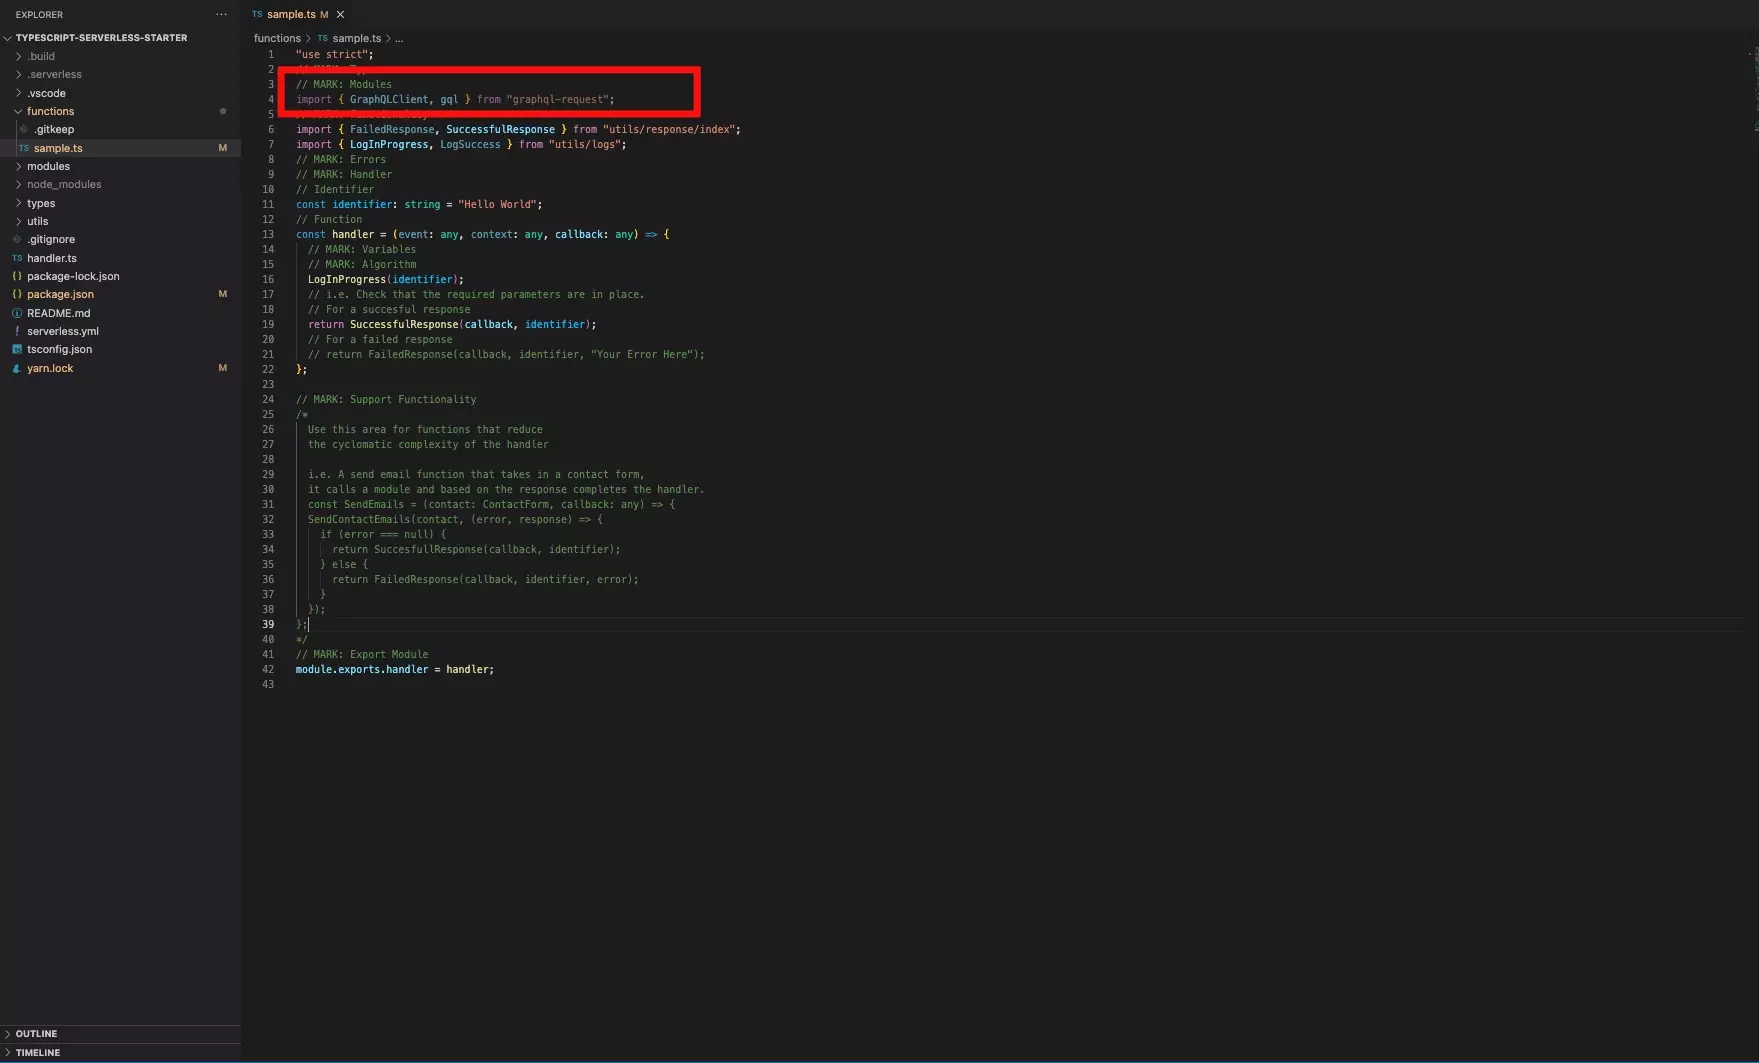
At the top of your Serverless function add the following line
import { GraphQLClient, gql } from "graphql-request";If you are new to Typescript, we recommend that you consult our recommended practices for creating structured Serverless Projects & functions, using the links below.
B | Make your Serverless function asynchronous
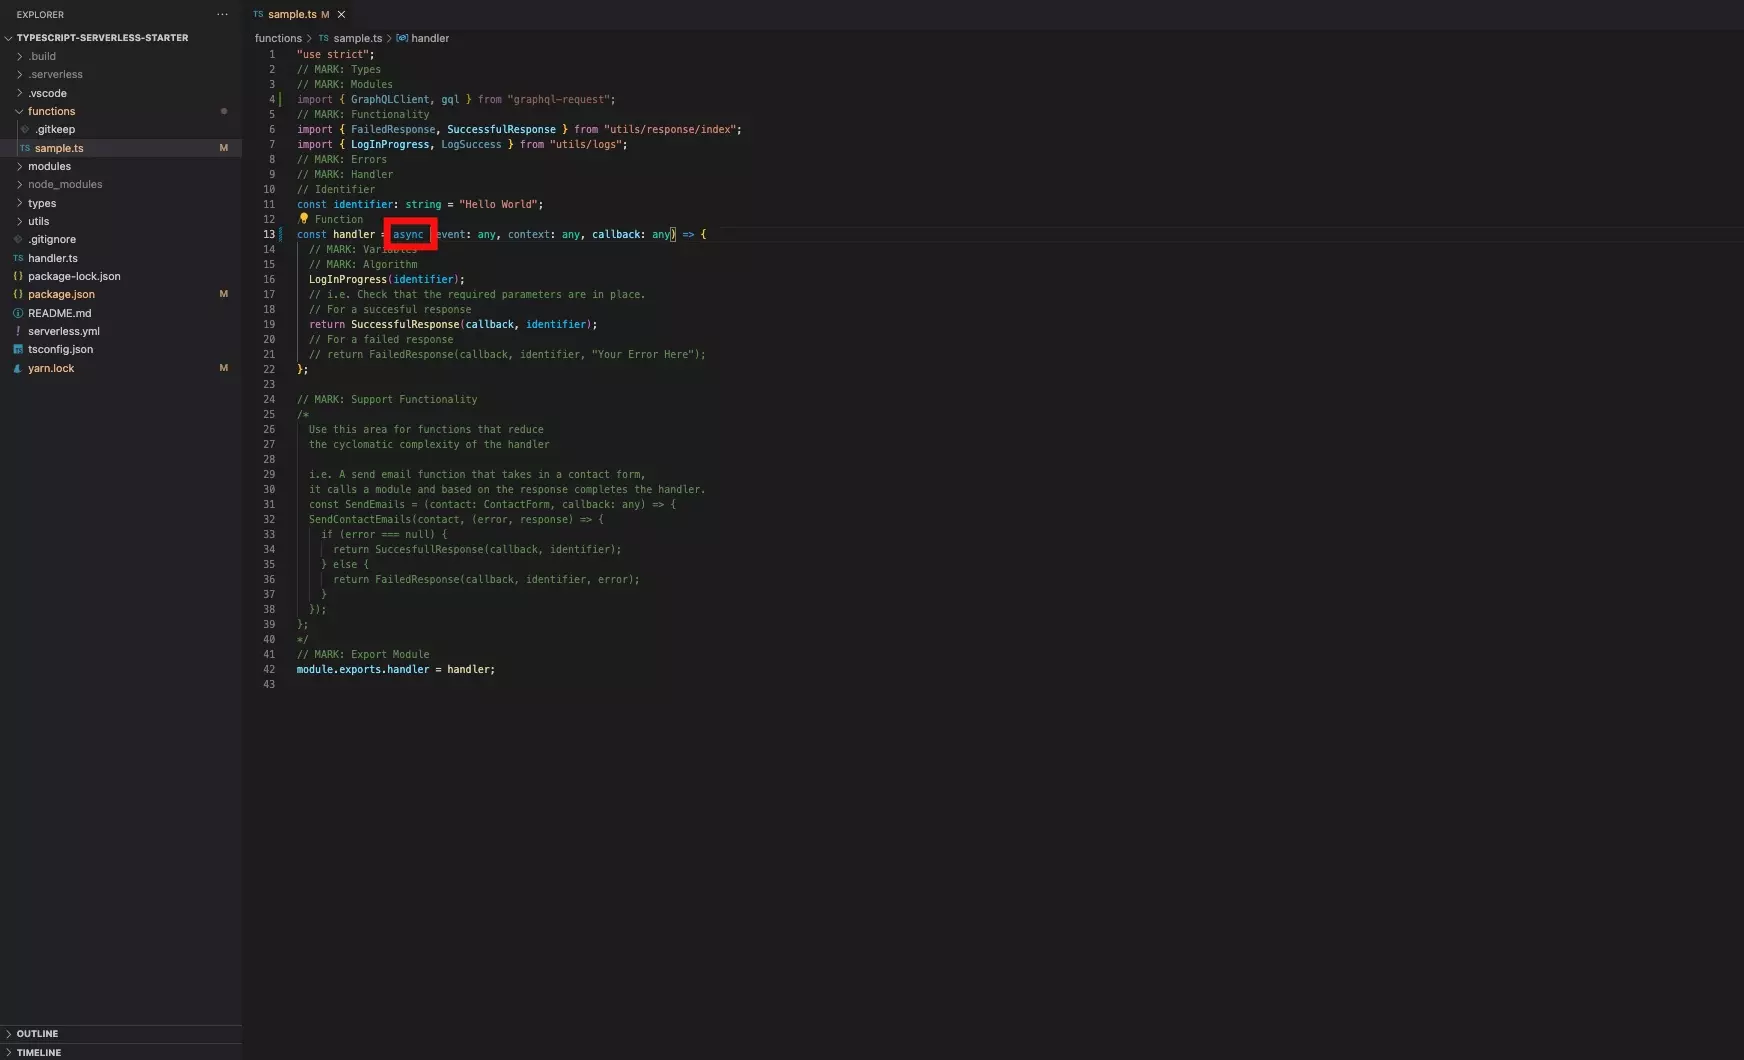
Add async to your function to make sure that it can work asynchronously, by using similar code to the one below:
const handler = async (event: any, context: any, callback: any) => {}C | Create a GraphQL client

In your Serverless function, setup a GraphQL client using code similar to the one below:
Please note that it is strongly advised that you use Environment variables for the endpoint and token.
D | Write your mutation
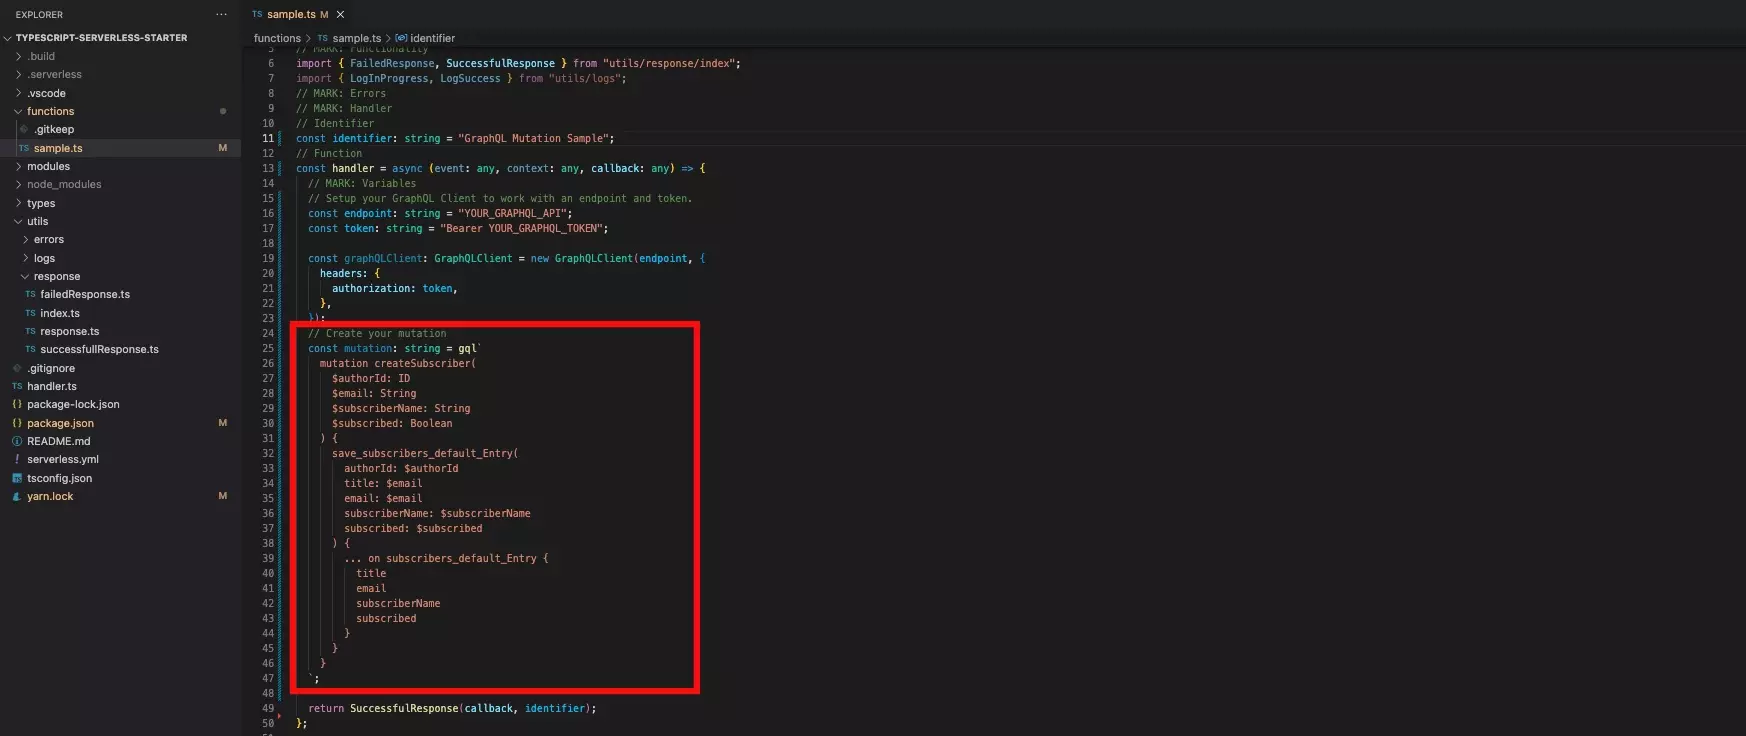
Using the GraphiQL, which can be accessed at YOUR_CRAFTCMS_URL.com/admin/graphiql, determine the mutation that you wish to create. For learning more about how mutations work, please consult the tutorials below for the relevant mutation.
In our case, it looks similar to the one below:
Implement this into your Serverless function using code similar to the one below:
E | Write the query variables
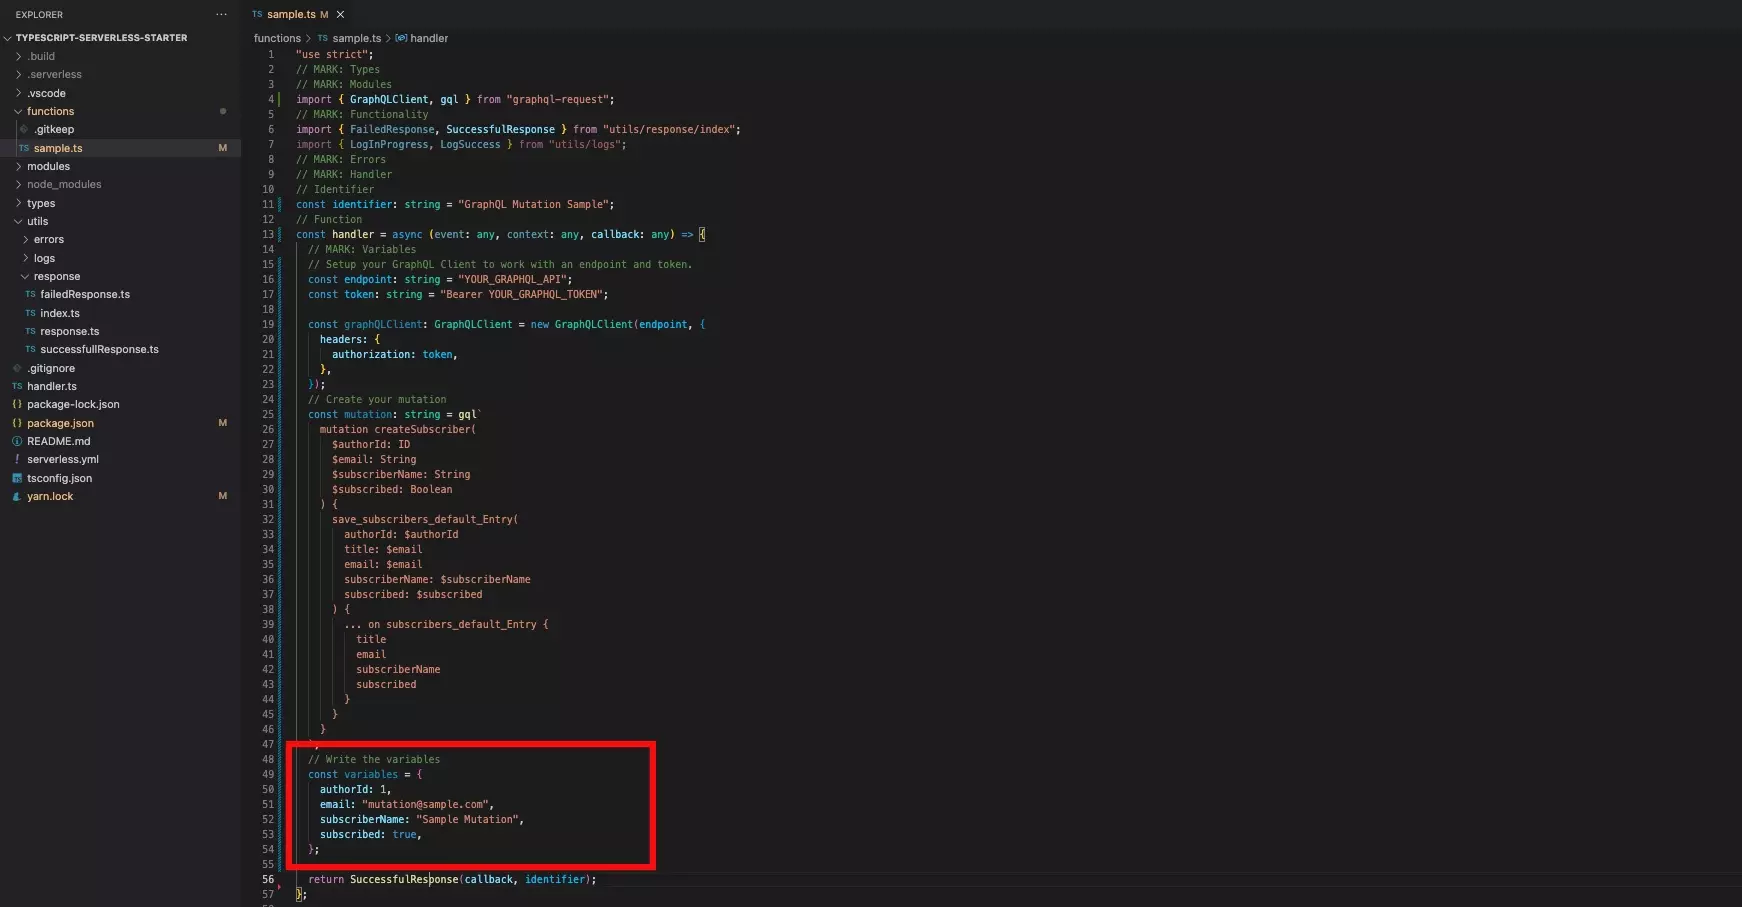
Below the mutation, write the variables that are required for the mutation to be carried out. These can be seen as the $ parameters that you wrote in your mutation query.
We have provided the sample code for our variables below.
For learning more about how mutations and GraphQL variables work, please consult the tutorials below for the relevant mutation.
F | Request and process the data
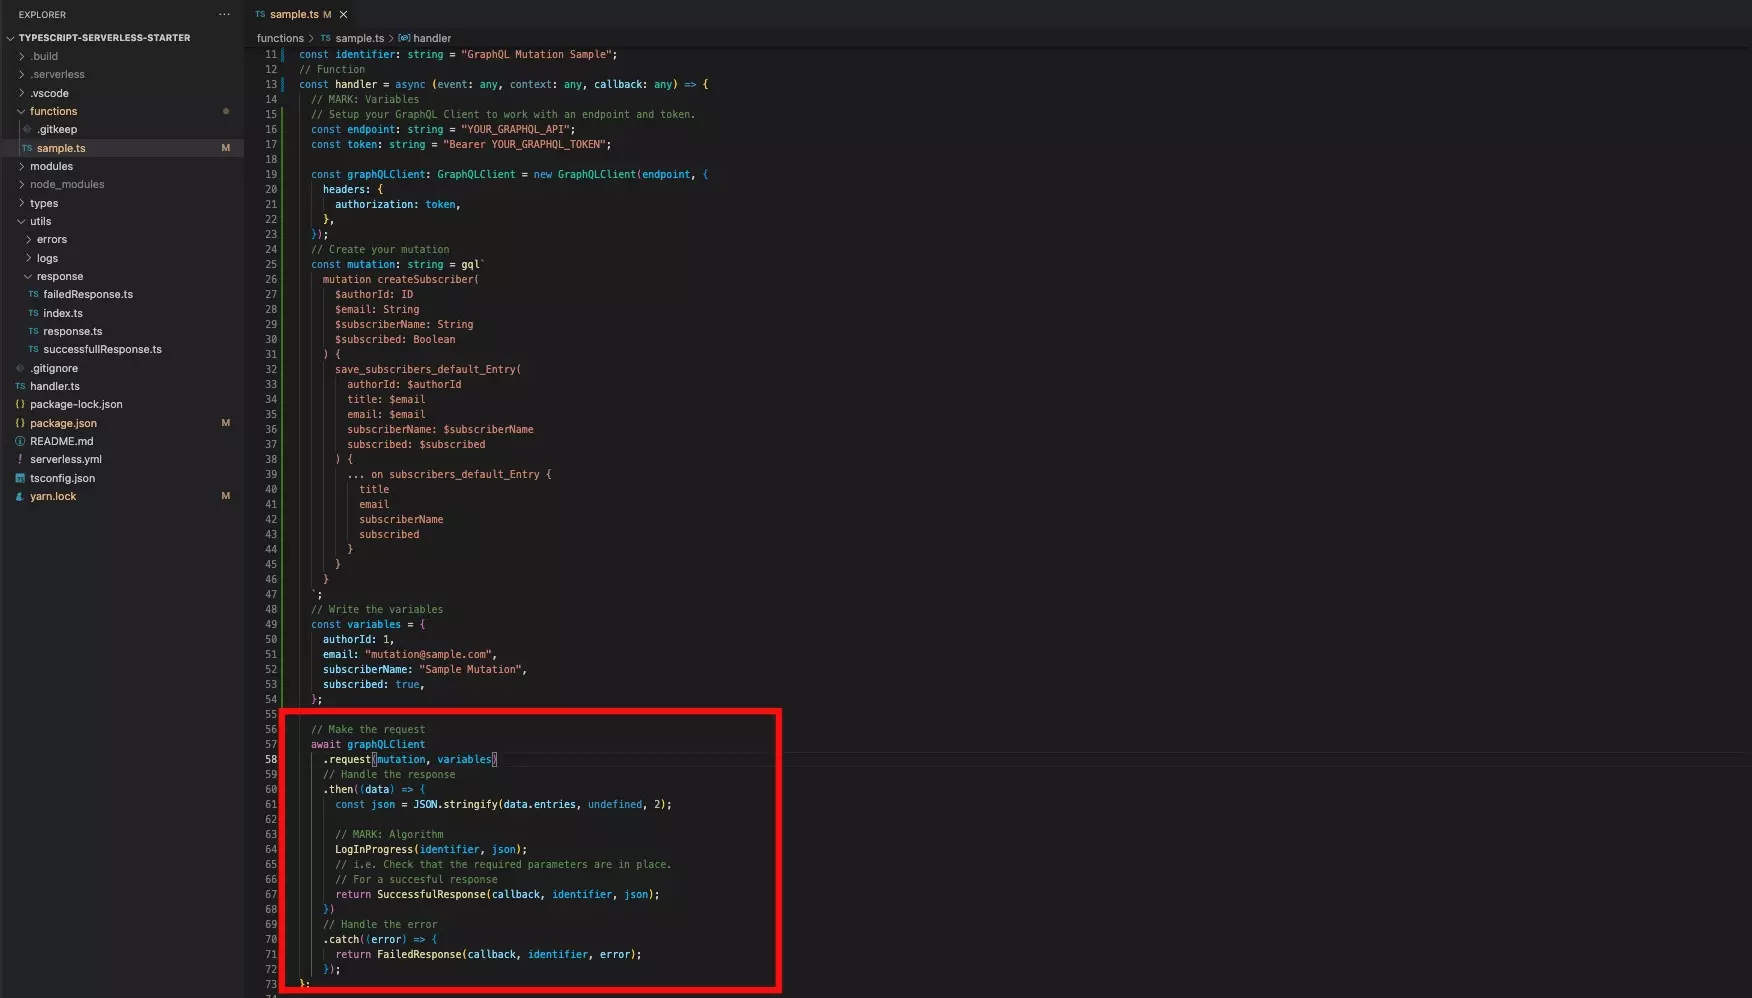
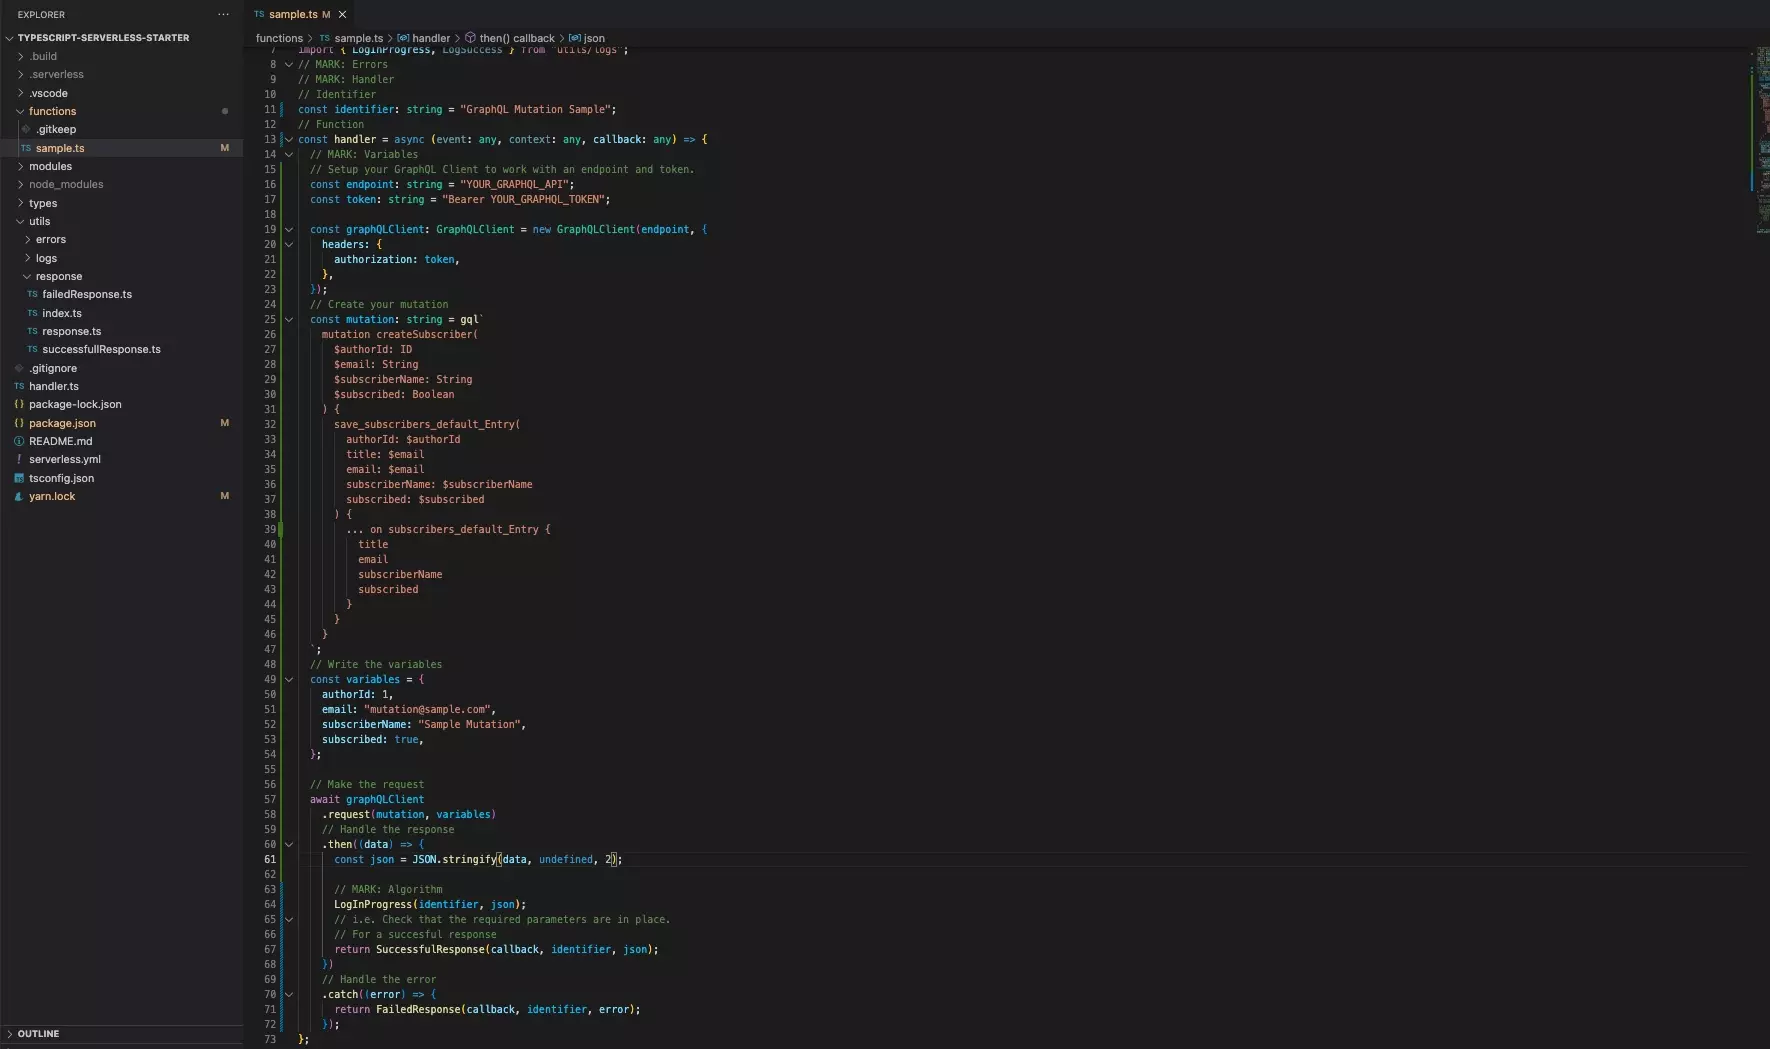
Using the GraphQL Client, request the query and process the response and error using code similar to the one below:
The sample code for the complete function can be found below.
Please note that we used our standardized response and log system as part of this final function.
Step Three: Test
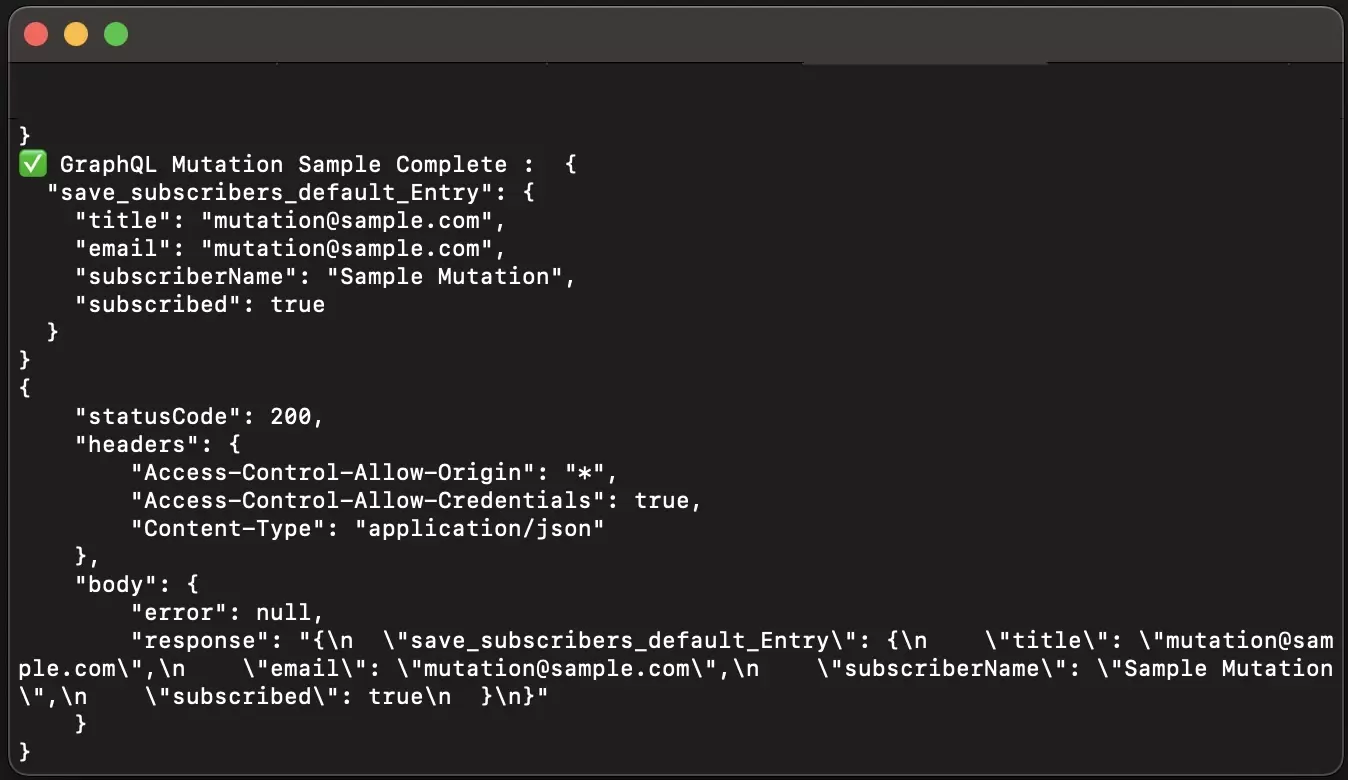
When possible, we strongly recommend testing your Serverless function locally by invoking it through the Terminal. If the function requires to be deployed for testing, we recommend deploying and testing a development stage before sending it out to production.
Any Questions?
We are actively looking for feedback on how to improve this resource. Please send us a note to inquiries@delasign.com with any thoughts or feedback you may have.