How to create a filtered search experience in Swift
A step by step tutorial on making a filtered search experience in Swift (iOS). Github repository included.

A step by step tutorial on making a filtered search experience in Swift (iOS). Github repository included.
SubscribeThe following tutorial walks you through how to filter through the data of a UICollectionView and present it to the user. It builds off our Swift Open Source starter project and starts on the tutorial/custom/searchbar branch with all relevant changes found on the tutorial/custom/filtered-search branch.
Please note that this tutorial builds of a series of tutorials listed below destined at creating a Swift starter project, setting it up for API calls, making a GraphQL API call and visualizing the results through a data driven UICollectionView.
Please note this tutorial uses the TinyConstraints Swift package, which we added using the Swift Package Manager.
Tutorial
Step One: Declare your filtered data variable
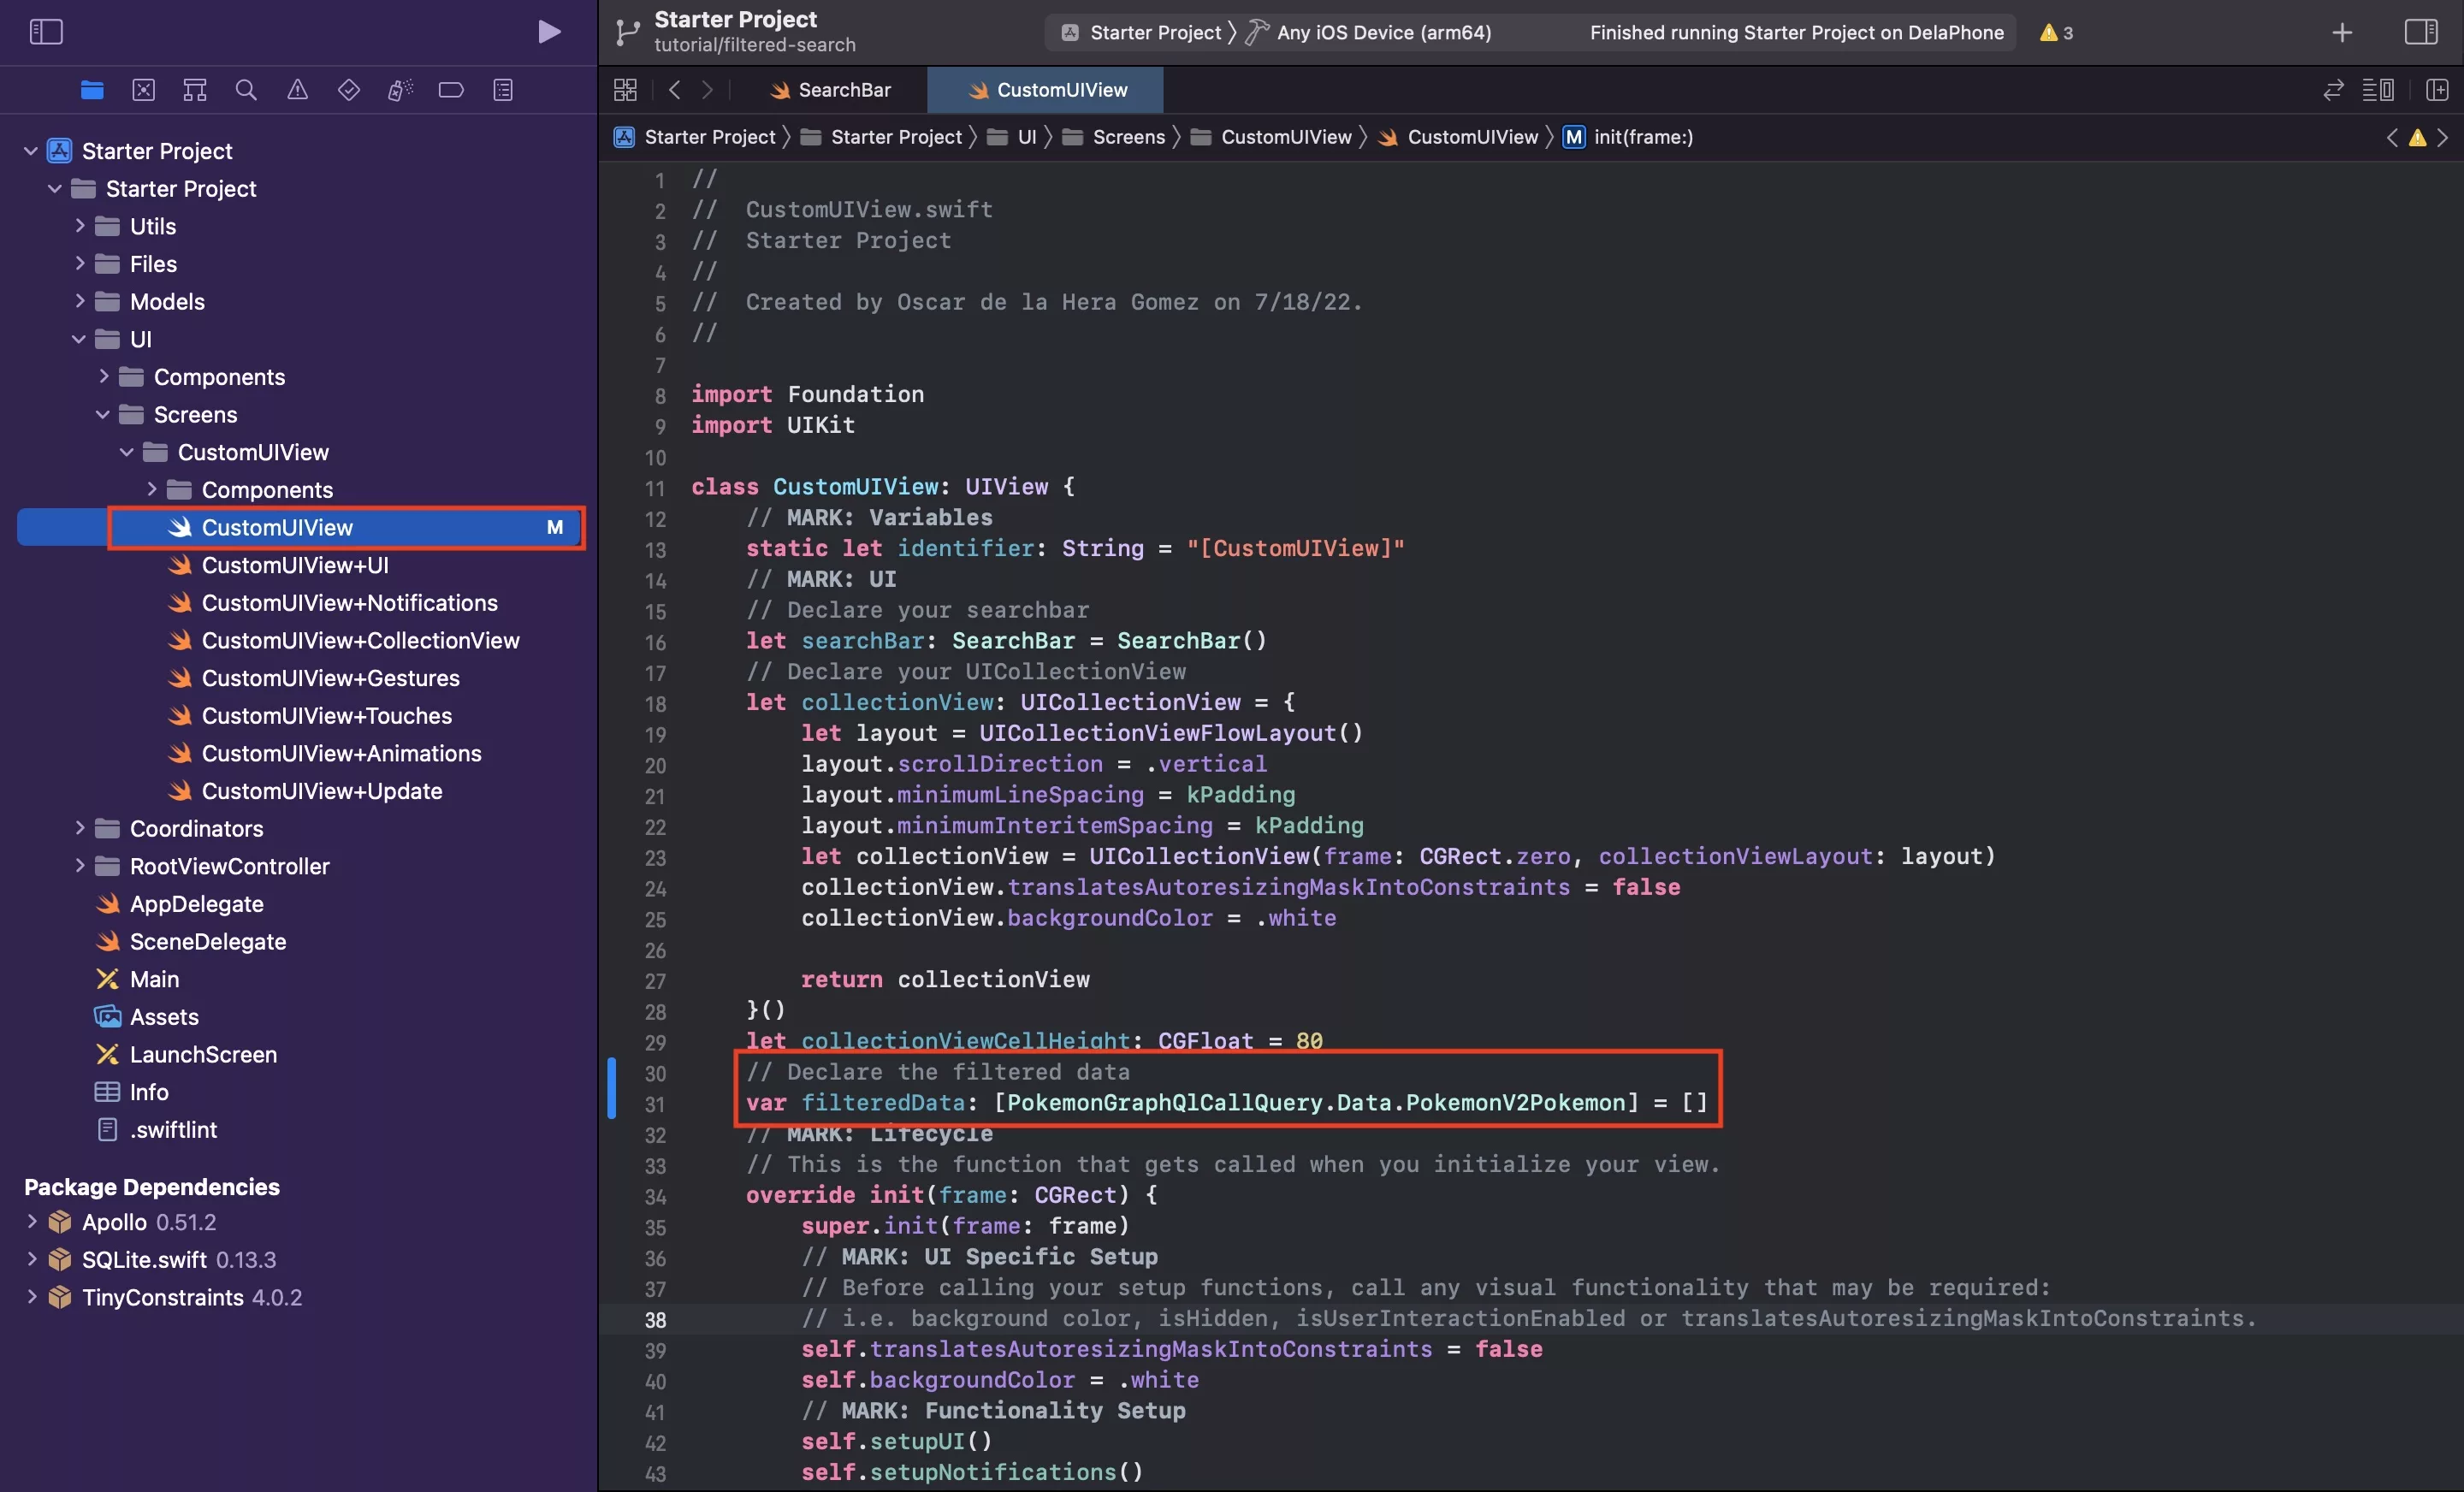
In CustomUIView.swift, declare your filtered data variable.
Please note that you are now required to import the API generated by the GraphQL and that the schema has changed since the original writing of this post.
This is reflected by the code provided in the repo.
Step Two: Alter UICollectionView dataset based on state
The following step is aims to alter the data that's offered by the collection view depending on the search query. For this, we must alter the number of items offered and the data that is shown by the UICollectionView.
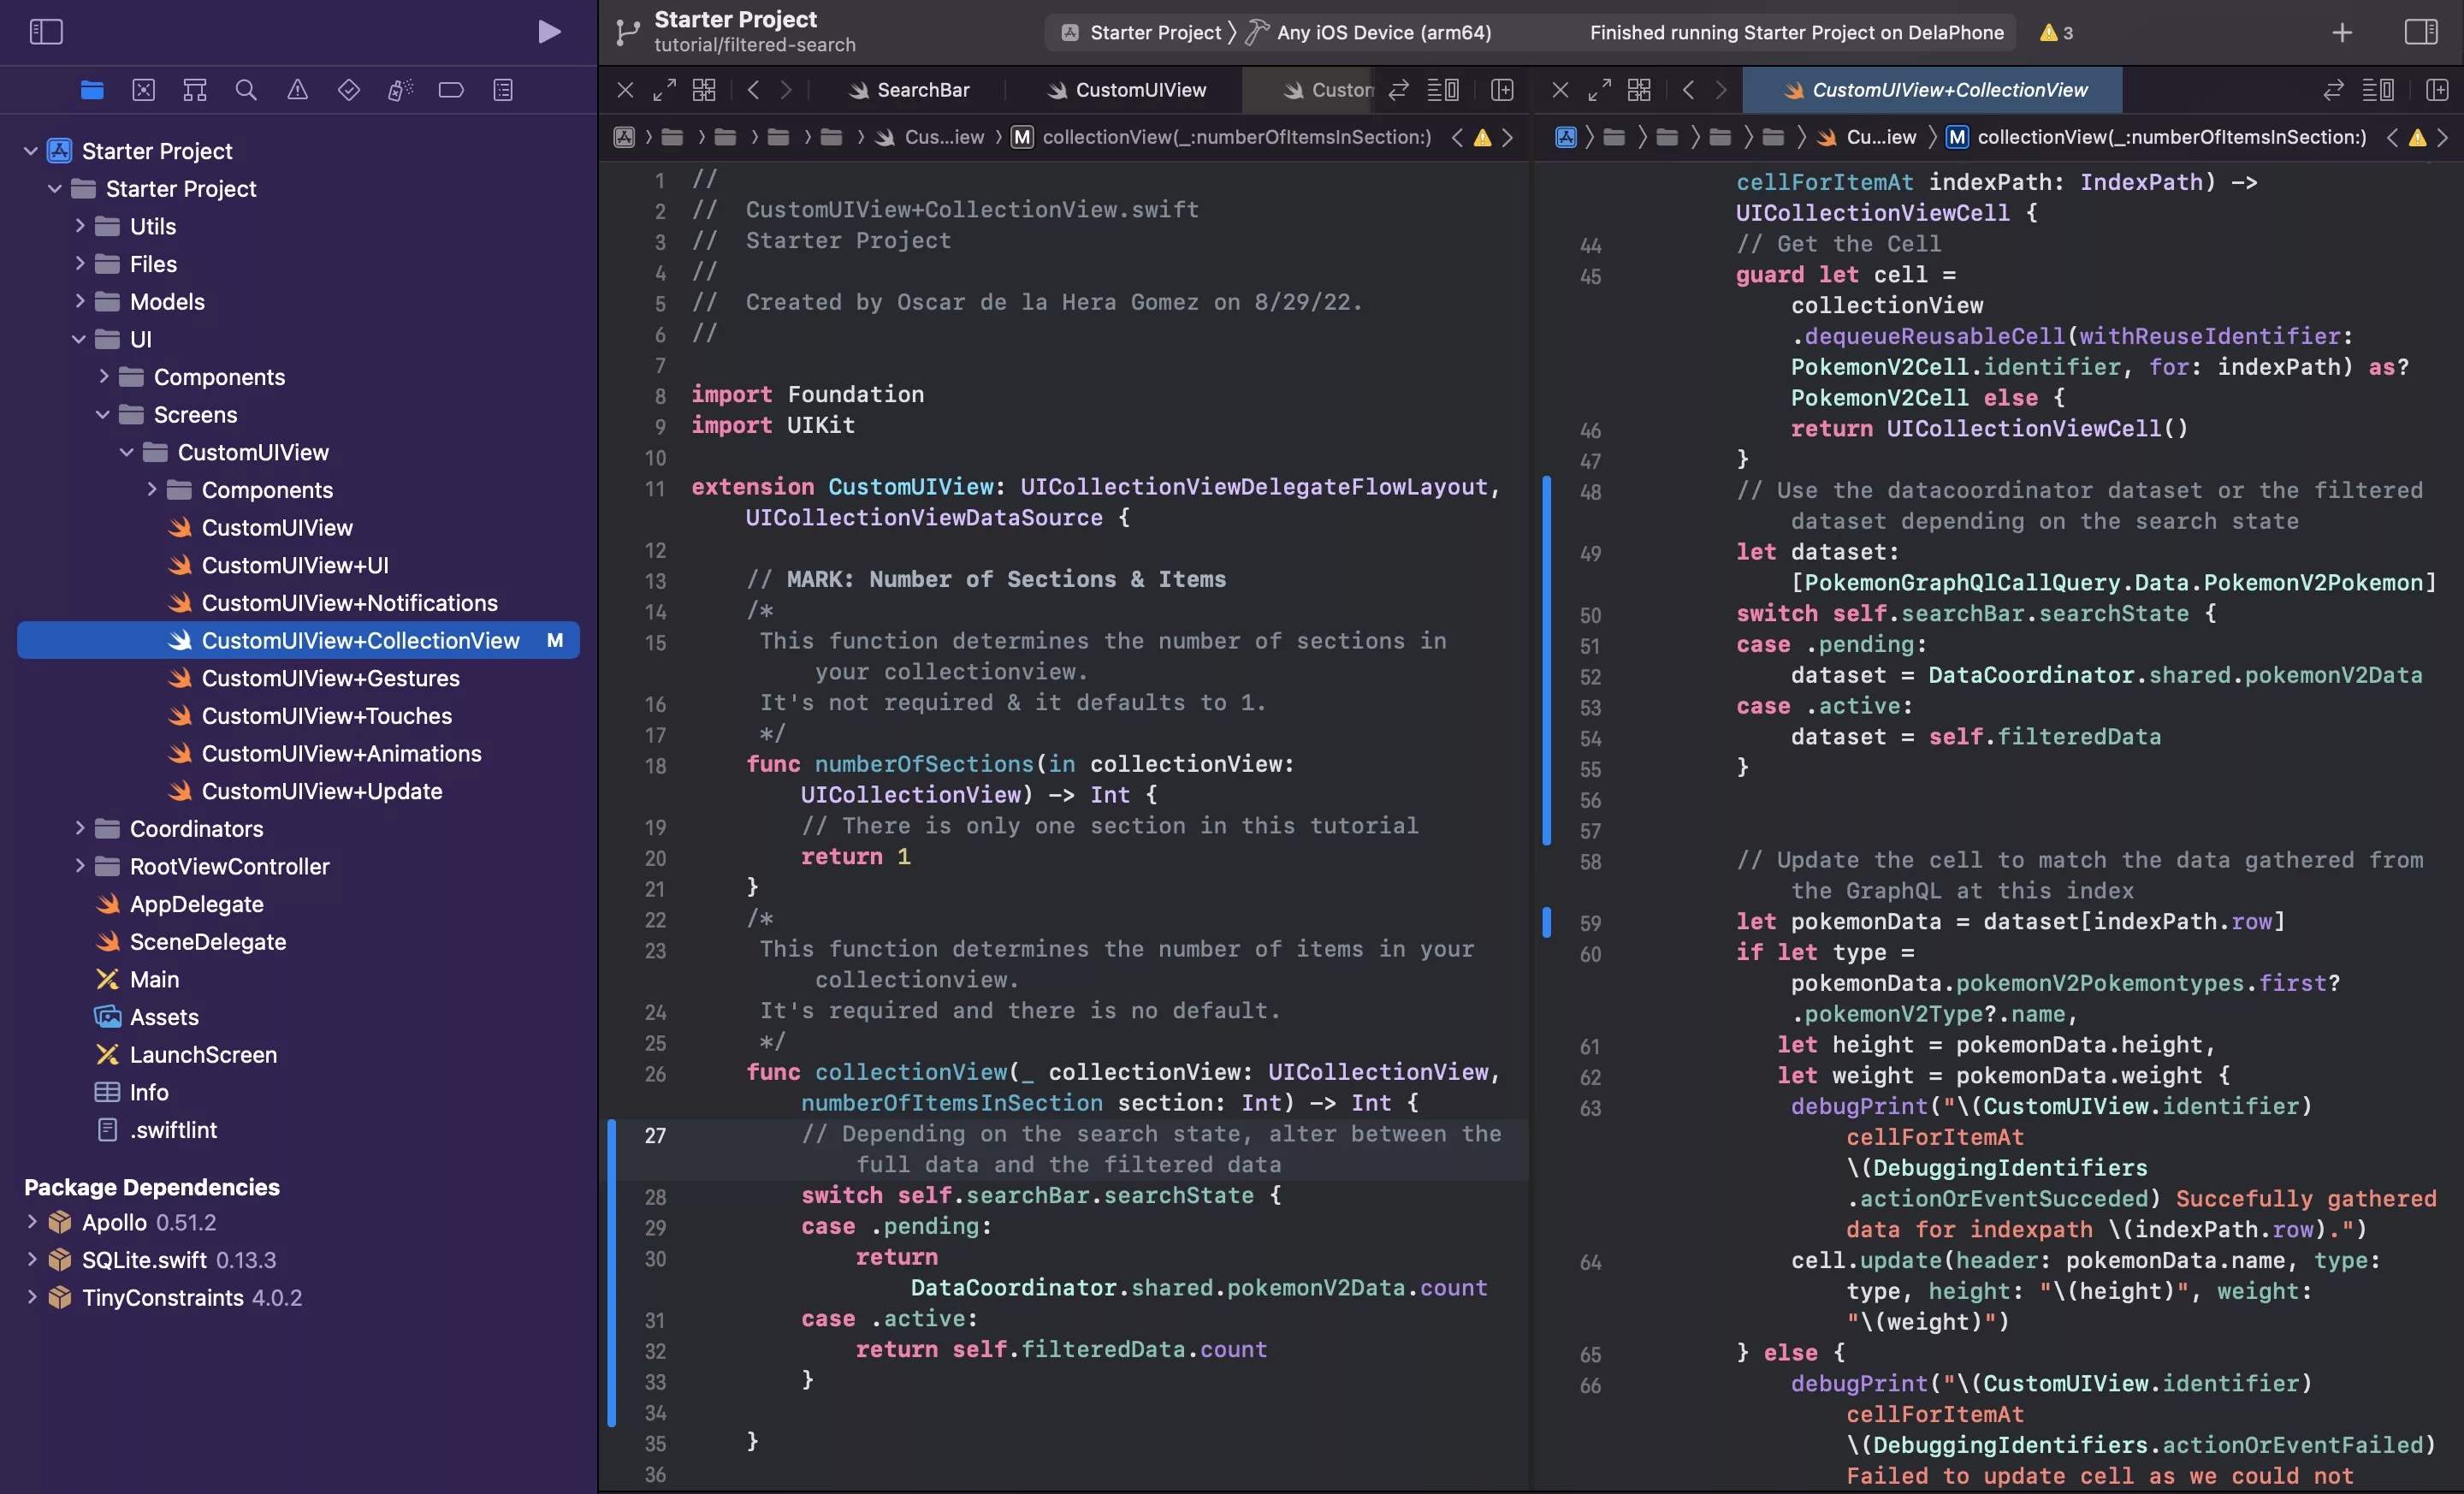
A | Alter the number of items
In CustomUIView+CollectionView.swift, alter the number of items offered by the UICollectionview depending on the search state.
This can be found on line 26 in the collectionView(_ collectionView: UICollectionView, numberOfItemsInSection section: Int) -> Int function.
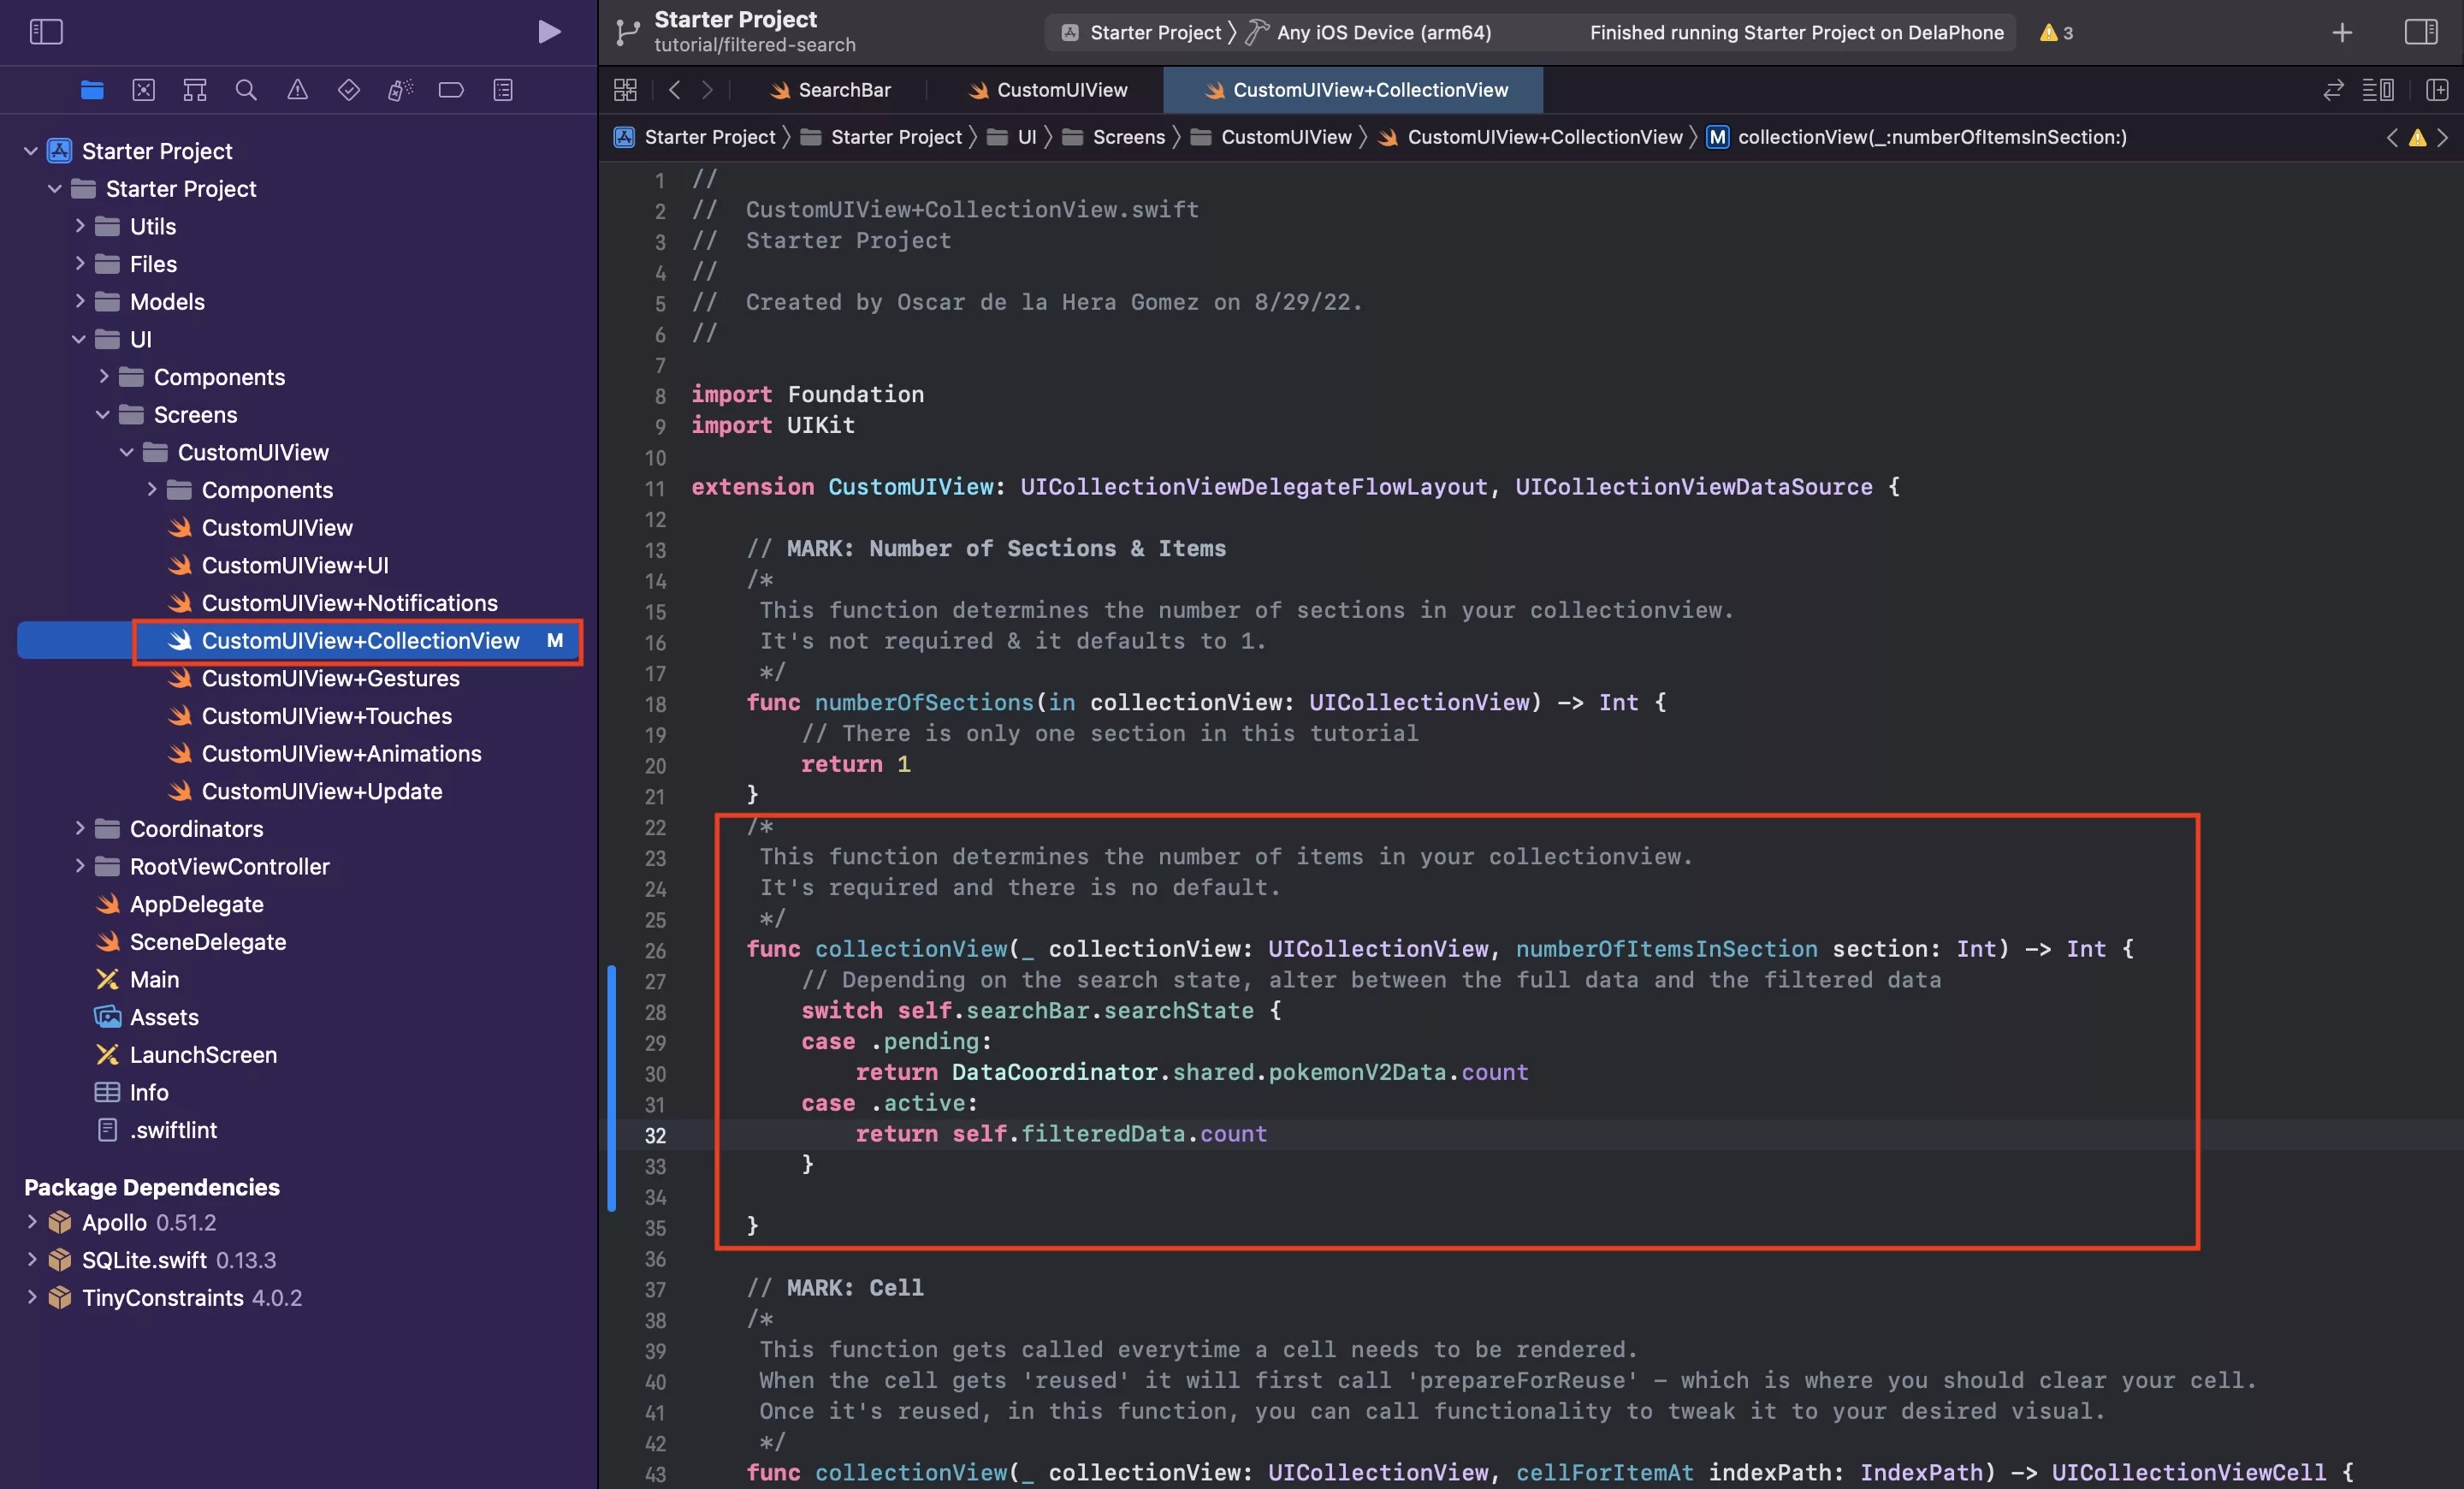
B | Alter the data that is displayed
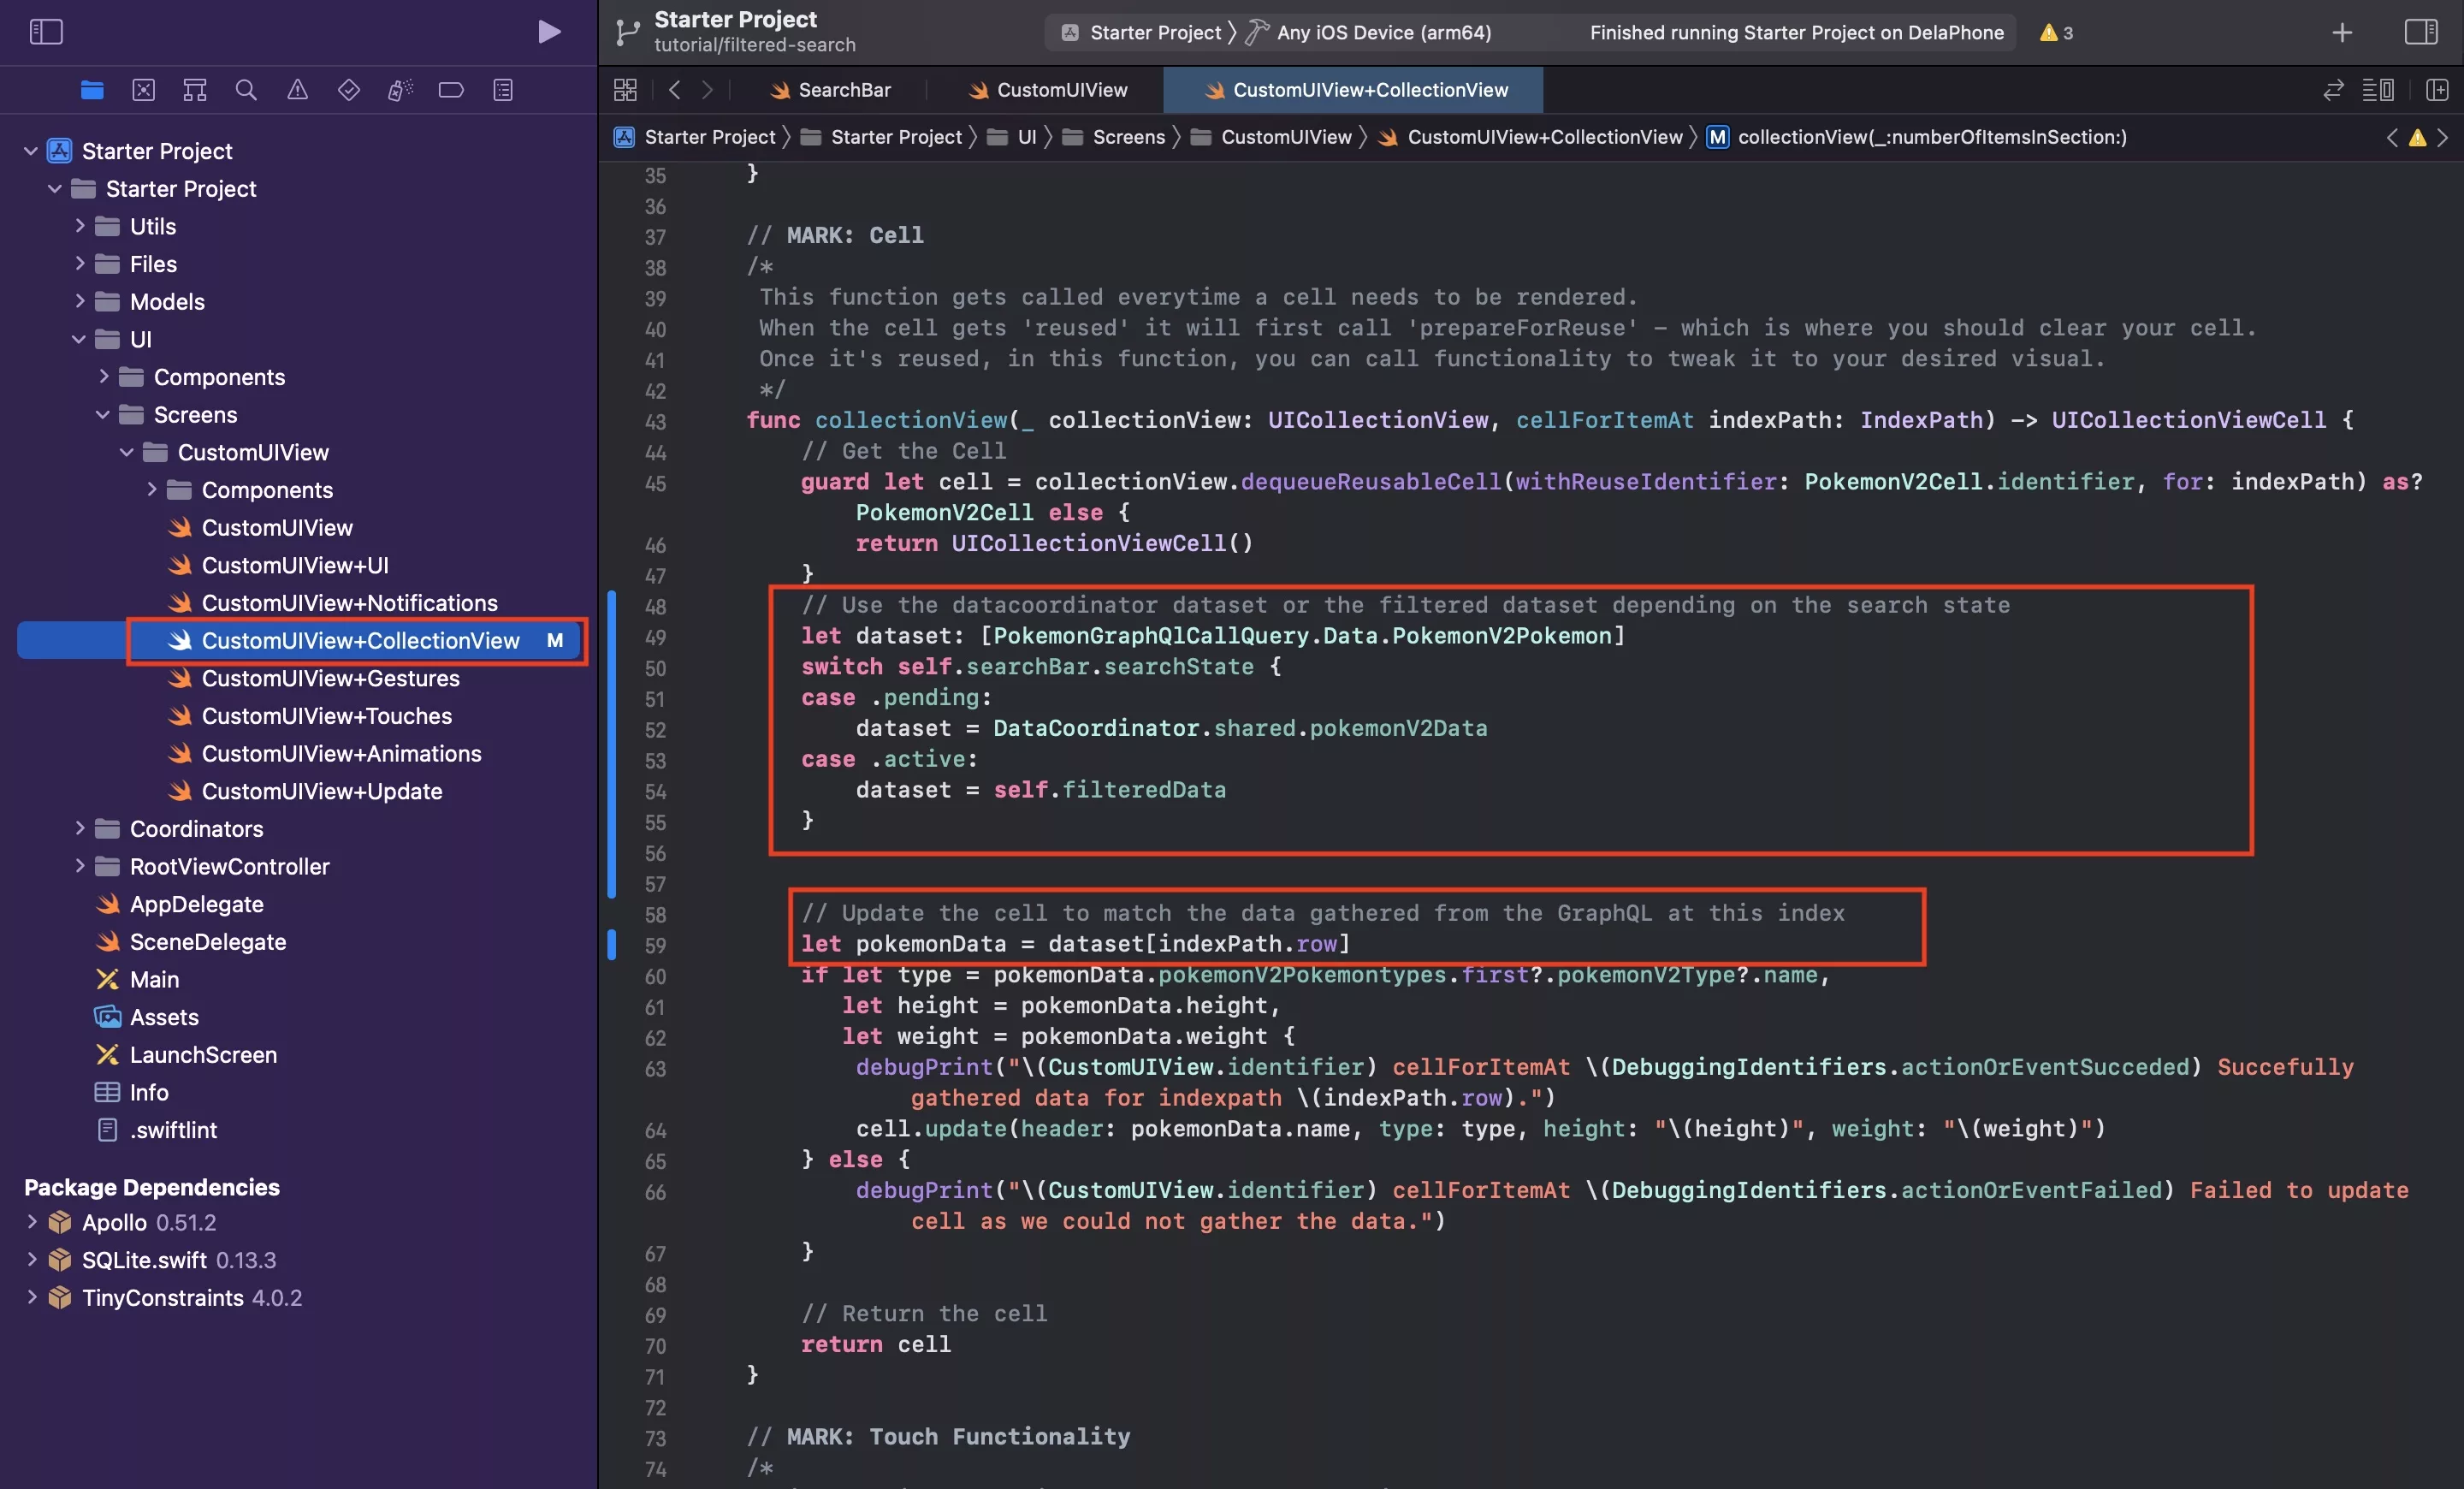
In CustomUIView+CollectionView.swift, alter the data offered by the UICollectionview depending on the search state.
This can be found on line 43 in the func collectionView(_ collectionView: UICollectionView, cellForItemAt indexPath: IndexPath) -> UICollectionViewCell function.
The complete code can be found below.
Step Three: Create the filtered search algorithm
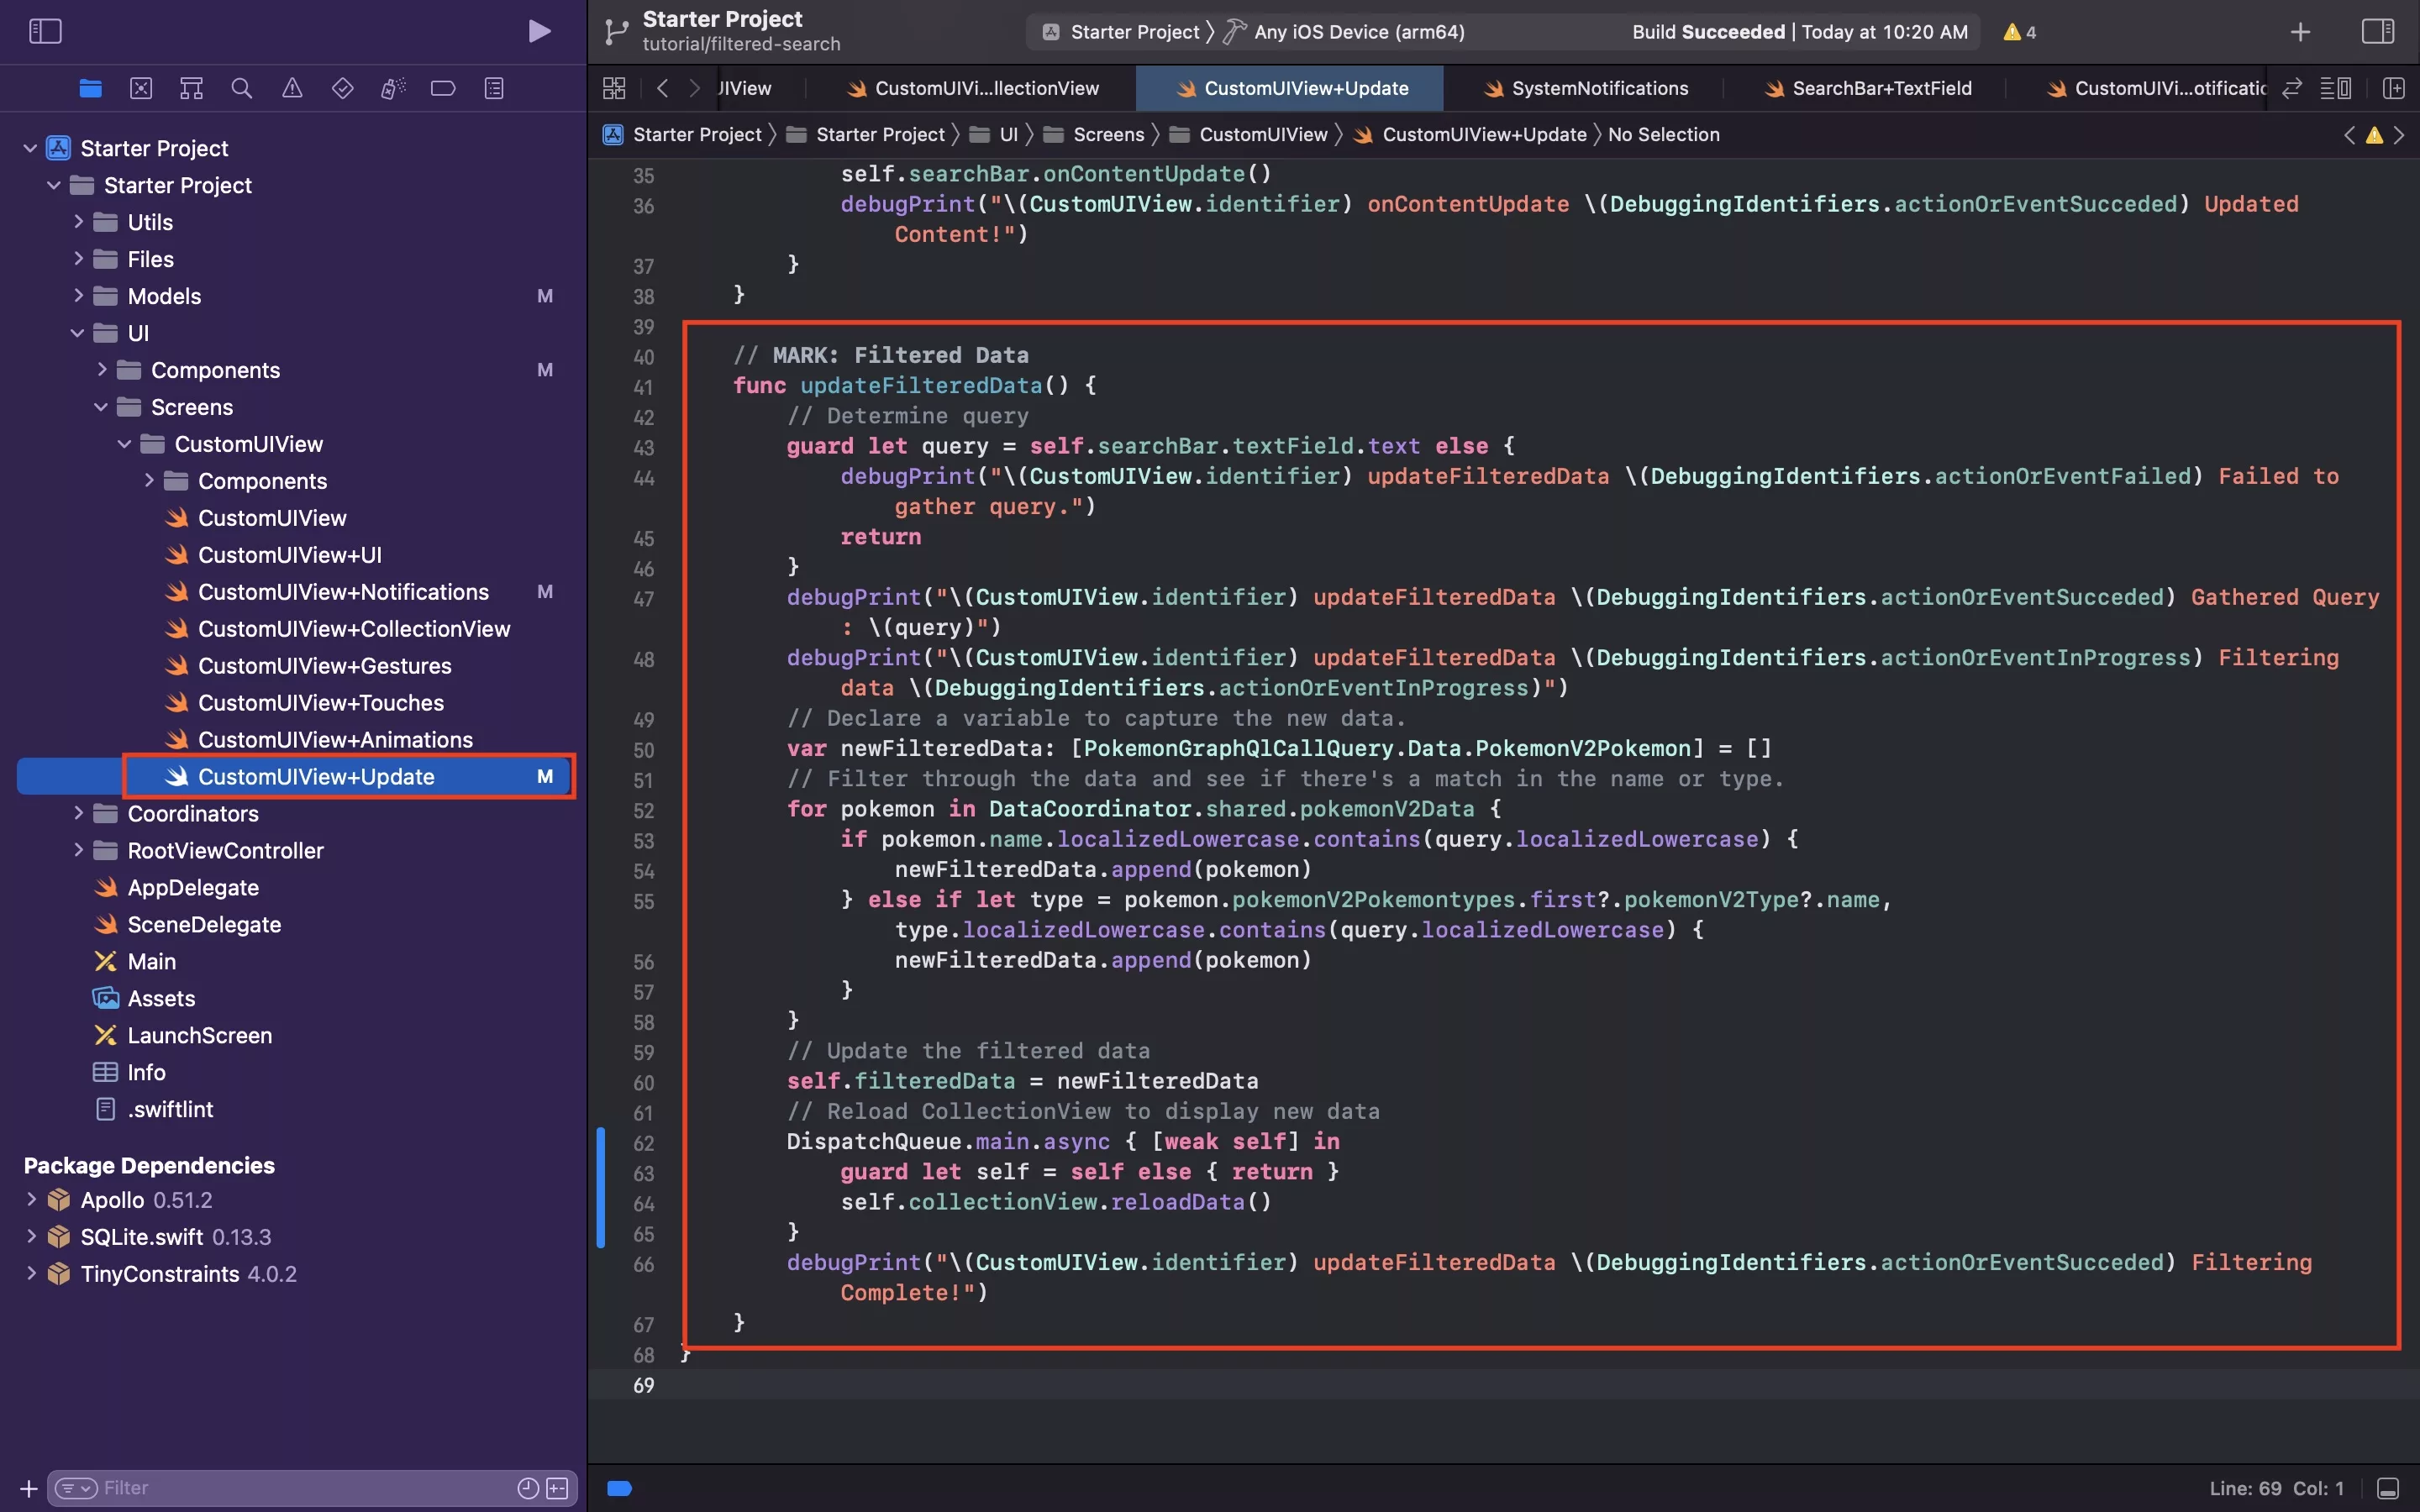
In the CustomUIView+Update.swift file, add a new function for your filtered data. We have made our complete extension available below.
Step Four: Create, send & receive the search query was update notification
The following step aims to create a notification whose purpose is to let the system know that the search query was updated. We then send it, when the search text is updated and use it to process the new filter - via the function created in the previous step.
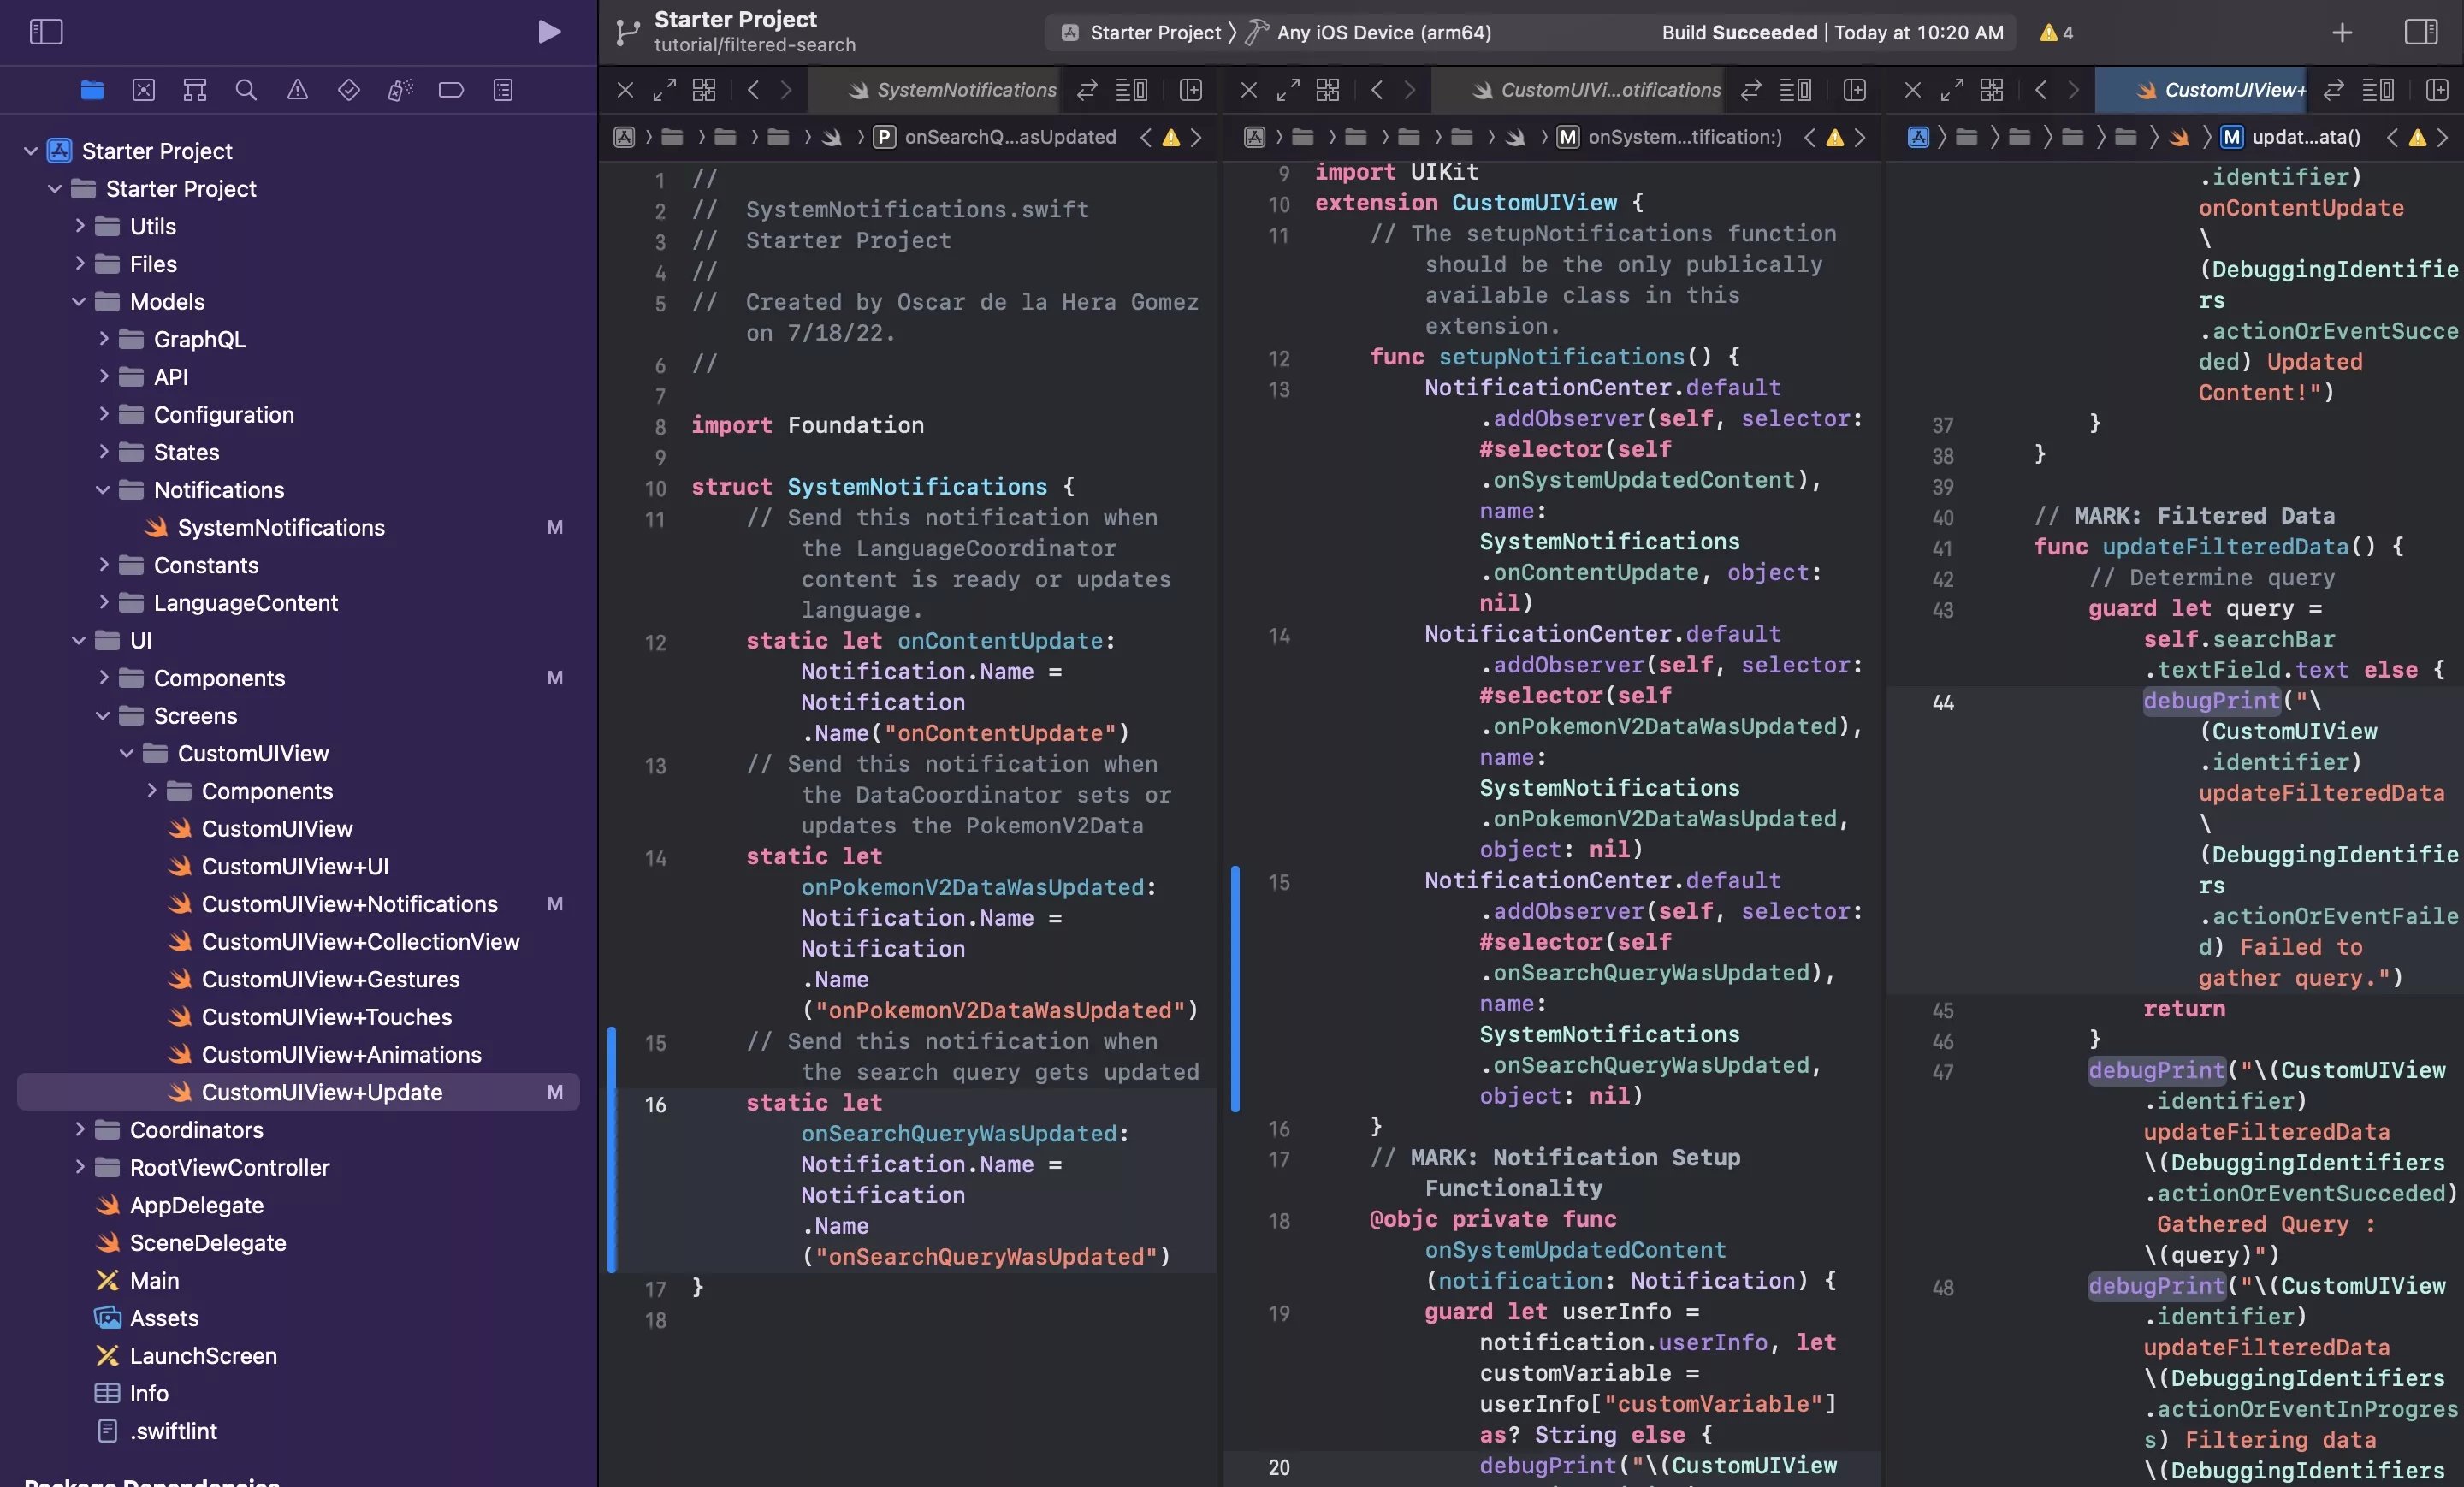
A | Create the notification
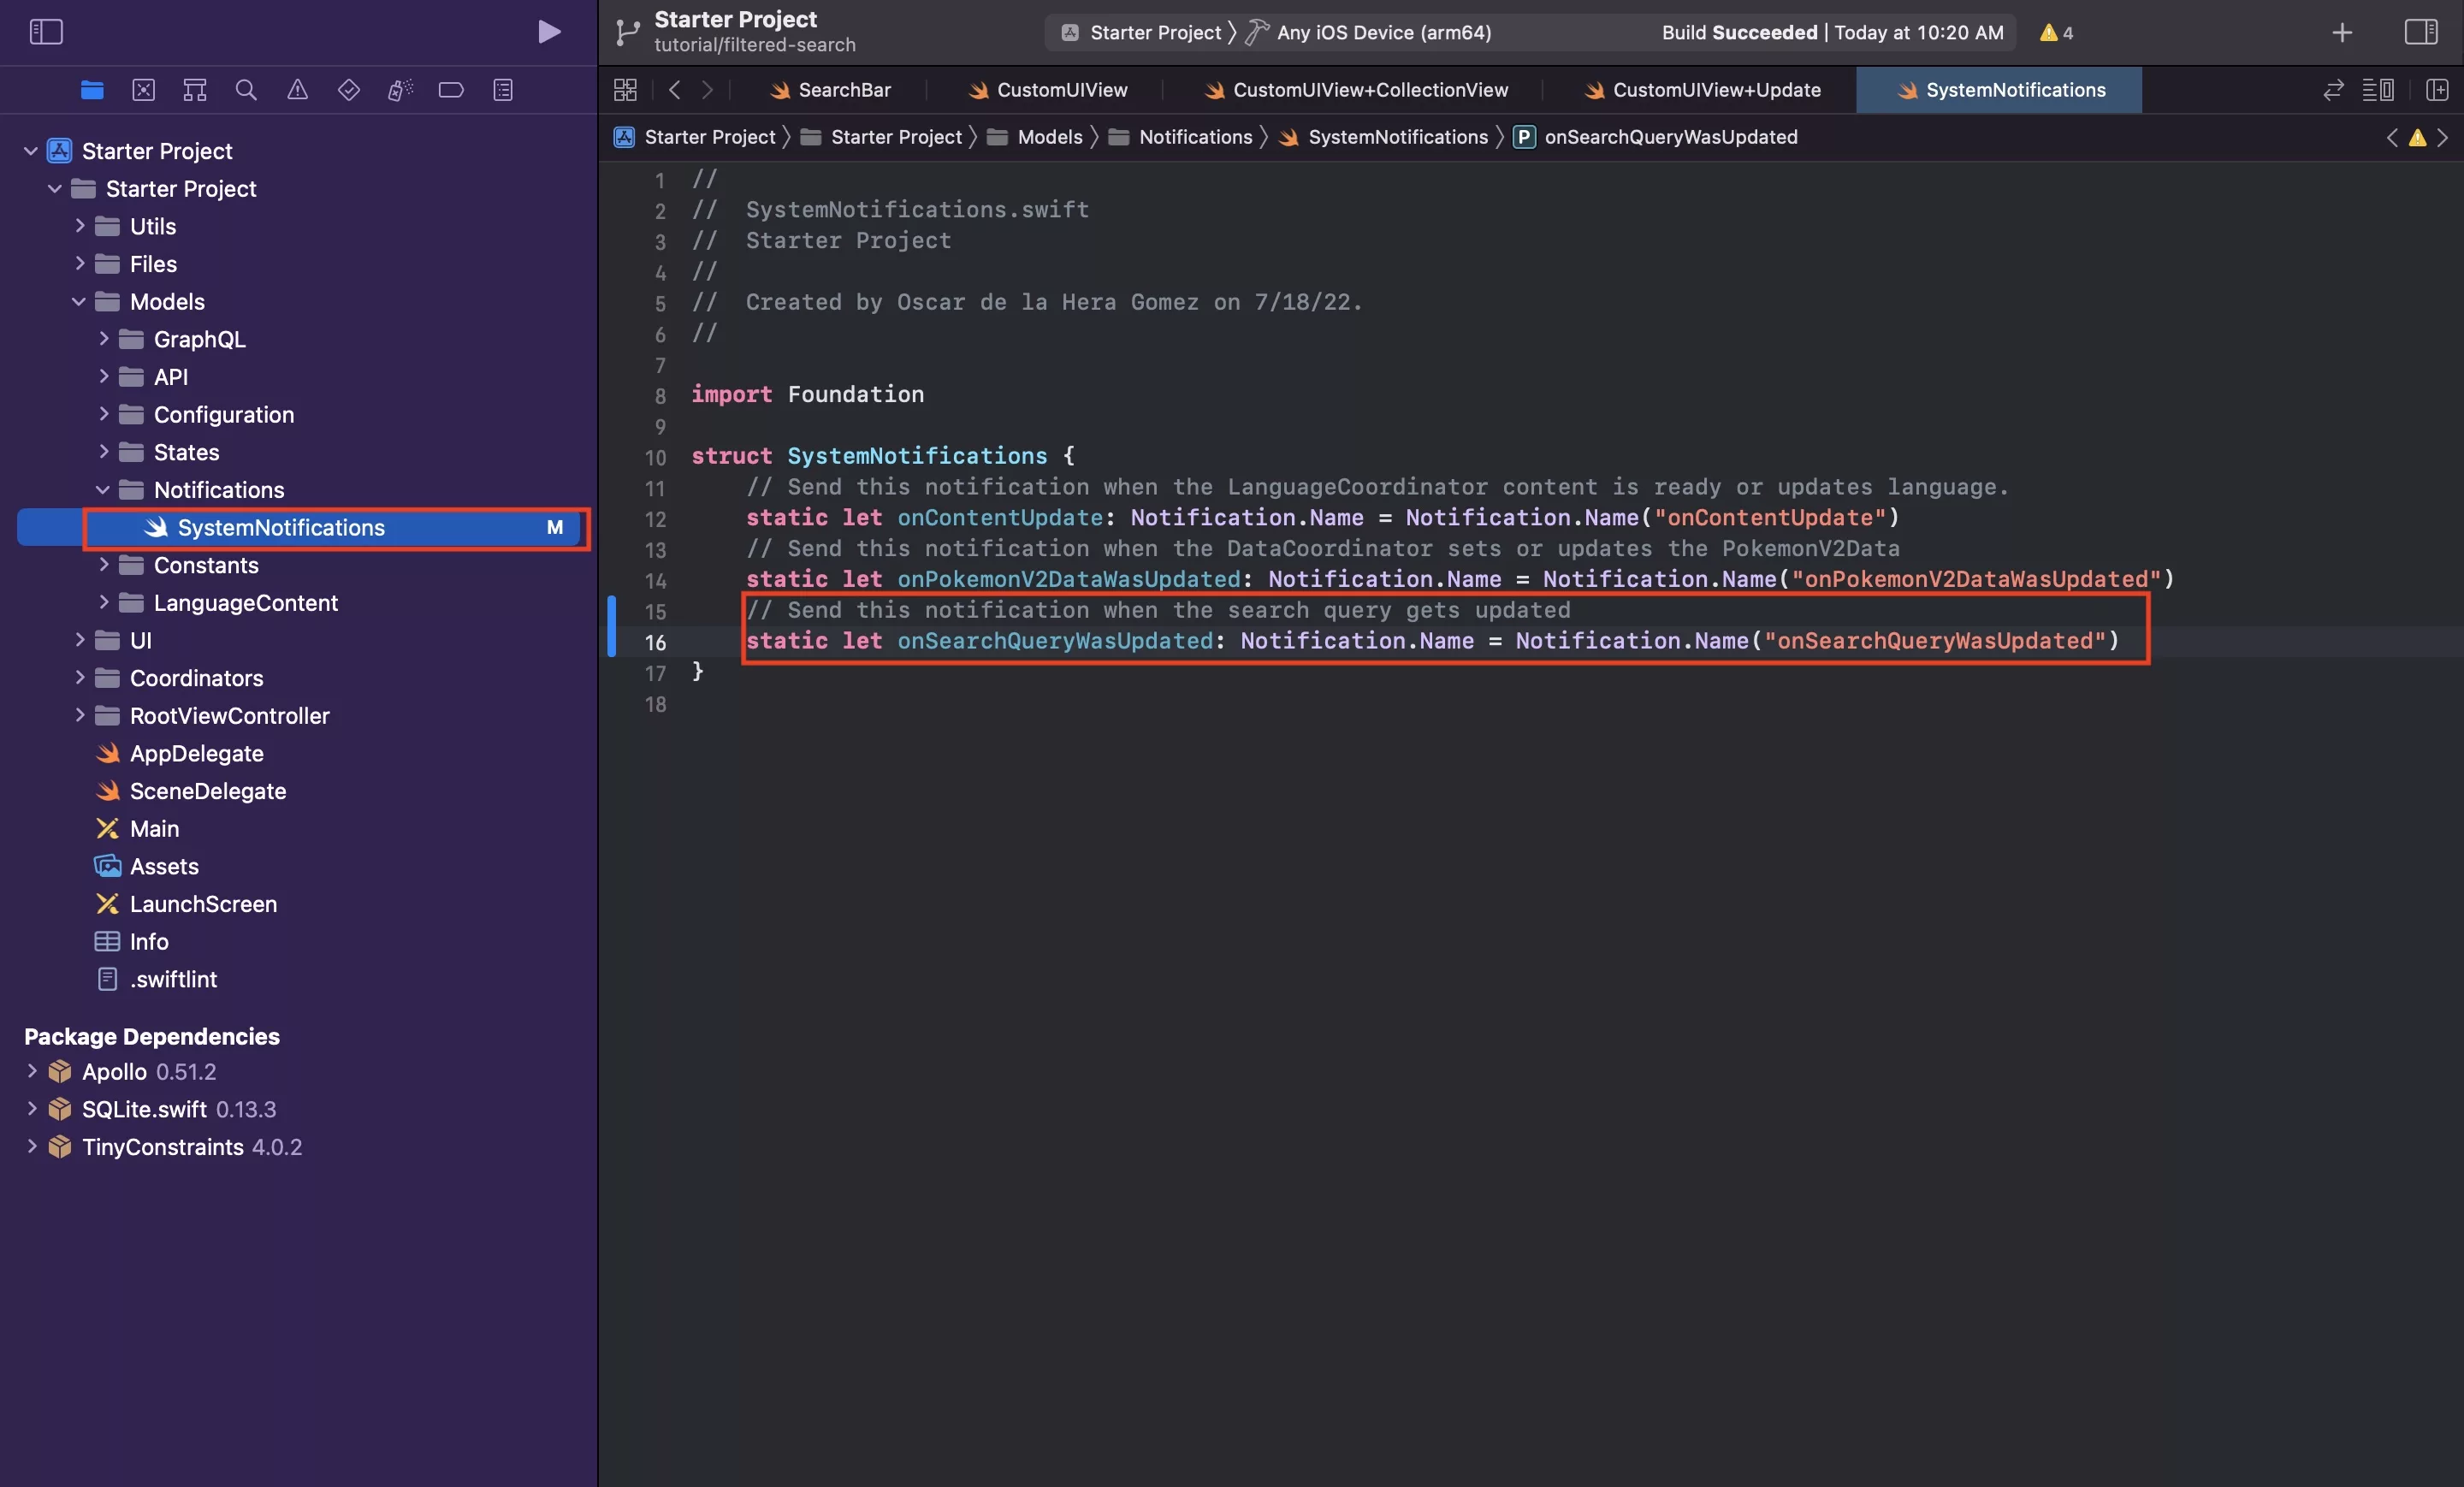
In SystemNotifications.swift, create a new notification called onSearchQueryWasUpdated.
B | Send the notification
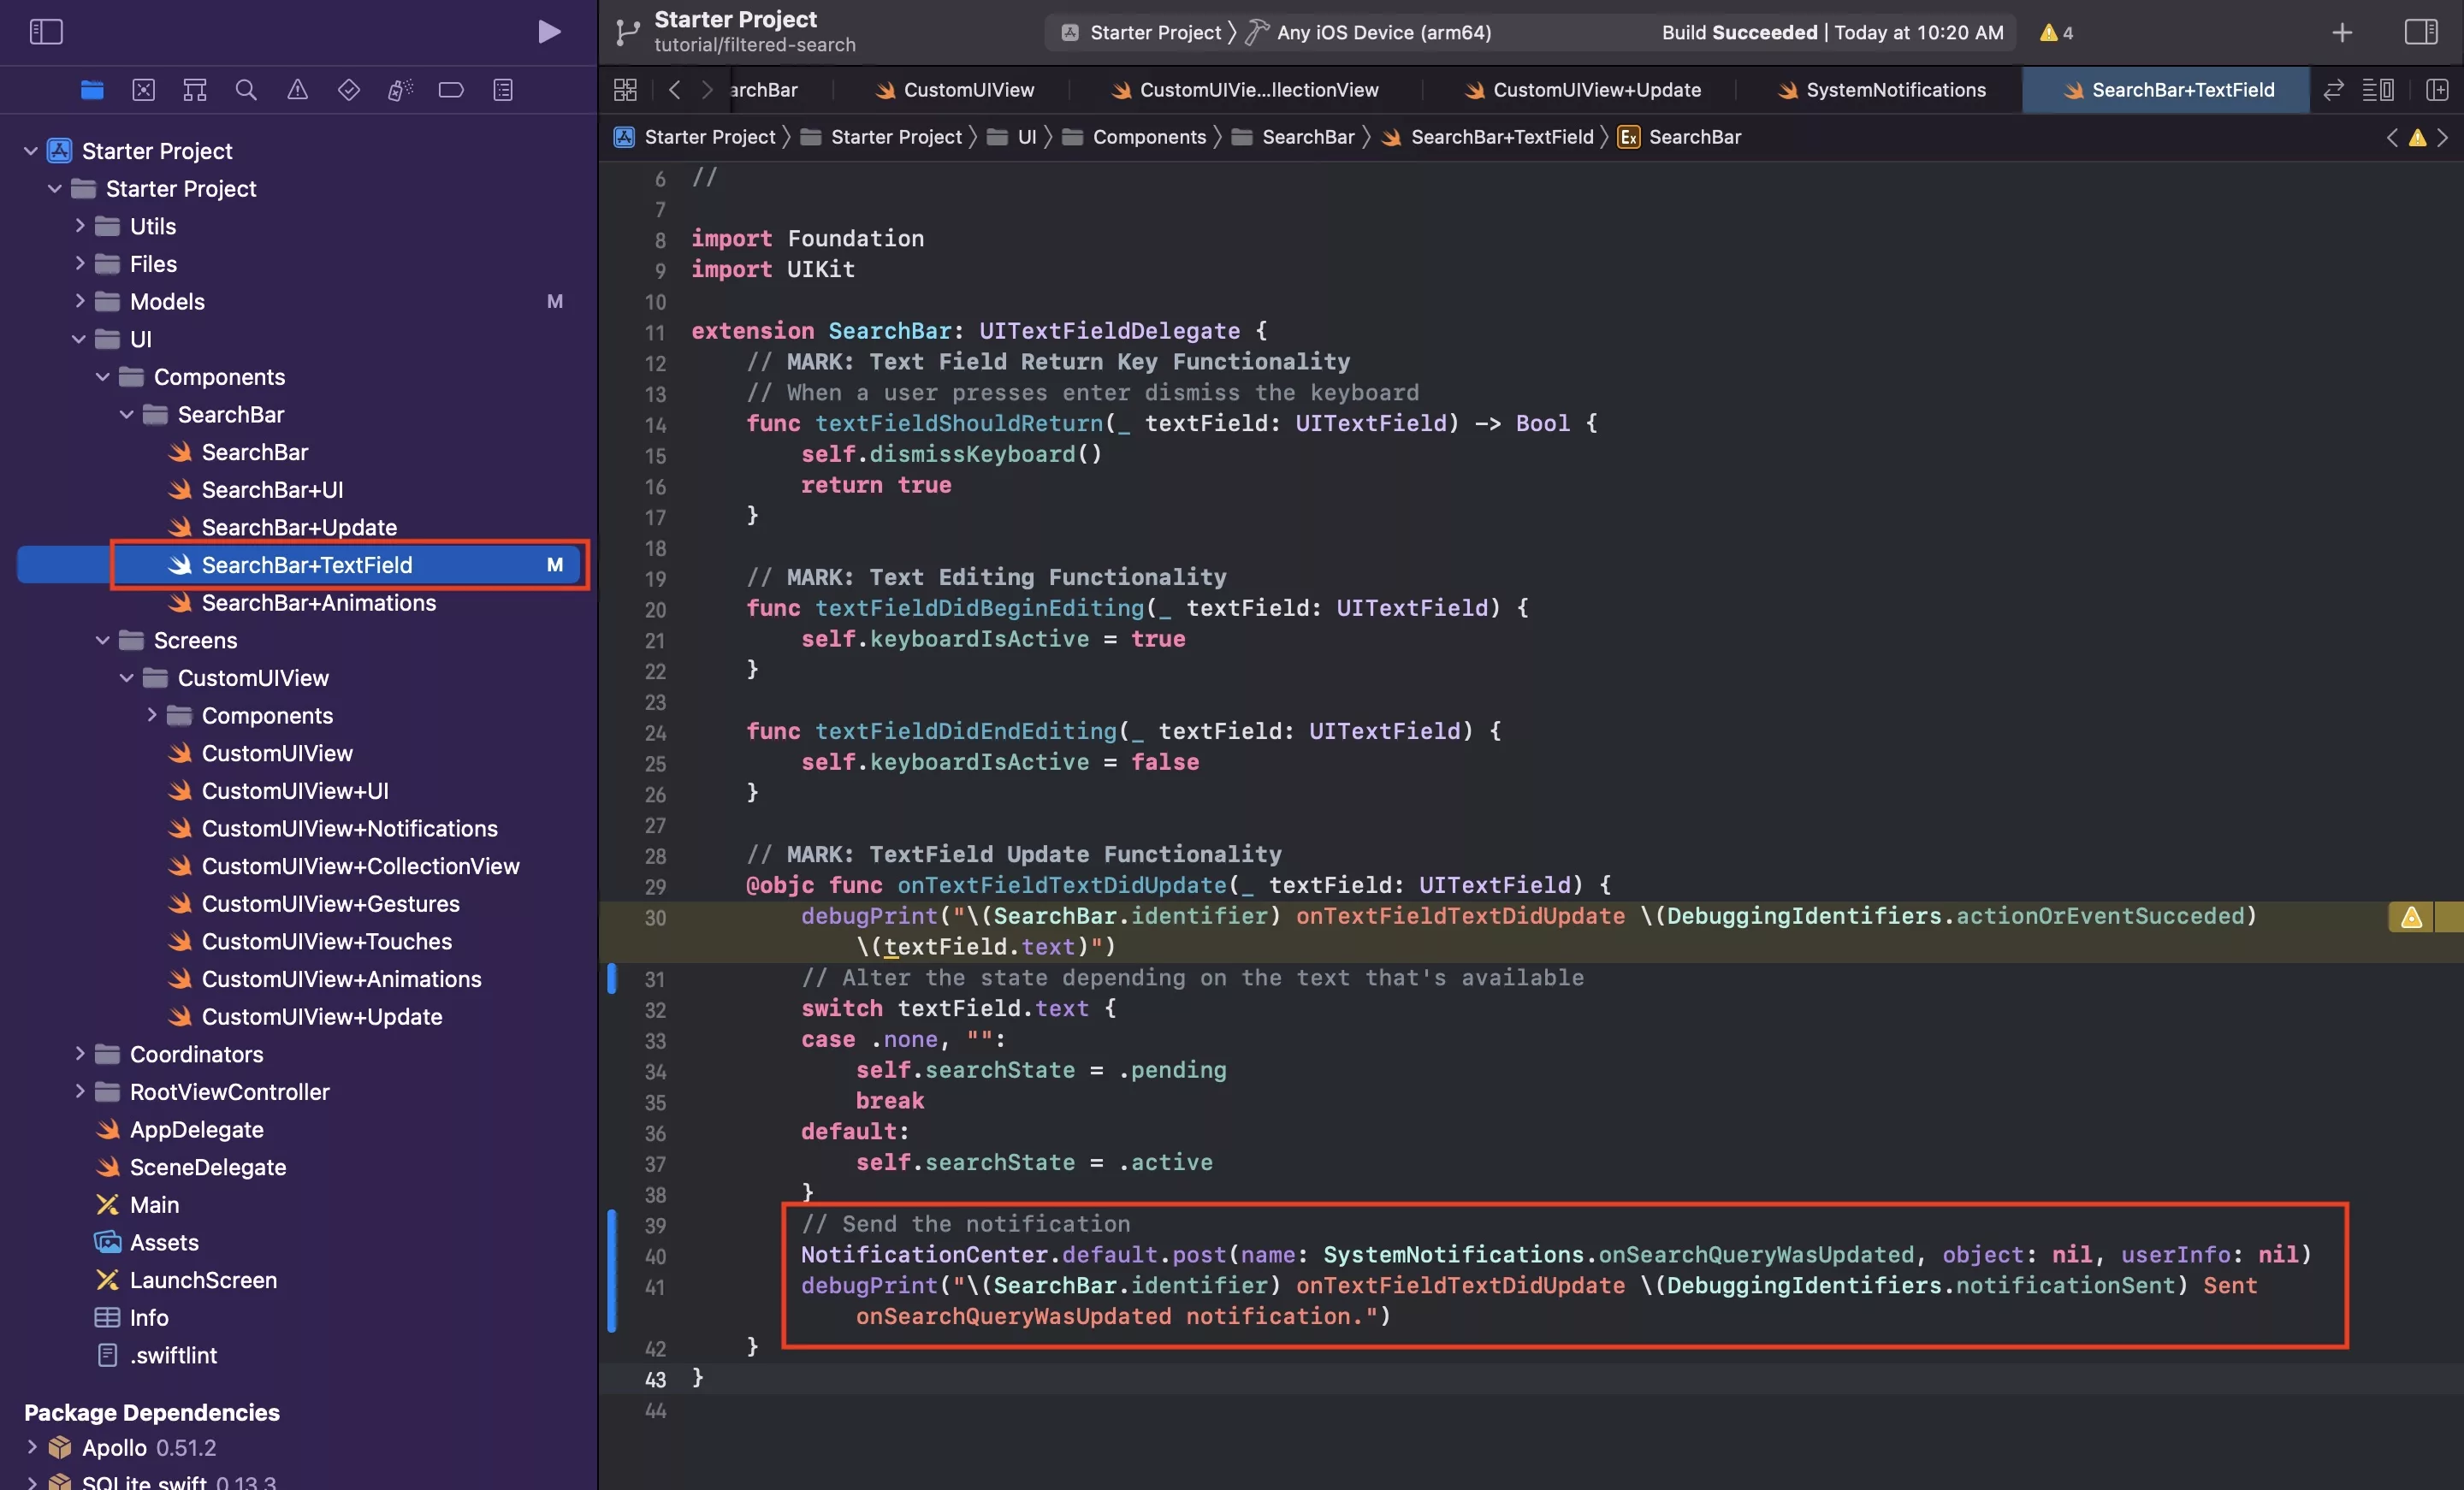
In SearchBar+TextField.swift, in the onTextFieldDidUpdate function, after updating the state, send the notification that the query was updated.
Please note that this code has been updated to use our NotificationCoordinator.
C | Receive and Process the Notification
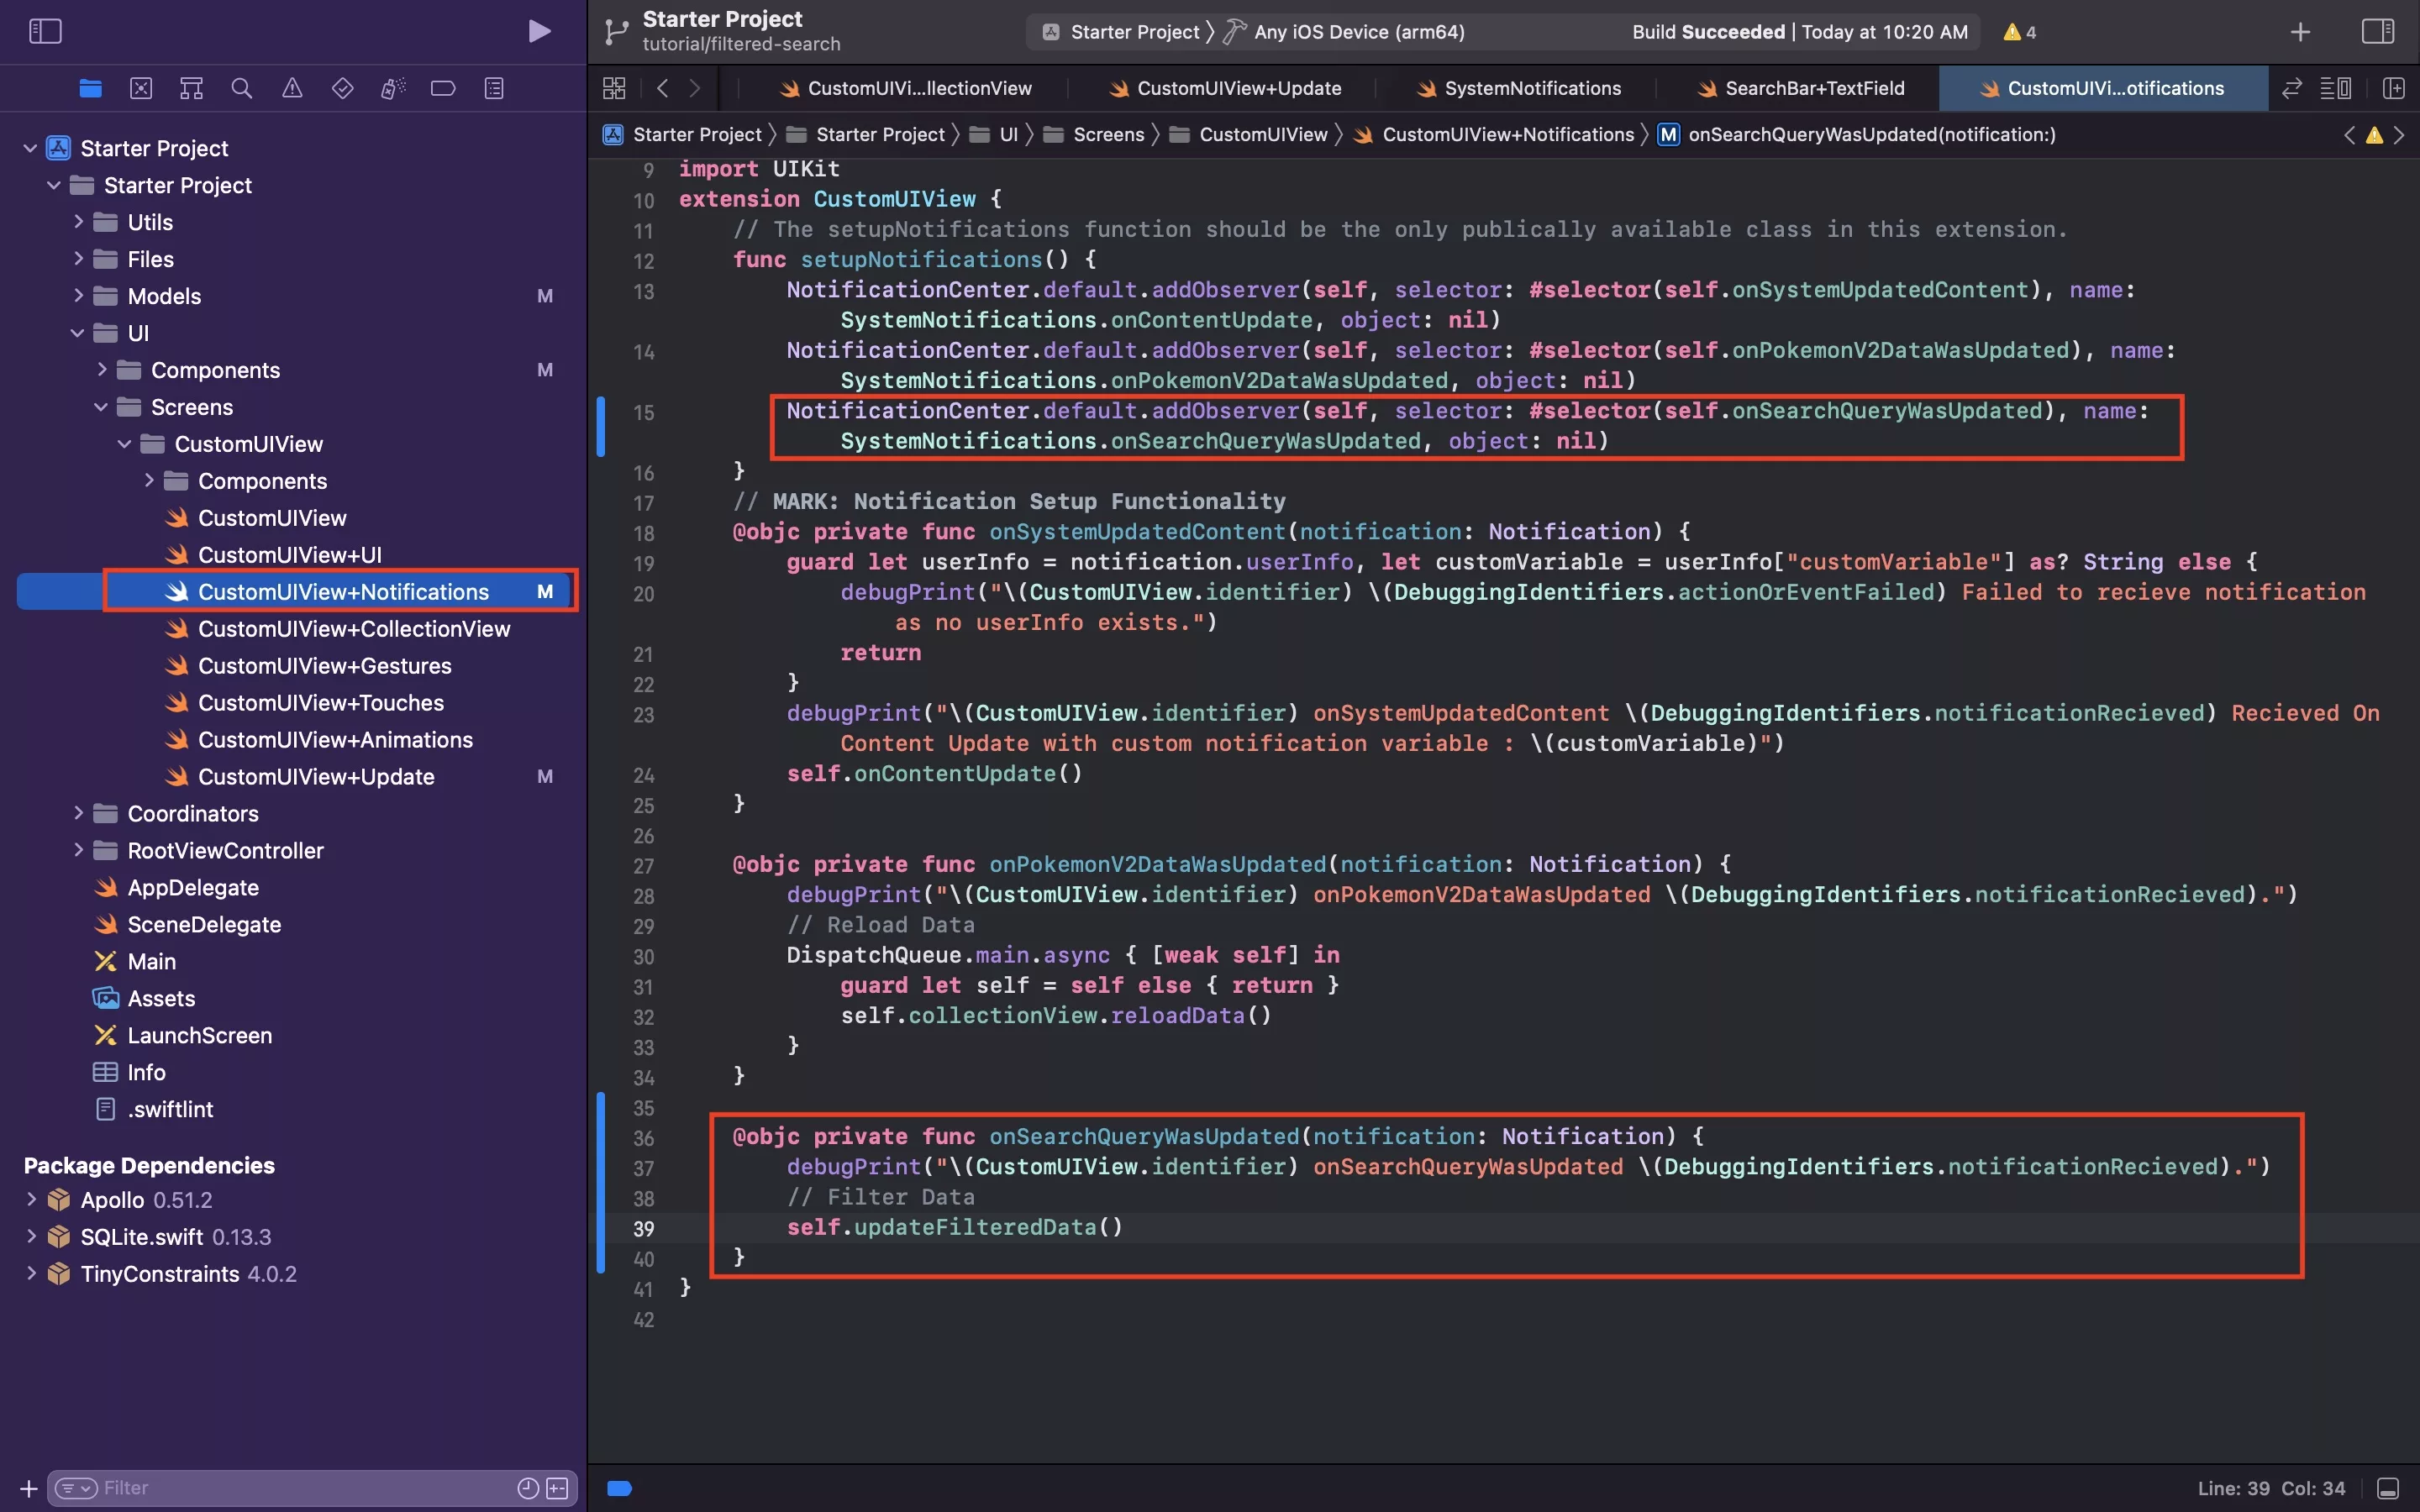
In CustomUIView+Notifications.swift, create a new notification observer and selector. Within the selector, tell the app to update the data.
Step Five: Verify
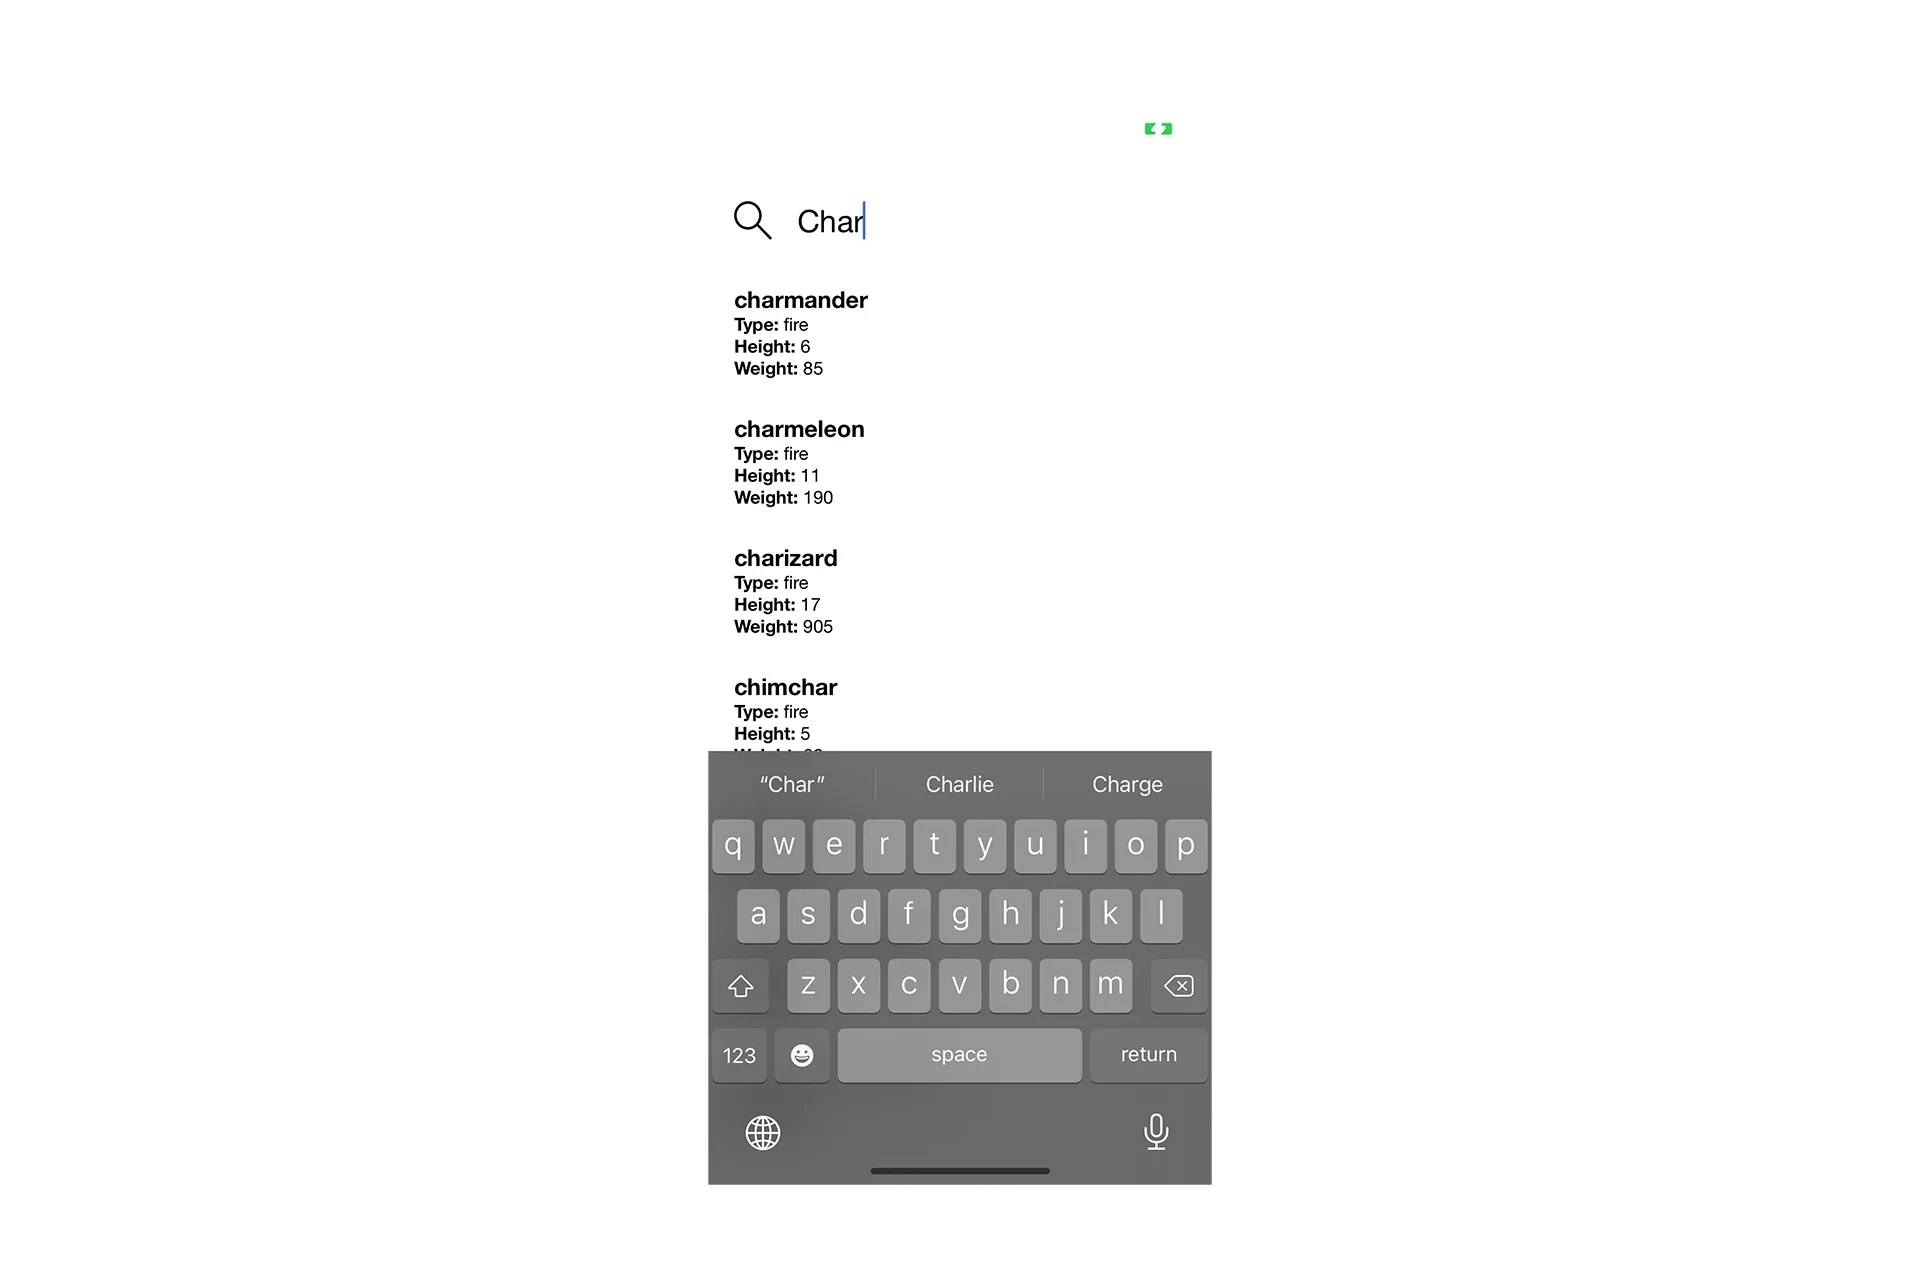
Run the app and see the UICollectionView change itself depending on the data.