How to make a custom search bar in Swift
A step by step tutorial on making a custom search bar in Swift (iOS). Github repository included.


A step by step tutorial on making a custom search bar in Swift (iOS). Github repository included.
SubscribeThe following tutorial walks you through how to make a custom search bar in Swift (iOS). The tutorial builds off our open source starter project and starts at the tutorial/graphql/data-driven-collectionview branch with all relevant changes found on the tutorial/custom/searchbar branch.
Please note that this tutorial builds of a series of tutorials listed below destined at creating a Swift starter project, setting it up for API calls, making a GraphQL API call and visualizing the results through a data driven UICollectionView.
Please note this tutorial uses the TinyConstraints Swift package, which we added using the Swift Package Manager.
What are we making in this tutorial ?
In this tutorial, we will be creating a custom search bar that uses a style for both the placeholder text and the active search text. We will handle all the keyboard dismissals by allowing the user to dismiss the keyboard when touching on the screen outside of the search bar or when pressing the return key and make the search bar change appearance depending on the content that is within it (i.e. if no content, appear grayed out, with content, appear black).
If you are seeking how to make use of the out of the box UISearchBar provided by Apple, please use the link below.
Tutorial
We recommend downloading our Open Source project, checking out the tutorial/graphql/data-driven-collectionview branch and carrying out the steps outlined below. All relevant changes are found in the tutorial/custom/searchbar branch.
git clone git@github.com:delasign/swift-starter-project.gitStep One: Add the content
The following step is dedicated at declaring the content for the search bar.
For more information on content and localization please read the tutorial linked below.
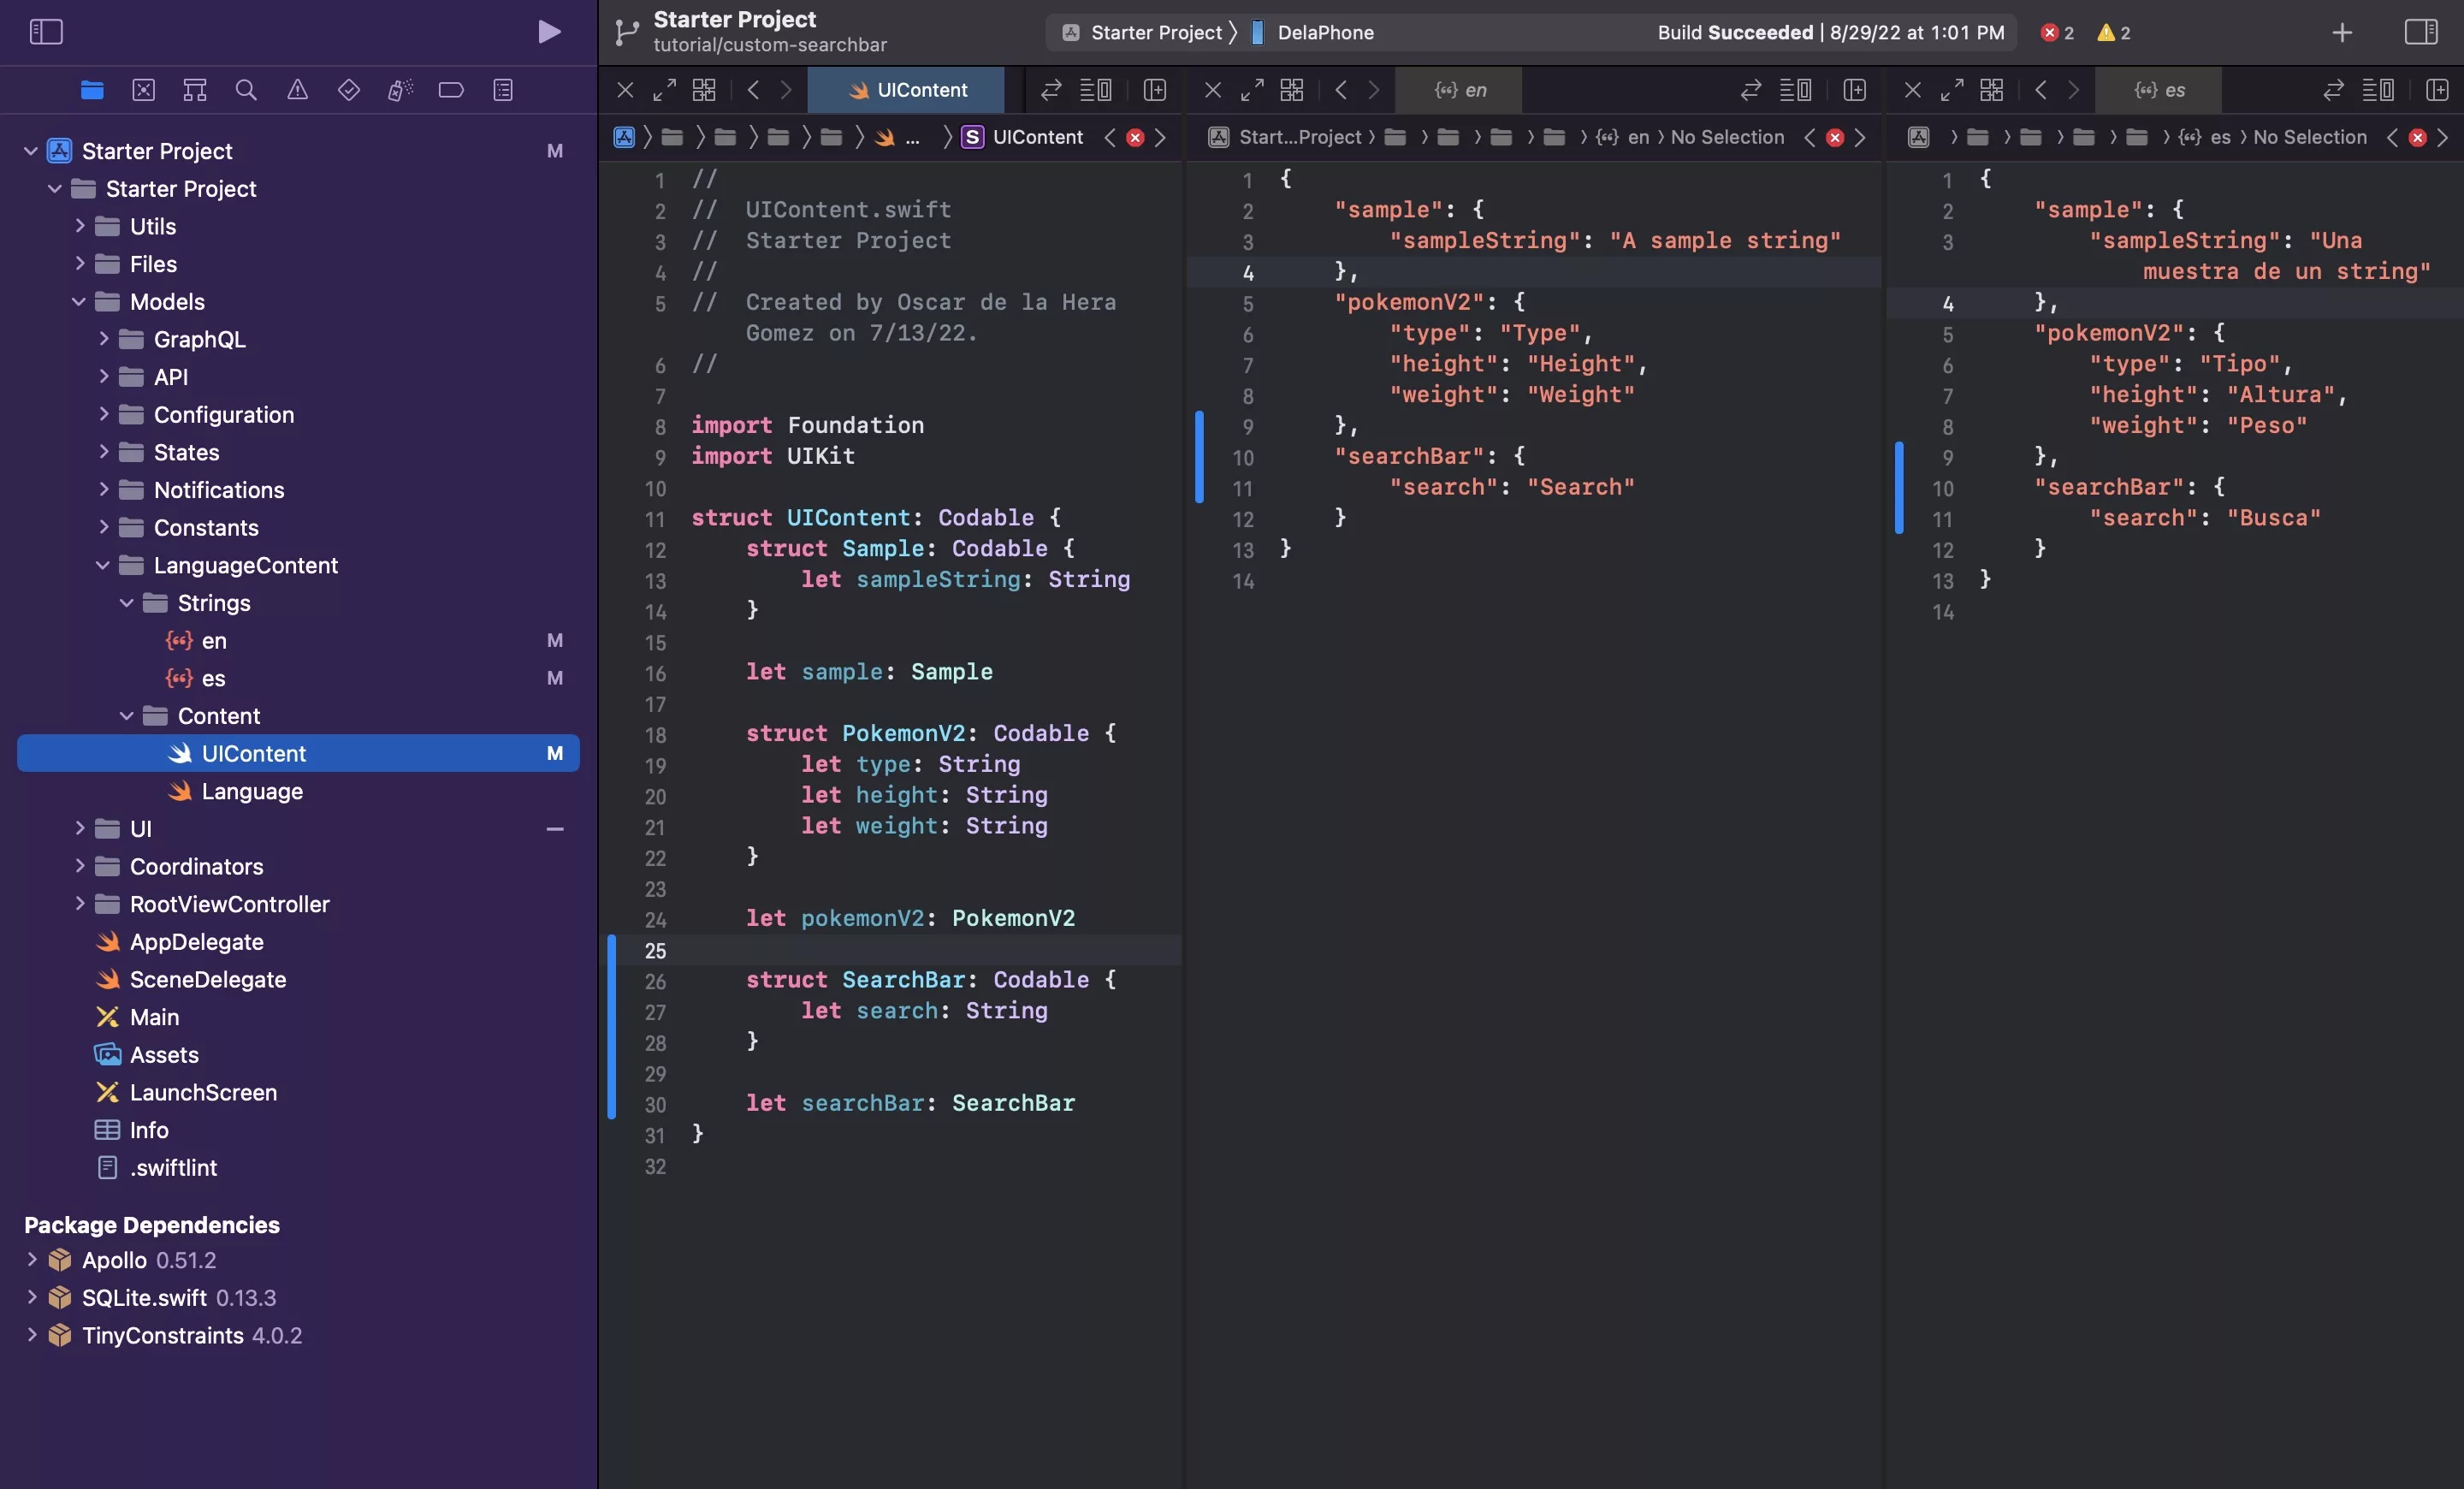
A | Declare the UIContent
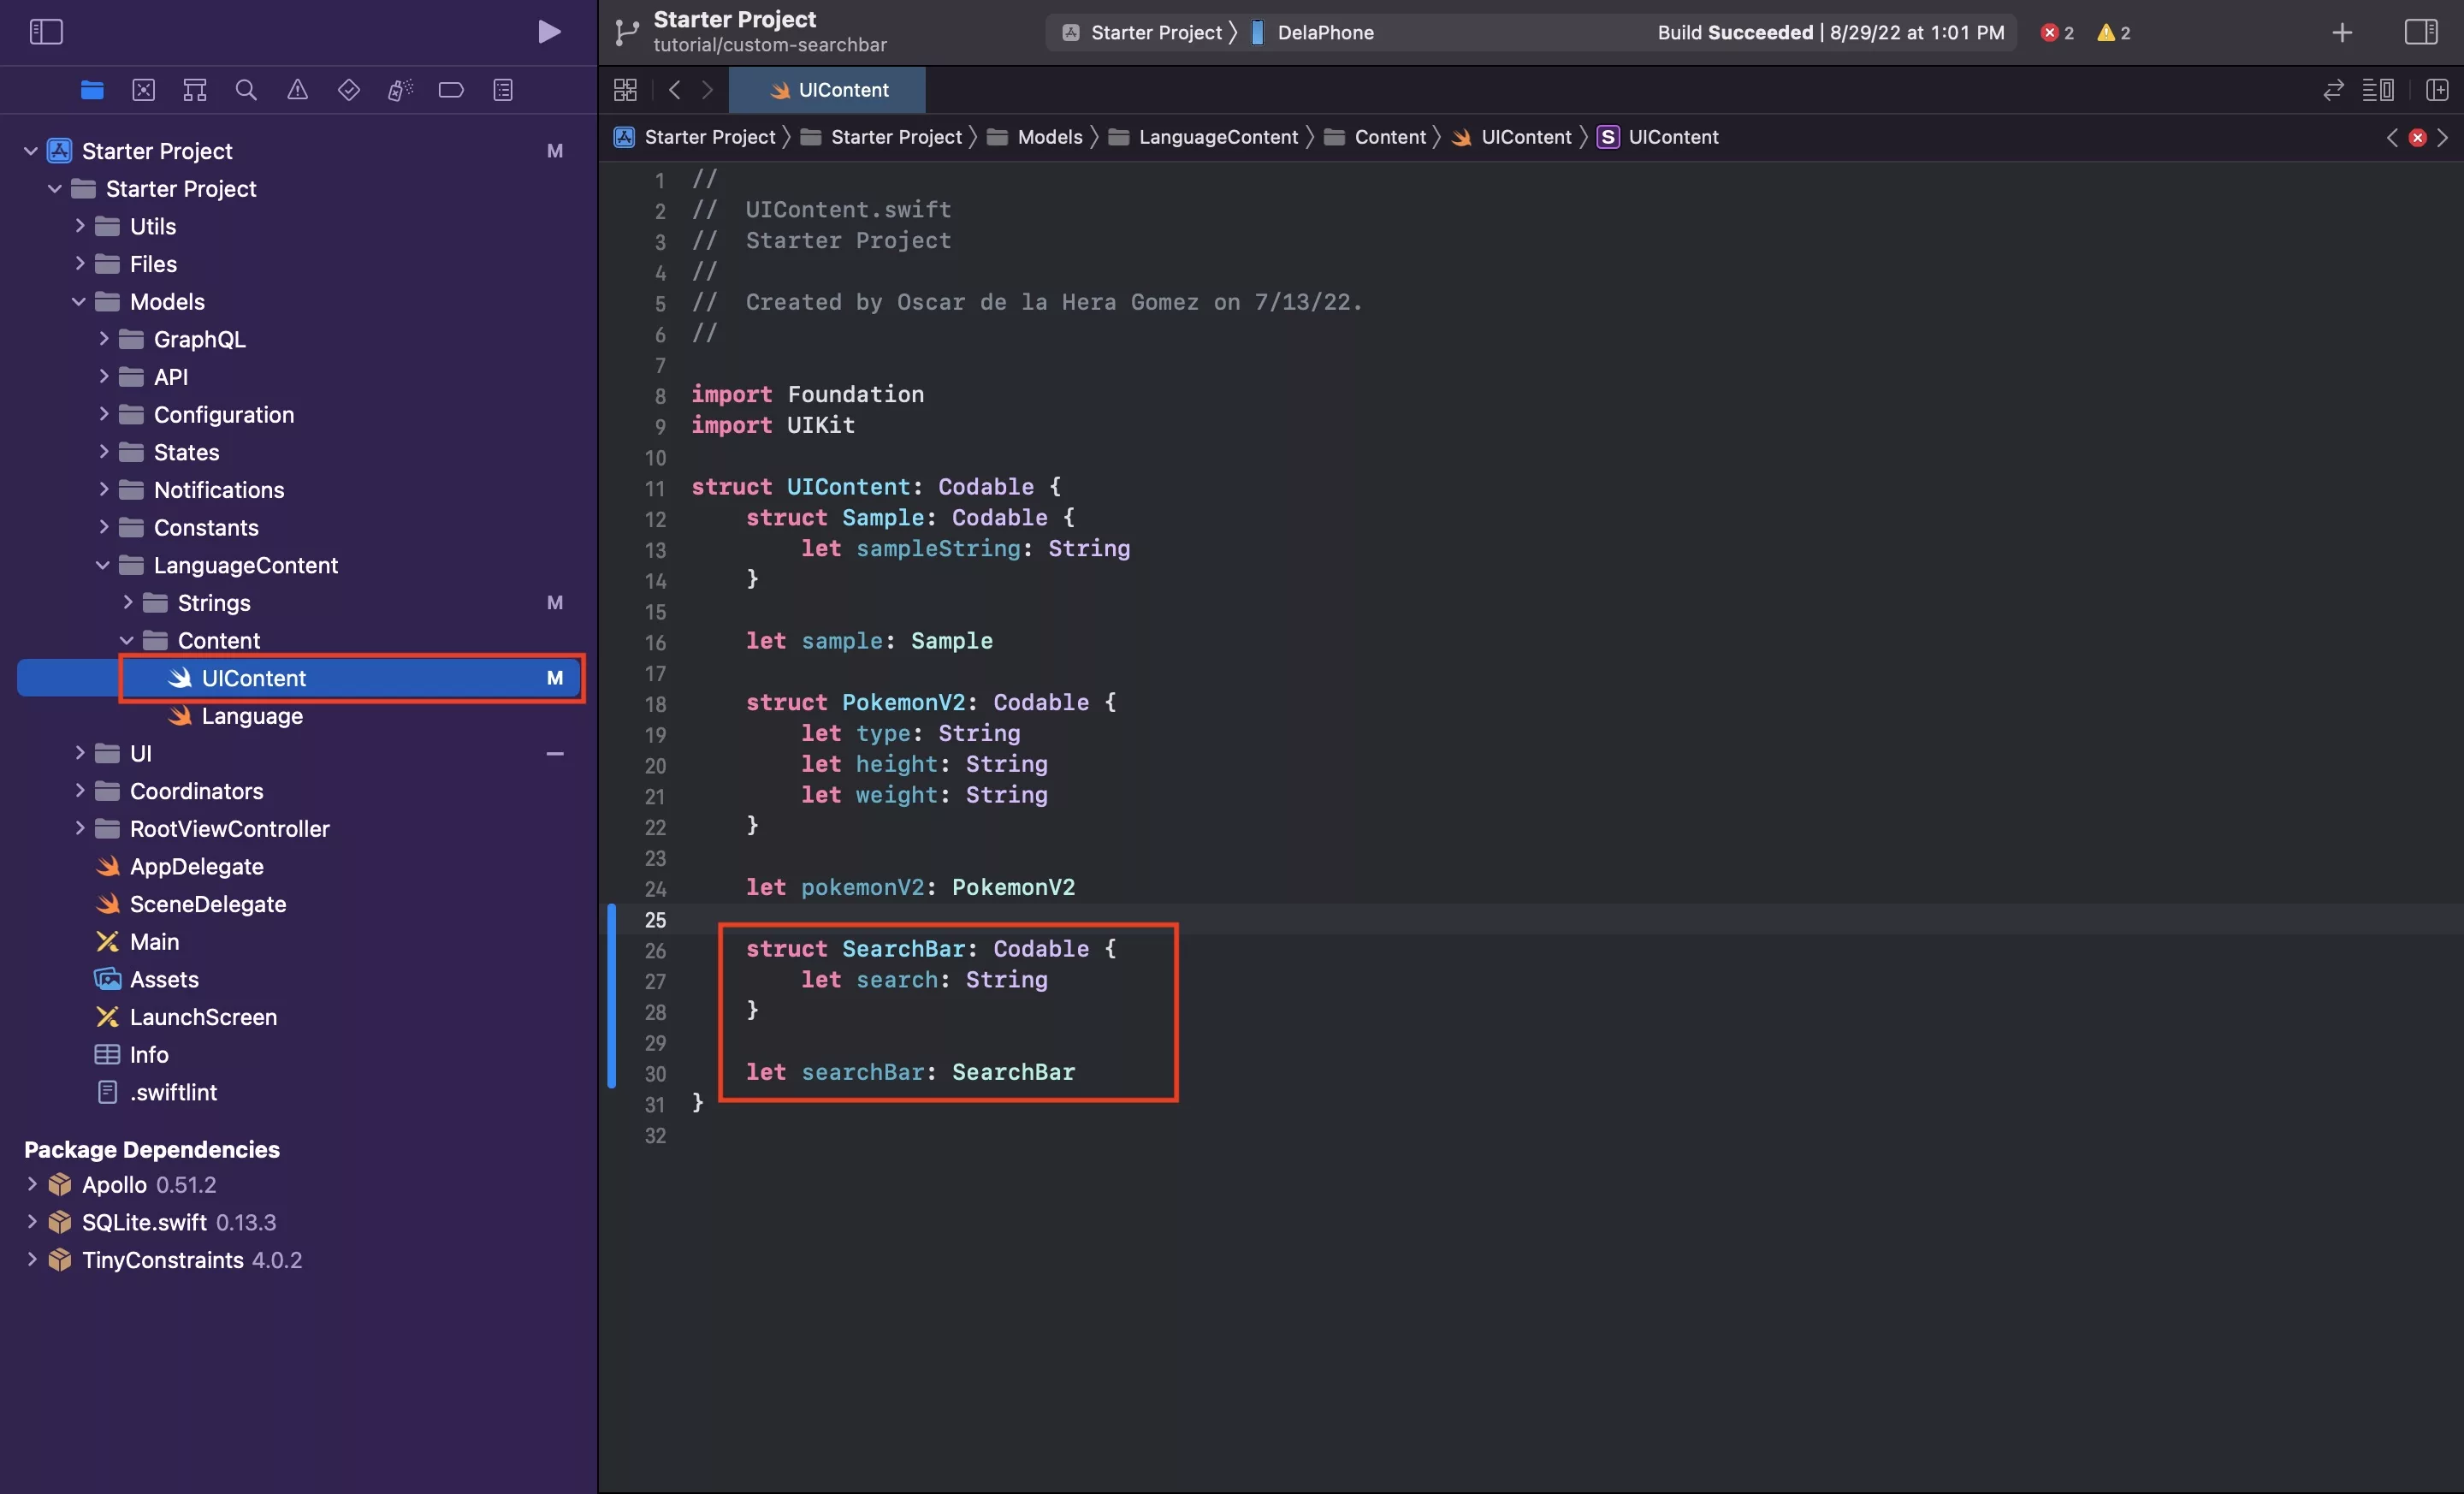
In UIContent.swift, declare a new struct called SearchBar and add a constant called search.
B | Add your strings
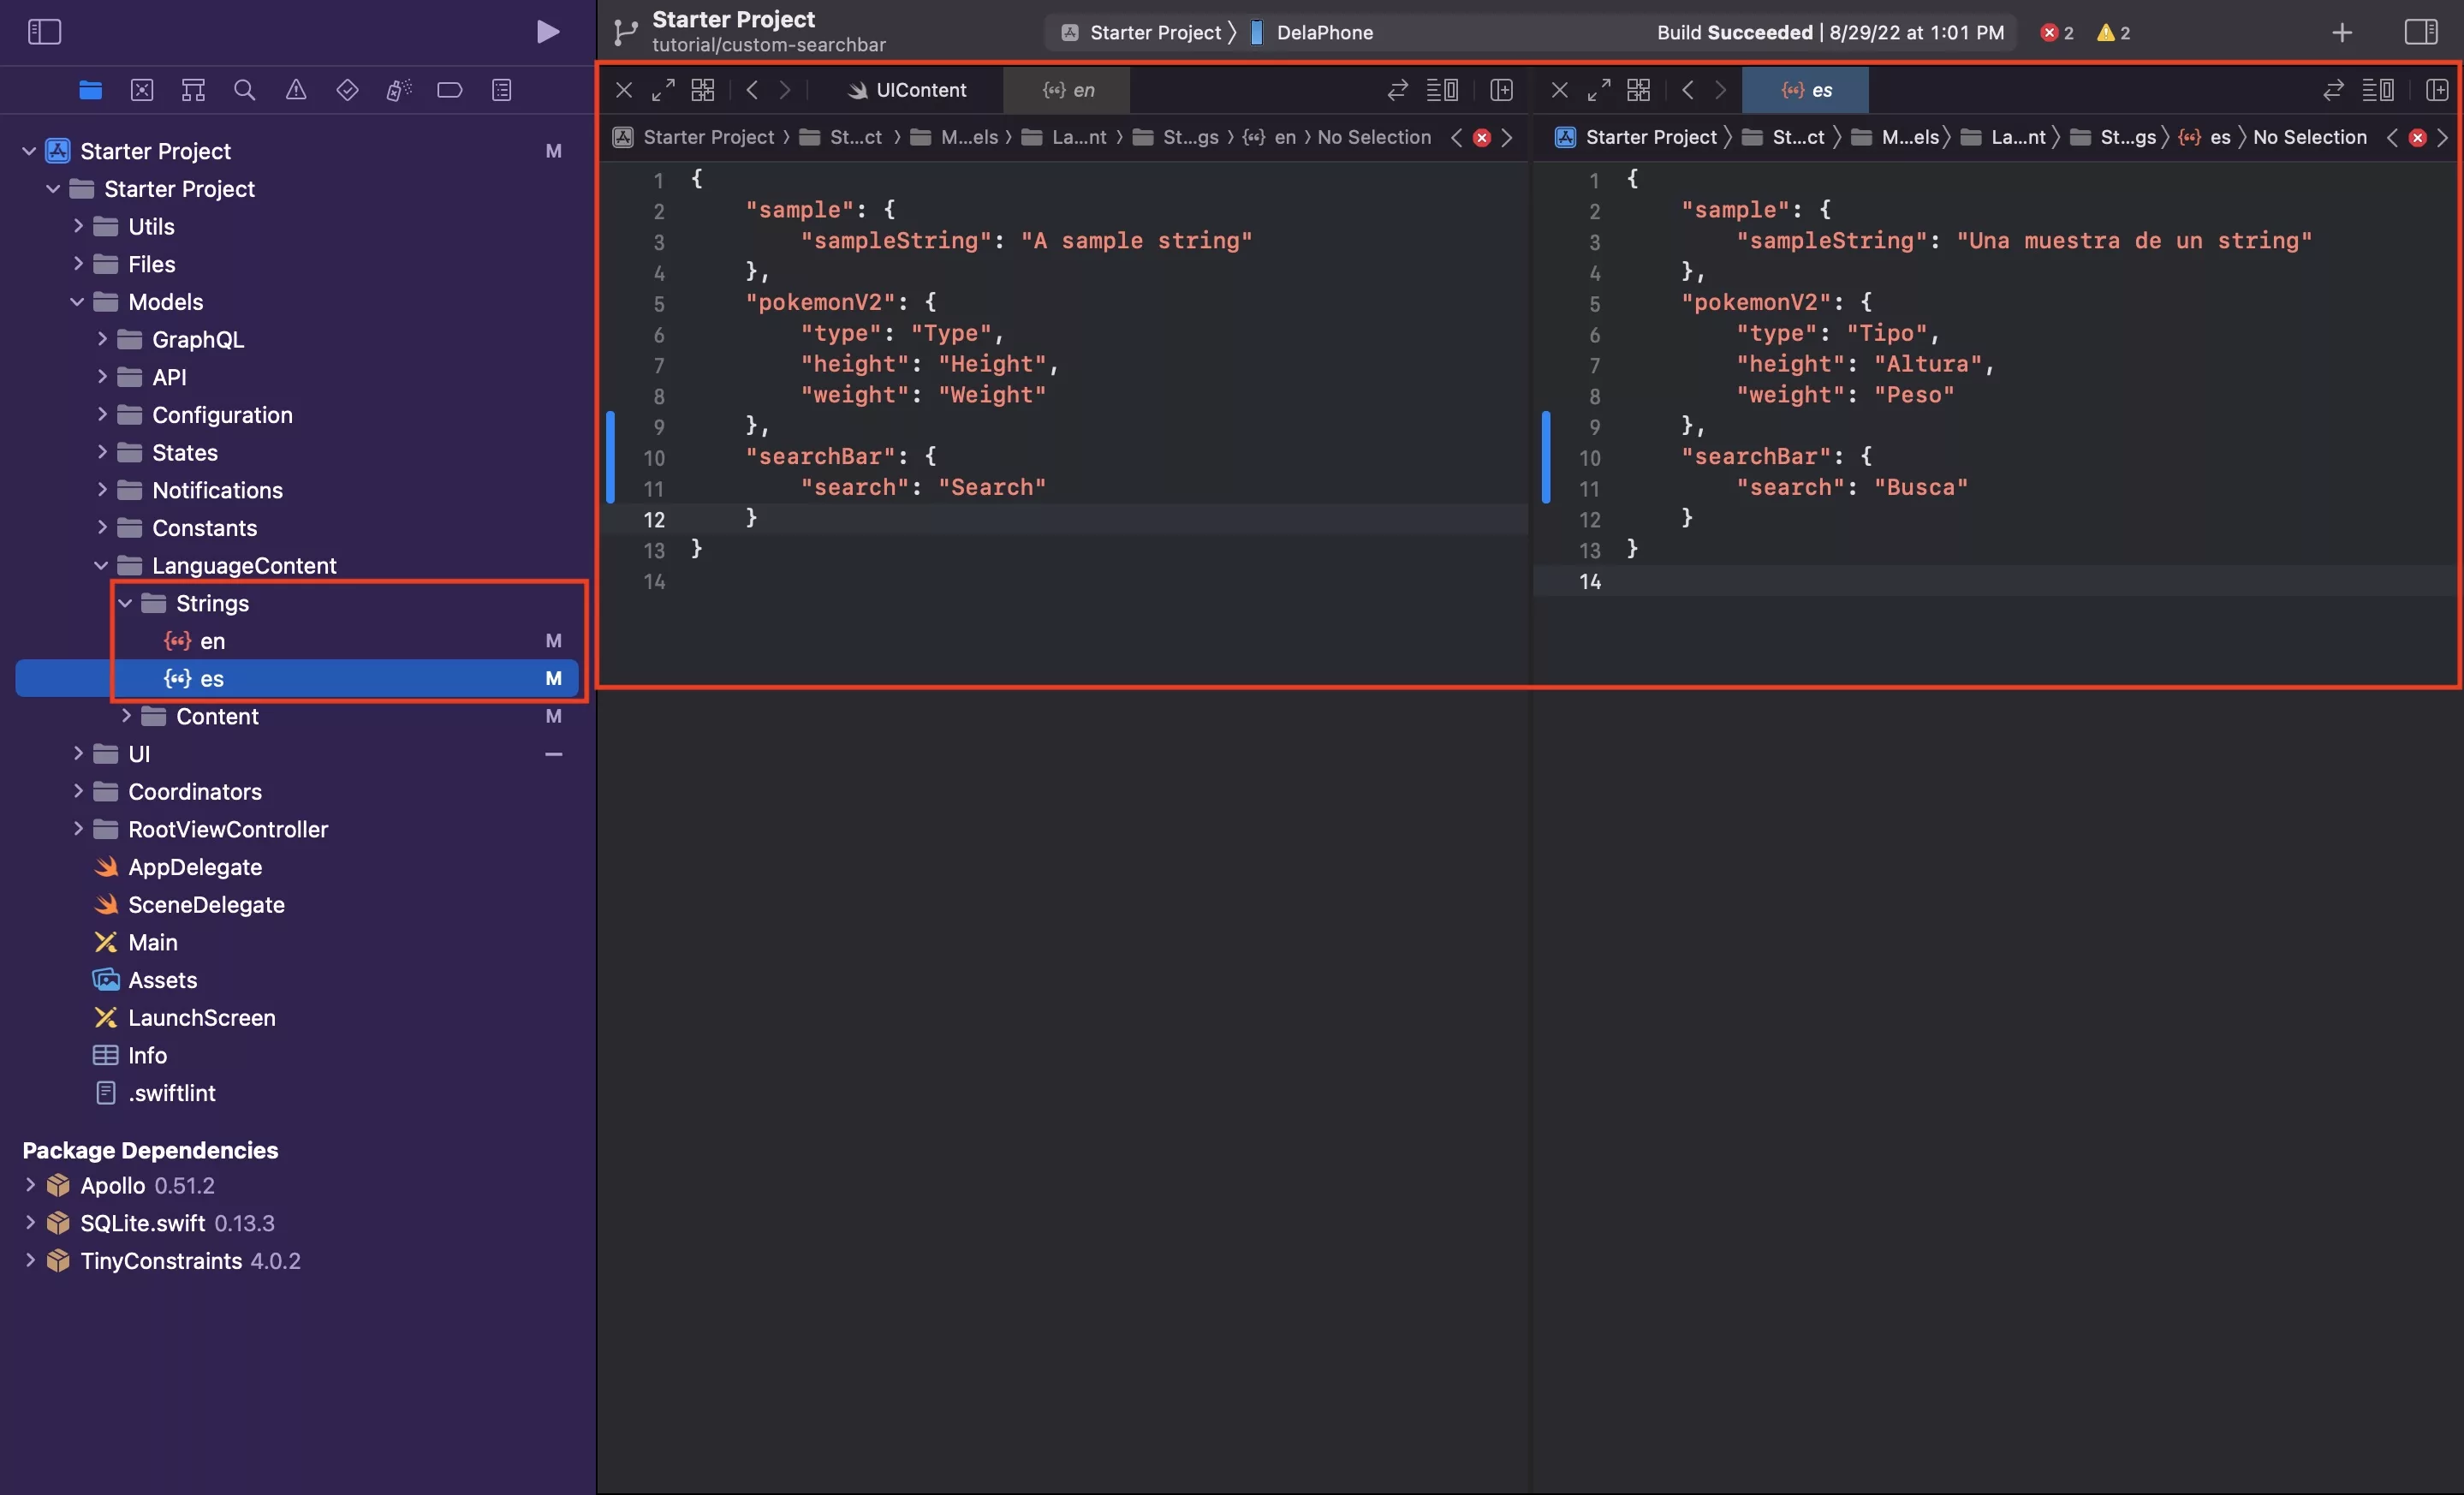
Add the struct and search string to the en.json and es.json.
Step Two: Add the colors
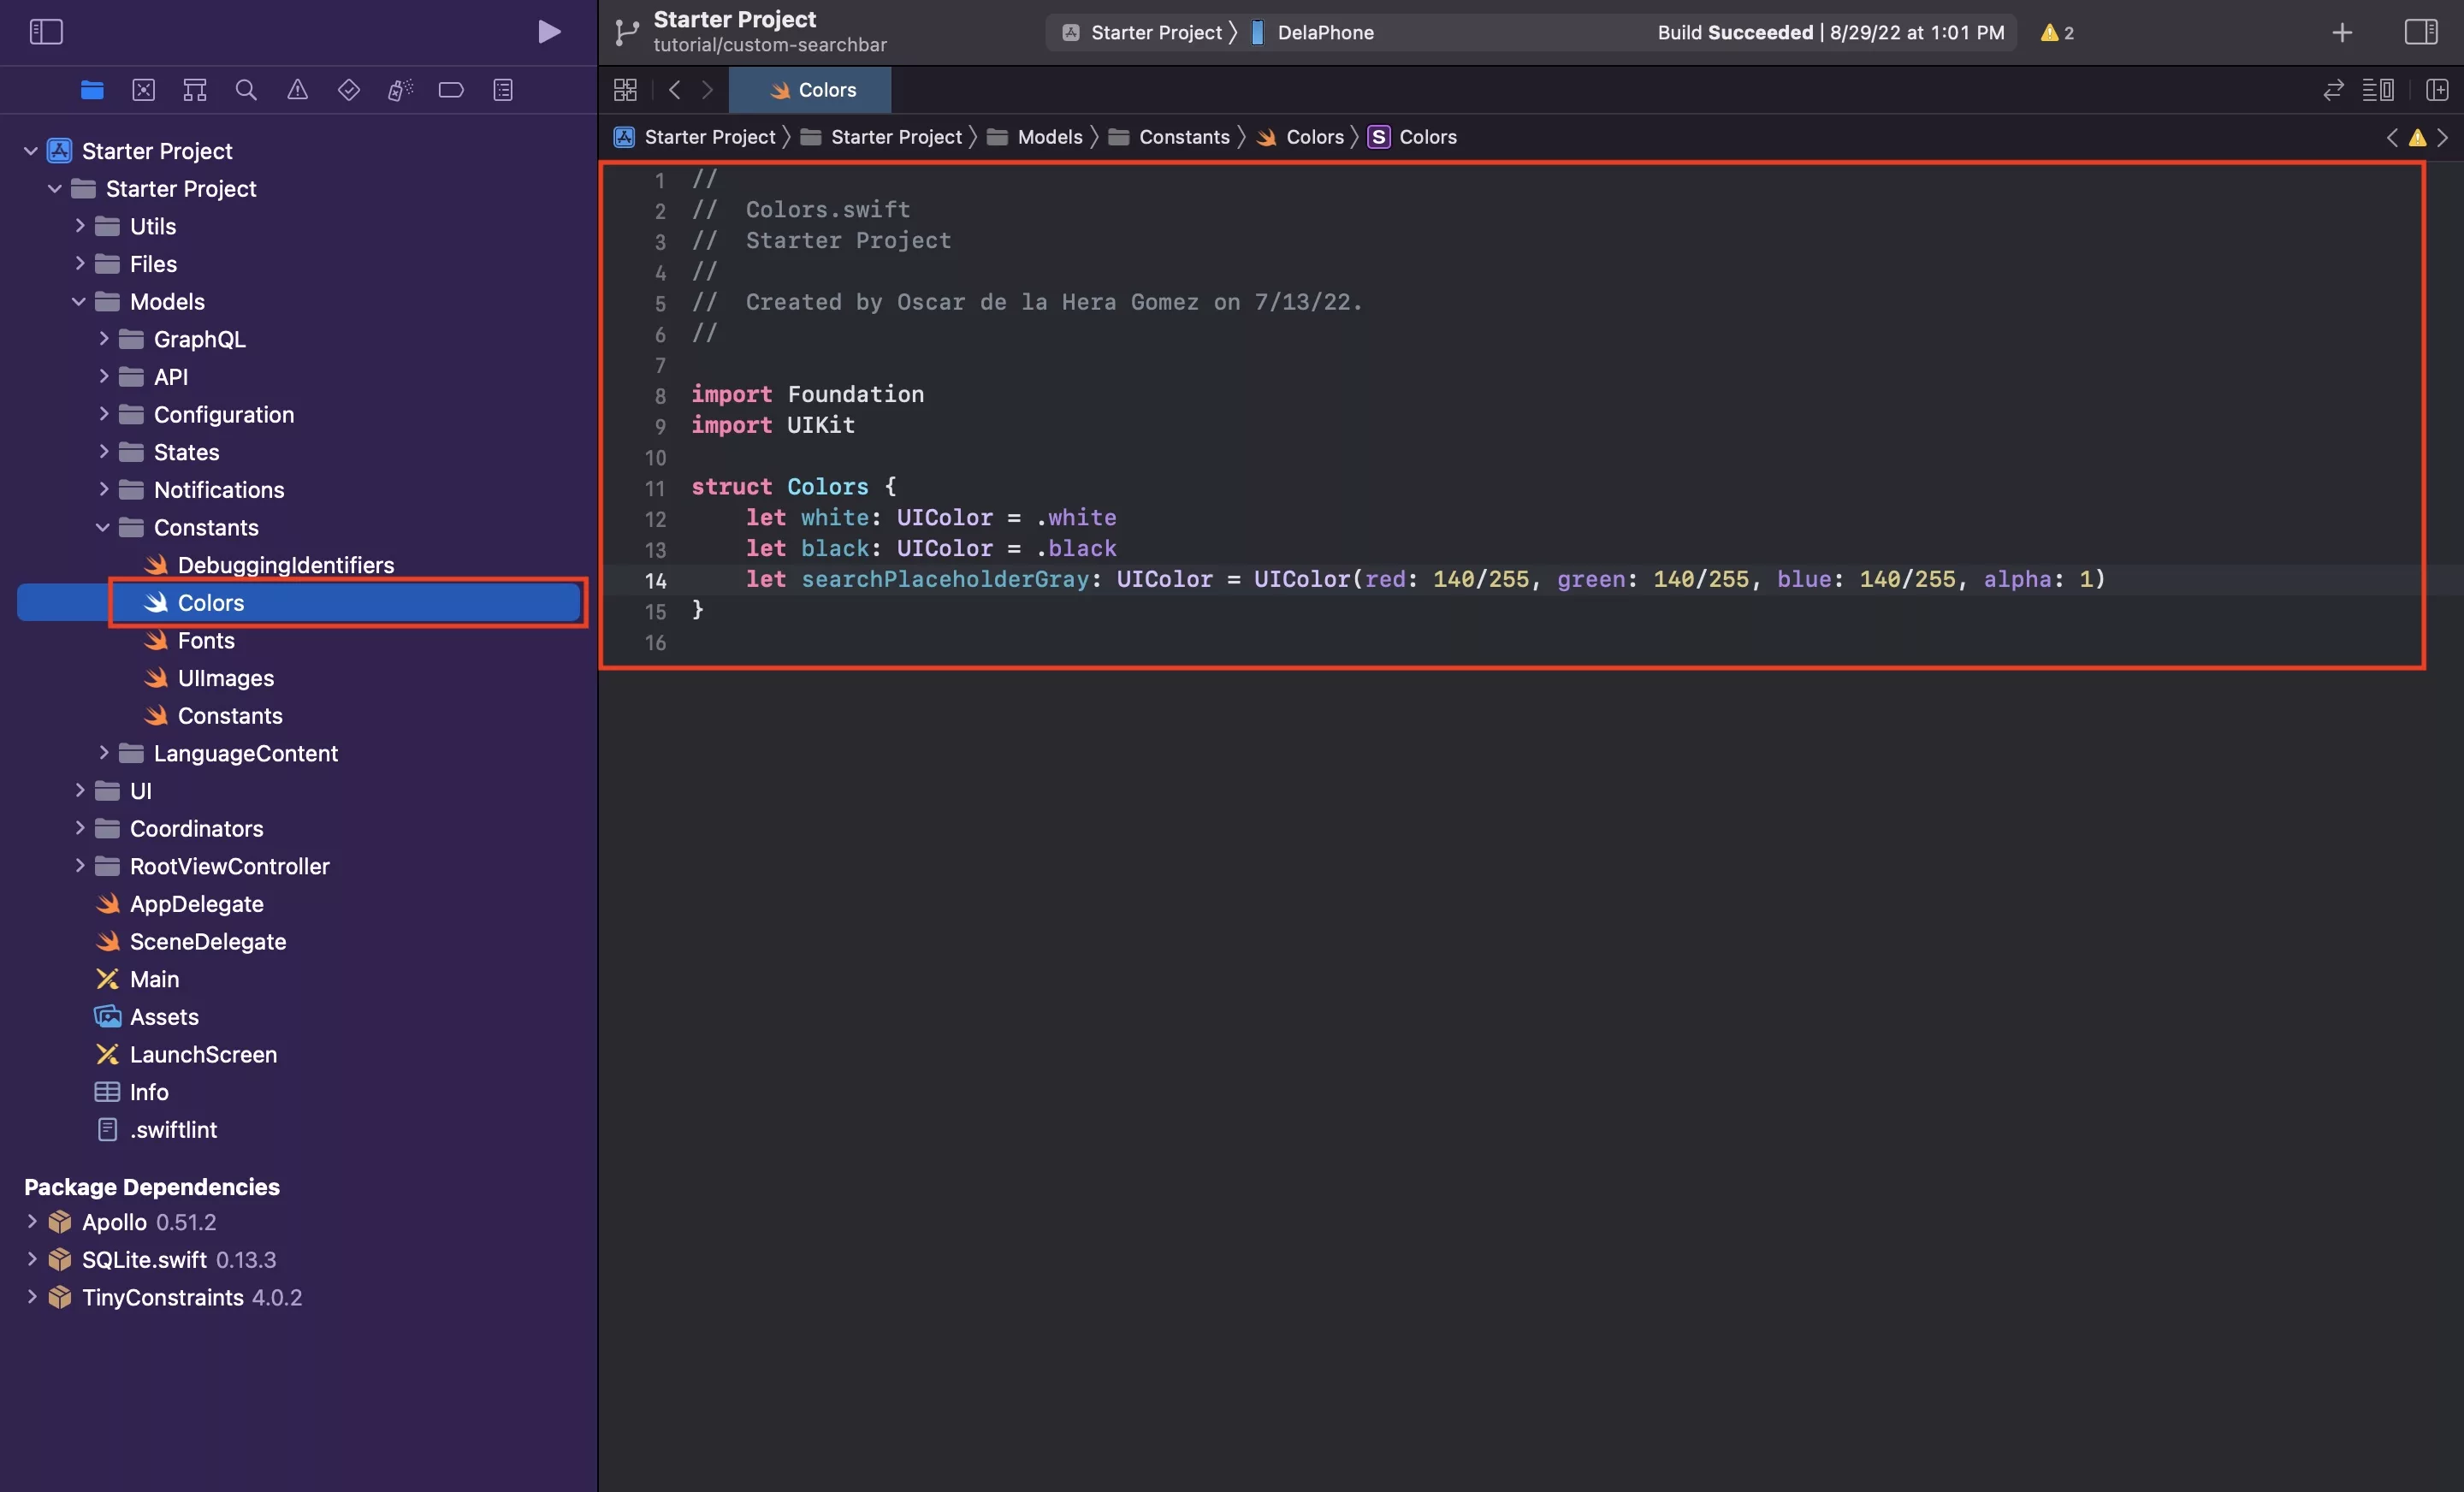
In Colors.swift, add the colors for your placeholder text and active search text. In our case, we are creating a searchPlaceHolderGray as we will be using black for the active search text and this already exists.
Sample snippet available below.
Step Three: Create the search style
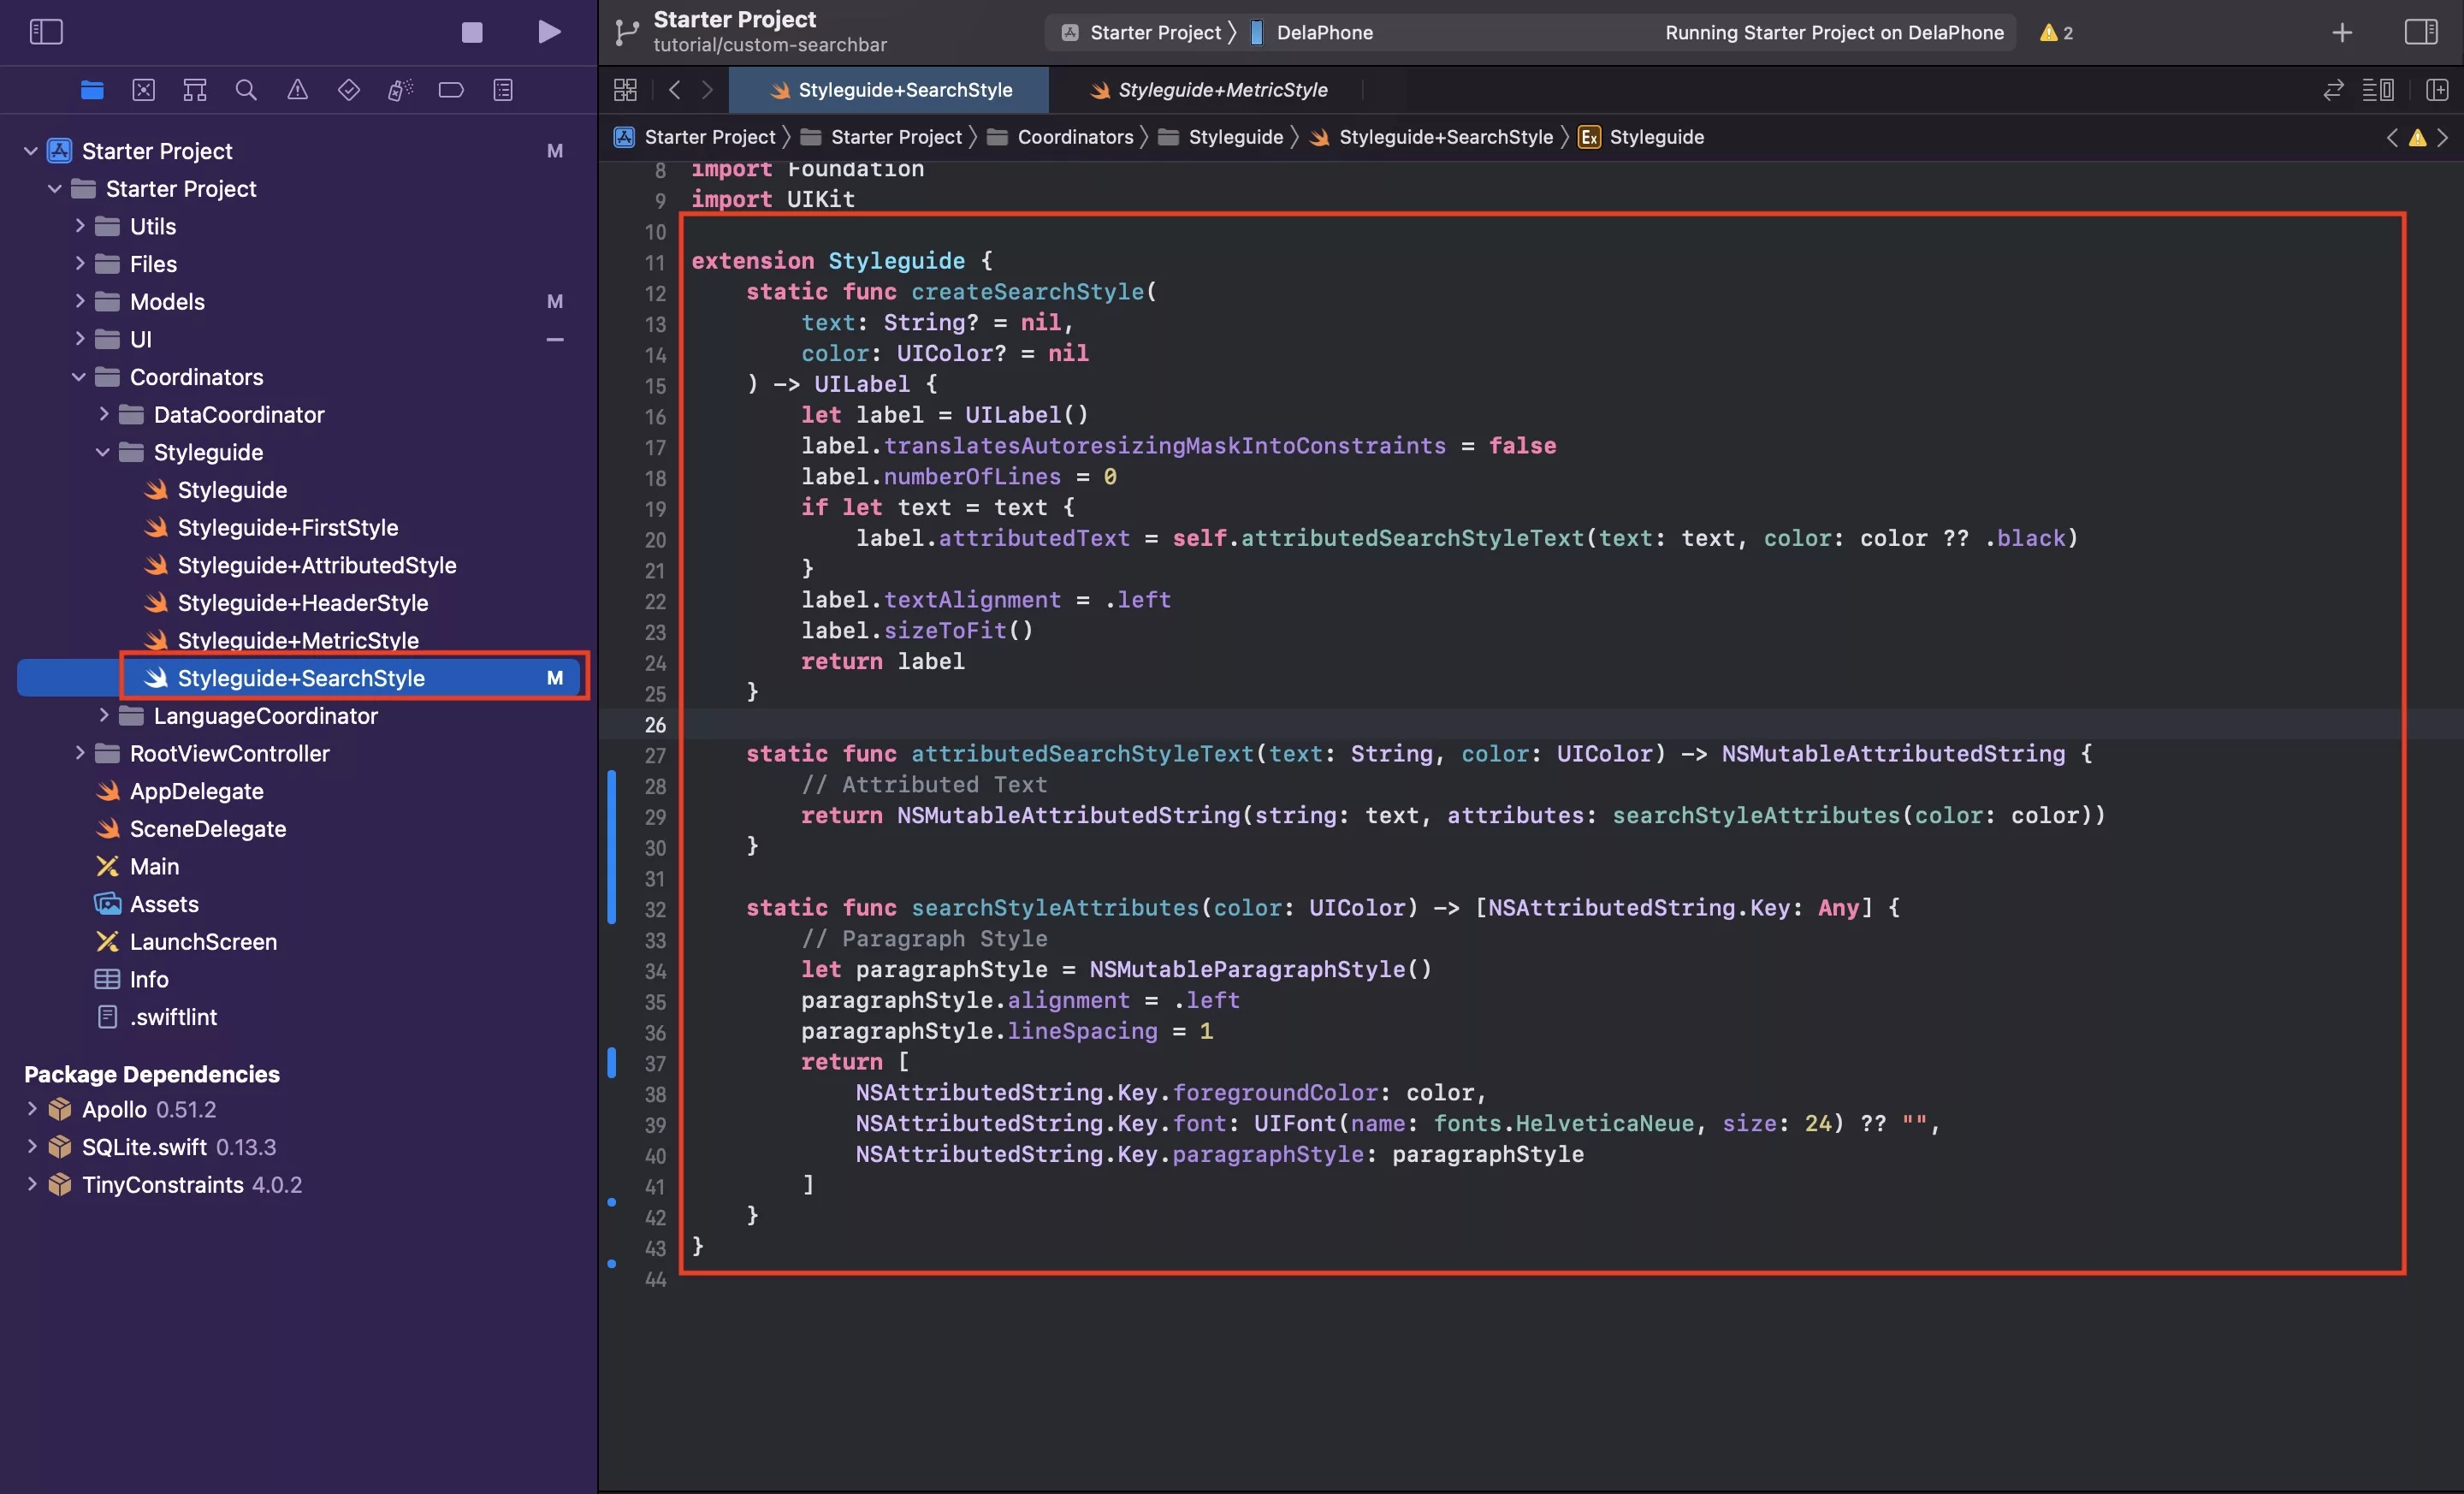
In our case we will be using a single style for both the placeholder and the active search text.
In the Styleguide folder, create a new file called Styleguide+SearchStyle.swift and paste in the code below.
Please note that in this case we have created a separate static function for the attributes as the UITextfield requires you to set default attributes to save you having to update the attributed text over time.
For more information on the Styleguide please use the links below.
Step Four: Add the Search Image

Add your local image to Assets.xcassets as searchBarIcon and subsequently add it to UIImages.swift as a constant within the SampleImages struct.
We recommend that you create different structs for different parts of your app, but for this tutorial we have added it there to simplify the process.
Step Five: Create the SearchBar UIView
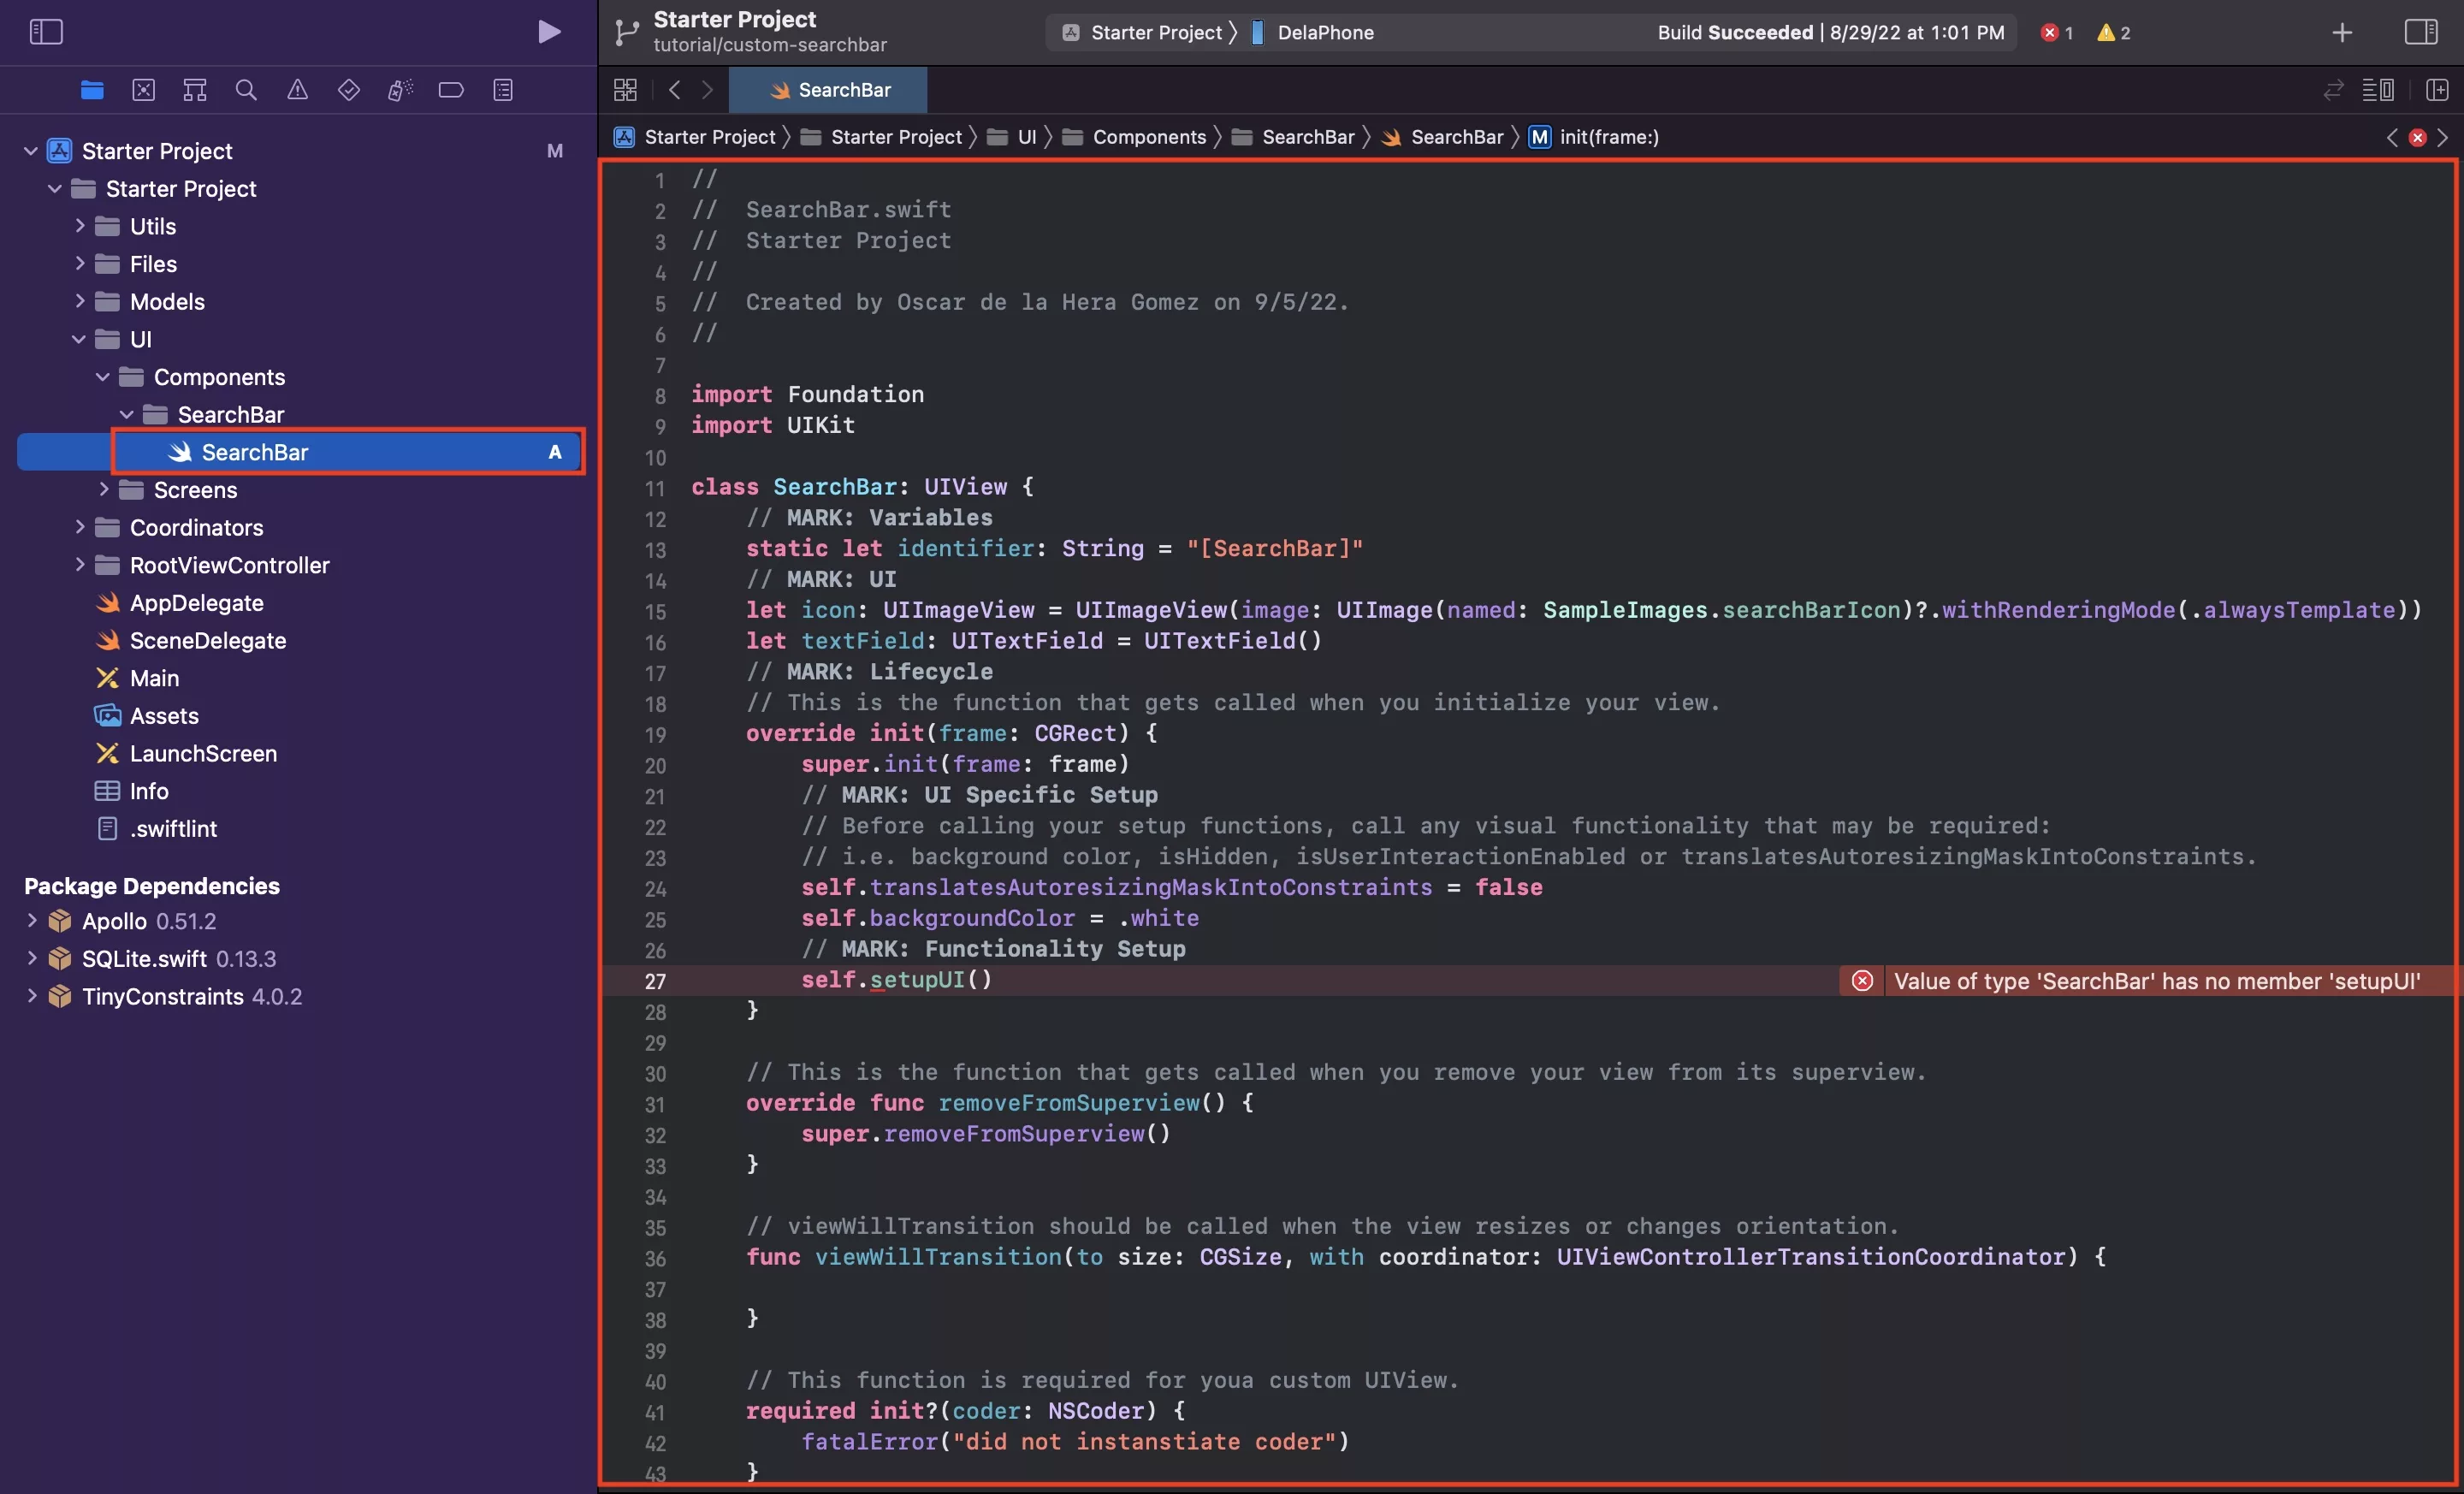
Within the Components folder, create a new folder called SearchBar.
Within the newly created SearchBar folder, create a new file called SearchBar.swift and paste in the code found below.
Please note that we created the setupUI functionality in the next step.
Step Six: Create the SearchBar UI extension
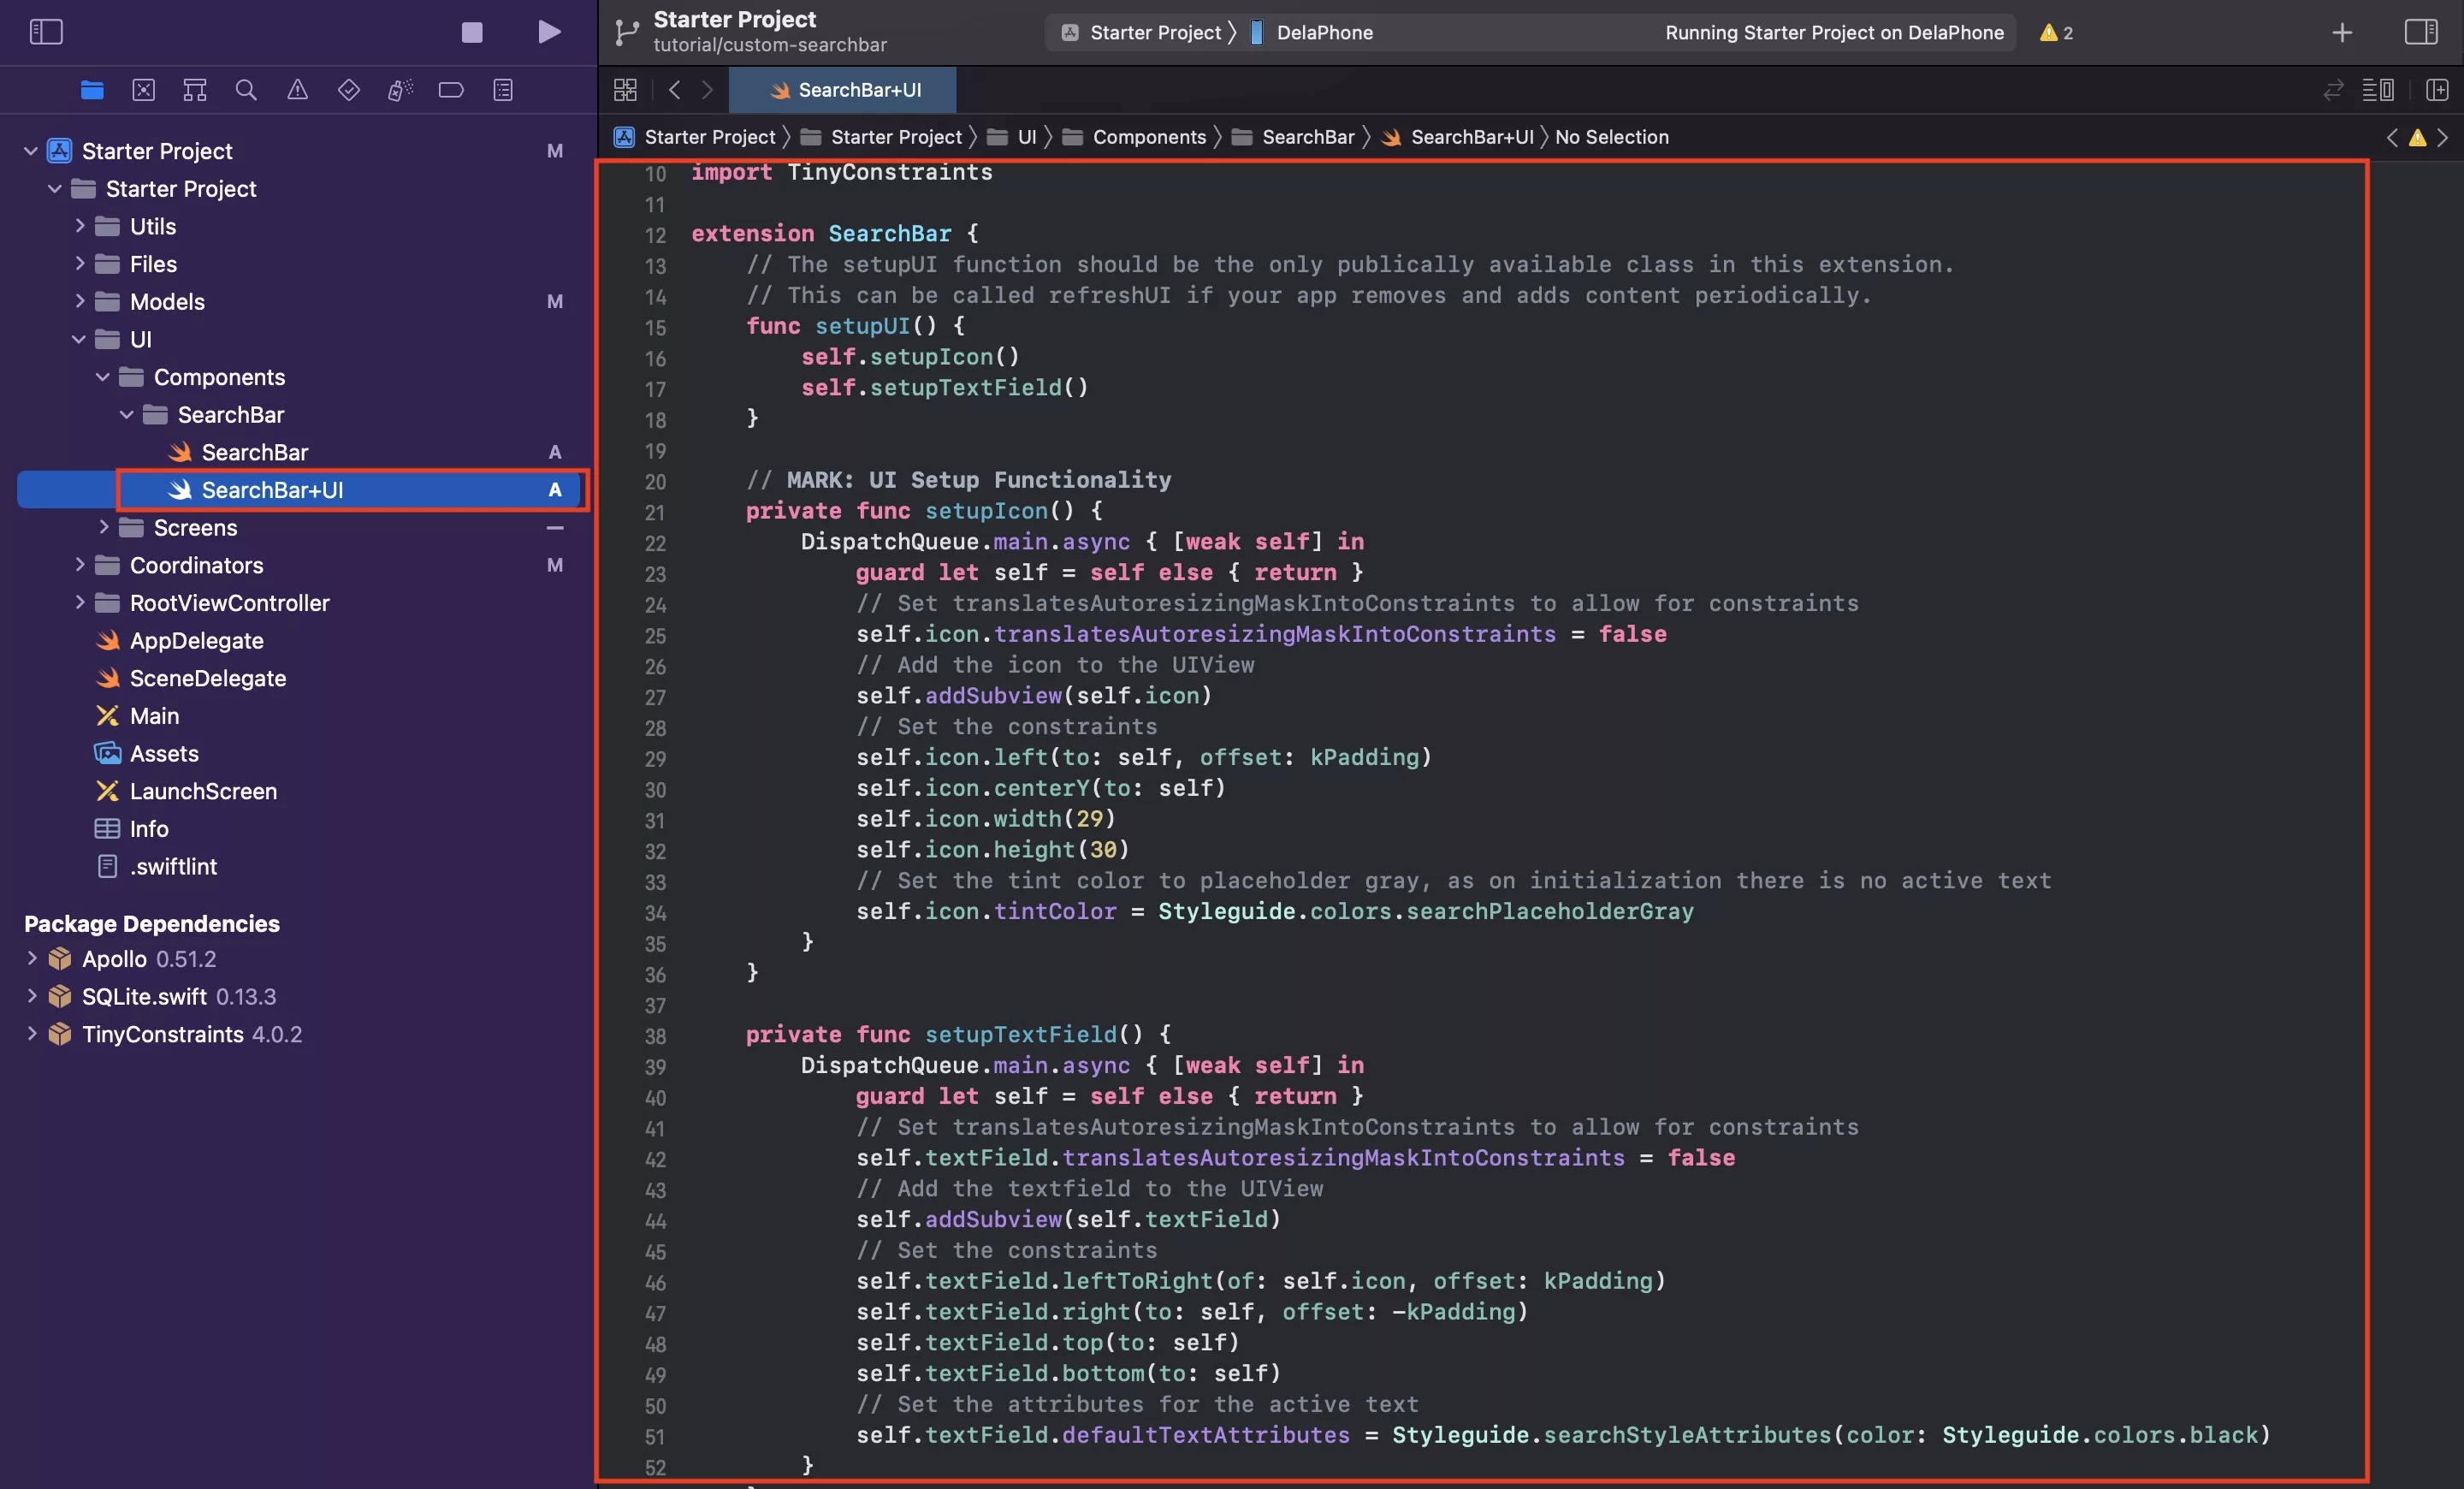
Within the SearchBar folder, create a new file called SearchBar+UI.swift and paste in the code found below.
Please note that we set the attributes of the SearchBar UITextFiled on line 51 - these match those of the placeholder and were created on Step Three.
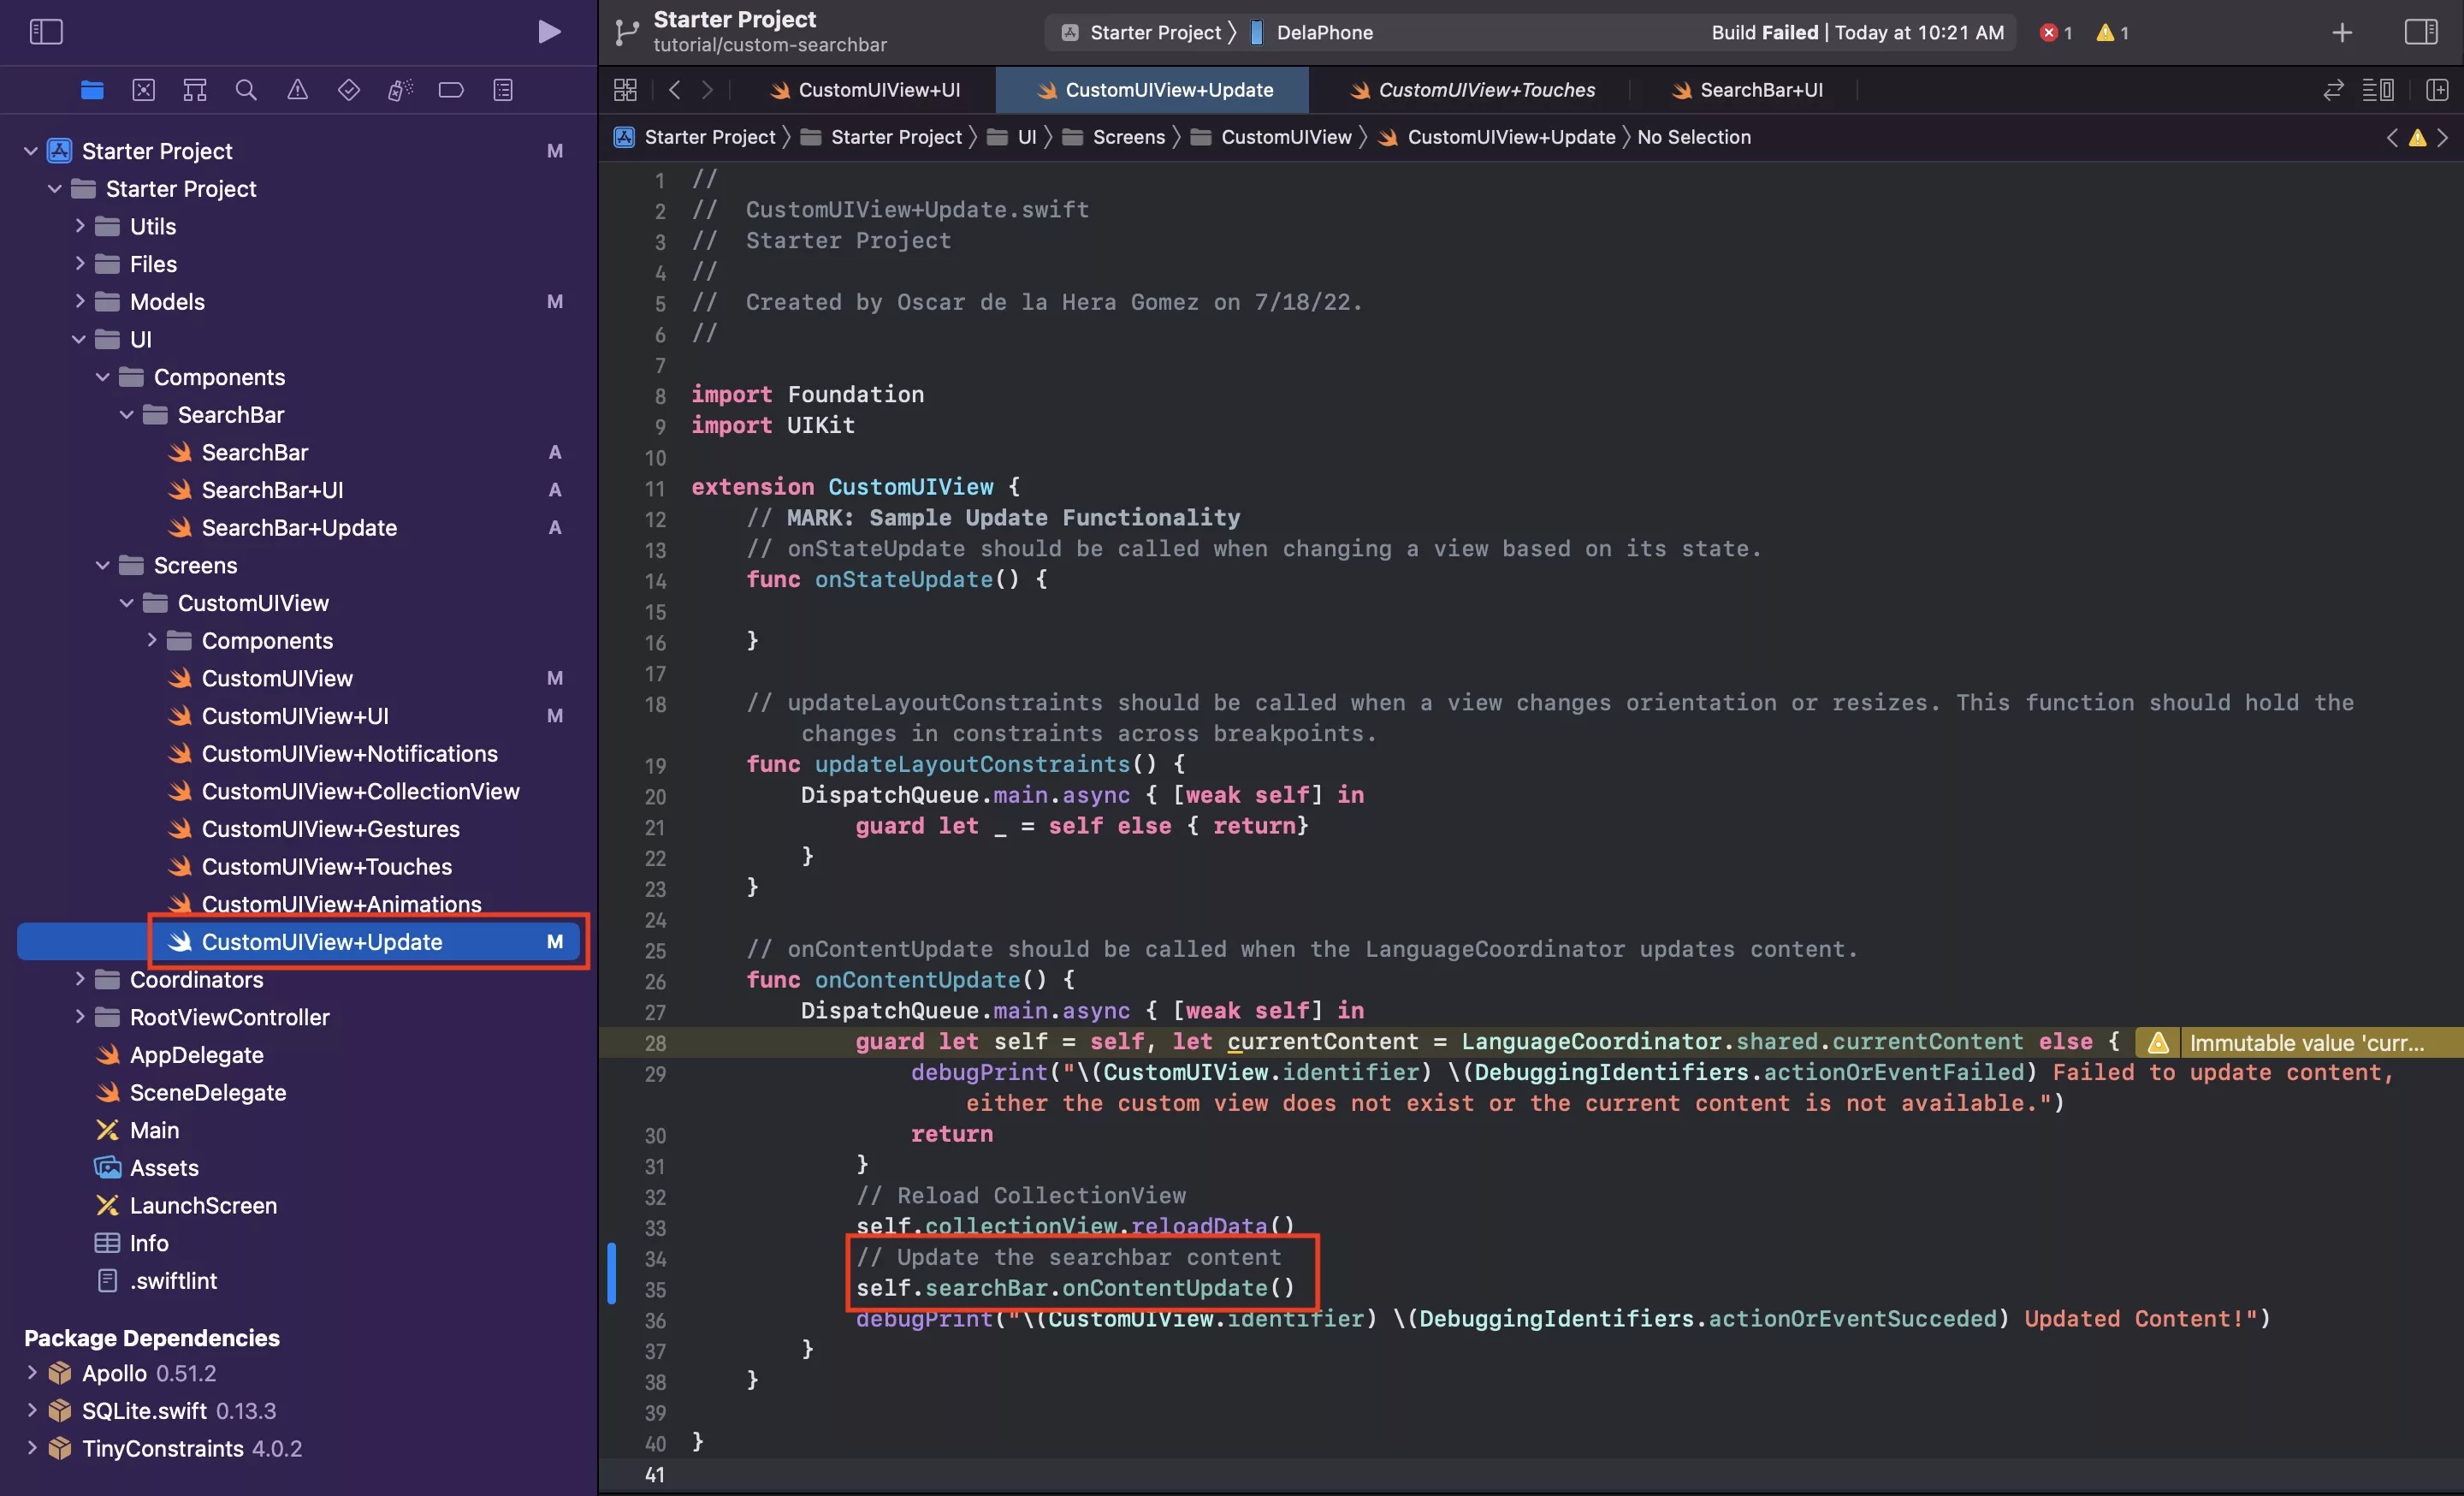
Step Seven: Create the SearchBar update extension
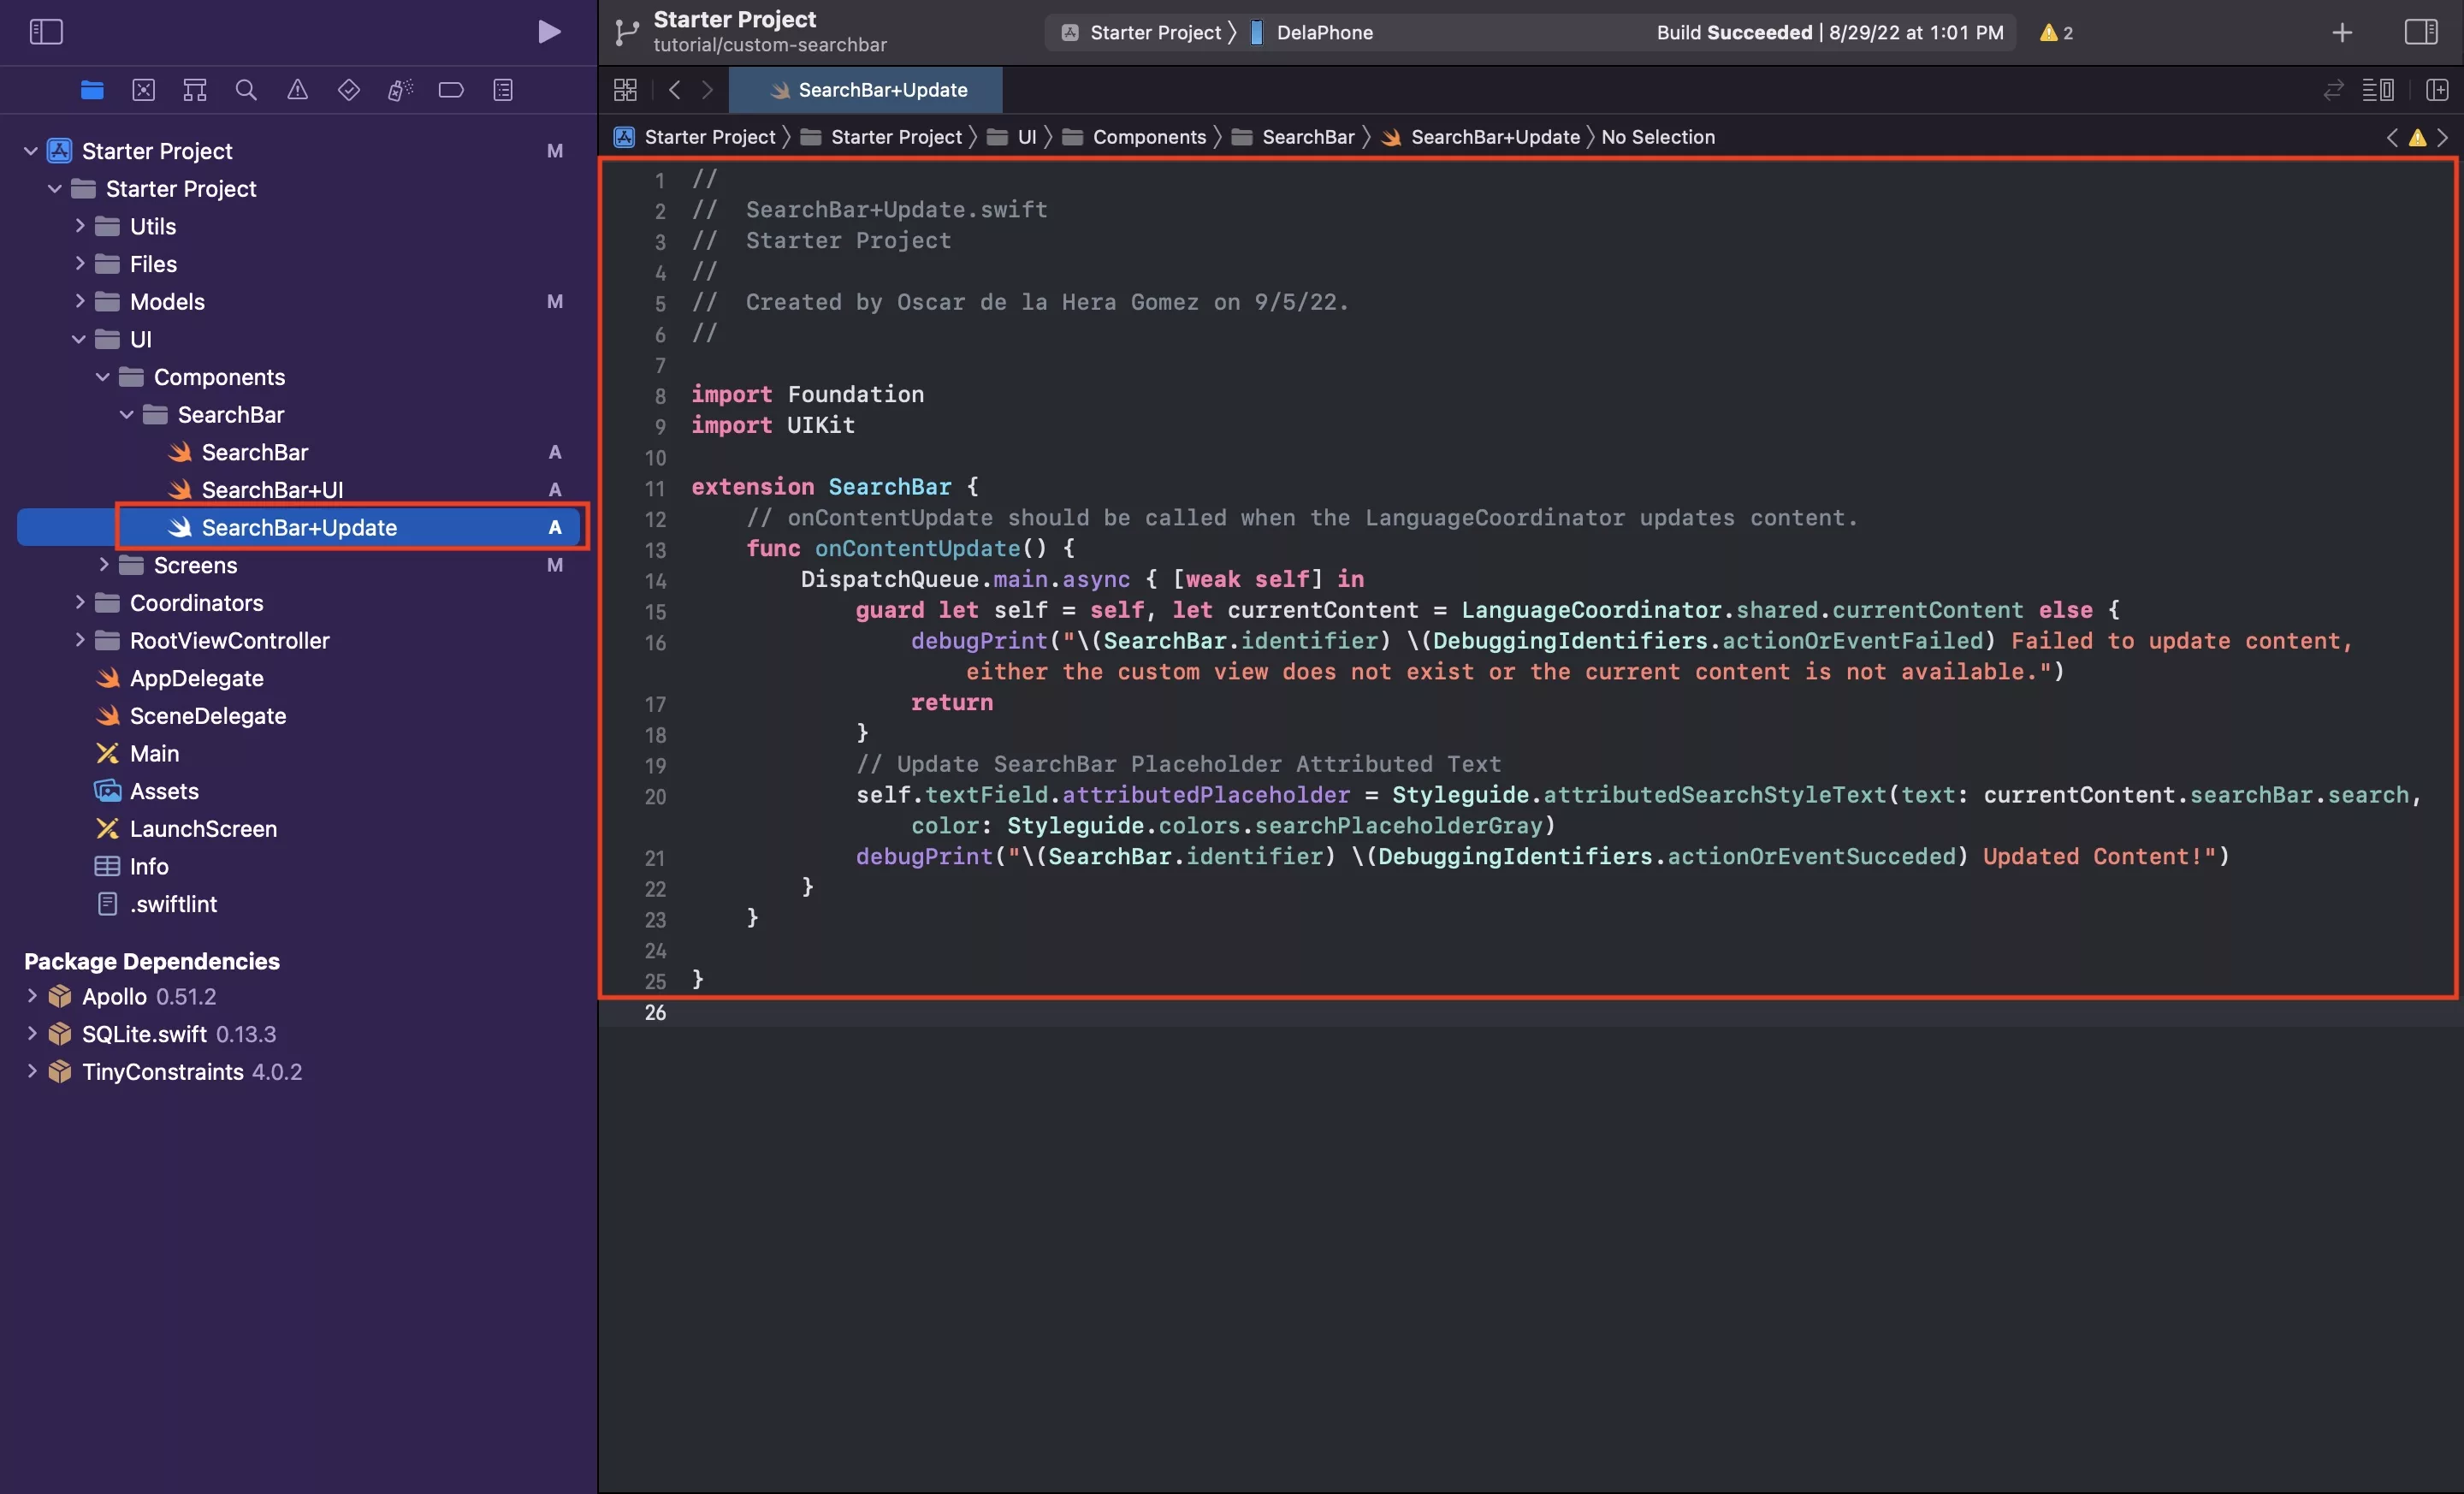
Within the SearchBar folder, create a new file called SearchBar+Update.swift and paste in the code found below.
The purpose of this functionality is to allow the attributed placeholder text to be set when the content is updated.
Step Eight: Add the search bar to the CustomUIView
The following step is dedicated at adding the search bar to the CustomUIView.
A | Declare the search bar
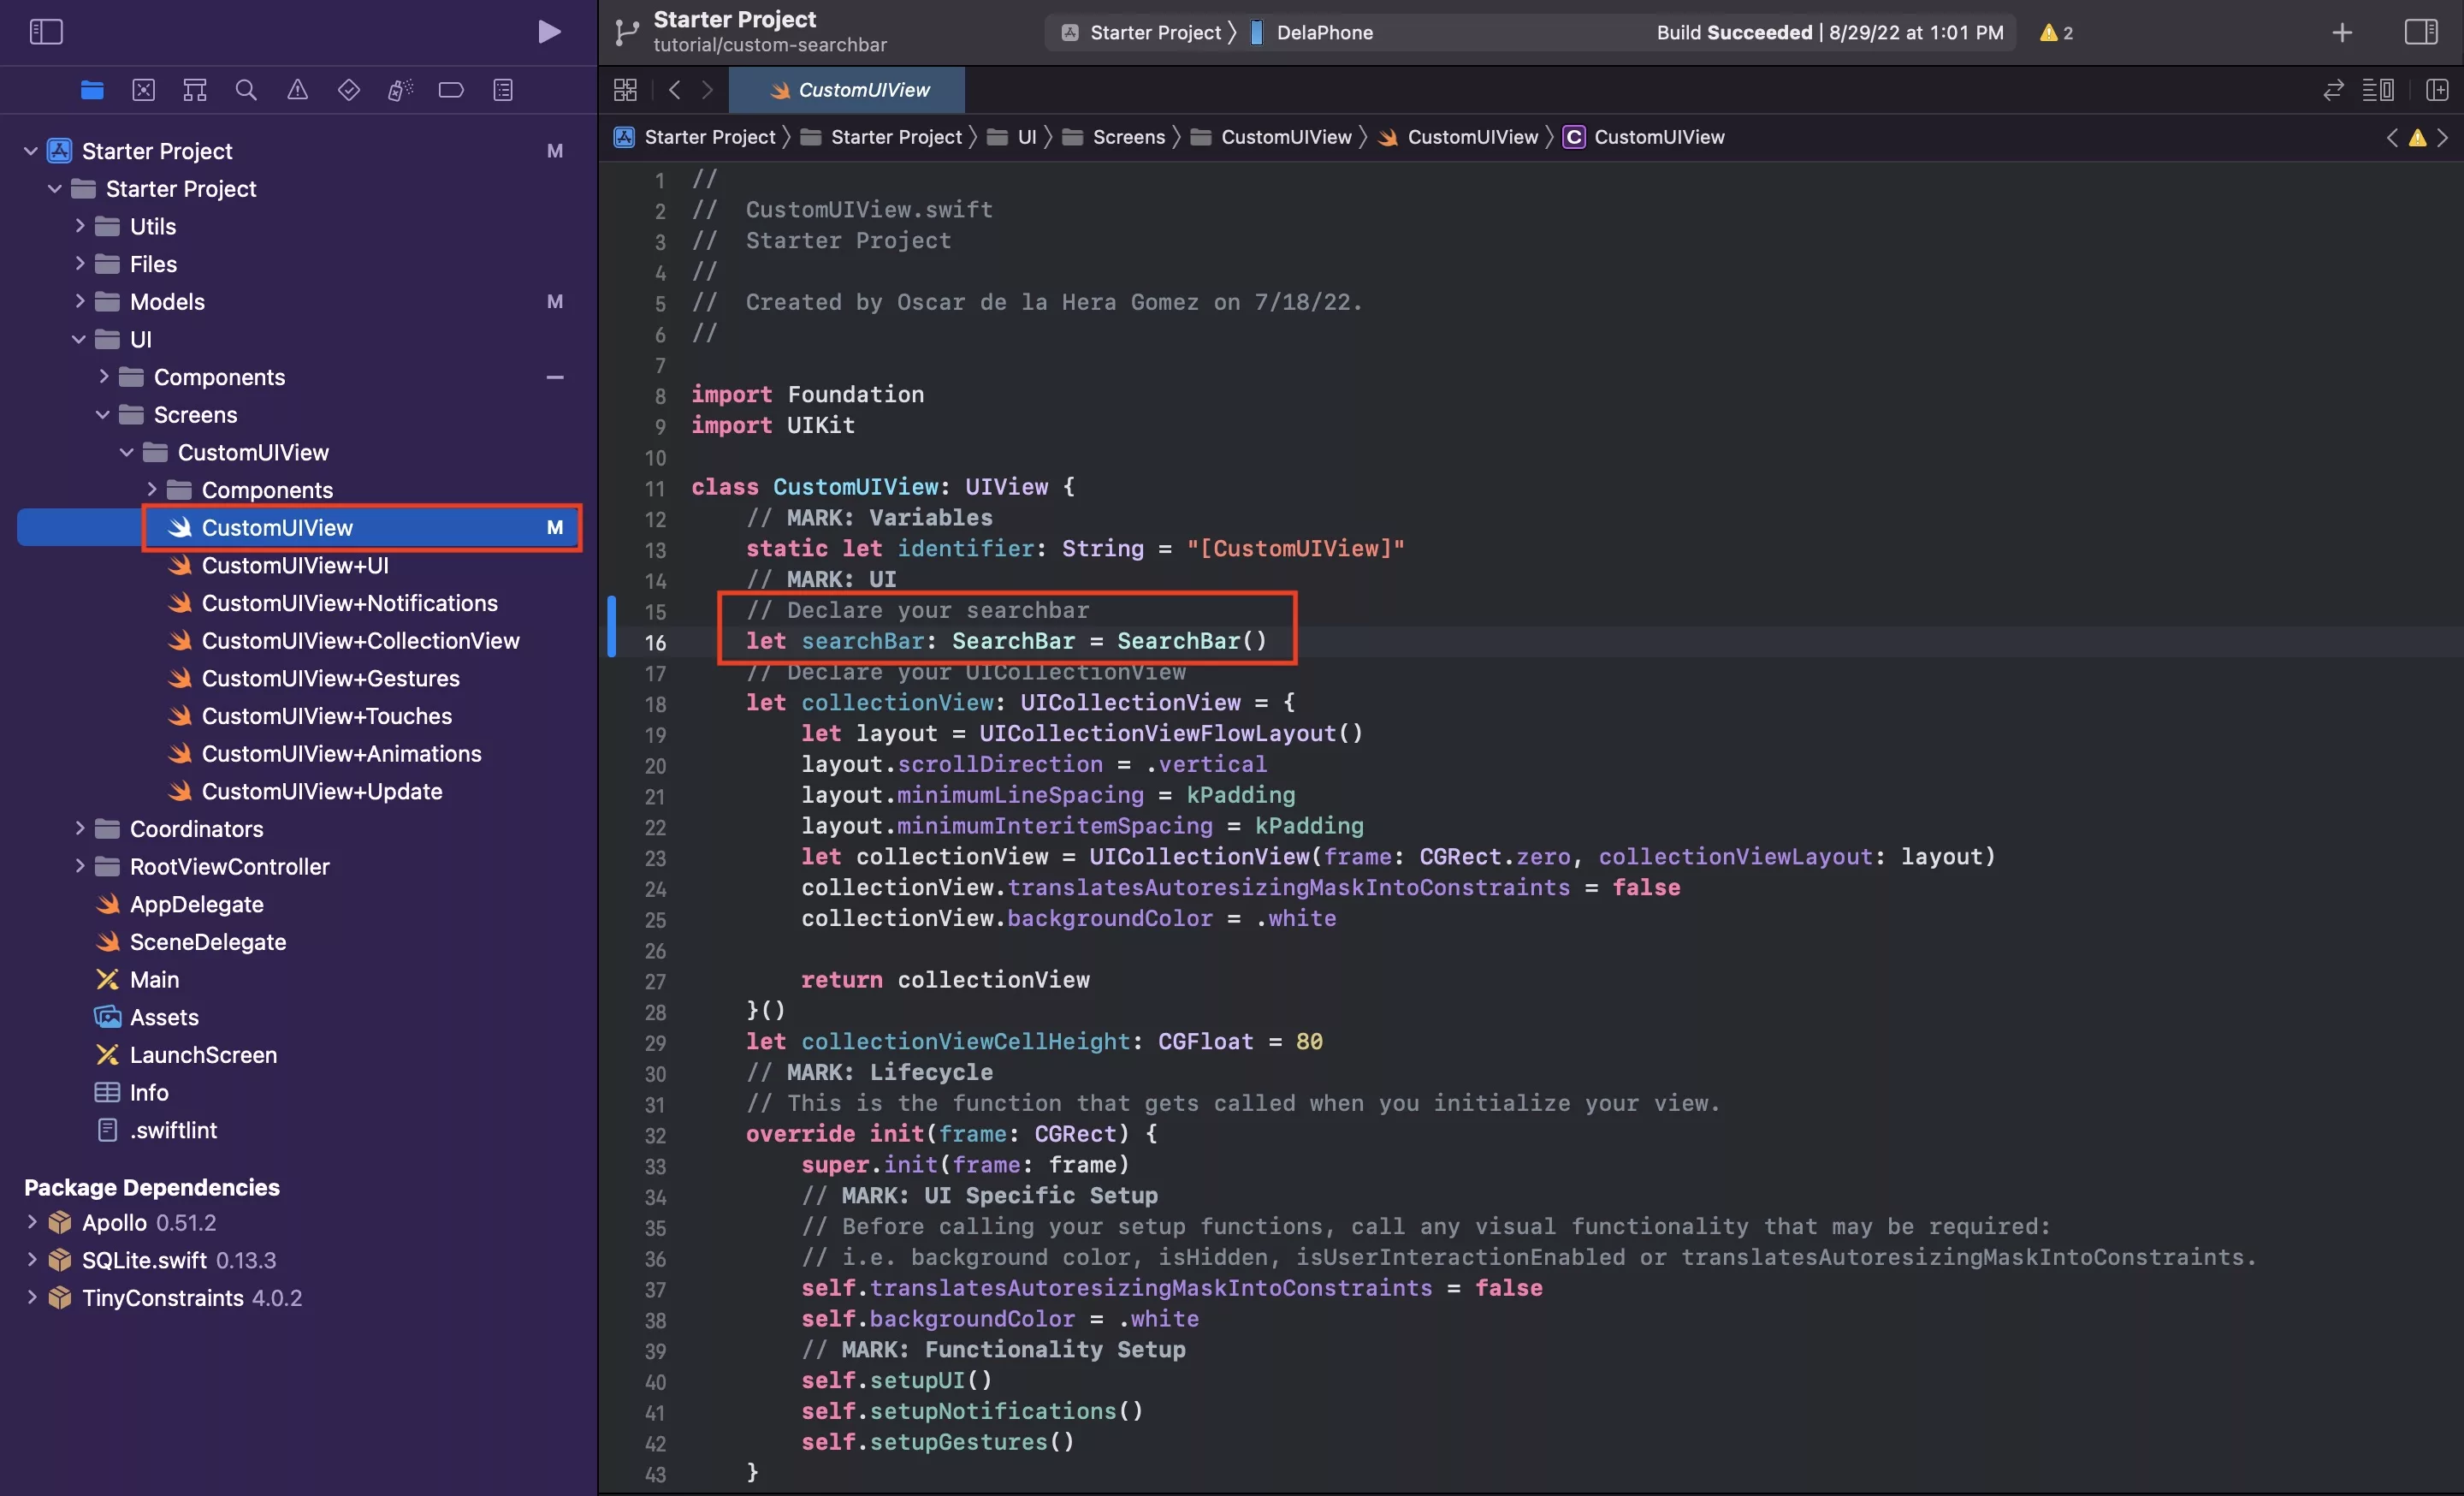
In the CustomUIView.swift, declare the search bar constant.
B | Add the search bar UI to the CustomUIView
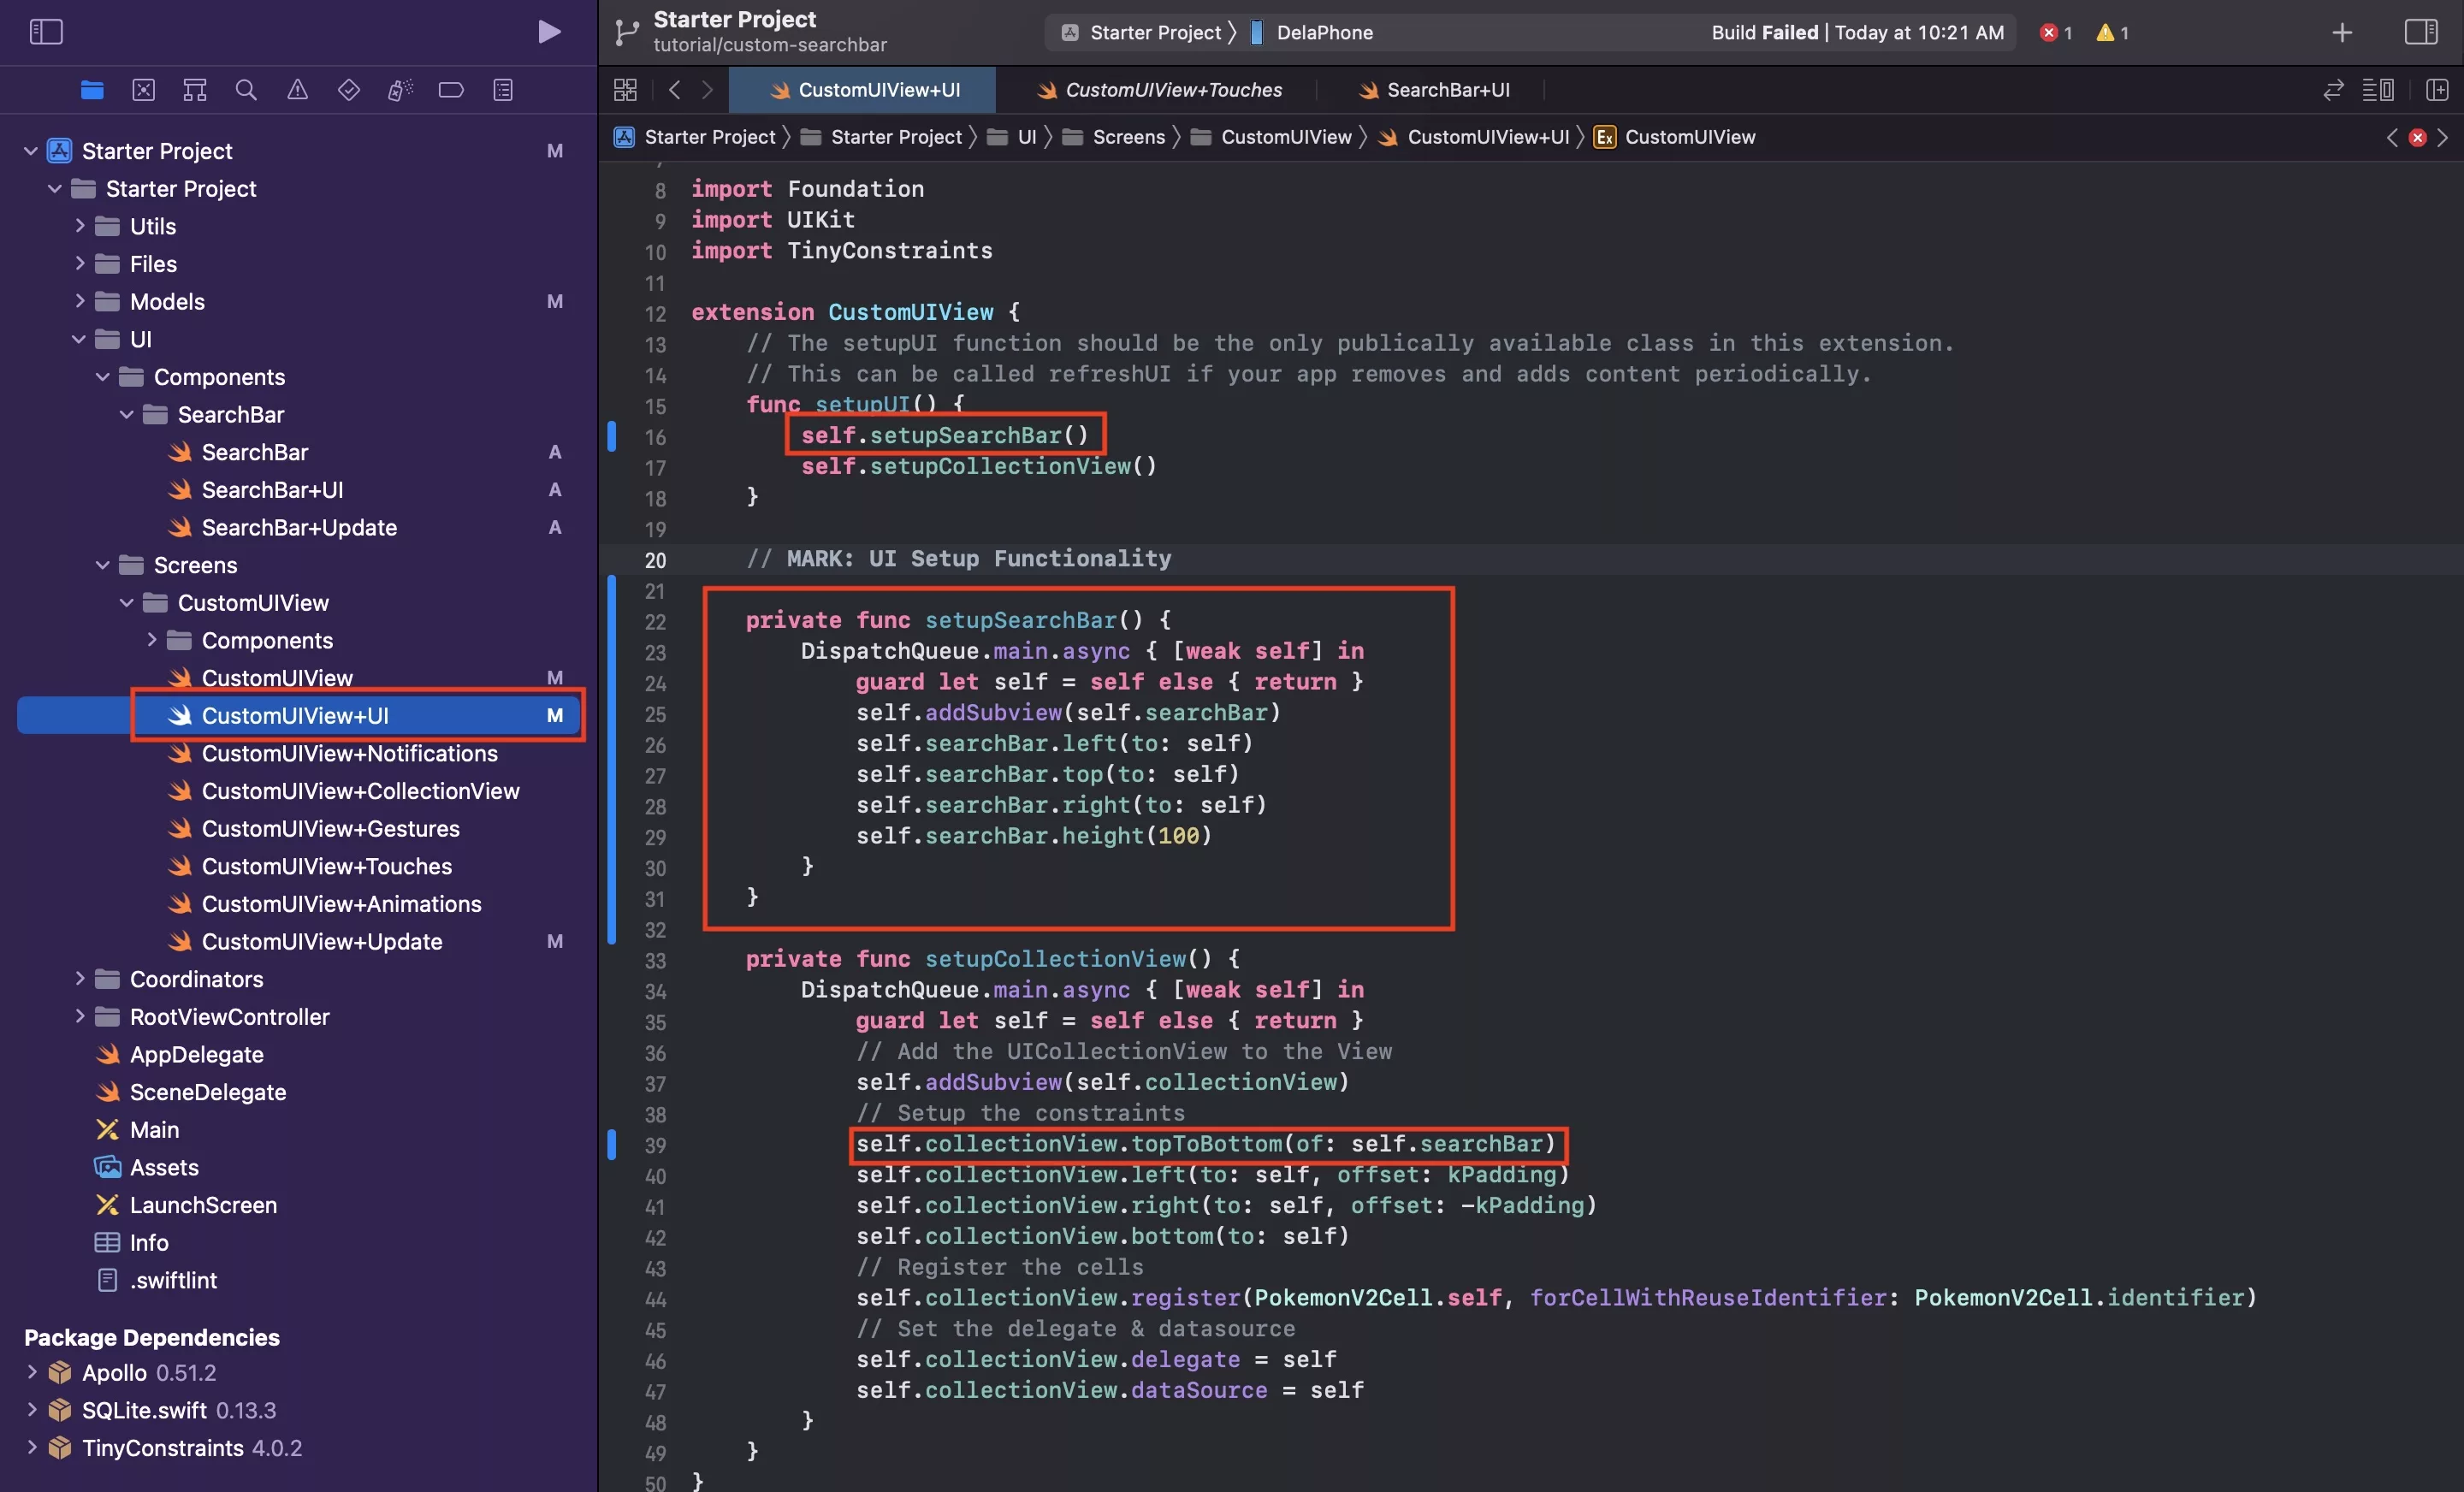
In CustomUIView+UI.swift, add the search bar to your UI.
Sample snippet provided below.
Please note that we updated the UICollectionView to be top to bottom of the search bar.
C | Update search bar content
In CustomUIView+Update.swift call the search bar content update to update the placeholder.
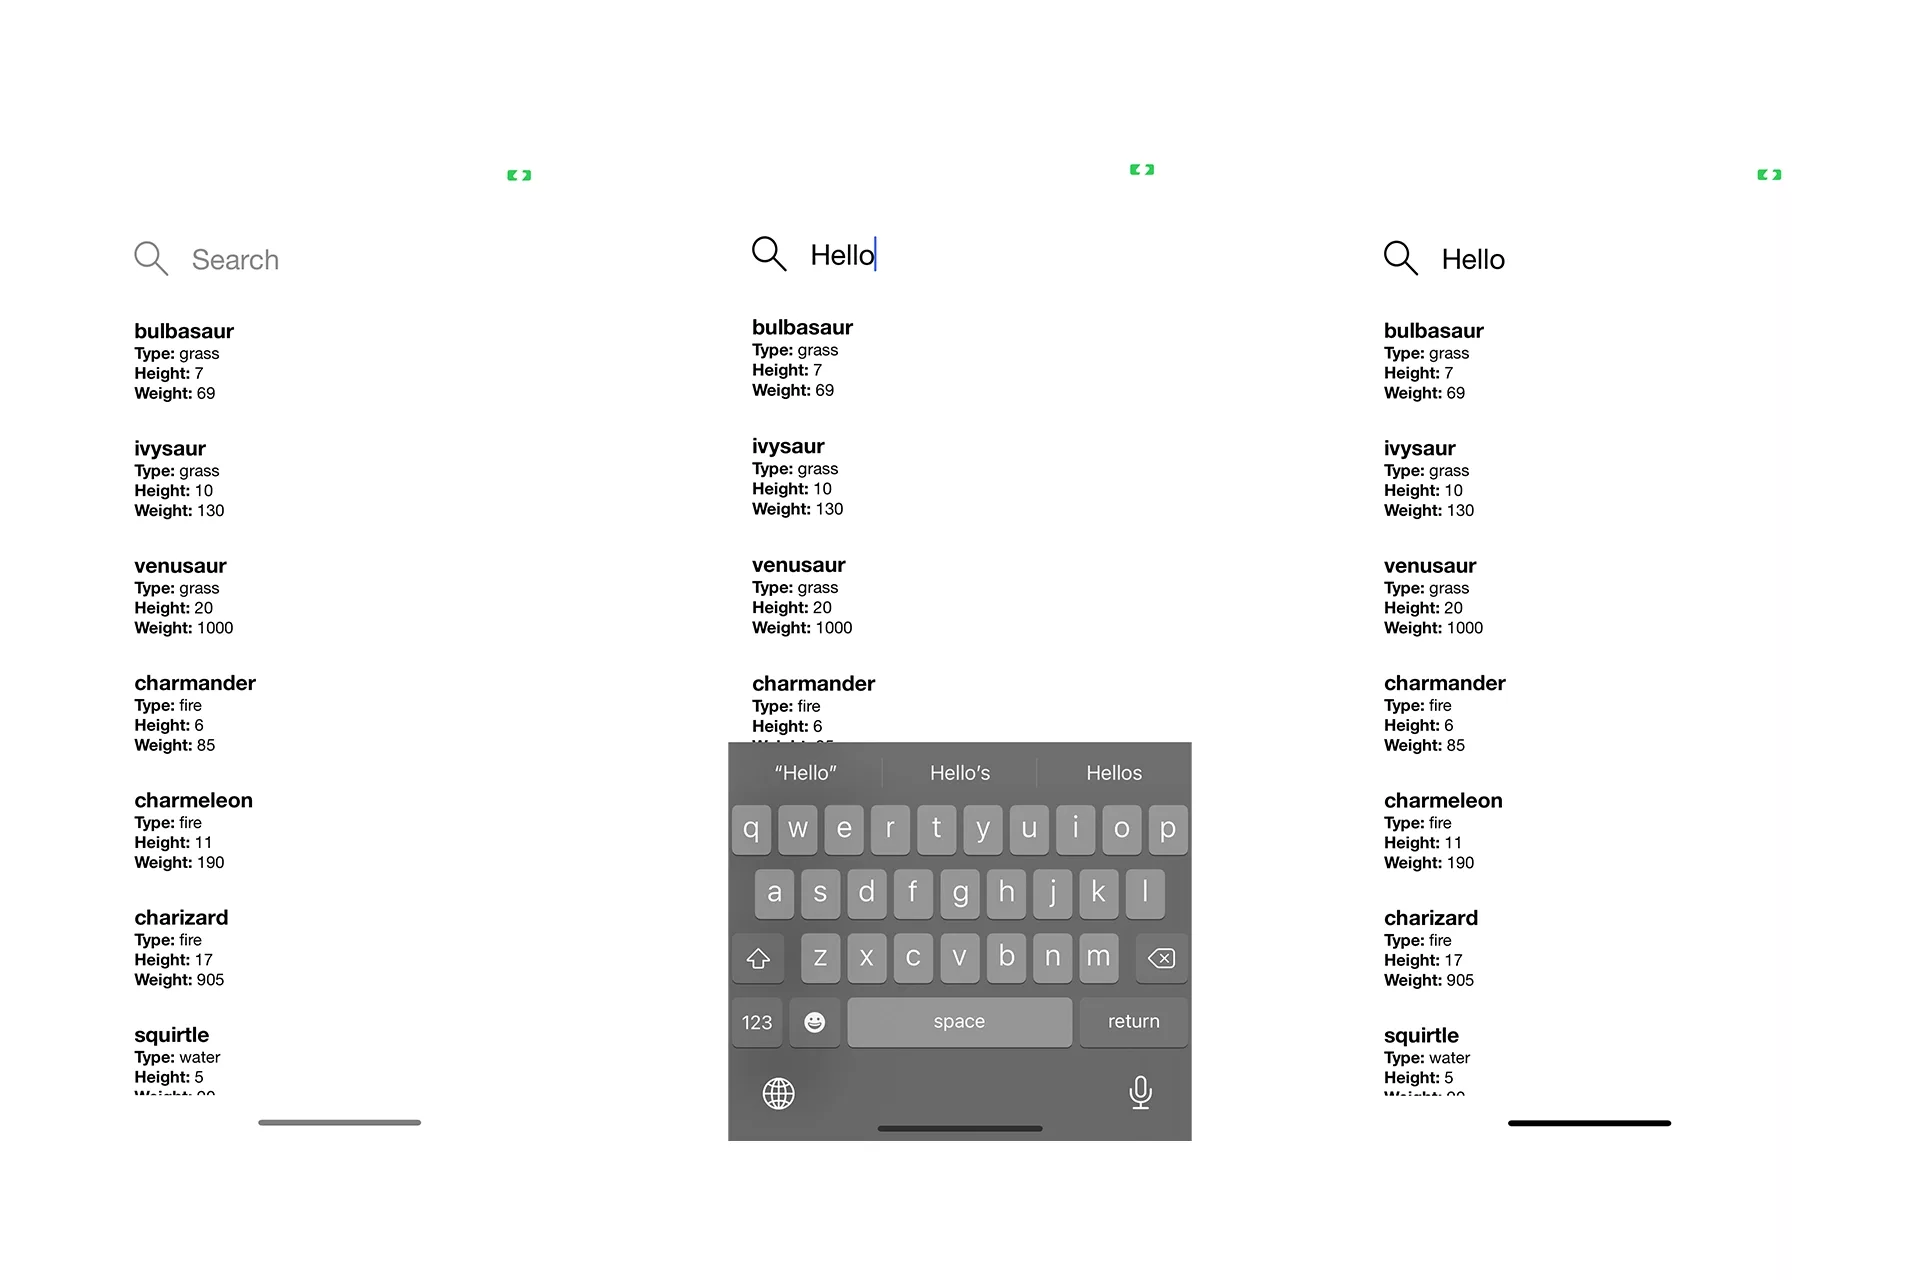
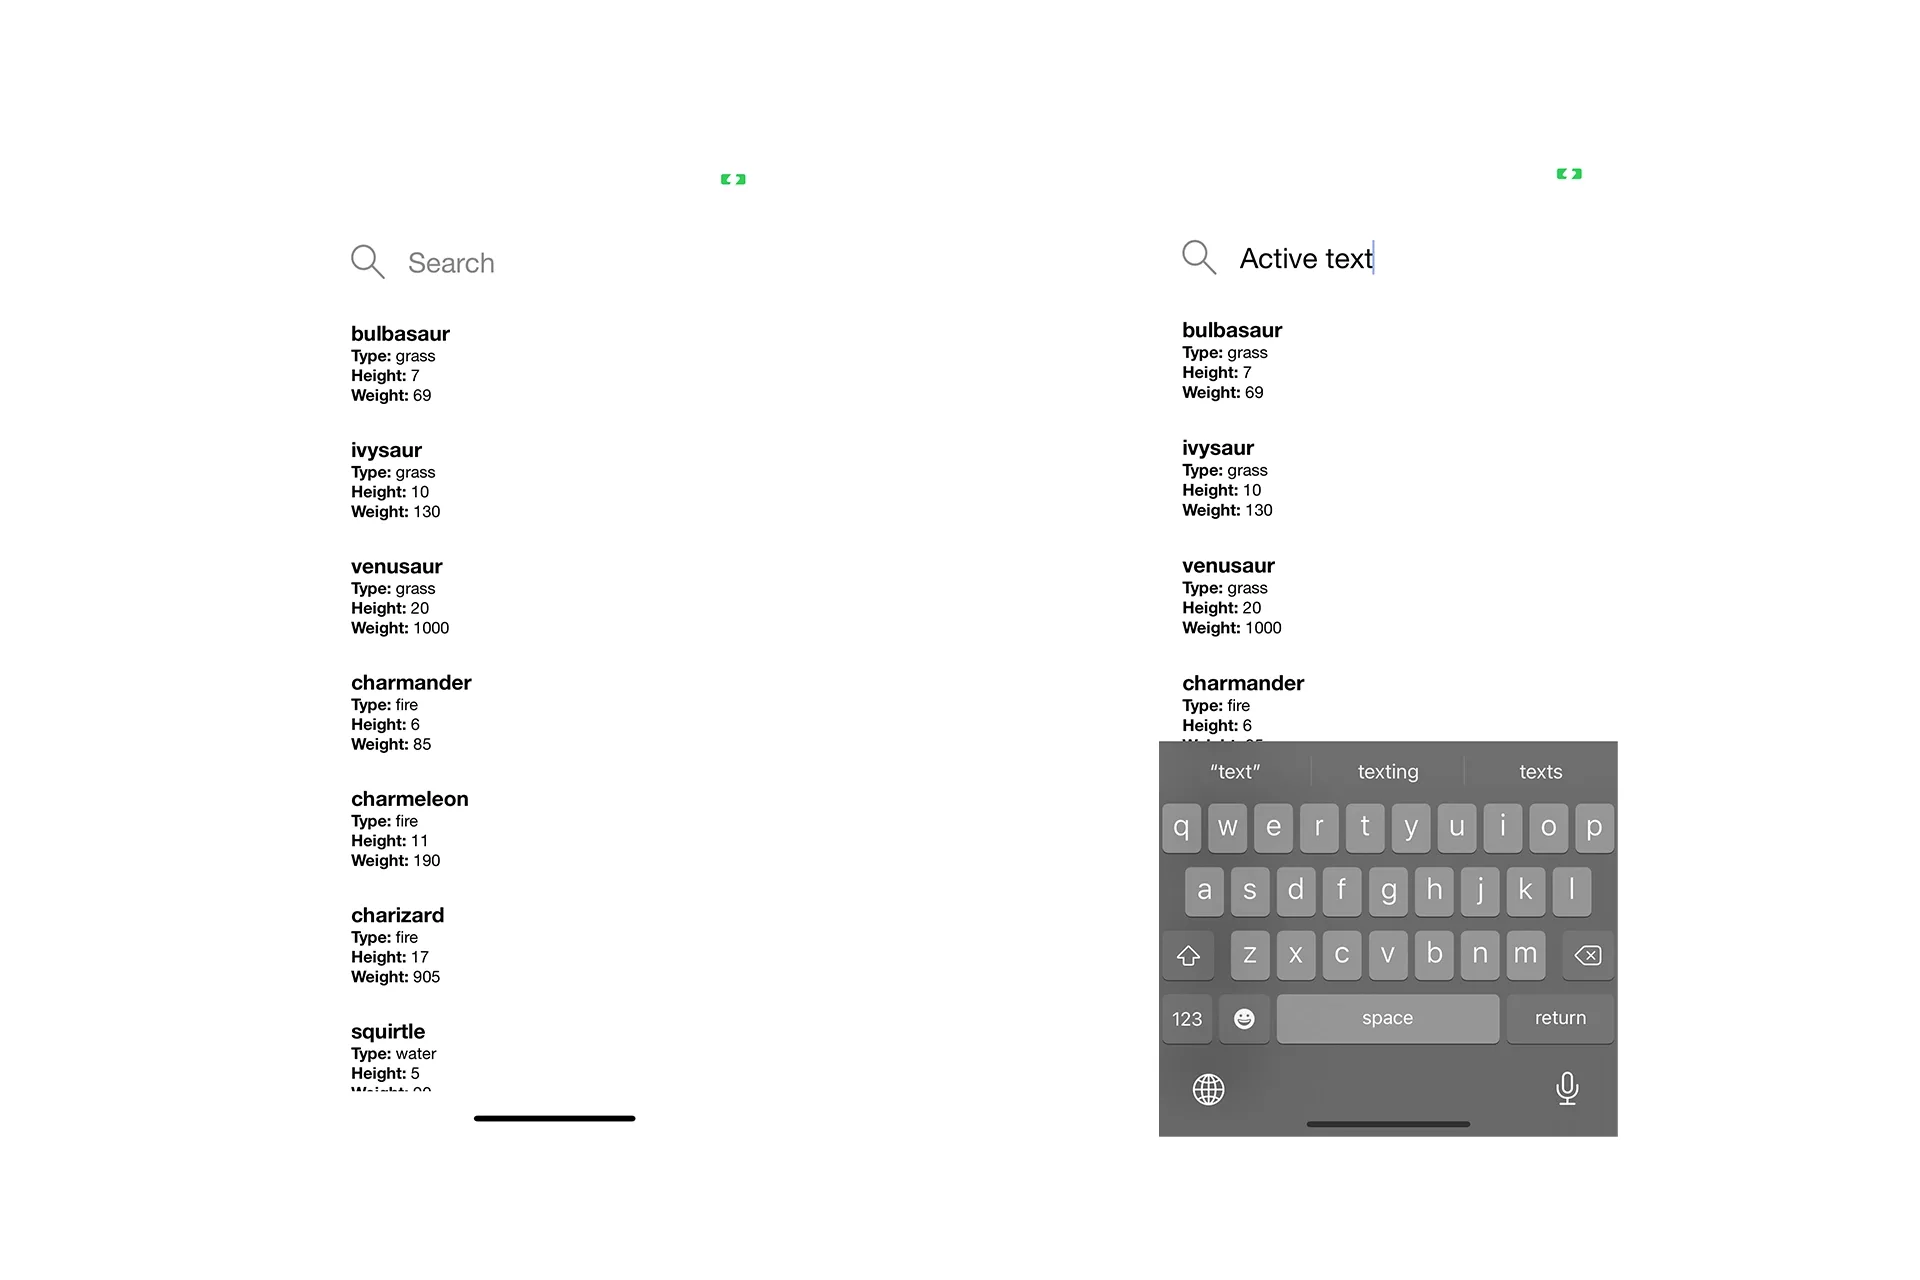
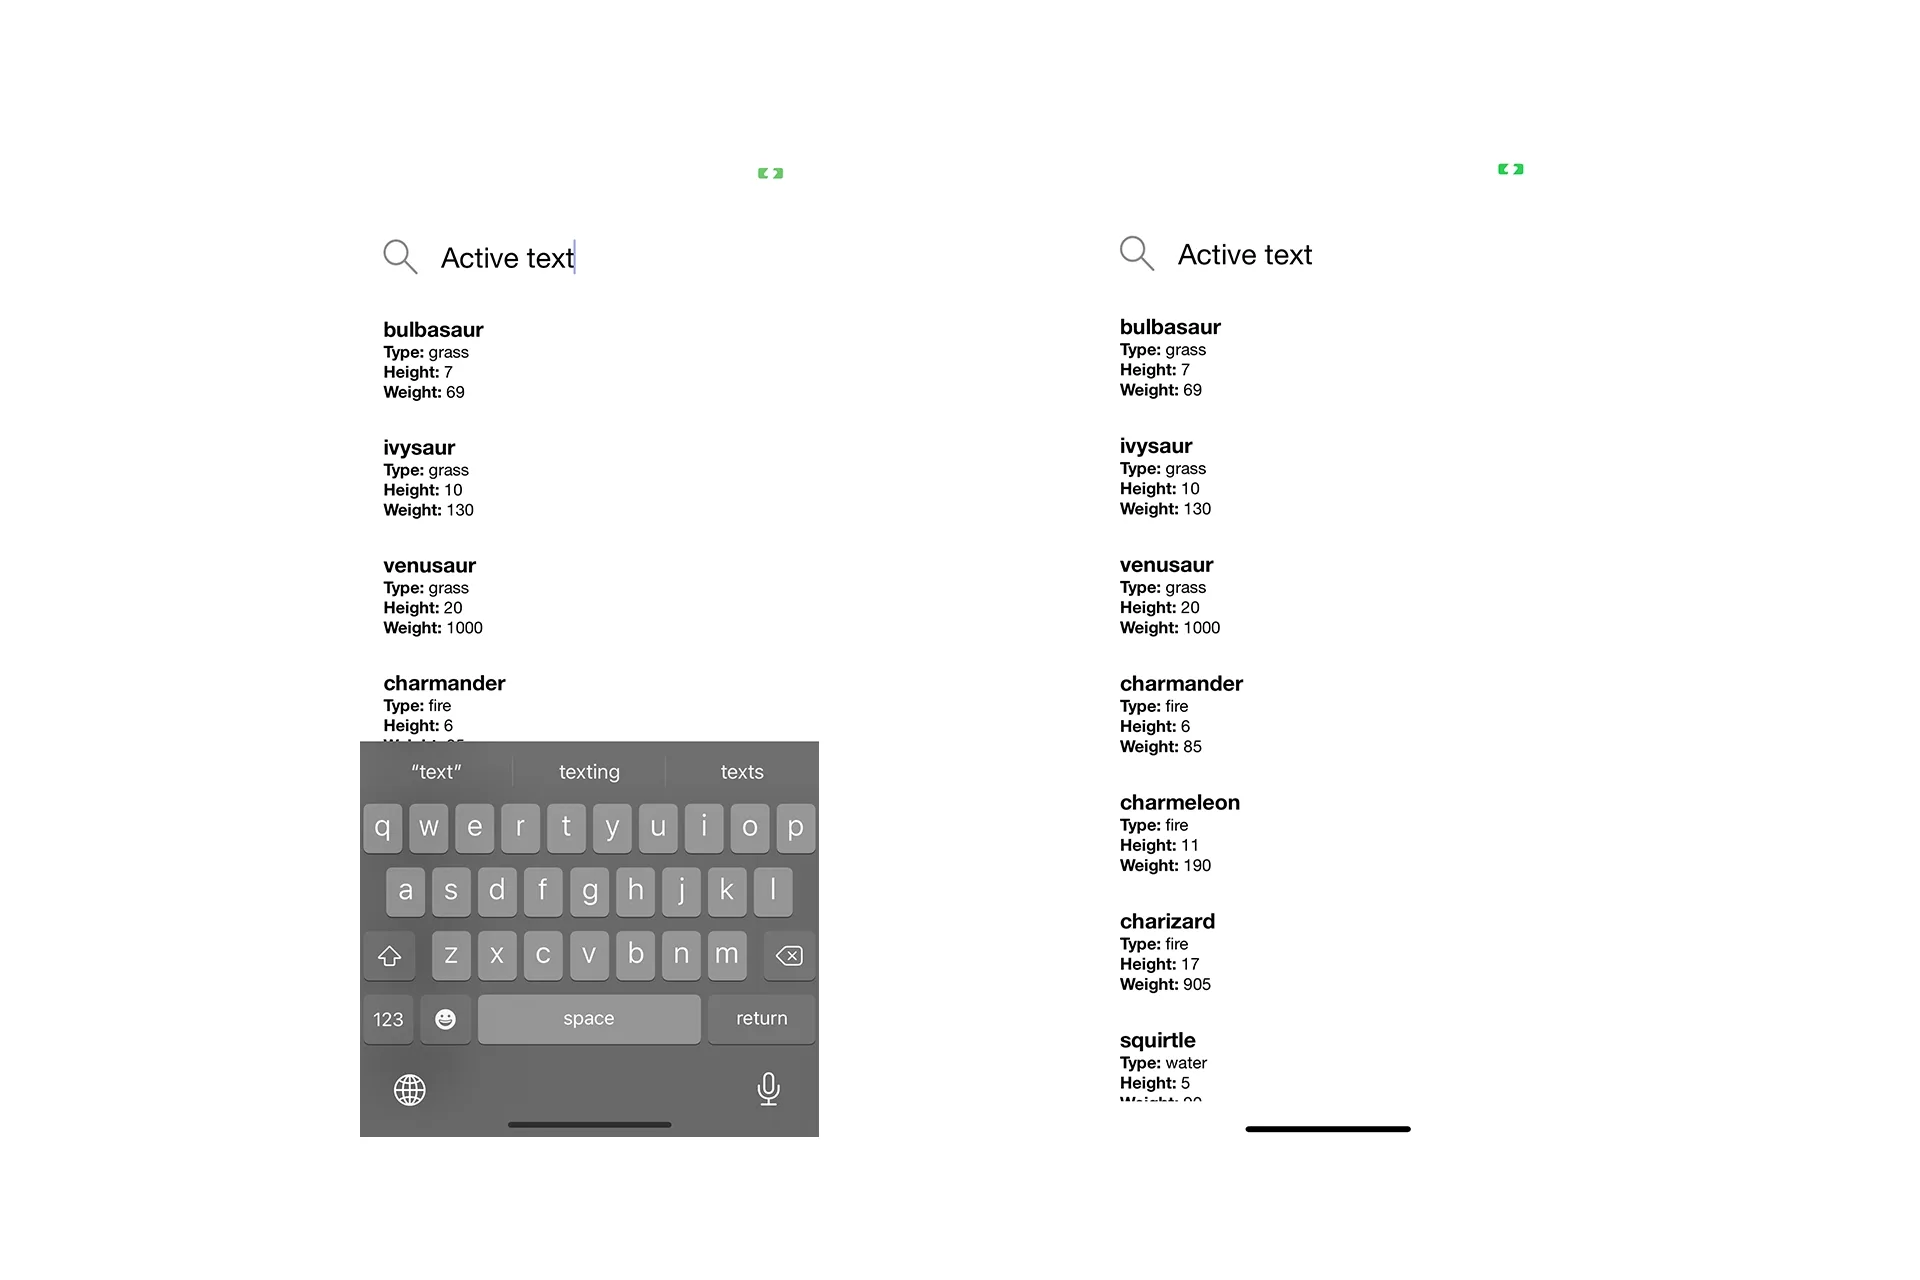
D | Verify
Run your app to make sure that it appears as above.
As you can see the UITextField works as expected, with the placeholder appearing on launch; a keyboard appearing on tap and the text changing to the attributed text that we set on Step Seven.
Step Nine: Hide the keyboard when the user presses return
The following step aims to dismiss the keyboard when the user presses return on the iOS Keyboard.
A | Set the UITextfield delegate
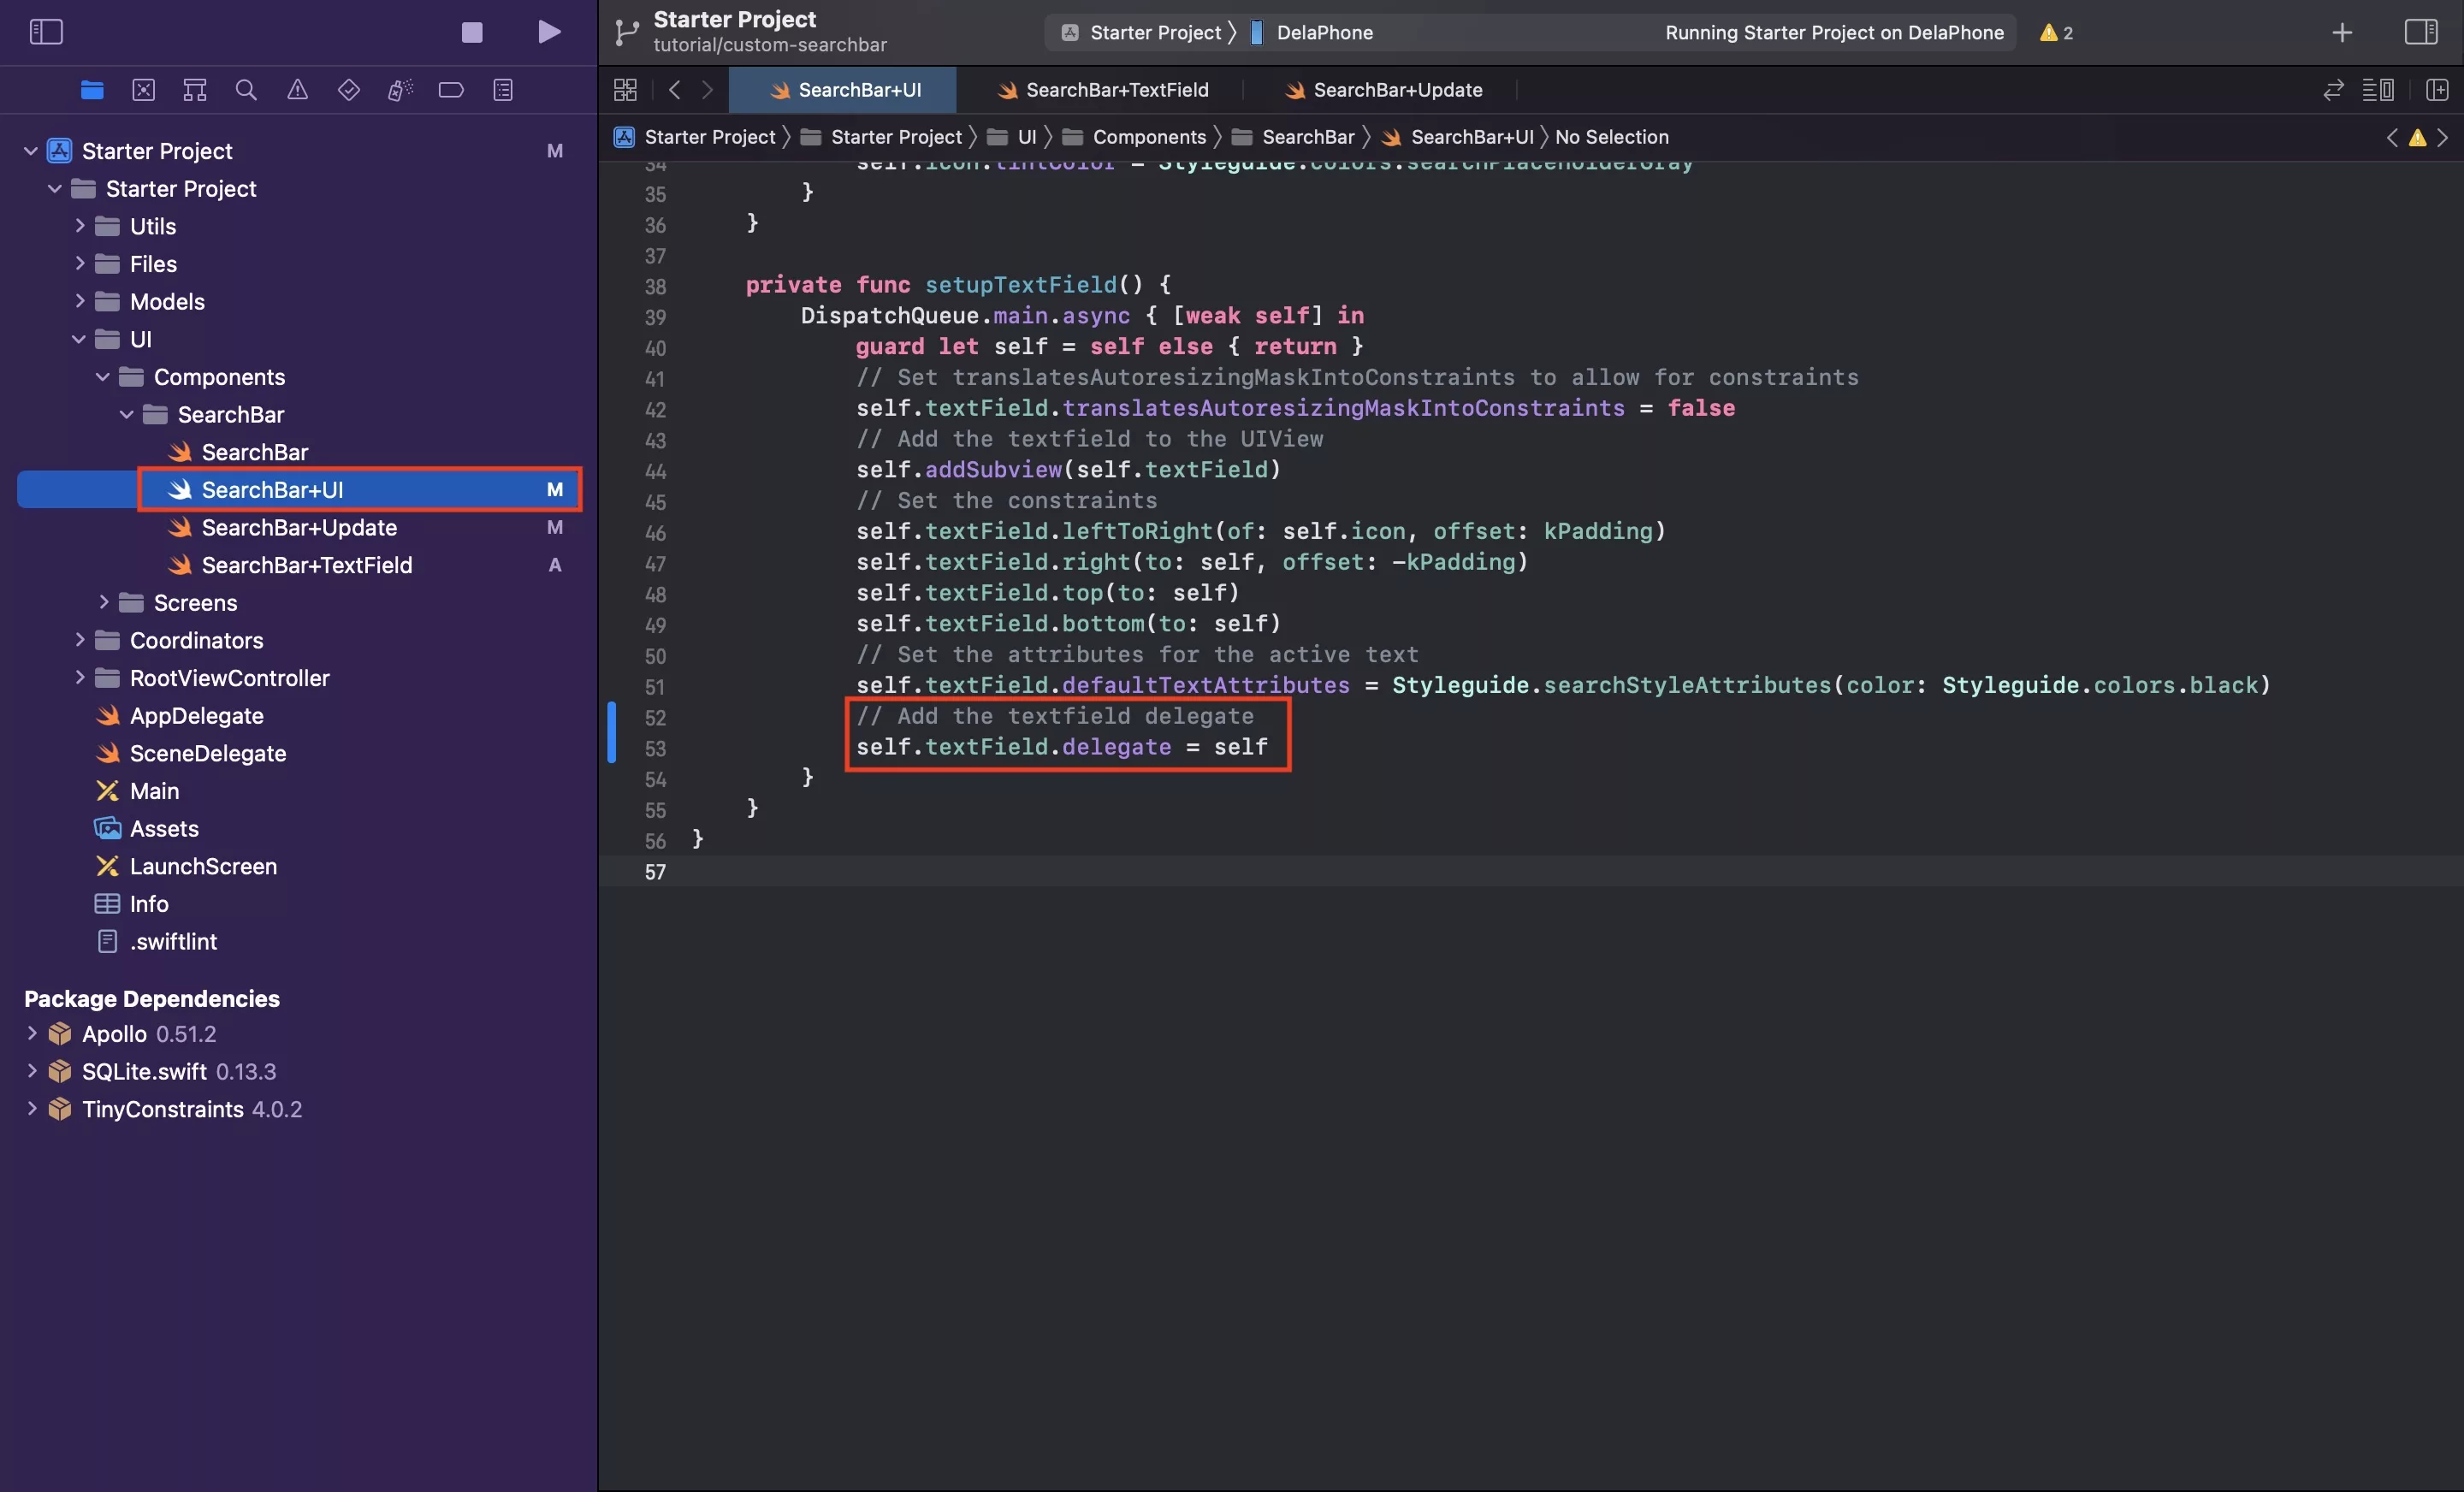
In SearchBar+UI.swift set the UITextfield delegate to self.
Please note that we create the delegate in the next part of this step.
B | Create dismiss keyboard functionality
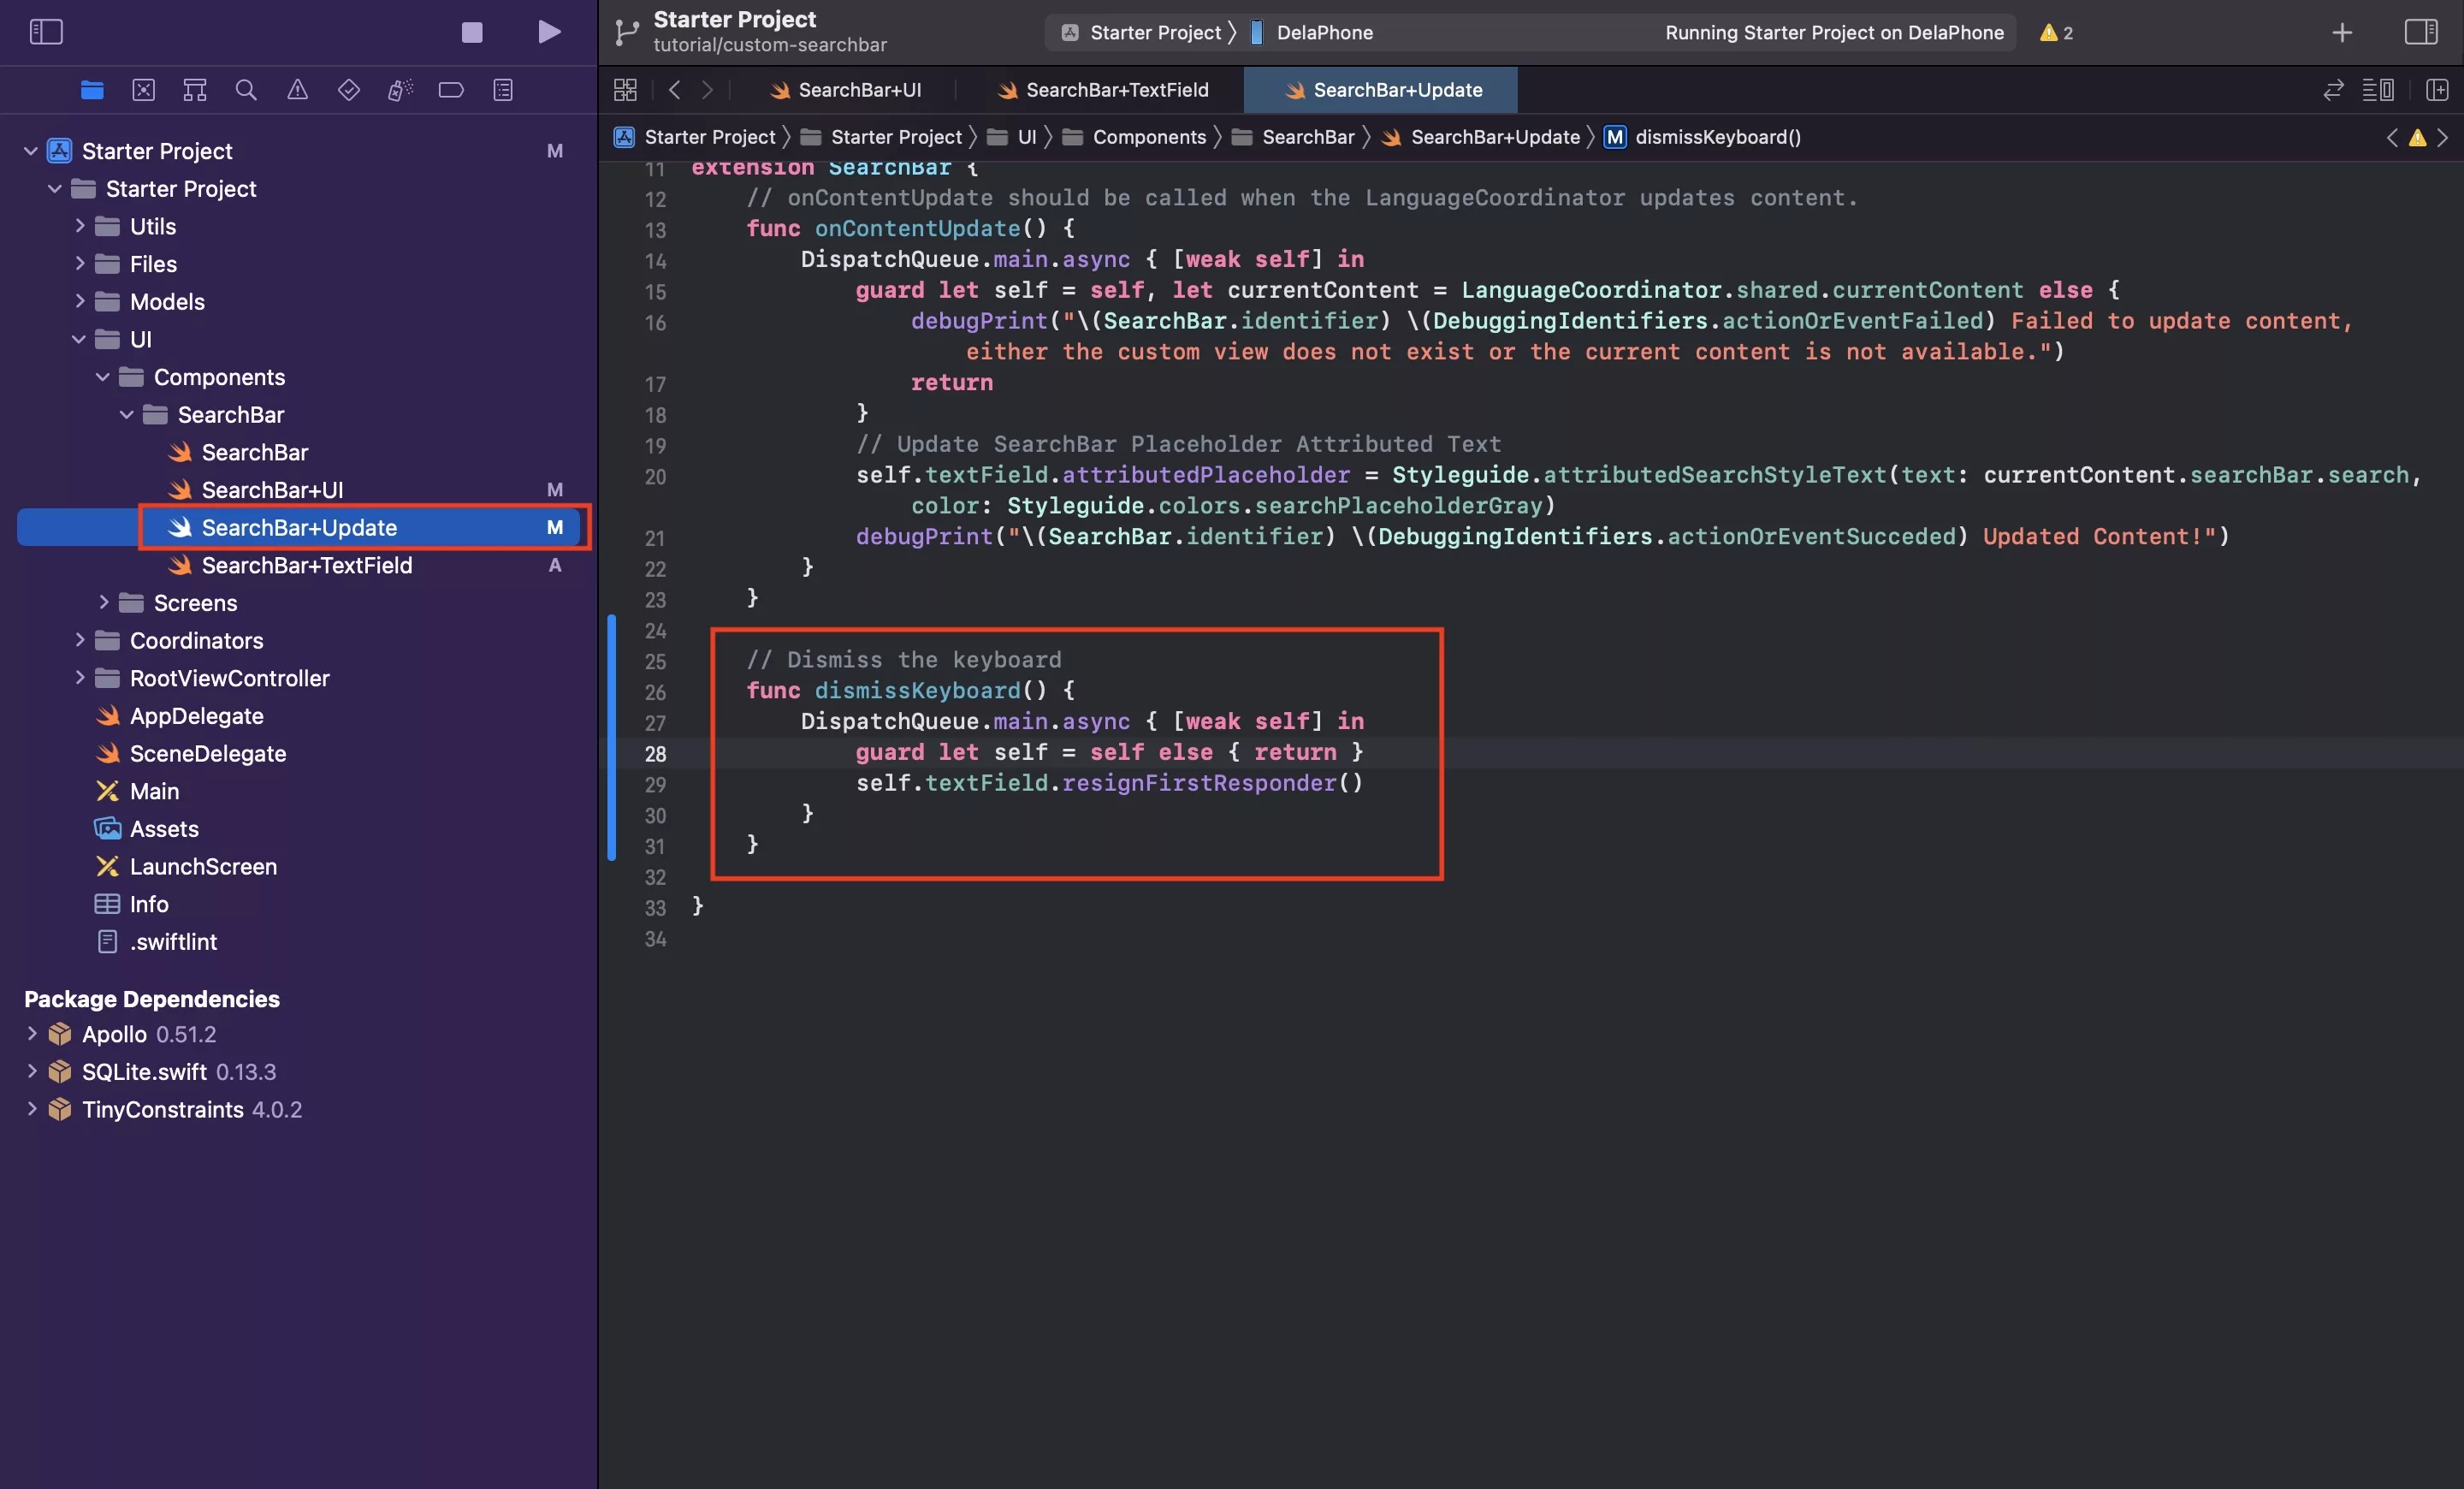
In SearchBar+Update.swift create the dismiss keyboard functionality.
Sample snippet available below.
C | Create the TextField delegate extension
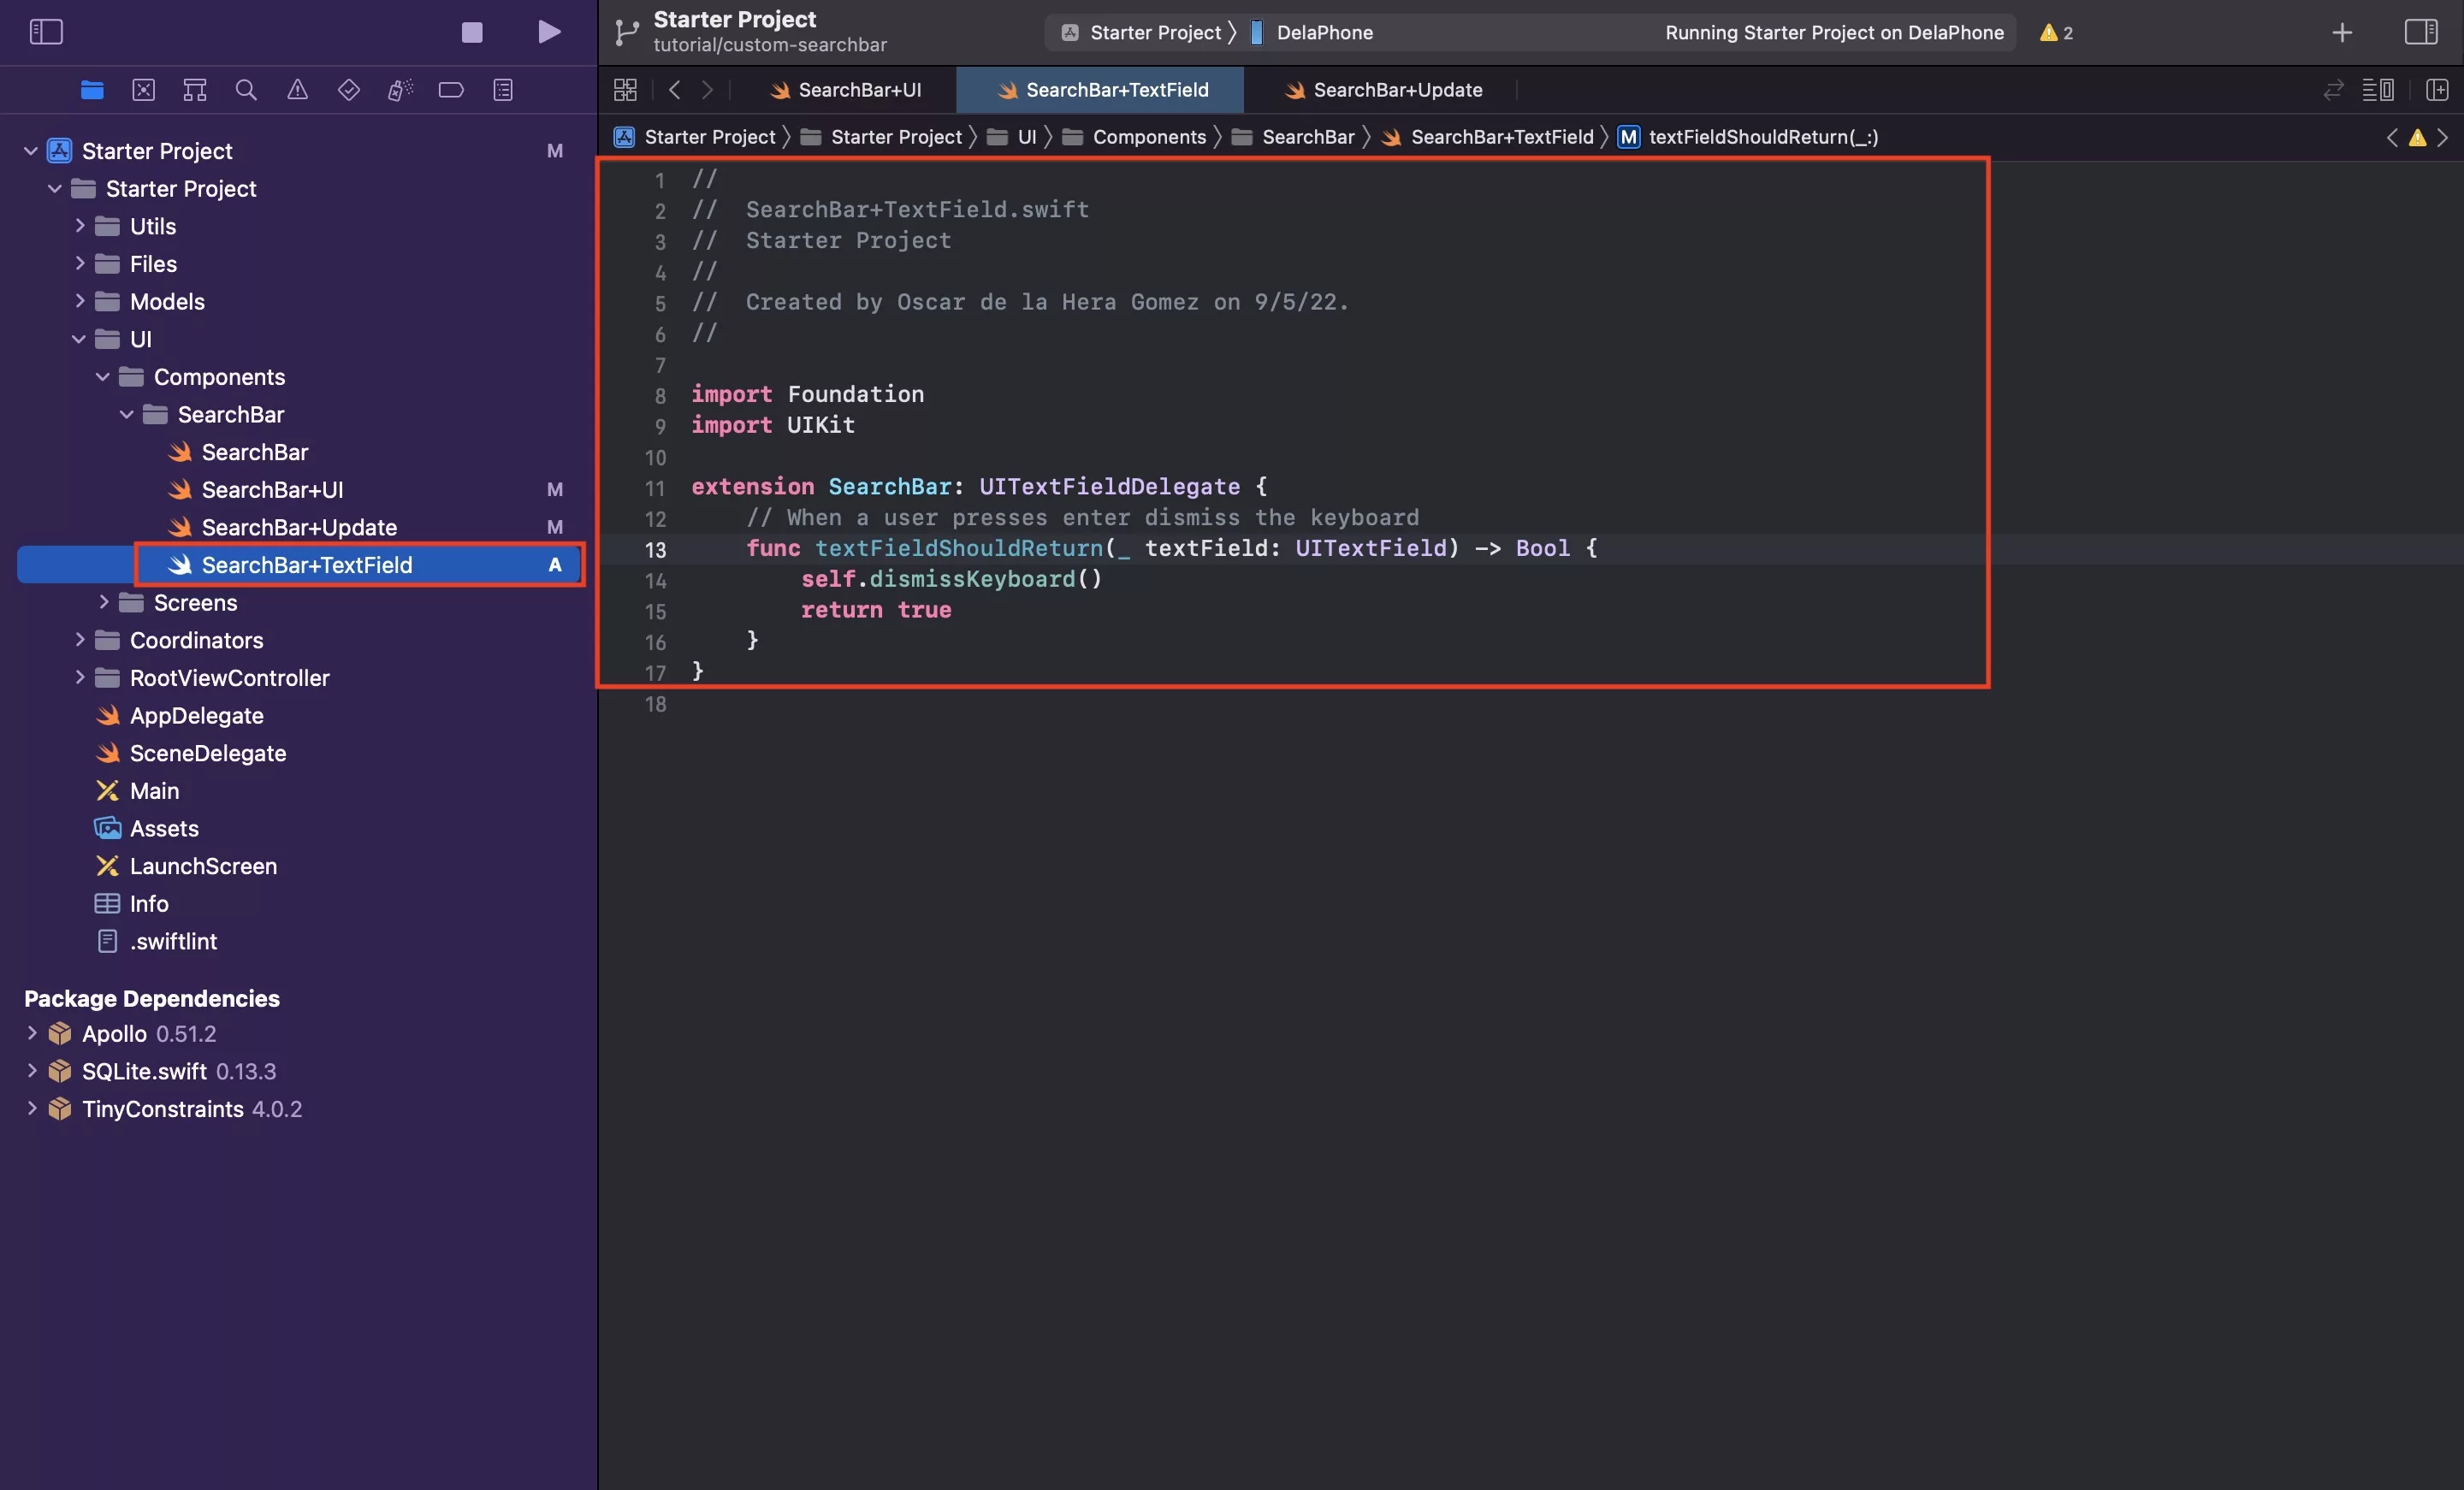
Within the SearchBar folder, create a new file called SearchBar+Textfield.swift and paste in the code found below.
D | Verify
Run the app, select the search bar textfield and see the keyboard appear. Then, verify that if you press the return key, the keyboard is dismissed.
Step Ten: Hide the keyboard when the user presses the screen outside the search bar
The following step aims to dismiss the keyboard when interacting outside of the SearchBar UIView.
A | Declare the keyboard is active variable
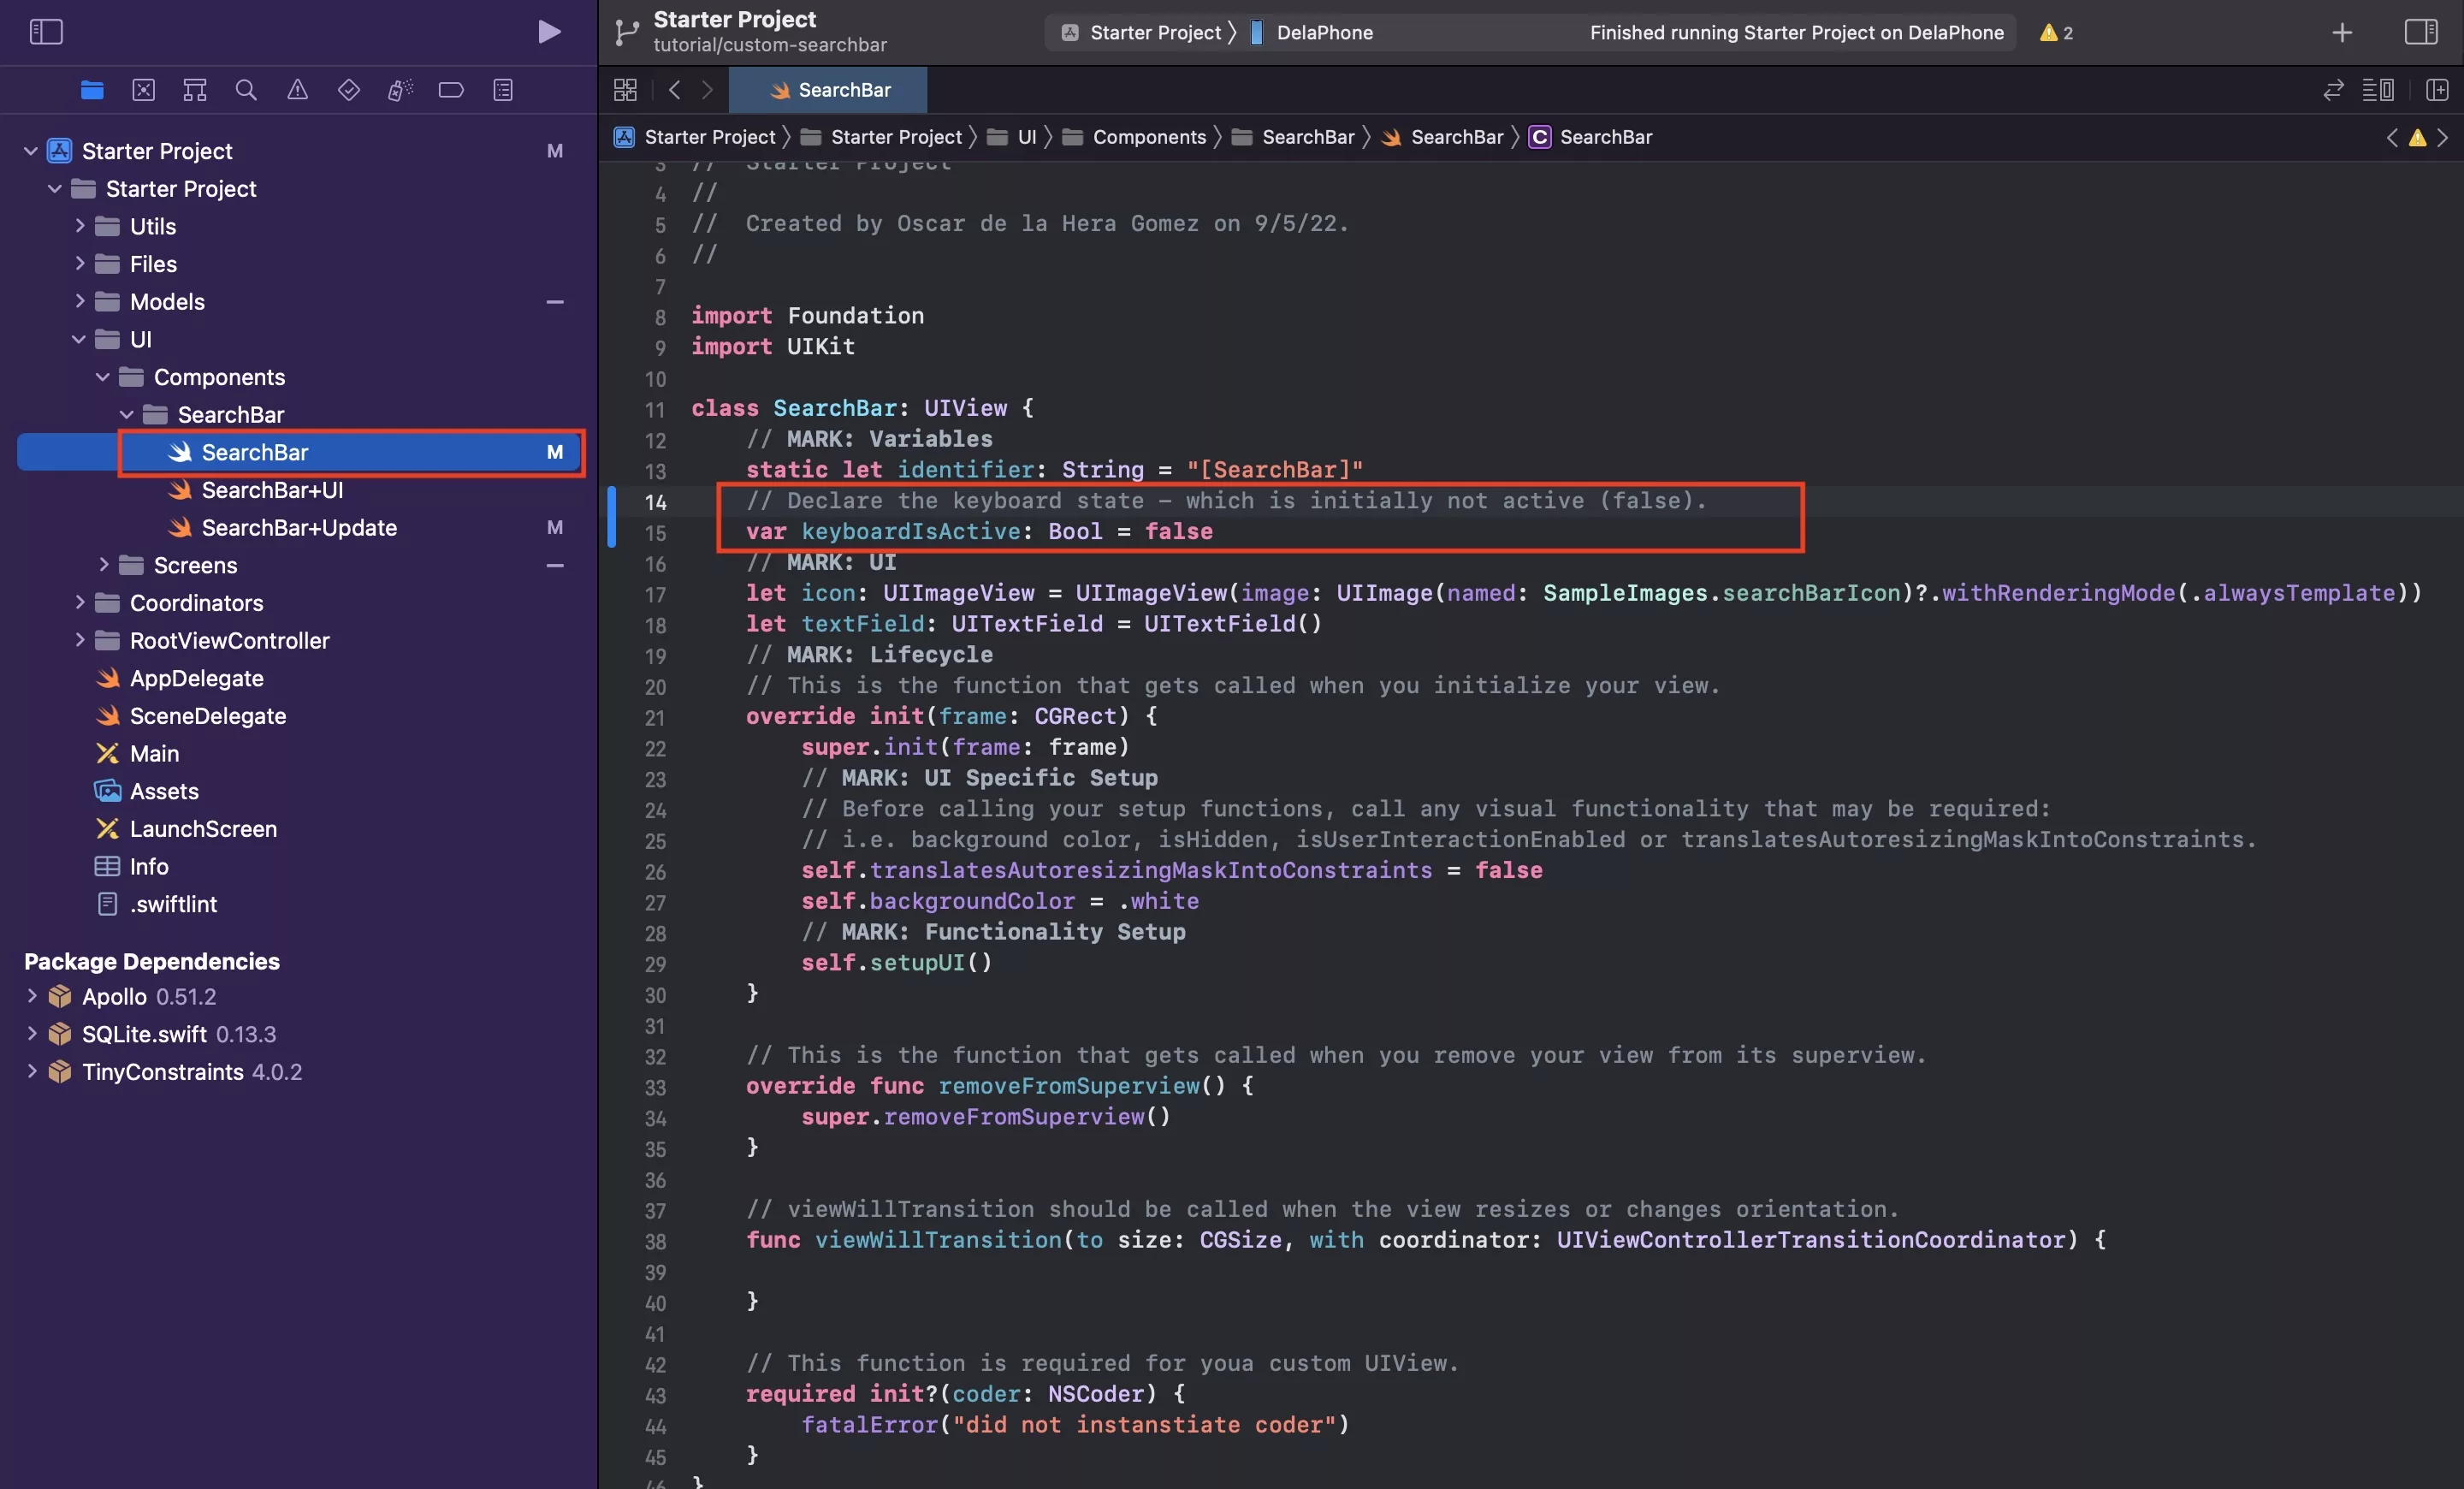
In SearchBar.swift declare a keyboardIsActive boolean variable and set it to false.
B | Update keyboard is active depending on edit state.
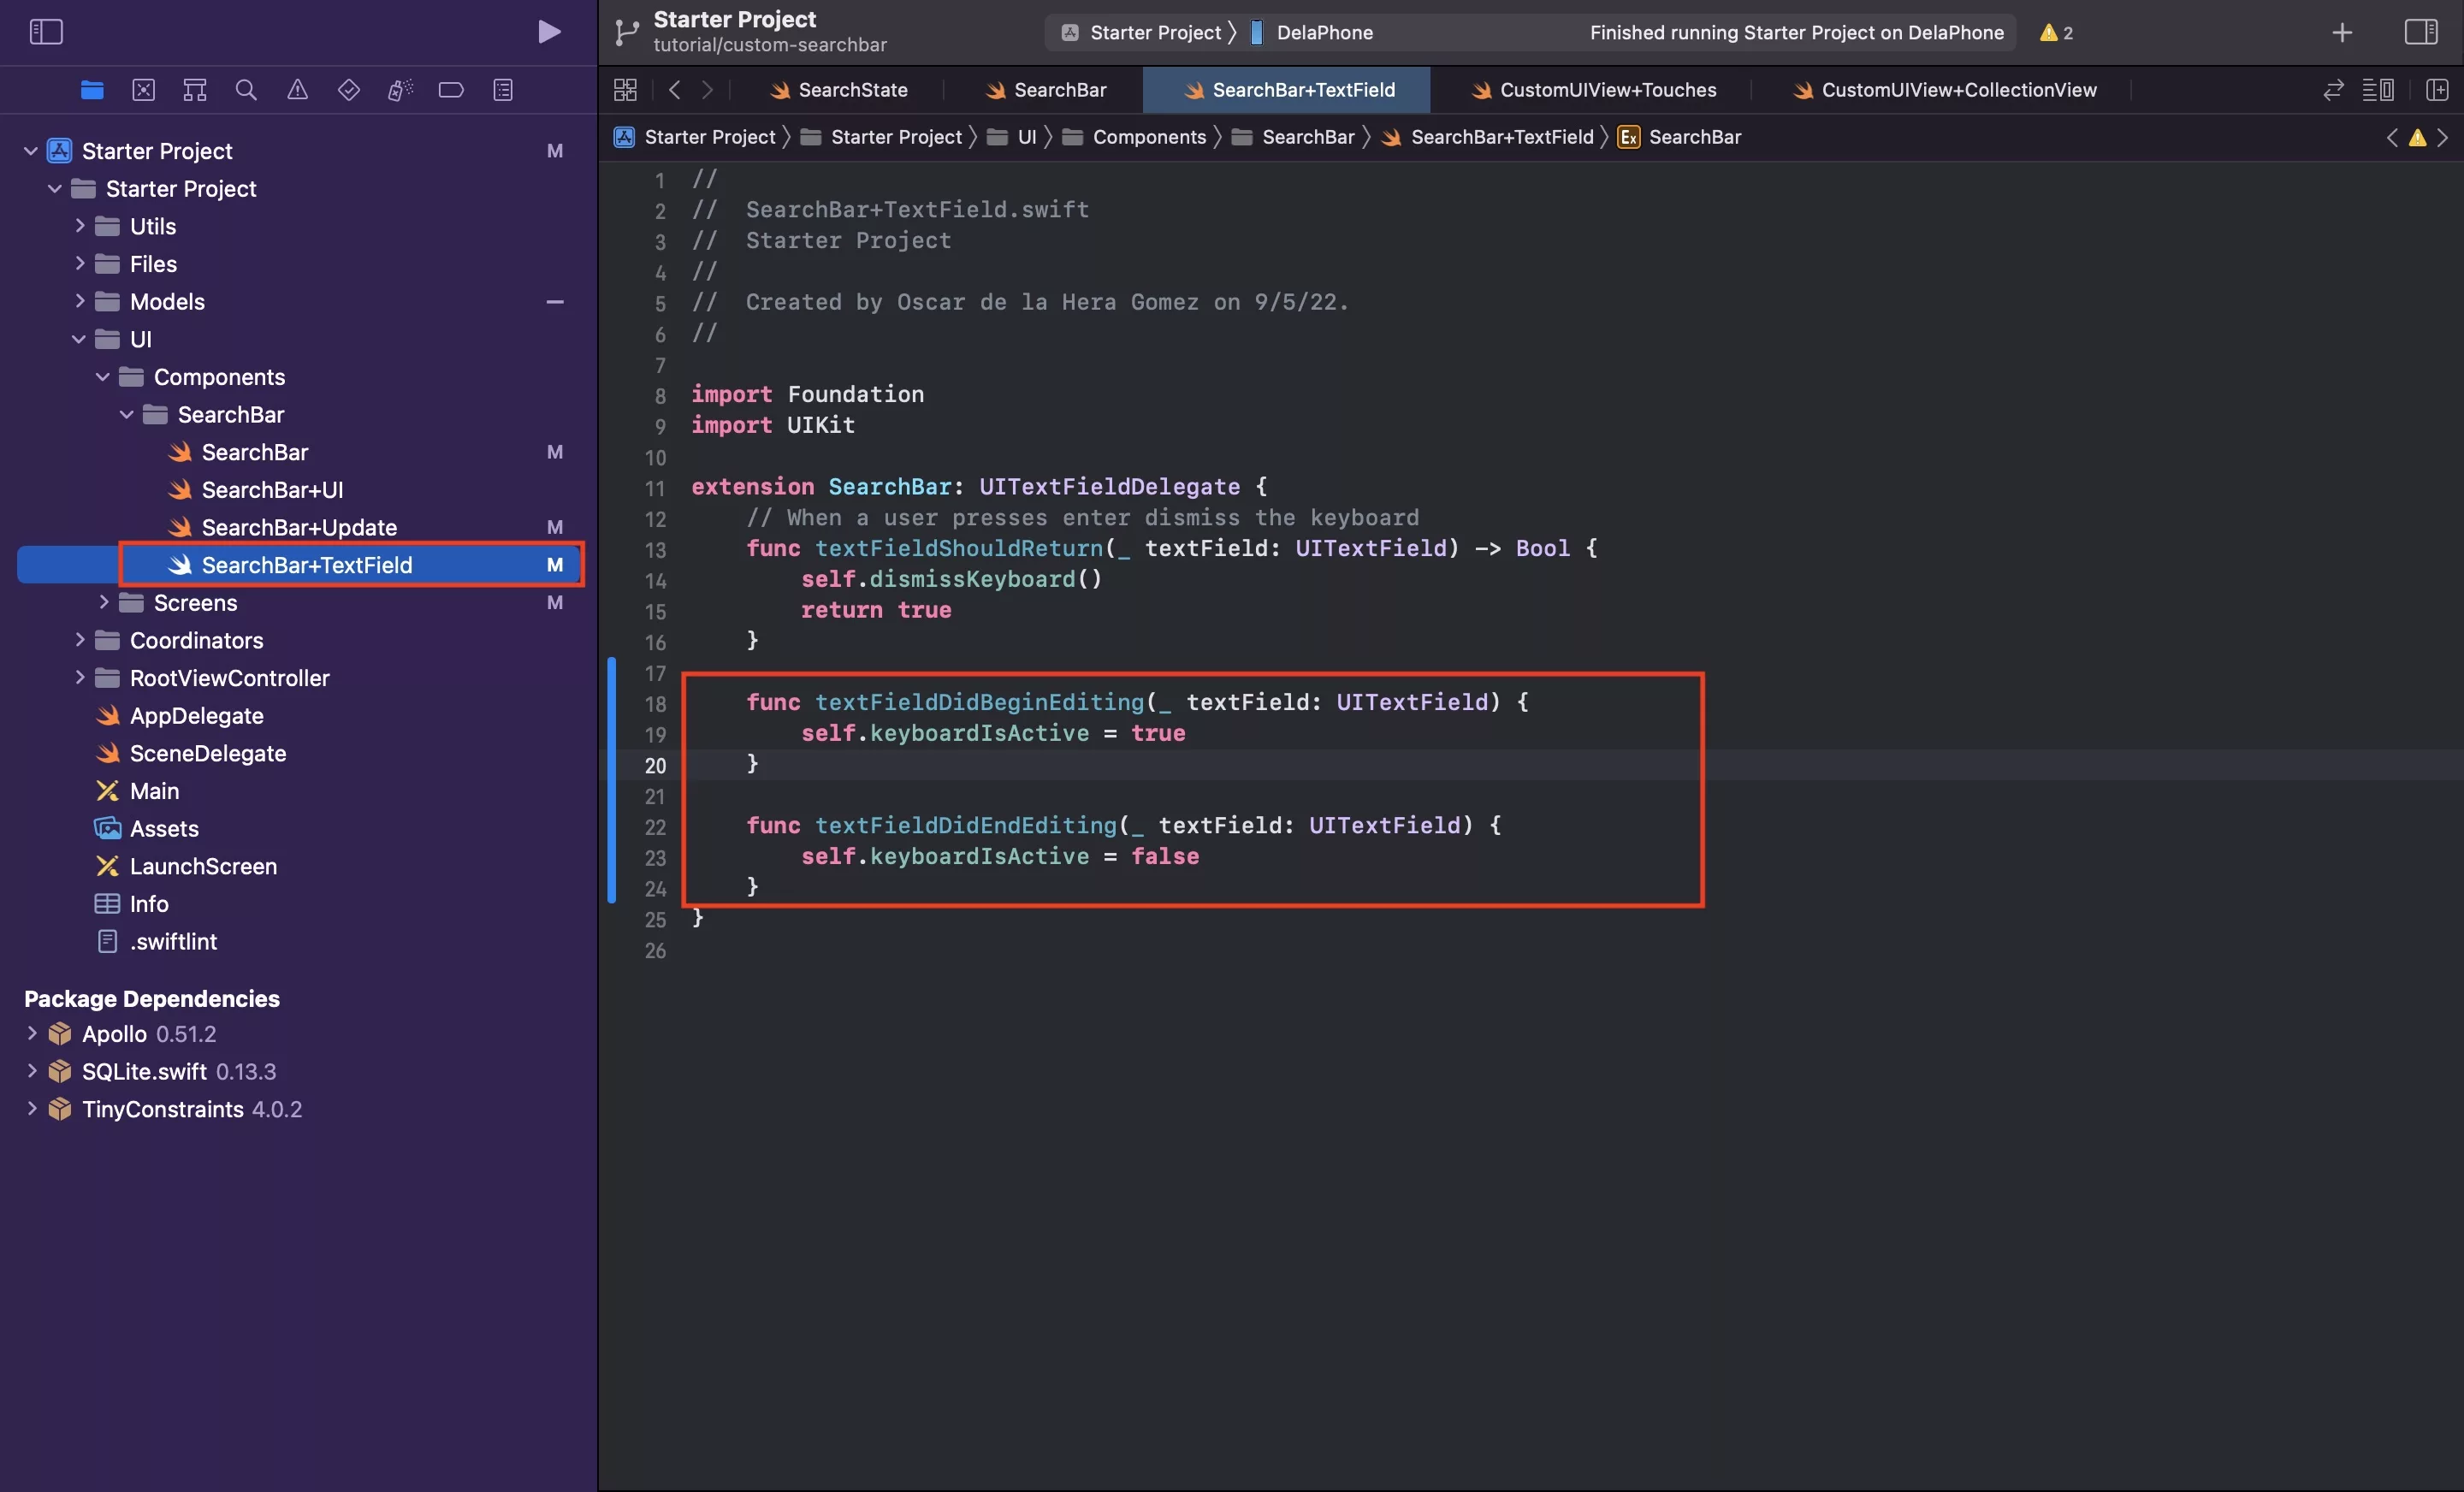
In SearchBar+Textfield.swift change the state depending on whether the UITextField is editing or not.
C | Hide the keyboard
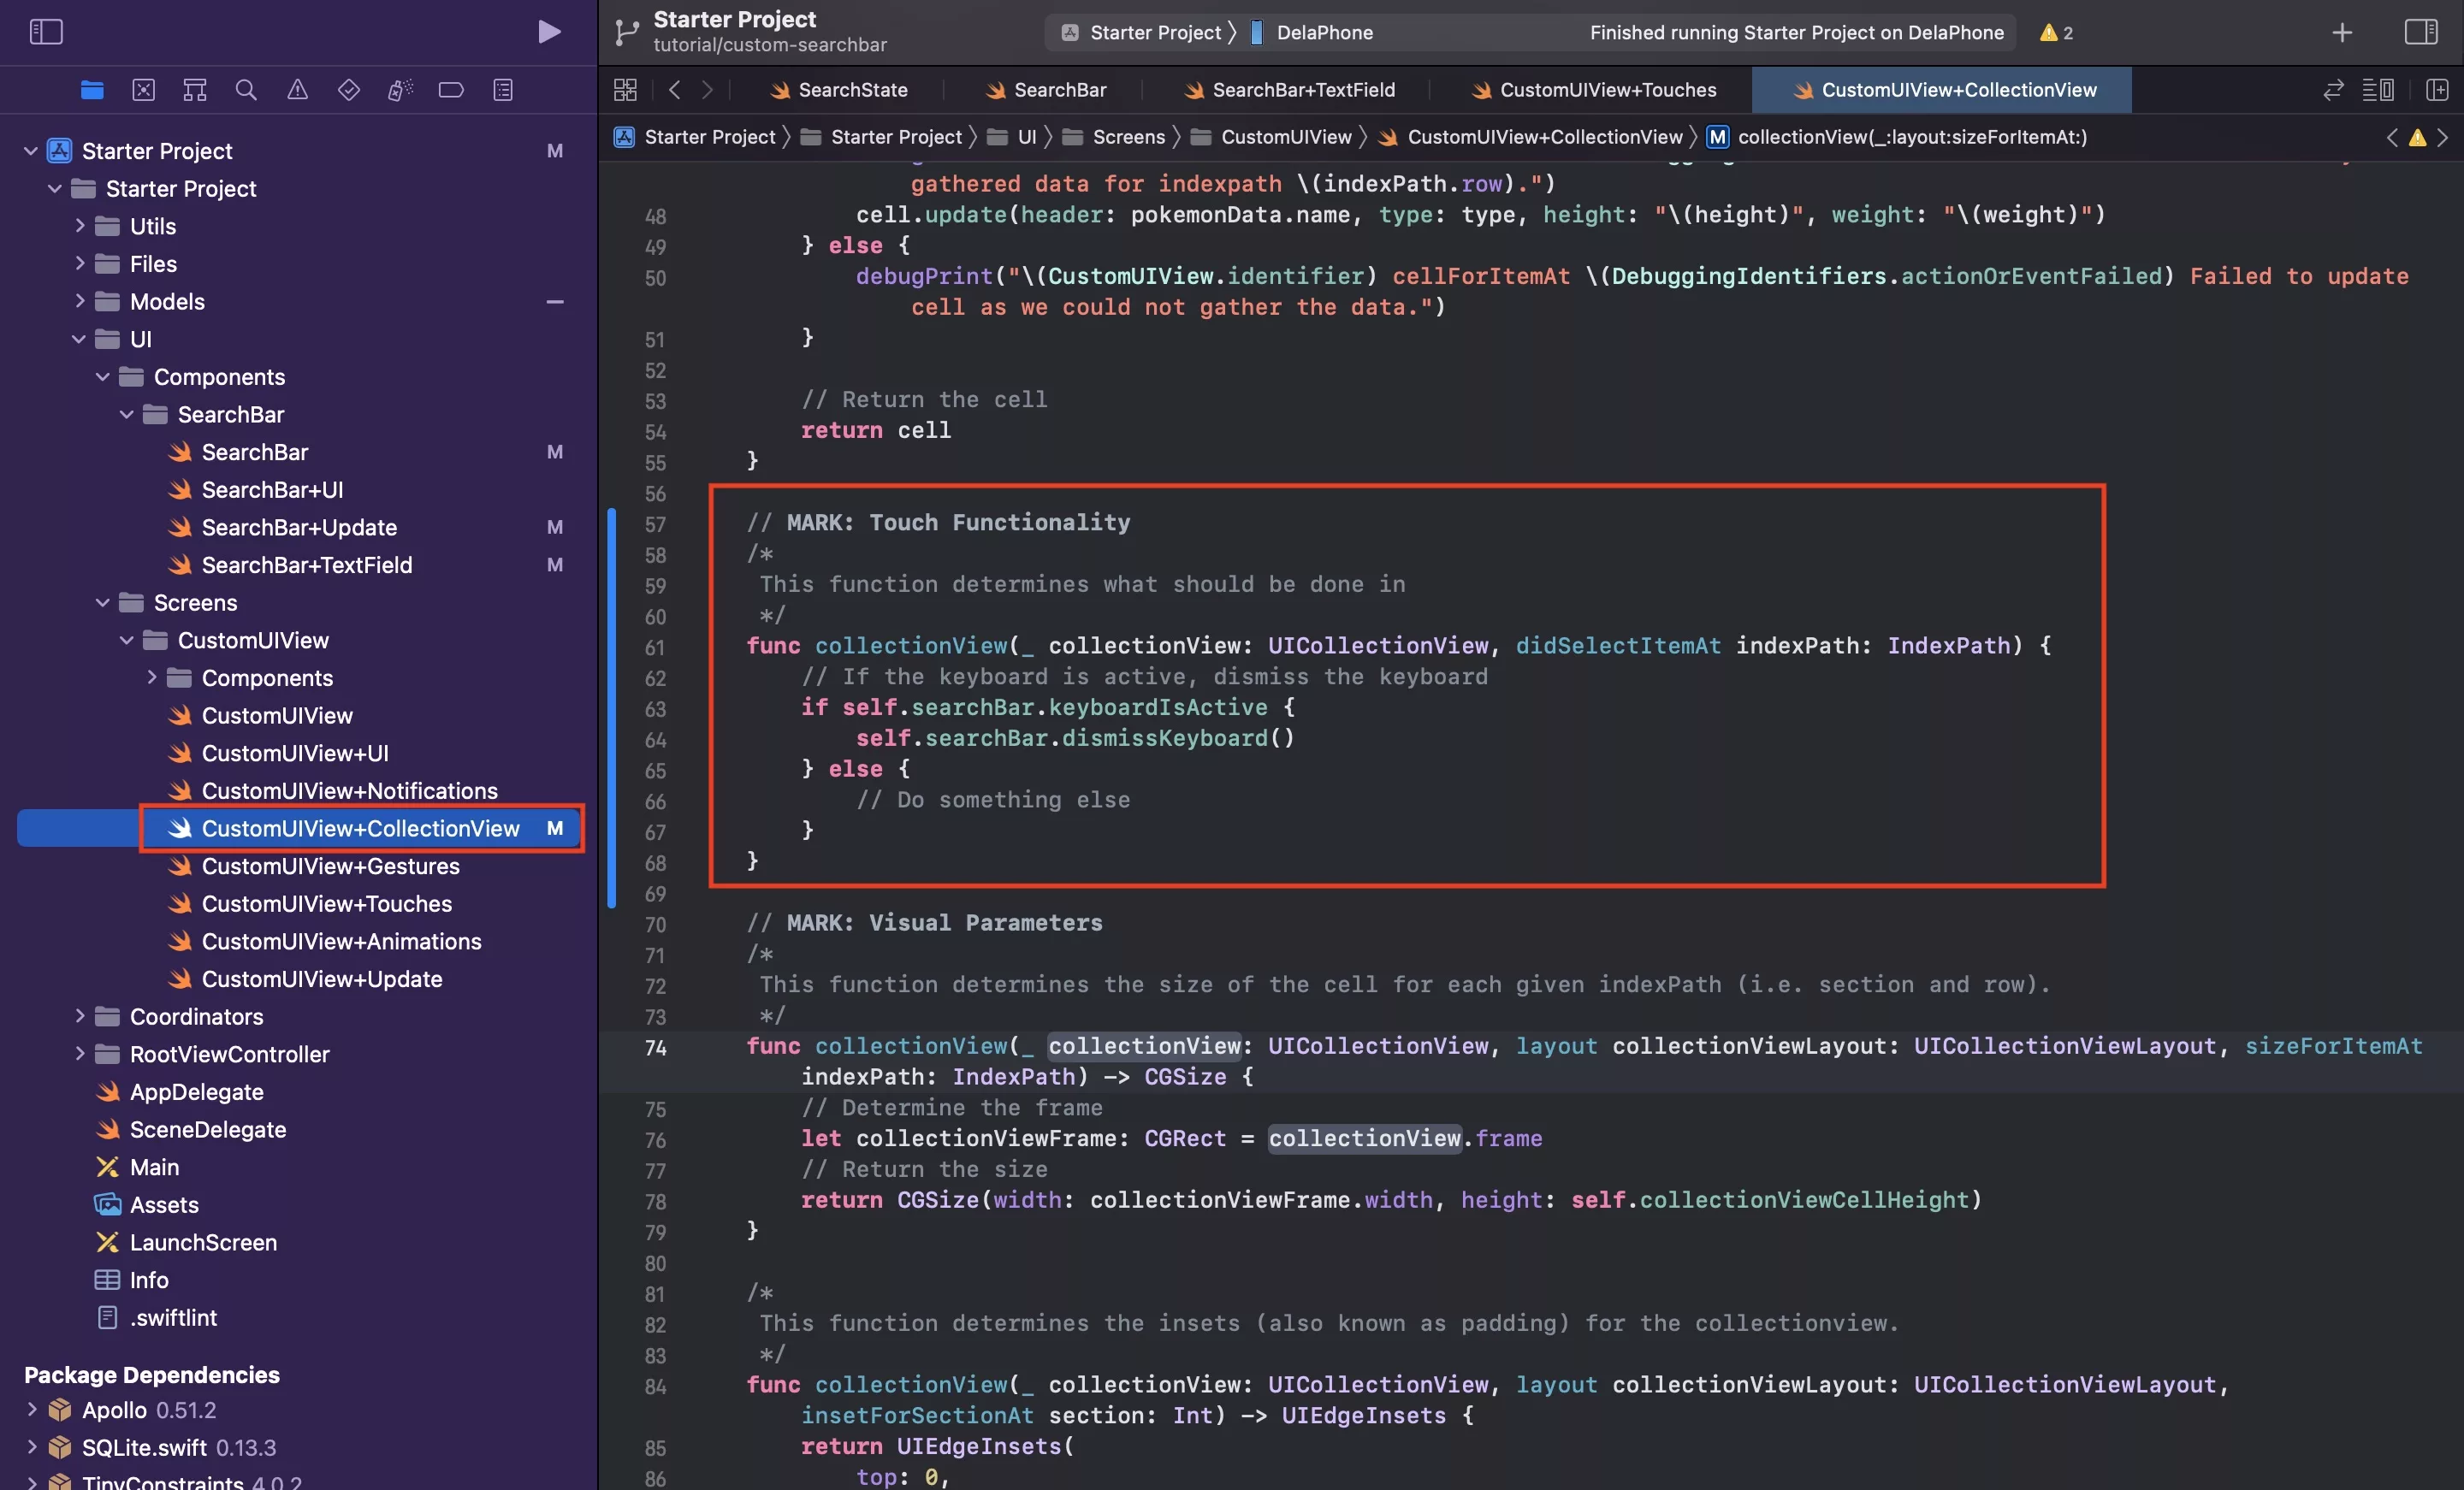
In CustomUIView+CollectionView.swift add the UICollectionView touch functionality above the visual functionality, and if the keyboard is active - dismiss the keyboard.
D | Verify
Run the app, press the search bar to see the keyboard appear. Then, press the screen to verify that the keyboard is dismissed.
Step Eleven: Change the search icon color if the search is active
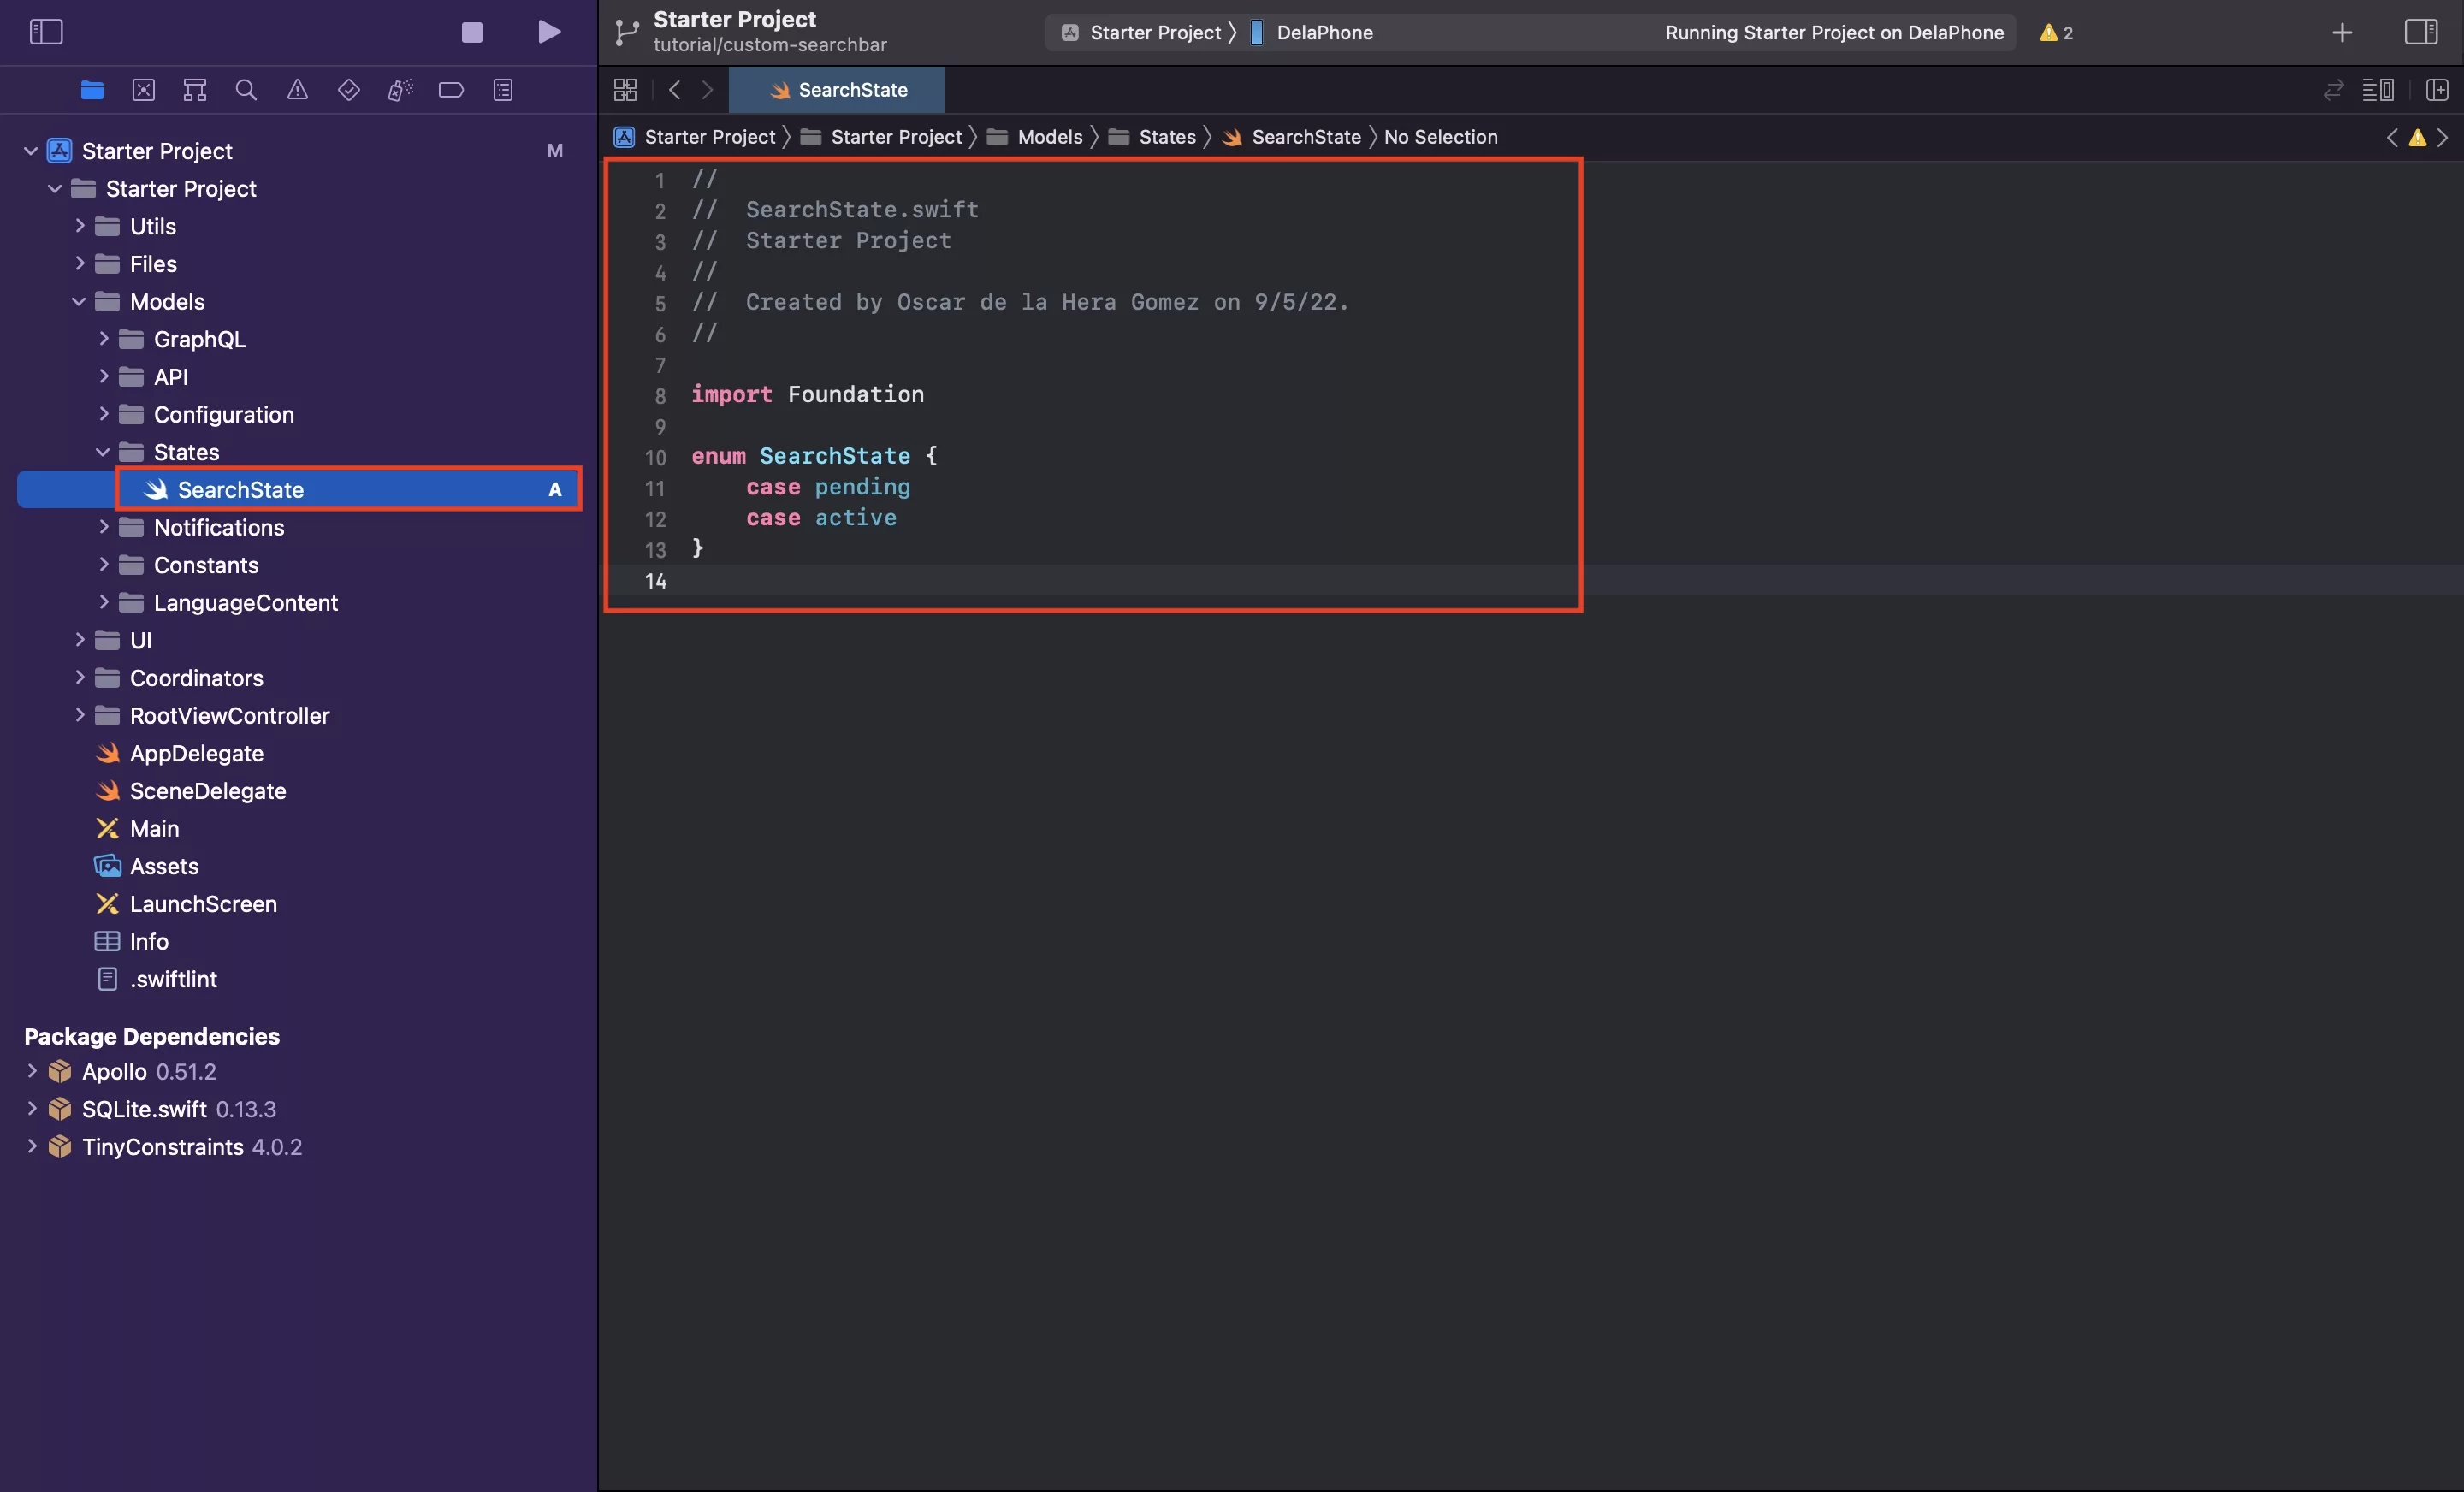
A | Create the SearchState
B | Add the animation time constant

In Constants.swift add the animation time constant. We recommend setting it to 0.67.
C | Create the animation functionality
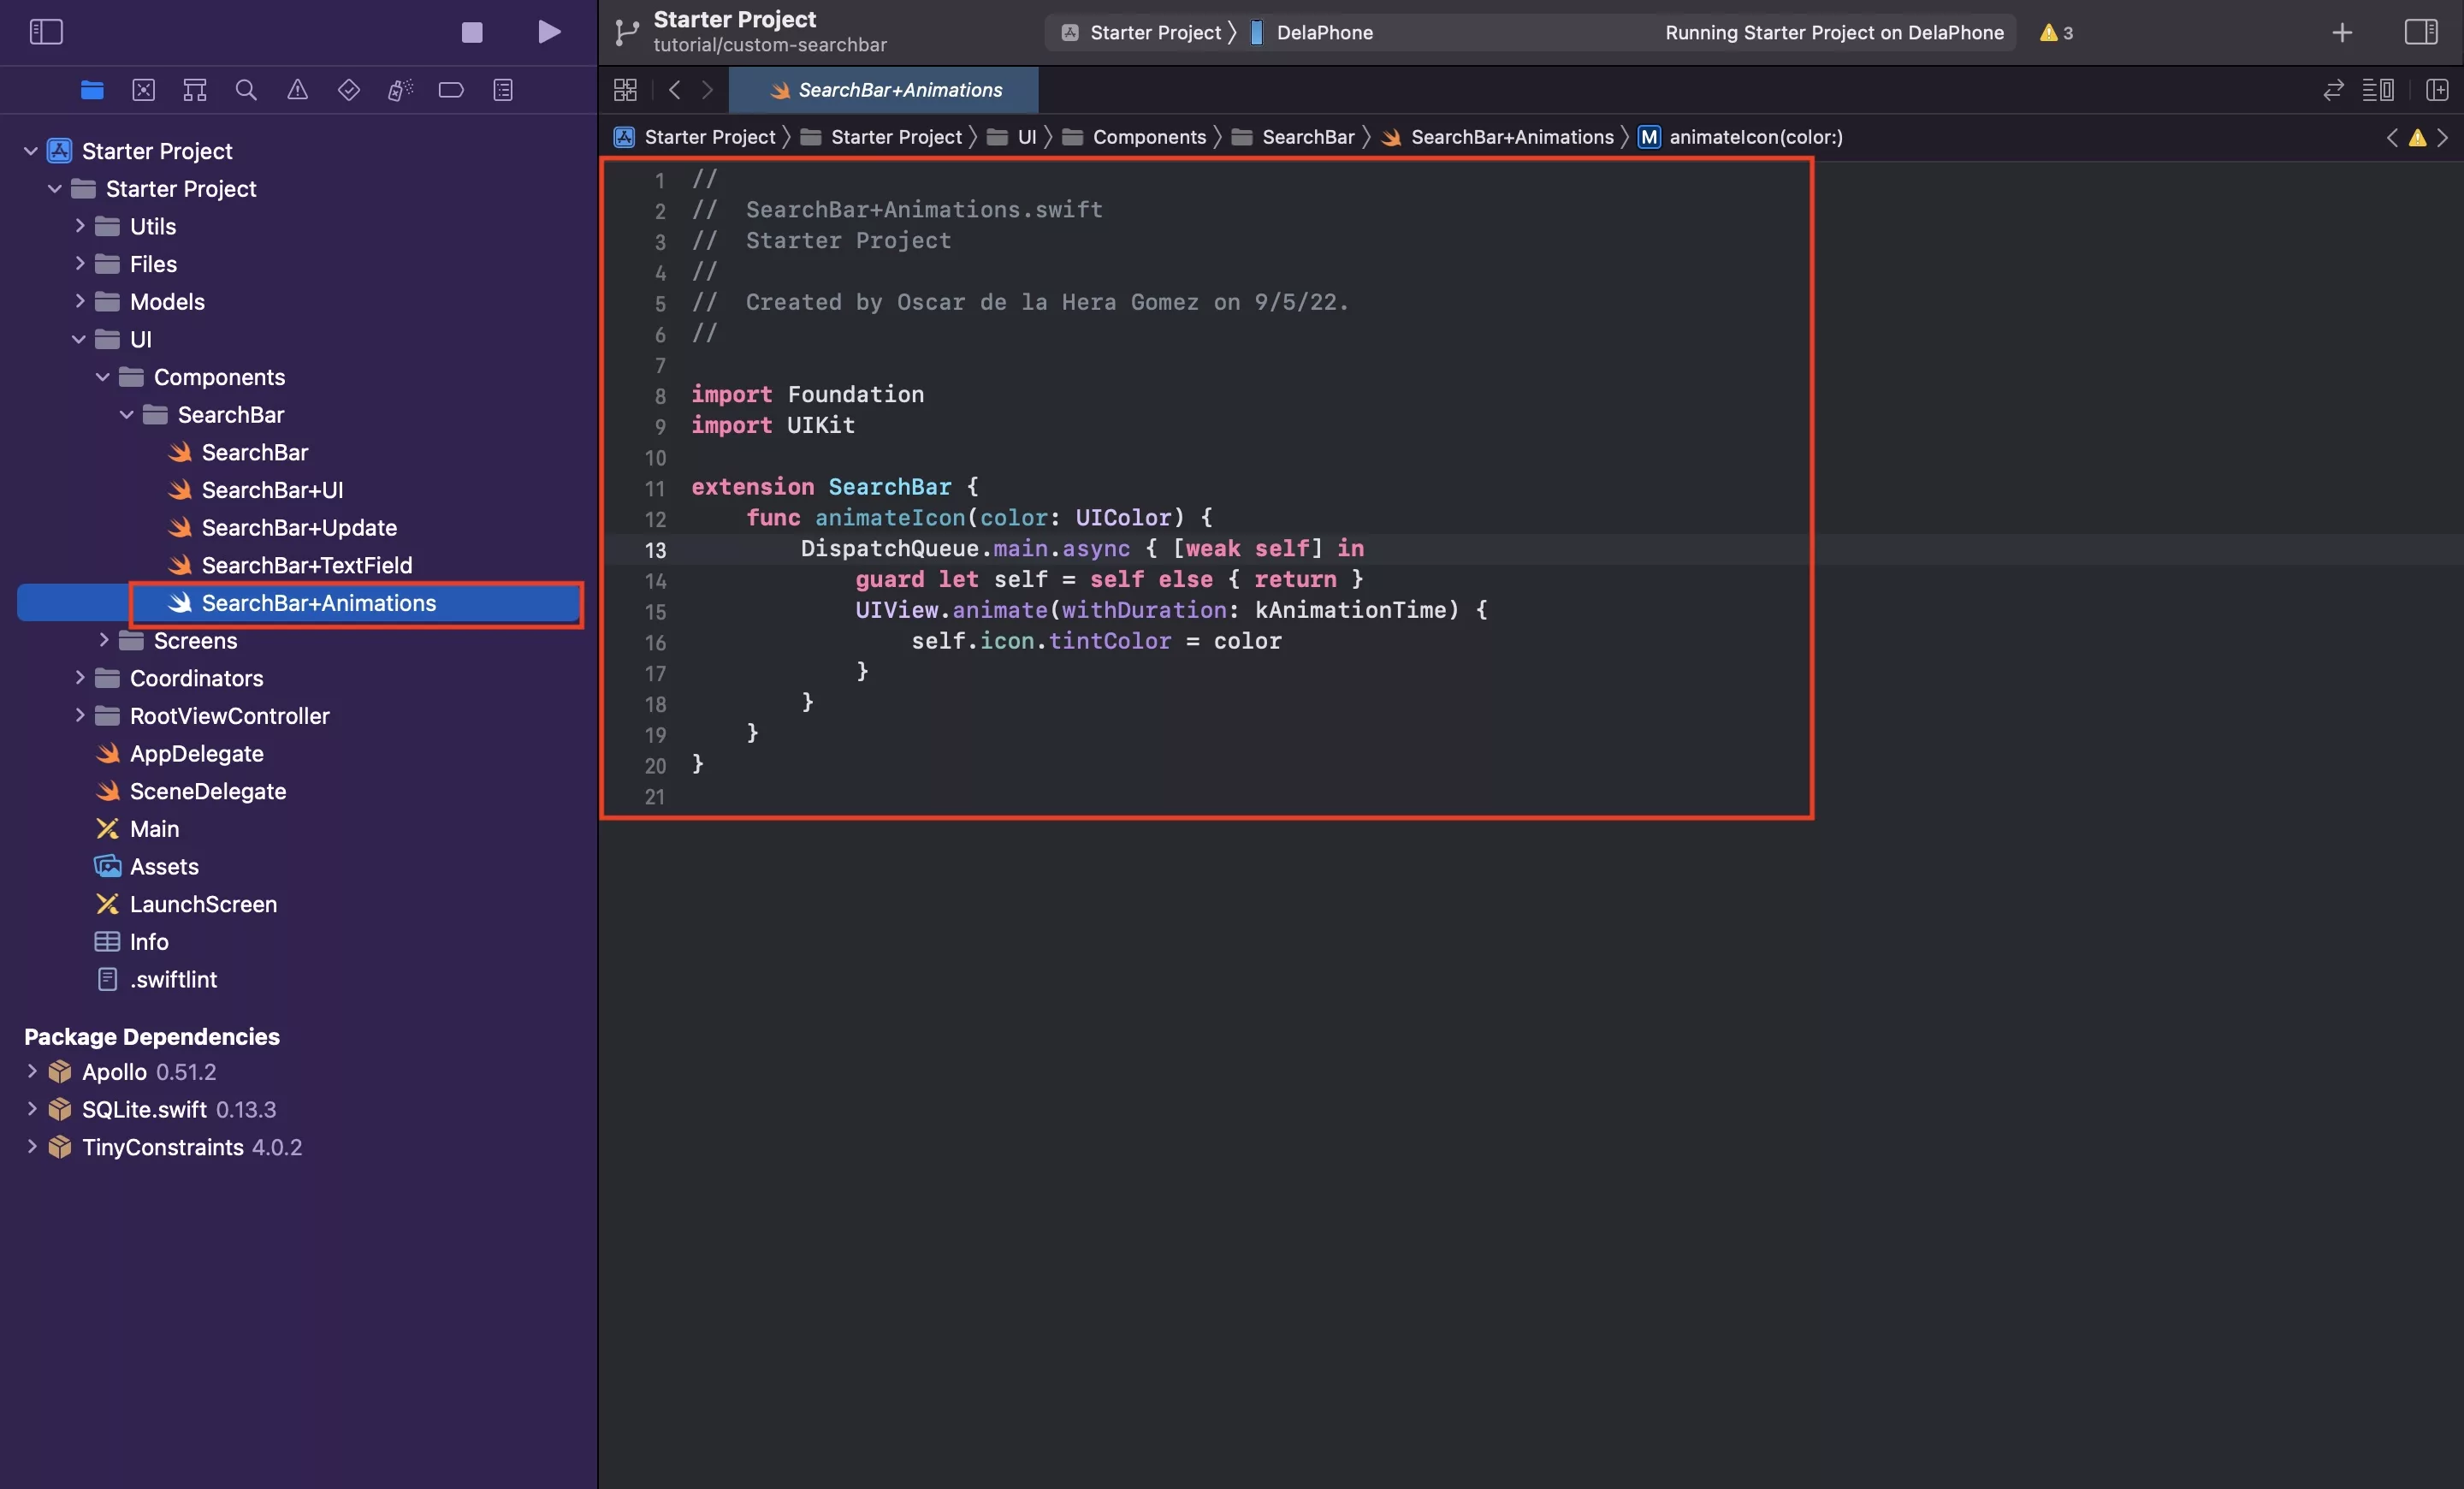
In the SearchBar folder, create a new file called SearchBar+Animations.swift and paste in the code found below.
D | Declare the search state and observer
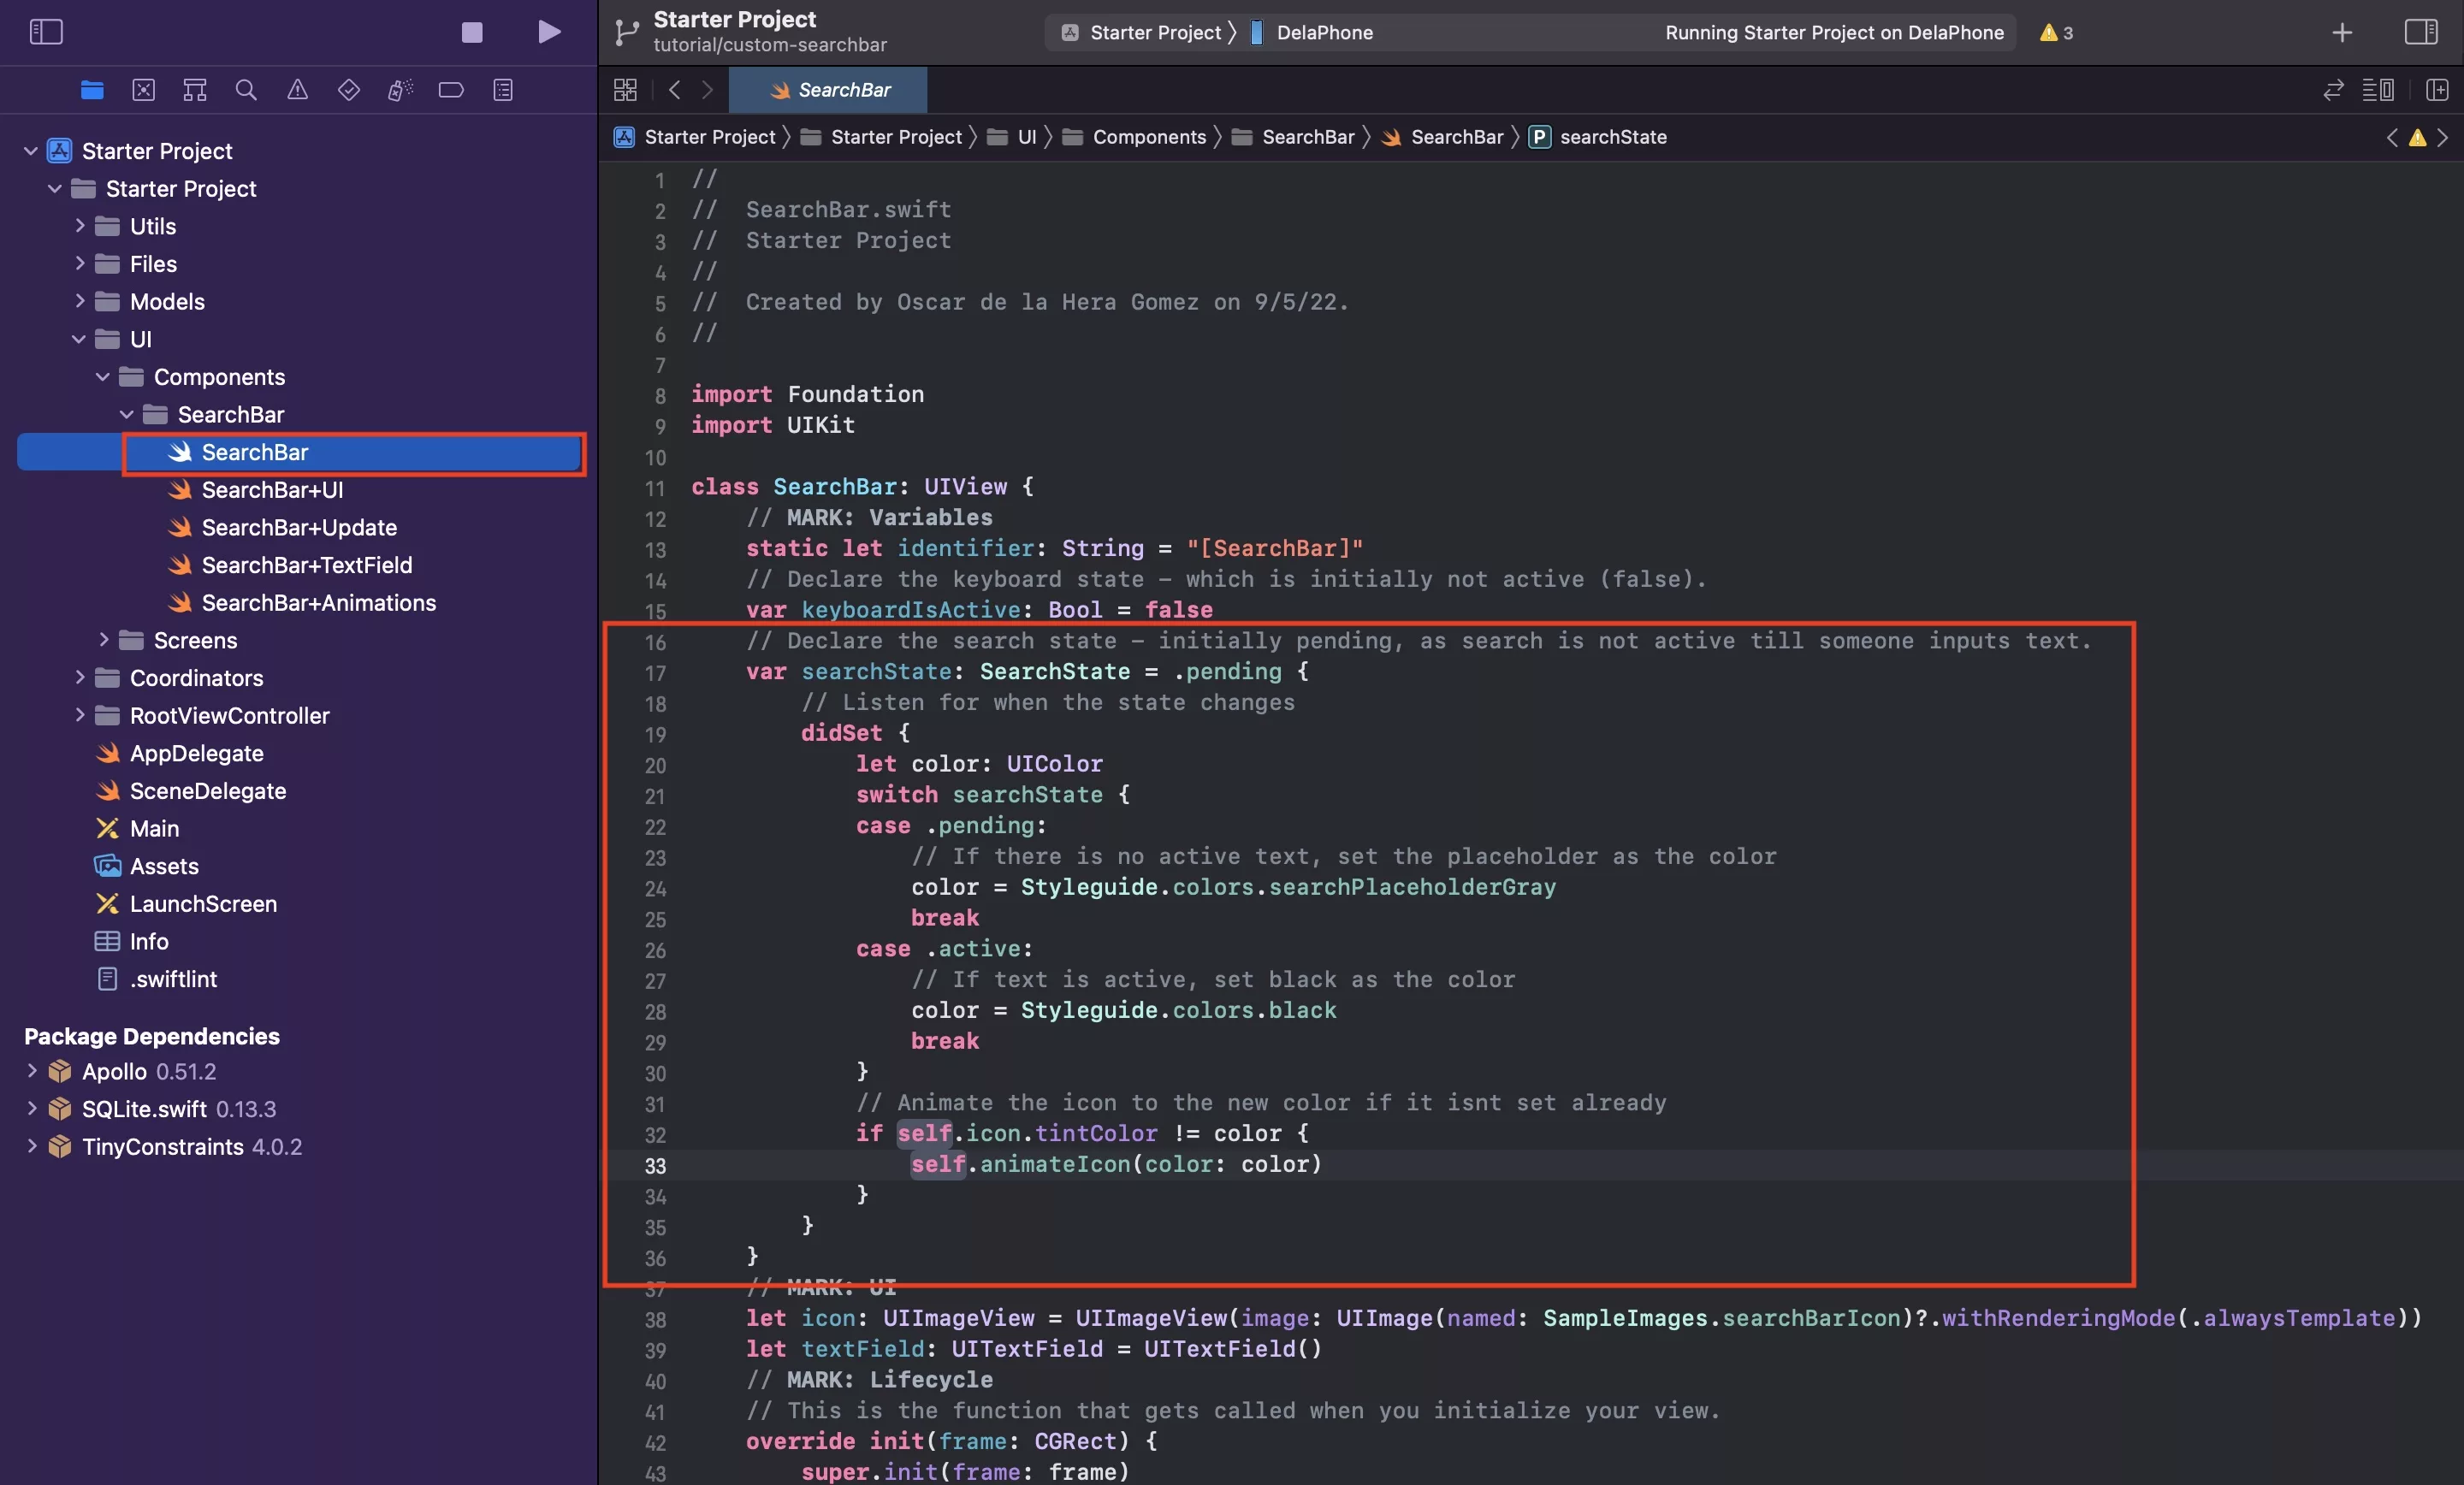
In SearchBar.swift declare the search state variable and set it to pending as search is not initially active.
Within it, create a didSet property observer and depending on the value, alter the appearance of the icon to being inactive (searchPlaceholderGray) or active (black).
For more information on Property Observers, please consult the Swift Programming Language Guide in the link below and search for didSet.
E | Update the TextField delegate extension
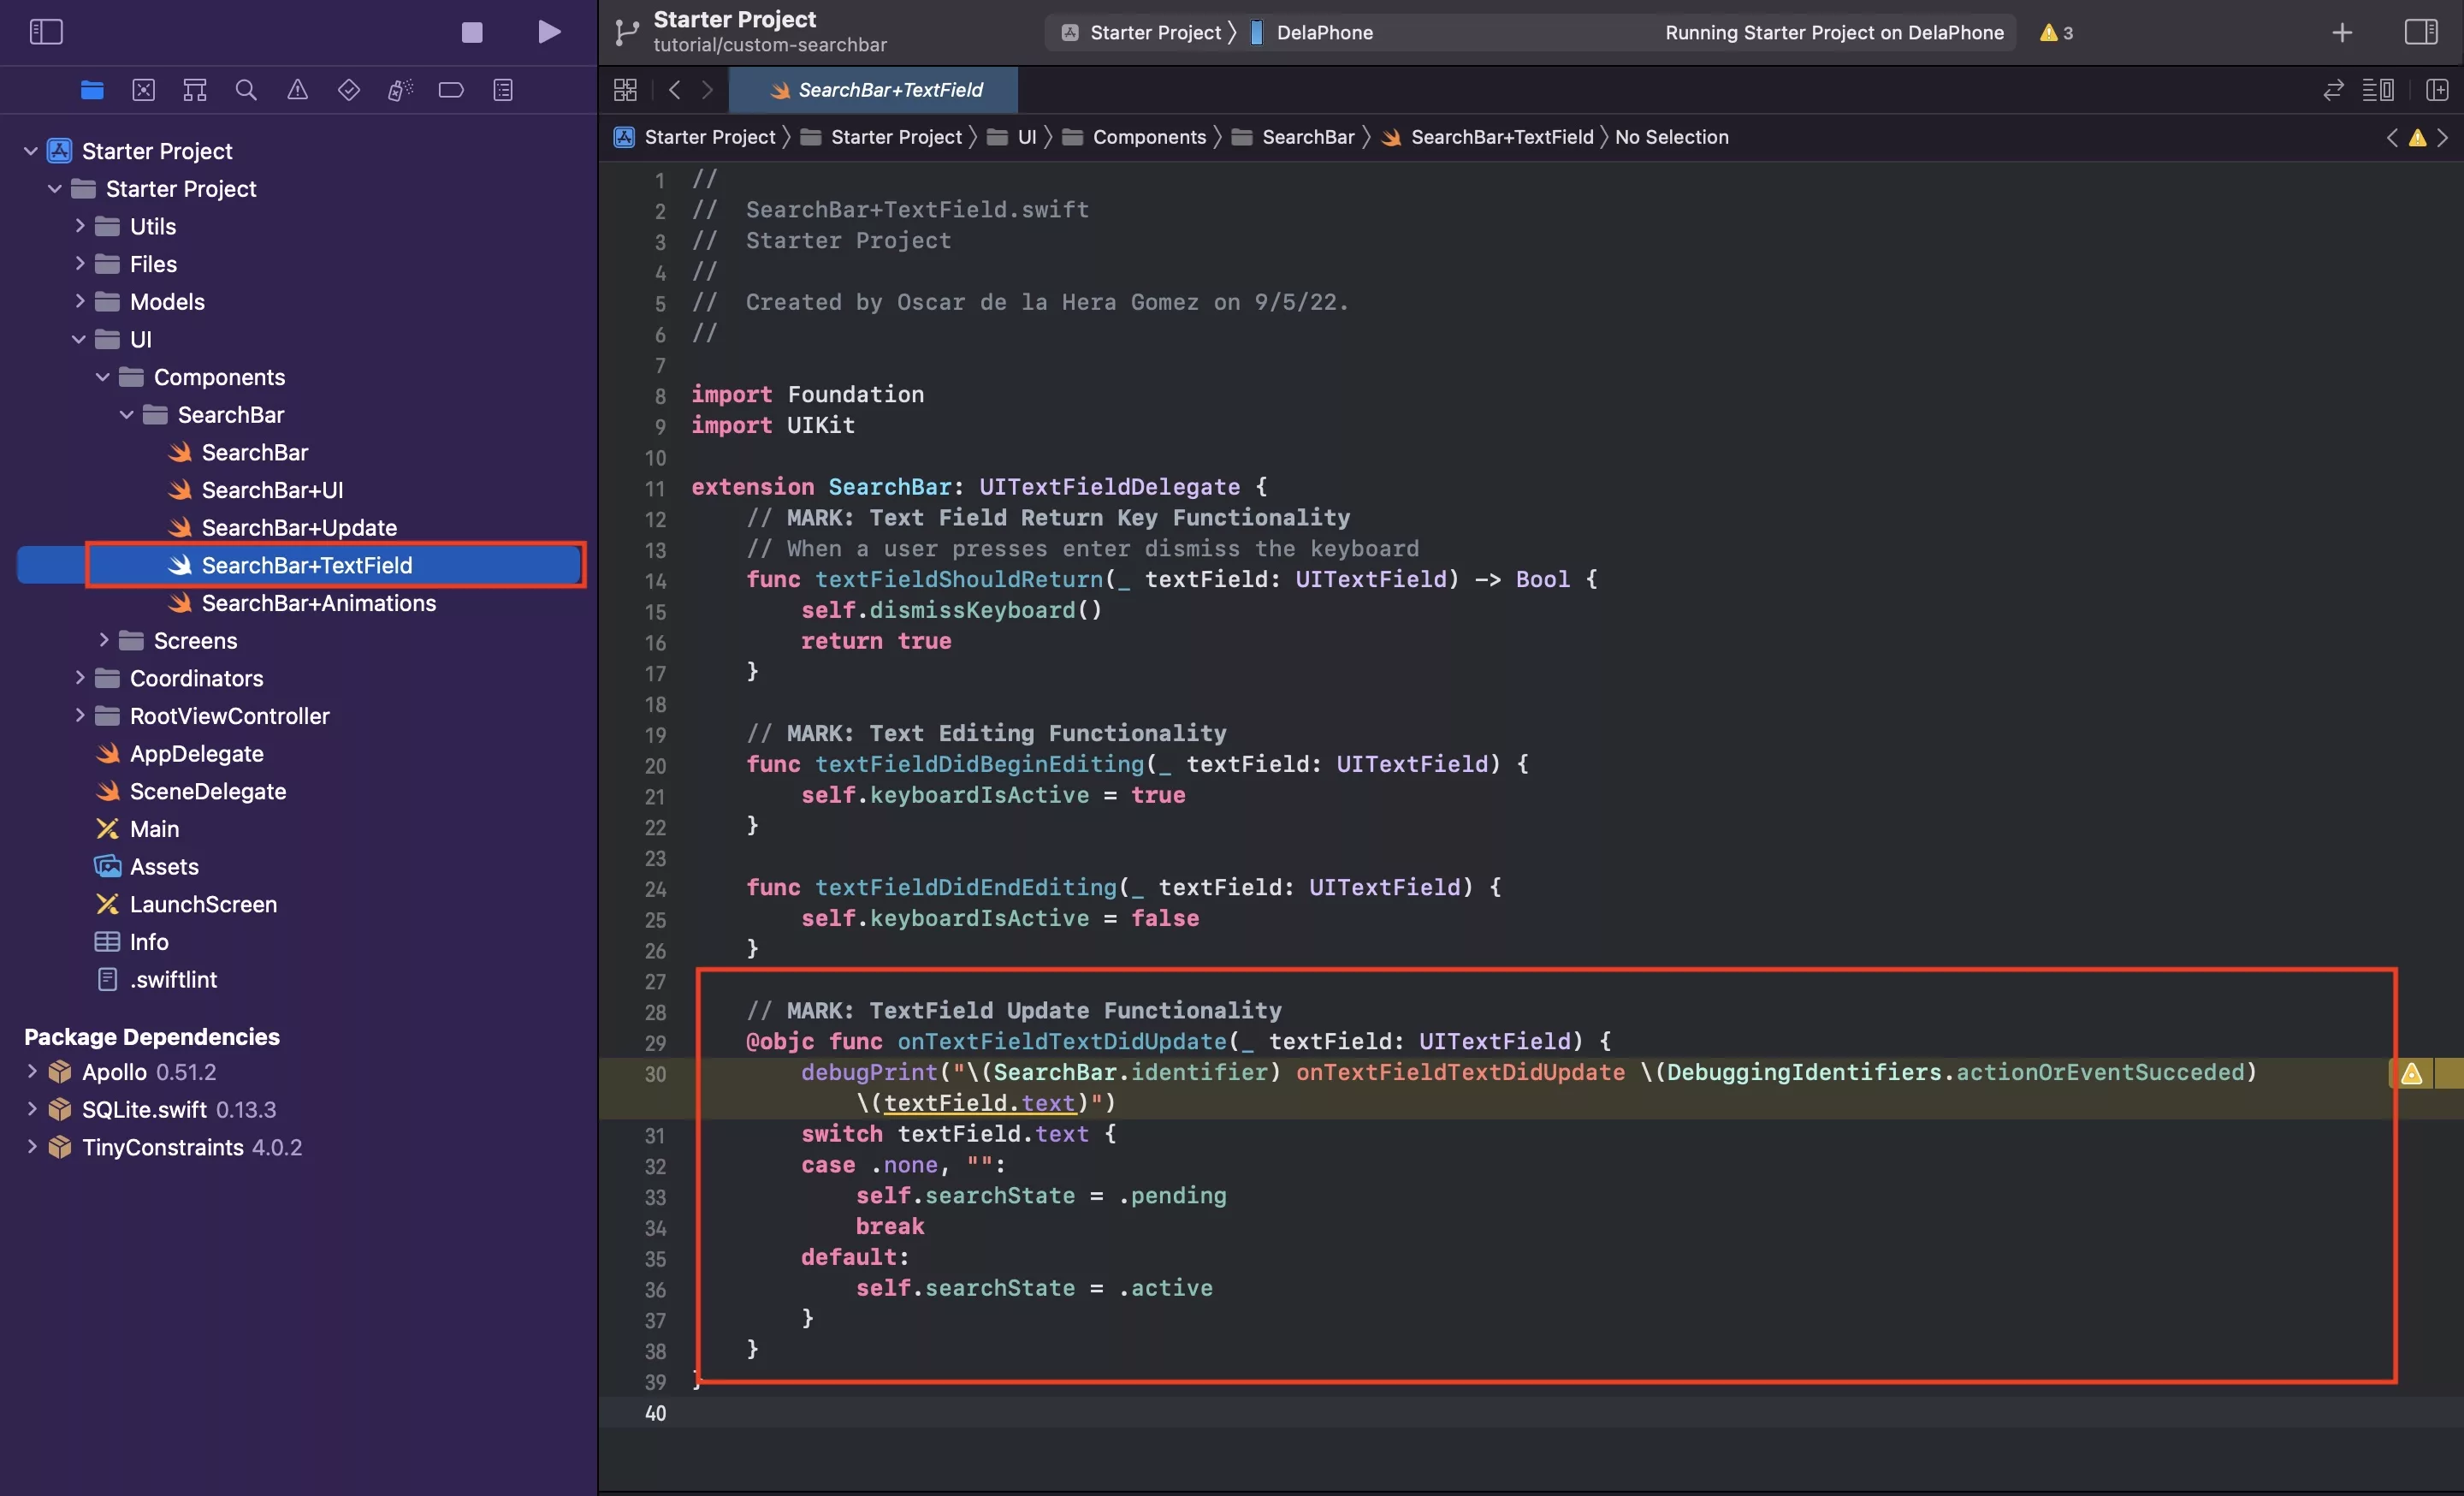
We need to a new function, of @objc type in the SearchBar+Textfield.swift, that will serve as a target for when the textfield updates. Within this function, depending on the text, update the search bar's search state to the relevant state.
The complete code for the textfield extension is provided below.
F | Add the target to the textfield
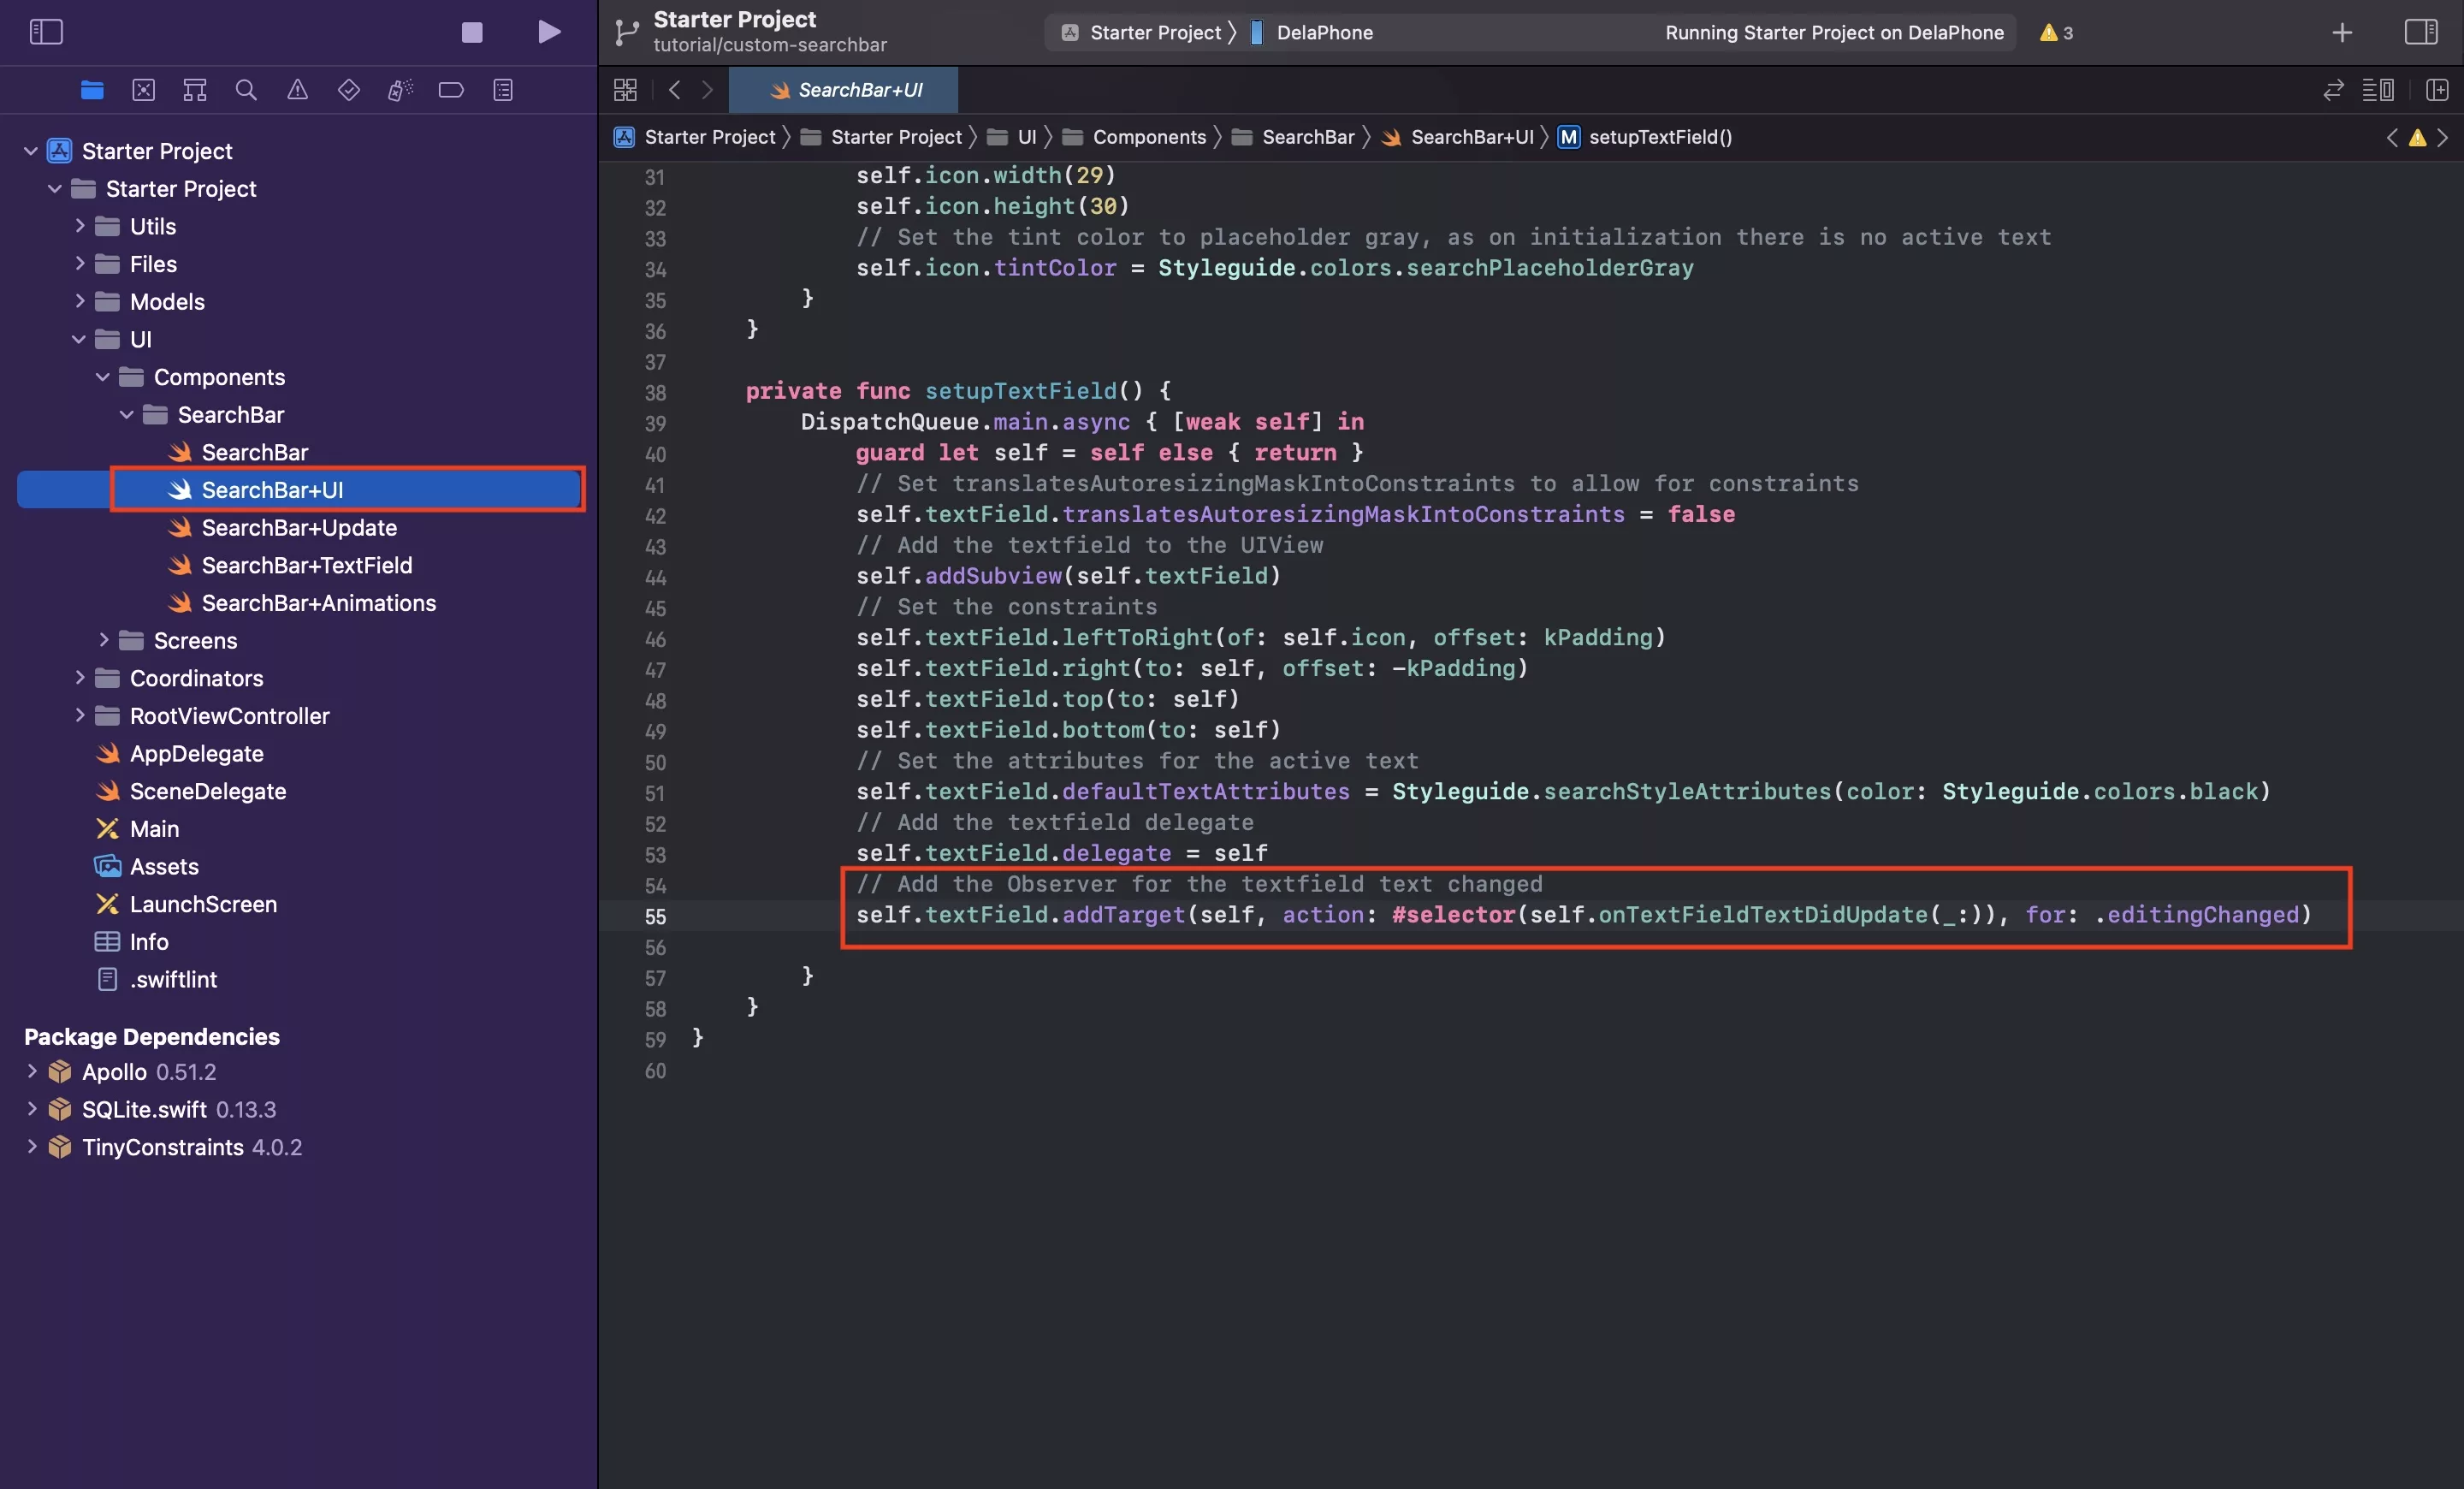
In order to listen to text changes, we must add a target to the textfield for the action editingChanged.
Step 12: Verify
Run your app and verify that it all works as expected. The checklist includes:
- That the search bar appears with the placeholder text and color on launch.
- That you can change the search text using the keyboard that appears when tapping on the search bar.
- That the text that you type into the textfield has a different color (black) than the placeholder (searchPlaceholderGray).
- That the search icon animates depending on whether the text is active (black) or not (searchPlaceholderGray).
- That you can dismiss the keyboard by tapping the screen or pressing return.
Want to filter the displayed data?
To change the results that appear on the UICollectionView to match filtered data based on your search query, please follow the tutorial in the link below.