How to create a StoreKit Coordinator in Swift
A step by step guide on setting up a StoreKit coordinator for managing the gathering, purchasing and verification of In-App Purchases and Subscriptions.

A step by step guide on setting up a StoreKit coordinator for managing the gathering, purchasing and verification of In-App Purchases and Subscriptions.
The following tutorial uses our Open Source Swift starter project to setup a StoreKit Coordinator for managing all events related to local or App Store Connect In-App Purchases and Subscriptions.
We recommend that you clone our Open Source Swift Starter Project, checking out the tutorial/storekit/setup branch and carrying out the steps below. The changes can be found on the tutorial/storekit/coordinator branch.
git clone git@github.com:delasign/swift-starter-project.gitBefore you start
The StoreKitCoordinator manages the gathering, purchasing and verification of In-App Purchases and Subscriptions ("products") and works with a StoreKit Configuration File and a product offering (In-App Purchases & Subscriptions).
If you do not have a StoreKit Configuration File and product offering setup, please consult the tutorials below.
Please note that a sample StoreKit Configuration File and product offering are available as part of our Open Source Swift Starter Project on the tutorial/storekit/setup branch.
Once you have setup the StoreKit Configuration File and offering, you must enable StoreKit Testing.
If you do not you setup StoreKit Testing in XCode, you will encounter errors such as Finance Authorization Error, [StoreKit] Did not receive any products or error for products request, or No Active Account
Tutorial
Step One: Create the Offering Plist

In the StoreKit folder under Models, create a new Property List file called Offering.plist.
In this file create a key value paring for each In-App Purchase or Subscription, with the key matching the Display Name and the value matching the product id of the respective In-App Purchase or Subscription.
Step Two: Create the Offering Configuration
With the vision of avoiding typo's in strings and establishing a consistent pattern, we recommend that you create an Offering Configuration that gathers the Offering Plist and makes the identifiers available for consumption to the StoreKitCoordinator.
This is similar to the configuration file that we created for making Swift API calls.
A | Create the Offering Keys
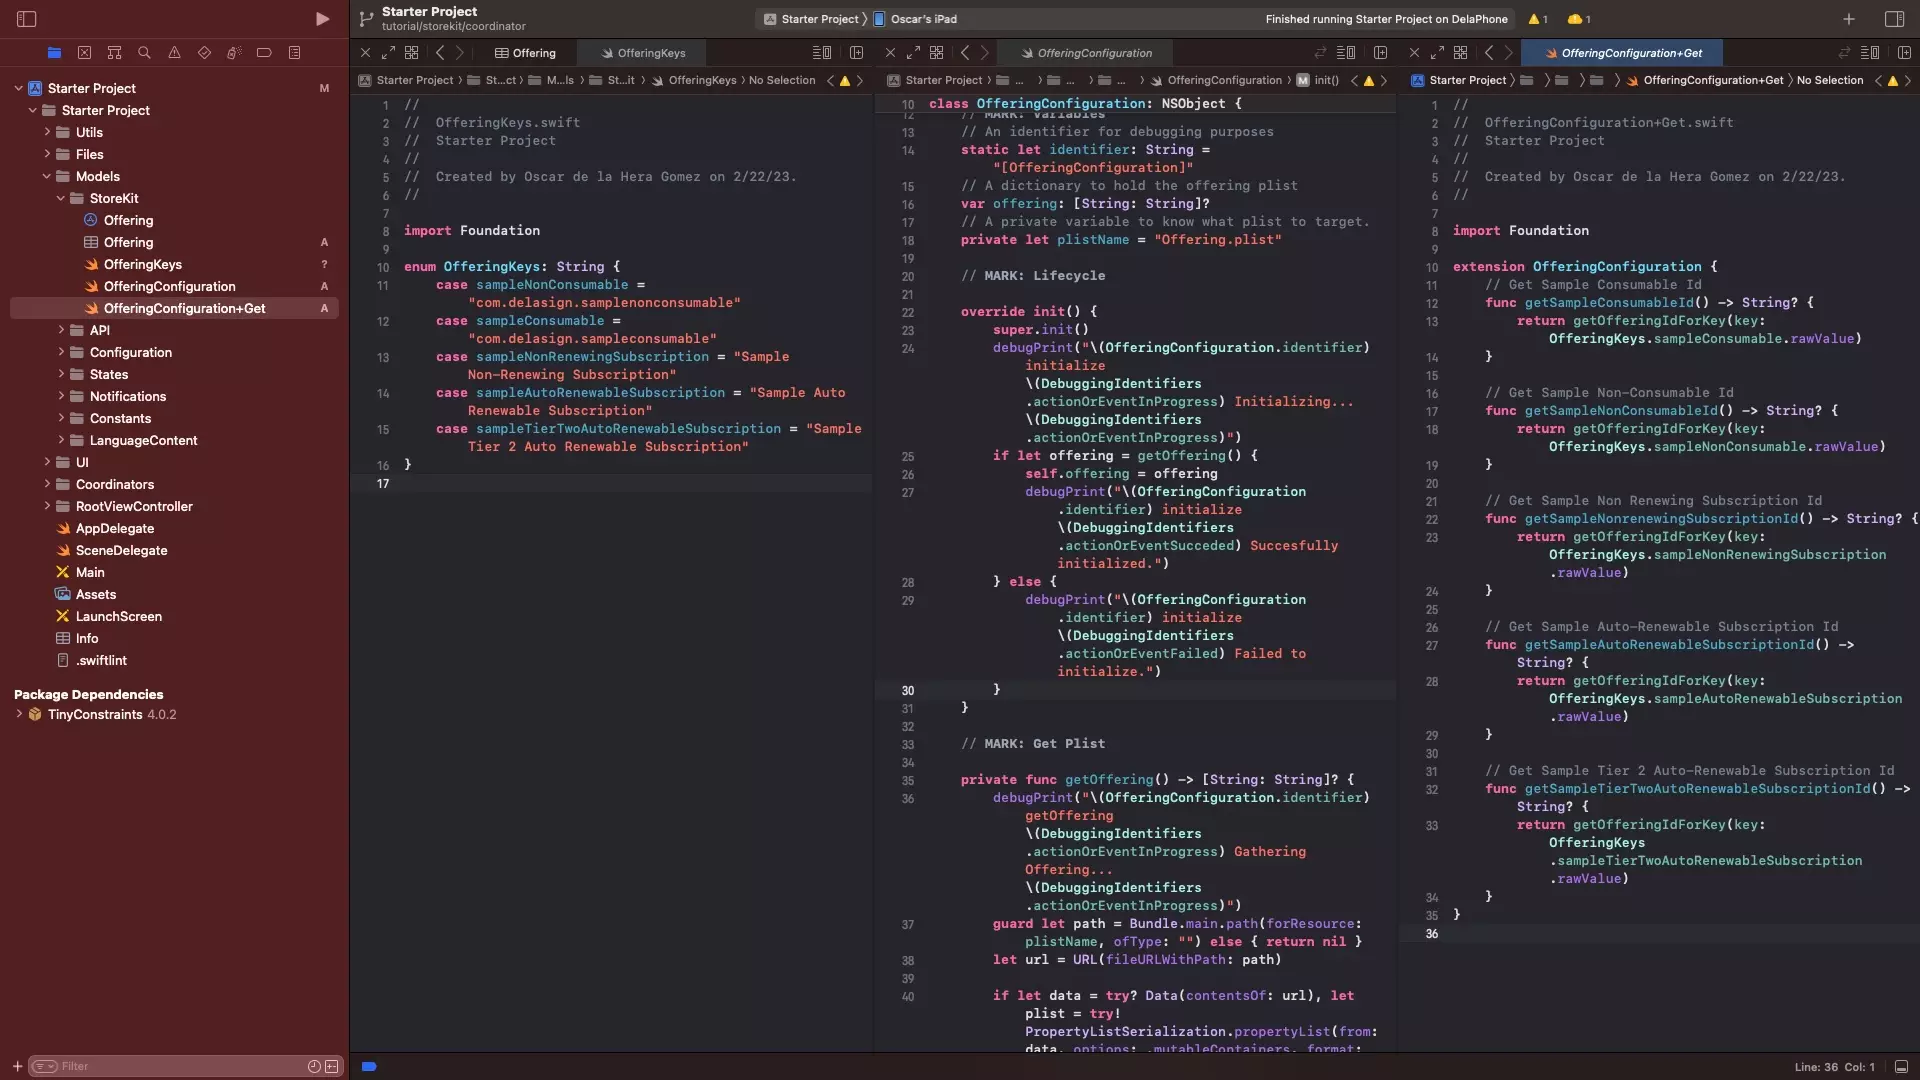
Under Models, in the StoreKit folder, create a new file called OfferingKeys.swift and create enums that match your offering in a similar way to the code available below.
When writing your Enum, make sure that each of the cases matches an item in the Offering.plist that you created.
B | Create the Offering Configuration base file
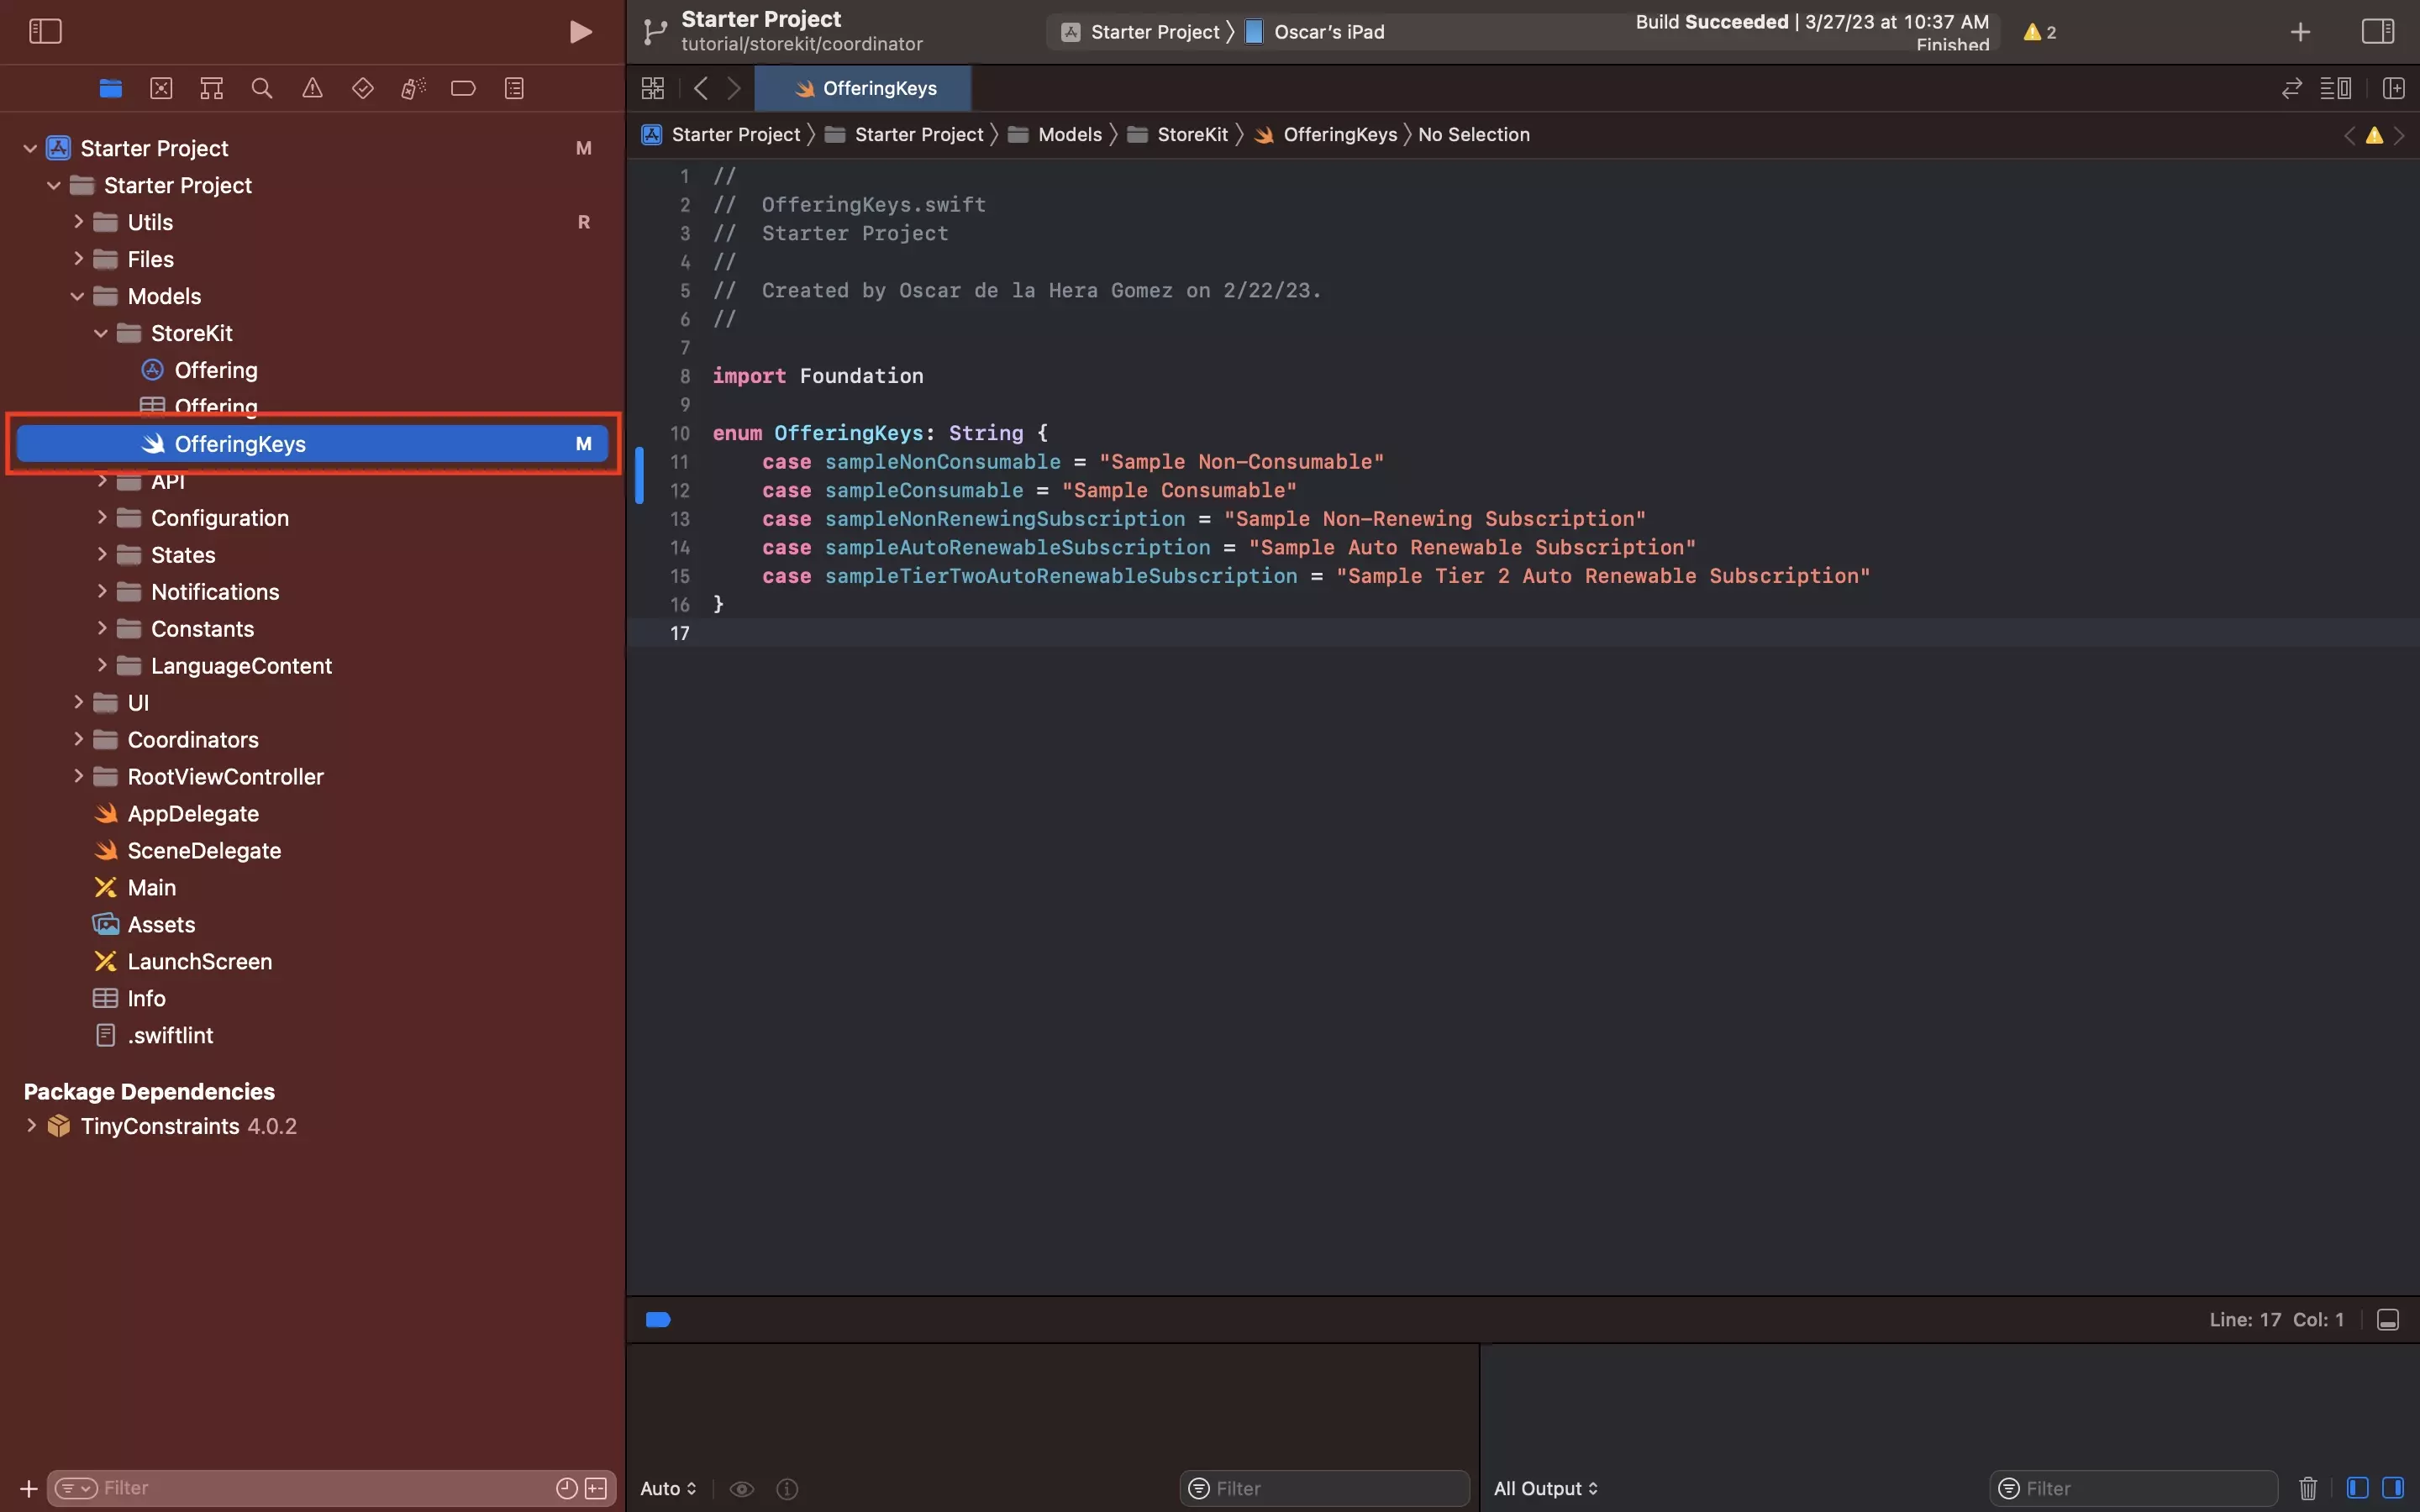
Under Models, in the StoreKit folder, create a new file called OfferingConfiguration.swift and paste in the code below.
This file is responsible for gathering the offering on initialization and allocating it to an offering variable so that it can be consumed by the StoreKitCoordinator. It also carries a utility to access the value (i.e. product id) when passing in a key (which matches one of the enums created in the step above).
C | Create the Offering Configuration Get functionality
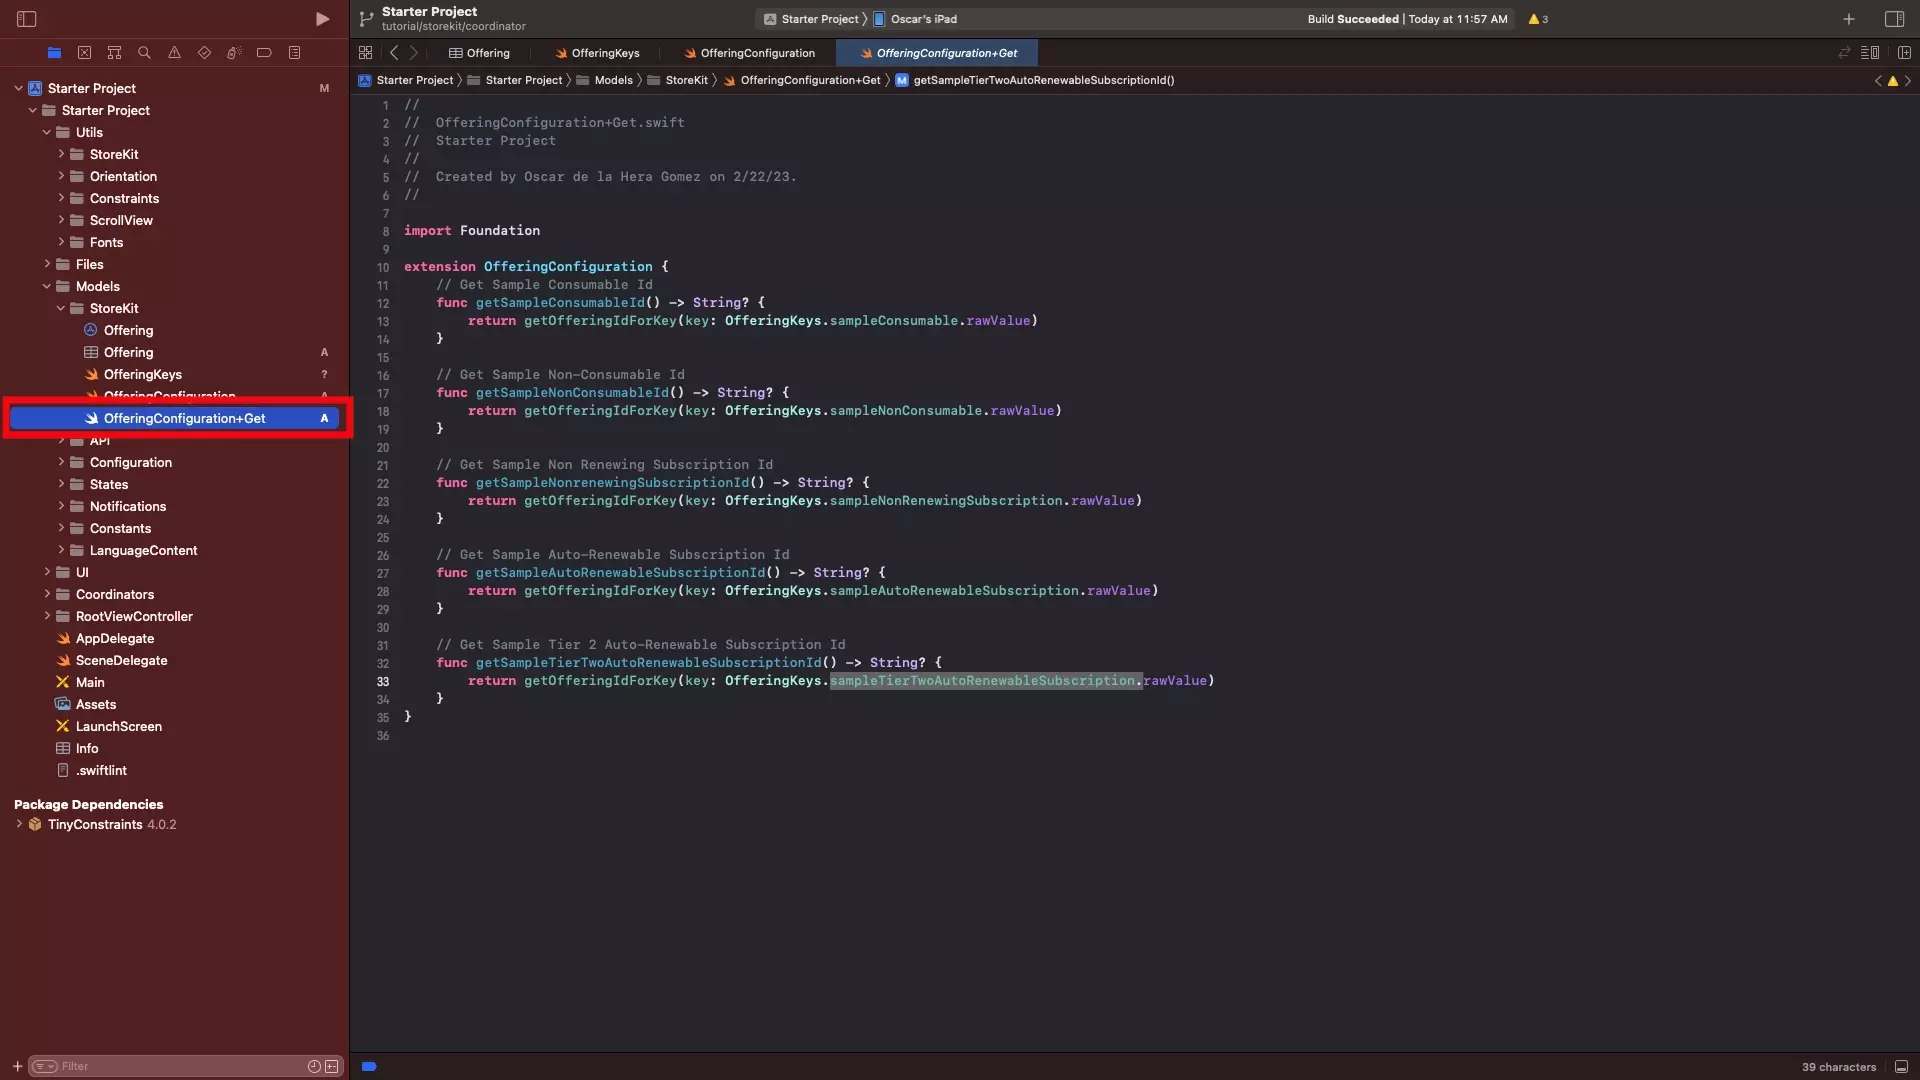
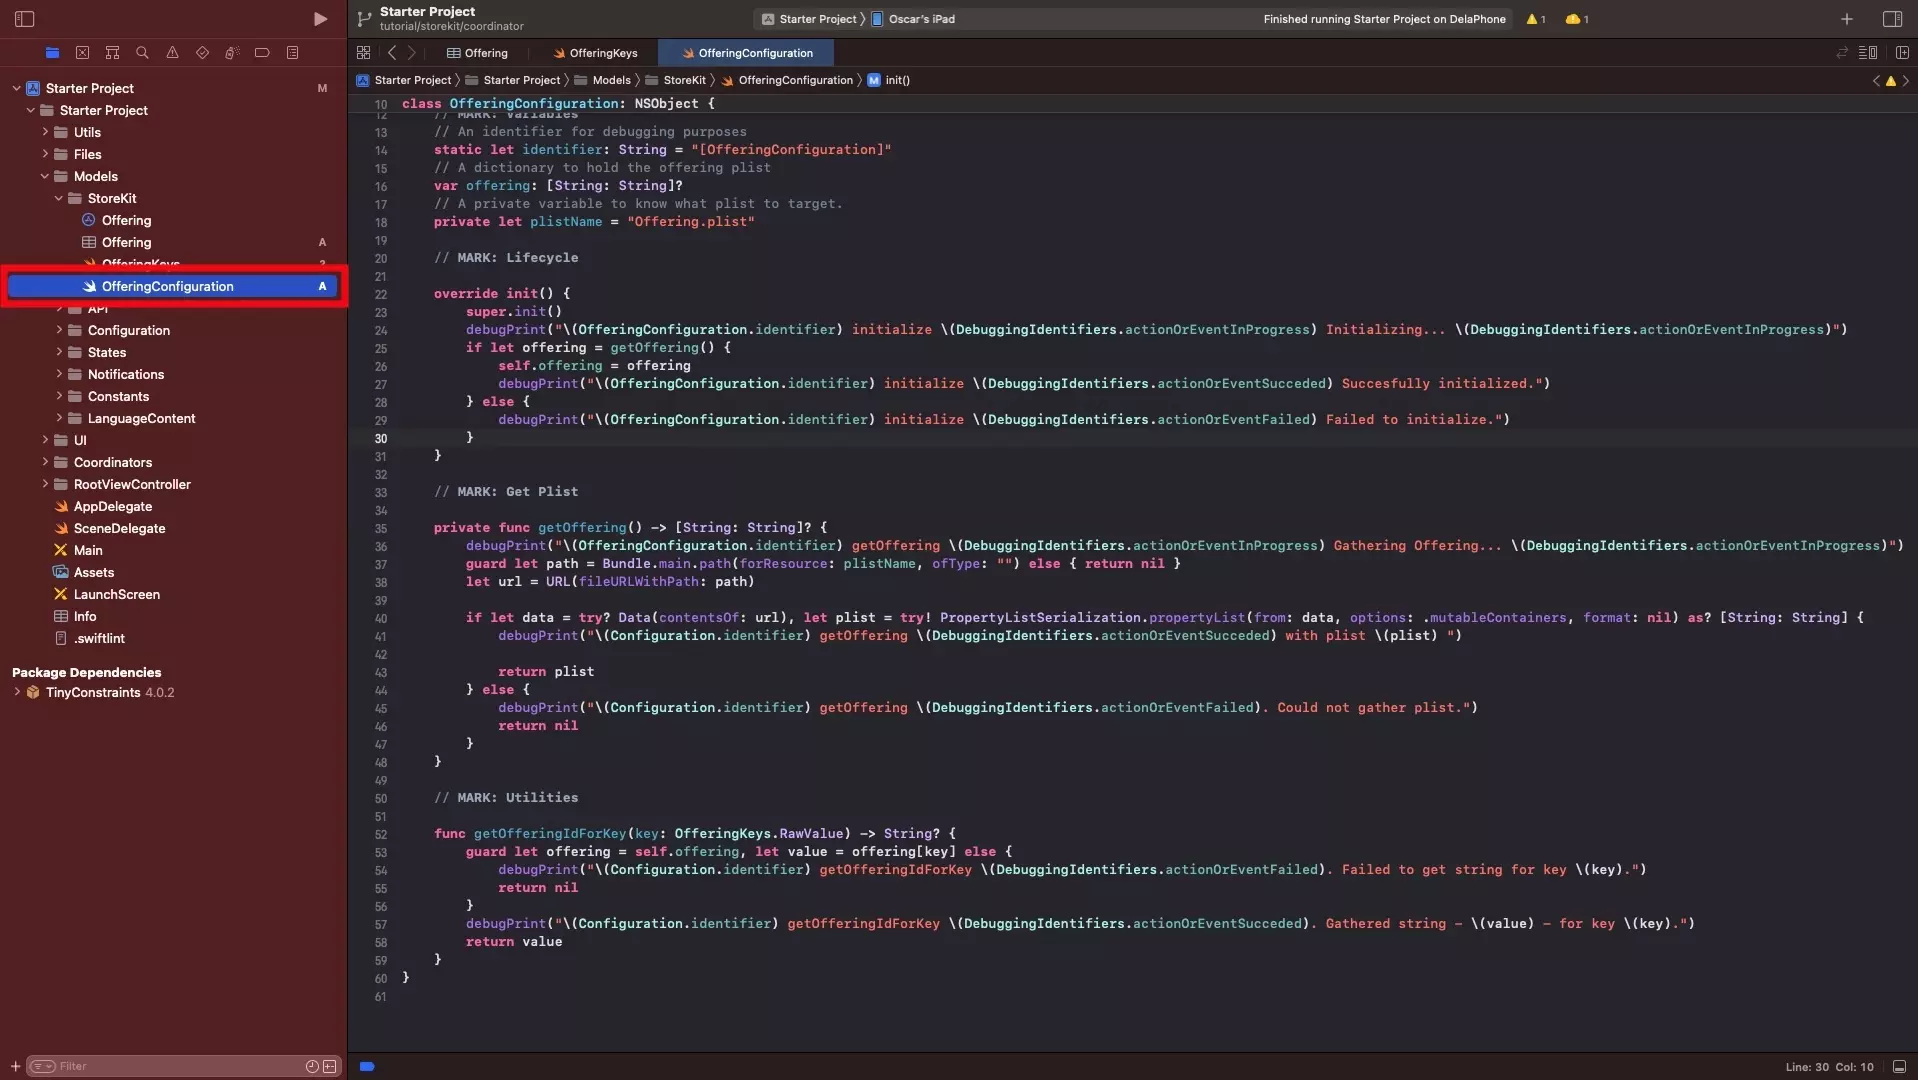
Under Models, in the StoreKit folder, create a new file called OfferingConfiguration+Get.swift and paste in the code below.
This file is responsible for offering functions that return the value (i.e. product id) for an In-App Purchase or Subscription within your offering.
Step Three: Create additional Models & Utilities
This step involves creating the typealias StoreKit utility as well as the StoreKit error and Subscription Tiers models.
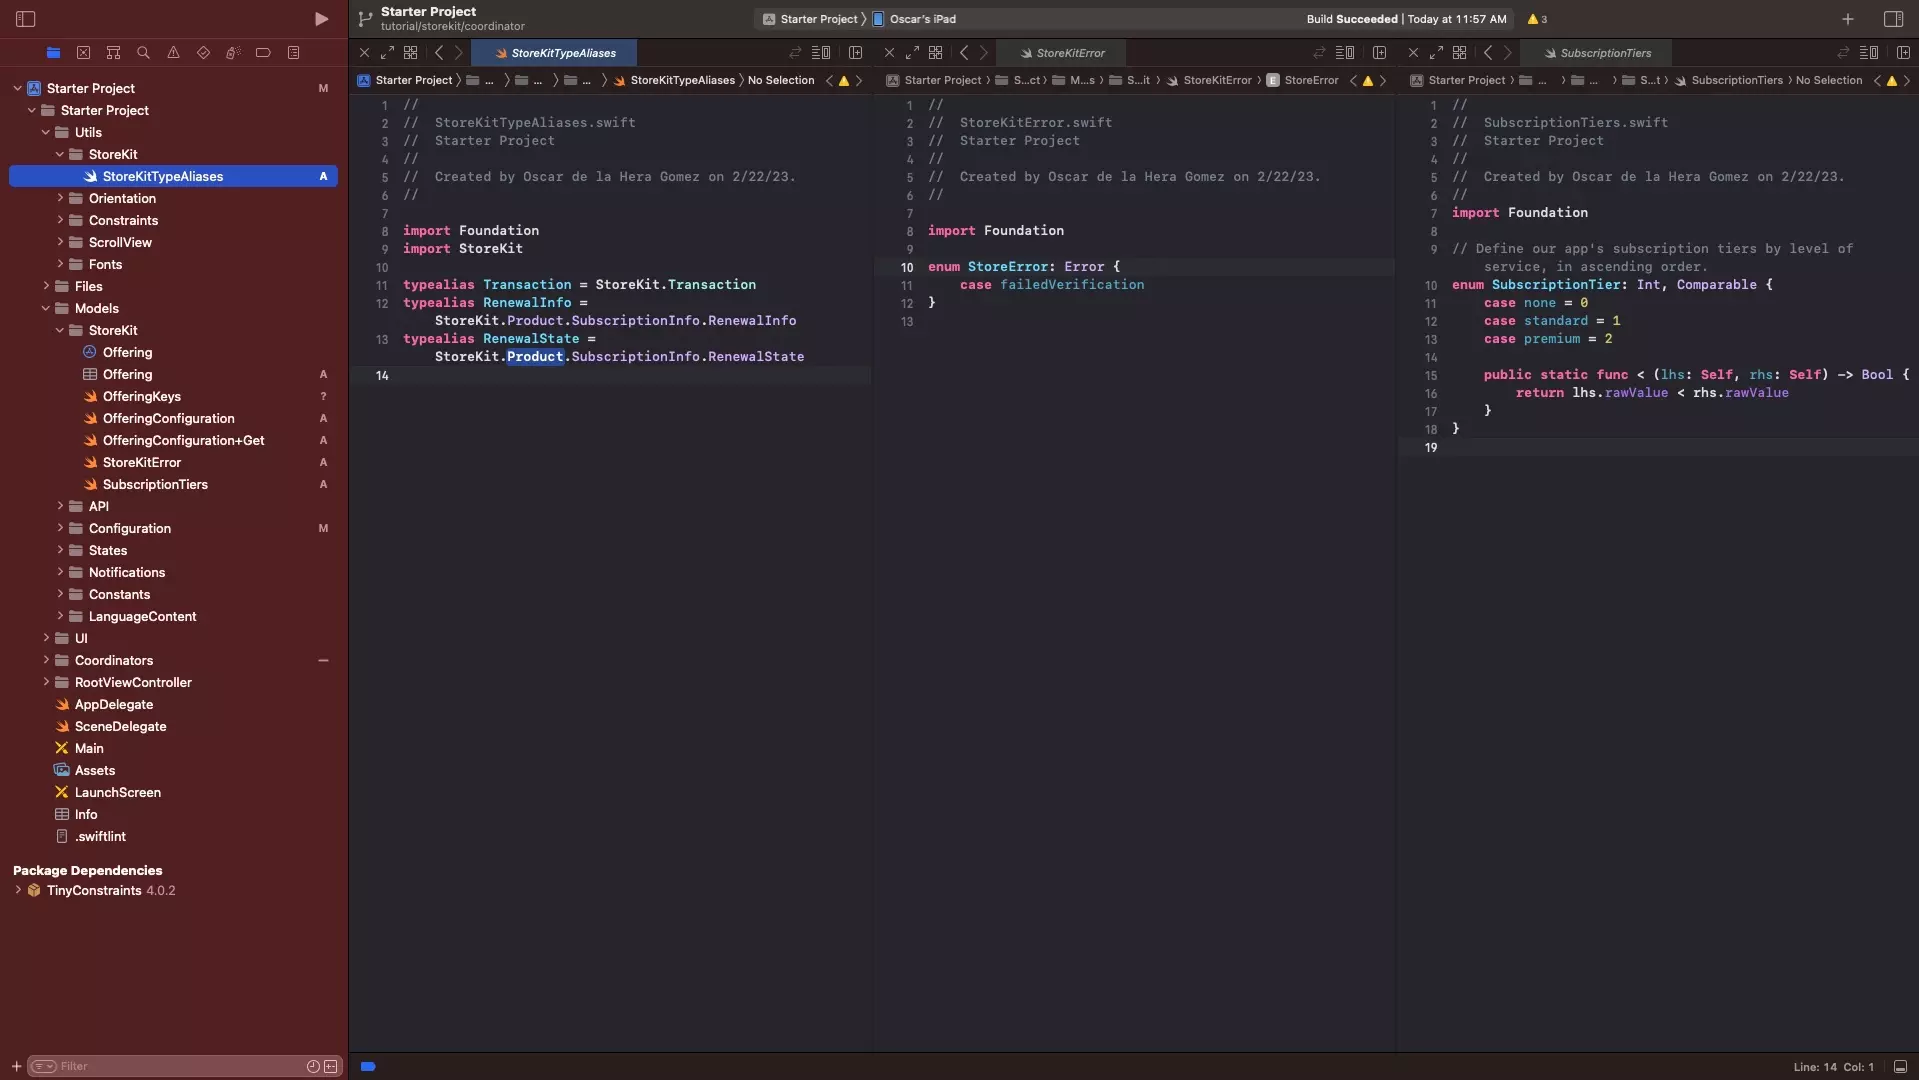
A | Typealias Utility
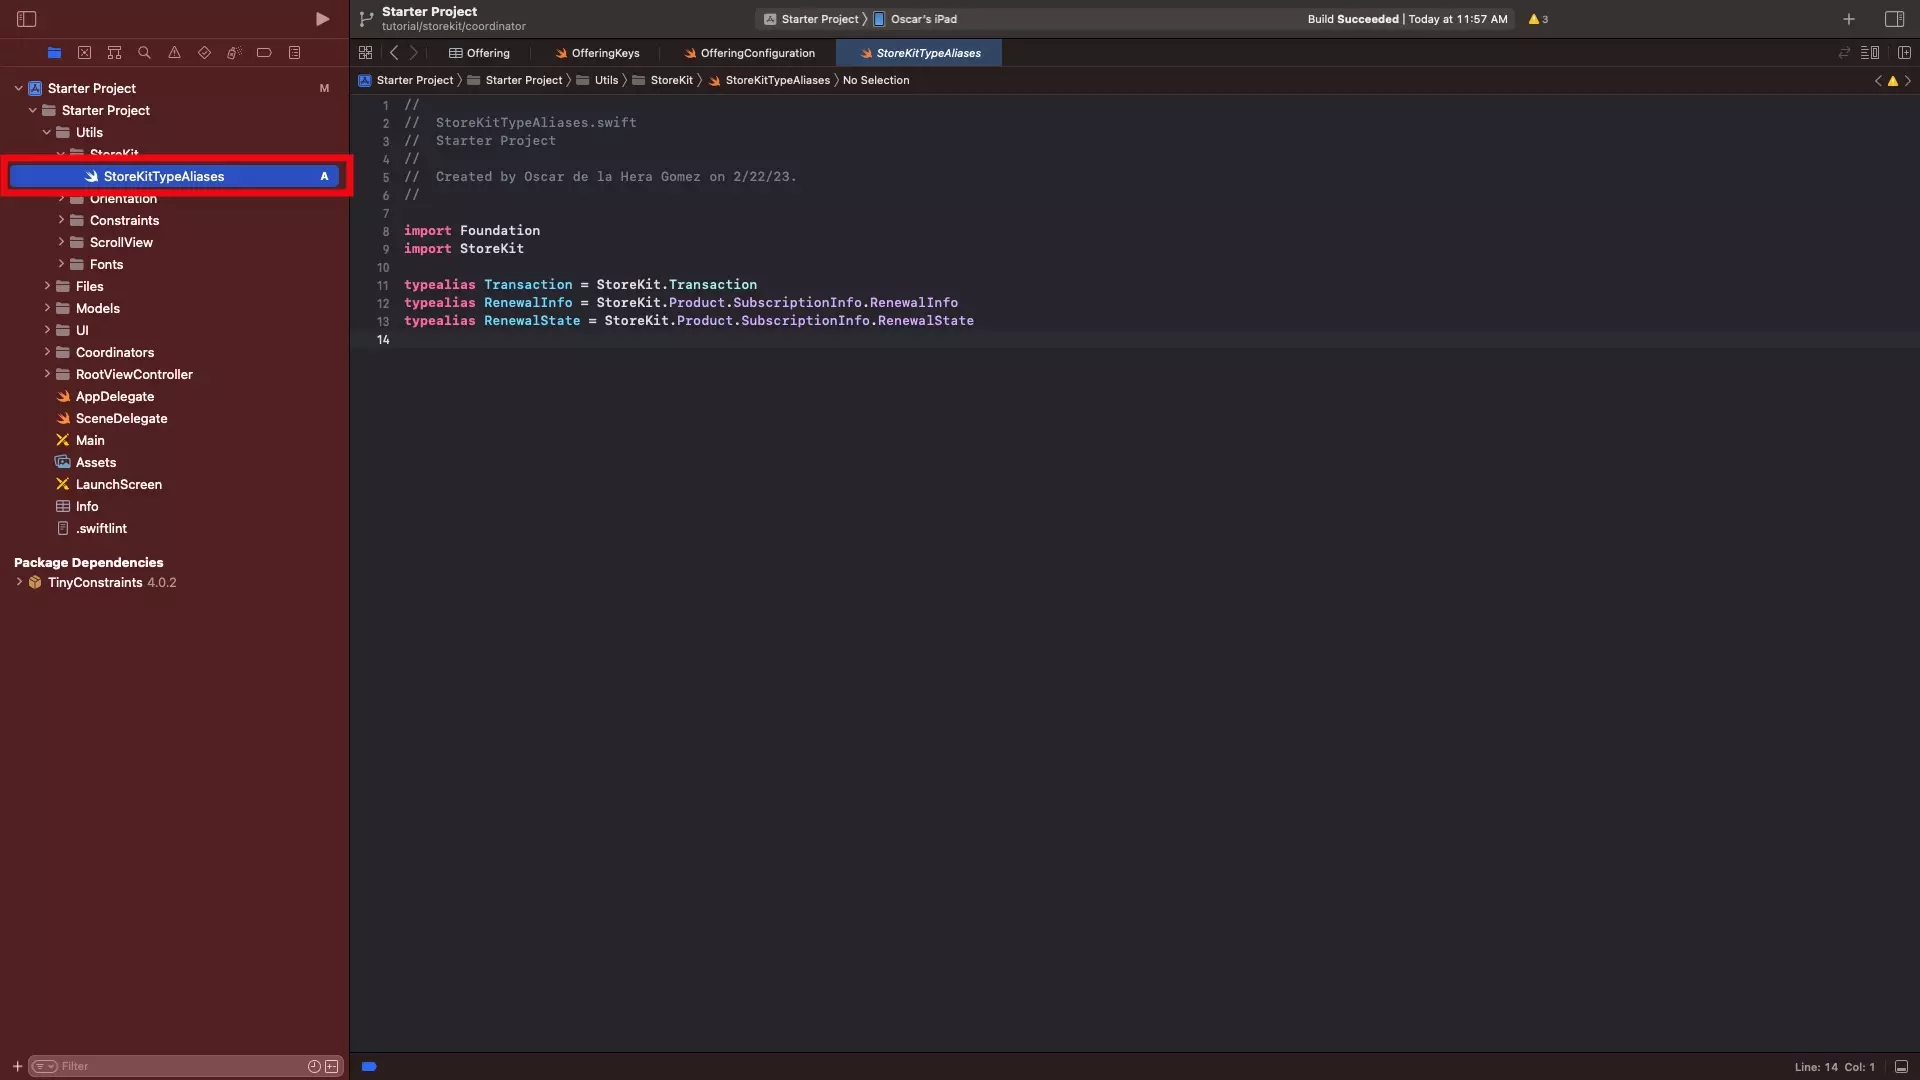
In the Utils folder, create a folder called StoreKit and within it, create a file called StoreKitTypeAliases.swift and copy in the code below.
B | Error Model
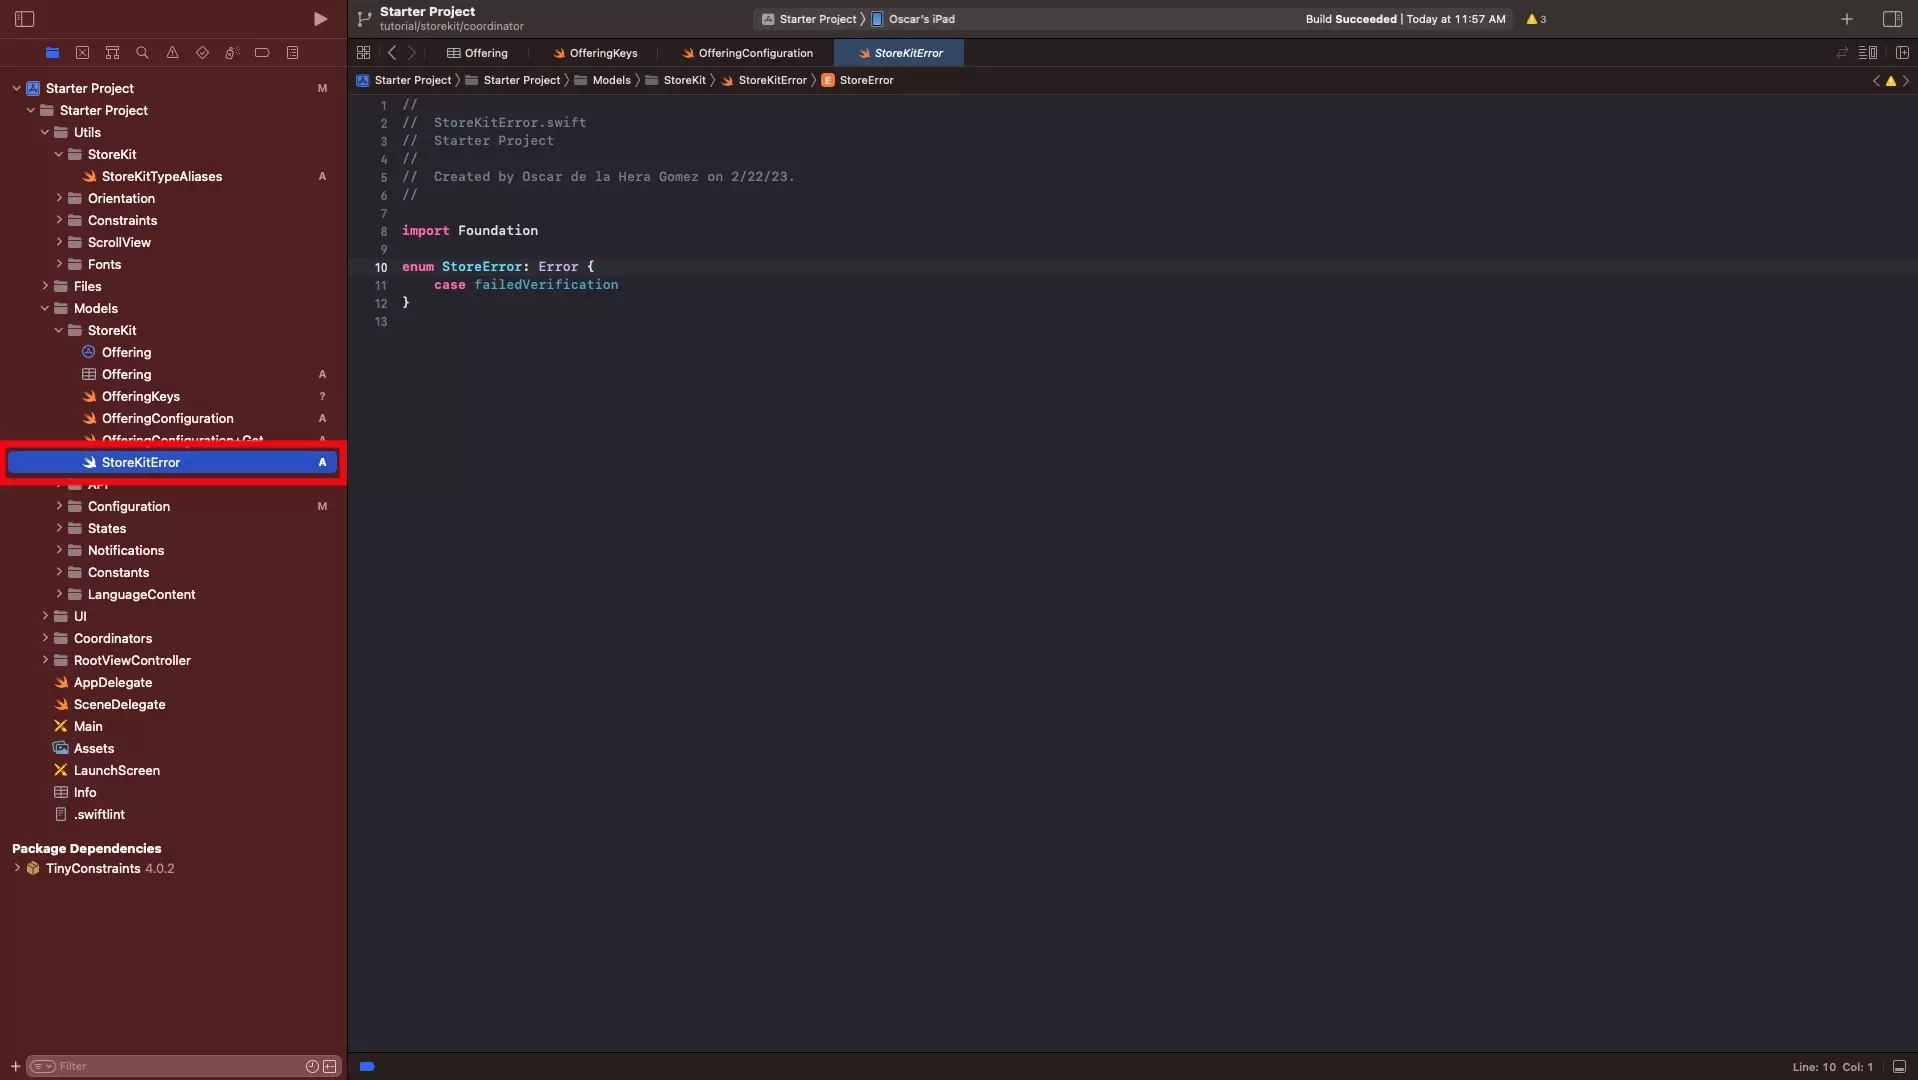
Under Models, in the StoreKit folder, create a new file called StoreKitError.swift and paste in the code below.
C | Subscription Tier Model (Optional)
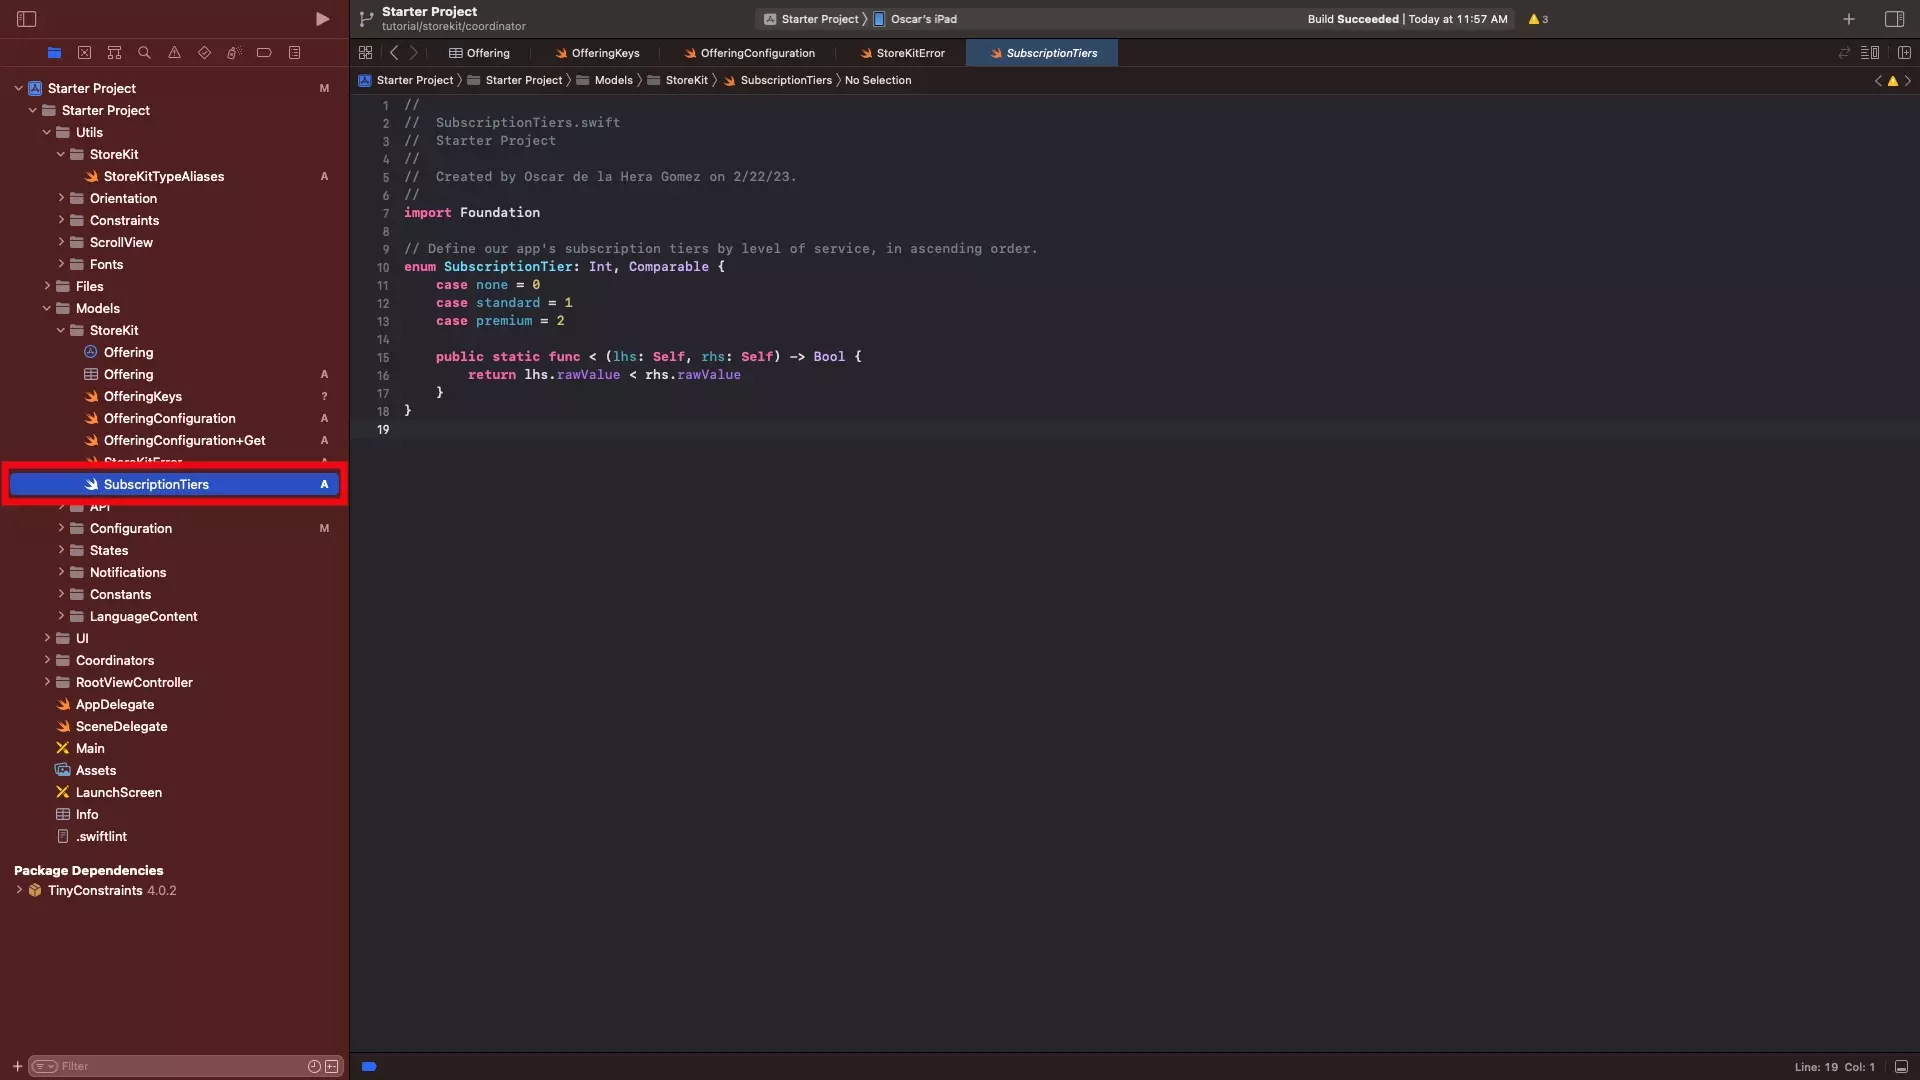
This step is only required if your App uses one or more Subscription Groups which have multiple levels of service.
Under Models, in the StoreKit folder, create a new file called SubscriptionTiers.swift and define the levels of service for your subscriptions using code similar to that below.
In contrast to the Subscription Levels defined in your Subscription Group, which appear in descending order, the Subscription Tiers in this file must be written in ascending order.
Please note that we have created a sample for a two tier subscription service within a single Subscription Group. You should code this to the requirements of your business logic, which may require more than one file for Subscription Tiers if you use multiple Subscription Groups.
Step Four: Create the Coordinator
The StoreKitCoordinator has been broken down into a series of files to help breakdown all the required functionality and is based on Apple's Open Source StoreKit Project which was demonstrated in Meet StoreKit 2 (WWDC21). Both of these are available in below.
Please note that we have not included functionality for the handling of consumables in this tutorial.
A | Create the folder
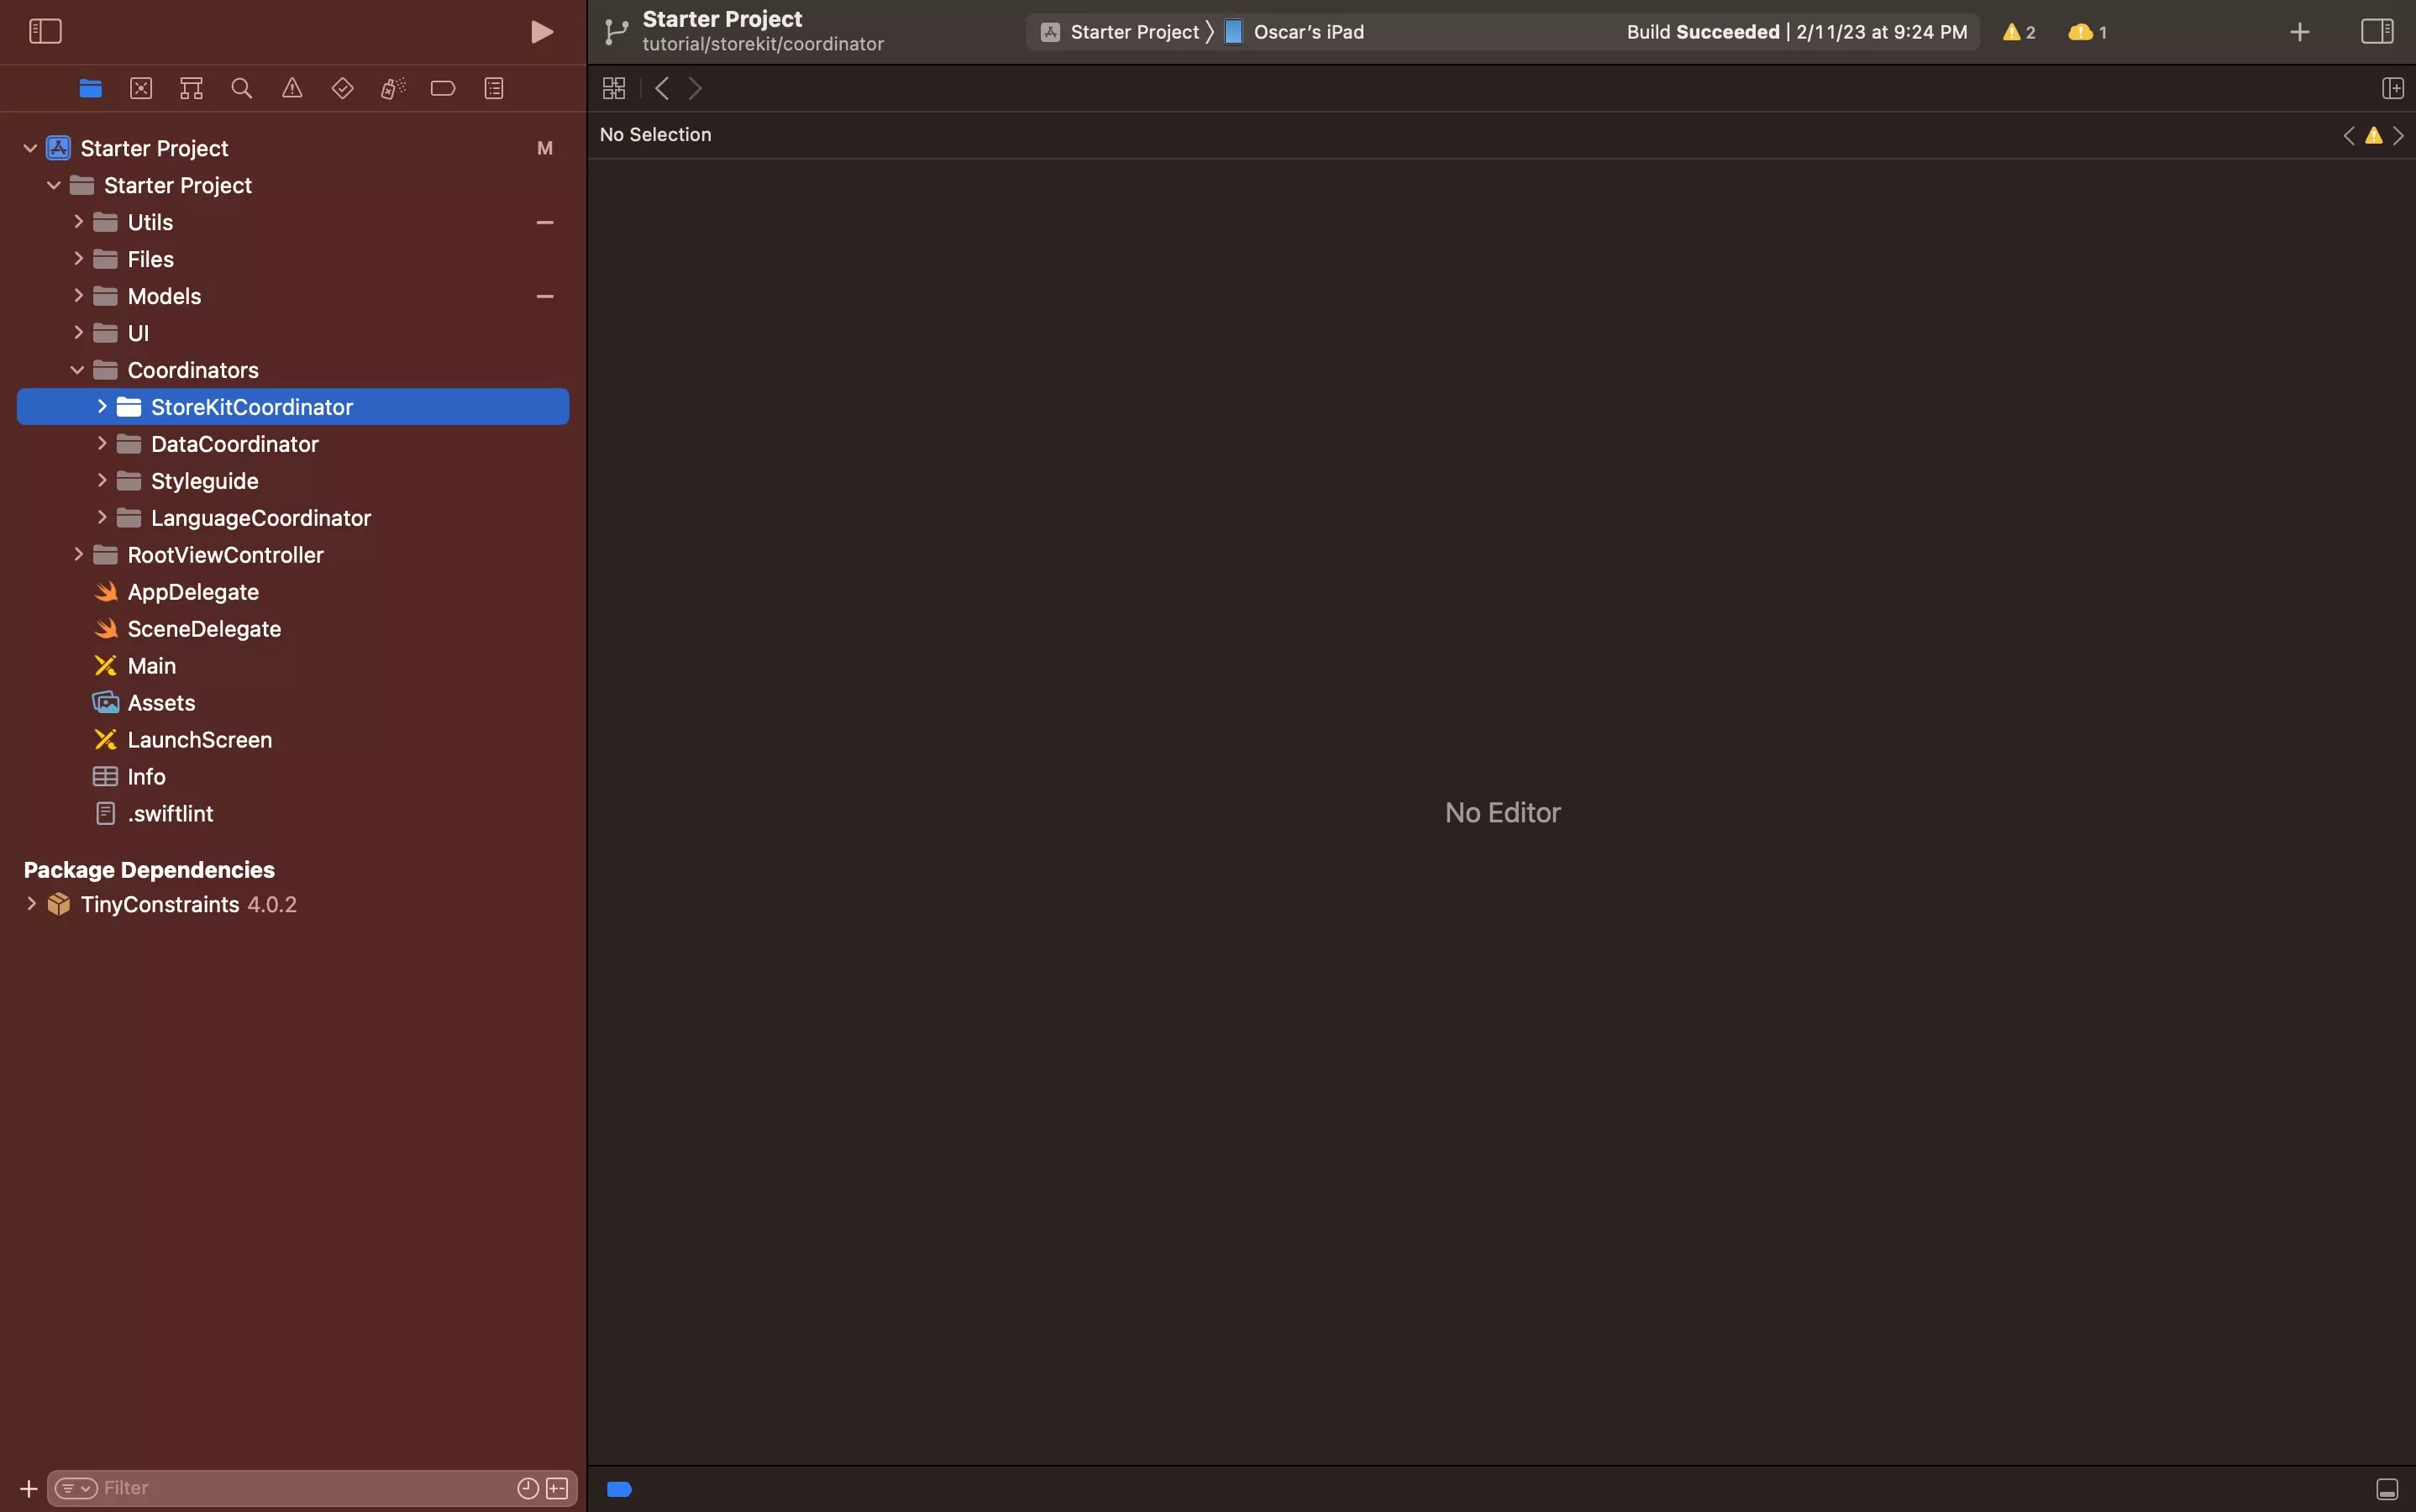
Under the Coordinators folder, create a new folder called StoreKitCoordinator.
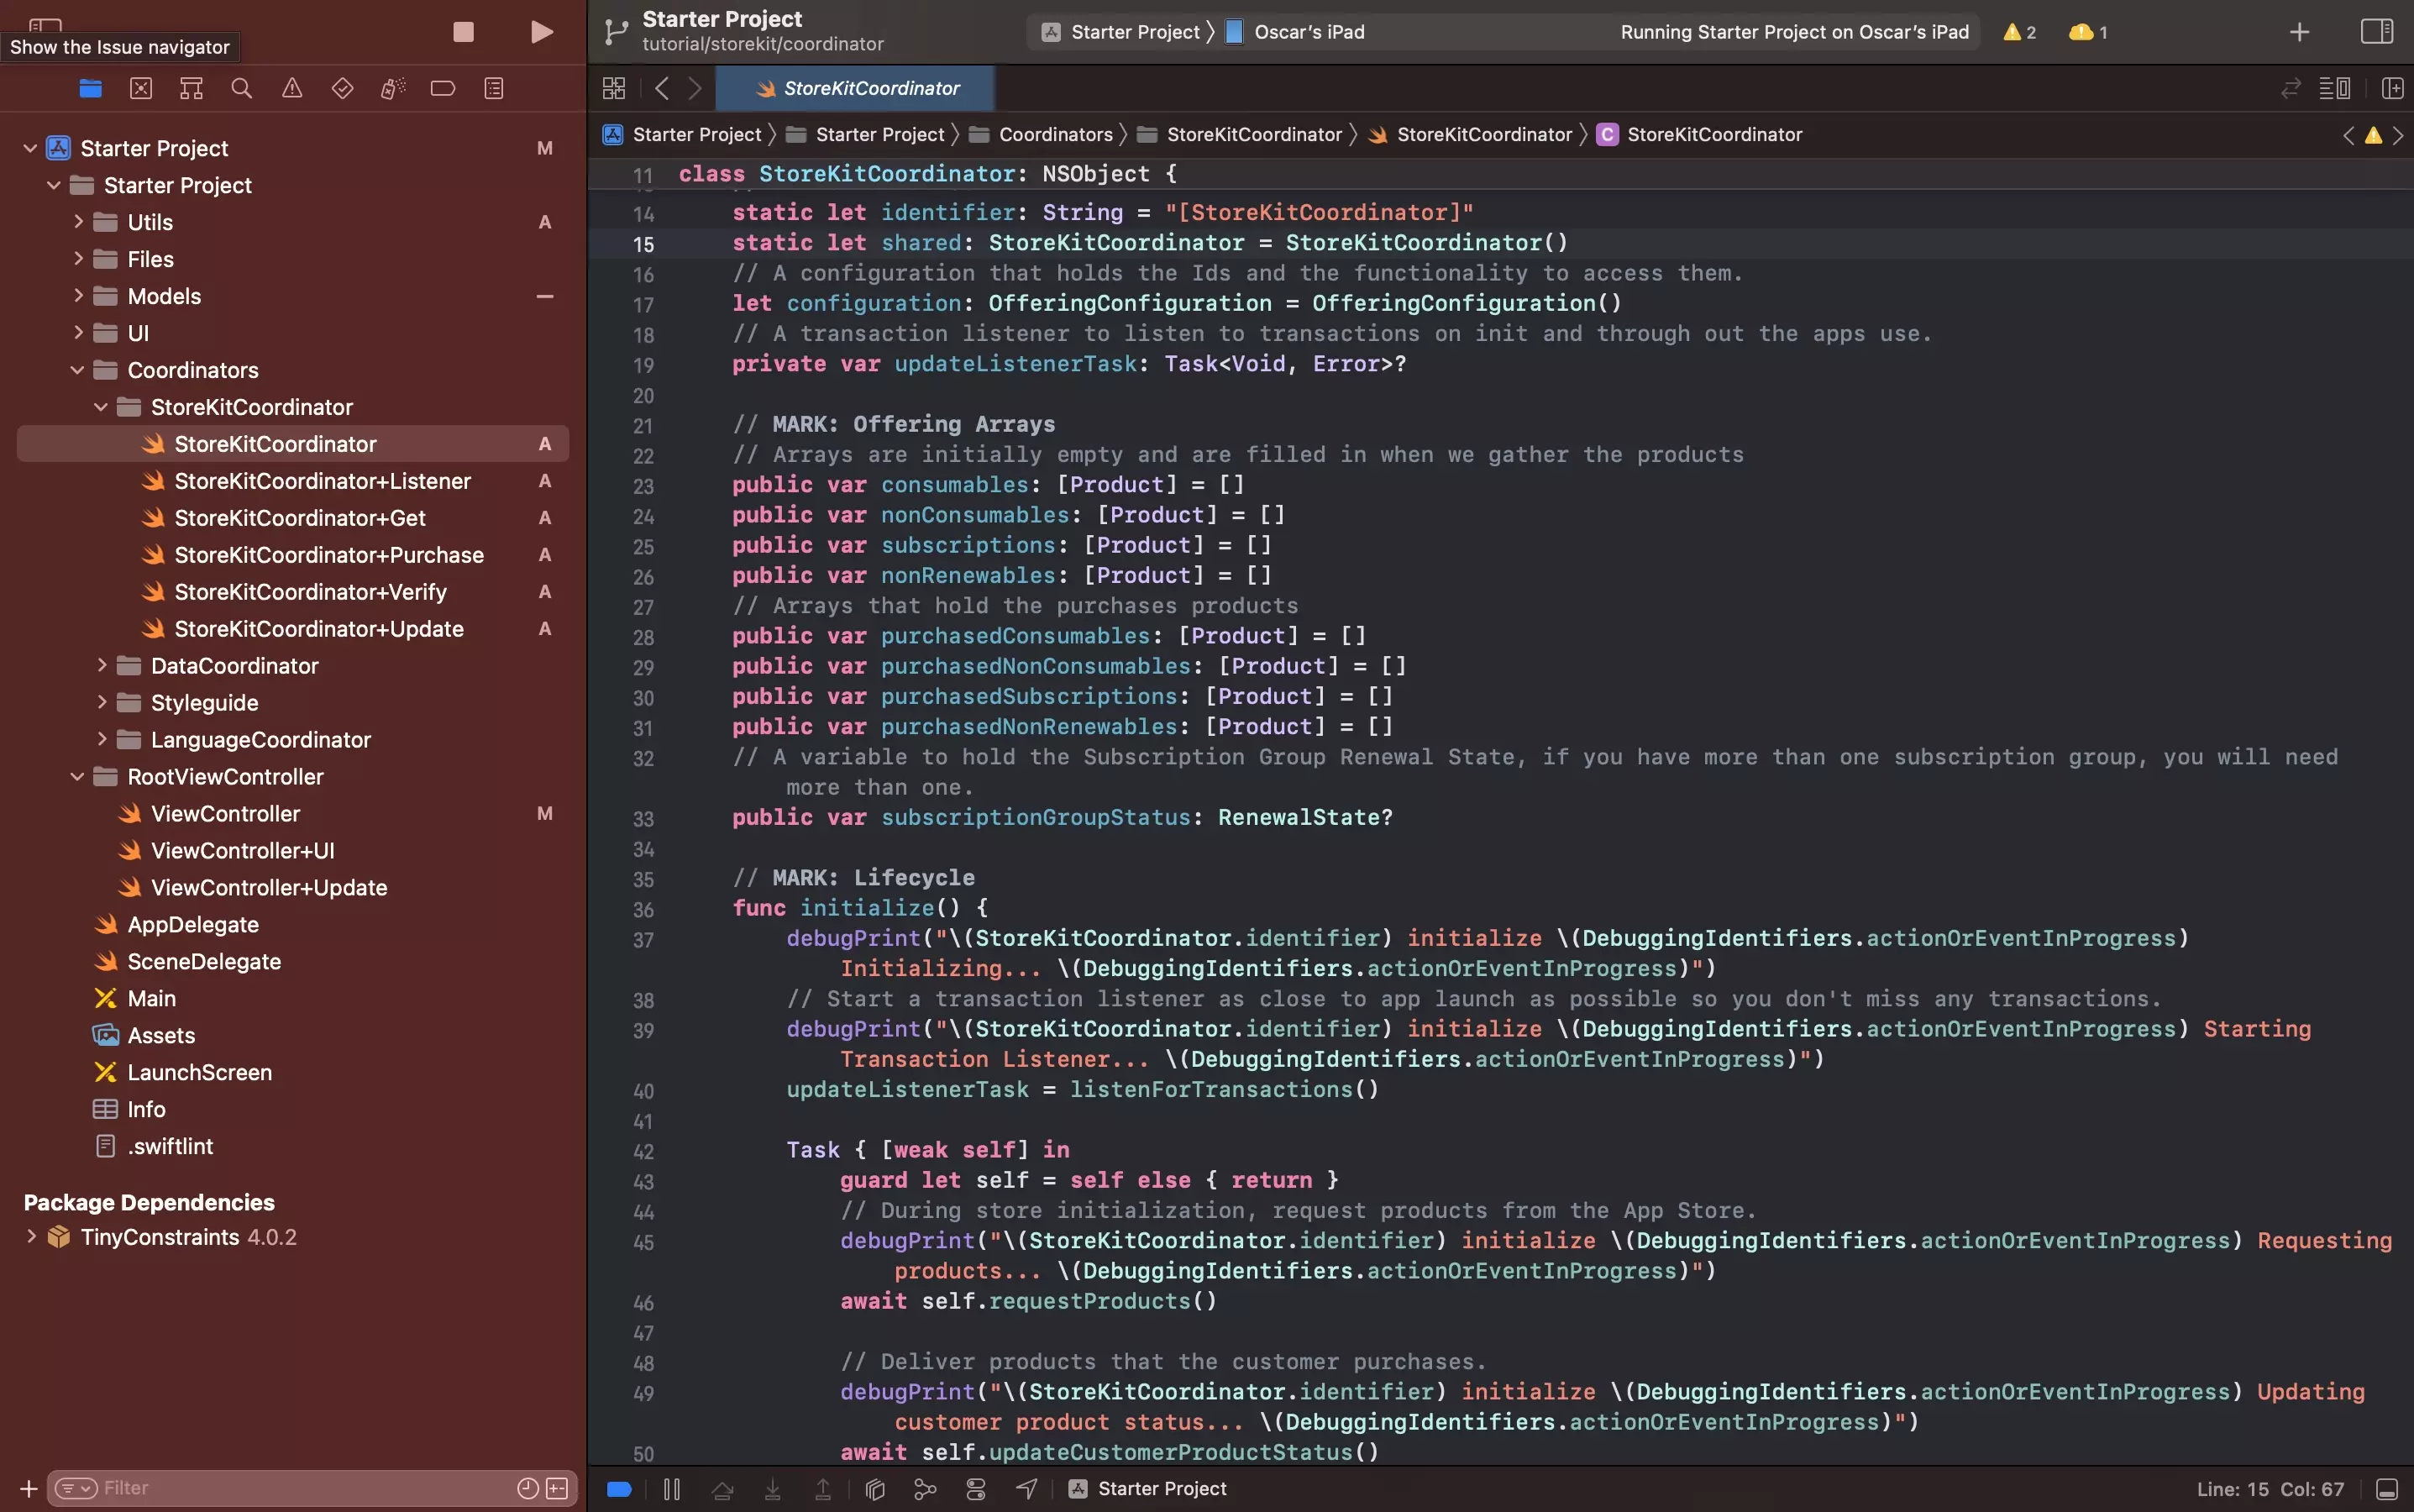
B | Create base file

In the StoreKitCoordinator folder create a new file called StoreKitCoordinator.swift and copy in the code below.
Please note that the StoreCoordinator includes variables for individual arrays, each of which holds items using known In-App Purchase or Subscription names.
This should be updated to suit the business logic of your app.
For an example of how to do this, consult Meet StoreKit 2 (WWDC21).
Additionally, the variables include a status which is written to, to manage the status of a single subscription group. You should include more statuses if you are using multiple subscription groups.
C | Create the Listener functionality
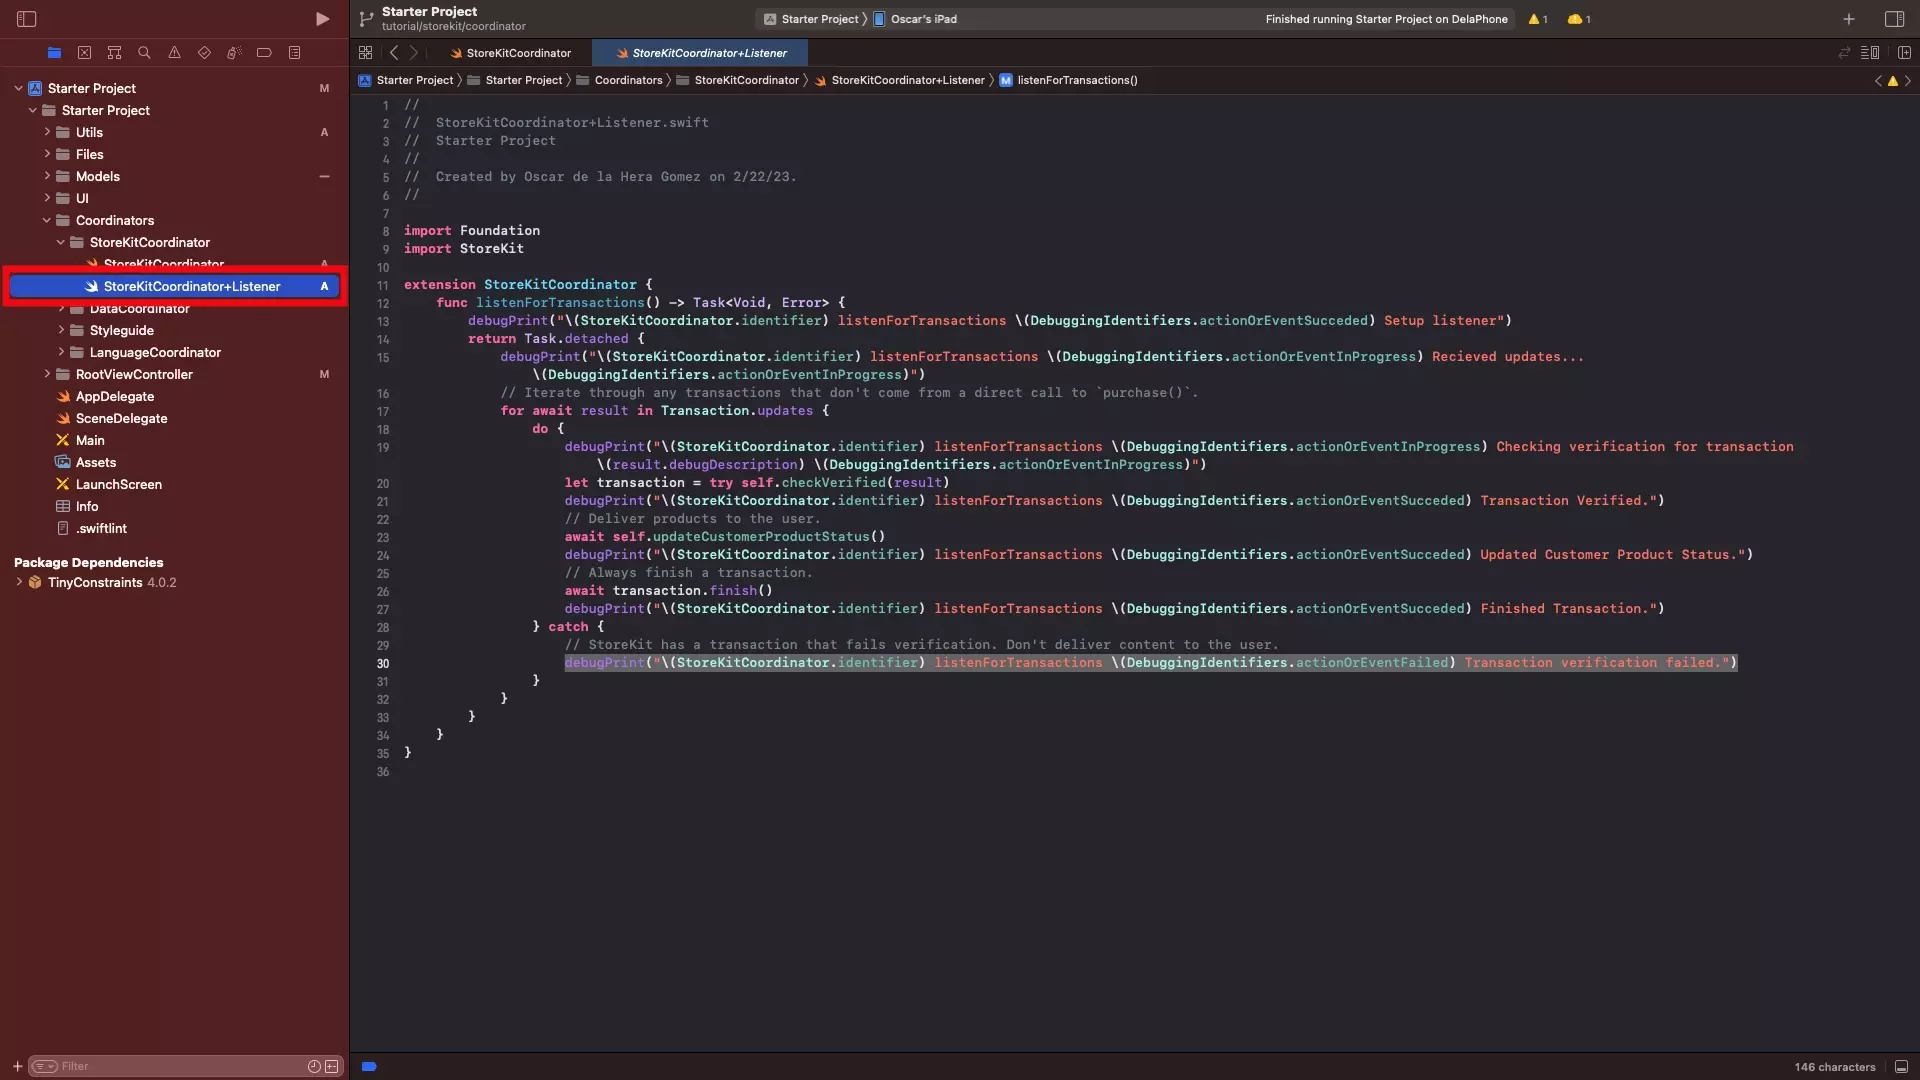
In the StoreKitCoordinator folder create a new file called StoreKitCoordinator+Listener.swift and copy in the code below.
This functionality is responsible for listening for updates on App Store Connect or a local StoreKit file, which could occur on devices separate from the one you're on (i.e. if a family member upgrades to a family plan or when a guardian or bank approves a pending purchase, the app will listen for that update and automatically update your availability).
D | Create the Get functionality
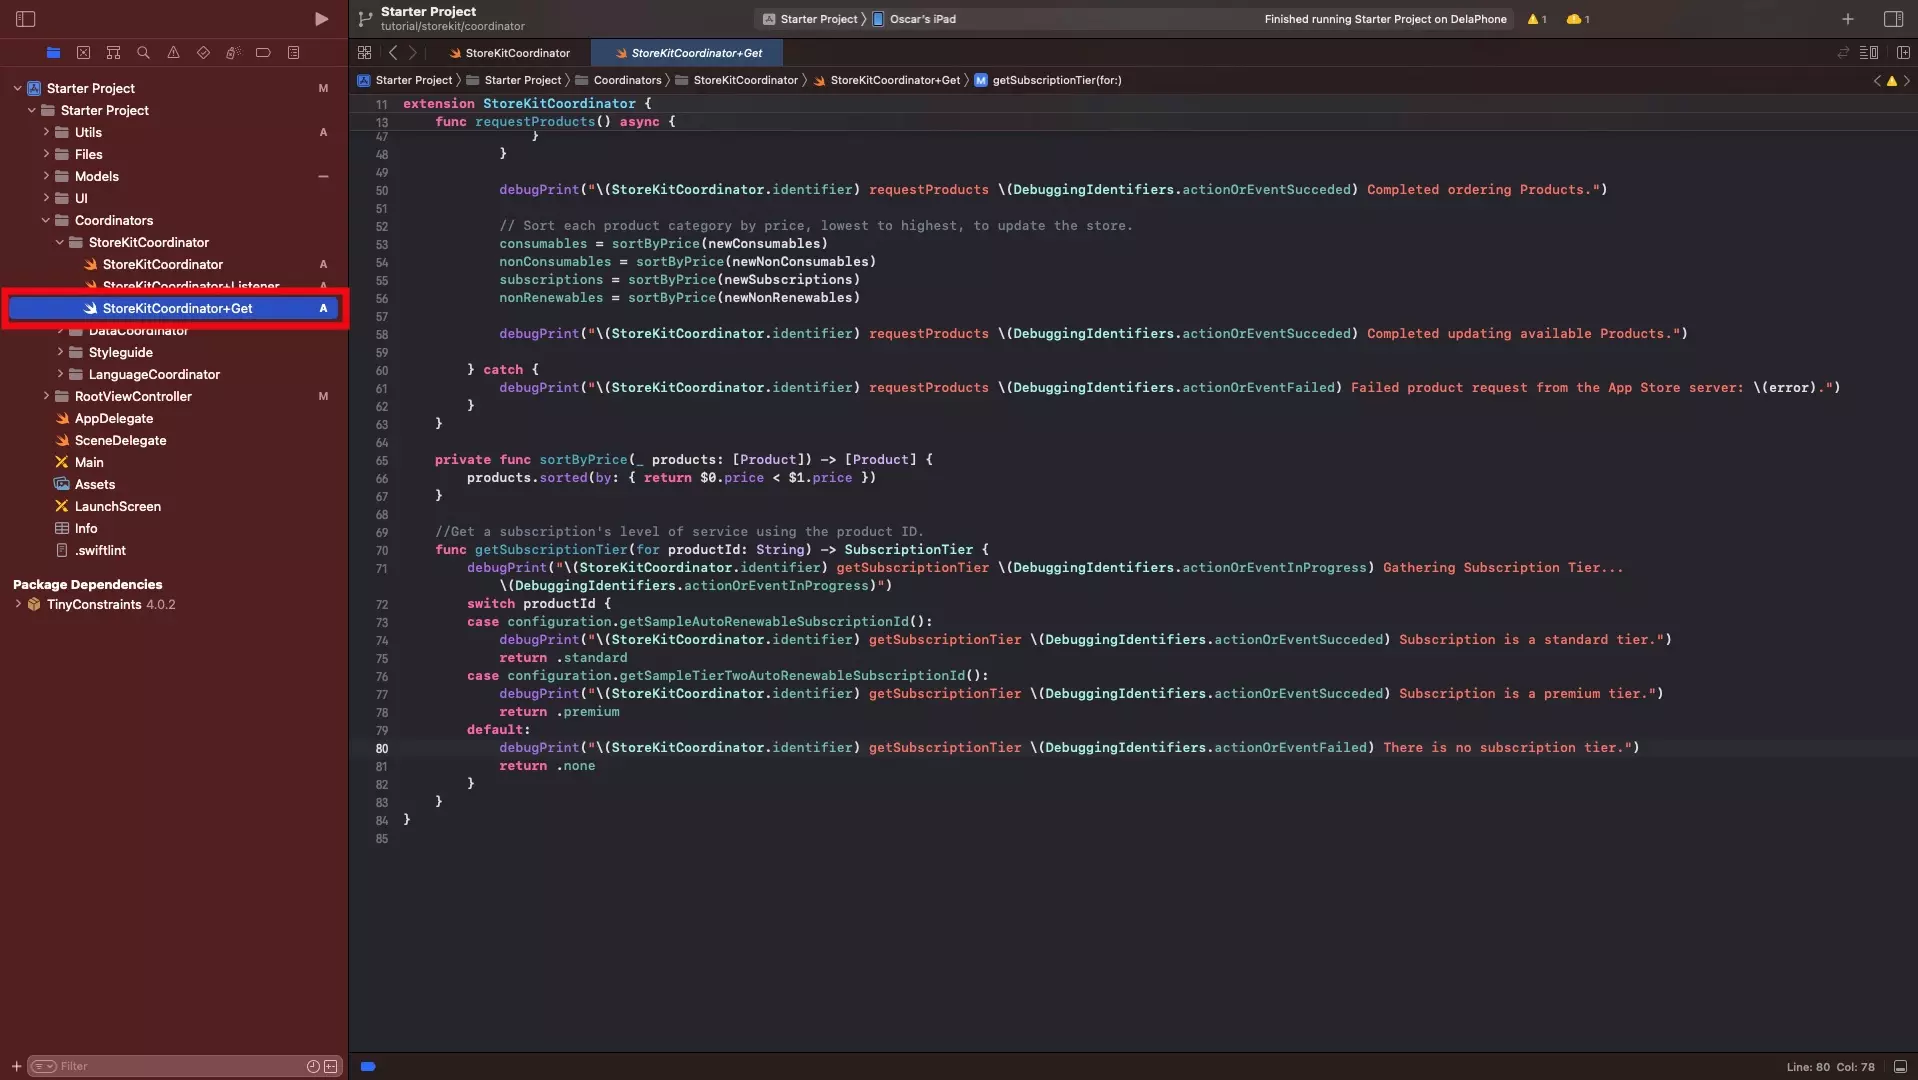
In the StoreKitCoordinator folder create a new file called StoreKitCoordinator+Get.swift and copy in the code below.
This functionality is responsible for gathering the products from the StoreKit Configuration File.
E | Create the Purchase functionality

In the StoreKitCoordinator folder create a new file called StoreKitCoordinator+Purchase.swift and copy in the code below.
This functionality is responsible for handling the purchase of products.
F | Create the Verify functionality
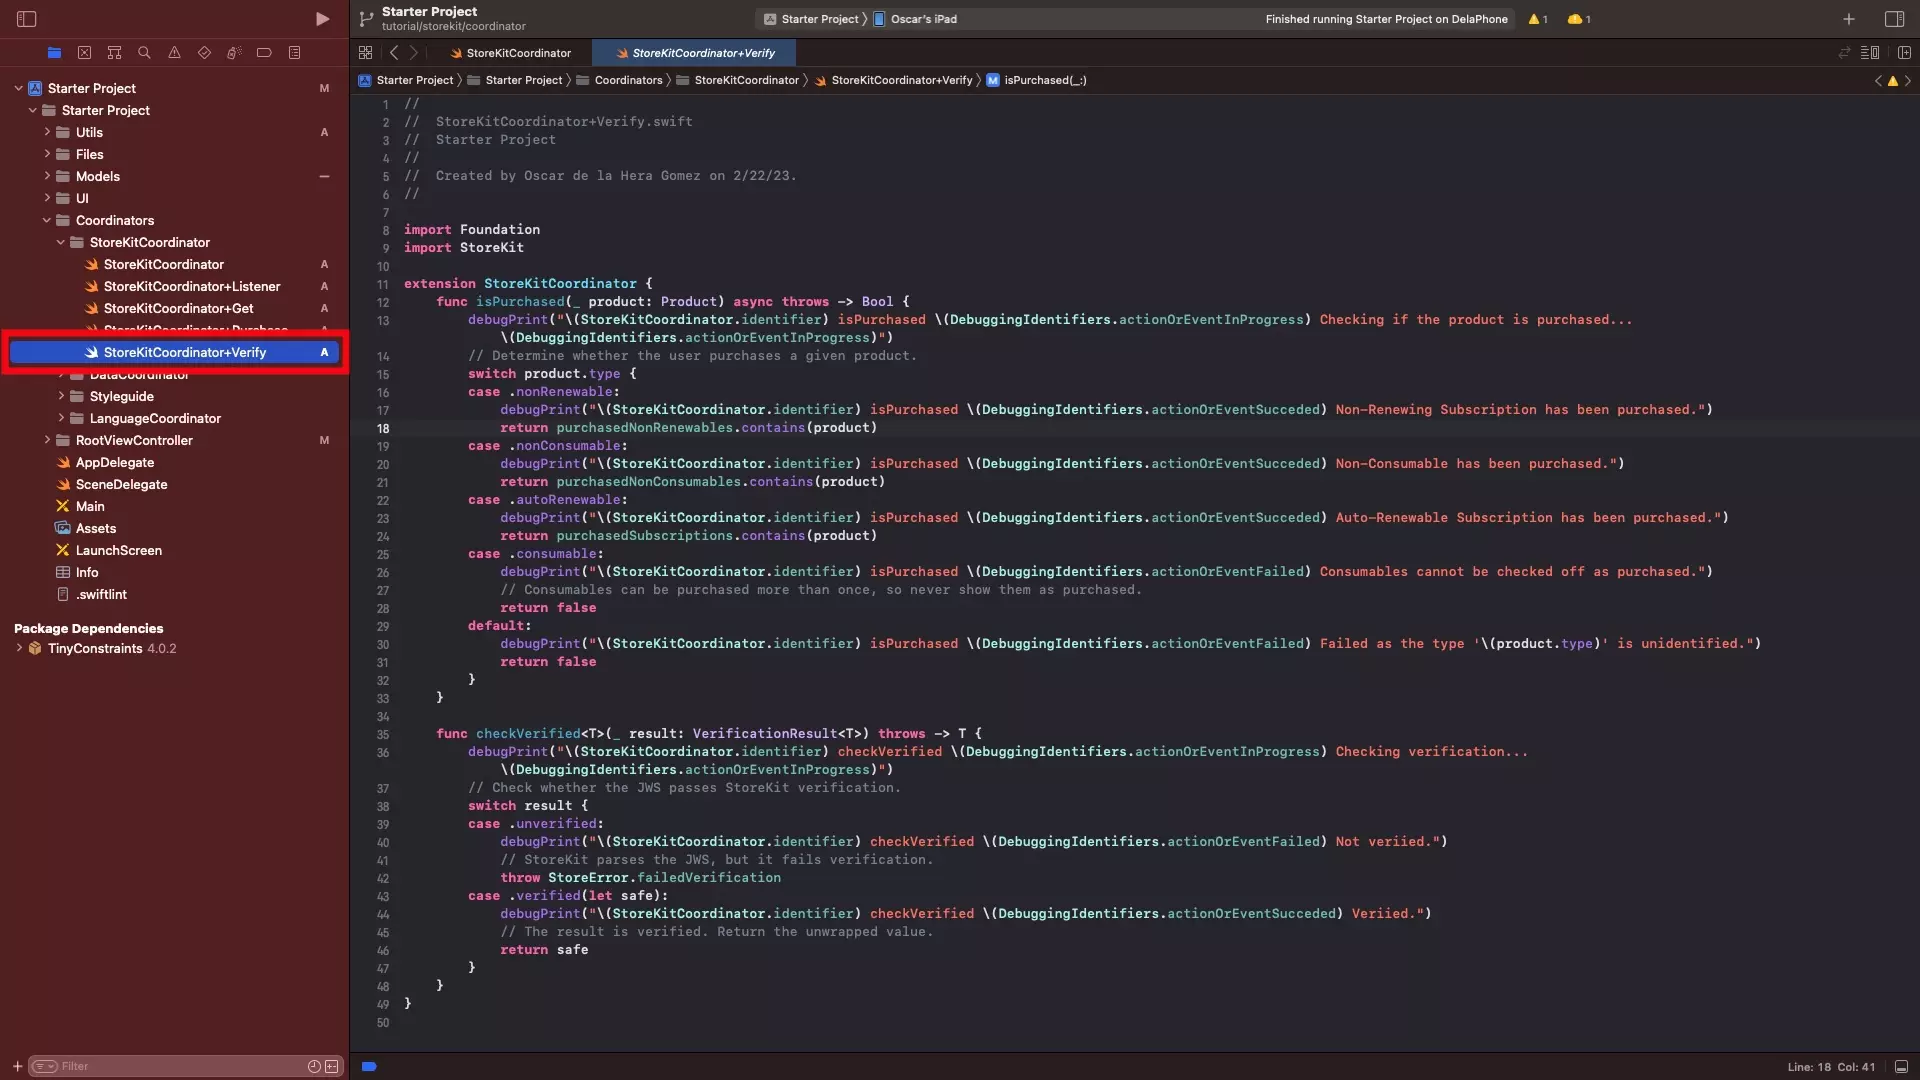
In the StoreKitCoordinator folder create a new file called StoreKitCoordinator+Verify.swift and copy in the code below.
This functionality is responsible for determining if a product has been purchased as well as to verify the purchase of products.
H | Create the Update functionality
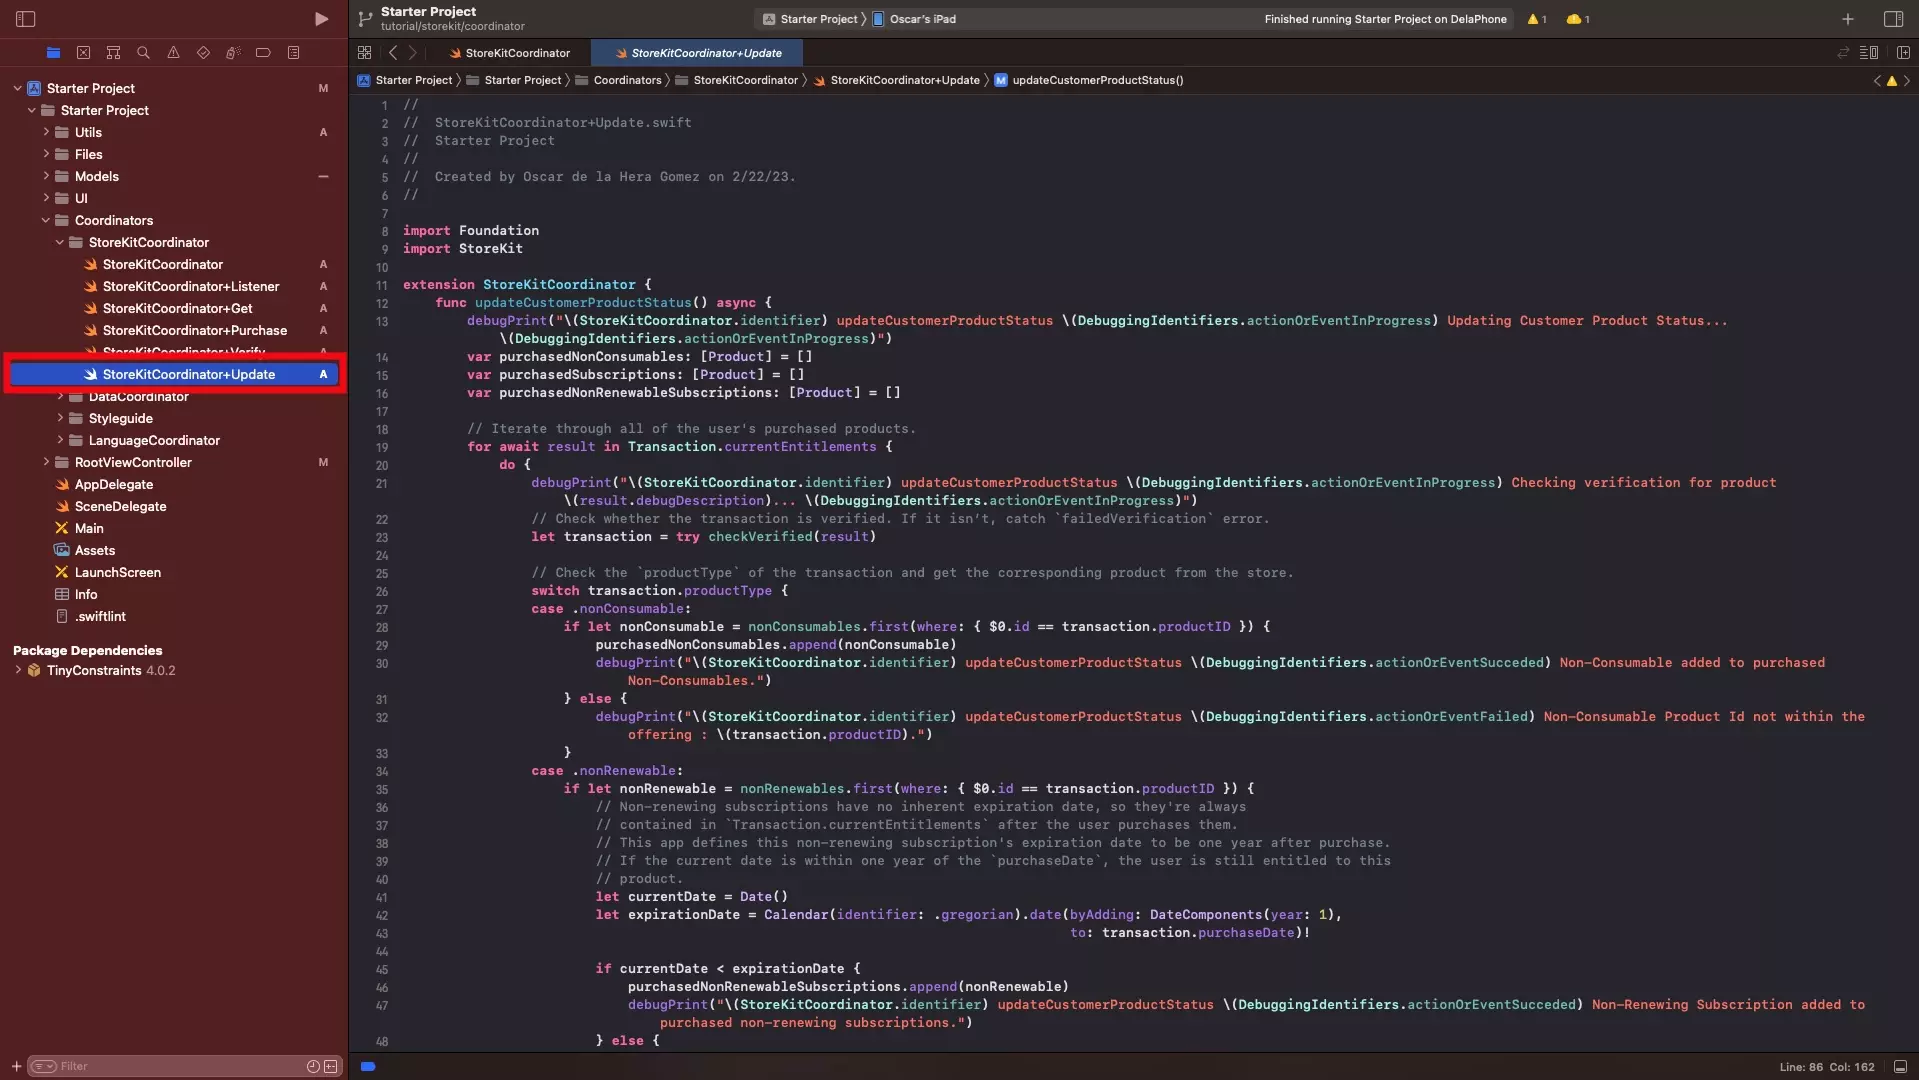
In the StoreKitCoordinator folder create a new file called StoreKitCoordinator+Update.swift and copy in the code below.
This functionality is responsible for running through and verifying the products that a customer is entitled to and adding them to the relevant purchased array.
Step Five: Initialize StoreCoordinator
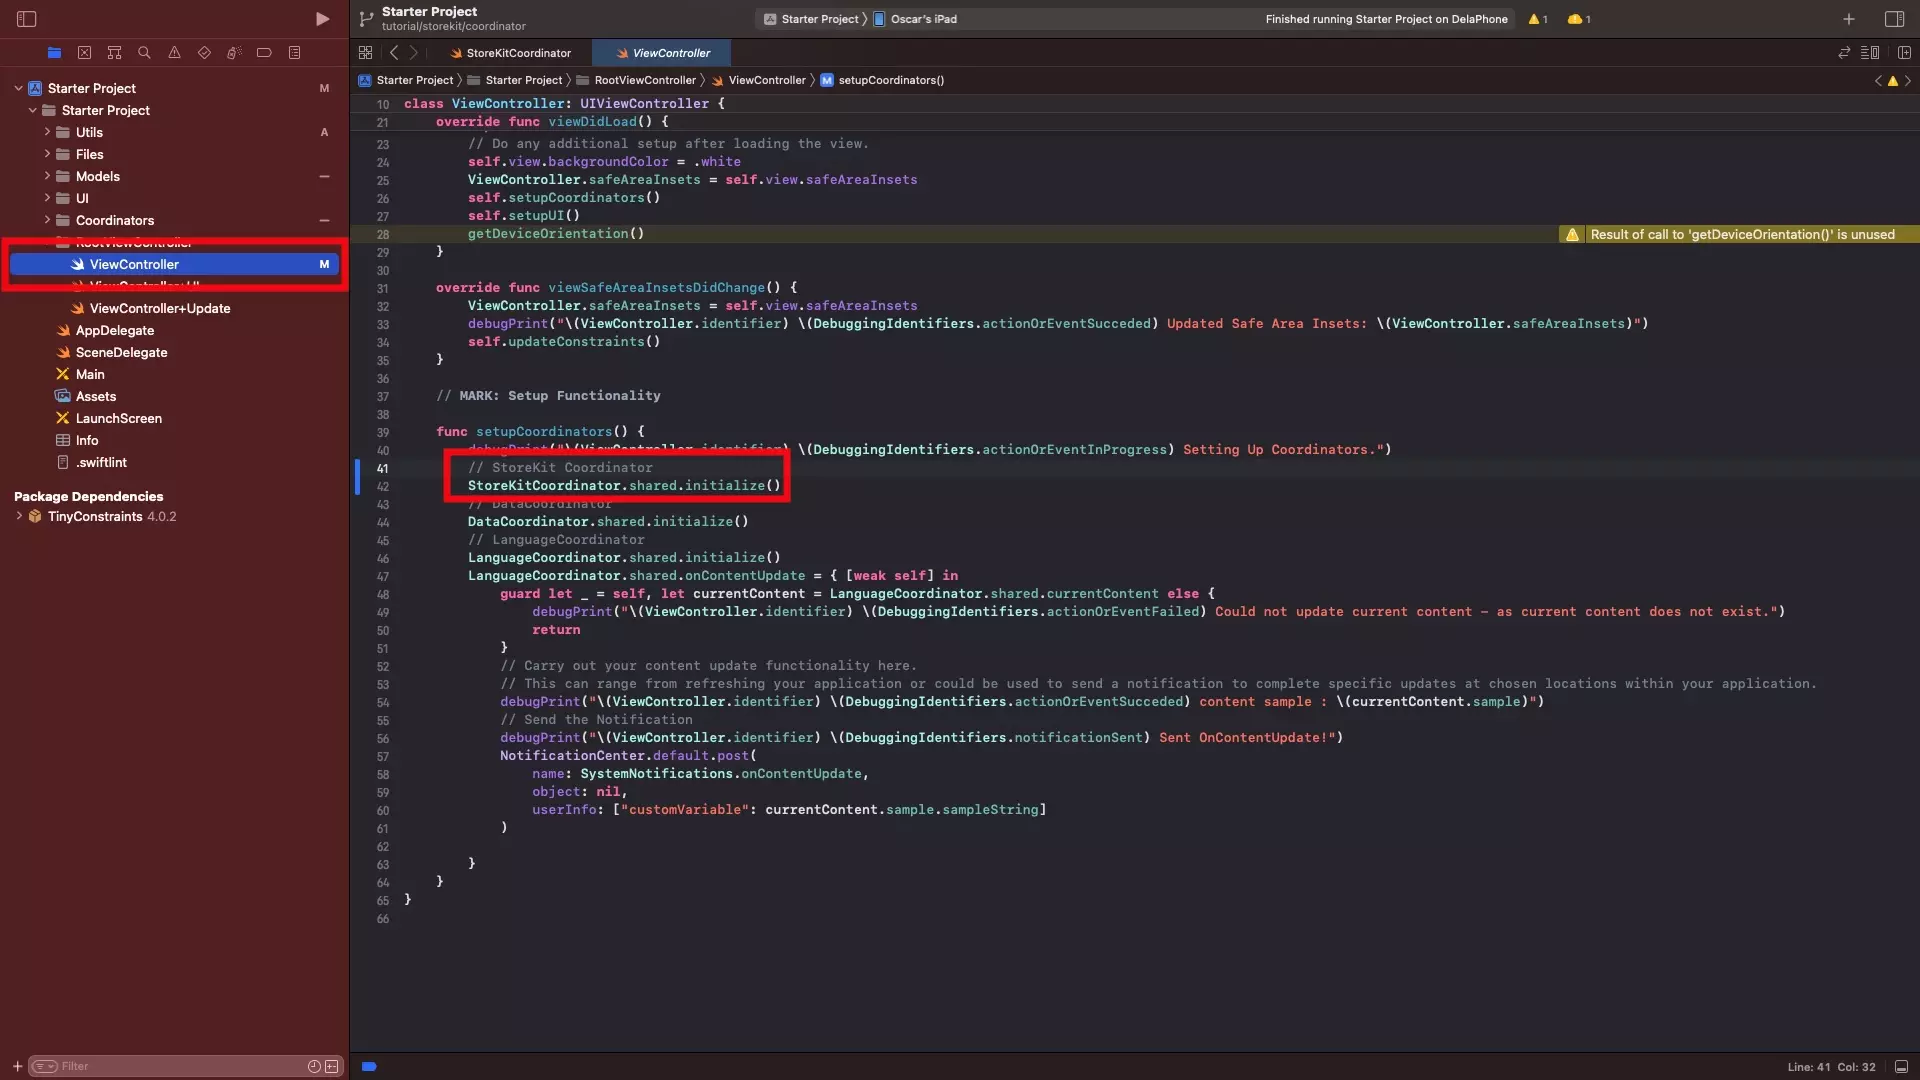
In the ViewController.swift file, in the setupCoordinator function, initialize the StoreCoordinator.
StoreKitCoordinator.shared.initialize()Step Six: Create the StoreKit Notifications
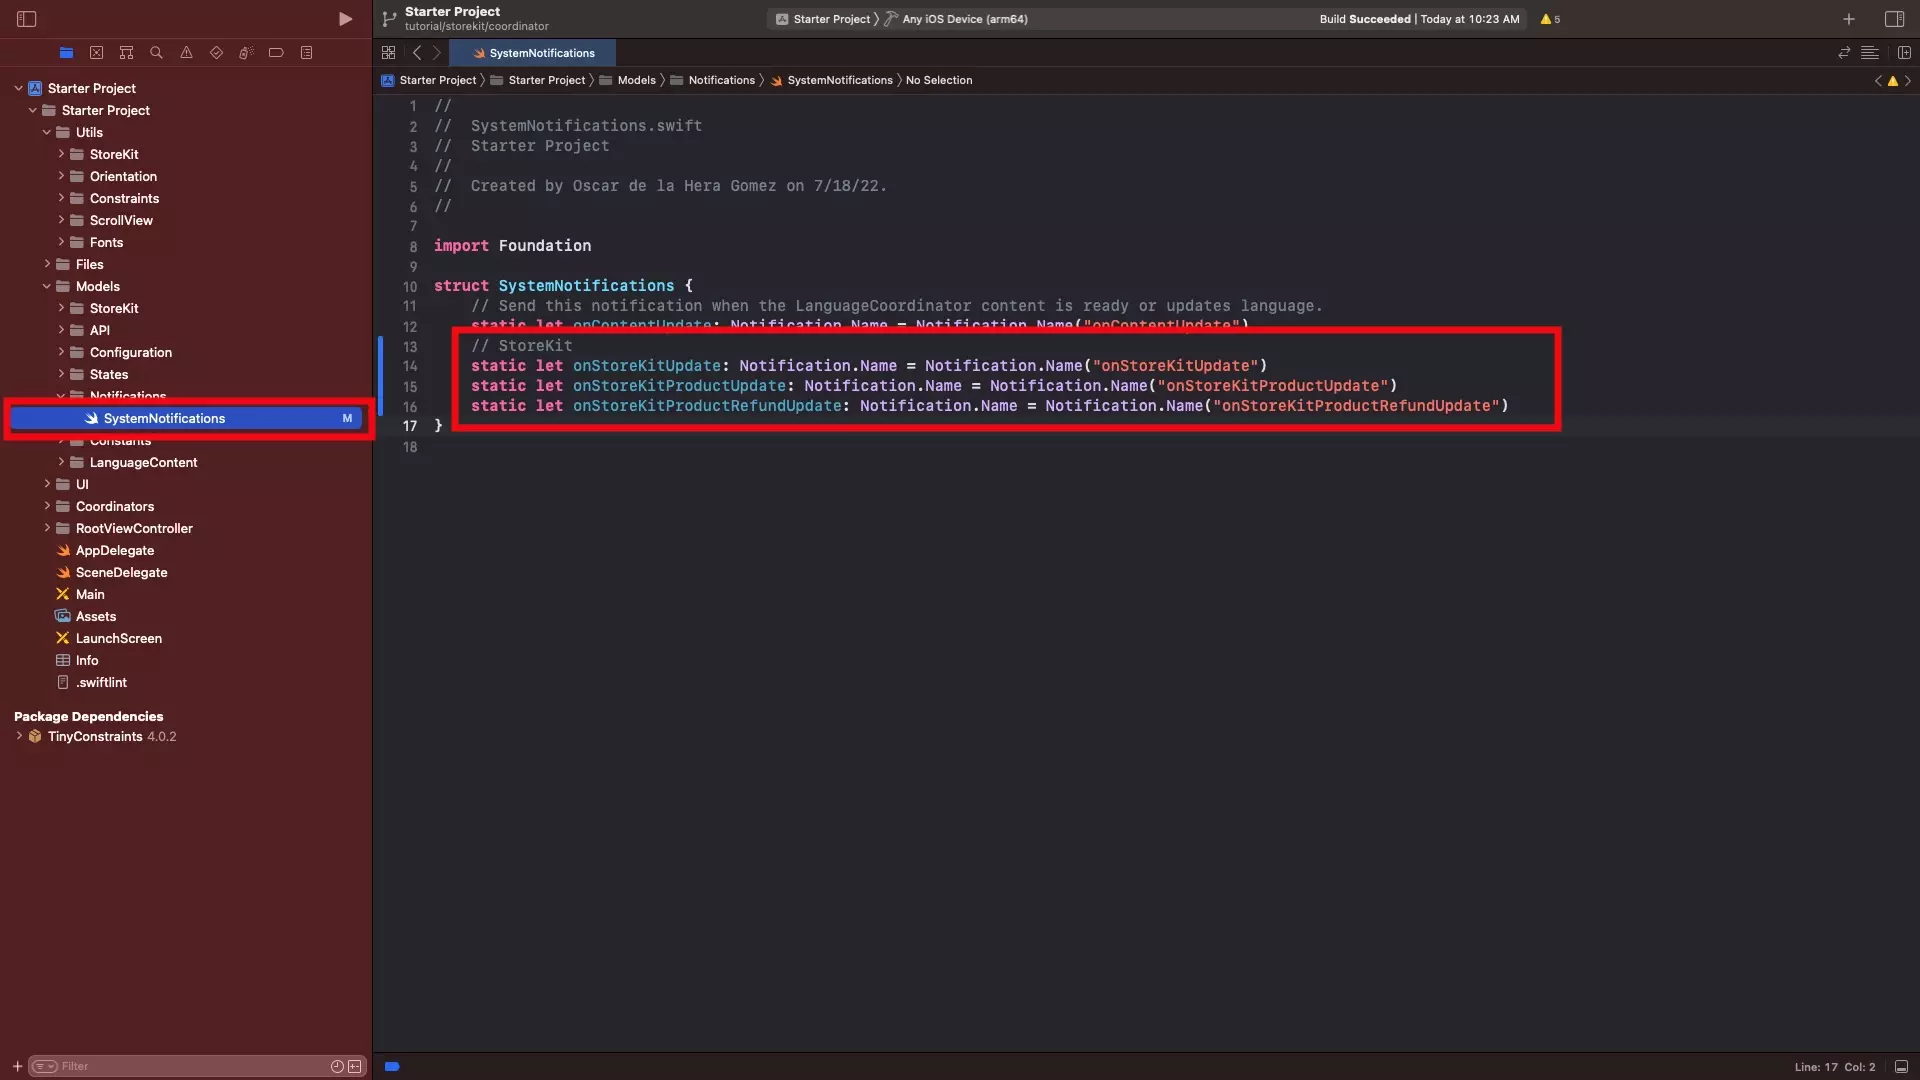
Under Models/Notifications in the SystemNotifications.swift file, add the three notifications available in the snippet below.
These are responsible for notifying the app of:
- StoreKit Updates - this notification is recommended to be used at the end of the +Update extension, which gets triggered when the StoreKitCoordinator initializes and every time the transaction listener receives an update.
- StoreKit Product Updates - this notification is recommended to be used in the +Purchase extension, to notify the system of specific product purchases. We recommend including the product and the type of result within the notification, to ensure that the right actions get taken, depending on the product and result.
- StoreKit Refund Updates - this notification is recommended to be used to notify the system of a refund state update and is recommended to include the product as well as a refund result (success, pending, failed, cancelled) to make sure that the right actions get taken in your app.
Step Seven: Notify System of StoreKit Update
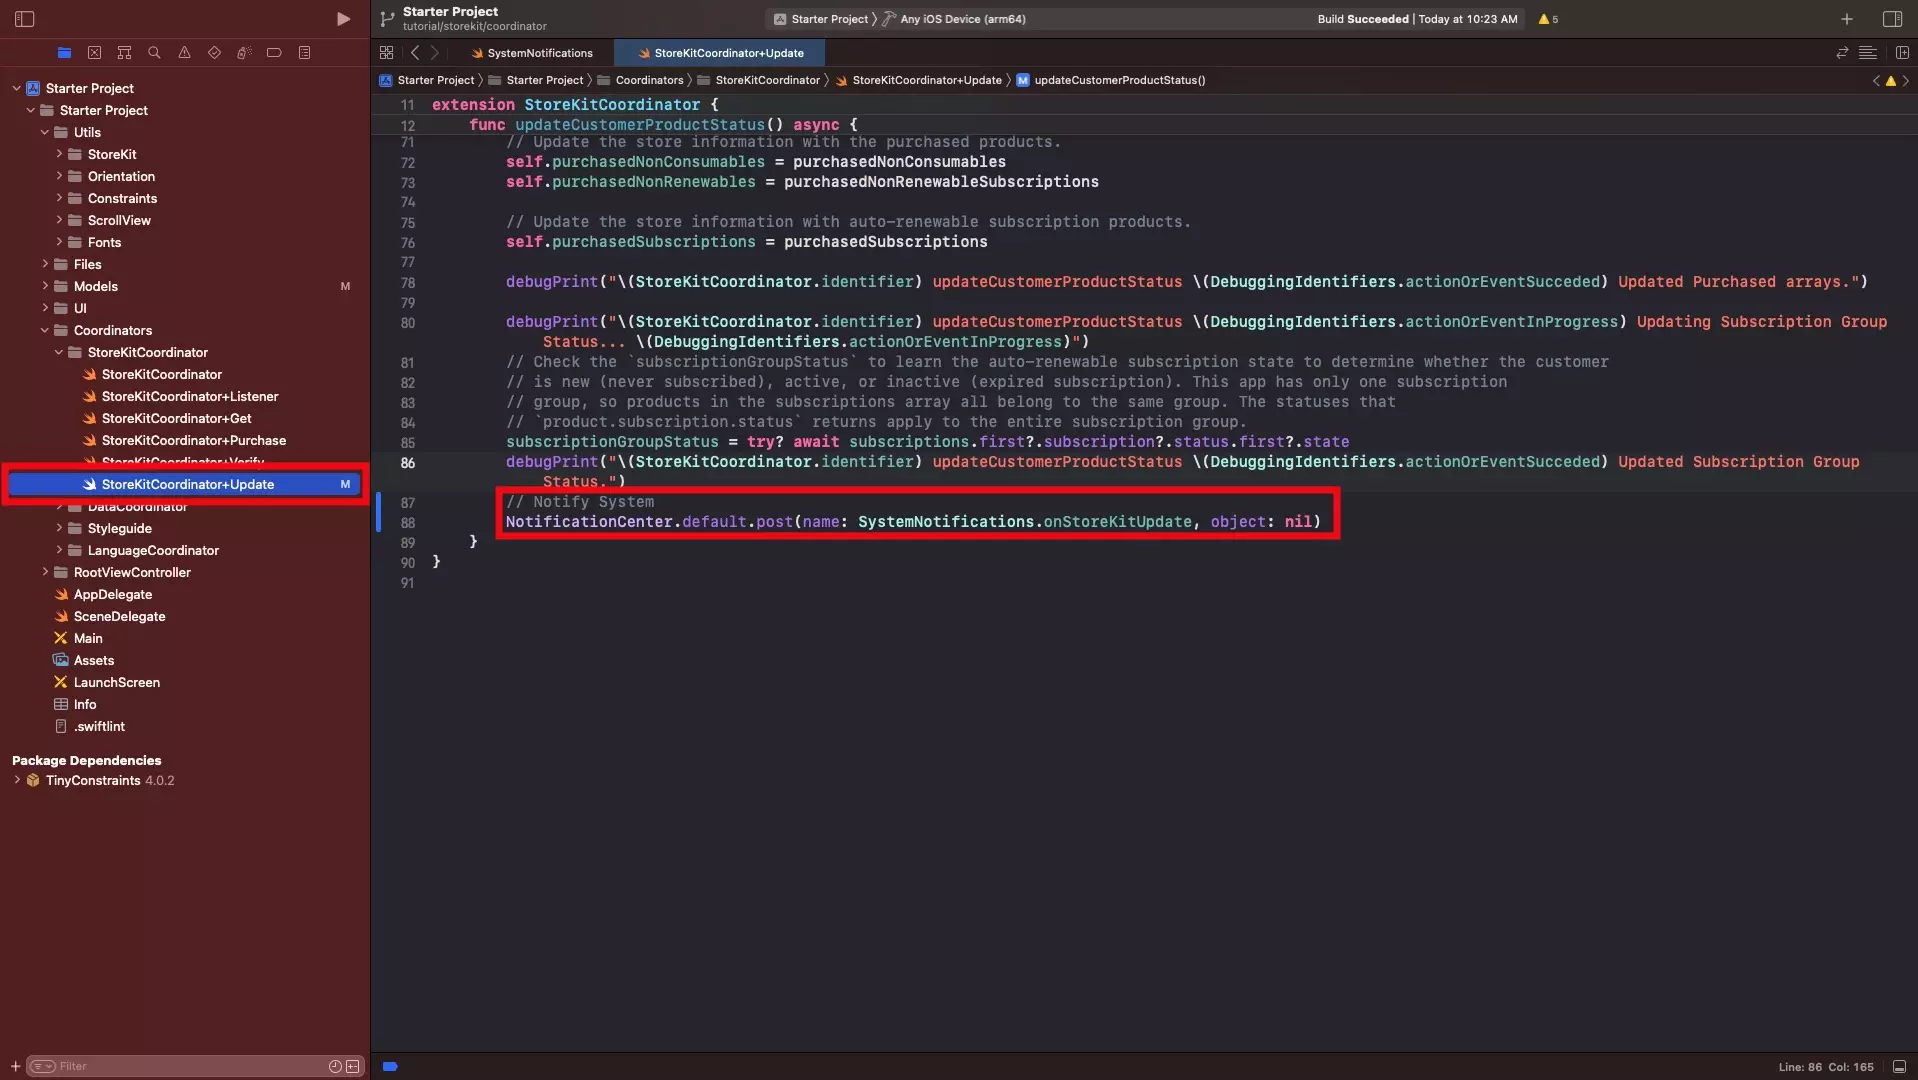
In the StoreKitCoordinator+Update.swift file that you created in Step Four, Part H; send the onStoreKitUpdate notification that you created in Step Six at the end of the process.
NotificationCenter.default.post(name: SystemNotifications.onStoreKitUpdate, object: nil)Step Eight: Trigger updates when returning to the foreground
As expired Subscriptions do not trigger an update to the StoreKit Coordinator's transaction listener, we recommend that you trigger an updateCustomerProductStatus when the App returns to the foreground.
The only way to receive real-time updates and take action on these events is to use App Store Server Notifications.
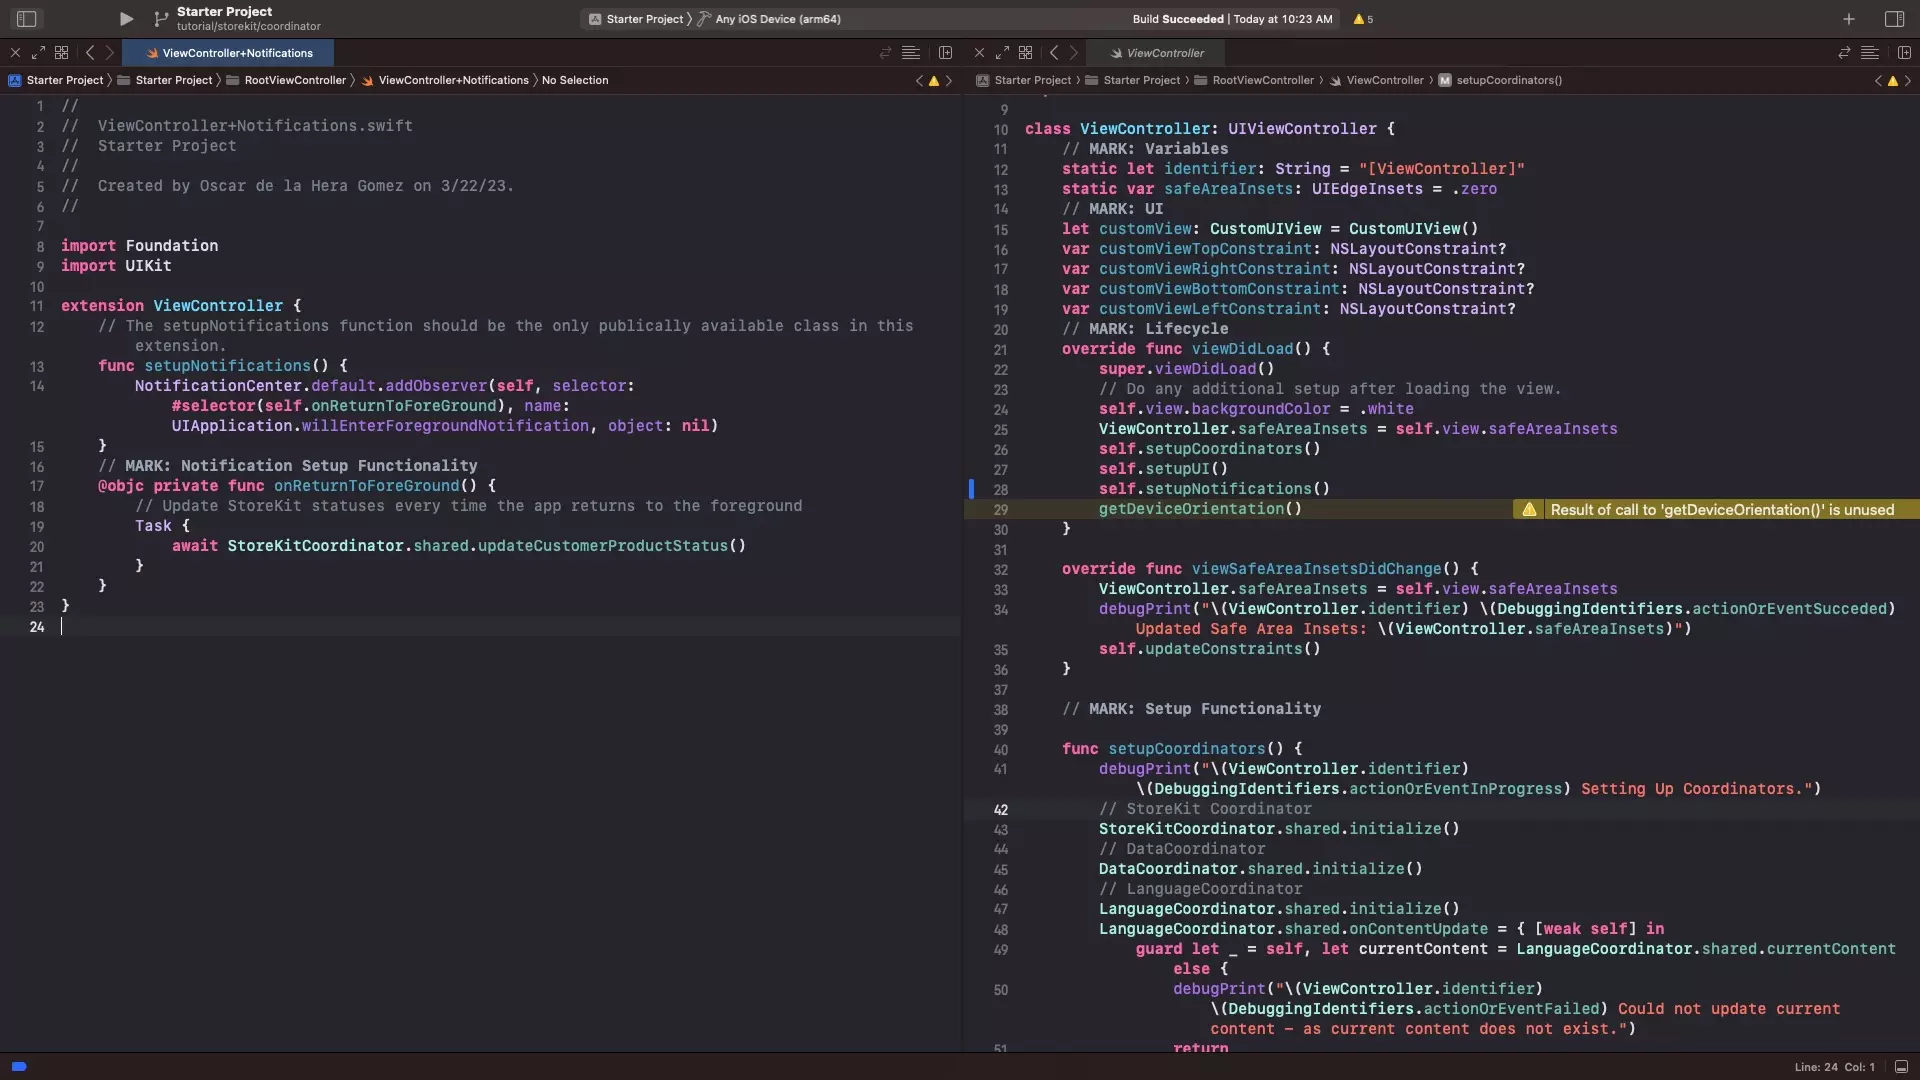
A | Create ViewController Notification extension
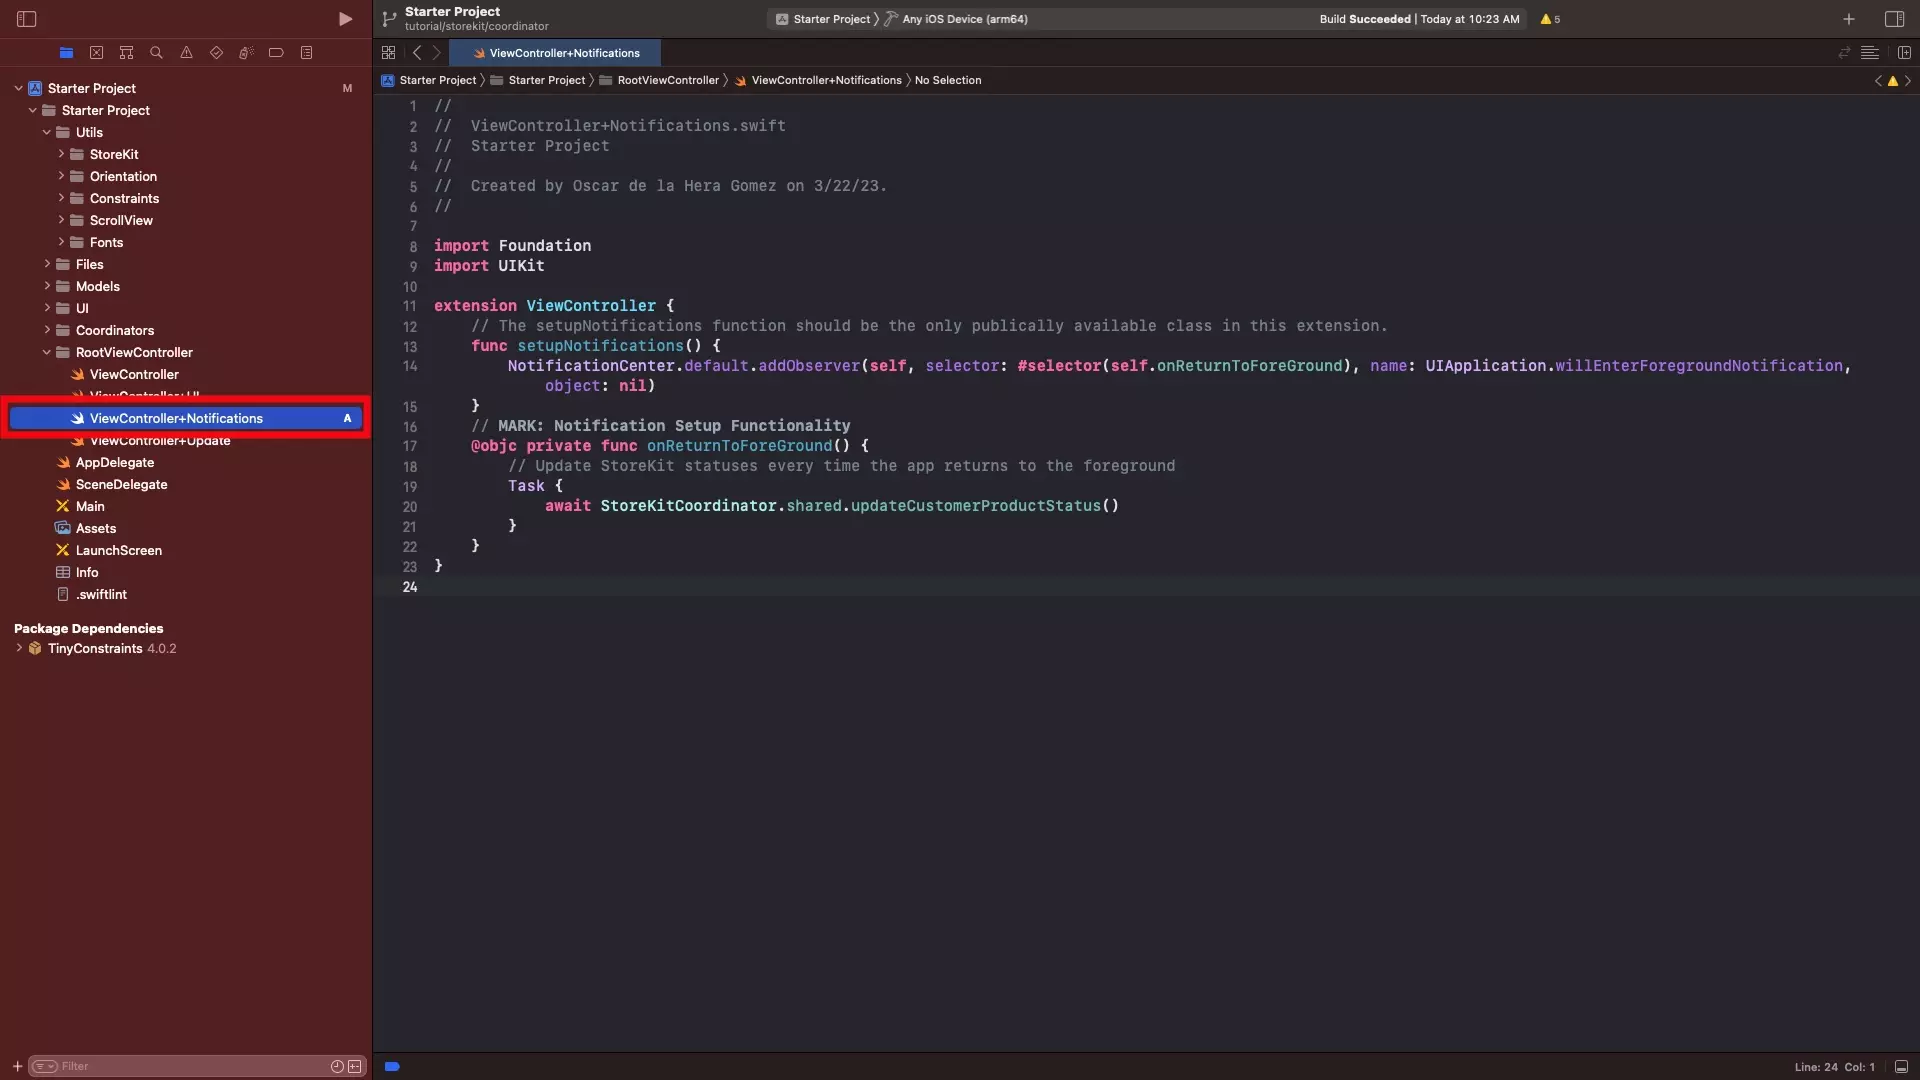
Under RootViewController create a new file called ViewController+Notifications.swift and paste in the code below. This code is responsible for setting up the notifications for when the app enters the foreground and triggering the updateCustomerProductStatus.
B | Call Setup Notifications
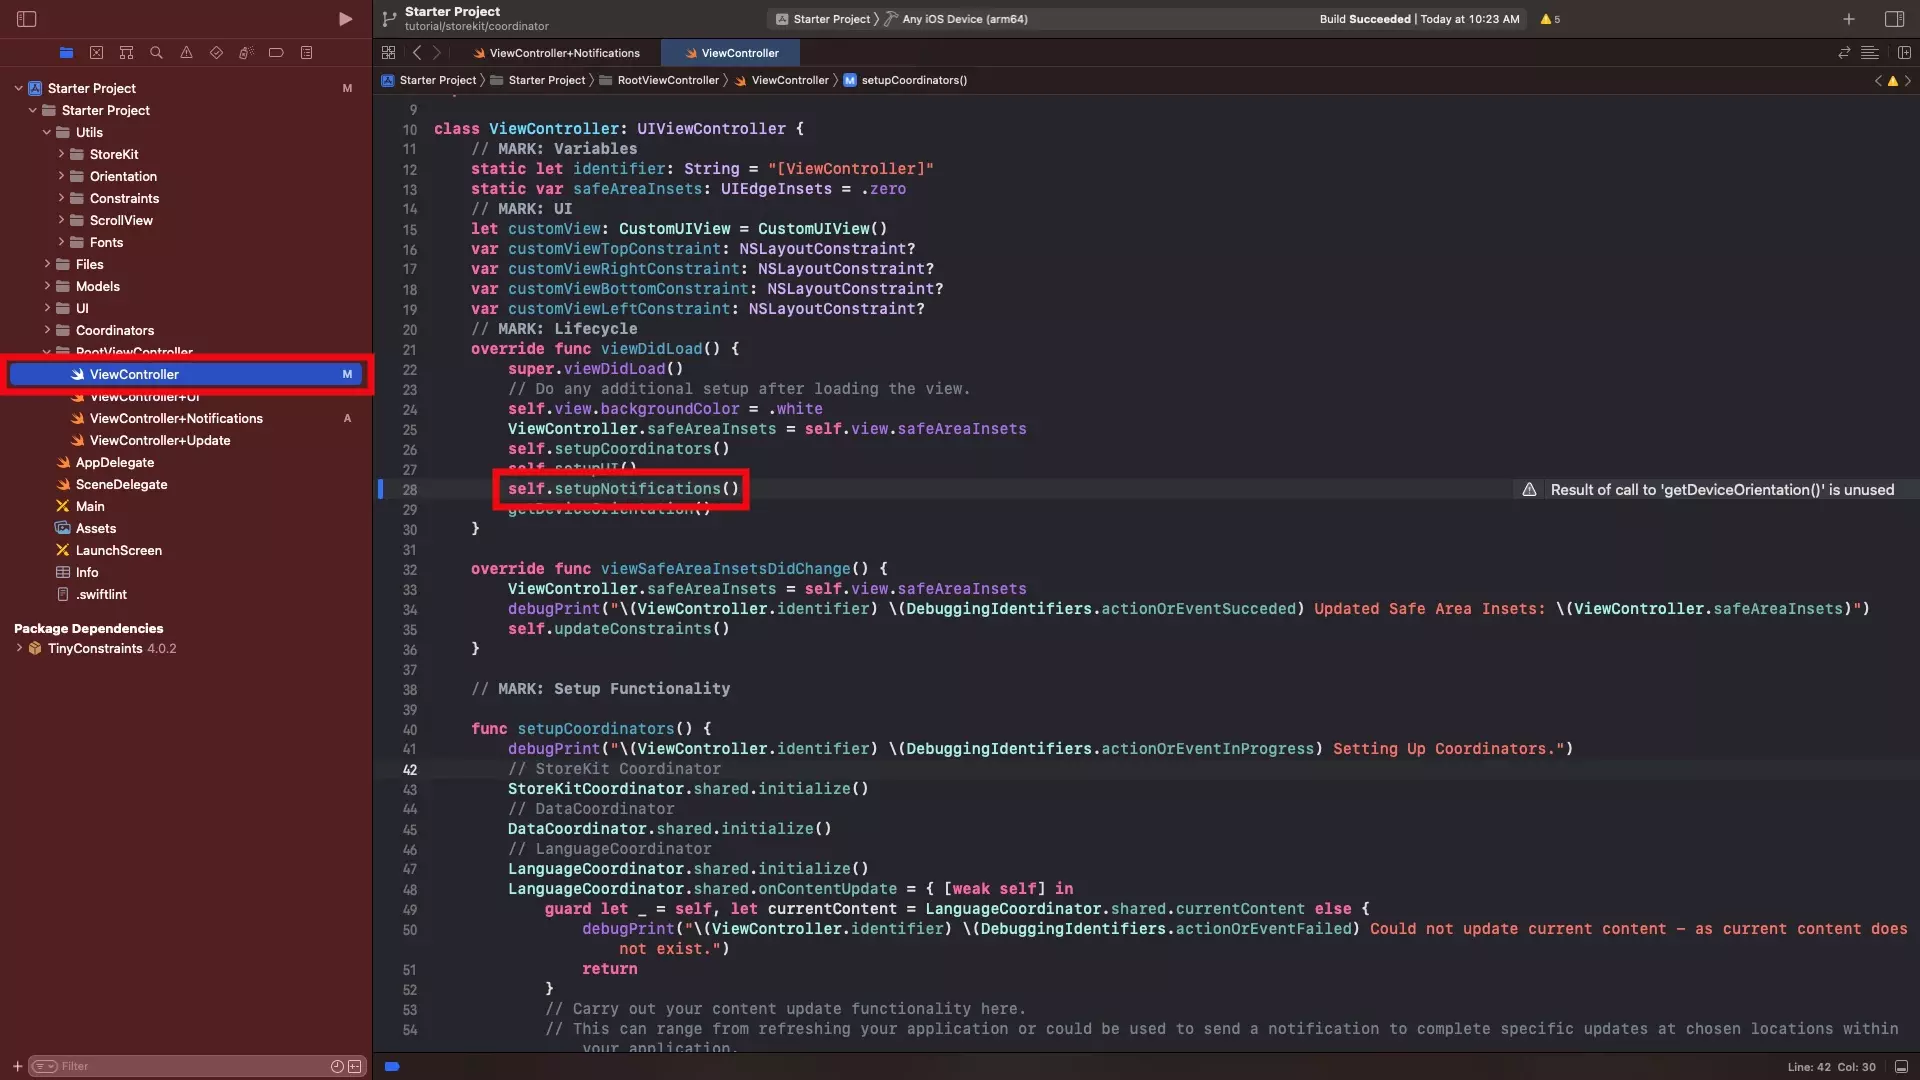
In ViewController.swift in the viewDidLoad function, call setupNotifications().
Step Nine: Verify
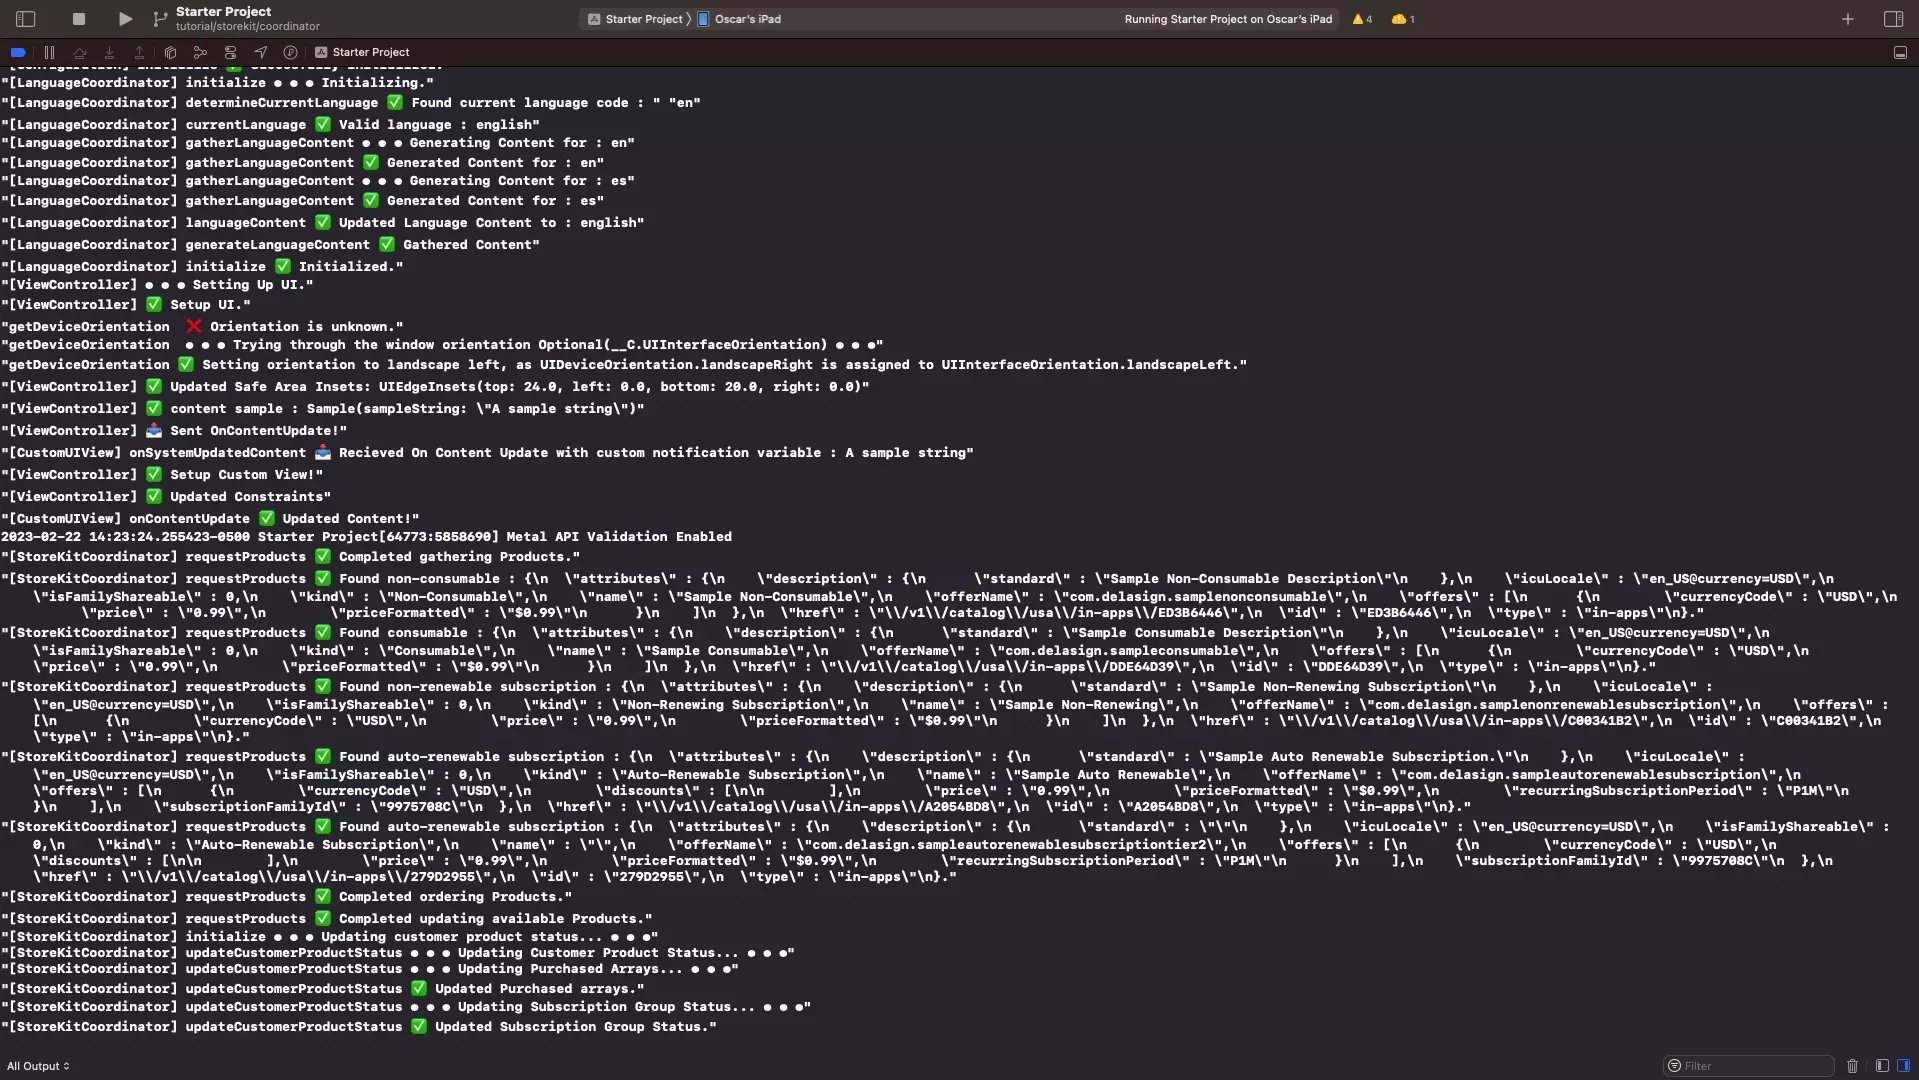
Run your project and using the debug console you will see that logs show that the products have been gathered successfully.
If you happen to run into an error, such as Finance Authorization Error, [StoreKit] Did not receive any products or error for products request, or No Active Account, make sure that XCode has been setup for StoreKit testing.
Looking to learn more about developing apps with StoreKit 2?
Read our comprehensive development guide linked below to learn about all the secrets behind developing In-App Purchases and Subscriptions with StoreKit 2.